- Free Practice Tests

Commercial Driving
- Introduction
Getting a CDL
- Fees and costs
CDL Types & Permits
Endorsements & Restrictions
CDL Exam Preparation
Written exams
Practical exams
- Skills test
- Pre-trip inspection
- TSA background check
- Retake policy
CDL Maintenance
ELDT Training & Certification
CDL how-to guides
During the pre-trip vehicle inspection test:
CDL Pre-Trip Inspection Test and How To Memorize It
The pre-trip is one of the things that students fear the most and fail the most. Let’s face it, the pre-trip is intimidating because there is so much stuff to memorize. The key to learning the pre-trip inspection is preparation, memorization, and repetition. Don’t go away, in this article I have exactly what you need to make sure you pass it the first time.
It is going to take time for you to memorize everything and the only way to do this is by repeating it over and over.
Hopefully, the school where you are being trained is giving you enough time to practice it everyday you are there.
I can’t stress that enough, regardless of which method you use below you need to repeat it daily and practice on your own.
Don’t expect that your run through once a day with your instructor is enough, it isn’t.
In this article I’m going to give you 8 tips that will help you memorize the pre-trip so you are able to pass it your first time and move on with your driving career.
1. REPETITION!
The only way to memorize the pre-trip is to repeat it over and over. Start with the engine area and work your way around the truck and finally inside the cab.
There is no way around consistent repetition. The more you do it the more you will memorize it. It’s just that simple.
Now that we have established how important repetition is I want you go through the rest of this list and figure out which method (or methods) works best for you and then repeat it over and over.
2. Record Someone Else
You can use YouTube to find a video of someone doing a pretrip and for the most part they work pretty well (more about YouTube later).
Take it a step further though. Ask someone (like and instructor or friend) to do a pre-trip and video record them.
While they are doing it try to use the zoom function on your camera so that you know what the parts look like and what is being checked.
Students that I come across have said that this method works really well because you have quality video and audio. Just watch your recording over and over and this stuff will be engraved in your brain.
Just make sure you are absolutely sure that the person you record knows what they are doing and are showing you everything. You don’t want to watch a video that skips anything that will be on the test.
3. Smaller Chunks
Break down the pre-trip into smaller chunks so that it is not overwhelming. If you think about memorizing everything at once it will be a daunting task.
My suggestion is you learn your air brakes first, then the inside of the cab, the engine compartment, and then the rest of the truck. You can chose any order that you want to as long as it helps you out.
Memorize each part and then tie it all together. You will find that learning the pre-trip is much easier if you do it this way.
4. Use Your Imagination
Do this while in bed before you fall asleep. Warning: the pre-trip is going to consume a lot of your attention during training, even while you sleep!
When you wake up go through a video you found on YouTube or the one you recorded (see #2) and correct any errors you made.
5. Find A Truck
It really helps if you have access to a truck. Pictures alone are not enough. Most of you are probably getting your training through a private school, company sponsored training , or community college.
All of these will give you access to an actual truck and should be taking time each day to practice the pre-trip.
Take advantage of this time with the truck to practice your pre-trip as much as possible. When class ends try to stick around to get in some extra practice, this could be the difference between passing and failing.
6. Watch A Pre-Trip Video On YouTube (not straight through)
There are a lot of videos on YouTube that you can choose from. Let me save you some time, these two (below) is the best because it has good audio and video quality, is accurate, and is easy to follow.
Don’t watch the video straight through over and over. Like I mentioned earlier you should chunk it into smaller sections.
Watch a section, pause it, and list off the names of the parts and things to look for. Play it again to see if you are getting them correct. When you finish one section go on to another section until you finish it.
Don’t move on to a new section until you have memorized the section you started. When you complete all the sections you should be able to watch the whole pre-trip and repeat everything on it from start to finish.
If you want to challenge yourself a little try mixing up the sections so that the sections that was last is now first. This will let you know if you are really memorizing everything.
7. Use A Checklist
Probably the most popular ways to memorize the pre-trip is to use a checklist. No doubt that wherever you are getting your training at is already giving you a checklist to use.
Use it. A lot.
Not all checklists are done in the same order but they should all cover the same stuff. I like this one here (printable PDF document) by the people at Trucking Truth , it’s easy to follow and is accurate.
Every possible thing that you will need to identify during the pre-trip is on this checklist.
8. Use Pictures/Diagrams
There are a ton of picture resources out there that will help you memorize the test. Just do a search for “cdl pre-trip inspection pictures” and you will find a ton of stuff.
The picture I like most are these (link to PDF) by Driver Solutions. The pictures are easy to see and distinct arrows are used to point to each part. Along with pictures is an explanation of what to look for and what to say for each individual part.
What Is The Pre-Trip Inspection?
The pre-trip inspection is an inspection of the commercial vehicle including the cab, engine compartment, and exterior.
A driver of a commercial vehicle is required, by federal law, to complete one every day before driving the vehicle and at least once in a 24 hour period. Every single time you begin driving your truck you will have to complete a pre-trip.
The purpose of it is to make sure that the vehicle is safe to drive.
This gives you a chance to get whatever is wrong fixed. If you miss something and are inspected it could result in citations by the DOT.
A lot of drivers find it to be a pain in the rear but you really need to do it every single time you drive your truck. Don’t listen to the irresponsible driver at the truck stop that tells you it’s okay to skip it. It’s not okay.
How Long Does An Inspection Take?
A pre-trip usually takes about 15-45 minutes to complete. It really depends on the type of truck you are inspecting and your experience.
After several years of driving it’s inevitable that your pre-trip is going to be quicker because you are better at doing it and you know what to look for.
As a new driver you should take your time and make sure you do it right. Make it a habit to always conduct a thorough inspection so that you run into less problems while on the road.
What To Say During The Pre-Trip Test
Knowing what to say is important during the test. There are some specific language the person testing you is going to be listening for. More than likely you already heard these phrases but here is an easy way to remember what to say:
PMS— Properly Mounted, Secure ABC— Abrasions, Bulges, Cuts CBB— Cracked, Bent, Broken
There are some tricks that you can use to make sure you say the right thing, here they are: 1 . If its mounted (almost everything is) use the words, “Properly Mounted, Secure” (PMS) 2. If its rubber use the words, “Abrasions, Bulges, Cuts” (ABC) 3. If it’s metal or another hard surface use the words, “Cracked, Bent, Broken” (CBB) 4. If it has fluid or air going through it or in it remember to say, “Not Leaking”
This language shouldn’t be new to you, hopefully the school that is training you has already taught you this stuff.
What Should You Cover During The Pre-Trip?
The areas that you should cover include the coupling system, light check, in-cab inspection, engine compartment, trailer, and drivers door fuel area. Make sure that you are prepared for all of these.
Also, keep in mind that CDL schools/classes may cover the pre-trip in different orders. It’s okay though, they all cover the same stuff. The order that you practice is probably going to be different from someones in a different school/class.
There is no correct order as long as you memorize everything.
What Will Be Tested On The Actual State Pre-trip Inspection Test?
You will be required to perform a pre-trip for the light check, the in-cab inspection, and the coupling system. These 3 areas you have to complete.
After completing those 3 areas your examiner will have you perform one of the following: the engine compartment, trailer, drivers door fuel door, or the entire vehicle.
You will not know ahead of time which one the examiner will choose. This is why it is crucial that you know all the areas.
What Else You Can Do To Prepare?
Aside from the ways listed above to help you memorize the pre-trip there are some other things you can do.
One thing you can do is try answering some practice tests like these here from Trucking Truth. There are 5 free practice tests you can take.
I really find that these practice tests reinforce what you need to know for the real test. It’s worth your time try them out just to see how you do.
What If You Fail The Pre-Trip?
If you do fail the pre-trip you are able to retake it. Make sure you know why you failed the test, ask the inspector if he/she can specifically tell you what you did wrong.
This is usually never a problem because the inspectors want you to know what you missed so that you can pass the test the next time.
One more thing, don’t be embarrassed because you didn’t pass it on your first try! This happens to a lot of people! You are not the only person that will fail the pre-trip and you won’t be the last.
Study what it is that you missed/did wrong and pass it on your second attempt.
Extra Tips For Passing The Pre-Trip Test
Probably the most common reason people fail the pre-trip is because they are nervous.
The two things that will help you out the most is to always remember that the pre-trip is a verbal contact test.
As you start walking towards the vehicle you should already be looking for any leaks under it, broken marker lights, loose mirror brakes and anything else that seems out of place.
BE VERBAL! Your number one priority is to make sure the examiner knows that you know what you are talking about. The more you talk the greater your chances are to pass the test.
Even if it might seem you are going overboard just keep going. Examiners tend to like when testers are verbal.
http://www.truthabouttrucking.com/fls/Pre_Trip_Inspection.pd
CONTACT! The second most important thing you can do is make contact with the item you are describing. For example, as you are explaining the radiator brace you need to make sure you point to or put your hand on the brace as well.
Your examiner wants to make sure that you actually know what the item is that you are explaining.
Make sure you are pointing the the correct item though! Don’t describe the radiator brace while pointing to the turbo!
Again, make sure you are VERBAL and CONTACT every single item (correctly) that you are describing.
Now go pass that test! Good luck driver!
Privacy Policy
COPYRIGHT © 2019 CDL TRAINING SPOT
CDL Pre Trip Inspection: Step by Step Guidelines

What is a Pre-Trip Inspection?
A pre-trip inspection is a thorough checkup of your truck to keep public safety and ensure there is no malfunction before starting your journey. A common pre-trip inspection process involves inspecting fluid levels, leaks, tires, brakes, clutch, shock absorbers, fifth wheel, and many other components. After finishing your pre-trip inspection, file your work on a DVIR (Driver Vehicle Inspection Report). Any issues detected must be addressed before departing. A thorough vehicle pre-trip is required by law and takes approximately 30 minutes.
The Pre-Trip Vehicle Inspection Test
To obtain your CDL exam, you need to complete a pre-trip inspection test. You will have no more than 50 minutes to complete a pre-trip vehicle inspection for the state examiner. During the exam, you should identify each part and tell the examiner what you are looking for or inspecting. Within each area, there are multiple parts you must identify.
CDL Pre-trip inspection guide (Step by step)
Follow this four-step process for each part inspected:

After finishing the four-step pre-trip inspection process for each engine part, you can fill in your results in the Pre-trip Inspection Form .
CDL pre-trip inspection checklist
Below is a detailed CDL pre-trip inspection checklist of the different parts of a pre-trip.
Front of tractor
Your pre-trip examination begins at the front of your tractor. Make sure that the reflectors, lenses, and lighting fixtures are clean, undamaged, and properly maintained. Make sure they are reflective and functional. The headlights ought to receive the same attention. It is crucial to have a good line of sight in front of your truck when it comes to safe driving.
Engine Compartment
You specifically check the mounting and operation of your turbocharger, air cleaner, oil level, hoses, pumps, brakes, shock absorbers, brake calipers, brake pads, tires and rims, air pressure, and seals on the passenger's side of your vehicle.
Coupling area
The coupling area in Class A vehicles involves 3 main parts
- Fifth Wheel Type: Mounting Softs, Platform, 5' Wheel Skid Plate, Release Arm, Kingpin, Apron, Sliding 5" Wheel Locking Pins.
- Pintle Hook/BaII Hitch Types : Mounting Bolts/wields, Pintle Hook/Ball, Safety Latch/Locking Device, Safety Chain/Cables, Eye/Coupler, Drawbar/Tongue.
- Tow Truck - Underlift Type: Underlift Reach, Pivot Pin, Crossbar, Receiver Retaining & Safety Pins, Tie-Down Chains or Straps, Safety Chains.'Cables.
Driver door fuel system
- When it comes to airbags, you must look for cuts, abrasions, leaks, bulges, and missing bolts.
- The axle seal must be filled and should not leak in accordance with specifications.
- Ensure that neither the brake hose nor the brake chamber is leaking air.
- The catwalk and steps need to be mounted and free of any loose objects for the truck driver's safety.
Side of truck
The trailer should basically stay the same as when it was initially loaded and attached to the tractor. But before you leave, make sure that everything is in working order. The landing assembly, handles, frame & cross members, tandem release, lights, and reflective tape should all be functional. Verify the trailer for body dents or rusty areas.
Rear of truck
The rear of the trailer is rather simple to inspect. Make sure your license plate is affixed and clearly visible, and check all the reflectors and lights. Confirm that the doors are shut and secured. Ensure the brake lights are in working order.
In-cab Inspection
Here is the list of parts included in the in-cab inspection process:
- Safety Belt
- Lighting indicators
- Oil Pressure Indicator
- Air Pressure Gauge
- Ammeter/voltmeter
- Wipers and Washers
- Heater/Defroster
- Safety/Emergency Equipment
Brake Check
Here are the checklists for inspecting your braking system
- Hydraulic Brake Check/Air Brake Checks (depending on your truck)
- Breakaway Module
- Parking Brake
- Service Brakes
If your truck uses air brakes, it is important to note that the air pressure must be greater than 100 psi to 120 psi to verify the air brake. Pump brakes, 60 psi warning lights, and pump brakes, 40 psi - 20 psi valves pop. Press pedals no more than 4 psi loss.

How to remember Pre-Trip Inspection for CDL exams
Get ready for the CDL exams with our CDL Prep App , providing a variety of exam-like Questions and state-specific practice tests.
- According to the Handbook, children present a hazard because
- If you experience a hazardous materials emergency, you should
- If your load exceeds the width or length of your trailer, which of these is the only thing it's NOT compulsory for you to have?
- When going down a long steep downgrade you should always:
- If you do not have a CB-radio what is the procedure you should do on the accident scene?
- You should have a minimum of _______ tread on your steering tires.
- You are transporting hazardous materials. When you are not behind the wheel, the shipping papers must be on the driver's seat or:
- If there is an RQ before or after the item description on the shipping paper, it means the:
- You are loading students along the route. When should you activate your alternating flashing amber warning lamps?
- If you are loading students on the route and cannot account for them

CDL Prep holds all the qualities that make it so magical!

- All Companies
- Driver Training
- All Freight Types
- Lease/Purchase
- Message Board
- Truck Driver Salary
- How to Become A Truck Driver
- Will I Be Successful?
- Truck Driving Schools
- CDL Practice Tests
- Get Your CDL
- Get Your First Truck Driving Job
- Your First 100,000 Miles
- Advanced Tips
- Sign Up Here
Select Location x
Please tell us your location.
Location not set
The Complete Pre-Trip Inspection Checklist

Due to heavy memorization, the pre-trip inspection is one of the hardest aspects of the CDL test. Also called the “Vehicle Inspection Test,” the pre-trip is one of the tests that trucking students fail the most.
With this pre-trip inspection checklist, we tell you everything you need to know and what you need to check for.
Engine Compartment – What to Check For:
When checking the engine compartment, you always want to make sure the following components are properly mounted and secured. You should also make sure they are not cracked, bent, or broken. The items you need to check for include:
Belt-Driven Alternator
All of the wires are connected. The belt is not cracked or frayed, and the free play on the belt is between ½ to ¾ of an inch.
Belt-Driven Water Pump
The free play on the belt is between ½ to ¾ of an inch, and all the hoses running to and from the water pump are tightly clamped. Ensure nothing is leaking.
Brake Chamber
The brake chamber is not leaking air.
The brake drum is properly mounted and secure.
The brake hose is rubber; it is not cracked and is not leaking air.
Brake Lining
Check for oil or debris on the lining. There should be at least ¼ of an inch of friction material.
Caste Nuts and Cotter Pins
All three caste nuts and cotter pins are present.
Coolant Reservoir

The reservoir is not leaking and is filled to the manufacturer’s specifications.
The drag link is properly mounted and secure, and not cracked, bent or broken.
Gear Box and Hoses
The gear box and hoses have no abrasions, bulges or cuts, and are not leaking.
Gear-Driven Air Compressor
The air compressor is properly mounted and does not leak.
Gear-Driven Power Steering Pump
The steering pump is properly mounted and not leaking.
General Hoses (Passenger and Driver’s Side)
The hoses are secure at both ends and are not leaking. There are no abrasions, bulges, or cuts.
The hub seal (or axle seal) is leaking and is filled to the manufacturer’s specifications.
Leaf Springs
None of the leaf springs have shifted or are bent or broken.
There are no signs of leaks under the truck.
There are no lug nuts missing. There are no rust trails, powder residue, or cracks around the bolt holes.
The oil level is filled to the manufacturer’s specifications.
The pitman arm is properly mounted and secure. It is not cracked, bent, or broken.
Power Steering Fluid Reservoir
The power steering reservoir is not leaking and is filled to the manufacturer’s specifications.
The rim does not have any unauthorized welds.
Shock Absorber
The shock absorber is not leaking. If it is leaking, the leak will be at the point where the top and bottom portion of the shock meet.
Slack Adjuster and Push Rod
With the brakes released and pulled by hand, the push rod does not move more than one inch.
Spring Hanger
The spring hanger is properly mounted and secure.
Steering Column
The steering column is properly mounted and secure. It is not cracked, bent, or broken.
There are no abrasions, bulges, or cuts on the tread or sidewalls. Tread depth should have a depth no less than 4/32 of an inch. Tires are properly filled to the manufacturer’s specifications. This can be checked with an air gauge.
The tie rod is properly mounted and secure, not cracked, bent, or broken.
Make sure all are accounted for.
Driver Door Fuel Area-What to Check For:
Remember – during the pre-trip inspection, you want to make sure these items are properly mounted and secure. Look for cracks, bends, and breaks.
The actual airbag has no abrasions, bulges, cuts, or leaks. The airbag is not missing mounting bolts.

The axle seal is not leaking and is filled to the manufacturer’s specifications.
The brake drum is secured properly and has no cracks, bends or breaks.
Check the brake hose at both ends to make sure it is not leaking air.
There is no oil or debris on the brake lining. There is at least ¼ of an inch of friction material.
Catwalk and Steps
The cat walk and steps are clear of any loose objects.
Door and Hinges
The doors open, close, and latch properly. Door seals should not be worn, torn, or rotten.
Drive Shaft
The drive shaft is not twisted, and the u-joints are free of any debris.
The tread and sidewalls have no abrasions, bulges, or cuts. The tread depth is no less than 2/32 of an inch. Tires are properly filled to the manufacturer’s specifications. This can be checked with an air gauge.
Exhaust System
The exhaust system shows no signs of leaks.
Frame and Cross Members
There are no unauthorized holes or welds. Bundle up the cross members to ensure none are missing.
Fuel is not leaking from the tank, and the cap is on tight.
There are no rust trails, loose bolts, powder residue, or cracks around the bolts.
Mirrors are clean, with no cracks or chips.
The mud flap is secured properly, with no cracks, bends and breaks.
There are no unauthorized welds.
The shock absorber is secure at both ends and not leaking. If it does leak, it is preferable to leak in the middle.
There is proper spacing between the tires and there is nothing stuck.
The spring arm is secure at both ends.
Spring Mount
The spring mount is secure at both ends.
The torque arm is secured properly, with no cracks, bends or breaks.
No u-bolts are missing.
Coupling Area-What to Check For:
Air lines should be secure at both ends with no abrasions, bulges, or cuts. They should not be leaking, dragging, or tangled.
Make sure the apron is properly mounted and secure. Look for cracks, bends, and breaks.
Make sure there is enough space between the tractor mud flap and the trailer landing gear, so that they don’t hit each other when making a turn.
Electric Line
The electric lines are secure at both ends. There are no abrasions, bulges, cuts, or exposed wires.
There is no space between the apron and the skid plate.
The seals are in good condition with no cracks, signs of rotting, or leaking air.
The king pin is properly mounted and secure, without cracks, bends and breaks.
Locking Jaws
Physically check that the locking jaws are fully locked around the king pin.
Mounting Bolts
No mounting bolts are missing.
The platform is properly mounted and secure, without cracks, bends and breaks.
Release Arm
The release arm is in the fully locked position.
The skid plate is properly lubed.
Sliding Fifth Wheel Locking Pin
The pin is in the fully locked position.
Trailer- What to Check For :
The airbag has no abrasions, bulges, cuts or leaks, not missing any mounting bolts.
The brake chamber is properly mounted and does not leak air.
The brake hose is secure at both ends with no abrasions, bulges, cuts, or leaks.
No oil or debris on the brake lining and at least ¼ of an inch of friction material.
No missing cross members.
Header Board
The header board does not have any holes or missing rivets.
Landing Gear
The landing gear is fully raised and the cradle handle secure.
No rust trails, powder residue, or cracks around the bolt holes.
The rims do not have any unauthorized welds.
Rear Door and Hinges
The rear door opens, closes, and latches properly. Door seals are not worn, torn, or dry rotten.
The shock absorber is secure at both ends with no leaks.
When the brakes are released and pulled by hand, the push rod does not move more than one inch.
Tandem Frame and Release
Release handle and locking pins are in the fully locked position.

Trailer Tire
There are no abrasions, bulges, or cuts to the tread or sidewalls. Tread depth is no less than 2/32 of an inch. The tire is properly filled to manufacturer’s specifications and checked with an air gauge.
Light Check
There are five locations where you must check your lights. These include:
- Front of the truck
- Both sides of the truck
- Rear of the truck
- Both sides of the trailer
- Rear of the trailer
The five functions are:
- Left turn signal
- Right turn signal
- Four way flashers
- High/low beams
- Brake lights
Inspection and Brake Tests-What to Check For: In-Cab
The last section is In-Cab Inspection and Brake Tests. For the In-Cab Inspection you once again want to make sure all of the following components are properly mounted and secure. As well as the following:
Air Brake Test
There are three stages to an air brake test:
- Applied Pressure Test – When doing the Applied Pressure Test, you want to build the air pressure to governor cut out. Put the truck in the lowest gear, turn the engine off and immediately turn it back on. Push in the tractor and trailer valves which then release the parking brakes. Push and hold the brake pedal, allowing the gauges to stabilize. When the gauges have stabilized, announce the Primary and Secondary PSI. Listen for air leaks while doing this.
- Warning Light and Buzzer – Pump down on the brake pedal until the warning light and buzzer comes on. This is typically at or before 60 PSI.
- Tractor/Trailer Protection Valve Pop Out – Pump down on the brake pedal until the tractor and trailer protection valves pop out, this will be between 20 and 40 PSI.
Air Pressure Gauges
The air pressure gauges build to governor cut out.
Emergency Equipment
Truck has a fire extinguisher, three red reflective triangles, and spare electrical fuses.
Heater and Defroster
Demonstrate both the heater and defroster are working properly.
Horns (Air Horn and City Horn)
Blow both horns to make sure they are working.
Lighting Indicators
Check the left turn, right turn, four way flashers and high beams; also point these out on the dashboard.
With the transmission in neutral, fully depress the clutch. Turn the key on, check the ABS light, announce when it comes on and off, and start the engine.
The seat belt is not ripped or frayed and adjusts and latches properly.
Oil Pressure Gauge
The engine oil pressure gauge should rise to normal operating range.
Parking Brake
- Trailer Parking Brakes – Set the trailer brake, release the tractor brake, and tug lightly on the trailer.
- Tractor Parking Brakes – Set the tractor brake, release the trailer brake, and tug lightly on the trailer.
Service Brake Check
Release both the tractor and trailer brakes. Drive at idle speed. Apply the service brake to make sure you come to a complete stop and that it doesn’t pull to the left or right when applying the brakes.
The voltmeter is charging between 13 and 14 volts.
Water Temperature Gauge
The water temperature gauge rises to normal operating range.
Windshield and Mirrors
The windshield and mirrors are clean, with no obstructions and in proper adjustment.
Windshield Wipers and Washers
Demonstrate the wipers and washers are working properly by spraying the windshield.

This is a really nice complete list, very useful.
Comments are closed.
Contact ClassADrivers.com
Please use the form below to contact our customer service or sales team.
You can also reach us at (888) 830-2326. Our normal business hours are Monday-Friday 8 a.m. to 5 p.m. (Pacific Time).
Our business address is: Attn: Class A Drivers MH Sub I, LLC dba Internet Brands 909 N Pacific Coast Highway, 11th Floor El Segundo, CA 90245
By clicking the ["Send"] button, you agree to our Terms of Use and Privacy Policy , and to the use of cookies described therein, and you also consent to the collection, storage, and processing of your data in the United States where the level of data protection may be different from that in your country.
Join 100,000+ Drivers
- Sponsorship
- Thinking of Becoming a Truck Driver?
- Getting a CDL License
- Trucking Driving Jobs Guide
- Trucking Company Guide
- Trucker Life
- Paid CDL Training
- CDL Schools
- Professional Driving Skills + Knowledge
- Owner Operator
- Latest Articles
- Truck Driver Skills
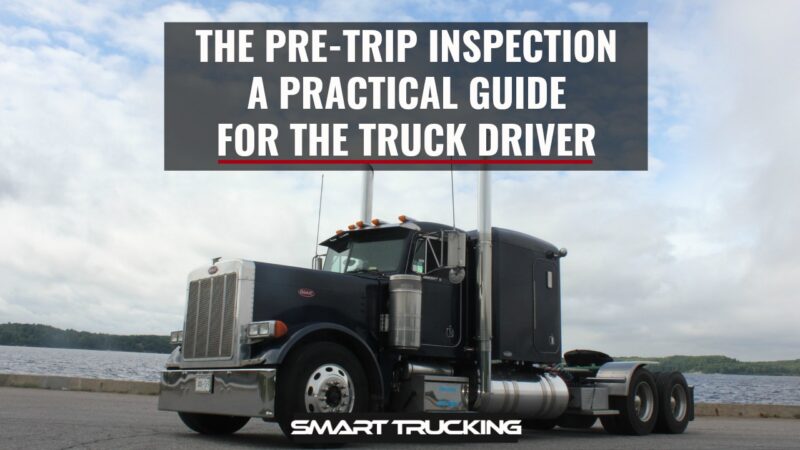
The Pre-Trip Inspection: A Practical Guide For the Truck Driver
Updated February 24th, 2022

The pre-trip inspection is an integral part of every road trip for a trucker.
It’s probably the most disliked and most often overlooked part of the job of the professional truck driver in the trucking industry.
This inspection is meant to be a thorough check of the truck, trailer and load.
The check is to ensure that everything is in correct working order, prior to the truck and driver, departing on a trip.
Any damage or issues found during the pre-trip inspection which needs attention, must be addressed before departure.
CDL Test Pre-Trip Inspection
If you just came through the process of getting your CDL, you can breathe a sigh of relief.
You don’t have to check all 500 or so items that you had to memorize for the test every single day.
Out on the road, a thorough pre trip shouldn’t take more than 10 to 15 minutes.
DVIRs – Daily Vehicle Inspection Report
According to federal law ( FMCSR Section 396.11 ), every day, a driver must submit a Daily Vehicle Inspection Report (DVIR) for each power unit he operates. Multiple trailers can go in one report.
DVIRs are either paper or electronic.
Not every trucking company (ahem) enforces this policy, so some truck drivers can go months or years without submitting a DVIR.
Minimum DOT Pre-Trip Inspection Requirements
- Service brakes including trailer brake connections
- Parking brake
- Steering mechanism
- Lighting devices and reflectors
- Windshield wipers
- Rear vision mirrors
- Coupling devices
- Wheels and rims
- Emergency equipment
Your trucking company’s DVIR might be more thorough.
This is a thorough Q&A on DVIRs which you can refer to.

Inspecting a New Truck
When you are assigned a new truck (either daily or just once), there are a few additional things you need to check for on the pre-trip inspection.
Truck Compliance
- Cab card and book – This is a book containing the registration, inspection, permits, cab cards, IFTA paperwork, and any other important papers for the truck. Make sure it is in the truck and all the paperwork is up to date.
- Inspection sticker – This is outside the truck. Find it and make sure the truck is not overdue.
- IFTA stickers – These are the fuel tax compliance stickers. They are on both sides of the truck. Make sure the current year is displayed.
- Elog device – Most trucks are required to have a working elog device.
- Required permits – These are in the cab card book. The most common permits are Heavy Motor Vehicle Trip Permit (Oregon) and the Weight Distance Tax Permit (New Mexico).
- New York HUT sticker – This is usually on the front of your truck. It’s a type of permit.
- License plate – Make sure the license plates on the front and back of the truck match.
- FMCSA Safety Regulations and Hazardous Materials book – These will be given to you by your company. They must stay in your truck within arms reach from the driver’s seat.
- Paper logbook – If your e-log stops working, you must log your hours in a paper logbook, which must be kept in your truck.
- Medical card – You must keep your current medical card in your truck. Always have your CDL on you as well.
- Orange triangles – You must have 3 triangles for when you break down.
- Fire extinguisher – Must be charged and secured to the truck. No rolling around on the floor.
- Extra fuses – If your truck doesn’t use circuit breakers, you must have spare fuses.
- Load bars and/or straps
- Extra oil, coolant, and windshield washer fluid
- Line antifreeze and diesel anti-gel
- Chains and bungees
- Gladhand seals
- Hammer, wrench, wire cutters, cable cutters, knife with glass-breaker
The Class A Pre-Trip Inspection Process
Unless I have to bobtail to pick up my trailer, I inspect my truck and trailer together.
The best way to memorize a thorough pre trip is to do it the same way each time.
Your process will look different from mine, but as long as you are consistent, you will be less likely to miss anything.
I do the inspection first thing each morning as well as every time I swap trailers.
Paperwork and Trailer
- Check the paperwork. It should be the first thing checked when you get to your truck.
- Match the trailer number to your paperwork. If your trailer has a seal, make sure it matches too.
- Unsealed trailer. If your trailer does not have a seal, open it and confirm the product matches the bills. If you are picking up an empty trailer, open it and make sure it’s actually empty.
- Confirm your destination. Ensure the destination is the same as on your trip sheet or load assignment. If there is a discrepancy, call your dispatcher.

I personally like to start with checking under the hood of the rig. Not everyone does, but I do.
Under the Hood of the Truck
I walk around the front of the truck, making sure all the lights work. Then I open the hood.

- Fluid levels – Check all fluids: coolant, oil, power steering fluid, and windshield washer fluid. Make sure caps are tight for the rad, oil filler, power steering fluid and the dip-stick is seated properly.
- Alternator, water pump, power steering pump –Make sure these are in good working order, and the belts are not worn or have too much slack.
- Observe at the engine block. Check for leaks, fluid running down the side of the engine. Check for wear, cracking or fraying. Inspect fan belts for proper tension and signs of wear.
- Hoses – Check all hoses for leaks, cracks, and tears.
- Wiring – Check wiring for wear.
- Steering linkage – Check linkage for worn or missing parts.
- Tires – Tires should be properly inflated and have decent tread. If there are flat spots on the tire, it needs to be replaced.
- Hub seal – Make sure it’s not leaking and wiped with oil if transparent.
- Brakes – Brake chambers should not be out of round and should be free of grease. Shoes should not be worn down too much.
- Slack adjusters – Pull slack adjuster. If it travels more than an inch, it needs to be adjusted.
- Suspension – Shocks should be in good condition, and not covered in grease or oil.
Back of the Truck
Next, I check the back of my truck because it’s easier to check this before hooking to a trailer.
- Tires – Tires should be properly inflated and have decent tread. If the tires have flat spots, the tire needs to be replaced.
- Suspension – Shocks and airbags should be in good condition, and not covered in grease or oil.
- Drive shaft – Driveshaft should be undamaged and free of grease. Make sure there is no debris in the u-joints.
- Frame – The frame should not have any welds and not cracked or significantly rusted.
- Fifth wheel – The fifth wheel should be properly greased and not broken.
- Fuel tanks – Fuel tanks should not be leaking.
- Stairs and catwalk – Stairs and catwalk should be free of debris and not broken.

Tires should be checked with a tire gauge.
Tip . This is especially if you are slip seating. Tire thumpers aren’t very accurate. If you use a tire thumper, still check with a tire gauge from time to time.
Drives and tandems should be inflated to 100-110 psi and have a minimum tread or 2/32in. Steer tires should be inflated to 110-120 psi and have a minimum tread of 4/32in.
Tires under 50 psi should be replaced, as they can’t retain enough air pressure.
Flat spots can occur from dragging tandems in the winter or when trying to slide the tandems. Tires with flat spots should be replaced.
Check tires for damage, nails, and punctures.

Next, I jump in my cab and start my truck.
- Gauges – Make sure air, oil, and water temperature gauges rise to normal levels.
- Mirrors – Adjust mirrors before moving your truck.
- Windshield wipers – Make sure they work and sit flat against the windshield.
- Horn – Make sure the city and air horns both work.
- Heat and A/C – Check to see if heat and/or air conditioning is working.
- Seat belt – Seat belt should not be frayed and should move freely.
Coupling and Air Lines
This is what could happen if you don’t do the tug test.
The pre-trip inspection is a pretty important thing to do.
Learn your pre-trip procedure and do it when required.
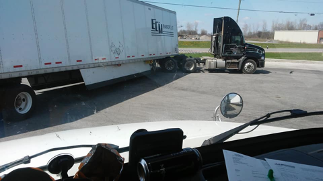
This is why you should always do a tug test when picking up a trailer. The passenger side of the front of the trailer is resting on the frame of the truck and NOT hooked up to the 5th wheel.

The front left corner of the trailer is supported by retracted landing gear only. (Not good!)
The truck driver in this photo (hopefully) learned how critical a pre-trip is. Don’t end up in a pickle like this guy.
Next, I hook up to my trailer.
- Tug test – I back under my trailer until I hear a click, and then immediately do a tug test.
A tug test tests both your coupling and your brakes. If you pull away from your trailer, you aren’t hooked properly.
If you pull your trailer with you, your trailer brakes are out of adjustment. Be absolutely sure to write it up and have it corrected before departure.
- 4 Ways + Headlights. I also turn on my four-way flashers and headlights.
- Airlines and pigtails – Next, hook up airlines and pigtails (electrical connection). Inspect to make sure they aren’t leaking or ripped.
- Visual check of Fifth wheel – Look at the fifth wheel arm under the trailer to make sure it is coupled. The arm should be in.
- Landing gear – Raise the landing gear and check for damage.

Next, I check the bulkhead (front of the trailer).
- Wall – Make sure the wall is not damaged.
- Inspection sticker – Check the DOT inspection sticker to make sure it’s not out of date.
- Registration paperwork – Check the front trailer box to make sure the registration is good.
- Reefer unit – If you are pulling a reefer, select the pre trip function on the unit and run it. It should be completed by the time you are finished your pre trip inspection.
Next step for the pre-trip inspection is to check the side of the trailer and the tandems.
- Lights – Lights should be on and flashing.
- Suspension – springs or airbags should be in good condition, and not covered in oil or grease.
- Tandem pins – Tandem pins should be locked in position, and slider arm should be in its cradle.
- Cables – Make sure the tandem cables aren’t dragging on the ground.
- Underbelly – Make sure there are no damaged beams under the trailer. Check the entire length.
- Mudflaps – Mud flaps should not be torn and hanging.
Back of Trailer
Next, I check the back of the trailer.
- Doors – Doors and hinges should not be damaged.
- Door latches – Doors should be closed and secured.
- Seal – Seal should be intact and match paperwork.
- DOT bumper – DOT bumper should not be damaged
- License plate – Check for the license plate. They tend to wear out and fall off.
Passenger Side
Next, I check the passenger side.
- Brakes – Brake chambers should not be out of round and should be free of grease.
- Suspension – Springs or airbags should be in good condition, and not covered in grease or oil.
- Mudflaps – Mud flaps should not be torn.
Ready to Roll

Finally, I jump in my truck and double check my paperwork and destination.
I release my air brakes, roll forward, and push the service brake.
If everything is good, I’m ready to roll.
Post-Trip Inspection
When I’m done for the day, and every time I swap trailers, I do a post-trip inspection. If I am swapping trailers, I do a pre-trip on the new trailer as well.
A post-trip includes:
- lowering the landing gear
- removing the airlines
- uncoupling, and walking around the trailer checking tires, lights, seal, and mudflaps
Then I finish my paperwork and go home.
Slip Seating
If you slip seat (meaning you are in a different truck each shift), your pre- trip check should be more thorough than if you are permanently assigned a truck.
This also applies to the first inspection after being assigned a truck.
Please be courteous and write up any problems or issues found, so the next driver of the vehicle doesn’t have to deal with it.
Side Note: Clean out your truck and throw away any trash. Common courtesy goes a long way in trucking, between drivers.
Pre-Trip Inspection F.A.Q.
Most breakdowns can be avoided with proper preventative measures, such as daily inspections.
Thorough inspections should be done at the start of each shift. Inspections of trailers should be done every time you swap trailers.
Each driver should do a thorough pre-trip every time they swap drivers.
It should take about 10-15 minutes to perform a pre trip inspection.
The DOT. Make sure you stay in compliance so you don’t end up with hefty fines and an out of service.
The best way to memorize your pre trip inspection routine, is to do it the same way every time. That way you’re less likely to miss something. If you have questions, ask your safety team at your company.
Fluids in the engine, engine hoses and wires, brakes and suspension, mudflaps, trailer registration and inspection paperwork, and license plates.
A Few Trip Planning Tips

- Buy and learn to read a trucker’s atlas. It’s useful to plan routes and avoid restricted roads. I find this road atlas a necessity as a professional truck driver.
- Buy a decent trucking GPS , but don’t rely on it 100%. Use common sense.
- Don’t use the GPS in your elog device. It will put you in a lake.
Please note that minimum requirements for the inspection are established by the FMCSA.
But these may vary by state, trucking company, truck type, and trailer type.
It is your duty as a professional truck driver to perform a thorough pre-trip inspection before each trip and before you drive.
You’ll save yourself from headaches, fines and unnecessary accidents.

More Articles You May Like
- Trucking Terms – A Guide to Our Industry’s Lingo
- The 18 Wheeler – A Comprehensive Guide to Big Rigs
CDL Truck Driver Skills – Tips, Tricks + Knowledge to Kick Your CDL Skills Up a Notch!
- The D.O.T. Physical- A Guide For the Truck Driver

Everything You’ll Want To Know About Paid CDL Training

Custom Big Truck Sleepers Photo Gallery Collection

The Best Trucking Companies to Work For 2024 USA

5 Best GPS For Truckers – A Professional Driver’s Guide
Twice a month we email you the best tips and new articles to help you better navigate the trucking industry..

10 Truck Driving Safety Tips Every Professional Driver Should Follow
A veteran 40+ years truck driver shares 10 of the all time, tried and true truck driving safety tips ALL professional truckers should know AND follow! If every driver of EVERY vehicle on the road followed these safety tips, our roads would be SO much safer.

Trucker Tips Master Guide: Expert Advice From Experienced Truck Drivers
A collection of trucker tips from million milers and experienced drivers. These are gold nuggets for the new truck drivers!

Instruction, clear advice, videos and photos for truck driver skills, maneuvers and information for all professional truck drivers.
A practical guide to paid CDL training programs. Recommended Company Sponsored Schools, Requirements, pros + cons, what to expect from company-sponsored cdl training programs.
Is a Career As a Department of Defense Truck Driver For You?
As a Department of Defense (D.O.D.) truck driver, your role is integral to the logistics and supply chain operations of […]
Navigating Fair Truck Driver Pay: Are You Earning Enough?
Ready to take control of your truck driver pay? Discover key factors impacting your earnings and ensure you’re compensated appropriately […]
The Best Tanker Trucking Companies to Work, U.S., 2024
Top Tanker Trucking Companies in the US To Work For Tanker work typically falls to the ‘better carriers’. Tanker carriers […]
Best Flatbed Trucking Companies, US, 2024: Our Top Picks
There are over 1 million truck drivers working for flatbed trucking companies in the U.S. trucking industry. However, not all […]
Best Trucking Companies For New Drivers in the U.S., 2024
For new drivers entering the trucking industry, diving into the right pool can make all the difference. The foundation of […]
Follow Smart Trucking
Prime’s Guide to Pre-Trip Inspections
Tractor-trailers can weigh up to 80,000 lb . if you count the semi, trailer and cargo. Operating a heavy tractor-trailer can be dangerous, so drivers undergo extensive training to earn their CDLs and start their careers.
Whether studying for your CDL test or heading to your next customer, pre-trip inspections help you catch problems with your vehicle or trailer. Unchecked issues can lead to accidents or extensive repairs.
Do you know how to perform a pre-trip inspection? Need a quick refresher? Follow our guide to pre-trip inspections to learn the basics. Reach out to our Safety Department for more in-depth information.
Use these quick links to jump to sections of the article:
- The Engine Inspection
- Driver Door Area & Tires
- Trailer Pre-Trip Inspection
Lights & Reflectors
In-cab pre-trip inspection , large truck crash statistics .
Knowing how to operate a semi-truck safely in various conditions is imperative for drivers. In 2019, there were 510,000 large truck crashes, according to FMCSA’s 2021 Pocket Guide to Large Truck and Bus Statistics .
Of these crashes, 4,479 were fatal, and 114,000 were injury crashes involving large trucks. Most fatal large truck crashes involved those weighing more than 33,000 lb.
Accidents happen. Drivers can mitigate their risk of an accident by being responsible behind the wheel , following federal regulations and performing pre- and post-trip inspections.
Your Pre-Trip Inspection Checklist
Drivers must provide a vehicle inspection report at the end of each day. Vehicle inspection reports list any issues that could affect the vehicle’s operation and safety. Inspecting vehicles before and after each trip helps catch problems and keep drivers safe.
At a minimum, each report covers the following parts of a vehicle :
- Coupling devices
- Emergency equipment
- Lights and reflectors
- Parking brakes
- Service brakes
- Steering mechanism
- Tires and rims
- Windshield wipers
Pre-trip inspections take around 15 to 20 minutes. You’ll examine your truck and trailer to ensure it’s ready for the trip.
Before every haul, you should check that you have your license, registration, medical card, updated inspection sticker and FMCSA Safety Regulation manual. If you’re picking up a trailer, always make sure the trailer number matches the number listed on your assignment.
Follow these steps to inspect your tractor-trailer, and watch our video on Prime’s pre-trip inspections . Chock your tires before you begin, so the vehicle doesn’t roll or slip.
Under the Hood: Examining the Engine
Start your pre-trip inspection by looking at the engine. Lower the gear guard so you can open the hood. Remove pins and unlatch the hood to do so. Once the hood is open, step back and look underneath the truck to see if there are any leaks.
Passenger Side
On the passenger side, make sure that your general hoses and alternator are free of cuts, abrasions or cracks. Hoses should be sufficiently secured, exhibiting no signs of leaks.
Driver’s Side
Walk around to the driver’s side and conduct a similar examination. Look at the parts listed below for signs of wear, abrasions and leaks. Your coolant and oil levels should be filled to the manufacturer’s specifications. Keep an eye out for fraying belts, improperly secured parts, and missing castle nuts and bolts.
- Air compressor
- Belt-driven water pump
- Coolant reservoir
- Gearbox and hoses
- General hoses
- Power steering fluid
- Power steering pump
- Shock absorber
- Spring hangers and arm
- Steering linkage
Check Your Brake System
Drivers must check the brake hose, brake chamber and slack adjuster. When pulled by hand, the push rod should not move more than 1” with the brakes released.
Your brake line should be free of debris and oil, and the hose material shouldn’t be worn too thin.
Outside Driver Door Area & Tires
If the engine looks good, inspect the outside of the truck.
- Check your mirror on the driver’s side to ensure it is clean and firmly mounted to the vehicle.
- Open the driver’s door, and examine the door’s seals and hinges for cracks or dry rot.
- The fuel cap should be on tight, and the fuel seal should not leak.
- Ensure that the catwalk and steps at the back are clear of any objects or debris.
In addition to the steps above, drivers should look at the following parts for damage, wear or debris buildup:
- Brake hose, chamber, lining and drum
- Drive shaft
- Frame and cross members
- U-joints and bolts
Check Your Tires (All of Them!)
The tires on your tractor-trailer should have a tread depth of no less than 0.125” and be aired according to the manufacturer’s standards. You can check the air pressure with a gauge and adjust it based on your load and the temperature .
The rims shouldn’t be bent or broken, and there shouldn’t be cracks around the bolt holes. Behind the tire, the mud flap should not be tattered or loosely attached to the vehicle. There should be space between the mud flap and the tire.
Trailer Pre-Trip Inspection
Is the truck good to go? Check! Now it’s time to inspect the trailer. Walk around the trailer and examine it for cracks, abrasions or broken parts.
- Brake hose, lining and chamber
- Frame and cross members
- Shock absorbers
You’ll also want to check that:
- The landing gear is fully-raised with the crank handle secure in its cradle. The landing gear and mud flap should be a proper distance apart.
- The tandem relief’s handle and locking pins are in the fully-locked position.
- The slack adjuster and push rod don’t move more than 1” when pulled by hand.
The back doors of the trailer should latch properly. The trailer’s lock rods and hinges must be intact and not bent. Your trailer should also have door chains for safety when loading and unloading.
Coupling: Back of Tractor, Front of Trailer
A driver’s next step is to examine where the tractor and trailer connect.
- Electric line — Ensure there are no exposed wires. The line should be secure.
- Air line — Your air line should be secured at both ends and not leaking.
- Gladhands — Check for worn or rotted seals on gladhand couplings. Make sure there are no leaks in the gladhands connected to the trailer’s air brakes.
- Trailer apron — No gap should exist between the apron and the skid plate. The skid plate should be lubed.
You should also check the kingpins, mounting bolts, and the sliding fifth wheel and locking pin.
Refrigerated Trailer Inspections
When you inspect one of Prime’s refrigerated trailers , you start by selecting the “pre-trip” option on the trailer’s display. It will take the reefer 10 to 15 minutes to complete a self-inspection and notify you of anything in need of adjustment or repair.
While the reefer’s self-test runs, you should look for any signs of damage on the bottom rail, top rail and sides of the trailer. Reefers are insulated. Drivers need to examine the trailer for cracks and exposed insulation.
You don’t want to drive off without working lights. The lights on your truck and trailer should be securely in place, not cracked and amber in color.
- Clearance lights
- Marker lights
- Headlights
- Tail lights
- Reflective tape on trailer and mud flaps
Once you’ve checked that the lights and reflectors are intact, you should test your lights and turn signals. Climb into your cab and turn the following lights and signals on:
- Left turn signal
- Right turn signal
- Four-way flashers
- Brake lights
Inside your cab, you’ll check that your seat belt latches and is not too worn. Next, check that you have a fire extinguisher that’s charged. Ensure your cab has three reflective triangles under the bunk area and electrical fuses in the glove box.
Once you’ve reviewed your safety gear, adjust your mirrors, start the engine and check the dashboard’s instrument panel:
- Oil pressure — It should be rising as the engine runs.
- Voltmeter — It should show the alternator charging between 13 and 14 volts.
- Air pressure — It should be around 120 to 125 psi.
While you’re here, test the heat and air conditioning, city horn and air horn.
Air Brake Test
With your tires chocked, you can perform an air brakes test. To do so, release both brakes and turn the truck off. When you turn the truck back on, you will apply pressure.
- Apply hard pressure to the brake.
- Watch for the gauges to stabilize.
- Hold a hard brake for one minute. You don’t want to lose more than four psi during this minute.
- Pump down on the brakes until the gauges read at or before 60 psi. Your warning light and buzzer should come on.
- Pump down on the brakes until the tractor and trailer valves pop up between 40 to 20 psi.
Parking Brake Test
After testing your air brakes, you can test your parking brake. Allow the truck to rebuild its air pressure before testing the parking brakes.
- Remove wheel chock.
- Release the tractor brakes and apply the trailer brakes.
- Put the truck in “drive.”
- Give your trailer brakes a light tug, ensuring they hold.
- Switch. Release the trailer brakes and apply the tractor brakes.
- Give your tractor brakes a light tug, ensuring they hold.
- Release both brakes.
- Pull forward to 5 mph, then use the brake pedal. The truck shouldn’t pull left or right. It should come to a smooth stop.
What to Do if There’s an Issue During Pre-Trip Inspection
Contact your fleet manager or road assistance immediately if you find an issue with your tractor or trailer. Prime will take corrective action and advise you on what to do next. Repairs must be made before the tractor-trailer can be dispatched again.
Inspection violations affect both the driver’s and carrier’s records. Violations can decrease a carrier’s CSA score . FMCSA keeps records of driver and vehicle violations. These records are updated monthly.
CDL Pre-Trip Inspection Test
Truck drivers must begin each work day with a pre-trip inspection. The Class A CDL test requires new drivers to know how to do a pre-trip inspection. Student drivers must be able to identify truck and trailer parts and understand how they operate.
You’ll walk an examiner through a pre-trip inspection for that portion of the CDL test. The best way to remember what’s on a pre-trip inspection checklist is to perform inspections the same way each time. The more you practice, the more it will become second nature.
Are you ready to become a driver?
Do you need CDL training? Our Driver Training Program prepares you for your CDL exam and offers experience hauling real loads.
Apply online to start our CDL training program, or contact our Recruiting Department at 866-290-1568 for details.
Recent Posts

What’s The Difference Between Dry Van & Reefer Trucking?

What’s A Good Gift for A Truck Driver?

Truck Driver Exercises to Keep You Fit on the Road
Transportation solutions, carrier solutions, drive for prime, work in house, success leasing.
Created by: Campaignium
Privacy Overview
- Company Culture
- Company Programs
- Leadership Team
- Fleet Maintenance
- Refrigerated Division
- Flatbed Division
- Tanker Division
- Intermodal Division
- Load Tracing
- Documentation
- Qualifications & Expectations
- Pay & Benefits
- Driver Training Program
- CDL Holders
- Driver Awards
- Salt Lake City
- Pittston, PA
- Springfield, MO
- Jobs At Prime
- View Available Loads
- Prime Power Fleet
- Lease & Lease Purchase
- Benefits of Leasing
- How to Get Started
- Pedigree Benefits
- Financing Information
- Equipment Inventory
- Omnitracs Logs
- Company Store
- Submit Pics from the Road
- Driver Verification
CDL Pre-Trip Inspection Practice Test
- Connecticut
- District of Columbia
- Massachusetts
- Mississippi
- New Hampshire
- North Carolina
- North Dakota
- Pennsylvania
- Rhode Island
- South Carolina
- South Dakota
- West Virginia
The pre-trip inspection test is neither an endorsement test nor a written test … but it is an essential part of the commercial driver’s license testing process.
The pre-trip vehicle inspection test is basically a skills test that is designed to determine if a driver can identify which features and equipment on a test vehicle should be inspected before operating the vehicle.
The test can cover a wide variety of equipment located both inside and outside of a truck. For example, the test could cover hoses and belts, specific parts of the engine, oil level, mirrors and windshield and much more. We’ll discuss in more detail what is covered on the test later in this guide.
Right now, let’s proceed on and take a close look at the test itself and the testing process.
Test Overview
The purpose of the vehicle inspection test is to both determine if a vehicle is safe to operate and to determine if a driver knows how to ensure his or her vehicle is safe to operate.
During the vehicle inspection test, the driver is expected to explain or show their knowledge of the vehicle inspection process. That means the driver will have to walk around the vehicle and point to or touch each item and explain to the examiner what they are checking and why.
If you do not pass this test, any other endorsement tests that you have scheduled will be canceled.
Before you go to the DMV to this and other endorsement exams, you should visit your state’s DMV website and find the following:
Age requirement for taking the test – most states require applicants to be 18 years of age with a valid driver’s license. If the driver is going to be driving from state to state, most states require that they be 21 years of age with a valid driver’s license.
Identification documents that most be produced to prove your identity. Sample documents that acceptable often include a birth certificate and a valid driver’s license.
Fees that will be due before taking the test. Also, as part of this step, be sure to check what payment methods are accepted at the DMV office you will be visiting.
What’s on the Test?
You will be required to conduct both an internal and external inspection of the test vehicle.
That means on the internal inspection you will have to identify and check such things as: engine hoses, engine belts, oil pressure, coolant level, power steering fluid, mirrors and windshield, safety equipment, temperature gauge, air gauge and more.
On the external inspection you will need to identify and check such things as: steering box, hoses and linkage, air brakes, suspension, wheels, tires, doors, splash guards and more.
During the test, the driver will NOT have to crawl under the hood or under the vehicle. The brake lights, emergency flashers, turn signals, and horn must be checked and if any of these items do not work, the skills and road portions of the test process will immediately be postponed.
One more thing, when taking the inspection test you may be able to use the guides shown in your commercial driver’s license handbook but you cannot have any instructions or notes written on them.
Here are some sample questions that you will need to be able to answer when conducting the pre-trip inspection:
- How much play is allowed in engine compartment belts?
- What might puddles on the ground or dripping fluids on the underside of the engine and transmission indicate?
- How should you go about checking the engine coolant level?
- When checking the wheels, what might rust around a nut indicate?
- How do you check the power steering fluid?
How to Prepare for the Test
We recommend a three step approach to preparing for this test.
Step One – study your commercial driver’s license handbook, paying particular attention to the pre-trip inspection section. Read this section multiple times and try to commit everything to memory.
Step Two – Take pre-trip inspection practice tests to asses and further increase your understanding of this topic. We offer pre-trip inspection practice tests right here .
Step Three – Take what you’ve learned and apply it to a real world truck. It’s one thing to see something in print but you should also look at a physical truck so that you know where essential components are and you can identify them.
Test Taking Tips – Improve Your Chances to Pass
Things you can do to improve your chances of passing this test include getting a good night’s rest the night before the exam.
You should also eat well before the test. This will ensure your mind and body have fuel needed to successfully execute the inspection.
Still more things that you can do include taking some deep breaths to relax yourself before beginning the test. You should also be very familiar with where the DMV is located and how to get there. Then you should plan on leaving early so that you will have to compose yourself before the test and you won’t feel rushed and stressed when you begin.
We also recommend scheduling an appointment at the DMV to avoid any long wait that can make you feel tired and stressed and negatively impact your test performance.
The pre-trip inspection test is a very important test because failing to pass this test will prevent you from being able to move an take scheduled endorsement exams.
This is done for a reason – because being able to identify that a truck is safe to operate is something that is critical for drivers to know how to do. Failure to master this skill can put lives at risk on the roadways.
So don’t take this test for granted. Study the handbook, take practice tests and be sure to practice inspections on real trucks to further expand your knowledge. Do these things and you’ll pass this test with flying colors and be able to move on to receiving the endorsements you covet.
Best Free CDL Pre-Trip Inspection Checklist | Trucker Safety & Profit

Brian Smith
October 9, 2023

The indispensable CDL pre trip inspection checklist is one of the most important rituals of a driver's day. Industry veterans know this routine like the back of their hands—it's that vital to the trade— but new drivers struggle with how to remember their CDL pre trip inspections, especially for the exam.
Drivers are required to complete this walkthrough at least every 24 hours, after their mandatory 10-hour break. A detailed inspection can safeguard not only your safety but also that of everyone else on the road.
This article will walk you through an exhaustive checklist to follow before every trip, as well as the potential costs of not doing so. We've designed this list with YOU in mind, so we're throwing in some money-making tips that will help you avoid steep fines and costly repairs.
"Spotting and fixing vehicle defects early on keeps you safe and your truck in good shape."

Why Following the CDL Pre-Inspection Checklist is So Important
The price of a failed DOT inspection makes completing a thorough CDL pre trip inspection checklist even more pressing. Violations can cost carriers thousands each year in both penalties and out-of-service (OOS) trucks. According to the FMCSA, around 20% of vehicles are OOS due to failed inspections at any given time. For an owner-operator, this means you'd be paying thousands in vehicle payments on a truck that's not earning you any money.
The pre trip checklist is designed to avoid any possible accidents due to equipment failure and failed safety inspections. A few minutes of caution pays for itself ten-fold down the line.
DOT & Truck Inspection
- Steer Axle/ Rear Suspension
- Side of Cab
- Rear of Cab
Driver Shaft/Rear Frame
- Trailer Front/Side/Rear- Trailer Suspension
Gauges/Inner Truck
- DVIR form fill out
"Most pre-trip truck inspection lists cover safety. We go beyond that with time and money-saving tips in our pre-trip inspection checklist PDF." - Brian Smith, Director, Global Marketing of Cota Systems
- Get the Google Sheet
- Download the Printable PDF
General Tips Throughout Your Pre-Trip Inspection
Because you don't have access to a pre trip inspection checklist during the CDL exam, drivers have created a few tricks to pass this part of the test. The most common memorization tricks are:
BBC: Is any plastic or metal bent, broken, or cracked?
CDL: No hard materials should be cracked, damaged or loose.
ABC: Are there any abrasions, bulges, or cuts on the rubber?
PFL: Peak for leaks in fluid and air containers.
PMS: Are bolts properly mounted and secure?
ABCDF: Do you see abrasions, bulges, cuts, dry rot, or frays?
A bit of common sense will help you put these acronyms to good use. For example, there's no way BBC would apply to rubber, as rubber wouldn't be bent, cracked, or broken. Most drivers pick one for each material type and stick with it until they get more comfortable with the list.
What are the ABCS in a pre-trip inspection?
As mentioned above, the ABCs refer to Abrasions, Bulges, and Cuts to check for during the Class A CDL pre-trip inspection. This applies to rubber or soft surfaces - things like tires, hoses, and rubber bushings.
How Long Should a Proper CDL Checklist & Inspection Take?
Ideally, it takes 15-30 minutes to run through the CDL pre trip inspection checklist depending on experience level and whether or not any issues are found. If issues are found, they must be fixed right then, before taking any more loads.
The cost of preventative maintenance averages $15,000 per truck per year. This figure is a drop in the bucket compared to the cost of inoperable equipment. Breakdowns and crashes due to mechanical failure cost carriers billions industry-wide. Consider an owner-op paying $3,500 per month on insurance and loan payments. Those payments still have to be made regardless of whether the truck is in the shop or on the road. Adds up quickly right? Spending a bit of extra time and money on prevention keeps trucks on the road and earning money.

Get your Free CDL Pre-Trip Inspection checklist today!
Standard cdl pre trip inspection checklist.
Our pre-trip inspection Class A checklist serves two purposes: helping new drivers pass this portion of the CDL exam, and guiding CDL holders through the process with 100% accuracy every time.
A few exam tips before the pre-trip checklist:
- Point to or physically touch each area being inspected. This will help your memory and prove you know your stuff.
- Start with a big section and break it down into small sections from left to right like reading a book.
- During the test, make at least 2 checks for every item or area.
▢ Hoses: all hoses should be secured on both ends with no splits or cuts
▢ Fluids: engine oil, washer fluid, coolants, and power steering
▢ Belts: no more than 1/2"" to 3/4"" of give, securely mounted with no fraying ends
▢ Alternator: securely mounted, belt in good shape
▢ Water pump: properly mounted with no split or leaking hoses
▢ Air compressor: securely mounted, no visible or audible leaks
If Left Unchecked:
Oil leaks and coolant issues are two of the most common breakdown causes, both of which can be spotted during pre-trip. Scheduling dry maintenance every 10,000-25,000 miles and wet maintenance every 25,000-50,000 miles can prevent most engine issues. These regular services, ranging from $50-$450 , are nothing compared to the price of replacing or rebuilding an engine - $20,000 - $40,000 . Thorough pre-trip inspections are the best way to avoid engine breakdowns and escalated damage.

▢ Brake Pads: ¼ minimum brake pad thickness
▢ Slack Adjuster: 1” of play and at a 90' angle to the brake chamber
▢ Brake Chamber : no audible leaks or visible damage
▢ Brake Hose: securely mounted, no audible leaks, splits, or cuts
▢ Brake Drum: no bluing from excessive heat, securely mounted
Brake problems are the most common cause of semi-truck accidents . While over-breaking is a big player in this, a lack of maintenance and unnoticed airline damage usually play roles, too.
Brake pad replacement costs $150-$300 per axle ($750-$1,500 total) and $80-$160 per hour in labor. The consequences of brake failure are incalculable - body repairs, cargo damage, and strikes to your carrier safety rating will follow you. The last thing you want to deal with is higher insurance premiums or trouble getting placed on loads. Take this part of your pre-trip inspection extra seriously.

- Front: clearance lights, headlights, high beams, turn signals, flashers
- Sides: turn signals, flashers, clearance lights
- Rear: tail lights, brake lights, left turn, right turn, 4-way flashers
- Front: clearance lights
- Rear: clearance lights, tail lights, license plate lights, brake lights, turn signals, flashers
▢ Reflector Tape: clear, free of dirt
If Left Unchecked:
Fines for a headlight out vary from state to state, but the consequences of non-functioning brake lights or turn signals could confuse drivers and create unsafe situations. Both of these can be spotted and fixed during a pre-trip inspection. It's easy to run to the shop and change the light yourself if possible. License plate bulbs are just a few cents, and headlight kits range from $40-$250 . Don't add the price of a ticket on top from getting pulled over!
On the topic of lights, it's important to note that warning lights like the engine light or battery alert light should be addressed immediately to avoid developing into bigger issues down the road.

▢ Wheel inside: not broken, no illegal welds
▢ Wheel outside: no cracks or illegal welds
▢ Tires: no cuts or bulges, air gauge matches manufacturer recommendations, tread depth at least 4/32" and evenly worn
▢ Spacing: duals are properly spaced
▢ Valve Stem: not audibly leaking. metal cap in place and secure
▢ Lug Nuts: present, tight, no cracks
▢ Hub Seal: not cracked or loose
Tire problems cause 8,000 truck accidents per year. While flats are sometimes unpreventable, blowouts can be caused by improper inflation , which can also shorten the lifespan of your tires via irregular wear and tear. Timely alignments and rotations can also keep tires running longer; the price of new big rig tires is from $250 to $600 . A tire blowout mid-load can make you miss your appointment and waste precious driving hours - all the more reason to be thorough in your truck inspection.
Something to keep in mind is the way you conduct your pre-trip checklist is important. For example, there are a lot of videos and content showing truckers how to check their tires by kicking, beating, and even using a hammer. Hitting a tire with force like that, in the right spot (damaged) can lead to a blow-up and severely injure you and your truck. Even lugging around a damaged tire can lead to a blow-up . Stay safe and take all necessary precautions!

Steer Axle/Rear Suspension
▢ Steering Shaft: not BBC, securely mounted
▢ Steering Gear Box: not BBC, securely mounted, no visible leaks
▢ Hose: no visible leaks, properly mounted
▢ Pitman Arm: not BBC, securely mounted, nuts and pins are all hardware is present and secure
▢ Drag Link: rubber is in good shape, bushings are properly greased and not split or cut
▢ Upper/Lower Control Arms and Tie Rod: not BBC, securely mounted
▢ Spring Mounts: not BBC, securely mounted
▢ Leaf Springs: not BBC, securely mounted, not shifted or scissored
▢ U-bolts: not BBC, securely mounted, all accounted for
▢ Shock Absorber: not BBC, securely mounted, no visible leaks, rubber bushings aren't dry rotting
If Left Unchecked:
On their own, each of these parts isn't a huge deal to replace. For example,
- Steering Shafts: $100-$300
- Pitman Arms: $50-$200
- Steering Gear Box: $150-750
- Shock Absorber: $50 - $90
On the other end of the spectrum, neglect can lead to the truck leaning to one side, which can cause further damage. Blown shock absorbers will also make your truck hard to handle, steer, and control. Say it takes a mechanic 3-5 days to diagnose and fix a suspension issue. You could lose out on $1,000 - $3,000 in earnings that week, plus the several hundred it will cost in repairs. Spotting these issues during your 15-minute pre-trip inspection could save you thousands.

▢ Mirrors: mirrors adjusted properly and without cracks, free of dirt
▢ Foot Pedals: unobstructed
▢ Horns: functioning properly
▢ Windshield: no stickers, cracks, or excessive dirt
▢ Heater/defrost: both operate when the fan is set to max
▢ Wipers: arms move properly when turned on, and wiper fluid works
▢ Steps: mounted and secured
▢ DEF cap: secured
▢ Fuel cap: gasket and vent in place, chain secures cap to the tank
▢ Skirting: no damage, panels secure
To be mid-trip and discover your defrost or wipers don't work can be a scary feeling. A suddenly obstructed view with no way to clear it is what the in cab inspection is meant to avoid.
With the average truck eating up $15,000 per year in maintenance and repairs, it's the little things that add up to such a steep number. For example, fixing a windshield can cost anywhere from $500 - $2,000, depending on the truck type and severity of damage. Wiper blades cost $14 - $35 on average, and an AC compressor would cost around $200 to fix/replace . It's easy to see how these numbers add up fast, but waiting until something breaks on the road and taking on the cost of an OOS violation can quickly double and even triple those numbers.

▢ Frame: no illegal welds, not BBC, no rust
▢ Drive Shaft: not BBC, properly mounted, not twisted, and the U-joints are clean
▢ Universal joint: not BBC
▢ Differential: no leaks
Rusting frames and chassis can be prevented and stopped in their tracks with preventative protective sprays . To protect a drive shaft, keep it free of dirt and debris and make sure it's well lubricated. The price of a new driveshaft is around $1,200 . The cost of checking it during pre-trip is free. Remember, the purpose of a pre trip inspection Class A is to not only keep you safe but to spot mechanical issues before they get worse.

▢ Bolts/Bracket: all accounted for and secure, not broken or bent
▢ Locking pins: all accounted for and secure, not broken or bent
▢ Release Handle: releases freely and is in the locked position.
▢ Apron: no cracks, no gap between apron and 5th wheel plate, securely fastened
▢ Skid Plate: no cracks, properly greased, securely mounted
▢ Platform: securely mounted, not cracked or broken, no illegal welds
▢ Kingpin/Locking Jaws: locking jaws are wrapped around kingpin, which is straight with no chips or welds
▢ Air Lines: securely mounted at both ends. Lines are free of cuts, no audible leaks.
▢ Electrical line: secured at both ends. Lines are free of cuts, no audible leaks.
The consequence of worn brackets or pins is accidental uncoupling, otherwise known as dropping a trailer. Not only can this cause accidents, but it can damage the trailer and the cargo inside. In these cases, the carrier is almost always liable for any damages.

▢ Header Board: properly mounted and secured, not BBC, no missing rivets
▢ Clearance lights: not loose, cracked, or dirty
▢ Top rail: No cracks or collision damage.
▢ Rivets, holes: no holes, all rivets in place.
▢ Landing gear: properly mounted and secured, not BBC, shoes are present, handle moves freely
▢ DOT tape: covers at least 50%, not dirty or peeling
▢ Floor: no holes
▢ Cross members: none are damaged, missing, or twisting
▢ Tandem release: properly mounted and secured, not BBC
▢ Slide rail: properly mounted and secured, not BBC
▢ Pins: engaged
▢ Clearance lights: not cracked or dirty
▢ Doors: not broken, no holes, seal intact
▢ Hinges: securely mounted, not BBC
▢ Door handles and rods: securely mounted, functioning properly
▢ Lights: securely mounted, not cracked or dirty
▢ DOT tape: clean, covers 100% of the backside of the trailer
▢ Bumper: properly secured, not BBC
The trailer keeps your precious cargo safe. Issues with the cross members, flooring, or doors leave cargo unsecured and exposed to the elements. Of this list, the most expensive fix is replacing or repairing cross members. Just one broken cross member puts a truck OOS, and repair/replacement costs thousands , mostly in labor. How can they get damaged?
- sloppy hooking/unhooking
- exposure to the elements
- uneven loading
- punctures from inside the trailer
- blown tires
If you notice trailer damage during your Class A pre-trip inspection, you'll have to get it fixed before taking any more loads.

▢ Air pressure: set to proper operating range, no warning lights
▢ Temperature gauge: rising to proper operating range, no warnings
▢ Oil pressure: rising to proper operating range (25-50 PSI), no warnings
▢ Voltmeter: operational, 13 - 14 volts
▢ Dashboard light indicators: check the indicators for the high beams, turn signals, and flashers.
▢ Fuel: gauge matches visual compared to looking in the tank
▢ Tachometer: 1000-1500
▢ Water temperature: 180-205 degrees
▢ Def level: minimum of one light bar
If these gauges don't pass the pre trip inspection Class A checklist, it's likely due to faulty wiring or a fuse issue. You'll have to identify the source or take it to someone who can.
Simple electrical fixes can be done on your own. At a mechanic, a blown fuse costs around $100 to repair, and a full rewiring can cost anywhere from $1,000 - $2,000 .
Preventative maintenance includes replacing old connections with more modern technology and having circuit protectors checked during regular maintenance.

A DVIR, or Driver's Daily Vehicle Inspection Report, is the form that drivers fill out during the Class A pre-trip inspection and at the end of their day. It's designed to keep the company informed of any missing or damaged parts of the truck, keep maintenance costs as low as possible, and keep trucks on the road safely.
Drivers should keep their completed forms accessible and stored for up to 6 months, just in case they're asked to pull them for reference.

Most Common Issues Found During Pre Trip Inspection
Below are the most common issues found while running through a CDL pre trip inspection checklist. If left unchecked, these things can lead to getting pulled over and receiving a violation, or worse, causing a breakdown where you or others are hurt.
Here's a run-through of what to do if you run into these common issues and how to avoid them."
Broken Lights
What to Do:
The first of the three L's (lights, leaks, and leans), broken lights are an easy way to get pulled over and trigger a full-blown roadside inspection. If you notice an issue with one of the many lights during your truck inspection, you're required (and it's in your best interest) to get a replacement immediately.
How to Avoid This:
Obviously, there's no way to avoid lights going out. However, you can avoid faulty reflectors by getting regular washes, especially if you've driven somewhere rural or salted. Shippers appreciate a clean truck, too.
Maintenance as a Money Saver:
Lighting violations are known as ""gateway violations"" because they open the door to law enforcement noticing other things wrong with the truck. This makes staying on top of maintenance even more pressing. For example, most new reflectors cost around $5 each . If you get pulled over for missing or faulty reflectors, it could trigger an inspection that makes you A) sit still and waste hours, B) miss your appointments, C) end up OOS, and D) get in trouble with your company.
Leaning is the second of the three L's. A leaning truck could indicate
- tire problems
- faulty suspension
- worn spring bushings
- airbag issues
The first step is to check out the above mechanisms yourself for any noticeable worn springs or airbag problems. To avoid damaging any equipment even further, go to the shop after your pre-trip inspection and get it checked out.
Uneven loading puts excess strain on the truck and can cause leaning over time. You have every right to ask shippers to fix uneven or shoddy loading.
A new leaf spring is one common solution to fixing a leaning truck. Costing anywhere from $80 - $450 , it's a solid first step compared to full suspension repair which costs $1,000 - $2,000.
The last of the three L's are leaks. When you look on the ground near the engine, do you see any puddles or fluids? There are three common sources:
- power steering
- water leaks
- brake fluid
Identify the source. What type of liquid is it? Does it smell? How big is the puddle? Is the radiator cap secured and not broken? If you can identify the problem and fix it - great. If not, make a call to the nearest shop.
The reason you check every bolt and hose on the pre trip inspection Class A checklist is to avoid these mystery leaks. Preventative maintenance is key.
Maintenance as a Money Saver:
It's a lot cheaper to replace nuts and bolts than it is to replace an entire system that's been damaged due to ongoing leaking. Driving with a leaking radiator can damage engine bay components and require repairs to a chain of other parts. If the problem was the radiator gasket, for example, the cost of a replacement would only be around $40 .
The limit for tread depth is 4/32" on steer tires and 2/32" on others to pass a Class A pre trip inspection. Sometimes tires look good during inspection, but after a long haul, treads have worn down too low.
Tire replacement should be prompt - blowouts happen all the time and can do serious damage to the underside of the trailer. Check if the tire is still under warranty, and have it and any others replaced ASAP.
Make sure tires are always filled to the manufacturer's recommendation and ideally the same PSI in each tire. Note that tread loss accelerates in extreme heat. Tires gain about 1 pound of pressure every 10 degrees as the temperature increases. Asphalt can be 20-50 degrees hotter than the air; keep that in mind before thinking any bulges or worn tread will be fine.
New big rig tires cost $250 - $600 , or $0.04 per mile. Because of the high cost, many large fleets are opting for imported tires to keep costs down. Research reviews on the brand you have in mind first - many have bad reviews from truckers. Here's a video that shows how much time can be lost by blowing a steer tire.
Overheating
Pull over safely and legally. Give the truck some time to cool down in idle. Try turning the heat on to get some of that heat out of the engine - it will feel uncomfortable but protecting the engine is worth it. Check to see if the radiator is jammed with debris or has bent fins. An overheating truck could be difficult to diagnose, and you'll most likely have to have a mobile mechanic come to you. If you were going up a steep grade, it might have just been the way you were driving.
- Keep the radiator clean
- Check the muffler for soot build-up in older trucks
- Don't use cruise control in hilly areas
- Don't overload the trailer
Constant overheating can be hard to diagnose, and it can make you chronically late to appointments. Regular maintenance and a thorough CDL pre trip inspection Class A are where the little details can be spotted and nipped in the bud.

Cota Systems Make More Money Per Mile CDL Pre-Trip Checklist
We know the struggle of hauling empty or partially full trucks and deadheading between every load. Our solution? Seamlessly connecting truckers with available LTL loads that complement their route and trailer capacity. Free and easy to use, Cota Systems™ platform makes it simple to earn more money per mile. We'll send you available LTL truck loads on your preferred routes as soon as they're posted.
Simply sync all of your favorite load boards into Cota Systems™ for easy browsing and instant notifications.
COTA SYSTEMS™ Mobile App
Cota Systems™ mobile app connects drivers with new loads and their dispatchers no matter where they are.
- Extra loads on the road.
- Scan and send documents.
- Keep track of your earnings.
- Seamless dispatch integration.
- Real-time load notifications.
- Stay connected anywhere.
Staying efficient on the road makes the difference between staying profitable and staying afloat.
Our trucking dispatch software is completely free and feature-rich, saving teams time on paperwork and document sharing. The platform integrates seamlessly with the driver app simplifying everything from load finding to billing.
How Cota Systems™ helps drivers 10X their income:
- Eliminates wasted miles with convenient LTL and partial load boards
- Efficient document uploading and one-click billing
- Communicate with shippers in the same app
- Load board syncing cuts down the time it takes to book a load
Bypass Construction
The DOT 511 traffic app provides state-specific traffic and construction updates. Check for delays on your route to get ahead of detours and lane closures. Each state has their own app, so download it ahead of time.
Why does it matter? If you earn $0.60 per mile on a 400-mile trip, that's $240 earned in roughly 8 hours. Now, say traffic adds 1.5 hours to your trip. You still earn the same $240 AND you don't have the opportunity to pick up another load before you reset. Time is money!"
In 2016, truckers were delayed a total of 1.2 billion hours because of congestion on the road - that's in the billions! Truck bottlenecks are mostly common in major cities. Planning your route ahead of time to avoid traffic delays is crucial to your bottom line.

Weather Apps
Winter and summer storms can eat into income and create seriously dangerous roads. Depending on the weather, you might be able to plan a different route to avoid delays or change the time and place you stop to rest. The AccuWeather app is a popular choice among drivers.
The horror stories of drivers getting stuck at a rest stop for days or getting blown over by strong winds paint the ugly picture of the weather as a driver's biggest opponent.
Truck Parking
After finishing your Class A CDL pre trip inspection, take a few minutes to map out overnight parking spots along your route. American Truck Parking does a good job of showing truck stops and rest areas that offer overnight parking, as well as the pricing, pictures, and other amenities. You can filter out for gated parking spots, CAT scales, showers, truck washes, and much more. Compare pricing beforehand and save yourself the cash!
Dock Details
Headed to a new shed? Check them out on Dock 411 to confirm things like pallet restrictions and hours of operation. Not sure if you can fit? Most places have pictures that other drivers took or reviews about slow loading and yard hazards.
The benefit? This helps plan things like getting lunch, calculating hours, and knowing whether or not you even want to take a certain load. If you see reviews that a shed has an average 7-hour loading time (the standard is 2.5 hours ), you can have a conversation with dispatch early on to make a game plan regarding detention and/or layovers.

Gas Buddy helps truckers find the cheapest gas prices along their route. While you're looking, you can see what stops have showers, food, repairmen, and other amenities so you can save time at a 1-stop shop.
For reference, the average owner-operator spends $45,605 on fuel per year ( 2022 ). Company drivers don't usually have this problem since they have discounted fuel cards. (You can get fuel cards with Cota Systems , too).
Legally Bypass Inspection Sites
Did we mention that time is money? Another way to save time is with Drivewyze , an in-cab app for driver devices that provides inspection bypass opportunities at 884 weigh stations across the states. When bypass isn't allowed, they have an e-inspection system that speeds up the process and avoids long lines. It sounds too good to be true, but it's 100% legal and works 89% of the time. Prepass is another company that offers this service.
Weigh station stops can take anywhere from 30 minutes to a few hours if lines are long or they find something wrong with your truck. That 30-minute stop could have earned you $15 (at $0.60/mile for 25 miles). Doing so every day could cost you $300/month, and that's IF the stops only take 30 minutes!
Most drivers use a combination of navigation apps. Hammer and Google Maps are popular choices. Systems made specifically for truckers won't take you down prohibited roads - that's why Google Maps alone might not cut it.
Health Apps
Recent studies found that workers who take care of their mental health average 9.3 fewer sick days per year than workers who don't. The life expectancy of truck drivers is 61 years , partly due to their unhealthy lifestyle and work-related stress. Your health is just as important as any CDL pre-trip list. Obesity is one of the most prevalent health issues in the trucking industry for long-haul drivers. These healthy habits can save you down the line:
- Skip the fast food, sugary snacks, and sodas.
- Find a way to manage your stress. Talking to a friend while you drive or finding a podcast that you enjoy are two common solutions.
- Exercise during home days focusing on your back.
- Switch up your stimulants. Instead of Redbull every day, try green tea, coffee, or Yerba Mate a few days per week.
Try out some apps like MyFitnessPal for weight loss and nutrient tracking or Luminosity for mental health support.

OTR drivers can take advantage of toll services like Prepass (which also serves as a weigh station bypass) and Best Pass , a prepaid transponder system. If a toll company isn't covered, it's best to just use cash and keep your receipt. A few tips:
- Take a second to review toll prices on your trip. Any tolls should be factored in when dispatch discusses rates, especially in cities.
- Find and join any toll discount program you can find (take the New York toll reimbursement program, for example)
- Best Pass offers cash toll discounts, but you should verify that the transponder rate wouldn't have been the same (and much faster).
How to Remember Pre Trip Inspection CDL Checklist
Start with our printable CDL pre trip inspection cheat sheet and repeat, repeat, repeat. Use the same checklist every time so your brain can get into that rhythm. Remember the acronyms:
BBC: Bent, broken, or cracked
ABC: Abrasions, bruises, cuts
PFL: Peak for leaks
3 L's: Lights, leaks, leans
Understanding the mechanics of the truck and how everything works together will help your brain form stronger connections and remember more. Try explaining the process to your wife, kids, or friends (even if they won't remember) so you can spot areas you need to study the CDL pre trip inspection PDF more.
What is the item most commonly overlooked during a pre trip inspection?
A few items on the CDL pre trip inspection checklist trip up new drivers most often:
- Chocks: During your CDL class a pre trip inspection, you'll have the vehicle on and off, and be testing various brake systems. Chocks prevent the truck from moving around while you're underneath and walking around.
- Seatbelts: It's often the last thing on a new driver's mind on the long list of items to inspect. But, your life depends on it.
- Emergency Kit: Especially if you drive a shared truck, you don't know if the previous driver used up anything in the kit. Just because you see the kit doesn't mean everything is present and functional.
- Reflectors: Reflectors help other vehicles see you at night. Because there are so many, drivers rush through this check or give them a quick glance. These are another "gateway violation" that can get you pulled over and given a roadside inspection.
- Wheel Lug Nuts: Loose wheel fasteners could have your tires speeding down the freeway toward other cars and trucks. Double-check that all lug nuts are fastened and free of rust.
- Personal Health: Remember the figures we mentioned about truck driver life expectancy. Put your health first, and don't drive if you feel sick and feverish.
This is all about the safety of you and others. Keep your pre trip inspection Class A cheat sheet with you and go through the same, thorough motions every time.
CDL Class B Pre Trip Inspection
The CDL Class B pre trip inspection follows virtually the same guidelines as Class A, but they differ in terms of vehicle type.
Class B includes buses, straight trucks, and smaller commercial vehicles that are typically not designed to tow additional trailers. Items like the 5th wheel and coupling mechanisms are obviously left off. Drivers have to check passenger doors, wheelchair lifts, handrails, emergency exits, and seating for passenger safety.
New Truck Pre-Inspection Checklist Addition
Non owner-operators who are regularly assigned new trucks can't take for granted that everything was left as you might have left it. Add these to your pre-inspection checklist:
- Cab card & book: permits, registration, IFTA paperwork, and cab cards are present and up-to-date
- IFTA Sticker: current year is displayed on both sides of the truck
- Elog Device: present and functional
- Permits: in the cab card book and up to date
- License Plate: front and back plates match
- Medical Card: med card and CDL are on your person or in the truck
- Paper Logbook: backup if E-log stops working
- Inspection sticker: stuck to the side of the truck and up-to-date
- FMCSA Safety Book: within arms reach of the driver's seat
Additional Supplies: load securing equipment, extra coolant and oil, cable cutters, hammer and wrench, hard hat, and steel-toed boots.
Final Notes on Completing Your CDL Pre-Trip Inspection Checklist
So, you're armed with the ultimate CDL pre trip inspection checklist that will help you pass your exam and save on vehicle maintenance. Your truck is your money maker; our goal for this guide is to give drivers the tools to protect their biggest asset and keep the most money in their pockets as they can.
Learn more about how to earn more money and truck driver pay in our blog . Here's another link to the pre trip inspection Class A PDF . Good luck!
I joined Cota Systems to help U.S. truckers grow their businesses. I proudly served in the U.S. Navy, managed some of the largest brands on earth, and I'm excited to share what I've learned with you. Truckers are the backbone of our great nation and when you and your family are thriving, so is America! 🇺🇸
Cota Systems LinkedIn
Brian's LinkedIn
Best articles
How To Avoid Surprising Double-Brokering Impact | Best Free Hacks
205 Best Truck Driver Quotes for Success in Life and Business
Popular articles
#1 Free Truck Dispatch Software: Boost Your Business
Dispatching for Truckers: The Unsung Heroes of the Road
Different Truck Types in Freight: Every Freight Truck & Goods They Haul
What is LTL Freight Shipping and How LTL Shipping Rates Are Calculated
#1 Ultimate Freight Broker Guide: Results You’ll Love
Join Our Newsletter
Discover new features of Cota systems along with tips, tricks, giveaways, and more to maximize your shipping profits.
You may also like

March 29, 2024
How to Find Box Truck Loads: The #1 Ultimate Guide
March 22, 2024
Buyer's Guide to Commercial Box Trucks: Box Truck Sizes and Weight Classes
.jpg)
March 15, 2024
A Day in The Life of a Trucker & Tips for Better Trucking Life
Back to topics

- Fleet Training
- CDL Training
- Insurance Discount
- Court Diversion
- Our Courses
- What is the SPIDER Method?
Pre-Trip Inspection: An Essential Guide for Commercial Drivers
Why are pre trip inspections essential, and how can they make a difference in the daily lives of truck drivers? With safety, regulatory compliance, and preventative maintenance on the line, pre trip inspections are a crucial aspect of ensuring smooth and efficient operations on the road. In this blog post, we dive into the critical components of pre trip inspection and provide valuable tips and resources to help drivers stay ahead of potential hazards and costly repairs.
- Pre-trip inspections are essential for promoting safety, compliance, and cost savings while on the road.
- The pre-trip inspection process should take approximately 10–15 minutes and include items such as braking systems, steering & suspension systems, emergency equipment & engine compartment.
- Establishing a routine for pre-trip inspections with sufficient time to check all components is key to ensuring vehicle safety and regulatory compliance. Accurate records must also be kept.
The Importance of Pre-Trip Inspections

- Lessen accident risks
- Comply with regulations
- Maintain the vehicle’s condition
- Avert expensive repairs and downtime
Frequent inspections, such as periodic inspection, are important for maintaining safety and preventing costly issues.
The benefits of conducting pre-trip inspections include:
- Ensuring safety and compliance with regulations like DOT inspections
- Preventing fines, penalties, and potential harm to the driver’s or company’s reputation
- Acting as preventative maintenance, catching minor issues before they escalate
- Saving time, reducing repair costs, and minimizing downtime
Safety Concerns
Ensuring the vehicle’s safety is of paramount importance when conducting pre-trip inspections. A thorough examination of various components is necessary, including:
- Fire extinguishers
- Brake lights
This enables drivers to spot potential hazards and affirm the vehicle’s operational readiness, ultimately reducing the risk of accidents, in line with the goals of the Commercial Vehicle Safety Alliance.
However, the consequences of neglecting a thorough pre-trip inspection can be severe. Overlooking potential hazards may render the vehicle unfit for operation, increasing the risk of collisions. An inspection focused solely on the vehicle can spot these hazards and confirm the vehicle’s safety, underlining the significance of a thorough pre-trip inspection.
Regulatory Compliance
The Federal Motor Carrier Safety Administration mandates pre-trip inspections as part of DOT inspections for commercial motor vehicles, requiring drivers to acknowledge and certify that appropriate repairs have been made before commencing a trip. Non-compliance with pre-trip inspection regulations can result in fines, penalties, and harm to a driver’s or company’s reputation. Conducting periodic inspections can help maintain compliance and ensure the vehicle’s safety.
A Driver Vehicle Inspection Report (DVIR) is an essential tool to guarantee regulatory adherence. Watching a pre-trip inspection video can help drivers understand the process and ensure they follow the correct procedures, further emphasizing the need for thorough pre-trip inspections.
Preventative Maintenance
Preventative maintenance is an essential aspect of vehicle upkeep, aiming to prolong the lifespan of corporate assets, equipment, and infrastructure. By inspecting, cleaning, lubricating, adjusting, and replacing parts as necessary, drivers can detect minor issues before they escalate into major problems, saving time and money on repairs and reducing downtime.
The advantages of preventative maintenance include enhanced safety, increased efficiency, and minimized downtime. By incorporating pre-trip inspections into a regular maintenance routine, drivers can ensure their vehicles remain in optimal condition and avoid unexpected breakdowns or costly repairs.
Pre-Trip Inspection Process

Conducting pre-trip inspections at the start of each shift and each time a trailer swap occurs is integral. Such regularity aids in upholding the vehicle’s safety, roadworthiness, and regulatory compliance while also acting as preventative maintenance. The average inspection should last between 10-15 minutes, allowing enough time for a thorough examination of all components.
Engine Compartment
Inspecting the engine compartment is a critical part of the pre-trip inspection process. Drivers should examine the engine for leaks, fluid levels, belts, hoses, and other critical components to ensure optimal performance and prevent breakdowns. This includes checking the water pump, power steering pump, and alternator for any signs of leakage, fraying of belts, and ensuring that all components are securely mounted.
Additionally, drivers should verify the location of the dipstick and the appropriate oil level, as well as inspect the coolant system for proper levels, hose conditions, and secure mounting at both ends. By carefully examining each part of the engine compartment, drivers can maintain their vehicle’s performance and avoid unexpected issues on the road.
Exterior and Tires
A thorough inspection of the vehicle’s exterior and tires is crucial for ensuring its safety and roadworthiness. This includes checking the lights, reflectors, fuel tank, battery, and tires for any damage or wear that could impact safety or performance. Tires should be inspected for adequate tread, cuts, bubbles, or gouges, and to make sure there are no foreign objects, such as stones or large debris, between the wheels and no space between tires and rims.
Moreover, it is vital to check and maintain the appropriate air pressure in the tires to ensure optimal performance and prevent tire-related accidents. By carefully inspecting the exterior and tires, drivers can guarantee a safer and more efficient driving experience.
cabin and Controls
The cabin and controls of a commercial vehicle play a crucial role in the driver’s safety and comfort on the road. During a pre-trip inspection, drivers should examine the cabin for proper functioning of:
- other essential equipment
They should also ensure the availability of emergency equipment.
In addition to checking seatbelts, mirrors, seat position, steering wheel, pedals, windshield, lights, turn signals, ABS lights, gauges, windshield wipers, and horns, it’s essential to verify that all required emergency equipment, such as fire extinguishers, warning devices, and first aid kits, are present and in good working condition.
By thoroughly inspecting the cabin and controls, drivers can ensure a safe and comfortable driving experience.
Essential Items on a Pre-Trip Inspection Checklist

In addition to the aforementioned items, a pre-trip inspection checklist should also include the engine compartment, exterior and tires, and cabin and controls, as previously discussed. Combining all these components in a well-structured checklist ensures a thorough and effective pre-trip inspection that promotes safety and compliance.
Braking System
The braking system is a vital component of any vehicle, and a thorough inspection is necessary to ensure proper functionality and safety. During a pre-trip inspection, drivers should examine all components of the braking system, including air brakes, parking brakes, and hydraulic systems.
Specifically, drivers should inspect the following parts of the service brake system for any signs of wear or damage:
- Brake chamber
- Slack adjuster
By carefully examining each part, drivers can guarantee the vehicle’s safe operation and prevent potential accidents due to brake failure.
Steering and Suspension
A vehicle’s steering and suspension systems play a significant role in ensuring proper handling and a smooth ride. During a pre-trip inspection, drivers should inspect the steering components, suspension system, and wheel alignment to guarantee the vehicle’s optimal performance.
Specifically, drivers should examine the following components of the steering and suspension systems:
- Ball joints
- Tie rod ends
- Strut mounts or shock towers
- Steering effort for both manual and power systems
By thoroughly inspecting these components, drivers can maintain the vehicle’s handling capabilities and provide a comfortable driving experience.
Emergency Equipment
Ensuring the presence and proper functioning of emergency equipment is a crucial part of a pre-trip inspection. Drivers should verify that all required emergency equipment, such as fire extinguishers, warning devices, and first aid kits, are present and in good working condition.
In addition to these items, drivers should also be familiar with the location and operation of any other emergency equipment required by law or their specific company. By confirming the availability and functionality of emergency equipment, drivers can be prepared for unforeseen situations and enhance the overall safety of their vehicle.
Digital Tools and Resources for Pre-Trip Inspections

- Mobile apps that provide checklists and guides for conducting pre-trip inspections
- Online videos and tutorials that demonstrate best practices for inspecting different parts of the truck
- Websites and forums where drivers can stay updated with the latest regulations and requirements for pre-trip inspections
By leveraging these digital tools, truck drivers can enhance their knowledge and efficiency when it comes to pre-trip inspections.
These digital resources not only simplify the pre-trip inspection process but also help drivers maintain compliance with regulations and support preventative maintenance efforts. By leveraging technology, drivers can enhance their pre-trip inspections and promote safety and efficiency on the road.
Mobile Apps
Mobile apps designed for pre-trip inspections can greatly benefit truck drivers by creating checklists, tracking progress, and storing records digitally for easy access and compliance. Some popular mobile apps for pre-trip inspections include iAuditor, Whip Around DVIR software, Teletrac Navman Pre-trip Checklist tool, and Titan GPS Digital Pre-trip Inspection.
By utilizing these apps, drivers can:
- Generate checklists tailored to their specific vehicle and requirements
- Monitor their progress throughout the inspection
- Maintain digital records for future reference and compliance purposes
This not only simplifies the driver only inspection process but also ensures that drivers are following a thorough and effective routine.
Online Videos and Tutorials
Online videos and tutorials serve as valuable resources for truck drivers looking to enhance their pre-trip inspection skills and knowledge. By accessing these resources, drivers can learn best practices for conducting pre-trip inspections and stay updated on regulations and requirements.
Drivers can find online resources on websites, YouTube channels, and other digital platforms that provide informative and instructional content on pre-trip inspections. By staying informed and utilizing these resources, drivers can ensure they are conducting thorough and effective pre-trip inspections that promote safety and compliance.
Tips for a Successful Pre-Trip Inspection
To ensure a thorough and effective pre-trip inspection, truck drivers should establish a routine, take their time, and keep accurate records. Following these tips allows drivers to boost safety, comply with regulations, and bolster preventative maintenance efforts.
Adopting a consistent routine for pre-trip inspections helps ensure that all components are checked and nothing is overlooked. Here are some tips to follow:
- Allow sufficient time for a thorough inspection, typically between 15-30 minutes, to prevent missed issues and potential safety hazards.
- Check all essential components, including tires, brakes, lights, mirrors, and fluid levels.
- Keep detailed records of the inspections, including any issues identified and actions taken.
Regularly review and update your inspection checklist to ensure it covers all necessary items. By following these tips and maintaining a consistent pre-trip inspection routine, you can demonstrate compliance and support preventative maintenance efforts.
Establish a Routine
Developing a consistent routine for conducting pre-trip inspections is crucial for ensuring all components are checked and nothing is overlooked. Adhering to a systematic process lets drivers ensure the vehicle’s safety, roadworthiness, and regulatory compliance.
Some recommended components to include in a pre-trip inspection routine are:
- The engine compartment
- Exterior and tires
- Cabin and controls
- Braking system
- Steering and suspension
- Emergency equipment
By incorporating all of these components into a well-structured routine, drivers can guarantee a thorough and effective pre-trip inspection.
Take Your Time
Allowing sufficient time for a thorough pre-trip inspection is essential to prevent missed issues and potential safety hazards. An average inspection should last between 15-30 minutes, giving drivers enough time to examine all components in detail and ensure the vehicle’s safety and roadworthiness.
Allocating time for pre-trip inspections helps drivers reduce the risk of missing critical issues and affirm the vehicle’s operational readiness. Remember, a thorough vehicle only inspection is not only essential for safety but also for compliance with regulations and preventing costly repairs down the line.
Keep Accurate Records
Maintaining detailed records of pre-trip inspections is essential for demonstrating compliance with regulations and supporting preventative maintenance efforts. Drivers should document any issues identified during the inspection, along with the actions taken to address them.
Maintaining accurate records enables drivers to easily refer back to past inspections and monitor the vehicle’s maintenance history. This not only helps ensure compliance with regulations but also supports proactive maintenance initiatives that can prevent major issues and costly repairs.
In Conclusion
Pre-trip inspections are an essential aspect of ensuring safety, compliance, and preventative maintenance for truck drivers. By following a systematic process, utilizing digital tools and resources, and implementing practical tips, drivers can guarantee thorough and effective inspections that promote safety and efficiency on the road. Remember, a well-executed pre-trip inspection not only minimizes risks but also contributes to a smoother and more enjoyable driving experience.
Frequently Asked Questions
Which of these items should be checked in a pre-trip inspection.
A pre-trip inspection should include thorough safety inspections of the coupling system, vehicle lights, engine compartment, tires and brakes, chassis, fuel tanks, and an in-cab inspection, and must be logged in your logbook as “on duty not driving.” This inspection should be done before every trip to ensure the safety of the driver and other motorists. It is important to check the coupling system for any signs of wear or damage, as well as the vehicle lights, engine compartment, tires and brakes, chassis, and fuel tanks. Additionally, an in-cab inspection should be conducted to ensure that all safety requirements are met.
What is the first step in the pre-trip inspection?
The first step of the pre-trip inspection is to check under the hood, starting at the front of the vehicle and inspecting the various components of the truck’s engine compartment. Begin by checking the oil level, coolant level, and power steering fluid level. Make sure all hoses and belts are in good condition and that all fluid levels are at the proper levels. Check the battery terminals and cables for corrosion and make sure the battery is connected and functioning.
What are the ABSC in a pre-trip inspection?
Pre-trip inspections involve inspecting all parts of a truck and trailer for abrasion, bruises, cuts, bent, broken or cracked parts, and ensuring all air and liquid-holding parts are not leaking. It’s recommended to do the inspection in order, starting with the truck and then the trailer, touching each part and working from the top down and from the center out while wearing gloves.
Which is not checked during an exterior pre-trip inspection?
The reservoir sight glass of the coolant level is not checked during an exterior pre-trip inspection, whereas the oil pressure gauge, wiper arms and blades, horn and heater/defroster should all be checked.
What does DOT mean in inspection?
DOT stands for U.S. Department of Transportation and a DOT inspection is conducted to ensure that commercial motor vehicles are up to standards and safe for public use.

Everything You Need to Know About CDL Medical Requirements

CDL Hours of Service Regulations – Everything You Need to Know
- Optimization
- Safety & Security
- Truck/Vehicle
- Dry Trailer
- INTEGRATIONS
- Utilization
- Reefer Container
- Dry Container
- AIS DATA SERVICES
- VESSEL MONITORING SYSTEMS (VMS)
- Maintenance
- Construction
- Agriculture
- Customer Experience
- Customer Success Stories
- ORBCOMM University
- Customer Care
1-800-ORBCOMM
+1-804-404-8681
- Smart Terminals
- Satellite Modems
- Tools and Apps
- CONNECTIVITY
- Vessel Monitoring Systems
- White Papers
- Success Stories
- In the Media
- CargoWatch®
- Coldchainview
- Device Cloud
- FleetManager.com
- ORBCOMMconnect
- ORBCOMM Platform
- ReeferConnect
- ReeferTrak®
- Everything you need to know about pre-trip inspection checklists
- Transportation
- Jan 18, 2024
- Cody Lirette

Embarking on a safe and efficient journey as a truck driver begins long before hitting the road. The cornerstone of every successful trip is a thorough pre-trip inspection. This guide delves into the essential aspects of a pre-trip inspection checklist. These critical checkpoints can make all the difference in your driver’s safety and the efficiency and success of the journey.
What is a pre-trip inspection?
A pre-trip inspection is a proactive measure taken by truck drivers to ensure their vehicles are in optimal condition and adhere to safety standards and other relevant regulatory requirements. This assessment checks for signs of wear, damage or malfunction on critical components like the engine, brakes, lights, tires, fluid and more.
The goal of a pre-trip inspection is two-fold: safety and compliance . A thorough vehicle examination helps identify potential issues so they can be addressed promptly, minimizing the risk of breakdowns and accidents. The inspection is crucial for compliance with industry regulations and standards. Failure to do so could result in fines, penalties or suspensions.
The importance of a pre-trip inspection
Pre-trip inspections are more than a regulatory requirement; they can help keep drivers and the public safe, maintain cargo integrity and improve vehicle longevity. Here’s why this practice is essential:
- Enhanced safety: Identifies potential mechanical issues before they escalate. This means reduced risk of breakdowns and roadside emergencies.
- Improved efficiency: Addresses issues before they happen on the road to ensure fleets deliver on time.
- Better compliance: Helps meet legal requirements, avoid unnecessary fines and penalties and comply with industry standards and safety protocols.
- Protected cargo: Ensures cargo is secure and adequately loaded, preventing damage during transit.
- Maintain equipment health: Identifies wear and tear on components, allowing for timely maintenance, reducing long-term repair costs and prolonging the longevity of the vehicle and its critical systems.
- Boosted reputation: Demonstrates a commitment to professionalism and responsibility. This enhances a fleet’s reputation and builds stronger customer relationships.
- Driver confidence: Following a standardized pre-trip inspection checklist reassures drivers that their truck is in optimal condition.
Main components of a pre-trip inspection checklist
To ensure drivers cover all the essential components of pre-trip inspections, here are the main checkpoints to keep in mind:
Tire inspection

- Tread depth: Measure tire tread depth . Inadequate tread depth can compromise traction and vehicle stability, especially in unfavorable road conditions.
- Tire inflation: Verify that all tires meet the manufacturer’s specifications. Improper inflation poses safety issues and can lead to uneven wear and reduced fuel efficiency.
- Visible tire damage: Inspect each tire for cuts, bulges or other visible damage. Address these issues promptly to prevent blowouts and other safety concerns.
- Valve stem integrity: Inspect valve stems for damage or leaks and ensure caps are in place. Damaged stems can lead to pressure loss.
Lights and reflectors
- Headlights: Ensure both high and low beams work. Check for proper alignment to maximize visibility without blinding other drivers.
- Taillights: Verify that taillights work, including brake lights and turn signals.
- Clearance lights: Ensure clearance lights work. These enhance the visibility of the vehicle’s dimensions, especially in low-light conditions.
- Reflectors: Confirm the presence and condition of reflectors on all sides of the vehicle.
- Hazard lights: Ensure hazard lights work.
- Turn signals: Ensure the turn signals work on both sides.
Brake check
- Air brakes: Check air brakes for leaks by listening for hissing sounds. Confirm that air pressure builds within a reasonable time after starting the engine.
- Parking brake: Test the parking brake to ensure it holds the vehicle securely.
- Brake fluid levels: Check the fluid reservoir for proper fluid levels. Low levels may indicate a leak or wear.
- Brake pads and shoes: Inspect brake pads and shoes for visible wear. They may need replacing if they are too thin or show uneven wear patterns.
- Brake drums and rotors: Examine brake drums and rotors for signs of scoring, grooves or heat-related damage.
- Brake lines and hoses: Pay attention to visible damage, corrosion, bulging or leaks.
- Anti-lock braking system: Check the dashboard for warning lights.
Engine compartment
- Engine oil: Check the engine oil level. Ensure it falls within the recommended range.
- Coolant: Ensure the coolant reservoir has the appropriate amount to prevent engine overheating.
- Drive belts: Examine for signs of wear, fraying or cracking.
- Hoses: Inspect hoses for leaks, bulges or soft spots. Replace any damaged hoses to prevent leaks.
- Battery: Check battery terminals for corrosion and ensure they’re securely connected. Loose or corroded connections can lead to electrical issues.
- Air compressor: Inspect the air compressor for visible damage and ensure proper functioning for optimal brake performance.
- Power steering fluid: Ensure power steering fluid levels are within the recommended range.
- Air filter: Check for decay and debris. A clogged air filter can reduce engine efficiency and fuel economy.
- Fuel levels: Ensure the fuel tank is full.
- Fuel cap: Verify the fuel cap is tightly secured to prevent spillage and contamination.
- Fuel tank integrity: Inspect the tank for visible damage, rust or signs of leakage
Fluid inspection
- Transmission fluid: Check transmission fluid levels, ensuring they’re within the recommended range.
- Windshield washer fluid: Keep the washer fluid full.
- Differential fluid: Check differential fluid levels. Low levels can lead to differential damage and affect vehicle performance.
Windshield inspection
- Cracks and chips: Inspect the windshield for any cracks or chips. Address any large ones that affect visibility.
- Windshield wipers: Ensure the windshield wipers are functioning. Replace worn or damaged blades.
- Windshield washer jets: Confirm the windshield washer jets spray fluid evenly. Malfunctioning jets can result in uneven cleaning.
Emergency kit
A well-equipped kit ensures drivers are ready to handle unexpected situations on the road, promoting safety and efficiency:
- First aid supplies: Essential medical supplies including bandages, antiseptic wipes, pain relievers and any necessary personal medications.
- Reflective triangles or flares: Confirm that you have reflective triangles or flares to enhance visibility in case of roadside breakdowns.
- Fire extinguisher: Ensure the fire extinguisher has a valid inspection tag and is not expired.
- Essential tools: Check for the basics like a wrench, pliers and screwdrivers.
- Flashlights and batteries: Test the functionality of flashlights and ensure spare batteries are available.
- Blankets or sleeping bags: Essential for unexpected delays or overnight stops.
- Communication devices: Test radios or cell phones.
- Side mirrors: Confirm side mirrors are correctly adjusted for the driver’s line of sight and are securely attached.
- Convex mirrors: Verify the alignment of convex mirrors to provide an optimal wide field of view. Ensure they are not loose.
- Motorized adjustment: If mirrors have motorized adjustment capability, ensure these work.
Front suspension
- Shock absorbers: Inspect for leaks, visible damage or signs of wear.
- Springs: Pay attention to signs of sagging, damage or cracks.
- Bushings and mounts: Ensure bushings and mounts are in good condition and don’t have any significant wear, deterioration or damage.
- Alignment: Test steering stability to identify any abnormal vibrations or wandering.
- Tie rods and ends: Examine tie rods for signs of looseness, wear or damage.
Driver door
- Door Latches: Verify that door latches engage and disengage smoothly to maintain safety while driving.
- Hinges: Inspect door hinges for signs of wear, rust or damage.
- Seals and weatherstripping: Pay attention to any gaps, tears or deterioration of seals and weatherstripping. Proper seals prevent leakage and maintain a comfortable cabin environment.
- Mud flaps: Should be securely mounted.
- License plate: Ensure the license plate is securely attached and visible. A properly displayed license is crucial for regulatory compliance.
- Exhaust: Note any damage to the exhaust system, like rust or loose components.
- Rear doors or gates: If applicable, test the operation of rear doors or gates.
Coupling system
- Fifth wheel: Inspect for damage or misalignment.
- Kingpin: Ensure there is no wear or damage. A well-maintained kingpin ensures a secure attachment to the fifth wheel.
- Locking mechanism and safety latch: Test the locking mechanism to ensure it engages securely to help prevent accidental uncoupling during transit.
- Release handle: A properly functioning handle facilitates efficient coupling and decoupling.
- Connection hardware: Confirm that all connection hardware, such as bolts and brackets, is secure. Loose components can compromise the coupling system.
- Air and electrical lines: Inspect these lines for damage or leaks and ensure the trailer brake and light systems work.
- Structural integrity: Inspect the trailer for signs of structural damage, including rust, dents or wear.
- Lights and reflectors: Check that all lights and reflectors are functional.
- Brake system: Test the trailer brake system, including service and emergency brakes.
- Suspension components: Inspect suspension components for signs of wear.
- Tires and wheels: Ensure proper tire tread depth and pressure.
- Cargo: Confirm that cargo is securely fastened and within legal limits.
- Landing Gear: Check for proper functioning to ensure stability during loading and unloading.
In-cab inspection
- Steering wheel: Ensure the steering wheel is aligned and stable.
- Seat and seatbelt: Adjust the seat for comfort and confirm the seatbelt is in good condition.
- Pedals: Test the functionality of gas, brake and clutch pedals.
- Instrument panel: Inspect gauges on the instrument panel for proper readings about the truck’s status.
- Documentation: Ensure necessary documents like permits are present and up to date. This is essential for regulatory compliance.
- Electronic devices: Test GPS and communication systems.
How to properly report a pre-trip inspection
Reporting a pre-trip inspection is not just an industry requirement. It’s also a critical communication tool between drivers and fleet management . To effectively report results, it’s important to:
- Use a standardized form provided by the company or regulatory body.
- Record observations in an organized manner.
- Be specific and descriptive.
- Prioritize safety concerns in the report.
- Include suggestions for corrective actions.
- Submit the report promptly to allow swift resolution of issues and minimize the risk of operational delays.
- If available, leverage digital reporting platforms for efficiency. Digital reports can transmit information in real-time, streamlining communication between drivers and management.
- Confirm that the report has been received and acknowledged by the appropriate personnel.
What to do if there are issues in the pre-trip inspection
Encountering issues during a pre-trip inspection is common, and educating drivers on the importance of reporting is crucial for ensuring road readiness and compliance.
If issues arise, ensure they are documented thoroughly and reported promptly. If problems are safety-related, communicate these concerns to management immediately. Always practice clear communication, like concise and descriptive language, to ensure a shared understanding and quick resolution.
Frequently Asked Questions
When should a driver perform a pre-trip inspection.
A driver should perform a pre-trip inspection before embarking on each journey. This proactive examination of the vehicle’s mechanical and safety components ensures it’s in optimal condition for the road. Conducting an inspection daily or before the start of each trip is a regulatory requirement in many jurisdictions. Plus, it can enhance driver safety, limit the risk of mechanical failures and contribute to overall road safety.
What is the first step of the pre-trip inspection?
The first step of a pre-trip inspection should involve an external assessment of the truck or commercial vehicle. This includes visually inspecting the vehicle’s overall condition, ensuring no visible defects or safety hazards. Start with a walkaround to identify any significant issues. Then, break the inspection down into components. For example, start with the tires, then move on to the lights, brakes, mirrors, and under the hood.
What is the most overlooked part of pre-trip inspection reports?
Drivers may focus on more visible components, like tires and lights, neglecting critical elements like brake lines, suspension and the exhaust system. Checking for signs of leaks, loose parts, or damage underneath the vehicle is crucial for identifying hidden issues that could compromise safety and performance. Completing every part of the checklist ensures a comprehensive assessment, reducing the risk of overlooking these critical components.
What happens if I don’t perform the inspection?
Failing to perform a pre-trip inspection can have serious consequences, both legally and in terms of safety. Regulatory bodies often mandate these inspections, and non-compliance can lead to fines, penalties or even the suspension of driving privileges.
Beyond legal implications, neglecting the inspection jeopardizes safety. Without identifying potential issues before hitting the road, there’s an increased risk of mechanical failures, accidents, and breakdowns, posing a danger to the driver and others on the road.
Additionally, failure to perform pre-trip inspections may impact insurance claims and the overall reputation of the driver and transportation company.
What is a DOT pre-inspection checklist?
A DOT pre-inspection checklist is a comprehensive list of items and components that commercial vehicle drivers must inspect before embarking on their trip, as mandated by the United States Department of Transportation (DOT).
Where should the ignition key be during the pre-trip inspection?
During a pre-trip Inspection, the ignition key should be in the “off” position. This is a standard safety practice to prevent accidents during the inspection. Keeping the ignition key off allows the driver to thoroughly examine various components without the risk of moving parts or unexpected vehicle movement. This includes checking the vehicle’s lights, brakes, tires and other essential elements. It’s a precautionary measure that promotes the safety of the driver and those in the vicinity during the inspection process.
How long should a pre-trip inspection reports take?
The duration of a pre-trip Inspection can vary depending on factors such as the driver’s familiarity with the vehicle, the complexity of the truck itself, and the thoroughness of the inspection. On average, a comprehensive pre-trip inspection typically takes around 15 to 45 minutes.

Cody Lirette is Senior Content Marketing Manager at ORBCOMM. With over seven years of marketing and communications experience for both the public and private sector, he uses his passion for innovative technology and plain language to build compelling content that provides value.

- Mar 27, 2024
- Meghana Joshi
Cargo theft has been on the rise—reaching unprecedented highs in recent years. With a 57% increase in incidents in North America in 2023 compared to the previous year, it’s an alarming trend that isn’t showing signs of slowing down. According to the FBI, cargo theft losses in the United States are estimated to be $15-35…

- Value-Added Resellers
- Mar 15, 2024
While MWC 2024 is in the rearview mirror, there’s plenty of value to be taken from the three-day event in sunny Barcelona. Each panel discussion was unique in its own way but one key takeaway was this: the cellular and satellite space is heating up with new technological developments that are creating ample business opportunities….

- Feb 21, 2024
- Colin Withers
While it may be true that the whole is greater than the sum of its parts, the parts still matter. To build a powerful IoT solution, you need world-class hardware that can support your applications and deliver ROI for your customers. The ST 9101 dual-mode terminal does just that, providing all the same comprehensive features…

Get started with ORBCOMM

- CDL Training Materials
- High Road Training Program
- Pre-Trip Inspection Test - Page 80
New! High Road 2.0! We have a new version of this program. You can find it here: High Road 2.0
Section 10: Pre-Trip Vehicle Inspection Test
During the pre-trip inspection , you must show that the vehicle is safe to drive. You may have to walk around the vehicle and point to or touch each item and explain to the examiner what you are checking and why. You will NOT have to crawl under the hood or under the vehicle. In addition to Section 10, applicants should review Section 2.1 through 2.2 for the pre trip inspection.
10.1 All Vehicles
Study the following vehicle parts for the type of vehicle you will be using during the CDL skills exams. You should be able to identify each part and tell the examiner what you are looking for or inspecting.
Engine Compartment (Engine Off)
Leaks/hoses:.
- Look for puddles on the ground.
- Look for dripping fluids on underside of engine and transmission.
- Inspect hoses for condition and leaks.
- Indicate where dipstick is located.
- See that oil level is within safe operating range. Level must be above refill mark.
Coolant level:
- Inspect reservoir sight glass, or
- (If engine is not hot), remove radiator cap and check for visible coolant level.
Power steering fluid:
- Indicate where power steering fluid dipstick is located.
- Check for adequate power steering fluid level. Level must be above refill mark.
Engine compartment belts:
Check the following belts for snugness (up to 3/4-inch play at center of belt), cracks or frays:
- Power steering belt.
- Water pump belt.
- Alternator belt.
- Air compressor belt.
If any of the components above are not belt-driven, you must:
- Tell the examiner which component(s) are not belt-driven.
- Make sure component(s) are operating properly, are not damaged or leaking, and are mounted securely.
While you're approaching the vehicle, tell the examiner: "I am checking under the vehicle for anything hanging down such as loose hoses and am also looking for puddles or dripping fluids which would indicate the possibility of a leak."
You should then physically crouch down and check under the vehicle
Pre-trip Inspection:
A pre-trip inspection is a thorough inspection of the truck completed before driving for the first time each day.
Federal and state laws require that drivers inspect their vehicles. Federal and state inspectors also may inspect your vehicles. If they judge a vehicle to be unsafe, they will put it “out of service” until it is repaired.
Commercial Driver's License (CDL)
A CDL is required to drive any of the following vehicles:
- Any combination of vehicles with a gross combined weight rating (GCWR) of 26,001 or more pounds, providing the gross vehicle weight rating (GVWR) of the vehicle being towed is in excess of 10,000 pounds.
- Any single vehicle with a GVWR of 26,001 or more pounds, or any such vehicle towing another not in excess of 10,000 pounds.
- Any vehicle, regardless of size, designed to transport 16 or more persons, including the driver.
- Any vehicle required by federal regulations to be placarded while transporting hazardous materials.
Hours Of Service
Operating While Intoxicated
When a violation by either a driver or company is confirmed, an out-of-service order removes either the driver or the vehicle from the roadway until the violation is corrected.
Review Questions - Click On The Picture To Begin...

- Only remove the radiator cap if the engine is hot
- Be sure the coolant level is below the fill line
- Never remove the radiator cap if the engine is hot
- Take a sample of the coolant to check for foreign debris
Quote From The CDL Manual:
Truckingtruth's advice:.
When checking the coolant level, tell the examiner:
"The coolant level is filled above the minimum level and the reservoir is not cracked, broken, or leaking."
- No free play at all
- 1 inch of free play
- 3/4 inch of free play
- 1.5 inches of free play
Engine compartment belts: Check the following belts for snugness (up to 3/4-inch play at center of belt), cracks or frays:
When checking belts, tell the examiner:
The belt is not cracked, frayed, or broken and free play is between 1/2in and 3/4in."
- Demonstrate how to add oil to the engine
- Indicate where the dipstick is located
- Rub some oil between your fingers to make sure the oil is free of metal shards and foreign debris
- Show how to test the oil for water
What to say to the examiner:
"The dipstick should be pulled to show that the oil level is above the refill mark and in safe operating range."

Click Anywhere To Close

- The High Road Training Program
- The High Road Article Series
- The Friendliest Trucker's Forum Ever!
- Email Updates When New Articles Are Posted

Apply For Paid CDL Training Through TruckingTruth
Did you know you can fill out one quick form here on TruckingTruth and apply to several companies at once for paid CDL training? Seriously! The application only takes one minute. You will speak with recruiters today. There is no obligation whatsoever. Learn more and apply here:
Apply For Paid CDL Training

TruckingTruth was founded by Brett Aquila (that's me!), a 15 year truck driving veteran, in January 2007. After 15 years on the road I wanted to help people understand the trucking industry and everything that came with the career and lifestyle of an over the road trucker. We'll help you make the right choices and prepare for a great start to your trucking career.
Becoming A Truck Driver

Becoming A Truck Driver is a dream we've all pondered at some point in our lives. We've all wondered if the adventure and challenges of life on the open road would suit us better than the ordinary day to day lives we've always known. At TruckingTruth we'll help you decide if trucking is right for you and help you get your career off to a great start.
- Privacy Policy

An official website of the United States government Here's how you know
Official websites use .gov A .gov website belongs to an official government organization in the United States.
Secure .gov websites use HTTPS A lock ( Lock A locked padlock ) or https:// means you’ve safely connected to the .gov website. Share sensitive information only on official, secure websites.
FMCSA Frequently Asked Questions Relating to the Waiver of Certain Pre-trip Vehicle Inspection Skills Test Requirements for Certain School Bus Drivers
The Federal Motor Carrier Safety Administration’s (FMCSA) waiver, effective January 3, 2022, permits States to waive the engine compartment component of the pre-trip vehicle inspection skills testing requirement in 49 CFR 383.113(a)(1)(i), known informally as the “under-the-hood” component, for commercial driver’s license (CDL) applicants seeking the school bus (S) and passenger (P) endorsements and the intrastate only (K) restriction. Drivers issued a CDL pursuant to this waiver are restricted to intrastate operation of school buses only.
Additionally, FMCSA waives the requirement in 49 CFR 383.133(c)(1) that States administer this portion of the pre-trip vehicle inspection test in accordance with an FMCSA pre-approved examiner information manual. The FMCSA issued this waiver in response to multiple requests that the Agency provide regulatory relief to address the growing shortage of school bus drivers, which has been exacerbated by the Coronavirus 2019 public health emergency. This waiver is intended for individuals who will operate school buses in intrastate commerce exclusively.
This FAQ document will be updated as additional questions are received.
Question 1: What is the purpose of the waiver?
Answer 1: The purpose of the waiver is to increase the number of school bus drivers by allowing persons to obtain a CDL to operate school buses only in intrastate commerce. An individual licensed under this waiver is not allowed to operate in interstate commerce or operate any commercial motor vehicle other than a school bus.
Question 2: Should drivers who currently hold a CDL be tested in accordance with this waiver?
Answer 2: No. This waiver is intended for individuals who do not currently hold a CDL and are seeking to operate school buses only in intrastate commerce. Individuals who currently hold a CDL and are looking to add a school bus endorsement to an existing CDL are not covered by this waiver and should be tested with the “under the hood” components.
Question 3: Does the waiver require the CDL license to have the K restriction?
Answer 3: Yes. Drivers issued a CDL pursuant to this waiver must be restricted to the intrastate operation of school buses only. The K restriction is the way to identify this limitation on the CDL.
Question 4: If a State decides to adopt the waiver, how does it affect the process for issuing the P endorsement and the S endorsement?
Answer 4: If the individual is seeking to operate a school bus in intrastate commerce only, the State can offer the applicant the skills test without the “under the hood” component, as described in the waiver. In these cases, the issued credential must have a K restriction and a school bus only restriction. If the individual is seeking a CDL with the S and P endorsements with no restrictions, the State is required to test the applicant in accordance with current testing procedures. The State should explain these two options to applicants, so they understand the implication of choosing the restricted license.
Question 5: Is a driver with an existing P endorsement allowed to test for the S endorsement under this waiver?
Answer 5: No. If a driver currently holds a CDL with a P endorsement, a State should not test the individual under the terms of this waiver. The State would test the CDL holder in accordance with current testing procedures for the S endorsement.
Question 6: If a driver already has a Class A or Class B CDL and decides to pursue a school bus and passenger endorsement under this waiver, do the K and school bus-only restrictions only apply to the driver’s school bus operations? Could the driver still operate a Group A property-carrying vehicle in interstate commerce?
Answer 6: No. This waiver is intended for individuals who do not currently hold a CDL and are seeking only to operate school buses in intrastate commerce. Individuals who currently hold a CDL and are looking to operate a school bus or commercial passenger vehicle are not covered by this waiver.
Question 7: How should States score skills tests administered pursuant to this waiver?
Answer 7: If a State issues CDLs under this waiver, the State can decide how to score the items that have been waived to achieve the goals of the waiver, including giving applicants credit for the engine compartment portion of the skills test. The waiver waives 49 CFR 383.133(c), which requires that States administer and score the CDL skills test based solely on the standards contained in the FMCSA pre-approved examiner information manual that conforms to the AAMVA Test Model (49 CFR 383.131(b)). States acting under this waiver may deviate from the skills tests scoring standards set forth in the AAMVA Test Model.
Question 8: Does a State have the option to present only the Form B test for the pre-trip portion of the skills test to school bus applicants subject to the waiver?
Answer 8: No. The State may not present only the Form B test to school bus applicants subject to this waiver. The State may continue to follow its current form selection procedure for the vehicle inspection portion of the CDL skills test.
Question 9: For States that do not have a “school bus only” restriction code, will FMCSA allow flexibility in labeling restricted CDLs issued under this waiver? For example, could a State mark (with a stamp, punch, or label) documents and noted on the license record as “school bus only.”
Answer 9: Yes. A State acting under this waiver is responsible for ensuring that the issued credential clearly states that the driver is restricted to operating a school bus only (in addition to the K restriction) and note that restriction on the CDLIS driver record in accordance with current regulations. If a State does not have a “school bus only” restriction code, the State can physically mark the CDL credential, as long as the mark clearly indicates that the driver is restricted to intrastate operations for school buses only. A punch will not satisfy this requirement unless roadside enforcement officers can easily distinguish that the CDL is valid only for the intrastate operation of school buses.
Question 10: Will FMCSA reimburse States that have incurred additional costs due to making system modifications to their IT system(s) as a result of implementing this waiver?
Answer 10: At this time, FMCSA does not intend to reimburse States for costs incurred as a result of this waiver under the terms of an existing Commercial Driver’s License Program Implementation (CDLPI) grant. If a State needs to modify IT systems as a result of this waiver, the State may submit the project under the Agency’s FY 2022 CDLPI Notice of Funding Opportunity. Applications will be considered under the existing CDLPI grant review process.
Question 11: How will drivers who are issued CDLs under this waiver get the ‘school bus only’ and ‘K’ restrictions removed?
Answer 11: If a State issues CDLs under the waiver, the State can develop its own procedures for removing the school bus only restriction in the future. For example, the SDLA may require the driver to retake the full CDL skills test in the future or simply require that the driver be tested only on the engine compartment Version 1: January 27, 2022 component of the pre-trip vehicle inspection portion of the skills test. States would rely on their current procedures for removing the K restriction.
Question 12: How do States treat reciprocities (license transfers) for individuals obtaining a CDL under this waiver?
Answer 12: A CDL issued under the waiver is valid only within the State that initially issued the CDL. Example: Pursuant to the waiver, State A issues a K-restricted school bus only CDL to an individual who later moves to State B. What happens next depends on whether State B has chosen to issue CDLs pursuant to the waiver. If so, State B would issue the restricted CDL in accordance with the procedures it established to implement the waiver. If State B chose not to issue CDLs pursuant to the waiver, the K-restricted school bus only CDL is not an option for the individual who has moved to State B. In order to obtain a CDL with the S and P endorsements, the individual would be required to follow State B’s regular procedures.
Question 13: How does this waiver impact a driver who would also like to drive charter motorcoaches?
Answer 13: Restricted CDLs issued under this waiver do not permit the holder to operate a charter motorcoach or any commercial motor vehicle other than a school bus in intrastate commerce. Drivers seeking to operate a motorcoach in intrastate or interstate commerce, in addition to a school bus, will be required to obtain a CDL with the S and P endorsements with no restrictions in accordance with current requirements.
Version 1: January 27, 2022
IMAGES
VIDEO
COMMENTS
Practical exams. Skills test. Pre-trip inspection. TSA background check. Retake policy. CDL Maintenance. ELDT Training & Certification. CDL how-to guides. Learn how to conduct thorough pre-trip inspections with our guide, a critical component for commercial vehicle safety.
During the external inspection portion of the pre-trip vehicle inspection test, you must verify that the steering box is securely mounted and not leaking. This questions appears in the following tests: Alabama Class A Knowledge Test. Alabama Bus. Delaware Class A Knowledge Test. Florida Class B Knowledge Test.
1. REPETITION! The only way to memorize the pre-trip is to repeat it over and over. Start with the engine area and work your way around the truck and finally inside the cab. There is no way around consistent repetition. The more you do it the more you will memorize it. It's just that simple.
Our Pre-Trip Inspection Study Guide has everything you need to prepare for the Class A CDL Pre-Trip Inspection Exam. Our study guide will cover the pre-trip inspection terminology as well as a thorough list of all of the parts you will be inspecting on the vehicle. For each part you will be inspecting there will also be a list of items you will ...
Printable Pre Trip Inspection Checklist (PDF) CDL Manual. CDL General Knowledge Practice Test. Pre Trip Inspection Practice Test. CDL HAZMAT Endorsement Practice Test. Edited for 2024 on 12/5/23. Complete CDL pre-trip inspection checklist with online reference and study guide plus a free PDF pre trip inspection checklist to print.
The Pre-Trip Vehicle Inspection Test. To obtain your CDL exam, you need to complete a pre-trip inspection test. You will have no more than 50 minutes to complete a pre-trip vehicle inspection for the state examiner. During the exam, you should identify each part and tell the examiner what you are looking for or inspecting. Within each area ...
The pre-trip inspection test requires heavy memorization and is one of the hardest trials to get your CDL. Use this helpful checklist to pass that test! ... Also called the "Vehicle Inspection Test," the pre-trip is one of the tests that trucking students fail the most. ... during the pre-trip inspection, you want to make sure these items ...
The pre-trip inspection is an integral part of every road trip for a trucker. It's probably the most disliked and most often overlooked part of the job of the professional truck driver in the trucking industry. This inspection is meant to be a thorough check of the truck, trailer and load. The check is to ensure that everything is in correct ...
Multiple-Choice Questions: Question #502 (1 of 1) Report This Question. During the pre-trip inspection test you must: All these are correct. Walk around the vehicle and point to or touch each item. Explain to the examiner what you are checking and why. Show that the vehicle is safe to drive. Click here to look up the answer.
About The Pre-Trip Inspectin CDL Exam. The The Pre-Trip Inspectin portion of the CDL Exam is required to obtain your CDL. During the pre-trip inspection, you must show that the vehicle is safe to drive. You may have to walk around the vehicle and point to or touch each item and explain to the examiner what you are checking and why.
Tractor-trailers can weigh up to 80,000 lb. if you count the semi, trailer and cargo.Operating a heavy tractor-trailer can be dangerous, so drivers undergo extensive training to earn their CDLs and start their careers.. Whether studying for your CDL test or heading to your next customer, pre-trip inspections help you catch problems with your vehicle or trailer.
the time of your test, the examiner will direct you to the areas of the vehicle to inspect for the test. 11.1.1 - Class A Pre-Trip Inspection If you are applying for a Class A CDL, you will be required to perform a pre-trip inspection in a Class A combination vehicle that you have brought with you for testing. The test includes an engine ...
During the pre-trip inspection you will: Walk around the vehicle and point to or touch each item and explain to the examiner what you are checking and why. When checking the hoses, you should: a. Look for puddles on the ground. b. Look for dripping fluids on underside of engine and transmission.
A pre-trip inspection checklist is a list of vehicle items that truckers must thoroughly examine before starting a trip. It helps identify and address mechanical and maintenance issues early on and prevent unexpected delays, breakdowns and severe accidents. Performing thorough pre-trip inspections promotes safety, ensures compliance and reduces ...
The pre-trip vehicle inspection test is basically a skills test that is designed to determine if a driver can identify which features and equipment on a test vehicle should be inspected before operating the vehicle. ... During the test, the driver will NOT have to crawl under the hood or under the vehicle. The brake lights, emergency flashers ...
A few items on the CDL pre trip inspection checklist trip up new drivers most often: Chocks: During your CDL class a pre trip inspection, you'll have the vehicle on and off, and be testing various brake systems. Chocks prevent the truck from moving around while you're underneath and walking around. Seatbelts: It's often the last thing on a new ...
During the pre-trip inspection, you must show that the vehicle is safe to drive. You may not take other required skills tests until you have passed the pre-trip inspection test. You will be given a CDL Pre-Trip Vehicle Inspection Memory Aid to use while you are performing the test.
What does the pre-trip inspection exam include? You will be expected to be able to perform a complete pre-trip inspection on your vehicle, including both in-cab & external features, as well as the engine compartment. Fluids, belts, brakes, air brakes, and lights are some of the main components to the test. The pre-trip inspection will ensure ...
The intent of this inspection is to ensure that the vehicle you are about to drive is safe to operate. There are several key points which you either need to do or be prepared to explain. All tests for the pre-trip include engine start and in-cab inspection. With any vehicle components you must be able to point and touch the equipment.
During a pre-trip inspection, drivers should inspect the steering components, suspension system, and wheel alignment to guarantee the vehicle's optimal performance. Specifically, drivers should examine the following components of the steering and suspension systems: Ball joints. Tie rod ends. Strut mounts or shock towers.
During a pre-trip Inspection, the ignition key should be in the "off" position. This is a standard safety practice to prevent accidents during the inspection. Keeping the ignition key off allows the driver to thoroughly examine various components without the risk of moving parts or unexpected vehicle movement.
New! High Road 2.0! We have a new version of this program. You can find it here: High Road 2.0 Section 10: Pre-Trip Vehicle Inspection Test. During the pre-trip inspection , you must show that the vehicle is safe to drive.You may have to walk around the vehicle and point to or touch each item and explain to the examiner what you are checking and why.
The Federal Motor Carrier Safety Administration's (FMCSA) waiver, effective January 3, 2022, permits States to waive the engine compartment component of the pre-trip vehicle inspection skills testing requirement in 49 CFR 383.113(a)(1)(i), known informally as the "under-the-hood" component, for commercial driver's license (CDL) applicants seeking the school bus (S) and passenger (P ...