Call us now on 01303 487156 | [email protected]

Sign up for Our Newsletter
Sign up today and and get notified when we have exciting new products! to get notified about sales and new products..
- Search for:
- Nik & Trick Gift Vouchers
No products in the basket.
Return to shop
- Photo Printing Offers
- Pro Quality Photo Printing
- Fine Art Photo Printing
- Photo Restoration Services
- C41 Colour Process 35mm
- B&W Processing Services 35mm
- E6 Colour Slide Film Services 35mm
- ECN2 & Remjet Developing 35mm
- Black & White Reversal 35mm
- C41 Colour Process Medium Format
- Black & White Medium Format Services
- E6 Colour Slide Medium Format Film Processing
- B&W 120 Reversal Processing
- C41 Processing Etc for 127 Films
- 127 B&W Processing
- E6 Colour Process for 127 Films
- B&W Reversal Process 127 Superslide
- C41 Colour Process for 110 & 16mm Film
- 110 & 16mm Black & White Processing
- Services for Xpan & Panoramic Films
- 35mm Half-Frame & 24mm Square Formats
- APS, 126 & Disk Films too!
- Sheet & LF Film Processing C41
- B&W Services for Sheet & Large Format
- E6 Processing for LF & Sheet Films
- Unusual B&W Films
- Unusual Colour Films
- Rare Formats 127, 110, 620, 16mm
- Films for Movie Cameras
- Outdated Films for Fun
- Nik & Trick Film Bundles
- Kodak B&W Films
- Kodak Colour Film
- Kodak Sheet Films
- Bergger & Others
- Rarer Formats
- 8mm & Super 8 Movie Films
- Black and White
- Colour Negative
- Colour Positive
- Liquid Developers
- Powder Developers
- Two Bath & Pyro Developers
- B&W Film & Paper Fixers
- B&W Stop Baths
- Finish, Wetting & Toning!
- B&W Paper Developers
- Black & White Reversal Kits
- Colour Chemistry
- C41, E6 & ENC2 Kits
- RA4 Chemistry
- Ilford Resin RC Multigrade
- Ilford Fibre Based Classic
- Ilford FB & RC Toning Papers
- RA4 Colour Papers
- Home Developing Starter Kits
- Tanks, Trays & Loading
- Measures & Jugs
- Chemical Storage
- Thermometers & Timers
- Safelights, Washing, Drying
- Archiving: Negs, Slides, Prints
- BelliniFoto Merchandise!
- Scanning Accessories
- Enlarger Lenses
- Chemistry Bundles ~ Film
- Chemistry Bundles ~ Paper
- Olympus Fit
- Hassleblad Lenses
- Tamron Adaptall
- Contax/Yashica
- Rollei Cameras & Lenses
- Medium & Large Format
- Rangefinder/Compact
- Gossen Light Meters
- Camera Light Seals Kits
- Cool Camera Straps, Cases etc
- Camera Leather Kits & Sheets
- Film Camera Batteries
- Lens Filters
- Lens Care & Caps
- Agfa & Fuji USB Drives
- SilvergrainClassics Magazine
- Used Books & Tutorials
- Photographs & Prints for Sale
- dev.a brochure
- The dev.a Processor
- dev.a Products
- dev.a Accessories
- Suggested Consumables
- Large Format Film Processing
Replacement Light Seal Kit ~ Olympus Trip 35

£ 10.60 Inc. vat
For the ever popular Olympus Trip 35
These are precision cut, self adhesive and ready to fit.
Just wet them and guide and slide them into position then leave for a few hours….make sure the old ones are totally cleaned away first.
Kit contains three sets so if you mess up there’s still plenty of opportunity to get it right!
Please not that we now offer Isopropanol, the best thing to clean out old light seals etc HERE
Out of stock
- Description
- Additional information
- Reviews (0)
Olympus Trip 35 Light Seal Kit
There are no reviews yet.
Be the first to review “Replacement Light Seal Kit ~ Olympus Trip 35” Cancel reply
Your review *
Name *
Email *
This site uses Akismet to reduce spam. Learn how your comment data is processed .
Related products

Cameras & Accessories
Schneider Symmar-S 150mm f5.6 for 5×4 ~ Superb!!

Asahi Pentax Traditional Logo Tee Shirt ~ A Tribute by Nik & Trick

Pentax SMC-A 70mm – 210mm Constant f4 Zoom

Mamiya TLR C330 Enamel Camera Pin

Bessa by Voigtlander Camera Enamel Pin Badge

Energizer CR123A Photo Power Lithium Battery

Camera Light Seals & Kits
Replacement Light Seal Kit ~ Contax G1 ~ Covers all the seals found in this camera

For Hasselblad V Series ~ Real Leather Film Magazine Holder
Username or email address *
Password *
Remember me Log in
Lost your password?
Matt's Classic Cameras
home of Matt's world famous vintage camera collection
Light Seal Replacement
Introduction.
You’ve all seen it, the bits of black crud that are somehow both crumbly and gummy at the same time, sticking to your camera door, the film rails, maybe even your mirror bumper. Nasty stuff that when it gets on your fingers you find it’s about as sticky as roof patch material… (Tip one: try not to get it on your fingers, it will get EVERYWHERE.) The bad news is that you’ll need to replace this stuff if you want your pictures to be free of giant washed out flare spots. The good news is that it’s not so hard. Read this through once, then put on the radio or a movie you’ve seen a hundred times and follow along!
Getting Started
Gather your materials: a well-lighted area; paper towels; jeweler’s screwdrivers; toothpicks; tweezers; cotton swabs; Windex and/or some other grease-cutting solvent; also, a dental pick is good for getting off tough tape or tiny bits in tricky corners. And that’s just for the removal part! Of course that’s 75% of the job. For the new seals, you can use a variety of materials, from craft-store closed-cell foam to prefab kits from some eBay sellers* or Micro-Tools . I’ve used a variety of things, including film canister felt (great stuff, but small), strips of neoprene from cut-up mousepads, “Foamies” (closed-cell foam you can get at the craft store). All good, but I’ve settled on two easy, long lasting materials: self-stick felt, and cotton yarn like they used to use in good old German cameras. Plus Pliobond as an adhesive.
* I do highly recommend Jon Goodman’s (not the actor!) light seal kits, they are well put together with excellent easy to follow instructions. He goes by the ebay handle ‘interslice’.
Special Note about the Example Camera
I’ve chosen a Yashica Electro 35 for the example, it’s pretty typical of a Japanese rangefinder, which is the likeliest camera to need new seals it seems. It’s also very similar in body construction to most SLRs I’ve seen. Some compact rangefinders have their light seals on the camera door rather than in the door mating grooves, I just clean it off as described here and replace with felt instead of foam, which can be too thick and keep the door from closing properly. Mirror bumpers are done as described as well, just more carefully. Be very careful not to touch the fresnel screen. And be very careful cleaning the residue off the mirror as well, I use Windex on a Qtip, it hasn’t failed me yet, but I’ve heard some bad stories.
First Steps
The first thing you have to do is dip a cotton swab in Windex and clean that back door. If it’s still sticky it’s not clean. Then wash your hands.
Now it gets “fun” – scrape off the foam you see, generally by the door hinge (the most important one, and always the first to go), and at the other end of the door, sometimes the trickest to get right because the latch is different on every camera. Remember exactly where it went! Your job is to duplicate it later.
Scraping – especially if you’re careful not to take off all the paint – isn’t always entirely effective. You might need to moisten the residue with Windex or Goo Gone, or enlist a dental pick to get that tape off (the adhesive that affixed the foam). And don’t worry too much if you scratch the paint, that part’s going to be under the felt anyway.
After the scraping comes the cleaning, go over those spots with Windex and make sure there’s nothing left. Take your time. Residue will keep the felt from sticking properly. And make double sure the pressure plate is *spotless*.
Oh Wait, NOW the Fun Part
Run your little flat blade screwdriver up the film door mating groove, holding the camera over the paper towel. The first pass is the most productive. Make sure none of this stuff falls back into the camera! Blow it out if it does, don’t touch it if you can avoid it. Sometimes it comes out easily, sometimes it doesn’t. You can even run a toothpick in the groove, flatten it slightly with some small pliers first for best results. Wood is non-marring! A dental pick comes in handy for the hangers-on. NOTE that I don’t try to clean the stickiness out of the grooves, I leave that to help keep the string in place.
Put it All Back!
The felt is fairly easy, cut strips with a metal ruler and a very sharp hobby knife, then cut the pieces to fit the spaces. You can butt pieces together to make longer strips, usually the width is the tricky part, especially with mirror bumpers. It will stretch slightly if you need it to. I use a bandages scissor to cut the length. Snip!
Remember I said I don’t try to sanitize the film door mating grooves, I leave it a little dirty so that the stickiness will help the string stay in place. Between that and compression, I find I only need to glue the ends, which I do with Pliobond. Then I stick it deep in the groove with my hobby tweezers, and hold it there while I run the string down the groove, then tamp it in place. I then cut it to fit and glue the far end. Pliobond is useful but nasty, note I use a toothpick to apply it, I stick the toothpick in the tube so I don’t have to squeeze it. When you do it’s like model glue, it just keeps coming out.
Once that’s done I close the door back to compress the string and make sure I can still comfortably close and open the door. (Once I did take a strand out of the string to make it fit better in a smaller camera. Worked OK.) The two-piece section where the film counter reset button lives is slightly trickier. Take your time, you have plenty of string…
What’s left?
Make sure the door opens and closes properly, then let the camera air out overnight with the door open so no fumes remain inside to cloud up the glass or affect painted surfaces. Should be ready to shoot the next day, take it for a spin and enjoy!
New seals and typical carnage:
Related Links
- For more info on general repair and cleaning see my repair tips page .
- £ 0.00 0 items

Olympus Trip 35 Light Seal Kit
£ 5.99
Keep your Olympus Trip 35 light-tight and protected with this light seal kit. Made of high-quality foam, these seals are easy to install and will extend the life of your camera. Includes fitting instructions and two sets of seals per pack.
Description
- Reviews (7)
Olympus Trip 35 Light Seal Kit – Keep your camera light-tight and protected
This Light Seal Kit comes with two sets of seals, so you can make a mistake and still have a spare set. The seals are made of high-quality foam that will keep your camera light-tight and protected from dust. The kit also includes instructions on how to install the seals, so you can get your camera back in working order quickly and easily.
Two sets of seals included Made of high-quality foam Keeps your camera light-tight and protected Easy to install instructions included
Prevents light leaks Protects your camera from dust Extends the life of your camera
Order your Olympus Trip 35 Light Seal Kit today!
7 reviews for Olympus Trip 35 Light Seal Kit
Howard Sandford (verified owner) – 24/07/2018
Really fast delivery, and the seals were easily fitted. This is such an easy job to do, it makes my Trip 35 feel like new (ok, maybe some hyperbole there!)
I still have the spare set of seals (yes, two sets come in the pack) for when these new ones need replacing (i.e. In about 20 years time!)
Many thanks for making me a happy photographer again 🙂
stevenjpointer (verified owner) – 10/02/2019
The light seal kit was a perfect fit, easy to install and had a spare seals in case you muck it up. Highly recommend for anyone bringing a Trip 35 back to life.
Matt – 10/03/2019
Brilliant kit, sent quickly. I must admit that the second set of smaller seals came in handy due to my clumsy fingers. Definitely worth it!
Peter Marsland (verified owner) – 25/03/2019
Excellent! The Trip 35 light seals came quickly, with a personalised message, and the downloadable instructions worked perfectly. When I asked for information about another camera I received helpful guidance. Communication was prompt and friendly. I recommend Milly’s Cameras wholeheartedly. Great service.
Neil (verified owner) – 28/10/2020
Quick delivery and quite easy to fit, but nice to have the reassurance of a second set if required. Handwritten note was a nice touch.
Darron – 29/10/2020
Thank you Neil, glad your project went smoothly. Wishing you all the best. 🙂
Ronnie Black (verified owner) – 25/02/2021
Perfect fitting light seals nice clear instructions Thanks Ronnie
Darron – 26/02/2021
Thank you Ronnie for taking the time to leave feedback. Always pleased to read customer experience and extra pleased to learn another camera has a new lease of life. Happy snapping! 🙂
Bob (verified owner) – 23/10/2023
super fast delivery, comes with great instructions and even a little tool to help place the thin seals.
Your email address will not be published. Required fields are marked *
Your review *
Name *
Email *
Related products

3mm Camera Light Seal Foam – Sheet

1mm Felt Camera Light Seal – Sheet

1mm Camera Light Seal Foam – Sheet
International P&P available at discounted rates


Follow along with the video below to see how to install our site as a web app on your home screen.
Note: This feature currently requires accessing the site using the built-in Safari browser.
- Happy New Year! Click to see our review of 2023
- Film 'tog of the year 2024 - voting is now open for March's entries, we welcome your votes - click on this notice
- Vote for your favourites in the New Old Digital Challenge #13 poll - everyone can vote, click here
- DPOTY24 - voting is now open for March entries, anyone can vote - click on this notice
- Main Discussion Forums
- Talk Film & Conventional
Olympus trip 35 light seals.
- Thread starter wontolla
- Start date 28 May 2012

Misery Guts Monica
- 28 May 2012
Hello to the film crowd! Just picked up 2 Olympus Trip 35s, felt the need to step back a few years! One is an early model with the chrome button, working but in need of a little tlc. The other is a newer black button type that is to be used as spares. The back will be replaced on the early one, (with the one off the spare) but the light seals are goosed on both and I cannot seem to find a supplier for them. The ones I found online are either US based or 'out of stock' in UK. Not being up to date with the film side of photgraphy, not sure on the best shops/suppliers to try. Anyone know a shop around Manchester, or an online supplier I have missed? Does anyone have some material lying around to make my own, or a trip kit that you have spare? Would appreciate any help to get my Oly up and running.

Simon photo
Im not sure if i can link you up on the forums but i recently bought a sheet of self adhesive felt light seal material on the bay, so long as you have a metal rule or edge and a sharp craft knife its a doodle. I got it to re seal my 35rc, very similar chassis with slight differences. I read that the trips are easier to do though so if you take your time you will be golden. There are plenty of tutorials and cutting guides online. There is a guy in Asia doing laser cut seals and skins for loads of cameras including the trips, not the 35's tho. I've bought a custom leatherette skin for my epl1 off them and its all kosher and above board. Not bad delivery time either. With the re sealing though make sure you are meticulous about cleaning and cover the lens inside the film chamber to avoid gettin any goo in there. You will need plenty of cotton buds and some naptha (lighter fluid) to clean the old adhesive off. Hit me up if you want the links

Blithering Idiot
I regularly see light seal repair materials on ebay.......not specific for the oly , you would have to cut toshape/size etc but worth a look maybe? Here is an item number to look at for starters: 220875378094

I've just emailed Jon Goodman, 'Interslice' from ebay to find out what the situation is as I know he had some problems last year with accounts being hijacked and was trying to sort out his own website rather than go through ebay.

I've never had a Trip, so don't know what type of materials it requires. I do have about 8"x4" each of 1.5mm closed-cell (non adhesive) and 3mm open-cell (sticky backed) foam sheets, if that's any use?

Hi just got two oly trips a few weeks back. One had new light seals and the other needed them. I cleaned the gunk off with a bamboo kebab stick, and used cotton buds and window cleaner to remove the the bits that were left. I then used sticky back felt to replace the seal. Just had my pictures back from the lab and they are fine.
Simon photo said: There is a guy in Asia doing laser cut seals and skins for loads of cameras including the trips, not the 35's tho. I've bought a custom leatherette skin for my epl1 off them and its all kosher and above board. Not bad delivery time either. With the re sealing though make sure you are meticulous about cleaning and cover the lens inside the film chamber to avoid gettin any goo in there. You will need plenty of cotton buds and some naptha (lighter fluid) to clean the old adhesive off. Hit me up if you want the links Click to expand...
Asha said: I regularly see light seal repair materials on ebay.......not specific for the oly , you would have to cut toshape/size etc but worth a look maybe? Here is an item number to look at for starters: 220875378094 Click to expand...
RaglanSurf said: I've just emailed Jon Goodman, 'Interslice' from ebay to find out what the situation is as I know he had some problems last year with accounts being hijacked and was trying to sort out his own website rather than go through ebay. Click to expand...
Carter64 said: I've never had a Trip, so don't know what type of materials it requires. I do have about 8"x4" each of 1.5mm closed-cell (non adhesive) and 3mm open-cell (sticky backed) foam sheets, if that's any use? Click to expand...
Emma1 said: Hi just got two oly trips a few weeks back. One had new light seals and the other needed them. I cleaned the gunk off with a bamboo kebab stick, and used cotton buds and window cleaner to remove the the bits that were left. I then used sticky back felt to replace the seal. Just had my pictures back from the lab and they are fine. Click to expand...

jgood21967 at aol.com That is Jon's email. Give him a shout and see what he is up to. Really nice guy in my experience. Use him rather than any of the others who ripped him off.

menthel said: jgood21967 at aol.com That is Jon's email. Give him a shout and see what he is up to. Really nice guy in my experience. Use him rather than any of the others who ripped him off. Click to expand...
wontolla said: Would love the link for the leatherette kit please Simon! Thanks for the reply too1 Is it THIS one Simon? Click to expand...
freecom2 said: PLEASE go via interslice/Jon Goodman guys. An honest guy with a good product - he actually sends it to you even before the payment gets through because he's so trusting of the customers he gets. It's from the US but the seals tend to get here within 4-7 days. I've just resealed my K1000 in the last few hours using one of his simple and well put together guides, as well as countless other cameras before these. Buying through email is something that feels very foreign and odd in 2012 - but I will happily vouch for him, as well many others. Buy with confidence. Click to expand...
RaglanSurf said: Top fella to deal with, that's the same email addy I've got for him. Click to expand...
- 29 May 2012
THere are lots of tip on the flickr olympus trip group for reparing old trips aswell

My F4's Broken...
repeat info and deleted
Emma1 said: THere are lots of tip on the flickr olympus trip group for reparing old trips aswell Click to expand...

Jon Goodman
- 30 May 2012
Hi folks from a really hot Texas. Thanks very much for the votes of confidence and complimentary words! Friends are such a treasure...particularly friends like you guys and gals. Please do keep my email address handy and please let me know of any light seal needs or questions you have. As has been mentioned already, I'm no longer selling the kits on eBay. Apparently you've heard about the piracy & fraud, so I'll concentrate on things more positive and ethical. The pre-cut kits will be sold for as long as possible. I've just retired, and so I'll now have a bit more time to devote to this. If I don't have a kit for your camera, please don't let it worry you. I keep a box of off-cuts of foam and other materials for these situations, and I'm happy to send them as needed. One way or another, we'll get your camera back on "the dark side." All you have to do is ask. In the cases where I don't have a kit for your camera, one of the most important things for me to know is the thickness of the seal material that is still in your camera (in mm, please). It gives me a starting point. If it isn't there any longer, don't let that worry you either, though. We'll work around it. DSLR mirror damper pads? They're starting to fail now, and I'm happy to help with those, too. I receive between 100 and 200 email messages a day on light seal and/or camera repair issues, and occasionally some of them mysteriously go to the spam folder. If you have not heard back from me within a couple of days or so, please send another message. I probably didn't see the first one, because I do answer all of them. Oh, I almost forgot. I also sell leather & leatherette covering kits. They're made by a good friend in Germany who has sold my foam there for many years. They're excellent kits and are available for some of the models which suffer shrinkage most commonly. If you're interested, please let me know. And battery adapters. Gee if I'm going to mention everything, I may as well toss these in. The same adapter I developed so long ago is still being made & sold. It turns a #675 hearing aid battery (a zinc-air cell) into a clone of the old mercury battery (like the PX-13, PX-625, etc). They're still $14 and that still includes free shipping to anywhere and a lifetime guarantee. Best regards, Jon Goodman
Welcome to the forum Jon, it's good to see you on here. I hope the mods don't get too uppity and I would just like to point out that there have been a lot of emails going 'to and fro' between Jon and us in the f&c section which has prompted Jon's arrival on here so please don't strike his post as an 'advertiser'.
RaglanSurf said: Welcome to the forum Jon, it's good to see you on here. I hope the mods don't get too uppity and I would just like to point out that there have been a lot of emails going 'to and fro' between Jon and us in the f&c section which has prompted Jon's arrival on here so please don't strike his post as an 'advertiser'. Click to expand...
Ah, good point there. Well, I hope they don't see it as advertising, too. Any time you get a large number of email messages, you're going to see common threads...FAQs, you know. I was simply hoping to answer what I believe will be (or already are) questions in some people's minds. As some of you who've dealt with me for years already know, I give away nearly as much of the stuff as I sell. As my wife is fond of saying "if we had to live off the proceeds of the light seal project, we'd be living under a bridge and it wouldn't even be a very nice bridge." On that Electro, please let me know if you have any questions about the "Pad of Death." I'm planning to have a website in the future, and one of the things I want to have on it is some repair instructions with nice large images. Simplified POD replacement is one of those things I want to document online. Best regards, Jon

Jon - you may wish to check your PM's before posting any further on the forum - wouldn't want you to fall foul of our "no advertising" regulations...
Jon Goodman said: Hi folks from a really hot Texas. Thanks very much for the votes of confidence and complimentary words! Friends are such a treasure...particularly friends like you guys and gals. Click to expand...
- This site uses cookies to help personalise content, tailor your experience and to keep you logged in if you register. By continuing to use this site, you are consenting to our use of cookies. Accept Learn more...
Writing • Photography • Travel
Resources to repair an olympus trip 35.
I came across this old Olympus Trip 35 camera at a pawn shop in Central Oregon and couldn’t pass it up for the price. I’ve shot a handful of different Olympus film SLRs in the past, but I’ve never gotten my hands on any of their point-and-shoot or rangefinder models. Make no mistake, the Trip 35 is a true point-and-shoot, grab-and-go camera that can produce some fun and surprising results.
Of course, if you’re seeking out a repair blog, you probably already know all this or you’re looking to patch up your ailing Trip 35 and make some memories.

I didn’t know much about these cameras before grabbing this one off the shelf, so I just loaded it up with a roll of Fuji Superia 400 film and handed it over to my wife to shoot a test roll. It came back with some spot-on photos, but also some missed opportunities with off exposure and weird focus shifts. So I started digging…
One of the most obvious things was that the lens barrel was very loose and wobbly. It’s a common problem where 4 mounting screws that secure the lens to the camera body work themselves loose overtime. In fact, one even came all the way out and started rattling around in the camera when my wife was using it! I think this was leading to some focusing issues, especially on close-up subjects in low light, where a small shift could throw have a greater affect.
Take these two photos for example, both taken back-to-back in low light in our living room. One came out, the other is blurry even though we’re the same distance apart in both photos.

Ok, so neither photo is tack-sharp, but this little camera did well given the lighting conditions.
One other thing I noticed is that the exposure was off a bit in a few shots, mostly in extreme conditions of bright sun and low light. Digging around on the internets I learned that this may be a death sentence for the camera since it’s full-auto and depends on its meter to function. Scary shit, right?!
But I don’t have much invested in this camera, so I figured this was a great chance to test my knowledge of vintage camera repairs and see if I couldn’t get this old Trip 35 in top working condition once again. These cameras are pretty straight-forward to work on, if you take careful steps and do a few key things that’ll make your life a lot easier.
Here are a few of the helpful resources I’ve come across for disassembling and repairing the Olympus Trip 35, plus a few notes worth keeping in mind before you go tearing into this thing:

Wobbly Lens Repair:
Flickr user Math.leduc went through the trouble of solving this one for us , even posting pictures online to help walk you through. Having just done this repair, I can feel his pain and frustration, and I have to offer him my thanks for saving me a lot of headache with this tutorial. This is one of the simpler repairs on the Trip 35, but it’s a little unsettling when you pull the camera apart in 2 pieces. It’s also a great time to replace the inner light seal between the camera body and lens unit.
Disassembly to Fix Stuck Aperture Blades/Shutter Mechanism:
I have absolutely no idea why the guy that runs the ThermoJet Microlight Stove website has a page dedicated to Trip 35 repair, but I’m not going to complain. This is an excellent step-by-step walk through of how to disassemble the lens unit to access inner lens elements, aperture blade assembly, and even the shutter unit (if you so dare). L
***NOTE: Take special care to mark the position of your front lens element and take note of how far it turns to the right (as ThermoJet Guy recommends) before you get it out of whack. This element twists when you turn the zone focusing ring, and if it gets out of place it is a really, really big pain to get it right again. ***

Refocusing the Front Lens Element:
If you’ve come to far and didn’t head the *** warning in the above post, then check out 120 Studio’s guide on refocusing the Trip 35 front lens element using wax paper, a measuring stick, and an upside down newspaper. HEED THE MANY WARNINGS. MARK YOUR LENS BEFORE DISSASSEMBLY AND PROSPER!
Complete Tear-Down and Parts Guide:
This guy Peter Vis has put together one of the most comprehensive guides to the Olympus Trip 35 that I’ve seen thus far . His posts cover everything from basic operation to detailed notes on circuitry, lens barrel assembly, and how the camera functions with its various parts and magical wizardry.
If you’re troubleshooting a problem or looking for a good place to start on your repairs research, this is it.

Modifying Shutter Speed to Stick at 1/200th
This crazy kid K. Praslowicz found a way to jam a paperclip in the Trip 35 and peg shutter speed at 1/200th of a second , thus allowing him to override the camera’s automatic setting and shoot with manual aperture settings. It’s a pretty cool mod that also kind of defeats the purpose of using a point-in-shoot, but hey whatever! Where there’s a will there’s a way I guess.
Adding Light Seals and Green Lizard Skin:
The scribes over at Lomography put together a how-to post aimed at freeing up stuck aperture blades on the Trip 35, but honestly there are other better resources online for that procedure (linked above). They gloss over some important points in that procedure, but offer a good overview of replacing light seals and applying a green lizard skin leatherette covering to the camera. Take for what it’s worth I guess.
Dealing with Light Meter and “Red Flag” Issues:
Somebody hit the panic button. The light meter is basically the heart of the Trip 35. Without it, the camera is toast. If possible you should always do a quick test of the meter before buying a Trip 35. Simply point it at bright light and push the shutter button to see if the aperture remains small (f22 is its default position) and listen to see if the shutter is fast. Next, stick it in a low-light area and do the same, these time checking for wide aperture and slower shutter. It’s not perfect but you can at least see if it’s responding to light in the right manner, although it could still prove to be inaccurate.
I noticed a few exposure errors on the first test roll through my Trip 35, but nothing to warrant too much concern Yet, once I repaired the lens wobble and reassembled the camera, I started getting the dreaded “red flag” pop up in the camera’s viewfinder regardless of the light situation. Even in bright light the camera was indicating there wasn’t sufficient light to take a photo — NOT GOOD!
While the selenium light meter on these cameras have a reputation for being pretty reliable, my research online pretty much gave my camera a death sentence — the “red flag” issue could mean your camera’s meter is dying and you’ve got a nice paperweight on your hands. That’s what I was led to believe, at least.
Yes, some light meters die and they’ll all die eventually I guess. But fortunately that wasn’t the problem in my case. I opened the camera’s top plate to take a closer look at the light meter configuration and see how it was responding using ThermoJet Guy’s details on how it should be reacting .
Confusingly enough, once I opened the camera up again, the light meter seemed to be working as-normal and was responding to different lighting scenes as expected. WTF?!? The more I fiddled with it I noticed that the meter’s needle get stuck randomly, not really hung up but sticky. It looked like the spring or magnet may have been gummed up and was hindering the needle’s movement at times. If I hit the camera body it would often jar it loose and the meter would start bouncing around again, so it seemed that at least the meter was still working.
I wasn’t prepared to open up the light meter housing (that just seems like a recipe for disaster) but with my gummy theory in mind I decided to take a calculated risk and attempt to clean the light meter, specifically where the needle comes out under the housing. Using a spray can of electronics cleaner (which shouldn’t leave any residues), I lightly doused the light meter housing, let it dry, and repeated the process 5-6 times. Slowly the meter started freeing up and behaving as intended. Crisis averted.
Now, time to burn another roll.
If you have any helpful Trip 35 repair links, insights, or other tidbits feel free to comment below. Per usual, attempt any of your own repairs at your own risk, or send it to me and I’ll fiddle with it for you.

Clay Duda is a freelance journalist and photographer. People usually pay him to write things. Here he does it for free.
- Recent Photos
- The Commons
- Flickr Galleries
- Camera Finder
- Flickr Blog
- The Print Shop
- Prints & Wall Art
- Photo Books
- Stats Dashboard
- Get Auto-Uploadr
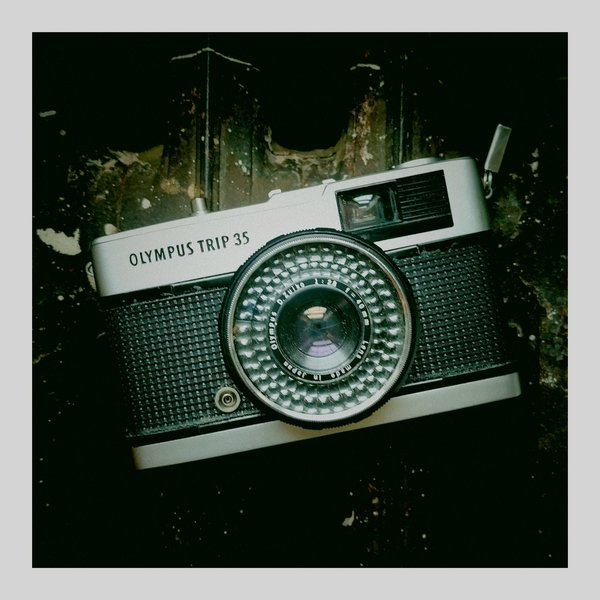
Olympus Trip 35
7,992 Members •
50.3K Photos •
1,448 Discussions
Group Since Jul 12, 2005
Drag to set position!
- Discussions
Light Seals

- Filmwasters »
- Which Board? »
- Photo Essays »
- Topic: Olympus Trip 35 -- who needs light seals?
- Send this topic
Author Topic: Olympus Trip 35 -- who needs light seals? (Read 7959 times)
Hookstrapped.
- Posts: 2,289
Olympus Trip 35 -- who needs light seals?
- Posts: 3,230
Re: Olympus Trip 35 -- who needs light seals?
- Global Moderator
- Posts: 3,555
Late Developer
- Posts: 4,033
Great shots, Hookstrapped. Though there're no light leaks I'd still recommend renewing the light seals depending on their condition. Some old light seals become a sticky mess which can get onto your lens and even on mechanics. They crumble and contaminate the film chamber. It's perfectly fine if the seals on the Trip don't crumble and feel intact but it might be a good idea to replace them when they start to crumble. I've had bad cases of sticky stuff in film chambers and it'd be a shame to soil an otherwise perfectly fine Trip. It's a lovely camera, I hope that you're going to have heaps of fun with it.
- SMF 2.0.19 | SMF © 2021 , Simple Machines | LimeStone by idesignSMF
The Olympus Trip 35 Review: Everything You Need To Know
I’ve worked with many Olympus Trip 35s over the years and I’ve discovered the pros and cons of this brilliant little rangefinder camera!
The Olympus Trip 35 is so popular because it’s very easy to use, it has a great lens and it’s ideal for the novice photographer. Also, the Olympus Trip 35 is one of the only 35mm cameras powered by the sun, making it really handy to take on holiday with you. Since 1967 10 million units have been sold, which is a tremendous amount even today.
If you want to know how this camera compares to others, how much you should be paying, some of its common issues and much, much more then read on!
I’ve worked with a hell of a lot of Trip 35s over the last few years and I like them because they’re really simple. If there’s something wrong with a Trip 35 I usually know it pretty much instantly because they aren’t especially complicated.
I’ve sussed out all the common issues, what can be fixed easily and what spells the end for an individual Trip 35. Usually, it’s lens fungus or an unreactive aperture that means doom for this little camera.
After years of working with them, I took one to the south coast of England to do a full review and I was actually pleasantly surprised by it. As you’ll see throughout the article, there are actually some good pictures that came from this ancient camera.
Some shots were let down by the very real limitations of this camera but on the flipside, due to the brilliant 40mm Zuiko lens, when the exposure is correct, its shots are great.
There are a lot of pros and cons to this camera so it’s well worth reading up on it to figure out if it’s the right fit for you. I enjoyed shooting it more than I expected but it wouldn’t be a camera that I’d rely on regularly.
Olympus Trip 35 Specs
Format – 35mm
ISO – 25 – 400
Battery – Solar Powered Selenium Battery
Exposure – Automatic
Shutter Speeds – 40 – 200
Flash – Hot Shoe
A Brief History Of The Olympus Trip 35
Introduced in 1967 and rolling on until 1984, the Olympus Trip 35 was completely ahead of its time. Sporting a solar-powered light meter in the late 60’s was pretty special.
Of course, Olympus’ market audience was pretty obvious, being named ‘Trip’, it’s kind of spelt out for you. Strong, reliable, doesn’t need any batteries, anyone could use it, that pretty much ticks all the boxes when it comes to a holiday camera.
Incredibly, over 10 million Trips were sold (Up for debate) and of course, they’re still being bought and sold to this day.
How Does The Olympus Trip 35 Battery Work?
The Olympus Trip 35 is powered by the sun using a selenium light meter which is the ring around the lens. This powers the light meter and allows the camera to choose the shutter speed and aperture (depending on which settings you have on). This would have been very unusual in its time but the fact that it’s still reliable today is brilliant.
Is The Trip 35 Lens Good?
Yeah, the Olympus Trip 35 has a pretty good lens but I’ve got to say, there are quite a few drawbacks. The lens itself is a beautiful 40mm 2.8 Zuiko lens, it’s pretty high quality for a camera that feels like a point-and-shoot.
I’d say the main drawback is that the focus is zonal and you only have 4 options. You should be able to see above, there’s a picture of one person, then two, then a group and then a landscape symbol. These are your focus options and it’s basically, 1.5m, 2m 3m and 6m and beyond.
This does limit the camera quite a lot but you’ve got to forgive a 50-odd-year-old camera sometimes.
The focal length is interesting, 40mm is pretty unusual but it’s still just wide enough to take the kind of pictures you’d usually take when you go on your holidays. It’d probably be preferable to have a 35mm lens but beggars can’t be choosers.
The Olympus Trip 35 Compared To The Olympus OM10
It’s worth comparing the Olympus Trip 35 with the Olympus OM10 as they’re currently at similar prices.
The Olympus Trip 35 isn’t that similar to the Olympus OM10, the Olympus Trip 35 is a small point-and-shoot rangefinder and the OM10 is an SLR however, it’s good to see what the Olympus Trip 35 is like in comparison to another well-known camera.
The Olympus OM10 would provide much better shots as it has better quality lenses and more control however, the Olympus Trip is more convenient, more compact and easier to use.
How Much Is The Olympus Trip 35 Worth?
Currently, the Olympus Trip 35 is worth around $100-125 or £70-100. You can of course get the Trip 35 for less if you try bidding for it on eBay or search thrift stores and flea markets but it’s worth trying to make sure that your Trip 35 is all working correctly.
What Kind Of Photography Is The Olympus Trip 35 Best For?
The Olympus Trip 35 is unsurprisingly best for travel-type photography. This camera was made with travel in mind as it’s small, compact, strong, easy to use and doesn’t require any batteries. Otherwise, this is also a good camera for day-to-day use. Photographers like David Bailey championed the Olympus Trip 35 believing that it was an incredibly high-quality camera.
Although the Olympus trip 35 has a great lens it’s not necessarily overly accurate and it’s not easy to focus correctly so despite the fact that it has a 2.8 lens it doesn’t mean it’s very likely that you’ll be able to focus correctly close range and get the most out of that lens.
This is not necessarily ideal for more professional types of photography and is definitely better to be used in day-to-day life and travel photography.
Is The Olympus Trip 35 Fully Manual?
The Olympus Trip 35 has two settings, one is an automatic setting that chooses your aperture and shutter speed for you, it decides between a shutter speed of 40 and 200 and between apertures of 2.8 and 22.
Alternatively, you can decide the aperture and the shutter speed will be decided by the camera. All focusing is manual and all ISO needs to be changed manually.
How To Use The Olympus Trip 35
Olympus Trip 35 is a very simple camera to use once you get the hang of it, until then understanding its limitations can be slightly hard.
If your camera seems not to be working properly try to leave it in the sun for some time to effectively charge its battery.
To open the back of the camera there is a small lever on the bottom of the side of the camera which just needs to be pulled down until the back pops open.
To change the aperture just rotate the ring at the base of the lens, this ring will show numbers from 2.8 two 22. If you want to shoot in automatically then turn it all the way around until the red ‘A’.
To change the ISO you just need to rotate the ring on the outer edge of the lens until you are to the correct ISO.
In order to focus you need to rotate the black ring on the lens. The closest focus mode is portrait mode, then there is middle-range portrait row mode, next, there are people standing further away from you and finally, there is a full landscape mode.
To attach a flash you simply have to slide it into the hot shoe located on the top middle of the prism.
To shoot and wind on you just have to press the shooting button on the top of the camera and then wind the black winder on the back of the camera until you can’t wind it any further.
To rewind the film you must first press the black button on the bottom of the camera to release the film and then wind the silver winder on the top left of the camera all the way back until it feels loose.
Common Faults Of The Olympus Trip 35
As the Olympus Trip 35 is a very old camera it has a number of common faults, hopefully, I can shed some light on these and help you avoid them or potentially fix them.
Commonly the red flag of the Olympus trip 35 will stop working, the red flag usually shows you when the scene would be too under-exposed. The red flag would appear at the bottom of the viewfinder when you are looking through it and would usually stop you from taking a picture if it’s too dark.
Sometimes the lens won’t react correctly to light, this is a great thing to check because if this is happening then it’s not really something that you can stop and it will ruin your photos. If this is happening the only advice I can give is to put it in the sun for a bit to see if this charges your selenium battery.
It’s likely that the light seals have worn away unless you bought your camera from a reputable dealer. You will probably have to replace a small number of light seals just to ensure that you do not get light leaks, this is fairly easy and if you want to find out how to do it then go to this link .
Lastly, the lens may have fungus and if the fungus is internal and it’s not something that would be easy to fix it would be much simpler just to get another one.
Final Word On The Olympus Trip 35
This is a great camera for travel and is certainly a camera to consider using. Personally, it’s not my kind of camera, I prefer more control and this just doesn’t cut it for me!
For a camera of its age, it truly is fantastic, a solar-powered vintage wonder that can still produce some beautiful shots!
Leave a Reply Cancel reply
Your email address will not be published. Required fields are marked *
Save my name, email, and website in this browser for the next time I comment.
Hey! I've been shooting film for a very long time and throughout all of my 20's it's been my main format. In 2019 I started to buy and sell film cameras and I became a top rated seller on Etsy and eBay. I've built up a wealth of knowledge about different kinds of film cameras and their common issues.
Since I started photography I've produced a number of zines/prints and more recently made a book called 'So Far So Good'.
I started this website in late 2021 with hopes of helping out people who had been looking for similar information to me and so far, I'm really enjoying it.
Similar Posts
The 12 best budget 35mm film cameras in 2023.
After working with film cameras for years, I’ve got first-hand knowledge about what’s good and what’s not in the camera market. There are so many film cameras out there, it’s tough to know what you should go for! So I’ve put together this guide of some of the best budget film cameras to make your…
Olympus Superzoom 70g/76g/80g/100g/105g Review – Are They Good?
Date written – 28/08/2023 I’ve been shooting film for 7 years now and over that time I’ve had a lot of experience with Olympus Superzooms. The Olympus Superzoom G series is comprised of zoom point-and-shoot cameras with 38mm to 70-105mm F 3.7 to F 9.5 lenses. They’re reliable, compact and easy to use, making them…
Olympus OM1 VS OM2 – What’s The Difference?
Over the years I’ve come across a lot of OM1s and OM2s and I’ve discovered the pros and cons of these classic cameras. The Olympus OM1 is a small, fully manual SLR camera with shutter speeds from 1s-1/1000s and the Olympus OM2 is a super compact, auto/manual SLR camera that has an electronic shutter. There…
The Pentax ME Super Review: Everything You Need To Know
I’ve shot and tested a hell of a lot of Pentax ME Supers over time I’ve got to grips with this fantastic SLR, this has provided me with great insight on this compact king. The Pentax ME Super is one of the best 35mm Aperture Priority cameras ever made. Many people agree that the Pentax…
The Lomography Apparat Review – Everything You Want To Know
I took the Lomo Apparat out for a spin so I can show you how to use it and get the best shots with it and find out if it’s worth the price! The Lomo Apparat is a film camera that Lomography released in 2022, it comes with a massive range of accessories and attributes…
Kodak Portra 160 VS Kodak Ektar 100 – What’s The Difference?
I’ve been shooting film for over 7 years and over that time I’ve shot a lot of Ektar 100 and Portra 160 and found the small differences between the two. Kodak Portra 160 has fine grain, pastel colour saturation, perfect skin tones and brilliant dynamic range, making it perfect for a number of different types…
Item added to your cart

If you're the proud new owner of a vintage Olympus Trip 35 film camera, you're in for a treat! This classic piece of photographic history is perfect for capturing memories with a unique analog touch with ease. In this guide, I'll walk you through the step-by-step process of using your Olympus Trip 35, complete with images and important precautions to ensure you get it right every time.
Expand the relevant guide:
Collapsible content
Loading film into the olympus trip 35:.
Step 1: Choose your film
Select your preferred 35mm film roll, keeping in mind that the Olympus Trip 35 is compatible with ASA/ISO speeds ranging from 25 to 400.
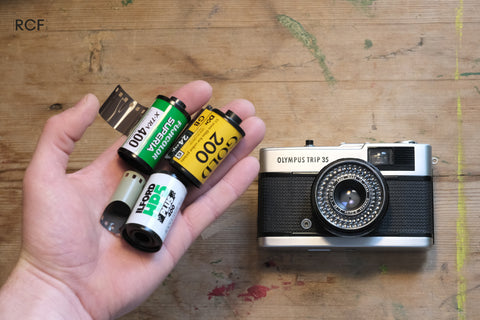
Popular film brands include Kodak, Fujifilm, and Ilford. This post I wrote might be useful: Buying 35mm Film - A Complete Guide
Step 2: Set the film speed and set the camera to manual for film loading
Set the appropriate ASA/ISO speed for your film using the dial located on the front of the camera, near the lens.

Also turn the aperture ring to any manual f number against the red line so that it isn't set to 'A'. The shutter can now be released regardless of light conditions.
Step 3: Open the camera back
![[Image 2: The Olympus Trip 35's back lock tab]](https://cdn.shopify.com/s/files/1/0571/3212/2301/files/DSCF2797_480x480.jpg?v=1684491064 "olympus trip 35 light seal")
Locate the back cover lock tab on the bottom of your Olympus Trip 35. Pull it down and the camera back should pop open.
Step 4: Insert the film cartridge
![[Image 3: Film cartridge being inserted into the camera]](https://cdn.shopify.com/s/files/1/0571/3212/2301/files/DSCF2798_480x480.jpg?v=1684491072 "olympus trip 35 light seal")
Lift up the rewind knob and insert the film cartridge into the film chamber on the left side of the camera, making sure the tip of the film is pointing toward the take-up spool on the right side. Then push the rewind knob back down into the roll of film (sometimes needs a wiggle or slight rotation to go all the way back down).
Step 5: Engage the film leader into the take-up spool
![[Image 4: Film leader inserted into the take-up spool]](https://cdn.shopify.com/s/files/1/0571/3212/2301/files/DSCF2800_480x480.jpg?v=1684491080 "olympus trip 35 light seal")
Pull the film across the camera and insert the tip securely through and into a slot on the take-up spool. Advance the film using the wind-on wheel.
Step 6: Align the film perforations
Ensure that the film perforations are aligned with the sprocket teeth on both sides of the film.
![[Image 4: Film leader inserted into the take-up spool]](https://cdn.shopify.com/s/files/1/0571/3212/2301/files/DSCF2801_480x480.jpg?v=1684491091 "olympus trip 35 light seal")
This ensures the film will advance smoothly when winding.
Step 7: Close the camera back
Close the camera back tightly. The camera back should click shut, indicating it is securely closed.
![[Image 6: Closing the camera back]](https://cdn.shopify.com/s/files/1/0571/3212/2301/files/DSCF2803_480x480.jpg?v=1684491101 "olympus trip 35 light seal")
IMPORTANT: Never open the camera back before fully rewinding the film, as this can expose your film to light and ruin your photos. Make sure to rewind the film completely after taking all 24 or 36 frames before unloading it.
Step 8: Advance film to '1'
Keep winding film and releasing the shutter until the film counter points to "1". This ensures the unexposed part of the film is ready for your first photo.

IMPORTANT: Watch the rewind knob when you wind the camera on ; it should start to rotate at the same time as you wind, indicating that the film has been taken up correctly - this is key, if this is not happening after a few shots then it probably means that the film has not been securely engaged by the take-up spool and the loading process will need to be repeated.

Step 9: Set the camera back to "Automatic" and get ready to shoot!
Turn the aperture ring until the 'A' mark is aligned with the red line in front of the viewfinder (click stop).

Your Olympus Trip 35 is now loaded with film and ready to capture amazing photos.

Taking Photos with the Olympus Trip 35:
How to take photos with the olympus trip 35:.
Step 1: Ensure the camera is wound on
This gets the shutter ready and primed to take a photo.
Step 2: Set subject zone focus distance on the lens
The Olympus Trip 35 has 4 settings which equate to focusing zone distances away from the camera (shown on the underside of the lens barrel):

- 🧍♀️Close focus ≈ 1 meter. This setting is used for focusing on anything ~1 meter away from the camera, be it close headshots or other close up details.
- 👥 Portrait ≈ 1.5 meters. Used for focusing on anything ~1.5 meters away from the camera, for example portraits or capturing wider details in the photo.
- 👯 Group ≈ 3 meters. Focusing on anything ~3 meters away from the camera, eg. full length body shots/group photos.
- 🌄 Scenery ≈ 5+ meters. Focusing on everything 5+ meters away from the camera, great for landscapes or subjects far away from the camera!

Step 3: Ensure aperture ring is set to 'A'
For 99% of situations in good light without a flash, it's best to leave the camera set to the red 'A'.

This lets the camera's solar powered meter set the exposure settings automatically and ensures a good exposure.
Step 4: Compose the photo using the viewfinder

Use the projected frame lines to see the area that will be captured in your photograph. There are hash marks to indicate the change in frame at close focus.
Step 5: Take photo by pressing shutter button

There should be a small click as the shutter fires - indicating a photo has been taken! 🙌 If instead a red flag appears in the viewfinder, this is a warning that there is not enough light in the scene for a proper exposure.

You can manually disable the red flag low light warning and take a photo anyway in low light by setting the aperture to '2.8'.
Towards the end of the roll it is important to not try to wind on the camera hard when you start feeling quite a lot of resistance or cannot wind on further - this signifies that the roll is finished, but if pushed too hard at this stage can result in the film snapping in the back of the camera.
Unloading Film from the Olympus Trip 35:
Step 1: Check the film counter
Once you've taken all the photos on your film roll (either 24 or 36 frames), check the film counter to ensure you've reached the end.
![[Image 10: Film counter indicating the last frame]](https://cdn.shopify.com/s/files/1/0571/3212/2301/files/DSCF2809_480x480.jpg?v=1684491137 "olympus trip 35 light seal")
Towards the end of the roll it is important to not try to wind on the camera hard when you start feeling quite a lot of resistance - this signifies that the roll is finished and if pushed too hard can sometimes result in the film snapping in the back of the camera.
Step 2: Press rewind button in
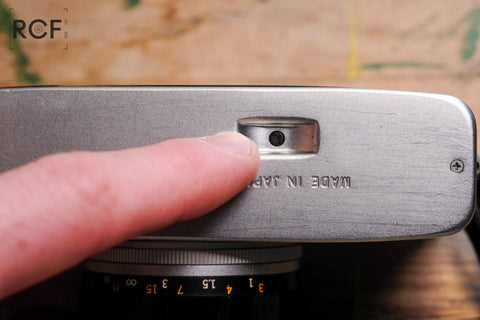
Find the small black button on the base of the camera and push it in to disengage the film from the winding mechanism and allow the film to wind back into the film canister inside the camera.
Step 3: Rewind the film
Press the rewind button located on the bottom of your Olympus Trip 35. Then, turn the rewind knob clockwise to rewind the film back into the cartridge. Keep rewinding until you feel the tension release, indicating that the film has been fully rewound.
Step 4: Open the camera back
Following the same steps as when loading the film, locate the camera back lock tab on the bottom of your Olympus Trip 35. Pull it outwards to open the camera back.
Step 5: Remove the film cartridge
![[Image 13: Film cartridge being removed from the camera]](https://cdn.shopify.com/s/files/1/0571/3212/2301/files/DSCF2813_480x480.jpg?v=1684491173 "olympus trip 35 light seal")
Pull up the rewind lever and lift the film cartridge out of the film chamber.
Step 6: Store and develop your film
![[Image 14: Film cartridge ready for storage or development]](https://cdn.shopify.com/s/files/1/0571/3212/2301/files/DSCF2814_480x480.jpg?v=1684491181 "olympus trip 35 light seal")
Place the film cartridge in a light-tight container to protect it from light exposure. Take or send your film to a lab for development or develop it yourself using the appropriate chemicals and techniques.
Shop The Olympus Trip 35
Olympus trip 35 vintage 35mm film camera | tested & fully refurbished | 100 day guarantee, olympus trip 35 vintage 35mm film camera - forest slate green | tested & fully refurbished | 100 day guarantee, olympus trip 35 vintage 35mm film camera - burnt orange | tested & fully refurbished | 100 day guarantee, olympus trip 35 vintage 35mm film camera - golden yellow | tested & fully refurbished | 100 day guarantee, olympus trip 35 vintage 35mm film camera - teal green | tested & fully refurbished | 100 day guarantee, olympus trip 35 vintage 35mm film camera - lipstick pink | tested & fully refurbished | 100 day guarantee, olympus trip 35 vintage 35mm film camera - royal blue | tested & fully refurbished | 100 day guarantee, olympus trip 35 vintage 35mm film camera - sand beige | tested & fully refurbished | 100 day guarantee.
- Choosing a selection results in a full page refresh.
- Opens in a new window.
- Rangefinders
- Medium format
- Compact cameras
- Around the World in 80 Cameras
- World on Film
- Analogue History
- Privacy Policy
- Refund Policy

Support Kosmo Foto
Keep Kosmo Foto free to read by subscribing on Patreon for as little as $1 month, or make a one-off payment via Ko-Fi . All your donations really help.

Subscribe to Kosmo Foto’s film photography YouTube channel.
- Latest Posts

Stephen Dowling Founder and editor at Kosmo Foto I’m Kosmo Foto’s founder and editor.
I’m a New Zealander who has been living in London since the mid-1990s, shooting film seriously since the year 2000. Kosmo Foto was launched in 2012 and has since become a film brand, with the release of my first films Kosmo Foto Mono 35mm (2017) and Kosmo Foto Mono 120 (2019).
I’m doing everything I can to promote film photography in the 21st Century, and help it survive and thrive. If you want to write something for Kosmo Foto, please drop me a line at [email protected].
- Rare Soviet Zenit-5 space camera under hammer this June – 16/04/2024
- Single Frame: Mr X – 14/04/2024
- CineStill releases 400D colour film in 4×5 format – 08/04/2024
Share this:
- Click to email a link to a friend (Opens in new window)
- Click to share on Facebook (Opens in new window)
- Click to share on Pocket (Opens in new window)
- Click to share on LinkedIn (Opens in new window)
- Click to share on Twitter (Opens in new window)
- Click to share on Reddit (Opens in new window)
- Click to share on Pinterest (Opens in new window)

- Camera reviews
- Classic cameras
Olympus Trip 35 review

In 1967, the Human Be-In at Golden Gate Park in San Francisco marks the start of the Summer of Love and the hippie movement. In the UK, the BBC transmits its first programmes in full colour. And the first Saturn V rocket – the one that will transport the first humans to set foot on the Moon – takes off for the first time from the launchpad at Cape Canaveral.
Something else launches this year too. It is chunky-yet-compact 35mm camera with a fixed lens and few frills, made by the Japanese photographic giant Olympus. It is nothing less than a revolution in photography.
The Olympus Trip 35 is aimed at the most amateur of amateurs; the kind of people who take their camera on the annual two-week holiday, and are unlikely to take the manual along with them. It is a camera that’s designed to document days of sun and sand and surf – and make those pressing the button confident that they’ve got the shot.
It is 50 years since the Olympus Trip 35 was born, a half-century that saw it become one of the most popular film cameras ever made. The Trip 35 was in production for 17 years, the last of them only coming off the assembly lines in 1984. It’s believed that more than 10 million of them were made.
The Trip 35 was not particularly novel when it appeared – it was, cosmetically at least, very similar to another Olympus camera, the Pen EES . The Pen EES was a half-frame camera using 35mm film (and giving the photographer 48 images of a 24-frame roll of film, or 72 off a 36-frame roll), a diminutive snapshooter with a large selenium meter cell arranged around the lens.
With the half-frame format starting to fall out of favour thanks to the cheapness of colour film, Olympus’s designers decided to build a cheap, tough little compact small enough to stick in a jacket pocket and able to be used by almost anyone – as long as you pointed the right end of the Trip at the subject – that Zuiko 40/2.8 lens the camera’s built around – you should be able to get a properly exposed picture out of it.
So if it was so simple, why did the Trip 35 make such an impression?

“I the in the UK the TV advertising campaign that featured David Bailey and a host of British actors in the 1970s has a lot to do with it,” says Dr Michael Pritchard, the director-general of the Royal Photographic Society , who wrote the book A History of Photography in 50 Cameras . “The ads are still fondly remembered by a generation who grew up at that time and the tag line “David Bailey? Who’s he?” has entered the language even if a generation doesn’t know it’s origins.
“That said, the Trip was a competent, well-made, camera and it found a ready market amongst amateurs who were increasingly travelling on package holidays and wanting a reliable, compact camera capable of producing good result. With the resurgence of interest in film, coupled with nostalgia, there’s a generation now wanting to buy the camera again and use it.
“In some ways the camera wasn’t exceptional, but Olympus’s marketing on TV and in print at the time was both extensive and clever, although ultimately the camera was competent and produced good results which made it popular.”
The Trip 35 was light and compact but robust, thanks to its mostly metal construction. This was a camera intended to be taken out into the great wide open, so Olympus’s designers made it relatively tough. Drop a Trip 35 on your big toe and you’re more likely to need to go to a doctor than a camera repairer.

It’s that robustness that’s also part of the Trip 35’s longevity, says Paul Lamb, who repairs and sells Trip 35s through his site, Trip Man .
“I think the Trip is the equivalent of a VW Beetle – a camera for all the people. It was so well built and so simple to use, but returns such great results, it has earned the label ‘cult camera’.
“Olympus built this camera for people to take on trips with them – it was small enough to take anywhere but strong enough to survive the average person’s adventures.
“The recipe of strong build with a high quality 40mm Zuiko f2.8 lens ensured sharp images were easy to obtain. The automatic exposure with the built-in light meter was a stroke of genius.”
There’s another reason the Trip might have been popular – unlike more sophisticated cameras, it didn’t need any batteries.
“The camera works without batteries, so it can go anywhere and won’t let you down,” says Lamb.
The David Bailey ad campaigns certainly helped, but Lamb says something even simpler might have been a big factor was another big reason behind the camera’s astonishing success.
“I think word of mouth has something to do with the great sales too – if your friend uses one and loves it, they’ll be the best advert for the camera – the results also speak for themselves. The Trip 35 seemed to beat the competition too – no other compact 35mm lasted this long in production.”
The Trip was the ideal travelling companion. The timing was just right – Paul Lamb, Trip Man
The Trip was also helped by a major societal change – cheap air travel to sunny places, especially in Europe. The arrival of cheaper flights to sunnier climes in the 1960s and 70s meant more and more people were able to take their holidays abroad. Tourism exploded.
“This was at a time when people had a bit more disposable income and time and were starting to travel further afield,” Lamb says. “The Trip was the ideal travelling companion. The timing was just right.”
The Trip 35’s specs underline its simplicity. But this was not a camera intended for portraits in low-light or freezing split-second sports action. The Trip 35’s mission was to capture holiday snaps – and for this it was spot on.

“I would argue that it was a forerunner of the point-and-shoot cameras – starting with the Konica C35AF from 1978,” says Pritchard. “These were incredibly popular in the 1980s and 1990s which used electronics (as opposed to the Trip’s mechanics) to control settings, and added auto-focusing, film advance and built-in flash. These really took the concept of the Trip and pushed it further with new technologies, which digital has since taken further.”
Lamb finds the Trip 35 is still in demand, even some 30 years after production stopped.
“We buy a camera every day pretty much,” he says. “Almost without exception, some work is needed to bring the camera up to a standard that is fit for me to sell. I am fussy about the cosmetics; I don’t like cameras with dents or bad scratches and it must have a good clear lens and viewfinder.
“Often we see dented filter rims where someone has dropped it. We have lots of spares so can change any dented or badly marked parts. The leatherette was pretty hard-wearing, so most are usable, but some are dirty and these cameras really benefit from a new set of leathers.

“All cameras of this age need new light seals. They go all sticky and probably leak light. Some Trips have had a hard life but still work! They have a bit of patina, which I don’t mind. Funnily enough, the most common problem is aperture blades sticking shut. This is just from lack of use.
“Thankfully it is an easy fix and we take the lens apart anyway to clean inside. The shutter nearly always works. It was simple, with just 2 speeds, 1/40 and 1/200, so less can go wrong.”
So what’s it like to shoot with?
The Trip 35 was designed to be as simple as possible. Instead of a rangefinder focusing system, it uses a zone focus viewfinder system; the lens can be set to one of four different distance settings according to how far away the subject was. The cartoonish little symbols – a stick figure, two groups of stick figures, and then a far-off mountain – were a guide to help you keep the Trip 35’s lens focused in the right place.
The Trip 35’s shutter only has two speeds – 1/40 th and 1/200 th – but the key to its ease of use lies in its simple, battery-less automatic exposure system. The Trip 35’s lens has a full range of apertures from f2.8 to f22. When the shutter button is pressed, the Trip chooses any aperture that will work with it’s preferred speed of 1/200 th . If that doesn’t work, it will try and match them to 1/40 th . That doesn’t work? A little red flag pops up in the viewfinder window to tell you that a picture can’t be taken, and the shutter button locks – which means you won’t waste frame of film.
Olympus stripped out everything that wasn’t strictly necessary (the camera only meters up to 400, which is as as fast as consumer film was back in the day), making a camera that was intuitive and easy to use. But one thing they didn’t scrimp on was the lens.

The Trip 35’s lens is sharp – really sharp. The Trip 35 was one of a bunch of compact Olympus cameras – like the 35RC and the 35SP – boasting fantastic lenses.
The Trip 35 is almost ridiculously easy to shoot with; the lack of rangefinder or SLR-style focusing means that, as long as you’ve got a reasonable eye for distance, you’ll most likely get acceptably sharp photos. The Trip 35 excels in good light.
Should you want to over-ride this “computer says no” approach, you can. Take the camera off the A setting, and choose your required aperture – the Trip 35 will snap away at 1/40 th . Hopefully, that will result in a well-exposed shot – you won’t know until the film is developed. It makes sense to do what most Trip-toting tourists would have done back in the day – load it up with negative film and shoot it in good light. If you want to add filters, you won’t need to compensate, as they’ll sit right over the selenium meter. However, because this is a viewfinder camera, you won’t see the effects of the filter through the viewfinder (worth bearing in mind if, for instance, you put a yellow filter on with black-and-white film and then use a roll of colour afterwards).

The filter size isn’t standard, either – like some of Olympus’s other compacts, it takes the slightly eccentric 43.5mm mount. Thankfully, so many Trip 35s were made the filters are still relatively common.
There’s nothing automated on the Trip 35, so rewinding the film is the usual manual rewind via a crank handle and a button on the bottom of the camera.
I’ve shot a good dozen or so films with the Trip 35 over the last few years, taking it out on trips to the South of France and recently to India and Sri Lanka aswell.

The Trip 35 isn’t a replacement for a decent SLR, nor is it a high-end compact like the Yashica T4 or the Contax T2 (but then neither does it sell for upwards of £250 on the secondhand market, either). But it’s a fantastic summer travel camera, perfectly suited for street photography in good light. Pair it with 100 or 200-ISO print film in strong sunlight and the Trip will default to 1.200 th and as narrow an aperture as it can, making exact focusing unnecessary – perfect for shooting on the street. And the 40mm lens, considerably wider than the perspective of the human eye, gives a nice wide view of the world.
And those who might be put off by the heavy vignetting from other viewfinder cameras like the LOMO LC-A might find the Trip 35 more appealing – get your focus right, and the pictures are very, very sharp indeed.
After all – 10 million Trip owners can’t be wrong.

* Olympus’s official profile of the Trip 35
* Daniel J Schenider’s comprehensive write-up of the Trip
* Streetshooters profile of the Trip 35
* Lewis Collard’s review
* 35mmc’s in-depth profile of the Trip
Subscribe to Kosmo Foto's film photography YouTube channel.
I'm a New Zealander who has been living in London since the mid-1990s, shooting film seriously since the year 2000. Kosmo Foto was launched in 2012 and has since become a film brand, with the release of my first films Kosmo Foto Mono 35mm (2017) and Kosmo Foto Mono 120 (2019).
- Rare Soviet Zenit-5 space camera under hammer this June - 16/04/2024
- Single Frame: Mr X - 14/04/2024
- CineStill releases 400D colour film in 4×5 format - 08/04/2024
RELATED ARTICLES MORE FROM AUTHOR
Three cameras for 2023, the zenit-4: a premium soviet slr that’s now a historical footnote, konica iii review.

I own one, an “early” one with a bright (as opposed to black) shutter button. It’s one of those cameras I wonder why I don’t shoot more often. I’d forgotten that this camera debuted in 1967 — so did I! I should definitely shoot mine more this year in honor of both half-century birthdays.

I love the Trip 35! Great camera that gives me exactly what I need. Maybe I have an older one too, my ASA dial goes 25-200. Superb AE, I’ve shot slide film with it and it hasn’t failed me, even after half a century of service!

A great tribute to a true classic! I snagged mine for a song some months ago, and after trying unsuccessfully to force the ASA dial beyond 200, realised that I’d found a very early model – the date stamp hidden behind the back plate indicates Dec. 1967. But it’s in excellent condition, the selenium meter works like a charm, and it feels surprisingly robust for such a compact camera. The Trip is one of three reasons I’ve rediscovered the joys of film after a decade of DSLRs (the other two being Voigtländers from the Fifties). Here are some of my … Read more »

I have been using an Olympus Trip for nearly nine years. In 2013 I gained a Fellowship from The Royal Photographic Society (FRPS) with a panel of 20 black and white photos taken at Dungenesss using my Olympus Trip.

I have lots of Olympus Trips and my favourite one is my December 1967 version with 200 asa and all orange symbols on the lens and we share the same birthday!!

What a great review of such a fine camera. I’ve just bought my 50th Olympus Trip 35 and am steadily rebuilding them from head to toe. I’ve added some other reviews and a decent scanned copy of the original User Guide if anyone wants to grab a copy: https://trip35.co/

Many thanks Robert! Glad you enjoyed it.
- Yekaterinburg
- Novosibirsk
- Vladivostok

- Tours to Russia
- Practicalities
- Russia in Lists
Rusmania • Deep into Russia
Day trip to Yasnaya Polyana from Moscow: transport, sights, tips, advices

Main Sights
Of course the main sight here is the Yasnaya Polyana estate itself. Located within the estate are the house where Tolstoy lived plus the auxiliary buildings of the estate which now contain exhibits dedicated to the work of peasants in running the estate.

The natural surroundings of the estate are also a highlight and don't forget to visit Tolstoy's simple grave on the territory of the estate.

During the low season from November until April, it is possible to visit the main house by yourself and take an audio guide (Russian, English, French or German). However from April until November you can only join a Russian group excursion.

Excursions around Yasnaya Polyana are held about every hour - tickets are bought at the ticket office next to the main gates. Excursions start there as well.
During the excursion, you will visit the central part of the estate, the Tolstoy House, and the exhibition in the Kuzminsky House.
Some exciting activities are offered by the museum including horse riding, carriage rides or sleigh rides, and tea drinking at the Coachmen's house with an interactive tour of a traditional Russian peasant's hut. In summer, excursions on bikes around places connected with Tolstoy are also organised. Activities should be booked in advance by email.
There is a little cafe called Prishpekt located just opposite the main gates where you can buy tea, pies and some hot dishes. Two kilometres from the Yasnaya Polyana estate, there is a restaurant and cafe and places where you can spend the night.
Visiting Tula

Three to five hours is enough to see all the sights and museums of the estate. So you should have time to go back to Tula and have a quick look around before heading back to Moscow. You could also make the trip into a weekend trip by spending the night and next day in Tula, which is worth a day-trip in itself as the city has a nice Kremlin and is associated in Russia with samovars, weapons and the Russian equivalent of gingerbread known as a 'pryanik'. To find out more about Tula visit our Tula pages.
Suggested Timetable
Here is our suggested timetable for making the most of a day-trip to Yasnaya Polyana. All train and bus times are approximate as the exact time may change.
There are a few souvenirs shops near the car park for the estate where you can buy standard Russian souvenirs such as Russian dolls and some local ones dedicated to the estate, Tolstoy and his work.

Plan your next trip to Russia
Ready-to-book tours.
Your holiday in Russia starts here. Choose and book your tour to Russia.
REQUEST A CUSTOMISED TRIP
Looking for something unique? Create the trip of your dreams with the help of our experts.
IMAGES
VIDEO
COMMENTS
Rated 5.00 out of 5 based on 1 customer rating. ( 1 customer review) $ 8.00. This USCamera light seal kit will fit the Olympus Trip 35 compact film cameras. This 4-piece seal kit includes 1 upper, 1 lower channel seals for the back cover, 1 back cover hinge seal and 1 door hinge seal on the camera body. USCamera custom light seal placement for ...
Remove the lens, give it a good clean with a microfiber cloth and set it aside. Step 5. Now you need to remove the bulk of the lens from the body. To begin, lift the wires on the bottom of the camera over the tripod thread to loosen them. Now locate the three deeper screws inside the lens and remove all three.
The Olympus Trip is now a fair few years old, and although quite reliable they will need a little TLC to keep them in tip top working order. After a while, the light seals on most analogue cameras begin to fail. ... written by trip35snapper on 2011-12-14 #gear #tutorials #diy #camera #tutorial #olympus #guide #tipster #trip-35 #light-seals. 11 ...
Olympus Trip 35 Light Seals . Discussion Hi! I recently bought a Trip 35 in really great condition. However, the light seals on the door hinge were really mushy and started to stick together. The camera came with a seal glued onto the body, and one glued onto the door, which touch each other when the door closes. ...
Replacement Light Seal Kit ~ Olympus Trip 35. £ 10.60 Inc. vat. For the ever popular Olympus Trip 35. These are precision cut, self adhesive and ready to fit. Just wet them and guide and slide them into position then leave for a few hours….make sure the old ones are totally cleaned away first. Kit contains three sets so if you mess up there ...
Olympus Trip 35; Olympus XA; Olympus XA2; Ricoh 500G; Ricoh Super Shot; Ricohmatic 35 and Ricoh Auto 35 V; Smena Symbol; Tower 51 (Iloca Rapid B) Vivitar 35ES; Voigtlander Vito B; Yashica Electro 35 GSN; ... light seal kits, they are well put together with excellent easy to follow instructions. He goes by the ebay handle 'interslice'.
breakable writer: The rear film compartment door seems a little loose and I'm wondering if this camera (an Oly Trip 35) needs new light seals. There only seems to be one seal near the hinge, but since I did have some streaks on my last roll of film could it be that there should some seals in the trough around the door itself? Any information will much appreciated. Thanks, Phil
Replacement Light Seal Kit For Olympus Trip 35 Fitting Instructions The first step to replacing your light seals is to clean off the old deteriorated light seals found along the inside of the back door hinge and in the thin channels. (See photo opposite to help locate these areas marked in red) There are various methods for doing this and it is
Rated 5.00 out of 5 based on 7 customer ratings. ( 7 customer reviews) £ 5.99. Olympus Trip 35 Light Seal Kit. Keep your Olympus Trip 35 light-tight and protected with this light seal kit. Made of high-quality foam, these seals are easy to install and will extend the life of your camera. Includes fitting instructions and two sets of seals per ...
I picked this camera up from an op shop and repaired the light seals. I used Kodak Tri-X 400 film. Music: www.bensound.com
28 May 2012. #1. Hello to the film crowd! Just picked up 2 Olympus Trip 35s, felt the need to step back a few years! One is an early model with the chrome button, working but in need of a little tlc. The other is a newer black button type that is to be used as spares. The back will be replaced on the early one, (with the one off the spare) but ...
Without it, the camera is toast. If possible you should always do a quick test of the meter before buying a Trip 35. Simply point it at bright light and push the shutter button to see if the aperture remains small (f22 is its default position) and listen to see if the shutter is fast. Next, stick it in a low-light area and do the same, these ...
flowerpotman!: I have noticed light seals seem to be an issue with the Trip 35. Kits are offered on ebay, cameras are for sale with new seals (and inflated prices) and there are many forums on how to do the job. The light seals on both of my Trip 35's are completely degraded, but I haven't noticed light leakage on any of my photos. I suspect they aren't really needed at all - or am I missing ...
I found this Olympus Trip while cleaning my apartment last week. I never used it after getting it off ebay about 10 years ago. The seleniun light meter still works -- the cool little red flag pops up in the viewfinder and the shutter doesn't fire when there's not enough light, and the aperture seemed to open to varying degrees under varying light...
The Olympus Trip 35 is so popular because it's very easy to use, it has a great lens and it's ideal for the novice photographer. Also, the Olympus Trip 35 is one of the only 35mm cameras powered by the sun, making it really handy to take on holiday with you. Since 1967 10 million units have been sold, which is a tremendous amount even today.
Olympus Trip 35 Light Seal Kit. The price is $7.00 US, includes 3 kits in 1 set. Shipping fee Asia : $5.50 US (registered airmail) Europe Oceania Middle East : $6.30 US (registered airmail) USA : $6.30 US (registered airmail) South America & Africa : $6.50 US (registered airmail) Olympus Trip 35 Custom Covering: 8 USD
How to Take Photos with the Olympus Trip 35: Step 1: Ensure the camera is wound on. This gets the shutter ready and primed to take a photo. Step 2: Set subject zone focus distance on the lens. The Olympus Trip 35 has 4 settings which equate to focusing zone distances away from the camera (shown on the underside of the lens barrel):
The Trip 35 was light and compact but robust, thanks to its mostly metal construction. This was a camera intended to be taken out into the great wide open, so Olympus's designers made it relatively tough. Drop a Trip 35 on your big toe and you're more likely to need to go to a doctor than a camera repairer.
Light on the shores of Moscow City. Olympus OM-D E-M1 markII. F/6.3 ISO100 live composite mode.
We very much enjoyed our group trip to Moscow and St Petersburg last year. excellent guides and accommodations. While Steven who has replied here has excellent advice, ( and we took advantage of it), we felt an organized tour really facilitated our enjoyment of the country. You may want to consider a combination of an organized tour and than ...
Source: From World Outlook, 29 July, 1966, Volume 4, No. 24, Paris and New York City Written: July, 1966 Translated: by World Outlook Transcrition & Marked-up: by David Walters for the Marxists' Internet Archive 2009. Public Domain: Creative Commons Common Deed. You can freely copy, distribute and display this work; as well as make derivative and commercial works.
Distances. 200km south of Moscow and 15km from Tula. Total time on train. 4½ to 7 hours depending on train (Moscow - Tula return) Total time on bus. 1 hour (Tula - Yasnaya Polyana return) Accessibility for foreigners rating. 3/5 - established tourist route, but maybe some difficulties in finding the correct bus and stop.