

The Elder Scrolls V: Skyrim
The elder scrolls v: skyrim guide, top guide sections.
- Main Quests
- Side Quests
- Cheats & Secrets
Images & Screenshots

The Elder Scrolls V: Skyrim PC Review

All Interactive Maps and Locations

Dawnstar Map

Falkreath Map

Markarth Map

Morthal Map

Solitude Map

Solstheim (Dragonborn DLC) Map

Whiterun Map

Windhelm Map

Winterhold Map

- The Elder Scrolls V: Skyrim Achievements
- The Elder Scrolls V: Skyrim News
- Walkthrough *
4. The Elder Scrolls V: Skyrim The Main Story
The main story.

The main quest line of Skyrim revolves around a new crisis that makes itself very obvious from the beginning of the game. I'll try not to reveal too much as I go and only detail the things you need to know for the achievements. After choosing your character and watching a dramatic scene unfold you are shown the basics of the game's mechanics as you flee the small settlement of 'Helgen'. The game then advises further travel to 'Riverwood' and then on to 'Whiterun', these journeys are all part of one long elaborate tutorial to introduce you to all the most basic elements of this vast game. It is highly advised that, although you may become heavily distracted by various side quests and exploration, you should continue almost entirely with the Main Story for now until you have a good grasp of the game.
I should note here also that completing the fourth main quest 'Dragon Rising', you will make the Daedric quests, and some other side quests, more difficult later on. There is a choice to be made here that I would not like to dictate for you, I will simply say this: If you plan on playing multiple playthroughs, like suggested in the General Hints and Tips page, then you should complete the fourth quest as and when you encounter it, it offers new character advantages and continues the tutorial of the game. However if you are only planning a single power playthrough then I'd advise you hold off on the Dragon rising quest and complete as many Daedric quests as possible before returning to it.
The Main Story has '17' mandatory quests and '2' optional quests. During the course of the Main Story you will unlock '8' achievements for the completion of certain quests and a further '3' achievements for completing tasks associated with the tutorial aspect of the story. The Main Story can be completed in a minimum of '20' hours depending on your character level, difficulty setting, your general skill, and your gaming style.
IMPORTANT: It is best to complete the Civil War quest line, at least up until the point where you unlock the 'War Hero' achievement, before reaching the 14th Main Story quest 'The Fallen', see below. You can decide whether to:
- Complete both quest lines at your leisure simultaneously but avoid advancing past the Main Story quest 'Alduin's Bane' (the prerequisite of The Fallen quest) until you have completed the Civil War quest that allows you take the main fortress of the opposing side in the war, namely 'Fort Greenwall or Fort Sungard'.
- Or if you plan on joining the Stormcloaks you can complete the 'Joining the Stormcloaks' quest but not start 'The Jagged Crown' then proceed to the Fallen quest in the Main Story, activate the 'Season Unending' optional quest and choose to give Ulfric and the Stormcloaks Morthal in stead of Markarth. This will allow you to progress in both storylines and gain all achievements and advantages.
The choice, like everything in this game, is yours to make.
For good advice on the style of players you can create see the relevant section of the 'General Hints and Tips' page.
Your choices here will affect gameplay quite significantly, your sex and your race especially will have varying affects on your abilities, quest lines, skill perks and general dialogue. I will outline some of the styles and differences below, but ideally you should have a plan in mind and make all your choices to help build towards that plan.
Altmer - The High Elf from the Summerset Isles, highly suited for Mage players, they have an extra 50 magicka, a daily rapid magicka regeneration ability, and starting bonuses to a variety of magic types. These are a proud and intelligent people, bare in mind the current political situation, they are part of the Aldmeri Dominion and are considered enemies of the Nords and an inconvenience for the Imperials, so although you may gain favor when dealing with other Elven peoples you may find it harder to associate with the main populace of Skyrim.
Argonian - Residents of Black Marsh- these can be suitable as light-warriors due to their daily healing ability, but they would serve best as a Thief . They have bonuses to Alteration and Restoration magic so a Mage character is also a viable option. Their agile nature and their bonuses to thief-like skills however would suit a thief style character best, their waterbreathing ability only contributes more to this. Argonians are loyal to the Imperial Legion, and they are treat somewhat harshly in Skyrim, with most of their population living in the slums. This lower class affiliation however is by no means a disadvantage, having favor with the merchants and the criminals of Skyrim can lead to many advantages through many quests.
Bosmer - The Wood Elf and resident of Valenwood, due to their skill bonuses these elves are the best possible choice for Thief characters, their light sneaky agile nature is perfect for stealth situations and their aptitude with the bow and arrow is unrivaled. The ability to command animals can also be fun and very useful early on but will become redundant in later levels. They do however have a fundamental resistance to poisons and diseases which will remain useful throughout your entire campaign.
Breton - Magic experts from the land of High Rock and the human descendants of Elves. These people are particularly suitable for Mages and as Anti-Mages, with a base 25% Magic Resistance and bonuses to the main schools of magic. They are also gifted with a useful ability to absorb the Magicka of spells cast at them and use it for themselves. They mainly live as mages, counselors, free-thinkers, and advisors in Skyrim, their place in society is in the middle; normally winning favour with both peasants and lords alike.
Dunmer - The Dark Elves hail from the land of Morrowind, they can serve well as both Mages and as Warriors , their adeptness with destruction magic and the sword are both well suited. They possess a bonus to destruction magic, and smaller bonuses to Alchemy, Illusion and Light armour. They also have a resistance to fire; very useful in general, but especially for characters who plan on spending a lot of time as a vampire. In Skyrim the Dunmer are looked down upon, they serve mainly as peasants and this can be useful for many quests, and to gain insider information, but can also be a hindrance when dealing with the higher classes.
Imperial - Also known as 'Cyrodiil's' after their homeland, these people serve as excellent Warriors both light and heavy with bonuses to block, heavy armour, enchantment and one-handed weapons. They also possess a bonus to Restoration and Destruction magics, the former being a useful alternative to healing potions. Being an Imperial character would obviously make joining the Imperial Legion a great advantage, you would gain favor with an invading army who, at the beginning of the game, have a very strong foothold in the region. You would however likewise be shunned in some ways; particularly by Nord characters who do not take kindly to you invaders.
Khajiit - The feline race from the desert lands of Elsweyr. These beast-like people make excellent Thieves due to their incredible agility. They also possess bonuses to Sneak, Archery, Alchemy, Lockpicking and Pickpocketing skills and the special ability to see in the dark using the 'Night-Eye' power. However they also make good Warriors being generally tough-skinned and possessing a bonus to the One-Handed skill. The Khajiiti are a greatly misunderstood and somewhat frowned upon race, they have strange customs that are often mistaken for insults and as such they find their place mainly as thieves, smugglers and beggars. Being a Khajiit can help to gain favor with the lower classes to find information etc but they may find problems dealing with the higher tiers of society.
Nord - The proud 'Children of the Sky' and natives of the land of Skyrim. A perfect choice for any type of Warrior class especially for light and Two-Handed warriors. They have base bonuses to Two-Handed, Block, Light Armour, One-Handed, Smithing and Speech skills. Nords are an excellent choice for your first character, they have a lot of unique dialogue options and gain favor with the majority of the people in Skyrim. Nords are the most common race of people found in Skyrim and you'll find them in all walks of life from guards, merchants, blacksmiths, lords and Jarls and more rarely as peasants. The Stormcloaks are almost entirely made up of Nords so joining their ranks would definitely be an advantage. Nords also possess an incredibly useful resistance to frost which will serve you well in the coldest region of the world.
Orc - Known as the 'Orsimer' or 'Pariah Folk' they come only from the 'Wrothgarian Mountains', the 'Dragontail Mountains', and the town of 'Orsinium'. The Orc-beast people are counted as the most resilient and formidable warriors in the world and are noted for their incredible courage in war. They make particularly good heavy Warriors and smiths possessing bonuses to Heavy Armour, Block, Smithing, Enchanting, and One and Two-Handed weapon skills. They also have a power that turns them into 'tank-like' maniacs, giving heavy bonuses to damage and physical resistance. In society Orcs are often considered as cruel brutes and mindless barbarians, but in recent decades they have won favour, especially among the Imperials, as useful loyal soldiers and smiths, the main front lines of most Imperial armies are made up of Orcs. This would mean that joining the Imperial Legion would be more favorable than joining the Stormcloaks.
Redguards - The dark-skinned people of Hammerfell. This race seems to have been born to be Warriors - their affiliation with the sword is legendary, as such they make excellent light warriors and with their general quickness and bonus to archery they can make good alternative thieves too. Their interests with Alteration and Destruction magic can also make them suitable as Mages provided they utilise some warrior styles. They possess an 'Adrenaline Rush' power that when used with light swords can deal devastating damage to tough opponents. Their place in the society of Skyrim is somewhat complicated at this time. The province of Hammerfell was part of the Empire before the Great War with the Elven nations but, as a condition of the peace treaty between them, the Empire decided to give the southern parts of Hammerfell to the Elves. The Redguards rejected this and went to war with the Aldmeri Dominion, although they won, Hammerfell was devastated and the Redguards now have great contempt for both Elves and Imperials alike. For this purpose it would be best to side with the Stormcloaks in the war and you will gain favor with most people who agreed that the Empire's decisions were wrong.
Choose a race that suits your style of gameplay, if you choose a Mage style race and then try to go off sneaking and picking locks etc you will fail a lot more than if you had chose a Thief style race, it will consequently take much longer to level up your skills and character. Once you have chosen your sex and race and have thought about your play style who should also have a good idea of what kind of appearance you should have. The options for appearance have been greatly advanced since Oblivion, you can now also change your muscular build, add tattoo's, scars, war-paint, jewellery, fur for Khajiit and feathers and horns for Argonians. These options are only cosmetic and will not affect any dialogue or physical abilities of any kind, but shaping your appearance to your play style will only increase your experience of the game.
A Note On Bugs
Skyrim can be very buggy, please refer to the General Hints and Tips page for more information and how best to avoid these bugs. For every quest in every quest line I've placed clear warnings in 'bold text' against actions that have a possible chance to trigger bugs. Many bugs were never properly fixed and although it is not 100% guaranteed that any given bug will occur, you should heed every warning since some bugs cannot be fixed, even by reloading a previous save. I will also advise 'SAVE' points throughout your entire Skyrim experience, I have designed these save points specifically for each quest and failing to save at these points can cause you to repeat long stretches of quests should you die, freeze or hit a bug.
Collectibles
On With The Story
Now with your character created you can continue with the story, but before you go running off into the wild remember your play style and concentrate only on the skills in that play style. If you attempt to level up all your skills at once and choose perks that are not relevant to your class you will only hurt yourself and make things more difficult and laborious.
> The grim scene will continue, it will come to your turn on the block, however this is interrupted by an incredible event that has not been witnessed in hundreds of years. When you're able to move freely you will activate your first quest, indicated on the screen as 'Unbound', there will be a white 'objective marker' on a Nord named 'Ralof' who you are supposed to follow.
> Jump down again and you'll find the Imperial soldier 'Hadvar', he will be outside of the door from the inn and to your left trying to help some people. Follow Hadvar closely, continue through the attack until he reaches a group of soldiers and battle-mages, try to listen to the dialogue here before moving on.
> You will come to a point where Ralof and Hadvar meet and prepare to attack each other, they soon discover, however, that getting inside to safety is more important; at this point your objective will update and you are faced with a choice, SAVE.
> Ralof (who will move to the right) represents the Stormcloaks and Hadvar (on the left) the Imperials, this choice does not bind you to either side of the war permanently but it is advantageous to make your choice now. You will be forced to kill members of the opposite side to gain the key to your freedom. After choosing, head inside and the ceiling will collapse behind you, SAVE.
> Move through and pick up a cabbage from the barrow (for cooking later), then go down the stairs, the ceiling will collapse then you'll move through into a dining area with two more enemies, kill them in your preferred manner then SAVE.
> Check the barrel for some useful potions and loot the whole room for any potions and cooking ingredients, especially 'Salt Pile' then move on down the stairs to find the torture room.
> Kill the attacking enemies and listen to bit of dialogue. Ralof or Hadvar will ask the 'Torturer' to open one of the cells, but he has lost the key. This is your first chance to pick a lock, there are some lockpicks in the knapsack on the stool to the right and some more on the counter in the corner.
> In the cell you'll find a 'Spell Tome', don't confuse a Spell Tome with a 'Skill Book', a Spell Tome will give you access to a new spell the first time you activate it from your inventory, whereas a Skill Book, (50 of which are required for the 'Reader' achievement) will raise a particular Skill one point upon activating it.
> Catch up to Ralof / Hadvar. NOTE: You need to pick '50' locks for the 'Thief' achievement, there are a few novice locked cells as you continue on, it is a good idea to start working on picking locks.
> Follow your companion as you proceed through some corridors then reach a sewer room where you'll fight up to 5 enemies, 2 of which will be archers across the room. This is the first bow and arrows you'll encounter for all you Thief class and light warriors out there. Follow your companion on as he drops a drawbridge and moves through into a cave, SAVE.
> Now follow Hadvar or Ralof to the exit of the cave through a crevice. When you get outside you'll see a certain large creature flying off into the distance. This will complete the quest and unlock your first achievement of the game:
Complete "Unbound"
Before the Storm
> Once outside the cave SAVE your game, at this point you are entirely free to total and complete exploration of this vast world, you are not bound to follow the Main Story should you choose not to, but it is my advice, for now, to continue a bit more, to get your bearings on the controls and the gameplay. Open your character menu and select 'map', this will give an overview of Skyrim, at this point you don't really have much to look at, but you will notice that Helgen is marked as a white icon, whereas Riverwood, along with the nine major cities are black, this indicates that you discovered Helgen but not anywhere else. Helgen will not count as a discovered location for the 'Explorer' achievement (to discover '100' locations), but from now on everywhere else will, all you need to do is turn the marker white.
> Your next objective is to visit the small village of 'Riverwood' down the way and meet up with your companion's friends or family. There is a little exploration and hunting along the way but try to stick with your companion for now.
> You will soon encounter your first ' Standing Stone '- in fact three of them, known as the 'Guardian Stones', at the side of the road, three different obelisk-style stones that when activated will allow a certain set of skills to increase 20% faster.

Here are the skills that each stone boosts:
- The Warrior Stone - Block, Heavy Armour, One-Handed, Smithing, Two-Handed, and Archery (if you have patch 1.2).
- The Mage Stone - Alteration, Conjuration, Destruction, Enchantment, Illusion, and Restoration.
- The Thief Stone - Alchemy, Archery (if you don't have patch 1.2), Light Armour, Lockpicking, Pickpocket, Sneak, and Speech.
Choosing your birthsign will unlock:
Select a Standing Stone blessing
There is an achievement for finding '13' Standing Stones, aptly called 'Standing Stones'. You do not need to activate them, just find them so they are marked on your map, the Guardian Stones will count as three. It is possible to revisit the same stones repeatedly for the achievement to unlock however I have integrated the locations of all 13 Standing Stones into the main quest lines of the game and you'll find their locations listed in the Miscellaneous Achievements page of this Walkthrough.
> SAVE and continue on to Riverwood, this path offers some good basic exploration and hunting that will not disrupt your tutorial. There will be some wolves and possibly some Elk along the road that you can kill for their furs, meat and ingredients used in alchemy. You will also find a small bandit camp off to the north you could plunder to find a treasure map that can be followed. And further southwest you'll find a 'Shrine to Talos' it's worshipers have been slain and a 'Thalmor' stands over them, killing him and finding a note on his body will reveal his motives.
> You should visit 'Embershard Mine' now, it's just around the corner from the Guardian Stones. Outside you'll find a 'Woodcutter's Axe' and a 'Chopping Block', pick up the axe then activate the block to chop some wood. Now proceed into the mine and kill the two bandits inside, near the fire down on the right is a pickaxe and a iron ore vein, pick up the axe and activate the ore vein to mine some ore. Ore deposits stand out a bit from surrounding terrain by having various coloured veins in them, an Iron Ore deposit looks something like this:

Also the Smithing Skill Book 'Light Armour Forging' can be found on a table in the forge area.
If you don't fancy visiting the mine just yet, don't worry, there will be dozens if not hundreds of opportunities to mine ore, chop wood and cook food throughout your Skyrim career, and a second opportunity to visit Embershard later. See the 'Manual Tasks' section of the Miscellaneous Achievements' page for more information.
> Whichever path you choose you should find your companion at Riverwood; if you followed Ralof you will be directed to a female Nord lumberjack named 'Gerdur' and if you followed Hadvar you will be directed to a Nord blacksmith named 'Alvor'.
> Talking to either contact will direct you on to the Jarl (king) of the region, in this case, it will be the Jarl of Whiterun 'Balgruuf the Greater' and they will give you some useful supplies to help you on your way.
If, for whatever reason, your contact is dead, or as a bug they will not advance the quest, you can just continue on to Whiterun with the main quest without talking to them .
> If you spoke to Gerdur she will give you the key to her house, and if you spoke to Alvor you can go into his house, this will grant you permission to take anything you wish from that house, within reason, for free. You can use the 'Cooking Pot' there to cook some of the food you should have gathered by now, and if you visited Embershard Mine then you'll unlock:
Chop wood, mine ore, and cook food
> You can also sleep there if you want to rest. Sleeping will heal you to full health, magicka and stamina and advance time for how many hours you choose up to a maximum of 24. Upon awaking you will receive the 'Well rested bonus' and all your skills will increase 5% faster for eight in-game hours (24 real life minutes).
> It would be advantageous, and related to an achievement, regardless of who your contact in Riverwood was, to speak to 'Hod' (Gerdur's wife) about chopping some wood (if you didn't visit the mine). To chop some 'Firewood' you have to first find a woodcutter's axe. There will be one near the pile of wood at the Mill, you do not need to be holding it just have it in your inventory then activate the chopping block, when you have some firewood go talk to Hod and he will pay you for it.
This aspect of the game may seem laborious and complicated at first, but once you know what you're doing it's much faster and easier, also you never need visit a Blacksmiths again if you really don't want to, and definitely not if you are a Mage. However the Smithing aspect of the game can be very advantageous, especially as a Warrior, and mastering their techniques will improve your efficiency in combat and in dialogue, making Smithing an integral part of the game experience.
> You should at this point explore the village a little, talk to some people about the dragon attack and other things, enquire about the area and make sure to visit the local store, the 'Riverwood Trader', here you can sell your unwanted items and buy some useful supplies. Talking to 'Lucan Valerius' will continue the game tutorial and activate a small side-quest to retrieve a special item from a nearby cave called 'Bleak-Falls Barrow'. This side-quest is not mandatory and the next Main Story quest will direct you to there anyway. While inside the store see if you can 'Cook some food' using the cooking pot by the fire, try to find some basic ingredients and use the pot to make a meal to eat that can restore health or stamina.
> Also found in Riverwood is the first opportunity to gain the 'Hero of the People' achievement very quickly. Try to find a child named either 'Frodnar' or 'Dorthe', if they're playing 'tag' you may be able to join in and every tag you complete will count as a miscellaneous objective. If you can't find either of them, or they're not playing tag, just be on the look out for other children in the following towns and offer to play tag with them: Solitude, Whiterun, Riverwood, Morthal and Markarth and with the Hearthfire DLC installed, tag can be played with your adopted children as well.
Successfully completing '50' miscellaneous objectives will unlock:
Complete 50 Misc Objectives
> There will be a friendly military camp and a farm on your left as you go, take the right towards the stables and approach the city gates further in, SAVE.
> Upon arriving at the main gate, a guard will tell you the city is closed to visitors. Any dialogue option you choose will let you into the city, except for trying to intimidate, and don't attack the guard. You can also pickpocket the key to the door from the guard if you are quick. If you have a bounty in Whiterun hold, then after your arrest (if you either serve a jail sentence or pay a bounty of at least 25 gold) you will be outside 'Dragonsreach'.
NOTE: You can purposely get caught pickpocketing the guard and serve time in jail to go for the 'Wanted' achievement now. Make a SAVE before trying to pick the guard's pocket, then choose 'I Submit, take me to jail'. Once inside your cell make sure to SAVE before attempting to escape the cell by picking the novice locked trapdoor. Once the achievement unlocks, reload the save. (See the 'Crimes' section of the Miscellaneous Achievements page for more information).
Escape from jail
> Once inside SAVE, follow the path up to Dragonsreach and enter. When you approach the Jarl, a Dark Elf Nightblade named 'Irileth', who serves as the Jarl's Housecarl (personal bodyguard), will ask you why you are interrupting their meeting, again any dialogue option will allow you to see the Jarl, this will complete this quest and automatically start the next one.
Bleak Falls Barrow
> After you tell Jarl Balgruuf about the dragon attack on Helgen he will order some troops to Riverwood and reward you with some levelled armour (whether you receive light or heavy armour will be determined by the highest level you have in either). The Jarl will then direct you to the court wizard 'Farengar Secret-Fire', who is an expert on dragon lore.
> Talk to Farengar, he wants you to retrieve a 'Dragonstone'- he knows where one can be found- an ancient Nordic tomb near Riverwood, named 'Bleak Falls Barrow', SAVE.
> You may want to take a look around Whiterun at this point, starting with Dragonsreach itself, do not kill anyone or steal anything (unless you know what you're doing). If you are a thief you may want to try out some pickpocketing or sneaking around. The Illusion Skill Book 'Before the Ages of Man' can be found in the Jarl's Quarters.
You can begin the 'Enchanting Tutorial' at Farengar's arcane enchanter if you have any enchanted weapons or clothing (you may still have the mage's robe from Helgen which you can use to learn a new enchantment). And if you have a filled soul gem, (you could steal one from Farengar's study), you may be able to make a new enchanted item (see the 'Enchanting' section of the Miscellaneous Achievements' page for more information).
If you have smithed an item, enchanted an item, and made at least one potion, you will now unlock:
Make a smithed item, an enchanted item, and a potion
Otherwise just keep a look out for other opportunities during your quests or see the relevant sections in the Miscellaneous Achievements page.
- The Archery Skill Book 'The Black Arrow V2' found under the counter of the 'Drunken Huntsman'.
- The Archery Skill Book 'The Marksmanship Lesson' in a display case in the living quarters of the 'Jorrvaskr'.
- The Heavy Armour Skill Book 'Hallgerd's Tale' on the table in the main hall of the Jorrvaskr.
- The Two-Handed Skill Book 'Song of Hrormir' in the basement at the end of the hall in the living quarters of the Jorrvaskr.
- The Smithing Skill Book 'The Armorer's Challenge' found at the Skyforge, above the Jorrvaskr.
- The Block Skill Book 'Death Blow of Abernanit' found on a table in the catacombs of the 'Hall of the Dead'.
- The Enchanting Skill Book 'Enchanter's Primer' found on the bedroom floor of 'Carlotta's Valentia's' house.
- The Restoration Skill Book 'Withershins' found in the 'Temple of Kynareth'.
- The Speech Skill Book 'The Biography of the Wolf Queen' found on a shelf near the counter in 'Belethor's General Goods'.
- The Two-Handed Skill Book 'Battle of Sancre Tor' found on a shelf in the west bedroom in the 'House of Clan Battle-Born'.
> Once in Riverwood SAVE, you may recall that you had a choice to activate (or you did activate) a side-quest for Lucan Valerius at the Riverwood Trader, this coincides directly with the main quest. So if you didn't activate it then you should now for an extra reward afterwards and a side-quest bonus.
> Bleak Falls Barrow is a great beginner-style dungeon that will introduce you to a few more sinister and challenging elements of the game, elements that you will encounter, in varying degrees of magnitude, throughout your Skyrim adventures.
At this point you may want to start exploring a bit more to find Skill Books and to build towards the 'Delver' achievement of clearing '50' dungeons. Just to the south of Bleak Falls Barrow is a little cabin called 'Anise's Cabin' where you will find the Alchemy Skill Book 'Song of the alchemists' on a table. You may also want to check out Embershard Mine if you previously missed it.
> The old ruin of Bleak Falls Barrow is just west of Riverwood, head there on foot. As you approach the doorway you may take note of wonderful stone-work. Looking at these you may begin to appreciate the depth and sheer scale of Skyrim, ancient words and runes scrawled into the stone, once serving as warnings or sacred rites, written by a long forgotten race.
Bleak Falls Barrow has some side-plots to it, if you go blundering in, you will miss opportunities to overhear the bandits inside talking about their activities. In most cases listening to guards and other enemies can give you valuable information such as; where certain keys are, or how to unlock secret passageways etc. If you sneak you will encounter such a conversation early on inside this ruin.
> After you're ready to move in kill them in your preferred manner and proceed on, deeper into the catacombs.
> Further in you will encounter a bandit trying to open a locked gate, he will fail. After he is dead it is up to you to unlock the gate by arranging the pillars in the correct order and pulling the chain. Look around and you will notice some symbols on the upper level, one has fallen to the ground, you can deduce from these symbols that the combination is: Snake, Snake, Whale.

There will be more puzzles very similar to this through the future exploration of Nordic Ruins, the ancient Nords used these codes to lock away precious treasures, and unknown artifacts, or to protect the tombs of important individuals. Activate the pillars so the combinations match and then pull the chain to open the gate.
If, for whatever reason, the pillars do not work correctly try this page for a possible bug fix:
http://www.uesp.net/wiki/Skyrim:Puzzle_Totems#Bugs .
> On the table in front of you as you enter the next room is a copy of the Pickpocketing Skill Book 'Thief'. Head down the spiral staircase and SAVE.
> Through further eavesdropping you will find some more of the story behind Bleak Falls Barrow and more information about the illusive 'Golden Claw' you are after. You'll soon come across a Dunmer Thief by the name of 'Arvel the Swift'- I'll leave it up to you to decide what to do with him.
> Whatever happens you should proceed further on into the catacombs. If Arvel dies be sure to take the Golden Claw and his journal from his body. You will begin to encounter 'Draugr' these are ancient Nordic warriors who have been reanimated. Draugr were once followers of 'Dragon Priests' in ancient times, and when these priests died they also died with them. They were later reanimated, and then sealed into the tomb where they would periodically awaken in order to worship the priests and transfer energy to them to maintain their undead state. Some draugr instead guard treasures buried in barrows and tombs. They often rest in catacombs to awaken and fight when they are disturbed. Always SAVE after killing any Draugr that you feel was a challenge or after groups of them.
> With the claw and journal in your possession you are now fully equipped to tackle the rest of Bleak Falls Barrow and uncover it's secrets. Remain cautious for any traps and proceed on killing any draugr you encounter until you find a room with a waterfall.
> Pull the chain and head down into the underground stream, be careful not to fall off at the end. Now take the narrow tunnel leading south. You'll emerge on a bridge halfway down the waterfall. Head all the way down to the bottom for some minor loot in a locked chest, then return to the bridge and head north. The final room is protected by a leveled draugr. Proceed through the door to 'Bleak Falls Sanctum'.
> Once inside the sanctum SAVE, proceed through until you can climb the wooden structure and over the bridge to open an iron door. You will encounter another puzzle with three rotating rings. If you read Arvel's journal you will discover that he was on the right track, and by examining the symbols on the Golden Claw you will discover the order in which to arrange the rings and open the door.

> You will come to a large open chamber where you will find your first 'Word Wall' - the large grey structure to the right in this image:

> After learning the Word, SAVE, the sarcophagus will burst open and a boss-level 'Draugr Overlord' will step out and attack you. Use your preferred combat style to defeat him, you will not be able to use the Unrelenting Force Shout yet as it requires a dragon's soul to unlock it. Draugr are generally weak to fire attacks but they are immune to poisons. Use your weapons and/or magics to defeat the boss and then examine his corpse for the 'Dragonstone', the item requested by Farengar back in Whiterun.
- A bug can occur here that makes it impossible to loot the Dragonstone. Bethesda technical support recommends reverting to a save prior to you entering the dungeon, raising your level, and then returning to the Dragonstone quest.
> Before leaving, look behind the small waterfall for a chest, then climb up the stairs and activate the handle which will elevate the stone wall and bring you to the exit of Bleak Falls Barrow. Once outside you can delete the SAVE I told you to keep before you entered the ruin and make a new SAVE.
> Return to Riverwood first to deliver the Golden Claw to Lucan, he will thank you and reward you, you can then take items from his store that are not marked red for free, and get lower prices from him from then on.
WARNING: Completing the next quest 'Dragon Rising' will activate the random spawning of dragons all over Skyrim, these dragons can spawn in towns and cities, and they not only cause the deaths of useful and even quest related people, but they can also cause multiple glitches across many quests. It is therefore strongly advised, at this point to avoid the Main Story quest line for now, especially if you plan on completing only one playthrough.
You should navigate instead to the 'Daedric Artifacts' page of this Walkthrough and gain as many artifacts as you feel necessary before returning here. You can also begin other quest lines, such as 'The Companions' and 'The Civil War' (up to 'Message to Whiterun') to help you level up to the required character levels.
Once you have completed all Daedric quests except 'The Whispering Door' for the 'Ebony Blade' which requires completion of Dragon Rising, you can proceed with the Main Story.
> Now return to Dragonsreach in Whiterun and SAVE. Find Farengar with his new female Breton companion 'Delphine' (you may have seen her at the Sleeping Giant Inn in Riverwood). Listen to their conversation for more important plot information and Farengar will take the Dragonstone from you and thank you. He will then direct you to the Jarl for a reward and the quest will be complete, this will unlock the story progression achievement:
Complete "Bleak Falls Barrow"
Dragon Rising
> When you are ready to proceed with the Main Story, take the Dragonstone to Farengar, SAVE. Irileth will approach with news of another dragon sighting just to the west of Whiterun at the 'Western Watchtower'. Follow Farengar over to the Jarl who will command that you aid Irileth in the investigation and possible battle with the dragon. After the conversation SAVE.
At this point the Jarl will reward you for retrieving the Dragonstone and allow you to buy a house in Whiterun. To unlock the 'Citizen' achievement, simply talk to 'Proventus Avenicci', the Jarl's personal steward, about buying a house in Whiterun, if you are having trouble finding him, you can get a quest marker on him through a miscellaneous task given by his daughter 'Adrianne Avenicci', who can usually be found outside of Warmaiden's, just inside the gates to Whiterun. Provided you have the 5,000 gold to pay for the house Proventus will allow you to buy 'Breezehome' immediately. Buying your first house will unlock:
Buy a house
If you don't have enough gold to buy the house you can check out the 'Making Money' section of the Miscellaneous Achievements page of this Walkthrough, or simply return later when you can afford it. For all additional information regarding houses, see also, the 'Houses' section of the Miscellaneous Achievements page.
> Now follow Irileth as she makes her way to the 'Guard Barracks' to recruit some help. After a short speech you will all head out to the watchtower, or you can meet her out near the road, SAVE.
> Follow the road, you will find the tower smoking and damaged with most of the tower's guards dead. Irileth asks you to search for survivors, you will find the only survivor staggering about near the north side of the tower. After this you will hear warnings of a dragon approaching, SAVE.
> This particular dragon is known as 'Murmulnir'- his name means; 'Allegiance-Strong-Hunt' and he has been waiting for many years to return once more to the skies. Murmulnir is resistant only to fire, so using lighting or ice attacks is advised, if you have neither then the bow and arrow is the most preferred weapon. If you only have hand held weapons you will have to either grab a bow from a fallen guard or wait for Murmulnir to rest on the ground and rush over to attack him. Be warned about ground attacks with dragons, they have extremely powerful physical attacks and it is best to stay back. Whilst in the air Murmulnir will use Thu'ums to attack you and the guards (and any other living thing in the area). Stay near the tower, if you become low on health; retreat inside and use spells, potions or food to recover.
> After losing a certain amount of his health (just over a quarter) Murmulnir will permanently land near the tower. Continue to use ranged attacks if you can and use the rocks and walls for cover against his Thu'um attacks, if you get too close he will change to physical attacks using his jaws, legs, wings and tail. Help Irileth and any remaining guards to bring him down for good. Irileth is quite effective and since she is an 'Essential NPC' (Non-player Character) she cannot be killed by any means, like any essential NPC if her health gets too low she will go down on one knee and become invincible, slowly recovering health until she is fit to stand again.
> Once Murmulnir is killed his soul will miraculously stream towards you and you will absorb it, this will indicate that you are the 'Dragonborn' of prophecy- the only living individual who can permanently kill a dragon by taking its soul. This will unlock:
Absorb a dragon soul
> Before leaving the tower search around for any loot, it's OK to take anything from the fallen guard's bodies and be sure to check the skeletal remains of Murmulnir. A dragon corpse will always contain some 'Dragon Scales' and 'Dragon Bones', these are valuable, albeit heavy, items that you can use to make highly advanced armour, once your Smithing skill is high enough. For now you can sell all these items or keep anything you feel may be valuable to you, remember not to clutter up your inventory with rarely used items though.
> SAVE before heading back to the Jarl in Dragonsreach to report what happened, listen out along the road for an almighty voice in the sky shouting 'Dovahkiin!'. After reporting to the Jarl he will conclude that the voice you heard in the sky was that of the 'Greybeards- The Masters of the Voice' summoning you to 'High Hrothgar'. He will say that being summoned by the Greybeards is a great honour and you should seek an audience with them immediately. Before you go however the Jarl will make you the honourary 'Thane of Whiterun', this gives you leave to explore any area of Dragonsreach and gives you favour with all the guards and people throughout the hold of Whiterun. Guards will also pardon you for most crimes. You will also receive a levelled magic axe as a symbol of your office and you will be appointed a housecarl (bodyguard) called 'Lydia'.
> You will unavoidably meet Lydia on your way out, she is a Nord Warrior highly skilled in Heavy Armour, One-Handed combat, Archery and Block. You can recruit her as a follower is you wish and she will be very useful at these early stages of the game, offering combat assistance, enemy warnings, valuable information about anywhere you go, and she will carry some of your loot for you. There is a lot of information regarding the follower aspect of Skyrim; you can give them commands and there are some very interesting and useful aspects of the game to be found with them, so for all information regarding followers see this page:
http://www.uesp.net/wiki/Skyrim:Followers
The Way of the Voice
> Before heading out to High Hrothgar SAVE. High Hrothgar is an old fort located halfway up the tallest mountain in Tamriel called the 'Throat of the World' you can see this mountain from almost anywhere in Skyrim, it lies to the southeast of Whiterun. High Hrothgar is difficult to reach however if you do not head to the settlement of 'Ivarstead' first, so your destination for now is Ivarstead.
If you're are following the Comprehensive Playthrough page or you have been to Ivarstead before, scroll down to where it says 'Ivarstead'. Otherwise follow the points below.
> Head out of Whiterun's main gates and take the east road passing by Honningbrew Meadery then east across the stone bridge. Your quest marker will be pointing directly southeast, but you can't travel over or through the Throat of the World, you'll have to make your way east northeast around the great mountain.
> SAVE and then follow the road as it stretches east and a little north. To continue with your progression towards the 'Delver' and 'Reader' achievements, there is an Archery Skill Book called 'Vernaccus and Bourlor' found on top of a barrel at 'Graywinter Watch' along a short road to your left. After this be on the lookout for the 'Ritual' Standing Stone on your left, this is another obelisk birthstone that will contribute towards the 'Standing Stones' achievement. The Ritual Stone will grant you the ability to raise people and creatures from the dead to fight for you, this is much more powerful than the normal 'Reanimate Corpse' spells because it can be used on larger creatures such as Mammoths and Giants and once they die they do not turn to ash and can be reanimated again. Bear in mind that if you choose this new birthsign you will lose your current birthsign. Whether you want the sign or not make sure to discover the Standing Stone so it is marked on your map and then SAVE before continuing on.
> Be careful ahead, there will be a giant's camp called 'Guldun Rock' on a path to your right, and you'll have to pass the heavily guarded 'Valtheim Towers' on the main road, the giants sometimes wander down to the main road and the bandits at Valtheim like to ambush travellers. SAVE if you encounter some hostiles and follow the road as it winds north then back south.
> If you feel adventurous you can brave the giants at Guldun Rock and enter 'Guldun Rock Cave' to find the Heavy Armour Skill Book 'The Knights of the Nine'. Also you should have already got the Archery Skill Book 'The Black Arrow V2' from the Drunken Huntsman in Whiterun, but if not, there is another copy in the north tower of Valtheim Towers. A bit further along the road and down near the river you can find the troll infested cave called 'Darkshade', inside the second room lying near the water is the Heavy Armour Skill Book 'Orsinium and the Orcs', note that a little further along this same book can be found in an easier cave inhabited by bandits, called 'Lost Knife Hideout' mentioned below. Also, after Darkshade, over to the east, past another giant camp called 'Cradlecrush Rock', you'll find a 'Shrine of Talos' where the Heavy Armour Skill Book '2920 Midyear V6' can be found.
Remember to SAVE after entering these areas, finding the skill book, and after leaving.
> If you didn't get the Two-Handed Skill Book 'Song of Hrormir' in the Jorrvaskr in Whiterun another copy can be found to your south in the 'Abandoned Prison' in a storage room filled with books and a master-level chest. Up the river to your west is a 'Shrine of Dibella' where you'll find the Light Armour Skill Book 'Rislav the Righteous' among the debris there.
> Return to the road and bear right when the path forks and just after this look out for a small dirt path on your right, just before 'Fort Amol', that's your shortcut to Ivarstead.
> Continue along this narrow winding path past the bandit cave 'Lost Knife Hideout', where, if you missed it at Darkshade the Heavy Armour Skill Book 'Orsinium and the Orcs' can be found on a table near a sleeping guard, in the collapsed fort section. SAVE after entering the cave, finding the skill book and after leaving.
> After some winding, and possibly some random animal encounters, you should emerge at a river that has a log bridge across it, but before this there is a Conjuration Skill Book called 'The Warrior's Charge' near some rocks on the right side of the path. Be careful crossing over the river here because, on the other side, in a small over-crop, there could be a 'troll' waiting to ambush you, at lower levels trolls can be very dangerous, so SAVE, and then proceed on, there will be some loot in the over-crop with a skeleton. Continue west and south along the path, don't take the stone bridge on your right as you have arrived at Ivarstead on your left, SAVE.
> Find a Nord named 'Klimmek' he will give you some valuable information about High Hrothgar and the Greybeards and you can complete a miscellaneous objective here to take some supplies up to the Greybeards for him.
> You may wish to visit the 'Vilemyr Inn' while you're here for a few supplies and to rid yourself of some weight you may have picked up. You can also talk to 'Wilhelm' about the haunted barrow nearby that is putting the town in decline and offer to help him out. This side quest is highly advised at this point, since it is the best chance to unlock the 'Kyne's Peace' Shout from the Word Wall there in 'Shroud Hearth Barrow', you will not encounter this Shout during any quest line. Also if you missed the Illusion Skill Book 'Before the Ages of Man' back in Dragonsreach another copy can be found on a stone altar near the entrance.
> The stone bridge on the north side of the town marks the long way up to High Hrothgar, there are some dangerous enemies up there, and there is no help of any kind along the way, so make sure you're prepared before heading up and remember to SAVE every so often. Also keep a lookout for the ten stone plaques along the way, if you can find and read all ten you will be awarded the 'Voice of the Sky' power that causes wildlife to neither flee nor attack you for 24 hours.
> Eventually you will reach the doors of High Hrothgar, head inside, SAVE and you'll be greeted by the powerful Greybeard elder 'Master Arngeir'. Arngeir is the only Greybeard you can talk to as the others do not yet have the mastery of the Voice to control their powerful Thu'ums. He will then give you the second word of Unrelenting Force, you will learn it by approaching the writing on the ground. Like before you will automatically unlock this Word without doing so from your menu. As a rare bug you are unable learn the Shout on the ground, the only fix for this bug is reload your previous save .
> Arngeir will ask you to prove yourself as the Drgaonborn, to do this simply use the Unrelenting Force Shout in their presence, (don't worry about harming them it's fine). Just use your Shout on the spectral practice dummies that the Greybeards spawn, three times.
> Head outside and SAVE, the Greybeards will then teach you the first word of the 'Whirlwind Sprint' Shout by casting it upon the ground like before, and like before, it will automatically unlock it for you. This Shout allows you to burst forward very quickly, a very useful Shout throughout your Skyrim adventures. After practicing the Shout, by getting through the gates before they close, Arngeir will give you your next task; to retrieve the 'Horn of Jurgen Windcaller' from a faraway Nordic ruin called 'Ustengrav'. This will complete the quest and automatically begin the next quest, also unlocking:
Complete "The Way of the Voice"
*Note that after completing this quest you will now have access to the Dragonborn DLC main quest line.
The Horn of Jurgen Windcaller
> Arngeir will mark Ustengrav on your map, you cannot fast travel directly to Ustengrav, you can only use Fast travel when you have previously discovered a location by physically walking or riding there. So you can either walk, ride, or fast travel back to Whiterun and take a carriage to Morthal.
> If you decide to make the very long and dangerous trek there on foot, you should walk or fast travel back to Whiterun first, and buy a horse for 1000 gold. Visit the stables outside of Whiterun and talk to a Nord named 'Skulvar Sable-Hilt' and buy a horse from him. Walk/ride through the fields northwest, if you didn't previously go to Embershard Mine then you can find the Smithing Skill Book 'Light Armour Forging' in 'Silent Moons Camp', it's near the Lunar Forge.
> Otherwise make your way northwest and then directly through the giant ruin of 'Labyrinthian'. Be warned however, that many difficult 'Frost Trolls' guard the exterior of that ruin. Continue west then north to the town of 'Morthal'. Here you can restock on supplies and you have the chance to find a further '9' Skill Books:
- The Destruction Skill Book 'Response to Bero's Speech' found in the 'Thaumaturgist's Hut'.
- The Restoration Skill Book '2920 Rain's Hand V4' on a table in 'Falion's House'.
- If you didn't get it in Fort Amol, the Enchanting Skill Book 'Catalogue of Armour Enchantments' on a shelf in 'Falion's House'.
- If you didn't find at the Shrine of Talos, the Heavy Armour Skill Book '2920 Midyear V6' behind a barrel in the 'Guardhouse'.
- The Illusion Skill Book 'The Black Arts on Trial' found 500 ft to the southeast of Morthal, on a snow-covered dragon mound out the southern gates.
- The Lockpicking Skill Book 'The Locked Room' found on a bookshelf upstairs in 'Highmoon Hall'.
- The One-Handed Skill Book '2920 Morning Star V1' found in a bucket on top of the barrel to the left of the bed in 'Jorgen and Lami's House'.
- The Pickpocket Skill Book 'Aevar Stone-Singer' found in 'Thonnir's House'.
- The Restoration Skill Book 'Racial Phylogeny' found inside a basket in the 'Moorside Inn'.
> Alternatively you can use the carriage service between major cities; outside of Whiterun you should find the horse and carriage near the stables, talk to the Nord carriage driver 'Bjorlam' there and ask him to take you to 'Morthal'.
> Once at Morthal you may want to check out the town for supplies, side quests or Skill Books (see above) if you wish, when you are ready SAVE and head out northeast through the marshes to Ustengrav.
> Continue on the main road north; the Apprentice Standing Stone can be found off to the northwest. You can find the Restoration Skill Book 'The Exodus' in a small, unmarked campsite, directly between Solitude's docks and The Apprentice Stone, not the camp outside 'Folgunthur' but to the west of it. You can, if you wish, visit Folgunthur to find the One-Handed Skill Book 'Fire and Darkness' in the lower level. It is well worth clearing Folgunthur now as there is also a Word Wall there containing a Shout called 'Frost Breath' that will not be encountered during any quest line.
> Ustengrav itself is over to the east of Folgunthur. When you approach Ustengrav SAVE, you'll encounter some bandits fighting a necromancer, after this proceed inside and SAVE. Begin to sneak through the old ruin, you'll find that the undead draugr and mages that occupy this first area are hostile towards each other so it may be tactical to play them against one another then finish off the victors. Fight your way down to the depths of Ustengrav, SAVE.
> You will pass a forested area, a waterfall and a bridge, continue on down the winding walkway and you'll soon come to another waterfall, at the bottom of this there is another 'Word Wall' . Approaching this wall will grant you the 'Become Ethereal' Thu'um, useful for avoiding attacks and traps by turning your body into an invincible ghost-like state for a short time (use a dragon's soul to unlock the Shout). SAVE.
> The Horn of Jurgen Windcaller is on the opposite side of the bridge. There is a tunnel ahead blocked by three gates. Each of the strange nearby rocks glow red at your approach, acting like keys to the gates. When they glow they will lift one of the gates. However, the gates will shut again when you get too far from the rocks. You must use the Whirlwind Sprint shout here, to dash through these 'Rock-keys' and open the gates long enough to get through them all. Once you are through to the end, the gates will remain fully open, allowing any followers to catch up. With only one word of the Whirlwind shout learned, getting all three gates to stay open long enough can be tricky.
> The puzzle can be solved by starting at the rock closest to the bridge; sprint by each of the rock-keys until you get close to the tunnel entrance and from there use Whirlwind Sprint to clear all the gates at once. You can also stand in front of the first rock-key, use Whirlwind Sprint, and then run through the rest of the tunnel. It is also possible to stand between the first two rock-keys to open the first two gates, use Whirlwind Sprint and then run, the third gate should still open by then. If you become trapped between gates inside the tunnel, you will find pull chains that will allow you to return and try again.
> Once you're through SAVE, be wary of some fire traps and frost spiders ahead as you continue on. You'll soon come to a large room, it has a very large frost spider hiding in the ceiling waiting to pounce on you, resist poison potions are very useful here. After defeating the spider and her hatchlings SAVE.
> Cut or burn your way through the spider's webs covering the tunnel to the final area. Old Nordic dragon statues will ascend out of the waters as you approach the resting place of the Horn of Jurgen Windcaller. Unfortunately, there's only a mysterious note addressed to you, where the Horn should be. This note wishes for you meet the anonymous author by renting an attic room at the Sleeping Giant Inn in Riverwood.
> You must now exit the ruin; use the door to the east and exit Ustengrav, SAVE, you can fast travel straight back to Riverwood via the map if you like, or if you fancy, you can walk or ride there.
> Once in Riverwood SAVE, head into the Sleeping Giant Inn and talk to Delphine about renting the attic room, she will tell you that there is no attic room, but that you can take the one on the left. Delphine follows you in and reveals that she was the one who took the Horn and she will then hand it over to you. She asks to speak privately, and she will lead you to the room across from yours. Delphine opens the wardrobe door revealing a secret room beneath the inn. She explains that her organization has been looking for someone like you. This will begin the quest 'A Blade in the Dark', SAVE and exit the Inn.
A Blade in the Dark
> In the secret room, in the Sleeping Giant Inn, Delphine will explain that dragons are not only returning to Skyrim- but that something or someone is purposely resurrecting them from their burial mounds. Not only that but she concludes that only the Dragonborn can stop them. However Delphine is not fully convinced that you are the real Dragonborn and she wants to witness you kill a dragon. According to her 'Dragonstone' map the next dragon will be resurrected in a burial mound near 'Kynesgrove'- a small village just south of Windhelm. You can go there now and return the Horn to the Greybeards afterwards or return the Horn now and meet Delphine in Kynesgrove, your choice.
> When you return to Arngeir in High Hrothgar give him the Horn and follow him into the main hall to meet with the other Greybeards. They will recognise you as the true Dragonborn and teach you the final word of the Unrelenting Force Thu'um. This completes the current quest and also, by learning all three words of one Shout, you will unlock:
Learn all three words of a shout
An important note here is that random dragon attacks will dissipate between talking to Delphine and visiting the burial mound at Kynesgrove. If you leave this quest alone then the only dragons you will encounter will be those at Word Walls, this will allow you to control dragon attacks should you find them a nuisance while completing other quests. If you decide to go off now and complete some other pressing quests (such as the Daedric quests) remember to avoid Kynesgrove and return when you are ready.
> You can follow Delphine to Kynesgrove or you can go at your own pace and meet her there. The fastest way to get to Kynesgrove is to fast travel to Whiterun and then take the carriage to Windhelm, once in Windhelm you may want to check around for supplies, side-quests and these '9' Skill Books:
- The Alchemy Skill Book 'A Game at Dinner' on top of a dresser in the middle floor of the 'New Gnisis Cornerclub'.
- The Sneak Skill Book 'Red Kitchen Reader' found under the staircase in the 'New Gnisis Cornerclub'.
- The Conjuration Skill Book '2920 Frostfall V10' found behind the dresser upstairs in 'Belyn Hlaalu's House'.
- The Destruction Skill Book 'A Hypothetical Treachery' found behind a bookshelf in the 'Aretino Residence'.
- If you didn't get it from Guldun Rock Cave, the Heavy Armour Skill Book 'The Knights of the Nine' found on a shelf in 'The Palace of the Kings'.
- If you didn't get it from outside of Morthal, the Illusion Skill Book 'The Black Arts on Trial' from the 'White Phial'.
- The Light Armour Skill Book 'Ice and Chitin' found outside the city in a guard's room under the bridge, between the gate and the stables.
- If you didn't get it inside Bleak Falls Barrow, the Pickpocket Skill Book 'Thief' found on a dresser in the 'Argonian Assemblage'.
- The Speech Skill Book '2920 Second Seed V5' found under the counter of 'Sadri's Used Wares'.
> Head out of the south gates and straight south towards Kynesgrove, just to your left is 'Brandy-Mug Farm' where you can find the Alteration Skill Book 'Daughter of the Niben' on top of the fireplace.
> Over to your right is the fort of 'Morvunskar', if you didn't pick up the Smithing Skill Book 'Cherim's Heart' during the Daedric quest 'A Night to Remember' for Sanguine's Rose then find you'll it here next to the forge along with the Destruction Skill Book 'Mystery of Talara V3' on a bookshelf in the northeast corridor.
> When you get to Kynesgrove, SAVE, a Nord innkeeper called 'Iddra' will run up to you saying that a dragon has been sighted flying over town and that you should get out of there. If you travelled with Delphine, she will run up ahead of you to the burial mound, but if you arrived ahead of her, she will arrive on the mound behind you, don't get too close to the mound, stand back a little.
> Upon arriving you will observe a great dragon called 'Alduin' using his Thu'um to resurrect another dragon called 'Sahloknir', listen to the ensuing dialogue and prepare yourself for a fight. Alduin will order Sahloknir to kill you and Delphine and then he'll fly away to resurrect more dragons (which he actually physically will do in the game from then on), SAVE.
> Sahloknir will be levelled to your character and he will attack you with either fire or frost Shouts depending on your level. Use standard tactics to take him down, establish which Shout he is using and counter it with resistances if you can. Also if you use magic you should use the opposite spell that he uses to inflict the most damage. When he is dead you will absorb his soul and Delphine will acknowledge you as the true Dragonborn, SAVE. Sometimes, as a bug, when you reach the dragon burial mound, Sahloknir will not fully emerge from the ground and does not die when his health reaches zero. This can be fixed by walking far enough out of the dragon's range, which extends as far as Kynesgrove and then walking back.
> Talk to Delphine, she will now reveal any and all information she can- she is the leader of the 'Blades'- a group of dragon hunters and Talos worshippers; the sworn protectors of those of the dragon blood in Skyrim. They are no longer the secret eyes and ears of the Septim Emperors; they were hunted and decimated by the Thalmor and are now only a shadow of their former selves. However the Blades have reformed with the return of the dragons and with your help they believe they can find out who is behind the dragon's return and stop them.
> Delphine concludes that the ones who will benefit most from the dragon's return would be the Thalmor, although this may be a prejudice assumption, you are tasked with infiltrating the 'Thalmor Embassy' near Solitude and investigating them, this begins the next quest 'Diplomatic Immunity', SAVE.
Diplomatic Immunity
> Delphine has no idea how exactly to infiltrate the heavily guarded embassy and asks you to meet her back at the Sleeping Giant in Riverwood to establish a plan. You can walk with her and she will explain some important plot details along the way, otherwise run or fast travel ahead and meet her there.
> Meet her in the secret room in the Sleeping Giant, SAVE, she will remember that the Thalmor sometimes hold an upper class party at the embassy and she comes up with a possible plan, involving sneaking in as a party guest. You are to meet your contact 'Malborn' who works as a Bosmer servant inside the embassy, since the Thalmor are responsible for his family's death, he is well inclined to help you, you will find him in the 'Winking Skeever Inn' in Solitude.
> You can use the carriage service again to get to Solitude quickly. You may want to explore Solitude for supplies, side-quests and these '7' Skill Books:
- The Archery Skill Book 'The Gold Ribbon of Merit' found on a low table in the 'Fletchers' store.
- The Enchanting Skill Book 'The Catalogue of Weapon Enchantments' found in the restricted Emperor's Tower area of the 'Castle Dour'.
- The Light Armour Skill Book 'The Rear Guard' found downstairs in the 'Castle Dour'.
- The Light Armour Skill Book 'The Refugees' found on a shelf in the upstairs bedroom in 'Solitude's Blacksmiths'.
- If you didn't get it from Belethor's General Goods in Whiterun, the Speech Skill Book 'Biography of the Wolf Queen' found in the Jarl's bedroom in the 'Blue Palace'.
- The Lockpicking Skill Book 'Surfeit of Thieves' found in the Pelagius Wing of the 'Blue Palace'.
- The Speech Skill Book 'The Buying Game' found in one of the classrooms in the 'Bard's College'.
> Now find the Winking Skeever inn on the main street, enter and SAVE. You'll find Malborn inside trying to lay low, talk to him and he will tell you that he can smuggle some equipment into the embassy for you. You will be searched before going into the embassy and any weapons found will cause an enormous fight and fail the quest, the game prevents you from being able to do this. So you want to give Malborn a stealth weapon and some lockpicks depending on your character you will have to decide these things for yourself. After giving Malborn the items you can leave the inn, (note there is no need to drop or store your other equipment anywhere at this point Delphine will keep them safe for you after you meet her), SAVE.
> Meet Delphine at the 'Solitude Stables' just southwest of Solitude. Once you arrive, SAVE, and she will ensure that everything went smoothly with Malborn and will then hand you an official invitation along with a set of party clothes and boots to look the part. After you have changed she will take your remaining equipment and you will automatically board the carriage to the Thalmor Embassy.
> You will arrive in the embassy courtyard as the other guests begin to arrive, SAVE. You will be greeted by a drunk Redguard named 'Razelan'. If you approach the entrance a Thalmor soldier will ask for your invitation, show it to him to gain entrance.
> Once you enter, the host 'Elenwen' will seek you out and ask a lot of questions, Malborn is standing right behind her and will soon interrupt and distract Elenwen's attention elsewhere. Talk to Malborn, he will tell you to create a distraction so he can unlock the back door without being seen.
> At this point you have a choice of who to use as the distraction, SAVE. Looking around the room you'll find that the guests (with a few exceptions) are made up of random people that depend on the actions you have taken before this quest. Talking to various guests will reveal that they don't much like the Thalmor and are there out of obligation.
> There are a few possible candidates you can use as a distraction, the easiest to use is the Redguard you met earlier Razelan , he has been refused any more drink so just fetch him some and he'll help you out, but if you wish to use a more interesting distraction see the list below. Not all of these people will help you or even be present, it depends on your relationship with them and some other parameters:
Erikur: A male Nord warrior and Thane of Solitude, wearing fine clothes, talk to him about Brelas.
Proventus Avenicci: A male Imperial steward, wearing fine clothing, you must not have the Daedric quest 'Whispering Door' or the Civil War quest 'Message to Whiterun' active.
Maven Black-Briar: A female Nord, wearing fine clothes, you must have gained a bit of favour with her by completing either the Thieves Guild quest 'Promises to keep' or 'Vald's Debt'.
Jarl Balgruuf the Great: A male Nord warrior and the Jarl of Whiterun, wearing noble clothing, you must have completed the Civil War quest 'Battle for Whiterun' for the Stormcloaks for him to help you.
Igmund : A male Nord barbarian and the Jarl of Markarth, wearing embellished robes, you must have a Speech skill of at least 50 and use persuade for him to help, but you must also have gained his favour a little by helping out the people of Markarth. So completing any helpful side-quest in the Reach Hold is necessary, these may include: 'Dungeon Delving' or 'Kill the Forsworn Leader'.
Jarl Elisif the Fair: A female Nord and the Jarl of Solitude, wearing fine raiment, you must have gained her favour a little by helping out the people of Solitude, this will include completing any helpful side-quest in Haafingar Hold, these may be: 'The Man Who Cried Wolf' or 'Fit For a Jarl'.
General Tullius : A male Imperial and the General of the Imperial Legion, wearing a set of gold-brown and red armour. you must have finished the Civil War quest 'Message to Whiterun' for the Imperial Legion and must not have a Civil War attack going on.
Orthus Endario: A male Imperial and citizen of Windhelm, wearing merchant clothing, you must have completed the side-quest 'Rise in the East' for him in Windhelm.
Idgrod Ravencrone : An elderly female Nord mystic and the Jarl of Morthal, wearing a fur-trimmed cloak, the Hjaalmarch Hold must be controlled by the Imperials and you must have completed the side-quest 'Laid to Rest' in Morthal, and you must also not be in the process of becoming the Thane of Morthal for her to help you.
Ondolemar : A male Altmer and Thalmor Justicar, wearing hooded Thalmor robes, you must have at least 50 Speech skill, you must have completed the side-quest 'Search and Seizure' for him in Markarth and Markarth has to still be under Imperial rule.
Siddgeir : A male Nord and the Jarl of Falkreath, wearing a refined tunic, you must be the Thane of Falkreath and have a Speech skill of at least 50.
Vittoria Vicci : A female Imperial and citizen of Solitude, wearing fine clothing, you must not have completed the Dark Brotherhood quest 'Bound Until Death' but you may need to have started it for her to appear, you must have completed the side-quest 'Spiced Wine' in Solitude for her and you also need at least a level 50 Speech skill.
> Whoever you use as the distraction, once it begins, you should make your way into the kitchen and SAVE.
> Malborn will follow you in and will silence the cook with a threat, then he'll leave you on your own so you can find some evidence tying the Thalmor to the return of the dragons. Remember you are not allowed in this area and any Thalmor that sees you will attack on site.
> Use stealth to avoid the guards. Note, that due to a bug that was never fixed, the Thalmor robes left out for you were meant as a disguise, but they do not work- the game only recognises 'Hooded' Thalmor robes as the disguise instead. You can however, find these worn by a Wizard upstairs, if you can kill him silently and take his clothes then all the other Thalmor will ignore you . If you feel up for it you can just go in 'all swords blazing', but be warned that the Thalmor here are not pushovers and employ some very high level mages.
> Either way you choose make your way upstairs and out into the courtyard, more soldiers are here along with a high level wizard, they will summon multiple 'Atronachs' (powerful elemental beings summoned from the planes of Oblivion) if you engage them, so avoid them if you can. You need to find the other building here called the 'Solar of Elenwen' and enter in sneak mode.
> Once inside SAVE, hide behind the plant in the south western corner and listen to the ensuing conversation between a Thalmor torturer named 'Rulindil' and his informant 'Gissur' about his prisoners.
> Gissur will leave and Rulindil will head downstairs, SAVE then sneak past the guard or kill him then head down into the dungeon. Find the chest in the north western corner to obtain the 'interrogation chamber key' and some documents proving that the Thalmor are not in fact responsible for the dragons' return since they too are investigating their reappearance as well as the Blades.
> Rulindil will be down here with another soldier torturing a Breton rogue named 'Etienne Rarnis' and questioning him about someone named 'Esbern'. After the questioning SAVE, Etienne will pass out and they leave him alone, wait for them to separate if you wish and this time you have to kill them both.
> Rulindil is a very powerful wizard with a lot of devastating spells so it's best to sneak around behind him and slit his throat if you can. With both of them dead SAVE.
> Open Etienne's cell and tell him you are here to help, cut him loose and ask him if he knows anything, he will tell you about Esbern. You can alternatively just look in the chest near his cell for the same answers, if, for example, he is dead.
> After either reading the Thalmor Dossier on Esbern or getting the information from Etienne, head up the east stairs quickly, you need to save Malborn. He has now been exposed as a spy and they will kill him very quickly if you let them. Quickly kill the soldiers and don't hit Malborn in the process.
> After the battle, search their bodies for the trap door key and go back to Etienne who will be waiting near the trap door, or just go to the trap door. (This will also be your last chance to free 'Brelas' if you involved her in your distraction by speaking to Erikur).
> You can now have up to three completely helpless followers; Brelas and Etienne have no further use after this quest apart from the thanks you receive later, Malborn however is a very useful character who can make a future quest a lot easier.
> Enter the 'Reeking Cave' with your followers and SAVE often. There is a dangerous troll down here, so run ahead and kill it before your followers even notice it (they will try to fight it and get killed otherwise). Also if you had a follower (such as Lydia) when you spoke to Delphine at the stables, he or she will probably enter the cave at this point from the other side and help to kill the troll so watch your fire, SAVE. Locate the tunnel with a dead conjurer and grab the 'Unusual Gem' here (this is one of '24' special gems required for a Thieves Guild quest called 'No Stone Unturned' (but not linked to an achievement)). Find the exit and SAVE outside.
> When you leave Reeking Cave you can find the Pickpocket Skill Book 'Beggar' on a table in a ruined house at 'Ironback Hideout' be watchful for the bandits there as well.
If you have been able to locate every Skill Book so far you will unlock:
Read 50 Skill Books
> Also to your northwest you can find the 'Steed' Standing Stone, activating this stone increases carry weight by 100 and removes the movement penalty of armour. It also makes worn armour weigh nothing.
> Now head back to the Sleeping Giant Inn in Riverwood, once inside SAVE, head down into the secret basement and talk to Delphine. When you tell her that the Thalmor have nothing to do with the dragon attacks she will be quite surprised and ask you to explain. When you tell her that they're looking for someone named Esbern, she will be shocked. Delphine knows who Esbern is; he was a fellow Blade, and it makes perfect sense for the Thalmor to blame him for the dragons. When you tell her about Esbern's supposed location in Riften she will immediately task you with tracking him down before the Thalmor do. She will then give you a secret phrase to gain Esbern's trust, thus ending the quest Diplomatic Immunity and beginning the next quest 'A Cornered Rat'.
> Remember to grab your equipment back from the chest before leaving and SAVE. This will unlock the quest related achievement:
Complete "Diplomatic Immunity"
A Cornered Rat
> Head out to Riften and SAVE before approaching the city. This quest is closely tied in to the Thieves Guild quest line and you may want to consult the beginning of the Thieves Guild page in this Walkthrough before deciding how to proceed.
> You may want to look around Riften for supplies, side-quests, getting married (please see the 'Marriage' section of the Miscellaneous Achievements Page for all information), and these '8' Skill Books :
- The Alteration Skill Book 'Reality and Other Falsehoods' found in a basket on top of a bookcase in 'Marise Aravel's House'.
- If you didn't get it from 'Carlotta Valentia's House' in Whiterun, the Enchanting Skill Book 'Enchanter's Primer' found in Honeyside (note you'll have to buy this house in order to enter (see the 'Buying a House' section of the Miscellaneous Achievements page)).
- The Lockpicking Skill Book 'Advances in Lockpicking' on a barrel behind a grille in the sewers.
- If you didn't get it from the Pelagius Wing of the Blue Palace in Solitude during the Daedric quest 'The Mind of Madness', the Lockpicking Skill Book 'Surfeit of Thieves' found in the Jarl's chambers in 'Mistveil Keep'.
- The Pickpocket Skill Book 'Purloined Shadows' found in Constance's bedroom in the 'Honorhall Orphanage'.
- The Smithing Skill Book 'Armorer's Challenge' found between the dresser and the safe in the 'Scorched Hammer'.
- The Sneak Skill Book 'Legend of Krately House' found in the master bedroom of the 'Black-Briar Lodge'.
- The Two-Handed Skill Book 'Words and Philosophy' found on top of a dresser in the southwest corner of the second floor of the 'Mistveil Keep Barracks'.
> It is not necessary to join the Thieves Guild but it is advantageous at this point to do so. You will need to speak with 'Brynjolf' in the marketplace to advance. If you are already a member of the guild you can either speak to 'Keerava' in the Bee and barb for directions or just go directly to the Ragged Flagon under the city and find 'Vekel the Man' who will point you towards Esbern.
> There are some vagrants and a few Thalmor agents in the Ratways, nothing major, take care of them and find Esbern's room in the southwest section of the Ratway Warrens. Give him the secret phrase you learned from Delphine and he'll let you in, SAVE. If you didn't get the One-Handed Skill Book 'Fire and Darkness' from Folgunthur you'll find a copy of it in Esbern's room.
> Esbern knows all about the Dragons, in fact he prophesied their coming and the consequent end of the world. He explains that you are the only one who can stop them and agrees to follow you back to Delphine in Riverwood. Before leaving he needs to gather a few things, SAVE. This begins the next quest 'Alduin's Wall'.
Alduin's Wall
> Esbern will now be a follower, head out of the Ratways the way you came in and back outside, SAVE, fast-travel back to Riverwood, SAVE and enter the Sleeping Giant Inn.
> Once inside listen to some dialogue and then go down into the secret room, Esbern will explain he needs to go to 'Sky Haven Temple', an old Blades headquarters built on ancient Akaviri ruins in the Reach. There is an ancient stone wall there that may reveal the solution to the dragon threat. Delphine recognizes Esbern's description of the Sky Haven Temple as 'Karthspire' and they decide to head out. At this point you can decide to accompany them there or make your own way.
> It is quicker and easier to make your own way by fast travelling to Whiterun, then taking a carriage to the city of 'Markarth' and heading east, be aware however that upon arriving at Karthspire there is a lot of Forsworn enemies and a special dragon attack, so prepare yourself. If you decide to walk there with Esbern and Dephine they may stop following you at various points for various reasons, if this happens simply continue on your own, they will meet up with you later.
> If you decide to go to Markarth first; take some time to stock up on supplies, talk to people for side-quests and consider finding any of these '7' Skill Books :
- The Conjuration Skill Book 'The Warrior's Charge' found on an end table in the Jarl's quarters in 'Understone Keep'.
- The Illusion Skill Book '2920 Sun's Dawn V2' found on the lowest shelf of a bookcase in a long row of books in the inner sanctum of the 'Temple of Dibella', careful this is trespassing, if things go sour, reload save.
- The Illusion Skill Book 'Mystery of Talara Part 4' found in the northeast bedroom of 'Nepos' House'.
- If you didn't get it from the guardsroom outside Windhelm, the Light Armour Skill Book 'Ice and Chitin' found on a wooden table in the 'Guard Tower'.
- If you didn't get it from Chillfurrow Farm outside Whiterun, the One-Handed Skill Book 'The Importance of Where' found on stone table in the 'Guard Tower'.
- If you didn't get it from Falion's House in Morthal, the Restoration Skill Book '2920 Rain's Hand V4' found on a shelf next to the priest's bed in the 'Hall of the Dead'.
- The Speech Skill Book 'A Dance in Fire V7' on a crate on the west side of the sales desk in 'Arnleif and Sons Trading Company'.
> Once you're finished in Markarth, SAVE and head east out of the main gates. Follow the main road past 'Salvius' Farm' and over the bridge. Pass a military camp on your right and you'll notice that the road splits north and east. If you want to find the 'Lover' Standing Stone turn north and find it past 'Kolskeggr Mine'. The Lover stone makes all skills increase 15% faster.
> If you head east over the bridge then past 'Reachwater Rock', you'll find the Conjuration Skill Book 'The Doors of Oblivion' a little further east and around the rocks to the left inside 'Reachcliff Cave'.
> Upon arriving at 'Karthspire Camp' SAVE, you will be greeted by Esbern and Delphine outside. They will assist you with the enemies there. Tell any followers you may have (except Esbern and Delphine of course), to either wait outside of the temple or go home to prevent a possible bug here.
> The Block Skill Book 'A Dance in Fire V2' can be found on a crate inside one of the lower tents at 'Karthspire Camp'.
> Make sure all forsworn are dead before entering the temple , SAVE and head into the ruins. If Esbern and/or Delphine are stuck in combat mode, even though there are no enemies about, you have to fix this to proceed with the quest, to fix it either wait '10' hours or leave the temple and then go back in.
> Inside the ruins you will encounter three pillars; Esbern will explain that the most important one is the one with the Dragonborn symbol on it- 'two dragon heads facing each other and an arrow pointing down', turn the three pillars until the Dragonborn symbol is facing you, this lowers a bridge on your left to cross:

> In the next chamber you will be confronted with a floor made up of pressure plates, they are inscribed with the same three symbols as the pillars. Once again the Dragonborn symbol is the key; step only on these tiles to reach the other side. Stepping off the route will cause a fireball to be launched, so moving slowly is advisable. If you prefer, you can use the Whirlwind Sprint shout to move across without triggering the trap, SAVE.
> Once safely on the other side, pull the chain to allow the Blades to cross, and exit the chamber. You will need to travel across a pair of bridges. Esbern heads for a large stone head built into the far wall. In front of the head is a large carved circle which Esbern declares to be a 'blood seal', requiring the blood of a Dragonborn to function. Activating the circle prompts you to cut your hand, dripping blood on the circle. The stone head then retracts, and an opening is revealed, SAVE.
> Proceed along the tunnel ahead. Esbern will go over to the far wall, a special wall known as 'Alduin's Wall'. He moves over to inspect it, the wall depicts the history of Alduin and the 'Dragon Cult' and details a prophecy regarding their defeat. Esbern concludes that the ancient Nords actually used a Shout to defeat Alduin, and Delphine turns to you asking if you know of such a Shout.
> You do not have the Shout required, but the Greybeards might know about it. Esbern will go on to explain a few more details. You should explore the temple a bit to locate the One-Handed Skill Book 'Mace Etiquette' on a table in the armoury along with the levelled sword 'Dragonbane' found opposite Alduin's Wall.
> When you're ready, leave the temple via the double doors up the stairs and fast-travel to High Hrothgar to see the Greybeards, this will prompt the next quest 'The Throat of the World' and unlock another story related achievement:
Complete "Alduin's Wall"
The Throat of the World
> Upon arriving at High Hrothgar SAVE, find Arngeir and tell him that you need to learn a Shout to defeat Alduin. He will be shocked and he'll ask where you learned about this Shout. Either tell him that you learned it from Alduin's Wall or that you were talking to the Blades. In either case, he will be strongly offended and, depending on what you say next, his fellow Greybeard 'Einarth' may scold Arngeir for being unhelpful and Arngeir will apologize. He then tells you that the Shout is called 'Dragonrend'. However Arngeir cannot teach it to you as he does not know it himself and it's origin has been lost.
> To learn the Dragonrend shout you must speak with 'Paarthurnax', the leader of the Greybeards. Paarthurnax lives at the peak of the Throat of the World mountain and surpasses all of the Greybeards in the Way of the Voice. The way up to Paarthurnax is blocked by lethal mists, but Arngeir will offer to help you and he leads you out into the courtyard where you will be taught all three words of the Dragon Shout 'Clear Skies', SAVE. If you cannot learn the Shout, due to a bug, the only fix is to reload the save before speaking to Arngeir, on the second attempt make sure to wait until words are properly lit on the ground.
> You are now ready to attempt the trek up to the summit. Rid yourself of any followers at this point to prevent a possible bug . The path up is blocked by magical mists dealing severe frost damage so you must use the Shout Arngeir gave you to clear them away before proceeding (after the first mist you can simply use the Become Ethereal Shout to walk through the remaining mists if you like).
> When you reach the summit, SAVE, do not attack the dragon here. He will land and greet you as Paarthurnax- the leader of the Greybeards. Listen to the following dialogue carefully and be ready to follow his instructions. He will cast a Shout onto the nearby Word Wall . Inspect the word to learn the new 'Fire Breath' Dragon Shout. Note that if you have already visited a Fire Breath Word Wall possibly in Dustman's Cairn during the Companions quest line, this will be the second word of the Shout and will not contribute towards the 'Thu'um Master' achievement. Use this new shout directly on Paarthurnax, he will not be harmed. He will then offer to answer your questions.
> Ask Paarthurnax about the Shout you need; Dragonrend. Although he doesn't know the shout, he believes it could be learned by returning to the beginning of the 'Tiid-Ahraan' or the 'Time-Wound' located there on the Throat of the World. However, an 'Elder Scroll' is required to activate this and to allow you to view the first 'Tongues' using the Thu'um to defeat Alduin. As the quest ends, the dragon admits he has no idea where to find an Elder Scroll. Your quest log suggests you talk to Arngeir or Esbern for more information. This ends the quest and activates the next quest 'Elder Knowledge', SAVE.
Elder Knowledge
Please refer to the 'Oghma Infinium' section of the Daedric Artifacts page of this Walkthrough for information regarding the 'Oblivion Walker' achievement and gaining the related Daedric artifact.
> If you have already completed the Daedric quest Discerning the Transmundane, and acquired the Elder Scroll this quest will be completed automatically and the next quest 'Alduin's Bane' will begin, please skip to the next quest 'Alduin's Bane' below if this is the case.
> Whether you speak with Arngeir or Esbern they will both point you towards the library at the 'College of Winterhold' for more information on where to find an Elder Scroll. Make your way to Winterhold and SAVE.
> There is not much in Winterhold, but you can find some supplies at 'Birna's Oddments', talk to some people for some side-quests and find these '3' Skill Books , should you wish to explore it further:
- The Alteration Skill Book 'Breathing Water' found in a basket on the bookshelf next to the fireplace in 'Kraldar's House'.
- If you didn't get it from Morvunskar, the Destruction Skill Book 'Mystery of Talara V3' found on a dresser upstairs in 'Birna's Oddments'.
- The Enchanting Skill Book 'Twin Secrets' found inside a basket in the southwest corner of the Jarl's bedroom in the 'Jarl's Longhouse'.
> If you have not already joined the College you will have to initiate the joining quest 'First Lessons', please see the College of Winterhold page of this Walkthrough for more information. Otherwise make your way to the 'Arcanaeum' in the main building of the college, SAVE.
> Find the Orc library master 'Urag Gro-Shub' and ask him about an Elder Scroll. If there are no relevant dialogue options it may be because you have an active conflicting College of Winterhold quest, complete any College quests and return to Urag. He will then explain all about the significance, history and dangers involved in handling an Elder Scroll before giving you two relevant books, 'Ruminations of the Elder Scrolls' and 'Effects of the Elder Scrolls'- you do not need to read them both fully, simply selecting them and opening them will advance the quest and incidentally activate the Daedric quest 'Discerning the Transmundane'. You find that the books are incomprehensible anyway and only the author, an elderly warrior scholar known as 'Septimus Signus' knows how to translate them. Urag explains that Septimus left the college many years ago and went off to research Dwemer artifacts in the north.
> From this point, the Daedric quest, 'Discerning the Transmundane'- to attain the Oghma Infinium artifact, will be part and parcel of this Main Story quest. The two quests can be completed together, you just need to complete a little extra after returning to Septimus later, so it's OK to just follow this page to complete both for now.
> Your map marker will lead you to a remote ice cavern called 'Septimus Signus' Outpost' to the north of the College. Head out northwards across the ice, you may want to check out the 'Serpent' Standing Stone , on a island to the far east for the 'Serpent's Kiss' birthsign; this grants you the use of a ranged attack that will paralyse a target for '5' seconds and also do '25' points of damage.
> If you head east from Winterhold or southwest from the Serpent Stone you will find the 'Wreck of the Pride of Tel Vos', further south, before you get to 'Bleakcoast Cave', you may be able to find the Heavy Armour Skill Book 'Chimarvamidium' under a fallen tree.
> To the far north you'll find Septimus Signus' Outpost. Enter and SAVE, (don't be dismayed by the copy of Chimarvamidium here, it is not a Skill Book version). You'll find Septimus inside, talking to him will reveal that he will help you if you help him. He wants you to retrieve a special Dwemer item to unlock the large puzzle box he possesses. You must agree in order to proceed, Septimus will then hand you a 'Blank Lexicon' and the 'Attunement Sphere'. Septimus will explain a few things and you should listen carefully to his helpful information and advice before setting out to find the largest and most illustrious underground cavern in Skyrim, 'Blackreach', SAVE.
> Blackreach is extensive, very extensive, and you may encounter dozens and dozens of 'Falmer' (deformed Snow Elves that have adapted to a violent life in the dark undergrounds), bandits, chaurus and even Giants, so prepare yourself well. To even find Blackreach you must trek through various Dwemer ruins and travel deep underground, although there are several ruins that all lead to Blackreach the main and recommended ruin is called 'Alftand' and is located southwest of Winterhold:

> Upon reaching the exterior of Alftand SAVE, you'll find an abandoned camp outside the ruin, you can pick up the 'Expedition Manifest' located in a shack nearby to gain an insight into what is happening here, an expedition into the ruin indicates that you are not alone in your quest.
> Head down the slope form the shack and into the first area, 'Alftand Glacial Ruins', once inside SAVE.
> Follow the tunnel ahead, you will soon see blood spatters all over the floor. Head east through the tunnel and follow the path as it twists and turns. You will soon arrive in a room with a table. The door to the north is barred, so take the western path and fight the 'Dwarven Automatons' (primitive but powerful machines that continue to guard the ancient Dwarven ruins even after their master's demise). All Dwemer machines are resistant to frost damage and immune to poisons.
> As the tunnel becomes icy again, you will encounter 'J'darr', a Khajiit Skooma addict, who will attack you on sight. In the corner, you will find the corpse of his murdered brother 'J'zhar'. Head north until you reach a chamber with two Dwarven spheres, SAVE. Proceed forward through the only available path and you will find a forge and more enemies. Open the western door and beware of the Dwarven pressure plate in front of the chest. From there, head south and around the corner until you arrive in a huge chamber with two levels. From the upper level of the chamber, proceed around the room to reach the door to 'Alftand Animonculory'.
> Enter and SAVE, open the door at the far end and enter the large chamber. Defeat the Dwemer spider then climb the stairs and find the slope to the east, where a Dwarven sphere is patrolling. Be sure to avoid the three pressure plates here that trigger a deadly set of spinning blades.
> After these proceed up a level and you'll find a very large room- a multi-levelled chamber. You are on the top level, so start making your way down the slopes fighting the enemies as you go. You will have to make a short jump down to proceed, where you will land near the body of 'Yag gra-Gortwog'. To the southeast is another slope leading down, where you will find the first Falmer enemy, SAVE.
> Stay on the path and kill any Falmer that get in your way. You will reach a platform with a door and a broken pipe spitting out fire. Open the door to leave the huge chamber for now and proceed forward towards an alchemy lab and several Falmer emerging from their tents. Dodge the flames coming from the pipes and head south until you reach a junction. The stairs to the east lead to a small room with some ingredients, while the path south will lead you to the next room.
> SAVE in this room, the elevator on the other side of the barred doorway leads back to the previous zone, Alftand Glacial Ruins, so at this point it is possible to return to the outside world and stock up on supplies, then return. Otherwise, skip the elevator ride and locate 'Sulla Trebatius'' Pack. Find the path to the northeast and open the door. You will find yourself back in the huge central chamber, where you can continue your descent.
> There are three Falmer and a frostbite spider at the bottom of the chamber, locate the door to the north and enter. The next area contains a tripwire which triggers a claw trap. Avoid the tripwire and the trap and continue into 'Alftand Cathedral'.
> Once inside SAVE, take a right and dodge the three pressure plates, all of which will trigger a slicing blade from the ceiling. Kill the Falmer and open the door to another large chamber, where you will find more Falmer. Dispose of them then head up the stairs next to the entrance and pull the lever. This lowers the spikes blocking the gate to the west, approach the area carefully as you will awaken a 'Dwarven Centurion'.
> Frost and poison are useless against Centurions so use fire, shock or physical attacks only. After the battle, loot the Centurion for the 'Alftand Lift key' and head up the stairs. Open the gate where you will witness the last two survivors of the failed expedition; 'Sulla Trebatius' and 'Umana' fighting each other. SAVE.
> Sulla and Umana will fight each other to the death, and then the victor will turn against you if you are spotted. Dispose of them and if you want the unique shield 'Targe of the Blooded' find Umana's body. Locate the 'Dwarven Mechanism' in the centre of the room. Activate it and the Attunement Sphere will do the rest. This will reveal a staircase leading downwards. You can return to the outside world from here by using your newly acquired key on the gate to the southwest. This will also provide a useful shortcut if you decide to complete the Daedric quest Discerning the Transmundane after this. Make sure you open the gate at the top of the elevator though. From here, head down the stairs and prepare yourself for Blackreach.
> You will now be in Blackreach, SAVE now and save often, this is a vast and dangerous underground cavern that will take some time to fully explore, it even has various little undocumented side quests found within its seemingly endless reaches. Dwarven automatons and Falmer are common respawning enemies here and you may encounter chaurus and giants as well. Blackreach can be overwhelming and quite difficult to navigate, especially since your in-game map will only ever allow you to see a portion of it. Blackreach is full of distractions, so unless you are the type of player who enjoys taking their time and fully exploring everywhere stick to your mission and concentrate on going for the Elder Scroll. Your target now is the 'Tower of Mzark'.
> Should you find a little Dawrven building called 'Silent Ruin' you may want to explore it to find the Block Skill Book 'Warrior', it can be found on the throne, but be careful not to trigger the pressure plate trap in front of it.
> Also in the ruined Dwarven city is a place called the 'Debate Hall' you can find the Speech Skill Book 'A Dance in Fire V6', it's found to the south on a second walkway, with an open metal gate leading to an alcove containing a skeleton that is reaching out towards the book.
> The shortest route to the Tower of Mzark is the road to the left immediately out of the Alftand Cathedral. Continue along the road in a south easterly direction and fight the Dwarven spheres and Falmer. When you come to the first junction, SAVE, make a right and head southwest along that road and fight more chaurus and another Falmer.
> As you travel underneath a bridge, a Falmer will shoot arrows at you from above, but just move forward and stay on the path. Fight two chaurus and continue on until the path turns in a western direction, across a bridge, SAVE. When you cross the bridge, the Tower of Mzark will be visible to the southwest, and the trail will lead you right to the entrance.
> Enter and SAVE, Do not leave the Tower of Mzark for any reason until you have the Elder Scroll in your inventory. After the first room go through the door and find the Dwemer contraption that Septimus Signus referred to. It consists of a giant sphere with various lenses above. The second floor sits on the upper part of the sphere and hanging from the ceiling, a series of lenses conceal a container.
If you investigate the surrounding area, you will find the skeletal remains of 'Drokt'. His journal will inform you how he became obsessed with the 'Oculory' and died without managing to align it correctly. The journal also contains a tip on how to solve the puzzle.
> Head up the last slope where you will find four buttons and a 'Lexicon Receptacle':

> Place the Blank Lexicon in the receptacle to the right of number (4) in the image above, and watch the ceiling of the room open. This activates the two buttons on the right (3 and 4 in the picture). Activate button (3) three or four times in a row until the Lexicon glows and opens up. Now press button number (2) once to align the lenses, then hit number (1) allowing the light shining through the container to hit the corresponding lenses on the floor, thus filling the Lexicon with knowledge. Now hit number (1) a second time making room for the container to be lowered down from the ceiling.
> Once it has reached the floor, it will open and reveal the legendary Elder Scroll- the very source of all 'Elder Knowledge'. Remember to pick up the inscribed Runed Lexicon from the receptacle, then claim the Elder Scroll. This ends the quest, starts the next quest 'Alduin's Bane' and unlocks the story related achievement:
Complete "Elder Knowledge"
> After you have the Elder Scroll exit the Tower of Mzark by using the lift to the east and pulling the handle. Back on the surface you may be attacked by bandits, so be careful and kill them all. You can return to Septimus at his outpost now to complete the rest of the Daedric quest Discerning the Transmundane (please refer to the Daedric Artifacts page of this Walkthrough for all information), otherwise make your way back to Paarthurnax at the top of the Throat of the World. SAVE.
Alduin's Bane
> Talk to Paarthurnax, he will be impressed and tell you to take the scroll to the Time-Wound immediately, it's only a few feet away to your northeast, it looks like nothing more than a floating blur.
> Activate the Elder Scroll in your inventory to read it while inside the Time-Wound and you'll be given a glimpse into the past. If the cutscene fails to trigger you can either reload a previous save or you can fast-travel away, complete a random quest then return and try again.
> After the scene SAVE, Alduin will appear flying above you and then Paarthurnax will take flight and attack him. Use the new Dragonrend Shout you have now learned to bring Alduin down. Direct the Shout at the quest marker if you cannot see him for darkness or snow.
> Alduin is completely invulnerable while in the air no matter how powerful your weapons or magic may be, so you must use Dragonrend to ground him first. Attack him by your preferred means when he is grounded. Alduin will use his 'Dragon Storm Call' Shout to rain flaming meteors down on you, you can use your Clear Skies shout to cancel this to great effect.
> Continue to attack Alduin until his health completely depletes, he then congratulates you on your power but also informs you that he is far more powerful than you and no one can slay him in the mortal world. Alduin then flies off and this quest is complete. The next quest; 'The Fallen' is then activated, SAVE.
NOTE: The Elder Scroll will remain a weightless quest item that you cannot drop forever after this. The only way to get rid of it is to sell it to Urag Gro-Shub at the College, be aware however that the Elder Scroll is required for a Dawnguard DLC quest and you will have to buy it back if you plan on doing that DLC.
It is advised to navigate to the Civil War page now and complete the Civil War quest line, at least up until the point of unlocking the 'War Hero' achievement, if you haven't already. Once that is complete proceed with the rest of the Main Story to the end.
> After Alduin is defeated, SAVE, you must speak with either Paarthurnax, Arngeir or Esbern to find out how to capture one of Alduin's dragon friends. A possible bug here can cause Paarthurnax to stay in the air after Alduin's defeat, making the objective of speaking to him impossible. Instead of going to Arngeir or Esbern to progress, use Dragonrend on Paarthurnax. He will land and not attack you, allowing you to properly complete this objective. If you speak with Esbern he will start you on the optional side quest 'Paarthurnax' see point '3' below, and the 'Paarthurnax' quest for details. Whoever you speak with, they will tell you that Dragonsreach in Whiterun was designed to capture a dragon.
> Go to Whiterun, SAVE, and speak with the Jarl. Now depending on where you are in the Civil War, there are different options at this point:
- If the civil war has not been settled yet, the Jarl will, at first, tell you that he can't help you capture a dragon with the ongoing war threatening his hold. You have to get both sides to agree to a truce by speaking to both Ulfric Stormcloak and General Tullius. (If you have initiated the Stormcloak's first war quest but gone no further, you may be unable to start a conversation with Ulfric or General Tullius until you get farther along in the quest line). Speaking to these will start the quest 'Season Unending' see below for details, which will now have to be completed before you can proceed with The Fallen quest.
- If the Civil War has been settled either way, the Jarl will allow you permission to use Dragonsreach and capture the dragon. This option actually becomes possible once either side of the Civil War controls at least eight of the nine holds: if you have joined the Stormcloaks, you must have started or completed the 'Liberate Haafingar' objective of the Liberation of Skyrim; and if you have joined the Imperials, you must have started or completed the 'Regain Eastmarch' objective of the Reunification of Skyrim.
- If you choose to complete the Paarthurnax quest by killing Paarthurnax before the Civil War peace negotiations it will anger Arngeir and he will refuse to talk to you further. This means you will have no way of negotiating the truce through peaceful means and you must instead end the Civil War through battle.
> After negotiations involving the Civil War are over, SAVE, you learn that you need to use a specific Shout at Dragonsreach to summon a dragon for capture. Esbern has learned a Shout that summons the great dragon 'Odahviing'- when you hear this name for the first time you automatically learn the 'Call Dragon' Shout . If you did not have to do Season Unending you are instead sent to Paarthurnax who provides you with the same Shout. At the moment you learn the Shout, your journal is updated to reflect Season Unending as complete, even if you had never actually started that quest.
> SAVE, follow your quest marker to Dragonsreach and prepare to summon Odahviing. Rid yourself of any followers at this point as they may hinder the quest. Follow the Jarl up the stairs behind the throne and up to the 'Great Porch' where you will capture the dragon. SAVE and then tell the Jarl you are ready.
> Use Dragonrend to bring him down and attack him by your preferred means. When he gets closer to the door you originally came through climb the stairs to your right and go to the quest marker, a large wooden yoke will slam down on his neck trapping him in place. SAVE.
After trapping Odahviing, you may fall through the ground and in turn be stuck under the map. This seems to be caused by standing under or near Odahviing when the trap is dropped into place. To fix this, simply fast travel, then come back.
> You can now question Odahviing about Alduin's location.
Due to a bug he may not talk to you and he will remain an enemy. This occurs after Vignar Gray-Mane has become the Jarl but the Companion's quest line has not yet been started. Even after becoming the Jarl, Vignar spends most of his time in the Companion's 'Jorrvaskr'. To fix this, do the first Companion's quest and Vignar will leave the building. Once you get back to the Great Porch to summon Odahviing, Vignar will be there and the dragon will be captured properly .
> Odahviing will relent and he'll reveal that Alduin has fled to the ancient Temple of the Dragon Cult- 'Skuldafn'. He will also reveal that Skuldafn cannot be reached on foot, you require wings to reach it. Odahviing will agree to take you to Skuldafn if you release him.
Before agreeing to release Odahviing make sure you are fully prepared:
- You can't take a follower with you and you cannot return to Skyrim for quite a while.
- You can also never return to Skuldafn once you leave there, so you want to be carrying as little as possible before you leave to make room for loot.
- If you're a type of Warrior class, fully repair and enchant your best weapons and armour and take only them with you.
- If you're more Magic orientated take some charged Soul Gems and some useful cloaks and potions.
- Also taking Fortify Carry Weight potions or gear, and even changing to the Steed Birthsign will help you to carry more loot back with you.
- You do not need to take a pickaxe or a woodcutter's axe since there is nothing to mine or cut.
- Take some resist magic, resist fire potions or the White Phial to help with the battle against Alduin.
- Make a SAVE before you leave and keep it until you return.
- If you have the Hearthfire DLC installed, kiss your family goodbye, you may not be coming home from this one.
> When you are fully prepared to leave talk to the guard on the upper balcony of Dragonsreach and tell him to release Odahviing (if you have a small bounty in Whiterun hold he may refuse, so simply pull the chain next to him yourself, same goes for; if the guard was killed by Odahviing). Now talk to Odahviing and he will whisk you away to Skuldafn for the finale of the Main Story.
Odahviing can become hostile after releasing him. To fix this, simply exit the Great Porch, wait a few hours inside Dragonsreach, and return to Odahviing.
> This completes The Fallen, activates the next quest 'The World-Eater's Eyrie' and unlocks the story related achievement:
Complete "The Fallen"
Paarthurnax
> This quest is given to you during or after 'The Fallen' quest above. If you talk to Esbern after completing Alduin's Bane, then return to Esbern, it will trigger. Or if you have not spoken to either Esbern or Delphine at the Sky Haven Temple, then later when the Season Unending conference is held, Delphine will approach you and start this quest automatically. You can avoid her if you exit the conference room quickly. If you do get stopped by her, you can refrain from making any selection and wait for the dialogue box to disappear and then leave.
> Delphine and Esbern have discovered that Paarthurnax is the Master of the Greybeards and an ancient enemy of the Blades. You can argue in Paarthurnax’s defense, but both of them will repeat that the atrocities committed by Paarthurnax are unforgivable. They will tell you that their oaths as Blades prevent them from giving you any further help until you kill Paarthurnax. If you go to Arngeir and tell him that the Blades want Paarthurnax dead he will tell you that it was because all dragons were in league with Alduin at first and that Paarthurnax couldn't help it. You are given the option to tell him that Paarthurnax must die or that you are going to spare the dragon. Alternatively, you can go to Paarthurnax at the Throat of the World, he acknowledges that all dragons thirst for dominance and that the Dragonborn shares this thirst, though he believes that he has overcome this through the sheer power of will and that he can be trusted.
> SAVE before making any crucial decisions:
The positives of killing Paarthurnax are that the Blades will welcome you once again and support you on dragon hunting missions, you will receive a dragon soul and the usual set of dragon bones and dragon scales. The negatives are that Arngeir will be angry and it will be no longer possible to ask him for the locations of the Word Walls (note that I have listed all Word Wall locations in the Miscellaneous Achievements page anyway), and Paarthurnax will no longer be around to provide meditation bonuses to certain Shouts and if you already have a bonus it will not go away, you will just be unable to change it.
The positives of allowing Paarthurnax to live are that Arngeir will continue to reveal the locations of Word Walls, Paarthurnax will continue to give Meditation bonuses, and he will appear for an extra scene later wherein he details his plans to rein in the dragons and teach them to live under the Way of the Voice, but this will not change gameplay and all dragons will continue to attack you. The negatives of allowing Paarthurnax to live are that the Blades will shun you and taking things from the Sky Haven Temple or Sleeping Giant Inn will be stealing, if you haven't brought three followers to the Blades already then this will become impossible causing the quest to be forever incomplete, and you will no longer be able to go on dragon hunts.
NOTE: If this quest is obtained during the Main Story and is not completed prior to finishing the Main Story line, it will disappear from your active quests. However, you may still kill Paarthurnax at any time after this point; the quest will now reappear in your journal and can be completed normally.
There is a potential bug that makes Paarthurnax immortal, his health bar simply repeatedly regenerates. The only known fixes are: Using Mehrunes Razor (see the Daedric Artifacts page), fast travelling away when his health bar is depleted or ordering a follower to attack him may kill Paarthurnax.
Season Unending
This quest may make it impossible to get the 'War Hero' achievement. You may want to wait until you've completed The Battle for Fort Greenwall for the Imperials or The Battle for Fort Sungard for the Stormcloaks in order to be sure you get this achievement.
There is an alternative method to obtaining the War Hero achievement as well as this quest, but you have to join the Stormcloaks in order for this to work. First, finish the quest 'Joining the Stormcloaks', but do not start the quest 'The Jagged Crown'. Without that quest being active, you can then schedule the peace conference. Because you are technically allied with the Stormcloaks, Tullius will make the opening demand for Riften. When Ulfric demands something in return, give him Morthal rather than Markarth. This will allow the Reach to remain open for Stormcloak invasion when you resume the Civil War quest.
This quest is quite complicated and how it plays out is greatly affected by your current standing and progress in the Civil War quest line. For a full understanding of the entirety of this quest and all of it's implications please refer to this Wiki page here:
http://www.uesp.net/wiki/Skyrim:Season_Unending
This page has a lot of extra information that will help you complete this quest in the fastest and most efficient way possible.
NOTE: This quest allows you to skip the normal prerequisite quests for becoming Thane for any holds that change hands during this quest, regardless of what side you're on, with the exception of The Rift. You will be allowed by the new Jarl to buy property in holds that change hands if the hold is one that has property available, including Hearthfire properties if you have Hearthfire installed. You will still have to initiate the Thane quest with the new Jarl, and help up to '5' citizens of that hold as well as buying property in holds where that is a requirement in order to become Thane, as per the normal requirements. You will only be allowed to buy Honeyside if Maven Black-Briar is installed in The Rift; you will not be able to skip the normal requirements in that hold to be made Thane.
NOTE: If you have started the quest 'The Forsworn Conspiracy' in Markarth, but not completed it, handing over the Reach to the Stormcloaks in the negotiations (which always happens if you are Imperial or unaligned) will end the quest. If you have completed that quest but have not started the quest 'No One Escapes Cidhna Mine', then handing over the Reach will remove your bounty in the Reach and prevent you from starting the Cidhna Mine quest.
> This quest is activated during the Main Story quest 'The Fallen', but only if the Jarl of Whiterun (Balgruuf or Vignar) insists that a truce must be negotiated before allowing Dragonsreach to be used to capture a dragon. If either side of the Civil War controls at least eight of the nine holds of Skyrim, a truce can no longer be negotiated, and this quest will not be triggered.
This quest is optional and not required for any achievement, however if you wish to receive a reward for completing this quest, you must have joined either the Imperial Legion or the Stormcloaks in the Civil War. As you complete more of the Reunification of Skyrim or Liberation of Skyrim, it becomes more and more difficult to negotiate a treaty that favours your faction and thus obtain a reward.
> To proceed with this quest you must gain permission from the Greybeards, travel to High Hrothgar and convince Arngeir to help you, SAVE.
> Now travel back to the 'Palace of the Kings' in 'Windhelm' and convince Ulfric to attend the truce negotiations, SAVE. Travel to Solitude and find General Tullius in the 'Castle Dour' and convince him too, SAVE. You can talk to the two leaders in any order using the 'I have a message from the Greybeards' option. They both have a persuasion option, which is the fastest way to convince them, but any selection will eventually lead to their cooperation.
> Now return to High Hrothgar, SAVE, leave any followers you may have, outside for this part of the quest. Find Arngeir and the other Greybeards waiting in the main hall welcoming everyone to the negotiations. Talk to Arngeir once you are ready to start the council meeting. If the meeting won't start try talking to some of the people there, waiting '24' hours, or pushing some of the people closer to the meeting area. If none of these fixes work, the only option is to reload the previous save. Once you take your seat at the table you will be unable to get up for the duration of the meeting and the negotiations will start.
> The end result of the negotiations is that the two sides, the Imperial Legion and the Stormcloaks, will swap control over certain holds. Your role in this is to make a series of decisions about which holds are exchanged and other terms of the truce. Regardless of your choices, a truce is always signed at the end of the quest, but the terms of the truce affect subsequent gameplay and control whether or not you get a quest reward. The holds that are currently controlled by each side will depend upon your progress in the Civil War, meaning that the available options during the negotiations can vary a lot. The primary factor influencing the quest is which side you have joined (if any) in the Civil War; this alters the overall options.
Despite the variations in the quest details, the negotiations always follow a fixed overall pattern:
> Pre-negotiation : Decide whether or not Elenwen can attend the negotiations;
Ulfric objects to having a Thalmor representative at the table. You get to decide whether she stays or leaves.
> Part One : Two holds are exchanged;
One side demands that they be given a major hold (The Reach or The Rift). The requested hold is predetermined, and cannot be negotiated.
The other side requests a hold in exchange. In most cases, you are given the choice between two possible holds (a major hold or a minor hold).
> Esbern's Speech
Following part one, one of the two sides always threatens to walk out of the negotiations. Esbern needs to intercede with a speech reminding everyone about the threat posed by Alduin before negotiations can resume.
> Part Two : Even out the terms of the truce;
A series of offers is made to appease the side that almost walked out. You are given the choice of whether to accept or refuse each of the offers. These offers continue either until the truce is balanced (neither side is favoured by the overall truce) or until all options have been exhausted.
> Review
Arngeir reviews all the terms of the treaty, and the two sides agree to them. Throughout these negotiations, the game maintains an internal score reflecting the currently agreed-upon terms. A net score of zero means that the truce is balanced and does not favour either side. A positive score means the treaty currently favours the Imperials, whereas a negative score favours the Stormcloaks.
If the final score is not zero, the side favoured by the treaty is pleased by the results. If you have joined that side's faction you will receive a levelled enchanted weapon as a reward. If instead your side is left at a disadvantage, you are accused of betraying your side, but there are no lasting consequences. If you do this quest late in the Civil War it may be impossible to negotiate a treaty that favours your faction and therefore impossible to receive the reward.
> Once the negotiations have reached their conclusion, Arngeir will summarize all of the terms that have been agreed upon so far and confirm those terms with each of the parties. Tullius and Ulfric will both agree and the meeting will conclude, SAVE.
> The side with which you are affiliated will talk to you, most of the parties will head back to their respective cities, but the Blades will remain to talk with you about how to proceed with trapping a dragon, thus automatically leading back to the quest The Fallen. Esbern will tell you that the names of dragons are always three words of power, and inform you that while you were preparing the negotiations, he retrieved a scroll listing the names of many of the dragons slain by the Blades. Cross-checking it with Delphine's map of dragon burials, he discovers that the next dragon's name is Odahviing. Esbern will then teach you the shout to call Odahviing. In addition, Delphine will walk up and demand that you kill Paarthurnax, if the 'Paarthurnax' quest hasn't already been given.
> Once Season Unending is complete, the Civil War will be on hold until the Main Story is complete. Return to Dragonsreach in Whiterun and continue the Fallen quest by speaking to the Jarl, follow the quest stages above then move on to the 'World-Eater's Eyrie' quest below.
The World-Eater's Eyrie
> Odahviing will drop you off in a very hostile place, straightaway you'll be attacked by two levelled dragons and multiple higher level draugr, SAVE. Fight them or sneak past them using your preferred style of play and make your way around to the entrance of the temple.
> Once inside SAVE, avoid the dart trap to the west and proceed onward, there will be several puzzles along the way.
Some of these puzzle can glitch; if the rings of the dragon claw switch do not rotate, or the door fails to open after the correct combination is set, try:
- Saving and then immediately loading that save.
- Loading either the auto-save from the entrance or a save from before you entered.
- Exiting the location, saving, then loading that save.
- 'Resetting' the door by selecting the right combination and try the claw, then turn each ring once and try the claw again. Do this until the correct combination re-appears and try again.
If all of these fail the only fix remaining is to clear your Xbox hard drive cache, return then reload an earlier save.
> The first puzzle consists of three pillars, each separated by a wall, and a switch between the pillars and the doorways. Each pillar has three symbols; 'Eagle, Snake, and Whale'. On the walls beside the two outside pillars are matching symbols for those pillars. The west pillar is a whale and the east is a snake. Set the outer pillars so that the same symbols face each other. Above the east doorway is an eagle, above the west doorway is a snake, which leads to the destination. Face the symbol on the central pillar that matches the desired door, to face north, toward the doors.
> Pull the lever to open the door (with your back to the lever, you should see Eagle, Eagle, Eagle to open and close the dead-end door on the right. With your back to the lever, you should see Eagle, Snake, Eagle to open and close the progressing door. You must close one door before you can open the other, SAVE.
> Kill the Draugr in the next room and then some frostbite spiders and you'll hit the second puzzle. This puzzle is solved by Whale, Snake, Eagle, with the solutions for the first and third shown above them and the second behind the platform. You can also use Whirlwind Sprint from the platform to bypass the puzzle. Enter the door to go to another section of Skuldafn Temple, SAVE.
> Kill some more Draugr and cross a bridge, watch for a pressure plate trap along the way, proceed up a staircase and take out more Draugr, pull the lever near the oil (in a small window) to open the gate on the other side of the room, move through and SAVE.
> Follow the wide tunnel avoiding another pressure plate trap and you'll soon reach a third puzzle guarded by a levelled draugr or dragon priest carrying the diamond claw needed to open it. The combination to the door is, from top to bottom, Fox, Moth, Dragon (this can be seen by examining the claw in your inventory).

Make sure to examine the 'Word Wall' in the next room and learn a word for the 'Storm Call' Shout, SAVE.
> You'll soon arrive back outside where some draugr will be waiting, Unrelenting Force will be useful here to simply blast them off the sides. Proceed along the wooden platform, SAVE, and you should notice two dragons perched upon columns above the portal to 'Sovngarde'.
> Before you can enter Alduin's portal you must kill the dragon priest 'Nahkriin' who guards it. This dragon priest can be tough, especially if you engage the two nearby dragons at the same time. However, the two dragons may not move from their perches or become hostile if unprovoked. When you reach the top of the stairs Nahkriin will notice you and make his way toward his staff. It's best to start your assault immediately. He doesn't attack until he gets his staff, so attack him quickly. After Nahkriin grabs his staff he'll turn around to face you. Be careful with this one as his staff does '50' shock damage per second. Any shock resistance potions or enchanted apparel you have would be useful now.
> After defeating Nahkriin, pick up his staff and his unique self-titled 'Dragon Priest Mask' and activate the 'Dragon Seal'. This completes the World-Eater's Eyrie quest and automatically activates the next quest; 'Sovngarde', SAVE.
> You will be transported to a mysterious place where the souls of the dead walk amongst an impenetrable mist. You can temporarily clear the mist with the Clear Skies Shout to help you find your way, but it will not harm you. You should encounter a Stormcloak soldier who warns you that Alduin is here, devouring the souls of the dead, and he is afraid and wishes to walk with you.
> Continue through the mist and you'll notice some characters from the game that have died along your various quests, some of which may even be taken by Alduin before your very eyes, but he will not harm you, for now.
> SAVE when you see a Nord guarding a strange bone bridge. This Nord is in fact the Nord God 'Tsun', and although you can convince him that you are worthy to cross the bridge as the Dragonborn (or other options if you have completed other quest lines) he still demands you fight him before you can cross over to the Hall of Shor.
> Tsun is very fast and powerful in combat, so keep on your toes, he is slightly weak to fire attacks. If you are having trouble beating him you can reload the save and attack him with ranged attacks before starting the dialogue.
> Once Tsun is defeated SAVE, cross the bridge and enter the Hall of Shor.
> Inside the hall you are greeted by 'Ysgramor', founder of the Companions, he asks you to speak to the Nord heroes who previously defeated Alduin, (the ones you saw in the Time-Wound vision). Find 'Gormlaith Golden-Hilt', 'Hakon One-Eye', and 'Felldir the Old'. The three heroes decide to join Shouts with you to clear the mist from all of Sovngarde and expose Alduin, SAVE.
> Now go outside and meet with the heroes, this ends the quest and automatically begins the final Main Story quest; 'Dragonslayer'.
Dragonslayer
> Gather with your fellow heroes on the other side of the whale-bone bridge, they will wait for you to use Clear Skies on the mist and they will join in when you do. Use the Shout three times, you will enrage Alduin and the fight will begin, SAVE.
> Now begins the final battle with Alduin, here he will use the Storm Call Shout to reign fire-balls upon you, this Shout does a lot of damage and covers a wide area, so use any fire or magic resistance potions or spells you have available. Remember Alduin is invincible while flying so you need to use Dragonrend to bring him down. Once you have grounded him you must unleash all of your most powerful attacks before he takes flight again. Avoid standing right in front of him altogether. Your Nord hero friends can do decent damage. Poisons work just as well on Alduin as on any other dragon and the Marked for death Thu'um is particularly useful here. Repeat the tactic of grounding him and striking, and do not hold back on your supplies, spells and Shouts. When Alduin's health bar is fully depleted his soul will leave his body for good and he is finally, utterly, and definitely defeated once and for all. Now observe as he dissolves into nothing, SAVE.
Finally ending Alduin will unlock the final story achievement:
Complete "Dragonslayer"
> Tsun and all the heroes of Sovngarde will now rejoice and congratulate you on your victory. Talk to Tsun and He will offer you a gift in the form of a special Dragon Shout called 'Call of Valor'; this allows you to summon the heroes of the Hall of Shor to your side in Skyrim. If you have been collecting all the Dragon Shouts mentioned in this Walkthrough you will now know the first word of '20' Dragon Shouts unlocking:
Learn 20 shouts
Otherwise please consult the 'Dragon Shouts' section of the Miscellaneous Achievements page to find the locations of the ones you're missing.
> Tsun does not return you to Skuldafn but instead to the summit of the Throat of the World where many dragons will be scattered around, but don't worry about them, they will not attack you. If you didn't previously kill Paarthurnax he will talk with you, congratulating you and he will declare that he will endeavour to turn Alduin's companions to the side of good and the Way of the Voice. Not all dragons will ally with Paarthurnax however, so dragon attacks will continue as normal allowing you to gather further dragon souls, bones and scales. You will also meet Odahviing now, who pledges his allegiance to you in the respect of killing Alduin, he will come to your aid, if he can, when you use the Call Dragon Shout in the future, SAVE.
You can, if you wish, return to High Hrothgar or Skyhaven Temple for extra dialogue and congratulations but it is not necessary as you have now fully completed the Main Story quest line.
Your adventures are never over however, the land of Skyrim is vast and many more quests await you out on the tundra!
A big thank you to The Unofficial Elder Scrolls Pages with permission for use of content granted under the Attribution-ShareAlike 2.5 License with due acknowledgement and thanks.
Thank you also to the guys from Bethesda Softworks LLC for providing additional information and writing the Official Elder Scrolls VI Skyrim Game Guide.
Skyrim:The Mind of Madness
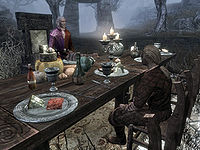
Quick Walkthrough [ edit ]
- Investigate a man called Dervenin .
- Gain access to the Pelagius Wing of the Blue Palace .
- Search for Dervenin's master in the Pelagius Wing.
- Complete the First Trial.
- Complete the Second Trial.
- Complete the Third Trial.
- Escape from Pelagius Wing .
Detailed Walkthrough [ edit ]
Solitude [ edit ].
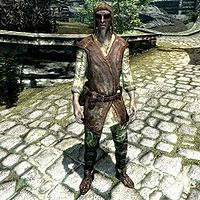
In Solitude , you may hear a rumor from innkeepers that a mad beggar is wandering around the streets of the city, distressed over the absence of his master, saying things like: "Please, take pity on an old madman!" and "You! You'll help me! You help people, right? That's what you do?"
The beggar, named Dervenin , will plead you to find his master: "My master has abandoned me! Abandoned his people. And nothing I say can change his mind. Now he refuses to even see me. He says I interrupt his vacation! It's been so many years... Won't you please help?" He will tell you that his master was "visiting a friend in the Blue Palace " and further detail that his master "went into the forbidden wing of the palace, to speak with an old friend". He will give you Pelagius' Hip Bone , required to enter the forbidden wing. You also need to retrieve the key to the wing, either from one of the cleaning staff or from Falk Firebeard , the steward.
Blue Palace [ edit ]
Enter the Blue Palace and locate one of the cleaning staff. The key can be obtained from Erdi or Una by discussing the Pelagius Wing with her and telling her that Falk asked you to "look into it". You must pass an easy level, invisible Speech check to persuade her to give you the key. Alternatively, you can convince the castle steward to let you in if you have completed the quest The Man Who Cried Wolf .
If you lack the respective requirement, the final dialogue option will not appear; the NPC will simply exit dialogue.
Exploring briefly in the wing will show it in a state of disrepair. Further travel will require you to walk through some spider webs before you suddenly find yourself transported into a strange realm .
Pelagius' Mind [ edit ]
You will find yourself suddenly wearing a full set of Fine Clothes with your inventory inaccessible and your abilities removed. The scene before you appears to be an extravagant dinner set in the middle of a misty wood and surrounded by stone archways. Two people are sitting at the table, one wearing a distinctive outfit and sitting on a throne, and the other a depressed man. The latter is Pelagius III who is complaining of various woes, although he sounds strangely sane, which delights the man across from him. Pelagius will leave after a short conversation during which the other man tries to cheer him up.
Upon further investigation, it then transpires that the other individual is none other than Sheogorath himself. Tell him that you have a message for him and that he needs to come back from vacation. Sheogorath says he will leave if you can make your way out of Pelagius' mind. He will give you the Wabbajack to help you. There are three arches which lead to three separate trials, all of which must be completed. To the southeast is the Arch of Confidence, to the northeast is the Arch of Night Terrors and to the northwest is the Arch of Paranoia. These trials can be completed in any order.
Pelagius' Confidence [ edit ]
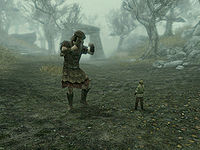
In this scene you will see Pelagius' Anger beating up Pelagius' Confidence . Confidence doesn't look like he is doing too well, since he is tiny and Anger is huge. Sheogorath wants you to tip the scales. Use the Wabbajack on Anger (casting twice) until he is tiny, and then on Confidence (again casting twice) until he is as big as Anger was. You must act quickly, as Confidence will shrink every time Anger hits him. During the battle, two spectral figures labeled Self Doubt will appear and begin to spar with each other. They do not seem to serve any purpose other than to get in your way as you attempt to complete the trial.
Pelagius' Night Terrors [ edit ]
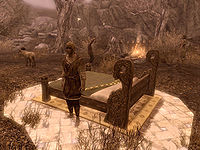
You will see a bed in the middle of the forest with Pelagius sleeping on it. Sheogorath tells you that Pelagius has been suffering from night terrors since he was a child, and you are tasked with getting rid of them. Use the Wabbajack on Pelagius the Tormented to start the sequence, and then use it on each terror in turn as they arrive. After a successful attack with the Wabbajack each will turn into something more innocuous. Do not attack the innocuous creatures; instead, use the Wabbajack on Pelagius again to call the next terror. Repeat this process of zapping Pelagius and then the creatures that appear until he wakes up. Don't take too long in zapping the creatures after they appear, or you will have to start over. In order, the creatures or enemies that appear are:
- A wolf will appear (to be turned rather humiliatingly into a goat).
- A bandit chief will then appear, to be turned into a younger version of Pelagius.
- A hagraven will appear. After use of the Wabbajack, it will be turned into one of Pelagius' sultry maidens , from his early days.
- A flame atronach will appear. It turns into a bonfire after use of the staff.
- A dragon priest will appear, to be turned into an inaccessible chest behind the bonfire. (The Dragon Priest may summon an atronach as well, but Wabbajack has no effect on it, so you should ignore it.)
After all of the terrors have been converted, everyone will convene around the bonfire, and Sheogorath will communicate with you and ask you to progress to the next area.
Pelagius' Paranoia [ edit ]
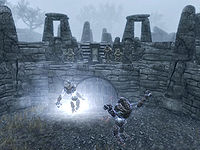
Through the Arch of Paranoia to the northwest is a small fort-like structure with steps leading up to the edge. In the middle of this structure there is an arena occupied by two fighting Storm Atronachs. Supposedly, one is yours and one is your opponent's , who is sitting opposite you with two other men. You are instructed to use Wabbajack to defeat your enemy. Don't bother zapping the atronachs themselves, as one will respond to the changes the other goes through, making the fight endless. Instead, aim for one of the two bodyguards sitting next to your opponent and Wabbajack them. Both of the men will turn into wolves and attack your opponent, killing him.
Your Reward [ edit ]
Go back to Sheogorath when you've finished his tasks and tell him you've fixed Pelagius' mind. He will summon Dervenin and return to the Shivering Isles , telling you to keep Wabbajack. He mentions his chamberlain, Haskill , as he prepares to depart, saying, "Well, I suppose it's back to the Shivering Isles. The trouble Haskill can get into while I'm gone simply boggles the mind..." You will then be transported back to the Pelagius Wing with all the items and powers you had when you started, as well as your new staff and clothes. Before leaving, move further down the hall and down the stairs to find a copy of the Lockpicking skill book Surfeit of Thieves .
Notes [ edit ]
- This quest contains several references to events in Oblivion and the Shivering Isles expansion. See here for more information.
- If you open the menu using the method above (or by pressing X on a highlighted quest, if playing Xbox360) you can fast travel out of Pelagius's mind. However, you will be unable to open menus, favorites, or change equipment. You will still be wearing the same outfit as in Pelagius's mind and be holding the Wabbajack.
- It is also possible to access your inventory while in Pelagius' mind; at the Night Terrors scene after the wolf is turned into a goat, other terrors can kill it. Its body can be "looted", rendering you able to take off your current equipment.
- You cannot pickpocket Sheogorath or Pelagius the Mad, but you can pickpocket Pelagius' Confidence (once Pelagius' Anger is defeated) and Dervenin (once he is summoned).
- The enemies meant to attack Pelagius in the Night Terrors section may attack you, instead.
- Right before you enter Pelagius' mind, you may appear naked for a brief moment.
- Punching or pickpocketing Dervenin after he is summoned by Sheogorath constitues a crime and will net you a bounty in Haafingar .
- This quest can be done as early as level 1. If your Speech skill is too low to convince the maids to let you into the Pelagius Wing, you can increase the skill with Fortify Persuasion effects. You can get The Gift of Charity bonus from Dervenin by giving him 1 gold before asking him about anything else, and you can get the Blessing of Dibella from the Temple of the Divines in Solitude.
Bugs [ edit ]
- The game may freeze on transition into Pelagius's Mind. This is probably just a "normal" transition freeze, but it may be caused by the quest-specific behavior that occurs at this point, and may not allow you to continue with the game. It is possible the freeze is caused by having more than 999 items of one kind - likely to be one or more types of arrows - in which case the freeze can be avoided by dumping enough of the offending item(s) to reduce the count to 999 or less, before reaching the transition point to Pelagius's Mind.
- The Official Skyrim Patch , version 1.9.26.0.8, fixes this bug.
- You must exit the dialogue with Sheogorath to trigger a scene that will lead to your leaving.
- Loading from an earlier save usually fixes this.
- If you have a Dead Thrall active when you enter Pelagius' Mind, the thrall may be missing when you return. If this happens, check your active effects, and if the thrall is still assigned to you, fast travel may return it to your location. ?
- One can gain access to his menu by pickpocketing Confidence, read a Black Book, exiting the pickpocket menu, then access the quick menu (Down button in PS4), selecting an item and then exiting. You will then be able to access your inventory permanently.
Quest Stages [ edit ]
- The following empty quest stages were omitted from the table: 0, 20, 30, 40, 55, 90, 95, 150, 190.
- Any text displayed in angle brackets (e.g., <Alias=LocationHold> ) is dynamically set by the Radiant Quest system, and will be filled in with the appropriate word(s) when seen in game.
- Not all Journal Entries may appear in your journal; which entries appear and which entries do not depends on the manner in which the quest is done.
- Stages are not always in order of progress. This is usually the case with quests that have multiple possible outcomes or quests where certain tasks may be done in any order. Some stages may therefore repeat objectives seen in other stages.
- If an entry is marked as "Finishes Quest" it means the quest disappears from the Active Quest list, but you may still receive new entries for that quest.
- On the PC, it is possible to use the console to advance through the quest by entering setstage DA15 stage , where stage is the number of the stage you wish to complete. It is not possible to un-complete (i.e. go back) quest stages, but it is possible to clear all stages of the quest using resetquest DA15 .
- Skyrim-Quests
- Skyrim-Quests-Daedric
- Skyrim-Bugs Fixed by the Unofficial Skyrim Patch
- Skyrim-Confirmed Bugs
- Skyrim-Bugs Fixed by the Official Skyrim Patch
- Skyrim-Unconfirmed Bugs
- Skyrim-SRQRP-Requires Final Review
- Skyrim-SRQRP-Unknown Objectives
Navigation menu
Personal tools.
- Not logged in
- Contributions
- Create account
- How to Contribute
- Recent Changes
- Random Page
- View Mobile Site
- Android App
- All Content
- Elder Scrolls Online
- Battlespire
- Call to Arms
- Merchandise
- Featured Content
- Community Portal
- Admin Noticeboard
- Join Server
- X (Twitter)
- Hosted Wikis
- Starfield Wiki
- Oblivion CS Wiki
- Skyrim CK Wiki
- Fallout 3 GECK Wiki
- Fallout 4 CK Wiki
- What Links Here
- Related changes
- Special Pages
- Printable Version
- Permanent Link
- Page information
- Cite this page
- This page was last edited on 7 February 2024, at 22:04.
- All content is available under the terms of the Attribution-ShareAlike 2.5 License .
- Privacy Policy
- About UESPWiki
- Disclaimers
- Mobile view
Medresi Dran and the Wandering Dead
- Edit source
- View history
Medresi Dran and the Wandering Dead is a quest available in The Elder Scrolls V: Skyrim in which the Dragonborn must assist Medresi Dran in clearing the out Draugr from Angarvunde .
- 1 Objectives
- 2 Walkthrough
- 6 Appearances
Objectives [ ]
- Destroy the Draugr in Angarvunde
- Talk to Medresi in Angarvunde
- Find a way to open the gates
- Open the other gate
- Return to Medresi
- Discover the treasure of Angarvunde
Walkthrough [ ]
Medresi Dran will speak to the Dragonborn when approached. Offering to help her will start the miscellaneous quest "Destroy the Draugr in Angarvunde." If the quest was not followed, the key may need to be obtained from Medresi by either pickpocketing or killing her.
Upon killing or pickpocketing Medresi Dran, the key can be looted and the quest "Discover the treasure of Angarvunde" will begin.
- Medresi Dran will ask to the Dragonborn to kill three draugr that scared her men off (level-dependent).
- Report back to Medresi
- Open the two gates blocking the path. Medresi will give the Dragonborn the key to two doors; one on each side of the main chamber in Angarvunde. The Dragonborn will have to go through both eventually (both doors are full of Draugr), and upon finishing each door, they will both return you to the main chamber.
- Go through the open gates and Medresi Dran will run ahead of the Dragonborn into the treasure room only to be crushed by the staircase shaft rising from the floor.
- Enter the secret staircase that appeared upon the demise of Medresi, and proceed down the stairs to obtain a word of the Animal Allegiance shout and a treasure chest. Learning the word of power will complete the quest.
Journal [ ]
- Medresi's corpse can be looted after she is killed by the shaft by standing on the stairs leading into the room and knocking her body off the top using a kinetic destruction spell such as Firebolt .
- PC (Fix) 360 (Fix) PS3 (Fix) Talk to Medresi Dran and have her "give" you the key, then exit and re-enter the dungeon and re-trigger the levers for both doors.
- PC (Fix) 360 (Fix) PS3 (Fix) Kill Medresi Dran.
- PC (Fix) 360 (Fix) PS3 (Fix) Use a paralysis spell to have the follower topple over or use Unrelenting Force.
Appearances [ ]
- The Elder Scrolls V: Skyrim
- Elder Scrolls
- 1 Console Commands (Skyrim)
- 2 Marriage (Skyrim)
- 3 Trainers (Skyrim)
- PlayStation 3
- PlayStation 4
- PlayStation 5
- Xbox Series
- More Systems
Game Basics
The elder scrolls v: skyrim special edition — guide and walkthrough (ps4).

Guide and Walkthrough (PS4) by SENIORBILL
Version: 1.5 | Updated: 06/18/2018
- Next: Skyrim Main Missions
Table of Contents
- Skyrim Main Missions
- Before the Storm
- Bleak Falls Barrow
- Dragon Rising
- The Way of the Voice
- The Horn of Jurgen Windcaller
- A Blade in the Dark
- Diplomatic Immunity
- A Cornered Rat
- Alduin's Wall
- The Throat of the World
- Elder Knowledge
- Alduin's Bane
- Season Unending
- Paarthurnax
- The World-Eaters Eyrie
- Dragonslayer
- The College of Winterhold Missions
- First Lessons
- Under Saarthal
- Hitting the Books
- Good Intentions
- Revealing the Unseen
- Containment
- The Staff of Magnus
- The Eye of Magnus
- College of Winterhold Side Missions
- The Dark Brotherhood Missions
- Innocence Lost
- With Friends Like These
- Mourning Never Comes
- Whispers in the Dark
- The Silence Has Been Broken
- Bound Until Death
- Breaching Security
- The Cure For Madness
- Recipe for Disaster
- To Kill an Empire
- Death Incarnate
- Hail Sithis
- The Dark Brotherhood Side Missions
- Contracts: Narfi; Beitild; Ennodius Papius
- Contracts: Lurbuk; Hern
- Contracts: Anoriath; Deekus; Ma'randru-jo
- Contract: Agnis
- Contracts: Helvard; Maluril
- Contract: Safia
- The Feeble Fortune
- The Thieves Guild Missions
- A Chance Arrangement
- Taking Care of Business
- Loud and Clear
- Dampened Spirits
- Scoundrel's Folly
- Speaking With Silence
- Hard Answers
- The Pursuit
- Trinity Restored
- Blindsighted
- Darkness Returns
- The Thieves Guild Side Missions
- The Companions Missions
- Take Up Arms
- Proving Honor
- The Silver Hand
- Blood's Honor
- Purity of Revenge
- Glory of the Dead
- The Companions Side Missions
- The Bard's College Missions
- Tending the Flames
- Rjorn's Drum
- Finn's Lute
- Pantea's Flute
- Civil War: Stormcloaks
- Joining the Stormcloaks
- The Jagged Crown
- Message to Whiterun
- Battle for Whiterun
- Liberation of Skyrim: Fort Neugrad
- Liberation of Skyrim: Compelling Tribute
- Liberation of Skyrim: The Battle for Fort Sungard
- Liberation of Skyrim: A False Front
- Liberation of Skyrim: The Battle for Fort Snowhawk
- Liberation: Battle for Fort Hraggstad
- Liberation of Skyrim: The Battle for Solitude
- Civil War: Imperials
- Joining the Legion
- The Jagged Crown: Imperials
- Message to Whiterun: Imperials
- Defense of Whiterun
- Reunification of Skyrim: A False Front
- Reunification: Battle for Fort Dunstad
- Reunification: Compelling Tribute
- Reunification: Battle for Fort Greenwall
- Reunification: Rescue from Fort Kastav
- Reunification: Battle for Fort Amol
- Reunification: Battle for Windhelm
- A New Order
- Seeking Disclosure
- Chasing Echoes
- Beyond Death
- Unseen Visions
- Touching the Sky
- Inner Sanctum
- Kindred Judgement
- Dawnguard Side Missions
- The Temple of Miraak
- Fate of the Skrall
- Cleansing the Stones
- The Path of Knowledge
- The Gardener of Men
- At the Summit of Apocrypha
- Dragonborn Side Missions
- Unearthed: Black Book Mission
- Reluctant Servant: Black Book Mission
- Lost Knowledge 1: Black Book Mission
- Lost Knowledge 2: Black Book Mission
- The Final Descent: Black Book Mission
- March of the Dead
- A New Source of Stahlrim
- Lost Legacy
- The Chief of Thirsk Hall
- Retaking Thirsk
- Skyrim Side Missions
- Blood on the Ice
- Forbidden Legend
- The Forsworn Conspiracy
- No One Escapes Cidna Mine
- Infiltration
- In My Time of Need
- Kyne's Sacred Trials
- Laid to Rest
- Lost to the Ages
- The Man Who Cried Wolf
- The Wolf Queens Awakens
- Missing In Action
- Promises to Keep
- Rise In The East
- Rising at Dawn
- Unfathomable Depths
- The White Phial
- Repairing the Phial
- Daedric Missions
- The Black Star
- Boethiah's Calling
- The Break of Dawn
- The Cursed Tribe
- A Daedra's Best Friend
- Discerning The Transmundane
- The House of Horrors
- Ill Met By Moonlight
- The Mind Of Madness
- A Night to Remember
- The Only Cure
- Pieces Of The Past
- A Taste Of Death
- Waking Nightmare
- Exploration Missions
- Ancestral Worship
- Angarvunde: Madresi Dran's Treasure
- Angi's Camp
- Evil In Waiting
- Forgetting About Fjiola
- The Hunter and The Hunted
- Find Red Eagle's Sword
- The Lost Expedition
- Melka And Petra
- Otar The Mad
- The Pale Lady
- A Scroll For Anska
- Siege Of The Dragon Cult
- Silenced Tongues
- What Lies Beneath
- Wilhelm's Specter
- The Masks Of The Dragon Priests
The Elder Scrolls V: Skyrim Special Edition Walkthrough for all systems
Skyrim is the ancient homeland of the Nords and it is immersed in a brutal civil war as the campaign opens. The Imperial Empire still rules; but, after their near defeat by the Aldemeri Dominion and the signing of the White Gold Concordat , they are weak and deferential to the Thalmor . The treaty banned the worship of Talos, alienating the Nords and leading to a rebellion after Ulfrick Stormcloak assassinated the High King . The Imperials are struggling to maintain power while the Stormcloaks seek to throw off the yoke of the Imperials and the Thalmor . Complicating the conflict is the return of Alduin , the ancient dragon known as the World-Eater, so named because Nordic lore prophesies that his appearance sets in motion events leading to the end-times. The Dragonborn is thrust into the chaos and the fate of Skyrim is in his hands.
This document outlines a campaign played on the Adept level of difficulty, but the practical difficulty of the gameplay, as the campaign progresses, is greatly determined by the player's actions and choices. Leveling is a function of the usage of skills and the wise choice of level and skill upgrades, especially early in the game. If one concentrates on magic, for example, one can speedily become an accomplished mage by placing level upgrades in Magicka and skill upgrades in Destruction or other magic related fields. Concentrate on One or Two-Handed combat or on Archery , and properly assigned skills can result in similar progress. Leveling non-combat skills, however, say emphasizing Alchemy or Pickpocket too early, can find one woefully weak during combat. Select a combat preference and stick with it to maximize its efficiency.
This document focuses on Archery and Stealth ; but the mission details of where, how many, how challenging, etc. are consistent and adaptable for all types of combat. The emphasis is on Archery, Sneak, Enchanting, Smithing and, secondarily, on Destruction and Light Armor . The goal is to maximize archery damage and stealth ( Sneak ), and to ultimately achieve 100% in Enchanting with 100% Smithing a long and grueling undertaking. That said, shorter term goals in both Enchanting and Smithing are keys to success.
While the selection of an archery-based character from the ten available choices would seem straightforward based on the given level of skills inherent to a character-the Bosmer or Wood Elf , for example, has +10 Archery and +5 in both Sneak and Light Armor , these are significant but transient advantages while the 25% Magic Resistance Active Effect of the Breton is permanent and remains highly beneficial throughout the campaign. So, while the Breton's skills aren't focused on the proper skills, lower level skills in Archery and Sneak accrue rather quickly and the initial deficits can be made up by smart gameplay, by the acquisition of Skill Books , by training with Faendal and by an early visit to Angi's Camp where you can earn six skill points and obtain an Archery Skill Book . That said, any of the ten playable characters are viable as an Archer, Warrior or Mage .
It must be noted that early game archery is rather weak. The long bow and the hunting bow, even with an early grindstone upgrade and a 20% Overdraw perk provide a meager improvement on a bow with an initial damage of 6 or 7. This damage can be doubled with a sneak attack (remaining undetected while in a crouched position) and the damage of the arrow is also added to the total damage. This shortfall will be remedied as the game progresses, but making an early-game investment to increase your Magicka is prudent; investing a skill point or two in Destruction also makes a spell like Flames an excellent backup when the bow can't get the job done. Increasing Magicka also makes spells like Clairvoyance, Detect Life, Flames , etc. more useful. A modest early investment in Magicka is not a waste of early level or skill perk assignments.
Loot is abundant in Skyrim . It can be found on corpses, in chests and urns, on environmental objects and in nature. It can be stolen or earned as a reward. One can initially tote 300 units of weight. Don't make the mistake of taking everything. Be discriminating, taking valuable items or useful items like a better weapon or armor, enchanted gear, Soul Gems , ores, jewels and useful ingredients or potions. Take only extraneous items that are worth at least 5 times its weight. If necessary, you can drop items. That said, fill up if you have space and are in a position to quickly sell it off.
Purchase a house- Breezehome in Whiterun will cost 5 000 gold septims and bedroom decorations another 300 gold septims . This is an essential goal. The house will provide permanent storage space and sleeping in an owned bed will provide a 10% Well-Rested bonus to skill leveling. Once you have this storage space, don't hoard items like armor, weapons and potions that you can sell for gold. An exception is enchanted gear, which, if not in use, should be disenchanted to level up Enchanting and to make that enchantment available to place on other gear. Compartmentalize, using a storage chest for ores, gems, Soul Gems , leathers and other craftable goods; use another for ingredients or for weapons or for armor. Don't hoard dragonbone or scales, especially early in the game-sell them for gold. You can't use them for crafting until late in the game and then only after you raise your Smithing level to 100%.
Every town has various merchants that buy and sell merchandise. Whiterun , for example, has a general merchandise dealer named Belethor and weapon and armor dealers like Warmaidens and the Drunken Huntsman . Once other cities are fast-travel stations, you can travel to them. Solitude , for example, has Bits and Pieces and Radiant Raiment . These merchants frequently have that piece of enchanted gear that you covet but haven't found. Use these merchants and the numerous other available merchants to sell off your extras and to purchase needed items. Hoarding extraneous gear serves no purpose and can be sold for gold. Be aware that merchants can be killed during enemy attacks. Belethor might get in the way of a cultist or vampire attack, making his store unavailable. Adrianne Avenicci labors at the forge near the Whiterun gates and she can also be killed by enemy attacks.
The player can carry as many weapons as his weight limit allows, but focusing on a preferred combat style and utilizing and upgrading the preferred weaponry is essential. This document focuses on archery, so the bow will be highlighted. Note, however, that the upgrading process applies to most weaponry and having a viable back-up weapon or spell is essential. The first bow acquired will be the lowly long bow which deals only 6 damage. This output can be doubled by utilizing a sneak attack-remaining undetected while crouched. The damage of the arrow is also added to that of the bow.
The Light Armor route is the best Smithing option for an archer. The highest base damage of the game's bows is the dragonbone bow. It has a base damage of 20 and won't be available until far into the campaign. However, the base damage of a bow can be massively upgraded with a dragonbone bow capable of exceeding 450 damage to which enchantments like paralyze and burning can be added, making them deadly to even the toughest of foes. The Elven, glass and dragonbone bows are all available through the Light Armor options in Smithing . An Elven bow can actually be obtained as soon as you enter Whiterun . You'll just have to pick an expert lock in the cellar of the Companion's headquarters in Jorrvaskr. to acquire it
Upgrading is done by finding better bows early in the game and by upgrading them at grindstones-a process that can be boosted by using a Blacksmith's Potion . As the campaign unfolds and skills become available, Overdraw and other Archery tree perks can be added to increase the damage. This process can be quickened by finding Archery Skill Books , by training with selected experts and by finding or enchanting gear that greatly bolsters archery-gauntlets or bracers, a helmet, a necklace and a ring can all be enchanted with archery and the enchantments stack. These enchantments can be further boosted by the use of an Enchanting Potion . Prioritizing Deadly Aim in the Sneak Skill Tree to increase bow damage to 3X is advised, and making an early visit to Angi's Camp can also yield as many as seven Archery skill points.
Upgrading your current bow is obviously both an ongoing and an extended process that will involve leveling up Archery, Sneak , Smithing and Enchanting . This process can be further bolstered by the use of potions to fortify Smithing and Enchanting . The following is the process to upgrade an Elven bow.
First upgrade Smithing to level 30 to permit Elven crafting or just pick the expert lock on the display case in the cellar of Jorrvaskr to steal one anytime after entering Whiterun . This process can be accelerated by selecting the Warrior Stone and smithing jewelry or gear with the Well-Rested bonus active. You can also level-up Smithing by finding the Smithing Skill Book located in the Embershard Mine (detailed in Before the Storm ) and another book near Eorland Gray-Mane's forge in Whiterun . Five additional skill points can be purchased from Ghorza at the forge in Markarth .
You can craft anything your perks permit to reach level 30. Making jewelry from ingots and precious stones or making iron daggers or anything you have the ability to make will slowly level-up Smithing . An Elven bow requires quicksilver and moonstone; and, early in the campaign, the moonstone needed to craft and upgrade an Elven bow is rare and expensive to purchase; so crafting Elven armor early in the game is a reach but the Elven bow and its upgrade requires only one quicksilver ingot and three refined moonstones ingots and it is worth the expense. Note that moonstone can be purchased from merchants or blacksmiths after you level-up past level 5.
Instead of Elven armor, you can use looted armor or craft either leather or hide armor instead. To maximize archery damage, you'll need to enchant a helmet, bracers or gloves, a ring and a necklace to maximize the damage of your bow. If you have a potion to augment Smithing , use it before upgrading the bow at the grindstone and the armor pieces at the workbench. Note that ultimately you'll also want to be wearing a separate set of body armor, bracers or gloves, a ring and a necklace to fortifying Smithing prior to the grindstone or workbench upgrading. Since this enchanting requires a high-level Soul Gem to be a significant factor, this may not be practical early on unless you choose to duplicate high-level Soul Gems , which can be done by following the procedure in the Cheats section.
To continue the process, you'll need to have high-level Soul Gems (preferably Grand Soul Gems ) to enchant the bow; and, if you have the wherewithal, the armor. Having your Enchanting level at level 3, preferably at 4, will yield a significant benefit and isn't a waste of your precious Soul Gems . To bolster archery, you must have disenchanted an "archery" item, making it available at the Arcane Enchanter . Before enchanting, travel to the Guardian Stones and select the Mage Stone , and then get the Well-Rested bonus by sleeping in an owned bed. If you have a potion to fortify enchanting, use it to enchant the bow with Fire, Soul Trap. Paralyze or whatever effect you covet. If you have the Soul Gems , take another potion and enchant the four aforementioned items with archery to maximize bow damage.
As you progress to higher levels in Smithing and Enchanting and use more potent potions, you can craft more powerful bows, finally reaching the ability to craft a dragonbone bow. At 100% Enchanting , you can put two effects, like paralyze and burning or frost on the bow, making it the ultimate killing machine. A glass or Elven bow can easily exceed 300 in damage and can punish a victim with two potent effects on the way to a dragonbone bow dishing out over 450 damage with two effects, making archery dominant.
Smithing : After the disenchantment of gear with the Smithing perk, the following gear can be enchanted to boost Smithing . These perks stack, so four items enchanted with a 10% perk, yield a 40% boost to crafting at the forge and upgrading at the grindstone and the workbench.
Body armor: Smithing
Gauntlet or Bracers or Gloves: Smithing
Necklace: Smithing
Ring: Smithing
Archery : After the disenchantment of gear with the Archery Perk, the following gear can be enchanted to boost Archery . These Perks stack, so four items enchanted with a 10% perk, yield a 40% boost to crafting and upgrading.
Helmet: Archery
Gauntlets or Bracers or Gloves: Archery
Necklace: Archery
Ring: Archery
Suggested Enchantments at 100% Enchanting level for an archer with magic as a back-up: This build can ultimately not only massively boost archery but can also enable nearly unlimited Magica to produce an awesome back-up for archery.
Body Armor: Light Armor and Destruction
Helmet: Archery and Destruction
Gauntlets: Archery and Sneak
Boots: Sneak and Carry Weight
Necklace: Archery and Destruction
Ring: Archery and Destruction
Suggested Skills for an Archer : Assignment of skill points will be determined by their availability but upgrades to Archery, Sneak, Smithing and Enchanting are priorities. A modest early-game level investment in Magicka (5 points) and skill upgrades to Novice and perhaps Apprentice Destruction are also a good investment. When nearing a goal, say Extra Effect in Enchanting , save enough skill points to acquire it.
Overdraw 1-5 : Increases bow damage in 5 20% increments, doubling the damage of the bow and enables the Archery Skill Tree .
Eagle Eye : (Requires level of 30) Consumes stamina to magnify the target.
Steady Hand 1-2 : (Requires Levels of 40 and 60) Slows time by 25% and then 50%.
Power Shot (Requires level of 50) Arrows stagger all but largest opponents 50 of the time
Quick Shot (Requires a level of 70) Draw a bow 30% faster
Sneak 1-5 : Raises sneak ability in 5 20% increments and enables the Sneak Skill Tre e
Backstab : (Requires level of 30) Empowers one-handed weapons to administer 6X damage.
Muffled Movement (Requires a level of 30) Noise from armor is reduced by 50%.
Deadly Aim : (Requires a level of 40) Deadly Aim enables sneak attacks with bows to do 3X damage. Get this perk as soon as it is available!
Steel Smithing
Elven Smithing (Requires a level of 30)
Advanced Armors (Requires a level of 50)
Glass Smithing (Requires a level of 70)
Dragon Armor (Requires a level of 100)
Enchanting :
Enchanter 1-5 : Raises Enchanting in 5 20% increments.
Insightful Enchanter (Requires a level of 50) Skill enchantments are 25% stronger
Corpus Enchanter (Requires a level of 70) Health, Magicka and Stamina enchantments on armor are 25% stronger.
Extra Effect (Requires a level of 100) Can put two effects on same item.
Destruction :
Novice Destruction : Novice spells consume half Magicka
Apprentice Destruction : (Requires a level of 25) Apprentice spells consume half Magicka .
Light Armor :
Agile Defender 1-5
Custom Fit : (Requires a level of 30) Wearing a full set of Light Armor gives 25% bonus.
Hidden Chests: :
If you're not a purist, game progress can be greatly facilitated by two actions. The first entails raiding four hidden merchant chests that can yield a wealth of items. Three of these chests can be accessed even before your initial entry into Whiterun by taking the carriage to Markarth , Solitude and Dawnstar . Following are the procedures needed to find them and the video-above-will also do the trick.
Markarth : The chest at Markarth can be found by travelling to the Markarth Stables . From there go east past the carriage, following the cobblestone road as it winds around to a bridge over the river. Turn east before the bridge and, where the cobblestone road ends, head down the grade to the next bridge. Don't cross the bridge. Head behind the short rock wall, crouch and move slowly along the wall to get the "Search Chest" icon.
Dawnstar : The chest at Dawnstar is located among the three small boulders near the entry of the Iron-Breaker Mine . Crouch and the "Search Chest" icon will reveal the hidden chest.
Solitude : The chest at Solitude is located southwest of the city near the bush south of the city's lower entry. If you crouch in the bush and look north toward the cobblestone road and align the tree across the road with the smallest of the small boulders, you'll get the "Search Chest" i con.
Whiterun : The fourth chest is found by jumping from the barrel in the alcove near Whiterun's main gate into the window and then to the ground to get outside the city walls. Note that you can't reach this position from outside the city. Make a long counterclockwise route around the city walls, moving away only to move around the rocky outcroppings. This route will bring you due east of Dragonsreach , as seen on your map. This will place you in a strange place where you can jump across the gap and then jump past the wall to be suspended in the air near a similarly suspended chest. Move near it, jump and activate when the :"Search Chest" icon appears.
Item Duplication :
The duplication of items like Soul Gems , precious stone and silver and gold ingots can greatly facilitate the leveling of Smithing and Enchanting and can result in the crafting of valuable items to sell for gold and for the enchanting of awesome gear. This process requires an inventory with items to duplicate and a companion to work with. Note that having more than five of an item you want to duplicate makes the process more efficient. Note also that items, especially ingots of silver or gold, will occasionally disappear.
Lets assume you have purchased Breezehome and have Lydia as a companion. Have her follow you outside and have her wait in a discrete location, preferably near the city gate. Lets now assume you have fifteen Amethysts or fifteen Grand Soul Gems in your inventory. Drop say ten of them, dropping them one at a time near Lydia. Interact with her, telling her "I need you to do something." Back off with that command still active and have her pick up the ten items. She will say "Okay, got it" as she grabs the designated items one at a time. Leave her waiting and exit Whiterun and then immediately renter and get to Lydia . Note that the items Lydia picked up-at least most of them-will be lying on the ground, even though she picked them up earlier. Take them. This is the point where the items on the ground may come up a few short. Now tell Lydia that "I need to trade some things with you." This will allow you to take back the items you told her to pick up earlier. This is a bit tedious but it can massively facilitate your ability to, for example, craft valuable gems and ingots into jewelry. You can also duplicate Soul Gems, allowing the enchanting of the jewelry or of gear. This process can accelerate the leveling of both Smithing and Enchanting and can raise huge amounts of gold and facilitate the enchantment of weapons and gear.
Shouts, Powers, Active Effects and Stones:
Shouts are found through gameplay or exploration although several like Unrelenting Force and Whirlwind Sprint are given during gameplay. Each Shout has three Words that require a dragon's soul to unlock and once used they have a recharge time requirement. Unlocking a Shout is not a requirement but is a choice. Some of the more useful shouts are Ice Form, Aura Whisper, Fire Breath, Frost Breath and Slow Time . These can be extremely useful and at least the initial Word for each can be found rather early in the game. Other Shouts like Dragonrend, Bend Will and Clear Skies are required and are acquired as needed during gameplay. Placing favored Shouts in "Favorites" makes them more useful. Following are the location of a Word of the aforementioned five Shouts .
Ice Form : The Shout briefly freezes an opponent in ice. A Word can be acquired In the ruins of Saarthal , acquired during the mission, Under Saarthal . the Shout can be acquired in the ruins of Volunruud during the side quest Silenced Tongues .
Fire Breath : The Shout projects highly damaging flames. A Word of the Shout can be acquired in Dustman's Cairn during the Companion's mission, Proving Honor .
Frost Breath : The Shout damages and slows down your opponent. A Word of the Shout can be acquired in Folgunthur during the side mission Forbidden Legend .
Slow Time : The Shout does as advertised-it slows time. A Word of the Shout can be acquired in Labyrinthian during the mission The Staff of Magnus .
Powers are selectable perks that provide a temporary boost. Dragonskin is an inherent power of a Breton and enables the wielder to absorb 50% of the Magicka from hostile spells for 60 seconds. Most powers can be only used once per day while others like Sun Flare , acquired on Solstein , can be reacquired at the standing stone where it was first activated.
Active Effects shows all the effects that are active on your gear, from the perk of a stone ( Lord Stone , etc.) or a reward ( Sailor's Repose . etc.) or a book Scholar's Insight , etc.). Perks on gear, like archery or magic resistance, will also display. Any disease you contract will also display in red. Frequently checking for an active disease is highly recommended. This can prevent you from becoming a vampire or prevent a drag on your health or the limitation of a skill.
Standing Stones provide a percentage boost to a set of skills or a perk of some kind. The Guardian Stones can be found very early in the game, just southwest of Riverwood, and they provide a 20% boost to the primary modes of combat and related skills. The Thief Stone is for Archery, Sneak, Light Armor, Lockpicking Pickpocketing, Speech and Alchemy ; the Warrior Stone f or Smithing, Block, Heavy Armor, One and Two-Handed combat and the Mage Stone for Destruction, Enchanting, Illusion, Conjuration, Restoration and Alteration .
Unless you have acquired the Aetherial Crown by completing the mission Lost to the Ages and are wearing it, only one Standing Stone can be active at a time. In addition to the Guardian Stones , the following Stones are the most useful of the remaining Standing Stones.
The Lover Stone is located on a mountainside due east of Markarth . Activating it will enable a 15% boost to all skills.
The Lord Stone is located on a mountainside southwest of Dawnstar , southwest of Frostmere Crypt . This Stone provides 50 points of damage resistance and also provides 25% resistance to magic. This provides a very lucrative boost to your defensive capabilities.
The Steed Stone is located north of the Statue of Meridia , which is west of Solitude . This remote Stone provides the user with 100 additional units of carry weight. It also makes your armor weightless and eliminates any movement penalty.
General Hints:
Quicksave often.
Select the Guardian Stone that best suits your style of combat: Thief Stone for archers; Warrior Stone for heavy combat; the Mage Stone for magic.
Assign favorite weapons, potions, Shouts, etc as "Favorites."
You can obtain an Elven Bow anytime after entering Whiterun -you'll just need to pick the expert level lock on the display case in the cellar of the Companion's headquarters in Jorrvaskr . Otherwise you''ll require a Smithing level of 30 and the somewhat rare refined moonstone to craft one.
A sneak attack yields 2X damage. To initiate a sneak attack, crouch and remain undetected as you attack your target. This can be increased to 3X with the skill Deadly Aim in the Sneak skill tree.
Use floor traps and oil slicks to help eliminate hostiles.
Always check treasure chests for triggers that activate a booby trap. Defeating the trigger isn't necessary. You can usually stand aside or open the chest and back off to avoid damage. Note also that most traps aren't fatal but some like spiked gates are best given a wide berth.
Many locations-dungeons, caves, ancient ruins-are dark and maze-like. Use Clairvoyance to find your way out. Note that you'll need to have a mission selected to lay a path to the exit. This spell can be found in Embershard Mine very early in the campaign as detailed in the main mission Before The Storm .
Be aware that the carriages at most major cities, including Whiterun , can transport you to other major towns for a small stipend. These carriages are available as soon as you reach the outskirts of Whiterun .
Disenchant any enchanted items at the Arcane Enchanter in Dragonsreach , unless you are wearing or using that item. You need to disenchant only one item with say Archery to have that perk available for any gear you want to enchant with archery. Sell or wear any other enchanted archery items.
You can move faster with your weapon unequipped.
Summoning creatures like familiars, undead or Atronachs is a good way to both attack an enemy and to distract them while you remain incognito.
Be aware that high-level Draugr oftentimes use powerful Shouts.
When you hear the chanting of a Word Wall, learn a Word of the Shout. Don't automatically unlock a Shout. Some may not suit your style of play.
Don't over-level non-combat skills early in the game or your opponents will level-up and you'll be weak against them.
Note the location of the Shrine of Talos in Whiterun , and whenever you have an impairment, visible in the Active Effects , use it rather than expending a potion to cure the malady.
Be aware that you can change the difficulty of the game whenever you choose to do so.
Make the purchase of Breezehome and its bedroom furnishings an early game goal. This will cost 5,300 gold septims but will provide storage space, a bed to obtain the Well-Rested bonus and you'll get Lydia as your Housecarl. She is a very effective companion.
Don't hoard gear but don't sell useful items like Soul Gems , precious stones and ores. Use the numerous merchants to sell extraneous gear. Don't keep numerous low-weight ingredients, potions, books and Soul Gems in your inventory-they can add up quickly-carry only what you need. Be aware that merchants restock every 48 hours-you can forward time to facilitate this.
Note that dragonbone and scales are only useful late in the game and they can be sold to generate gold. This can raise needed funds early in the game to purchase Breezehome or a piece of gear with an elusive enchantment.
Jarl Balgruuf's steward Proventus will offer bounties. One will take you to Halted Stream Camp , which is located due north of Whiterun . You can go there with or without acquiring Proventus' quest to find the Spell Tome: Transmute . This extremely useful spell can change iron ore into silver and gold ores. Its acquisition is key to crafting jewelry, raising Alteration and Smithing and, potentially, Enchanting .
You can acquire the Spell Tome: Detect Life during the mission Infiltration detailed in the Side Missions section. This spell allows the caster to briefly see the location of the living even through walls. This can be highly beneficial, especially to a stealth character. This spell isn't generally available until Alteration reaches level 50, but when your combat skills are sufficient, probably at level 10, making a trip to the fort at Treva's Watch can yield the spell.
Speak to stewards, innkeepers and bartenders, asking about side jobs and rumors to activate quests.
Be diligent in searching corpses, chests, urns, etc. to obtain worthwhile loot but take only useful or valuable items.
Always store or sell items to free-up inventory before setting out to explore or pursue a mission.
Find and keep a pickax in your inventory to mine ores.
Companions can be useful but frequently spoil stealth operations. They will frequently trigger traps. They can also carry loot for you and can be given higher-level gear to make them more effective.
Use trainers to help level the skills you prefer. Search the environmental to find Skill Books . Note that they have a higher value than other books.
Be aware that you can have as many quest lines in progress as you want. Oftentimes beginning a quest line, like the Dark Brotherhood , yields lucrative gear that boosts a skill significantly. Having multiple quest lines active also lends variety to the gameplay.
Using poisons like frostbite venom on an arrow or weapon, especially early in the game, can provide a significant boost to damage.
Note that horses are oftentimes able to negotiate territory and grades that you can't do on foot.
Note that using a bow that traps souls is an excellent way to fill Soul Gems . Note that Draugr as well as wildlife, including mudcrabs , are a good source of souls. Be aware of what empty Soul Gems are in your inventory or you may find high-level Soul Gems filled with petty souls. Carrying a second bow without the soul trap is recommended. Note that Soul Gems a re needed to sustain an enchantment, so you'll need to fill Gems and reload an enchanted weapon or staff.
Purchase only what you simply must have. This excludes a house and bedroom decorations. Purchasing useful training is also advised-you can oftentimes just pickpocket the trainer to reclaim your gold. Iron ores are also cheap and can be transmuted into silver and gold, making them a good buy. If you can't find an enchanted item that you covet-like something with a Smithing or Sneak enchantment, for example-buy it. As the game progresses, gold will be plentiful, so indulge yourself.
Consider raiding the hidden chests detailed in Cheats early in the campaign to get an early edge by obtaining Soul Gems , enchanted gear, potions and gold septims.
Search Results
Guides & walkthroughs | skyrim wiki.
- Create new page
- Recent Changes
- Permissions
- Edit Open Graph
- Clear page cache
- Clear comments cache
- File Manager
- Page Manager
- Wiki Templates
- Comments Approval
- Wiki Settings
- Wiki Manager
Guides & Walkthroughs for Skyrim is a section to guide both experienced and new players on certain aspects of the game. This includes detailed information on walkthroughs, achievements, as well as a guide for new players. The purpose of the content provided is to help in finding a specific solution or guide on a certain part of the game that a player is having difficulty with.
New Player Help
Walkthrough index, console commands, easter eggs, trophy & achievement guide.
Blood in the Water
- Recent Changes +
- File Manager +
- Page Manager +
- Create Wiki +
- ⇈ Back to top ⇈
Skyrim: The Mind Of Madness Daedric Quest Walkthrough
Our step-by-step walkthrough for The Elder Scrolls V: Skyrim's most iconic Daedric quest, The Mind of Madness.
Quick Links
Starting the mind of madness, accessing the pelagius wing, escaping pelagius' mind, getting the wabbajack.
You might find a beggar wandering the streets of Skyrim's capital, Solitude. If you are feeling charitable, you can listen to his worries and offer to help. He will ask you to help him convince his master to return from his vacation before calamity befalls the province.
Related: Skyrim: Paladin Build Guide
What isn't immediately obvious is that his master is none other than the Daedric Prince of Madness, Sheogorath, and that he is enjoying a vacation in the dead Emperor Pelagius' mind. Helping Sheogorath will allow you to avoid calamity and give you a Daedric artifact that is every bit as chaotic as its maker.
Updated on November 25 by Nicolas Ng: We've updated this guide to bring it in line with the rest of our Skyrim walkthrough and ensure you have all the information you need.
You start your journey by looking for a raving beggar called Dervenin near the Bard's College in Solitude. He will tell you that his master is on a vacation and that there will be disastrous consequences if you do not help him resolve the issue.
Dervenin's master is in the Pelagius Wing within the Blue Palace. The beggar will hand you a hip bone to allow you to find his master within. It is best not to think too hard about it.
The Pelagius Wing is located inside the Blue Palace, in the Avenues District . Once inside, you will quickly learn that getting a key to the Pelagius Wing doesn't seem to come easy. Surprisingly though, there aren't any extra hoops you need to get through to get into the room. To get the key, simply talk to one of the maids (like Erdi) to get the key for the wing.
You could also get the key from Falk if you finished The Man Who Cried Wolf.
Once you proceed inside, you will find yourself in an abandoned, cobweb-covered part of the Blue Palace. Simply walk forward until you find yourself transported inside the mind of Pelagius the Mad, an infamously murderous Emperor.
Here you will find Sheogorath, the Daedric Prince of Madness talking to Pelagius in a demented therapy session. He refuses to leave until you "cure" Pelagius. He will hand you the Wabbajack and send you to treat the dead Emperor's personal demons by solving three different puzzles .
The quest is now divided into three separate parts that can be done in any order.
Anger Issues
Anger Issues is accessed by using the southeast portal. There you will find Confidence , a tiny rendition of Pelagius , being pummeled by Anger, a large Imperial soldier. You need to use the Wabbajack on Confidence to make him grow.
G rowing Confidence will create Self Doubts that will beat Confidence to a smaller size. Be mindful of their appearance and plan your adjustments accordingly.
Your target is to grow him large enough to take out Anger. Simply use the item on Confidence to make him grow and on Anger to make him shrink . Once you hear Sheogorath begin speaking, the task is done.
Next, you can access Paranoia by using the northwest portal. Here you will find an arena where Pelagius is fighting two Storm Atronachs along with a couple of bodyguards. Here you need to ignore the Atronachs and shoot the bodyguards to turn them into wolves.
Night Terrors
Finally, you will need to use the northeast portal to deal with Pelagius's Night Terrors . This is where things can get a bit tricky, as you will need to jump back and forth between shooting different enemies. Here is the order the Wabbajack needs to be used in :
- Shoot sleeping Pelagius
- Shoot the wolf
- Shoot Sleeping Pelagius
- Shoot the Bandit
- Shoot the Hag
- Shoot the Flame Atronach
- Shoot the Dragon Priest
Once the Priest turns into a chest and Pelagius wakes up, you have completed this task. Return to Sheogorath to report your successful therapy. He will be confronted by Derevin and will be convinced to end his vacation.
Before he leaves, Sheogorath allows you to keep the Wabbajack as your reward. You will be able to use the staff as a weapon in combat.
The Wabbajack has over two dozen effects that will be randomly applied to a victim. It is not the most powerful weapon, but it is certainly very entertaining.
In a perfect representation of its creator's domain, the Wabbajack will either help or harm you when used with no way of predicting the outcome. It could unleash an offensive spell, transform the target into livestock , or simply kill the target outright.
Next: Skyrim: The Taste Of Death Daedric Quest Walkthrough
IMAGES
VIDEO
COMMENTS
This is a quest mod that serves to add context to the Waking Nightmare quest within the vanilla game. It relies on everything but what you'd normally find in...
I take you through cyan49's house of horrors mod "Wandering Ones(Beta)"Follow the link below to the mods page to download and try for yourself.https://bethes...
Today we dive deep into the terrifying and impressive Wandering Ones. This quest mod is more like a full on horror game, complete with a fantastic story to u...
What do I do in Wandering Ones (I'm stuck) I am playing the Wandering Ones quest mod and I keep getting to points where idk what to do. Usually I have figured it out but now I am completely stuck and no play through online is helping. I am at the part of the quest where you are in a very dark maze full of stairs and swinging blades with the ...
Angarvunde. Upon entering Angarvunde, you will encounter Medresi Dran complaining about her cowardly work force who fled as soon as they encountered some undead. Until the path is clear, Medresi is unable to reach the treasure she seeks. If you offer to assist her, she will in turn offer to split the treasure with you.
updated Aug 23, 2022. advertisement. IGN's The Elder Scrolls V: Skyrim Wiki Guide contains a full game Walkthrough for the Main Questline, an Interactive Map that details all of the important ...
Detailed Walkthrough: ... They may appear in the taverns of Skyrim in addition to a Divine's temples, and a few other alehouse-type places such as Drunken Huntsman and Helga's Bunkhouse. The Traveler has one of a few occupations: a farmer, a warrior, a scholar, a peddler, a noble, and a pilgrim. ... A Spirit of Boy is helplessly wandering the ...
creations.bethesda.net
You need to complete five side quests from Vex and Delvin (Cumulatively) in each of these four holds: Markarth. Solitude. Whiterun. Windhelm. It is easier to complete the Bedlam Job ( Delvin) and ...
Wandering Ones pt 1 | The Elder Scrolls V: Skyrim PS4 (Modded Gameplay #2)The links to all my socials are all right here. You can follow me and reach me to g...
Summary. Bethesda Game Studios' blockbuster open-world RPG puts players on the precipice of determining the future of Skyrim as the Empire waits for the prophesized Dragonborn to come; a hero born ...
The "Wandering Ones" Horror Mod. 1 / 2. 1 comment. Best. Add a Comment. JagoMajin • Assassin • 1 yr. ago. I put the mod down for about a month when I came across that by complete accident, besides that and the chase sequences, it's an alright mod, I like how trippy it can get.
Hey everyone, its Bkstunt here with a guide on The Elder Scrolls V: Skyrim. I'm a BIG fan of Bethesda after playing through Morrowind and Oblivion (and Fallout 3), so getting the chance to write ...
Find 'Gormlaith Golden-Hilt', 'Hakon One-Eye', and 'Felldir the Old'. The three heroes decide to join Shouts with you to clear the mist from all of Sovngarde and expose Alduin, SAVE. > Now go ...
Through the Arch of Paranoia to the northwest is a small fort-like structure with steps leading up to the edge. In the middle of this structure there is an arena occupied by two fighting Storm Atronachs. Supposedly, one is yours and one is your opponent's, who is sitting opposite you with two other men.
Legend says this tomb holds a treasure that bestows great power on the one who discovers it. Beyond that, not much more is known. Obviously, this treasure will fetch a good deal of gold, and I'm willing to let you share in the reward when we find it.Medresi Dran Medresi Dran and the Wandering Dead is a quest available in The Elder Scrolls V: Skyrim in which the Dragonborn must assist Medresi ...
https://store.playstation.com/#!/tid=CUSA00572_00
Go behind the inn in windhelm, there we see him, a large black clad figure, accept his quest and we're done being level 81, open up the console and type this: player.setlevel 1. Back to level one with a new quest activated.... and a bunch of letters, oh well. The Ebony Warrior: Level: 80. Health: 2071.
Game Basics. The Elder Scrolls V: Skyrim Special Edition. Walkthrough for all systems. Skyrim:. Skyrim is the ancient homeland of the Nords and it is immersed in a brutal civil war as the campaign opens. The Imperial Empire still rules; but, after their near defeat by the Aldemeri Dominion and the signing of the White Gold Concordat, they are weak and deferential to the Thalmor.
Guides & Walkthroughs for Skyrim is a section to guide both experienced and new players on certain aspects of the game. This includes detailed information on walkthroughs, achievements, as well as a guide for new players. The purpose of the content provided is to help in finding a specific solution or guide on a certain part of the game that a player is having difficulty with.
Detailed Walkthrough: ... They may appear in the taverns of Skyrim in addition to a Divine's temples, and a few other alehouse-type places such as Drunken Huntsman and Helga's Bunkhouse. The Traveler has one of a few occupations: a farmer, a warrior, a scholar, a peddler, a noble, and a pilgrim. ... A Spirit of Boy is helplessly wandering the ...
To get the key, simply talk to one of the maids (like Erdi) to get the key for the wing. You could also get the key from Falk if you finished The Man Who Cried Wolf. Once you proceed inside, you will find yourself in an abandoned, cobweb-covered part of the Blue Palace. Simply walk forward until you find yourself transported inside the mind of ...
Wandering Ones awarded THE BEST SKYRIM MODS OF 2020 by Shapeless Media.https://youtu.be/hzAUReZi1Ms?t=1740Wandering Ones was featured as a puzzle-themed mod ...