2-FOR-1 GA TICKETS WITH OUTSIDE+
Don’t miss Thundercat, Fleet Foxes, and more at the Outside Festival.
GET TICKETS
BEST WEEK EVER
Try out unlimited access with 7 days of Outside+ for free.
Start Your Free Trial
Powered by Outside

Grand Canyon Rim-to-Rim Hike—The Ultimate Guide
Ready to cross one of the most scenic canyons on earth we've got you covered..
Heading out the door? Read this article on the new Outside+ app available now on iOS devices for members! >","name":"in-content-cta","type":"link"}}'>Download the app .
It’s hard to think of a more classic adventure than the 24-mile Grand Canyon Rim-to-Rim hike. Linking together some of the best-known trails in the country—the North Kaibab Trail , then either the South Kaibab or Bright Angel Trail —through one of the most-photographed natural features on the continent, it’s hard to beat for scenery, geology, or bragging rights. But this isn’t a route for the faint of heart: Less than a single percent of the 5 million people who visit the Grand Canyon every year head below the rim, and only a fraction of those tackle the entire Rim-to-Rim traverse. Over 13,000 feet of elevation change, extreme temps, and exposure make it a challenge even for experienced hikers. But for those who come prepared, it’s a life-list experience like no other.

The Route: Rim-to-Rim Grand Canyon Hike
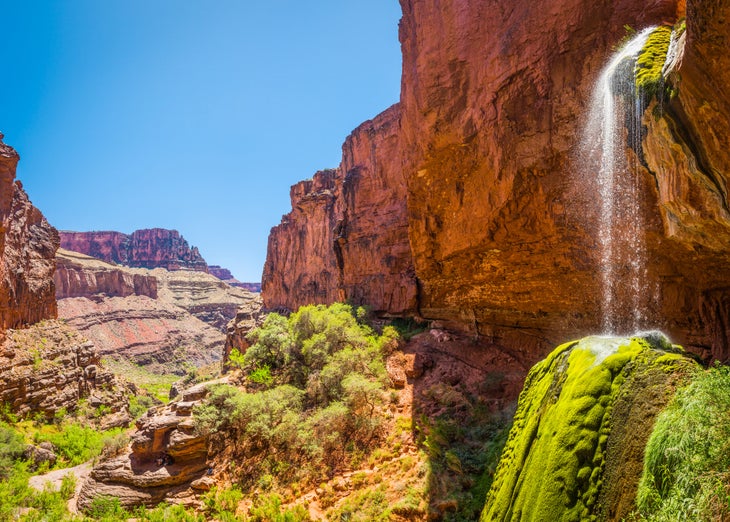
Start from the North Kaibab Trail trailhead, about two miles north of the North Rim Visitor Center. At an elevation of over 8,000 feet, this spot can be cold in the morning; the trail starts in alpine coniferous forest rather than the desert most people expect. The path begins dropping immediately, switchbacking down the red canyon walls (if you don’t like heights, be prepared for a few narrow cliffside sections where you won’t want to look down) and past a precipitous waterfall on Bright Angel Creek. Reach Cottonwood Campground, your first camping option, at mile 6.8. Most people, though, continue to Bright Angel Campground or Phantom Ranch, a few miles further on. Around mile 12, enter The Box, where the canyon walls narrow to only a few dozen feet. This section can be the hottest on trail, with recorded temperatures up to 130 degrees. Soon after that is Phantom Ranch and Bright Angel Campground, where most hikers spend the night.
Here the two route options diverge. The Bright Angel Trail has less elevation gain, more shade, and more water stations, so in the hotter summer months it’s the most common choice. From Bright Angel Campground, head 1.5 miles to River Resthouse, where the trail leaves the river again to start climbing. Climb steadily for another 3 miles to Indian Garden, where water and restrooms are available at a treed oasis among the red rock. After Indian Garden, any moderation in the climb is over; switchback 4.5 more miles to the canyon rim. The views back over the canyon during the climb are expansive enough to distract you from your burning muscles, and the feeling of accomplishment when you reach the South Rim will make you feel like you’re on top of the world.
If it’s late or early in the season, or you’re more interested in views than mitigating the difficulty of the climb, take the South Kaibab Trail to the South Rim instead. From Bright Angel Campground, head along the river to Black Bridge, then cross the Colorado and start climbing. Steadily gain elevation until the Tipoff Overlook at mile 16, where you can take a break while checking out the view through Natural Arch. From there, switchback again to the end of Cedar Ridge, where you’ll get expansive views of the Colorado River and the canyon to both east and west.

Grand Canyon Rim-to-Rim Permits
You can make Earliest Request reservations for backcountry sites on specific days a couple months in advance of your hike (for January hikes the window is August 20th to September 1st, for February hikes it’s September 20th to October 1st, and so on). After that the remaining permits are given out in the order of requests received, up until 2 weeks before your hike (if any permits are remaining at that time). A backcountry permit costs $10 per group plus $8 per person per night below the rim, and a flat group rate of $8 per night above the rim. Check the park’s website for backcountry permit request forms and instructions. Phantom Ranch is on a separate reservation system, with spots given out by lottery several months in advance–enter as early as possible to secure your spot.
Staying Hydrated While Hiking Rim-to-Rim
The most important thing you can do to avoid disaster when hiking in the desert? Drink water. Plan to drink 5 quarts a day when doing hard hiking in high heat, and even on cooler days bring more than you think you’ll need. Know where all of the locations with water refills available are along your route, and how long it will take for you to reach them. Don’t just drink water alone, though; add electrolyte mix to your drinks, and snack along the way. If you drink water without any other nutrients you could develop hyponatremia, when you have too much water and too little sodium in your system. Symptoms include fatigue, headaches, nausea, confusion, and, in some extreme cases, coma and death.
Avoiding Heat Stress and Heatstroke on a Rim-to-Rim Grand Canyon Hike
If you or a hiking partner start getting nauseous, irritable, and/or dizzy, you might have heat stress. Luckily it’s easily treatable : Take a break in the coolest and shadiest spot you can find, drink water, and have some sport drink or high-electrolyte snacks. Once you feel recovered, you are! If you don’t catch heat stress in time, though, it can turn into the much more dangerous heatstroke. Signs of heatstroke include hot, dry skin, slurred speech, confusion, headache, and rapid breathing and heart rate. If you or your hiking partner has heatstroke, cool the patient as much as you can and call for evacuation.
When to Hike the Grand Canyon Rim-to-Rim
The Rim-to-Rim is best done in May, September, or October, when the North Rim road is open but the temperatures aren’t as hot as they are in midsummer. You can hike the route during the winter as well, but the trails are often icy (bring traction), and you’ll need to go south rim to north rim back to south rim again to avoid the closed road. If you do hike it in the summer, start early, rest during the hottest part of the day, and carry plenty of water.
Gear for the Rim-to-Rim Grand Canyon
To succeed and stay safe on the Rim-to-Rim, you’ll need to pack smart. Temperatures can vary wildly between the rim and the canyon floor and between day and night, so bring layers: in colder weather, a t-shirt, long johns, shorts, hiking pants, a shell jacket, and an insulating layer make a good essential kit. Bring an extra pair of socks to give your first set a chance to dry out after the sweaty descent to the canyon floor. A sun hat, bandana, and sunscreen will keep your skin from burning. Also make sure to pack water treatment options (drops, tablet, or a filter) just in case. In summer, you might want to consider breaking the cardinal rule of layering and wearing cotton: The heat-sapping properties of the material when it gets wet can work in your favor when temps run into the triple digits.
Shuttle for the Rim-to-Rim Grand Canyon
The Trans-Canyon Shuttle runs two trips between the rims every day from May 15 to October 16, and one per day until November 15. Reservations are required, and each seat costs $90. Alternatively, you can take two cars and drop one at your exit point, or hike the Rim-to-Rim-to-Rim instead, crossing the canyon again to return to your car.
Popular on Backpacker

Join Outside+ to get access to exclusive content, 1,000s of training plans, and more.
Healthy Living
- Clean Eating
- Vegetarian Times
- Yoga Journal
- Fly Fishing Film Tour
- National Park Trips
- Warren Miller
- Fastest Known Time
- Trail Runner
- Women's Running
- Bicycle Retailer & Industry News
- FinisherPix
- Outside Events Cycling Series
- Outside Shop
© 2024 Outside Interactive, Inc
Spin the Globe Project
Inspiring adventurous souls and socially conscious hearts
Hiking the Grand Canyon from Rim to Rim: A Complete Guide

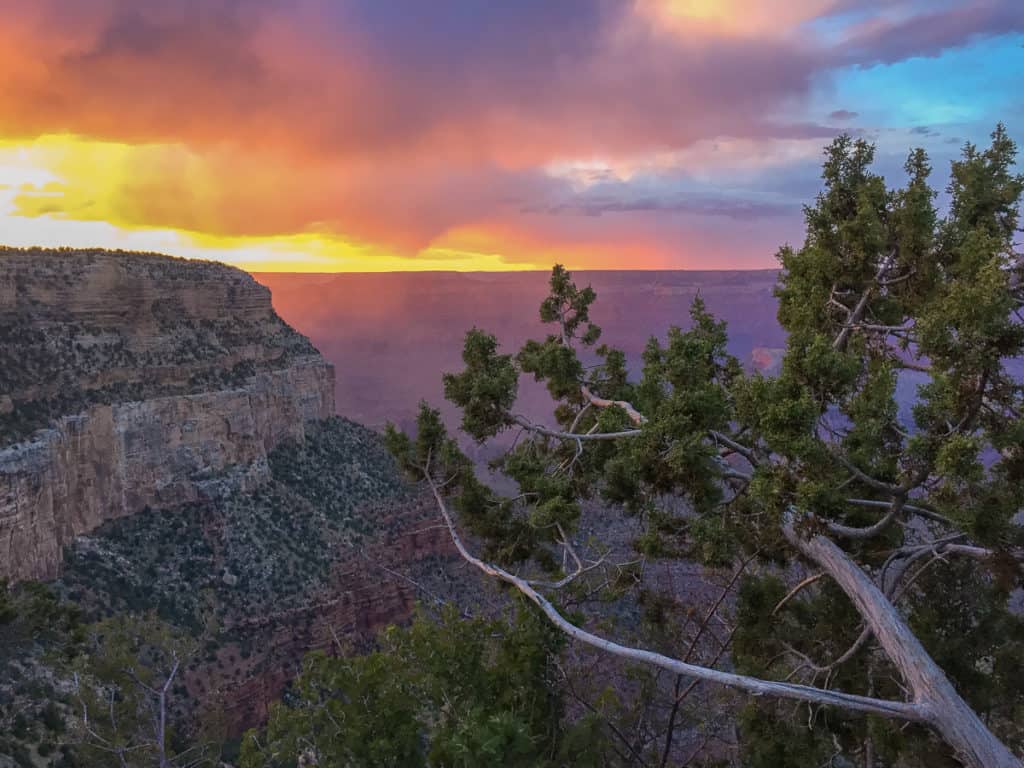
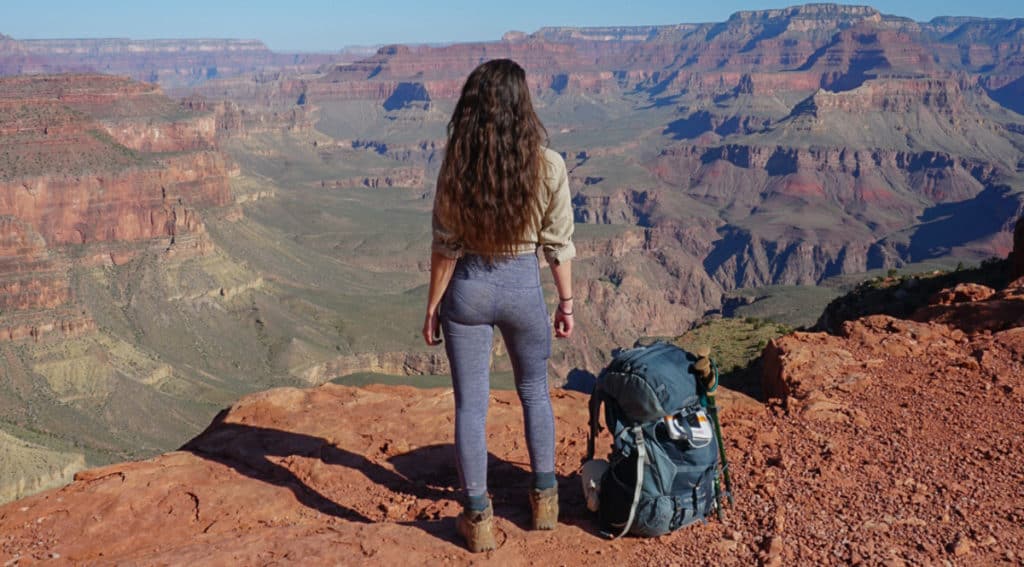
Hiking the Grand Canyon from rim to rim is a once in a lifetime experience that easily made it into my top 3 favorite hikes of all time. The day’s last rays of light reflecting off the multicolored rocks, the steady babble of Bright Angel Creek, the curious wildlife, and the desert landscape slowly morphing into Pine and Aspen trees make for an unforgettable backcountry hike.
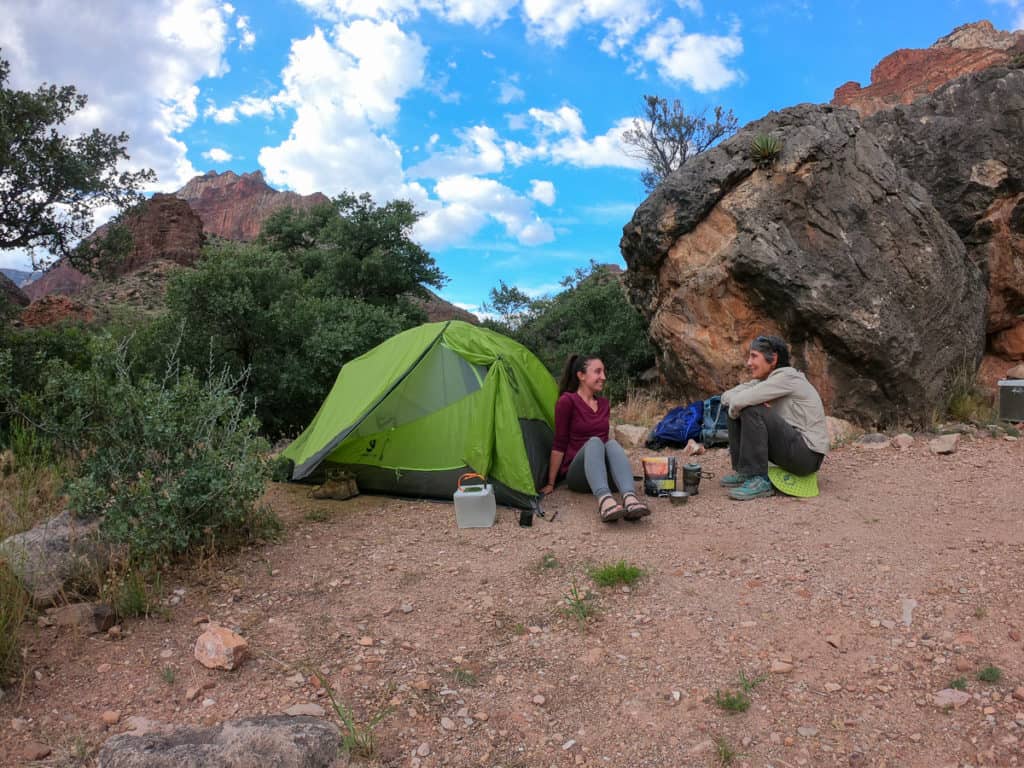
I hiked the canyon in the first week of June with my mom who was thru-hiking the 800-mile Arizona Trail. Meaning, she had already hiked 700+ miles from the Arizona/Mexico border to get to the Grand Canyon South Rim, and was in much better shape than I was.
After 3 days and 21 miles down and then up, and sometimes down again, the Grand Canyon Rim to Rim hike bumped into first place for the most consistently beautiful hike I’ve ever done (and I’ve done some noteworthy hikes in the Andes, New Zealand, Canadian Rockies, and even Havasupai). EVERY. SINGLE. STEP. from South Kaibab trailhead to North Kaibab Trailhead was indescribably beautiful in its own right. Seriously, the entire hike is stunning!
So if you want to see tons of pictures, know when to go, where to park overnight, what kind of permit you need, how much it costs, where to camp, what to do with pets, what trail to take, what to pack, how hard the hike is and what makes it so special…then keep scrolling down.
There are many ways to experience the beauty of the Grand Canyon, both in and outside of the National Park, but a rim to rim hike is an epic way to take in this natural wonder by foot. Not to mention, it is less crowded than hiking to Havasupai and much more accessible than getting a spot on a long wait list for rafting down the Colorado River.

The Canyon itself is 277 miles long, up to 18 miles wide, and reaches depths of a mile! The steep-sided cliffs and contours were carved by the Colorado River over the span of 5 million years, creating the iconic views you see today.
The Grand Canyon is home to the Havasupai tribe, the smallest and most remote Native American Nation in the country, and the only place in America where mail is still delivered by mule. The Canyon is also home to more than 1,500 plant, 355 bird, 89 mammalian, 47 reptile, 9 amphibian and 17 fish species, according to the National Park Service .
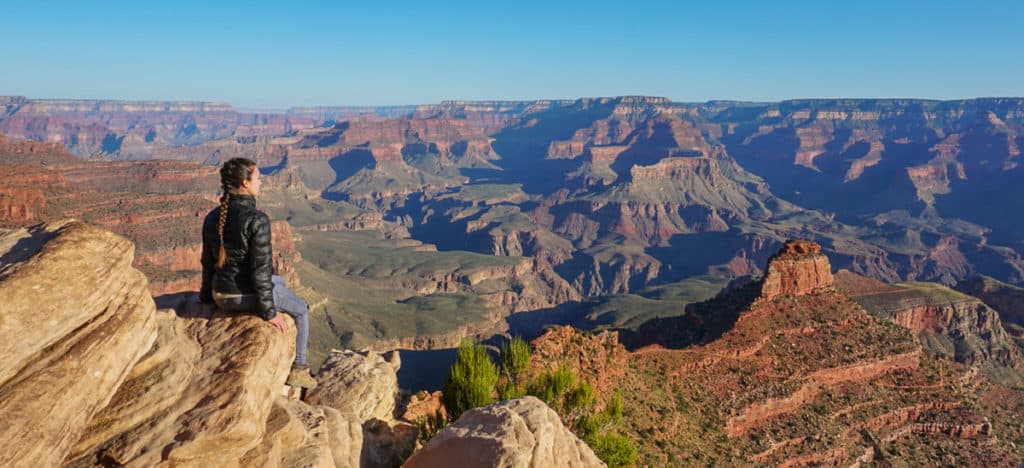
90% of visitors experience it from the viewpoints at the South Rim, and way fewer see it from the 1000 foot taller North Rim.
The beauty of hiking rim to rim, whichever way you choose to do it, is that you get to see the Grand Canyon from multiple perspectives.
When to Hike

The North Rim is only open from mid-May to mid-October, so unless you are an advanced hiker and want to do a rim-to-rim-to-rim hike which is a minimum of 42 miles and would need to begin and end at the South Rim, then you can only do a rim to rim hike from May 15th to October 15th.
Theoretically, a trip in late May or September would provide the least weather obstacles.
REALLY HOT (but it’s a dry heat), with regular thunderstorms in July and August. Temperatures throughout the summer soar to 120°F!
Average temperature at the South Rim: 48°F to 83°F
Average temperature at the bottom (near the Colorado River, and Bright Angel Campground): 74°F to 104°F
**The thermometer in the sun at Bright Angel Campground read 125°F when I was hiking in the first week of June, and two people had to be evacuated by helicopter for heat exhaustion**
It is highly recommended not to hike between 10 am and 4 pm to avoid the extreme heat.
Spring and Fall
The weather is fickle but mostly cool (it can snow or be extremely hot and high winds are common).
Average temperature at the South Rim: 32°F to 63°F
Average temperature at the bottom (near the Colorado River, and Bright Angel Campground): 56°F to 82°F
Page 3 of this Grand Canyon Hiking Brochure explains extensively what to expect weather wise in each season in the canyon.
What to Pack

- bring at least a liter on your way down, and 2 on your way up
- water filter or treatment method (I highly recommend this 1L fast filter collapsible lightweight bottle )
- salty snacks (e.g. Kind bars , Larabars , Cliff Bars , and trail mix )
- high-calorie meals ( Backpacker’s Pantry & Good-to-Go are my favorites and they have lots of vegetarian and gluten-free options)
- electrolytes (tablets are simplest to carry)
- energy hydration/nutrition gel ( GU is my favorite )
- First Aid Kit (with blister care , duct tape is extremely useful, and a small pocket knife)
- Map (you can get a free one at the visitor or backcountry information centers and/or print out page 6 of this hiking brochure )
- Get 15% off a LuminAid Lantern with code: SPINTHEGLOBE
- Sun Protection (sunscreen, hat , and sunglasses)
- Hiking shoes/boots (make sure they are broken in before your trip)
- lightweight rain jacket (depending on the season)
- lightweight down jacket (can double as a pillow)
- Backpacking tent ( this is the one my mom and I used for this trip )
- Backpacking backpack ( this is mine )
For a more comprehensive list of backpacking clothes and gear, check out my backpacking essentials guide & checklist .

Grand Canyon National Park entrance fee:
- $35 per vehicle or $30 for a motorcycle for a 7-day pass
I highly recommend the $80 America the Beautiful National Parks and Federal Recreational Lands Annual Pass (it’s definitely worth it if you plan to visit 3 or more parks within a year).
Backcountry camping permits:
- $10 per permit (plus $8 per person/night) camped below the rim
- $8 per group per night camped above the rim
Other Optional Services
Trans-Canyon Shuttle – rim to rim ride service so you can leave your car at one end of the canyon (more info below):
- $90/one way/person
Phantom Ranch (A lottery based cabin style accommodation near Bright Angel Campground at the bottom of the Grand Canyon):
- $155 for a cabin for 2 people/night
- $53 for dorm bunk bed/night
Duffel Service (A mule carries your bag down to or up from Phantom Ranch from the South Rim):
- $70 each way
- Maximum dimensions per duffel are 36” x 20” x 13” (up to 30 pounds)
- Book at the counter inside any of the Grand Canyon Lodges
- Bag drop off is by 3:30pm the day before at the Xanterra Livery Barn

For more information on Phantom Ranch accommodations, meals, and duffel services: go here .
Pet Kennel (overnight boarding options for dogs and cats):
- $26.50 Overnight dog (50 pounds or less)
- $30 Overnight dog (50 pounds or more)
- $17.50 Overnight cat
For more information on kennel services, call 928-638-2631 or 928-638-0534 or visit the park services page .
Getting A Backcountry Camping Permit

There are two ways to get the necessary backcountry camping permit for any of the three campgrounds in the canyon (Indian Garden, Bright Angel, and Cottonwood).
- Submit a Permit Request Form by fax, mail or in person . Forms should be received by 5pm on the 1st day of the month, 4 months prior to your trip start date for the best chance of getting your selected itinerary (Note: Processing can take up to 3 weeks).
- Fax request to the Backcountry Information Center: 928-638-2125
- 1824 S Thompson Street, #201, Flagstaff AZ, 86001
- Bring request to the Backcountry Information Center (located inside the park on both the South and the North Rim)
2. Get a last-minute walk-up permit at either the South or North Rim Backcountry Information Centers (This option is for people with some flexibility or Arizona Trail thru-hikers. You may have to spend a few days on the rim until you get your ideal itinerary).
Backcountry Information Center:
- Open daily: 8 am to noon and 1-5 pm
- North Rim Office is only open mid-May to mid-October and located in the admin building
A limited number of last-minute permits are available and they are only good for one or two consecutive nights, and cannot be purchased more than one day prior to the start of a hike.
**Note: last-minute permit priority for Bright Angel and Indian Garden campgrounds are given to people on the South Rim, and Cottonwood Campground permit priority is given to those on the North Rim.**
My mom and I were able to bypass this last-minute priority system and camp in the “stock camp” for mules and horses, because she was an Arizona Trail thru-hiker and we were sharing a tent.
You can find more backcountry permit information here .

There are 3 main trails inside the Grand Canyon: North Kaibab, South Kaibab, and Bright Angel . Each has multiple rest/viewpoints, varying elevation changes and difficulty as can be seen in the picture above.
The three trails make up four routes you can choose for a rim to rim hike (1 & 2 begin from the South Rim, 3 & 4 begin from the North Rim):
- South Kaibab Trail to North Kaibab Trailhead
- Bright Angel Trail to North Kaibab Trailhead (easier)
- North Kaibab Trail to South Kaibab Trailhead
- North Kaibab Trail to Bright Angel Trailhead (easier)

I did number 1 above and completed it in 3 days and 2 nights, breaking it into manageable 7-mile/day chunks, which I highly recommend!
I started at the South Kaibab Trailhead, camped in Bright Angel Campground, then hiked to Cottonwood campground on day 2, and out the Canyon on the North Kaibab Trail the third day. This route ended up being 20.7 miles in total, and even as an experienced hiker (albeit not currently in shape) this route was strenuous and made me sore.
Trail Distance/Elevation Change from trailheads to campgrounds (from the South Rim):
Bright Angel Trailhead (6840ft/ 2085m) to Indian Garden Campground:
- 3,400 ft elevation change
Bright Angel Trailhead (6840ft/ 2085m) to Bright Angel Campground:
- 4,340 ft elevation decrease
- Some shade and seasonal water available
- All the park rangers said this is the easier trail to go down
South Kaibab Trailhead (7200ft/ 2195m) to Bright Angel Campground:

- 4,700 ft elevation decrease (very steep)
- NO SHADE & NO WATER
- Exposed ridgeline the entire way
Trail Distance/Elevation Change from Trailheads to Campgrounds (from the North Rim):
North Kaibab Trailhead ( 8240ft/2511m) to Cottonwood Campground:
- 4,200 ft elevation change
- Some shade on the trail, seasonal water
North Kaibab Trailhead ( 8240ft/2511m) to Bright Angel Campground:
- 5,740 ft elevation change
- Some shade, seasonal water

You should choose a route based on your abilities. Pages 4-6 in this Grand Canyon Hiking Brochure are very helpful for planning the hike that is the best match for your physical fitness level.
No matter which trail, route, or campgrounds you choose for your trip, it is highly recommended that you set aside 3-4 days to do a rim to rim hike!
I also recommend that you start from the North and hike South, to decrease the amount of ground you have to cover going uphill because the North Rim is over 1000 feet taller! If I did it again, I would follow one of the first two itineraries below.
Recommended Itineraries

North to South Rim
4 days/3 nights (for beginner or moderate hikers):
- Day 1: Start at North Kaibab Trailhead and camp at Cottonwood campground (6.5 miles)
- Day 2: Hike from Cottonwood to Bright Angel Campground (7.2 miles)
- Day 3: Hike from Bright Angel Campground to Indian Garden Campground (5 miles)
- Day 4: Hike from Indian Garden to Bright Angel Trailhead (4.5 miles)
3 days/2 nights (for experienced hikers):

- Day 1: Start at North Kaibab Trailhead and camp at Cottonwood Campground (6.5 miles)
- Day 2: Hike from Cottonwood to Bright Angel campground (7.2 miles)
- Day 3: Hike from Bright Angel Campground to South Kaibab Trailhead (7 miles)
2 days/1 night (ONLY IF YOU ARE AN ADVANCED HIKER):

- Day 1: Start from North Kaibab Trailhead and camp at Bright Angel Campground (13.7 miles)
- Day 2: Hike from Bright Angel Campground up South Kaibab Trail (7 miles)
South to North Rim
4 days/3 nights (for beginner hikers):
- Day 1: Start at Bright Angel Trailhead and hike to Indian Garden (4.5 miles)
- Day 2: Hike from Indian Garden to Bright Angel Campground (5 miles)
- Day 3: Hike from Bright Angel to Cottonwood Campground (7.2 miles)
- Day 4: Hike from Cottonwood to North Kaibab Trailhead (6.5 miles)
3 days/2 nights (for beginner to moderate hikers):

- Day 1: Start at Bright Angel Trailhead and camp at Bright Angel Campground (9.5 miles)
- Day 2: Hike from Bright Angel to Cottonwood campground (7.2 miles)
- Day 3: Hike from Cottonwood to North Kaibab Trailhead (6.5 miles)
3 days/2 nights (for moderate to advanced hikers):

- Day 1: Start at South Kaibab Trailhead and hike to Bright Angel Campground (7 miles)
- Day 2: Hike from Bright Angel to Cottonwood Campground (7.2 miles)
Getting Around and Parking
Overnight Parking: You can park overnight for free in the Backcountry Information Center (Parking Lot D). It is recommended that you share your license plate number with the ranger when you purchase your permit.
Hiker’s Shuttle: There is a free hiker’s express morning shuttle bus with four stops: Bright Angel Lodge (where you want to get off if you are hiking from Bright Angel Trailhead), Backcountry Information Center (where you can leave your car during your trip), Grand Canyon Visitor Center, and South Kaibab Trailhead.
Times that shuttle leaves Bright Angel Lodge (takes about 30 minutes from Lodge to South Kaibab):
- May/September: 5am, 6am, 7am
- June/July/August: 4am, 5am, 6am

Overnight Parking: You can park for free at the North Kaibab Trailhead (It is 1.7 miles from the Grand Canyon Lodge)
Grand Canyon Lodge Hiker Shuttle (May 15- October 15): A shuttle to the North Kaibab Trailhead picks up passengers in front of the Grand Canyon Lodge at 5:45 am and 7:10 am. Make reservations 24 hours in advance at the lodge front desk.
Other services are listed in the North Rim Pocket Map .
Trans-Canyon Shuttle
You can purchase a rim to rim shuttle beforehand so you can leave your car at one end of the canyon.
- 7 am and 2 pm pick up times from North or South Rim
- 4.5-hour drive
- Reservations are required at least 48 hrs in advance. Call (928) 638-2820 or Book Online
Visit their website for more information.
What to Expect When Hiking the Grand Canyon

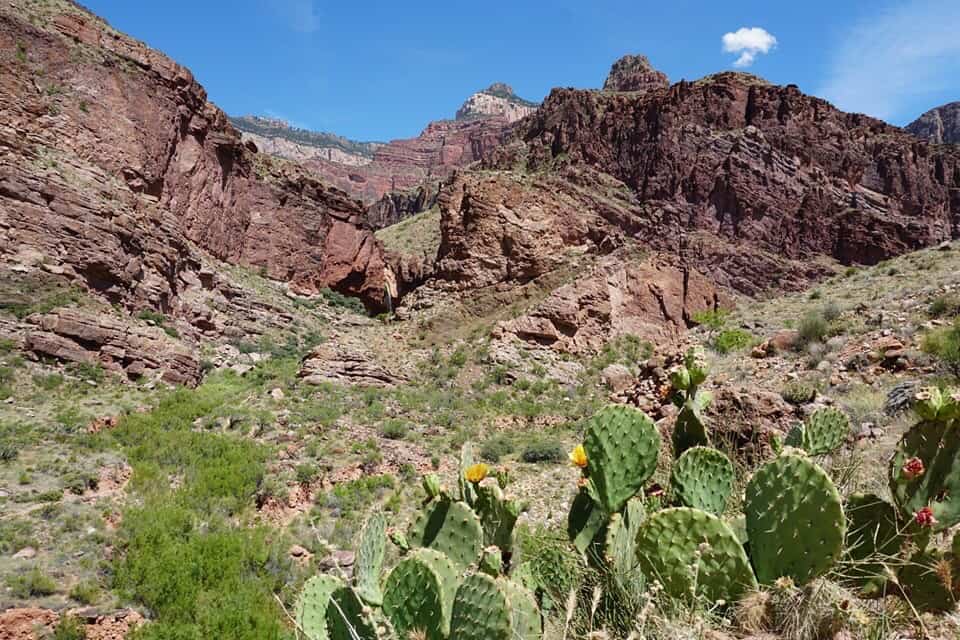
The trail is absolutely beautiful from every side, angle, and time of day. The landscape varies between high desert and forest vegetation. So you’ll definitely want to keep your camera out the whole time because there are uniquely dramatic and stunning views around every corner!

The most common wildlife sightings are in the form of deer, squirrels, frogs, and lizards (based on my personal experience).

There are bathrooms with composting toilets along the trail and at campgrounds (some have hand sanitizer and toilet paper and others don’t, so I recommend bringing your own).

If you have a water filtration system, there are multiple Bright Angel Creek access points (just off the trail) where you can refill your water container from Bright Angel Campground all the way to Manzanita Rest Area.
The trail is crowded with day hikers especially the first few miles from each trailhead on the North and South Rim, but thins out further down and closer to the campgrounds.

You CANNOT swim in the Colorado River due to strong currents and extreme temperatures. You can, however, swim in Bright Angel Creek at your own risk.

The squirrels are insanely sneaky and will chew holes in your tent, backpack and clothes if you leave anything with a scent out. For that reason, each campground has clear instructions on how to safely store your food, lotion etc., and provides metal boxes for your gear.
Don’t forget to check in with a ranger before you begin hiking to verify up to date trail information, water sources, and weather forecasts. Hiking the Grand Canyon is not a casual hike, there are only 2 ways out if something goes wrong: by foot, or by helicopter. So unless you want to rack up a hefty medical bill, please hike with care.
Come physically prepared, pack light, bring plenty of water and sun protection, hike early, and rest if you are tired.
Most importantly, enjoy the grandness of the canyon, keep an eye open for critters, soak in the dramatic panoramic views, and take time to show the canyon the respect it deserves!

Also, if you’re flying in from out of town or from another country, you might find the logistical tips below helpful.
Leave A Comment Cancel reply
Your email address will not be published. Required fields are marked *
About Author
Anna is an optimist with pessimistic tendencies who enjoys making a short story long, listening to soundtracks from musicals, and watching anything in the post-apocalyptic sci-fi genre. These days you can catch her learning about off-grid living and gardening the hard way, wandering with her partner and dogs through forest roads in a camper, or hiking to waterfalls or glacial lakes. You can also find her on YouTube at Anna and Ryan.

Exploring Banff & Jasper National Parks in Canada

Visit Machu Picchu for $100

The Ultimate Backpacking Checklist & Gear Guide

Jungle Trekking in Thailand With an Ethical Elephant Encounter
You are using an outdated browser. Please upgrade your browser or activate Google Chrome Frame to improve your experience.

- Trip Styles
- Destinations
Backpacking Rim-to-Rim-to-Rim in the Grand Canyon: Everything You Need to Know
- All Inspiration and Destinations
- Canadian Rockies
- New Hampshire
- New Zealand
- North Carolina
- Vancouver Island
- Washington State

Exhausted, shivering, and barely moving, we trudged back up the Bright Angel Trail. My first time hiking the Rim-to-Rim- to-Rim (R2R2R) in the Grand Canyon was in December 2018. It was my second backpacking trip ever, and we were unprepared for both the cold and the physical exertion. My mind still flashes back to the 4,000-foot climb back up to the South Rim, where every step required extreme mental focus. Though the challenge and sore legs are burned into my memory, I still look back on this trip fondly. The climb was seemingly interminable, but once we got to the top, the trailhead felt completely different and I experienced a kind of physical euphoria I had never felt before. Viewing the orange and red layered canyon walls after hiking through the canyon and back again is truly unforgettable.
I’ve backpacked/ran the Rim-to-Rim- to-Rim route three times now, and am considering going back again this spring. The Grand Canyon is one of the most unique places I have ever been, and each trip left a lasting impression on me. It’s also where I experienced my proudest moment ever: collapsing on top of the South Rim after running R2R2R in one day for my 24th birthday. Recalling the moment brings tears to my eyes, as I remember how the stunning, challenging, harsh, and beautiful landscape has changed me.
BACKPACK the Grand Canyon with Award Winning Guides
Why Hike the Rim-to-Rim- to-Rim?

The Grand Canyon is unlike anywhere else in the world. It’s inspired countless adventurers, poets, musicians, and travelers. Trekking by foot from the South Rim to the North Rim is one of the most striking ways to experience the majesty of the canyon, as its ecosystems and geology change with your elevation.
Though I usually don’t prefer out and back trails, it’s worth it for the R2R2R. There’s so much to see with every step; you’ll probably be even more enamored with the landscape on the second crossing. Plus, you can switch it up by choosing different south rim trails. For example, if you start on the South Kaibab, you’ll get expansive views of each layer of the canyon as you descend. On your way back up, hit the Bright Angel Trail for sparkling streams and lush riparian areas where you can find shade under cottonwood trees.
But you may be wondering about crowds on the trail because the Grand Canyon is one of the most popular national parks. Lucky for hikers, permits are strictly enforced in the Rim-to-Rim- to-Rim corridor. For me, I found this to be a happy medium of people on the trail. You’ll encounter enough backpackers to feel safe and have community camaraderie, but the trails are empty enough towards the bottom that you won’t feel overcrowded. Even in one of the world’s top hiking destinations, I’ve hiked for hours without seeing another person.
Though you can day-hike into the canyon from either of the rims, the Colorado River at the bottom of the canyon is one of my favorite places on this earth. One particularly memorable stretch is the seven miles between Phantom Ranch and Cottonwood Campground. It’s relatively flat and winds along the river, flanked by towering canyon walls. I’ve hiked that stretch of trail six times now, and would do it every single day if I could.
Most people hike the Rim-to-Rim- to-Rim as part of a multi-day trek, while some undertake it as an ultra-run. Others hike from the South Rim down to the river and back in a day. While you can reach the Colorado River on an extremely long day-hike, you’ll have little time to soak in the experience and views.
What to Expect

Whether you’re hiking R2R2R solo or with a group, you can expect the full out and back to take 3-5 days. There are many different itineraries possible, so going with a guide service is a great way to take the planning off your plate. Just be sure that your fitness level matches the trip pace. This is an extremely difficult backpacking trip with over 10,000 feet of elevation gain and loss.
One classic version of the Rim-to-Rim- to-Rim trek starts and ends at the South Rim o the South Kaibab Trail , continues to the North Rim, and then returns to the South Rim on the Bright Angel Trailhead. However, many trip itineraries are possible depending on your permit length and campsites.
South Kaibab Trail to Phantom Ranch
Distance: 6.3 miles , elevation loss: 4,860 feet.
The South Kaibab Trail is one of the most direct ways to access the Colorado River, as it features almost 5k of loss in six miles! This steep trail offers up mesmerizing views of the Grand Canyon, and you’ll encounter plenty of resting points along the way – from Cedar Ridge, to Skeleton Point, to the Tip Off. Stop and rest in the shade if you need before continuing down into the jagged layer of Vishnu Schist at the bottom of the canyon.
Phantom Ranch to Cottonwood Campground
Distance: 7.2 miles , elevation gain: 2,300 feet.
This is the relatively “flat” section of the trail. The first five miles have a gradual incline that you hardly notice; most of the elevation gain is in the last couple of miles. In the early morning or late afternoon, this section is mostly shaded by the canyon walls with a nice breeze coming off the river.
Cottonwood Campground to North Kaibab Trailhead
Distance: 6.8 miles, elevation gain: 4,080 feet.
The climb up to the North Rim is harder than the South Rim. The trail gets steeper as you get higher, and it’s seemingly never-ending. However, the views of the canyon and waterfalls below are absolutely stunning. The terrain gradually turns into pine trees and a darker red rock. On top of the North Rim, it’s breathtaking to see how much the earth can change over just 20 miles of hiking.
Phantom Ranch to Havasupai Garden
Distance: 5.5 miles, elevation gain: 1,400 feet.
Once you return to the bottom of the Grand Canyon from the North Rim, you’ll follow the Colorado River again towards the Bright Angel Trail. Enjoy the gradual path along the river and across the historic Silver Bridge before you begin your climb back up. Once you start climbing, you’ll follow side canyons and streams towards Havasupai Garden. This section offers diverse views and plant life, with steep climbs interspersed with more rolling terrain.
Havasupai Garden Campground to Bright Angel Campground
Distance: 4.5 miles, elevation gain: 3000 feet.
Fill up your water at Havasupai Garden and prepare yourself for a winding climb to the top of the canyon. The trail is seemingly endless switchbacks, with incredible views of canyon walls as far as the eye can see. For primo views, aim to hike this section around sunset.
Know Before You Go

Weather in the Grand Canyon
If you’re hiking during the high season, plan for heat. The bottom of the canyon can be over 20 degrees hotter than the top, so even if it’s nice and breezy at the South Rim, the canyon bottom can reach scorching temperatures. When you’re checking the forecast, make sure to look at both the South Rim (Grand Canyon Village) and Phantom Ranch.
Though temperatures are harsher during peak visiting months, there are more services, like water pumps, available. I recommend going in either of the shoulder seasons –April/May or September/October. I’ve hiked it during September, April, and December, and late September was by far the most favorable weather.
However, winter is also a wonderful time to experience the Grand Canyon. Although you may encounter snow and ice on the trails (bring microspikes!), daytime temperatures are usually pleasant and crowds are fewer.
water Sources
There is plenty of water available via pumps and natural water along the Rim-to-Rim- to-Rim corridor. If you’re hiking during the high season (May – October), the pumps will most likely be turned on. However, be sure to check the National Park Service website for trail and water conditions and always bring a backup filter just in case.
One great thing about an out-and-back hike is the lack of travel logistics. Both the north and south rim have multi-day parking for backpackers. The South Rim is typically a bit busier with tourists, but also offers more dining options.
what to bring
Unless you’re staying at one of the highly coveted Phantom Ranch cabins, you’ll need a full backpacking setup . This means a tent, sleeping bag, sleeping pad, and cooking system. You’ll want to dress and pack for temperature swings, especially if you’re going in the shoulder season months. Most importantly, be prepared for sun exposure with UPF protective clothing and plenty of sunscreen.
Guided or Independent?

Grand Canyon National Park is popular for a reason. Backpacking through the Rim to Rim corridor is one of the most memorable ways to experience this magical place. I’ve done this trip three times now, and each time I’ve emerged humbled, grateful, and teary-eyed. Though it’s physically challenging and the permit process is tricky, it’s a bucket list trip that will leave you wanting even more.
Join a Guided hiking Adventure
About Katelyn Kommer

Katie is a freelance writer based in Salt Lake City, Utah. When she’s not behind her laptop you can find her searching for fresh powder to ski, new trails to run, or daydreaming about her next desert road trip. She’s always looking to try new sports and learn new skills, as long as they include a bit of type-two fun.

wildland Wires
Sign up to receive our exclusive Wildland Wire emails and stay up to date with Wildland Trekking's promotions, discounts, contests, outdoor tips and tricks, trip reports and more!

Grand Canyon Backpacking | Ultimate Rim to Rim to Rim Guide

Home / Plan Your Adventure / Adventure Ideas / Grand Canyon Backpacking | Ultimate Rim to Rim to Rim Guide
Backpacking the Grand Canyon inevitably ends up on every adventurer’s bucket list. For a backpacker visiting the Grand Canyon for the first time, the 21 mile journey (33.8 km) from the South Rim to the North Rim is the ultimate trip to cut your teeth. You’ll descend the South Kaibab Trail deep into the Grand Canyon to the Colorado River before climbing a punishing 5700ft (1700m) up the North Kaibab trail to the Grand Canyon’s quieter North Rim.
Perhaps, the only better way to backpack the Grand Canyon for the first time is to do it all over again in reverse for an epic backpacking trip known as the rim to rim to rim (R2R2R2). During the late spring, summer and fall when the North Rim is open and shuttles are available, this add-on makes limited sense. However, when the North Rim shuts down backpacking the Grand Canyon this way is an incredible opportunity to find a level of solitude unimaginable at other times of the year. If you’re thinking about this trip, dreaming of this trip, or have secured a permit, this epic guide to backpacking the Grand Canyon rim to rim to rim was written just for you. So, let’s stop with the formalities and dive right into it!
There’s tons of detail in this post, so here is a quick, clickable summary of what you’ll find here:
- Need to know for backpacking the Grand Canyon rim to rim to rim
- Things you’ll love
- Things you won’t love
How many days does it take to backpack the Grand Canyon rim to rim to rim?
How hard is it to backpack the grand canyon.
- How do you get a permit?
Do you need a park entrance pass if you have a backcountry permit for the Grand Canyon?
Which direction should you hike.
- Should you hike the Grand Canyon rim to rim or rim to rim to rim?
Which trails do you hike for the rim to rim to rim?
When is the best time to hike the grand canyon rim to rim to rim, can you have campfires inside the grand canyon.
- How do you get to the South Kaibab Trailhead?
How do you get to the Bright Angel Trailhead?
- Squirrels in the Grand Canyon
Where to stay before hiking or backpacking the Grand Canyon
- Trail Sections and descriptions
- Campsites in the Grand Canyon on the rim to rim to rim
- Itinerary options
What to pack for backpacking the Grand Canyon
- What to wear in the Grand Canyon
- Final thoughts
** Some of the links in this post are affiliate links. If you click one of the links and make a purchase we’ll earn a small commission at no cost to you. We’re very particular about products and we only recommend products, services, or accommodation we trust and use ourselves.**
Need to know for backpacking the Grand Canyon rim to rim to rim
Days Required: 2 – 7 days Difficulty: Moderate, but extreme heat and weather can increase difficulty dramatically. Distance: 44.5 miles (72 km) Elevation Gain: 10, 141 ft (3,090 m) Elevation Loss: 10, 541 ft (3,210 m) Permit Required: Yes, competitive. Navigation: Easy, trails are very well marked. Water Sources: Frequent potable water sources available between May and December. Large portions of the Bright Angel and North Kaibab trails have access to water for purification year during the rest of the year. South Kaibab trail has no water. Food Storage: Provided at designated campsites. Best Campsite Walked Past or Stayed At: Cottonwood (below the rim), but read section on the u ltimate hack for backpacking the rim to rim to rim for a special campsite tip.

Things you'll love about backpacking the rim to rim to rim
- Remarkable geology and natural scenery that will leave you awestruck at every turn.
- Incredible trail infrastructure.
- Established trail with no navigation required.
- Readily available potable water via taps at numerous points (seasonal and not on the South Kaibab).
- Numerous campsites allow for very manageable daily mileage and different itineraries.
- Opportunity to camp on the seasonally isolated North Rim.
Things you won't love about backpacking the rim to rim to rim
- The squirrels. Take your eye off your bag for a second and they are in it.
- The heat can be the most challenging factor.
- Competitive permit process that requires using a fax machine.
- Navigating the throngs of day hikers at the beginning (and end).
- Keeping a constant ear out for trail runners coming in hot.
- Busy campsites that are close together with limited privacy.
- Did I mention it can get deathly hot?
A backpacking trip of the Grand Canyon’s rim to rim to rim is typically done in 4-7 days.
That said, you’re likely to encounter many ambitious trail runners and a few speed hikers pushing to complete the 44.5 mile (72 km) rim to rim to rim in one very, very long day.
Fortunately, backpacking allows the benefit of time to enjoy the splendor of the Grand Canyon, not to mention some of the best night skies you’ll see in your life. So, less mileage is often more enjoyment. We spent 6 nights on the trail and that was absolutely perfect. I’m not sure I would’ve wanted to move much faster since we had daily high temperatures approaching 110 Fahrenheit (45 degrees Celsius) on several occasions.
For fit, ultralight backpackers this trip could be done in as little as 2 days, spending 1 night on the North Rim. That said, the heat in the Grand Canyon adds a whole new variable that can force schedule interruptions on even upon the most determined hikers.
The rim to rim to rim backpacking trip in the Grand Canyon is a deceivingly challenging hike.
On one hand, the corridor trails that make up the R2R2R2 route (South Kaibab, North Kaibab, and Bright Angel) are impeccably maintained, require no navigation skills, campsites feature numerous amenities, and potable water is readily available during many times of the year.
On the other hand, the Canyon coaxes you into a false sense of security with its upside down mountain topography. You start with the ease of descending and gravity on your side, you finish working against it. You’ll descend 4780 ft (1450 m) from the top of the south rim only to climb 5700ft (1700m) up to the North Rim, before doing it all over again in reverse.
The biggest challenge you may face is the elements. The intense sun and searing heat, lack of shade (especially on the South Kaibab), and lack of water and requirement to haul extra (exacerbated during non-peak season when many taps are shut off) are variables unique to those unfamiliar with desert hiking. The heat can be so intense that you’ll find yourself kneeling with gratitude at the smallest amount of shade and setting your alarm earlier each day in a futile attempt to beat the worst of it.
During the winter, fall and spring, cold weather is also a major part of the equation. Snow, ice and below freezing temperatures are commonplace higher on the South Rim and the North Rim.
Ultimately, backpacking the rim to rim to rim can be tough, but with proper planning and respect for the environmental conditions, most backpackers encounter no issues.

How do you get a permit to backpack the Grand Canyon?
To backpack in the Grand Canyon you need a permit which is obtained through an antiquated process that involves either sending a fax, mailing the permit request or dropping it off at the North or South rim information center.
Permit requests are accepted during the 10 day period, 4 months before the month of your desired start date. If you wish to hike in November, you would submit your completed permit application anytime between June 20 and July 1. The order permits are received doesn’t matter, this period is simply the window in which applications are accepted. Once the deadline passes you’ll receive a response within a couple of weeks.
To complete the application one member of your group will need to complete the permit request form with y our group size and desired itinerary (nightly camp location). Additional details and complete instructions on backcountry permits can be found here .
To maximize your chances of obtaining a permit follow this common sense logic:
- Selecting a big window for alternative start dates or the entire month, if possible.
- Selecting a lower minimum number of nights (know your limits and conditioning though).
- Selecting a lower minimum group size. There’s always one friend you kinda want to drop anyways…
With this sage wisdom you’ll hopefully score a permit and ideally write an even better blog post than this after your epic backpack through the Grand Canyon, thereby saving future readers the misery you’re presently enduring in reading this one…
Yes, you require a park entrance pass even if you have a permit for backpacking the Grand Canyon. The lines to pay entrance fees at the gate can be long, so make sure to purchase your entrance pass in advance to save time.
America the Beautiful Annual Pass if the best bet if you plan on visiting multiple parks or multiple times within the year of purchasing it. The Grand Canyon charges $35 per vehicle for a 7 day pass, so it doesn’t take many visits to National Parks or federal public lands to pay back the $80 dollar cost of the America the Beautiful Annual Pass .
You can also pre-purchase your 7-day entrance fee at recreation.gov i f this is the only time you’ll be visiting a National Park this year.
The rim to rim to rim trail is started from the South Rim, taking either Bright Angel Trail or the South Kaibab trail down before ascending the North Kaibab to the North Rim and then doubling back. The primary reason for this is the seasonal closure of the North Rim that typically begins on the 1st of December until May 15.
Should you hike the Grand Canyon rim to rim or rim (R2R2R) to rim to rim (R2R)?
When the North Rim is closed to vehicles you’ll only have the option to hike the rim to rim to rim if you wish to complete this hike in its entirety. This provides a couple of advantages. You can camp on deserted North Rim (more on that below) and you will run into fewer and fewer people the further you get from the South Rim. Purely from a solitude perspective, the R2R2R takes the cake while the North Rim is closed to vehicle access. It will take double the time thought, so this itinerary might not be feasible for everyone.
During the later spring, summer and fall months when the North Rim is open, I’d gravitate towards doing the R2R as you get no real benefit from the extra days and mileage at this time of year aside from getting to look at the views in reverse, spending more time in the grand canyon, and avoiding a 4-hour shuttle ride.

The most popular and recommended way to backpack (or hike) the R2R2R is to begin your hike by descending the South Kaibab trailhead. After climbing the North Kaibab and returning to Phantom Ranch you’ll be faced with a choice of climbing the South Kaibab or hiking up the Bright Angel Trail. Despite being 2 miles longer, Bright Angel is the wiser choice, especially if there is any kind of heat whatsoever. The South Kaibab is relentlessly exposed with virtually no shade and no opportunity for water. Descending it at the heat of the day on an unexpectedly hot day in April left us completely bagged, I couldn’t have imagined hiking up in these conditions. The smart choice here is to ascend Bright Angel as it provides numerous opportunities for water and shade making the already challenging experience of climbing out of the Grand Canyon significantly more enjoyable.
If you can secure a permit, April is the ideal month to hike the Grand Canyon rim to rim to rim. The heat typically is not yet in full force (It did get to over 110, so extreme heat is still possible), the likelihood of winter conditions (ice, snow) at the higher elevations is reduced, the days are long, and the North Rim is still closed. Hiking the R2R2R while the North Rim is closed affords a couple key advantages. First, it reduces some of the day hiker traffic descending from the North Rim (although according to the park service only around 10% of visitors to the Grand Canyon visit the North Rim) and most importantly it provides an unprecedented way to obtain some solitude on what is a very busy trail by spending a night camping on the North Rim.
The ultimate rim to rim to rim backpacking hack : Book a night on the North Rim and beat the crowds
I was lucky enough to speak to an informative ranger before requesting our permit who was kind enough to advise me that despite the North Rim being closed, the campground remains open to backcountry travelers venturing from the Grand Canyon’s south side. As long as you’re equipped with warm enough gear for the high elevation of the North Rim, (the daily average low is 32F (0C) in April), this can be an incredible experience. With luck, you’ll have an empty campsite and the opportunity to explore the viewpoints of the North Rim in near isolation.
No, fires are prohibited throughout the backcountry in Grand Canyon National Park.

How do you get to the South Kaibab Trailhead?
After parking your vehicle at the Backcountry Information Lot you’ll hop on the free Hikers’ Express shuttle bus to the South Kaibab trailhead. The hours change depending on the season, but they typically leave as early as possible to ensure hikers beat the heat. Check this page on the Grand Canyon’s site to determine the times the bus departs during your trip dates.
The Bright Angel Trailhead is only a ¼ mile from the Backcountry Information Lot making a return to your vehicle seamless on completion of your trip.
Food storage while backpacking the Grand Canyon
Metal food storage containers are provided at each campsite along the corridor trails of the Grand Canyon. If you’re planning an itinerary that includes campsites off the main corridor trails bring something to protect your food, like a ratsack .
Squirrels in the Grand Canyon
Along the corridor trails one of the largest annoyances and potential dangers you’re likely to face is the Grand Canyon famous rock squirrels. It’s rumored that they hold the title for most dangerous animal in the Grand Canyon and this becomes immediately obvious after witnessing the behavior of the first squirrel you see. Extra caution is required! Do not leave your bag or clothing unattended and ensure all food is placed inside the metal food storage boxes. Leave your pack open and hanging from the metal bars at each campsite. Apparently, this allows them to climb inside and take a look around before realizing there is nothing good to eat and thereby preventing them from chewing though your pack to investigate. Be extra aware of the squirrels nearest to the South Rim. The high volume of day hiker traffic here seems to have further emboldened this cohort, likely due to many people feeding them. If you sit down and pull out a snack, you may look over to realize there is a squirrel uncomfortably close. You’ve been warned.
How do I have dinner at Phantom Ranch?
In the middle of a long hard day of backpacking it’s only natural to have visions of your favorite dinner pop in and out of your head. Maybe it’s your favorite pizza, steak frites, or marinated tofu delight. Whatever your fancy, you’re usually constrained to dining on some form of dinner that involves adding boiling water to something dry. One benefit that comes with the sometimes diluted wilderness experience around Bright Angel Campground and Phantom Ranch is your ability to treat your hiking buddy (or have them treat you) to a sit down meal at the Phantom Ranch Canteen. You’ll have your choice of steak, stew or vegetarian option at the heart of the Grand Canyon. A great meal and backpack weight savings all at once! Like any good restaurant, reservations are required, so make a booking for dinner well in advance if this is something that tickles your fancy.

To ensure an early start and guarantee you catch the H ikers’ Express Shuttle Bus from the Backcountry Information Center it’s most convenient to spend the night before your hike close to the South Rim of the Grand Canyon. The best option is to stay inside the park itself which allows for exploration of the rim area and historic district during the day before your hike. These options book up incredibly fast, so make your booking as soon as you’ve secured your permit.
Best accommodation options inside Grand Canyon National Park
Camp at mather campground.
The most economical option is to camp at one of the 327 campsites at Mather Campground in Grand Canyon Village. The campsites include all the amenities you’d expect plus flush toilets and potable water throughout the campground. If you’re tenting, Pine Loop is a tent-only area where generators are prohibited. Book a reservation on recreation.gov well in advance to secure a spot.
Stay at one of the Grand Canyon’s historic lodges
Sometimes nothing beats a comfortable bed before (and after) multiple nights in the tent. Fortunately, the Grand Canyon offers numerous historic lodges to get a good night or two of sleep before heading out on your rim to rim to rim adventure. The majority of these are within easy walking distance of the Canyon Rim.
El Tovar Hotel i s considered to be the crown jewel of Historic National Park Lodges. Constructed in 1905 of local limestone and Oregon Pine, this historical hotel is located directly on the rim of the Grand Canyon.
Bright Angel Lodge and Cabins – Another historic lodging option at the rim of the Grand Canyon. This lodge was originally constructed as a less expensive option to El Tovar. This National Historic Landmark features 90 rooms ranging from cozy lodge rooms (some with shared, some with private bathrooms) and several historic cabins. For one of a kind accommodation consider a stay at the historic Buckey O’Neill Cabin or Red Horse Cabin. You can find more information on these historic cabins and details on how to book them here .
Kachina Lodge , Thunderbird Lodge , Yavapai Lodge and Maswik Lodge – These lodging options in Grand Canyon Village are slightly more contemporary than the first 2, but do offer more conventional hotel amenities still within easy access of the Canyon Rim.
Hotels outside Grand Canyon National Park
If the options in the park are booked up there are several notable options just outside of the park gates in the small village of Tusayan. Only 7 miles (11 km) south of the south rim is a suitable backup option that leaves a very manageable drive for the morning of your departure.The Grand Hotel at the Grand Canyon is most sought after choice here with several other decent chain hotel options available .
Trail sections and descriptions
The three trails that make up the rim to rim to rim of the Grand Canyon are referred to as the Corridor trails. These include the South Kaibab Trail, North Kaibab Trail, and Bright Angel Trail. The most common route for hiking rim to rim to rim is to descend the South Kaibab Trail to the Colorado River and Phantom Ranch. From there you’ll climb the North Kaibab trail to the North Rim before doubling back to Phantom Ranch and taking Bright Angel Trail back to the South Rim. The trail sections are broken down with descriptions in this order,

South Kaibab Trailhead to Bright Angel Campground
7 miles (11.3 km), 4780 ft (1450 m) elevation loss.
After disembarking from the Hikers’ Express Shuttle bus, take a moment to top up your water supplies (this tap is seasonal and may not be turned on until early May). This is your last chance to do so prior to reaching Phantom Ranch and you have 7 miles of very exposed hiking to get through with almost no shade. After approaching the Canyon rim and dropping, in it doesn’t take long before you come across a series of switchbacks before traversing the slope in a straight shot until coming up on the sublime vista at the aptly named Ooh Ahh Point. You’re already 800ft (250m) of descending in with plenty to go!

After Ooh’ing and Ahh’ing for as long as you feel is required, continue along the trail as it descends the ridgeline to Cedar Ridge where toilets (no water) are available to anyone feeling moved by the views… The South Kaibab continues its descent along the ridgeline before skirting around the west side of O’Neill Butte and descending to Skeleton Point. Depending on the season, you’ll likely be ready to de-layer by this point as you notice the substantial increase in temperature as you descend towards the canyon floor. After Skelton Point the trail drops down dramatically via a series of switchbacks which descend 650ft (200 m) of elevation in just over half a mile (1 km) towards the Tonto plateau. By this section, hiker traffic thins substantially as all but the boldest, fittest or most naive day hikers have turned back. After completing the switchbacks and continuing your descent at a rapid, but slightly more gradual pace you’ll reach the Tonto Plateau and a small rest stop at the Tipoff. The Tipoff has a shaded pavilion and toilers (no water) and is a terrific spot to have a snack, rehydrate, and embrace the shade before tackling the final leg of the South Kaibab.

The section following Tipoff can feel like a race against time, especially for those hiking in late spring, summer or during an unseasonably hot day. In 1.5 miles (2.5 KM) from the Tipoff to the fork with River Trail you rapidly descends nearly 1280ft (390 m). Despite the rapid descent, you’ll do so without t he major switchbacks you encountered earlier and almost no shade. We hiked during an unseasonably hot day in April where the temperature got to well over100 and this section felt like the most challenging of our entire hike. The Park Service advises that everyone start hiking well before dawn or in the late afternoon during May to September and advises against being on the trail between 10 am – 3 pm to avoid medical risk and potential need for rescue. So start early! After reaching the fork with River trail continue to the right. head through the tunnel and across the Black bridge.

After crossing black bridge you’ll pass by Boat Beach ( a nice spot to check out on the Colorado River) before walking for another ½ mile to reach Bright Angel Campground, shade, and most importantly water.

Bright Angel Campground to North Kaibab Trailhead or North Rim Campground
14 miles (22.5 km), 5761 ft (1756 m) elevation gain.
After leaving Bright Angel Campground and passing through Phantom Ranch the trail meanders alongside Bright Angel creek as the Grand Canyon enters one of its narrowest sections, the Inner Gorge or “the Box”. The hiking here is quite flat and easy, but with dark rock walls and low elevation this section can feel like the parking lot at a Phoenix Target in August, so once again, make sure to start early.

After leaving the Box, the trail remains a gradual incline for the entire 7.2 mi (11.6 km) stretch from Bright Angel to Cottonwood Campground. After negotiating a small hill around 5.5 miles from Bright Angel, you’ll have the option of making a wonderful side trip to the cool oasis of Ribbon Falls.
This trip is well worth it and can also easily be made as a quick afternoon trip directly from Cottonwood campground, if you’re overnighting there. Going to Cottonwood first adds a 1.6 miles (2.6 km) each way, but gets off the trail before the heat of the day and helps you secure a better campsite at Cottonwood by getting there early.
To get to Ribbon Falls follow the path until you hit Bright Angel Creek before crossing and following the fork to the left to lower ribbon falls. If you have the energy, a longer trail (0.9 miles or 1.4 km) forks right and climbs 330ft (100m) of elevation to the less visited Upper Ribbon Falls, Note that at time of hiking the bridge to access to this trail was removed and an easy ford of Bright Angel Creek was required to access the trail to both upper and/or lower Ribbon Falls.

After reaching Cottonwood campsite or overnighting there, you’ll hike for 1.4 miles (2.3KM) gaining about 390 ft (120 m) alongside Bright Angel Creek before crossing a final bridge to reach the Manzanita Rest Area. Seasonal water taps are available at the Manzanita Rest area. During the winter and spring months, you’ll a have a final opportunity to fill and treat water by taking the short, ¼ mile side trip to Roaring Springs which lies ⅔ mile (1.1 KM) up from Manzanita Rest Area. Regardless of your water needs, the short side trip to Roaring springs is worthwhile as it brings you closer to the incredible stream of water that gushes out from the cliff above before making its way down to Bright Angel Creek below. Once you’re filled up and ready to get started, backtrack along Roaring Springs Trail back to the North Kaibab and take a breath. The big ascent is about to get started.
For the next 1.7 miles (2.8 KM) after the junction with Roaring Springs the trail picks up nearly 1000ft (300 m) of elevation before reaching Redwall bridge. During this section you’ll pass along beautiful sections of trail with sheer cliff faces dropping off to the right hand side. For anyone afraid of heights, this section is the likeliest to potentially test your nerves. Fortunately, the wide trail provides ample room to hug the cliff wall so the exposure never feels truly frightening. This section of the North Kaibab trail is stunning example of a time when trail construction involved blasting away giant sections of rock to accommodate a hiking trail.

After descending slightly to Redwall Bridge you’ll begin another big uphill slog gaining close to 850ft (260 m) in 0.9 miles (1.4 KM) before reaching Supai Tunnel. Supai Tunnel offers a restroom and a seasonal water tap. At an elevation of 6800 ft (2073 m) you’ll begin to notice a change in both vegetation and temperature with large coniferous trees becoming more prevalent.

From the Supai tunnel the North Kaibab trail pushes on, snaking its way up another another 850ft (250m) of elevation with a dozen switchbacks over the next mile (1.6km) to the Coconino Overlook. Take a moment to savor the view here, as this is the last panoramic view you’ll get of the Canyon on the North Kaibab Trail.
After enjoying the view, take a deep breath and crush out the final 0.6 mile (1 km) to the top of the North Kaibab Trailhead. Hopefully, you took a moment to enjoy the view from the Coconino Overlook, as the terminus of the North Kaibab is somewhat anticlimactic with no view to speak of. If time permits, consider the 2 mile (3.2 KM) easy trek to Bright Angel Point for a spectacular view back across the Grand Canyon. During the quiet months that North Rim is closed to vehicle traffic this trip is particularly worthwhile. If you’re fortunate enough to be camping on the North Rim, head west for just under a mile (1.4 KM) of easy walking to the BIker/Hiker section of the North Rim Campground on the far west side adjacent to the rim. After getting your site set up, ditch your big pack and take the 1.6 mile (2.6 KM) trail along the rim’s perimeter to Bright Angel Point.

Return to Bright Angel Campground
14 miles (22.5 km), 5761 ft (1756 m) elevation loss.
Double back the way that you came on the North Kaibab Trail following the same route until you reach Bright Angel Campground. Hopefully, you were able to enjoy a night on the North Rim.

Bright Angel Campground to Bright Angel Trailhead
9.5 miles (15.3 km), 4380 ft (1337 m) elevation gain.
From Bright Angel Campground you’ll have the option to hike out on the South Kaibab Trail or take the recommended route out on Bright Angel Trail (see earlier section for the reasons why). From Bright Angel Campground take the Silver Bridge to the west across the Colorado River. After crossing the river you’ll hike along sand dunes alongside the Colorado River for around 1.2 miles (1.9 km) until the trail begins its ascent back to the South Rim at the Pipe Creek drainage. At this point you’ll find the River Resthouse, a toilet and a convenient spot to fill up and treat water if you happened to forget to do so before leaving Bright Angel.
You’ll begin your ascent up the Pipe Creek Drainage a fter departing the River Resthouse . For the first mile (1.6KM) the trail follows alongside Pipe Creek and picks up about 350ft of elevation (100m). After crossing the creek a final time, you’ll encounter a series of switchbacks called the Devil’ Corkscrew which rapidly gains another 500ft (150 M) of elevation. This section is likely to be one of the most unshaded parts you’ll encounter on Bright Angel Trail, so an early start (or late in the day) is recommended to ensure safe passage here.

T he trail links up with Garden creek about a mile after starting the switchbacks of Devil’s Corkscrew. From here, it’s a gradually elevated mile (1.6 KM) along the creek gully to Havasupai Gardens Campground. Just before reaching Havasupai Gardens Campground the trail forks with an option to hike out to Plateau point or gain access to the westbound side of the Tonto Trail. The trip to see the view from Plateau Point (1.4 miles or 2.3 km one-way) is a worthwhile side trip if you have the time.
After staying the night at Havasupai Gardens or stopping to refill and refuel, it’s time to buckle up for the final push back to the South Rim. Following the Garden Creek drainage the trail gains around 500ft (150 m) in the first mile before rapidly gaining another 330ft (100m) in a series of switchbacks to reach 3 Mile Resthouse. Fortunately, the rest stop provides ample opportunity to catch your breath before the next big push. By this point of your hike, you’ll notice an increase in the trail traffic as you start to encounter a higher frequency of day hikers coming down from the South Rim.

When you’re feeling re-energized and ready for more elevation push towards the 1.5 Mile Resthouse 1.5 Miles (2.4 KM) up the trail. Nearly a dozen switchbacks and nearly 1000 ft of elevation gain (300 m) separate you from the final rest stop on your rim to rim to rim journey. As you continue upward, take a look back and see where you’ve come from looking for Havasupai Gardens way down below. After the final rest stop of your adventure summon your legs for the final set of switchbacks that lead you up the last 1.5 miles and 1100 ft (340m) of elevation to the Bright Angel Trailhead.
Congratulations, you’ve just completed the Grand Canyon rim to rim to rim.

Campsites in the Grand Canyon on the rim to rim
Along the corridor trails you’re limited to camping in the established campsites which serve as a sufficient place to bunk down with some incredible dark sky views over the canyon walls. The night skies and sublime mesas and canyon walls that adorn every section of the Grand Canyon more than make up for the somewhat lackluster campsites themselves. Many of the sites are close together, with limited privacy. The vast majority of backpackers are respectful of lights out times and quiet time, but bring ear plugs for the one night you inevitably come across a snorer or someone that fails to observe the rules.
Bright Angel Campground
Located near historic Phantom Ranch and near the confluence of Bright Angel Creek and the Colorado River, this is the busiest campground along the Corridor trails. It is also my least favorite. The 30 small campsites are close together with limited privacy, the squirrels are relentless (unquestionably due to the constant prevalence of easy meals) and the cantina, restaurant, and lodging at Phantom Ranch take away slightly from the backpacking/backcountry experience. Not to mention the flush toilets and running water. The entire experience at Bright Angel Campground feels more analogous to car camping than backpacking. All this said, it still has many things to love especially for a one night stay. Bright Angel Creek runs right through it and the cold water is balm to any weary joints and muscles. The site also provides easy access to an incredible beach along the Colorado River that more than makes up for the sleep you’re likely to lose from your neighboring backpacker’s snoring.
Havasupai Gardens Campground (f.k.a. Indian Gardens)
This is an excellent final night option if you plan on exciting your trip via the Bright Angel Trailhead. The 15 small group sites lie 4.8 miles from the South Rim and about halfway up the Bright Angel Trail making for a relaxed half day hike to exit. The campsites are quite close together with some offering more privacy than others. It’s situated in a beautiful cottonwood grove and adjacent to a small creek. Staying here also provides easy access to add on trips along the Tonto Trail or Plateau point.
Cottonwood Camground
Camping at Cottonwood is a delight. It’s a smallish campground with 15 sites located 7.2 miles (11.6 km) from Bright Angel Campground on the North Kaibab Trail. This site feels a little more spacious and private than both Indian Garden and Bright Angel and this was definitely my favorite site below the rim. Bright Angel creek bubbles joyfully alongside providing several incredible spots to cool down or soak and relax. Sleeping here was a delight with mesas rising from all around the campground to provide an enchanting silhouettes in contrast to some of the most incredible stars you’ll ever see. Earplugs may still be required, but this site is not even on the same level as Bright Angel. Look for a couple sites on the left as you head toward the North Rim after passing the toilets. Potable water is seasonal here, so ensure you have a treatment method if traveling between the middle of October and the middle of May.

North Rim Campground - Winter Camping
As I mentioned before, I believe staying a night on the North Rim is the ultimate hack for hiking the Grand Canyon rim to rim to rim. It can be very cold at night with the possibility of waking up to snow. That said, the solitude provided here is unmatched by any of the other campsites on the R2R2R2. You need to be prepared with proper layers and sleeping gear. We camped here and had the entire place to ourselves which was quite the change from the chaos of Bright Angel Campground. You’ll set up camp in the section near the canyon rim at the west end of the campground about a 1 mile walk from the North Kaibab Trailhead. The view here is breathtaking! Additionally, you can explore the lookout at Bright Angel Point without another person anywhere in sight. The entire experience of staying here in winter feels almost post-apocalyptic .Ultimately, I believe staying here also makes for a much more enjoyable experience hiking the North Kaibab Trail as it provides an epic conclusion to the day. Otherwise, you’ll reach the trailhead (which has no view) after the big push up and turn around.
Itinerary options for backpacking the Grand Canyon rim to rim to rim
There are numerous ways to structure an itinerary for backpacking the Grand Canyon rim rim to rim depending on your desired mileage, your fitness level, and the weather conditions/season. When planning your itinerary, note that both Havasupai Gardens Campground and Bright Angel Campground offer several great options for day hiking off the main corridor trails which may make them worthy of an extra night’s stay! Simply add another night or 2 to these campsites on your permit request. These base camp stops get you day hiking off the highly trafficked corridor trails, not to mention the reprieve of lightening your load for a day of exploration.
Remember when planning your itinerary, it’s critical to recognize that the Grand Canyon is a place of extremes where both heat and snow/ice can impact trip feasibility. On our trek through the Grand Canyon at the end of April we watched our daily wakeup time increase to a nadir of 3:00 am in a futile effort to bike before the heat during an unseasonably warm spell. Best be prepared for the unexpected.
With this in mind, let’s take a look at a few options:

Grand Canyon rim to rim to rim in 2 days 1 night
- 21 miles (33.8 KM) (+ 0.9 miles (1.4 km) to Campground)
- Approximate Elevation Gain 5761 ft (1750 m)
- Approximate Elevation Loss 4780 ft (1457 m)
- 23.5 miles (37.8 km) (+ 0.9 miles (1.4 km) from North Rim Campground to Trailhead)
- Approximate Elevation Gain 4380 ft (1337 m)
- Approximate Elevation Loss 5761 ft (1750 m)
Itinerary notes
This is an extreme itinerary that is not to be taken lightly and is only recommended for experienced backpackers and thru hikers that have experience with pushing 25+ mile days. This length of mileage is challenging backpacking anywhere, but the climate and environment of the Grand Canyon may at times make these distances impossible, completely unenjoyable, and often dangerous. In the late fall, winter and early spring, snow and ice cannot be ruled out and may dramatically slow down your pace. In the spring or fall, unseasonal temperatures have the potential to make the Grand Canyon dangerously hot, making hiking during mid-day hours nearly impossible. If you’re thinking about taking this on, recognize that you may be forced to spend a significant part of your trek hiking in the dark and know your limits. Less is often more in the Grand Canyon, but if you’re limited on time and have the experience and conditioning, this might be the itinerary for you.

Grand Canyon rim to rim to rim in 3 days 2 night
- 14.2 miles (22.9KM)
- Approximate Elevation Gain 1600ft (480 m)
- 20.8 miles (33.4 km)
- Approximate Elevation Gain 4160 ft (1268 m)
- Approximate Elevation Loss 5760 ft (1756m)
- 9.5 mi (15.3 km)
- Approximate Elevation Loss negligible
Itinerary notes
Completing a R2R2R backpacking trip in 3 days is no small feat with several tough days and one seriously long day. Similar to the sprint of doing it in 1 night, this trip is only recommended for individuals very comfortable with their backpacking abilities and some knowledge of the conditions/extremes one is likely to encounter here. The first day provides for an early morning descent down the South Kaibab and the opportunity to take some time to cool down and wait out the heat (as applicable) in the Phantom Ranch Area. In the later afternoon or on cooler days, the section between Phantom Ranch and Cottonwood is smooth sailing. Day 2 is the most challenging, requiring an early departure from Cottonwood on days where heat may be a factor. The final day features shorter mileage with significant elevation gain made manageable by the availability of water and shade along the Bright Angel Trail. The downside of this itinerary is the lack of time it affords to experience or camp at the North Rim. Additionally, I found Havasupai Gardens Campground to be nicer than Bright Angel, but this itinerary makes camping here for the last night logistically awkward. Or maybe it’s just a good excuse to get a dinner reservation at Phantom Ranch for your last night in the Grand Canyon.

Grand Canyon rim to rim to rim in 4 days 3 nights
- 6.8 miles (10.9 KM) (+ 0.9 miles (1.4 km) to North Rim Campground)
- Approximate Elevation Gain 4161 ft (1268 m)
- Approximate Elevation Loss Negligible
- 14 mi (22.5 km) (+ 0.9 miles (1.4 km) from North Rim Campground to Trailhead)
- Approximate Elevation Gain Negligible
- Approximate Elevation Loss 5761 ft (1756 m)
- Approximate Elevation Loss negligible
Completing the rim to rim to rim in 4 days and 3 nights is likely the choice for you if you seriously considered doing it in 2 days, but really wanted the opportunity to stay a night on the North Rim. This itinerary groups heavy mileage with heavy descending and low mileage with ascending. The only downside here is the requirement to stay at Bright Angel on the last night vs the nice Havasupai Gardens Campground. That said, get a dinner reservation at Phantom Ranch and it might be the perfect way to spend your last evening in the Grand Canyon.

Grand Canyon rim to rim to rim in 5 days 4 nights
- 6.8 miles (10.9 KM) to North Kaibab Trailhead (+ 0.9 miles (1.4 km) to Campground)
- 6.8 miles (10.9 KM) (+ 0.9 miles (1.4 km) from North Rim Campground to Trailhead)
- 7.2 mi (11.6 km) + 4.7 mi (7.6 km) = 11.9 mi (19.2 km)
- Approximate Elevation Gain 1320 ft (400 m)
- Approximate Elevation Loss 1600 ft (480 m)
- 4.8 mi (7.7 km)
- Approximate Elevation Gain 3060 ft (930 m)
This might just be the perfect itinerary for hiking the Grand Canyon Rim to Rim to Rim. The daily mileage is manageable with one long day that is primarily descending. Additionally, you’ll avoid staying at my least favorite campground (Bright Angel), and have plenty of time to take in the splendor of the Grand Canyon. ’d likely choose this route, i f I were to do this trip over again. The biggest consideration you’ll here is ensuring you get a very early start on day 1. If you don’t start early enough and the heat becomes unbearable, you may be forced to pitstop for a couple hours at Phantom Ranch between 10 am – 3 pm. The same goes for Day 4 when you’ll hike from Cottonwood to Havasupai Garden.

Grand Canyon rim to rim to rim in 6 days 5 nights
- 7.0 mi (11.3 km)
- Approximate Elevation Loss 4780ft (1457 m)
- 7.2 mi (11.6 km)
- Approximate Elevation Gain 1600 ft (480 m)
- 11.9 mi (19.2 km)
Daily mileage is very manageable and affords the ability to avoid hiking during hot temperatures if you encounter them. This was the itinerary that we hiked on our rim to rim to rim trek. In ideal hiking conditions it may have felt a little relaxed, but with unseasonal temperatures well over 100F, we were happy to have the time. We’d start hiking shortly before sunrise and finish many days before 11am. Day 2 will be short with limited elevation gain, but this provides the option of setting up camp and then using the afternoon to hike to and relax at nearby Ribbon Falls.

Grand Canyon rim to rim to rim in 7 days 6 nights
- 7.2 mi (11.6 km)
- Approximate Elevation Gain negligible
- 4.7 mi (7.6 km)
This option is like the 6 day option, but splits the trek up between Cottonwood and Havasupai Gardens. Doing it this way allows you to conquer the hottest part of your ascent up the South Rim first thing in the morning and takes significant mileage and elevation off your final day’s trek out.
The lighter your pack, the more enjoyable your backpacking trip in the Grand Canyon is going to be. A lighter backpack helps you cover more mileage and more elevation with way less effort making big days more realistic, not to mention more comfortable!
If you’re new to backpacking , don’t stress out about buying the latest and greatest equipment. Save money and use things you already own that can be repurposed for backpacking, rent gear or borrow stuff from a gear-head buddy. Later, when you’ve gained more experience, modify your kit and change out gear as you get a better understanding of what creature comforts you can and can’t live without.
Here’s a complete list of gear to pack for backpacking the Grand Canyon. Click any item below to jump ahead in the post for a detailed recommendation.
Essential Items
Sleeping mat, backpacking pillow.
- Sleeping bag or quilt
- Water purification
- Trowel & TP
- Swiss army knife
- Stove & fuel canister
- Lighter/matches
- Backcountry cookset
- Water bottle or reservoir
- Water storage container
- First aid kit
- Trekking poles
Headlamp with red light mode
- GPS, compass & map
- Battery back-up & charging cable
Luxury Items
What to wear, convertible hiking pants, a pair of shorts.
- Shell Jacket
- Puff Jacket (seasonal)
- Base Layer Top
- Base Layer Bottom
- Hiking Socks
- Hat & Warm Hat (seasonal)
- Gloves (seasonal)
- Trail Runners or Hiking Boots
- Camp Shoes (optional)
Additional Items
Microspikes (season dependent), low trail running gaiter (optional).
- Sunscreen & SPF lim balm
- Tooth Brush & Toothpaste
- Emergency Medical Insurance (if traveling from outside the US)

Best tent for backpacking the Grand Canyon
I upgraded to Mountain Hardwear Strato UL2 since backpacking the R2R2R2 and it’s been great, that’s it above at Rae Lakes in Sequoia National Park. It’s the perfect tent for backpacking the Grand Canyon as it’s semi-freestanding, double walled and weighs in at a mere 2.5 lbs. Unlike many 2-person tents, it doesn’t have a tapered floor and is able to fit 2 extra wide sleeping pads side-by-side with no overlap, a rarity in this class of tent! It’s cozy for two, but palatial for one!
If you’re looking for a completely freestanding tent that doesn’t need to be staked out to stand, check out the Big Agnes Copper Spur UL2. It’s unique blend of functionality, livability, weight, and durability earn high praise and Big Agnes’s customer service is outstanding!
For an incredible ultralight option, check out the single wall Durston X-Mid Pro which weighs in at a mere 20 oz (565g). There’s a reason this tent has developed a serious cult following among ultralighters.

Best backpack for backpacking the Grand Canyon
If you’re just getting into backpacking, there is nothing wrong with using a large-size backpack with a decent suspension system (and good hipbelt) or borrowing one from a friend. Going this route gives you time to decide what features you need and whether or not backpacking (and the gear) is something you want to invest in. Whatever backpack you use, make sure you have a good fit before by following this guide to backpack sizing. When I first started backpacking, I used a 60L travel backpack, our Khmer Explorer Travel Set on Canada’s West Coast Trail. While not designed for hiking, it worked great despite my ridiculous overpacking!
If you’ve begun dialing in your backpacking kit and moving towards a lightweight set-up, check out either the Osprey Exos or Woman’s Eja. At under 3 lbs these packs provides a great compromise between barebones ultralight packs and the heavier feature-laden packs. Their excellent suspension systems prevent the dreaded swampy/sweaty back on hot days. That’s my Exos hiking the Narrows in Zion in the photo above.
Learn more about the Exos and Eja:
Or view the women’s Eja at REI .
Or view women’s Eja at Backcountry
For a similar option that checks in even a little bit lighter in weight, check out the Gregory Focal and Facet (women’s) lineup:
Or view the women’s Facet at REI .
Or view women’s Facet at Backcountry
If you’re an extreme gram counter, you might like the Hyperlite 3400 southwest . It’s 100% waterproof and constructed from ultralight dyneema fabric. Being ultralight you’ll sacrifice features, so if you hate getting a swampy back (that’s me) you may prefer the Osprey or Gregory despite the weight penalty. Backpacking gear is always a zero sum game!
C heck the price of the Hyperlite 3400 southwest :
I used to have terrible sleeps in the backcountry until I switched to the Therm-a-Rest NeoAir X-lite. It’s incredibly lightweight, comfortable, and packs down to the size of a Nalgene bottle. This is probably one of my favorite backpacking items! Get one. You won’t regret it. Sleep well!

Sleeping bag or quilt
My Patagonia Sleeping Bag kept me nice and toasty on the North Rim. Plus at only 822 g (29 oz) it’s lightweight and packs down small! I found the 30°F / -1°C to be perfect for most outings – if it gets colder you can always layer up! Like all Patagonia products, it’s not cheap, but they stand behind their gear and the quality matches the price point. If you spend a lot of time in colder environments they also make a 20°F / -7°C version . These bags are a worthwhile splurge!
If you’re looking for an even lighter-weight option, consider going for a sleeping bag quilt. Feathered Friends Flicker UL Quilt Sleeping Bag has won numerous awards and is a stalwart among ultralight backpackers. With a weight starting at 526g ( 1 lb 2.5 oz), I can see why!
Yes, you can sleep with a pillow not made of bunched up clothes in the backcountry. Check out the Nemo Fillo Elite. It packs down ultra small and provides a new level of comfort after long days on the trail. Once you try one you won’t imagine how you lived without!
Water purification
Outside of the summer months you’ll need to bring something to purify your drinking water. I love the Steripen . It’s light, portable and only takes minutes to purify a liter of water using only UV light. Press the button, place the pen in your bottle, and stir for a couple minutes it’s that easy!
Make sure to bring tablets as a backup though should you run into any technical problems/dead battery with your Steripen.
Trowel & toilet Paper
The rim to rim to rim offers a number of toilet facilities along the way and you should do everything you can to make use of them and avoid the alternative! That said, it’s always a good idea to pack a trowel just incase nature urgently calls at an unexpected time. Follow minimum impact camping principles and be sure to go at least (650 ft) 200m away from any established trails, campsites, or water (creeks, lakes, rivers etc.), dig your cathole at least 6 inches deep, and pack tp out.
Swiss army knife
For fixing gear or cutting food, make sure to bring swiss army knife .
Stove & fuel canister
Lightweight, convenient, and reliable, the MSR pocket rocket has been my go-to backpacking stove for years.
Lighter and matches
A little baby bic lighter is all you need. I often bring a small pack of matches wrapped in ziplock bag as well for backup or you could bring a small pack of waterproof ones.
Backcountry cookset
I love the GSI Halulite Microdualist II , two-person cookset. It’s lightweight and I can fit my MSR pocket rocket and a fuel canister inside.
If you’re looking to buy a minimalist stove and cookset c heck out the MSR PocketRocket Stove Kit for an all-inclusive solution.
Water bottle or reservoir
Nalgene are always a backcountry favorite. C heck prices at Backcountry / REI . If you’re cutting weight or looking for a way to save a buck, a simple smart water is the go-to for ultralight backpackers.
Alternatively, a hydration reservoir allows you to stay hydrated continuously without stopping to grab and open a bottle.
Water storage container
Extra water capacity is important for safety on your hike of the rim to rim to rim. So make sure to bring a MSR DromLite Bag or Dromedary for additional water storage. They are also convenient to have around camp for cooking and cleaning up.
First aid kit
From blisters, to scrapes, and cuts, a first aid kit is an essential item to have. The pre-built kits from Adventure Medical Kits offer varying sizes for party size and trip length. At the end of your trip write down any items you used and replace them right away so your kit is ready for your next adventure.

Trekking poles
The huge elevation gains and losses in the Grand Canyon make trekking poles an essential item in your kit! I resisted getting them for years, but take it from a former skeptic, poles are incredible at reducing the strain of long, grueling descents and providing extra stability on exposed sections. Leki makes some the best trekking poles on the market, I bought the Leki Micro Vario before doing the R2R2R and just look at how much fun I’m having with them in the photo above. If you’re looking for a premium hiking pole check out the new version, the MCT Vario.
The Grand Canyon is an International Dark Sky Park (IDSP) and you’re likely to encounter some of the most beautiful night skies you’ve ever seen. You’re also going to see numerous signs asking you to use the red light mode on your headlamp to preserve yours and others night vision.
The Black Diamond Spot 350 is the way to go with 6 modes including the night vision saving red light! Red light mode takes a minute to get used to, but once you do it’s a total game changer trust me! Hello stars!!
GPS, compass and map
The rim to rim to rim trail is extremely well marked and easy to navigate, but make sure to download the GAIA app for maps and gps. Additionally, I always bring a traditional compass and map for use in the case of technical problems or dead batteries.
Battery back-up and charging cable
Keep your phone charged for photos and gps. View options at REI .

Luxury items to pack for backpacking the grand canyon
Should you pack a camp chair.
No need to bring a backpacking chair on the corridor trails as picnic tables are provided at every established campsite. Hello luxury!
If you’re heading to a more remote site and this item makes your weight cut, check out the Helinox Chair Zero. At just over 1lb and is light enough to justify bringing on slower/easier backpacking trips where weight isn’t as big of consideration.
A hammock can be the ultimate luxury item or even a replacement to sleeping in a tent. Unfortunately, the Grand Canyon is hit and miss with spots to string one up. Havasupai Gardens has a couple man-made options for hanging a hammock and it’s possible and allowed on the North RIm. However, you are not allowed to use trees at Bright Angel or any of the other sites below the rim.
If it’s worth it to get horizontal with some great reading material in the pre-dinner hours or take in an amazing sunset from your own outdoor couch, the ENO Double Nest has room for two and at ½ kg it’s hardly even a splurge in weight to pack.
P.S. don’t forget the straps are sold separately (view them at Backcountry / REI ).
What to wear in the Grand Canyon
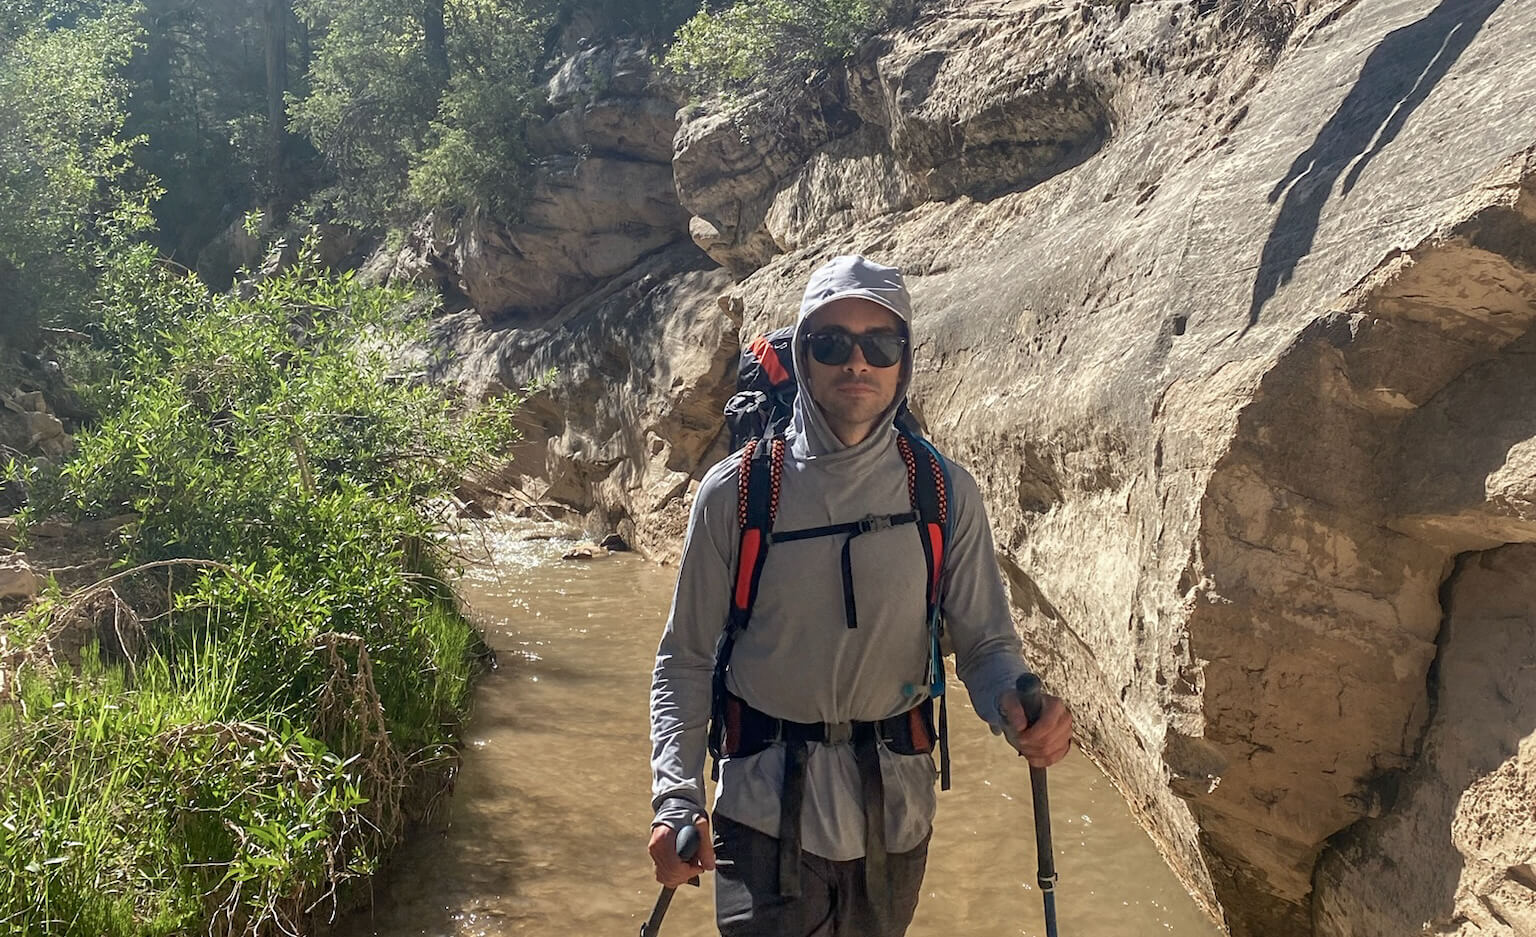
Sun hoodie - the best clothing item to pack for the Grand Canyon
When I did this hike a few years ago, I was shocked to see throngs of Arizona Trail thru-hikers wearing hoodies in the 100 degree (40 C) heat. Turns out they were onto something! A sun hoodie has been one of the best items I’ve added to my backpacking kit. They keep you burn free, are surprisingly cool, and let you get away with leaving the bottle of sunscreen at home (or bringing way less). The Sahara Sun Hoodie from REI is one of the best items I’ve added to my backpacking wardrobe and you can’t beat the price.
I never thought I’d see the day I embraced the zip-off. But they really are the best of both worlds and can’t be beat for quickly changing Grand Canyon conditions and keeping warm in the evening during the non-summer months when the temperature drops. Check out the Patagonia Quandary Pant.
They are also available in a women’s version.
Should you hike in shorts or pants? Should you wear shorts or leggings in the Grand Canyon?
Regardless of the season you’ll almost certainly get hotter as you descend. During many months of the year, that may mean going from near freezing temperatures to heat stroke temperatures all in the matter of hours. As we descended the South Kaibab Trail, a ranger took one look at my wife’s black leggings and said “You’re going to regret those”. Sure enough, an hour later she was making a trail side outfit change. To avoid this situation, just remember layers are key. If you have convertible hiking pants, wear those. If not, wear a pair of shorts underneath a pair of hiking pants. Layering makes it easy to adjust your temperature depending on the environment and how much you’re exerting yourself.
In addition to hiking pants, it’s nice to have a pair of shorts to change into after a long day on the trail or as a backup option. Trail running shorts are light and comfortable.
Shell jacket
An essential piece for wind, rain, and snow. The Arc’teryx Beta shell is the best all around shell jacket. While you’re unlikely to encounter much rain here this shell performs in all adverse conditions and is the perfect outer layer for the North Rim. Arc’teryx gear is expensive, but impeccably designed. I was skeptical for years, until I purchased a few pieces of their trail running gear and got hooked. If you’re looking for the best reviewed hiking shell out there this is the one.
For another excellent option that is more economical, check out the Patagonia Torrentshell 3L.

Puff jacket
I’ve had the Patagonia Nano Puff Hoody for years and it works great on it’s own or underneath a shell for extra warmth. It’s a perfect multi-functional item for everyday, backpacking, and pretty much anything where you might need a bit of warmth. I’m still looking for an activity it doesn’t work for. This item likely won’t be needed in the summer months, but is ideal for cold nights on the North RIm.
Base layer top
In addition to a sun hoodie, I also bring one base layer top to change into after hiking or have as an alternate. The Capilene Cool trail t-shirts work great for me on long hikes and trail runs, but pretty much any athletic quick-dry top will work fine.
Base layer bottom
A merino bottom baselayer is perfect for warming up at night or during chilly mornings especially during the non-summer months.
I’ve had the best luck with these Patagonia underwear for hiking, trail running, mountain biking and skiing and found them to be more durable than the more expensive ones from lululemon. I usually bring a 2-3 pair depending on trip length.
They also make women’s underwear , but I am unable to advise on fit, form, function, or durability on this front. C heck them out for yourself at Backcountry / Patagonia .
Hiking socks 3 pairs
I typically bring 3 pairs of socks. 1 pair for hiking, 1 pair to change into at camp, and a reserve to throw into the rotation as needed. Darn Tough Vermont makes the best hiking socks hands down. They’re guaranteed for life/replaced free of charge and they don’t stink. So go ahead and try to get holes in your socks. Really!
Sun hat & warm hat (seasonal)
A ball cap or tilley hat keeps your face protected from the sun. Check out these options at REI / Patagonia / Backcountry .
For colder months, bring a winter hat or beanie to warm up during chilly mornings or evenings.
This little item was super helpful on the rim to rim to rim. It helped block sun exposure on my head and neck and worked great to cool down with by soaking it at every creek or water stop.
Don’t forget to pack your favorite pair !
I bring a thin weatherproof pair if you’re camping on the North Rim.
Trail runners or hiking boots
Unless you’re hiking in the winter with the potential for snow and cold or you’re carrying the gear for your whole family, I’d choose trail runners for this hike. I’ve had great luck with the La Sportiva Bushido II.
The Altra Lone Peak are also a thru-hiker favorite and award winning trail shoe!
I do have a larger more traditional hiking boot, the Scarpa Kailash that I occasionally use when I’m carrying more gear/weight or heading somewhere with lots of snow. I actually wore these on this hike as I didn’t have my pack weight nearly as dialed as do now. I prefer trail runners now, but these are still a great boot.
Crocs are back! Well for backpacking camp shoes they never left… They’re lightweight and ugly as ever. Many backpackers find them to be the perfect camp shoe for resting sore feat after a long day in boots/shoes.
Personally, I still hate them. I have an old pair of Tom’s which I occasionally bring. They are light and less bulky than Crocs. If I’m wearing a trail runner, I’ll often ditch the camp shoe altogether and just loosen my laces. Your call!
Additional items to pack for backpacking the Grand Canyon
Kahtoola Microspikes slip effortlessly over your boots and make walking on snow and ice a breeze. If you’re tackling this hike when snow and ice are possible, bring these!
Low gaiter s can be helpful for keeping rocks, sand, and snow out of your trail runners and saving you from blisters.
Sunscreen & SPF lip balm
Duct tape (repairs and blisters), tooth brush & toothpaste, food for backpacking the grand canyon.
Everyone has different takes and caloric requirements, diets, and preferences so I won’t tell you exactly what to bring. I generally try to avoid/limit the just-add-water meals you find at REI . They’re overpriced and often don’t rehydrate as well as you’d like. I usually head to the grocery store and search for things like lentil rice , ramen, or plant-based mac & cheese . They’re basically just add water/boil quickly meals and way cheaper. Always re-bag/re-pack this type of food, as there is no reason to carry unnecessary packaging on the trail. If you’re looking for convenience consider P atagonia Provisions soups and chilis . I’ve found them to be a better bet than the other just add water options.
If you're coming from outside the US, don't forget this!
If you’re traveling from outside the US don’t forget to purchase comprehensive travel insurance that includes emergency evacuation. Check out World Nomads * for a quote. Hopefully, you never need to make a claim, but if you do you’ll be beyond happy you were prepared! I broke my collarbone traveling a few years ago, which hurt enough! I can’t imagine how much worse it would have hurt if I had to pay the $15,000 in medical bills out-of-pocket…
Final thoughts on backpacking the Grand Canyon
- Terrific first backpacking trip to the Grand Canyon that provides a great introduction to the nuances of backpacking here, not to mention the incredible scenery.
- First and last sections felt busy with day hikers from the South Rim.
- The heat was unbearable at times and felt like the biggest obstacle to overcome, much more so than elevation gain.
- Would avoid staying at Bright Angel Campground if possible due to congestion.
- Would take the earliest possible Hikers Express on day 1. South Kaibab trail is much more enjoyable this way.
- Would love to camp at the North Rim again while it’s closed to vehicle traffic.
Your Thoughts on backpacking the Grand Canyon
Have you backpacked the Grand Canyon rim to rim to rim? I’d love to hear from you. Questions about backpacking the rim to rim to rim? Drop me a line in the comments below and I’ll do my best to help!
More adventures you might enjoy

Rae Lakes Loop | The Ultimate Guide to Backpacking Rae Lakes
Rae Lakes loop is one of the most coveted backpacking trip in SEKI National Park with a seemingly endless supply of Sierra Nevada superlatives. This guide breaks down everything you need to know to make this incredible backpacking trip happen.

Rockwall Trail | The Ultimate Guide to Hiking the Rockwall
The Rockwall Trail is one of the Canadian Rockies’ premier backpacking trips. For 55km you’ll be treated to a seemingly unending supply of sublime Rocky Mountain scenery. Here’s how to make it happen with must-read tips for getting a permit and beating the crowds.

Share this post
Leave a reply cancel reply.
Your email address will not be published. Required fields are marked *
More Tales from the Banana Trail

Kananaskis Backcountry Camping | Best Spots for Backpacking
Kananaskis Country is a sublime section of Rocky Mountain wIlderness that provides some incredible opportunities for backcountry camping and overnight hiking. Situated just south of

Balian Beach | Ultimate Guide to Bali’s Hidden Paradise
Balian Beach feels like a mirage. Didn’t this Bali die long ago under a crush of Instagram swings and co-working hubs?

Best Backpack for Peru | How to Pick a Backpack for Peru
What is the best backpack for Peru? Should you take a hiking backpack or will a travel backpack work better? Read this post before you decide.
Adventure with us on Instagram @ BananaTrail

Download the Explorer's guide.

Shop Banana Backpacks Gear
- Kiri Customizable Everyday Collection
- Khmer Explorer Travel Set
Explore the Tales
- Plan Your Adventure
- The Explorer Series
- Learn, Pack, & Get Equipped

Rim-to-Rim-to-Rim: Backpacking Guide to the Best of the Grand Canyon
I n 2018, the Grand Canyon slapped me upside the head. I was attempting a Rim-to-Rim-to-Rim hike in two days, in freezing weather, without a sleeping pad, but I was detrimentally optimistic. After my coldest night ever, I crawled back up to the South Rim without finishing the entire route. Though I was sore for days, this magical place stole a forever spot on my shortlist. This September I returned and finished Rim-to-Rim-to-Rim in two days. Day one totaled 27 miles with 6,000 ft of elevation gain and 10,000 ft of descent, my longest ever. Returning to and crushing a goal that once eluded me is a feeling I can’t quite describe, but I have a feeling most of y’all know what I’m talking about.
I think Rim-to-Rim-to-Rim should be on everyone’s backpacking shortlist. Though it’s not technically a thru-hike, it follows the Arizona Trail and takes you through some of the most magnificent terrain this world has to offer.
Rim-to-Rim-to-Rim at a Glance

This spot captions itself.
- Distance: 40.8 – 47.5 miles
- Elevation gain: ~11,000 feet
- Difficulty: Hard
- Days to hike: 1-5
- Camping options: Established backcountry sites only
- Permit required: Yes
- Water availability: Flowing water year-round, taps turned on seasonally
- Best time of year: September – November and March – May
- Terrain: dirt/sand
Why Hike R2R2R?

A snap of my favorite section along the trail. The 7 miles between Phantom Ranch and Cottonwood are relatively flat, winding through the bottom of massive canyon walls
I know, an out-and-back may not seem appealing to many thru-hikers. However, considering how special the canyon corridor is, hiking through it twice will not seem redundant. The Rim-to-Rim route falls along the Arizona Trail, takes you through one of the Seven Natural Wonders of the World, and has plenty of water. It’s also a great trip to do alone, because of all the ranger stations and emergency phones. At the bottom of the canyon, you can stop at Phantom Ranch, which has a small canteen for hikers. I’ve heard their lemonade is amazing, but I wasn’t willing to pay $5 for anything without caffeine. Stopping for a cold brew in the middle of my hike was definitely a highlight.
Many hikers go Rim-to-Rim in a day, but logistics from the South Rim to the North Rim are a straight-up nightmare. If you’re able to score a backcountry permit and have the time to double back, I cannot recommend it enough. There are three different backcountry campsite options, all of which require a permit. You can choose an itinerary that pushes the mileage, or take a leisurely trip through the canyon. Another option to bypass the backcountry permit requirement would be to hike Rim-to-Rim in a day, camp at a developed front country campground on the rim, then hike back the following day.
How to Choose your Trailhead and Route

The view from the top of Bright Angel. Did I feel like a dork taking this with my own mini tripod? Yes. Do I want a random stranger touching my phone right now? Absolutely not.
There are three potential routes for this trip if you start from the South Rim. The length depends on which trail you choose on the South Rim. The South Kaibab and Bright Angel Trailheads both lead to the Colorado River from the South Rim, and the North Kaibab is the only trail from the river to the North Rim.
South Kaibab Trail Rim-to-River
- 4680 feet elevation change
- No water until Bright Angel Campground
- No overnight parking near trailhead (shuttle access only)
Bright Angel Trail Rim-to-River
- 4460 feet elevation change
- Water available every few miles (depending on season and how well the pipes are working at any given time)
- Overnight parking near trailhead
North Kaibab Trail Rim-to-River
- 5850 feet elevation change
Understanding the pros and cons of each individual trail will help you to piece together a Rim-to-Rim-to-Rim itinerary. Choosing the South Kaibab to North Kaibab route follows the AZT the entire way, and is shorter. However, the Bright Angel Trailhead is less exposed than South Kaibab, slightly less steep, and has water taps available seasonally. I chose to start at the South Kaibab Trailhead and exit through Bright Angel so I could have a shorter descent and longer ascent.
South Kaibab Trailhead to North Rim to South Kaibab Trailhead:
- Shortest route
- Steeper and more exposed than Bright Angel, no water
South Kaibab Trailhead to North Rim to Bright Angel Trailhead:
- Hit all three trails
- More logistical difficulty getting between the two South Rim trailheads (limited transportation options)
Bright Angel Trailhead to North Rim to Bright Angel Trailhead:
- Longest, but most gently graded, route
- Bright Angel Trail has water and camping options
Starting at the North Rim
If you start at the North Rim, you’ll have an easier time doubling back on whichever South Rim trail you choose. You’ll also have more downhill miles to the river because the North Rim is taller. Because of the extra elevation, it’s closed to the public for winter, so a North Rim start would be impossible for winter hikers.
Transportation

North Rim festivities.
Every morning, there is a shuttle bus that runs from the backcountry permit station to the South Kaibab Trailhead. No parking is available at South Kaibab, and no drop-offs are allowed. This road is only open for shuttles, so if you want to start at this trail, check for updates here on shuttle availability. Overnight parking is allowed near the backcountry permit station, which is closest to Bright Angel Trailhead. If you’re starting from the south, I highly recommend exiting Bright Angel because there are no shuttles from South Kaibab back to the permit station. It’s confusing and annoying, I know. But, you don’t want to be caught with a long road walk at the end of your trip.
From May to November, there is usually a shuttle between the South Rim and the North Rim. However, it’s currently closed due to COVID-19. It operates independently from the National Parks Service. Bear in mind, it takes roughly five hours to drive between the North and South Trailhead, and shuttles are expensive. Logistics alone make Rim-to-Rim-to-Rim easier to plan than Rim-to-Rim.
Permit Process
You need a permit to camp overnight in the Grand Canyon. If you’re day-hiking or staying in a developed campground on the rim, you do not. As with many popular National Parks, permits are typically reserved far in advance. A permit costs $10 plus $8 per party member per night. However, if you’re flexible with your itinerary, walk-up permits are available (yes, even during COVID). Here’s how each system works:
Advanced Reservations
The earliest permits are given out on the 1st of the month that is four months before your proposed start date. You can submit your permit up to 10 days before the 1st, but it will be considered along with the other earliest permits. For example, if you are planning a trip sometime in April 2021, you can mail or fax in your permit application 10 days before December 1st.
After these earliest consideration slots are filled, mail and fax permits are processed in the order they are received. You can check this corridor availability report to get an idea of what may still be available. Full instructions on where to mail or fax in permits are available here.
Walk-Up Process
I won’t lie, I have an extreme bias for walk-up permits. I’ve been able to score overnights on the Wonderland Trail, a John Muir Trail permit, and my desired itinerary for Rim-to-Rim-to-Rim via walk-up systems. A lot of wilderness headquarters reserve some portion of allocated backcountry permits for walk-ups, so the key is to get there before anyone else does.
Normally, you would arrive at the backcountry permit office, located at the South Rim’s Grand Canyon Village, the day before your anticipated start date. So, if you want to head into the corridor on Tuesday, you would arrive on Monday morning. Rangers help each individual group to find an available permit in the order they arrived. With COVID restrictions, the backcountry permit office is closed to the public. However, for a walk-up permit, you still arrive the morning before. There are instructions for you to follow posted on the door. Walk-up permits have a two-night max stay in the canyon.
I love this system because you have the opportunity to work with a person one-on-one in the case your desired itinerary isn’t available. This is much more appealing to me than mailing something into the ether and hoping someone else isn’t snagging your same plan.
Backcountry Campsite Options

Each campsite has critter boxes for scented items. Enormous for one person, potentially tiny for six.
In the Rim-to-Rim corridor, there are three backcountry campsites. These are Indian Garden, Bright Angel, and Cottonwood. Here is each campsite’s mileage:
From Bright Angel Trailhead
- Indian Garden: Mile 4.5
- Bright Angel: Mile 10
- Cottonwood: Mile 17
From South Kaibab Trailhead
- Indian Garden: Unreachable unless you double back to Bright Angel
- Bright Angel: Mile 7
- Cottonwood: Mile 14
From North Kaibab Trailhead
- Cottonwood: Mile 6.5
- Bright Angel: Mile 13.5
- Indian Garden: Mile 19 (if exiting via Bright Angel Trail)
With these options, a multitude of itineraries is available. On my most recent trip in September, I stayed for one night at Cottonwood Campground. I left on the South Kaibab Trail, dropped my gear at Cottonwood, summited the North Rim and came back down. Then, I hiked out via the Bright Angel trail. I highly recommend this itinerary if you’re looking to push your mileage and experience both South Rim trailheads.
Worth noting, the campsites at Cottonwood are solid rock. I can’t accurately speak for Indian Garden or Bright Angel, but you will *not* be able to get a stake in the ground at Cottonwood. Luckily, I went in September so it was warm enough to cowboy camp. But if you’re planning a winter trip, consider a freestanding tent.
Water Sources

Phantom Ranch is one of many places to refill water and relieve yourself in a toilet. Backcountry luxuries am I right?
When the seasonal taps are turned off, you will have to hike roughly 5-7 miles from any trailhead to reach a reliable water source. Even when all the corridor taps are on (treated water available every 3-5 miles), bring a filtering system. There is year-round water available in the canyon via the wonderful Colorado River. The pipes suffer yearly breaks, and cannot be your only option for water. For a list of which water taps are currently on, check here.
Best Time of Year to Hike Rim-to-Rim-to-Rim

Circa December 2018. It was very, very cold and I was very, very underprepared.
The only time of year I would *not* recommend going is summer. The temperatures are scorching and the crowds are massive. The fall, winter, and spring months have varying pros and cons.
September – October:
- Pros: Cooler weather (although it can be hot in early September and cold in late October), water taps may still be on, more shuttles available than in winter, fewer crowds than in summer, fall colors on the North Rim
- Cons: Variable weather, water may be off
November – March:
- Pros: Very small crowds, nice hiking weather during the day, epics views of the desert in the snow.
- Cons: Potentially below-freezing temperatures, snowstorms, fewer services available (no filtered water, fewer shuttles, North Rim closed), ice and snow on the trails.
April – May:
- Pros: Cooler weather (although it can be cold in early April and hot in late May), water taps may already be on, more shuttles available than in winter, fewer crowds than in summer.
- Cons: Variable weather, water may be off.
Safety Considerations
- Physical toughness. Climbing out of the canyon is hard as hell. Be prepared for hours-long uphills with little shade. Every year upwards of 100 hikers utilize the Grand Canyon’s search and rescue. Know your limits, and turn back before it’s too late.
- Extreme temperatures and temperature swings. In the summertime, the bottom of the canyon can reach 115+ degrees. The temperature is often completely different once you’re in the canyon, so it’s imperative to bring layered options. In the winter, it’s straight-up frigid. Don’t go without microspikes and an adequate layering system. Going into the Grand Canyon in December without a sleeping pad is still one of my most regretted mistakes.
- Critters. Though there are minimal larger animals to be aware of, desert critters are plentiful. Keep your eyes and ears out for rattlesnakes and scorpions. Also, the squirrels are aggressive. They will sneak into your pack as soon as you turn your back, so use the critter boxes at each campsite.
- Bring more than you think you need. Because it’s the Grand Canyon, every hike you do will start with a descent. This can lead to a false sense of security or ease before the bulk of the work begins. It’s imperative to bring ample water and food. I tend to drink 6-8 liters a day, and I always bring ~3200 calories a day. I almost always hike out with extra food, but I never considered that wasted weight. On longer trips, I generally don’t bring chews or gels, but caffeinated Clif Block s or Honey Stingers are life on a trip like this.
Resource for extreme weather conditions
How to assess your hiking limits
Preparing for the GC backcountry video
Covid Considerations
Because the Grand Canyon is a popular destination, it’s important to arrive prepared. Masks are required inside any buildings and on the shuttle buses, and while at Phantom Ranch in the canyon. Shuttle buses are also operating at limited capacity. Because of this, I advise arriving 20-30 minutes early for any scheduled shuttle. In late September, the peak season crowds had petered off. For this coming winter and spring, COVID safety may make an off-season hike that much more appealing.
The Arizona Trail Association is currently discouraging long-distance thru-hikes on the AZT. For anyone on the trail, they ask hikers to “follow proper sanitation practices and STAY HOME if you are exhibiting symptoms or may have been exposed to COVID-19.”

This website contains affiliate links, which means The Trek may receive a percentage of any product or service you purchase using the links in the articles or advertisements. The buyer pays the same price as they would otherwise, and your purchase helps to support The Trek's ongoing goal to serve you quality backpacking advice and information. Thanks for your support!
To learn more, please visit the About This Site page.

Hi! My name is Katie (Gallon Smash) Kommer. I recently completed the John Muir Trail, and am already hungering to find my way back to my truest, stinkiest self. On the trail, I'm known as gallon smash for my exceptional ability to fall headfirst into a bush or a river, and in the "real world" I'm known as the recent grad who's trying her best, okay?
Comments 11

I’m doing it this week, starting Thursday. I’m hiking over 4 nights, though I’ve done the route a few years ago over a shorter period. Just taking my time this time, taking a lot of pictures.
I love the Canyon and take advantage of it every chance I get. I hiked rim to river and back in a day 3 weeks ago. Seriously kicked my ass.
Great article!

Thank you Lance! Best of luck with your trip – the weather looks incredible!! It’s a magical place for sure 🙂

Great roundup. I’ve only done the rim to river and back in a single day due to time constraints. I came down South Kaibab and up Bright Angel. The Phantom Ranch lemonade is tasty – especially when mixed with a beer – for a very refreshing Shandy. I’d also recommend doing the Phantom Ranch Junior Ranger program – any age is welcome to complete it which I learned when doing them with my daughter. Once you complete the booklet, and answer the questions from the Park Ranger on duty, you can get a patch that is only available at Phantom Ranch (The Phantom Rattler). I’m was told by the park ranger that less than 1% of visitors to the Grand Canyon visit Phantom Ranch.
The only advice I’d add is get an early start (first shuttle leaves around 4:30 or 5:30 depending on the month) and if hiking in Sep – avoid the hottest parts of the day. Great time for a shady siesta. Coming down was super fun – going up was super hard. Pace yourself, don’t get over-confident based on how easy it is to get to the river, and drink a mix of fluids and salty snacks. Have fun.
That sounds like an INCREDIBLE day hike!! And a beer would definitely make the lemonade worth that price… thanks for the pro tip 🙂
Yeah, because of COVID the first shuttle of the morning left at 6 am which was a bit of a bummer for me. I like hiking in the dark, but only if it’s early morning! Thanks for adding those helpful tips for other hikers 🙂

Great article. Lots of really useful info. I will bookmark this so I can try it when the time is right.
Awesome, Sam thanks for reading! Feel free to reach out to me on IG or FB if you have any specific questions! Looking forward to your trip 🙂

This trip sounds amazing! I just forwarded this to some friends… maybe in the spring!
What Do You Think? Cancel reply
- Skip to primary navigation
- Skip to main content
- Skip to primary sidebar
- Skip to footer
TravelAwaits
Our mission is to serve the 50+ traveler who's ready to cross a few items off their bucket list.
11 Things To Know Before Hiking Rim To Rim In The Grand Canyon

Cindy Barks
- Activities and Interests
- Destinations
- Grand Canyon
- National Parks
- Outdoor Activities
- United States
- United States National Parks
Sandstone buttes glowing in the early morning light; waterfalls cascading over mossy rock walls; blue-green waters of the mighty Colorado River snaking through the canyon: These are among the magnificent scenes you can expect on a Rim-to-Rim hike through the Grand Canyon.
At the same time, however, you might also experience cramping leg muscles, burning lungs, aching feet, and feelings of discouragement. The Rim-to-Rim hike is considered an extreme bucket-list adventure for a reason. Not only does it feature scenes of astonishing beauty, but it is also extraordinarily difficult — both physically and mentally.
Living just two hours from the Grand Canyon National Park , I have hiked below the South Rim numerous times — sometimes on fairly brief jaunts to scenic spots, like Cedar Ridge on the South Kaibab Trail or Indian Garden on the Bright Angel Trail, but also on the adventure considered the “big one” in the Canyon, the Rim-to-Rim hike.
Although many people choose to backpack and camp the Rim-to-Rim route over two or three days (the recommended way to do it), a day hike has a number of advantages. For one thing, there is no need to carry a large pack with camping essentials, and for another, there is no need for a permit.
Note that the Grand Canyon National Park advises against doing the Rim-to-Rim hike, or indeed any hike to the Colorado River and back, in a single day. But the legendary challenge, along with the ability to travel light and fast, has made the Rim-to-Rim in a day an increasingly popular bucket-list adventure. On a busy fall day, you’re likely to encounter scores of other hikers all on the same quest.
Spring and fall are the best seasons to do a Rim-to-Rim hike. With warm sunny days and cool nights, late September/early October and late May are optimal.
Remember that the Rim-to-Rim hike should be attempted only by fit and experienced hikers with a well-thought-out plan. Here are 11 things to know before you set out on a Rim-to-Rim hike in the Grand Canyon.

1. It Could Be The Toughest Day Hike You Ever Do
Any hike below the rim of the Grand Canyon is considered strenuous — a point that the national park’s website stresses. “Warning: There are no easy trails into or out of the Grand Canyon!” it says.
But the Rim-to-Rim hike is in a league of its own. Consider that you will be on your feet for 12 hours or more traversing 21 to 24 miles of rocky terrain. Along the way, you’re likely to experience extreme temperature changes, ranging from as low as 30 to 40 degrees when you start out before sunrise, to the 90s or 100s when you reach Phantom Ranch in the bottom of the Canyon.
Then, there is the climb. Depending on where you begin, you will be descending more than 4,500 feet in elevation change, and then facing a daunting climb out of upwards of 5,000 feet.
Combine that with altitude that is higher than most places in the United States (6,800 feet at the South Rim, and 8,300 feet at the North Rim), and you have conditions that make for one of the most difficult day hikes anywhere.
And don’t discount the mental battle. Like in a marathon, Rim-to-Rim hikers are known to hit a “wall” about halfway up the climb. I’ve found that a rest in the shade, a drink of cool water, a salty snack, and a pep talk from fellow hikers — sometimes even from strangers — can do wonders for that feeling of discouragement.
2. Advance Training Is Key
Considering all of the extreme factors, physical conditioning is crucial. For weekend hikers who are used to mostly moderate hikes, it is important to gradually increase the distance and intensity.
For several months before your hike, plan to get to trails that feature steep stretches of 10 percent incline or more, and try to get in some distances of 10 miles or more. Or, if there are no steep trails available in your area, substitute intense workouts on a treadmill or elliptical machine.
Then, as your hike day approaches, ratchet up the training even more. I usually try to hike at least three times a week during the month or two before a Rim-to-Rim hike, and then cap off the training with one or two hikes of up to 20 miles long — all tapering off with a few days of rest before the big hike. Other tips are available in this article .

3. Age Is A Factor, But Not The Most Important One
The group I’ve hiked with in the Grand Canyon is made up mostly of intrepid adventurers in their 50s and 60s — many of whom have done the hike annually for years.
My take is that although the hike can feel a bit more intense as you get older, the principles remain the same. The more you train, the better you will do on the hike.
While it’s true that young hikers seem to have the easiest time on the steep sections of the trail, my group has also come across plenty of younger, seemingly fit hikers having extreme difficulty climbing the North Rim. Hikers of all ages appear to feel the effects of the heat, the high elevation, and the steep climb.
4. Planning Ahead Is Essential
Even though day hikes do not require permits, some advance planning is necessary.
The recommended Rim-to-Rim hike begins at the North Rim, traverses down the North Kaibab Trail for 14 miles or so to Phantom Ranch, and then proceeds nearly 10 miles up the Bright Angel Trail, for a total of about 24 miles.
If that is your chosen route, you will need to spend the night before your hike at or near the remote North Rim. Rooms are very limited, so early reservations are recommended. Some choices include the Grand Canyon Lodge North Rim (two miles from the trailhead) or the Kaibab Lodge (18 miles from the trailhead).
If possible, enlist a friend to drop you off at the North Kaibab Trailhead and then drive the more than four-hour route to the South Rim, where they can pick you up post-hike. After the long hike, I recommend also having a room reserved at the South Rim , where hotel choices are more plentiful. Choices include a variety of South Rim hotels or a range of options in nearby Tusayan .
Another Rim-to-Rim route option is to hike from the South Rim to the North Rim, starting at the South Kaibab Trail, down to Phantom Ranch, and up the North Kaibab Trail. This is the route I have taken for my Rim-to-Rim hikes. Although it is shorter at 21 miles, the hike up the North Rim is more extreme, gaining nearly 6,000 feet in elevation.
When it comes to lodging for the south-to-north option, plan to spend the night before your hike at the South Rim and have lodging and transportation set up for the North Rim. For a unique experience, check out the Grand Canyon Lodge/North Rim’s rustic cabins .
Pro Tip: Most years, a Trans-Canyon Shuttle is available to transport hikers between the north and south rims. Because of the COVID-19 pandemic, be sure to check on availability before setting out.

5. Footwear Is Make Or Break
It should go without saying that you should set out on the Rim-to-Rim hike with a broken-in pair of good hiking shoes. Specifications differ depending on your feet and hiking style, so it’s best to do some research well in advance of our hike.
A quick internet search on Rim-to-Rim hiking gear will turn up a wealth of information and recommendations.
Pro Tip: If you can spare the space and weight, I like to have a pair of hiking sandals along as well to allow for wading in Bright Angel Creek or beneath Ribbon Falls, one of Arizona’s most beautiful waterfalls .
6. Proper Gear Can Save The Day
Along with proper footwear, hikers should be equipped with a comfortable day pack. I like a waist pack with side pouches for large water bottles and a pocket large enough to hold my camera. Other hikers prefer a streamlined pack with a water bladder inside.
Other things to be sure to have on hand: sunscreen; layers of clothing to deal with the changing temperatures; a first-aid kit; plenty of salty snacks; a hearty lunch; a cell phone; a headlamp or flashlight with extra batteries; a hat to shield from the sun; extra socks to allow for a change along the trail; and a bandana or cooling neck wrap.

7. A Super Early Start Is Recommended
On October 1, the sun rises over the Grand Canyon at 6:24 a.m. and sets at 6:11 p.m., according to the park’s website. That gives autumn Rim-to-Rim-ers less than 12 hours of daylight. Because the hike can take anywhere from 12 to 15 hours (some can do it faster, some slower), you likely will be hiking in the dark at some point.
For me, a before-sunrise start is preferable to an after-sunset hike. It will be cold out there in the morning, but I recommend a 4 or 5 a.m. start.
Pro Tip: Take along hiking gloves to protect your hands from the chilly morning temperatures.
8. The Downhill Section Can Be Grueling
Even though the uphill stretch rightfully gets most of the attention, remember that the downhill section can be difficult as well.
Regardless of which route you choose, you will have at least seven miles of steep descent to start out your hike. After a few miles, the rocky surface and downward steps will take their toll or your knees and toes. Here is where a well-fitted pair of hiking shoes is critical. Many hikers end up with bruised and blackened toenails from the constant bumping of their toes against the front of their boots.

9. Muscle Cramps Are Common (Try To Avoid Them)
For me and many other hikers, the hot temperatures and grueling pace often result in sharp leg cramps, which can be debilitating.
The muscle cramps are said to be caused by an imbalance of electrolytes, dehydration, and fatigue. Among the ways to avoid leg cramps is to stay on top of your electrolytes (levels of sodium, potassium, calcium, and magnesium) by adding supplement tablets to your water and eating salty snacks. The National Park Service recommends drinking some plain water and some with electrolyte supplements. I also like to have packets of energy gel and salt tablets on hand in case of emergencies.
10. Plan For Water Fill-Ups
Although no one wants to carry water they don’t need, it’s important to fill up when you can so you never run short.
Under normal conditions, water is available at a number of stops on the Bright Angel Trail and the North Kaibab Trail. On the North Kaibab Trail, you typically will find water at the Supai Tunnel, 1.7 miles from the North Rim; Manzanita Rest Area, 5.4 miles from the North Rim; Cottonwood Campground, 6.8 miles from the North Rim; and Phantom Ranch, 14.2 miles from the North Rim. On Bright Angel, water stops are available at Indian Garden, 4.8 miles from the top of the South Rim; 3 Mile House, 3 miles from the top of the South Rim; and 1.5 Mile House, 1.5 miles from the top of the South Rim.
There are no water sources along the seven miles of the South Kaibab Trail, so carrying water there is especially crucial.

11. It Might Be Your Most Beautiful Hike Ever; Enjoy It
You’ve done the training, made the complex arrangements, and you’re in one of the most beautiful places in the world — a true natural wonder. Be sure to embrace it all!
Despite time constraints and physical challenges, Rim-to-Rim is a one-of-a-kind hike and a highly enjoyable experience. And the feeling of accomplishment at the end? Hard to beat.
Pro Tip: The North Rim closes for the winter, so lodging there is typically available only from May 15 to October 15.
Cindy Barks is an Arizona-based newspaper reporter, freelance travel writer, and travel blogger. Her blog, NearandFarAZ gives readers an insider's view of the wonders of the U.S. Southwest, and a traveler's take on far-off locales from Panama to Hong Kong to the Czech Republic. Regardless of the destination, her goal is to find the perfect scenic hike, city walk, beach stroll, or road-trip jaunt, and bring it to life in her blog. Cindy's articles about outdoor adventures have appeared in numerous regional and national publications.
Halfway Anywhere

Rim to Rim to Rim in a Day Guide – Grand Canyon

Completing Grand Canyon’s Rim to Rim to Rim in a single day is a huge effort that should only be attempted by those familiar with the challenges of running/hiking in the canyon and with the proper fitness to complete the trail.
Many people undertake this as a multi-day effort. Here I’ll cover everything you need to know to undertake R2R2R as a single-day effort.
Although there are multiple routes down to the Colorado River from the rim on both the south and north sides of Grand Canyon National Park, the classic (and, due to infrastructure, the only reasonable) route is via the North Kaibab Trail to/from the North Rim and either the Bright Angel Trail or South Kaibab Trail to/from the South Rim.
I completed (and will describe here) the route beginning at the South Rim’s South Kaibab Trailhead, ascending/descending the North Kaibab Trail, and then ending at Bright Angel Trailhead at the South Rim.

Rim to Rim to Rim Overview
- Location: Grand Canyon National Park (Arizona, USA)
- Length: 43.1 mi / 69.4 km (varies with trailhead selection )
- Type: Out-and-back
- Most Popular Months: March/April or October/November
- Max Group Size: 10
- Permit Required: No
- Dogs Allowed: No
- South Rim Trailheads: South Kaibab Trailhead ( map ) | Bright Angel Trailhead ( map )
- North Rim Trailhead: North Kaibab Trailhead ( map )
- Low Point: Silver Bridge / Black Bridge (Colorado River) 2,417 ft / 737 m ( map )
- High Point: North Kaibab Trailhead 8,232 ft / 2,509 m ( map )
- Elevation Gain: 12,030 ft / 3,667 m (varies slightly with trailhead selection )
- Elevation Loss: 12,390 ft / 3,776 m (varies slightly with trailhead selection )
- Difficulty (as a single-day effort): Extremely Strenuous

Things to Know
- You can begin and end the trail at either South Kaibab Trailhead (South Rim), Bright Angel Trailhead (South Rim), or North Kaibab Trailhead (North Rim). You can descend/ascend via either South Kaibab or Bright Angel on the South Rim (or mix and match).
- A permit is not required for Rim to Rim to Rim (so long as you are not camping)
- Phantom Ranch is just north of the Colorado River – where you’ll find cabins, a ranger station, potable water, restrooms, and a shop.
- The temperature at Phantom Ranch is significantly warmer than the temperature at the rim.
- The trail between the Colorado River and the North Rim (North Kaibab Trail) is nearly twice as long as the trails between the Colorado River and the South Rim.
- In winter, the North Rim is closed to vehicles ; the road is closed at Jacob Lake – 42 mi / 68 km north of the North Rim.
- The North Rim is over 1,000 ft / 305 m higher than the South Rim.
- The Hikers’ Express Shuttle Bus departs the backcountry information center in the morning (where there’s parking) and stops at both Bright Angel Lodge and South Kaibab Trailhead but this is a morning bus only . If you’re doing Rim to Rim to Rim in a day with a personal vehicle, it’s best to utilize one of the parking lots closer to the rim (assuming a South Rim start/end).
- The (free) Village (Blue) Route Shuttle Bus to Bright Angel Trailhead does not run year-round . It runs between Memorial Day Weekend at the end of May and Labor Day Weekend at the start of September.
- Be sure to check Grand Canyon National Park’s Critical Backcountry Updates page
Getting to Grand Canyon National Park
Your only option for getting to Grand Canyon National Park is via car. There is no public transportation to Grand Canyon National Park.
There are a few options if you’re interested in a private tour from Las Vegas or Flagstaff , but most people arriving in Grand Canyon National Park will do so via a private vehicle. Also, it would be strange to pay for a private tour simply to get to the Grand Canyon, but don’t let me tell you what to do.
Tusayan, Arizona ( map ) is the closest town to Grand Canyon National Park. Tusayan has restaurants, a market, hotels, and a visitor center. It exists essentially as a result of its proximity to the park.
Flagstaff, Arizona ( map ) is the closest, largest city to Grand Canyon National Park. This is also where you will find the closest major airport. There is also a small private airport just south of the park where you can, presumably, fly via a small (and likely expensive) plane.
Williams, Arizona ( map ) is directly south of Grand Canyon National Park along Interstate 40. Williams is a large town with hotels, restaurants, and supermarkets. It’s possible to reach Williams from Flagstaff via train (the Amtrak).
NORTH RIM : Jacob Lake, Arizona ( map ) is the closest bit of civilization to the North Rim of the Grand Canyon. It’s officially an unincorporated community and besides a gas station, only has a campground and a motel – with a small shop and restaurant inside. It’s 42 mi / 68 km on a paved road from Jacob Lake to the North Rim, and the road is closed during the winter. There’s not much nearby, and you’ll have to go as far as Kanab, Utah, or Page, Arizona before you find a large town.
Hitchhiking
Hitchhiking is legal in Arizona. However, you must remain off the roadways (where cars are permitted to drive) and off the interstates. It’s not crazy to think that a hitchhiking trip from Flagstaff or Williams to the park would be possible.
Hitchhiking within Grand Canyon National Park is not permitted .

R2R2R Trailheads
There are three trailheads for Rim to Rim to Rim, two on the South Rim and one on the North Rim . You can start the trail from any of the trailheads. If you’re beginning/ending at the South Rim, you can opt to begin/end at the same trailhead or different trailheads.
If you’re beginning/ending at the North Rim, it makes the most sense to ascend/descend the same trail on the South Rim. Getting between trailheads on the South Rim adds 4.3 mi / 6.9 km of distance on a road along the (busy and mostly paved) South Rim. Yes, you could do this, but if you want to hit both South Rim trails, it’s best to begin/end at the South Rim.
South Kaibab Trailhead (South Rim)
South Kaibab Trailhead ( map ) is a popular starting/ending point for Rim to Rim to Rim. It’s 2.3 mi / 3.7 km east of the Grand Canyon Visitor Center. South Kaibab Trailhead is east of Bright Angel Trailhead (also on the South Rim).
From the Visitor Center Shuttle Bus Terminal ( map ), you can take the Eastbound Kaibab Rim Route (Orange) Route shuttle to the South Kaibab Trailhead. The shuttle is free.
The shuttle runs every 30 minutes from 4 am to 6:30 am and every 15 minutes from 6:30 am to 30 minutes after sunset (i.e. the last bus is 30 minutes after sunset).
From the Visitor Center, the South Kaibab Trailhead is the first stop.
Bright Angel Trailhead (South Rim)
Bright Angel Trailhead ( map ) is also a popular starting/ending point for Rim to Rim to Rim – and is more popular with day hikers than the shorter but steeper Bright Angel Trail (probably because there’s typically water available at Havasupai Gardens Campground).
Bright Angel Trailhead is 2.4 mi / 3.9 km west of the Grand Canyon Visitor Center and west of South Kaibab Trailhead (also on the South Rim).
From the Visitor Center Shuttle Bus Terminal ( map ), you can take the Village (Blue) Route Shuttle Bus to Bright Angel Trailhead. The shuttle is free.
This shuttle does not run year-round and generally begins at the end of May and runs through the start of September. When in service, it runs every 30 minutes from 4 a.m. to 6:30 a.m., every 10-15 minutes from 6:30 a.m. to 8:30 p.m., and every 30 minutes from 8:30 p.m. to 11 p.m. The last bus is at 10:30 p.m.
North Kaibab Trailhead (North Rim)
North Kaibab Trailhead ( map ) is the only North Rim trailhead option for Rim to Rim to Rim. There is no public transportation at the North Rim and the only way to reach the trailhead is via private transportation. This is why most people choose to start/end their hikes at the South Rim.
It’s worth noting North Kaibab Trailhead is 2.1 mi / 3.4 km from the North Rim Visitor Center ( map ), 1 mi / 1.6 km from the North Rim Backcountry Information Center ( map ) (where there’s water), and that the road to the North Rim (and therefore North Kaibab Trailhead) is closed during the winter .
Single-Day R2R2R Itinerary
The following covers how to complete Rim to Rim to Rim in a single day. There are a few ways to accomplish this since the South Rim has two trailheads, Bright Angel and South Kaibab. Here is the total distance covered with each trailhead combination.
- 40.7 mi / 65.5 km South Kaibab + North Kaibab + South Kaibab
- 43.1 mi / 69.4 km South Kaibab + North Kaibab + Bright Angel
- 45.4 mi / 73.1 km Bright Angel + North Kaibab + Bright Angel
The South Kaibab Trail is shorter and steeper than the Bright Angel Trail . That said, they’re both beautifully maintained trails. Descending and ascending South Kaibab Trail instead of Bright Angel Trail saves around 5 mi / 8 km.
I recommend starting at South Kaibab and ending at Bright Angel. That said, the R2R2R fastest known times (FKTs) typically start and end at South Kaibab Trailhead .
If you plan to hit both trails, I suggest leaving a car at the trailhead you plan to finish at and then finding a way to your starting point. This could be via a ride, walking, a shuttle bus, or some combination.
When I did R2R2R, I was alone with a single car. I parked at Bright Angel Trailhead and walked to the Visitor Center to catch the first shuttle to South Kaibab Trailhead. Why did I walk? Because it was 3:30 in the morning and there were no early-morning shuttles from Bright Angel to the Visitor Center because I did this in March (these shuttles typically start Memorial Day Weekend, in May). It was a good warm-up?
Where to Stay
Spending the night either before or after completing Rim to Rim to Rim in a day is an option that will make things logistically easier than arriving and leaving the Grand Canyon on the same day (e.g. if you were staying in Flagstaff).
Grand Canyon Village
If you would like the closest (and arguably most comfortable) lodging to the trailheads. There are six (privately owned) hotels within the park.
- Bright Angel Lodge ( map )
- El Tovar Hotel ( map )
- Kachina Lodge ( map )
- Maswik Lodge ( map )
- Thunderbird Lodge ( map )
- Yavapai Lodge ( map )
Four (Bright Angel, El Tovar, Kachina, Thunderbird) are near Bright Angel Trailhead , Maswik Lodge is near the backcountry information office (closer to Bright Angel Trailhead than South Kaibab but set further back from the Rim), and Yavapai Lodge is closer to the Grand Canyon Visitor Center . Yavapai Lodge also has an RV park .
For more on Grand Canyon lodging, check here .
Mather Campground (GCNP)
Mather Campground ( map ) is the only campground (within the park) in the proximity of Grand Canyon Village. It’s 1.5 mi / 2.4 km from Mather Campground to the Grand Canyon Visitor Center (where you can catch a shuttle).
For Mather Campground campsite reservations check here ; campsites are between $18 and $30 per night. Toilets, trash cans, and potable water are available at Mather Campground.
There are also communal hiker/biker sites available at Mather Campground for $6. These are first come, first served and are only available to people traveling by foot or bicycle.
Kaibab National Forest
Dispersed camping is allowed in the Kaibab National Forest ( map ) so long it’s not expressly prohibited because of proximity to developed campgrounds or resource concerns.
I recommend heading down Forest Service Road 328 ( map ), past Apache Stables (where camping is prohibited). There are plenty of pullouts and you’ll likely see lots of other campers in the area.
More on Kaibab National Forest dispersed camping here .
The town of Tusayan ( map ) is 2 mi / 3.2 km south of the park entrance. Note that it’s 6.6 mi / 10.6 km from Tusayan to the Visitor Center.
Tusayan offers plenty of lodging options, restaurants (including a very expensive McDonald’s), and shops. There is also a seasonal (free) shuttle service operated by the Park from Tusayan to the Visitor Center – although this service will likely begin later in the day than most would like for an R2R2R attempt.
The city of Flagstaff ( map ) is the largest/closest city to Grand Canyon National Park – it’s 80 mi / 130 km from the park.
This is also where the closest commercial airport is to the park. Flagstaff has everything you could want before or after a Rim to Rim to Rim attempt including outfitters, breweries, restaurants, lodging, and a hospital.

When to Attempt R2R2R
Rim to Rim to Rim can be done year-round. That said, the most popular time of year for R2R2R is spring and fall . Remember that the Colorado River is over 4,500 ft / 1,370 m lower than the South Rim and over 5,800 ft / 1,768 m lower than the North Rim (i.e. the North Rim is higher than the South Rim). Temperatures can (and do) vary significantly between the river and the rim; you can expect differences of around (or surpassing) 30°F / 7°C.
Spring: Spring (March) is when I completed R2R2R and is probably when I would do it again. That said, I did have to postpone one day because the morning I originally planned to start I woke up to 6 in / 15 cm of fresh snow blanketing my car and the South Rim. Average temperatures at the South Rim are around 51°F / 11°C in March and climb to 76°F / 25°C by the end of May. Just remember that even if it’s freezing at the rim in the morning, it may still be hot at the river at midday. It’s also worth noting that it has snowed at the Rim as late as June (although typically snowfall will have ended by April or May).
Summer: Is it possible to complete Rim to Rim to Rim in the summer? Sure. Is it advisable? No. Unless you are highly experienced in extreme temperatures and are deliberately attempting to subject your body to brutal conditions, there’s no reason to attempt R2R2R during the summer. A “nice day” at the Rim can still mean absurdly hot temperatures at the river. Summer temperatures at Phantom Ranch have reached 120°F / 49°C . Most of the rain the Grand Canyon receives falls in July and August; this is also when the risk of severe thunderstorms is highest.
Fall: Fall is essentially the opposite of spring at the Grand Canyon. Average highs at the South Rim hover around 76°F / 25°C in September and fall to 51°F / 11°C by mid-November. It can snow at the North Rim as early as September, but generally, snow won’t fall until later in the year. If I were to attempt R2R2R in the fall, I would probably do so in early November. That said, the transition from summer to winter can happen quickly and drastically making the fall a difficult time of year to predict.
Winter: It’s possible to complete Rim to Rim to Rim in the winter, but it will depend on when in winter you attempt it. Snow falls at both the South Rim and the North Rim, and trails – especially the North Kaibab Trail – can hold snow into spring. However, the South Rim trails can also hold ice and snow toward the Rim. The North Rim can be extremely cold in winter with temperatures having fallen to –22°F / –30°C. As with summer, unless you’re trying to make R2R2R difficult for yourself, it’s best to opt for a spring or fall attempt.
Here’s a look at average temperatures in the inner canyon.
Gear & Packing List
If you’re going to complete Rim to Rim to Rim in a day, you’ll probably be going light (as you’ll most likely be running). Here’s a checklist to make sure you’ve got all you need to be successful.
Running Vest: If you’re attempting Rim to Rim to Rim in a day, you likely have a tried-and-true running vest . Do you need a running vest? I guess not. But you’ll likely want something to carry your water, filter, food, and other gear. Why make things more difficult than they have to be?
Trekking Poles If you’re a fan of using trekking poles when you run (or quickly hike), don’t forget them on R2R2R. There is 12,030 ft / 3,667 m of total elevation gain and an equal amount of less. The ups and downs are equally unrelenting – expect no undulation and very little flat.
Electrolytes: Bring electrolytes ! Rim to Rim to Rim is exposed . There is very little shade to be found along the trail – unless it’s early in the morning, late in the afternoon, or you get lucky with the sun around Phantom Ranch – and the sun can be (and often is) intense. Make sure you’re bringing electrolytes to stay hydrated.
Water: There are few opportunities to fill up on water along R2R2R. I used a 1.5L hydration bladder (which I did not enjoy), but would have preferred to carry two 500 ml soft flasks and an additional 500 ml bottle in my bag. Whatever you do, make sure you have enough capacity to remain hydrated between water sources .
Water Filter: I was told that the water from spigots along R2R2R is safe to drink, but if you want to play it safe, bring along something like a Platypus QuickDraw for filtering your water—just in case. Also, if there is no water on the North Kaibab Trail (which can happen), you can filter from Bright Angel Creek, which parallels the North Kaibab Trail until it begins climbing up Roaring Springs Canyon.
Traction: If you’re not on R2R2R in summer (again, not the best idea) or in a summer-adjacent month, there’s a chance you’ll be encountering ice and/or snow toward the South Rim, North Rim, or both (but likelier the North Rim). Some foot traction may be a good thing to have with you. You wouldn’t want to nearly make it up to the North Rim and then have to turn around because of icy trail conditions.
Satellite Messenger or PLB: There is cell reception at the North Rim and the South Rim, and there are other people out, but carrying a PLB is never a bad idea – particularly on an effort as big as this one. I generally carry a Garmin inReach Mini 2 . It’s small, lightweight, and can save your life.
Sunscreen: Bring sunscreen . As stated above, the trail is very exposed. If you’re running on a clear day, you can expect to be in the sun for the majority of the trail.
For more recommendations on gear, check out my current gear list or gear reviews .

Route Description
Whether you decide to take the Bright Angel Trail or the South Kaibab Trail, the Rim to Rim to Rim trail is remarkably well-maintained and easy to follow. The North Kaibab Trail is one of the most impressive trails I’ve ever been on.
That said, there are a couple of things you should keep in mind regardless of which trail(s) you choose. First, regardless of your starting point, you have a huge climb at the end of R2R2R. Also, the distance between the Colorado River and the North Rim is nearly twice as long as the distance between the Colorado River and the South Rim. You’ll probably make it down the Colorado River fairly quickly (assuming a South Rim start), but don’t allow yourself to be fooled – you are far from halfway at this point.
Bright Angel vs South Kaibab
You can choose whether to start or end your hike at Bright Angel Trailhead, South Kaibab Trailhead, or a mixture of both. As stated above , here’s a look at the difference in distances:
Reasons to take South Kaibab Trail
- Shorter than the Bright Angel Trail by 2.35 mi / 3.8 km (one-way)
- More scenic than the Bright Angel Trail – follows a ridgeline down instead of a canyon
- There’s a cool tunnel you go through immediately south of the Colorado River
- Less popular (and thus less crowded ) than the Bright Angel Trail
- Less likely to hold snow and ice due to its exposure
Reasons to take Bright Angel Trail
- Offers more shade and shelter than the South Kaibab Trail
- There is a year-round water source , a natural water source, and two seasonal water sources; South Kaibab has no water
- Not as steep as the South Kaibab Trail
- More trailhead infrastructure and (arguably) easier access to the trailhead
- More toilets available on the trail
R2R2R Water Sources
Rim to Rim to Rim water sources are fairly straightforward. Water sources in the Grand Canyon can be divided into three categories: seasonal , year-round , and natural . Seasonal and year-round water sources refer to those provided by the park while natural water sources are perennial natural sources.
The longest stretches of trail without reliable, year-round water are the stretch from where the trail departs Bright Angel Creek and climbs to the North Kaibab Trailhead at the North Rim (10 mi / 16 km roundtrip) and the South Kaibab Trail (7 mi / 11.3 km one-way) between the Colorado River and South Kaibab Trailhead.
Seasonal water sources are generally available from May to October . Still, you should always check and confirm with the park as these water sources can be turned off at any time for a variety of reasons.
Year-round water sources (Havasupai Gardens Campground, Bright Angel Campground, North Rim Backcountry Information Center) are generally always available. However, as with seasonal sources, check and confirm with the park before beginning.
Natural water sources (which should be filtered) along Rim to Rim to Rim include the Colorado River, Bright Angel Creek, Garden Creek, Pipe Creek, and Roaring Springs.
Water Source Details
South Rim: It would be wise to arrive hydrated and with water to the start of Rim to Rim to Rim. However, if you need water at the south rim you can find spigots at Mather Campground ( map ). There is no water at South Kaibab Trailhead (but there is a privy). You can find water near Bright Angel Trailhead from the hotels and shops nearby.
Note: There are no water sources on the South Kaibab Trail between the trailhead and the Colorado River.
1.5 Mile Resthouse | Bright Angel Trail | Seasonal: Water is available seasonally (May to October) at 1.5 Mile Resthouse on the Bright Angel Trail ( map ).
3 Mile Resthouse | Bright Angel Trail | Seasonal: Water is available seasonally (May to October) at 3 Mile Resthouse on the Bright Angel Trail ( map ).
Havasupai Gardens | Bright Angel Trail | Year-round: Water is available year-round at Havasupai Gardens ( map ) on the Bright Angel Trail. There are also toilets here. Havasupai Gardens is 4.5 mi / 7.3 km from the South Rim.
Garden Creek / Pipe Creek | Bright Angel Trail | Natural: The Bright Angel Trail crosses and is adjacent to Garden Creek and Pipe Creek. Water can be collected and filtered from these sources.
Colorado River | All Trails | Natural: You can easily access the Colorado River on the north side to obtain and filter water. That said, there are two spigots just north of the river ( Bright Angel / South Kaibab ). Phantom Ranch and Bright Angel Campground are also just north of the river, which makes filtering from the river rather pointless (and the river will likely clog your filter if it’s sediment-filled).
Bright Angel Campground | All Trails | Year-round: Bright Angel Campground ( map ) is between the Colorado River and Phantom Ranch and has year-round water spigots and flushing toilets . Note that the campground is on the west side of Bright Angel Creek (Phantom Ranch is on the East Side). At the north end of the campground, there is a bridge to cross the creek back to Phantom Ranch and the North Kaibab Trail.
Phantom Ranch | All Trails | Year-round: Phantom Ranch ( m ap ) does not have spigots (you’re better off getting water from the nearby Bright Angel Campground), but it does have a canteen where you can purchase beverages and snacks from 8:00 a.m. to 4:00 p.m. Cash and cards are both accepted.
Bright Angel Creek | North Kaibab Trail | Natural: Bright Angel Creek flows into the Colorado River from Bright Angel Canyon and is what the North Kaibab Trail follows for around 8.7 mi / 14 km north of the Colorado River before starting up Roaring Springs Canyon. The trail runs parallel to and is often close enough to the creek for you to collect and filter water. Once you cross north of the bridge just south of Manzanita Rest Area, the creek will no longer be accessible .
Cottonwood Campground | North Kaibab Trail | Seasonal: Cottonwood Campground ( map ) is 6.8 mi / 11 km south of the North Rim and has water available from mid-May to mid-October. It also has an emergency phone and pit toilets.
Manzanita Rest Area | North Kaibab Trail | Seasonal: Manzanita Rest Area ( map ) is 5.4 mi / 8.7 km below the North Rim and has water available seasonally. That said, when I did Rim to Rim to Rim in early March, the water here was turned on. It’s always best to check with the Backcountry Information Office or rangers directly to confirm water source status.
Roaring Springs | North Kaibab Trail | Natural: Roaring Springs ( map ) is 4.7 mi / 7.6 km below the North Rim and requires a slight detour to reach (~0.25 mi / 400 m). It’s close enough to Bright Angel Creek that filling up at the creek would probably make more sense instead of detouring to the spring.
Supai Tunnel | North Kaibab Trail | Seasonal: Supai Tunnel ( map ) is 1.7 mi / 2.7 km below the North Rim. Water is available here seasonally, but this is one of the first sources to be turned off in the fall. There are also pit toilets; there is no emergency phone.
North Rim | North Kaibab Trail | Seasonal: At the North Kaibab Trailhead ( map ), seasonal water is available via a spigot. This water source is one of the first to be turned off in the fall, so be sure to check its status before relying on it. If there’s no water here and you need water, you can go instead to the North Rim Backcountry Information Center.
North Rim Backcountry Information Center | North Kaibab Trail | Year-round: The North Rim Backcountry Information Center ( map ) is 0.4 mi / 0.64 km from North Kaibab Trailhead via the Bridle Trail and a road. There is year-round water available here at a spigot outside the office.

The following is an overview of Rim to Rim to Rim with landmarks. Note that this should be used as a guide, and it is not necessarily 100% representative of what’s on the ground (i.e., you shouldn’t just be blindly trying to follow this track).
I’ve included a few detours and tried to label all the noteworthy landmarks along the trail (e.g. water sources and toilets).
A single-day Rim to Rim to Rim run/hike/adventure provides a huge challenge (and a cool post-activity elevation profile). The entire trail is well-maintained, and the Grand Canyon is spectacular, but there are serious hurdles to deal with, including the drastic temperature differences between the river and the rim and ensuring you remain adequately hydrated.
The lack of water sources can provide additional challenges depending on the time of year, and once you’re in the canyon – you’re in the canyon. If you don’t manage to get yourself out to the rim, it means a helicopter ride. Be safe and know what you’re getting yourselves into, friends.
I’m always looking to improve upon the information and resources provided in these guides, so if you have any questions, suggestions, or updates, please leave a comment below or get in touch .
- Grand Canyon National Park (NPS)
- Kaibab Rim (Orange) Route Shuttle Bus to South Kaibab TH (NPS)
- Village (Blue) Route Shuttle Bus to Bright Angel TH (NPS)
- GCNP Shuttle Buses (NPS)
- Fastest Known Time R2R2R
- Grand Canyon National Park Lodging (NPS)
- Mather Campground Reservations (Recreation.gov)
- Parking Lot Information (NPS)
- Grand Canyon Historical Weather (NPS)
- Yavapai Point Webcam
- Critical Backcountry Updates (NPS)
- Bright Angel Trail description (NPS)
- South Kaibab Trail description (NPS)
- North Kaibab Trail description (NPS)
Affiliate Disclosure: This page may contain affiliate links, which means I may receive small commissions for purchases made via these links at no additional cost to you. This helps to pay the bills and keep the site up and running. Thank you for your support!
Similar Posts

Hayduke Trail Grand Canyon Itinerary

Every Hayduke thru-hiker will need a Hayduke Trail Grand Canyon itinerary. The trail spends nearly 150 mi / 240 km in Grand Canyon National Park…

Zero to 100 – Running My First 100-Mile Race
The Pacific Crest Trail was my first overnight backpacking trip. Crossing the Australian Outback was my first bicycle tour. The Arizona Trail was my first…

Grand Canyon Rafting Winter Itinerary to Pearce Ferry
While planning my Grand Canyon rafting trip on the Colorado River, I found it difficult to predict how far we would make it each day,…

Guide to Hiking the Mount Anne Circuit in Tasmania
The Mount Anne Circuit is named for the 4,669 ft / 1,423 m Mount Anne – the highest peak in Tasmania’s Southwest National Park. I…

Royal Arch Loop – The Ultimate Backpacking Guide
The Royal Arch Loop is a 32-mi / 51.5-km loop hike beginning at South Bass Trailhead in Grand Canyon National Park. The hike can be…

Wicklow Way Unsupported FKT Attempt
Ireland’s Wicklow Way is an 80-mile / 130-km trail through Wicklow Mountains National Park south of Dublin. It’s tackled either in stages or as a…
Thank you for this detailed information. I am considering R2R2R from the south in August. The goal is to complete it in 24 hours, hiking/running mostly in early morning and evening, resting during the middle of the day. Do you know of anyone that has attempted/completed during the middle of summer like this? Any specific advice?
I don’t personally know anyone who has done this (odds are someone has), but my honest advice is do not do this in the summer. Otherwise, carry a lot – a lot – of water and wear sunscreen.
Great Details, Thanks a lot. I plan to do SK-NK-SK on May 12th, Hike not Run. Any suggestion on training. Thanks
Wow, great recap! I’m looking forward to reading more of your posts! For R2R2R, is there a link to your map with “noteworthy landmarks”? A couple friends and I plan to give it a go April 2023. Thanks!
Thank you for pointing this out! The map has been fixed and should now be displayed on the page. If you’re still having trouble seeing it, please let me know.
Hello Emily, I was planning the same, but unfortunately the North Rim is will be closed until June 2nd because of heavy snowfall and damages from rockfall and landslides.
“No hikers will be allowed to pass through this area under any circumstances.”
https://www.nps.gov/grca/learn/news/north-rim-to-reopen-june-2-for-2023-summer-season.htm
Leave a Reply Cancel reply
Your email address will not be published. Required fields are marked *
TRANS-CANYON SHUTTLE
The original Rim to Rim Shuttle service. We also offer trailhead shuttles, and bicycle and luggage transport.
WELCOME TO TRANS- CANYON SHUTTLE.
SERVING GRAND CANYON HIKERS DEPENDABLY FOR OVER 35 YEARS.
Reservations are required. CALL 928-638-2820 today or Book Online >>

RESERVATIONS REQUIRED
Cancellation policy.
- Cancel two weeks prior to reservation date – $10 per person.
- Less than two weeks, up to 48 hours prior to reservation – $30 per person
- Less than 48 hours, no refund
Ready to reserve your seat?

Your journey of a lifetime is waiting! We'll do the driving.
At trans-canyon shuttle, it's all about the hiker..
It is a privilege to connect people who are ready for an epic journey across the Grand Canyon. Hikers can count on us to shuttle them to and from the Grand Canyon -North or South Rim. We also run shuttles to Marble Canyon. Read more here.
Book Online or Call 928-638-2820 Today!
Trans-canyon shuttle: the original grand canyon hiker shuttle..
Phone: (928) 638-2820
Email: [email protected]
Copyright © 1989—2023 All Rights Reserved by Trans-Canyon Shuttle
- Skip to global NPS navigation
- Skip to this park navigation
- Skip to the main content
- Skip to this park information section
- Skip to the footer section
Exiting nps.gov
Alerts in effect, how do i travel to the north rim.
Last updated: March 20, 2024
Park footer
Contact info, mailing address:.
PO Box 129 Grand Canyon, AZ 86023
928-638-7888
Stay Connected

Unmeasurable Adventure
Outdoor Adventures
First-timer's guide to the grand canyon.
For those making their first trip to the Grand Canyon, here's an expert take on when to go, where to stay, and how to get around.

Before you pack your bags and make the trip to Grand Canyon National Park , a few words of practical advice:
With the kids out of school, summertime is undoubtedly the busiest time of year, making peak season at Grand Canyon between June-August. If you're staying during this time, be sure to book your lodging early, as reservations start filling up nine months to a year in advance .
For cooler weather, lighter crowds and better lodging availability, plan your trip during the shoulder seasons between March-May, and September-November.
South Rim or North Rim?
According to the Grand Canyon National Park's official page , though the width of the canyon is roughly 10 miles, driving from the South to North Rim can take at least five hours on a route that sometimes dips south through Tusayan and even Flagstaff before turning back north through Cameron or Bitter Springs. Hiking rim-to-rim is possible but is recommended only for the experienced hiker. (See " Grand Canyon Hiking " for more trail options.)
Most easily accessible from Phoenix, Sedona or Flagstaff, the South Rim welcomes more visitors than the North Rim and offers the most amenities and attractions in terms of lodging, dining, tours, transportation, viewpoints and family-friendly experiences. It is also open year-round. As this area tends to be much busier—particularly during peak season—be sure to book reservations well in advance.
Quieter, more remote and offering fewer visitor services, this rugged portion of Grand Canyon National Park experiences fewer visitors and offers a more outdoor-minded experience. Due to its higher elevation, the North Rim is also cooler in temperature and experiences heavy snowfall in winter, resulting in a shorter season. (It's open from mid-May through mid-October.)
Quieter, more remote and offering fewer visitor services, the North Rim experiences fewer visitors and offers a more outdoor-minded experience.
Where to stay
Bring your tent or RV to enjoy the great outdoors at one of the many campgrounds in the park.
Two of the three National Park Service campgrounds accept reservations: Mather Campground on the South Rim and North Rim Campground . Desert View Campground on the South Rim (open seasonally between mid-April and mid-October) is first-come, first-served, and Trailer Village is a concessioner-run RV park with full hook-ups.
If roughing it isn't quite your style, Grand Canyon National Park Lodges operates numerous hotels, both inside and outside the park.
Located at the top of Bright Angel Trailhead, the historic Bright Angel Lodge & Cabins , designed by Mary Colter in 1935, provides rustic accommodations close to outdoor adventure. Take your pick from budget-friendly lodge rooms with shared bathrooms, standard lodge rooms or private cabins (one of which was home to one of Roosevelt's "Rough Riders").
Perched on the edge of the South Rim, the European chalet-style El Tovar Hotel , which opened in 1905, offers spectacular views, one-of-a-kind rooms and suites, and fine dining in the famous El Tovar Dining Room.
Just a mile from the entrance of the park, The Grand Hotel at the Grand Canyon is the area's only Three-Diamond hotel, and the rustic chalet-style hotel offers an indoor heated swimming pool and hot tub, a steakhouse and saloon, and plush rooms with a kitchenette.
Meanwhile, Thunderbird Lodge and Kachina Lodge are popular choices for families, due to their casual, modern aesthetic and convenient location within walking distance to many of the park's attractions.
On the North Rim, book one of the cozy cabins at the historic Grand Canyon Lodge to stay amid towering pine trees and just steps away from the scenic Bright Angel Point Trail. This landmark lodge boasts cliffside views and an on-site restaurant serving up hearty, regionally inspired dishes such as venison meatloaf and wild rice primavera.
Getting around
Take advantage of the Grand Canyon National Park's free shuttle buses that operate on set routes throughout the park along the South Rim, including:
- the Village (Blue) Route, connecting the visitor center with lodging and other facilities;
- Kaibab Rim (Orange) Route, a figure-eight route between the visitor center and five scenic viewpoints;
- Hermit Road (Red) Route, connecting Grand Canyon Village and Hermits Rest, with scenic overlook stops along the way; and
- the Tusayan (Purple) Route, a park-and-ride service between the community of Tusayan and the park.
The early-morning Hiker's Express Shuttle transports hikers to the South Kaibab Trailhead from Bright Angel Lodge, the Backcountry Information Center and the Grand Canyon Visitor Center. For a $90 fee, the privately run Trans-Canyon Shuttle takes visitors between the North and South Rims.
You've arrived
You made it to the Grand Canyon. Welcome! Now what? We have you covered here, too. Read on to discover our three-day, activity-filled Grand Canyon itinerary —perfect for newcomers and returning visitors.
About the Author

Arizona Office of Tourism
These articles are brought to you by the staff of the Arizona Office of Tourism, and occasionally local tourism organizations around the state.
- Link to site translated for China
- Link to site translated for Japan
- Link to site translated for France
- Link to site translated for Germany
- Link to site translated for Mexico
- Link to Arizona Office of Tourism's official Facebook page Facebook
- Link to Arizona Office of Tourism's official Instagram Instagram
- Link to Arizona Office of Tourism's official Twitter Twitter
- Link to Arizona Office of Tourism's official Pinterest Pinterest
- Link to Arizona Office of Tourism's official YouTube channel YouTube
- Link to Arizona Office of Tourism's official TikTok TikTok

Most Searched Stories

Request Your Copy
Official State Travel Guide

Top Annual Events

Sustainability
Appreciate AZ

Travel Inspiration
Plan Your Trip
Cities & regions.
From the abundance of Saguaro cactuses and unique wildlife in the Sonoran Desert to the high country and forests of the White Mountains to the breathtaking Grand Canyon, Arizona’s regions are full of experiences that don’t disappoint.
West Rim Ground & Air Tour from Las Vegas
Learn More »
Grand Canyon West Rim
Fast becoming one of the most talked-about destinations at the Grand Canyon, Grand Canyon West attracts about 700,000 visitors each year. The destination has become increasingly popular among Grand Canyon tourists since the March 2007 grand opening of the Grand Canyon Skywalk. This cantilevered glass-bottomed bridge is just 2 ½ hours from Las Vegas and appeals to adrenaline seekers, Las Vegas daytrippers and regular folks alike. While not a part of Grand Canyon National Park, Grand Canyon West's visitors still experience stunning vistas, the Skywalk, Guano Point, Eagle Point, and Hualapai Ranch, all points of pride for the West Rim's operators, the Hualapai Native American Tribe.
Grand Canyon West is open to the public from 8:00 am to 5:00 pm daily from October through March, and from 7:00 am to 7:00 pm daily from April through September. It is open every day of the year including all major holidays.
Although Grand Canyon West is typically less crowded than the South Rim, one can expect a swell of visitors each day between 11:00 am and 2:00 pm. Most visitors stay about 3–4 hours, so be aware that the last ticket is sold 1½ hours prior to closing time.
The best time of year to visit Grand Canyon West is late fall through spring, when daytime temperatures are pleasant, ranging from the mid-60s to the mid-90s, and generally under sunny conditions. Summertime temperatures can soar to well above 100° Fahrenheit, so standing in line for the shuttle or the Skywalk can be hot under the intense sun.
No matter when you visit, be sure to bring about a quart of water per person, a wide-brimmed hat, high SPF sunscreen, sunglasses, and very light layers.
Stay in Las Vegas When Visiting the West Rim
Reservations.
The Hualapai Nation offers visitors flexible admission packages to the Grand Canyon Skywalk with optional helicopter tours, Canyon floor helicopter landings, boat trips on the Colorado River, entertainment, dining, horseback riding, 1-day river rafting and more. Reservations can be made on their website at www.hualapaitourism.com, by phone 1-888-868-WEST(9378) or 928-769-2636, or by booking with a tour company like those listed on our West Rim Tours page .
We recommend doing the latter if you do not plan on driving yourself to Grand Canyon West and are starting from Las Vegas. There are several excellent options for helicopter, air and ground tours from Las Vegas to Grand Canyon West, and they are all capable of combining the transportation/tour portion with tickets to Grand Canyon West and custom add-on activities in one neat little package.
Remember, the West Rim is not inside the Grand Canyon National Park. It is owned and operated by the Hualapai Tribe; the Hualapai collect fees for entrance to the West Rim. A National Park 7-day entry pass, Golden Age passport or other National Park Service pass will not apply at Grand Canyon West.
At the very least, each person is required to purchase the Legacy Package, priced at $44.05 (including all taxes and fees) per person.
No private vehicles are permitted past the Grand Canyon West entrance. You must park your car at the Grand Canyon West Welcome Center, located at the West Rim Airport. Visitors then board the free Hop-On Hop-Off shuttle service to get to the West Rim attractions.
At the Welcome Center, you'll have the opportunity to meet with a tour operator and select a tour package. The basic package and every other upgraded package includes the Hop-On Hop-Off shuttle to area attractions like Hualapai Ranch, Eagle Point, Guano Point, Native American demonstrations and cowboy performances at three viewpoints, a Hualapai visitation certificate, and photo opportunities with Hualapai members.
The packages are priced per person (child or adult) as follows:
The Legacy Package — $42.99 per person inclusive of taxes and fees: This basic entry package is the minimum required package. The Legacy package DOES NOT include walking on the Skywalk.
The Legacy Gold Package — $79.00 per person inclusive of taxes and fees: This is the least expensive packages that includes tickets to walk on the Grand Canyon Skywalk. It includes everything in the Legacy and Legacy Silver packages, with the addition of an adult Skywalk ticket.
Additional add-ons are available at any level, including helicopter rides that land at the bottom of the Grand Canyon, pontoon boat rides down the Colorado River, horseback rides, meal packages and overnight lodging packages and upgrades.
- Park-and-ride shuttle from Dolan Springs — $15 cash round-trip
- Meal package — $16.00 per person
- Professional Skywalk photos — ~$30 each
- Overnight cabin on the Rim — $149.90 (per person based on double occupancy)
- 30-minute horseback ride to the Rim — $37.45 per person
- 60-minute horseback ride to the Rim — $59.39 per person
- 90-minute horseback ride along the Rim — $80.25 per person
- 12–15-minute Flight of the Eagle air tour — $143.03 per person
- 40-minute Grand Canyon Discovery helicopter tour with 20-minute landing below the Rim — $153.73 per person
- Helicopter/Boat trip with flight, Canyon floor landing, and pontoon boat ride — $199.99 per person
The West Rim does feature overnight accommodations nearby; Hualapai Ranch and Hualapai Lodge are operated by the Tribe. The Hualapai Ranch is located inside the Grand Canyon West recreation area, while the Lodge is approximately 90 minutes from the West Rim in Peach Springs, AZ on historic Route 66. A third option is the Grand Canyon Ranch Resort, just 2 miles outside Grand Canyon West on Diamond Bar Ranch Road.
Here's a list of estimates, exclusive of taxes, gratuities and fees where applicable:
- Hualapai Ranch & Cabins — $129 per person
- Hualapai Lodge on Route 66 — $69.95 per person
- Grand Canyon Ranch Resort — $300 per person
The Hualapai Tribe also operates Hualapai River Runners, the only providers of 1-day whitewater river rafting at the Grand Canyon. Trips operate from March through October, departing in the early morning from Peach Springs, so it's wise to book the night before at the Hualapai Lodge on Route 66. The Hualapai tourism site can assist visitors with booking these lodging/rafting packages.
- 1-day Colorado River whitewater rafting trip — $382 per person, after taxes and fees
Getting Here
Whether you drive yourself or take a guided helicopter, air or coach tour, Grand Canyon West is an ideal day trip from Las Vegas. While we typically encourage visitors to drive themselves to the South and North Rims of the Grand Canyon, Grand Canyon West is a different story, IF you're coming from Las Vegas. There are a myriad of high-quality tours from Las Vegas to the West Rim, whether by helicopter, airplane or ground, and the tour companies each do a terrific job of providing an excellent tour, with informative and entertaining narration, and neatly packaging the entrance fees, activities and upgrades available at Grand Canyon West.
That being said, you can drive yourself to the Grand Canyon West entrance. Be prepared for the 9 mile unpaved yet graded, bumpy and dusty drive on Diamond Bar Road as you approach the Grand Canyon West airport. (Note: it is estimated that the road will be paved in full by Spring 2014.) No private vehicles are permitted past the Grand Canyon West entrance. You must park your car at the Grand Canyon West Welcome Center. You will be directed purchase an entrance package and board the Hop-On Hop-Off shuttle, included in the price of all entrance packages.
Click here for West Rim driving directions from Las Vegas, the South Rim, Sedona & more .
Park-and-Ride Shuttle
If you don't want to drive the unpaved portion of the road, you can take a shuttle service from Dolan Spring. The Park and Ride shuttle is $15 per person round trip. If you are interested in this service please contact http://www.hualapaitourism.com/parknride.php (888) 868.9378(WEST) or (928) 769.2636 to make your reservation. This shuttle departs from 16011 Pierce Ferry Rd, Dolan Springs, AZ.
Hop-On Hop-Off Shuttle
The Hop-On Hop-Off shuttles circulate throughout Grand Canyon West continuously throughout the day, taking visitors to the three main areas. They stop at each point of interest, Guano Point, Eagle Point and Hualapai Ranch, approximately every 15 minutes.
There are dozens of ways to see the West Rim, from helicopter tours to coach bus rides to pontoon boat cruises, and this is the only place at the Grand Canyon where you can experience a helicopter landing on the Canyon floor. There is easily a half-day's worth of activities available. Walk the Skywalk, marvel at the views from Guano Point and Eagle Point, and watch Native American and cowboy demonstrations; all accessible by a Hop-On Hop-Off shuttle included in the price of admission to Grand Canyon West.
Grand Canyon Skywalk
Grand Canyon West boasts the newest visitor attraction, the Grand Canyon Skywalk. Its plexiglass floor extends 70 feet over the edge of the Canyon's rim, allowing visitors to look straight down to the canyon floor 4,000 feet below. It is 10 feet wide, and flanked by glass walls 4–6 feet high; high enough to exceed safety code, but low enough to let visitors explore and view the Canyon unencumbered.
Cameras and personal property are not allowed on the Grand Canyon Skywalk. Lockers are provided, and professional photographers are available to take your picture on the Skywalk, with photos available for later purchase. Photos of the Skywalk may be taken from the side with personal cameras. Pets, wheelchairs and strollers are not permitted on the Skywalk, in order to preserve the view through the DuPont SentryGlas® transparent floor.
Eagle Point
The Skywalk is the highlight of the Eagle Point area, but you'll also want to do a walking tour of Native American Village: authentic Native American dwellings depicting multiple tribes. Sit down at the amphitheater and enjoy live Native American performances from various tribes demonstrated continuously all day. Browse handmade, authentic Native American jewelry and crafts.
Guano Point
Hualapai ranch & cabins.
The final stop on the free shuttle route is the Hualapai Ranch & Cabins. Enjoy western hospitality, cowboy entertainment, wagon rides and more. Learn how to rope, quick draw and tomahawk toss the cowboy way. Embark on a guided 30-minute horseback ride to the rim and 90-minute rides along the rim. Stay overnight in western cabins, the only lodging "in-park" at Grand Canyon West, facing the canyon rim. At night, join the cowboys making S'mores and telling stories around an open fire.
Package Add-Ons
At Grand Canyon West, there are exhilarating tour and activity upgrades that will round out your experience. These options are not for the budget traveler, however; when added to the typical entrance package price of $88 per person (which includes the Skywalk) these upgrades will likely push your trip up to the "bucket-list" level of expenditure. The following prices do not include taxes and fees.
- Stay overnight in a cabin on the Rim — $100 (per person based on double occupancy)
- Traditional 30-minute horseback ride to the Rim — $35 per person
- Extended 90-minute horseback ride along the Rim — $75 per person
- 12–15-minute Flight of the Eagle air tour — $129 per person
- 40-minute Grand Canyon Discovery helicopter tour with 20-minute landing below the Rim — $139 per person
- Helicopter/Boat trip combines a flight through the canyon, landing on the Canyon floor, then a pontoon boat ride on the Colorado River — $171 per person
One-Day Whitewater River Rafting
About 90 minutes away from Grand Canyon West, in the town of Peach Springs, the Hualapai Tribe also operates Hualapai River Runners, the only providers of 1-day whitewater river rafting at the Grand Canyon. Trips operate from March through October, departing in the early morning from Peach Springs, so it's wise to book the night before at the Hualapai Lodge on Route 66. A shuttle, included in the package price, returns visitors to Peach Springs at the end of the trip. The Hualapai tourism site can assist visitors with booking these lodging/rafting packages.
It's Not the National Park
While there has been some criticism of Grand Canyon West as a tourist attraction, there are an equal number of excellent reviews raving about the dramatic Grand Canyon views, the Native American heritage displays and the Skywalk itself. The key to getting the most out of Grand Canyon West is to be well-informed and fully prepared for the expense, travel time, road conditions, weather and remoteness.
Grand Canyon West is privately owned and operated by the Hualapai Tribe and requires the purchase of a permit and Legacy tour package for entry. Outside food and drink are not permitted (except for water) and you may be persuaded to purchase photos and/or a souvenir. A typical visit, without tour add-ons, could total around $206 per person, if it looked like this:
- Legacy Gold entrance package, includes a meal and the Skywalk — $87.92 after tax/fees
- Three professional Skywalk photos — $96.30 after tax
- Souvenir purchase at the gift shop, using a $5 coupon included in the package — $21.40 after tax
The travel time — just 2 ½ hours from Las Vegas — is minimal compared to the drive to the South Rim from Las Vegas, but because signage is minimal until you get within about 10 miles of Grand Canyon West, and much of the drive is on 2-lane roads and even 9-miles of a graded dirt road that's bumpy, dusty and has a 25 MPH posted speed limit, it seems like a more arduous journey than it really is, especially if you're unprepared. Patience and a high-clearance vehicle are definitely recommended; it's unwise to take a regular sedan — especially a rental car — to Grand Canyon West. Don't follow the car in front of you too closely, or you'll be shrouded in dust and unable to see properly. If you are driving a rental car, take the Park-and-Ride shuttle from Dolan Springs. It's just $15 cash, round trip, paid to the driver and worth every penny to avoid additional charges from the rental car company.
You may experience long lines at the shuttle stops or waiting to walk on the Skywalk. There isn't much protection from the elements in these queues, so be prepared with a wide-brimmed hat, plenty of high SPF sunscreen, sunglasses, light layers, and at least a quart of water per person.
Some visitors are struck by the remoteness of the West Rim. There are no services along the 50–70 miles between US-93 or Kingman, respectively, and Grand Canyon West, so make sure you have sufficient gas, air in your tires, and your car is in good working order. Take precautions typical of any road trip; have water, food and emergency supplies in your vehicle.
There is almost no cell service at Grand Canyon West. Do not rely on your mobile for emergency calls, nor your smartphone for directions, a connection to the internet, or travel apps. Be prepared with some printed or written directions, and make your hotel reservations ahead of time.
West Rim Hotels & Lodging
Grand Canyon West, while conveniently located just 125 miles east of Las Vegas, Nevada, is in a remote part of northwestern Arizona, with few developed comforts in the area. The West Rim does feature overnight accommodations nearby; Hualapai Ranch and Hualapai Lodge are operated by the Tribe. The Hualapai Ranch is located inside the Grand Canyon West recreation area, while the Lodge is approximately 90 minutes from the West Rim in Peach Springs, AZ on historic Route 66. A third option is the Grand Canyon Ranch Resort, just 2 miles outside Grand Canyon West on Diamond Bar Ranch Road. This working cattle ranch offers pine cabins, sleeping tipis (seasonally), western entertainment, helicopter flights, and horseback rides. The Hualapai have preserved this remote part of Arizona, providing lodging and dining that meet our creature comforts, but not taking away from the beauty that is the Grand Canyon West Rim.
Truth be told, most Grand Canyon West Rim visitors are daytrippers who choose to book their overnight accommodations in Las Vegas, NV — just a 2 ½-hour drive from this western-most Grand Canyon point of interest. One can easily drive themselves or take a bus or coach tour from Las Vegas and see the West Rim in 8 hours round-trip, or even half that time on a helicopter or air tour from Las Vegas.
We also highly recommend checking out West Rim hotels in Kingman , just 70 miles from Grand Canyon West and a central resting stop with easy access to I-40, I-93, and several fascinating attractions including ghost towns, gold mines, museums, lakes, Hoover Dam, gaming and more.
The Grand Canyon West Rim's elevation, at 4,800 feet above sea level, is right between that of desert Las Vegas and the lofty plateau of the South Rim. It stands to reason, then, that visitors generally experience temperate weather year-round; although summer temperatures can climb past 100° F. The West Rim isn't subject to extreme winter snow conditions like the South and North Rims, although it is possible visitors could encounter snow at Grand Canyon West in December, January and February.
[[$westRimTemps]]
Daylight Savings Time
Arizona does not observe Daylight Savings Time, so if you're coming to Grand Canyon West from Las Vegas, you may need to account for a time difference.
- Daylight Savings Time (Spring to Fall) — Arizona is equal to Pacific Daylight Time (PDT), so it's the same as Nevada
- 9:00 am in Las Vegas = 9:00 am at Grand Canyon West
- Standard Time (Fall to Spring) — Arizona is equal to Mountain Standard Time (MST), which is 1 hour ahead of Nevada
- 9:00 am in Las Vegas = 10:00 am at Grand Canyon West
POPULAR GRAND CANYON WEST RIM TOURS & LODGING

Pink Jeep Tours
What guests like about this place ».
Family-Friendly | Lunch Provided | Multi-Attraction Tours | Combination Tour | Leaves from Las Vegas | Leaves from Sedona

Maverick Helicopter Tours
Leaves from Las Vegas | Leaves from Grand Canyon/Tusayan

Papillon Grand Canyon Helicopters
Family-Friendly | Leaves from Las Vegas | Leaves from Grand Canyon/Tusayan | Optional Skywalk Tour

Grand Canyon West Rim Bus Tour from Las Vegas with Optional Upgrades
Leaves from Las Vegas | Optional River Tour | Optional Air Tour | Optional Skywalk Tour | Professionally Guided | Hotel Pickup | Lunch Provided
In the Spotlight

RELATED TRIP IDEAS

MORE WAYS TO EXPLORE GRAND CANYON WEST RIM
More grand canyon west rim tours.

Grand Canyon from the Air

Walk a Glass Bridge Over the Grand Canyon
West rim vs south rim.

Hoover Dam: An Architectural World Wonder
The best times to visit the Grand Canyon

Editor's Note
There are many different vantage points and ways to experience Grand Canyon National Park , and you can easily visit a dozen times before you really begin to absorb its beauty and scope. However, not everyone has the luxury of multiple visits, so we're here to help you choose the best time of year for your trip.
Note: Some areas of the Grand Canyon, such as the Desert View Watchtower, are currently closed. So, be sure to check the National Park Service's website for the latest information if you're planning to travel soon.
For more TPG news delivered each morning to your inbox, sign up for our daily newsletter .

The best time for good weather
At the South Rim (which sits at a 6,800-foot elevation and is located almost two hours north of Flagstaff, Arizona), spring runs from March to May; fall runs from September to November. Both seasons offer relatively moderate temperatures. Nighttime lows during these seasons are often in the 30s while daytime temperatures will rise into the 60s. The weather is pleasant for Grand Canyon hikes, although there might be a chance of rain. Inside the canyon, temperatures range from 55 to 82 degrees during the shoulder seasons.
The North Rim (which sits at an 8,000-foot elevation and is located four hours north of Flagstaff) is only open from mid-May through mid-October because of the potential for snowy conditions. When this part of the park opens for visitors, temperatures range from the low 30s to the 60s; it then warms up more through the summer.
At the West Rim — where you'll find the famous Grand Canyon Skywalk — spring is warmer, with lows in the 50s and highs mostly in the 80s. Temperatures at the West Rim are quite hot in September (the high 60s to high 90s), while October (58 to 84 degrees) and November (46 to 68 degrees) are more moderate. The West Rim sits about four hours east of Las Vegas.
Not surprisingly, summer brings dry conditions and hot temperatures. The South Rim temperatures rise above the 80s — and can get up to 100 at the bottom of the canyon. At the North Rim, temperatures are less extreme, ranging from the mid-40s to the upper 70s in June through August. The West Rim can be uncomfortable in summer, with average temperatures ranging from the upper 70s to more than 100 degrees.
The South Rim area remains open during winter, with temperatures at the rim generally ranging from the 20s to the low 40s; on the floor of the canyon, they are usually between the high 30s and high 50s.
Many visitors consider winter a special time to visit, as fewer people travel to see the dramatic snow-dusted red rocks; when compared to the number of summer visitors, only about 10% come during the winter. If you want to beat the crowds, winter may be the best time to visit.
Related: How to stay near a national park using points
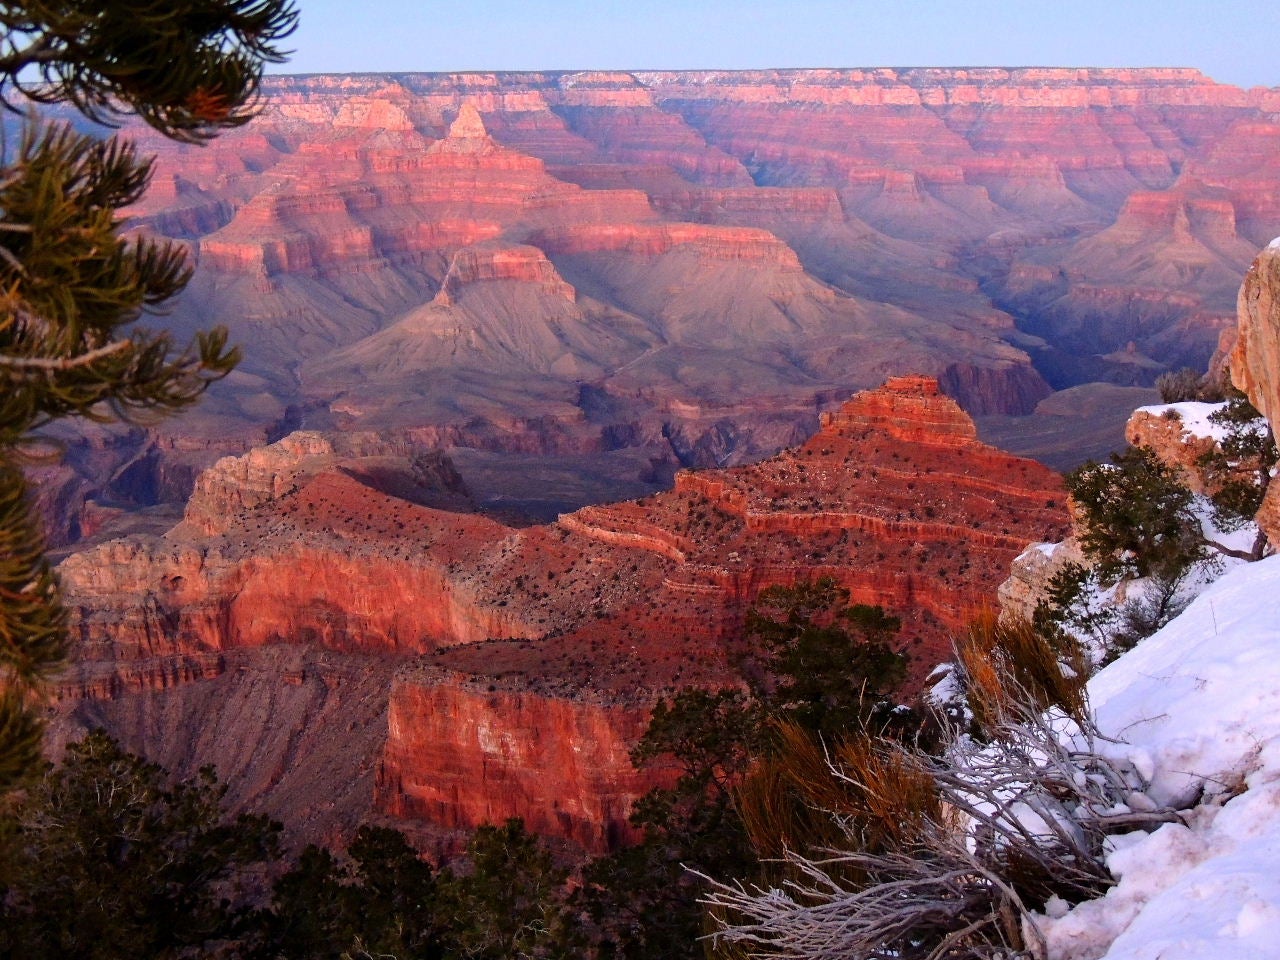
The best time to explore the interior
Most visitors will not feel satisfied by a visit to the Grand Canyon unless they can descend, at least part of the way, into the canyon. The view from inside is quite different from the broad vistas at the rim. There are many ways to accomplish this special experience, including through guided treks on mules or by foot.
No matter what time of year you go, the only time to hike in or out of the Grand Canyon is daytime. At the South Rim, you'll see numerous signs cautioning visitors not to hike to the bottom and back in one day. The trip down to the canyon floor is about 7 or 9 miles, depending on which trail you choose; hiking back up is strenuous, and it takes twice as long as the way down, even for experienced hikers. If you are still on the trail after dark, those pleasant, well-groomed paths become treacherous. Visit the National Park Service website and read its FAQ for hikers.
A variety of providers offer guided hikes to the canyon floor as well as mule rides into the canyon from the South Rim.
The best time to venture to the canyon floor by any method depends on your tolerance for heat or cold and what activities excite you. If you dream of splashing in the Colorado River, choose summer or early fall when the water is a little warmer. (Rafting trips begin in mid-June.) A wintertime trip is great for travelers who want smaller crowds and evenings by the fire.
Related: The best national parks to visit during winter

The best time to avoid crowds
You probably didn't need me to tell you this, but the Grand Canyon gets busier when school is out of session. Summer, spring break or any other holiday is going to mean a spike in attendance.
With more than 6 million annual visitors, there can be long lines to get in, crowds at the most popular viewpoints and waits for virtually everything else. The National Park Service even has tips for surviving crowding at the South Rim .
If you can go when school is not on a traditional break, you'll be rewarded with lighter crowds. If you must go during a school break because your life revolves around a school schedule, then check out the NPS crowd survival guide linked above, and be sure to enter the park as early as you can in the morning.
Related: Tips for visiting national parks with kids
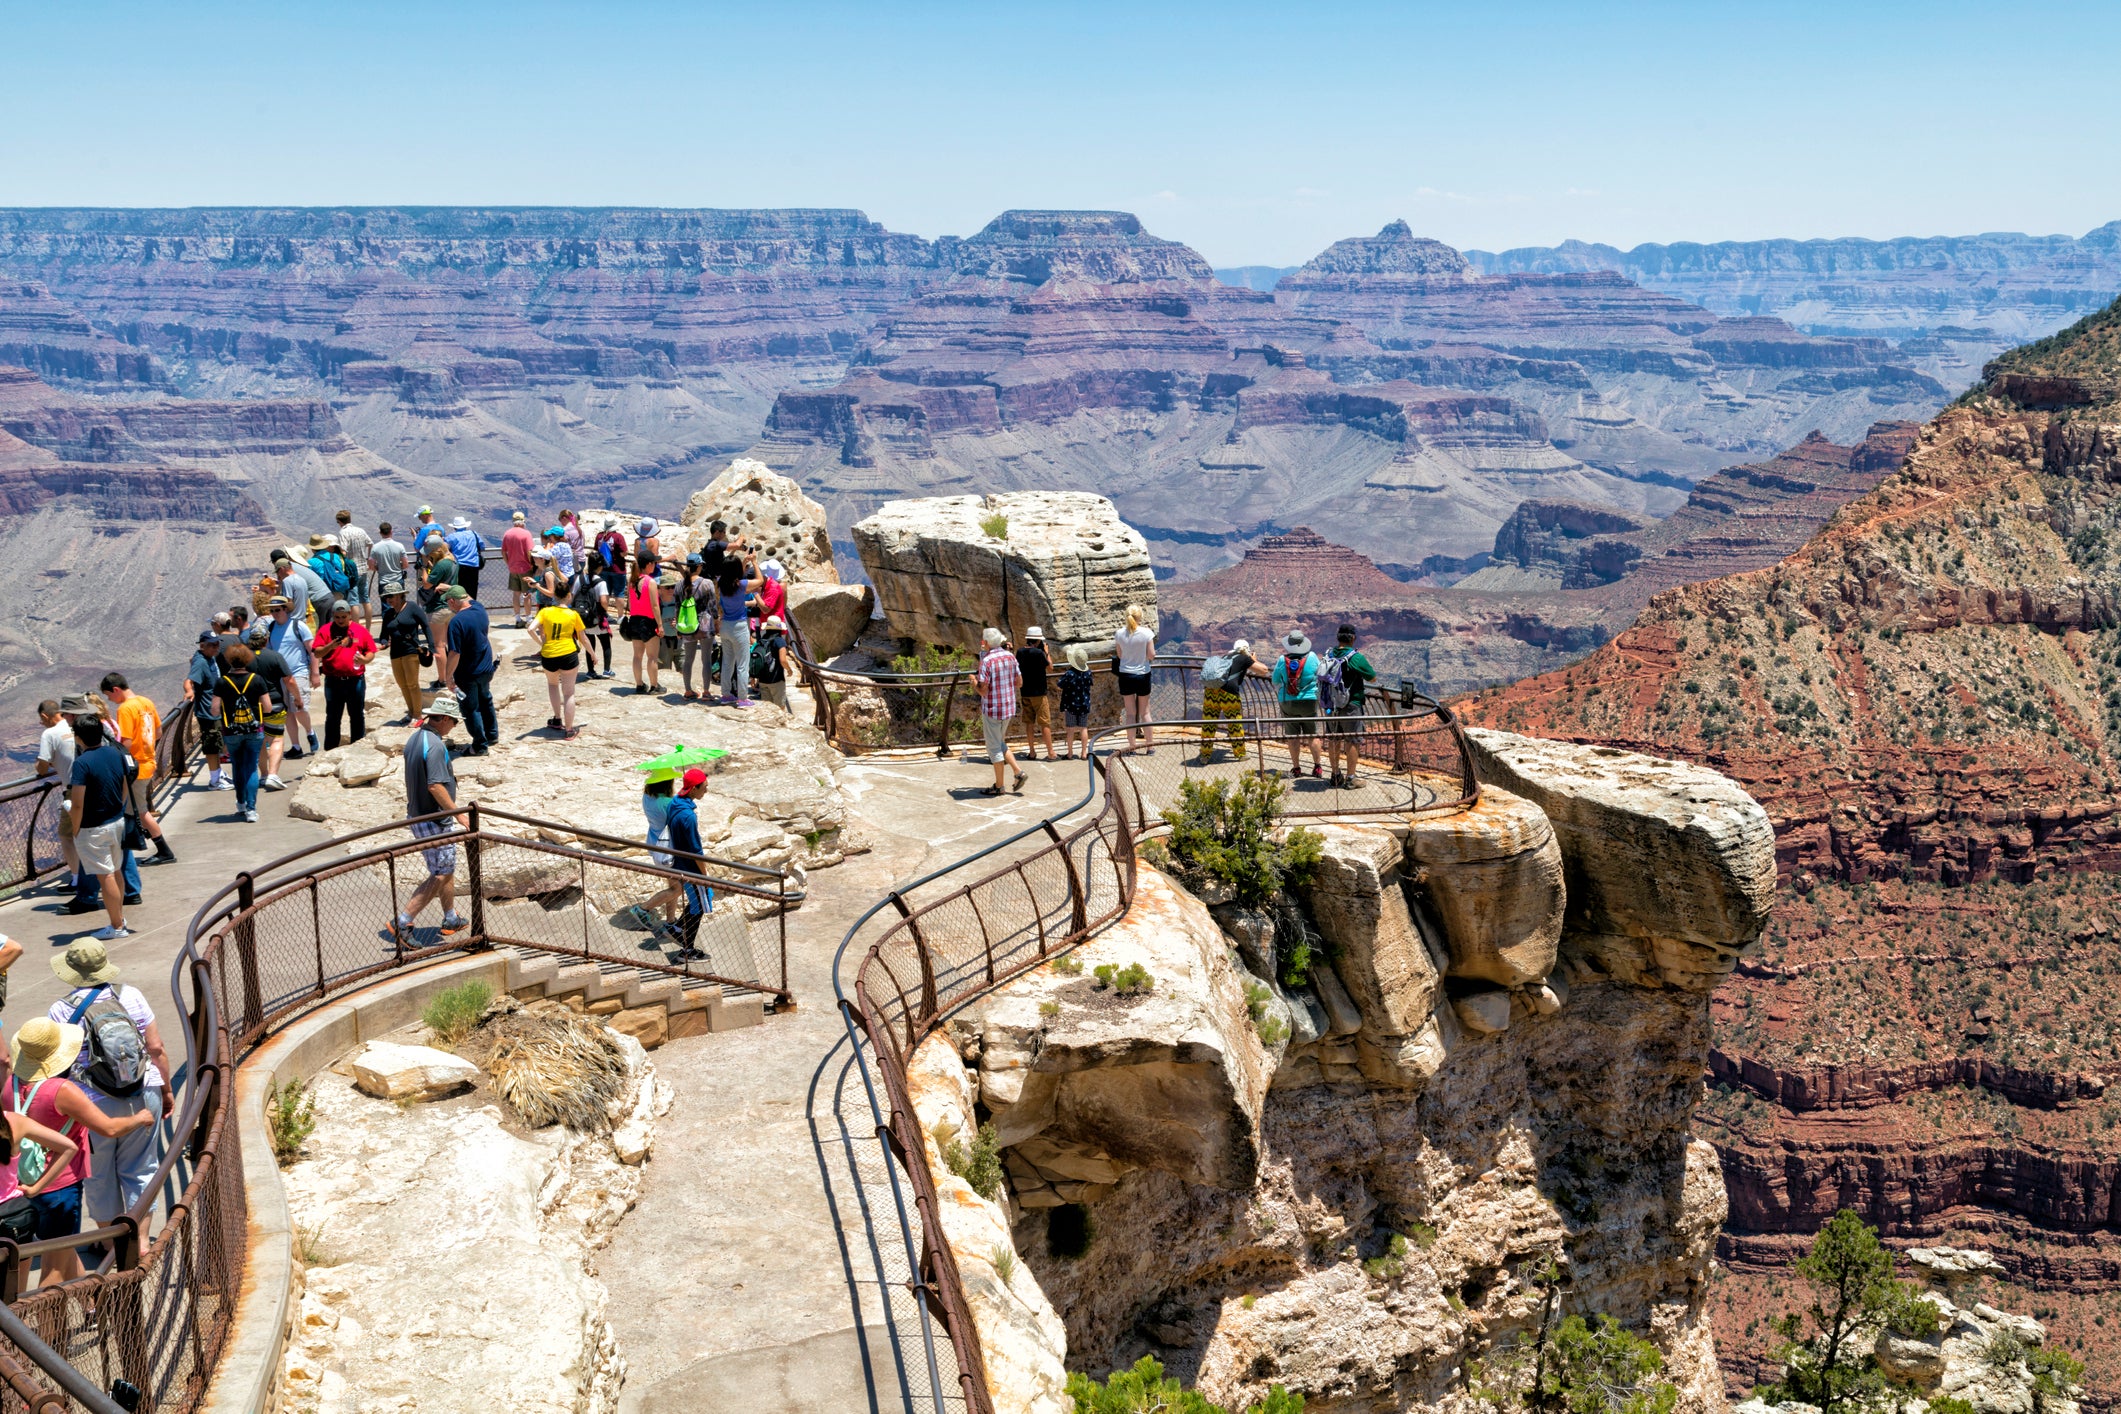
The best time for special events
During a normal year, Grand Canyon National Park typically hosts annual events such as an Independence Day parade in July, stargazing nights in June and a two-day Native American Heritage Celebration in November to honor National Native American Heritage Month.
The best time to see wildlife
Grand Canyon National Park is home to 447 species of birds, 91 species of mammals, 48 species of reptiles, 10 species of amphibians, and a world of bugs and insects.
The elk that inhabit the Grand Canyon are considered the most dangerous animals in the park. They weigh up to 730 pounds and, according to the NPS, they can become aggressive during the fall (their mating season); the park service recommends staying at least 100 feet or more from these animals.

In general, the best time to catch glimpses of mammals — including the elk, bighorn sheep, bison, mule deer, javelinas and mountain lions — is to visit when the park is cool and quiet. Dawn and dusk are good times of the day to spot wildlife. You'll see more animal activity during the cooler months in late fall, winter and early spring. This is not only because of the weather but also because more animals appear when there are fewer humans around.
Bird-watchers may be able to spot rare species, as several species of threatened and endangered birds make the park their home. These species include the California condor, southwestern willow flycatcher, western yellow-billed cuckoo and others. In addition to the California condor, several other birds of prey inhabit the park, including peregrine falcons, red-tailed and zone-tail hawks and Mexican spotted owls. The best time of year for bird-watching is autumn, but you'll see some of these species at any time of year.
The best time for cheap deals
Affordable flights.
Searching for flights on Skyscanner , you'll see that the least expensive time of year to fly from major cities to Phoenix Sky Harbor Airport (PHX) or Las Vegas' Harry Reid International Airport (LAS) varies by origin.
If you're flying from New York City to Phoenix, for example, November is typically an affordable time to travel, though prices spike for the Thanksgiving holiday. During a normal year, flights from Los Angeles are lowest in June, while flights from Boston drop in August. Atlanta-based flights are cheapest in October.
Use Skyscanner to find an affordable time of year to travel from your preferred airport. If you're planning to trek to the canyon floor, you'll want to book that experience first (15 months ahead); that will give you plenty of time to find an affordable flight. Here are some tips for maximizing your airline miles for a domestic trip .
Related: Top US national parks to visit with kids and family
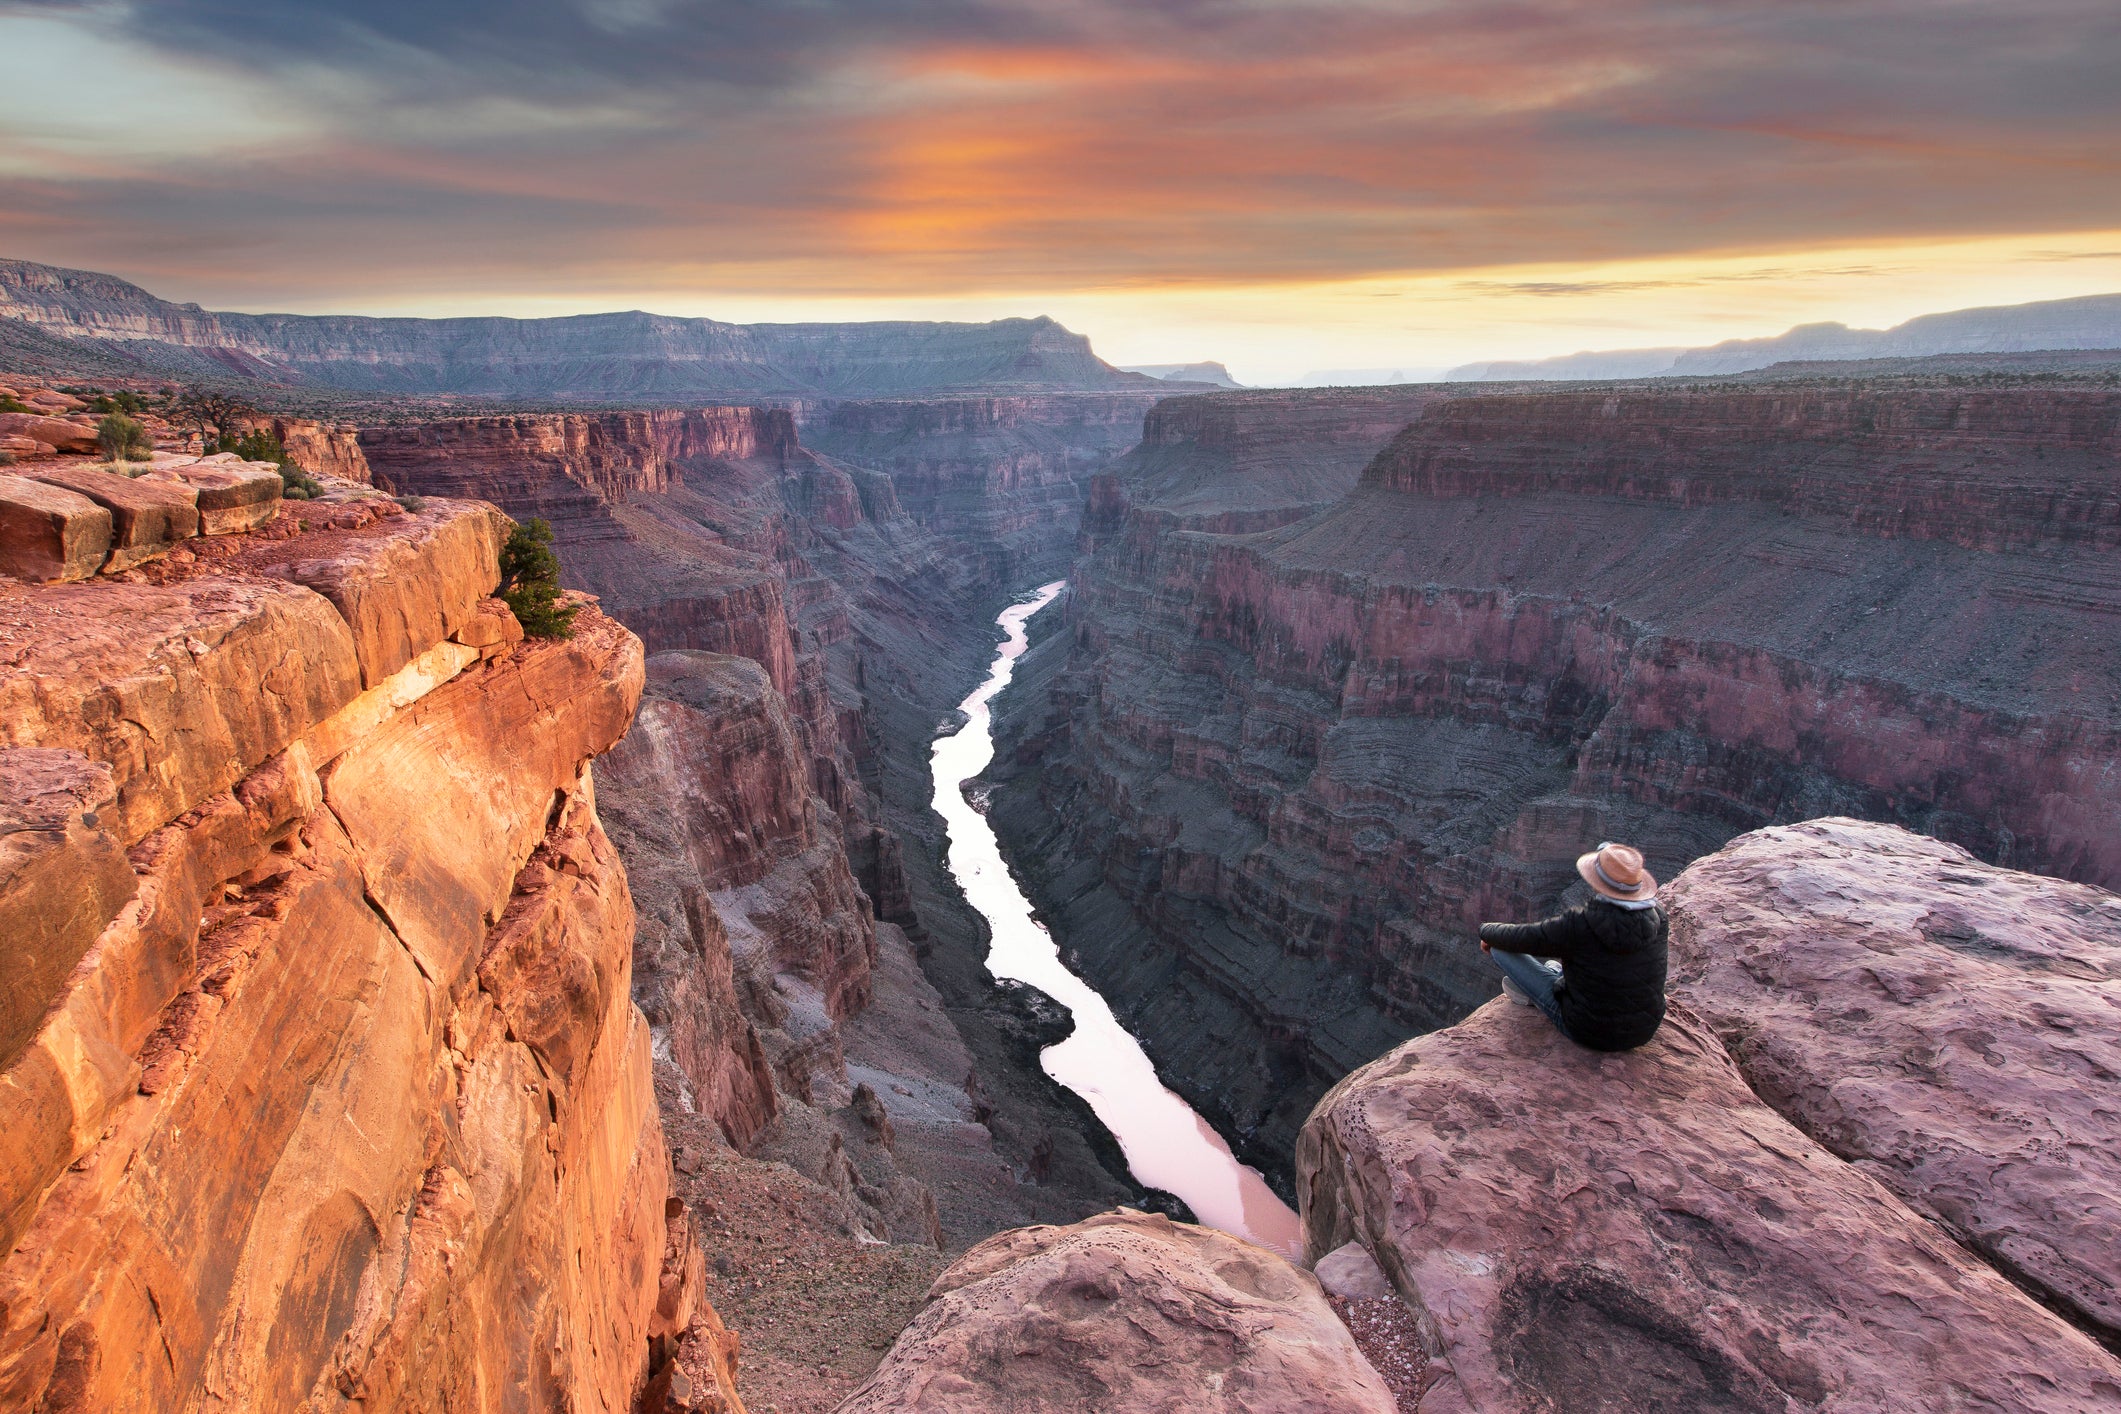
Affordable hotels
When you visit Grand Canyon National Park, you have a choice of staying inside the park or in a neighboring community. The pros and cons of each option are pretty simple. Staying inside the park gives you a more immersive experience and more time to enjoy the natural surroundings of the canyon. Staying outside means you'll have access to more varied services and the opportunity to book your lodging with rewards points.
Note that not all accommodations are open at this time due to the pandemic. Always contact the hotel directly to confirm availability.
Hotels inside the park: Delaware North and Xanterra Parks & Resorts handle reservations for lodging at the South Rim of the park; rooms become available a year in advance. To stay inside the canyon at Phantom Ranch , enter the National Park Service's lottery 15 months before your travel dates. At the North Rim, Grand Canyon Lodge offers a few types of cabins and lodge rooms; only the Western Cabins provide two queen beds.
Hotels outside the park: Here's a fun, low-stress way for travelers to visit the Grand Canyon: Stay outside the park, in the charming small town of Williams (54 miles south of the South Rim), and take the Grand Canyon Railway into the park (two hours and 15 minutes). Two trains leave the depot each morning and return to Williams in the late afternoon. You'll get to enjoy the beautiful scenery without driving. A seat in the Pullman Class (the cheapest option) costs $67 round-trip for adults and $32 round-trip for kids. If you want to ride in the glass Observation Dome, a seat costs up to $189 for adults and $153 for kids. The Luxury Dome and Luxury Parlor cars are more expensive (and no children are allowed in either).
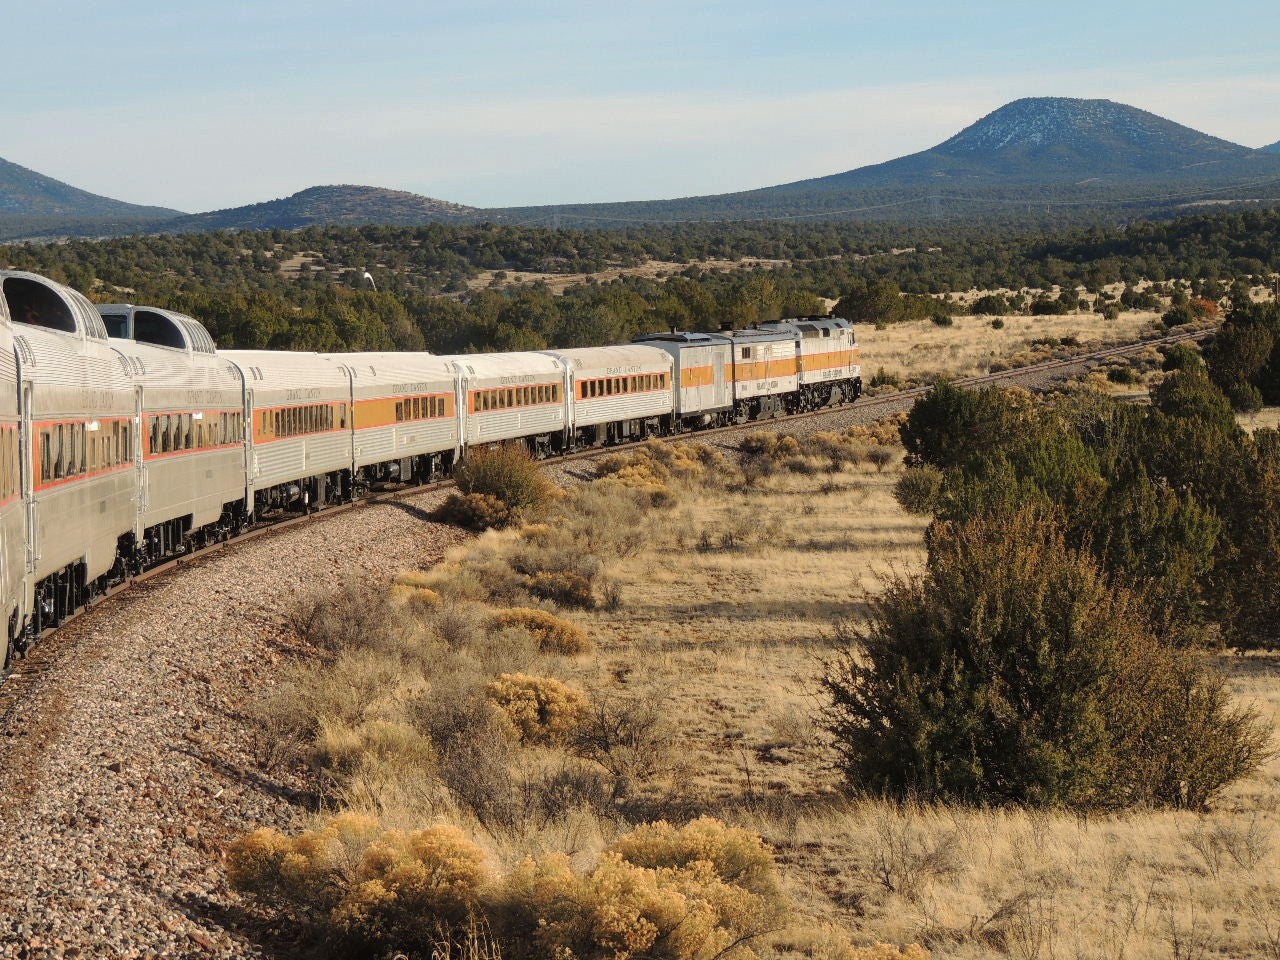
For a more traditional hotel experience, the Holiday Inn Express & Suites Williams, a half-mile from the train depot, has rooms with two queen beds, 42-inch televisions, a microwave and a fridge. Rooms start at 15,000 IHG Rewards Club points per night, with breakfast included.
Wyndham offers several properties in Williams for 15,000 points per night, including Travelodge by Wyndham Williams Grand Canyon. This property has rooms with two queen beds and free continental breakfast; adjoining rooms are also available.
There's also the Best Western Plus Inn of Williams, which is available for 16,000 points per night and includes breakfast.
Tusayan is the closest town to the park entrance. It has the Best Western Premier Grand Canyon Squire Inn, where rooms with two queen beds are available from 24,000 points per night.
Related: The best national parks in the United States
Bottom line
Unless you are targeting the North Rim, which is closed for the colder half of the year, there's no bad time to visit the Grand Canyon. It's magical 365 days a year. Still, depending what you're looking for, some times may work better for you than others.
We'd avoid July and August due to the heat and excessive crowds. Instead, travel between March and May (before Memorial Day) or from September to October (but after Labor Day). If you must go during a peak time of the year (read: summer), consider the more secluded North Rim. Maybe even add a trip to Zion National Park , just a couple of hours away. That way, you can check off several of the country's best national parks in one trip.
Trump trial schedule: Latest on the trial and what you should expect this week

Former President Donald Trump 's hush money trial is on break Monday, but court will reconvene Tuesday morning .
Although the jurors and lawyers typically gather on Monday mornings, Judge Juan Merchan ruled last week that there would be no proceedings Monday, April 29.
Monday is part of the last two days of the Jewish holiday of Passover . Court also let out early on April 22 and April 23 to allow people to travel for religious gatherings.
Trump faces 34 counts of falsifying business records to disguise the hush money payment to porn star Stormy Daniels that allegedly constituted an illegal campaign contribution.
Here is what to know as Trump's trial continues into Week 3:
Prep for the polls: See who is running for president and compare where they stand on key issues in our Voter Guide
Trump trial live updates: Michael Cohen's banker to testify on payment to Stormy Daniels
Trump trial schedule
The tria is expected to last six to eight weeks, according to a media advisory .
Proceedings typically start at 9:30 a.m. local time and run through the business day. Court is on break on Wednesdays .
Trial is not televised, but you can read transcripts
New York City Criminal Court is publishing the trial transcripts and copies of evidence shown to the jury.
Transcripts of proceedings aren't always available, but officials decided to make them available because of "unparalleled public interest."
Monday, Tuesday and Thursday's transcripts are available now on the New York State Unified Court System's media website. Evidence shown to the jury, including texts, emails and photos , also are available from last week's proceedings.
Week 2 ended during third witness testimony
Jurors heard from three witnesses last week.
First, David Pecker, former head of the National Enquirer’s parent company, testified about how he used the publication to write positive stories about Trump and prevent negative stories about him from coming out during his 2016 presidential campaign.
His testimony and cross-examination spanned three days. He also said his editor-in-chief believed Stormy Daniels' story about an alleged sexual encounter in 2006, which Trump denies.
Trump's former executive assistant Rhona Graff made a brief appearance on the witness stand Friday. When court wrapped for the week, the prosecution was questioning Gary Farro, former senior managing director at First Republic Bank. Farro, who was former Trump lawyer Michael Cohen's banker in 2016, could be used to bring in email evidence about the payment to Daniels. CNN reported Cohen used money from his home equity line to cover Daniels' payment, and an email from a First Republic Bank employee confirmed the transfer.
Leaving the courthouse Friday, Trump challenged President Joe Biden to a debate.
“We’ll do it at the White House,” Trump said. “That would be very comfortable, actually.”
Contributing: Bart Jansen and Aysha Bagchi
Biden to travel to North Carolina to meet with families of officers killed in deadly shooting
President Joe Biden is expected to travel to North Carolina on Thursday to meet with the family members of four officers killed earlier this week in the deadliest attack on U.S. law enforcement since 2016
CHARLOTTE, N.C. -- President Joe Biden is expected to travel to North Carolina on Thursday to meet with the family members of four officers killed earlier this week in the deadliest attack on U.S. law enforcement since 2016.
The president is scheduled to visit Wilmington across the state that day and is planning to add a stop in Charlotte to meet with local officials and the families of officers shot Monday while serving a warrant, according to a person familiar with the matter.
The four officers were killed when a task force made up of officers from different agencies arrived in the residential neighborhood in the city of 900,000 to try to capture 39-year-old Terry Clark Hughes Jr. on warrants for possession of a firearm by an ex-felon and fleeing to elude in Lincoln County, North Carolina. Hughes was also killed.
Four other officers were wounded in the shootout, and an AR-15 semi-automatic rifle, a 40-caliber handgun and ammunition were found at the scene. Those killed were identified as Sam Poloche and William Elliott of the North Carolina Department of Adult Corrections; Charlotte-Mecklenburg Officer Joshua Eyer; and Deputy U.S. Marshal Thomas Weeks.
After the attack, Biden expressed his condolences and support for the community, calling the slain officers “heroes who made the ultimate sacrifice, rushing into harm’s way to protect us."
“We must do more to protect our law enforcement officers. That means funding them – so they have the resources they need to do their jobs and keep us safe. And it means taking additional action to combat the scourge of gun violence. Now," Biden said in a statement, calling on leaders in Congress to pass a ban on assault weapons, among other gun control measures.
Also on Wednesday, a local police chief said that an officer from his force who was shot Monday underwent surgery and is expected to make a full recovery. David W. Onley, the police chief of Statesville in the Charlotte metropolitan area, expressed condolences Wednesday and “unwavering solidarity with our law enforcement brethren during this difficult time,” according to a statement released by his office.
One of the four officers injured in the attack was Cpl. Casey Hoover of the Statesville Police Department, who served on the task force. He was shot in his upper torso — an area unprotected by his bulletproof vest.
Hoover was taken by the Charlotte-Mecklenburg Police Department to a Charlotte hospital, where he underwent surgery. Onley said the officer, who has worked for the Statesville police for eight years, is now stable and is expected to make a full recovery and “exemplifies the bravery and resilience of our law enforcement community.”
Law enforcement officers were still investigating Wednesday, attempting to determine a precise timeline of events and whether Hughes acted alone or with a second shooter.
Hughes’ criminal record in North Carolina goes back more than a decade. It includes prison time and convictions for breaking and entering, reckless driving, eluding arrest and illegally possessing a gun as a former felon, according to state records.
The attack was the deadliest day for U.S. law enforcement in one incident since five officers were killed by a sniper during a protest in Dallas in 2016.
___ Miller reported from Washington.
Top Stories

Prince William shares 1st update on Kate Middleton, kids
- May 1, 9:37 AM

Justice Stephen Breyer's blunt message to Supreme Court conservatives: 'Slow down'
- May 1, 5:03 AM

Threat 'neutralized' after active shooter reported outside Wisconsin middle school
'Surprising' and 'disturbing': Legal experts react to SCOTUS on Trump immunity case
- Apr 30, 6:52 AM

College protests updates: UCLA cancels all classes due to 'violence' overnight
Abc news live.
24/7 coverage of breaking news and live events
- Share full article
Advertisement
Supported by
Automatic Refunds and No More Hidden Fees: D.O.T. Sets New Rules for Airlines
The Transportation Department issued new requirements on refunds when flights are canceled or delayed and on revealing “junk” fees before booking. Here’s what passengers can expect.

By Christine Chung
The Transportation Department on Wednesday announced new rules taking aim at two of the most difficult and annoying issues in air travel: obtaining refunds and encountering surprise fees late in the booking process.
“Passengers deserve to know upfront what costs they are facing and should get their money back when an airline owes them — without having to ask,” said U.S. Transportation Secretary Pete Buttigieg in a statement, adding that the changes would not only save passengers “time and money,” but also prevent headaches.
The department’s new rules, Mr. Buttigieg said, will hold airlines to clear and consistent standards when they cancel, delay or substantially change flights, and require automatic refunds to be issued within weeks. They will also require them to reveal all fees before a ticket is purchased.
Airlines for America , a trade group representing the country’s largest air carriers, said in a statement that its airlines “abide by and frequently exceed” D.O.T. consumer protection regulations.
Passenger advocates welcomed the new steps.
Tomasz Pawliszyn, the chief executive of AirHelp, a Berlin-based company that assists passengers with airline claims, called it a “massive step forward and huge improvement in consumer rights and protection” that brings the United States closer to global standards in passenger rights.
Here’s what we know about the D.O.T.’s new rules, which will begin to go into effect in October.
There’s now one definition for a “significant” delay.
Until now, airlines have been allowed to set their own definition for a “significant” delay and compensation has varied by carrier . Now, according to the D.O.T., there will be one standard: when departure or arrival is delayed by three hours for domestic flights and six hours for international flights.
Passengers will get prompt refunds for cancellations or significant changes for flights and delayed bags, for any reason.
When things go wrong, getting compensation from an airline has often required establishing a cumbersome paper trail or spending untold hours on the phone. Under the new rules, refunds will be automatic, without passengers having to request them. Refunds will be made in full, excepting the value of any transportation already used. Airlines and ticket agents must provide refunds in the original form of payment, whether by cash, credit card or airline miles. Refunds are due within seven days for credit card purchases and within 20 days for other payments.
Passengers with other flight disruptions, such as being downgraded to a lower service class, are also entitled to refunds.
The list of significant changes for which passengers can get their money back also includes: departure or arrival from an airport different from the one booked; connections at different airports or flights on planes that are less accessible to a person with a disability; an increase in the number of scheduled connections. Also, passengers who pay for services like Wi-Fi or seat selection that are then unavailable will be refunded any fees.
Airlines must give travel vouchers or credits to ticketed passengers unable to fly because of government restrictions or a doctor’s orders.
The vouchers or credits will be transferable and can be used for at least five years after the date they were issued.
Fees for checked baggage and modifying a reservation must be disclosed upfront.
Airlines and ticket agents are now required to display any extra fees for things like checking bags or seat selection clearly and individually before a ticket purchase. They will also need to outline the airline’s policies on baggage, cancellations and changing flights before a customer purchases a ticket.
The rules, which apply to all flights on domestic airlines and flights to and from the United States operated by foreign airlines, have varying start dates.
For example, automatic refunds must be instituted by the airlines within six months. But carriers have a year before they’re required to issue travel vouchers and credits for passengers advised by a medical professional not to fly.
Follow New York Times Travel on Instagram and sign up for our weekly Travel Dispatch newsletter to get expert tips on traveling smarter and inspiration for your next vacation. Dreaming up a future getaway or just armchair traveling? Check out our 52 Places to Go in 2024 .
Christine Chung is a Times reporter covering airlines and consumer travel. More about Christine Chung
Open Up Your World
Considering a trip, or just some armchair traveling here are some ideas..
52 Places: Why do we travel? For food, culture, adventure, natural beauty? Our 2024 list has all those elements, and more .
Mumbai: Spend 36 hours in this fast-changing Indian city by exploring ancient caves, catching a concert in a former textile mill and feasting on mangoes.
Kyoto: The Japanese city’s dry gardens offer spots for quiet contemplation in an increasingly overtouristed destination.
Iceland: The country markets itself as a destination to see the northern lights. But they can be elusive, as one writer recently found .
Texas: Canoeing the Rio Grande near Big Bend National Park can be magical. But as the river dries, it’s getting harder to find where a boat will actually float .
Every product is independently selected by (obsessive) editors. Things you buy through our links may earn us a commission.
Our Favorite Portable Speaker Is 38 Percent Off Right Now

JBL’s Clip 4 is one of my favorite Bluetooth speakers : It’s compact yet puts out ample sound that’s worthy of a bathroom-karaoke session, has monthslong battery life, and includes a built-in clip that makes it extra convenient to take your tunes wherever you go. I’ve used it to latch the Clip 4 onto both my shower-head and a loop on my backpack, and it’s never fallen off. The audio quality JBL’s packed into the Clip 4’s small size is impressive, but so is its waterproof design, which makes it a great companion for outdoor parties or traveling. Right now, it’s $30 off on Amazon, bringing the price down to $50, and for that amount, it’s one of the best speakers you can get.

The Strategist is designed to surface the most useful, expert recommendations for things to buy across the vast e-commerce landscape. Some of our latest conquests include the best acne treatments , rolling luggage , pillows for side sleepers , natural anxiety remedies , and bath towels . We update links when possible, but note that deals can expire and all prices are subject to change.
- the strategist
- electronics
- deal of the day
Every product is independently selected by (obsessive) editors. Things you buy through our links may earn us a commission.
Micro Sales
Greatest hits, most viewed stories.
- 18 Things on Sale That Would Make Excellent Mother’s Day Gifts
- All of the Best Mother’s Day Gift Ideas
- The Strategist Haul: What the Editors Bought in April
- The 17 Very Best Protein Powders
- All the Best Walking Shoes We’ve Ever Written About
- Mother’s Day Gifts for Every Type of Mom
Today’s Top Clicked

IMAGES
VIDEO
COMMENTS
The South Rim is the busy part of the Grand Canyon, with easy access by car, bus, and plane. For the rim-to-rim hiker, that means it's easier to score accommodation and transportation on the South Rim. The North Rim, only open for 6 months a year, gets only about 15% of the South Rim visitors. Photo NPS
Award-winning Hiking Tours: Grand Canyon Rim to Rim Backpacking Tour! All-inclusive trips, expert guides, Top-rated hiking company on Trip Advisor! 800-715-HIKE (4453) (9-4:30 Every Day) ... Go to our reviews page. Related Trips. You might also like... 4-5 Days . from $1749 . Hermit Loop.
The Route: Rim-to-Rim Grand Canyon Hike. Start from the North Kaibab Trail trailhead, about two miles north of the North Rim Visitor Center. At an elevation of over 8,000 feet, this spot can be cold in the morning; the trail starts in alpine coniferous forest rather than the desert most people expect. The path begins dropping immediately ...
For example, if you want to go hiking rim to rim with a backcountry permit in September 2024, you need to be in the advance lottery on April 16, 2024. You are requesting a permit for a group, not as individuals. People can make requests for "small groups" of 1-6 people or "large groups" of 7-15 people.
GRAND CANYON RIM-TO-RIM TRAIL QUICK FACTS. Trail to Summit: Bright Angel or South Kaibab to North Kaibab (or vice versa). Type of Trail: Point-to-Point. How long is the Grand Canyon Rim-to-Rim Hike: 21-23.5 miles depending on route (Check out Section 5 'Grand Canyon Rim-to-Rim Hike Map, Itinerary, & GPX File' for more details.). Total Elevation Gain: 4,460 to 5,850 feet, depending on route
When running up and down the stairs, make sure to take frequent short breaks. Do this exercise for 20 to 30 minutes. Hike Challenging Trails: The Rim to Rim hike features constant elevation changes, for which you can prepare by regularly hiking difficult trails with an elevation gain of at least 1000 feet.
She's a long-time canyon hiking guide and Grand Canyon National Park volunteer who's made the rim-to-rim hike dozens of times. @itsfantaisistique. The Route. Ranney prefers going from the North Rim to South Rim, starting the hike down the North Kaibab Trail and then up Bright Angel Trail, so that the descent into the canyon is quieter and ...
Hiking the Grand Canyon from rim to rim is a once in a lifetime experience that easily made it into my top 3 favorite hikes of all time. The day's last rays of light reflecting off the multicolored rocks, the steady babble of Bright Angel Creek, the curious wildlife, and the desert landscape slowly morphing into Pine and Aspen trees make for an unforgettable backcountry hike.
This is an extremely difficult backpacking trip with over 10,000 feet of elevation gain and loss. One classic version of the Rim-to-Rim- to-Rim trek starts and ends at the South Rim o the South Kaibab Trail, continues to the North Rim, and then returns to the South Rim on the Bright Angel Trailhead. However, many trip itineraries are possible ...
For a backpacker visiting the Grand Canyon for the first time, the 21 mile journey (33.8 km) from the South Rim to the North Rim is the ultimate trip to cut your teeth. You'll descend the South Kaibab Trail deep into the Grand Canyon to the Colorado River before climbing a punishing 5700ft (1700m) up the North Kaibab trail to the Grand Canyon ...
North Kaibab Trail Rim-to-River. 14.2 miles. 5850 feet elevation change. Water available every few miles (depending on season and how well the pipes are working at any given time) Understanding the pros and cons of each individual trail will help you to piece together a Rim-to-Rim-to-Rim itinerary.
Here are 11 things to know before you set out on a Rim-to-Rim hike in the Grand Canyon. Cindy Barks. 1. It Could Be The Toughest Day Hike You Ever Do. Any hike below the rim of the Grand Canyon is considered strenuous — a point that the national park's website stresses.
Williams, Arizona is directly south of Grand Canyon National Park along Interstate 40.Williams is a large town with hotels, restaurants, and supermarkets. It's possible to reach Williams from Flagstaff via train (the Amtrak).. NORTH RIM: Jacob Lake, Arizona is the closest bit of civilization to the North Rim of the Grand Canyon.It's officially an unincorporated community and besides a gas ...
TRANS-CANYON SHUTTLE The original Rim to Rim Shuttle service.We also offer trailhead shuttles, and bicycle and luggage transport. BOOK SHUTTLES make reservations WELCOME TO TRANS-CANYON SHUTTLE. SERVING GRAND CANYON HIKERSDEPENDABLY FOR OVER 35 YEARS.Reservations are required. CALL 928-638-2820 todayor Book Online >> Your EPIC Grand Canyon Hike Starts With Trans-Canyon Shuttle RESERVATIONS ...
The North Rim Has a Short Season. The North Rim Season (with all visitor services) runs from May 15, through October 15 each year. The entrance to the North Rim is located 30 miles south of Jacob Lake, AZ on Highway 67 (the actual rim of Grand Canyon is an additional 14 miles south of the park entrance). Jacob Lake, AZ is located in Northern Arizona on Highway 89A, not far from the Utah border.
Where to stay. Bring your tent or RV to enjoy the great outdoors at one of the many campgrounds in the park. Two of the three National Park Service campgrounds accept reservations: Mather Campground on the South Rim and North Rim Campground. Desert View Campground on the South Rim (open seasonally between mid-April and mid-October) is first-come, first-served, and Trailer Village is a ...
The travel time — just 2 ½ hours from Las Vegas — is minimal compared to the drive to the South Rim from Las Vegas, but because signage is minimal until you get within about 10 miles of Grand Canyon West, and much of the drive is on 2-lane roads and even 9-miles of a graded dirt road that's bumpy, dusty and has a 25 MPH posted speed limit ...
The South Rim temperatures rise above the 80s — and can get up to 100 at the bottom of the canyon. At the North Rim, temperatures are less extreme, ranging from the mid-40s to the upper 70s in June through August. The West Rim can be uncomfortable in summer, with average temperatures ranging from the upper 70s to more than 100 degrees.
Here is what to know as Trump's trial continues into Week 3: Prep for the polls: See who is running for president and compare where they stand on key issues in our Voter Guide Trump trial live ...
President Joe Biden is expected to travel to North Carolina on Thursday to meet with the family members of four officers killed earlier this week in the deadliest attack on U.S. law enforcement ...
"Obviously, it's uncharted territory," said Martin F. Horn, who has worked at the highest levels of New York's and Pennsylvania's state prison agencies and served as commissioner of New ...
These networks owe their continued existence and health to staying in Musk's good graces — which can come and go with startling speed. The bottom line: Musk is one of the world's most mercurial men. He doesn't just have immense power over these quasi-utilities; he's also unafraid to wield it.
Here's what we know about the D.O.T.'s new rules, which will begin to go into effect in October. There's now one definition for a "significant" delay.
JBL's Clip 4, one of our favorite speakers due to its portable design, great sound, and durable build quality, is 38 percent off today on Amazon.