The leading authority in photography and camera gear.
Become a better photographer.
12.9 Million
Annual Readers
Newsletter Subscribers
Featured Photographers
Photography Guides & Gear Reviews


9 GoPro Timelapse Tips To Get That Magic Shot
Master the art of GoPro timelapse photography with these top tips, ensuring you capture those magical moments flawlessly every time.
Camera Gear Guides | GoPro Guides | By Jeff Collier
If you’re a fan of timelapse photography and own a GoPro, shooting timelapses on your GoPro is the next logical step!
However, you need more than just the correct GoPro video settings to capture awe-inspiring pictures and videos.
You need an understanding of composition, environment awareness, and a touch of creativity!
This is what I hope to inspire through this guide!
We’ll go together through various tips, mixing between the technical side and a more creative one that’ll leave your viewers in awe.
Shooting timelapses on your GoPro is a fun idea , so let’s get stuck into the tips.
Table of Contents
1. Get To Know Your GoPro Model and Its Intricacies
So, you’ve got yourself a beautiful GoPro and want to see it in action. First, you need to ensure it’s the HERO4 model or newer.
These are the only GoPro models with the time-lapse option. After learning the type, it’s time to look for the unique features that make your camera stand out.
For instance, the HERO4 cameras could provide amazing low-light images with excellent quality.
The HERO5, on the other hand, offered better shooting options, like raw photos and wide dynamic range capture. Knowing your model can help you utilize it to the best of its abilities.
Another thing you need to watch out for is firmware updates. GoPro often releases updates that resolve bugs, enhance performances, or introduce new features.
Keeping your camera updated ensures that everything runs smoothly and beautifully!
2. Pick the Right Intervals for Time Lapse
The intervals you pick are where the magic of time-lapse happens. In simpler terms, the intervals are the time gaps between each shot your GoPro takes.
For instance, if you set the intervals for each shot at two seconds, the GoPro will snap a photo every two seconds.
Later, it’ll compile all these images to create a high-quality video with the illusion of sped-up time. The problem with intervals is that you must be mindful of your subject to choose the right timestamps.
If you capture a fast-moving subject, like people moving or rain, short interval time is your friend. These are around 1–2 seconds.
On the other hand, for a sunset or a blooming flower, you can go for longer interval settings. These intervals aren’t just a few seconds but can go anywhere from seconds to a few minutes.
Another thing to think about is the duration of the final time lapse. This can be hard to calculate, so having a time lapse calculator do it for you is more manageable. Knowing this information can help you save up on memory cards and battery life!
3. Stability Is Key

Credit: Gabriela Palai
The main point of a time-lapse is to capture the beauty of time progression through one frame. Nonetheless, what if the frame you’re presenting is blurry images?
Sadly, the tiniest movement in sped-up videos can look like jarring jerks, ruining the whole video.
Plus, the main problem here is that you don’t know what could cause the jerks. It could be an accidental nudge, a gust of wind, or a tiny squirrel that got too curious!
Hence, you’ll need to take precautions from everything. Did you know you can even start the recording using a voice command ?
To start, you can use a GoPro-specific mount, like the jaw clamp mount or GorillaPods, that can grip onto almost anything.
If this isn’t enough, you can tie small weights or sandbags to the setup to help anchor the tripod.
Before giving the all-clear, give your camera a gentle nudge. A bit odd, I know! However, this is the best way to test if everything is secure and steady. If the camera wobbles, then adjust and secure further.
4. Scout Your Time Lapse Location

Credit: Frederik Rubensson
Picking your location isn’t just about choosing a beautiful spot; it’s about using that spot to your advantage.
For instance, do you know what this spot looks like at dawn, noon, and sunset? Photographers often praise the golden hours after sunrise or sunset, but what if it looks different where you choose to set up camp?
How do the colors change with each shift in the light conditions? Better yet, how does your subject change with the sun’s movement?
My main tip would be to visit your site in advance, multiple times, and to follow the sun’s path. Certain apps like Sun Surveyor can help you with the sun’s trajectory, so you know the changes are according to what.
Another advice here would be to beware of foot, vehicle, and nature traffic. Each one of those is a double-edged sword. While their hustle and bustle can add to the time-lapse dynamism, it also means there’s a higher chance of something messing it up.
5. Search for Unique Perspectives

Credit: Alan Quirvan
Photographers everywhere took myriad photos of the world from countless angles. What does this mean for you?
Well, it means you need to fish for a new perspective. For instance, take a step back from the traditional eye-level shot.
You can climb up to find a high vantage point or crouch low. These little changes can offer a fresh perspective on something that might’ve been done before.
Another trick here is to use a frame within a frame. This is to say that your camera’s frame isn’t the final composition, and you can create another.
Archways, window panes, leaves, and branches are all natural elements you can frame the shot with.
This way, you can draw the viewer’s attention to whatever you want without ruining the outline. Finally, use a foreground element to add a layering effect to make your shot more dramatic.
6. Keep Your Time Lapse Gear Safe
Whether you’re capturing a serene sunset by the beach or a busy shot with people celebrating, one thing remains a priority: protecting your GoPro.
This is especially important in GoPro time-lapse videos because you’ll have to leave the camera as it is for some time. Naturally, this leaves it exposed to various elements, natural and otherwise.
To start, we need to get waterproof casting for damp conditions. If you’re filming in a wet environment or expecting rain, you’ll be thankful for this!
Also, you must be mindful of the direct sun and heat and how they can heat your camera.
You can do various things to keep it cool, including minimizing your usage by turning off the back screen once you’ve framed your shot.
7. Think About Motion
While static shots are beautiful, why not add a touch of drama to your time-lapse video? I know I mentioned earlier how the tiniest of bumps can affect your video, but this is different.
This is controlled motion.
While you’re showing the viewer the clouds zipping by, you can add a gentle pan or a slow slide to the side.
Having this can help draw in the viewers and make them feel like they’re moving in time with the subject.
Of course, you can’t manage that if you’re holding the camera, as your hands can shake and affect the shot.
Instead, you can use sliders, motorized pan heads, or tilt systems to give your video the touch of flare it needs!
8. Play With Reflections
If you don’t feel like moving your camera around but still want to add drama and depth, then reflections are the answer!
Reflections have this uncanny ability to elevate the ordinary to extraordinary! Their dual perspective of the world has an enchanting appeal that draws many viewers.
Moreover, reflections create symmetry, which is incredibly pleasing and attractive to us . Let’s not forget that with time lapses, the dynamic changes in the scene, coupled with its reflection, can be hypnotic!
You’ll have to search for water bodies, glass facades, mirrors, and shiny surfaces to create such shots.
9. Incorporate Shadow s
We often overlook shadows as they’re seen as the mere absence of light. However, while light affects the colors and brightness in your shots, it also affects how the shadows fall.
How is this important to your video? Well, shadows affect the depth and dimensions of scenes.
For instance, as the sun moves from east to west, the shadows elongate, retreat, and dance in front of our eyes. Yet, we don’t notice because of how slow this dance is with the passage of time.
In a time-lapse video, this is different. The sped-up shots can help you show the viewer so much more than what’s simply in the picture.
While I’d love to tell you to use artificial light to create shadows, natural light is almost always the best. The ideal times for shadow play are usually around sunrise, sunset, and midday.
All you have to do is find patterns through trellises, window grills, or leaves and branches, for example. For something even more dramatic, use shadows of people moving or children playing!
Frequently Asked Questions
How to do a timelapse with GoPro?
Starting a time-lapse on your GoPro is relatively easy. All you have to do is follow the steps below:
- Switch to video mode
- Tap the time-lapse mode
- Pick the regular intervals you prefer
- Set up your shot and let it record
- End it by pressing the shutter button
What is the difference between GoPro time lapse and night lapse?
As you already know, a timelapse is a video of photos compiled together. You can use video editing software to adjust its frame rate, white balance, and whatever else you need.
Remember that there are also time lapse video editing apps which may come in handy too.
Regarding the night lapse mode, it does the same thing with the addition of long exposure to highlight the stars in the sky. This way, your video is perfectly set for night photography .
How long can you time lapse on GoPro?
If your battery is charged and you have room for the video file in your memory, your GoPro can continue the time-lapse video for as long as needed.
You'll Also Like These:

Jeff Collier is an experienced film photographer who enjoys experimenting with modern digital photography equipment, software and apps. He’s also an ex-world champion triathlete and avid cyclist, clocking hundreds of km each week in the beautiful Tweed Valley of northern NSW, Australia.
Leave a Comment Cancel Reply
👋 WELCOME TO SHOTKIT!

🔥 Popular NOW:

Unlock the EXACT blueprint to capture breathtaking iPhone photos!
Shotkit may earn a commission on affiliate links. Learn more.
GoPro Time Lapse Guide: Settings, Gear and Tutorials
Ready to start shooting GoPro time-lapse videos? In this guide, you’ll learn the settings and gear you need to create your own. This guide includes a set of 5 detailed GoPro time-lapse tutorials.

Table of Contents
GoPro Time Lapse Guide
Sure, GoPro cameras are great for action sports. But they also make some incredible time-lapse videos.
In this guide, you’ll learn about the settings and gear to consider when shooting your own GoPro time-lapse. And we end off the guide with 5 details tutorials.
What is a time-lapse video?
A time-lapse video is a series of photos shot over a period of time.
The images are then combined into a video and it gives the appearance of time being sped up. It is great for showing a busy market, sunrises, sunsets, blooming flowers, etc.

1. GoPro Time Lapse Settings
Here’s an overview of the settings and considerations for setting up your GoPro time lapse shoot. For a full breakdown of the settings, check out the set of time lapse tutorials below.
Before you can decide on your settings, you’ll need to decide on what your final product will be. How long do you want your video to be? How much action do you want to capture?
- 10 Seconds: To create a 10-second time-lapse video, you’ll have to shoot for 5 minutes (1 image per second) or 25 minutes (1 image every 5 seconds) if you play back the images at a standard 30 frames per second (fps).
- 30 Seconds: To create a 30-second time-lapse video, you’ll have to shoot for 15 minutes (1 image per second) or 75 minutes (1 image every 5 seconds) if you play back the images at a standard 30 frames per second (fps).
GoPro Time Lapse Settings
Here are the settings you should consider when shooting a GoPro time-lapse:
- Resolution: (7MP WIDE) For the Hero4 Black, I recommend shooting at 7MP W(ide). If you don’t require a wide-angle, the 5MP M setting will be perfect. What size video will you create with these still photos? While you can shoot your images at the highest resolution, there are limited benefits to this. What size photo do you need to shoot a 4K time-lapse? 4K resolution (3840 x 2160) is just an 8.3-megapixel image. Even if you shoot 5-megapixel still images, this will allow you to render a 2.7K time-lapse video (2.7K video resolution is 2704 x 1520 or 4.1-megapixel stills). Remember: higher resolution images mean larger files.
- Shooting intervals: (1 image every 2 seconds) Interval options range from one image every 0.5 seconds up to every 60 seconds. For most situations, you’ll find that an interval of 2 seconds will work well. Reduce the interval (0.5 or 1 second) and your video will slow down. Increase the interval (5 to 60 seconds) and your time will pass faster (if you render at the same rate).
- Shooting length: (From 10 to 20 minutes) This depends on your shooting interval and what you’re shooting. You’ll want enough time to pass to ensure that you capture some action. A busy street will require less time than slow-moving clouds. You should place the camera for at least 10 minutes if you’re using an interval of 2-seconds. This will create a 10-second video clip – perfect for scenes with lots of action (traffic, people). I usually shoot sunsets for 1-hour or more. The sun moves slowly and you need a longer shooting length to show the movement.
- Protune: Protune is a set of features that enhance your footage. Shooting in Protune is an advanced setting and isn’t required.

There are lots of things that can be shot as a time-lapse video. The settings you should use will depend on the specific situation.
Common Time-lapse Intervals
Here are some common time-lapse ideas and some suggested shooting intervals for each one.
1 Second Intervals
- moving traffic
- fast-moving clouds (like the one I shot in Yunguilla Valley, Ecuador)
2-5 Second Intervals
- sunsets/sunrises
- slow-moving clouds
- crowds of people
10-30 Second Intervals
- moving shadows
- sun moving across the sky
- night lapse/stars (maybe 10-60 second intervals)
30-60 Second Intervals
- fast-growing plants
- construction (if there’s a lot of action – like walls going up or trusses being put in place)
- snow falling
Creating a video from your photos isn’t hard. With GoPro Studio – it will take only a few minutes.
Here are a few things to watch for when editing:
- Playback Rate: Standard video frame rate ranges from 24 to 30 frames per second (fps). The frame rate you choose will depend on the feel you want for your video. It is also affected by your original shooting interval.
- Filters: Called “Presets” in GoPro studio, these can significantly improve and change your footage. They can change aspect ratio, change day for night, and brighten your footage.
- Resolution: Most videos will be great at 1080P for YouTube. Unless you’re rendering for a professional format, this is probably all you’ll need.
Tip: If your time-lapse seems a little long (boring) just speed up the frame rate. It’s better to have a compelling 10-second clip – than a 40-second clip that seems like it’ll never end.
2. Gear for GoPro Time Lapse
Aside from the camera and the correct settings (see above) you don’t need much gear to shoot a great time-lapse video with your GoPro.
But there are some things that will make it easier. Here’s what you should consider:
- Large memory card: Even if you shoot at 5 or 7MP, the card can fill up quickly. Choose the largest card you can afford – and that your camera will accept.
- Batteries: If you want to shoot longer than one hour, you’ll want extra batteries.
- Rotating mount: This will give a sweeping motion to your time-lapse video.
Stable GoPro Mounts
There are a number of mounts that will do this. And the best mount for your shoot will depend on where you’re shooting.
- GorillaPod: I bought my first GorillaPod with my first dSLR about 10 years ago – and I’m still using it. They are expensive and they are worth it. I now own three different sizes – the newest one has a level and a ball head for fast leveling.
- Suction Cup Mount: This is best for driving time-lapse videos. I created a dozen videos of Cuenca, Ecuador while driving around the city in my truck.
Large (and fast) memory card
- SanDisk Extreme (32, 64, 128GB): While you can access the photos via USB cable, I usually remove the microSD card and copy the footage via a card reader and the included SD card adapter.
Although you can get microSD cards up to 256GB, GoPro cameras will only accept up to 128GB.
GoPro Batteries
- GoPro Batteries: I like to travel with a handful of charged batteries. If you shoot a time lapse that lasts longer than an hour, you’ll need to change your batteries. Because Hero5 is still brand new, there aren’t many aftermarket options for batteries. This should change in the coming months.
- Powerbank: For extended time-lapse shoots, you might consider direct connecting a power bank directly to your camera. I’ve done this a few times and it is amazing.
- GoPro Session (Hero4 and Hero5) doesn’t have a removable battery pack.
Rotating mounts
There are two ways to do this: Camalapse or DIY.
- Camalapse: If you’re like me, you like the sounds of DIY but it takes time. For a few bucks more, you can buy a mount that is made just for this purpose. This is the mount that we own. I’ll be publishing footage from it soon.
3. GoPro Time Lapse Tutorials
This set of tutorials shares everything I’ve learned so far about shooting GoPro time-lapse videos.
How to Create a GoPro Sunset Timelapse (Galapagos Clouds)
This was my very first time-lapse video – and it’s still my favorite. I first published this tutorial on October 1, 2014.
See all my settings below the video.
In this section, I’ll cover the specific settings needed to create a quality time-lapse video, including the shooting interval, image resolution, and playback rate.
Okay, now let’s get started:
GoPro Time Lapse Settings to Time-Lapse Video
- Decide on the shooting interval. This time-lapse was shot with one image every two seconds. Remember that it’s easy to remove extra images, but they cannot be added if they weren’t shot. This shoot produced almost 700 images (4.12GB) over 35 minutes.
- Decide on image resolution. This set of images was shot at 10MP (3840px X 2880px). This was overkill and is rated as ultra-high-definition (2160p). For a standard high-definition video, you should shoot at 1080p (1920px X 1080px). This is around a 2MP image. Because you will sometimes want to crop the video, it is a good idea to shoot a slightly higher resolution (like 5MP) which gives you some room to crop and still finish with a high-definition video.
- Decide on playback rate. I’ve found that 15 fps (frames per second) playback rate keeps things fluid without making them move too fast.
- Render and upload. Once you’ve organized your images and entered these settings, you are ready to render the video and then upload it on a video-sharing site.
What you’ll need to create a GoPro time-lapse video: a GoPro Hero3+, Gorillapod tripod, Wasabi battery, large capacity memory card (I prefer the 64GB), and some editing software .
5 Tips for GoPro Timelapse Video
- Use a solid (stable) tripod: There are lots of options (tripod, suction cup, etc.) but it is hard to beat the Joby Gorillapod. It is easy to set up and gives a death grip. If your camera moves, your time-lapse is ruined.
- Use long-life batteries: The last thing you will want to worry about is your battery dying halfway through the shot. I like the Wasabi brand. They last longer than the standard battery that comes with the GoPro. And they come with their own charger (both wall and car adapter).
- Use a huge memory card: Space is the other constraint. Shooting hundreds of images over a short period of time will quickly fill up your memory card. I like using a 32GB Class 10 microSD card – I haven’t been able to fill one in a day yet. Choosing the right image resolution will help ensure that it doesn’t fill up too quickly.
- Take time to frame it up: Even the most magnificent setting can look awful if you don’t take the time to frame it up. Follow the rule of thirds to shoot a pleasing video.
- Avoid distracting elements: One of the major problems with time-lapse videos is the close-up elements – because they are distracting. As you will see in the tutorial video below, they can ruin the whole video.
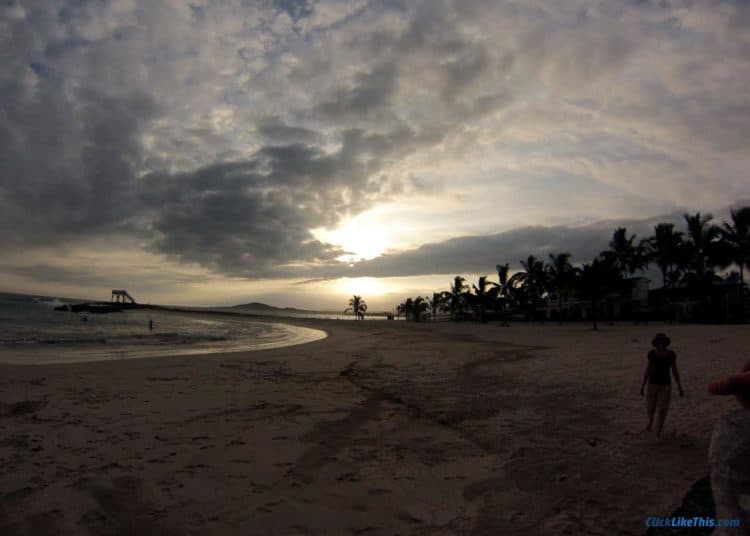
GoPro Sunset Timelapse Settings and Tips (Galapagos Beach)

A few years ago, I created my first time-lapse video while visiting the Galapagos Islands . The images and video in this section were all shot on Isabela Island. This beach is directly in front of the lodge where we were staying. This section was first published on March 25, 2016.
In this section, I review what I’ve learned since publishing my first time-lapse tutorial (previous section). Some of the settings were good – but others could be improved. I also created a new video showing how frame rate affects the feel of the video.
5 GoPro Sunset Timelapse Settings
Here are the GoPro time-lapse settings I recommend for shooting a sunset.
- Shooting Interval: This time-lapse was shot at a rate of 1 image every 2 seconds. This shoot produced nearly 700 images (4.12GB) over a period of 35 minutes.
- Image Resolution: While this was shot at 10MP (on the Hero3 Silver) it was overkill. If you want an HD video (1080P), shooting at 5MP image resolution is plenty. Shooting higher-res images means that your card will fill up faster – and the image set will take up more space on your computer.
- Playback Rate: When I first rendered this time-lapse, I output it at 15 fps. In retrospect, this was too low and made for a fairly boring video. I recommend a minimum of 30fps. See more below.
- App Connection: I recommend that you don’t use the WiFi connection during a time-lapse. It drains the batteries faster – and if you have to change batteries during the shoot, it will change the composition. I used Wasabi batteries for this shoot.
- Card Size and Speed: You’re not going to want to skimp on your card size. High-resolution images (shot every second or two) will fill up a small card quickly. If you are planning on shooting a few time lapses in one outing, I recommend a 32GB card (at least). And speed matters. I recommend the SanDisk Ultra card – in either 32 or 64GB.
Bonus Tip: Choose an evening when there is some cloud movement. The video below was shot the day before – and is much more dramatic. While the clear sky has its own appeal, I definitely favor the painted, moving clouds.
Best GoPro Frame Rate Setting for Sunset Time Lapse
What’s the best frame rate setting? It depends. If the sunset time lapse is part of a longer video, you’ll want to have a higher frame rate – so it goes faster. If the sunset timelapse is the purpose of the video, a lower frame rate is fine – it will make a longer video.
My GoPro Setup: Sunset Timelapse
- Hero3 Silver: This was my first GoPro and still shoots a respectable quality video.
- Joby GorillaPod: You’re going to want a stable mount. If your camera moves at all during the shoot, it’s going to be ruined. I’ve had great success with the GorillaPod.
- Wasabi Batteries: You’re not going to be happy if your battery dies during your shoot. If you have to change your battery, your composition will change. In my tests, Wasabi batteries last longer than the GoPro ones – and they cost less.
- SanDisk Ultra Memory Card: You are going to be shooting hundreds of large images. You’re going to need a memory card that can keep up. Depending on your shooting rate and image resolution, your camera might reduce image quality so your card can keep up. For this shoot, I used a Class 10SDXC card, but have now upgraded to the Extreme PRO series.
5 Required GoPro Hero3 Timelapse Settings
With these GoPro Hero3 timelapse settings , you’ll be ready to create your own. Here are the settings, gear, and tips you need to create some great time-lapse clips.
In this section, I’ll share the time-lapse settings I use to create videos with my GoPro Hero3 camera.
In addition to the Hero3 time-lapse settings, you’ll also learn how to create your own time-lapse video. I also share a list of some great time-lapse subjects , complete with suggested intervals.
5 GoPro Hero3 Timelapse Settings
Here are the GoPro Hero3 timelapse settings I used for the above sunset timelapse.

- Shooting Interval . This time-lapse was shot at 1 image every 10 seconds. This rate generated 484 images over 90 minutes. This was an ideal interval because the shoot was so long. For a shorter time-lapse, you can also shorten the interval (to 1-2 seconds). See more on Shooting Intervals below.
- Shoot at 5MP Resolution . I shot the still photos at 11MP (on the Hero3 Silver) – and it was higher than necessary. For an HD video (1080P) 5MP image resolution is plenty. Higher-resolution images will unnecessarily fill up your card.
- Turn Off Your WiFi Connection . I recommend that you don’t use the WiFi connection during a time-lapse. It drains the batteries faster – and if you have to change batteries during the shoot, it will affect the composition. Not only does this affect the final product – it wastes time in post-production. Even without WiFi, 90 minutes is a long shoot and I had to change the battery after about an hour. (You’ll see the hiccup in the video at 0:19.)
- Choose a Large and Fast Card . You’re not going to want to skimp on your card size. High-resolution images (shot every second or two) will fill up a small card quickly. If you are planning on shooting a few time lapses in one outing, I recommend a 32GB card (at least).
- Use a Stable Mount . I can’t stress this enough. While this isn’t an on-camera setting, the success of your shoot depends on a stable camera mount. If it moves a little, it can be hard to watch. If it moves a lot – you’ll need to start over. You’ll need to think about people-bumping, wind-blowing, and battery-changing. For this shoot, I used the SLR GorillaPod (pictured below).
Tip: Since this shoot, I bought the Pedco UltraClamp. This thing is strong! (I even shot a driving time lapse and it stayed tight for two hours on top of a bus!)

How to Create a GoPro Time Lapse Video
Unlike the newer models, the Hero3 and Hero3+ cameras don’t automatically create a time-lapse video.
Don’t worry, it’s super easy to create your own time-lapse video with a GoPro Hero3 camera.

To create a time-lapse with your Hero3 camera, you’ll need to follow these two steps:
- Shoot the photographs. You’ll first shoot your set of time-lapse images. And you’ll need anywhere from a few hundred to a few thousand photos. See the above settings.
- Edit into a video. This is done on your computer. Using free editing software, it’s super easy. I’ve embedded a video tutorial at the end of the post.

These are the GoPro Hero 3 timelapse settings that I’ve used. What settings are you using to sh oot a time-lapse video with your Hero3?
How to Create a GoPro Sunset Time Lapse (Morden, Bay of Fundy)
In this section, you’ll learn how to create a GoPro sunset time-lapse video. I first published this tutorial on September 5, 2015. The settings follow the video.
To create a sunset timelapse video, you’ll need four things:
- A steady tripod. I favor the Gorillapod SLR. It is stable enough for a heavy DSLR – so it doesn’t budge with a GoPro.
- GoPro camera Any version will work. This video was shot with the Hero4 Black.
- Charged batteries. You should bring an extra one or two. This was shot with Wasabi batteries.
- A great location. It’s hard to beat the Bay of Fundy (Nova Scotia) for a sunset. Morden is a family favorite. We shot this footage while having a fire on the beach . You can see the occasional puff of smoke drift across the video (from left to right).

GoPro Sunset Time Lapse Settings
I shot one 12MP image every 0.5 seconds. While this should have produced 120 images/minute, the camera produced 90 images/minute. I’m not sure why, but the result is still good.
This was shot from 7:50 PM to 9:07 PM – a total of 77 minutes. Here are all the settings I used:
- Time-lapse interval: 0.5 seconds
- Resolution: 12MP (4000 x 3000 pixels)
- Shooting time: 77 minutes
- Total image count: 6794 (14.6 GB)
- Location: Morden, Nova Scotia (Bay of Fundy)
- Shoot date: August 1, 2015
How I Rendered the Sunset Time Lapse
To create the video, I used GoPro Studio. Their free software is very easy to use.
Because I started with a battery at half capacity, I had to change the battery during the shoot – and it caused the angle/orientation to be off. You will notice this in the video and I talk more about it below.
- Playback rate: 60 frames/second
- Edited with: GoPro Studio
- Gear: GoPro Hero4 Black, Gorillapod SLR, Wasabi batteries
In the video below, the first 12 seconds are played back at 3X faster (180 frames/sec) than the rest of the video.
I then replay the video at standard (60 frames/sec) speed. This frame rate is overkill. See the end of the post for what I learned from this shoot.

What I Learned From This Shoot
I learned four lessons from this shoot:
- From a previous time-lapse, I learned that I need to shoot at a higher frame rate (it was at one image every 5 seconds). I went too far the other way on this shoot and shot one image every 0.5 seconds – or ten times as many images. This was too many for a sunset time lapse. I plan on shooting the next sunset time lapse at a rate of one image every 1 or 2 seconds.
- I set up in a traffic area. Because of this, I had to crop the bottom half of the video because of the number of close-up people walking by. (And I think there was a little intentional photobombing.) My next sunset time-lapse will be set up in a not-so-visible area and with less up-close activity.
- I’m going to start each shoot with a fresh battery . As you might notice in the video, the camera angle changes slightly. This is because I had to change the battery and I accidentally adjusted the angle. While I was able to fix it (mostly) it is still a distracting element. Because they last longer than the standard GoPro batteries, I use Wasabi brand. They also cost much less.
- I wish I had let the sky go completely dark before stopping the time-lapse. I think the dramatic change from bright sun to darkness would have been more dramatic.
Watch for the sweeping sun along the cliffs at 0:16. Want more? Here are 10 Bay of Fundy timelapse videos .
How to Shoot a GoPro Driving Time Lapse
In this post, I share the five steps to shoot your driving time-lapse and the four settings to create your driving time lapse .
But first, here’s the finished product:
How to Create a Cloud Timelapse Video (Ecuador)
In this section, I’ll share the specific settings I used to create a cloud timelapse video in Ecuador’s Andes mountains.
Check out the tutorial below.
But first, here’s the final product:
This was shot from our apartment in Santa Isabel, Yunguilla Valley (located 90 minutes from the city of Cuenca).
When I shot this, we were making plans to return to Canada. And we didn’t want to forget what our back deck view had been for three years.
But first, here is the final product:
Settings to Create a Cloud Timelapse Video
Here are the settings I used to shoot this cloud timelapse.
- Shot 1 image every 5 seconds with my GoPro Hero3 Silver
- Resolution: 11 MP
- 3744 Images / 16.4 GB
- Length of shoot: Just over 5 hours
- Shoot Date: February 1, 2015
- Location: Yunguilla Valley, Ecuador. Located 90 minutes from the city of Cuenca
- Edited with: GoPro Studio (free software by GoPro)
- Camera mount: This was one of my more bizarre ones. I mounted the GoPro on the end of a three-foot extend pole and then mounted that to a full-size tripod (see image below). Since the camera has such a wide-angle view, and I was shooting from my back deck, I wanted to put the camera past those distracting elements and capture just the cloud movement. Not only did that not work, but the wind also moved the camera and affected the image quality. Live and learn…
See post-production details below the image.

Post Production: Create a Cloud Time Lapse
The first thing I did was delete the spoiled frames from battery changes and distracting elements.
Inside GoPro Studio, I imported all the images and created a video at 48 fps . When I played this back, it was too boring. The clouds didn’t seem to move fast enough. I then boosted the playback rate by 50% (the software shows it at 150%) which created an effective 72fps.
Since I was shooting 12 images/ minute, this means that each hour of cloud movement was reduced to 10 seconds of video.
While GoPro Studio is no longer available, there are still lots of great GoPro video editors to choose from.
What I Learned From This Project
I learned two lessons from this cloud timelapse project:
- The biggest flaw with this time-lapse is that the camera wasn’t steady . As mentioned above, I had the GoPro on the end of a 3′ extend pole that was mounted on a full-size tripod. The wind easily moved the camera, causing a shake and some distracting movement.
- For longer shoots, I can shoot fewer images and then reduce the playback frame rate. The final product will be the same and I’ll need fewer images. For example, for my next cloud time-lapse, I think I’ll try shooting a frame rate of 1 image/ 10 seconds (6/min) with a rendering frame rate of 30fps.
For context, here is a still shot of the valley.

I’m pretty happy to have this video. We watched this cloud activity every day for three years – and now we’ll never forget what it looked like.
Create GoPro Tide Timelapse Video (Bay of Fundy)
Learn how to shoot a tide timelapse video with your GoPro camera. This video was shot in Wolfville, Nova Scotia.

A few weeks ago, we happened upon low tide in Wolfville, Nova Scotia. The small basin in front of Waterfront Park was completely empty. It looked like a giant, empty mud puddle.
We set up the GoPro and started shooting. Over the next 80 minutes, the basin completely filled with the tidal waters of the Bay of Fundy.
In the following video, I explain the whole process. Below the video, I share all the specs and settings used in this shoot.
How to Create a GoPro Tide Time Lapse Video
How I Created This GoPro Tide Time Lapse
As you can see in the following images, I have the camera in an open (non-waterproof) mount. With this mount, I can connect an external power source. I did this because the battery wasn’t 100% – and I didn’t know how long it would take to fill the basin.
In the end, it didn’t matter. My Wasabi battery lasted the full 81 minutes and still had charge left.

Settings Used to Create the GoPro Tide Time Lapse
- Camera settings: 1 image every 2 seconds (30 images/minute) at 7MP resolution.
- Total shoot time: 81 minutes. Total of 2430 still images.
- Location: Reservoir Park, Wolfville, Nova Scotia, Canada. Shot in front of the gazebo.
- Gear Used: GoPro Hero4 Black camera, Pedco UltraPod II tripod, Wasabi battery.
- To render the video , I used GoPro Studio. In GoPro Studio, I rendered the video at 2 speeds. The fast speed was rendered at 150 frames per second (fps) and the slower speed at 60 fps.
Overall, I’m happy with the final product. Here’s what I learned from this time-lapse shoot:
- I can reduce the time-lapse interval for shooting slow-moving clouds and water. For my next shoot, I’ll use 5 frames per second.
- I think it would have been more dramatic to mount the camera higher and angled down. The camera was set up just a couple of meters above the high-water mark, making the water appear to be almost on the same level. If I had mounted it higher, I could have cut out more sky and shown the dramatic rise in water level.
- The music I chose was too short. At 0:59 in the final video, the music stopped and then restarted. It felt like the video must be over, but it had another 13 seconds to go. I should have either chosen the correct length or blended the two clips together better. ( Update Nov. 12, 2015: To fix the weird music edit, I just replaced my audio track with one on YouTube – without having to render and upload a new video. Such a time saver! )
To give some context to the shoot, here are a couple of images from the park in Wolfville, Nova Scotia.

What is your favorite setting or mount for shooting time-lapse video? What’s your question about creating a GoPro time-lapse video?
Thursday 13th of June 2019
Hi, I am using Go Pro Hero 4 SE. I can't found resolution settings on video lapse menu, but i only can use it on timelapse menu.
Monday 13th of May 2019
I’ve been asked to shoot a time lapse video of a stage being built (8 hrs) with a GoPro camera... I don’t know what model GoPro I’m using yet ... for an 8 hrs time lapse video what settings should I use ? Power? Card? Thank you
Bryan Haines
Tuesday 14th of May 2019
You'll want to power the camera with a powerbank or direct connect to a laptop. The in-camera battery won't last much more than 1 hour each.
For memory card, larger is usually better. The minimum size needed depends on many factors - shooting resolution, interval, etc. Without knowing your objective of the time lapse, it's hard to know the best settings.
Wednesday 10th of April 2019
Shooting a house construction over the course of the day using two Hero 3s. Probably no power available, so will need a power bank I assume. Recommendation on card size to shoot over the course of a day? Any other suggestions? Thanks.
6 Steps to Create a GoPro Travel Timelapse Video: Settings / Gear

Here are the 6 steps you need to create a travel time-lapse video with your GoPro camera. I include the settings, gear, and tips for composition.

While exploring Cuenca, Ecuador a few months ago, we were in a nostalgic mood.
We had just decided to return to Canada after almost six years in Ecuador. And the reality of not living in Ecuador was starting to sink in.
We had lived in the city for three years and had spent countless days in the city center, especially around Parque Calderon. While Dena was shooting some stills, I shot a set of short time lapse videos with my GoPro camera.
In this post, I’ll share how I did it, including the settings, composition, and gear.
How to Create GoPro Time Lapse Video
In this post, you’ll read about:
- 6 steps to shooting a GoPro time-lapse video
- My time lapse settings and stats
- The gear I used
- What I learned from this shoot
- The final product: my GoPro travel time lapse from Cuenca, Ecuador
Note: As you’ll probably notice, many of the photos have a ClickLikeThis watermark. This post was originally published there (a site we also own) but moved this post here to expand on the Ecuador content. Update November 2022, ClickLikeThis has been renamed GudPixel .
6 Steps to Shooting GoPro Time-lapse Video
- Use a stable mount: If the mount isn’t stable, the video will make you seasick. I tried to steady the camera on a cement wall to get cloud movement at a look-off point over Cuenca. I thought I was doing okay until I output the video. It was all over the place. Even the stiff wind can ruin your time lapse if your camera is just sitting on a table or a ledge. I used a Pedco UltraClamp for all the videos in this time lapse. {Read my UltraClamp review}
- Use a fast / large memory card: If you are shooting at 0.5 / 1 images per second, your card will fill up fast. And with too many incoming images, the quality can suffer. I’ve heard that the camera automatically lowers image resolution if the card isn’t fast enough. (I used SanDisk Ultra on this shoot and I’ve since upgraded to SanDisk Extreme .)
- Get Up-Close: A few of the locations I set up in were too far from the subject. Because of that, I had to crop into the video to eliminate the boring foreground. The GoPro has such a wide angle view, you can get much closer than you think.
- Shoot Longer Than You Need: Sometimes, nothing happens. Maybe the clouds disappear, people stop passing by (or lots of people pass by) and you just don’t get the scene or feel you want. You might not notice this until you edit your video. Let it run a little longer than you need – it might make the difference of getting the images you want.
- Bring extra batteries: You are going to eat through batteries. I’m a big fan of Wasabi battery for GoPro . I have them for all our GoPro cameras (from Hero3 Silver and up to the Hero7 Black ). They last longer and cost less than GoPro’s own battery. I have three batteries for each camera – enough to last all day.
- Don’t worry about a few spoiled images: To check on the battery life or space remaining, you might need to stick your head in the shot. Don’t worry about this. You can edit them out, by playing images back at 15 – 30 frames per second, it’s impossible to notice a few missing frames.
Here are a few shots of me – photobombing my own time lapse…

6 GoPro Time Lapse Settings and Stats
For this time lapse, I used the following settings:
- Shot 1 image every 5 seconds with GoPro Hero3
- Resolution: 11 MP
- 2530 Images / 13.4 GB
- Shoot date: March 2, 2015
- Edited with: GoPro Studio (free software by GoPro)
- Playback at 30 fps, output to source resolution (3840 x 2880), no adjustments to speed, deflicker or fisheye removal. I like the fisheye and it keeps more of the scene in the frame. Output to MOV format in High quality. I added a stock audio track and text watermark in the bottom right corner.
Recommended Time-lapse Gear
- GoPro Hero3 Silver: This is my first GoPro and the only one I had while in Ecuador. I love this thing!
- Wasabi Batteries: I’m a fan of long-lasting batteries. And they cost less than GoPro’s own battery. Nice!
- Pedco Ultra Clamp: This beauty will clamp to anything. I’ve clamped it to buses, benches, tables and the front of an antique door at Cuenca’s famous flower market. One of the best camera mounts available. It’s not just for GoPro. This mount will keep your camera steady like nothing else.
- Sandisk Ultra Micro SD Card 32 GB: This was a decently fast card when I bought it – 2.5 years ago. I now use this ultra card in my GoPro Hero (the entry-level GoPro) and have bought Sandisk Extreme cards for my Hero3 and Hero4.

GoPro Travel Time-Lapse: Cuenca, Ecuador
Here’s the finished product:
Watch on YouTube
Interested in more travel photography? Check out our 13 Lessons: DSLR Basics for Travel Photography
What I Learned From This Shoot
I learned two lessons from this shoot:
- City shots, with close up movement (cars and people), should be shot at a higher frame rate . These were shot at one image every 5 seconds (12 images per minute). And the results are choppy.
- I need to get closer to my subjects. While they don’t look that far away in the video, I had to crop in significantly before rendering the video.
Overall, I’m happy with the video. With a higher frame rate, I could have captured more detail and made a more fluid final product.

Hi, I'm Bryan Haines . And I'm a co-founder of Storyteller.Travel . I'm a traveler and photographer.
I also blog about photography on Storyteller Tech .
Leave a Reply Cancel reply
Your email address will not be published. Required fields are marked *
- Your Credit Estimate Credit On File
- Your Credit Estimate
- Your Zip Code
Why we ask for your zip code.
Your zip code helps us provide you with the most accurate vehicle pricing and vehicle availability.
Why we estimate your credit score.
We estimate your credit score to give you an idea of your monthly payments. To get an accurate payment amount, complete our credit application by clicking the Start Credit Application button below.

How To Make a Time-Lapse Video of Your Next Road Trip
Written by, jordan r. july 22, 2016 july 22, 2016.
Want to show the world how it looks from your perspective? Have a nice morning drive or a sunset view on your evening commute? Plans to drive on an All-American Road or drive through the mountains?
You can easily capture a drive and quickly show it in a time-lapse video, and GoPro cameras make it really easy. Whether you want to have a time-lapse to quickly show everyone your experience or you just want to have a quick way to relive an important, fun or beautiful moment, try a time lapse video.
All you need is a few pieces of equipment and the right camera settings, and you can make a really cool time-lapse video anywhere.
Different Methods for Shooting a Timelapse Video on a GoPro
Interval settings that take photos one-by-one
This is very easy way to make a time-lapse with a GoPro and GoPros are very high-quality, so the footage will look beautiful. There are two GoPro options for this method. First is set an interval rate for the camera to take pictures and then upload them into GoPro studio, and the program will create the time-lapse video for you.
Or there’s the new special interval "Time Lapse" setting that GoPro added to the new Hero4 Silver or Black. This new setting takes still photos in 4k resolution, and then the GoPro automatically puts them into a video file once filming is complete.
Shoot a video over a period of time
Set up the camera, press record, and leave it alone. The result is a time-lapse video with no time jumps or frames missing. This will look more smooth or less “jumpy” but since this method is constantly recording, it takes up a lot of memory space, which will require a lot of big memory cards and a lot of memory on the computer used for film editing.
Also, since the camera is recording actual time, you have to put the footage into your computer and then edit the video to play at a faster frame rate.
Necessary Equipment for a Time-Lapse Video in the Car
- Fully charged GoPro with an already formatted memory card or two. Do the math to figure out how much memory you need.
- How long is your trip? If it is more than 2 hours, you will either need to buy multiple batteries or a special accessory that will allow your GoPro to hook up to a power source.
- A level surface and a mount to keep it in place. There are a variety of mounts out there. Download the GoPro
- Your car (duh)
Time-Lapse Camera Settings for the Drive
As discussed, there are two ways to go about this and if you are making a time-lapse from video footage, you don’t need to worry about this part. But if you are doing a time-lapse that is a compilation of still frames taken at intervals, your interval settings are very important, and you need to consider a few things.
- How long do you want the video to be?
How much time-lapse do you want? The best part about time-lapse is that it provides the imagery of everything in a condensed time so 30 seconds of footage actually shows a ton footage!
- How long is your car trip?
If you are going on a shorter ride, you can set it at a faster interval, but if are going on a long car ride, you might want to use a longer interval. But, that’s up to you and your purpose of the time-lapse.
So what will a 30 minute car ride get you? Let’s start with the basics.
To get one second of film, you need 24-30 pictures. This is because 1 second of film consists of 24 or 30 frames per second (fps), depends on what you want, but these days 30fps is fairly standard.
To make the math a little easier, all of the below examples are going to relate to film using 30 fps.
So if the camera is set at .5 seconds, in one minute the video is 4 seconds long -- in 60 seconds 120 photos have been taken, so that is 120 frames and you need 30 frames for 1 second, so 120 frames / 30fps = 4 seconds of footage.
So, a .5 second interval on a 30 minute car ride will produce 2 minutes of footage.
Are you traveling for two hours? A .5 second interval for 2 hours will result in an 8 minute time-lapse video, and that’s a pretty long time-lapse video and it could be a little boring.
Try a 5 second interval. In one minute the camera has taken 12 photos. In 120 minutes or 2 hours, you’ll have 48 seconds of timelapse footage.
However, if you are trying to capture a timelapse video of a long road trip, you want to make the intervals a little longer, maybe 10, 15 or 30 seconds, otherwise you will have too much footage.
The problem with longer intervals is that the final video might look little less fluid, than the a video with faster intervals. This is because you have traveled much farther than you did in 5 seconds.
However, if you are traveling on a long stretch of highway where the terrain doesn’t change very much, it won’t be as drastic looking as you think. The same thing applies to slow traffic.
So, how long is your long road trip? Here is what you will get a these intervals.
10 seconds = 6 photos per minute. In 5 minutes there is 1 second of footage, so in one hour there is 12 seconds of footage. In a 4-hour drive you have 48 seconds of footage.
15 seconds = 4 photos per minute. In 7.5 minutes there is 1 second of footage. So in one hour that is 8 seconds of time lapse footage. So an 8-hour drive at a 15 second interval will produce one minute and four seconds of footage.
Things to Keep in Mind
Be strategic with your GoPro placement. The front window pane can produce a glare and ruin your footage. Each car is different so you will need to test it out to make sure you don’t get a glare.
Test out the time intervals for yourself to see what looks best to you.
Ta-da! You’ve made your very first time-lapse video. Show us what you made on our Facebook or Twitter. Who knows…we may have a contest some day.
Let’s get you the best deal! Please enter your email address and zip code to receive exclusive deals.
HERO11 Black: Time Lapse Settings And Resolutions
Sep 15, 2022 • block, information.
- TimeWarp Video
- Time Lapse Video
- Time Lapse Photo
- Night Lapse Video
- Night Lapse Photo
- Star Trails
- Light Painting
- Vehicle Lights
- 100 Bit Rate
- HEVC/H.265 file format
- RealTime Audio
- Zoom in Wide, Linear Digital Lenses
- Resolution Options: 5.3K, 5.3K (4:3), 4K, 4K (4:3), 2.7K (4:3), 1080p
- Digital Lens options: Wide, Linear, and Linear+Horizon Lock (Leveling for 4:3 aspect ratio)
- Speed options: Auto, 2X, 5X, 10X, 15X, 30X
- RealTime Slo-Mo (except 5.3K)
- 150 or 100 Bit Rate
- HEVC/H.265 .mp4 files
- Resolution options: 5.3K 5.3K (4:3), 4K, 4K (4:3), 2.7K (4:3), 1080p
- Interval options: 0.5s, 1s, 2s, 5s, 10s, 30s, 1m, 2m, 5m, 30m, 60m
- Digital Lens options: Wide Linear
- Zoom options in Wide and Linear Digital Lenses
- .jpg file format
- Digital Lens options: Wide and Linear
- Zoom options in Wide and Linear
- Raw Photo (Wide) in intervals 5s and longer
- 150 or 100 Bit Rate (except 1080p, 100/60)
- Shutter options: Auto, 2s, 5s, 10s, 15s, 20s, 30s
- Interval options: Auto, 4s, 5s, 10s, 15s, 20s, 30s, 1m, 2m, 5m, 30m, 60m
- Raw Photo (Wide)
- Resolution options: 5.3K, 5.3K (4:3), 4K, 4K (4:3)
- Shutter options: 0.5s, 1s, 2s, 5s, 10s, 30s
- Interval: Auto
- Digital Lens: Wide
- Trail Length options: Short, Long, Max
- Format: Video
- Scheduled Capture options: On, Off
- Duration Limit options: No Limit, 15s, 30s, 1min, 5min, 15min, 30min, 1hr, 2hr, 3hr
- Timer options: Off, 3s, 10s
- Zoom option in Wide
- Bitrate: 150
- Shutter options: 0.5s, 1s, 2s
IMAGES
VIDEO
COMMENTS
Time Lapse settings. GoPro Time Lapse settings include: Resolution: Shoot at up to 5.3K resolution with the newest GoPro HERO12 Black camera.; Interval: This is how often GoPro cameras capture a still—anywhere from half a second to an hour. Lens: Choose Wide, Narrow or Linear just as you would in normal video mode. Format: Choose between Time Lapse Video or Photo mode.
In total, 48 seconds of footage. You can accordingly plan your interval depending upon your shooting length. I recommend 5-10 seconds under daylight conditions. For night or day to night time-lapses set it to at least 15, better 30 seconds or more in case of long drives.
A longer shutter speed, and the slight blur that comes with it, will often give a better sense of motion and help make your time lapses a bit smoother. 10. Bring extra memory cards. If you're not using your GoPro in loop mode, filming your car journeys or road trip will take up a lot of space.
2. Pick the Right Intervals for Time Lapse. The intervals you pick are where the magic of time-lapse happens. In simpler terms, the intervals are the time gaps between each shot your GoPro takes. For instance, if you set the intervals for each shot at two seconds, the GoPro will snap a photo every two seconds.
Open the program and select 'Step 1 - View & Trim', then 'Import New Files'. Select the folder that contains your images and GoPro Studio will do the rest. Play around with the settings under the 'Advanced Settings' button until you have the desired output. 'Add Clip to Conversion List' and 'Convert'.
2. Use a Tripod. Without a tripod, your images will not blend properly into a watchable video. I travel with a Joby Gorillapod (the one for DSLR cameras) which works well for the GoPro and the much heavier DSLR cameras. This way I don't have to carry two tripods. The attachments and mounts come with the GoPro kit.
A short video of our 2012 US road trip for friends and family. We were on the road for 4 weeks, from May into June. We stopped at a bunch of places along t...
Here are the GoPro time-lapse settings I recommend for shooting a sunset. Shooting Interval: This time-lapse was shot at a rate of 1 image every 2 seconds. This shoot produced nearly 700 images (4.12GB) over a period of 35 minutes. Image Resolution: While this was shot at 10MP (on the Hero3 Silver) it was overkill.
Learn more. Here are the 6 steps you need to create a travel time-lapse video with your GoPro camera. I include the settings, gear, and tips for composition. While exploring Cuenca, Ecuador a few months ago, we were in a nostalgic mood. We had just decided to return to Canada after almost six years in Ecuador.
If the interval is set to 60 seconds (one frame capture every minute), the camera will need to be recording for at least 30 minutes in order to have one second of Time Lapse Video Footage. When recording Time Lapse Video, the time displayed on the camera's LCD screen(s) reflects the amount of captured video footage; not the time that has ...
Have you seen those cool time lapse driving videos that other folks make and you've wanted to make some of your own? Good for you! The cool thing is that it'...
The GoPro Hero 11 introduces some really awesome new time lapse modes that are super easy and fun to use. This video explains how to use every one of them, i...
Are you traveling for two hours? A .5 second interval for 2 hours will result in an 8 minute time-lapse video, and that's a pretty long time-lapse video and it could be a little boring. Try a 5 second interval. In one minute the camera has taken 12 photos. In 120 minutes or 2 hours, you'll have 48 seconds of timelapse footage.
Hello, I'm planning to do a long road trip and thought about buying a mount to mount the GoPro form inside the windshield looking outside the whole time. The road trip will be around 20 hours of driving and I'd like to record all of them at 5.3k 60FPS, the car has a 12V USB charging port.
HERO10 Black's settings Time Lapse are below. For information on how to change your settings in the camera, please visit our How to Use Presets article. TimeWarp Video: Time Lapse Video: Time Lapse Photo: Resolution: 20MP (5184x3888) Night Lapse Video: Using Manual Shutter Options with Night Lapse Video: Night Lapse Photo:
Time-lapse. GoPro time-lapse captures a series of still images at a set interval, which are later combined into a video. Time-lapse is best suited for capturing slow-moving subjects or for stationary shots, such as capturing the movement of stars or the changing of seasons. Time warp. Time warp captures video footage and speeds it up to create ...
In this video I was conducting a test to see what mode (photo or video) gave the best results while capturing a driving time lapse also known as a drivelapse...
HERO11 Black's Time Lapse settings are below. For information on how to change your settings in the camera, please visit our How to Use Presets article. Shooting modes that fall under Time Lapse are: TimeWarp Video; Time Lapse Video; Time Lapse Photo; Night Lapse Video; Night Lapse Photo; Star Trails; Light Painting; Vehicle Lights
Settings for road trip time lapse? I've never done a time lapse before, so I'm looking for recommendations on setting it up. I'm about to embark on a 24hr drive, and will set up Hero 3 white as a dash cam, with usb power. With a 64gb card, what interval do I use? I'd like speed up footage to make a 10-20 second high speed clip. If it's any help ...
Road Trip Time Lapse . I am taking a 7-9 hour road trip with the family and want to make a time lapse. What time interval would you suggest that eats up that time but won't look super choppy? ... There are suggestions in the GoPro owners manual or you can do a quick Google to see what others are using. Even a YT dive will get you an answer ...
GoPro 360° time lapse in car trick - learn how to set up your GoPro to capture a360-degree time-lapse shot. Perfect for an epic road trip!Filmed on Panasonic...
Any time you're taking a long activity and turning it into a shareable video clip, you're going to want to default to a GoPro Time Lapse or TimeWarp. Now, add low light into the equation, and you're in luck with Night Lapse Video. The ideal GoPro settings to capture a solar eclipse are: Mode: Night Lapse Video; Resolution: 5.3K 8:7
It completely depends on the roads you're driving on. If you're going in a perfectly straight line on the highway, One frame every 30-60 seconds is fine. If the roads are twisty, you'll want a much shorter duration. Highly recommend shooting in a TimeWarp instead of a TimeLapse. 3.