A prompt is a short text phrase that the Midjourney Bot interprets to produce an image. The Midjourney Bot breaks down the words and phrases in a prompt into smaller pieces, called tokens, that are compared to its training data and then used to generate an image. A well-crafted prompt can help make unique and exciting images.
Basic prompts.
A basic prompt can be as simple as a single word, phrase or emoji 😊.
The Midjourney Bot works best with simple, short phrases that describe what you want to see. Avoid long lists of requests and instructions. Instead of: Show me a picture of lots of blooming California poppies, make them bright, vibrant orange, and draw them in an illustrated style with colored pencils Try: Bright orange California poppies drawn with colored pencils

Advanced Prompts
More advanced prompts can include one or more image URLs , multiple text phrases , and one or more parameters
Image URLs can be added to a prompt to influence the style and content of the finished result. Image URLs always go at the front of a prompt.
Read more about Image Prompts
The text description of what image you want to generate. See below for prompting information and tips. Well-written prompts help generate amazing images.
Parameters change how an image generates. Parameters can change aspect ratios, models, upscalers, and lots more. Parameters go at the end of the prompt.
Read more about Parameters
Prompting Notes
Word choice.
Word choice matters. More specific synonyms work better in many circumstances. Instead of big, try tiny, huge, gigantic, enormous, or immense.
Plural words and Collective Nouns
Plural words leave a lot to chance. Try specific numbers. "Three cats" is more specific than "cats." Collective nouns also work, “flock of birds” instead of "birds.”
Focus on What you Want
It is better to describe what you want instead of what you don’t want. If you ask for a party with “no cake,” your image will probably include a cake. To ensure an object is not in the final image, try advanced prompting using thee --no parameter .
Prompt Length and Details
Prompts can be simple. A single word or emoji will work. However, short prompts rely on Midjourney’s default style, allowing it to fill in any unspecified details creatively. Include any element that is important to you in your prompt. Fewer details means more variety but less control.
Try to be clear about any context or details that are important to you. Think about:
- Subject: person, animal, character, location, object
- Medium: photo, painting, illustration, sculpture, doodle, tapestry
- Environment: indoors, outdoors, on the moon, underwater, in the city
- Lighting: soft, ambient, overcast, neon, studio lights
- Color: vibrant, muted, bright, monochromatic, colorful, black and white, pastel
- Mood: sedate, calm, raucous, energetic
- Composition: portrait, headshot, closeup, birds-eye view
Table of contents
- Midjourney Website
- Midjourney Discord

A Complete Guide to Writing Perfect Midjourney Prompts – With Examples!
Learn how to write well-crafted Midjourney prompts to create unique and extraordinary images. Start with the basics of good prompt writing in Midjourney and discover how to use parameters to influence the result.
Writing a good prompt makes all the difference when generating the perfect image in Midjourney.
In this 4-part Midjourney Prompting Guide, I will show you how to use your creativity and write an excellent technical prompt to generate the images you have in mind!
Table of Contents Midjourney Prompts
- Part 1: How to write a good Midjourney Prompt + Examples
- Part 2 : How to optimize your Midjourney images
- Part 3: Essential Midjourney Settings for better prompting
- Part 4: How to use Midjourney Parameters to optimize your prompts

Add me on Instagram @sprinkleofai for more daily tips, free Midjourney prompts, and artist shout-outs!
How does Midjourney work
Midjourney generates high-quality images based on a short text input called a Prompt . The Midjourney Bot will break down the words and phrases in your prompt into smaller pieces called tokens .
Besides Midjourney, you can use tools such as DALL-E and Stable Diffusion to create stunning visuals by text-to-image .
Learn how to get started with Midjourney
New to Midjourney ? Check my handy free guides for beginners to set up Midjourney in just 10 minutes and learn how to write the perfect Midjourney prompt to get started right away!
Free Midjourney Prompt Sets
Discover my free Midjourney Prompt Sets and level up your creativity! I can’t wait to see what you’ll make with them. Check my Instagram for more examples!

TLDR – Most essential takeaways
– Write your prompts short and to the point, focus on the details – Set the correct parameters to optimize your final images – Use the /prefer setting to change your defaults like aspect ratio – Turn on the /remix setting to alter prompts before running a variation
Advanced Midjourney Text Prompts
The Midjourney Bot can create images based on a single word, phrase, and even emojis.
However, to create more unique images, it’s necessary to give the Midjourney Bot a precise description of what you want to see .
Advanced prompts can include multiple text phrases , image URLs, and parameters. Here’s an example of an advanced text prompt with multiple text phrases and parameters:

With just this short phrase and two parameters, you can:
- set the composition
- set the gender
- set the emotion
- set the nationality
- set the fashion look
- set the action
- set the scene
- set the location
- set the time period
- set the weather
- set the time of day
- set the color
- set the lighting
- set the aspect ratio
- exclude a subject
Midjourney Prompt Length
Midjourney has its own default art style. When you write a short prompt, Midjourney will rely more heavily on this, while a more descriptive prompt can be used to create your own unique look .
One of the biggest misconceptions about Midjourney is that using lengthy prompts means you will automatically see better and more detailed results. This isn’t the case.
Midjourney can only interpret a set amount of tokens. Therefore, it’s best to keep your prompts short and concentrate on the main concepts you want to see in your image.

How to analyze your Midjourney Prompts
You can test your prompts by using the Shorten command . Simply type /shorten in your Discord text bar, followed by your prompt.
Midjourney will analyze the contents and show you how to use alternative wording to make your prompt more effective.
Details Matter
When writing your Midjourney prompts, it’s essential to be clear about the context and details that matter to you and want to see reflected in the images Midjourney generates. The Midjourney Bot will randomize anything you leave out.
Using fewer words in your prompt means each word has a more powerful influence on the result. Remove words when possible, and use commas, brackets, and hyphens to organize your prompts.
How to Separate Midjourney Prompt Concepts
Midjourney can consider two or more separate concepts individually when using a double colon (::) as a separator.
This is helpful when you want to focus on both your subject and the background or setting of an image. Here is an example of how to use a double colon in Midjourney prompts:

I didn’t use a double colon in the first photo, so Midjourney automatically focused more on the first words in the prompt: two teenage girls.
In the second photo, I used a double colon between the girls and the location so Midjourney focuses on both subjects more equally, creating a very different result.
How to Multi-Prompt in Midjourney
Separating concepts within a prompt allows you to assign more importance to certain parts. This is handy when you want to focus on a subject and also create a detailed background.
In the following example, I’ve added more focus to the first part of the prompt by adding a prompt weighting of 2 . This makes the first part of my prompt twice as important as the second part, focusing more on the girl than the tulip field.
When deciding on a number, all that matters is the relationship they have to each other. A prompt weight of ::10 and ::5 is the same as using ::2 and ::1 ,or ::100 and ::50.
What to include in your Midjourney Prompts for the best result
How do you write a good prompt in Midjourney? Here are ten things to consider adding to your Midjourney prompts to get the best results :
Start with describing the main subject of your image. For example, a person, animal, location, or object.

When making Midjourney portraits, focus on refining their look by choosing their gender, hair color, nationality, etc.
You can also add words like artistic, eccentric, fantasy, magical, kawaii, and preppy to your prompts to influence the overall style of your subject.
If you want to see multiple subjects in one image, use specific numbers or descriptions. For example, 3 cats, a herd of cows, a flock of birds, etc.
#2 Art Style / Medium
Choose the style of your image. For example, a closeup photo, pencil drawing, oil painting, sketch, or watercolor illustration.

#3 Environment/Setting
Choose where your image is set. For example, indoors, in the jungle, on Mars, underwater landscape, in Paris, 1960, or the future.

Try using specific synonyms and exaggerating what you want to see to ensure Midjourney understands your direction. For example, instead of big, try gigantic or immense.
You can also set the weather or season by adding words like Summer and Winter to your prompt. Additionally, you can make it rain or snow, create fog, or opt for a sunny day.
#4 Composition/Camera Angle
Choose the angle at which the image is shot. For example, aerial view, low angle, closeup, bird’s eye view, flat lay, selfie, etc.

Use words like candid, formal portrait, group photo, wedding photography, etc., to influence the subjects’ poses.
#5 Camera Lens/Type
Midjourney does not recognize camera brands or specific camera lenses. Still, you can give it a direction by using words like DSLR, vintage, analog, GoPro, Kodak, fisheye lens, etc., to change the overall look of your final image.

#6 Lighting
Set the lighting and tone of your images. For example, cinematic lighting, soft light, ambient light, daylight, vibrant light, neon light, etc.
Add shadow to your images for a more realistic effect. For example, playful shadows of a tree, soft shadows, striped shadows on face, etc.

Set the color of your subject or overall image. For example, vibrant, monochromatic, warm, autumn, pastel, red and white, bright, or pastel colors.

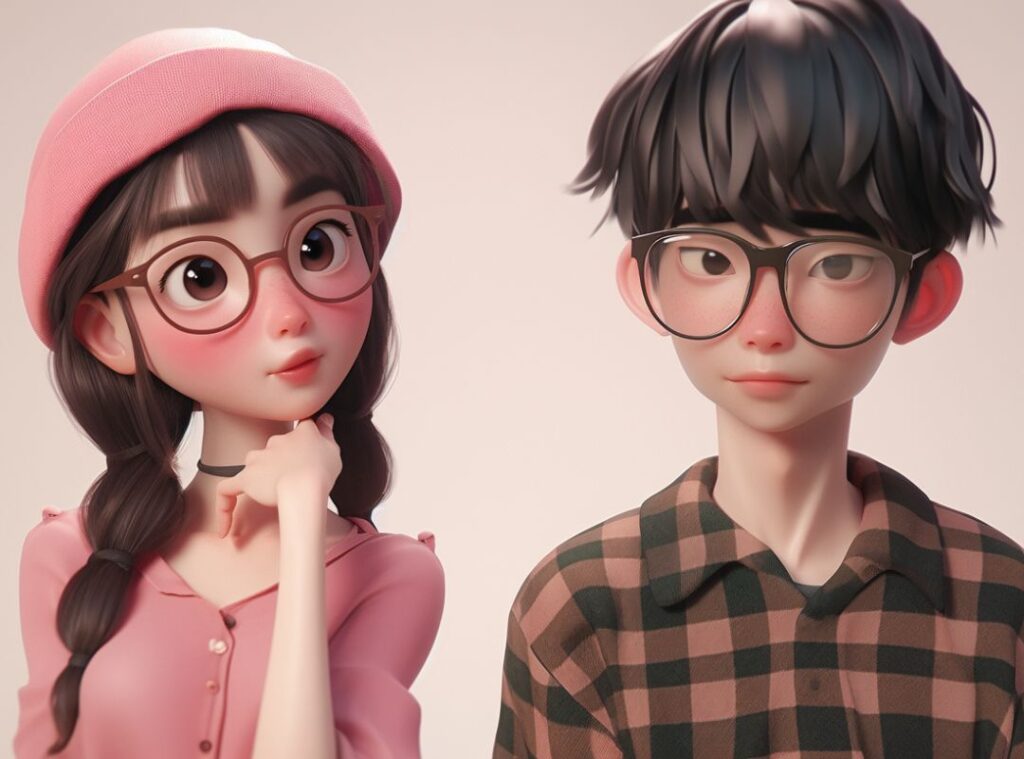
When creating multiple images for one matching set, I recommend choosing 2 to 3 colors to match the overall aesthetics .
I love working with brown and black pastel colors for a soft, natural look, or choose green and pink pastel colors for a more vintage feel.
#8 Facial expressions/emotions
Set your subject’s facial expressions and overall tone of the image by adding different emotions. For example, giggling, smiling, energetic, in love, angry, etc.

Add some flair to your Midjourney models and create a fashion look that fits the scene. For example, sporty, haute couture, traditional folklore, the 80s, strawberry print, ruffled dresses, etc.

#10 References
Set the mood and tone of your images by adding references to movies, artists, magazines, photographers, etc. For example, Wes Anderson , Tim Burton, Andy Warhol, Peter Lindbergh, Vogue, National Geographic, etc.

PRO TIP : Turn on Remix Mode in /settings so you always get a pop-up box to quickly alter the Variation or Pan of your images and add or remove specific keywords from your prompt.

Image prompts – Use a photo as a prompt
Midjourney can also generate new images based on reference images . Upload the image to Discord, grab the image file link (ending on .jpg or .png), and paste it at the front of your prompt.
You can add instructions and parameters after the URL or leave it empty.
For more tips on using Image prompts, check my How to use your image as a reference in Midjourney Guide or learn more with my super fun Margot Robbie Barbie Midjourney Prompt Set .

How to optimize your Midjourney experiments
Midjourney generates four images for each prompt. Once generated, you can run a Variation (Strong) for each image or do a general Variation for four new results. You can Upscale the images that you like.

If you love an image but need to fix some minor mistakes, Upscale the image and choose Vary (Subtle) to make small changes to the original.

The Vary Strong or generic Variation option will change the subjects and setting and slightly alter the composition. The overall look and feel of the image will remain the same.

You can pan your image to the left and right to add new subjects by repeating or altering the original prompt. Turn on Remix Mode in /settings to alter the prompt before panning.

You can pan each newly generated image in a new direction unlimited times, allowing you to create fun panoramic photos.

Square Option
The Square option lets you turn any image that isn’t a 1:1 aspect ratio into a Square without cropping.

Zoom Out Option
You can zoom out with the Zoom buttons. Use the Custom Zoom button to add new objects to your image after each zoom.
Guide : How to use the Zoom Out option in Midjourney

Essential Midjourney Settings
Choose new automatic defaults for your prompts by typing /prefer in your text bar.
/prefer suffix allows you to add parameters to each prompt automatically. This is helpful if you consistently create images in a specific aspect ratio. Simply add the parameter like –ar 3:4 or –ar 9:16.

Basic Midjourney Settings

Choose Midjourney Model
Select your default Midjourney version from the dropdown menu under /settings . You can also find the Niji 5 Model here and set it as your default.
Remix is a super handy setting that allows you to edit your prompt for each new variation.
With the Remix setting turned on, you can easily rerun your prompts without copy-pasting them.

This is useful when you’re experimenting and want to quickly adjust certain keywords to change the subject, scenery, colors, etc.
/prefer remix will automatically activate the Remix Setting. You can also activate this option via /settings .
High / Low Variation Mode
Change the default High Variation Mode to Low Variation Mode. The High Varation Mode and Vary (Strong) buttons produce new images with significant changes in the image’s composition.
This setting is handy when creating multiple concepts based on a single image.
Low Variation Mode and the Vary (Subtle ) buttons produce images that retain the main composition of the original image and only introduce subtle changes.
This setting is perfect for refining and fixing minor errors in an image, like too many fingers.
Parameters change the default settings of how images are generated. They can be used to change aspect ratios, Midjourney models, exclude objects, and more. Parameters go at the end of your prompts.
To use a parameter, type double hyphens ( — ) or an em-dash on Apple devices ( — ), followed by the parameter you want.
Basic Parameters
In the following list, you can learn more about the basic Midjourney parameters to create your desired image.
Aspect Ratio Parameter
You can change the image dimensions with the aspect ratio ( –aspect or –ar ) parameter. The default aspect ratio is 1:1 (square).
Here are some examples of aspect ratios that you can use:
- 16:9 (desktop wallpaper)
- 3:4 (Instagram post)
- 2:3 (Instagram story)
- 4:3 (blog post header)
No Parameter
You can exclude objects from appearing in your images by using negative prompting with the No parameter ( –no ).
For example:
Tile Parameter

The tile parameter ( –tile ) lets you generate seamless patterns by making repeating tiles. I recommend using the default aspect ratio for tiled images.
Also read: How to Make Seamless Patterns with Midjourney +15 Creative Prompts
Stylize Parameter
The stylize parameter ( –stylize or –s <number>) influences how strongly Midjourney’s default artistic style is applied to your images. The default value in Midjourney version 5 is 100.
You can go to /settings and select a default for low, medium, high, and very high styling.
Style Parameter
Midjourney 5.1 and 5.2 introduced a raw style ( –style raw ) that lets you generate images with a more natural and less refined appearance and removes some of the default Midjourney aesthetic style.
This setting is perfect for creating stock photos or more generic images for blogs and print-on-demand designs.
You can also go to /settings and select RAW Mode as your default .
Chaos Parameter
The chaos parameter ( –chaos <number> ) changes the variety of your results. A higher value will produce more unusual and unexpected images. The default value is 0 and can go up to 100.
Niji Parameter
The Niji parameter ( –niji5 ) allows you to run the Midjourney Niji 5 model to create beautiful anime-styled images.
Within Niji5, you can choose from 4 different image styles : default, cute, expressive, or scenic ( –style cute ) to influence the art style of the results further.
Instead of adding –niji 5 to your prompts, you can also select Niji as your default by selecting Niji Model 5 from the Version Dropdown in /settings .
To learn more about Niji 5 and its different styles, you can check my guide on How to Use Niji 5 in Midjourney – Exploring All Creative Styles .

Free Midjourney Prompt Guides
For more inspiration and guidance, you can check out my free Midjourney prompts here:
- 15+ Free Prompts to Make Gorgeous Midjourney Portraits
- 17x Gorgeous Wes Anderson Midjourney Prompts
- 17 Free Prompts for Knolling Photography in Midjourney
- 14 Free Midjourney Clipart Prompts
- +15 Creative Prompts for Making Seamless Patterns in Midjourney
Now You Know How to Write a Good Prompt!
I hope this guide for writing better Midjourney prompts has been helpful to you! Please add me on Instagram @sprinkleofai to ask me any questions you still have, and don’t forget to tag me in all your wonderful AI Art!
NEXT GUIDE: Learn how to use NIJI in Midjourney
Learn how to use the NIJI function in Midjourney and create super cute AI art in anime style!
About the author
My name is Marloes Ratten, and I love to make things. During the day, I’m a Macrame teacher , and at night I love to go a little crazy in Midjourney.
If you would like to see more of my AI artwork, follow Sprinkle of AI on Instagram or check out more posts on my blog sprinkleofai.com !
For more info about me or my handmade items, check my blog macrameforbeginners.com , or browse my Etsy Shop for beginner-friendly step-by-step patterns.
This website features a collection of fictional characters and products crafted with Midjourney. All images are purely imaginative, and any resemblance to actual persons or products is entirely coincidental.
Similar Posts

Celebrating Lady Diana’s Timeless Elegance with AI: A Colorful Tribute

17 Creative Ideas for Knolling Photography in Midjourney – Free Knolling Prompt Set

33+ Unique Midjourney Prompt Ideas To Spark Your Creativity

12 Stunning Midjourney AI Retro Travel Poster Prompts

Let There Be Light Prompt Set – Now Available on Midjourney Circle + Candle Challenge!

21 Free Midjourney Prompts – Daily Sprinkle Prompt Challenge on Threads
Let's Try Ai
The Complete Guide to Midjourney Advanced Prompts
Midjourney advanced options are quite powerful and give you significantly more control over image generations. Let's learn more about them
Written by: Milan K
Published on: September 18, 2023
Midjourney advanced prompts are defined as prompts that involve the use of options like Remix, Vary Region, Panning, Permutations, Zoom Out, and Image Prompts. These are all advanced options that enable you to greatly influence generated images.
I've already written a few articles where I discussed some of these advanced options individually. Today, I'm going to give you a complete guide on how to use Midjourney advanced prompts .
Each advanced option in Midjourney serves a specific purpose. For instance, the panning feature enables you to extend an image in any direction. The Vary Region option enables you to edit parts of an image.
After reading this article, you will be able to take your prompting skills to the next level.

List of Midjourney Advanced Prompts
At the time of writing this article, there are 7 advanced prompt options in Midjourney. Here is a full list of the Midjourney advanced prompts:
- Image prompts
- Permutation prompts
- Multi prompts
- Panning feature
- Zoom out feature
- Inpainting feature
I'm going to cover each advanced option in depth and hopefully teach you how to effectively use every single one of them by the end of the article.
Midjourney Image Prompts
Image prompts represent the first Midjourney advanced feature I used. It's relatively simple to use, but there are a few things that you should keep in mind, such as:
The longer the text portion in your image prompt, the less it will be connected to the original image. Apart from that, remember that the soft cap in Midjourney is set at 60 words, which is an additional reason why you should keep your prompts concise.
You can't change only one element of an image with this type of prompt. For instance, you can't change the color of the sky in a landscape image without also affecting other parts of an image.
When you use images in prompts, the files you use should end in .png, .gif, .webp, .jpg, or .jpeg extensions.
Now that we've covered the basics of Midjourney image prompts, it's time to talk about how to use this advanced feature.
How to Use Midjourney Image Prompts
The first thing you'll need when you use this advanced option is an image. You can basically use any image you want. I personally like to use only original photos, which I have an endless supply of since my brother's main hobby is photography.

I'm going to use the photo above, which he took on a recent trip to Iceland, to show you how the image prompts option works. The first thing you'll want to do is upload the image either to the public Midjourney Discord server or your direct messages chat with the Midjourney Bot. You can do this simply by dragging the photo to the chat.
When you drag the photo over to Discord, you simply press enter and it will be uploaded. Now you can right-click on the image and press on the ' Copy Link ' button. The copied link should be placed at the beginning of your prompt. In essence, this is how your image prompt should look like:
/imagine [image link], text prompt, parameters
Of course, the use of parameters is completely optional. In my image prompt that involves the use of the original photograph above, I used the following prompt:
/imagine [image link] evil lair, purple sky, ethereal aesthetic, astral aesthetic, ominous --ar 16:9
I decided to use the aspect ratio parameter because I didn't want the image dimensions to differ too much from the original photo. This is the result of my image prompt.

I like how it turned out. I kept the prompt simple but made sure that I greatly influenced the image style with the use of specific aesthetics tokens.
If you'd like to find additional information about image prompts or would like to see more prompt examples, I suggest that you check out my article on Midjourney prompts for existing images . It's an in-depth piece that covers this topic more than I did today because I also have to talk about other options in this article.
Midjourney Permutation Prompts
Permutations represent one of the most popular advanced options in Midjourney. Users love this feature because it enables them to write a single prompt that creates multiple image variations. I personally use this feature when I want to experiment with different prompt ideas.
What’s important to know is that the number of permutations you can do with a single prompt depends on your subscription plan. Here’s how the access to this feature is divided according to subscription tiers.
- Midjourney users with a basic subscription plan are able to create a maximum of 4 jobs with a single permutation prompt .
- If you have a standard subscription plan , you'll be able to do a maximum of 10 jobs with a single permutation prompt.
- Pro and mega subscribers can create up to 40 jobs with one permutation prompt .
When I say job, I mean it in the concept of creating one set of four images.
It's important to know that each permutation prompt variation is considered an individual job in the context of how much GPU time it consumes. That's why using permutation prompts regularly can lead you to spend way more GPU time than you normally would.
I'll show you how this feature works in the example below.
/imagine photorealistic image shot with Canon EOS R5, close up shot of a {woman, man} looking directly at the camera with a slight smile, wearing professional attire and leaning on a {white office building wall, glamorous art nouveau style wall}, ultra realistic --ar 16:9
Whenever you use the permutation prompts feature, you'll get a message asking you to confirm the process.

With the permutation prompt I wrote above, I was able to generate four sets of images without having to write four individual prompts. These are the individual prompts the AI model created from my permutation prompt.

Each word or phrase that you put in curly brackets and separate with commas instructs the AI model to create an image variation using it. You can even write nested permutations, meaning that you put curly brackets with keywords inside of curly brackets that already contain certain keywords.
These are the results of my permutation prompt, divided into four different variations that were created from it.
/imagine photorealistic image shot with Canon EOS R5, close up shot of a woman looking directly at the camera with a slight smile, wearing professional attire and leaning on a white office building wall, ultra realistic --ar 16:9

/imagine photorealistic image shot with Canon EOS R5, close up shot of a man looking directly at the camera with a slight smile, wearing professional attire and leaning on a white office building wall, ultra realistic --ar 16:9

/imagine photorealistic image shot with Canon EOS R5, close up shot of a woman looking directly at the camera with a slight smile, wearing professional attire and leaning on a glamorous art nouveau style wall, ultra realistic --ar 16:9

/imagine photorealistic image shot with Canon EOS R5, close up shot of a man looking directly at the camera with a slight smile, wearing professional attire and leaning on a glamorous art nouveau style wall, ultra realistic --ar 16:9

Permutation prompts can help you save time, but they'll also lead you to consume more GPU time. It's easy to lose track of how many images you've generated when you're using this feature. That's why you should keep track of how many GPU hours you use when you start using this feature regularly.
In case you're looking for more information on how to use this feature, I suggest you read my article on how to use permutations in Midjourney . It includes more relevant information as well as additional prompt examples.
Midjourney Multi Prompts
Multi prompts are arguably the most simple advanced feature you can use in Midjourney. It enables you to instruct the AI model to consider two or more separate concepts individually. When you want to use the multi prompts option, it's often a good idea to include open compound words in your prompt.
You can activate the multi prompts feature by adding a double colon to a prompt. I'll show you an example of how this feature works. Let's say that you wanted to create something unique while keeping your prompt incredibly short. You start with a basic idea like:
/imagine living room

As you would expect, the AI model generates photorealistic images of a living room when given this prompt. However, if I were to use the multi prompt feature and add a double colon between the two words, the generated results would be very different.
/imagine living:: room

When you use this feature, the AI model is instructed to separately consider these two concepts. In other words, the model considers this concept as a room that's come to life.
Midjourney Remix Mode
Remix mode is a powerful Midjourney feature that enables users to change prompts and add/remove parameters. The way this feature works is that it takes an initial image you generated and uses it as a starting point to generate a new image.
This is a popular option in Midjourney because it essentially gives you more creative freedom over variations. You can easily change the setting or alter the subject of an image however you see fit.
Before you start experimenting with the remix mode in Midjourney, you'll have to make sure that this feature is enabled. To do this, type /settings in your chat with the Midjourney Bot or the public Midjourney Discord server and press the ' Remix Mode ' button.

When you press on the button pictured above, you'll be able to edit your prompt during each image variation. Let's see how to use this feature effectively with a prompt example.
/imagine photorealistic image shot with Canon EOS R5, Italian pizza on a rustic wooden table, rusticcore aesthetic

Now that I've created the initial image for this experiment, it's time to use the remix mode and see how I can alter the image. When the initial image grid consisting of four images is generated, you can choose one of the 'Variation' buttons to enter the remix mode.

I decided that I was going to make variations to the second image in the grid because that's the one I like most. As soon as I pressed the 'V2' button, a pop-up window appeared giving me the option to make changes to my prompt.

There are numerous ways you can go about remixing a prompt. You can change the art style, add/remove elements of an image, use parameters, and so on. For this image, I wanted to change the subject from pizza to a bowl of pasta. In the remix mode window, I typed " bowl of pasta ".

This is how the image turned out. I didn't need to mention a wooden table or specify that I want it to be a photorealistic image. All I had to do was instruct the AI model to alter the subject and it kept the same aesthetic.
Remember that the image you choose from the initial grid has a huge influence on how the variation will look. That's why you shouldn't randomly choose an image but search for the right one. If you don't like any of the four images, use the prompt again until you find the one you feel comfortable using.
Midjourney Panning Feature
The panning feature in Midjourney is one of the most fun options you can use. It essentially enables you to extend an image in any direction. In combination with the remix mode, you can also add more details to the image. It's the closest you can get to painting a picture step by step with the use of generative AI technology.
Let me show you how the Midjourney panning feature works. I'll start with a simple prompt.
/imagine peculiar landscape, otherworldly, cosmic background
As usual, the Midjourney AI model will generate a set of four images from the prompt. But to access the panning feature, you will need to upscale one of the four images.

The four arrow buttons shown in the image above represent the panning feature. You can press only one button at a time. The button you press will extend the image in the selected direction. I decided to extend the original image to the right. Here's the result.

Since the AI model is expanding the canvas with the use of this feature, it will change the aspect ratio of the original image. I can once again upscale the image and expand the canvas if I want to. However, now I can only expand the canvas in either the left or right direction. To have all four directions available, I'd need to press the ' Make Square ' button.

The 'Make Square' feature will revert the new image back to the default aspect ratio while filling the gaps with new elements. Here's how the image looks after I use this feature.

I can now use the ' down ' arrow button to expand the canvas once again. You can basically infinitely play with this feature and see how it evolves with each additional use of the panning option.
Now that I've covered the basics of the panning feature, I'll show you how to use this advanced prompt option in combination with the remix mode to get even better results.
I'll use the same prompt as when I started explaining the panning option. I'll also repeat the upscaling process and then press the left arrow button to expand the canvas. When I do this, a pop-up window will appear enabling me to add new details to the prompt. That's the remix mode .

I wanted to see an alien spaceship flying in the sky in the left part of the image, so that's exactly what I typed in. Here's what the AI model generated from my prompt.

This is exactly what I was looking for. You can use the combination of the panning feature and the remix mode on a single image multiple times to create a canvas filled with incredible details.
You can check out more prompt examples related to this advanced option in my article on how to use the Midjourney panning feature . In that article, I dive deep into how this feature can be used. I especially take the time to explain how to use the feature several times on a single image.
Midjourney Zoom Out Feature
If you want to see just how powerful the Midjourney text-to-image AI model is, all you have to do is use the Zoom Out feature on an image several times and simply observe the results.
When this feature was released, I saw countless people within the Midjourney community having a blast experimenting with it. You can practically use it endlessly on a single image. Nevertheless, I have to mention that the results may become weird after the first few times you use the zoom out option on an image.
The first step to using the zoom out feature is to write a prompt and generate an image grid. The second step is to upscale one of the four images. When you do that, you'll find two buttons underneath your image displaying your zoom out options. Essentially, you have the option to choose between a 1.5X and a 2X zoom .
Let's see how the zoom out feature works using a simple example.
/imagine close-up shot of a small piece of sea glass in the middle of a white sand beach on a sunny day --ar 16:9

This is the prompt I came up with to show you the power of the Midjourney zoom out feature. The upscaled image is shown above. When I upscaled it, I was given the option to zoom out the image. I clicked the ' Zoom Out 2X ' button, and here's the result I got.

I was interested to see what would happen to this specific image if I used the zoom out feature a few more times. I'm not going to include each iteration but instead will show you how the result turned out after I zoomed out the image three more times.

The result is incredible. While you're using the zoom out option, you get to see a step-by-step process on how the AI model can expand the canvas. Whenever you feel like something is missing from a generated image, I would advise that you use the zoom out feature and see how it will look then.
Pressing a single button in Midjourney can greatly improve the result.
In case you want to learn additional information about this advanced prompt option and see more prompt examples, I suggest you read my article on how to use the zoom out feature in Midjourney . It's a quick guide packed with all the info you'll need to know to use this feature effectively.
Midjourney Inpainting Feature (Vary Region)
Inpainting is arguably the most useful advanced prompt option in Midjourney. There might be a lot of people who don't share this opinion, but I personally find inpainting to be extremely important due to the amount of control it gives users. With the Vary Region option you can add, remove, or alter elements of an image simply by selecting a portion of the image.
The Midjourney team recommends that the inpainting feature should ideally be used when you want to select between 20% and 50% of the image . However, I've used this option a lot and it usually works great with smaller/larger regions as well.
Another thing to keep in mind is to ensure that the edits you want to do match the original generated image. Doing this will ensure that the feature works optimally.
Let's test out the Vary Region option with a simple prompt example.
/imagine photorealistic image, close-up shot of a beautiful young blonde woman wearing a blank white shirt, looking directly into the camera, photogenic, ultra realistic --ar 3:4

An image like this is a great way to show you the power of the Midjourney inpainting feature. Here's what you have to do to make changes to a portion of the image.
Start by upscaling the image you like the most from the initial grid. As soon as the upscaling process is complete, you'll see a button underneath the image called ' Vary (Region) '. Click on the button and a pop-up window will appear.

You can now select the portion of the image that you want to change. I decided that I didn't want the woman in the image to wear a blank white shirt. Instead, I felt like it would be better if she wore a purple striped shirt.
I selected the portion of the image that featured the shirt and simply wrote 'purple striped shirt' and pressed enter. Here's the result I got.

Are you not entertained? Gladiator reference aside, the inpainting feature is probably the closest thing we've got to magic at this point. It's insane that the AI model can make a change like this when given only a simple instruction and without including random objects in an image. It's truly remarkable.
The example above gives you only a limited view of what’s possible when you use the Vary Region option. You can change entire landscapes, combine art styles, remove objects, and do so much more with this advanced prompt option.
If you've read the whole article up to this point, it may not come as a surprise that I also have an in-depth guide on using the Midjourney inpainting feature . It's a great article that will provide you with even more ideas on how to use the Vary Region option in Midjourney.
Final Thoughts
The advanced options in Midjourney are quite powerful and give you significantly more control over image generations. It's relatively easy to learn how to use each advanced prompt, but it takes time to develop the intuitive skills to know when to use each option.
In my opinion, Midjourney users should first become comfortable with writing standard text prompts before they begin using advanced options. When you become good at writing standard prompts, it will make it easier for you to use the advanced features effectively.
The advanced options I use the most are the panning feature, inpainting feature, and permutation prompts. However, I think that each option is really important and should be a part of your prompting routine.
Leave a Comment Cancel reply
Save my name, email, and website in this browser for the next time I comment.
About Milan K
Midjourney Prompts for Stickers (15 Prompt Examples)
Midjourney prompts for cartoon characters (12 prompt examples).
- Ad Creative Eye-catching designs that perform
- Social Media Creative Engaging assets for all platforms
- Email Design Templates & designs to grab attention
- Web Design Growth-driving designs for web
- Presentation Design Custom slide decks that stand out
- Packaging & Merch Design Head-turning apparel & merch
- eBook & Digital Report Design Your digital content supercharged
- Print Design Beautiful designs for all things printed
- Illustration Design Visual storytelling for your brand
- Brand Identity Design Expertise & custom design services
- Concept Creation Ideas that will captivate your audience
- Video Production Effortless video production at scale
- AR/3D Design New creative dimensions that perform
- AI-Enhanced Creative Human expertise at AI scale


- You can also adjust other settings here, so feel free to go over them before continuing.
- If you don't want to adjust your settings via the Discord command, simply add --v5 to the end of your prompt.

- Instead of "Show an image of a pack of wolves drawn like they were in a cartoon in a snowy forest with a lot of trees and bushes," write "A pack of wolves in a dense snowy forest drawn in a cartoon style."

- Leaving part of your prompt vague can lead to some interesting results. Combine specific and vague language in your prompt to create the image you're looking for. In the example above, if you want Midjourney to create a random monster but you want the monster to be specifically attacking NYC, you could write, "A huge monster attacking New York City."
- Use numbers or collective nouns when referring to plural nouns, such as "a pack of wolves" or "five cars."

- Media type: Add a media type such as photography, illustration, painting, or sculpture
- Technique: Including a technique such as sketch, acrylic, impasto, or cel shading along with a media type to further influence your piece
- Media title: Include the name of a movie, TV show, or video game to create an image evocative of their art style
- Mood: Include some mood descriptors, like melancholy, joyful, serene, or haunting, to let Midjourney know what tone of image you're looking for.
- Artist name: Use the name of an artist with a particular style you want your image to reflect, such as Vincent van Gogh, Monet, Andy Warhol, or Marcel Duchamp.
- Art movement: Use names of specific art movements, such as surrealism, cubism, pop art, or impressionism.
- Time period: Include a time period to create an image that would fit in with that era, such as Baroque, Medieval, Contemporary, or Modern
- Geographic location: Influence style using location-based terms such as Japanese Ukiyo-e prints, Norwegian rosemaling, or Dogon wood carvings.

- You can get super in-depth with your descriptors, even going so far as to specify what camera lens or type the AI should try to replicate when generating a photorealistic image.

- For example, a prompt with parameters might look like "Three cats sitting on a fence at night time, illustration, 1990s cartoon, --v5 --ar 16:9 --stylize 50".

- Basic subscribers can enter a repeat value of 2 through 4
- Standard subscribers can enter a repeat value of 2 through 10
- Pro and Mega subscribers can enter a repeat value of 2 through 40

- Seed numbers shouldn't be used after a lapse in sessions, as they are not static.

- The --style raw parameter will reduce Midjourney's influence on the image and allow advanced users more control and freedom over how their final image looks.

- Note that some of the parameters listed in this article will only work with Midjourney V5, 5.1, or 5.2.

- Note that the --weird parameter is not fully compatible with seeds, so you may not be able to reliably produce a weird image with the --seed parameter.

- If you have an image you want to use but it isn't uploaded online, simply send the image on Discord (it can be on any server or message). You can then copy the image URL by right-clicking (or Cmd-clicking on Mac) and selecting Copy Link (on the Discord desktop app) or Copy image address (on the Discord web app). If you're on mobile, you can long-press the image and select Copy Media Link . Use that link to create your image prompt.
- You can use the --iw (image weight) parameter to let Midjourney know if it should pull more from your image prompt or text prompt to create your images.

- You can also remix upscales. One particular remix you can do is Vary (Region) , which will allow you to select a portion of the upscaled image and modify the prompt. After submitting the job, a new image will be generated. For example, if you generate an image with the prompt "busy street full of people with a taco food truck," you could upscale the image and select Vary (Region) , select the taco truck with the selection tool, and change the prompt to "busy street full of people with a hot dog stand" to change the taco truck to a hot dog stand without interfering with the rest of the image.

- You can also assign weights when creating a multi prompt. The default and non-specified weight is 1. The format is word1::weight word2::weight , so, for example, you could write jelly::2 fish, or jelly:: fish::2.

- For example, you could write a prompt that says "a colorful illustration of a {cat, dog, horse} wearing a bowtie" or "a colorful illustration of a cat wearing a bowtie --weird 0, 500, 1000 . Each example would generate three separate jobs. The first example would generate three jobs, each featuring a different subject (cat, dog, or horse) wearing a bowtie. The second example would generate three jobs where each would have the same subject but varying levels of "weirdness."
- Your subscription level determines the maximum amount of permutations you can do. Basic subscribers can create a max of 4 jobs with one permutation, Standard subscribers can create 10 jobs with one permutation, and Pro and Mega subscribers can create 40 jobs with one permutation.

- Upscaled images that are not square will also have a Make Square button. This is similar to Zoom Out but will make the image square by increasing the borders of the image to a 1:1 ratio in the direction (horizontal or vertical) denoted on the button.
- The Custom Zoom button lets you select a custom value between 1 and 2 for zoom. You can also change the aspect ratio by adding an --ar parameter, and you can tweak the prompt before submitting the custom zoom value (i.e., changing the prompt to feature the original image you generated as a framed print on a wall).
Midjourney V5 vs. Earlier Midjourney Models

- Midjourney V5.1 was released on May 5th, 2023 and has a stronger default aesthetic, which makes it easy to use with simple text prompts. It is also good at understanding prompts and produces fewer unwanted artifacts in images, producing images with increased sharpness for clarity.
- Midjourney V5 was released on March 30th, 2023. It produces more photographic images than V5.1. While it can generate images that closely match the prompt provided, you may have to give it a longer prompt to get the image you're looking for.

Expert Q&A
You might also like.

- ↑ https://docs.midjourney.com/docs/prompts
- ↑ https://docs.midjourney.com/docs/parameter-list
- ↑ https://docs.midjourney.com/docs/model-versions
About This Article

- Send fan mail to authors
Is this article up to date?
Featured Articles

Trending Articles

Watch Articles

- Terms of Use
- Privacy Policy
- Do Not Sell or Share My Info
- Not Selling Info
Keep up with the latest tech with wikiHow's free Tech Help Newsletter
ExploreAi.Online Newsletter

The Ultimate Midjourney Prompt Guide:
Prompt suggestions, guidelines, powerful phrases, tips/tricks.

Section 1: Prompt Guide Introduction
Section 2: the official midjourney user guide, section 3: prompt crafting 101, section 4: prompt power words, section 5: advanced prompt crafting, section 6: generating photorealistic people, section 7: prompt -> profits, section 8: generators, guides, & useful links, section 9: bonus - “black hat prompt-craft”.

Section 1: Introduction
I’m going to proceed as though you’re well aware of the Stable Diffusion influenced “AI Art Generator” known as Midjourney, and you’re here to learn how to get the most out of your text prompt generated images .
( To Get Started: Go to Midjourney.com, sign in using Discord, and then you can interact with MJ using Discord on your Computer or Mobile Device)
ExploreAi.Online Newsletter is a reader-supported publication. To receive new posts and support my work, consider becoming a free or paid subscriber.
Why you might want to use this guide: If you’re a free user of MJ, you have a very limited number of image generations available.

Even as a paid user, there is a limited amount of /FAST TIME available to use with your subscription .
Using /RELAX MODE is a great way to save your /FAST TIME for Max Upscaling your favorite images.
/FAST TIME is necessary for Max Upscales, and makes using MJ faster; you can produce more images in less time.
This guide exists simply to help you make the most out of every piece of art you create with Midjourney .
Let’s make every prompt count!
If you haven’t read it yet, it’s worth looking at:
Click Here for the official MJ User Guide
( https://midjourney.gitbook.io/docs/web-app )
Otherwise, just keep reading to get the most important skills you’ll need
to start making high quality AI Generative art ASAP .

*TIP: Long-tail descriptions tend to provide the best results; be as specific as you can with your prompt .
*TIP: Include lots of adjectives . The more descriptive your prompt, the better the result tends to be.
*TIP: Name an Artist : Integrating an artist’s name into your prompt will use that artist’s style as an influence for your generated image.
Fast Vs. Relax Mode: When you subscribe to Midjourney, you can choose to use your service in FAST or RELAX mode . Activate by typing /fast or /relax, then send your message to the Midjourney bot.
As a subscriber, you will have a limited number of FAST hours available, and unlimited RELAX hours .
FAST MODE is necessary for Max Upscales, and makes using MJ faster; you can produce more images in less time .
Format for generating artwork from text using Midjourney:
(type the following into the appropriate Discord channel; A NEWBIE channel if you’re a free user, or DM the MJ Bot if you’re a subscriber)
/imagine prompt: “Remove the quotes and replace this text with whatever you want Midjourney to create for you”
Once you submit your prompt, you’ll receive a 4x4 grid of images. Below the images will be 9 buttons to choose from.

By clicking button “U1”, you are asking MJ to UPSCALE the quality of image #1.
U2 upscales image #2, u3 upscales image #3, and u4 upscales image #4,. , by clicking button “v1”, you are asking mj to variate image #1; mj will generate 4 new images for you influenced by image #1. , v2 creates variations of image #2, v3 creates variations of image #3, and v4 creates variations of image #4., the final button option looks like a recycling symbol. , this button will reroll your original prompt, giving mj another chance to interpret your request and generate new images..
If you Upscale an image, your result will include the following options:

Section 4: Prompt “Power Words”
Some words might as well be magic; certain keywords can have a big effect on your final image .
Click here to view the official Midjourney Style List (must login to MJ )
Click here to view the midjourney community showcase.
Use the following parameters to have more control over your prompt inputs and generate more specific images.
*TIP: From the official MJ user guide: All parameters should always be added at the end of your command. Failure to do so might make your jobs partially or completely unusable.
Click here to view the parameters in a spreadsheet, ( general purpose artistic mode), ( photo-realism mode), ( uses a new an experimental algorithm. this model takes significantly longer to run and only produces 2 outputs (1 for non square resolutions). it also does not work with --hd, --stylize, and --q 5 ), ( uses a different, older algorithm that’s potentially better for larger images, but with less consistent composition. best for abstract and landscape prompts. this also generates images at higher resolutions without the need to upscale), --aspect or --ar, ( generates images with the desired aspect ratio. try --ar 16:9 for example, to get a 16:9 aspect ratio (~448x256)), --w <number> and --h <number>, ( sets width and height of the image, respectively. --ar is better supported and should be used instead. the values used by --h and --w should be between 256 and 2034, while keeping in mind that the maximum upscale resolution is around 3 megapixels. these values work better as multiples of 64 (or 128 for --hd)), ( sets the seed, which can sometimes help keep things more steady and reproducible when trying to generate a similar prompt again. it must be a positive integer (any whole number between 0 and 4294967295). if not used, a random seed will be chosen instead, behind the scenes. you can react to a job's message to know what seed value was used), ( makes it so the seed affects all images of the resulting grid in the same way. if not used, each image in the grid will use a different "slice" of the seed, providing higher variety), ( negative prompting (--no plants would try to remove plants). equivalent to using an advanced text weight of ::-0.5 ), ( sets image prompt weight relative to text weight. default value is --iw 0.25 *simply include an html link to an image when you type your prompt to mj), --stylize <number>, or --s <number>, ( the stylize argument sets how strong of a 'stylization' your images have, the higher you set it, the more opinionated it will be. default value is 2500), --quality <number> , or --q <number>, ( how much rendering quality time you want to spend. default value is 1. higher values cost more and lower values cost less, see below:), (changes how much time is spent generating your image. the shortcut version is --q. please only use one of the values below. any other value will be rounded to a valid value instead. --quality 0.25 rough results, 4x faster / cheaper. --quality 0.5 less detailed results but 2x faster / cheaper. --quality 1 the default value, you do not need to specify it.--quality 2 more detailed results, but 2x slower and 2x the price (2 gpu minutes per /imagine). --quality 5 kind of experimental, might be more creative or detailed... also might be worse (5 gpu minutes per /imagine)), --chaos <number>, ( how much more varied, random, and different the results will be. must be between 0-100. higher values will favor more interesting and unusual generations in exchange for less reliable compositions. ** try combining the "patterns" + "chaos 100" feature. it will create three patterns and one portrait with some patterns on the face.**), ( faster images, less consistency, less expensive. you can also use --q 0.5 and --q 0.25 for a similar result, see below), ( stop the generation at an earlier percentage. must be between 10-100. this currently does not work with upscales * sometimes you may want to create a “less developed” image. midjourney can be instructed to stop the render early. the full cycle is 100; if you want to stop the render when it is 50% complete you would use the stop command --stop 50), ( saves a progress video, which is sent to you in the ✉️-triggered dm (you must react with the envelope to get the video link). this currently does not work with upscales), --version <1 or 2> or --v <1 or 2>, ( uses old algorithms 1 (which was formerly the "vibe" option, sometimes better for macro or textures) or 2, the last improvement. we are at 3 now, which you do not need to specify. so specify --version 2 to use the previous older model, or --version 1 for the one before), ( uses the "light" upscaler when selecting the u buttons. results are then closer to the original image, with less detail added during upscale. ideal for faces and smooth surfaces), ( changes how artistic you want your generation to be. it can be used also with the shortened version --s, and can be followed by any integer between 625 and 60000. here are some example values: --stylize 625 if you basically want to turn it off and be less artistic. --stylize 1250 good for when you want it to be 'less strict' but still 'pretty' (this is probably recommended for skilled users). --stylize 2500 the default value, so you don't have to specify this. --stylize 20000 if you want it to 'take over' and start drifting from your text, but not go crazy. --stylize 60000 hands off the wheels, who knows what will happen.), ✉️ envelope:, ( the envelope emoji reaction sends an image to your dms with the seed # and job id. if the result was a grid, it will send each individual image. you may have to hunt for this emoji by typing "envelope" in your emoji list ), ( marks image as "favorite". this shows in a separate feed on the web gallery and sends the image to the #favorites channel), ( cancels or deletes a generation at any time. it is also removed from the web gallery. please help us by removing content you accidentally generated that is in violation of our pg-13 content guidelines), ( you can suffix any part of the prompt with ::0.5 to give that part a weight of 0.5 (50%). if the weight is not specified, it defaults to 1 (100%) **adding weights to prompts can be handy for telling the midjourney bot which elements of the prompt are important to you or what you don’t want to see in an image. this allows you to fine tune your midjourney prompts and achieve images which are more closely aligned to what you have in mind.), ( you can now add --tile after your prompts to generate seamless textures (this means the images repeat if you use them as tiles)).
Want a way to make prompt crafting a little easier ?
Check out the amazing PROMPTER v2.7 spreadsheet by
[email protected] , click here to access . , (+click here for shane’s awesome notes) , thank you shane..
Another great resource for inspiration and Prompt “Power Words” can be found here:
Click here to search All Midjourney images using Lexica .
Finally, make sure you join the MJ Discord and get involved with the Prompt Craft Channel for live help and lots of examples!

If you start to work with MJ, or most AI art generators, you’ll quickly find that generating realistic people isn’t always easy :
warps, mutations, and other off-putting features can make the uncanny valley too much to look at and actually enjoy.
Using an image as a prompt can help , make sure to set the image weight to --iw 0.5 or greater.
Some of the “ power words ” from Section 4 can come in quite handy:
“Symmetrical normal hands,” “symmetrical normal eyes” -> these seem to help A LOT with making your image as realistic as possible. You can use this for ears, lips, etc.
“Cinematic lighting,” “Photorealistic,” “4K,” “Ultra HD,” “Highly Detailed” -> these keywords help provide some of the best image results when generating human faces.
No matter how hard you might try, sometimes you just won’t get a perfect face from MJ alone .
It can be tremendously helpful to process your final MJ image using another piece of Open Source Software known as GFPGAN .
Click here to check out THISPERSONDOESNOTEXIST.com for some super helpful resources to make the most realistic faces.
* There are a wide variety of upscaling tools available for photo restoration and facial feature restoration .
Click here to check out The GBU Guide to explore over 200+ AI Tools & Resources.

(How to make money with your AI prompts & AI art. )
Many people are worried that artists/creatives will be displaced/replaced by AI generators.
While this is not necessarily happening IMMEDIATELY, it seems inevitable that the technology will continue to improve , and the output images will become better and better as well as easier for anyone to make.
While AI won’t necessarily replace artists…. artists who use AI will likely begin to replace / outpace artists who do not use AI.
One limitation you may face right now, is that many AI art generators do not provide high resolution images; without high resolution, many stock image sites will not allow you to upload your art .
There are a variety of Upscaling Tools available to improve the resolution of your images, but that will not always guarantee your art will be accepted by a stock image marketplace. Click here to check out The GBU Guide to explore over 200+ AI Tools & Resources for Upscaling & More
Your imagination is the limit when it comes down to finding ways to sell your art.
One simple idea is to use your generated art to sell on-demand online products: t-shirts, canvas prints, phone cases, etc.
You can also sell your art online as stock images . Many marketplaces for digital art and stock images already exist. As an AI assisted artist, you can explore these sites to begin selling your creative assets :
(I have not yet tested each of these sites, I will update this article as I do)
Https://www.alamy.com/become-a-contributor.aspx, https://creativemarket.com/sell, https://submit.shutterstock.com/, https://www.gettyimages.com/workwithus, https://contributor.stock.adobe.com/, https://www.redbubble.com/about/selling , https://www.eyeem.com/sell-your-work, https://www.dreamstime.com/sell-stock-photos-images, https://motionarray.com/become-a-producer/, https://www.pond5.com/sell-stock-footage, you can sell your words in the form of txt2img prompts if you’re a talented prompt writer. check out: https://promptbase.com/sell.

Want help with selling digital assets online?
Please click here to Support ExploreAi.Online by subscribing on Patreon
You can get a live consultation and learn how to integrate AI tools into your workflows to get more done in less time.
Section 8: Generators & Useful Links
Too lazy to write your own prompts? That’s ok too. Here’s a wonderful list of Txt2Img Prompt Generators you can play with:
https://promptomania.com/prompt-builder/
Https://prompt.noonshot.com/midjourney, https://huggingface.co/spaces/gustavosta/magicprompt-stable-diffusion, https://huggingface.co/spaces/doevent/prompt-generator, https://phraser.tech/, https://blog.user.today/midjourney/ , https://drawingprompt.com/, https://riku.ai/prompt-building-with-riku , https://artsideoflife.com/random-art-prompt-generator/ , https://www.kaggle.com/datasets/da9b9ba35ffbd86a5f97ccd068d3c74f5742cfe5f34f6aaf1f0f458d7694f55e .
Useful Articles & Links:
You can also find prompts by browsing images that have already been created:
https://www.midjourney.com/app/feed/all/ (log in required)
Https://estoodio.com/beginners-guide-to-writing-midjourney-prompts-with-examples/, lexica midjourney image search, section 9: banned words & black hat prompt-craft.
NO LONGER AVAILABLE

About ExploreAI.online
Using the resources available at ExploreAI.online , we can begin to extend ourselves by increasing the number of tasks we can do without thinking about them.
Let’s seek to know why things work whenever possible; let’s can explore our interests and seek to understand the things that improve lives .
Let’s learn to love to learn, and learn deeply, so that we are always capable of rebuilding by using First Principles Thinking if those things that improve our lives should fade from their current form.

Please feel free to ask me anything, just click the button below..
Submit Questions
I hope you liked this article! If you found it useful, there’s even more when you subscribe to the ExploreAI.online Substack .

Looking for another way to support & get more ?
Click Here to Become an ExploreAi.online Patreon member & get instant access to popular AI tools, + real human support(if you want it) .

ALL of the images you see in this post were generated using AI tools . This article was written the “old fashioned way” (with fingers, a brain, and a keyboard), but AI writing assistants were used to brainstorm and elaborate upon ideas.
Ready for more?
Back to all topics
All-In-One Guide For Midjourney: The Art Of Prompts

Imagine having a personal artist at your fingertips, transforming your thoughts and ideas into stunning visuals within minutes. That's the magic of Midjourney, a cutting-edge AI program and service, brought to life by the creative minds at the San Francisco-based independent research lab, Midjourney, Inc. As a brilliant brainchild of artificial intelligence, Midjourney takes natural language descriptions called "prompts," and transforms them into captivating images , much like OpenAI's DALL-E and Stable Diffusion.
Unlocking the power of Midjourney is as simple as joining their official Discord server, sending a direct message to the bot, or inviting the bot to a third-party server. By typing a prompt with the /imagine command, you'll unleash the AI's creative prowess, resulting in a mesmerizing set of four images. From here, you can choose your favorite masterpiece and watch it come to life in even greater detail through upscaling. With Midjourney, the artistic possibilities are virtually limitless!
How to get into Midjourney?
Ready to embark on a creative journey with Midjourney? First, hop on board the official Midjourney Discord server or invite the bot to a third-party server. With a verified Discord account, you can sail smoothly through the onboarding process on Midjourney.com or their Discord server. Congratulations, you've unlocked the gateway to endless creativity 🔓
How to start generating images with Midjourney?

To conjure up mesmerizing images, simply type the /imagine command in a designated channel or direct message. Describe the visual masterpiece you wish to create in the prompt field and hit return. Watch in awe as Midjourney weaves its magic and generates a set of four images inspired by your vision.
How to start to refine created image?
Once you have your initial set of images, it's time to polish your artwork. Choose to upscale your image, adding more details; create variations, exploring different takes on your theme; or rerun the job with the same prompt to discover new possibilities. Use the U and V buttons to upscale and create variations, respectively, and the 🔄 button to rerun the job. Let your creativity soar as you refine your AI-generated art to perfection!
✨JOIN waitlist✨

Picture Midjourney is a versatile tool kit, filled with advanced settings like seed, stylization, and chaos parameters that empower you to fine-tune your generated images. It's like having a magic wand that can conjure up the perfect blend of randomness, artistic flair, and image variation. Don't be afraid to mix and match these settings, experimenting with different values like a mad scientist, until you strike the perfect balance for your creative vision. Embrace the power and let your imagination run wild!
Unleash the power of Midjourney's customization by tweaking these captivating parameters to refine your image-generation process:
Seed: Take the reins of serendipity with the "–seed [NUMBER]" parameter, orchestrating the perfect harmony of your generated images for consistent masterpieces.
Stylization: Dial up or down the "–s" parameter to effortlessly glide between artistic styles, with a spectrum of values from 0 (subtle) to 1000 (dramatic).
Chaos: Embrace the element of surprise with the chaos parameter, crafting a mesmerizing mosaic of initial image grids using values between 0 (tame) and 100 (wild).
Dive into the world of Midjourney and orchestrate a symphony of stunning visuals by fine-tuning these parameters to your heart's content!
- A tranquil Zen garden with a cherry blossom tree –seed 42 –s 200 –c 50
- Vincent Van Gogh painting a futuristic cityscape –seed 24 –s 800 –c 10
- Salvador Dali's take on a neon-lit cyberpunk alley –seed 99 –s 500 –c 70
- A steampunk dragon soaring above a Victorian city –seed 7 –s 300 –c 30
Remember, these settings are merely guidelines. Feel free to tweak them to your liking and explore the limitless potential of Midjourney's advanced settings!
5. Spotlight your masterpiece with weights
Picture your image as a symphony, with every element playing its part to create a visual harmony. Sometimes, you'll want the soloist to take center stage. Enter the "::" notation - your conductor's baton - to assign weight ratios to different parts of your prompt, orchestrating the AI to magnify or dim specific elements , ensuring your visual magnum opus shines brilliantly.
- [Eiffel Tower]::3 illuminated at night with [fireworks]::1
- [A roaring lion]::2 in front of a [sunset]::1 on the African savannah
- [Starry Night]::4 sky by Vincent Van Gogh combined with [The Persistence of Memory]::1 by Salvador Dalí
By using the "::" notation to adjust the weight of various elements in your prompt, you can turn the spotlight on the star of your visual symphony and create a breathtaking masterpiece.
6. Unleash your inner Picasso with Remix mode
Craving a little creative twist to your generated images? Remix mode is like having a magic paintbrush at your fingertips. It lets you dance between variations, blending and bending your prompt, all while using the composition of your starting image as a muse. With Remix mode, the only limit is your imagination!
- A cityscape at night in the style of Van Gogh's Starry Night, with swirling skies and glowing streetlights –seed 12345
- A steampunk submarine exploring a coral reef filled with mechanical sea creatures and sunken treasures –seed 67890
- A futuristic city skyline with towering skyscrapers, neon lights, and flying cars in a cyberpunk aesthetic –seed 13579
- A colorful tea party scene in a magical forest, inspired by Alice in Wonderland, with talking animals and oversized teacups –seed 24680
To activate Remix mode, type "/settings" into the chat and select the 'Remix mode' button. Let your creative juices flow and watch your artwork transform into mesmerizing new versions!
7. Paint your prompts with a splash of color
Looking to infuse your generated images with a kaleidoscope of hues? Adding colours to your prompts in Midjourney is like dipping your brush into a boundless palette of possibilities. Enliven your pictures by specifying the colours you want to see, harmonizing tones, and evoking the mood of your masterpiece. Let your artistic vision take flight as you explore the vibrant world of colour in your AI-generated art!
- A lush enchanted forest with emerald-green foliage, magical creatures, and shimmering fairy lights –seed 12345
- A mesmerizing desert landscape with a blazing red-orange sunset, casting long shadows on the sand dunes –seed 67890
- A soft, pastel-coloured dreamscape with floating islands, calming waterfalls, and gentle clouds –seed 13579
- A dynamic, black-and-white graphic novel scene with intense action, dramatic shadows, and captivating characters –seed 24680
Unleash the full spectrum of your creativity as you blend and balance colors in your Midjourney prompts, bringing your vivid imaginings to life!
8. The art of discovery: Iterate and experiment

Pop Culture and Fan Art

- Build Your Website
17 Simple Steps To Build a Mobile Website

ChatGPT Store: Best GPTs For Website Creation (+ Reviews)

- Business Hacks
Go Global: The Essential Beginner’s Guide to International SEO
Get started with bowwe.
START CREATING

Specifically, we'll look at:
- Midjourney V6 prompt structure
- Tis for in-image text
- Photography prompts
- Fashion prompts
- Wallpaper prompts
- Comic book prompts
- Logo prompts
- Gaming prompts
Let's get started.
Stay up to date with AI
We're an independent group of machine learning engineers & quantitative analysts. We apply AI & LLMs to financial markets & track every VC deal each week.
Prompt Structure
First up, one of the biggest upgrades is more accurate prompt following, natural language understanding, and the ability to provide longer prompts.
While longer prompts for the sake of it likely won't improve results, Tatiana Tsiguleva suggests using the following framework in order to follow a typical linguistic style:
- Style: Artistic direction (Example: "Renaissance-era painting")
- Subject: Main focus (Example: "Astronaut in space")
- Setting: Environment/context (Example: "Futuristic city at night")
- Composition: Framing and viewpoint (Example: "Aerial view")
- Lighting: Mood and tone (Example: "Sunset lighting, warm colors")
- Additional Info: Complex details (Example: "Crowd in the background")
MIDJOURNEY'S NEW PROMPT STRUCTURE Midjourney v6 is coming soon with a better understanding of prompts. This means no more random phrases and words. We'll need a new way of creating prompts. I personally plan to test this simple structure that reflects a typical linguistic… pic.twitter.com/wWRiWaBfuh — Tatiana Tsiguleva (@ciguleva) December 19, 2023
Another prompting tip is to try multi prompts with V6, which allows you to...
blend multiple concepts using :: as a separator. Using a multi-prompt allows you to assign relative importance to the concept in the prompt, helping you control how they are blended together.
We'll explore both of these concepts below, but first, let's start with tips on generative in-image text, which is another major development in V6.
Tis for In-Image Text
While generating in-image text is still far from perfect, V6 is a major step int he right direction.
Here are some tips for generating in-image text from Chase Lean on X .
- Quotation Marks: Always enclose text you want to generate in quotes for better results - use "double quotes" as 'singe quotes' rarely works properly.
- Font Style: Add descriptions like 'calligraphic' to control the font style.
- Raw Parameter for Prominence: Use the --style raw parameter to make text more prominent, though it may reduce artistic elements.
- Stylize Values for Size and Style: Adjust stylize values to balance text size and style. Lower values for bigger, more accurate text; higher values for fancier, smaller text.
- Strong Variations for Refinement: If initial text generation is not perfect but composition is good, use Strong Variations for potential improvements.
- Upscaling for Sharpness: Use Subtle or Creative upscaler options to sharpen text
- Image Prompts for Style Transfer: Transfer the style of one image to another using image prompts to also get the text right.
Here are a few examples of in-image text prompts:

Photography
Next up, let's use the aforementioned structure and try a few examples of photography-inspired prompts.

Next, let's look at a few examples of fashion-related prompts.
As this X user highlights , you can easily create unique wallpapers for your phone or desktop. Here are a few examples:

Comic Books
Next, here are a few prompts for creating comic books. Of course, you'd still need to refine these for a finished product, but definitely a good starting point.
Next, let's look at a few examples of creating logos inspired by this X user .

Finally, Midjourney is amazing for creating gaming assets and imagery, here are a few examples to get you started.
That's it for the 25+ Midjourney V6 prompts, if you have any other prompt categories you'd like to see, you can always contact us here .
- Generative AI
Spread the word
Rabbit r1 launches ai companion device, 15+ ai code generators to watch, keep reading, midjourney t-shirt design prompts, getting started with midjourney alpha, 20+ midjourney web design prompts, subscribe to our newsletter.
Stay updated with MLQ.ai by signing up for our newsletter.
🎉 Awesome! Now check your inbox and click the link to confirm your subscription.
Please enter a valid email address
Oops! There was an error sending the email, please try later
- Setups & Tech
- iOS & Mac
Midjourney Prompts Guide, Examples & Settings
Midjourney (MJ) is among the world’s leading AI image generators, able to create photo-realistic images and detailed artworks. Plug your prompt into the Midjourney Discord channel, and Midjourney will turn out four high-quality images in under 60 seconds.
But how does Midjourney work? And how do you craft first-rate prompts that produce the best Midjourney images possible? Scroll down to learn more about Midjourney, from the different MJ models to prompt parameters and much more.
A quick note before we dive in: Midjourney is perfect for having fun, brainstorming, or even sparking ideas for your next mood board. While it’s great for personal use, if you’ve got a project or commissioned work in the pipeline, it’s always best to work with professional artists and creatives who can bring your vision to life!
Subscribe to our weekly newsletter, The Flow — a concise, value-packed focus and recharge digest for a balanced approach to productivity:
- First Name First
Table of Contents
Midjourney Prompts Guide
Midjourney prompts examples.
Midjourney can be pretty daunting at first glance, but after a couple of hours playing around, you’ll be creating amazing images in no time. Here’s a look at Midjourney’s basic usage and how to craft high-quality Midjourney prompts.
The Basics of Midjourney
Here’s a quick run-down of some of Midjourney’s basic functionality so you hit the ground running:
- After signing up for an account, join the Midjourney Discord
- Consider DMing the Midjourney Bot so you can keep track of your images — otherwise they’ll get lost in a sea of prompts!
- Type “/imagine” in a message to the Midjourney Bot followed by a prompt to generate a grid of images
- Type “/settings” in a message to the Midjourney Bot and press “enter” to adjust the Midjourney model, quality, style, and mode
- Once Midjourney generates a grid of four images, you can click “U 1-4” or “V 1-4” to upscale or make variations of a specific image
- Toggle “Remix mode” in “/settings” to update your prompts before generating variations
Midjourney Models
Midjourney has nine models currently:
MJ versions 1-5
- Niji version 4
- Niji version 5
- MJ Test Photo
With MJ versions 1-5, the higher the version number, the higher the quality of the images in almost every conceivable way. MJ version 5 is the fastest and has the largest stylistic scope, with improved resolutions and dynamic range.
All five versions of Midjourney are still usable, but you’ll get the best results using versions 4 and 5. Newer versions produce more realistic images with detailed backgrounds and greater color usage.
MJ V5 is better at the finer details, including realistic hands with the correct number of fingers — something Midjourney has struggled with in the past!
Midjourney test models
MJ Test and MJ Test Photo were released prior to MJ V4. MJ Test essentially aims to combine aesthetics and coherence, creating images that look more like pieces of art than real-to-life images.
“MJ Test Photo” is basically the same as “MJ Test” but focuses on making photo-realistic images. Both test models generate fewer images (1 or 2 images per prompt) than MJ versions 1-5. Since it’s a test model, MJ Test Photo has more trouble following specific details in prompts. (We’re speaking from experience — we encountered this issue while researching for this post.)
Niji versions
Niji version 4 and Niji version 5 are explicitly geared toward anime and illustrative designs. Like the original MJ models, Niji version 5 makes more detailed and imaginative images to almost every extent.
Useful Commands for Midjourney
Here are some useful commands and their functions when writing Midjourney prompts. You can find a full command list here .
Generates an image based on a text prompt
Changes Midjourney’s image-generating speed to fast
Adjusts Midjourney’s settings
/prefer suffix
Add specific suffixes to future prompts
Toggles Remix mode
Adding Parameters as Prompt Suffixes for Midjourney
Adding suffixes to your prompts is a UI that allows you to set parameters like seeds, versions, quality, stylistic ranges, and more. Adding prompt suffixes are essential for producing the exact image you want in the way you want it.
To quickly add suffixes without entering “/settings,” you can type “/prefer suffix” to automatically add a suffix command to the end of your prompts. There are various parameters you set using the “/prefer suffix” command. A few of the most useful parameters include:
- Aspect ratio (“–ar”)
- Quality (“–q <.25, .5, 1, or 2>”)
- Seed (“–seed”)
- Stylize (“–s <number>)
- Version (“–v <1, 2, 3, 4, or 5>”)
For example, you can type “/prefer suffix –v 5 –q 1” to adjust future prompts to use MJ version 5 and set the default quality, 1. Or, type “/prefer suffix –ar 16:9” to adjust the aspect ratio of an image from the default 1:1. Different Midjourney models have different maximum aspect ratios — Midjourney version 5 allows you to use any aspect ratio.
These are just a few of Midjourney’s suffix parameters. You can find a full list here .
Seed Parameters
Out of all Midjourney’s parameters, seeds are the most complex, yet among the most useful.
In Midjourney, you’ll receive different images whenever you enter a prompt, even if your prompt is exactly the same. This feature isn’t ideal if you’re trying to build upon an already-generated visual style. This is where setting the seed parameter is helpful.
For every Job, Midjourney assigns a random number. You can add a seed number to the end of prompts by adding the suffix “–seed”.
By using the same seed, you reproduce similar images, using the same field of “visual noise” as the initial image. Midjourney describes this “noise” as a visual starting point similar to television static. This function allows you to build on prompts with the same early visuals used in the initial image grid.
The “–seed” parameter applies random visual building blocks from across all four images in the initial seeded grid. The “–sameseed” parameter instead applies a specific starting visual noise to produce four very similar images. The “–sameseed” parameter is incompatible with MJ V5 and MJ V4.
How to find a Midjourney image’s seed number
You can find the seed number of a Job by reacting with a ✉️ emoji to a specific Job. The Midjourney Bot will DM you with the job and seed of your chosen image.
To get the seed of an old image, use the Job ID, type “/show job_id” command and paste the Job ID. You can react to the revived Job again with the ✉️ emoji to get the seed.
Remix mode lets you modify prompts for the upcoming output. It’s extremely useful for image variations, as otherwise you can’t modify your prompt and you may totally lose that unique output.
Toggle “Remix mode” in “/settings” to add details to your prompts when making variations of images. Or, simply type “/remix” to turn Remix mode on or off.
Multi-prompts in Midjourney
Using multi-prompts is one of the best methods of getting precisely what you want from an image. Multi-prompts allow you to separate your prompts into several different concepts, which Midjourney will consider individually.
By adding “::” to your prompt, Midjourney will consider each idea separately. For example, if you type “/imagine cheese:: cake” rather than “/imagine cheesecake,” you’ll get a set of results that look like cheese in the shape of a cake instead of a literal cheesecake.
You can also add prompt weights to your multi-prompts. If you type “/imagine cheese::2 cake” as a prompt, Midjourney will make the word “cheese” twice as important as the word “cake.” The result is an image that resembles cheese far more than cake.
Negative prompt weights remove unwanted elements from images and can be added by typing “::-.5” after the component you want to remove or lessen. Negative weight prompts work similarly to the “–no” parameter, which removes unwanted aspects from an image.
Tips for Writing High-quality Midjourney Prompts
Crafting high-quality Midjourney prompts is a skill that you’ll perfect over time. You’ll want to add as much detail as you can to your prompt and know exactly how to lay it out to get the results you want from Midjourney. Check out the Midjourney community showcase for inspiration when writing prompts.
To make detailed prompts, you’ll want to give Midjourney style directions, such as the artistic technique, the camera angle, and lighting. And, of course, the more detail you provide about what you want from your image, the better it’ll turn out. Multi-prompts and prompt weights will help you separate ideas and emphasize specific ideas.
- Useful details to add to your Midjourney prompts include:
- Adjectives (delicious, graceful, filthy, beautiful)
- Artistic style (surreal, cartoonish, isometric)
- Inspiration (Studio Ghibli, Andy Warhol, Trey Ratcliff)
- Camera angle (wide-angle shot, aerial view, close-up)
- Lighting (frontal, backlighting, bright::1, dim::-0.5)
- Sensory details (smells, sights, sounds)
Using ChatGPT to Generate Midjourney Prompts
Try using ChatGPT to generate Midjourney prompts if you’re struggling for inspiration. Ask ChatGPT to act as a Midjourney prompt generator and provide ChatGPT with a basic prompt and any specific details and styles you want to include. ChatGPT will write a more detailed description for Midjourney, which you can use as a basis for your next prompt.
Below is an example of a prompt you can send ChatGPT to generate Midjourney prompts:
“I want you to act as a prompt generator for Midjourney’s artificial intelligence program.
Your job is to provide detailed and creative descriptions that will inspire unique and interesting images from the AI. Keep in mind that the Al is capable of understanding a wide range of language and can interpret abstract concepts, so feel free to be as imaginative and descriptive as possible.
For example, you could describe a scene from a futuristic city, or a surreal landscape filled with strange creatures. The more detailed and imaginative your description, the more interesting the resulting image will be.
Here is your first prompt: <Insert Prompt>”
Here’s several examples and use cases of Midjourney prompts in different visual styles for extra inspiration for making your own Midjourney masterpieces.
Portraits in Midjourney
Midjourney version 5 can produce photo-realistic images with highly detailed prompts. Include specifics like what the person should wear, the setting, the camera angle, and even which film and camera to use. Add an “ar–” suffix to change the aspect ratio to change the image’s height and width.

Surrealism in Midjourney
This image particularly favors the work of artist Roger Dean with an pleasing color palette. The prompt writer used the chaos (“–c”) parameter to devise a grid of four images with more varied and unusual compositions, which is ideal for abstract artworks.

Isometric or Rolling Backgrounds in Midjourney
Specifying their preferred aspect ratio and style has helped this user produce some unique, colorful cartoon isometric cityscapes. Many people using similar prompts have been able to turn these into rolling backgrounds for animations.

Landscape photography in Midjourney
This use case is just one example of the beautiful landscapes Midjourney can produce. Using Josh Adamski and Elizabeth Gadd as inspiration with a stock photo style illustrates how adept Midjourney version 5 is at constructing HD images.

Illustrations in Midjourney
Midjourney is capable of creating unique and captivating illustrations. The highly detailed prompts can be used to generate inspiration for a wide range of characters, places, and objects.

Cyberpunk art in Midjourney
By setting highly specific photography details including light sensitivity and shutter speed, this user has developed a prompt for a high-realism cyberpunk street performance.

Remember: Midjourney is constantly evolving, so ensure you check Midjourney announcements in Discord for all the latest updates and changes!
That’s all for this Midjourney prompt guide. Let us know in the comments below if you’ve written any Midjounrney prompts you’re particularly proud of!
Privacy Preference Center
Privacy preferences.
- Privacy Overview
- Strictly Necessary Cookies
This website uses cookies so that we can provide you with the best user experience possible. Cookie information is stored in your browser and performs functions such as recognising you when you return to our website and helping our team to understand which sections of the website you find most interesting and useful.
Strictly Necessary Cookie should be enabled at all times so that we can save your preferences for cookie settings.
If you disable this cookie, we will not be able to save your preferences. This means that every time you visit this website you will need to enable or disable cookies again.
Crafting Exceptional Prompts for Midjourney
# what is midjourney.
Midjourney acts like a digital artist, available at your fingertips. Once you engage with their Discord bot, all it takes is a text prompt to unlock the AI's enormous creative potential. Read more about Generative AI here .
At its core, Midjourney uses linguistic inputs, commonly known as prompts, to generate graphical representations. For instance, a beginner could simply type " a beach at sunset ", and Midjourney would fragment this into "beach" and "sunset," synthesizing an image accordingly.
However, for those with more advanced knowledge, prompts can be intricate. Take, for example, " a Venetian canal with reflections of the setting sun on the water. " Here, the algorithm will dissect your prompt into more complex constituents like "Venetian canal," "reflections," "setting sun," and "water," and generate a far more nuanced visual.
To initiate the generation process, use the /imagine command as a prefix to your prompt.
Developed by the San Francisco-based research lab, Midjourney, Inc., this tool leverages advanced Natural Language Processing (NLP) technologies, reminiscent of OpenAI's DALL-E and Stable Diffusion algorithms.
Midjourney is a transformative generative AI engine, designed to transmute your linguistic expressions into awe-inspiring visuals.
# The Mechanics of Midjourney
The AI uses a vast data repository to interpret your prompts, ensuring that the output resonates with your vision. For an extensive overview of parameter fine-tuning, visit Midjourney web wiki .
# A Spectrum of Prompts
Prompts can range from simple to complex based on your imagination and desired outcome. Here are some examples:
- Metaphorical Constructs : To invoke a thematic effect like surrealism, use " /imagine Dali-esque melting clocks "
- Composite Entities : If you want to merge two different elements, a prompt like " /imagine an elephant with butterfly wings " would suffice.
- Chromatic Nuances : For more color-focused images, use terms like " /imagine monochrome blue jazz clu "
# Basic Midjourney prompts
Begin with straightforward words, phrases, or even emojis. The simpler the better; excessive complexity could dilute the bot's focus**.**

# Tips for Writing Prompts on Midjourney
- The more specific you are in your prompt, the more likely Midjourney is to generate an image that matches your vision.
- For example, instead of writing "a cat," you could write "a photorealistic portrait of a tabby cat with green eyes."
- When you are writing your prompt, be sure to use keywords that will help Midjourney understand what you are looking for.
- For example, if you want Midjourney to generate an image of a cat, you could use keywords like "cat," "feline," "whiskers," and "paws."
- Adjectives and adverbs can help you to add detail and specificity to your prompt.
- For example, you could write "a photorealistic portrait of a tabby cat with green eyes, sitting on a windowsill in the sunlight."
- If you can, use examples to help Midjourney understand what you are looking for.
- For example, you could write "a photorealistic portrait of a tabby cat that looks like this [URL link to an image of a tabby cat]."
- Don't be afraid to experiment with different prompts. See what works and what doesn't.
- The more you experiment, the better you will get at writing effective prompts.
- If you want Midjourney to generate an image in a specific style, be sure to use keywords that are relevant to that style.
- For example, if you want Midjourney to generate an image in the style of Vincent van Gogh, you could use keywords like "van gogh" and "impressionism."
# How to Make Midjourney More Realistic
- When you are writing your prompt, be sure to use keywords that are relevant to realism.
- For example, you could use keywords like "photorealistic," "detailed," and "lifelike."
- Use adjectives and adverbs to describe the desired level of realism.
- For example, you could write "a photorealistic portrait of a tabby cat with green eyes, rendered in a hyper-realistic style."
- Midjourney has a variety of settings that can affect the realism of the images it generates.
- Experiment with different settings to see what works best for you.
# Advanced Midjourney prompts
For a more nuanced result, advanced prompts can incorporate image URLs, multiple text phrases, and parameters. To impact the visual style and content, place image URLs at the beginning of the prompt.

# Effective Prompting Tips
- Brevity vs. Detail: While a word or emoji can generate an image, leveraging the bot’s default style, descriptive prompts yield more unique results. However, avoid convoluted sentences; focus on the core ideas.
- The Power of Word Choice: Opt for specific synonyms to enhance the influence of each word. For instance, use 'gigantic' instead of 'big'. Eliminate superfluous words where possible.
- Punctuation and Syntax: Although the Midjourney Bot does not interpret grammar as humans do, utilizing commas, brackets, and hyphens can help organize your thoughts better.
# Image Parameters
Parameters can modify various elements like aspect ratios, models, and upscalers. These should be placed at the end of the prompt for optimal results. Discover more about Parameters.
Fine-tuning can be achieved through specific parameters:

- Stylistic Preferences : Inject styles by adding keywords like " impressionistic ," " Baroque ," or " noir ."
- Degree of Stylization : Use the -s flag followed by a number to control stylization, e.g., -s 2000 for high stylization.
- Level of Abstraction : The -chaos flag followed by a number (0-100) can help control the level of abstraction, e.g., -chaos 70 .
- Resolution & Aspect Ratio : Use hd or quality followed by a number for resolution and -ar for aspect ratio, e.g., -ar 16:9 .
- Exclusion Criteria : Utilize -no followed by the object you want to exclude, e.g., -no clouds .
- For distant shots : "Wide-Angle Shot", "Ultra-Wide Angle", "Far-Shot", "Aerial View" or "Satellite View"
- For medium shots : "Medium-Shot", "Top-Down Shot", "Ground-Shot", "Ground-Shot", "Low-Angle Shot", "High-Angle Shot", "Full-Shot", "Full-Body Shot" or "Full-Length Shot"
- For shots very close to the subject : "Eye-Level Shot", "Close-Up", "Glamour Shot", "Glamour Portrait", "Macro-Shot" or "Macrophotography"
- Read more about lighting and environment .
- Lighting Conditions : To dictate the mood or atmosphere, you can specify terms like "cinematic light" or "volumetric light."
10 Midjourney Prompt Examples
# Advanced parameters
Navigating the selection of choices available in Midjourney Bot can be an ambiguous task. However a comprehension of these elements can give you matchless jurisdiction over your imagery propagation tasks. In this composition we explore in detail the parameters you can use to boost the distinction, haste, and individuality of your imagery propagations.
# Aspect Ratios
Aspect correlation plays an important role in how your formed picture painting will gaze. By operating the -aspect or -ar directive, you can control the aspect correlation of the painting to suit your explicit essentials.
# Level of Abstraction
Use this if you want to introduce a plane of randomness or variance to your picture paintings. The -chaos flag followed by a number (0-100) can help control the level of abstraction, e.g., -chaos 70 .
# Speed Up Operations
This command allows you to override your current settings and execute a single job at a higher speed using Fast Mode.
# Balancing Image and Text Weight
The --iw command allows you to balance the weight of the image prompt relative to the text weight. This is particularly useful when you want to influence the output more heavily with either the image or the text.
# Using Denial Prompts
The -no admonition allows you to eliminate convinced particulars from your formed picture painting. For instance, -no plants would strive to remove plants from the painting.
# Quality Control
Distinction is a grave influence in imagery propagation. The -quality directive allows you to adapt how much rendering age you seek to bestow.
# Switch to Relax Mode
The --relax command is designed to override your current setting and run a single job using Relax Mode, giving you a less rushed and more detailed output.
# Efficient Repetitions
This parameter allows you to create multiple jobs from a single prompt, making it easier to rerun a job multiple times.
# Controlling Image Grids
The --seed command allows you to influence the initial randomness of the image grids generated by the bot.
# Partial Job Completion
The --stop command allows you to terminate a job partway through the process, which could result in blurrier, less detailed images.
# Impacting Aesthetics
This command allows you to influence the aesthetic style applied to your generated images.
This admonition permits you to act upon the aesthetic vogue practical to your begotten paintings.
# Seamless Patterns
Use the --tile command to generate images that can function as repeating tiles, creating seamless patterns.
# Turbocharge Your Job
The --Turbo command allows you to execute a job in Turbo Mode, significantly speeding up the process.
# Experimental Aesthetics
Dive into the unknown with the --Weird command. This experimental feature allows you to explore unique aesthetics.
You could find some extra information about Midjourney prompting here or here
# /image Command
Nowadays, in the online realm, photos work as compelling instructions, molding a project's full appearance, from its structure to its vibrancy. Wielding these instructions can culminate in a fusion of text and visual signs, ensuing in engaging and enthralling content. Dive into this guidebook to master the subtleties of operating image instructions.
# Integrating Images into your prompt
- A photo instruction is typically stationed at the onset of your assignment.
- To gain the finest conclusions, an instruction can be coupled with another photo or text. This fusion is imperative for the apparatus to operate efficiently.
- Verify that the link guides directly to the web photo without any redirections.
- Adhere to extensively accepted photo formats: .png , .gif , .webp , .jpg , and .jpeg .
- Tip: In numerous browsers, obtaining a photo URL is as easy as right-clicking or long-pressing on the photo and opting for 'Copy Image Address'.
- Mobile-Friendly Photo Instruction : For mobile users, the /blend order streamlines the progression, making it user-friendly and productive.
# Uploading Photos on Discord
Here's a step-by-step breakdown:
- Generating a Direct Image Link: Your photo URL should conclude with familiar extensions such as .png , .gif , .webp , .jpg , or .jpeg .
- Initiate by pasting your chosen photo into a chat session with the Midjourney Bot.
- Simply press Enter to broadcast your photo.
- For Desktop Users : Right-click the photo and choose "Copy Link."
- For Web Users : Click the photo to expand, then right-click and pick "Copy Image Address."
- For Mobile Users : A long press on the photo will unveil the "Copy Media Link" choice.
- If these approaches are unsuccessful, expanding the photo and opting for "Open in Browser" frequently does the trick, granting you access to the photo URL.
- Embedding the Photo URL in Your Assignment : As you type /imagine , a prompt box emerges. You can either haul the photo file there or paste the previously copied link.
# /describe Command
The /describe command serves as a robust utility for those who want to explore AI-generated art on a new level. Whether you are into abstract forms or more realistic scenes, this feature offers a plethora of options.
# How the /describe command operates
- Initialize the Command : Open the Discord chat and type /describe followed by the "Enter" key.
- Upload Your Image : now would you simply click on the designated box or simply drag and drop the file.
- Analyze and Receive Output : Midjourney processes the image and provides four distinct text prompts, each describing different aspects of your uploaded image.
For instance, if you upload an image featuring a scenic landscape with mountains and lakes, you might receive prompts like the ones below:
- Realistic waterfall pouring from cloud-covered mountains, with a vibrant color palette
- Surreal landscape featuring spherical sculptures and intricate detailing
- A harmonious blend of natural elements with a psychedelic twist, illuminated by a luminous water body
These text prompts can be employed to generate a range of unique AI-generated art pieces.
# Conclusion
Midjourney's advanced features provide an unparalleled level of customization and precision for your AI-generated images. By mastering these functionalities, you can create art that is not only unique but also aligns perfectly with your vision.
Now, how can you best leverage these advanced features to align with your specific project goals? Feel free to share your thoughts or queries in our Discord .
All rights reserved © HARPA AI TECHNOLOGIES LLC , 2021 — 2024
Designed and engineered in Finland 🇫🇮
Crafting Effective Midjourney Prompts: A Comprehensive Guide
Identify your audience, who are they, what do they need, how can you help, define the journey, map out the path, pinpoint the midpoint, highlight key stages, craft engaging prompts, use active language, be clear and concise, test and adjust, measure effectiveness, gather feedback, make improvements, examples of midjourney prompts, examples from different industries, examples from successful brands, how to apply these examples.
Imagine you're on a road trip. You've passed the starting point but you're still not at your destination. That's where a midjourney prompt comes in — a nudge or suggestion that guides you in the right direction, keeping you engaged and on track. This is your ultimate midjourney prompt guide, designed to help you create effective, engaging prompts that connect with your audience and drive them to take action.
Before you can even think about crafting a midjourney prompt, you need to get to know your audience. Understanding who they are, what they need, and how you can help, gives you the necessary insight to create prompts that resonate. Let's break this down:
Identifying your audience involves understanding their demographics, interests, and behaviors. Are you speaking to teenagers interested in fashion trends, or are you talking to small business owners looking for marketing tips? By knowing your audience, you can create a midjourney prompt guide that speaks directly to them.
Now that you know who your audience is, it's time to identify their needs. What challenges are they facing? What questions are they asking? A compelling midjourney prompt addresses these needs, offering your audience a solution or answering a pressing question.
Finally, consider your own role. How can your product, service, or content help your audience? Maybe your online course can help them learn a valuable skill. Perhaps your blog provides them with the latest industry news. Your midjourney prompts should guide your audience towards the value you offer, keeping them engaged and moving forward on their journey.
Once you've identified your audience, the next step in this midjourney prompt guide is to define their journey. This involves mapping out the path they're going to take, pinpointing the midpoint, and highlighting key stages. Here's how:
Start by outlining the steps your audience will take. For example, if you're a software company, the journey might start with a free trial, move on to a tutorial, and end with a premium upgrade. Your midjourney prompt might come in during the tutorial phase, gently nudging your users to consider upgrading.
The midpoint, as the name suggests, is the middle of the journey. It's the point where your audience might start losing interest or momentum. A well-crafted midjourney prompt at this stage can reignite their enthusiasm, reminding them of the value and benefits that await them as they continue on.
Lastly, highlight the key stages in your journey. These are the points where a midjourney prompt can be particularly effective. For instance, in an online course, key stages might include the end of each module. A prompt at these points might encourage learners to recap what they've learned or introduce them to the next module.
Now that you have a clear understanding of your audience's journey, let's dive into the meat of this midjourney prompt guide: crafting engaging prompts. You want your prompts to not only grab attention but also inspire action. Here's how you do it:
Active language is all about making your prompts direct and compelling. Instead of saying "Our next module could be of interest", say "Discover intriguing insights in our next module". This subtle change shifts your prompt from a passive suggestion to an active invitation.
Clarity and conciseness are key when crafting your midjourney prompts. Your audience should immediately understand what you're asking them to do and why. For example, instead of "Why not consider continuing your journey and finding out what's next?", a clearer, more concise prompt might be "Continue your journey. Uncover what's next."
Finally, each midjourney prompt should add value. This could be in the form of a benefit ("Get exclusive access when you upgrade now"), a piece of useful information ("Our next module explores cutting-edge SEO techniques"), or a solution to a problem ("Struggling with the course content? Our premium plan offers personalized support"). The more value you can pack into your prompt, the more likely your audience is to respond.
Once you've crafted your midjourney prompts, your job isn't over yet. The next step in this midjourney prompt guide is to test and adjust your prompts based on their performance. Here's how:
First, determine if your prompts are actually working. Are they encouraging your audience to continue their journey, or are they falling flat? You can measure this by tracking metrics like click-through rates, conversion rates, and time spent on your site after encountering the prompt.
Second, don't shy away from asking your audience for feedback. If your prompts aren't as effective as you'd like, your audience can provide valuable insight into why that might be. Perhaps the language isn't engaging, or the value isn't clear. Surveys, user testing, and feedback forms can be great tools for gathering this information.
Finally, use the data and feedback you've gathered to make improvements. If a particular prompt isn't performing well, try a different approach. Maybe a more direct call to action, or a stronger value proposition, will yield better results. Remember, the goal is to guide your audience along their journey, and that requires constant fine-tuning to ensure you're hitting the mark.
Now that we've talked about how to create and refine your midjourney prompts, let's look at some real-life examples. Observing how other brands use midjourney prompts can spark ideas and help you further improve your own.
In the retail industry, a midjourney prompt might be a pop-up reminding customers of items left in their shopping cart. For example, Amazon uses this technique effectively to guide customers towards purchase completion. In the travel industry, booking sites like Expedia might use prompts suggesting add-ons like car rentals or hotel bookings in the middle of a flight booking process. These prompts serve to enhance the user's overall experience and journey.
Successful brands like Netflix and Spotify use midjourney prompts to improve user engagement. Netflix prompts users with personalized recommendations based on their viewing history, keeping them engaged and consuming content. Spotify uses prompts to suggest new songs or artists based on what the user is currently listening to, seamlessly guiding them on their music discovery journey.
Looking at these examples, you might be wondering how to apply these ideas to your own midjourney prompts. Start by thinking about your user's journey and the actions you want them to take. Then, use a mix of clear language, added value, and strategic placement to design prompts that guide your audience towards those actions. Remember to keep testing and adjusting based on user feedback and performance data to create an effective midjourney prompt guide for your brand.
If you're looking to further improve your skills in crafting effective midjourney prompts, don't miss the workshop ' Midjourney AI: Beginners Crash Course ' by Ansh Mehra. This comprehensive workshop will enhance your understanding of midjourney prompts and provide you with practical tips and strategies to create engaging, impactful prompts for your audience.

Live classes every day
Learn from industry-leading creators
Get useful feedback from experts and peers
Best deal of the year
* billed annually after the trial ends.
*Billed monthly after the trial ends.

Prompt Design Resources for MidJourney AI
Visual Notebook ▪ Prompter Builder ▪ Shop ▪ Blog Entries
by Shane McGeehan
About Me ▪ Contact ▪ Donate
Visitors in 2023!
My name is Shane and I am sort of a “swiss army knife” for anything digital. I work as a professional video editor, but also enjoys everything from cameras, to graphics, to sculpting 3D forms in Virtual Reality. I am a tech geek and weird artist who got an MFA because I was bored. Well, I got bored again and along came AI imagery. Since I love to teach, I created this website in order to help others master MidJourney and create new things, because creativity makes us happy, and we all deserve to have fun and explore our imaginations.
Prompter Guide is an incredibly detailed and organized resource with visual examples , insightful blog posts , and even a feature-packed prompt design tool . As MidJourney grows and evolves, I plan to keep this resource free and constantly updated – so you might as well bookmark it!

(me… as a muppet)
Recent Updates
Prompter 02/17 Update → Added Niji V6, and a text-only option for Stable Diffusion, Dalle, etc. Version 6.0 → Version 6 compatibility added to all notes. Video Released → How to Fine Tune your own Style! Imagine Shirts → Just launched a shop page with some sweeeeeeeeet shirts. About Me → Added a new page with some background info about me and my work.

Get Your Own Prompter Shirt!
Table of contents.
Click on a category below to jump to that section, or copy these links to share with someone else. Sharing is caring!
Chapter 1: Beginner Notes
- MidJourney → A text-to-image artificial intelligence, that is awesome.
- Prompter → A free tool to assist and inspire prompt building.
- Beginner Tips → Useful info everyone starting out should know. └ Signing Up (Discord and Subscriptions) └ Pro Tips (what to know when you start)
Chapter 2: Discord Notes
- Discord Commands → Prompting, settings, and more. └ Beginner Commands , GPU Hours , Prompting (/imagine, /shorten, /describe), Privacy
- Discord Interface → How to navigate the main interface. └ Initial Options (re-rolls, variations, and upscales) └ Vary and Zoom (vary, zoom) └ External Upscaling (upscale using other software)
- Special Features └ Vary Region (inpainting, selective changes) └ Remix (edit prompts or switch models) └ Remaster (convert V1/2/3 into Test Creative) └ Upscaling Choices (options and quality) └ Emoji Reactions (delete images, get seed numbers, and star images)
Chapter 3: Prompting Notes
- Workflow → Some methods I use to create with AI. └ Additive , Poetic , Image Input
- Prompt Writing → Things to think about when designing prompts. └ Main Idea
- Descriptors → Terms to define your image └ Descriptor , Medium , Camera , Lighting , Color └ Artist , Movie , Game └ Weights (::), Separators (,)
- Image Prompts → Use your own images as prompts. └ Uploading , Image Weight , Image Blending
- Prompt Batching → Send a bunch of prompt through at once. └ Repeat (multiples), Permutations (variations of terms)
Chapter 4: Parameter Notes
- Parameters → Fine tune your prompt with quality, stylize, seeds, and more. └ Algorithms (MidJourney: V1, V2, V3…), Test/TestP (MidJourney + Stable Diffusion), NijiJourney (anime, illustrative) └ Output Parameters └ Quality , Stylize , Style , Chaos , Weird , Stop , Tile , HD , No , Image Weight └ Seeds , Upscaling , Video └ Frame Size (detailed examples in the Aspect Ratios section)
- Aspect Ratios → Change up your frame size. └ Cinema , Phones , Photography └ Super Wide , Super Tall └ Others
New Blog Entries
Get shpongled.
Mar 28, 2024 | Image Prompts
Are you Shpongled? (if so, you rock) I’ve been playing around with the new cref feature that allows you to refrence facial details from another image, then randomly decided to put the Shpongle Mask in my prompts… Immediately, I laughed out loud. 🤣
Anyway, here is the Shpongle Man: …in Star Wars with R2D2. …in The Simpsons watching TV. …in a photograph by Lewis Hine. …in a Shpongle concert! 🍄
Hold up. You don’t know what the heck Shpongle is? Okay, I am warning you, be careful, this might change your life: https://tinyurl.com/GetShpongled
(click the prompt to copy it!)
/imagine prompt: a movie scene from star wars of a man with r2d2 --ar 2:3 --cw 100 --cref https://s.mj.run/CvBGgkTWP7c --v 6.0

(click to view)
Photography to Video, in RunwayML
Dec 3, 2023 | Art , Video
I will admit, it’s not perfect, but it is quite interesting, and shows the direction we are headed with these new powerful creative tools. I am excited to see where Runway as well as others like Pika take this new technology.
Be Careful Out There
Nov 15, 2023 | Thoughts
Here is a very different kind of blog post. A warning, or something like that.
We need to talk about something really weird that’s happening on facebook. Recently there has been a huge spike in random “pages” posting AI generated images of a person and art with stupid captions like “my wife made this wooden owl with his own hand, appreciate it” or “my son made this and no one likes it, please like” and then, because most people are fucking stupid, the image gets literally thousands of likes and shares, along with boomer comments like “amazing talent” and stuff (sorry, not sorry, because most of the commenters are boomers). Here are a few I collected in the last 48 hours.
Now, it seems harmless, but why would “Life Is Beautiful” or “Garden Flowers” or “Love Dogs” take the time to post awful AI images just for some likes? It doesn’t add up to me. Maybe I am overthinking things, but I feel like this could be either a simple way to gather a list of names and profiles of very gullible people to later scam out of money or passwords – or even darker, what if something like this was a big bait-and-switch plan, and when the US election season heats up “Love Dogs” becomes “Vote Freedom” or something and starts spreading political misinformation or even worst, false political AI images. Again, I don’t know, but it’s freakin’ weird and nothing can be done about it because Facebook is a runaway monster. I hope I am just paranoid, but you never know.
Anyway, be careful out there. Don’t accept everything as truth, and always look at images very closely to make sure they are not fake. Question everything, because as I see it, this is only the beginning.

Evil Shane Styles
Nov 8, 2023 | Humor , Tricks , V5
Evil Shane … I made a custom “Evil Shane” style, and I encourage you all to make some Evil Shane’s and share them if you are up for it, prompt below… but, before you think this is some genius science, it’s not. It’s stupid. I love messing around with new tool, plus it’s fun, and I love fun. (1) I used the new /TUNE feature with a URL link of a headshot of myself with a simple prompt “portrait” after it. (2) I selected a few really creepy Shane images to fine tune my style. (3) I then ran a bunch of PERMUTATION prompts to find the best looks with variable stylize and image weight. (4) I used the /PREFER OPTION SET command to make –EvilShane replace a prompt with my URLs headshot,style code, stylize, and image weight. (5) Lastly, I pushed through a bunch of random prompts adding –EvilShane to them to get really weird results! (keep in mind the –EvilShane thing is local, for me only, so you’ll need to copy the entire prompt below) Want to make an Evil Shane? Just type in any prompt idea and add to it:
/imagine prompt: YOUR PROMPT HERE https://s.mj.run/ZAVpESe9BOw https://s.mj.run/rATstUmIv6w --style buLsr5r9E9IERM-2U4NwPvHtUVQG --stylize 850 --iw 0.8

Fine Tune Your MidJourney Styles
Nov 5, 2023 | Tricks , Tutorial , V5 , Video
My last video about the Style Tuner was a quick intro, but now we dig deeper and really fine tune those looks. Here is a longer tutorial that goes more in depth, so you can be a pro in no time. Learn about the new Prompter and a few useful features, how to best use the Style Tuner for your work, and follow along with some random and funny prompts.
HERE is a link to the Style Tuner I used so you can play around, and below are style codes for the three example styles in the video. Feel free to copy and use in your own prompts while you watch!
--style 1GRrA8D6rhfnB2c2nsN1E7euH (bright, washed out, vintage)
--style Hkrz0ovIoeA5q4U0cbR (dark, underexposed, creepy)
--style yVW0VP8Wuj (colorful, pop, surreal)
View More From My Blog ►
Pin It on Pinterest

- $ 0.00 0
Recently added
Anime Stickers , Sticker Packs
Home » Blog » The Ultimate Midjourney Prompt Guide | AI Artwork
The Ultimate Midjourney Prompt Guide | AI Artwork
- March 5, 2023
What is Midjourney?
Midjourney is an innovative AI image generation tool that allows users to input prompts and parameters, as well as images, to produce unique and personalized images. Utilizing a powerful machine learning algorithm trained on vast amounts of image data, Midjourney generates images that are tailored to the user’s input.
It’s an exciting platform that makes AI art generation easy and fun. Users interact with a midjourney bot on Discord to generate images. There are free and paid plans. It has solid performance and can create images that will spark your imagination.
As with many machine learning models, Midjourney can be somewhat of a black box, meaning that the inner workings of the algorithm may not be fully understood by the user. However, the end result is often a highly impressive and personalized image that is sure to captivate and inspire.
Kawaii Style AI Art
Using midjourney to create sticker designs.
Midjourney is a great place to start if you want to create cool stickers.
Here are some keywords to consider including in your prompts to have Midjourney make sticker designs:
- Die Cut Sticker
- Vinyl Sticker
- White Background
Combine these keywords with your artwork idea, and you can start to create some really neat stickers. Here’s an example of a prompt in action:
/imagine prompt: Cute Pikachu Sticker, cartoon style die cut sticker, white background, simple
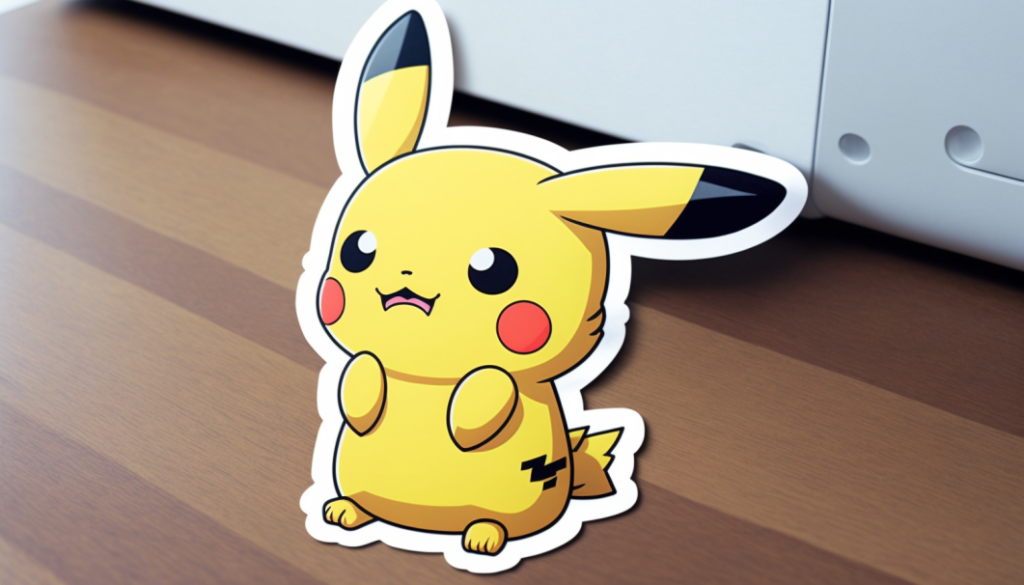
As you can see, it’s super cute, and if you simply remove the background in Photoshop or something similar, it would make a great sticker!
Aspect Ratio
Design themes using ai, art design themes using ai.
To start out, let’s talk about different art styles and themes to get your creative juices flowing. We’ll share some of our favorite styles and themes, along with example prompts. Keep in mind you can combine these art styles and themes with our sticker keywords to get a sticker design in any style you like. For example:
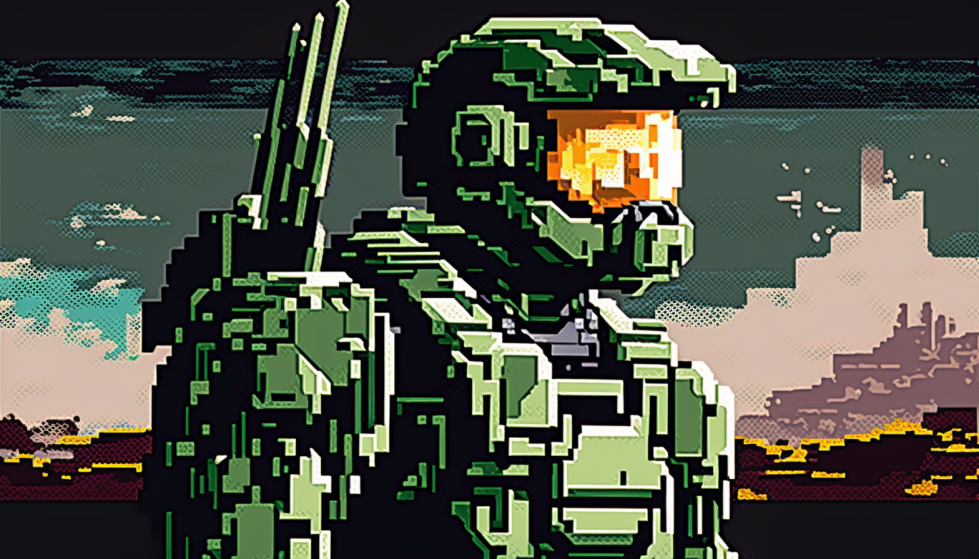
Here our prompt was: master chief, halo, 8-bit retro pixel art graphics –ar 16:9

Here we simply added a bit to the prompt: master chief, halo, 8-bit retro pixel art graphics die cut sticker –ar 16:9
Retro Video Game Styles
Of course at Culture of Gaming, we are gamers. In particular we love retro gaming. Using the power of AI, it’s pretty easy to make high quality video game themed stickers using various graphic styles. Here are a few that we like:
- 16bit 1990’s Style Point and Click Adventure Game
- 8bit retro pixel graphics
- 32bit isometric
Of course you can mix and match these prompt ideas with classic games, modern games, or something non-gaming related. Here are some examples:
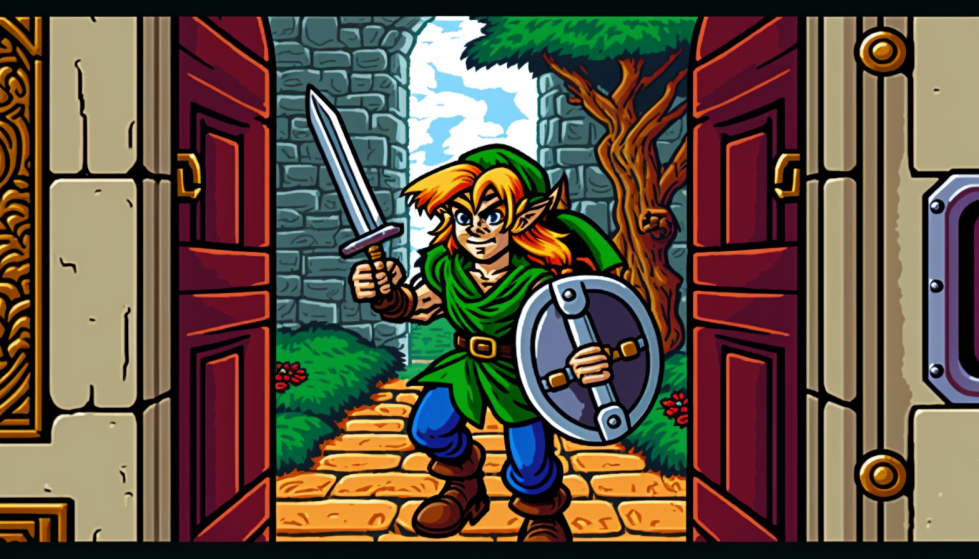
Prompt: Link from the Legend of Zelda , 1990s point and click16bit adventure game –ar 16:9
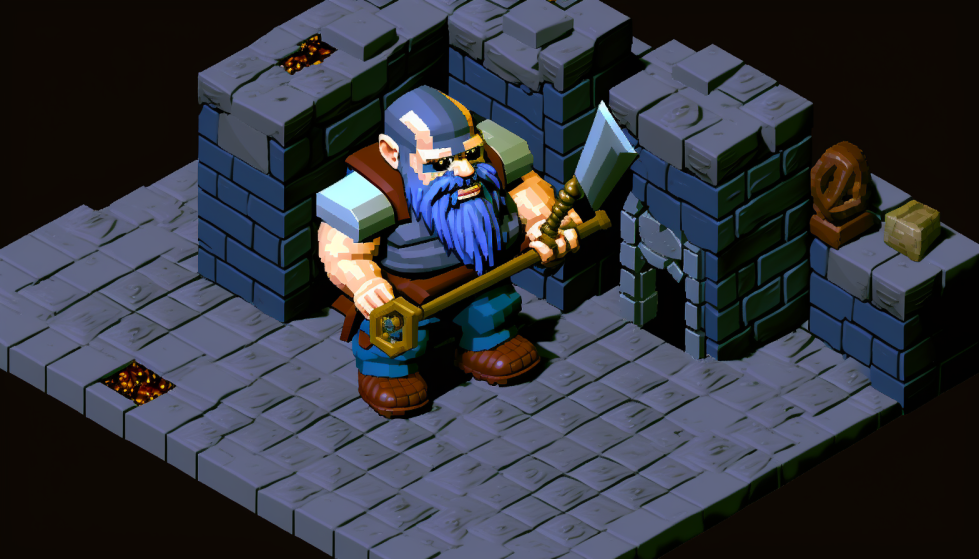
Prompt: Dungeon Crawling Dwarf, 32-bit isometric –ar 16:9
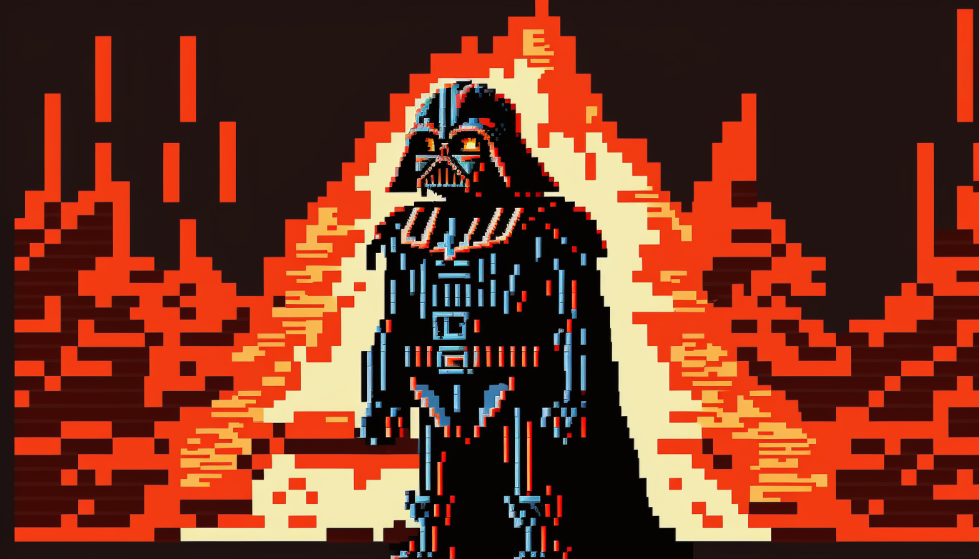
Prompt: Darth Vader, 8-bit retro pixel art graphics –ar 16:9
Anime Style AI Art Design
It’s no secret we’re big fans of anime, too! In particular, anime art styles make for great sticker designs. Something cool about MidJourney is that you can prompt it to use specific artist styles. Combine an artist’s name in your prompt with other things you want, and you can get some really neat artwork that you can use for your sticker designs.
Here’s some ideas to include in your prompts:
- Masashi Kishimoto (Artist behind Naruto)
- Makoto Shinkai (One of my favorite Anime Artists)
- Akira Toriyama (A Classic Anime Artist)
- Japanese Anime Style
- Illustration
- Bold Color Choices
- Dragon Ball Style
- Naruto Style
And here are some examples of awesome artwork we generated by mixing and matching these keywords:
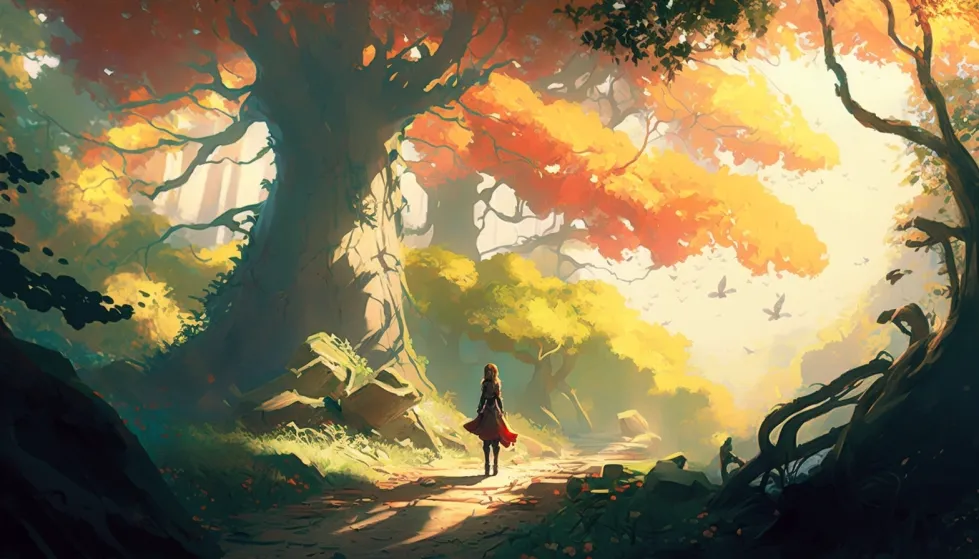
Prompt : Elf forest wind leaves trees sun beams, Art by Makoto Shinkai, bold color choices –ar 16:9

Prompt: Robot, Japanese anime cartoon, Masashi Kishimoto style, Naruto style –ar 16:9
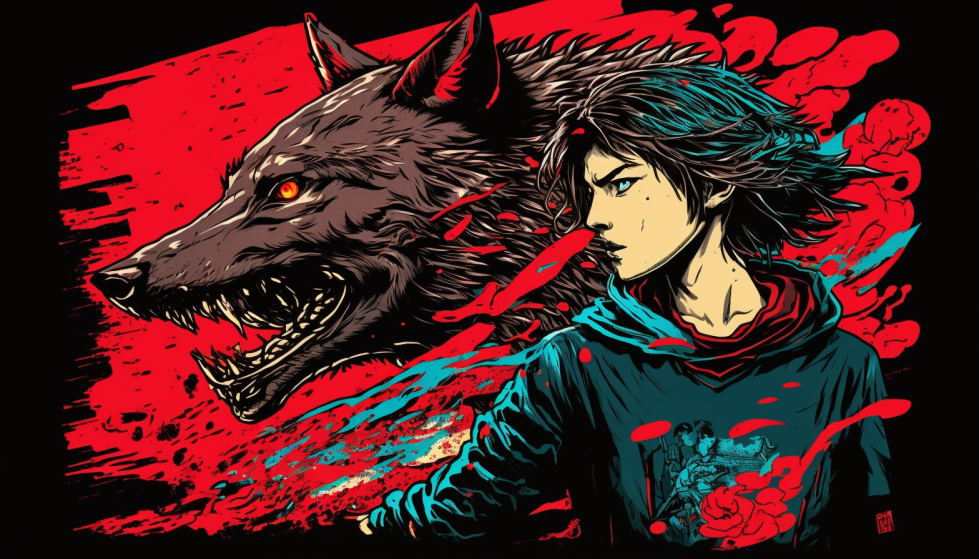
Prompt: Dire Wolf, Akira Toriyama, Japanese Anime Style, Illustration, bold color choices –ar 16:9
Comic Book Style Art
We’re on a nerd theme here with gaming, anime, and now comic books. Don’t worry, we’ll get to other styles soon enough!
Even if you aren’t nerdy like us here at CoG, you probably like Superhero, and comic book themed stuff, even if you don’t actually read comic books. The fact is, that comic book art is really fun, and it makes for great stickers because the designs are bold, bright, and exciting!
Here are some keywords to consider:
- Comic Book style
- Graphic novel style
- Bold colors / Bold Lines
- Inkpunk Diffusion (An art style that is similar to comic book)
- Al Williamson (A classic comic book artist)
- Steve Dillon (A personal favorite graphic novel artist)
- Panels (if you want it to look like a comic book page with different panels)
Now for some examples:
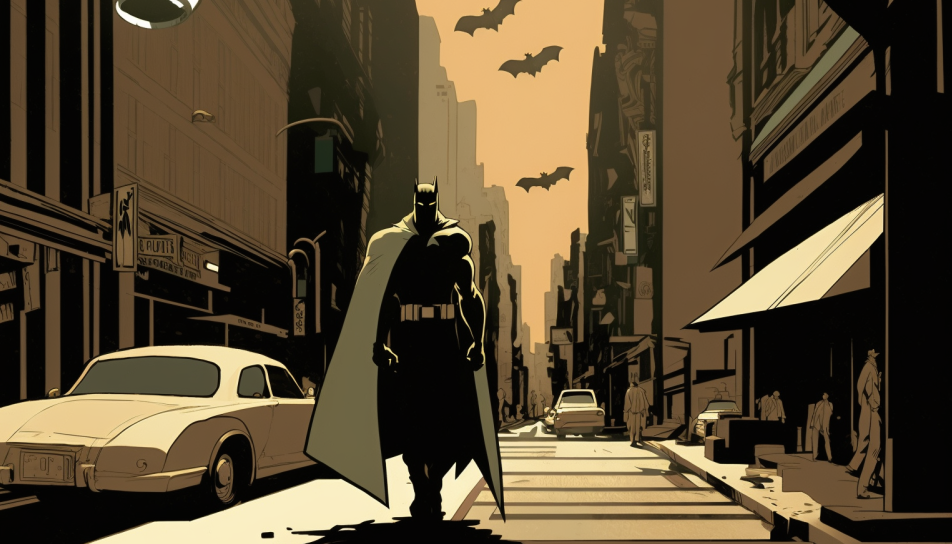
Prompt: Batman city street, Steve Dillon style, inkpunk diffusion Contrast –ar 16:9
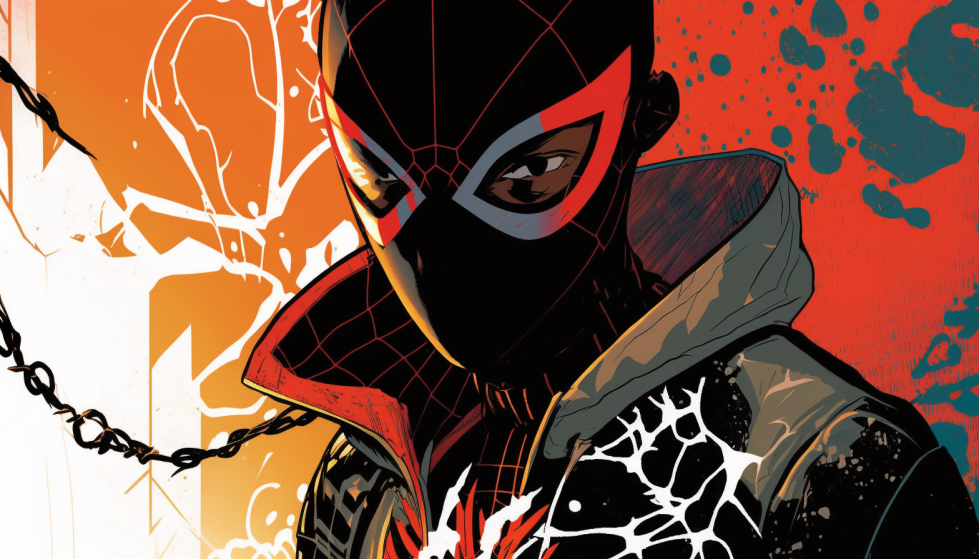
Prompt: Miles Morales, Al Williamson style illustration, intricate lines and bright colors, inkpunk diffusion –ar 16:9
Prompt: f-18 Fighter Jet flying over a city, comic book style, bold colors and lines –ar 16:9
Side Bar: Weighting Your Prompts
Now seems like a good time to talk about weighting prompts in midjourney.
To weight your prompts, the key is to break up the prompt into its key components using :: For example, we can weight a Comic Book style with Anime Style to mix them up at various ratios. For example, if we do Robot Steve Dillon comic Book Style :: Robot Naruto Anime Style it would weight them equally. On t he other hand, if we use ::2 then it weights the first section of the prompt at 2x the second part of the prompt.
Weighting in Midjourney prompts allows us to give different elements of the prompt proportional weights. For instance, if we were to write “red::1 blue::0.5”, the Midjourney bot would understand that blue is half as important as red. The default weight is 1, so “red:: blue::0.5” would have the same effect as the previous example.
To see weighting in practice, let’s look at an example. For these images, we use a Comic Book style robot first, then a Naruto style robot, then weighted them equally.
1. Robot Steve Dillon Comic Book Style, 2. Robot Naruto Anime Style, 3. Robot Steve Dillon Comic Book Style :: Robot Naruto Anime Style
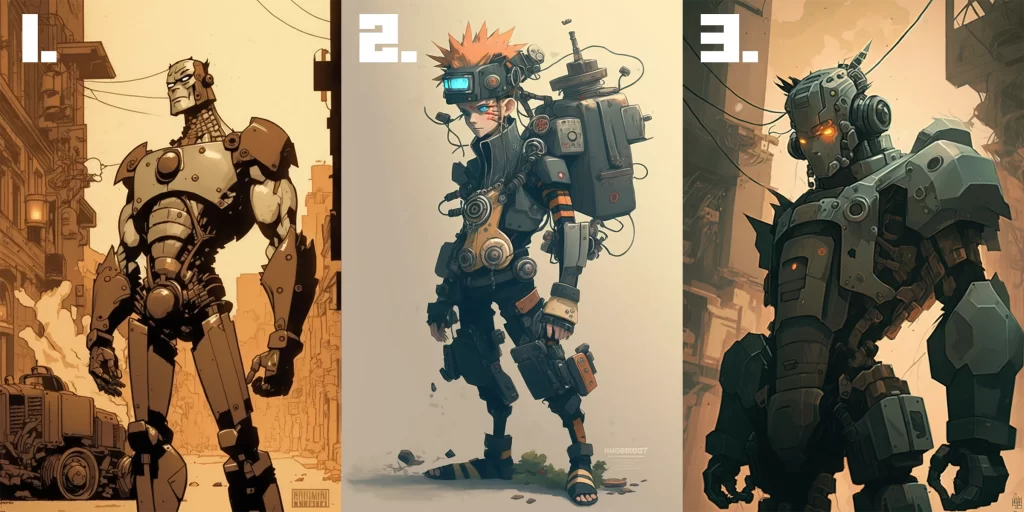
You can see how the third image comes together as a mixture of the two styles. We could weight either side heavier or lighter to make the weighted image lean towards one style.
Flat Duotone Images
Duotone style art is a popular design technique that involves using two contrasting colors to create an image. This style has been used in various forms of art for centuries, including print media, photography, and digital design.
In traditional printing, duotone involves using two colors of ink, usually black and a secondary color, to create a grayscale image with added tonal depth and contrast. Today, digital design software has made it easier to create duotone effects with a wider range of colors.
Duotone style art is often used to create striking and visually impactful designs. It can be used to give a modern and stylish look to posters, album covers, and other graphic design projects. It can also be used to add depth and interest to photographs, making them more visually appealing.
Here are some keywords to include if you want to make Duotone style art
Here are some examples of Duotone style midjourney prompts, and their results:
Prompt: whale ocean Duotone Flat Illustration Clean Lines Simple –ar 16:9
Prompt: forest landscape trees leaves Duotone Flat Illustration Clean Lines Simple –ar 16:9
Synthwave Style Designs
Synthwave style art is a genre of retrofuturistic art that draws inspiration from 1980s pop culture, music, and technology. It is often characterized by its use of neon colors, grid-like patterns, and futuristic landscapes.
The style originated from the synthwave music movement, a electronic music genre that emerged in the mid-2000s. Synthwave music draws inspiration from the soundtracks of 1980s films, video games, and television shows, featuring heavy use of synthesizers and electronic instruments.
Synthwave style art often features stylized images of retrofuturistic cars, motorcycles, and other vehicles, as well as futuristic cityscapes, palm trees, and sunsets. It is also common to see references to 1980s pop culture icons, such as arcade games, VHS tapes, and cassette tapes.
Here are some keywords to include if you want to make Synthwave style art
- Retro Futuristic
Here are some examples of Sythwave style Midjourney prompts, and their results:
Prompt: retro futuristic synthwave Disney Princess –ar 16:9
Prompt: Boba Fett Synthwave space neon galaxies –ar 16:9
Prompt: City with sunset retro futuristic neon synthwave –ar 16:9
Kawaii is a Japanese word that means “cute” or “adorable”. It is a cultural phenomenon that has become popular around the world, particularly in art, and entertainment.
In Japanese culture, cuteness is highly valued and celebrated, and this is reflected in various aspects of Japanese life, including popular culture. Kawaii characters and designs are often characterized by their round, childlike features, bright colors, and whimsical elements.
Kawaii has become a popular aesthetic outside of Japan. It is often associated with a sense of playfulness, innocence, and childlike wonder.
Here are some keywords to include if you want to make Kawaii style art
- Kawaii Style
Here are some examples of Kawaii style midjourney prompts, and their results:
Prompt: cute kawaii style cartoon car –ar 16:9
Prompt: Colorful kawaii cartoon style potted plant –ar 16:9
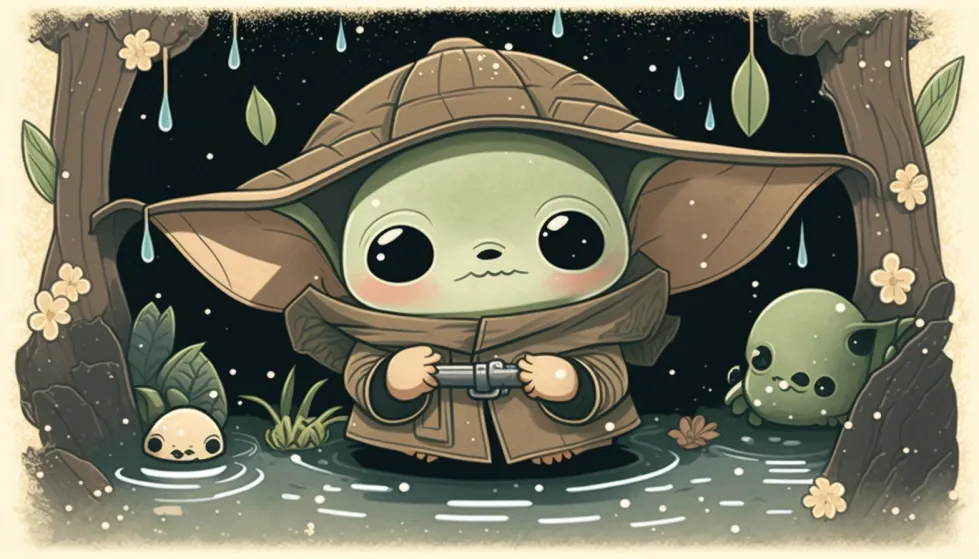
Prompt: Kawaii style, Baby Yoda, illustration –ar 16:9
More Amazing Styles
Street photography.
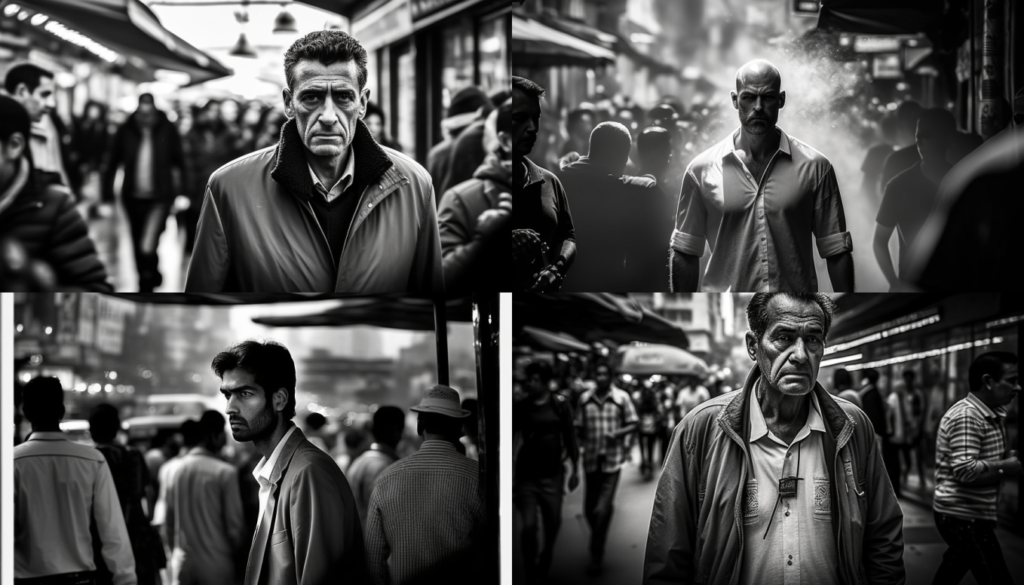
Prompt: Man in a bustling City, black and white street Photography, Candid moments, urban landscape, Street life, Stories in motion, portrait
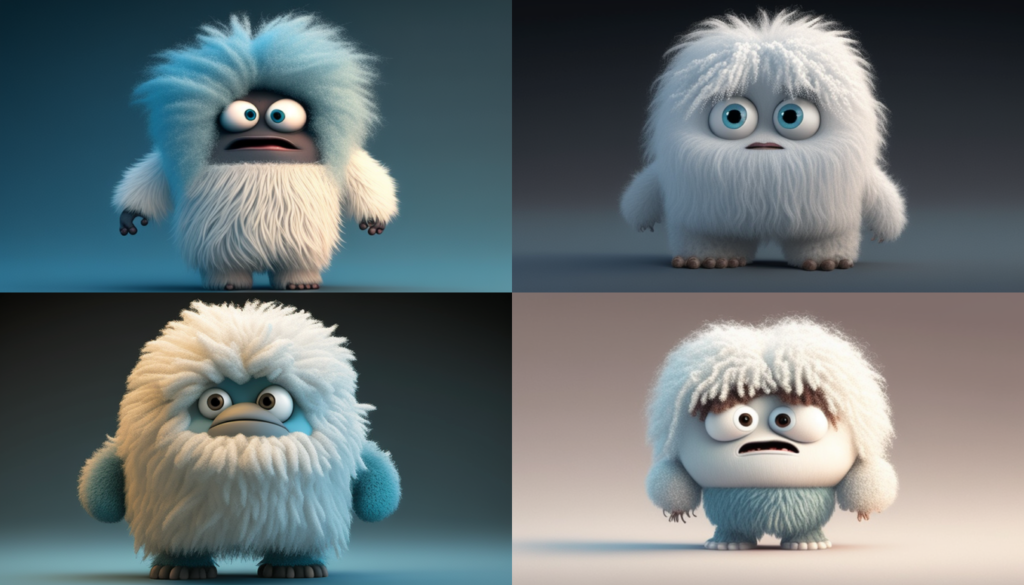
Prompt: Pixar animated Yeti, cute cartoon style rendered
Hyper Realistic
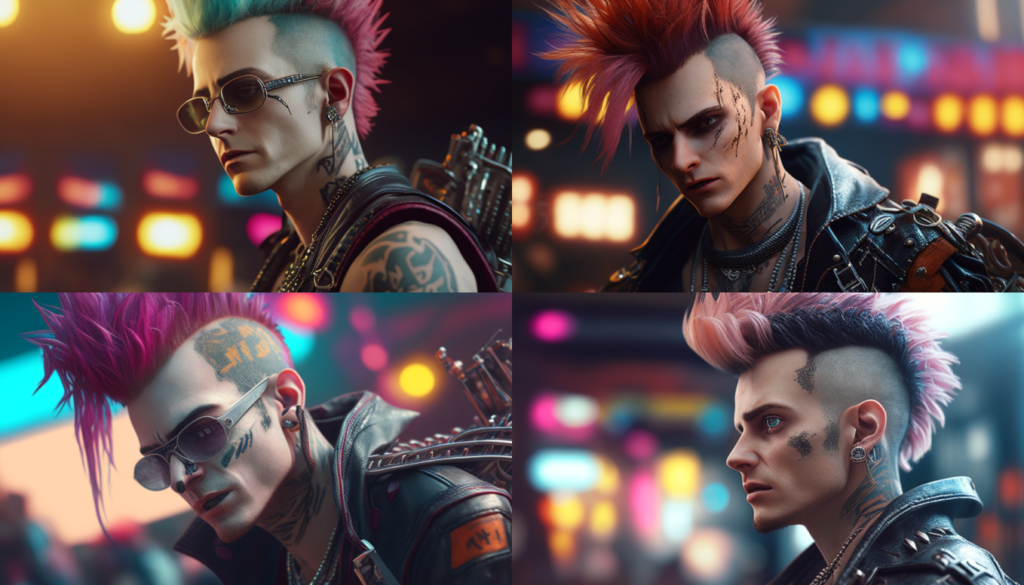
Prompt: punk rocker hyper realistic screenspace reflections ultra realistic, ray tracing, Cinematic, hyper-detailed, and insane details come to life in this beautifully color graded masterpiece. Created with the power of Unreal Engine, it features stunning DOF, super-resolution, megapixel, cinematic lightning, and advanced rendering techniques such as anti-aliasing, FKAA, TXAA, RTX, SSAO, and post-processing. Volumetric lighting and photorealistic, ultra-detailed, and intricate details
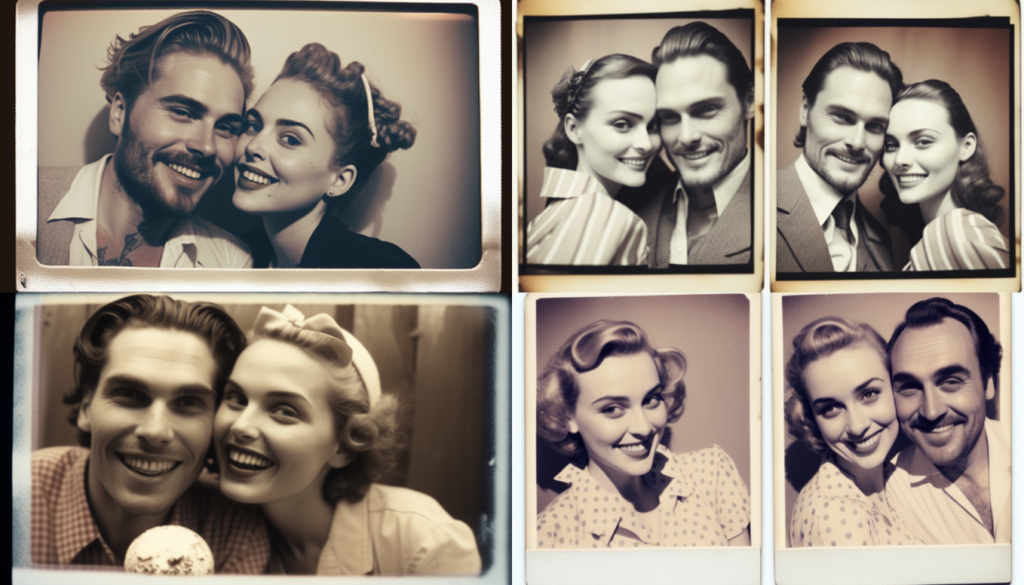
Prompt: happy couple vintage polaroid style photography –ar 16:9
Impressionism

Prompt: beautiful woman at a park trees, wind, leaves impressionism pastels impressionistic portrait expressive brush strokes –ar 16:9
Abstract Art
Surreal art.
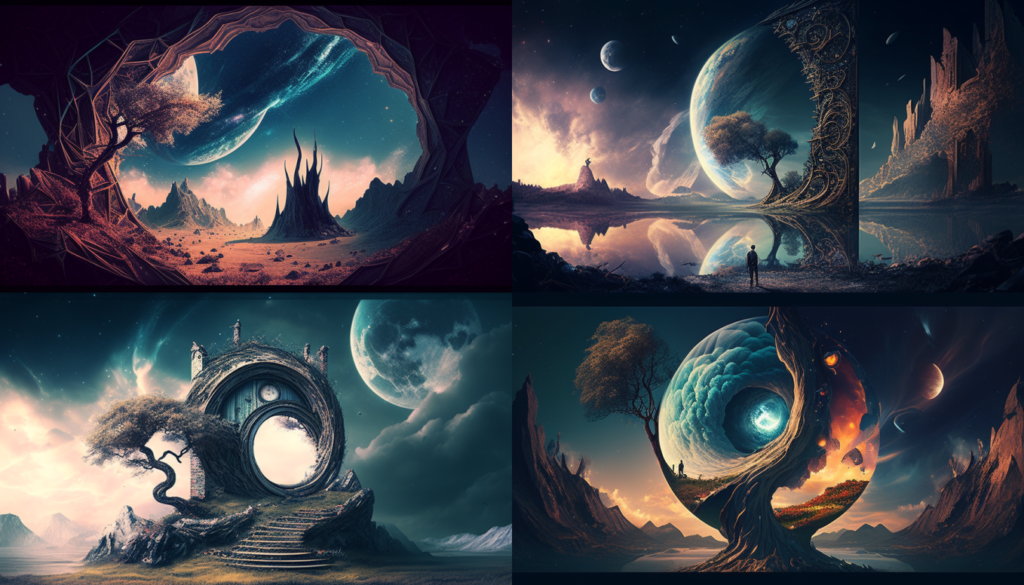
Prompt: dreamlike fantasy landscape space, surreal art, twisted reality, mystical –ar 16:9
Portrait Photography
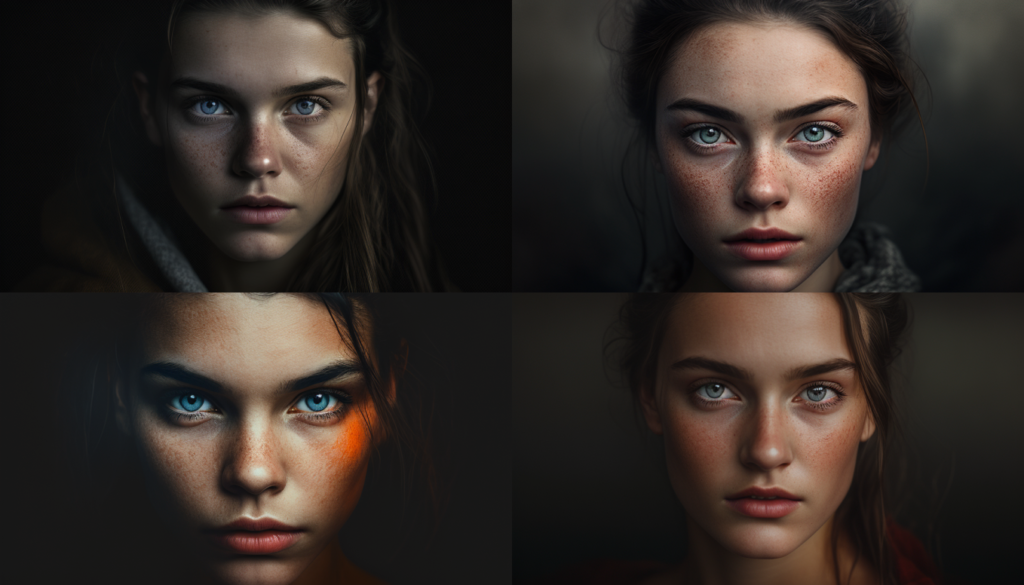
Prompt: portrait photography emotive intense gaze contemplative moody stylized –ar 16:9
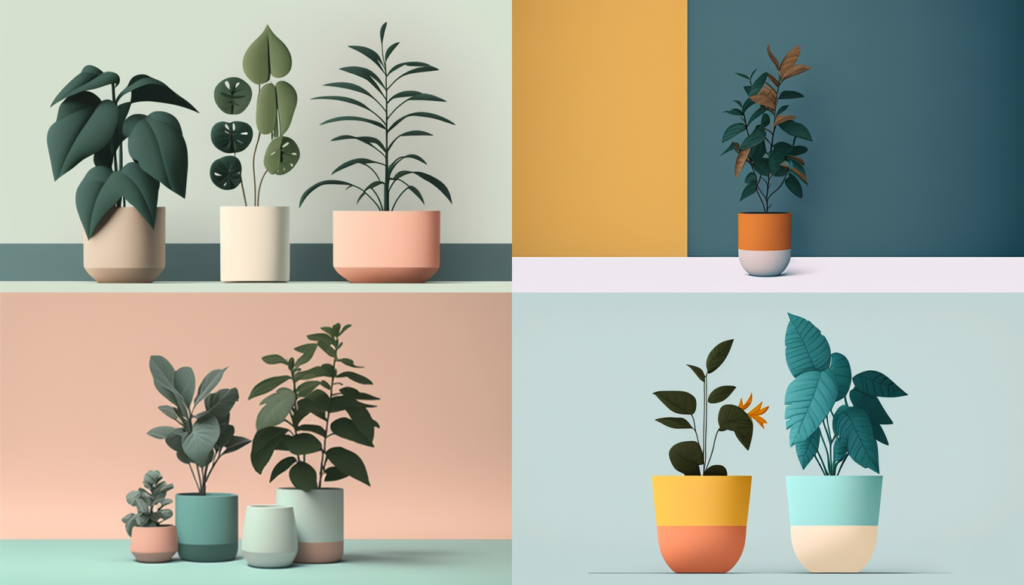
Prompt: potted plants Minimalism Simplicity Clean lines Minimal colors Negative space Minimal still life –ar 16:9
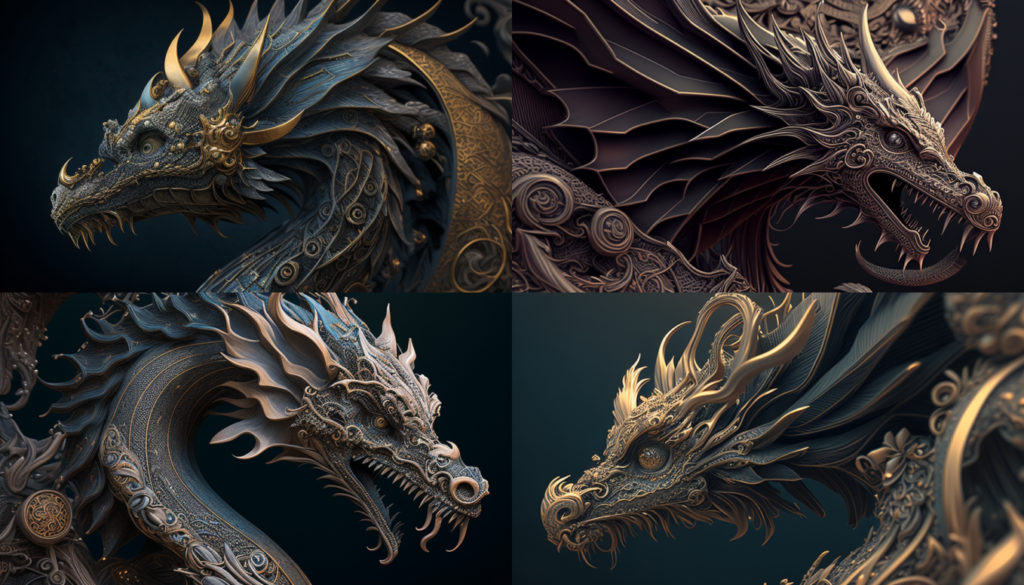
Prompt: ethereal dragon, edgar alan poe, intricate details, ornate, detailed, octane render –ar 16:9
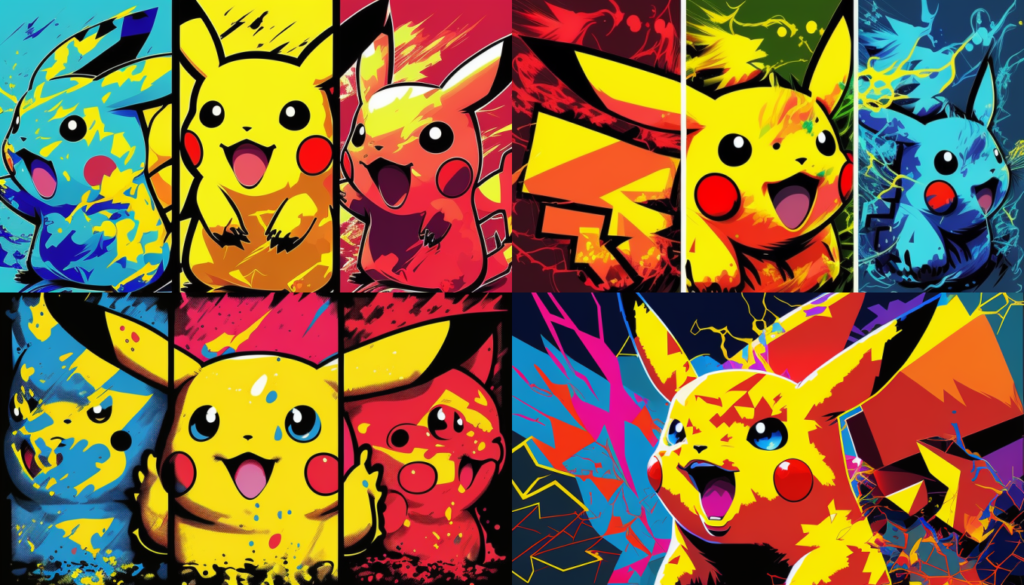
Prompt: pikachu pop art bold colors –ar 16:9
Ukiyo-E Japanese Style
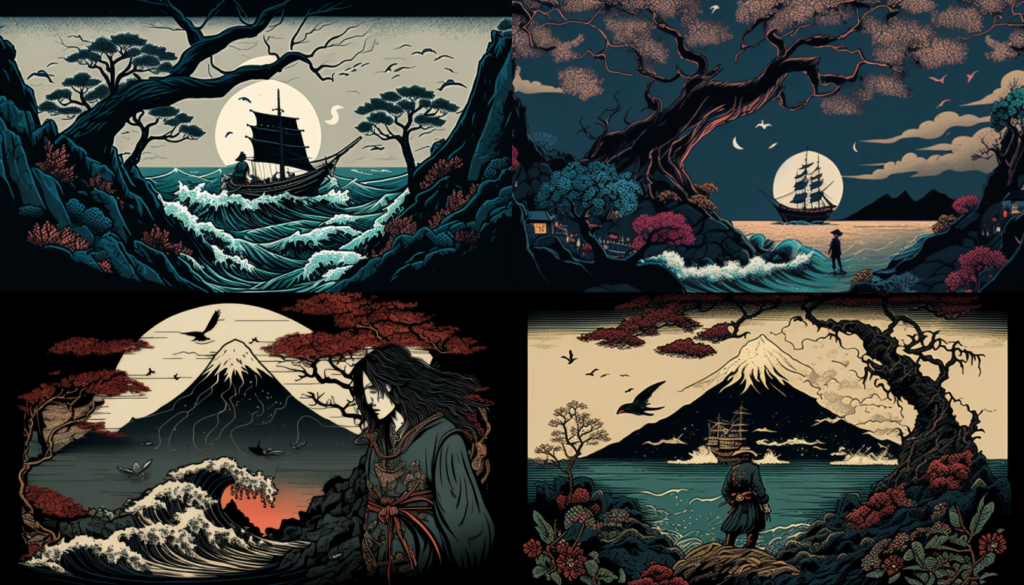
Prompt: ukiyo-e style, dark fantasy, island
Night Photography
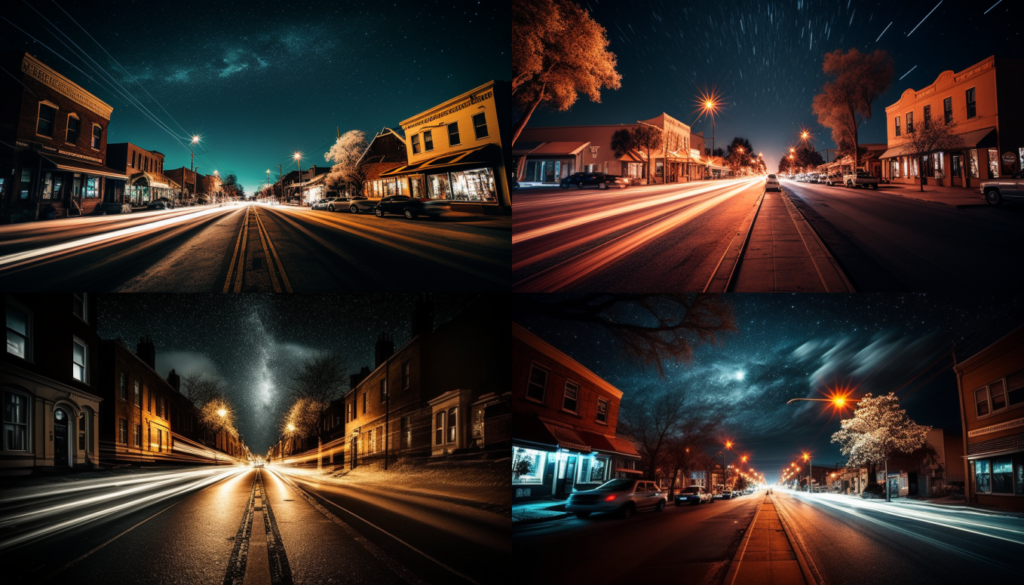
Bold and Expressive Painting

Prompt: Samurai Expressive brush strokes and bold color choices Japanese Style
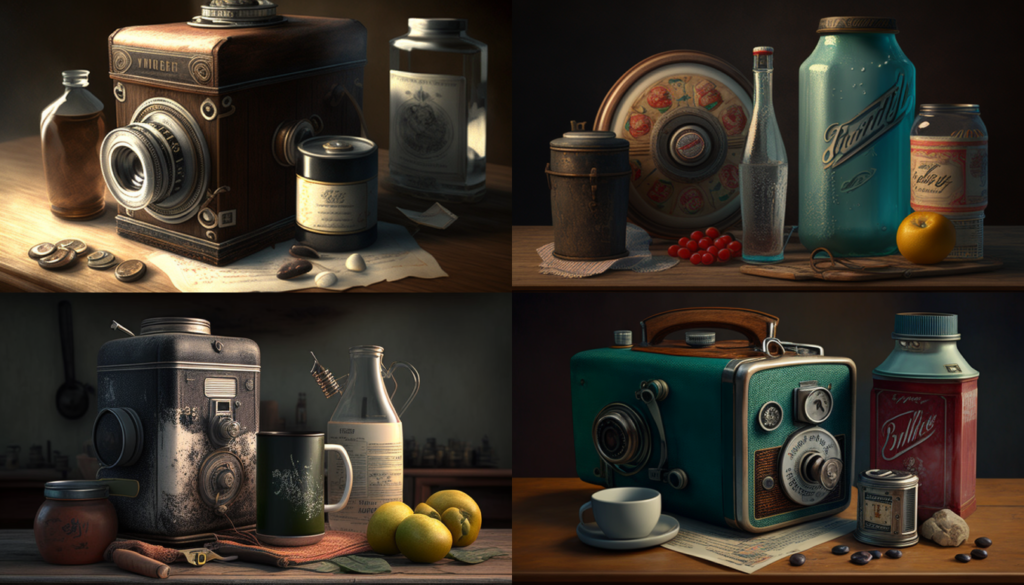
Prompt: vintage desktop realism hyper-realistic textures, details, still life –ar 16:9
Phantasmal Irridescent
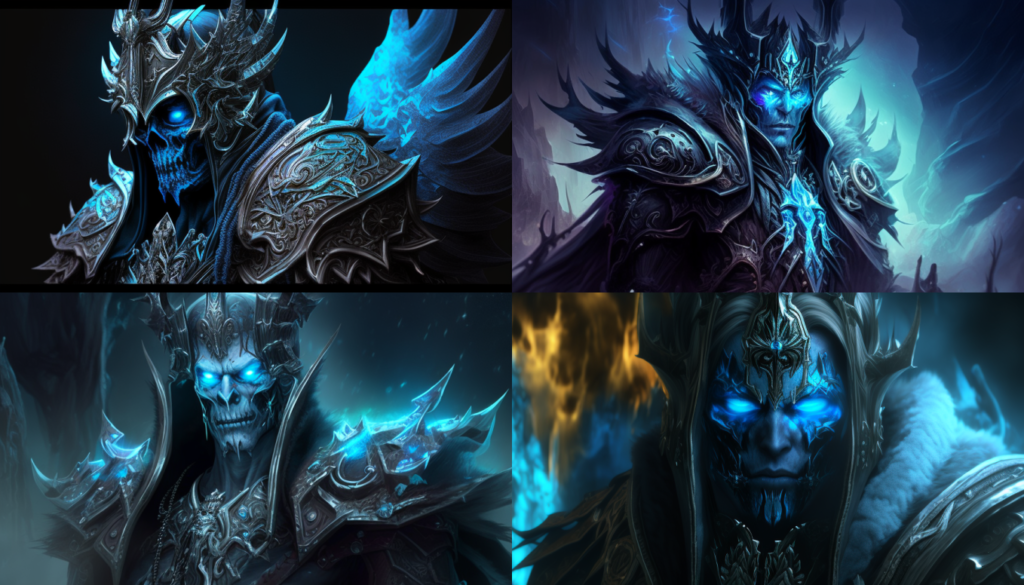
Prompt: the lich king Phantasmal iridescent –ar 16:9
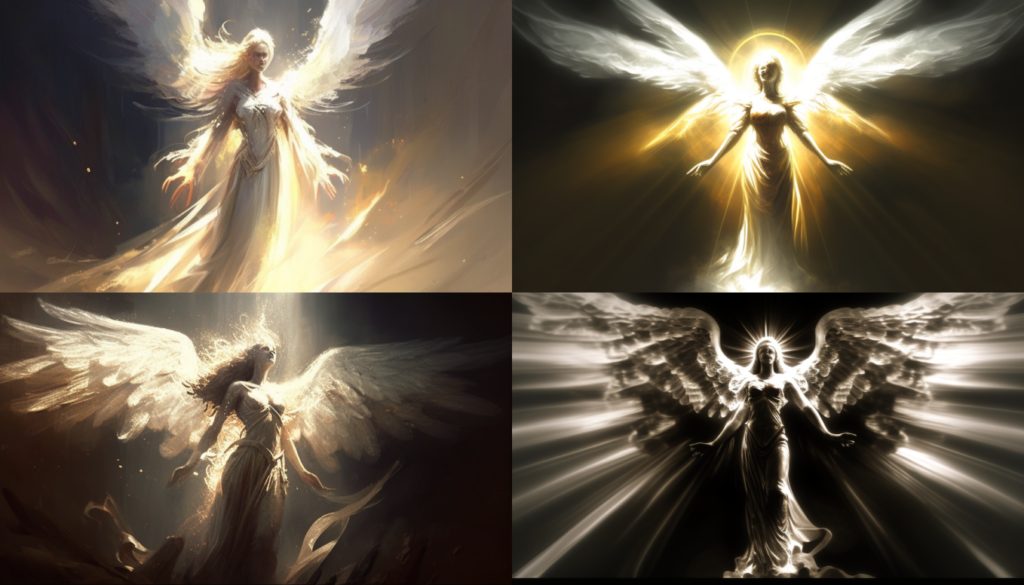
Prompt: angel ethereal, spirit, magic, sky and sun, ghostly –ar 16:9
Ferrofluids

Prompt: Raven, ferrofluids, beautiful dark chaos, high fantasy, dark colors –ar 16:9
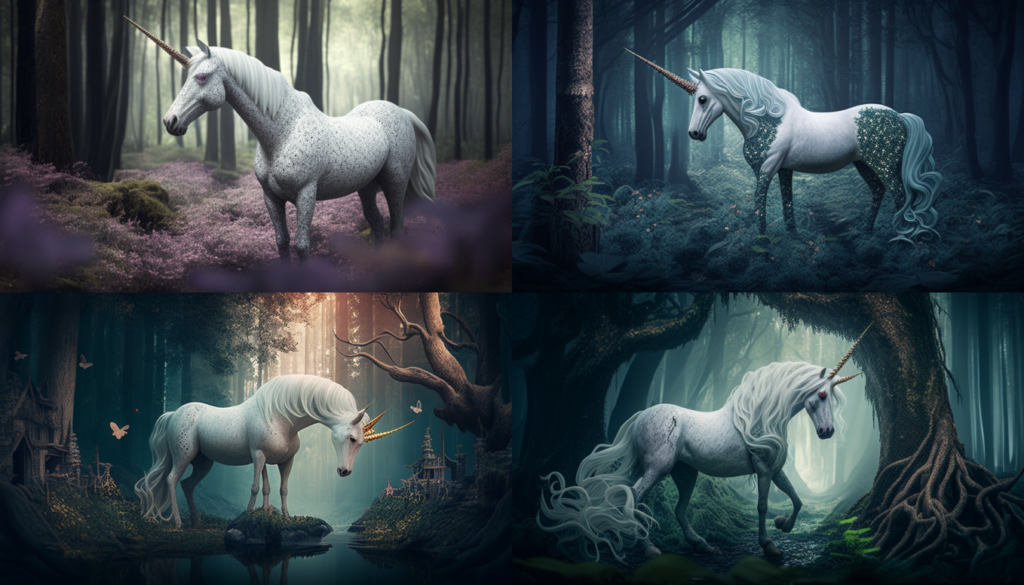
Prompt: Fairy Tale Unicorn, fantasy, magical forest, enchanted whimsical –ar 16:9
Prompt: steampunk style blimp, Jules Verne, mechanical –ar 16:9
Prompt: Darth Vader fractal –ar 16:9
Exploding Geometric
Prompt: Martin Luther King Jr Exploding Geometric colorful –ar 16:9
Prompt: Majestic imagery, zeus, face in clouds, god, mighty, lightning storm, fury
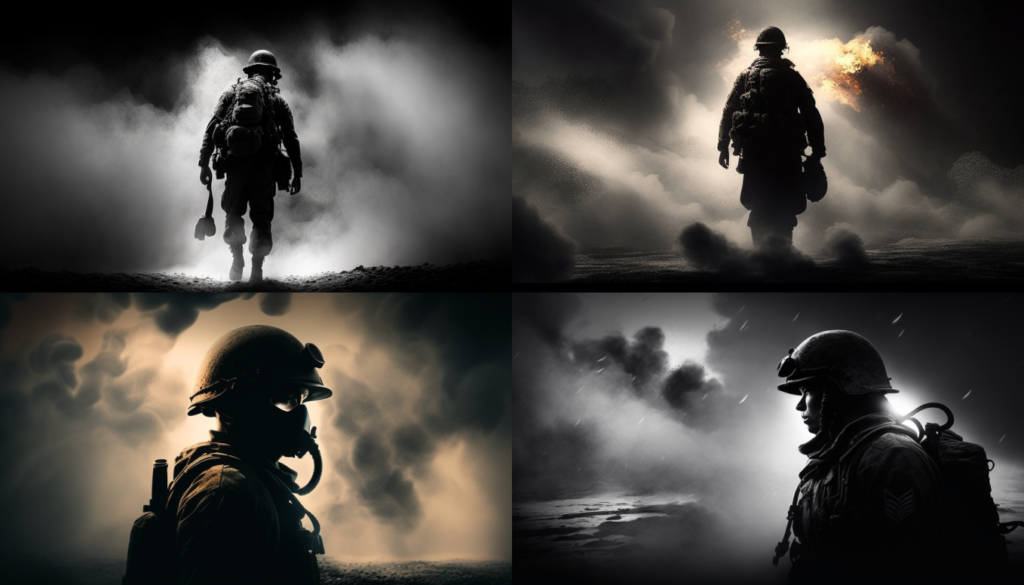
Prompt: World War 2, Soldier, battlefield epic shot, extreme long shot, dark mood and strong backlighting, volumetric lights, smoke volutes, high fantasy, bold and emotive strokes, contrast, intensity, drama –ar 16:9
Scratched / Etched

Prompt: black and white scratched, dwarf on a mountain
Stained Glass
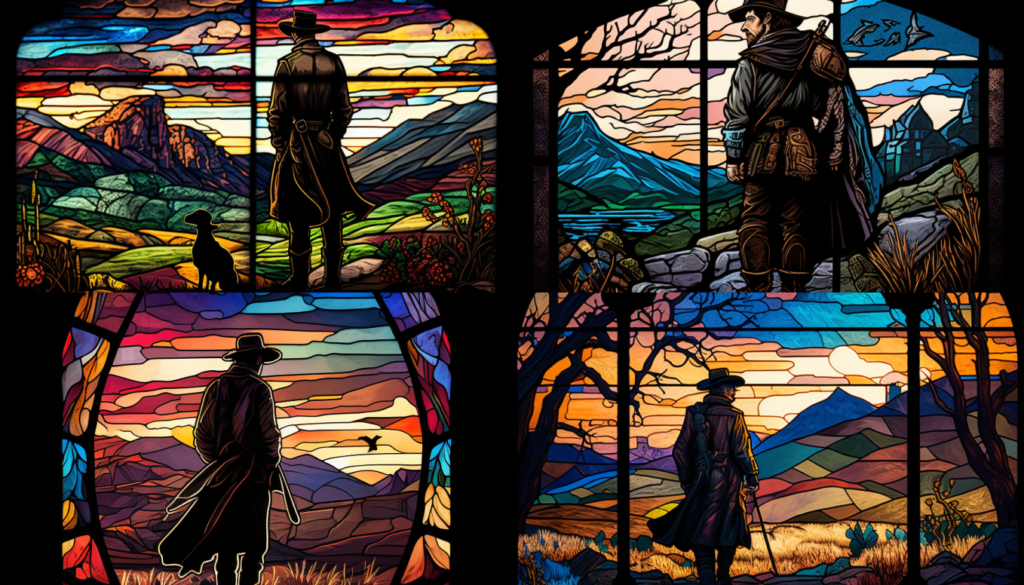
Prompt: Stained Glass style, the lone wanderer –ar 16:9
Inca Style Art
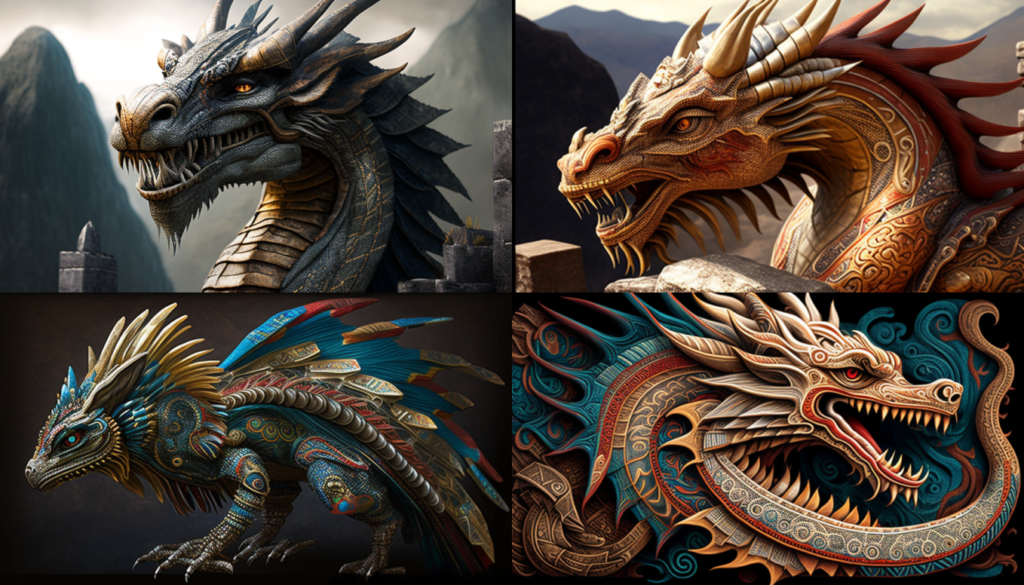
Prompt: Inca style art, dragon –ar 16:9
Psychedelic
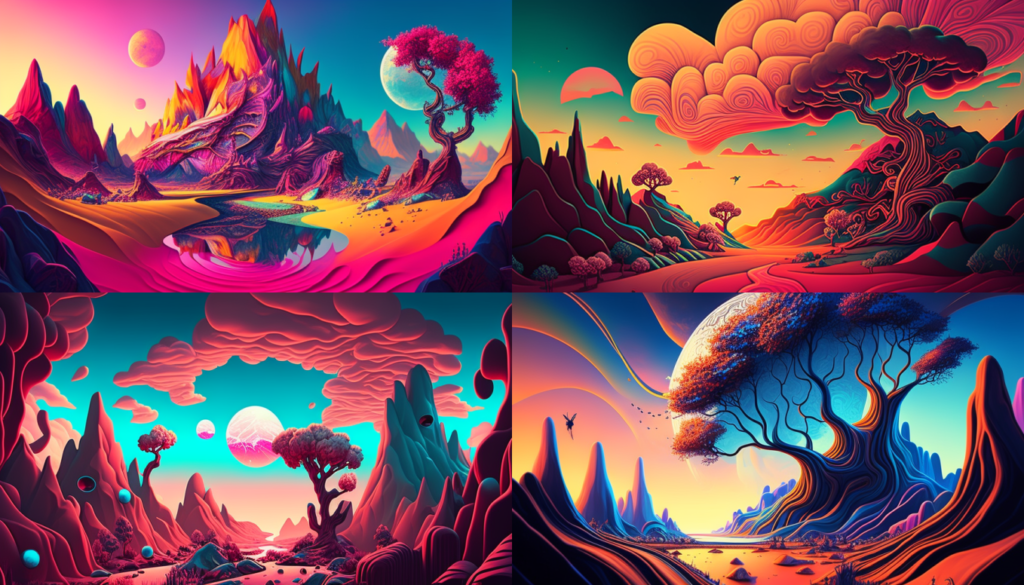
Prompt: Psychedelic fantasy landscape –ar 16:9
Cthuhlu Lovecraftian
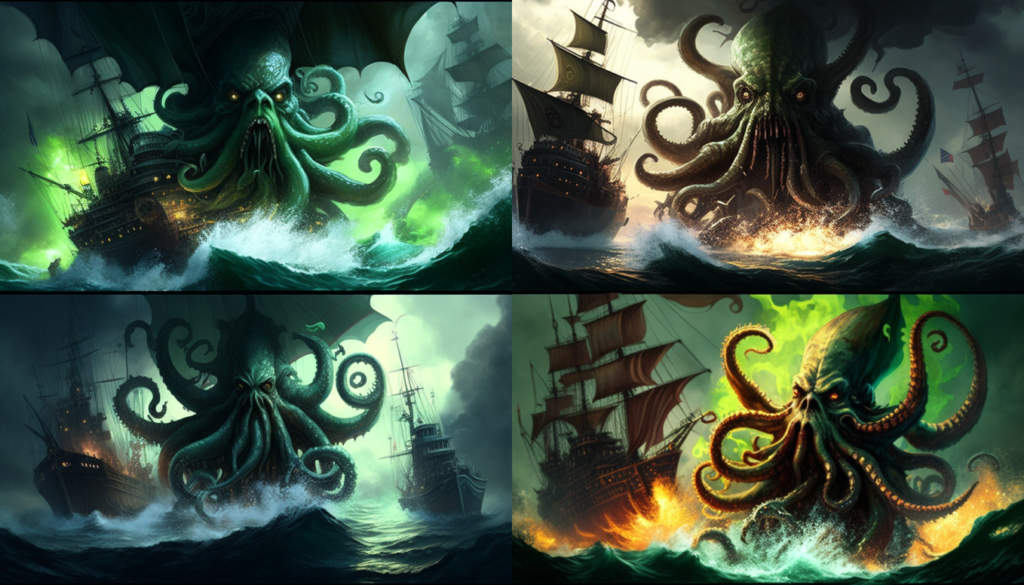
Prompt: Cthulhu art style, kraken fighting a pirate ship
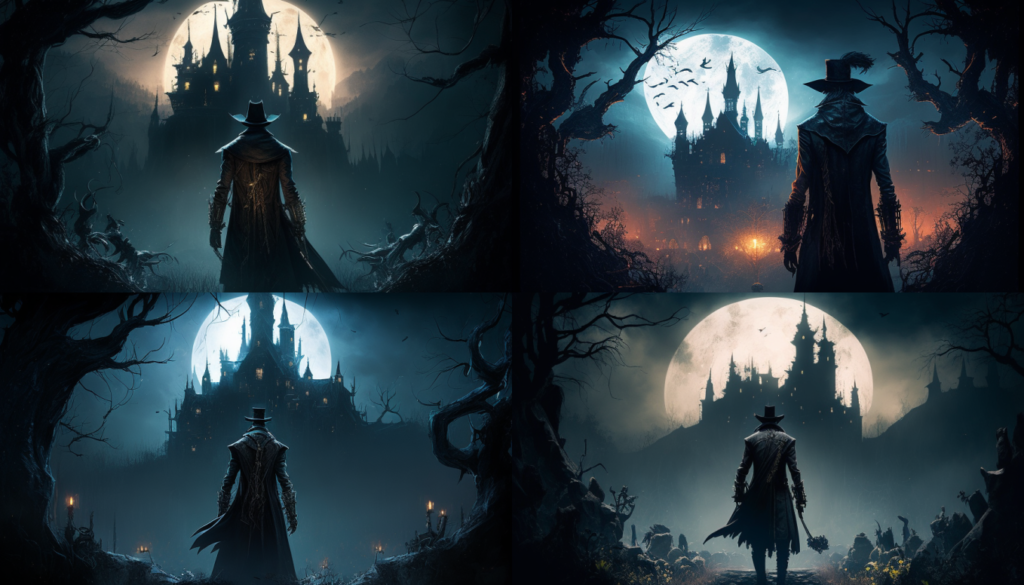
Prompt: Bloodborne style vampire hunter underworld castle dark fantasy –ar 16:9
Famous Artists
Anime and comic book styles.
Hayao Miyazaki – creator of many popular anime films, including Spirited Away and My Neighbor Totoro.
Osamu Tezuka – known as the “godfather of manga”, Tezuka created many iconic anime characters such as Astro Boy and Kimba the White Lion.
Rumiko Takahashi – creator of many popular anime series, including Inuyasha and Ranma 1/2.
Akira Toriyama – creator of the immensely popular Dragon Ball series.
CLAMP – a group of female manga artists who have created many popular anime series such as Cardcaptor Sakura and Tsubasa: Reservoir Chronicle.
Masashi Kishimoto – creator of the hit anime and manga series Naruto.
Eiichiro Oda – creator of the popular anime and manga series One Piece.
Hideaki Anno – creator of the critically acclaimed anime series Neon Genesis Evangelion.
Hiromu Arakawa – creator of the beloved anime and manga series Fullmetal Alchemist.
Mamoru Hosoda – a talented animator and director who has created many critically acclaimed anime films, including Summer Wars and Wolf Children.
Fantasy Styles
Boris Vallejo
Gerald Brom
You must be logged in to post a comment.
Share this Post
Latest articles.
Apple Opens Doors to Retro Gaming Emulators on App Store

Unleash Your Inner Shaman: Netflix Announces Shaman King Flowers Streaming on April 21
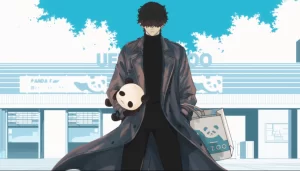
Embracing Villainous Self-Care: An Ode to Mr. Villain’s Day Off”
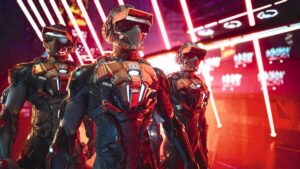
Embracing Creativity: The Power of Smaller Games According to a Ubisoft Designer
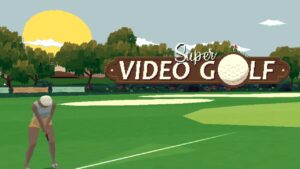
Super Video Golf: The Ultimate Golfing Experience Just Leveled Up with Exciting New Features!
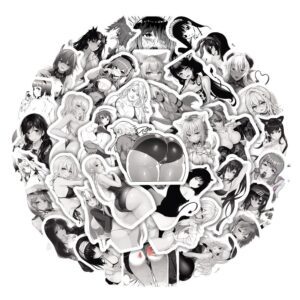
Anime Stickers , Sticker Packs , TV Stickers
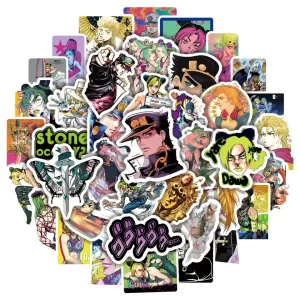
Latest Reviews
Reviews News Previews Editorials Analysis
Video Games Movies & TV Anime Tech Trading Card Games Comics
272 W Center St Orem, Ut 84057 [email protected]
Contact Form


Why Try AI?

80 Best Midjourney Prompt Modifiers: Visual Guide (+240 Copy-Paste Prompt Ideas)

Some of the best Midjourney prompts need just a single style modifier.
Midjourney can easily handle prompts written in natural language, which makes the popular practice of “ splatterprompting ” completely unnecessary.
Every month, I share five new Midjourney prompt ideas. So the list below is constantly growing. Check back now and then…or subscribe to get my future posts in your inbox:
Why Try AI? is a reader-supported publication. To receive new posts and support my work, consider becoming a free or paid subscriber.
Remember that all of the individual prompt modifiers on this list can be combined in any number of ways to create a unique look. Try to experiment!
Best Midjourney Prompts: December 2022
The best Midjourney prompts from December 2022. Sample images are Midjourney Version 4.
1. “Exploded [subject] by Nychos”
Nychos is an illustrator and urban artist known for visually striking cross-section and X-ray images, often with gory details. Using the word “exploded” adds a sense of motion.
This post is for paid subscribers
IMAGES
VIDEO
COMMENTS
Prompts. A prompt is a short text phrase that the Midjourney Bot interprets to produce an image. The Midjourney Bot breaks down the words and phrases in a prompt into smaller pieces, called tokens, that are compared to its training data and then used to generate an image. A well-crafted prompt can help make unique and exciting images.
Part 1: How to write a good Midjourney Prompt + Examples. Part 2: How to optimize your Midjourney images. Part 3: Essential Midjourney Settings for better prompting. Part 4: How to use Midjourney Parameters to optimize your prompts. TAP HERE FOR ALL MY FREE MIDJOURNEY PROMPT SETS.
To do this, type /settings in your chat with the Midjourney Bot or the public Midjourney Discord server and press the ' Remix Mode ' button. When you press on the button pictured above, you'll be able to edit your prompt during each image variation. Let's see how to use this feature effectively with a prompt example.
Let's look at a couple examples of turning negative language into positive when writing prompts: 🚫 [/imagine] an image of a cat. Avoid the color white. [/imagine] an image of a brown cat. 🚫 [/imagine] a drawing of a busy street. Don't make it look like a cartoon. [/imagine] a drawing of a busy street.
3. Multi prompts. Adding :: to a prompt tells Midjourney it should look at each part of the prompt separately. This is particularly useful if you wanted to, for example, generate an image of a fish made of jelly; if you simply put jellyfish, Midjourney would likely generate a jellyfish.
*TIP: Long-tail descriptions tend to provide the best results; be as specific as you can with your prompt. *TIP: Include lots of adjectives.The more descriptive your prompt, the better the result tends to be. *TIP: Name an Artist: Integrating an artist's name into your prompt will use that artist's style as an influence for your generated image. Fast Vs
The ultimate guide for pro prompts building for Midjourney. 1. Begin with a basic outline. Imagine yourself as an artist, preparing to draw a picture. Start by making a simple, clear description of the image you want to create. Describe the main subject, the scene, or the small details you want to include.
1. Location. Add location in your prompt to specify the background of your image. Otherwise, Midjourney will assume the best one as per the image description. This text input will be helpful if you add two elements that aren't normally seen together, such as a whale in outer space or elephants in Times Square.
The LLM is trained on a massive dataset of images and text, which allows it to understand the meaning of the prompt and generate an image that matches the description. The process of generating an image with Midjourney can be broken down into three steps: 1. The prompt is processed by the LLM.
By strategically leveraging Midjourney prompts, you can guide users along their decision-making journey, providing them with the information they need to make informed choices. Prompt-based visuals are a powerful tool for capturing attention and evoking emotions. Visual content has a profound impact on human psychology, often leaving a more ...
This guide breaks down the key components and offers hands-on tips for more control and better results. 1. Our goal today is simple: to help you start writing better MidJourney prompts. Whether you are just beginning or already have some experience, we hope you will find this post helpful.
Here are a few examples of in-image text prompts: 💡. MLQ High Tech. Ad for a new tech gadget, with the product name "MLQ" in bold, sleek, letters showcased next to an image of the high-tech device in action --ar 16:9 --v 6.0. Hidden Gems of Europe.
Type "/imagine" in a message to the Midjourney Bot followed by a prompt to generate a grid of images. Type "/settings" in a message to the Midjourney Bot and press "enter" to adjust the Midjourney model, quality, style, and mode. Once Midjourney generates a grid of four images, you can click "U 1-4" or "V 1-4" to upscale or ...
Tips for Writing Prompts on Midjourney. Be Specific. The more specific you are in your prompt, the more likely Midjourney is to generate an image that matches your vision. For example, instead of writing "a cat," you could write "a photorealistic portrait of a tabby cat with green eyes." Use Keywords. When you are writing your prompt, be sure ...
This comprehensive workshop will enhance your understanding of midjourney prompts and provide you with practical tips and strategies to create engaging, impactful prompts for your audience. Design. Learn to create impactful midjourney prompts with our easy-to-follow guide. Master audience identification, journey mapping, and more!
1. Locate the Image: Find the image on your device that you want to use. 2. Send to Midjourney Bot: Send the image as a message to the Midjourney Bot on Discord. This action will generate a direct ...
Prompter Guide is an incredibly detailed and organized resource with visual examples, insightful blog posts, and even a feature-packed prompt design tool. As MidJourney grows and evolves, I plan to keep this resource free and constantly updated - so you might as well bookmark it! (me… as a muppet)
What is Midjourney? Midjourney is an innovative AI image generation tool that allows users to input prompts and parameters, as well as images, to produce unique and personalized images. Utilizing a powerful machine learning algorithm trained on vast amounts of image data, Midjourney generates images that are tailored to the user's input.
The best Midjourney prompts from December 2022. Sample images are Midjourney Version 4. 1. "Exploded [subject] by Nychos". Nychos is an illustrator and urban artist known for visually striking cross-section and X-ray images, often with gory details. Using the word "exploded" adds a sense of motion.