Quality product content. In your inbox. Every week.
How to create effective product tours that users will love.


Skip to section:
Product tours (or product walkthroughs) introduce new users to apps by giving them the lay of the land. You can think of them like interactive tutorials—they help users get comfy with your UI while guiding them to the core processes that bring value to your product. Great product tours set users up for long-term engagement and increase the odds of product activation , product adoption , and user retention .
If you want to keep new users as customers, your product has to work seamlessly from the start —and there’s no better retention mechanism than a stellar product tour.
What is a product tour?
A product tour is a guided walkthrough of a product or service, typically presented to users after they sign up or first log in. Product tours are used to onboard new users, introduce them to a product's key features and value, and help them get started using it. They’re different from product demos , which intend to show a custom solution to a specific user need.
Why use a product tour?
You should expect adopting any new software to come with a bit of a learning curve. A product tour helps users navigate this friction while promptly revealing an app’s important value-laden features. Good tours walk a tightrope between annoying users with over-engagement and frustrating users with under-assistance.
They act as a guided tour for new customers learning how to use your SaaS product for the first time. Product tours:
- Compel users to take specific, meaningful actions in your app. Instead of leaving users to figure out your app on their own, product tours influence user behavior by explaining why each step is important and guiding users to take critical actions within your product.
- Guide users toward their aha moment. An aha moment is when users first realize the value that your product provides. Users who stumble upon their aha moment understand how your product improves their work (or life). This isn't always something they'll discover on their own—but a product tour makes that discovery process a heck ton easier.
- Can be simple to build and experiment with. Tools like Appcues allow you to create or amend a product tour without making software changes within your app. This makes experimenting with your onboarding process a breeze and quickly uncovers what resonates with your users.
ONBOARD SMARTER
Ready to tour appcues' product tour software.
- Use in-app guides to educate users
- Increase activation with personalized flows
- Drive feature adoption to improve stickiness

10 tips for building successful product tours
Every product has different features, and every user has different needs—that’s why effective product tours look different for every app. That being said, here are 5 best practices for designing a great product tour that moves users through your flywheel and onto the next stage in their journey.
- Be sequential : Don't just show users a random collection of tooltips without any clear structure. Each step in your product tour should be clearly defined, and each step should move users further down the path to activation.
- Focus on the core value : Explaining every little feature will only lead to frustrated and annoyed users. Make sure you're only highlighting necessary features users need to experience your product's core value to keep them truckin' along to their aha moment. (You can always introduce additional features later.)
- Keep things short and sweet : New users are keen to get started using your app. Respect their time by making sure your tour is brief. Unnecessary steps add unnecessary friction to the onboarding process. Less is more—and three to five steps are usually plenty for an onboarding flow.
- Provide clear next steps : The best product tours clearly explain the next step a user should take. How do they begin adding their data? Do they need to sign up for a paid subscription first? Users can’t take the next step without first knowing where to start, so show them!
- Make sure to provide further help : A successful product tour will improve customer success. This means you must stay on top of users’ progress with your product features. Provide links to additional content, interactive guides, and access to real-time customer support as they continue to explore your app. And let them know where they can go to find the product tour if they need to walk through a step again.
- Personalization is key: Think of your product tour as a personal guide tailored to each user's needs. It's not about one-size-fits-all—it's about fitting like a glove. Segment your tours based on user roles or behaviors. This way, a newbie gets the beginner's introduction, while the seasoned user gets the advanced tips. It’s like having a personal shopper—they know just what you need.
- Keep your tours up-to-date: Your app evolves, and so should your product tours. Regularly review how your tours are performing. Are users dropping off at a certain point? Maybe that step is the equivalent of a party guest who overstays their welcome. Update and tweak your tours based on user feedback and engagement data. It's like keeping your playlist fresh—nobody wants to hear last year's hits at this year's party.
- Monitor user engagement: Keep an eye on how users interact with your product tours. Use analytics to understand where they find value and where they don’t. Think of it as being a good host at a party—you want to make sure everyone's having a good time, and if they’re not, you change the music.
- Constantly seek feedback: Encourage users to give feedback on your product tours. It's like asking your guests for their favorite dessert recipes—it helps you serve up exactly what they want next time. This input can be invaluable in refining and improving the user experience.
- Offer a ‘skip’ option: Not everyone wants the grand tour. Some users might want to dive right in. Respect their familiarity and confidence with a ‘skip tour’ option. It’s like offering a self-service buffet alongside a sit-down meal. Everyone gets to enjoy their experience in their own way. Plus, this flexibility can prevent user frustration and keep the experience positive.
Andrew Capland , PLG Advisor and Growth Leader, gives us a bit of insight into how he's structured product tours:
"The main challenge with product tours is that most display 1x (usually when the page/feature loads for the first time) and then disappear forever. That's challenging because many users want to explore on their own first - then have guidance later. With that in mind, I've found the best tours can be minimized and then viewed when the user is ready. Ideally, combined with a checklist or "getting started" page. Something that provides help when they need it - on their terms."
While there's no one-size-fits-all best product tour format, there are best use cases for onboarding flow design patterns ; using UI patterns like tooltips, hotspots, and modal windows engages users and educates them on how to use your product.
Types of product tours
Crafting an engaging product tour is a bit like hosting a lively party—every element should spark interest, guide your guests, and make them feel right at home—and remember, variety is key. Here’s a roundup of the different UI patterns you can mix and match for your product tour. Think of these as your party essentials, each bringing its unique flair to the event!
- Pop-ups: Pop-ups are like those friendly neighborhood billboards, popping up at the right moment to highlight the good stuff. They range from simple splash screens to modal windows demanding a bit of action. Think of them as your app's way of saying, "Hey, check this out!" They're quick, effective, and get the message across without much fuss.
- Interactive walkthroughs: Imagine having a savvy friend guide you through a new city. That's what interactive walkthroughs do for your app. They're like personal tour guides for users, showing them the ropes step-by-step, making even the most complex processes feel like a walk in the park.
- Hotspots: Hotspots are the subtle nudges in your app that say, "Psst, look here." These little beacons of wisdom draw users to specific points, perfect for highlighting updates or tucked-away features. They're like the hidden gems of your app, waiting to be discovered.
- Tooltips: Tooltips are the whisperers of the app world. They hover around, offering nuggets of wisdom about features or elements, without pushing users to act. They're there to inform and enlighten, offering insights in bite-sized pieces.
- Explainer videos: Combine the charm of a good story with the clarity of a demonstration, and you get explainer videos. They're like mini-movies for your app, greeting new users with a visual feast that walks them through your app's coolest features.
- Task lists: These are your app's to-do lists, guiding users through tasks with a clear sense of direction and purpose. They're like breadcrumbs leading to the heart of your app, ensuring users don't miss out on anything important.
- Progress bars: Like mile markers on a road trip, progress bars show users how far they've journeyed in your app and how much more adventure lies ahead. They're a visual pat on the back, encouraging users to keep going and explore all that your app offers.
No matter the mix, the aim is the same: engaging users in a journey of discovery through your app. It's about making learning interactive, fun, and effective for all types of users.
How to choose the right UI pattern for your product tour
Selecting the right UI pattern for your product tour is like picking the right music for your party—it sets the tone and keeps the vibe just right. Here’s how to ensure you’re making the best choice for your users:
Assess your app’s complexity
Just like a complex dish needs more detailed instructions, a complex app requires more comprehensive guidance. If your app is a multi-layered lasagna, packed with features and intricacies, you'll need a full-on guided tour to help users digest it all. But if it's more like a simple, yet elegant bruschetta, a few tooltips or hotspots might suffice.
Below you’ll see how Zenefits uses a blend of modal windows and tooltips to smoothly guide users through its HR platform. It’s a perfect example of matching the tour complexity with the app's nature.
Know your audience
Just as a good host knows their guests' tastes, understand who your users are. Are they digital natives who navigate apps like a fish in water? Or are they folks who might need a bit more hand-holding?
It's important to match the UI pattern you choose with the needs of your users and the requirements of your app. More complex apps might require more targeted onboarding guidance , while straightforward apps might only require basic tips.
You should also think about your users' motivation. How likely are they to complete a more extensive product tour? How tech-savvy are they? It's important to empathize with users as you choose which UI pattern to apply to your product tour.
These are the 3 most popular UI patterns for building product tours :

If your users are like tech-savvy partygoers, a light touch with hotspots or brief tooltips, much like Asana's "Add New" button highlight, could be the way to go.

For those who are more like first-time guests in the digital world, consider a more structured approach with interactive walkthroughs or even explainer videos. Remember, it's all about making your guests feel at home.
Align UI patterns with user motivation
Think of this as choosing the right music for your party. How engaged are your users likely to be? Are they ready for a deep-dive tour, or would they prefer the highlights? This is where you gauge the room's mood.
If your users are eager learners, ready to explore every nook and cranny of your app, then a detailed tour with progress bars or task lists might be the ticket. But if they're only popping in for a quick visit, a simple tooltip or a brief explainer video might be the better choice. It's about reading the room and adjusting the volume accordingly.
3 amazing product tour examples
There’s no better way to level up your product tour game than looking at great examples in action. Here are several of the best IRL product tour examples and product walkthroughs that set the bar for what you can achieve.

Personal finance management app Mint built its product tour to guide users through a lengthy setup process that involves everyone’s favorite task: typing in sensitive personal information. Mint uses tooltips to make what would otherwise be a thorny starting process a cinch.
After entering their email address, Mint asks users to add all of their bank accounts. Mint knows that most people don’t enjoy tracking down all of their financial information and giving it to a private company, so they include a reassuring sidebar on the right side of the screen to build trust with users. The sidebar includes a checklist of the steps required to get started, while including blurbs highlighting its dedication to security and the trust of its millions of clients.
After that, Mint liberally uses tooltips to point out the most important features within the app. The tooltips employ bold colors to contrast against the rest of the UI. It also includes CTAs and options for more information for users who want to engage with the feature immediately. For everyone else, the “Next Tip” button stands out brightly against the dark gray tooltip.

Mint’s tooltips also employ the use of gentle animations to further draw attention to its onboarding tips.
HR platform Zenefits uses a combination of modal windows and tooltips to acquaint users with its app. Its product tour funnels users to a demo version of its platform that allows them to learn about and engage with important features before venturing off on their own.
First, Zenefits uses modal windows for users to input the information required to get started.

Another modal window then informs the user that they’ll be working inside a demo version of the software. It also uses this as an opportunity to have users review its Terms and Privacy policy.
.png "user guided tour")
From here, Zenefits guides users from function to function with the use of tooltips. The tooltips point directly to the features mentioned in the copy. The product walkthrough thoughtfully includes a “Back” button within each tooltip in the event a user accidentally hits the “Next” button.

Zenefits also grays out the area behind the tooltip and feature to emphasize the feature’s location within the UI.

Product tours should stay short to retain users’ attention, but sometimes complex products require more guidance. Enterprise software company Zuora bills itself as an “all-in-one” solution. It offers a full stack of subscription management tools to stand out from competitors. Users must understand how to work every tool in its stack to see the full benefit of the product. This means its product tour runs long by most standards.
Zuora solves this problem through the smart use of modal windows. Early in the product tour, new users select whether their interest in the app concerns “Product & Growth” or “Finance & Accounting.” This allows Zuora to immediately introduce users with targeted in-app messaging to the features that brought them to the product in the first place.

Zuora uses tooltips as the framework for most of its product tour. Too many tooltips will disengage readers and can lead to customers clicking “Next” without reading anything. Zuora throws in a few action-driven tooltips to prevent this from happening:

It wraps up its lengthy product tour with a modal window congratulating the user. This final modal contains a video that allows curious users to find more helpful information on how to use the product to get results. Users who’ve seen enough can click the “Done” button in the bottom right corner.

4 best product tour software to consider
There are plenty of free, paid, and open-source tools to build modal windows, tooltips, and more for your product tour or walkthrough. It's great to have options, but the reality for most SaaS companies is that building your own product tour from scratch isn't cost-effective . This rings especially true once you factor in the costs of maintenance and iteration. Instead, consider using dedicated tour-building software to build your product tours. Such platforms are usually more efficient, easier to use, and less expensive in the long run than their alternatives.There are many platforms out there that can help you build a user-friendly product tour, including:
Of course, we're biased! But Appcues has nearly a decade of experience in the product tour space. Companies like Amplitude, Heap, and Hotjar use Appcues to enhance their user onboarding and product experience. Its easy-to-use tour builder allows you to create pleasing walkthroughs without getting bogged down in coding. Tooltips, slideouts, hot tips, and modal windows can all be constructed in Appcues and implemented across tours and flows. It’s the premier tool for companies looking to enhance their product tours or build their first one from scratch.
Consider Appcues for its:
- Array of UI patterns
- Easy installation
- Code-free tracking and powerful analytics
- Many integration options, including Salesforce, Slack, and Mixpanel
- Mobile app support
Check out this step-by-step guide to creating interactive product tours in Appcues quickly and efficiently.

Pendo allows you to create product tours across your website and mobile apps. Its UI pattern toolbox includes banners and lightboxes to add flavor to your walkthroughs. Its analytics functionality is powerful and works well for product managers whose interest in analytics capabilities exceeds their need to improve the user experience.

Userpilot is another popular option for product tours. You can build tooltips, checklists, and more using its no-code builder. Userpilot backs its tour-building features with analytics tools to help segment users and test flows for optimized performance, though these features are not as robust as some of its competitors.
Level up your product tours
Remember that no one experience fits every customer’s needs. Just like your product, your tour should evolve based on user feedback and changing needs. Your returning customers, for example, will appreciate tours that recognize their familiarity, offering them new insights instead of a repetitive run-through.
The key to a successful product tour is continuous improvement. You’re in the unique position of knowing your product intimately, but stepping outside that familiarity is crucial, and seeing the tour through your users' eyes is even more crucial.
Use tools like A/B testing, usability tests, microsurveys, and product metrics to fine-tune your approach. This isn’t only about making your tour better—it’s about making it the best it can be for every user, every time.
And if you’re hungry for more insights on crafting standout product experiences, we’ve got just the thing. Dive into our collection of wisdom with 20 Proven Strategies for Creating More Impactful Product Experiences . This guide is your next step towards mastering the art of engaging and effective product tours.
Customers returning to your product after some time away won’t want to watch a full-fledged product tour again. It’s worth creating different product tours for unique user segments to provide more personalized and pleasing UX.
And one final piece of advice: test your product tours thoroughly. You and your team know your product inside and out, so your experiences with your product are inherently biased. Employ A/B testing, usability tests, micro surveys, and track product metrics to optimize your tour experience and balance between being helpful without being obtrusive.
How do I make a product tour?
Creating a product tour is like crafting a story—it needs a beginning, middle, and end. Start by identifying the key features and functionalities you want to showcase. Use a tool like Appcues to build the tour without heavy coding. Keep it interactive, simple, and focused on delivering value. Test it out, gather feedback, and don’t be afraid to iterate.
How effective are product tours?
Product tours can be incredibly effective if done right. They're like the friendly neighborhood guide who helps new residents settle in. A well-designed tour can boost user engagement, increase product adoption, and reduce time-to-value. However, their effectiveness hinges on their relevance, brevity, and clarity.
How do you improve a product tour?
Improving a product tour is like tuning a musical instrument—it requires attention and regular adjustments. Use analytics to understand where users drop off or engage the most. Personalize the tour for different user segments, and always allow for feedback. Keep the content updated, and ensure that the tour aligns with your product's new features.
What are product tour trends to watch?
Some product tour trends to keep an eye on include increased personalization, the use of AI and machine learning for more dynamic tours, integration of multimedia elements like videos and animations, and the rise of mobile-friendly tours. Also, watch for more immersive experiences, like augmented reality tours, as technology evolves.
What is a product walkthrough?
A product walkthrough is a step-by-step guided tour within an application, designed to familiarize users with its main features and functionalities. It's like having a knowledgeable friend walk you through a new device, ensuring you know all the cool things it can do and how to use them.
What is a feature tour?
A feature tour focuses specifically on showcasing the features of a product. It's more detailed and feature-centric than a general product tour. Think of it as a highlight reel for your app, spotlighting each feature with explanations and demonstrations, helping users understand and utilize your product’s capabilities to the fullest.

Intuitive and customisable tours for user onboarding
TourGuide is a Javascript library written for creating user tours and on-boarding steps for your apps.
TourGuide JS has a range of promise driven methods and callbacks to provide an enjoyable developer experience.
Framework agnostic
Written entirely in vanilla JS with TypeScript and usable in virtually any framework. Choose from CDN or NPM installation.
Typescript support
Type definitions help automatically detect available options in your IDE as well as ensure a type safe package for your projects.
1 Dependency
Tour positioning is supported by Floating-ui. It's required modules are pre-bundled into the TourGuide JS library.
Customizable
Define an array of options to create the perfect onboarding experience for your visitors, you can even use custom HTML in your tour content.
Open source
TourGuide JS is in early stages of development and contribution is welcome. Open license for both commercial and personal use.
CDN installation is available for simpler integration or testing purposes
For projects with build processes, NPM is recommended
Get started
Installation.
Creating a tour only takes a few steps, once initialized you can interact with the TourGuideClient object.
Include in your project
Declare steps (data attribute method)
Initialization
Customization
With a variety of options you can tweak the tour to suit your needs.
Read the documentation to understand how to use events, declare steps and customize the tour behaviours futher.
Drive product adoption with powerful tour!
Complex onboarding made simple
Collect feedback from users any key moment
Create interactive demos of your product

Drive product adoption with powerful tour

Collect feedback from users at key moment

Self-service support hub to find answers and solutions to common questions and issues
Get frequently asked questions and their answers.
See survey, tour model, tooltip demo and templates in action.
Introduction to the process of integrating and orienting new users to a product

A Comprehensive Guide to Screen Recording with Hotspot Magic

DemoX: Revolutionising Screen Recording
Accelerate user's aha moments, personalised product tour provides a dynamic and interactive product experience that helps user to quickly understand the value of your product, leading to a better customer experience and lower churn rates..
- Engage, educate & convert
- Faster time to value
- Deliver unique user experiences
- Easy no-code solution
Product tours & walkthroughs
Build effortless user experiences
- No code required
Engage right users with right content at right time
- Custom segments
Analyze your product tour
- Measure and iterate
Simplify your onboarding process
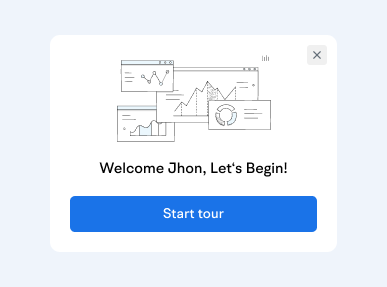
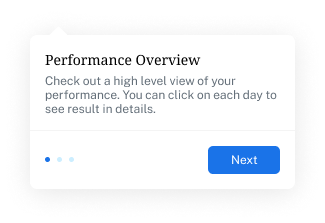
Product tour popup modal
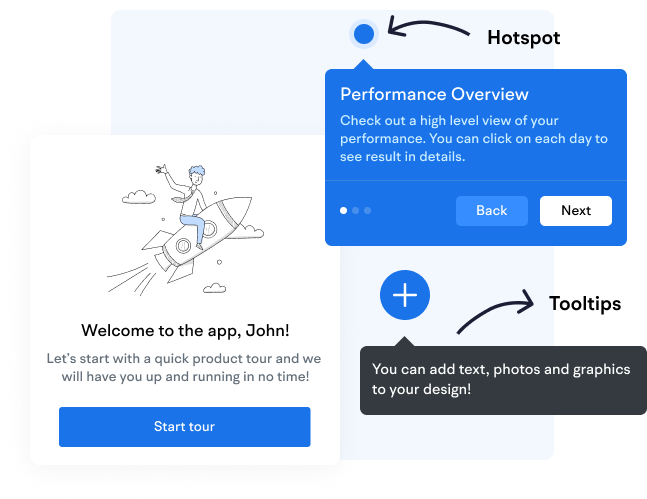
Grab your user’s attention and guide them through the onboarding process with a personalized welcome popup modal that makes a great first impression.
Using tooltips is a great way to guide users step by step through your product. By using tooltips, you can ensure that users have a seamless and frustration-free experience while exploring your product.
Hotspot is a visual feature used to draw user attention to new or important aspects of your product. It highlights essential information and guides users through specific workflows.
Product Tours
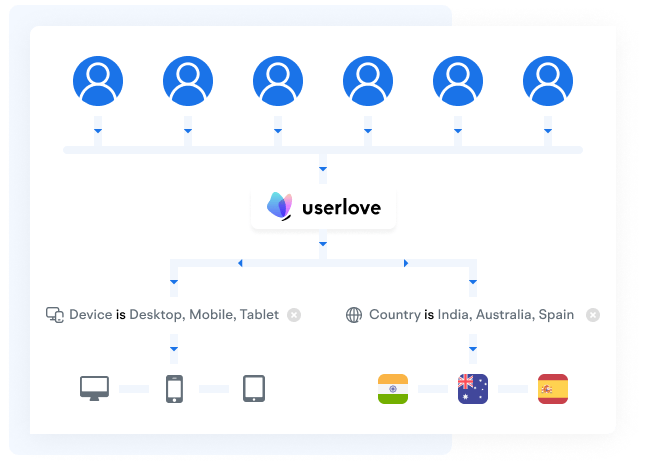
Userlove’s Product Tour feature allows you to create interactive product tours that guide users through your SAAS product. These tours offer a hands-on experience that highlights key features, functionalities, and benefits of your product. With the Product Tour feature, you can customize each tour based on user behavior, language, and location.
Product Walkthroughs
Userlove’s Product Walkthrough feature provides step-by-step guidance to help users navigate your product. This feature is especially helpful for SAAS products with complex functionalities or workflows. With Userlove’s Product Walkthrough feature, you can create a series of interactive guides that walk users through each stage of the product, ensuring they understand and utilize all of its features.
Interactive Product Tours and Walkthroughs
Userlove’s Product Tour and Walkthrough feature provides interactive and engaging experiences for your users. These interactive experiences offer a hands-on approach to learning about your product, helping users feel more confident and informed when using it. By providing an interactive experience, you can reduce user confusion and increase product adoption rates.
Guided Tour Examples
Userlove’s Product Tour and Walkthrough feature provides customizable templates and examples to help you create effective product tours and walkthroughs. These templates offer a starting point to create engaging and informative product tours and walkthroughs that cater to your users’ needs.
Website Guided Tour Examples
Userlove’s Product Tour and Walkthrough feature provides in-app guided tour examples to help you create engaging and informative website tours. These examples offer a starting point to create interactive and engaging tours that guide users through your website, highlighting key features and functionalities.
Product Tour / Product Walkthrough Software and Tools
Userlove’s Product Tour and Walkthrough feature provides a range of tools to create effective tours and walkthroughs. With Userlove’s intuitive and user-friendly software, you can create customized product tours and walkthroughs that cater to your users’ needs. Userlove also offers a range of tools to measure the success of your tours and walkthroughs, helping you optimize your user onboarding process and improve product adoption rates.
Best Product Tour Software
Userlove’s Product Tour and Walkthrough feature is one of the best interactive walkthrough software options in the market. Userlove provides customizable templates and examples to create engaging and informative tours and walkthroughs. The software is intuitive and user-friendly, allowing you to create personalized tours and walkthroughs that cater to your users’ needs. Userlove also offers a range of tools to measure the success of your tours and walkthroughs, helping you optimize your user onboarding process and improve product adoption rates. With Userlove’s guided tour software, product tour tools, and product walkthrough tools, businesses can enhance user onboarding, drive product adoption, and deliver exceptional user experiences.
SAAS Product Tours
Userlove’s Product Tour and Walkthrough feature is especially helpful for SAAS products. With SAAS products, users often require more guidance and support during the onboarding process. Userlove’s Product Tour and Walkthrough feature offers a seamless and personalized experience, guiding users through your SAAS product and ensuring they understand and utilize all of its features.

Best Examples & Practices of Guided Tours & Tutorials in Mobile Apps
- Bartek Dziegiel
What is a guided tour in a mobile app?
Guided tours and tutorials are potent tools to help find themselves in the new app. It allows users to navigate complex interfaces, grasp core functionalities, and ultimately derive maximum value from their interactions with a product.
Guided tours are sometimes also called walkthroughs or product tours . Designers can use guided tours of all types of digital products.
They serve as virtual mentors, accompanying users on their journey through digital experiences. Tutorials can use many different types of guidance, such as
- providing step-by-step guidance and explanations,
- interactive demonstrations,
- contextual tips.
Dedicated UI elements provide the instructions. These features shorten the learning curve. Moreover, they empower users to quickly become proficient in using new platforms.
What are the types of guided tours?
There are two main approaches to guide users through a digital product.
One of them is static onboarding screens. Those screens appear when users open the app for the first time. They often appear as a slide show – a quick presentation teaching the users how to use the app’s primary functions.
The other is a contextual instructions approach in the form of tooltips and coach marks. They provide information relevant to the current layout of the app or website.
This article will discuss best practices from the most popular apps. We will take product tour examples from widely used and successfull apps.
Best examples of guided product tours
№1: take advantage of animated instructions like notion.
Onboarding screens appear right after opening the application for the very first time. They are a great way to welcome new users and show them the apps’ value proposition. For example, Slack, a widely used communication and collaboration platform, takes this approach. App walkthrough informs users, what the app does and what it is for.

Alternatively, it is an opportunity to demonstrate the app’s main features. The Notion, productivity and note-taking web application, presents its functions through screens with animations. A short animation showing a screen of the application demonstrates how users can organize their notes.

This method is handy when it describes actions that can be taken outside of the platform (like in the “Settings” of the device or actions done in a browser). For example, Evernote, a note-taking and task-management application, uses animation to explain how to save web content.
№2: Use tooltips to present relevant information like Otter
Many modern applications use contextual instruction to demonstrate their functions. Pieces of information nudge users into exploring various features of the app. Tooltips are located near the button that serves the function the tooltip describes.
For example Otter, a transcription software, guides users through the application and demonstrates how to use it using tooltips hovering over certain UI elements. Small arrows at one side of the tooltips draw the user’s attention to specific details. In some cases, Otter uses visual emphasis (like a darker background combined with a contrasting UI element) to further bring users’ attention to the element it describes.

№3: Use page indicator and navigation for multi-step instructions like Meetup
A guided tour takes the user through different screens of the app. Tutorials can be done via tooltips describing certain interface elements one after the other.
For its instructions, divided into separated stages, Evernote uses tooltips containing step indicators and buttons that lead from one step to another. They provide navigation through instructions and allow users to take an actual guided tour through the app.

Meetup, a social media platform for hosting and organizing in-person and virtual activities, takes navigation through tutorials even further by allowing users to go back to the previous instruction.

№4: Make instruction dismissable through skip and close button like Slack
Onboarding instructions appear when a user opens the app for the first time. However, not every person is a first-time user – some of them have previous experience with this interface and do not need this information.
Consequently, it is an excellent strategy to let users to skip or dismiss the tutorials. Lengthy, unskippable introductions can be frustrating for the users.
For example, welcome onboarding screens of Slack are easily skippable through the “Skip” button located at the top right corner. Users can just as easily dismiss the tooltips by using the close icon. Similarly, Otter’s tooltips always include close buttons that let users brush off instructions they are not interested in.

№5: Let the user access instructions again like Evernote
However, allowing users to access instructions again could be beneficial.
Most apps allow users to go through their guided tutorial only once and never again. If users prematurely skip initial instructions, they are left to explore the app on their own.
Providing the option to access instructions multiple times can help to avoid that scenario. Moreover, thanks to that approach, users can reinforce their understanding of the app. They can retake a tour to clarify doubts and refresh their memory on specific tasks or features.
Take an example from Evernote and its approach to guided tours and tutorials. After opening the app for the first time, users’ attention is brought to the “Get Started” widget, which contains six tutorials explaining how to use the app’s different functions.
Users can tour the app, guided by helpful tooltips, as often as they like. Then, the user can remove the widget by customizing the app’s home screen. Through the same function, they can bring the widget back and reaccess the tutorials if some interface elements are unclear.

Why are Guided Tours and tutorials important?
If you are currently working on guided tour or tutorial flow yourself Talebook is a helpful resource to simplify your task.
This article was based on research conducted at Talebook. Here you can access the report based on that research. It was made using Talebook.io, an online research repository.
Furthermore, you can access the link to explore tutorial flow wireframes that are conveniently available for download. Wireframes are fully customizable and offered free of charge, so go on and start designing your user onboarding process today!
Talebook UI Kit – Onboarding Wireframes
Back to Lou
Try For Free
How to Design a Great Product Tour
Guidelines and examples for creating beautiful and effective product tours.

Product tours handle the essential job of introducing and familiarizing users with your product or new features. When executed well, they improve UX and encourage users to take meaningful actions. Great product tours also decrease new users’ time to value, enhancing conversion, activation, and retention rates.
However, when they first hit the market, product tours got a bad name. V1 product tours weren’t interactive or efficient. Long tours bombarded users right when they logged onto the platform, forcing them to click through every little thing the platform could do. Overall, product tours were overwhelming and not immediately helpful, with no clear goal in mind. Chances are you’ve taken a bad product tour, but we can guarantee it wasn’t a Lou product tour.
In fact, the contrast between good product tours and bad product tours was so stark that some companies started labeling good, interactive product tours as “guided tours” or “product walkthroughs.” They claim they are better than typical product tours because they interactively teach and help users reach milestones and key activities. Here at Lou, we think that’s exactly what a great product tour should do. So we keep it simple and just call product tours, product tours.
Let’s dive into what makes a great product tour and why they’re a powerful tool for increasing product adoption.
What Makes a Product Tour Powerful?
Great product tours are powerful because they can:
Drive product adoption and the adoption of new features
Make onboarding self-serve and decrease support tickets
Catch users in-product at just the right moment to increase engagement
Gamify the onboarding process & lower the learning curve for adopting a new platform
Give insights into user behavior so you can analyze, iterate, & improve their experience
In fact, in 2021, 85% of users who experienced a Lou product tour reported that it was helpful!
5 Qualities of a Great Product Tour
Distinct features and varying user needs may make effective product tours look different from platform to platform. However, there are universal best practices for designing a great product tour that helps users adopt products with ease.
They’re designed with a goal in mind
They’re timely and relevant to the user’s journey
They’re well-designed (to-the-point and look built-in house)
They let users opt-out
They’re tested and iterated on

5 Qualities of a Bad Product Tour
Bad product tours do not consider the user’s journey or goals. They ultimately give users more obstacles to overcome instead of actionable assistance.
They don’t have a clear goal and aren’t driving users towards an action or milestone
They require too many steps or include too many blocks of text
The information contained isn’t relevant to where the user is at in their journey
They hold users hostage and force them to take the whole tour
They’re published but never iterated or tested on again

What Makes a Great Product Tour?
Let’s dive deeper into what specific elements make a product tour great.
They have a clear goal
The best product tours focus on goals, not features. They include concise but in-depth directions on how to help users solve a problem. Without a clear goal, you risk squandering your user’s motivation and attention, which may be difficult to regain.
Goals might look like reaching “aha” moments, or when a user has an emotional reaction and suddenly grasps the value of your product. Goals could also look like significant milestones in a user’s journey, like getting them from signup to onboarded, or even to an upsell. Similarly, goals could be achieved on a smaller scale, like getting users to adopt a new feature or visit a particular web page.
In this example from GMail, they launched a tour that announced two new features, the ability to "chat and make video calls in GMail". As you can see in their 4 step tour, GMail announces the new features and then guides the user through navigating to the new chat and meet options in the GMail nav bar.

By setting a goal, product tours will drive results for the milestones and metrics you care most about. Additionally, goal-setting is a fast and effective way to see if your product tour generates the results you want.
With Lou, designating a goal for your product tour is as simple as one click. Lou’s goal tracking feature captures how many users adopt a feature, click a button, or visit a page in your app. By creating a goal and linking it to a Lou tour, you receive access to advanced analytics that show exactly how effective the tour is at driving users toward its associated goal.
They reach users at the right time
Great product tours trigger tailored messaging to specific users and meet them at the right time in their journey, like when they’ve reached a particular page or completed a specific milestone, for example. Showing tours to the right users when they complete a milestone can encourage further engagement.

For onboarding tours , we recommend setting them to start immediately after a user creates their account. Sometimes, it’s helpful to trigger a product tour the second or third time a user logs in if they didn’t complete the tour the first time. Note that just because a user opts out once doesn’t necessarily mean they won’t be interested in taking the tour a little later.
Segmenting your audience will allow you to display the right tours, to the correct users, at the moment it's most helpful to them. Targeted tours help users reach their “aha moment” efficiently.
When purchasing a product-tour solution, make sure it offers the ability to easily create user segments so that you can launch targeted tours without involving your dev team.
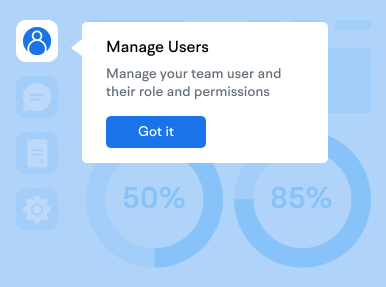
In the example below, you can see two different onboarding tours within the same platform. One onboarding tour is geared towards admin users whose first milestone is inviting their team, while the second onboarding tour is designed for general users whose first milestone is to create an account and join the team the admin invited them to. Targeting tours to different user segments ensures that the message is relevant and personalized to each user.

They are well-designed
Users are more likely to engage with your product tour if it’s well-designed and looks native to your product. It’s also imperative that you keep your tour short and to-the-point. Users are 3 times more likely to complete a tour if it has 5 steps or less. If you need a tour to cover a bulk of information, think about how you can break it up into multiple tours that are easier to digest.
Here are some more tips for a well-designed product tour:
Choose a color for the tour steps that stands out against your platform, and keep the font and corner radius of the tour steps consistent with your brand. Choose a text color and size that’s easy to read, too.
Add visuals. Images are valuable because they can make tours more engaging or allow users to see simplified examples. Occasionally, embedding instructional videos right into a tour step is helpful so that users can watch them without leaving the page they’re on.
Ensure you position each tour step close to where the user needs to click or read and that it’s not obscuring important information. If it is, be sure to change the positioning of the tour step.
Consider darkening your platform’s background during the tour. A dark environment is helpful to minimize distractions if there’s one place you want to draw your users' attention to. However, do not add an overlay on users' screens when you want to familiarize them with an entire page, like in an onboarding tour on a dashboard.
They let users opt-out
An excellent product tour doesn’t hold users hostage—rather, it allows them to opt-out through these 3 methods:
Tell users what the tour is about at the get-go and ask them if they’d like to take it. They can continue by clicking the button (call-to-action) that would allow them to start the tour.

Include an exit icon in each step of the tour so users can choose to leave at any time.

Lastly, you can also elect for product tours to close when a user clicks on the background of your platform. This can be a powerful option in the right setting, but we recommend being cautious when choosing this opt-out method, as an accidental mouse click could cause users to close a tour before they are ready.
They’re tested and iterated on
Don’t treat product tours as one-and-done solutions—test and iterate based on the analytics you receive. A/B testing unlocks the ability to compare the behavior and progress of users who received product tours to those who didn’t. You can also pair an A/B test with a code-free goal to obtain access to advanced analytics that can help you determine how effective your experience is at driving users towards a key activity.

We recommend evaluating how long users are spending on each step of the product tour, where they’re dropping off, and which particular product tours are more helpful than others. Integrating your product tour software with your analytics provider will help you better understand the impact product tours have on your overall metrics. At Lou, we offer one-click integrations with no set-up time with most major analytics providers.
Lastly, we recommend surveying your users at the end of a product tour to gain quantitative data into their experience. However it’s important to be thoughtful about how often a user would be asked to take a survey so that you can be sure to maintain a frictionless user experience.

With all of these elements to consider, product tours can feel like a technical and challenging undertaking. But with Lou, you can create completely code-free product tours with very little time and effort. Our average user launches their first product tour in less than an hour!
Ready to create compelling product tours that guide, train, and delight your users? Create a free account now and start building your own tours.
Published on September 10th, 2021
SHARE THIS POST
Ready to get started?
Create your free account now.
© LOU Web Technologies Inc.
Onboarding and product adoption tips right to your inbox.
Product tours & walkthroughs
Create interactive guided tours to onboard users to your software or website. Without any coding.

Show users how to get things done in your application
Welcome users, guide them step by step, explain features, and highlight important elements in your SaaS or website.
Everyone can build guided tours. No coding needed.
Our intuitive editor allows you to create interactive tours, walkthroughs and guides directly in your app’s UI without involving your IT department.
Have product tour handy whenever users need it
Let users launch a walkthrough from a tooltip, checklist or another tour. Even replay a tour from the Life Ring Button.
Style tours to match your brand look & feel
Easily change fonts, colours, alignment, padding, etc. Customize size and adjust position so tours feel like an integral part of your software.
Our tool supports custom CSS for advanced styling
Take your product tours to the next level

Segmentation
Engage users with content that’s relevant on a group or individual basis.
Tailor walkthroughs to personas, steps in user journey, device, application versions, first-time vs. returning users, etc.
Optimize user experience. Maximize business results.
Know which tours users like, where they get stuck and when they skip. Optimize according to your goals.
Integrate Product Fruits with your analytics and CRM tools to get the most out of it

Custom events
Trigger product tours based on user activity in your app.
Push events from your software to Product Fruits or launch a tour when the user performs a specific click or any other event.
You deserve the best user onboarding tool
Multi-page enabled.
Walk users through complex multi-page flows in a single tour
Dynamic URLs
Profile pages, user IDs and other dynamic URLs are supported
100% localizable
Language settings are imported from your app automatically
Text inputs
Ask users for text inputs and advance tours upon receiving it
Delay cards
Wait for animations to finish, handle dynamic content
Create guided tours & walkthroughs without a developer
5-minute setup
Deploy our snippet via tag manager or test it with a Chrome extension
Hassle-free deployment
Build & QA on staging, deploy to production with few clicks
We don’t interfere with your source code, nor alter UI or functionality
Style tours to make them look like an integral part of your software
Performance neutral
There’s no impact on your app’s loading or response times
GDPR compliant
We’re ISO certified. Our servers are located in the EU
Device agnostic
Works with any SaaS and web based app, regardless of user’s device
Start onboarding more users today
Get in touch. We'll help you to create beautiful onboarding experiences for your users.
See what else you get with our all-in-one product adoption toolbox
Onboarding checklists.
Motivate users to complete all the steps in your onboarding
Hints & tooltips
Highlight features, give tips & contextual information
NPS & surveys
Measure loyalty, satisfaction and capture insights
Life Ring Button
24/7 in-app help center: your support anytime, anywhere
Feedback widget
Make it easy for users to report bugs & send feedback
In-app announcements
Modals, banners & newsfeed to keep users informed
Knowledge base
Provide users with instant answers directly in your app
Terms & Privacy

The 16 Best Product Tour Software to Support SaaS Onboarding | 2024 update
Summary points:.
This article is a list of the best product tour software designed to help you guide users through your digital product. You will find some popular tools like Intercom and Whatfix, as well as lesser-known ones like Chameleon. Read on to discover what they can do for your business.
How Important Are Product Tour Apps?
Any SaaS business runs the risk of losing potential customers because they can’t figure out how to use the product from the get-go. This is where product tour software comes into play. They introduce users to your product and help them navigate its features to discover its value.
Effective product tours can increase product activation, adoption, and user retention rates and loyalty . Product tour software can also be used to record and analyze customer feedback. If you’re on the hunt for a good product tour tool, check out our suggestions:
1. Userpilot
Cost : from $249/month
Best Features:
- Growth Insights
- Engagement Layer
- User Sentiment
- Reporting, Targeting & Customization
- Integrations

With Userpilot you can create fully interactive product walkthroughs and tours. It offers many segmentation and personalization options, as well as advanced analytics. It is easy to use and install (by downloading a Chrome extension and adding a JavaScript snippet). Userpilot is Custify’s primary choice in product tour software and we often recommend it our customers. We also have an active partnership so, as a customer of Custify, you can benefit from a significative discount.
2. UserGuiding
Cost: from $69/month, billed yearly
- Onboarding Checklist
- Segmentation
- Resource Centers
- NPS surveys
- Goal Tracking

UserGuiding is a product tour and digital adoption platform that you can use to create fully customizable in-product experiences easily without any coding. You can also set up sophisticated onboarding flows, checklists for additional help, and resource centers to maximize efficiency and engagement. UserGuiding’s NPS surveys feature helps you gather customer input to measure customer satisfaction and improve customer experience. Keep in mind that, at the moment, UserGuiding elements show on mobile devices but can’t be used for mobile apps.
3. Intercom
Cost : from $59/month
- Code-free builder
- Audience targeting
- Multipage tours
- Click-to-advance

Intercom is a conversational relationship platform that has a product tour add-on. You can use it to create product tours for your customers and drive onboarding and adoption. With Intercom you can also create frameless video tours to make your customer feel closer to you. However, Intercom tours are linear, with no real interactivity.
Cost : free version, price quote for other plans
- Mobile guides
- Guide consumption analytics
- Themes and styling
- Pre-built layout library
- Guide scheduling

Pendo helps you interact with customers by designing personalized onboarding and tutorials, and by sending in-app messages. You can tailor your messages for specific customer segments to make sure they all know how to use the features they need. In-app messages can also result in reduced customer support calls due to increased customer satisfaction. However, keep in mind Pendo’s interface is not friendly to inexperienced users.
Cost: custom price quote
- Automatic, Precise Targeting
- Condition-Based walkthroughs
- Zero-Coding Content Creation
- Multilingual

Whatfix offers interactive product tours and smart content creation. Like Userpilot, it can be installed via Chrome extension and JavaScript snippet. You can use it to easily create content, no coding skills required, and display it in various formats (video, PDF, etc). Whatfix’s installation process is a bit difficult and its customization options are limited.
Cost: from $249/month billed yearly or $299/month billed monthly
- Onboarding tours
- In-app surveys
- In-app messaging
Appcues is an easy-to-use product tour software that comes with a no-code design-builder and many design options. Its tracking features require no coding skills as well, so you don’t need any help from developers or analysts. Appcues also comes with custom dashboards for reporting and analysis. Nonetheless, its price range is very high compared to that of other software from this list.
7. CommandBar
Cost: free version, from $249/month for other plans
- Universal search
- Product tours
- Onboarding checklists
- Help hub/resource center
Cost: price quote
- Full Interface Control
- Advanced API Support
- Multi-language

WalkMe is one of the most popular product tour software on this list. You can use it to quickly build, test, and launch non-linear product walkthroughs. It has a wide variety of features like analytics, A/B testing, and task automation, which may seem overwhelming at first. Based on reviews, it’s price quotes are quite steep, and it’s more suitable for large businesses.
9. Chameleon
Cost: from $279/month
- Microsurveys (including NPS)
- Event Triggering
- Audience Segments
- A/B Testing

Chameleon is an onboarding and product tour software that you can use to record and analyze customer feedback. Although not as well-known as other tools such as Appcues or WalkMe, Chameleon provides many UX elements to use in product tours. It also offers custom CSS, allowing you to set specific styling or themes for your product walkthroughs. However, custom coding means Chameleon will take longer to deploy.
10. Userlane
- Audience Targeting
- Multi-Language
- Reporting/Analytics
- Surveys & Feedback
- Customer Segmentation

Userlane is a no-code product tour tool that allows you to offer tailored guidance and support to users. With Userlane you can collaborate with your team members to build step-by-step, on-screen interactive guides. It is easy to use and customize and it gets regular releases of new features. Based on online reviews, one of the downsides is that Userlanes’s analytics feature could use improvement.
11. Userflow
Cost: from $200/month, billed yearly
- Launchers/Hotspots
- Surveys/NPS
- Flow/checklist views
- Automatic, segmented flow triggering
With Userflow you can build in-app, highly customized, and dynamic flows with no code. Its drag and drop builder is visual and intuitive and it allows you to easily preview flows, directly in your own app. It is also a customer input software that you can use to collect user feedback via NPS, CSAT, and free-form text surveys. However, access to many of its features is restricted on the lower pricing plans.
- Intelligent Analytics
- Complex Flow Creation
- Multiple Domains
- Custom Validations

With Apty you can simplify the learning curve for users and help them get familiarized with your product. You can use walkthroughs and in-app messaging to onboard users or highlight newly launched features. Apty’s analytics tool analyzes user behavior and helps you create customized flows for various user groups. One possible drawback is that Apty’s deployment and integration can take some time.
13. Nickelled
Cost: from $99/month
- Unlimited users and views
- Easy page embedding
- User Segmentation
- Embed video or audio in guides

Nickelled is a 100% code-free product tour software. You can use it to drive product adoption with guided tours, website banners, and onsite widgets. Nickelled is cross-platform so it works on mobile, desktop, and tablet. It doesn’t require software downloads or browser extensions, and Javascript is optional. It is one of the less pricey options on this list, but note that it offers no customer segmentation at the moment.
14. Usetiful
Cost: free version, from €29.90/month for other plans
- Product tour
- Customizable themes for native look
- Usage analytics
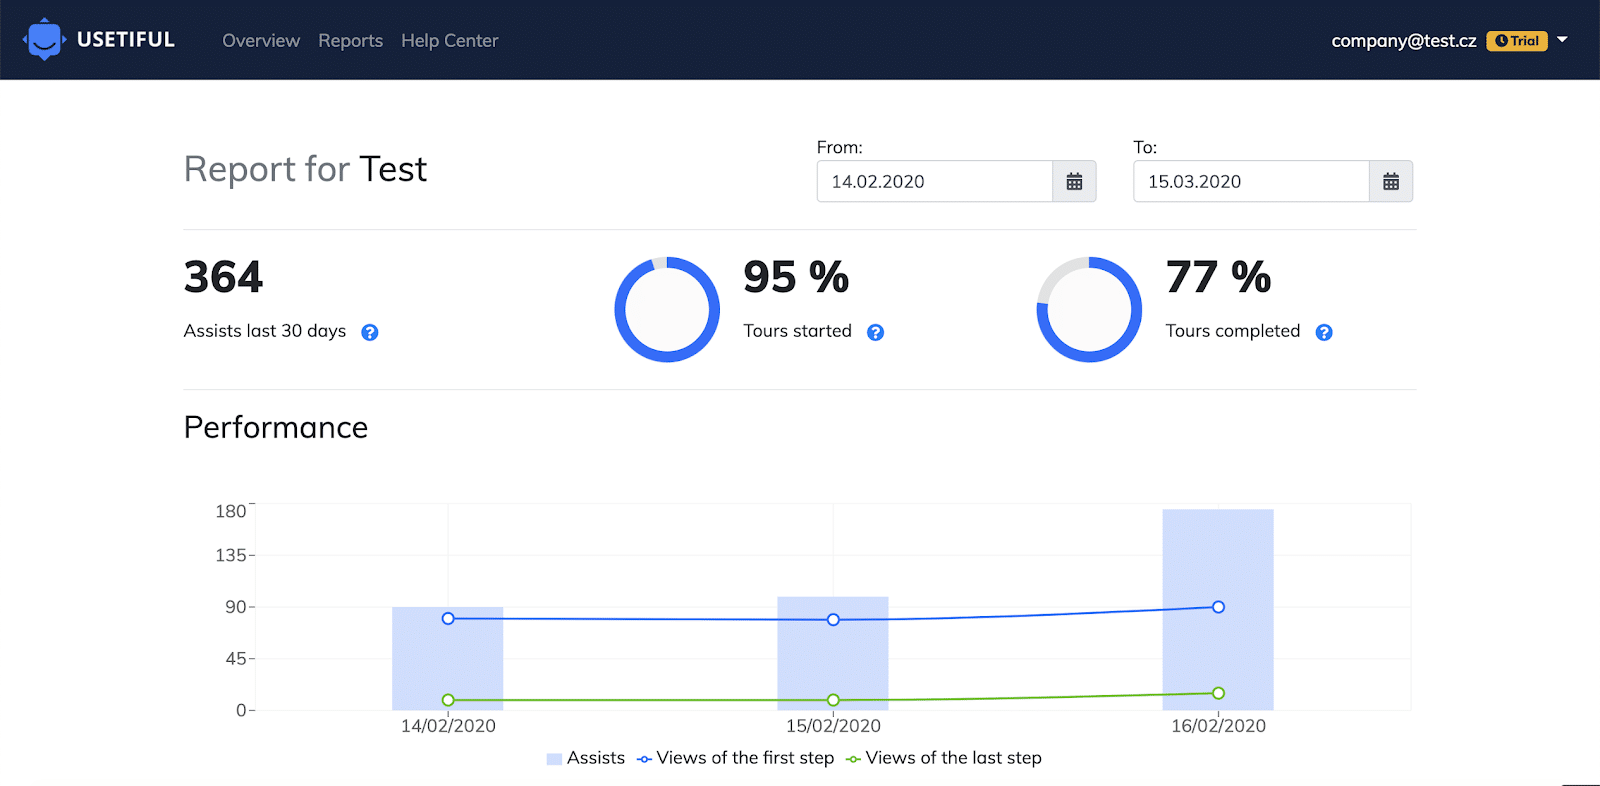
Usetiful markets itself as an “affordable premium solution for digital adoption” which seems to be accurate. You can use it by pasting a snippet of code into your product, or by adding their browser extension. Their product tours and smart tips were designed to look native in your software product for good user experience. As is often the case, lower pricing plans don’t include access to many features.
Cost: Free for Basic Plan, $29 per user/month for Pro Plan, and customizable charge for Enterprise packages.
Best Features
- Automatic guide creation for training employees and assisting customers
- Instant documentation of best practices across teams
- Document consistency and easy update
- Automatically updated documents
- Screenshot redaction
- Embedded guides in any CMS
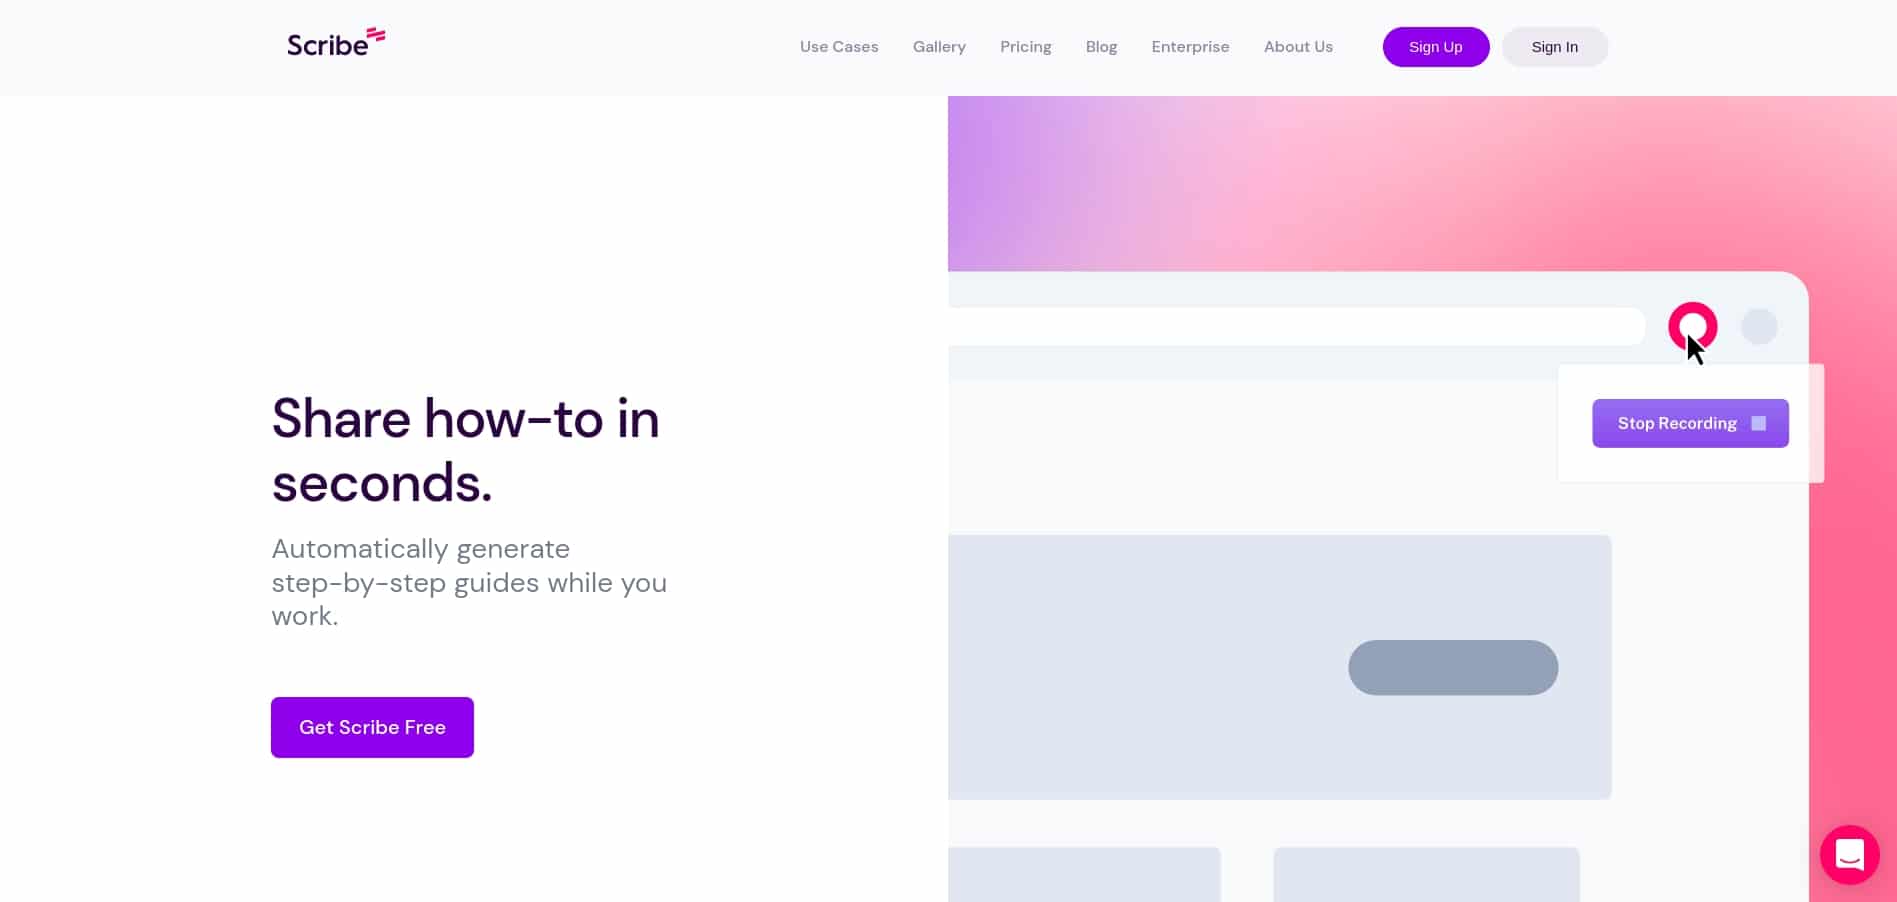
Scribe is the first process documentation tool of its kind. It’s a browser extension or desktop app that automatically creates how-to guides.
Simply click “Record” and capture your process. Scribe will instantly create a step-by-step document, complete with written instructions and screenshots. Additional features enable you to edit and update your Scribe, effectively making those changes wherever it’s shared or embedded.
16. Intro.js
Cost : free open-source, lifetime commercial license starts at $9.99
- Simple, lightweight API
- Completely customizable
- Free open-source
- Easy install
- 24/7 Priority support option
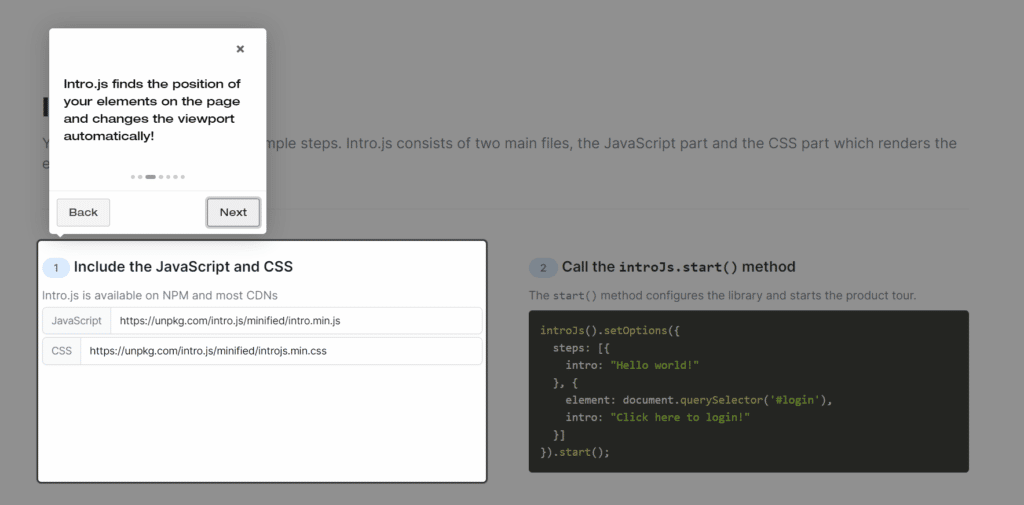
Intro.js is a very smart tool that can be just what you need if you’re starting out in the SaaS world. While it doesn’t have all the flashy features of its competitors, Intro.js makes up for it through a highly customizable, 10kB API. The API is free and open-source for personal use. Commercial lifetime licenses start at $9.99 and can go up to $299 for 24/7 priority support, and unlimited projects. The biggest downside of Intro.js is that you need some knowledge of CSS and JavaScript to integrate it. However, that can also be a plus since it allows you to tailor everything to your needs.
Final Thoughts
It might seem difficult to decide – maybe one tool has a feature you like, but is missing another. Or maybe they’re all good. We recommend the following process:
- Find out what you need from the product tour software (be as precise as possible)
- Settle on a budget
- Shortlist a few of the best options for you on this list
- Do extensive research for each of them
- Message them with any concerns or questions
Consider your needs and budget and do extensive research before deciding on one. Based on the high review count on websites like G2 or Capterra, Intercom, Pendo, and Whatfix seem to be the go-to product tour tools. Judging by what they offer, however, Appcues and WalkMe are very good choices as well. So here you have it, the next part is on you – good luck!

Written by Victor Antiu
Victor Antiu is the Marketing Manager at Custify. With nearly 10 years experience, his focus is SEO, product marketing, and B2B inbound strategy. When he’s not trying to fix websites and automate processes, he’s traveling and sailing around the world.
You might also enjoy:

Best CRM Tools for SaaS Sales 2024 and How to Choose
Whether you’re a small business owner or a large corporation, your customer relationship management (CRM) platform is key …

The 36 Best Customer Feedback Tools You’ll Want to Try | 2024 Updated List
Looking for the best customer feedback tool for your business? SurveyMonkey and UseResponse are just two of many options. Read our list to discover more!

The Best Customer Self-Service Solutions
79% of customers expect organizations to provide self-service solutions to their questions and issues. Meanwhile, 77% say they …

Improving the Customer Journey with a CSP
Free PDF eBook with practical examples and insights on how to use a CSP to optimize your customer journey.
Thanks! You're all set.
You can download the PDF eBook here: Download Now
See how Custify can help you fight churn.
Notice: This website or its third-party tools use cookies, which are necessary to its functioning and required to achieve the purposes illustrated in the privacy policy . If you want to know more or withdraw your consent to all or some of the cookies, please refer to the privacy policy . By closing this banner, scrolling this page, clicking a link or continuing to browse otherwise, you agree to the use of cookies.
Existing customer? Sign in
6 Best Angular Product Tour Libraries For User Onboarding
If you want to build onboarding tours for Angular applications, here are six open-source libraries you should check out. And if you want to try a no-code solution to save time and resources, we’ve got you covered, too.
If you’re using Angular to develop your web applications, you’re already familiar with its robust features and ease of use. Developed and maintained by Google, Angular is known for its ability to create Single Page Applications (SPAs), which helps you offer a seamless user experience and faster loading times.
Additionally, Angular has a large and active community of developers, which means that there is a wealth of resources and support available to you. This community-driven support also ensures that Angular is continuously updated with new features and security patches, making it a reliable and secure framework for building web apps.
And if you’re looking to build product tours on Angular, you’re in luck. It offers a wide range of tools and features that make it easier to build user onboarding tours. For example, you can use Angular's built-in support for animations and dynamic components to create engaging and interactive tours that guide users through your key features.
The best place to start with building your own Angular product tours is to find an open-source library that gives you all the tools you need to get started.

Can't code? No time? Try our no-code tool instead.
Quickly create sophisticated onboarding flows, all without any code involved.
6 Best Angular onboarding tour libraries #
An open-source library simplifies building from scratch and saves you precious time. So if you want to build onboarding tours for Angular applications, here are six open-source libraries you should check out for building your Angular product tour.
We’ve picked them out based on their ease of use as well as their reliability and how they are being looked after by the team that made them. For instance, we’ve omitted libraries that are not being maintained anymore.
1. Angular Intro.js #

Good old Intro.js. We’ve talked about it in our previous articles on JavaScript tours , React tours , and Vue.js tours . Of course, Intro.js also works with Angular.
Intro.js is a well-known library for creating step-by-step introductions and guided tours on web applications. There are other features such as various customization options, controlling the order of the steps, as well as tooltips and highlighting elements.
It is used by major companies like Amazon and SAP, so it is quite reliable and trusted. Unlike various other open-source libraries, Intro.js has a commercial license that starts at a one-time purchase of $9.99.
If you decide to get Intro.js, make sure to get the Angular wrapper , which allows Intro.js to work inside an Angular app.
2. Angular Shepherd #

Shepherd is another onboarding library that pretty much works for all JavaScript-based frameworks. Angular as well.
Like Intro.js, Shepherd allows you to define a sequence of steps that guide users through your application's interface, highlighting key elements and providing descriptive tooltips. The library provides a flexible API for customizing the behavior, appearance, and position of each step, as well as the ability to add event handlers for user interactions.
Shepherd provides a wrapper for Angular so you can get started with it on your Angular product right away.
To use Angular Shepherd, you need to install and import the angular-shepherd package in your Angular application. You can then define the steps of the tour using the ShepherdService, and customize each step's content, position, and styling using HTML and CSS.
3. Angular UI Tour #

Angular UI Tour is a plugin that uses popovers from Angular UI Bootstrap to display a guided tour. It was originally created as Angular Bootstrap Tour , inspired by Bootstrap Tour , but then they tweaked it so that it doesn’t have any dependency on Twitter Bootstrap or JQuery.
Angular UI Tour gives you the ability to create tours with multiple steps that can be customized with HTML and CSS. Each step can include a title, a description, and a template with custom content. You can also highlight elements on the page and add tooltips or popovers to provide additional information.
Angular UI Tour also supports multiple positioning options, such as left, right, top, and bottom, and allows you to control the size and position of the highlighted elements. Additionally, you can add event handlers to respond to user interactions, such as clicking or hovering on an element.
To use Angular UI Tour, you need to install and import the angular-ui-tour package and add the ui-tour directive to your Angular app. You can then define the steps of the tour using a configuration object and start the tour by calling the start() method.
4. Ngx UI Tour #

Inspired by Angular UI Tour, Ngx UI Tour is a product tour library that uses Angular Material MatMenu to display tours. So before you use this, you’ll have to make sure Angular Material is installed properly. Originally, this was Ngx Tour , but that library is not being maintained and it has been replaced by Ngx UI Tour.
It allows you to create customizable steps that guide users through your application's interface and provides various features such as tooltips, popovers, and highlight elements.
With Ngx Tour, you can define each step of the tour using an HTML template, add event handlers to respond to user interactions, and customize the content, placement, and styling of tooltips and popovers. Ngx Tour also supports multiple positioning options, such as top, bottom, left, and right, and provides flexibility to adjust the step's size and position.
It’s also super well-maintained. Since 2021, it has had releases with new features and fixes like clockwork, right up to 2023. Considering that Angular UI Tour’s last release was in 2017, this might be a better option.
To use Ngx Tour, you need to install and import the ngx-tour-core package and the specific ngx-tour-ngx-bootstrap or ngx-tour-md-menu package for the styling library of your choice. You can then add tour steps to your Angular app using the TourService and TourStep classes, and customize their appearance and behavior using CSS.
5. Angular Popper #

Angular Popper is a library that simplifies creating onboarding tours in Angular applications. It is built on top of Popper.js , which is a lightweight tooltip and popover library itself.
As such, its focus is on creating tooltips. You can position them, arrange them in order, point them to certain elements. If all you need are great tooltips to give in-app guidance, Angular Popper may be the best fit for you.
To use it, you need to install and import the NgxPopperModule and use the ngx-popper directive with a configuration object to create tooltips. You can define the content of each step using Angular components, choose from various placement options, and customize the styling of the popovers using CSS.
6. Angular Joyride #

Angular Joyride is a product tour library built entirely in Angular with no external dependencies. As with other Angular-based libraries, you can take advantage of the various UI components offered by Angular when creating your tours.
Aside from the usual ability to create tour steps and style them, you can use custom HTML content, pass parameters to your templates, set up multi pages navigation, and do everything you need to easily guide users through your site.
It’s also fairly well maintained. New releases are not as frequent as NgX UI Tour, but the last release was in January 2022. Still fairly recent when compared to some other libraries on this list.
To use Angular Joyride, install and import the ngx-joyride package and add the joyride directive to your Angular app. You can then define the steps of the tour using a configuration object and start the tour by calling the startTour() method.
Don’t have the time or resources to build? Use a no-code onboarding software instead #
Open-source libraries are great when you are looking to make user onboarding a DIY project for your in-house team.
But if you think about the opportunity cost, knowing that building takes time and resources away from other mission-critical tasks you should be doing, consider using a product adoption platform as a no-code solution for onboarding.
In this case, Chameleon could be the right fit for your needs. You can use it to create customizable, on-brand Tours, Tooltips, Microsurveys, and Launchers. Try it for free and get into the sandbox environment to play with it, or book a personalized demo with our product experts.
👉 Check out this interactive demo on building an onboarding Launcher in Chameleon.

Build onboarding for your Angular app fast & easy
Save dev time and quickly deploy product tours for your Angular app with our no-code suite of tools
You might also be interested in...
User Onboarding Metrics, KPIs, and Benchmarks: A Comprehensive Guide
User onboarding still isn't good enough, but here's how it's changing, mobile user onboarding: the ultimate guide for 2023, boost product adoption and reduce churn.
Get started free in our sandbox or book a personalized call with our product experts
jQuery Script - Free jQuery Plugins and Tutorials
10 best tour plugins to guide visitors through your app (2024 update), what is guided tour plugin:.
A Tour plugin allows you to quickly create an interactive, dynamic, step-by-step guided tour for specific elements within the document.
It is a commonly used UI component that provides an interactive, user-friendly interface to introduce tutorials, new features or featured content on the web applications.
The Best Guided Tour Plugin:
In this post, You will find a list of 10 best jQuery and Vanilla JavaScript tour plugins to help guide your visitor around your website or web application. Have fun with it and don't forget to spread the world.
Originally Published Jan 16 2018, up date d Feb 17 2024
Table of contents:
- jQuery Tour Plugins
- Vanilla JavaScript Tour Plugins
Best jQuery Tour Plugins:
Guided website tour with directional arrows - jquery guides.
An easy-to-use jQuery plugin that adds an intuitive, interactive, dynamic guided tour to your website.
[ Demo ] [ Download ]
Interactive Tooltip-style Guided Tour Plugin - jQuery TourJS
A jQuery-dependent tour library that helps you create customizable, interactive, tooltip-style, step-by-step tours to guide your users through your web application.

Interactive Visual Guide Plugin For Bootstrap - jQuery Tour
A Bootstrap plugin to create an accessible, interactive visual guide that lets your users guide through / scroll between new features and functions in your web app.

jQuery Feature Tours Plugin - Joyride
Joyride is a cool and mobile-friendly jQuery plugin for easily and quickly creating feature tours for your website or web application using small tooltips.

Guide Your Users Around The Web Application - jQuery Tour.js
A jQuery plugin that provides your users a configurable, navigatable, step-by-step, guided tour around your web application. The plugin has the ability to highlight a given element with a fullscreen overlay to introduce the new features or functions on the webpage.

Best Vanilla JavaScript Tour Plugins
Simple step by step site tour plugin.
Intro.js is a simple and fast js library that makes it easier to create Step By Step website tour guide with keyboard and mouse support.

Responsive Guided App Tour In JavaScript – shepherd
shepherd is a JavaScript library that creates an interactive, accessible, dynamic visual guide to let your users learn about new features and functions on your web app.

Create Interactive Guided Tours In App – TourGuide.js
A customizable, framework-agnostic, and feature-rich guided tour/onboarding library written in JavaScript (TypeScript).

Easy Guided Tour Plugin For Bootstrap 5 - bs5-intro-tour
An easy-to-use guided tour plugin for Bootstrap 5 that guides your visitors through a tour of your app.

Feature-rich Step-by-Step User Guide In JavaScript – webtour.js
A feature-rich, user-friendly, fully responsive guided tour JavaScript library for the web.

More Resources:
Want more jQuery plugins or JavaScript libraries to create awesome Guided Tours on the web & mobile? Check out the jQuery Tour and JavaScript Tour sections.
- Prev: 10 Best Form Builder Plugins To Generate Forms From JSON Data
- Next: 10 Best Snackbar Plugins In jQuery And Pure JavaScript (2023 Update)
You Might Also Like

10 Best Image Croppers In jQuery And Vanilla JavaScript (2024 Update)

10 Best Toggle Button Plugins In JavaScript & CSS

10 Best Responsive Menu Systems In jQuery/JavaScript/CSS (2024 Update)

10 Best Gauge Plugins In jQuery And Pure JavaScript/CSS (2024 Update)

10 Best Material Ripple Click/Tap Effects In JavaScript/CSS (2023 Update)

10 Best Timeline Components In jQuery And Pure JS/CSS (2024 Update)
Add Your Review
Top Website Tour Examples To Learn From In 2023
10 min read

If you’re creating a user onboarding flow for your SaaS company, you’ll want to look at website tour examples from other businesses before you start.
We can learn from their mistakes, as well as follow the best practices they’ve established for teaching customers how to use their product. Having helped thousands of SaaS teams with onboarding, we can assure you that other web apps have faced the same challenges that you have.
Let’s get right into it.
- SaaS businesses use website tours as a way of showing new users how their products work.
- Website tours are valuable because they make users activate faster and more consistently, leading to a higher rate of retention in the long-term.
- A typical website tour is built out of modals , tooltips , hotspots and driven actions.
- To maximize the odds of your website tour being a success, ensure that you segment your user s and keep your tour as interactive and personalized as possible.
- Don’t code your product tour from scratch . Use Userpilot instead. Get a free demo today!
What is a website tour?
In many cases, website tours are interactive, requiring the user to actively engage with your product. That’s because learning by doing is a more effective means of user education than merely passively reading tooltips.
When users visit your app for the first time, it’s unwise to simply leave them to their own devices and let them figure out your product in their own way.
Ultimately, the risk of churn for SaaS companies is just too high to do something like this. We’re talking about an industry where Day One churn rates often exceed 70% or 80%!
Many businesses solve this problem by giving users a product tour that highlights their web app’s key features.
What constitutes “key features” is subjective, depending entirely on what a particular user group finds valuable.
So a CEO will likely have a very different set of product needs than an intern at the bottom of the hierarchy, for example.

I’ve seen plenty of businesses attempt new user onboarding with passive tours as well, but I don’t advise it.
Types of UI patterns used in product tours
Most product tours are built out of the following elements:
- Tooltips : brief text snippets that walk users through one individual product feature
- Modals : larger, rectangular elements that grab users’ attention with striking graphics
- Hotspots: small circles that flash softly to illuminate one particular part of the UI
- Driven actions: focus the user’s attention on a specific action such as a click or an input

Userpilot will let you build all of these UI patterns from simple templates, without facing the hassle of having to code. Get a free demo today!
Other patterns include:
- Lightboxes: similar to modals , but smaller and less disruptive to the user’s sense of flow
- Banners: long, thin, rectangular elements displaying an important message, often at the top or bottom of the screen.
- Sliders: similar to banners, but they slide in from the sides of the screen
So you now know what a website tour consists of, but why should your business care about creating one, when there are so many other things you could be spending your time on?
Why use product tours in your user onboarding process?
Put simply, serving your new users with a high-quality product tour is positively correlated with all the most important SaaS metrics .
For example:
Website tours reduce Time to Value
It’s in the commercial interests of all SaaS businesses to ensure that their customers experience value from their products as soon as possible.
Partly, this is due to the high-dopamine, low attention span world that we live in.
But it’s also about fulfilling the promises you make to your users. If they’ve come to your app to experience a particular benefit, they’re likely to churn if they don’t receive what they were looking for.
So imagine if you signed up for a new product and were greeted with an empty state like this:

Not exactly very motivating, is it?
By contrast, social media scheduling tool Kontentino greets new customers to their app in a friendly, engaging way:

And they follow this welcome screen with two tooltips that guide users towards connecting their social media account and scheduling their first post:

Out of these two examples, I can assure you that Kontentino’s customers will be the ones more likely to stick around and experience value .
Customers that experience a website tour are more likely to activate
Arguably the most important milestone in any new user onboarding journey, activation is the moment when a customer personally experiences the value of your product for the first time.
A typical product tour is designed to highlight the features that are most important to each particular user segment.
Generally, this is achieved by giving the user a checklist of tasks to work through, like this:

By the time the customer has worked through the checklist, activation is almost certain.
That’s because you can use onboarding software like Userpilot to define a custom event that equates to activation on your app, and then guide users towards it with modals , tooltips and hotspots.
If you want to create custom events for your app that will help your customers to activate, get a Userpilot demo today!
User onboarding product tours drive more user retention
Imagine you’re a new user who’s using a web app for the first time and you’re overwhelmed at the amount of value you receive.
You had signed up to find a way to organize your team’s work projects more effectively, and the product tour you experience shows you multiple ways of doing just that.
You experience the core value of the product through engaging with different features.
Do you leave and check out competing products?
Of course not!
Since it’s given you exactly what you wanted and the website tour made it so easy to use, there’s a good chance you’ll stay with this app for a long time.
From the perspective of the SaaS business who made this app, this translates into a high retention rate and multiple recurring subscription payments.
Now that I’ve got your attention…
Top tips for effective website tours
Every product tour is different, but there are some best practices that can be applied to just about any SaaS business, regardless of niche.
Don’t code your product walkthroughs from scratch
If this is your first SaaS product, it might be tempting to think that you can easily create a bootstrap tour on your own.
Think again.
The simplest UI element used in almost every product tour is a tooltip . Here’s how much code you need to make one:

Now imagine that multiplied by the number of UI elements in your entire product tour.
But that’s not all!
Your developers will also need to edit your tooltips every time your product marketers want to run a product experiment , perhaps to change the tooltip’s color or shape to see if that affects performance.
Maybe you have investors with deep pockets, but given how expensive developers are and how little time they normally have, that sounds like a risky strategy to me.
A better strategy is to use code-free user onboarding software like Userpilot. That way, your product marketers can build product tours to their hearts’ content, without having to bother your devs.
But don’t take my word for it. Get a Userpilot demo today to see how it works!
Ensure your website tour is interactive
Do you remember that boring old professor at college that used to lecture you back in the day?
I’m prepared to bet that he lectured students 30 years ago in exactly the same way. Right?
The worst thing you can do is to create a product tour like that . I’m talking about a website tour that
- goes through the same product features
- in the same order
- to every single customer, regardless of use case
- in a dry, non-interactive way
This is called a linear product tour. And users consistently hate them !

This is why Pendo’s tooltip-based product tours don’t work, by the way. They’re just too linear and repetitive.
A better approach is to create an interactive walkthrough, like Kommunicate did here:
To the user, this feels more like a two-way dialogue than a boring lecture.
The product tour asks them to try out one of the core features , the user does so at their own pace, and then they get served with another interactive task that’s directly linked to their particular use case.
All the while, the website tour has tooltips and modals guiding users towards the features that they need.
Don’t forget to segment your users and personalize your website tours
As we mentioned earlier, what your customers find valuable about your product tour is subjective.
It will depend entirely on their particular use case. For example, if your product is an SEO tool:
- Senior management will look at the bigger picture of their business
- SEO managers will be interested in higher-level analytics to see how their team is performing
- Link builders will generally only care about specific metrics such as domain authority and domain reputation
So it would be foolish to serve the same website tour to each of these user segments.
The solution?
Segment your users, and deliver an individualised product tour to each segment .
A great place to segment is on the welcome screen . You can ask your users questions that assess how they want to use your product, and then use software like Userpilot to personalize the subsequent product tour based on their answers.
This is how Postfity segmented their users:

If you want to see how Userpilot can help you segment your customers, get a Userpilot demo today.
Website tour examples that follow best practices
Now that you know what a website tour is and what the signs of a good tour are, let’s look at some guided tour examples from other businesses.
Website tour example #1: Rocketbots
Rocketbots have a web app that allows you to connect all your messaging systems on one platform.
After the user logs in, they initially see this welcome screen :

Observe how Rocketbots is addressing me by name and how it’s already looking to personalize my user experience at this stage of the process.
This form is also extremely minimalistic, which shows that Rocketbots want to keep their website tour brief and get their users to activate as quickly as possible.
Once you’re done with the welcome page, the software serves you with an onboarding checklist , which looks like this:

It’s notable that the checklist includes the tasks “Connect a Channel” and “Create a Space.”
These are the two most important activation tasks that Rocketbots requires of its users.
Their software won’t work if you don’t have a “space” to put all your inboxes in, and you won’t experience any value until you’ve connected your first inbox (or “channel”) to your space.
Rocketbots used Userpilot to create a series of tooltips that walk users through these two activation tasks.
Here’s what the tooltips look like for adding your first channel:

Once this is complete, activation won’t be far away.
Website tour example #2: Tallyfy
Tallyfy is a project management tool. It has two main functionalities: documenting business processes, and then automating them.
Tallyfy’s tour consists of the following two tasks, both of which require action from the user:

The first task is simple enough. Simply follow the instructions and click “Open.”
Giving users a fast win like this is often a good idea when building your onboarding process . That way, your users will be more motivated than if you had a long, linear product tour .
The second task is rather more playful. If you click “Open,” you’re asked to choose between sand, bacon or cheese.

Adding a light touch of gamification is a great way that Tallyfy keeps its users engaged.
Once you’re done with these two trial tasks, Tallyfy finishes up by prompting you to create your own task.

There’s just the one CTA here, so it’s very clear where to go next after this website tour.
It seems to me like Tallyfy have listened to their user feedback and discovered that their product tour needn’t be any more complicated than this in order to get users to activate.
Website tour example #3: Demio
Demio is a webinar hosting service.
Their website tour is perhaps the very definition of interactivity . You are asked to join a fake webinar, and then handed over the reins to control it.
The webinar initially looks like this:

When the host passes control to you, you’re given dummy data and a slideshow to ensure that you have something to talk about.
If you’re anxious that this is some kind of a test, fear not! There is a fake audience who will chat in the sidebar and appreciate whatever you say!

There’s an element of playfulness to this website tour which makes it memorable.
And since it’s a fake webinar, there’s no risk to you if things go wrong. So it will be good practice for when you come to deliver a real webinar to real users.
If you take one thing away from this article, let it be that you consider using Userpilot to build your website tour!
It really is so much faster and cheaper than coding everything yourself, and Userpilot has templates for all the UI elements you’ll need.
Get a demo today and you’ll see what I mean.
Leave a comment Cancel reply
Save my name, email, and website in this browser for the next time I comment.

Get The Insights!
The fastest way to learn about Product Growth,Management & Trends.
The coolest way to learn about Product Growth, Management & Trends. Delivered fresh to your inbox, weekly.
The fastest way to learn about Product Growth, Management & Trends.
You might also be interested in ...
Funnel marketing: definition and strategies that work for saas, how to do market research: a step-by-step guide, 20 effective saas marketing tactics to drive product growth in 2024.
WorldWide Telescope User Manual
Guided Tours
Guided Tours are annotated and animated slide-shows, created to demonstrate a feature of WorldWide Telescope (such as the Welcome tour), galaxies (such as the Sombrero Galaxy tour), or different views and perspectives of the sky and Earth (such as the Multiple Worlds tour). Feel free at any time to pause a tour, explore on your own (with multiple information sources for objects at your fingertips), and rejoin the tour where you left off.
Highly rated tours include Tours > Galaxies > Universal Beauty -- a tour of spectacular sights in the Universe set to music, created by High Skies. For a clear explanation of the search for Earth type planets, visit Tours > Planets > Search for Extra Solar Planets , created by the Harvard-Smithsonian Center for Astrophysics. Or select Tours > Galaxies > Dust & Us to join Harvard Astronomer Alyssa Goodman on a journey showing how dust in the Milky Way Galaxy condenses into stars and planets. Select Tours > Cosmology > Dark Matter at Abell 1689 to take a tour with University of Chicago Cosmologist Mike Gladders to see a gravitational lens bending the light from galaxies allowing you to see billions of years into the past. Looking to the future, our own Milky Way galaxy is expected to collide with the Andromeda galaxy in a few billion years time, which is explained in the Tours > Galaxies > Impact with M31 tour, created by Francis Reddy of Astronomy Magazine. The apparent result of a galactic collision is shown in the Tours > Galaxies > M82 Cigar Galaxy tour by Robert Hurt of the Spitzer Space Telescope. Other tours cover nebula, eclipses, black holes, the Apollo programs, supernova and many other topics.
You can also create your own tours, and share them with friends and colleagues.
Playing Tours 🔗
To display the range of tours supplied with WorldWide Telescope, click on Guided Tours . Thumbnails will appear in the top pane for many different types of tour. These are folders of tours. Click on one of the folder thumbnails to view the range of actual tours. If a thumbnail is a direct link to a tour, it will contain a large T in the top right hand corner. If a thumbnail is for a folder of tours, it will not contain the T , and by default is an image of a folder.
To play a tour, click the thumbnail:

Alternatively, hover the mouse over the thumbnail so that the tour properties appear, and then press the play arrow:

To pause a tour, click the Escape key. You are then free to explore at will. When a tour is playing the top and lower panes are hidden. To bring these panes into view, simply hover the mouse over where they normally appear.
To restart the tour, press the play arrow in the top left corner of the screen. If the tour is not visible in the top panel, click the name of the tour in the menu bar to bring it up.
Note the thumbnails in the top panel show the tour stops (the large M that appears in the first image indicates that this is a master slide - refer to Creating a Tour for more details).

To cancel a tour, click the X by the tour name in the menu bar:

To close a tour after it has completed, either click the X by the tour name, or the Close Tour button that appears in the final credits. In order to transmit your rating of the tour, click on one or more stars. If you enter too many stars and reconsider your opinion, click the star to the left to reduce the number of stars. Click Close Tour and this rating will be included in the average rating presented to other users.

To navigate the folders of tours click on the thumbnails to open up folders and tours, and click on the text to step back. For example, clicking Nebula in the image below will close that folder and go back to display the contents of the higher level Tours folder:

- There are other ways to start a tour. For example from the Explore > Open > Tour... menu, from community data, and from other data collections that contain tours.
- When a tour is selected, a copy of it is downloaded to your local computer, and the entry Save Tour As... is added to the Guided Tours Menu Entries . This tour can then be played again without internet access, and edited (though be mindful of copyright and ownership issues).
Playing Tours in Demo Mode 🔗
Refer to the Guided Tours Menu Entries section for details on how to play one or more tours in demo mode (that is, continuously).
Creating Basic Tours 🔗
Creating your own tour can be as simple as annotating a few images showing deep sky objects, or locations on Earth. Or a tour can be as immersive as combining images with art and music and speech to illustrate and enhance a complex argument or experience.
Tour Properties Dialog 🔗
To create a tour, click Guided Tours > Create a New Tour... , or Explore > New > Slide-based Tour..., which has the same effect. The first thing that you will see is the Tour Properties dialog. Give the new tour a title (with a recommended limit of 35 characters, otherwise the title will be resized or truncated), and add as many of the properties as you can now. However these properties can be edited later, and some of the details may well not be finalized until you have completed the content of the tour.

The information entered into this dialog is for informational purposes for the users that might run the tour.
The author image should measure 70 pixels wide by 94 in height.
The Data Guide contains a full list of classifications for use with the Classification Taxonomy entry. Properly classifying guided tours will help users locate the tour when searching. (Note the search feature currently only applies to tours added to the default collection).
Tour Editing Pane 🔗
Click OK to close the Tour Properties dialog and bring up the tour editing pane:

Adding slides to your tour could hardly be easier. Simply navigate to where you want to be and click Add a Slide . Note that when you do this a thumbnail image of the current view is taken, and added to your tour. You can change the view using the Look At and Imagery lists between slides though if you do the tour will jump sharply from one image to the next and not scroll smoothly.
The key editing elements are to the right of the image above. Tour Properties will bring up the original properties dialog, for editing. Music , Voiceover , Text , Shapes and Picture items can be added to the slide. The Show Safe Area checkbox can be used if you are using a wide screen, but plan on the tour being fully visible to users of narrower screens - checking it simply shades out the wider area.
Music : MP3 and WMA files are the supported formats for both music and voice. Browse for a suitable piece. Note that there are not fade-in, fade-out or other sound effects available in WorldWide Telescope, so applying effects must be done independently in audio editing software. Only volume can be adjusted while editing a tour. If a piece of music is attached to an individual slide, and the piece is longer than the slide display time, the music will cut off suddenly at the end of the slide. The recommended approach is to attach music to the starting Master Slide , so that the music runs without glitches throughout the tour. Start by completing a silent version of the tour, so you know exactly how long the tour is, then locate suitable music and apply fading and perhaps other effects (using quality music editing software) and finally apply it to the tour when the music and tour are in a completed state. Note that the entire music file is embedded in the tour binary, so it is a good idea to fade out and truncate the music at exactly the right time, so as not to store unnecessary data.
Voiceover : Use a similar procedure as for music, recording and editing the audio using quality software. The Sound Recorder accessory provided with Windows can be used to create voiceovers if you have a microphone attached to your computer, but without any editing features it is of limited utility. The difference between voiceovers and music is that voiceovers should be applied to each individual slide, to get the timing right. Both music and voice can be rendered simultaneously, though adjust the volumes appropriately.
Text : Enter the text into the dialog, along with font and color information. Note that the text can be resized on the slide, so there is no need to get the point size perfect within this dialog. If a background color is required for the text, select one after clicking on the palette icon in the text dialog. Add line breaks by pressing ENTER where required.
Click Save to add the text to the slide. Then use the resize and rotate handles as necessary.

To select white as a color, click on any of the white space around the color picker. The two colored boxes at the bottom of the color picker show the old and new colors respectively.
Shapes : Circles, rectangles, open rectangles, rings, lines, arrows and stars are supported shapes. Once added to the screen, edit some of their properties using the right click menu shown below.

Use the Bring to... and Send... options to layer multiple images appropriately.
Selecting the Color/Opacity entry will bring up the color picker dialog shown above.
Selecting Hyperlink will add a URL to the tour. If the user clicks on the shape, the URL will be opened in the default browser in a separate window. Note that no indication that this is a link is provided automatically -- this indication should be provided by the tour author.
Animate enables the movement, recoloring and resizing of text, shapes or pictures. To animate an object, first move it, size it and color it at the location in the view you wish it to start. Then click Animate . Then drag the object to the location you wish the animation to end, and recolor and resize the object if required. Then deselect the object. Animations are only enabled between a starting point and an ending point. Right-click the slide you are working on, select Preview Tour From Here... and test the animations. Each animated object should smoothly move, recolor and resize over the time period assigned to the slide.
Picture : Jpeg, Tiff, Png and FITS still images can be added to the slide. Similar to text and shape entries, picture entries can be resized and rotated on the slide. The same right click menu available for Shapes can be used with pictures.
Slide Editing Menu 🔗
Some editing options are not quite so visible. Right click on a slide to bring up a menu with a range of detailed options:

Merge Tour after slide... will insert another tour to become part of the tour being edited.
To set the start and end camera position for a slide, simply navigate to the required angle, then click Set Start Camera Position . Then navigate to the required ending angle, and click Set End Camera Position . When the slide is shown in the tour, the view will smoothly animate from the starting to ending positions.
Use Capture New Thumbnail to replace the thumbnail image of a selected slide.
To add a slide for a particular time -- say to capture an eclipse or a crescent moon or a certain alignment of a star or planet, for example -- go through the following procedure:
- Click View then open the Date Time Selection pane from the Observing Time pane.
- Click the push-pin icon in the Date Time Selection pane to undock it.
- Use the arrows to select the required time. Click Apply as many times as necessary to locate the exact time you want. Do not click OK so the Date Time Selection pane remains open. So far you have not edited the tour, but just selected the right data and time.
- Click the tour title bar to return to editing the tour. Create the new slide if it does not already exist and ensure the slide that the date and time applies to is highlighted with a yellow outline. Right-click to bring up the editing context menu, and ensure Track Date/Time/Location is selected.
- Right-click the slide again to bring up the menu again, and this time select Set Camera Start Position .
- In the Date Time Selection pane (that should still be storing the required date and time for the camera), click OK . This edits the tour and applies the date and time to the slide.
- Preview your tour to ensure you have done this procedure correctly.
By default each slide will appear for 10.0 seconds. To change this click on the pane just below each slide, and use the up and down arrows to change the number of seconds.

As an alternative to using the up and down arrows, mouse over the time itself, and edit the numbers by hand.
Note that the time taken for a tour is greater than the sum total of times for each slide, as the transition times from one slide to another are included in the total run time.
Master Slides 🔗
Before progressing to add more and more slides, first consider creating a master slide. Master slides are templates that are applied to all subsequent slides, containing watermarks, logos, copyright messages, and so on. One tour can have one or more master slides -- so the master slide can change as the tour progresses, though only the most recent master slide applies to any one slide in a tour. All music, voiceovers, text, shapes and pictures on a master slide will be applied to all subsequent slides.
If background music is to be applied to your tour, consider starting the tour with a master slide with a display time of only a second or two, and attaching the music file to this one slide.
To make a slide a master slide, right click to bring up the context menu, then select Master Slide . A bold M will appear on the thumbnail. To revert a slide to normal status, bring up the menu and click Master Slide again.
Slide Title 🔗
To add a title to a slide, click on the area below the thumbnail but inside the yellow bounding rectangle, and type up to 15 characters as a title, for example:

Note that a selected slide can be dragged and dropped to a new location in the displayed list of slides.
Control Views and Settings 🔗
To change current view settings for your slides, go into the View or Settings menus and make the appropriate changes for the selected slide (for example, to turn Constellation Figures or Boundary lines on or off). To go back to editing the tour, click on the name of the tour in the menu bar.
View and Settings entries can be changed for each slide.
Completing the Tour 🔗
Click Save in the tour editing pane to save off the tour at any stage. Close the tour when it is completed by clicking the X by the name in the menu bar:

Sharing the Tour 🔗
Tours can be sent by email to friends and colleagues. A tour is stored in a .wtt file, and can be sent as an attachment to a normal email. The file size of the tour should obviously be below the limit applied by your ISP.
Creating Interactive Tours 🔗
An interactive tour is a tour where the user is required to give feedback. This feedback could be in response to a menu of possible selections, such as in a quiz with multiple choice answers, or even as simple as "where do you want to go from here?". The main difference between an interactive tour and a normal tour is that an interactive tour will not follow a set sequence of events, but will instead jump from one stop on the tour to another that has been selected by the user, or is in response to input from the user.
The basic process for creating an interactive tour is very similar to that of creating any other tour, this section just covers the differences. So if you are not familiar with the process of creating a tour, start with the Creating Basic Tours section.
Scenarios for interactive tours include providing "Back" buttons in normal tours, creating coursework quizzes - perhaps at the end of a normal tour, the students can be quizzed on its contents, and in providing some control over the flow of a complex or long tour.
Tour Menu Selection 🔗
The following images shows a typical menu system that might appear in a quiz. The blue text entries are all links to other slides. The white text entries are not linked to other slides.

Three text entries in the question slide are linked to the "Wrong" answer slide: Mars, Mercury and Pluto.
The "Try again" text will return the user to the question slide.

Only the correct text entry on the question slide is linked to the "Correct" answer slide: Venus.
The "This is Venus" text will more the user onto the next question.
In order to create the menu system shown above, first create all the required slides with the appropriate text on them. Next right click on each text entry in turn, and click on Link to Slide , this will bring up the following dialog:

Slides can be linked to another specific slide with the Link to Slide (Select below) option. This is the appropriate selection for all the menu entries — linking "Venus" to the correct slide, and the rest to the "Wrong" slide.
The "Wrong" slide may be used many times, so its "Try again" text should be linked to Return to Caller — so the user will be returned to the question they got wrong.
The correct answer slide will probably be linked to the next question with the normal Link to Next Slide option.
Any of the overlays — text, shapes or pictures — can be turned into active links. There are a few things to consider when creating an interactive rather than normal tour:
- Master slides apply to the slides that follow it in linear order, not necessarily the order that the slides will be displayed. Consider making every slide that links to, or from, a slide out of normal sequence a master slide.
- In order to prevent the timeout of a menu slide (or any slide with links on it that a user should select one of) from simply moving on to the next slide, link that slide to itself. For example, the menu and "Wrong" slides should link back to themselves, however the "Correct" slide can simply timeout and move on to the next question slide.
- Music will not necessarily be rendered smoothly when the user jumps around the slides.
- Links can be applied to entire slides, rather than to overlay entries. For example, instead of the "Wrong" slide having a "Try again" button the slide could be linked with Return to Caller , in which case it would simply timeout and then return the user to the question slide. Or of course, both systems could be used.
Guided Tours Menu Entries 🔗
Clicking on the down arrow below Guided Tours opens up the menu entries.

Tour Home , Tour Search Web Page , and Music and other Tour Resource link to Microsoft Research WorldWide Telescope websites.
To play tours in demo mode (that is, in a continuous loop) select Auto Repeat then one of:
- One : play the selected tour continuously

Undo and Redo are enabled appropriately while editing a tour.
CBX Tour – User Walkthroughs/Guided Tours
- Development
Description
CBX Tour – User Walkthroughs/Guided Tours helps to create interactive feature tour for product, service or simply step by step feature demonstration of anything. Now a days it’s really important to display any service or product step by step. Any kind of take a tour type implementation can help or solve this problem. Here comes CBX Tour to solve step by step feature walk though with next prev button, little pop info.
CBX Tour by Codeboxr
📺 Live Demo | 🌟 Upgrade to PRO | 📋 Documentation | 👨💻 Free Support | 🤴 Pro Support | 📱 Contact
🛄 Core Plugin Features
Create Tours – Create, Delete, Update tour from WordPress native post creating and listing window – Add Multiple tour steps with title, mini description and html element id – Redirect url as optional after tour is ended. – Single Tour Setting – Show/Hide tour button – Tour Button Text custom input – Tour Block Button (full width) – Tour Button alignment – Auto start tour – Tour Layout choose – Display Tour Once (Pro Feature)
Tour Layout – Core version includes 4 ready made layouts and can be extended – Basic layout – Red layout – Green layout – Blue layout – Pro addon has lots of ready layouts and custom layout(Custom color chooser)
Tour Display & Shortcode Tour can be display in different ways
- Tour display shortcode [cbxtakeatour id=”tour post id here”]
- Tour display widget
- Custom function call
Classic Widgets
- Dynamic Tours (Select the source from which the tour will display the content)
- Show/Hide tour button
- Tour Button Text custom input
- Tour Block Button (full width)
- Tour Button alignment
- Auto start tour
Elementor Widgets
WPBakery Addon
- Dynamic Tours (Select the source from which the tour will display the content )
Our Core plugin is free and will always be free. To extends the features we have Pro addon called CBX Tour – User Walkthroughs/Guided Tours Pro Using the pro addons we have added some cool features and more controls.
💎 CBX Tour – User Walkthroughs/Guided Tours Pro Features
👉 Get the pro addon
- Pro Layouts
- Tour Usages Tracking
- Google Analytics Tracking
Available Pro Layouts
There are 10+ pro layouts including custom layout. Custom layout helps to choose custom colors and everything custom style needed. Custom layout helps to style both the tour button and the tour popup box all elements.
- Basic(core)
- Green(core)
- Purple(pro)
- Indigo(pro)
- Yellow(pro)
- Orange(pro)
- Deep Orange(pro)
- Blue Grey(pro)
- Custom Layout(pro)
Tour Button Custom Style
- Tour button custom font size
- Tour button custom padding
- Tour layout custom color
Google Analytics Integration
- Enable/disable tour start event with google analytics event tracking
- Track tour start
- Prevent Bounce Rate
Tour Usages Logging
- Enable/disable tour tour usages log
- Enable/disable tour repeat visit log
- Track IP Address
- Anonymize IP Address
- Guest Cookie Stay Day(s)
- Display tour button once(Per tour configuration basis)
Other Pro Feature
- Unlimited Tours
- Reset custom styles to default
- Copy any ready layout styles to custom style settings
👍 Liked Codeboxr?
- Join our Facebook Page
- Learn from our tutorials on Youtube Channel
- Or Rate us on WordPress
🔩 Installation
- [WordPress has clear documentation about how to install a plugin].(https://codex.wordpress.org/Managing_Plugins)
- After install activate the plugin “CBX Interactive Feature Tour” through the ‘Plugins’ menu in WordPress
- You’ll now see a menu called “CBX Tour” in left menu, start from there, create new tour
- Use shortcode or widget or other custom features as you need to display tour
- Try our pro and free addons for more extra features
Screenshots

This plugin provides 1 block.
- CBX Tour - User Walkthroughs/Guided Tours

Beaver Builder compatibility

Excellent & effective plugin
Contributors & developers.
“CBX Tour – User Walkthroughs/Guided Tours” is open source software. The following people have contributed to this plugin.
Translate “CBX Tour – User Walkthroughs/Guided Tours” into your language.
Interested in development?
Browse the code , check out the SVN repository , or subscribe to the development log by RSS .
- [improvement] Security improvement
- [pro addon] New version of pro addon(V1.1.2) released
- [update] Setting library ‘select’ field update to handle both single select and multi select using same method
- [improvement] PHP 8.x compatibility check
- [improvement] Minor improvements and bug fixes.
- [improvement] Dashboard ui/ux improvement for the whole Tour plugin’s dashboard area
- [pro addon] New version of pro addon released that compatible with 1.0.12
- [new] New color picker
- [new] New confirm dialog
- [improvement] WordPress 6.0 compatibility check & minor improvement
- [fixed] If auto start enabled, after first time auto start and ended, if clicked again now tour works
- [fixed] Solved with bootstrap based theme
- [fixed] Few other minor style adjustment
- [improvement] WordPress 5.8 compatibility check
- [fixed] Bug fixed or resolved conflict with GamiPress plugin
- [improvement] Dashboard setting ui/ux improvement
- [improvement] Backend UI improved.
- [new] Add new menu Helps & Update.
- [fixed] Missing translation update
- [improvement] Setting page loads faster, improved in js
- [improvement] Delete all steps now has confirm dialog to avoid mistake remove
- [fixed] Error on uninstall solved. now uninstall or remove/delete the plugin
- [improvement] Removes console.log from js or commented
- [improvement] Added setting url in plugin listing row for quick settings menu access
- [New Feature] Introduces new pro features – Google analytics tracking, tour usages logs
- [New Feature] JS based event hook (filter and do action like php in js)
- [bug fix] Minor bug fix for a url missing in upgrade notice
- [bug fix] Gutenberg Editor compatibility fix
- [bug fix] WPBakery Page builder compatibility fix
- [bug fix] WPBakery widget loading fix
- [bug fix] Tested with wordpress 5.4(upcoming version release candidate)
- First public release
- Version: 1.1.2
- Last updated: 3 weeks ago
- Active installations: 100+
- WordPress Version: 3.7 or higher
- Tested up to: 6.4.4
- Advanced View
Contributors
Got something to say? Need help?
View support forum
Designing guided tours
Use these tips to help you create effective guided tours for your users.
Planning a guided tour
- What is the purpose of the tour? Do you want to use callouts that provide detailed\n user interface descriptions so your users can better understand the feature? Or do you\n want the user to learn how to perform a task, such as how to create a new incident? It\n is important that you consider these questions and perhaps do some research before you\n begin to plan the tour so that you can properly break down the overall objective into\n discrete steps.
- Where should the tour be available? If you intend to guide your users to complete\n tasks that they might perform daily, such as ordering an item from the Service Catalog or creating an\n incident, it makes sense to make the tour available on your production instance. If you\n intend to train users to explore these tasks without creating actual records in the\n system, consider making the tour available on a non-production instance for training\n purposes instead. Both scenarios are valid.
- What should you name your tour? When you create a tour, you are prompted to provide a\n tour name. The name must be\n unique\n and intuitive so your users can understand the purpose of the tour. For example, use\n “Create a New Incident” or “Review the Incident List” as possible tour names.
- What assumptions are you making regarding what the user already knows about the page\n or task? Do all users who can take the tour have the same level of understanding? Use\n this information to decide how much description to provide at the beginning of the tour\n so that any user who takes the tour understands the content.
- If the purpose of the tour is to perform a task, how can you personalize the\n instructions so that each user who takes the tour creates a different record? For\n example, if the tour walks users through creating a group called Facilities, you can\n prevent subsequent users from getting a duplicate name error by instructing them in a\n callout to assign a unique value to the group Name field.
- What page should the tour start on?
- What steps are important to accomplishing the objective?
- How should a user navigate from one step to the next?
Guided tour plan
Review the following sample plan for a guided tour whose objective is to explore the Service Portal home page.
- Tour Name: Service Portal \n Overview
- Goal: Users should have a good understanding of how to navigate key elements of the\n Service Portal home page
- Portal Name: Service Portal
- Starting Page: Service Portal : ID\n Index
Selecting triggers
- Next button: The user types the value or looks it up and\n selects it, and then clicks Next .
- Change Element Value trigger: After the user selects the\n value and clicks outside the field, the trigger moves to the next step.
When the user right-clicks the element, in this case a field label,\n this instruction disappears, and the next one appears.
- The Mouse over the Element trigger is similar to the\n Right click the Element trigger. When the user points to the\n element, the callout disappears. For example, if you demonstrate that a hint appears\n when you point to a field label, the callout step disappears before the hint text\n appears. This type of trigger can seem disruptive to the guided tour flow.
Using callouts
You must place a callout on top of an element to interact with it. The element is\n highlighted in blue when it is selected as the target. In the following example, it looks\n like the callout is pointing to the context menu icon, but notice that the header bar is\n highlighted blue.
This example depicts the correct placement of the callout for the context menu. Notice that\n the context menu icon is highlighted blue.
- When you place a callout on a form that contains tabs, consider that a user may not\n have the tab open for viewing. Create a new callout that instructs the user to first\n open the tab before proceeding with the rest of the tour.
- Minimize callouts on fields that are associated with dynamic content. A delayed page\n refresh may prematurely end the tour if the user cannot find the associated tour\n element.
- When you guide a user through pop-up windows, add your callout to the originating page\n on or near the pop-up icon. Within the callout instructions, guide your user through the\n steps intended for the pop-up window, because callouts cannot be added to the pop-up\n window.
- While\n the color of a callout is static in the standard platform UI, you can customize callouts\n on Service Portal . Consider using\n this capability to ensure a consistent look-and-feel between your callouts and your Service Portal pages. For more\n information on guided tours that you create on Service Portal pages, see Request guided tours .
Auto-launching your tour
Auto-launch a tour if you want your users to take the tour on their first page visit.
You may choose to auto-launch multiple tours from a single starting page. In this case, you\n can apply the auto-launch order to each tour successively so that your users begin the\n second tour upon their second page visit, their third tour upon their third page visit, and\n so forth. Use this option if you intend to start your users with an introductory tour and\n add increasing levels of complexity or different areas of focus with follow-up tours.
Testing your tour
- Impersonate a role to verify the tour through the eyes of the intended user. By\n impersonating a user that holds a role targeted by the tour, or multiple users if the\n tour targets multiple roles, you can experience the tour just as the user does.
- Send the tour URL link to your colleagues to review the tour and provide feedback. If\n the feedback is valuable, modify your tour accordingly. For more information about tour\n feedback, see Create a guided tour .
- After the tour is published, review any tour failures due to errors that you see from\n the Guided Tours Overview page. Review these failures to provide you with insight into\n which users experienced problems with the tour, on which step the tour failed, and what\n the error message was. You can then use this information to troubleshoot and resolve\n issues.
7 advantages of guided tours for first-time travelers
Who out there dreams of seeing the world, but doesn’t quite know how to travel internationally for the first time? Well, meet traveler Lydia. She set off to Europe for the first time on our London, Paris & Rome trip and came home ready to spread the word about the benefits of group tours for your first time abroad. Check out why she loved going guided, and why you will, too!

Explore top tours for first-time travelers

4.7 out of 5 stars

4.6 out of 5 stars

Read more tips for traveling abroad for the first time

IMAGES
VIDEO
COMMENTS
Product tours: Compel users to take specific, meaningful actions in your app. Instead of leaving users to figure out your app on their own, product tours influence user behavior by explaining why each step is important and guiding users to take critical actions within your product. Guide users toward their aha moment.
Effective guided tours guide users to take meaningful action instead of providing passive overviews of key features. This " learning by doing " maximizes knowledge retention so users can master your product faster. They improve engagement. Well-designed guided tours reduce friction in the user onboarding process.
Create various guided tours based on different user actions and app engagement. 2. Trigger product tours with user action. Not all product tours should initiate right when a user logs into your product. Triggering product tours based on specific user actions ensures tutorials appear seamlessly in the proper context. If users engage with a ...
Customization. Tailor the tour using a range of options, either set options on initialization or update them on command with the setOptions () method. All options are optional and defaults will be used in place of custom values. Use the TourStep type definition to automatically detect available options in your IDE. Set options on initialization.
Guided Tour Designer. Drive user learning and ensure adoption. ServiceNow® Guided Tour Designer helps train your users with built‑in guidance and visual cues that show employees how to use any form, application, or portal. Empower users with integrated self‑help guidance to reduce support requests and accelerate productivity within your ...
Most good product tours contain a welcome screen, a microsurvey for segmentation, a checklist, and multiple experience flows. It's incredibly difficult to build a product tour from scratch unless you're a coding genius, or have substantial dev resources available. It's much easier (and cheaper) to use a product tour software like ...
A product tour demonstrates to your customers exactly how to use your product's features and guides them toward activation (the realization of value). Importantly, product tours should be interactive. Interactive product tours will engage your users while dull, sequential, and irrelevant tours will drive them away.
Userlove's Product Tour feature allows you to create interactive product tours that guide users through your SAAS product. These tours offer a hands-on experience that highlights key features, functionalities, and benefits of your product. With the Product Tour feature, you can customize each tour based on user behavior, language, and location.
A guided tour takes the user through different screens of the app. Tutorials can be done via tooltips describing certain interface elements one after the other. For its instructions, divided into separated stages, Evernote uses tooltips containing step indicators and buttons that lead from one step to another. They provide navigation through ...
Great product tours are powerful because they can: Drive product adoption and the adoption of new features. Make onboarding self-serve and decrease support tickets. Catch users in-product at just the right moment to increase engagement. Gamify the onboarding process & lower the learning curve for adopting a new platform.
Welcome users, guide them step by step, explain features, and highlight important elements in your SaaS or website. Everyone can build guided tours. No coding needed. Our intuitive editor allows you to create interactive tours, walkthroughs and guides directly in your app's UI without involving your IT department.
2. Create interactive user manuals with no-code tools. Using a pre-built platform is a much better option. With the low technical barrier to entry, anyone from operations to customer success managers - can quickly create an interactive tour, which means you can reduce reliance on software developers.
Product Tours. Guide users to success, one step at a time. Onboarding Checklists. Highlight the next steps in user's journey. Resource Centers. Gather all support content in one place. Segmentation. Create a unique experience for each user. Analytics. Track the performance of your user onboarding. Customization. Create a native experience for ...
Effective product tours can increase product activation, adoption, and user retention rates and loyalty. Product tour software can also be used to record and analyze customer feedback. If you're on the hunt for a good product tour tool, check out our suggestions: 1. Userpilot. Cost: from $249/month. Best Features: Growth Insights; Engagement ...
Angular UI Tour is a plugin that uses popovers from Angular UI Bootstrap to display a guided tour. It was originally created as Angular Bootstrap Tour, inspired by Bootstrap Tour, but then they tweaked it so that it doesn't have any dependency on Twitter Bootstrap or JQuery.. Angular UI Tour gives you the ability to create tours with multiple steps that can be customized with HTML and CSS.
Guided tour popovers can be opened in any direction. The position of the popover can be placed along every edge. The User Experience Toolkit describes a design language for the overall look and feel of Insights Hub and Industrial IoT. The toolkit contains a collection of patterns, best practices, and products to support you in developing ...
A Tour plugin allows you to quickly create an interactive, dynamic, step-by-step guided tour for specific elements within the document. It is a commonly used UI component that provides an interactive, user-friendly interface to introduce tutorials, new features or featured content on the web applications.
Website tour example #2: Tallyfy. Tallyfy is a project management tool. It has two main functionalities: documenting business processes, and then automating them. Tallyfy's tour consists of the following two tasks, both of which require action from the user: The first task is simple enough.
Steps for creating an ngx-guided-tour : Create an Angular project and install the npm module for guided tour component: npm install ngx-guided-tour --save. Import modules to app.module.ts as given ...
WorldWide Telescope User Manual. Guided Tours are annotated and animated slide-shows, created to demonstrate a feature of WorldWide Telescope (such as the Welcome tour), galaxies (such as the Sombrero Galaxy tour), or different views and perspectives of the sky and Earth (such as the Multiple Worlds tour). Feel free at any time to pause a tour ...
Description. CBX Tour - User Walkthroughs/Guided Tours helps to create interactive feature tour for product, service or simply step by step feature demonstration of anything. Now a days it's really important to display any service or product step by step. Any kind of take a tour type implementation can help or solve this problem.
Loading... Loading...
3. You have a team to help you plan your perfect itinerary. One of the advantages of guided tours for first-time travelers is that you can work with our Tour Consultants to compare and contrast each itinerary to find the one that fits your interests and price range. Being able to work with an expert to get personalized travel recommendations is ...