- Mods 1 – Getting Started
- Mods 2 – Tire Size Guide
- Mods 3 – Tire Buying Guide
- Mods 4 – Performance
- Mods 5 – Lift & Level Kits
- Mods 6 – Grille Kits
- Mods 7 – Headlights
- Mods 8 – Fog Lights
- Mods 9 – Rock Sliders
- Mods 10 – Roof Racks
- Mods 11 – Front Bumpers
- Mods 12 – Rear Bumpers
- Mods 13 – Skid Plates
- Mods 14 – Wheels
- Switch Systems
- Rooftop Tents
- Acc Lighting
- Tail Lights
- Rock Sliders
- Skid Plates
- Front Bumpers
- Rear Bumpers
- Accessories
- Recovery Gear
- Refrigerators
- Trail Tested
- Maintenance

5th Gen Mods , Accessories , DIY , Expeditions , Install , Off-Road , Overland , Performance , Reviews , Trail Tested
Arb safari snorkel install & review – 5th gen 4runner.

ARB Safari Snorkel Step-By-Step Install On The 5th Gen 4Runner: Full Review & Product Overview
While the majority of 4Runners sold here in North America will sadly spend most of their miles on pavement, there are some that will see a lot of time off-road, either out of necessity or for recreation.
For those on dirt, there are certain modifications that are smart to consider to extend the life and comfort of your 4Runner. Suspension upgrades, tougher tires, bolt-on armor, etc… While all of these upgrades are valid, what upgrades are being made to protect the motor while on the trail? The motor only has a few points of entry or exit that will cause damage or wear over time: the intake and the exhaust. The exhaust side of the equation is less of a concern because it’s pushing gasses away from the motor, so let’s focus on the intake side as its job is to feed the engine with clean air.
ARB Safari Snorkel for 5th Gen 4Runner
Benefits of a snorkel.

The stock air intake on the 4Runner pulls air from the space between the inner and outer front fender on the passenger side. With the plastic fender liner installed, a good amount of dust and water will be averted from the open intake hole. But take a long trip through the dust, or ford a river and you risk a clogged air filter or worse—water in your intake box.
If you have aftermarket front fenders and no longer have the factory fender liner, you can take that risk and increase it. How do you minimize or eliminate the risk? Like many great answers to overland questions — ask the Aussies! There’s no coincidence that one thing you’ll see on many Australian vehicles who spend time off-grid is a raised intake or snorkel. Drawing clean air from a windshield height intake will help prolong your engine life, reduce filter replacement, and eliminate water intake problems. Many vehicle manufacturers offer raised intakes from the factory for overseas applications, but unfortunately, Toyota hasn’t made an option for the 4Runner, but we’re not lost.
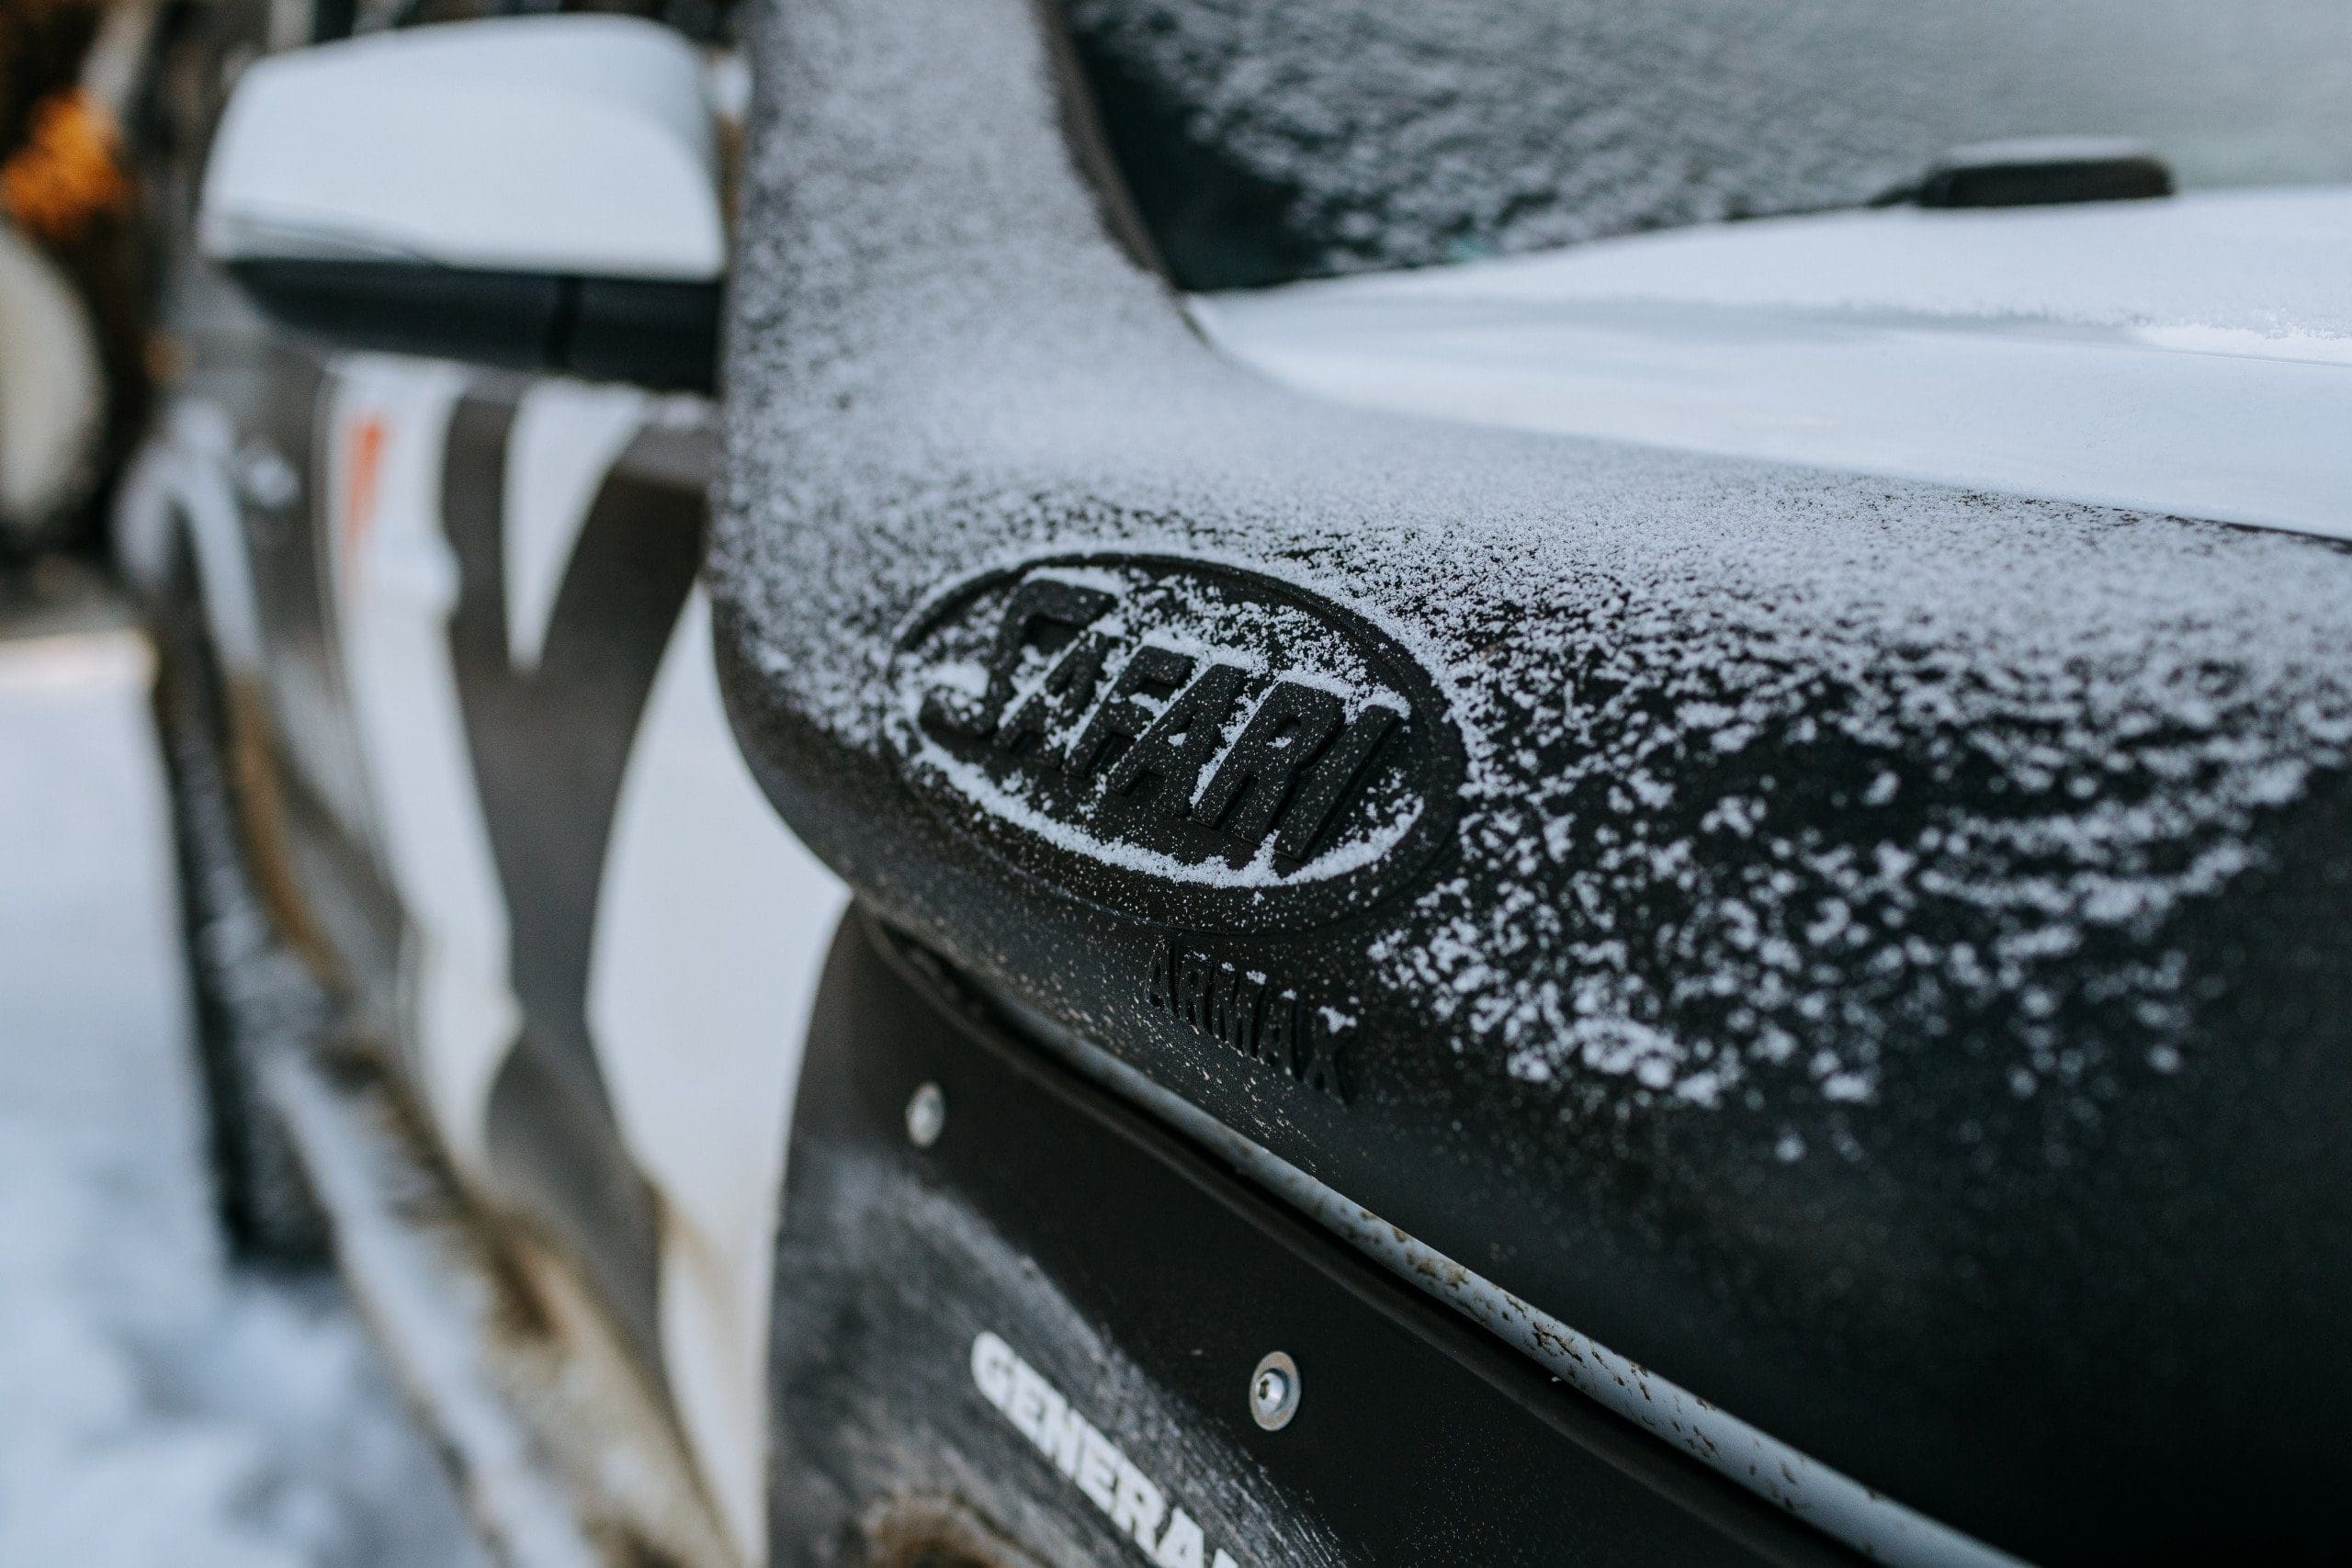
ARB Safari Snorkel

Safari Snorkel has been one of the leaders in the snorkel aftermarket for decades and has an extensive product offering that includes our 5th Gen 4Runners. They use a UV-stable polyethylene material that has been CAD-designed for optimal fitment and airflow specific to the 4Runner. Paired with their signature Air Ram head, the snorkel is designed to work in the harshest conditions keeping dirt, debris, rain, and rivers out of your vehicle’s intake.
Find it online:
- Safari Snorkel Kit (Part #SS450HP) 5th Gen 4Runner: Check Price
Install Overview

- Safari Snorkel SS450HP
- Air Ram head
- Adapter boot
- Hole/cutting template
- Upper mounting plate
- Miscellaneous hardware
Tools and Materials
- Painter’s tape
- Permanent marker
- Marking punch
- #5 step drill bit
- Miscellaneous drill bits up to 5/16”
- Right angle drill (optional)
- Body saw (air reciprocating saw)
- 80-grit sandpaper
- Deburring tool
- Loctite Blue 242
- Rustoleum black paint
- Silicone sealant
- Rubber mallet
- Body clip tool
Step 1. Prep Surface

To start, go ahead and prep the area you’ll be working on by washing the front passenger side of the 4Runner. This will remove any contaminants and make sure you have a nice “seal” between the snorkel and the body panel when you’re all finished.
Step 2. Remove Airbox

Remove the upper half of the factory airbox loosening the 10mm clamp on the intake hose closest to the airbox, and removing the factory MAF harness from the intake. You can leave the intake hose attached to the throttle body, but put a nitrile glove over the hose to prevent any contaminants from entering the intake while you’re working.
Remove the three 12mm bolts attaching the airbox to the fender, and roll the airbox towards the firewall to gain access to the bottom of the intake wiring harness. There is one clip to undo here. Remove the lower section of the airbox.
Step 3. Remove Factory Intake Duct

While you have the airbox handy, remove the factory intake duct using a small pry tool. This is where the new adapter hose will attach later on. After removing the inlet, give the whole lower section a thorough cleaning from debris that might have been in the airbox from before. This will also allow you to have a benchmark for how well the snorkel is performing after you’ve installed it.
Step 4. Seal Factory Drain Holes

The factory airbox has two drain holes in it, one on the side that faces the front of the vehicle and one on the bottom. It’s optional, but I would recommend using silicone caulking to fill these holes to seal up the intake. This will keep your intake sealed during water crossings, but will also keep any water that goes into the snorkel (unlikely) in the intake. So if you do seal the intake, make sure you check it occasionally if you’re operating in heavy rain or snow to make sure it’s dry. Once the silicone is applied, set it aside and let it dry while you work.
Step 4. Mask Off Work Area

Next, use the painter’s tape to tape off the area of the fender that you’ll be working on. Use the template as a guide, going all the way down to the fender flare. Make sure you add some tape over the seam between the fender and flare so metal shavings don’t pile up in them when you drill. Taping the whole work area will help keep your fender from being accidentally scratched while working. It’s not a required step, but it’s a smart step to take to protect your 4Runner.
Step 5. Put Layout Over Tape

Take the template out of the box and line it up on the back of the snorkel to make sure all of the holes match up. This preventive step helps to ensure you’re not drilling the wrong holes if you were supplied the wrong template! Attach the template to the fender using painter’s tape, aligning the left edge with the door jam and the top with the top of the fender. Make sure you thoroughly tape the edges so everything lines up properly and matches the contours of the fender.
Step 6. Outline Layout

With the template installed, mark the holes with a permanent marker. Once marked, remove the template and set it aside.
Step 7. Install Studs into Snorkel

Before getting into the drilling portion of the install, grab the six 8mm studs from the hardware bag. Apply some Loctite 242 to one half of the thread on the stud, and install them into the snorkel. Doing this ahead of time will allow the Loctite to set a bit before you add the nyloc nuts during install.
Step 8. Remove Inner Fender

Remove the plastic inner fender liner from the front to the back starting with the body screws under the factory bumper working through the plastic clips and screws towards the firewall. Use a body clip tool to pry the factory clips without breaking the heads off. You’ll only need to pull the fender liner a little more than halfway down. Just far enough to be able to reach back to the rear-most mounting bolt.
Step 9. Drill Holes into Fender

Back to the outer fender… With the holes now marked take a marking punch and punch a mark in the center of each pen mark. This will help keep the drill bit centered when you begin to drill. With the center punched, take your step drill and drill the six mounting holes in the fender. Make sure you are wearing safety glasses for this task as metal in your eye will ruin your weekend install. Take your time and once the appropriate diameter has been reached, spin the bit lightly a couple more revolutions to clean up the hole edge. You’ll want to drill to 16mm, or 5/8” for the mounting holes. No turning back now!
When drilling the hole closest to the passenger door, make sure you have enough clearance behind the fender so you don’t hit the inner fender. Have someone you trust poke their head in the fender to watch while you drill. Make sure they’re wearing safety glasses as well.
Step 10. Drill Cut Start Point

With the mounting holes drilled, mark your hole for the starting point for the inlet hole. You’ll need to choose a size that’s large enough to accommodate your saw blade of choice. Make sure when you mark your hole, mark it on the INSIDE of the area to be cut and far enough from the cut line to make sure you’re not drilling into the portion of the fender you’re keeping.
Step 11. Cut Out Big Hole

After drilling the starter hole, it’s time for the main event. I would recommend taking this moment to enjoy some liquid courage as you’re about to cut a big hole in your 4Runner. Beverage consumed (and then some time to re-group), grab your body saw. I used a pneumatic reciprocating air saw for this task because it’s a precision saw that leaves a thin kerf and a very smooth finish. Use good lighting for this job to make the line more visible. Take your time, adjusting your position to get the best stability during the cut. You can use a magnet across a cut section of the hole to hold the inner piece in place when you finish your cut so it won’t fall through. Breathe easy, the hardest part is over!
Step 12. Clean Cut Holes

Use the deburring tool to remove any metal burrs from the holes you just cut/drilled. Lightly use your finger to feel the inside of the holes for burrs. On the larger intake hole, use 80-grit sandpaper to smooth off the edge of the hole, if needed. Remove the painter’s tape when you’ve finished cleaning the holes.
Step 13. Test Fit Snorkel

Take your snorkel with the studs pre-installed and line it up with the fender to check the fit with the new holes. With any luck, you’ll have a perfect fit with no adjustments needed. If your holes are off, use a die-grinder to adjust them.
Step 14. Mark Drill Holes on A-Pillar

Use this time to mark your A-pillar mounting plate. Mockup the snorkel, and look at where you’ll need to apply painter’s tape. Remove the snorkel, and apply the tape with a few inches on each side. Then reapply the snorkel with the upper plate installed to mark where the plate will be attached to the A-pillar. Use your permanent marker to mark the top, bottom, and windshield edge of the plate. Remove the snorkel and the plate from it. You’ll come back to this in a bit.
Step 15. Paint Drill Holes

With the holes cleaned up, use a Q-tip to apply a layer of paint on all bare edges of metal. This will help prevent any rust from eating away your fender underneath the snorkel. Let the paint dry while you move on to the next step.
Step 16. Drill Pilot Holes into A-Pillar

Take the upper mounting plate and realign it with the marks you made earlier. Then using your permanent marker, mark the three holes you’ll need to drill in the A-pillar. With the holes marked, use the marking punch to set the center of the holes to drill. Starting with a small drill bit (1/16”) drill a pilot hole with your right angle drill. You can use a standard drill for this, but the right angle drill will allow for more depth control when drilling. You’ll want to just break the surface with these holes, but you won’t need to worry about any airbags in the A-pillar.
Step 17. Drill Final Holes into A-Pillar

After drilling your pilot holes, you can get ready to drill the holes for the plastic clips supplied in the snorkel kit. My final hole size was 5/16” to where the clips fit snugly with a hammer tap to set them. I would recommend drilling a 9/32” hole first, checking for snugness with the clip, then widening to 5/16” if needed. You want these to be as snug as possible to help hold them in place. Remove the painter’s tape.
Step 18. De-Burr Drill Holes

With your three holes drilled, use the deburring tool to clean up your holes and paint them as you did with the holes on the fender. Let them sit for a good 10-30 minutes, depending on how warm your workspace is. I used a heat gun to help cure the paint a little quicker.
Step 19. Silicone Clips into Holes

Paint cured, grab the silicone that you used for the airbox and apply a bead around the bottom of the clip. Line it up with the hole, and use a rubber mallet to tap it into place. Gently rotate the clip once it’s seated to even out the silicone at the interface. Repeat this for the other two clips. You can remove any silicone residue by lightly wiping it off with a paper towel damp with Acetone.
Step 20. Install A-Pillar Bracket

Install the upper plate with the supplied stainless steel screws by hand. Be sure to not spin too fast or the clip will start spinning. If it does, take a thin pair of pliers to lightly grip the edges of the clip while you screw in from above. Snug up all 3 screws evenly.
Step 21. Remove Stock Airbox Tabs

You’ll need to modify the stock airbox by removing the retaining and alignment tabs where the factory inlet used to be. I used a die grinder to remove the tabs as described in the instructions and smoothed them with some sandpaper to ensure a clean fit. This is where the snorkel adapter will slide onto the airbox.
Step 22. Install Intake Adapter

Set the intake adapter into the fender with the round end through the inner fender. Slide the smaller of the two hose clamps over the end sticking through the hole with the tensioning screw facing up on the forward side of the adapter. Take the lower half of the intake box and set it into place, sliding the round end of the adapter over the intake on the box. Use a little dish soap on the inside of the rubber adapter as a lubricant if needed. Reinstall the lower airbox, along with the wiring harness clips you removed at the beginning. Wait to tighten the hose clamp until after the snorkel is installed.
Step 23. Install Hose Clamps on Adapter

Take the larger of the two hose clamps and install it on the oval end of the adapter in the fender. Snug it up just enough so it doesn’t rotate on the adapter. You’ll want the tensioning screw facing down on the rearward side of the adapter. Take a small amount of dish soap and spread it on the inside of the adapter as a lubricant.
Have one of the upper bracket bolts at the ready. Bring in the snorkel and line it up with the fender, setting it into place. Reach in from underneath to massage the adapter onto the snorkel making sure it seats evenly. Then, grab your bolt and lightly thread it into one of the upper bracket holes to keep the snorkel in place while you get ready to secure it from inside the fender.
Step 24. Install Nuts and Washers

With your six washers and nyloc nuts handy, thread one of each onto the six studs inside the fender. Tighten them evenly with a ratcheting wrench, eventually getting them all snug on the fender. Once the snorkel is secured from inside the fender, add the upper mount bolts on the A-pillar and tighten them until they’re snug.
Step 25. Tighten Hose Clamps

With the snorkel fully secured, tighten the hose clamps with a 7mm socket on both the snorkel and the intake side of the adapter.
Step 26. Install Airbox

Make sure your airbox is cleaned out using a vacuum and rag, then reinstall the filter and upper half of the air box. Tighten the hose clamp (10mm) and reinstall the harness clips/plug before securing the upper airbox.
Reinstall the inner fender liner after you have cleaned out any metal shavings from the drilling using a vacuum. Use the driver’s side if you can’t remember which clips/screws go where.
Step 27. Install Air Ram

Finally, attach the Air Ram head to the top of the snorkel using the provided black hose clamp with the tensioning bolt facing back. That’s it! You’re done!
Trail Impressions

With the snorkel installed, it isn’t really noticeable from the driver’s seat. You’ll only know it’s there from the grief you get from your significant other when you pick them up from work…ask me how I know.
Aesthetically, the Safari Snorkel will change the exterior appearance of your 4Runner and may look a little out of balance if you have a mostly stock 4Runner. That being said, this is a functional upgrade, first and foremost. If the Safari Snorkel gives you what you need when you need it, who cares what it looks like. On a mild to wild build, this snorkel looks right at home with its black textured finish.
Road Impressions

On the road, there is surprisingly no increase in sound from the snorkel either from wind or intake noise. You do get some increased intake noise if you rev the engine while parked, a benefit for overland parking lot meetups…joking.
Final Thoughts

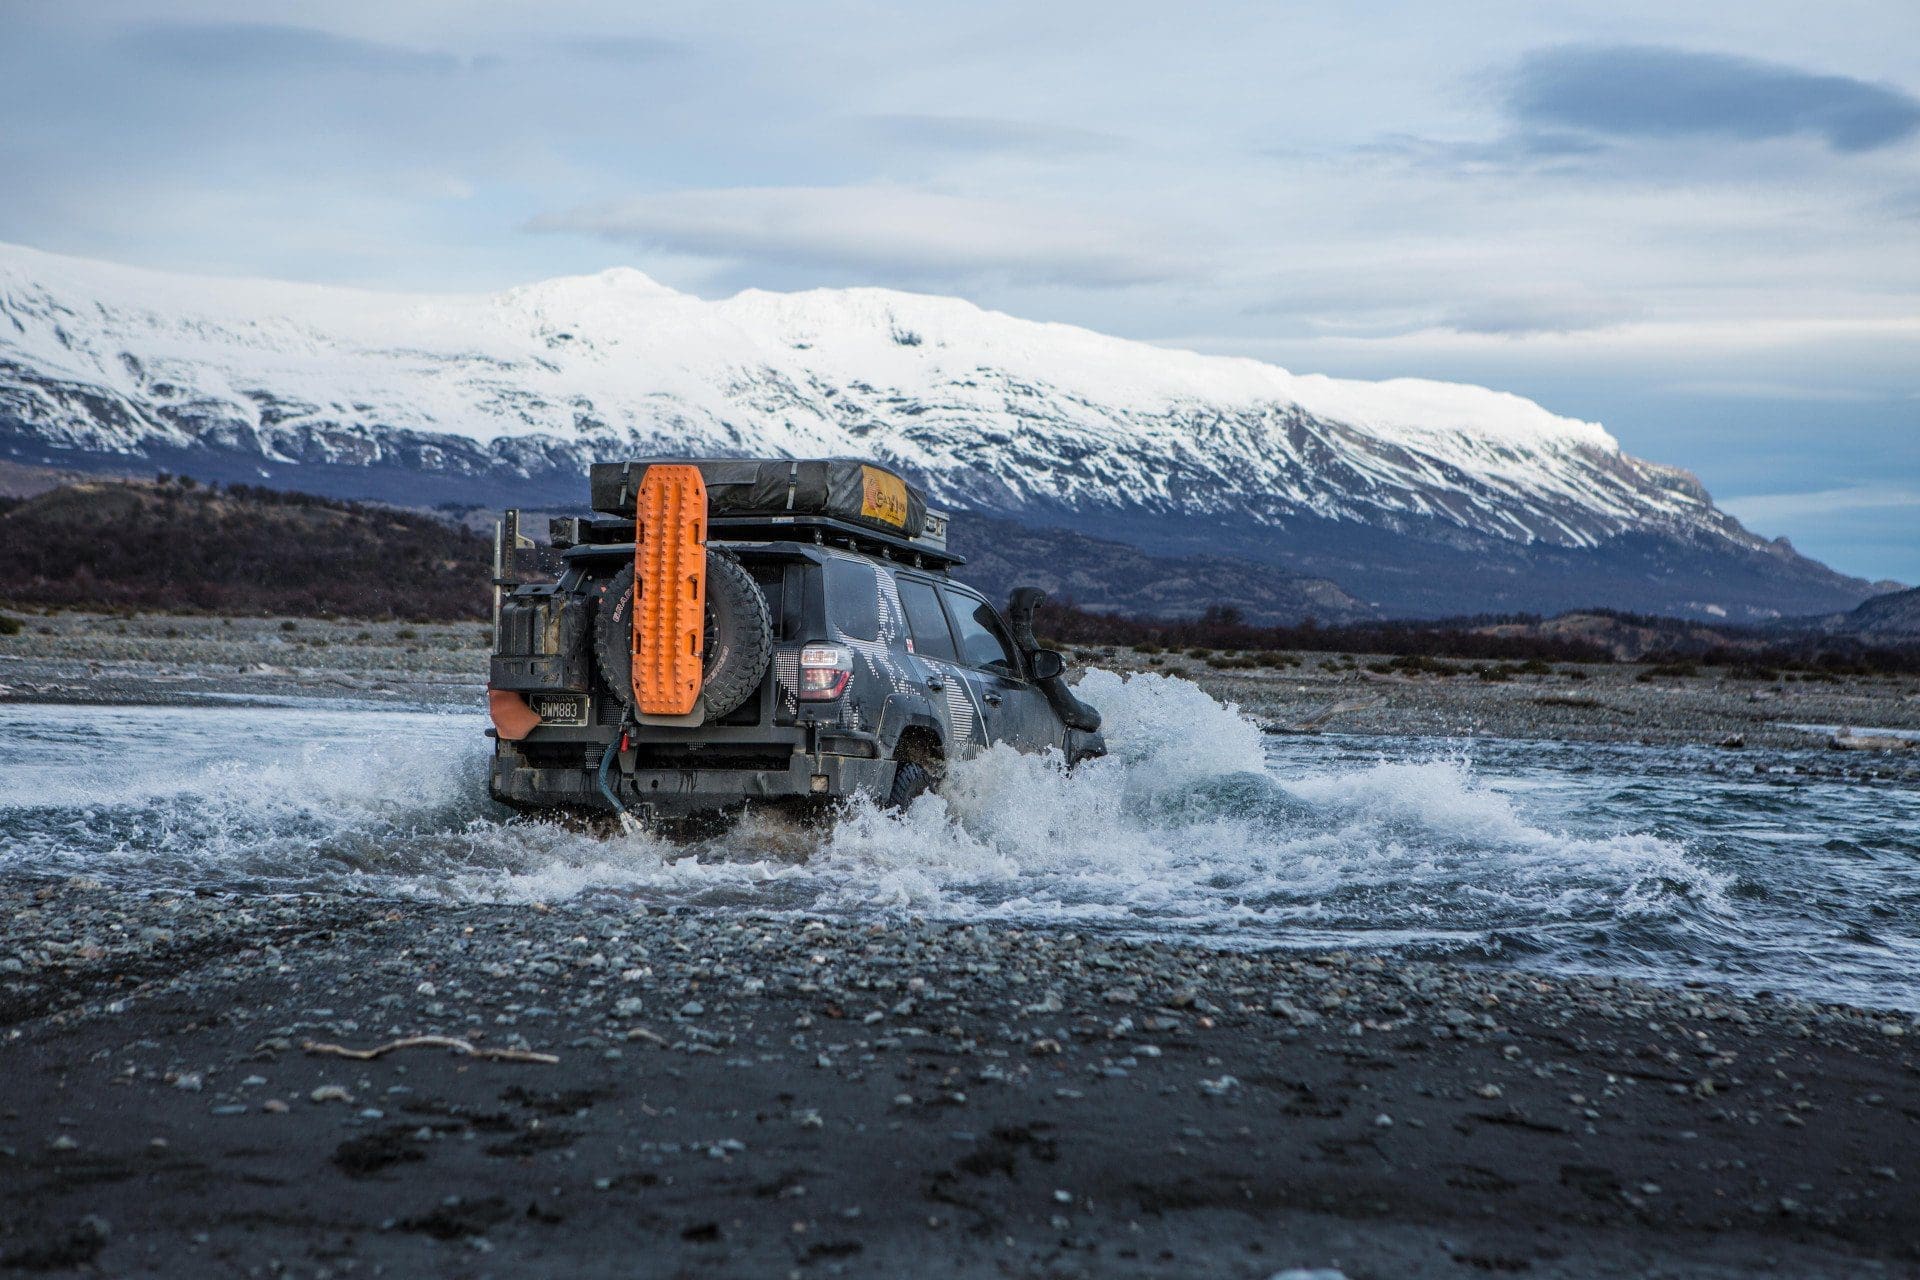
Functionally, the snorkel has been working well on the 4Runner. I’ve taken it through a number of good water holes that have been covering the trails here in Central Oregon with no water to show in the airbox. I have also driven through heavy rain and snow with the snorkel with no accumulation in the intake, which is promising. The major factor I haven’t been able to test yet is dust, which was my main reason for installing the snorkel. With winter set in here and plenty of moisture in the dirt, I won’t get a good idea for dust until later this year.
I have high hopes for this Safari Snorkel to keep my airbox clean and dry through all of the conditions that I intend to put my 4Runner through in the years to come. It’s big, burly, and built to take a beating — much like the 4Runner itself.

Max Sheehan
Freshly rooted in Central Oregon, I have always had an eye for the outdoors and the vehicles that get you there. As a gateway to the wild, I have spent weekends exploring the best that the west coast has to offer in my expedition style 4Runner.

Thank you for the great write up! I just installed my snorkel following it.
One thing that I figured out that helped was to tape over the washers holes with painters tape (the ones that go on the inside of the fender). Then poke a little starter hole in the middle of the tape to use to press the washer onto the studs. This way the washers have a little bit of friction from the tape to hold them on when pushing them onto the studs giving you all the time you need to get the nut ready.
I only needed this trick for the upper 2 left studs that are very hard to reach with large hands.
I’d welcome thoughts for the nuts. I lost 2 in the process somewhere in the fender and had to buy more. I thought about hot gluing the nut to the washer so they go on as one unit, but that was after I already lost 2 so I never tried it.

Will this install be different for the 2020? There are SRS airbags in each of the A-pillars; what’s the possibility of activating/damaging the airbag system when drilling into the passenger side pillar?

No . Air bags are behind the a piller trim on inside. There is a Chanel in between on the outside. When you drill in its does not go through to inside of vehicle

Look at Snorkel Upgrade for a pre filter.
It’s almost like you know what article is dropping soon! 😉 I’ve been very happy with the one I installed on this ARB snorkel.
- Get Free Parts & Get Paid! Apply to Write
GET 20% OFF
Take up to 20% off at the trail 4runner store.

- Forum Listing
- Marketplace
- Advanced Search
- Toyota FJ Cruiser Discussion
- 4x4 / Off-Road Tech
ARB Safari Snorkel Install Instructions w/ Pics
- Add to quote

Awesome thread!!!

Very well done! Can't wait to see the TRD CAI + S.Snorkel write up.
TGREGG said: Very well done! Can't wait to see the TRD CAI + S.Snorkel write up. Click to expand...
Corey said: Awesome, you got your hands on a snorkel already? Click to expand...

Awesome, you got your hands on a snorkel already?

Cool!! Keep the info/pic's coming.

sw you kick ass this is really gonna help those who are gonna add a snorkle any clues as to what is needed for the cai install (not detailed just rough idea )
thugasaur said: sw you kick ass this is really gonna help those who are gonna add a snorkle any clues as to what is needed for the cai install (not detailed just rough idea ) Click to expand...
ha ha i have your answers ... oscar was asked the same question and he said that it was designed for a more on road application and that at idle or low rpms the hole was static and it would not be in use till you get on the gas hard so they made the plug to accommodate the off-road guys
thugasaur said: ha ha i have your answers ... oscar was asked the same question and he said that it was designed for a more on road application and that at idle or low rpms the hole was static and it would not be in use till you get on the gas hard so they made the plug to accommodate the off-road guys Click to expand...

Shadow-Warrior said: I decided to make a thread for the install of the ARB Snorkel Click to expand...

cruiserlarry said: shooting for release before Christmas, but they may not get here 'til Jan '08 Click to expand...
lol beat ya to it joel! and uphill they are conspiring against you

I know from personal experience importing shipping containers from overseas, more time is spent in customs then on the boat in travel time. It costs a arm and a leg not only for shipping overseas but customs fees are out of control. I assume with the number and weight this is slow boat and not air freight.

Do you think the container is marked "Safari Snorkels for FJ Addicts?" I'm thinking we can help ARB get them "past" customs faster... :ninja: :lol: I kid, I kid. Sorta
Give me a ceramic knife, some rope, and point me in the general direction. I'll get her done. :worried:
Know anyone in customs? Click to expand...
So, for going snorkeling in my FJ, is there anything else I will need besides the snorkel? Are all the other components already water tight? Computer modules, etc?
Mask and fins are optional. Water can enter the cab, and if you intend up going in water a lot, it is best to try and waterproof the ones in the cab. There may be some threads here on that, I am not sure. I am getting a snorkel for dust control though, not for water.
Sweet, thank you sir!

Shadow-Warrior, that black box that is under the back of the FJ, is that water proof?
Shadow-Warrior said: I would have to say it is, Toyota says the vehicle can go up to 27" of water, that is way below 27", so yes, it is water proof. Click to expand...

Is there any other way to connect the snorkel without having to cut the panel. That is my only worry, having to cut and drill that panel.

Look at it this way, the inner fender panel has a hole in it already, so you are good there, and the outer fender is where you would need to put a hole, but it also gets reinforced with square pattern of four bolts from the ARB kit...

I want my snorkel.

Thanks for the great installation details. I read through all of the replies it did not find any mention of price for the stock snorkel kit. Has the pricing been released or have any "group buys" been arranged yet?
Yo Mike, I keep reading through the install instructions and every time I do, it becomes more and more apparent that I'm NOT going to be able to do this myself. I can design stuff, no probelm, but actually drilling a bunch of big holes into my FJ, and expecting everything to turn out great, well lets just say, I learned my lessons years ago. I will most likely have TLC do the install for me. Yeah, they are all little more expensive than others, but I have been VERY happy with the expertise and experience thay bring. Unless you want to come out to California and help me? We could work our the bugs on my rig. I have beer!
volhoo said: Yo Mike, I keep reading through the install instructions and every time I do, it becomes more and more apparent that I'm NOT going to be able to do this myself. I can design stuff, no probelm, but actually drilling a bunch of big holes into my FJ, and expecting everything to turn out great, well lets just say, I learned my lessons years ago. I will most likely have TLC do the install for me. Yeah, they are all little more expensive than others, but I have been VERY happy with the expertise and experience thay bring. Unless you want to come out to California and help me? We could work our the bugs on my rig. I have beer! Click to expand...
- ?
- 122.9K members
Top Contributors this Month

- Get Started
- Accessories
- Acc Lighting
- Front Bumpers
- Rear Bumpers
- Rock Sliders
- Skid Plates
- Trail Tested
- Maintenance
3rd Gen , Accessories , Install , Off-Road , Overland , Review
Arb safari snorkel 3rd gen tacoma review.

Alright, here we go… a mod that I probably waited too long to do. The snorkel.
Before my Tacoma, I had a 4th Gen 4Runner. That truck ran a snorkel for two, call it main reasons.
- 1. It sealed up my exposed air box (missing fender liners) and lifted the air intake to the roof line.
- 2. It looked super rad (in my opinion).
However, that snorkel was a cheap Amazon find. It was for an 80 series (I think). It worked ok. Got the job done. Didn’t sit well or really have any instructions or anything. It also needed a ton of modification. For example, I had to cut into the body to make room for the new tubing – there was no way it was going to fit any other way. The point is.. it worked, but not in a very calculated fashion.
This time, I knew what I wanted (needed). A tried and true, tested system with EVERYTHING I needed, right off the bat. And the ARB warranty and support – which has always been good to me.
Enter the ARB Safari Snorkel. Let’s run through a quick installation guide (ARB also provides one) and review.
ARB is currently sold only through retailers. I got this one from Mudify. These guys stock a ton of ARB products for fast shipping, and also have good customer service.
Find It Online
- ARB Safari Snorkel (3rd Gen Tacoma): Check Price
Table Of Contents
Why should you add a snorkel.

What Is A Snorkel?
A snorkel is a series of tubing, connections, and airways that takes the point of air intake from a lower point on the vehicle (passenger wheel well, under fender liner) and moves it closer to the roof line. The result is a sealed system that allows temporary exposure to water that may have otherwise been taken into the intake, and immediately into the motor. This would cause catastrophic failure in the form of hydro-lock. Yes, that means a new motor. Not cheap.
Think of it as cheap insurance – especially if you wheel your truck. Exposing your intake to water, especially as a newer driver, is easier than you might think. And freak accidents can happen. Investing in a snorkel is a great preventative measure.
Why Would You Want One?
I’m not going to go into anything crazy complicated here. There are a few main reasons to add a snorkel, and a few secondary reasons that I’m sure are up for debate.
First, and most obviously, as described, is moving the air intake out of harm’s way from potential water intrusion. This can protect your vehicle and decrease the likelihood of water getting into your motor. It can also allow you to risk doing deeper water crossings. This can be expanded to include dust, since the fenders are typically more exposed to dust off-road than the roof. So you are avoiding unnecessary dust intake. This can further be improved upon with a snorkel pre-cleaner.
Many would argue that a snorkel is a sort of “cold air intake” where air in the fender can potentially be warmer than the ambient air outside. I would guess this applies more to slower driving, as the air movement as you drive 50, 60, 70+ mph on the highway may negate that. However, I still think there is somewhat of a valid point here.
A different line of thinking could also suggest that since the new intake head on the snorkel is bigger than the factory opening, and that it usually faces the rushing air as you drive, that is allows the motor to “breathe” easier. Don’t quote me. I’m not saying you’re getting any true forced induction. But another idea I’ve seen discussed.
Key takeaway – snorkels have value relative to their cost to the decreased risk involved with off-road and overland travel. With some secondary effects. Pretty simple.
This is all reinforced the harder you wheel, and the more water/dust you see. And a snorkel is especially useful if you lose your fender liners like I did, when I trimmed my fenders/flare for tire clearance.
Installation

Install is not as bad at you might think. The right tools are important. You should have a good understanding of hand tools. But there is some room for error when it comes to cutting and drilling. Just move carefully, and really make sure everything lines up. Check it ten times if you have too. Worst case – you can buy a new fender. But we don’t want to do that. So use this guide and take your time.
ARB also gives you detailed instructions.
Required Tools
- Mechanic’s toolset
- Drill + bits
- Cutting tool (jig saw, or similar)
- Dremel (or some kind of smaller saw/cutting tool)
- Screwdrivers
- Utility knife
- Painter’s tape
- Double-sided exterior automotive molding tape (optional)
Step 1. Remove Air Box

To start, I’ve seen people get really into removing extra components. Wiring, separating the top of the airbox from the intake, etc.
While you can do that for peace of mind, there is plenty of slack to work with, and you should be able to save some time.
Unclip and open the airbox. Pull out your filter. Check to see if it needs replacing.

Next, take out the bottom portion of the airbox. There are three screws total. Two are pictured here. One is to the left of the box.
Step 2. Remove Air Inlet & Trim Air Box

Once you have the airbox out, remove the inlet, seen in the picture above on the bottom. You can dispose of this.

You will need to trim the mounting tabs for the inlet you just removed. I used a Dremel. Simple and easy. Final cuts seen above.
Step 3. Apply Template & Mark Holes

Now apply the provided template to your passenger’s side fender. Make sure that all the lines are evenly matched to the ends of the fender.
Carefully tape it into place. Second set of hands here is nice.
Take a marker and mark all the holes.
Step 4. Drill & Cut Holes

Now drill the holes. Use a step bit, or step up your drill bit size for a clean hole. I used two drill bits to make the smaller holes.
I also make a hole in the larger circle with enough room to get my jigsaw into. Then I made the entire cut. This helps to make it look cleaner.
You don’t have to use a handheld jigsaw, but it is quick and easy.
DO NOT use a hole saw here. It’s a terrible mistake and you will do damage.

Clean up any burrs. I also used a Q-tip dipped in a small cup of some black spray paint to protect the bare metal on all my cuts. I would not skip this step.
Step 5. Install & Secure Flexible Tube

It’s important to note, if you don’t have an aftermarket bumper or cut fenders/flares like I do, you will need to remove your liner beforehand. There are several clips and a few screws to pop the liner out.
Once the liner is removed, take the large rubber connector tube and insert it through the factory intake inlet hole. There is a notch on the tubing so you understand its orientation. A good reference photo is seen above.

A shot from the inside of the engine bay. Make sure to put the hose clamp on before you reinstall the airbox.

Attach the airbox to the new intake tubing. This can be tedious. Install the tube before you secure the airbox again.
The hose clamp might give you a hard time. Make sure it is sitting in the groove on the tube all the way around. You will have to feel around to make sure. This is crucial because you need a good seal here.
Once that is done, you can reattach the airbox, and reassemble the filter, cover, etc.
Step 7. Prepare Snorkel Body

Prepare the snorkel body with blue thread locker and the threaded studs.

This is another key step. Above you can see the bracket that ARB wants you to bolt to the snorkel, and rivet to the A-pillar.
I chose to use double sided exterior 3M automotive tape. I found it at my local auto parts store. Added a piece along the bracket, and trimmed to fit.
Not necessarily recommended, and not that I am afraid to drill into my truck, I did not want to this time and wanted to test this alternative.
Note: This fitment works okay. I could have done a better job lining it all up with the truck, but there is some movement above 30-40 mpg and at highway speeds. I’m not currently bothered, but know that this is a risk. You can always go back and add rivets. You can’t undo drilling the holes and placing rivets as easily. I do think I could get it a little tighter though, and get less movement – the tape could have better contact.
Step 8. Attach Snorkel Body To Fender

Take your snorkel body and align with the holes. Depending on how well you did, it may slide right in. It may not. You might need to drill out some of the smaller holes. This did happen to me, but no big deal. Only a small delay.
Eventually, with a little physical persuasion (lol), we got it all to line up nicely. Don’t panic if it doesn’t work the first time. Again, some margin for error here.
Obviously be mindful that you also need to get the plastic intake end to meet the new tube. Another set of hands will help here.

Take all the washers and nuts and tighten the snorkel down to the fender.

Add the other hose clamp to the connection between the new tubing and snorkel body.

Bam! Almost there.
Step 9. Mount Snorkel Head

Finally, take the snorkel head and the black clamp, and attach the snorkel appropriately to the body. That’s it! Not so bad.
Finished Install

I love it! I’ve done this before, and become more comfortable with cutting trucks. But even with documentation, this was pretty straightforward and we were able to move along.

A quick close up shot of the 3M tape and bracket. It attaches relatively well, but again, the contact could be better. I could easily redo the tape though. We will see.

The real question…? Have I crossed any super deep water? The answer… Not yet! However, I don’t need to submerge the truck under a huge amount of water to note that this system fits great, seals really well, and will do the job when expected to.
I’ve used a snorkel before, and I can tell you that I certainly felt better on the occasions where we were wheeling along, many states from home, and unexpectedly dropped into a deeper than anticipated river. The same goes for nights where we saw flooding and I accidentally hit massive pools of water late at night, that could have ended badly.
The fit and finish is awesome. ARB stands behind their products. And to top it off, I absolutely love how it looks. How could you go wrong?
Final Thoughts

Bottom line? Protect your engines. Invest in a snorkel if you plan on wheeling and adventuring hard to remote places.
I’m stoked with how this turned out – no complaints whatsoever. Let me know if you have any questions!

Konrad Chojnowski
Nothing like a day on the trails and a night under the stars! I'll drive just about anywhere to disconnect and have a rad experience.

Self tapping stainless screws and RTV on the pillar. Honestly will you ever remove your snorkel? If you do you have to replace your fender and filling two small holes and blending in your fender to match the door and pillar you would paint anyway is not a big deal. Best to have a secure fitment so nothing vibrates loose or rubs paint away leading to rust. Last note, deburr all the holes. Installing a cyclone greatly improves dust performance otherwise you are literally scooping it up. Sure, the intake is higher and helps but it’s really not effective without. … Read more »
You’re not wrong about mounting the snorkel directly. And as I mentioned, I’m not opposed to drilling into my truck. I was in part experimenting with this alternative, since I know many people have had the same idea. I agree with what you are saying in general. I did mention under the photo about painting the holes to remove all burrs. A pre-cleaner surely helps to eliminate the majority of dust exposure. But the idea of getting less dust is considering that there is much more dust at wheel/fender level than there is at the roof line. I can say … Read more »

It might be worth noting that snorkels aren’t as useful for fording water in the Tacoma as many think without additional and extensive modifications in the engine bay. The Tacoma (and most Toyota trucks) have a critical [and incurable] design flaw for water fording, which is the location of the alternator below/at the level of the top of the tire. Adding a snorkel to the Tacoma to put your intake at six feet high (or thereabout) without extensive waterproofing to the engine, and carrying a spare alternator for the almost certain contamination of bearings and destruction of most of the … Read more »
Man. A lot to unpackage here, haha. To start, while I understand the textbook logic behind this answer, the real-world application is a bit different and may relay the wrong message to someone reading it. You absolutely can ford water in a Tacoma, relatively safely (albeit there is always risk) despite the concerns you mentioned. I’ll explain why. While the alternator (and other components) may be exposed, the only time that this will be a concern is if the vehicle (unfortunately) gets stuck in the water and there is no motion. With the proper technical approach, even if the water … Read more »
Right! And I don’t disagree with what you say here. To be clear, I’m not saying that crossing water deeper than your alternator will damage it immediately and in the moment; I’m saying: (a) that could happen, and (b) the damage will be there and will more likely manifest over the longer-term. As in, you submerge a bunch of unprotected electrical connections and your spinning alternator, it will diminish the life of your alternator and other components in ways most users will not understand is connected to a prior decision to float their Tacoma/Toyota truck. Notice how many caveats there … Read more »
Totally. I think we are on the same page. We certainly want to present as much information as possible. Only so much that I can put into a quick install and review without losing the user in the technicalities. Ultimately, we should cover this to every length possible under – “everything you need to know” – like everyone else, I invite you to write a post for us. I think you would be a good fit for this post and other technical ones. Shoot me an email! We pay for this kind of stuff. [email protected] The only thing I want … Read more »

Now you have me thinking a snorkel would have been a good investment for my last build. I was on the fence about weather to snorkel or not. This article has opened my eyes to things never considered before. With the amount of snow runoff this year a snorkel would almost be an essential element for river crossings. I’m not sure if the new build would benefit from one though. Going a different direction this time. Thanks again for expanding my knowledge of useful Tacoma products. Great site, really enjoy it
I would say that anyone who spends any time near dust or water could benefit. Ultimately, it’s for peace of mind and insurance in case something happens. I’d be lying if I didn’t account for the looks too, haha. Thanks for commenting and being involved!
GET 20% OFF
Take up to 20% off at the 4runner store.

Site Navigation

- Today's Posts
- Register Now

- Air Compressors
- Air Systems Accessories
- Tire Accessories
- Awning Accessories
- Camping Gear
- Fridge Parts & Accessories
- Fridge Slides
- Fridge Transit Bags
- Roof Rack Accessories
- Rooftop Tent Accessories
- Air Locker Parts & Accessories
- Air Locker Tools
- Differential Covers
- Front Bumper
- Rear Bumper
- Bumper Accessories
- Recovery Points
- Side Rails & Steps
- Skid Plates
- Floor Liners
- Seat Covers
- Drawer Systems
- Storage Accessories
- Driving Lights
- Auxiliary Lighting
- Lighting Accessories
- Off-Road Recovery Kits
- Recovery Boards
- Recovery Straps
- Trail Jacks
- Winch Accessories
- Coil Springs
- Leaf Spring Bushing
- Panhard Rod Bushing
- Shock Absorber Bushing
- Strut Bushing
- Suspension Stabilizer Bar Bushing
- Greasable Shackles
- Panhard Rod
- Suspension Hardware Kit
- Suspension Stabilizer Bar Spacer
- Control Arms
- Leaf Springs
- Torsion Bars
- Merchandise
- Advance search result
- Catalog Search
Write a Review
Safari VSPEC Snorkel SS983HF

- Create New Wish List
Part Number: SS983HF
- Specifications
Features & Benefits
- UV Stable Cross linked Polyethylene Body
- High Flow Air Ducting And Body
- Air Supply In Excess Of Engine Requirements
- Designed For Maximum Dust And Water Sealing
- Color Black
- Housing Material Linear Low Density Polyethylene
- Engine Fuel Gas
- Warranty 3 YR
- Warranty Lifetime
Product Highlights
Recommended products & accessories.
Safari VSPEC Snorkel SS385HF
Safari VSPEC Snorkel SS56HF
Safari VSPEC Snorkel SS1066HF
Safari VSPEC Snorkel SS1000HF
Safari VSPEC Snorkel SS1135HF
- Vehicle Builds
- Gear We Use
- Overlander Network
- Overlanding Blog Overlanding Blog
Snorkel 101: Function & Step-By-Step Installation
There are few build modifications that make a vehicle look as rugged and expedition-ready as a snorkel. Also known as a ‘raised air intake’ this aftermarket addition may look cool, but it also serves some important functions.
The main purpose of a snorkel is access to clean air. Most people associate the snorkel with water crossings, as it prevents water from flooding through the vehicle’s airbox and into the engine, potentially causing electrical and mechanical damage. But a properly installed snorkel can also protect your engine from the dust that would normally enter the air intake under the vehicle’s wheel well. It works just as a swimming snorkel does – by raising the air intake, your lungs have access to the water-free air above you.
It is important to note that installing a snorkel does not give your off-road vehicle an Aquaman-like ability to breathe underwater for long periods of time. Manufacturers not only set wading and intake depths based on which components are most likely to be damaged in a water crossing, but also take into account how well sealed the cabin is from water intrusion. Have you installed a lift kit or swapped out stock tires for larger ones? These factors will also impact how you approach a water crossing.
Snorkel fitment is another important consideration. The best bet, in our experience, is to purchase a snorkel that is made specifically for your vehicle. A snug fit is important here – you don’t want any leaks! We’ve had great success with the , and have installed them on every one of our vehicles since 2010 (with the exception of the Prospector and Gladiator builds, for which AEV manufactures ). If you don’t have the tools and materials, head to your local 4×4 shop for help with installation.
A Step-By-Step Guide to Installing an ARB Safari Snorkel Intake Kit
If you do have the tools and would like to give a snorkel installation a go, we’ve set out the how-to below! Make sure to check out Episode 26 of “Oh Hey There!” with Jeff below, as the video is a great visual complement to these instructions.
1. Use the provided template to tape and mark your drilling locations .
2. Remove the template and drill the stud holes. We like to use the step-bit as it gives a nice clean cut and won’t mangle the metal as much as a normal bit would.
3. Next, cut the large hole for the airflow intake into the engine. Using a body saw is the easiest way to create the oval shape. Some kits are also designed so that you can use a four-inch hole saw to make the cut.
4. Go in and file the edges of your holes , ensuring any burrs are removed. Follow this up with a bit of paint to prevent any rust from forming.
5. Insert the studs into the snorkel. This is just for fitment at this point. We’ll use LOCTITE later in Step 9. We want to make sure everything lines up properly, because next is our most critical step.
6. Drilling holes into the A-pillar: Mark the area in tape where the bracket will be installed, lining the holes up correctly. Drill your holes, file and paint. Finally, insert the plastic tabs that will be screwed into later.
7. To install the air intake hose , first remove the airbox. Pinch together the end of the air intake hose that goes into the engine bay. Feed it up through the wheel well and into your air intake hole. Once that is in place, place your clamp around the air intake hose and reinstall the airbox.
8. Place the collar around the other end of the hose, which should be accessible through the large oval snorkel hole.
9. Put LOCTITE on the studs in the snorkel . Now you’re ready to mount the snorkel onto the vehicle.
10. Once that is complete, loosely screw the washers and nuts into the wheel well . We do this so that the bracket on the A-Pillar can be lined up first. Once lined up, make sure to tighten up the nuts in the wheel well and the bolts located on the A-pillar. Ensure your hose clamps are nice and tight as well, both inside the wheel well and inside the engine bay.
11. The last step is to install the ram head. Insert the clamp around the base of the ram head first – slide it on top and tighten it down. We like to face the screw clamp to the back so that we don’t snag anything on it when we’re on the trail.
Finally, for river crossings it is a good idea to extend your diff breathers and make sure your electrical components are also protected.
We hope this post has proved helpful! Does your vehicle have a snorkel? If so, have you noticed an improvement in the health of your engine and air filters? How about installation? Have you installed your own snorkel? Let us know if you have any questions below.
Share This Story, Choose Your Platform!
Related posts.

XOVERLAND Exclusive: We Put the 2024 Toyota Tacoma Trailhunter to the Test

Africa: A Look Back at How to Navigate the Unknown While Overlanding (as a Family)

2023 Overlander’s Holiday Gift Guide

XOverland’s Next Chapter

Tips for Overlanding Through Iceland and Scandinavia
Log in or Sign up

- Search titles only
Separate names with a comma.
- 1545176268" id="search_bar_group_pages_after" class="AutoChecker" data-uncheck="#search_bar_nodes" /> After page 1
- Display results as threads
Useful Searches
- Recent Posts
You are using an out of date browser. It may not display this or other websites correctly. You should upgrade or use an alternative browser .
Welcome to Tacoma World!
- Participate in all Tacoma discussion topics
- Communicate privately with other Tacoma owners from around the world
- Post your own photos in our Members Gallery
- Access all special features of the site

ARB Safari Snorkel install
Discussion in ' 2nd Gen. Tacomas (2005-2015) ' started by AbePDX , Feb 18, 2017 .

#1 AbePDX [OP] Well-Known Member
So I was debating for a while whether should I buy a snorkel or just pass on such mods because there are obviously more important mods to do first. however, after a lot of research and a lot air filters plus a couple of water drops here and there along the airfilter ram I was convinced to put the snorkel on my list. I looked everywhere trying to find a deal for the ARB safari snorkel, the only good deal I found was from OK4wd.com they had a special price on the 05-15 Tacoma plus you get a 5% off when you sign for there news letter. the install was a little bit tricky, as we faced a couple of fitment issues that required us to drill bigger holes than what the instruction sheet said, its our mistake, as we did align the template correctly however, we drilled at an angle rather than drilling straight, and that when we faced fitment issues. the clips were causing trouble a little bit, but nothing major. other than that everything else was straight forward. The goods... good thing that they put a warning there! the last time I am going to see this part of my truck! laying out the goods. we might have went a little bit over with the masking tape.... but hey! better safe than sorry, protection is good. Jeeps are always lurking around the Tacoma! The outline after we took the template off Making pilot holes for the hole saw. Then comes the hole saw, the instruction calls for a 4-1/2" but we got away with 4-1/4". first hole done second hole is drilled. then we started with drilling a pilot hole for the rest of the points. more holes at this point we wanted to make everything sits flush, and it did! after many tries. at this point we painted all the holes we made, I know my paint game is not that good, but at least its going to be covered! making the outlines on the A pillar for the bracket, I was more stressed about drilling the A pillar than drilling the fender! making pilot holes. no comment here , we cleaned the holes well before the final install. bracket goes on. at this stage we tightened the nuts that go on the bolts through the holes, reinstalled the fender well, hooked the air ram back, its a good idea to use pressured air to clean the area from all the dust and the debris from the drilling and the filing. the end result! the snorkel is well worth the money, it not only adds a protection measure for the engine and ease of mind when crossing water, but it looks beefy! in the end, I am glad the I went with ARB Safari snorkel over the other options (which we dont have a lot for the Tacoma anyway). I hope to update this thread soon with more pictures of the Tacoma in the woods and on the trails!
Attached Files:
Img_6222.jpg, img_6223.jpg, img_6224.jpg.

#2 diabetiktaco Instalander
Are they still running the deal? I don't live too far from ok4wd. Looks good!
#3 icegrill Well-Known Member
Nice, you didn't happen to go to Pearl Hardware did you??
#4 AbePDX [OP] Well-Known Member
diabetik81 said: ↑ Are they still running the deal? I don't live too far from ok4wd. Looks good! Click to expand...
#5 AbePDX [OP] Well-Known Member
icegrill said: ↑ Nice, you didn't happen to go to Pearl Hardware did you?? Click to expand...

#6 Caltech90 Well-Known Member
Looks good!
#7 AbePDX [OP] Well-Known Member
Caltech90 said: ↑ Looks good! Click to expand...

#8 Lord Helmet Prepare To Attack

Nice work

#9 bullaculla IKA fabrications
I didn't drill my pillar for my airflow. Just used 3M automotive mounting tape. Been solid for over a year now. Easy to change a fender, A pillar, not so much.
#10 AbePDX [OP] Well-Known Member
bullaculla said: ↑ I didn't drill my pillar for my airflow. Just used 3M automotive mounting tape. Been solid for over a year now. Easy to change a fender, A pillar, not so much. Click to expand...

#11 BohlaaH Loading...
Bit of a scary install but I'm loving mine! Did you use dielectric grease on your electrical connections?
#12 AbePDX [OP] Well-Known Member
BohlaaH said: ↑ Bit of a scary install but I'm loving mine! Did you use dielectric grease on your electrical connections? Click to expand...
#13 aaen Well-Known Member
Hmm, did you seal the parts of the snorkel/air filter with the sealant?

#14 Icepuck72 Well-Known Member

how did the hose connect to the air filter? Good fit? I'm doing this tomorrow.
#15 aaen Well-Known Member
I did mine the other week and the hose fit to the air box was great. Some modifications were required on the air box (i.e remove some tabs, so the hose would sit flush), but it was a great seal. I ended up not using any sealants, so far so good.

#16 Nikuraba29 Well-Known Member
Looks like a great job. +1 on the 3M tape idea.

#17 Naveronski Well-Known Member

Did everyone repaint their holes after cutting? Anyone have signs of rust for not doing it?
#18 Lord Helmet Prepare To Attack
Naveronski said: ↑ Did everyone repaint their holes after cutting? Anyone have signs of rust for not doing it? Click to expand...
#19 Naveronski Well-Known Member
Lord Helmet said: ↑ You gotta paint, it's bare metal exposed to the elements. Click to expand...
#20 Icepuck72 Well-Known Member
yes...I went to auto zone and just bought some color match and painted. not that you can see it under the snorkel...but you don't want rust
Products Discussed in Entire Site Forum: 2nd Gen. Tacomas (2005-2015)

- No, create an account now.
- Yes, my password is:
- Forgot your password?
Select your vehicle
- Price List Go Clear Download
- Find Stockist Go Clear View
SAFARI SNORKELS
- Ford Ranger Next-Generation (2022 – Present)
Safari Snorkels
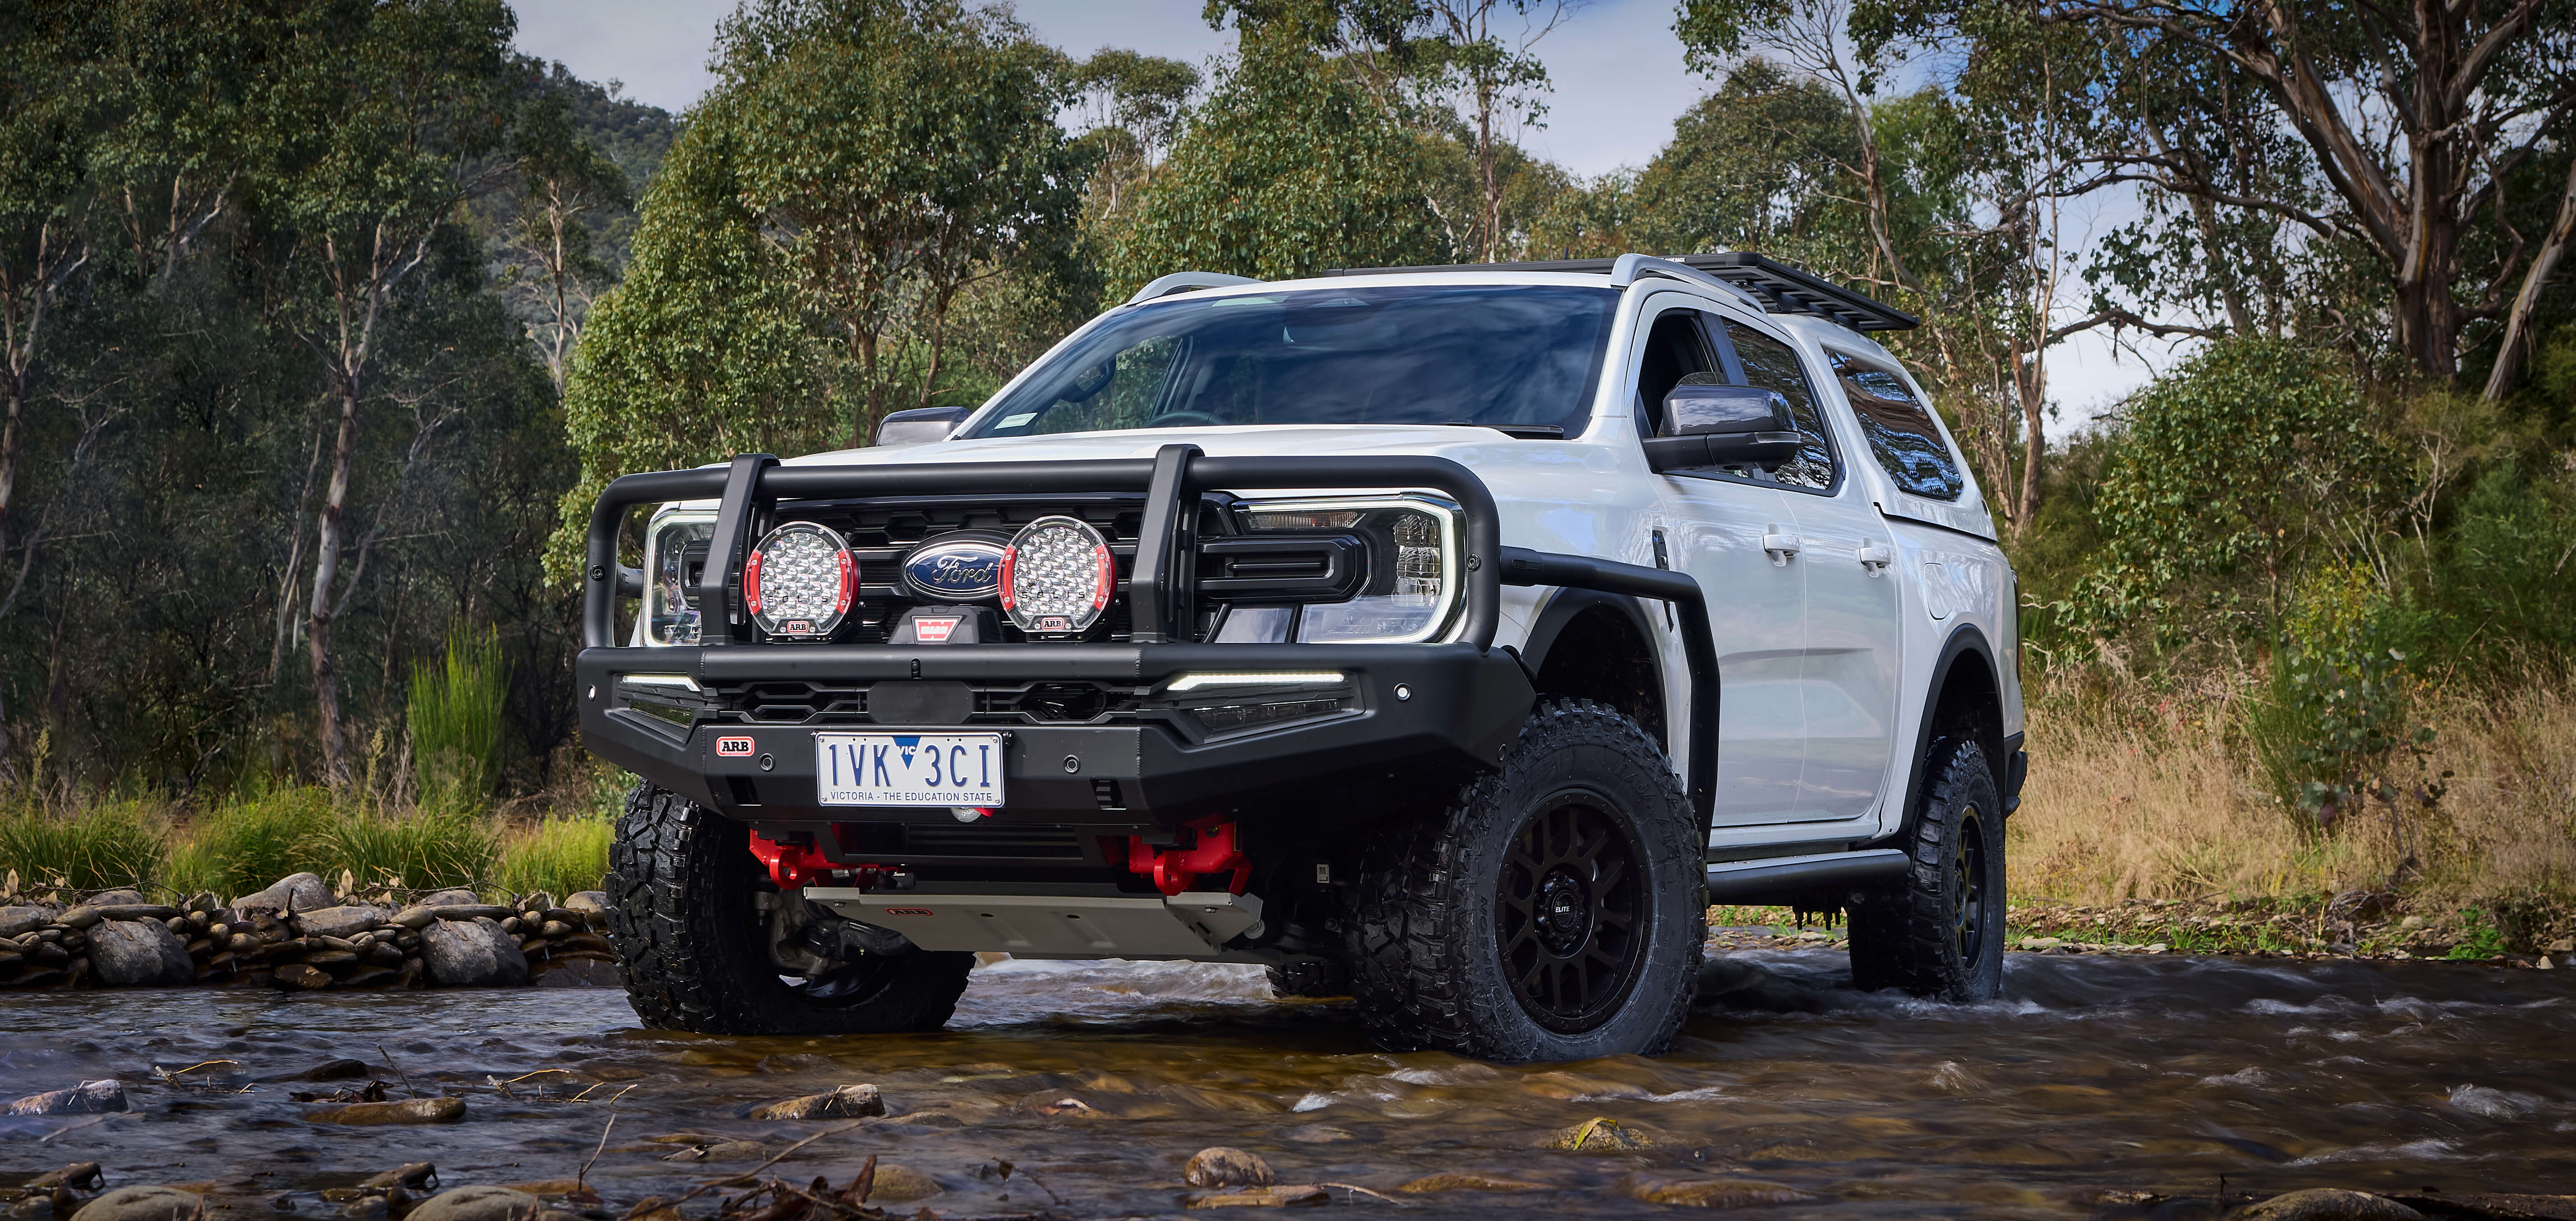
Utilising Safari‘s traditional design concepts and incorporating the very latest in scanning and CAD design software, Safari‘s V-Spec Snorkel for the Next-Generation Ford Ranger/Everest is ready to perform in the most extreme environments, protecting the vehicle’s engine against water, dust, and snow ingress while delivering cool, clean air to the engine.
Fully designed and manufactured in Australia, tested and verified on a custom flow bench to ensure the airflow meets or exceeds the factory inlet design. The Safari Snorkel offers the best air intake protection and performance for today’s 4WD vehicles.
Clever Design

Safari’s Air Ram system is a pivotal and functional attribute of the snorkel; CAD and lab tested, the Air Ram is designed to simultaneously remove the maximum volume of water from the incoming air stream, while delivering the maximum airflow to your vehicle’s engine.
Durable Materials

Safari snorkels utilise a UV stable polyethylene body which ensures a strong and robust fitting to the outside of your 4×4, complemented by high-grade stainless steel and plated hardware for corrosion resistance on all internal and external fittings and fixtures. All Safari connection ducting is custom designed and tooled and is manufactured from EPDM moulded rubber, rated to a continual 130°C operating temperature. There is nothing better!
Vehicle Specific

Nothing fits like Safari. As a result of the intricate design process, working with a combination of CAD modelling and actual vehicles, Safari snorkels are manufactured to integrate seamlessly. Where other products might look similar, none are developed with such attention to detail from the air-box back to the Air Ram to work perfectly with your vehicle.
Safari Snorkel Features

Reduces dust intake in Outback conditions
Safari snorkels are ideal for convoy driving where severe dust can have a detrimental effect on your engine’s performance.

Protects Your Engine From Water
Keep your engine dry and your 4WD moving during water crossings, Safari snorkels reduce the likelihood of engine damage.

Pre Cleaner Compatible
Safari snorkels are fully compatible with optional 7″ or 10″ pre cleaners on some models.

Maintains Fresh Air For Your Engine
High flow air ducting and body ensures air supply is in excess of engine requirements.

Uncover the gear as well as some tips you'll need for your next adventure off grid!

Discover ARB's all-new Slide Kitchen and more

View online or pick up in store
Your Preferred Store ARB Store Search Find Your Nearest Store View Details Australia International --> Find Closest Search or --> or located km away View Details View all Stockists

Subscribe to ARB to receive your regular 4x4 CULTURE magazine, exclusive ARB promotional news and new product release information.
- first_name *
- last_name *
- Country * Afghanistan Albania Algeria American Samoa Andorra Angola Anguilla Antarctica Antigua and Barbuda Argentina Armenia Aruba Australia Austria Azerbaijan Bahamas Bahrain Bangladesh Barbados Belarus Belgium Belize Benin Bermuda Bhutan Bolivia Bonaire, Sint Eustatius and Saba Bosnia and Herzegovina Botswana Bouvet Island Brazil British Indian Ocean Territory Brunei Darussalam Bulgaria Burkina Faso Burundi Cambodia Cameroon Canada Cape Verde Cayman Islands Central African Republic Chad Chile China Christmas Island Cocos Islands Colombia Comoros Congo, Democratic Republic of the Congo, Republic of the Cook Islands Costa Rica Croatia Cuba Curaçao Cyprus Czech Republic Côte d'Ivoire Denmark Djibouti Dominica Dominican Republic Ecuador Egypt El Salvador Equatorial Guinea Eritrea Estonia Eswatini (Swaziland) Ethiopia Falkland Islands Faroe Islands Fiji Finland France French Guiana French Polynesia French Southern Territories Gabon Gambia Georgia Germany Ghana Gibraltar Greece Greenland Grenada Guadeloupe Guam Guatemala Guernsey Guinea Guinea-Bissau Guyana Haiti Heard and McDonald Islands Holy See Honduras Hong Kong Hungary Iceland India Indonesia Iran Iraq Ireland Isle of Man Israel Italy Jamaica Japan Jersey Jordan Kazakhstan Kenya Kiribati Kuwait Kyrgyzstan Lao People's Democratic Republic Latvia Lebanon Lesotho Liberia Libya Liechtenstein Lithuania Luxembourg Macau Macedonia Madagascar Malawi Malaysia Maldives Mali Malta Marshall Islands Martinique Mauritania Mauritius Mayotte Mexico Micronesia Moldova Monaco Mongolia Montenegro Montserrat Morocco Mozambique Myanmar Namibia Nauru Nepal Netherlands New Caledonia New Zealand Nicaragua Niger Nigeria Niue Norfolk Island North Korea Northern Mariana Islands Norway Oman Pakistan Palau Palestine, State of Panama Papua New Guinea Paraguay Peru Philippines Pitcairn Poland Portugal Puerto Rico Qatar Romania Russia Rwanda Réunion Saint Barthélemy Saint Helena Saint Kitts and Nevis Saint Lucia Saint Martin Saint Pierre and Miquelon Saint Vincent and the Grenadines Samoa San Marino Sao Tome and Principe Saudi Arabia Senegal Serbia Seychelles Sierra Leone Singapore Sint Maarten Slovakia Slovenia Solomon Islands Somalia South Africa South Georgia South Korea South Sudan Spain Sri Lanka Sudan Suriname Svalbard and Jan Mayen Islands Sweden Switzerland Syria Taiwan Tajikistan Tanzania Thailand Timor-Leste Togo Tokelau Tonga Trinidad and Tobago Tunisia Turkey Turkmenistan Turks and Caicos Islands Tuvalu US Minor Outlying Islands Uganda Ukraine United Arab Emirates United Kingdom United States Uruguay Uzbekistan Vanuatu Venezuela Vietnam Virgin Islands, British Virgin Islands, U.S. Wallis and Futuna Western Sahara Yemen Zambia Zimbabwe Åland Islands
Subscribe to ARB
- Bull Bars & Protection Equipment
- Drawers & Cargo Solutions
- Ute Lids & Tub Accessories
- Portable Fridge Freezers
- Air Lockers
- Air Compressors & Tyre Accessories
- Rooftop Tents
- General Accessories
- Fuel Tanks and Storage
- Driving Lights
- Dual Battery and Solar Systems
- Recovery Equipment
- The Low Down
- Destinations
- Reader Writes
- Travel Tips
- 4wding Abroad
- 4×4 Fit Outs
- At ARB, We Get It
- Vehicle Weights
- Kids Corner
- 4X4 For Beginners
- Service and Parts Manual
- Store Locator
- Join our Mailing List
- ARB Catalogue
- ‘Just Gotta Ask’
- Merchandise
- Sponsorship Requests
- ARB Off Road Racing Series
- News And Releases
- Calendar of Events
- Investor Relations
- New Zealand
- Latin America
- Old Man Emu
- Dealer Portal
Share this page

Sovremennik" cinema square, Elektrostal Live Cam
Sovremennik" cinema square, elektrostal.
Live webcam shows the square in front of the cinema «Sovremennik» in real time. The camera is installed on the house number 18 on Mir Street in the city of Elektrostal, Moscow Region, Russia. The live camera is aimed at the monument to I.F. Tevosyan, which is located on the square of the Sovremennik cinema. The intersection of Tevosyan Street and Mir Street is in the field of view of the web camera. Therefore, this live camera can help assess the workload of this section of the road and the presence of congestion at the intersection. The main entrance of the school №13 and the pedestrian crossing in front of it also on the broadcating.
Other Languages
Webcam on the map and the nearest, nearest webcams.

Similar webcams


Turn Your Curiosity Into Discovery
Latest facts.
8 Facts About National Make Lunch Count Day April 13th
12 Facts About National Tie Dye Day April 30th
40 facts about elektrostal.
Written by Lanette Mayes
Modified & Updated: 02 Mar 2024
Reviewed by Jessica Corbett

Elektrostal is a vibrant city located in the Moscow Oblast region of Russia. With a rich history, stunning architecture, and a thriving community, Elektrostal is a city that has much to offer. Whether you are a history buff, nature enthusiast, or simply curious about different cultures, Elektrostal is sure to captivate you.
This article will provide you with 40 fascinating facts about Elektrostal, giving you a better understanding of why this city is worth exploring. From its origins as an industrial hub to its modern-day charm, we will delve into the various aspects that make Elektrostal a unique and must-visit destination.
So, join us as we uncover the hidden treasures of Elektrostal and discover what makes this city a true gem in the heart of Russia.
Key Takeaways:
- Elektrostal, known as the “Motor City of Russia,” is a vibrant and growing city with a rich industrial history, offering diverse cultural experiences and a strong commitment to environmental sustainability.
- With its convenient location near Moscow, Elektrostal provides a picturesque landscape, vibrant nightlife, and a range of recreational activities, making it an ideal destination for residents and visitors alike.
Known as the “Motor City of Russia.”
Elektrostal, a city located in the Moscow Oblast region of Russia, earned the nickname “Motor City” due to its significant involvement in the automotive industry.
Home to the Elektrostal Metallurgical Plant.
Elektrostal is renowned for its metallurgical plant, which has been producing high-quality steel and alloys since its establishment in 1916.
Boasts a rich industrial heritage.
Elektrostal has a long history of industrial development, contributing to the growth and progress of the region.
Founded in 1916.
The city of Elektrostal was founded in 1916 as a result of the construction of the Elektrostal Metallurgical Plant.
Located approximately 50 kilometers east of Moscow.
Elektrostal is situated in close proximity to the Russian capital, making it easily accessible for both residents and visitors.
Known for its vibrant cultural scene.
Elektrostal is home to several cultural institutions, including museums, theaters, and art galleries that showcase the city’s rich artistic heritage.
A popular destination for nature lovers.
Surrounded by picturesque landscapes and forests, Elektrostal offers ample opportunities for outdoor activities such as hiking, camping, and birdwatching.
Hosts the annual Elektrostal City Day celebrations.
Every year, Elektrostal organizes festive events and activities to celebrate its founding, bringing together residents and visitors in a spirit of unity and joy.
Has a population of approximately 160,000 people.
Elektrostal is home to a diverse and vibrant community of around 160,000 residents, contributing to its dynamic atmosphere.
Boasts excellent education facilities.
The city is known for its well-established educational institutions, providing quality education to students of all ages.
A center for scientific research and innovation.
Elektrostal serves as an important hub for scientific research, particularly in the fields of metallurgy, materials science, and engineering.
Surrounded by picturesque lakes.
The city is blessed with numerous beautiful lakes, offering scenic views and recreational opportunities for locals and visitors alike.
Well-connected transportation system.
Elektrostal benefits from an efficient transportation network, including highways, railways, and public transportation options, ensuring convenient travel within and beyond the city.
Famous for its traditional Russian cuisine.
Food enthusiasts can indulge in authentic Russian dishes at numerous restaurants and cafes scattered throughout Elektrostal.
Home to notable architectural landmarks.
Elektrostal boasts impressive architecture, including the Church of the Transfiguration of the Lord and the Elektrostal Palace of Culture.
Offers a wide range of recreational facilities.
Residents and visitors can enjoy various recreational activities, such as sports complexes, swimming pools, and fitness centers, enhancing the overall quality of life.
Provides a high standard of healthcare.
Elektrostal is equipped with modern medical facilities, ensuring residents have access to quality healthcare services.
Home to the Elektrostal History Museum.
The Elektrostal History Museum showcases the city’s fascinating past through exhibitions and displays.
A hub for sports enthusiasts.
Elektrostal is passionate about sports, with numerous stadiums, arenas, and sports clubs offering opportunities for athletes and spectators.
Celebrates diverse cultural festivals.
Throughout the year, Elektrostal hosts a variety of cultural festivals, celebrating different ethnicities, traditions, and art forms.
Electric power played a significant role in its early development.
Elektrostal owes its name and initial growth to the establishment of electric power stations and the utilization of electricity in the industrial sector.
Boasts a thriving economy.
The city’s strong industrial base, coupled with its strategic location near Moscow, has contributed to Elektrostal’s prosperous economic status.
Houses the Elektrostal Drama Theater.
The Elektrostal Drama Theater is a cultural centerpiece, attracting theater enthusiasts from far and wide.
Popular destination for winter sports.
Elektrostal’s proximity to ski resorts and winter sport facilities makes it a favorite destination for skiing, snowboarding, and other winter activities.
Promotes environmental sustainability.
Elektrostal prioritizes environmental protection and sustainability, implementing initiatives to reduce pollution and preserve natural resources.
Home to renowned educational institutions.
Elektrostal is known for its prestigious schools and universities, offering a wide range of academic programs to students.
Committed to cultural preservation.
The city values its cultural heritage and takes active steps to preserve and promote traditional customs, crafts, and arts.
Hosts an annual International Film Festival.
The Elektrostal International Film Festival attracts filmmakers and cinema enthusiasts from around the world, showcasing a diverse range of films.
Encourages entrepreneurship and innovation.
Elektrostal supports aspiring entrepreneurs and fosters a culture of innovation, providing opportunities for startups and business development.
Offers a range of housing options.
Elektrostal provides diverse housing options, including apartments, houses, and residential complexes, catering to different lifestyles and budgets.
Home to notable sports teams.
Elektrostal is proud of its sports legacy, with several successful sports teams competing at regional and national levels.
Boasts a vibrant nightlife scene.
Residents and visitors can enjoy a lively nightlife in Elektrostal, with numerous bars, clubs, and entertainment venues.
Promotes cultural exchange and international relations.
Elektrostal actively engages in international partnerships, cultural exchanges, and diplomatic collaborations to foster global connections.
Surrounded by beautiful nature reserves.
Nearby nature reserves, such as the Barybino Forest and Luchinskoye Lake, offer opportunities for nature enthusiasts to explore and appreciate the region’s biodiversity.
Commemorates historical events.
The city pays tribute to significant historical events through memorials, monuments, and exhibitions, ensuring the preservation of collective memory.
Promotes sports and youth development.
Elektrostal invests in sports infrastructure and programs to encourage youth participation, health, and physical fitness.
Hosts annual cultural and artistic festivals.
Throughout the year, Elektrostal celebrates its cultural diversity through festivals dedicated to music, dance, art, and theater.
Provides a picturesque landscape for photography enthusiasts.
The city’s scenic beauty, architectural landmarks, and natural surroundings make it a paradise for photographers.
Connects to Moscow via a direct train line.
The convenient train connection between Elektrostal and Moscow makes commuting between the two cities effortless.
A city with a bright future.
Elektrostal continues to grow and develop, aiming to become a model city in terms of infrastructure, sustainability, and quality of life for its residents.
In conclusion, Elektrostal is a fascinating city with a rich history and a vibrant present. From its origins as a center of steel production to its modern-day status as a hub for education and industry, Elektrostal has plenty to offer both residents and visitors. With its beautiful parks, cultural attractions, and proximity to Moscow, there is no shortage of things to see and do in this dynamic city. Whether you’re interested in exploring its historical landmarks, enjoying outdoor activities, or immersing yourself in the local culture, Elektrostal has something for everyone. So, next time you find yourself in the Moscow region, don’t miss the opportunity to discover the hidden gems of Elektrostal.
Q: What is the population of Elektrostal?
A: As of the latest data, the population of Elektrostal is approximately XXXX.
Q: How far is Elektrostal from Moscow?
A: Elektrostal is located approximately XX kilometers away from Moscow.
Q: Are there any famous landmarks in Elektrostal?
A: Yes, Elektrostal is home to several notable landmarks, including XXXX and XXXX.
Q: What industries are prominent in Elektrostal?
A: Elektrostal is known for its steel production industry and is also a center for engineering and manufacturing.
Q: Are there any universities or educational institutions in Elektrostal?
A: Yes, Elektrostal is home to XXXX University and several other educational institutions.
Q: What are some popular outdoor activities in Elektrostal?
A: Elektrostal offers several outdoor activities, such as hiking, cycling, and picnicking in its beautiful parks.
Q: Is Elektrostal well-connected in terms of transportation?
A: Yes, Elektrostal has good transportation links, including trains and buses, making it easily accessible from nearby cities.
Q: Are there any annual events or festivals in Elektrostal?
A: Yes, Elektrostal hosts various events and festivals throughout the year, including XXXX and XXXX.
Was this page helpful?
Our commitment to delivering trustworthy and engaging content is at the heart of what we do. Each fact on our site is contributed by real users like you, bringing a wealth of diverse insights and information. To ensure the highest standards of accuracy and reliability, our dedicated editors meticulously review each submission. This process guarantees that the facts we share are not only fascinating but also credible. Trust in our commitment to quality and authenticity as you explore and learn with us.
Share this Fact:
IMAGES
VIDEO
COMMENTS
Once the snorkel is secured from inside the fender, add the upper mount bolts on the A-pillar and tighten them until they're snug. Step 25. Tighten Hose Clamps. With the snorkel fully secured, tighten the hose clamps with a 7mm socket on both the snorkel and the intake side of the adapter. Step 26. Install Airbox.
I finally got around to installing the ARB Safari snorkel. It turned out great but it was not an easy or flawless install...
In this video I share how to install the ARB Safari Snorkel. I show you a few tips and tricks to make this install easy. ARB SS450HP Snorkel https://amzn.to/...
5. Using a 105mm hole saw, drill the snorkel body outlet hole. 6. Using a step drill, drill the eight mounting hole positions to 16mm. 7. Deburr and paint holes to prevent rust. 8. Apply loctite to all eight studs (Item 7) and install the studs into the snorkel body mounting inserts (Item 1). 9.
Once that is done, you can reattach the airbox, and reassemble the filter, cover, etc. Step 7. Prepare Snorkel Body. Prepare the snorkel body with blue thread locker and the threaded studs. This is another key step. Above you can see the bracket that ARB wants you to bolt to the snorkel, and rivet to the A-pillar.
Hey guys and girls!Here is a quick, easy install of the Safari Snorkel on my MQ Triton. I purchased the snorkel from SG OFFROAD and installed it at home. Thi...
Our range of Safari 4×4 snorkels is designed for recreational and commercial use. Each product is the result of an extensive research and development program that ensures your brand-new 4×4 snorkel is fully engineered for off-road adventures. From dusty conditions to heavy rains, floods and deep snow, our 4×4 snorkel kits have got you covered.
ARB Safari Snorkel Installation. Model number SS81HF manufactured by ARB of Australia. We decided that we need a snorkel for a variety of reasons. The main decision factors were the potential for major river crossings and the need to have a cooler engine bay. This is the updated model that takes into account that this is a US vehicle which ...
Safari RSPEC Snorkel SS82R. Buy in monthly payments with Affirm on orders over $50. Learn more. A safari snorkel system relocates your engines air intake point from the relatively low and vulnerable position under the hood to a much higher and safer location where a constant source of cool, clean, dry air is available.
File and paint all the nice holes you've made! Install the studs in the snorkel body with some blue Loctite. Install the A-Pillar bracket onto the snorkel body; hand tight. Put some tape on the A-Pillar itself so you can mark the bracket location. Carefully place the snorkel body onto the fender.
Safari Snorkel Air Entry Hose 362-024-000 $117.00. Safari Snorkel Pre Cleaner PBH024256 $15.29. Safari Snorkel Upper Mounting Bracket 337-032-000 $32.00. Safari VSPEC Snorkel SS1000HF $527.00 Safari VSPEC Snorkel SS1066HF $614.00. Out of stock. Safari VSPEC Snorkel SS1130HF ...
Safari VSPEC Snorkel SS983HF. Buy in monthly payments with Affirm on orders over $50. Learn more. A safari snorkel system relocates your engines air intake point from the relatively low and vulnerable position under the hood to a much higher and safer location where a constant source of cool, clean, dry air is available.
Durable Materials. Safari snorkels utilise a UV stable polyethylene body which ensures a strong and robust fitting to the outside of your 4×4, complemented by high-grade stainless steel and plated hardware for corrosion resistance on all internal and external fittings and fixtures. All Safari connection ducting is custom designed and tooled ...
Fitment. Vehicle Specific Design: The ARB Safari Snorkel is compatible with Jeep JL Wranglers and JT Gladiators that are equipped with either the 3.6L Pentastar or 2.0L GME Hurricane engine. Engine Protection: Defend your Jeep's engine from water, snow, rain, dust, and dirt with this high-quality precision-fit snorkel. Installation Notes.
A Step-By-Step Guide to Installing an ARB Safari Snorkel Intake Kit. If you do have the tools and would like to give a snorkel installation a go, we've set out the how-to below! Make sure to check out Episode 26 of "Oh Hey There! ... To install the air intake hose, first remove the airbox. Pinch together the end of the air intake hose that ...
ARB Safari Snorkel install. Discussion in '2nd Gen. Tacomas (2005-2015)' started by AbePDX, Feb 18, 2017. Post Reply. Page 1 of 2 1 2 Next > Feb 18, 2017 at 11:30 PM #1 #1. AbePDX [OP] Well-Known Member. ... I looked everywhere trying to find a deal for the ARB safari snorkel, the only good deal I found was from OK4wd.com they had a special ...
This snorkel comes with a 2-year limited warranty against defects on the materials and workmanship. For questions or clarifications about the terms and conditions, kindly contact the manufacturer.Application. This ARB Safari Air Snorkel System can be installed on 2016-2023 models of the Toyota Tacoma with 3.5L engines.
Safari snorkels utilise a UV stable polyethylene body which ensures a strong and robust fitting to the outside of your 4×4, complemented by high-grade stainless steel and plated hardware for corrosion resistance on all internal and external fittings and fixtures. All Safari connection ducting is custom designed and tooled and is manufactured ...
Live webcam shows the square in front of the cinema «Sovremennik» in real time. The camera is installed on the house number 18 on Mir Street in the city of Elektrostal, Moscow Region, Russia. The live camera is aimed at the monument to I.F. Tevosyan, which is located on the square of the Sovremennik cinema.
40 Facts About Elektrostal. Elektrostal is a vibrant city located in the Moscow Oblast region of Russia. With a rich history, stunning architecture, and a thriving community, Elektrostal is a city that has much to offer. Whether you are a history buff, nature enthusiast, or simply curious about different cultures, Elektrostal is sure to ...
Elektrostal , lit: Electric and Сталь , lit: Steel) is a city in Moscow Oblast, Russia, located 58 kilometers east of Moscow. Population: 155,196 ; 146,294 ...
Find detailed information on Basic Chemical Manufacturing companies in Elektrostal, Russian Federation, including financial statements, sales and marketing contacts, top competitors, and firmographic insights.