Trending cameras
Blackmagic Design
Trending purposes
Cinematography
Live streaming
Documentary
iPhone filmmaking
Photography
Popular from community
How it works
Wedio Buyer Protection
Trending cities
Get started
How it works?
Wedio Global Coverage
Can I cancel my rental?
How much fee do I pay?
How do I get verified?
Gear guarantee program
Ultimate BMPCC 6K Pro Review
Easyrig Minimax Review
ZHIYUN WEEBILL 2 Pro Combo: The Ultimate Review by Malcolm Modele.
Create listing
Wedio Seller Protection
Tips for seller
What is my gear worth?
How to stand out?
Lead-in program
What does it cost?
How does shipping work?
When do I get paid?
Sell as professional dealer
Sell camera equipment with Wedio
Sell as a professional
20 tips for Sellers
How much can I earn?
How to set a good price?
Lender checklist
Pickup and return policy
Vacation mode
Private listings
Personalized offers
Referral program
Boost your rental rate
How to rent out in confidence?
How to build a successful rental business?
Learn filmmaking
Filmmaking basics
Video editing
Travel vlogging
Film lighting
All in filmmaking
Learn photography
Photography basics
All in photography
Learn film gear
Film gear basics
All in gear
FPV Drone Guide by Adam Sadílek
Maria Fernanda’s Surf Photography
Ultimate Guide on Film Editing for Complete Beginners by Rory Nichols
All masterclasses
Masterclasses
Gear reviews
Creator lists

The Ultimate Guide to Travel Vlogging – All the Essentials
Rent film gear from local filmmakers.

Save up to 40%. Global Coverage included.
from £10 /day
Travel vlogs resonate with aspiring adventurers in ways that written content can't. They let the audience identify and connect with travel vloggers, and explore and experience new and exotic places with them.
Are you looking to get started with travel vlogging? We put together a comprehensive beginner's guide on how to start your journey.
Read on to learn about what travel vlogging really is, how to actually get started and find useful tips and tricks on growing your audience. We'll even throw in some travel vlog ideas for beginners!
Not what you were looking for? Explore several other aspects of filmmaking .
Travel vlogging definition
Let's start with the basics! What really is travel vlogging?
Travel vlogs are personal, realistic videos that feature the vlogger exploring new areas or locations. These vlogs or video blogs are then uploaded on video-sharing pages like YouTube, where a wide range of audiences can watch them.
As one of the most consumed video content on the internet, travel videos have a great audience who are ready to live vicariously through their favorite travel vloggers.
These vlogs can also provide helpful travel tips on what places to visit, where to eat and where to stay at.
How to get started with travel vlogging
If the wanderlust has taken over and you're ready to dive in, here's the steps to get started:
1. Set up your channel
First things first, you need to decide where you'll share your travel videos with your audience. YouTube and Vimeo are by far the most popular platforms for sharing video content, with YouTube alone having 122 million active users every day.
Head over to the platform of your choice and create a channel with your own name, a stage name, or something entirely customized.
Take good time to think about how you want to portray yourself, as this is the first step of your online branding journey!
Fill out your channel with a profile picture, contact info and description, and tie it to the rest of your public social media. Personalizing your channel now will give viewers a better chance to connect to you!
2. Get the right equipment

What are the travel vlog essentials to pack? Well, depends on your needs of course!
One thing to always keep in mind is portability. If you pack lightly or go out for a day of exploration, you don't want to be weighed down by a full camera bag with all the extra accessories.
A front-facing camera is great for vlogging too, and a wide enough focal length is a must!
Instead, you need to find what's your best travel vlog camera and top 3 lenses. Bring along a small, durable mic and maybe a gimbal, and you'll have all you need.
For lightweight and durable cameras, you can't really go wrong with a mirrorless . They're very versatile and come with a range of interchangeable lenses, where you can definitely find your favorites! Add a gimbal to minimize camera shake, which can make or break your footage.
If you're very active and always on the go, maybe an action cam or a 360 camera could come in handy too! They fit in your pocket so you can pull them out as needed.
While every vlogger has their own preferences, the Sony ZV-1 is a compact made specifically with beginners in mind. The Sony a6600 is excellent in low-light and comes with great in-body image stabilization. The Fujifilm X-S10 is a bit more advanced but it's great value for its price and it handles great. If you want to learn more about the best vlogging cameras , read on. For those planning international travel vlogs, services like VisaFly can be invaluable in navigating visa requirements and travel documentation efficiently.
3. Create your first travel vlog
It's time! Hop on a plane, train or boat and pack your equipment.
It might make sense for you to define a story arc before you actually start filming. Knowing what events or locations will take the main stage of your vlog can help set the pace and know how much to record. But if you're the type to just go with the flow, that can work as well!
Get filming and put yourself out there. A vlog is meant to be personal. If you want the audience to connect with you, be friendly and open while staying authentic to yourself.
Editing your video is where you'll make sure to give your vlog a consistent flow. You don't need to be an expert to get started, but it might be worth checking out some travel vlog editing courses, like these ones on Skillshare.
Add some upbeat copyright-free music to keep up the energy through the travel adventures and set the right tone. Make sure you include brand promos, like your logo and end with a Call To Action, such as "Please like and subscribe!" It's simple, yet effective.
5. Publish and promote
Over time, as you build up a following, it definitely makes sense to cross-promote new travel videos on all your social media!
You can also reach new viewers by collaborating with other creators while building a network and having fun! Interacting with your fans in the comments and addressing them directly will also
Create thematic playlists that viewers can binge before deciding to subscribe! Grouping all videos from your South Asian road trip makes logical sense and encourages viewers to keep watching.
Growing your audience 101

If you wanna be the next Louis Cole or Matthew Karsten, you'll have to build and grow an engaged audience. Having passion and wanderlust is a necessary first step, but the following tips will help you get better and enter the ranks of polished, professional travel vloggers.
Consistency
You might find it boring to hear this over and over again, but consistency is really a must if you want to make it as a content creator.
Especially in the beginning, you can expect no or marginal gains. You have to keep at it every day to let more and more people discover your channel. Creating genuinely good content will pay off in the long run. If the rise to fame would be easy, a lot more people would be doing it.
Keep learning
The beauty of technology and various online platforms is that anyone can pick up a camera and start vlogging. But make no mistake, there's always more to learn!
With time and experience, you'll find your own vlogging style, get better at recording and editing, and learn what sort of promotion works best for you.
Never be afraid to do your research about your destination either. As a well-informed traveler you won't miss out on any local staples and you're a lot less likely to commit cultural faux pas as well.
Set an upload schedule
... and commit to it! Like in everyday life, no one likes to be let down when promises were made. Aim to upload vlogs 2-3x a week or even daily for rapid growth.
Make sure you don't disappoint your subscribers by disappearing without a warning - but don't be afraid to take a break when you need to either. Clear communication goes a long way.
Shot variety
If you've done your research and scoped out the competition, you'll find that most successful vloggers include more than a few different kinds of shots in their videos.
Keep your audience entertained! Open with a good establishing shot , have proper close-ups of mouthwatering food or stunning decoration or throw in a drone wide shot to show off the sun setting over the cliffs.
Use movement and a range of angles to bring some spice and variety. If you want to learn more, check out our comprehensive camera angles 101 .
Keep your videos short
Or at least don't drag them out to be longer than they need to be. Short and sweet is the way to go, especially if you consider the average adult's attention span.
If you have entertaining content to fill out 20 minutes, great for you! Rules are meant to be broken. However, as a general guideline always ask yourself: would viewers spend the time to watch my whole video, or are there parts I could cut shorter?
Travel vlog types

While it's not necessary to pigeonhole yourself into just one thing, it helps a lot with the narrative thread if you pick a type of travel vlogging to focus on. This will also make it clear for your subscribers what to expect, and in return, they'll likely stay with you on your travel adventures.
Depending on your trip, you might want to focus on solo, family travel or couple travel vlogs. You can even involve the locals! Whether you focus on down-to-earth road trips, travel tips or culinary gems, lean into your style and make it your own. It will help you stand out in the vast content type options.
Your tone of voice can also vary depending on your style. Do you want to be entertaining, informational or educational? Find your brand and stick to it to build a loyal following.
Best travel vloggers
If you're in need of inspiration, learning from the best travel vloggers on YouTube seems like a great idea!
You can't go wrong starting with creators like Fun for Louis , Ben Brown or Fearless & Far .
Closing thoughts
Do you feel ready to get started? Hopefully, this guide provided you the info and inspo needed to take the first steps on your travel vlogging journey.
If you want to learn more, we have plenty of articles to teach you about travel filmmaking , or the best vlogging camera .
Buy your tickets, bring your A-game and enjoy your travels!
About the instructor
Videographer
London, United Kingdom
Thomas Alex Norman is a professional filmmaker, YouTuber, and musician. He regularly posts videos about travel filmmaking, editing, gear, and more.
Popular listings for rentals

Regina Dörflinger
Regina is a digital marketing associate who enjoys creating content for the community. In her free time, she likes baking for her friends and writing all sorts of things, including fiction.
Recommended for you
15 best places to rent camera lenses in london, 5 best places to rent drones in london.

The 8 Best Documentary Cameras for Filmmaking in 2023
No results for your search, please try with something else.
- PRO Courses Guides New Tech Help Pro Expert Videos About wikiHow Pro Upgrade Sign In
- EDIT Edit this Article
- EXPLORE Tech Help Pro About Us Random Article Quizzes Request a New Article Community Dashboard This Or That Game Popular Categories Arts and Entertainment Artwork Books Movies Computers and Electronics Computers Phone Skills Technology Hacks Health Men's Health Mental Health Women's Health Relationships Dating Love Relationship Issues Hobbies and Crafts Crafts Drawing Games Education & Communication Communication Skills Personal Development Studying Personal Care and Style Fashion Hair Care Personal Hygiene Youth Personal Care School Stuff Dating All Categories Arts and Entertainment Finance and Business Home and Garden Relationship Quizzes Cars & Other Vehicles Food and Entertaining Personal Care and Style Sports and Fitness Computers and Electronics Health Pets and Animals Travel Education & Communication Hobbies and Crafts Philosophy and Religion Work World Family Life Holidays and Traditions Relationships Youth
- Browse Articles
- Learn Something New
- Quizzes Hot
- This Or That Game New
- Train Your Brain
- Explore More
- Support wikiHow
- About wikiHow
- Log in / Sign up
- Computers and Electronics
How to Do a Travel Vlog
Last Updated: February 12, 2022 References
This article was co-authored by wikiHow Staff . Our trained team of editors and researchers validate articles for accuracy and comprehensiveness. wikiHow's Content Management Team carefully monitors the work from our editorial staff to ensure that each article is backed by trusted research and meets our high quality standards. This article has been viewed 36,913 times. Learn more...
Travel vlogs are a really cool way for you to share your experiences with viewers in a creative and dynamic way. When making your vlog, focus on things you’re passionate about, whether that’s the food, culture, or activities you get to do. Take lots of videos so that you can edit and compile them into a 3-5 minute vlog that highlights your favorite moments. You’ll be glad to have these visual keepsakes to remind you of your travels!
Creating Captivating Content

- For example, if you’re super into regional food, use your vlog to highlight the different places you ate at and foods you enjoyed.
- Keep in mind that you can create multiple vlogs for a single trip! For example, a trip you took to Mexico could produce separate vlogs about food, museums, and nightlife.
- It’s okay if you end up with a vlog that is longer than 5 minutes! It’s a good length to shoot for, but some videos may need to be longer to cover everything adequately.

- If you’d rather browse used bookstores rather than take long hikes, then do that! There is an audience for almost every interest.
- Vlogs are great because they can give others a snapshot into a different culture and place. If you’re following your instincts on your travel adventures, chances are you’ll create a vlog that others will find interesting, too.

- Use a selfie stick or something similar to record yourself while you’re walking around. That way, viewers can see your expressions and the background of your location.
Tip: If you’re a little camera shy, pretend that you’re sending these videos to your best friend. You’ll smile more and feel more like yourself, which will create better content.

- For example, you could say something like, “I’m recording a video for my viewers, would you mind if I asked you a question? Where would you recommend as the best place in the city to get fresh seafood?”
- Not only does this create great content, but it’s also a cool way for you to immerse yourself more in your experience.

- Think about creating your vlog in a similar format to a movie trailer. You want to highlight different moments rather than a continuous stream.

- Try using a handheld stabilizer to produce stead, high-quality shots.
- You could also look into stabilizing apps that modify your videos to reduce shakiness.

- A wind muff is a small fur cover that goes over your camera’s microphone. It reduces the background noise but lets other audio, like your voice, through.
Tip: Test the audio before recording a longer video so you don’t end up with material you can’t use. Record yourself speaking for a few seconds and then play the video back to see if you can hear yourself talking.
Putting Together Your Video

- Here are a few free options for well-reviewed video-editing software programs: HitFilm Express, iMovie (for Apple products only), VideoPad (some features do cost money), DaVinci Resolve 15, and VSDC (for Windows products only, the basic version is free).

- Imagine that you’re taking your viewers on the journey with you. Think about what information they need upfront to keep their interest.
- For example, if you’re taking a tour of different wineries, start your vlog with a short video of you in front of a vineyard talking about what you’re about to do.

- For example, if you’re going on a hike you could start at the beginning with a shot of the entry point, add some content about things you see along the way, and finish with the beautiful view at the end.
- Chances are, you’re working with a couple of dozen short videos that you recorded on your travels. They should be in chronological order on your phone or camera already, so simply transfer them to your video-editing software and select the ones you want to use.

- If the video is of a stunning view, keep about 3-4 seconds of it.
- Conversations with others should be about 10 seconds long.
- Videos of you talking should be about 15 seconds at a time, if not shorter.
- Shots of you walking or looking at things should be 3-7 seconds long.
- In the end, you have complete control over what you decide to do with your vlog! If you feel like a certain part warrants more time, go for it.

- Even in sections where you’re talking, you may want to edit and splice your videos so that there aren’t long pauses.

- For free music for your vlog, check out Soundcloud, the YouTube audio library, Free Music Archive, and Free sound .

- You could even have a trusted friend watch the video and give you feedback about its pacing and sequencing.
Tip: Take 24 hours away from your vlog and then watch it one more time with fresh eyes. You may notice dead space that could be cut out or opportunities for more content that you thought you didn’t have space for.
Expert Q&A
- You don’t have to use fancy, expensive equipment to be a vlogger—your phone will work just fine if that’s what you want to use. Thanks Helpful 5 Not Helpful 1
- Don’t forget to put your camera down every once in a while and enjoy your trip! Thanks Helpful 3 Not Helpful 1
- Learn from other travel vlogs. Watch them and take note of what you like and what isn’t your style. Thanks Helpful 2 Not Helpful 0

You Might Also Like

- ↑ https://flyingchalks.com/en/travelogue/98/travel-tips-12-travel-vlogging-tips-that-will-help-you-make-an-awesome-video
- ↑ https://youtu.be/4gGbm9qoRiM?t=285
- ↑ https://thetravelhack.com/blogging/vlogging-tips-top-travel-vloggers/
- ↑ https://www.tomsguide.com/us/best-free-video-editing-software,review-5301.html
- ↑ https://youtu.be/4gGbm9qoRiM?t=176
- ↑ https://youtu.be/4gGbm9qoRiM?t=444
About This Article

- Send fan mail to authors
Is this article up to date?

Featured Articles

Trending Articles

Watch Articles

- Terms of Use
- Privacy Policy
- Do Not Sell or Share My Info
- Not Selling Info
wikiHow Tech Help:
Tech troubles got you down? We've got the tips you need
How to Start a Travel Vlog: 7 Easy Steps

Do you have a burning desire to share your travel experiences with the world? Maybe you are curious about how to start a travel vlog or are looking for some tips on what equipment to use.
It doesn’t matter whether your goal is to document your backpacking trip through Europe or to post videos of your family’s adventures around the US. If you want to know how to begin vlogging, this article will give you all the information you need.

How to start a travel vlog
If you want to record and share your experiences and adventures on video, you want to be a travel vlogger. A travel vlog can be an excellent way to make money, promote your brand, or just share your stories with the world.
Here’s a vlogging guide to the steps you will need to take if you want to start a travel vlog.
1. Choose your niche
Although millions of people travel the world and share their impressions, only a few of them become famous. The best travel vloggers don’t just make random videos of their travels, they have a unique angle around which everything revolves.
To start your travel vlog on the right track, you have to define your niche.
Start by looking at your travel style and interests. Our YouTube channel focuses on destinations, because that’s what we like. Do you like to backpack? If so, you could make videos about being a budget traveler. Do you have a favorite destination? Your videos can focus on a single spot. Do you enjoy wine? Your travel vlog niche can be on wine destinations.
The best travel YouTube channels cover their niche from assorted angles. Adventure vloggers might share travel tips or talk about solo travel, but it will still be an adventure vlog. The point is that all your content should align with your niche. Everything should be harmonious.
2. Set up your channel
Once you’ve selected your niche, you’ll need to set up your channel. Come up with a great name for your travel vlog, then check to see if anyone is using it. If so, don’t despair. Great ideas are always in the air.
There are endless options for names, but it’s important that your chosen name reflects your personality and niche. The closer they align, the easier it will be for people to find your videos. Try to select a creative name that they can easily remember. Choosing the right name is super important, because it’s is the first step of your online branding journey.
Next, choose where you’ll share your travel videos with your audience. Most vloggers have a YouTube channel. YouTube is by far the most popular platform for sharing video content, with 122 million people on the website every day. But there are also other websites for vloggers, as well.
If you plan on becoming a YouTube vlogger, you’ll want to learn about video SEO. Fill in your new channel profile with images, contact details, and descriptions. Add links to your other social media profiles so people know where else they can find you. Also add a link to your YouTube channel on all your social media platforms, especially Facebook, Twitter, and Instagram.

3. Get the right vlogging equipment
Even though you’ll need quality videos for your travel vlog, it’s impractical to carry around a heavy bag full of gear. When asking yourself “what do I need for vlogging,” consider that most travel vloggers opt for gear that’s small and lightweight.
Here is a list of essential video blogging equipment:
- lightweight camera with image stabilization – you can use your phone or a dedicated camera like the Sony Cybershot
- flexible tripod – a Gorillapod is small, flexible, and easy to use with a camera
- external microphone – lavaliere mics are small and inconspicuous
- An action camera like the GoPro
ⓘ TIP: Action cameras are just for specific scenarios that require it. Do not use it as your main camera or you will get disappointing results.

4. Start filming
Practice makes perfect, so get out there and start filming!
Travel vlogs cover the globe, so start by shooting local sites. Tourists visit your hometown, too! You can visit a nearby museum, try a local restaurant, or drive to a state park for the day. Where you go doesn’t matter. You just want your travel video to immerse the viewer in your world.
It’s best to have a basic format in mind before you start. Tell a story in your travel videos , with a beginning, middle and end. Make viewers feel like they’re there. Let them hear the rustle of dry branches underfoot, the splash of the mountain river, or the chirping of birds. Let them feel it all for themselves.
ⓘ TIP: Don’t be afraid to experiment. Even random 30-second clips can be turned into YouTube #shorts.
5. Learn video editing
If you want to become a successful travel vlogger and make engaging videos , you must make your videos user-friendly. This is where video editing becomes an important tool.
To get started making videos, all you’ll really need is some type of video editing software. Once you have it installed, you can find plenty of tutorials on YouTube.
Adding music is an easy way to improve the quality of your travel videos. A simple web search for “free video music download sites” will produce lots of results.
Creating a quick video intro will make your videos stand out as well.
Not only is watching other travel vloggers a good source of inspiration, it’s also a useful way to learn new techniques.
6. Upload your video to your YouTube channel
Once you’ve finished editing your video, you can upload it to your YouTube channel. Set the privacy level to “Private” when you upload. This will give you time to make edits and add keywords and a thumbnail before you publish.
As far as publishing, it’s best to schedule your videos so viewers know when to expect them.

7. Promote your video content
First, promote your content on social media. Share news about your travels with friends and allow sharing of your posts. Moreover, ask and encourage them to do so. You will create all the necessary settings only once, and then everything works automatically.
Once your travel vlog has gained followers, start collaborating with other bloggers. For example, a mountain hiking channel can work with an online mountain boot shop. Or team up with other travel vloggers and develop a network of followers.
Be sure to communicate with people who follow your travels and leave comments. Answering comments is a very important part of promoting a video blog. Develop your travel vlog constantly. Be patient and consistent. Over time, people will subscribe and follow your travels around the world.
5 vlog tips and tricks
You already know how to start a great travel vlog. The most important vlogging tips beginners need to know include:
- Don’t feel like you’re on vacation. Creating a travel blog is hard work. If you act like you’re on vacation, your video clips will reflect that and you’ll be disappointed with the results.
- Do not travel vlog for everyone and everything. Choose your niche, study the audience, and remember the main idea. that’s how to get a loyal following.
- Don’t disappear for long. Make a schedule for uploading regularly, and follow it, so your followers will know when to expect another travel video.
- Do not forget that you become a public figure when you start travel vlogging. Watch what you say. A bad joke or an insensitive statement can cause you to lose followers.
- Do not try to repeat someone else’s success. Be yourself! Trying to be someone else is redundant.
And don’t be afraid to experiment. Great things do not happen to people who fear making a mistake. Mistakes help you hone your craft. Embrace it.

Final thoughts about starting a travel vlog
In conclusion, travel vlogging is a fun platform to share your world with the people who are not able to see it for themselves. By creating content that speaks to you, you can help others understand how amazing life is.
Inspired? Pin this post and share it with your friends!

Share this story with others
Written by Linda
Linda is multilingual and has been to over 50 countries. Her insatiable love of travel, cuisine, and foreign languages inspired her to create As We Saw It, where she documents her trips, shares practical itineraries, and offers insider tips. She’s passionate about helping fellow travelers save time, money, and hassle, and loves to discover new places to explore.
You may also like...

7 Top Tips for Taking Great Videos While Traveling

How to Make a Travel Video (Easy Guide)

10 Ways to Travel Without Leaving Home
- Africa Africa
- Cambodia Cambodia
- Malaysia Malaysia
- Nepal Lifetime Experiences!
- Philippines
- Singapore Singapore
- Taiwan See our Taiwan destination page for more.
- Curacao Travel photos and articles
- Dominica Exhilarating adventures, breathtaking landscapes and fairy-tale coral reefs
- Jamaica Heartbeat of the World
- Sint Maarten/ St Martin The Friendly Island
- Belize Belize
- Panama Panama
- Andorra Andorra
- Austria Austria
- Belgium Where Benelux begins
- Croatia Croatia
- Czechia Czech Republic
- France France
- Germany Germany
- Greece Greece
- Hungary Hungary
- Ireland Ireland
- Italy Italy
- Montenegro Montenegro
- Netherlands Netherlands
- Slovakia Slovakia
- Spain Spain
- Switzerland Switzerland
- U.K. United Kingdom
- Vatican City Vatican City
- Israel + Palestine Land of Creation
- Saudi Arabia Hello World
- Türkiye You Will Want to Stay Forever
- United Arab Emirates Discover all that’s possible
- Mexico Mexico
- United States United States of America
- Australia There’s NOTHING like Australia.
- New Zealand New Zealand travel inspiration, articles, and tips for curious travelers
- Argentina Argentina travel inspiration – destinations, things to do, and tips for the curious traveler.
- Brazil Brasil – sensational!
- Colombia Colombia is magical realism
- Ecuador All you need is Ecuador
- Peru Land of the Incas
- 1-day itineraries
- Weekend Getaways
- 1- to 2-week itineraries
- food and drink
- Things to Do
- travel planning
- know before you go
- cruise ports
- cruise tips
- Viking Grand European Tour Daily journal entries from our Grand European Tour, a river cruise from Budapest to Amsterdam, with activities, experiences and tips.
- photo gallery Travel photos by As We Saw It
- photo essays Photo Essays
- photography tips Photo Tips
15 Travel Vlogging Tips for Beginners (from a SOLO FEMALE Travel Vlogger)
Last Updated on January 8, 2024 by Christine Kaaloa

This post may contain affiliate links. I never leave home without travel insurance. Here’s an tirip insurance finder tool to find one that matches your budget. I use World Nomads as it covers adventures . I also get the plan that covers gear and travel theft.
Being a solo female travel vlogger on YouTube and freelance camera operator, I love shooting stories in exotic and new destinations both, at home and abroad. The one important rule to acknowledge with travel is that there is no do-over once you leave a destination. You need to get your shots and shot list checklist complete so you can tell the story. Thus, being thoughtfully prepared and packed for my shoot is most important to me. I’m sharing travel vlogging tips to prepare you for shooting a destination .
Read Benefits of Travel Vlogging on YouTube
Table of Contents: 15 Travel Vlogging Tips for Beginners (from a SOLO FEMALE Travel Vlogger)
- 0.1 Travel Vlogging for Beginners: Is travel vlogging for women different from men?
- 1.0.1 1. Never pack your main camera gear in your checked luggage
- 1.0.2 2. Decide on the right gear to pack and which to leave behind
- 1.0.3 3. A wide-angle lens is a must for making travel videos.
- 1.0.4 4. Keep travel camera backpacks compact
- 1.0.5 5. Are you planning vacation or a film shoot?
- 1.0.6 6. Choose the right travel camera bag for solo travel
- 1.0.7 7. Do not assume you can “buy replacement gear” when you arrive.
- 1.0.8 8. Invest in an SSD
- 1.0.9 9. Capturing the details is key to a good story.
- 1.0.10 10. Ask permission to shoot locals
- 1.0.11 11. Prepare for all outcomes
- 1.0.12 12. Prepare for the weather
- 1.0.13 13. Insure your camera gear
- 1.0.14 14. Remember to wipe your lens
- 1.0.15 15. Check camera settings
- 1.0.16 Conclusion
- 1.0.17 What recommendations would you add to this guide on Travel Vlogging tips for beginners and how to start a travel vlog?
Travel Vlogging for Beginners: Is travel vlogging for women different from men?
Being a solo female travel vlogger brings unique challenges compared to male counterparts, even though our camera gear and YouTube styles may be similar. I strive to be authentic with my audience, but sometimes, I hesitate to share my struggles as a woman in a male-dominated industry, fearing I might be perceived as “whiny.” However, being a female vlogger on a solo travel journey presents distinct hurdles.
Safety is a top concern. Navigating unfamiliar territories while being a female traveler demands constant vigilance, especially in societies with traditional gender norms. Cultural differences and societal/dress codes can make it more challenging for me to blend in and stay safe. Additionally, carrying my gear around adds a physical and emotional burden, and dealing with touts and travel scams can feel overwhelming.

Read How to make travel videos for youtube
Each new destination requires me to adapt to a unique set of rules and customs while ensuring my storytelling remains informative for my travel audience. Speaking to my camera in public spaces can attract unwanted attention, leaving me feeling nervous and self-conscious.
Despite these challenges, I’m determined to overcome them and share my amazing experiences with the world. As a travel vlogger, I believe in inspiring other women to embark on their own solo adventures and break through the barriers. Here are some tips that have helped me along the way:
See my conference slides on How to Make Money with YouTube
15 travel vlogging tips for beginners, 1. never pack your main camera gear in your checked luggage.
A rule of thumb is that you never want to separate yourself from your main camera gear because it is both, essential to your film trip and valuable. Your flight can get delayed or your luggage can get tossed, lost or stolen.
So what can you pack in checked luggage?
- Cables, adapters and backup chargers (I always keep one for my main gear bag in case luggage gets lost and I have to charge things).
- Pocket light panels, gorilla pod, tripods and selfie sticks.
- If I pack valuable gear I’ll pack a short lens and wrap it up in my clothes or tuck it away in a shoe or cup.
Avoid packing camera and external batteries. You may carry a lot of batteries like me, but it’s against airlines regulations. I like to pack my accessories in my luggage (although I take mostly carry-on luggage so i’m never far from my gear period).
See my packing list for travel vlogging
2. decide on the right gear to pack and which to leave behind.
When you travel and film, you need to choose the right gear to bring with you, because you’re carrying it for the entire day. It’s like a marriage that has to last for the day. Pack the wrong stuff – underestimate your shooting needs or the weather– and you’re kicking yourself for hours.
Think about the shots and content you want to capture first and then the weather. Then plan your packing around it.
I know photo journalists who carry two DSLRs, so they do not have to switch out lenses when they shoot for an event or red carpet. But solo travel run and gunning is a beast when you’re sightseeing, walking crowded markets and doing outdoor activities like hiking. It also takes mental preparation when your day spans into a long day of navigating public transportation, taking Uber or rickshaws and getting lost on foot!
Your camera backpack weight, the miles you’re walking, the obstacles of filming the shots you want and the climate… they all add to the challenge.
- Leave some gear at your hotel or home. Although I pack gear for my trip, I also repack my gear for the day’s itinerary and shooting needs.
- For hiking, landscapes, I leave my heavy 70-300mm zoom lens at home and use my everyday cameras: GoPro , vlog camera and/or mini DSLR .
- For food content, I pack my vlog camera and/or mini DSLR with my camera shotgun mic.
- If filming a safari or street crowds, I’ll pack my zoom lens.
- For travel portrait days (I don’t really do portraits), I might bring a 50mm lens.

3. A wide-angle lens is a must for making travel videos.
A wide-angle lens is a must of travel content creators; you’ll be glad when you make that investment. Other camera lenses will not be able to capture the landscape as you experience it and even your wide lens will not capture the epic greatness you experience.
I’m typically the type of film coach, who advises that it doesn’t matter what gear/brand you get, but this is one piece of glass you will find the most use with.

The 11-24mm ultra wide angle lens offers stellar, high-quality performance and is great for architecture, landscape and weddings. The con is that it can be pricy and a bit more on the heavy side. It is a solidly built camera lens with heavy glass.
These two wide-angle lenses are the best bet to capture your landscape before the image begins to distort.

4. Keep travel camera backpacks compact
When you solo travel, you carry your all your camera gear and luggage with you. You want to have a light and maneuverable equipment backpack , as you’ll be wearing the weight on your shoulders and back within the course of your travel-film days. Check out my camera backpack (I absolutely love it for solo filming)
- Avoid large camera backpacks. I’ve had to fit my camera gear on anything from train lockers, plane cabins to maneuvering small and crowded buses in developing countries. Large backpacks also tempt you to want to pack more than you need.
- Adaptability. You want to comfortably transport your valuable gear on flights (laptop included, if you take one). But you also want to be able to downsize and strip down to the travel-film essential you need, during long haul sightseeing days when you spend a lot of time on your feet.
Being light and nimble helps you move quickly and fit into tight spaces.
See top carryon convertible luggage for solo travelers
5. are you planning vacation or a film shoot.
If your goal is to grow a successful YouTube channel, then plan your trips around your film shoot ideas. Each day is an expense, when I’m traveling a destination and even my sponsored stays come with a time limit.
I am IN for the shoot; OUT when I’ve collected the stories/videos I came for. It’s what is in my film budget. There are times that I certainly want to stay longer, but my time is often shared with freelance videography work at home that offers paying clients vs the passive income that blogging/vlogging brings and must be earned by investing time, energy and money into content. Generally, it’s hard to take a vacation when your job is to film your “vacation”. I can only truly turn off my camera when I’ve reached home.
Being a solo female travel vlogger involves juggling two distinct aspects: the basic travel budget and logistics, and the filmmaking and content planning. It’s a challenging, rigorous but rewarding journey that requires preparation and adaptability.
- On the solo travel front, I meticulously research and plan my trip, trip dates, prices, considering factors like budget-friendly accommodations, transportation options, and personal safety as a female traveler . Dealing with language barriers, managing equipment gear, and navigating unfamiliar situations … it all happens here . I need to know where I’m going, who I’m meeting and by what mode of transportation I’m using (i.e. bus, overnight train, ride share, rickshaw, etc..). I have to be prepared for every situational variable that’s thrown at me and if I’ve never experienced it, then whoa , there’s always a first time! How to use a bathroom that’s got a squat toilet, in a stall with no luggage hook and with all your gear on you and luggage with you… that’s a learned female solo travel vlogger skill!
- As a travel vlogger, I dedicate time to plan my film shoots and create content. Researching filming locations, potential story angles, and researching and connecting to sponsors is crucial. Reaching out to sponsors takes much behind-the-scenes work, but it can help travel-to-film expenses be more manageable, unless my YouTube income covers that additional expense or I can upsell a stay into a paid freelance project! (And when I get home to edit all this footage and post social media posts, budget has to be factored in as well!)
- Taxes: I consider expenses associated with video creation, like flights, transportation, meals, activities, guides/fixers, Uber, food haul expenses and visa fees, which can be claimed as Costs of Goods Sold when I earn YouTube income.
- Being responsible for my content, including correctly pronouncing foreign words, is essential, even though mistakes can happen and jerks leave you a stinky comment about how I should know how to speak their language.
Balancing both aspects during a trip can be taxing, especially when facing physical fatigue and challenging weather conditions. Something as small as your ponytail getting caught under your camera backpack strap can be the last straw! Despite the difficulties, proper planning and finding support make traveling and filming more manageable and enjoyable.
Want to monetize your YouTube channel faster? Nab my book bundle on How to Make Money Blogging & Vlogging
6. choose the right travel camera bag for solo travel.
One of the most vital things about choosing the right travel camera backpack is functionality. It needs to be easy to access so you can remove your camera and start shooting immediately. You want your gear to be organized, easily accessible for breaking action. You also need to be protective of your gear and protected from pickpockets… Yes, it can be stressful if you’re a woman traveling alone carrying visibly expensive gear that needs to come out for you to do your job.
You want to think of your backpack in terms of how you’ll maneuver a crowded train in Japan, dirty back alley streets of Varanasi or on a city walking tour, where you’re in a group that has to keep moving.
Photographer’s bag cases that you have to lay on the ground to remove your camera are not practical. Avoid them, unless you specialize in cinematography . Cinematographers will create more time in a place just to film it properly. Otherwise, some locations won’t afford you the space or privacy to open and expose your equipment. Tip: I’m in love with the Manfrotto NX CSC Camera Backpack. It’s compact, keeps everything organized with top and back loading entrances to the bag. ( check out my review )
7. Do not assume you can “buy replacement gear” when you arrive.
Before traveling, ensure your travel vlogging equipment kit checklist includes backup batteries and charging cables. Some countries may lack Apple stores or offer electronics at higher prices in airports. Moreover, be mindful of varying plug types in different countries. For instance, when I purchased a Mac laptop in Hong Kong at an Apple store, it did not occur to me that it would come with a Hong Kong plug adapter , which required a specific plug adapter for use in the U.S.
Tip: B&H Photography delivers internationally , so if you need to replace a piece of gear, you may consider this option. Amazon may also be an option if you are staying at a hotel for a set number of days. Keep in mind, you may need to open an Amazon account in the country that you’re sending to and their international partners are limited! Amazon operates in over 20 countries, such as: United States, France, Italy, the United Kingdom, Turkey, India, Saudi Arabia, Japan, Singapore, Mexico, and Brazil . Here’s their international shipping policies.
Download my camera equipment buying gear list It’s a little dated but it’s still helpful, as I share reasons behind what I buy.
8. invest in an ssd.
Anything can happen on the road. You can lose your camera, your external drive can get banged up and corrupt, someone can steal your luggage …and whooops there goes all your hard work, planning, and expense. I like to take two 2TB SanDisk Extreme Portable SSDs and split them up in two bags. They are wallet size and super durable and slim so you can stash them inconspicuously in many things. It allows you to edit and transfer footage anywhere– even on the toilet. TMI, i know. But I’m in love with them!
Avoid: Stop buying the regular brick external storage. Read my SanDisk review here, especially if you do not know what’s the difference between and SSD and external harddrive!

9. Capturing the details is key to a good story.
With vibrant landscapes and exotic cultures unfolding before you, it’s easy to get sucked into getting cinematic portraiture as your broll. Wide shot, wide shot, wide shot … can get boring for YouTube audiences. If you are planning to film your journey for YouTube and not a travel documentary like Baraka , you will likely need more activity, emotions and dynamics to fuel a story.
Find the story in your journey, the destination, its people and culture. If you see holy men on the steps of the Ganges from your Ganges sunrise boat cruise , use your lens to probe deeper into their lifestyle, the ornaments they wear, their actions. A cultural festival has deeper meanings to locals than it does tourists, so probe, probe, probe with your lens. Get close-ups of details! These also make great b-roll.
Pick a story and follow it through to give your videos more insight and a deeper meaning.

Check out my YouTube JumpStarter Kit Bundle if you are starting a new YouTube channel.
10. ask permission to shoot locals.
Always ask permission before you film locals. It’s tempting to just film people without their awareness because you want to capture a beautiful moment and once they notice a camera, they botch that authenticity. But still, it’s their right to their privacy. I’ve certainly had my moments when I was naive and took photos in secret. Some countries, the locals are happy to have their photo taken, but others may not be. The more western you go, the more stringent the rules get.
Japan can be a challenging country to film, as there are many “No photo” signs up at marketplaces and eateries. Shops and locals may not appreciate being photographed.
I worked with a sponsor who wanted me to promote one of their many cooking classes in Tokyo . The vendor (aka “cooking teacher”) they chose, who was giving the cooking class agreed to let me film with the possibility the experience could show up on my YouTube channel. However, I didn’t have a filming permissions or media release contracts in place. To shorten a long story, a few years later I decided to edit and publish that trip experience for my channel. A day after publishing, the vendor contacted me to request I pull the video down. He had a nasty split with the sponsor and didn’t want to be associated with them. I asked if there were ways I could re-edit it. It was possible to remove the sponsor as they had gone out of business during the pandemic. But no. Was it a personal whim or bigger spat ? As I did not have a signed contract, I did the honorable thing and pulled the video. But it sucked royally. I paid to film, produce and edit that video with my personal time and money. I lost money on that video.
The U.S. is another country, where natives don’t like their privacy probed by lenses to the point they have no problem jumping into a lawsuit. It certainly adds to the challenge of filming inspirational travel videos.
I know it’s awkward as hell as a solo female creator to break into a very Real moment that you witness and say– Hey, is it okay if I film you? It’s a cold shower to the moment and ends whatever real thing you were hoping for.
Filming a YouTube video to fit professional legal standards is a gray line for most creators. You’re paying out-of-pocket for your trip’s expenses, for what can be considered a home video and you might not be making any money on it. Travel vlogging is an investment.
But if you’re hoping to monetize your videos on YouTube, learning the legality of things helps!
Note: If you are on a paid campaign or assignment, you must request permission from anyone you film. I know in some countries a head nod is the closest language to permission as it gets. Ask if you can film them stating their name and contact number on your recording, in case you ever need to follow up.
Tip: Jotform and Google Forms are free to use and set up a quick talent permissions form.
11. Prepare for all outcomes
Travel is exciting to shoot because you never know what’s around the corner. The downside is that things don’t always go as planned either. Equipment failures happen when a situation arises that you did not expect.
If you have a content assignment that is paid or work-based, you don’t want to miss a moment and risk a part of your gear going down in the field. When my DSLR died – twice – under the Bangkok humidity, finding a Canon repair shop to get it fixed took a good chunk of days, stress and wasting time in a search.
On one trip- my first planned solo trip – I had to buy a new point-and-shoot camera, so that I could at least get memories of my trip. It turned out to be a bombass Samsung ST500 camera that wasn’t yet in the U.S. and ultimately, I used upgraded versions of it for travel vlogging! It was a blessing in disguise but it was still time and stress, frantically running around shopping malls when I wanted to be exploring Thai temples!
Today, I travel with two vlogging cameras , and most definitely, if I am on a paid campaign! I’m prepared if one of those cameras go down.
12. Prepare for the weather
Weather changes should always be prepared for when you’re packing sensitive camera gear.
Know how your gear and batteries react in different weather types. Winter and snow wear your batteries down quickly, so going on an Arctic roadtrip with Mazda , I bought more batteries. This type of weather also causes lens fogging- when going from outdoor cold to indoors. It can also create brittle plastics– I broke a clip on my extreme selfie stick!
Keep your equipment dry from humidity, condensation and rain are not good. They can cause the fine instruments in your gear to go wonky or corrode. If moisture is trapped in your lens over time , it may be subject to lens haze , a contaminant effect of your lens developing a fungus that makes it look foggy.
Tip: I keep silica gel packets in my camera bag when traveling through humid and moist weather, to keep the moisture from being locked in. These silica gel packets act as absorbers and dehumidifiers. You can order them by packet or save up the packets that come in the packing of new items.

Alternate solution: Buy silica gel dessicant . It’s a tiny container with holes for the gels to absorb condensation, but make sure the container is sealed. I bought one at a camera shop and when I dropped it. All the tiny silica gel marbles scattered throughout my room and I had to worry about my dog finding and eating them. But I have em!

13. Insure your camera gear
If you’re wondering about how to start a travel vlog, you need to think not only on the creative end, but about your business and its tools. What are the odds something could happen to your camera equipment gear when you’re on the road? Homeowner’s Insurance is a popular insurance for covering camera equipment. However, not everyone owns a home.
I purchase World Nomads travel insurance for its tech equipment coverage for lost, stolen or damaged gear. It also doubles as trip insurance!
14. Remember to wipe your lens
This sounds soooo simple. It’s easy to forget to wipe your lens, when you’re running around famous landmark sites and content gathering gets demanding.
Smudges don’t always show up on your camera viewfinder when the sun is beating down on it, which often it is! But they are visible when you edit.
Tip: Be sure to clean your lens with a lens cloth at the end of the day, the start of it and the middle. Do this to your iPhone cameras too! (ai… this one is easy to forget)
15. Check camera settings
Checking your camera settings at the beginning of each day while traveling is crucial to avoid mistakes that can become troublesome during post-production. When you’re in a new and exciting location, it’s easy to forget to adjust your camera settings, leading to overexposed or underexposed shots, blurry images, or incorrect white balance.
Additionally, it’s easy to accidentally knock your settings off if you’re in a rush. If you have a camera with knobs, be careful that they don’t accidentally catch on something and turn your notice. If your camera has touch screen menus, then be sure while you’re operating it, you don’t accidentally swipe a feature and turn it on.
On a recent trip, I shot all super-wide footage on a GoPro because I didn’t realize I kept knocking my settings off. Such a rookie mistake! I can rush, when capturing footage as there are many places I try to film in one day. By taking a few minutes each morning to review and adjust your camera settings, you can ensure that your footage is of high quality and ready to use without spending hours fixing issues later.
Here are camera settings to consider:
- Exposure : Check your aperture, shutter speed, and ISO settings to ensure proper exposure for the specific lighting conditions you’ll encounter throughout the day. Night time is challenging. Use a higher ISO in low-light situations .
- Focus : Check your focus settings to ensure your subjects are sharp and in focus. Consider using manual focus for more control, especially in challenging lighting conditions or when dealing with moving subjects.
- File Format and Resolution: Choose the right file format and resolution for your needs. RAW and 4K/60 fps files offer more flexibility in post-processing and look better tracking motion, but they take up more space on your memory card. I like to keep my settings at Full HD (1920 x 1080) 1080p and 60fps but sometimes, my hand accidentally changes it to 30fps, which drives me nuts! If using a GoPro, make sure you are not on the super-wide settings unless you mean to be. The menu is super sensitive and easy to accidentally nudge or swipe a setting. This was a mistake I made on my last trip!
- Battery and Memory Card: Make sure your battery is fully charged and your memory card has enough space for the day’s shooting. Carry extra batteries and memory cards to avoid running out of power or storage.
- Image Stabilization: Enable image stabilization if your camera or lens has this feature, especially when shooting handheld or in situations with potential camera shake.
- Audio Settings: If you’re recording audio with your camera, check your microphone settings and audio levels to ensure clear sound quality.
By taking the time to review and adjust your camera settings each day, you can avoid common mistakes and capture stunning footage that requires minimal post-production work. This preparation will ultimately save you time and help you tell your travel stories more effectively through your vlogs.
By being true to myself and my journey, I’m confident that my solo travel vlog will continue to grow and inspire others. As a YouTube coach, I’m passionate about helping fellow female travel vloggers achieve their dreams and rise to the top of the travel vlogging community.
What recommendations would you add to this guide on Travel Vlogging tips for beginners and how to start a travel vlog?
Recommended Trip Planning Services:
Travel with me and join me on my next group adventure !
Getyourguide is my favorite tour booking site. Find everything from food tours, city sightseeing discounts, SIM cards and more
- Discover Cars finds the best car rental price quote.
Booking Yoga Retreats – a huge directory of yoga, surfing, meditation retreats around the globe.
Skyroam – Global wifi (take 10% off with my referral code GRRRLTRAVLER )
Booking.com who I book accommodations with
World Nomads trip insurance that covers my adventure style in travel.

My Travel Survival Cheat Sheet
- eSim I’m using to stay connected abroad. Activate it before or on your trip!
- Skyroam – Global wifi (take 10% off with referral code GRRRLTRAVELER )
- Trip Insurance Finder Tool for budget travelers looking for trip insurance to fit specific needs.
- I get my adventure trip insurance from World Nomads trip insurance (they cover travel theft)
- Expedia for great weekend trip package deals
- Take your yoga traveling and book a yoga retreat/ training .
- Book hotels without a cancellation fee. Use this Hotel Comparison Tool to find the lowest prices!
- Book chic hostels with Hostelworld
- Ditch and store your luggage at local businesses for under $10/day
- 12goAsia Book trains and buses.
- GRRRLTRAVELER Group Adventure trip : Travel with me beyond YouTube.

Download my 25 Solo Travel Mistakes to AVOID Checklist
And Get my Travel Survival Blog Updates

Related Posts

17 Networking Tips for your first Travel Conference

Creating a Home Vlogging Studio Setup in 4 Simple Steps

Benefits of Attending Travel Conferences
Group adventure trips 2024.

KEEP ME ON THE ROAD

Solo Travel Survival Tools

YouTube Mentoring & Services

My Latest Gear Review
I'm Christine! I film my travels 100% alone, so get confident traveling alone too!
GRRRL Discounts We Love

70% OFF 3-year plan + 1 month FREE: Use code: GRRRLTRAVELER

Copyright & Affiliate Link Disclosure
All content on is this site ©GRRRLTRAVELER. Artwork on this site from contributors have special permissions for our use.

- Vlogging Gear

The Ultimate Guide to Starting a Travel Vlog on YouTube
So you want to start a travel vlog.
Makes sense! Video is one of the most immersive and engaging mediums for telling stories. When done well, you can effectively bring people along with you on your journey and make them feel like they’re traveling with you. You’ll also be able to showcase your personality and connect with your audience in a way that words and photographs just don’t allow.
Then there’s the glamour surrounding this line of work. After all, who doesn’t want to travel to exotic destinations and make a living off it? It may sound like a dream — and it can be — but it’s a lot of work. Many people set out to be travel content creators and ultimately give up because the road to success is such a slow burn.
In this post, we offer a step-by-step guide to starting a travel vlog on YouTube based on our learnings over the past year. From deciding on the type of vlogs you want to make and choosing the best filming equipment to video editing tips and promotion tactics, we’ve got you covered.
Table of Contents
Decide on the type of travel videos you want to make, choosing the right video cameras & equipment, just start filming, editing your videos: process & tools, publish your video & promote: youtube seo & more.
Before you do anything, it’s important to decide on the type of videos you want to make and what story you’re trying to tell.
Here are a few types of travel videos you can consider:
- Travel guides
- Documentaries and cultural storytelling
- Explanation and marketing videos
- Niche topics, such as adventure and sports, travel hacking, food, urban explorations, etc. The possibilities are really endless!
If you’re not sure what you want to focus on yet, you can start researching what others in the field are doing to get inspired (this basically means binge-watching YouTube). You can also begin by filming and publishing a few different ideas. Take note of what your audience seems to like and what you enjoy doing and lean into that!

How We Decided on Travel & Food as Our Niche
A lot of content creators have trouble deciding on their niche. I certainly did.
This is not my first rodeo — I first created my travel blog in 2013, and the site you see now is in its third iteration. For years, I created generalized content on travel, and, as the number of creators proliferated, it was extremely difficult to stand out.
For me, I associated my niche with my passion, and I was always stuck on figuring out what in the world that was. It always felt like this elusive idea that I couldn’t quite nail down, and I was over-complicating it like hell.
Ask yourself, what do you like to do? What do you already do? What can you do regularly and consistently over a long period of time? This will be your niche. It may already be right in front of you and you just don’t realize it yet.
I’ve been a voracious eater for as long as I remember. I love food, I’m curious about food, and I’ll try anything once. When I travel, I often center my explorations around food and eat more than three meals a day. In 2020, I had this lightbulb moment: I’m going to make travel videos, and a lot of them will be about food . Duh. I was already eating everything while traveling anyway, just not filming it.
And it’s ok if what you like is outside the box. So many people have built empires around non-traditional topics or interests that school convinced us we couldn’t make money off of. Jason Rupp has almost half a million subscribers on YouTube posting videos of himself getting barbered and pampered around the world. People make a sustainable living on YouTube by posting hour-long videos of fishing, for goodness sake. People watch YouTube for all reasons. Use this to your benefit.
Of course, cameras and equipment are essential for making videos. However, I would nail down your niche and the story you’re trying to tell before choosing what to invest in, as this will impact the type of equipment you need.
For example, if you want to showcase how you travel hack and get the best deals, maybe all you need is a webcam and screen recordings to start.
We create food and travel videos — what we care about is producing high-quality content that makes people feel like they are traveling with us. We also care about being able to fit all our equipment into a backpack so we can film on the go. Our camera and accompanying gear were chosen accordingly, and we made the conscious decision to put in a larger upfront investment.
Camera & Gear We Use for Our Travel Vlog
- Sony a7 III camera body (and we just pre-ordered the Sony Alpha 7 IV ! ). This is often regarded as one of the best cameras for filming videos because the images are 4k and of cinematic quality.
- Sony 16-35mm camera lens . This is the lens we use to shoot most of the footage you see on our current YouTube videos .
- JOBY GorillaPod . This is a bendy, flexible tripod that can be set up anywhere. It also easily fits into a backpack for on-the-go shooting!
- Sennheiser wireless microphone system ensures crisp, clear audio in spite of background noise. We also use a RODE microphone on occasion, especially when we’re shooting multiple subjects.
For those with less to spend and who want to get started quickly, the Sony Z1 Digital Camera for Content Creators is a fantastic all-in-one option. This camera films in 4k, has a flip screen and super-wide filming angle so you can easily film yourself, and a high-quality microphone and wind screen.
See our full list of travel vlogging equipment and why we chose it here.

It’s going to feel weird when you first start filming — especially if you’re talking on camera or filming yourself. You’re not going to feel prepared, you may feel awkward, and you’re not always going to know what to say. It can be nerve-wracking to talk on camera in front of a room full of people. I used to judge YouTubers for not being perfectly articulate until I started talking on camera myself, and now my attitude has changed to pure admiration.
The best way to learn is to simply start doing and improving from your mistakes. Being on camera gets easier with practice, and you’ll get better and more natural with time (even if the nervousness never fully goes away). Now, whenever I feel shy during filming, I remind myself of a piece of wisdom passed on by Lenza — “literally nobody will remember you in an hour.”
When it comes to the quality of your footage, watching what you’ve filmed and taking a stab at editing will show you what you’re missing and what you need to capture in the future to tell the story you want to. Just throw yourself into the deep end and let it happen.
Alright, so you have your raw footage. Now it’s time to make magic with it.
Filming & Editing Travel Vlogs: Our Process
Every filming and editing process looks a little different, but here’s how ours goes right now: 1. Plan an idea. Whether this is a food tour in a specific destination or a story we want to tell, we plot out the rough flow of the video and the footage we want to capture. If it’s a food tour, I’ll research where we’re going to go ahead of time. If it’s a specific subject matter or story, I’ll script an outline of how the scenes should flow. There is an element of improvisation since you can’t predict everything that will happen during filming, and that’s what makes it fun! 2. Film the idea. 3. Stitch together a rough cut of footage . This can be a chronological stitch or a stitch based on a pre-set storyline or idea. 4. Trim excess footage . Oftentimes, you’ll find yourself with redundant scenes or footage that don’t add value — the “fat.” Be ruthless in cutting this. Modern internet users have the attention span of goldfish. If you don’t get to the juice right away, you’ll lose viewers. 5. Add the “frills.” Once excess footage is cut, we add transitions, b-roll, music, special effects — you know, the fancy stuff. 6. Complete a final round of feedback and record any voiceover that is needed. 7. Final review and publishing. We watch the complete video obsessively to catch any errors/make final changes before uploading to YouTube.
Video Editing Tools
- Video Editing Software: We use Adobe Premiere Pro to edit all of our videos.
- Music: Good music is powerful. I’m still amazed at how a boring clip of me talking automatically becomes more bearable with the right music. We get all the music for our videos currently using Epidemic Sound , which gives us access to a huge library of royalty-free music and sound effects.
- Voiceover : Voiceover can be an effective, engaging way to tie your footage together into a story. Think about Parts Unknown — what makes the show iconic is Anthony Bourdain’s deep voice and storytelling skills. It stitches together an hour’s worth of footage into a narrative . We use this compact RODE microphone to record voiceover on the go. It’s so easy to use that even the least tech-savvy person (cough, me) can figure it out.
When you get started, there’s going be a skill gap between where you are and what you aim to be. It may take hours to get something simple done. This is frustrating at first, but, like anything you learn, grow, and become better and more efficient. Practice makes perfect, as the cliche goes.
When you get started, there’s going to be a skill gap between where you are and what you aim to be.

Woohoo, your first video is ready! Now it’s time to create your YouTube channel and publish! But there’s more to it than just uploading your video. If you’ve never heard of SEO before, there’s no better time to learn than now because it’s a huge part of how people are going to find your videos. And there are other considerations to increase your channel’s visibility as well.
YouTube SEO…A Necessary Evil
SEO stands for search engine optimization. And you need to understand at least the fundamentals to improve the ranking and visibility of your videos on YouTube.
Let’s say you’ve created a video on the best places to eat in Rome and you’re trying to figure out a good title. Originally, you were going to go with “where to eat in Rome,” but after some research, you find that people search for “best restaurants in Rome” significantly more. The keywords convey essentially the same thing, but going with “best restaurants in Rome” will result in more people finding your video.
Think about how people find videos. They have a question they want answered or something specific they’re looking for and they turn to the YouTube search engine to surface relevant content. There are trends in the way people type their queries — specific sets of words or specific orders of words are more commonly used than others. You want to make sure you’re using the right words in the right order so YouTube will know to display your video when it makes sense.
Of course, there are more nuances than that, but that’s the gist of it.
Here’s how to optimize your videos for SEO:
- Learn SEO Fundamentals . Moz has a great SEO guide for beginners so you can begin understanding the landscape.
- Do Keyword Research. Find out exactly what people are typing in the search bar to find the type of videos you are creating. TubeBuddy has a video keyword explorer in their robust suite of YouTube optimization tools. I also like the Keywords Everywhere Chrome extension, which shows you a list of keywords that any video on YouTube is ranking for.
- Optimize Your Videos: Once you have your keywords nailed down, make sure you include them in your video title and video description . When you add tags your video , add your primary keyword as the first tag and then max out the number of tags you’re allowed with synonyms and tangential words and phrases. You want to provide the YouTube algorithm with a clear signal of exactly what your video is about so it knows which search terms to showcase it under.
How to Promote Your YouTube Video
Unfortunately, there really is no secret to making your video go viral or growing your channel rapidly. Instead of obsessively focusing on views or subscriber growth, direct that energy towards making high-quality content. If your videos are engaging, people will eventually come. Just be patient! In the meantime, here are a few things you can do to spread the word that are in your control:
- Create Eyecatching Thumbnail Images. You want folk to be compelled to click on your video when they see your thumbnail image. Go for colors, interesting imagery, and big ol’ fonts that pop right off the page. I use Canva Pro — a powerful drag-and-drop graphic design tool — to create my thumbnail images.
- Post to Social Media. If you have an existing following, great! If not, post to your personal channels or share with friends and family to get a boost.
- Share to Relevant Communities. Research Facebook groups, Slack communities, Reddit threads, and more that focus on the topics you make videos about. Be careful though — a lot of these communities are resistant to blatant self-promotion. Make sure you are contributing in other meaningful ways so your posts stay up.
- Embed and Link Videos. If you have a blog or website, make sure you embed your videos on relevant posts and webpages. This offers a great boost for SEO as well.
I hope you enjoyed this step by step guide to starting a travel vlog on YouTube! If you have any questions or thoughts, please leave a comment below!
Liked This Post? Pin It!

Dottie is a travel blogger and YouTuber, and one part of Dots on a Map. Check out her YouTube at www.youtube.com/dotsonamap, where she tells stories about travel, food, and local cultures around the world.
Where to Eat in Mexico City: Best Restaurants, Street Food & More
An unexpected exotic food tour: exploring mercado de san juan in mexico city, you may also like, our youtube channel for food & travel is..., learnings from five months of travel blogging while....

I really appreciate how you broke down the process step by step, making it seem less overwhelming and more attainable. Your emphasis on authenticity and storytelling resonated deeply with me. It’s refreshing to see someone emphasizing the importance of being true to oneself rather than conforming to what’s popular or trendy. Your reminder to focus on creating valuable and engaging content rather than obsessing over equipment and fancy editing techniques was a much-needed reality check for me.

Hello!Namaste! Dottie ma’am!Thank you for sharing your Vlog blogging youtube channel information for beginners like me.I already have got started Website/blog and youtube tube channel .It’s on way to go for. I want to begin a TRAVEL Vlog video youtube channel like you on near future. Your Vlog blog helped me to boost my knowledge to join a new parttime job. Your job is great!Thanks Dottie ma’am!
Leave a Comment Cancel Reply
Save my name, email, and website in this browser for the next time I comment.
/ OWC Videos
How to create a travel YouTube Channel: Part 1—Shooting and Editing
Want to know how to shoot a travel vlog? We talk you through everything from planning ahead of your trip to shooting and editing your travel films.
Josh Edwards • Aug 23, 2021
If you’re at the beginning of your journey on how to shoot a travel vlog and be a travel vlogger, it can all seem a little daunting. Where do you begin? How do you shoot a travel vlog? How do you create a YouTube channel? How do you get your video seen by an audience? If you want to be successful, there are a lot of different factors to acknowledge and address.
For the past nine months, I’ve been living and traveling in Indonesia, recounting my experiences in my YouTube series “The Lombok Life.” I’ve learned a lot about shooting while on the go, editing quickly, using drones, creating and promoting a channel, etc. I plan to share everything I’ve learned with you.
In this series, I’ll be breaking it all down from start to finish, giving you everything you need to know to get you started. In this part one, we’ll be taking a look at the process of actually creating a travel video. Because if you don’t have any travel videos to share, the chances are your new YouTube channel might not perform so well! Below, I cover everything from how to write a travel vlog, how to prepare for shooting, the process of actually filming and then finally, how to edit a travel vlog.
Let’s get into it.
Pre-production

As with any other film production (no matter the scale), it’s great to be well prepared. As the old adage goes: “Failure to prepare is preparing to fail”. Particularly when shooting while traveling, the scale of the failure and possibilities of things going wrong are vast. So, even though this may just be a YouTube vlog, I’d say pre-production is essential.
If you know where you’ll be headed before you get there, take the time to do your research on the place. Find out everything you can about your destination. Some key things to address may be:
- What’s the weather and climate like?
- How safe is this destination? (Are there any ongoing wars, what are crime rates like, how do they react to people filming with cameras)
- What is the history and context of this destination?
- Where’s best to eat and stay?
Location scout
Obviously, you can’t physically do a location scout on a place before you visit; but we do have some great tools at our disposal. Utilise Google Earth and other tools that show you what a place looks like with street view. There are apps such as Sun Seeker and The Photographer’s Ephemeris that allow you to find out where the sun is going to be in any given location at any time and how it’s going to fall across the environment.
Furthermore, read up on message boards and forums and find out what others are saying about your destination on YouTube. This will help give you a “fee”l for a place, find out what’s interesting about the destination, and by reading through comments sections, see what audiences enjoy and want to know more about. Think about how you can cover this destination from a unique and interesting perspective.
How to write a travel vlog
The very essence of a travel vlog is that it’s somewhat spontaneous and happens in the moment as you travel. Like any adventure, you can’t always predict and know everything that’s going to happen at all times (that’d be a very boring travel experience). However, I think it’s still worth writing up some sort of pre-production script or document that gives you a reference point and understanding of what it is you want to achieve.
You may want to write a general summary of the story you’re trying to capture. For example, “I want to tell the story of navigating New York’s subway system for the first time” (good luck!) This becomes your north star.
You may be able to write out some voiceovers, if that’s part of your style, as well as plan specific shots and sequences you have in mind. For example, you know for certain that you need an intro to the video, as well as an outro. This will all help form the next part of your pre-production.
Shot lists and production calendar
When you start to build up an idea of the locations where you want to film, and when (for example, Grand Central station with the early morning light filtering through), you can create a shot list and production calendar.
A production calendar tells you where you need to be and when. From my own experience, it’s best to build flexibility into the timeline. If your schedule is too rigid, one misstep could unravel the whole thing and cause a lot of stress and pain. Be flexible and prepare to adapt. I’d recommend padding things with 24- to 48-hour windows.
Meanwhile, having a shot list will streamline your shoot. Rather than just showing up at a destination and not really knowing where to begin, you’ll have a plan that can guide you and ensure you get everything you need. There’s nothing worse than getting to the edit and realising you missed out on three vital shots, knowing you can’t just fly back and get them.
How to shoot a travel vlog

Alright, now that you’ve prepared your shoot and you’re fresh off the plane, it’s time to shoot!
There was never going to be an article looking at how to shoot a travel vlog without covering gear. Sorry! In fact, you could write a whole article about this one subject. I’ll try to keep it brief for you.
The basics of what you need in a great travel vlogging camera are this:
- Something that’s small and compact . You’re going to be on the move all day and the last thing you want is a big, heavy camera that’s difficult to travel with. A) your body won’t appreciate it and B) you also draw way more attention to yourself. Keep your vlogging camera as small and lightweight as possible.
- Ensure you have good autofocus . As this is a travel vlog, you’ll presumably be turning the camera on yourself and others quite often. Having a solid, reliable autofocus means you don’t have to keep worrying and checking about whether or not your face is in focus. Just press the red button and start shooting.
- Get a good microphone . Good audio is everything to a YouTube video. You need to ensure there are no hiccups with this.
- Make sure you have spare batteries . When travel vlogging, you’ll be on the go all day, every day. The chances to charge up only really come at the beginning and end of a day at your accommodation, so make sure you have enough juice to see you through.
- Don’t bring too many lenses . If you’re shooting on a camera that has interchangeable glass, don’t be that guy. I’ve made this mistake myself and it’s just not worth it. Pick one lens (two at the most) and stick with it. Something that’s a little versatile and gets the shots you need. Anything more is just filling up your bag space and weighing you down.
Alongside this, there are some other additional cameras you may want to pack:
- Drones . Drones can really help to flesh out a scene with beautiful aerial imagery and stunning shots that draw an audience in. I’d say they’re pretty essential for travel vlogs. Just do yourself a favour and first check if the country you’re visiting is drone-friendly.
- GoPros . If you’re getting wet or active, GoPros are always a Go-To. They’re tiny as well, which is great for travel.

Story is king
I’m not here to tell you how to shoot everything. Ultimately, if you’re going to be successful on YouTube, you’ll need to forge your own style and way of filming.
What I will say is this: the gear doesn’t matter and the beautiful shots mean nothing if you don’t have a story. The story is what will keep your audience watching – they want to see you go on this journey and feel like they’re there with you.
My advice is to focus on yourself and the other characters within the vlog. Share with the camera what you’re all experiencing through all of your senses:
- How do you feel?
- What can you smell?
- What do you see?
- What can you taste?
Don’t be afraid to show the raw side of things too. If an experience is bad, be honest about it. An audience always appreciates honesty and can tell if you’re being sincere or not. Sometimes, travel disasters can make for the best stories anyway!
The most important thing
You should consider hiring a fixer. Seriously, these people are the crucial cog in so many of my travel film productions. A fixer is a local, somebody who knows the lay of the land. They know people and can pull strings, they understand the local customs and culture, they can translate accurately and perhaps they can even drive or carry gear. They’ve proved invaluable to me several times.
Backing up footage
Ok so I know I just said that a fixer is the most important thing when it comes to shooting, but this is probably more pressing. Back. Up. Your. Footage. And do it regularly.
A perfect drive for travel vlogging is something like OWC’s Pro Elektron series . It’s small, rugged, and with drive space ranging from 240 GB to 2TB, you’ll have more than enough space for daily shooting and off-load.
At the end of each day, the footage from my cameras is offloaded onto one of my drives and then mirrored over to the other. ( The Mercury Elite Pro would be ideal for something like this.)
Whenever I travel, one drive comes with me in personal carry-on luggage and the other travels in check-in luggage. This minimises the risk of losing your footage or having the drives somehow damaged. Even if you lose one bag or one drive, you’ll still have the other. Don’t cut corners on this!
How to edit a travel vlog

You’re home, the trip has (hopefully) been a great success, and now it’s time to start editing. Here are my tips on how to edit a travel vlog.
Offloading and backup procedure
Before I touch any editing software, I need to ensure my footage is safe. I copy over all of the footage from my portable hard drives onto a much larger, static 8TB drive. I then mirror this on a second 8TB drive. Safe and sound. If you have the budget, you can’t beat using a RAIDed system like the ThunderBay 4 Mini , or better. And as any good 3-2-1 backup solution has, uploading to some kind of offsite or cloud-based solution like Backblaze would be wise.
How to organize footage
When you’re shooting a travel vlog, the chances are that you’ll come away with a lot of footage. For your own sanity in the edit, it’s important to keep all of it as organized as possible. Here’s my method for doing so:
- Firstly, wherever I’m looking to store this project, I create a folder for media. Within this, if the travel vlog has been shot over multiple days (almost always the case), I’ll create multiple folders for day one, day two, day three and so on.

- Then, within these folders, I create individual folders for each of my cameras. See the example below:

There are different ways to organise so do what works best for you. At the end of the day, it all comes down to streamlining the edit process and making it as smooth as possible.
Tips for editing
How to edit a travel vlog could easily be its own article so, while I can’t cover everything here, I do have some important tips to remember:
- Figure out your story . As I mentioned in shooting, keep the story at the heart of everything. When you’re working with your footage, ask yourself how it’s going to craft and tell a great story. How does each clip contribute to this? Using the 3-act structure is a great way to do this

- Show the human moments . It can be very easy to just focus on the beautiful shots and mesmerising images you captured; but remember to balance this with the human moments. If you want to grow on YouTube and have your channel succeed, you need to show your personality and offer your insights. This is what is going to keep people coming back.
- Edit for YouTube . Editing for YouTube is important. As a rule of thumb on the platform, you’re aiming for your video to run anywhere between 10 to 25 minutes. Remember that when someone clicks onto your video, the first few seconds are vitally important. Ensure that your intro really draws people in and encourages them to watch more. In the first 10 seconds, someone will decide whether they’re going to keep watching or not.
Wrapping up
So, those are my top tips on how to shoot a travel vlog. Discovering how to be a travel vlogger is not easy but, by being prepared ahead of time, having procedures in place, and knowing what you want to achieve, you can ensure that everything goes as smoothly as possible. At the end of the day, you’re doing this because you love it, so remember to have fun and enjoy the adventure too.
Next week, in part two of this series, I’ll be taking a look at how to set up your YouTube travel channel. Stay tuned.

Other topics you might like

Finding the Slower Moments of a Blistering Tour Bus Life
Updated on Mar 4, 2024

Jellyfish Server Brings New Life to Video Production at SoCal’s Harvest Church
Updated on Feb 27, 2024

Roll Tide: How the University of Alabama Upgraded its Massive Online Learning Production Studio With a Jellyfish R24 NAS
Updated on Feb 22, 2024

Take the Hours Back: How 11 Pro Photographers and Videographers Make Use of Fast Storage
Updated on Jan 26, 2024
15 Travel Vlogging Tips
It has never been easier to make a travel video today. Anyone can share their adventures with a simple smartphone camera. In this article, we share 15 practical travel vlogging tips for beginners.
The tips and tricks below can be applied by anyone regardless of technical know-how or level of experience. Learn how to make the filming more enjoyable and hassle-free, while improving the quality of your content. We hope you enjoy!
If you want more travel vlogging tips and info, or learn about vlogging in general, check out our other articles as well:
- How to Start a Vlog in 2020: The Ultimate Guide
- Top 8 Cameras For Travel Vlogging
- 101 Creative Vlog Ideas for Youtube
Best Vlogging Tips
1. start with what you have.
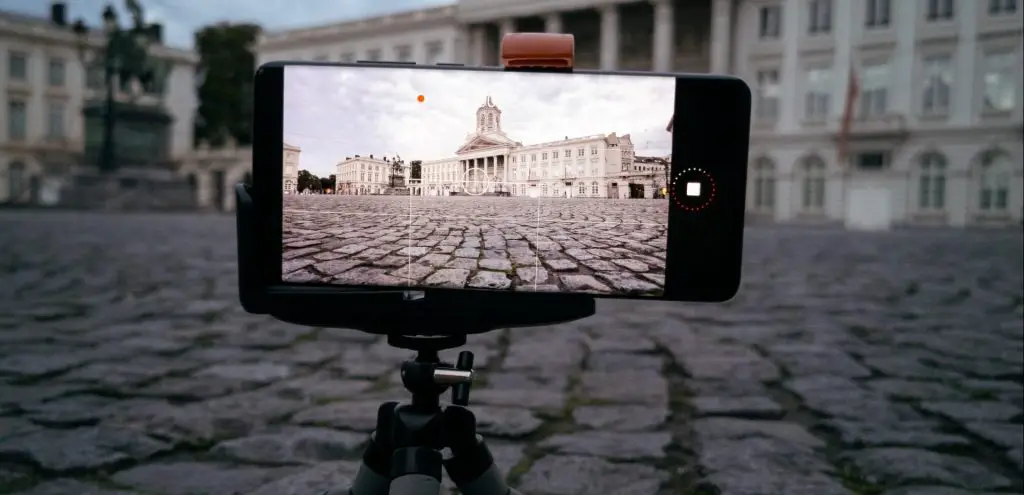
The first vlogging tip might also be the most important. And is primarily targeted at people thinking about getting into travel vlogging.
With the power and quality offered by a simple smartphone camera today, there are really no excuses not to get started right away. If you wait to get the best camera, drone, or that exciting new piece of gear, you risk not getting started at all. Instead, use the gear you have available.
Through proper planning, set up, and editing, you can do a lot with very little. Even though you might not be able to capture a drone shot or underwater footage, it will be the human element people return to your content for.
As you progress, you will want to upgrade and add gear to your toolkit. But do not let the gear itself hinder you from getting started today.
2. Audio is as important as video (If Not More)
While viewers might forgive mediocre video quality, bad audio can make a video unwatchable. Capturing good sound for your video can be hard, especially when you what to capture unique moments while traveling. Take the time to think and plan how to capture audio for your vlogs.
Ideally, you will want to use an external microphone for recording. But there are steps you can take to make the best of the smartphone or camera mic you already have; Like avoiding windy locations, using a microphone muffler, and speak close to the camera.
3. Use Video Stabilization
When it comes to travel vlogging, there is nothing more annoying than shaky video. Today, most cameras have some video stabilization features. You can even find it on most smartphones as well. Quality will vary greatly, and built-in stabilization will only get you so far. Overall, make sure to plan out our shots in advance with proper positioning and gear.
4. Find the Story
While it can be nice to showcase amazing locations, travel vlogging is about telling a story. A video featuring amazing drone shots and beautiful scenery but with no narrative will be pretty boring to watch.
Have a narrative or story in mind as you shoot videos. This will help you understand what it is you need show, and what you can do without. In the end, you will end up creating a more interesting and engaging video for your viewers.
5. Use First-Person Shots
Make use of first-person shots in your videos. First-person shots can help bring the viewer along for the ride and feel they are part of this experience. This type of shot is also ideal when you don’t have time to set up a scene or you are moving, like when boarding an airplane or biking.
6. Use Establishing Shots
Always try to capture wide, establishing shots for the location you are visiting. Some do this with drone footage while others with a simple tripod.
7. Include the Locals
If you are able to, try to include the locals in your videos. Interview and interact with them, and ask for permission to include them in the vlog. They can bring a new perspective and personality to your vlog while helping people learn about another culture or way of life.
8. Center Your Content Around Activity (Not Just Location)
A good travel vlog is not just about the location. The location is just the setting around an activity or story. The story is what your video is really going to be about. As we mentioned in the previous tip, focus on a narrative behind the video. In each place you visit, try to center the narrative around an activity; This could for example be exploration, a guided tour or people.
9. Use Timelapses
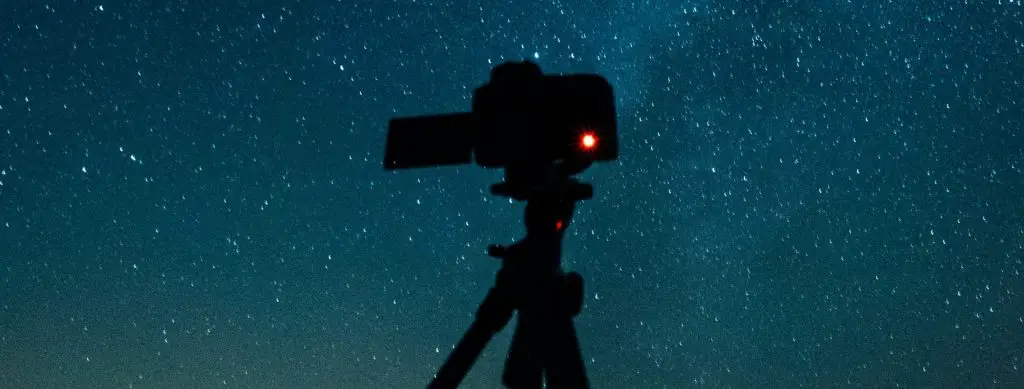
Timelapses can be an amazing way to establish a location in a video or capture a beautiful sunrise or sundown. A timelapse is not that difficult to do but will require at least a smartphone camera and a proper tripod.
To create a beautiful timelapse, it is important that you choose a background with one element that changes or moves. This could for example be clouds, car traffic, or pedestrians.
10. Use a Sun Chaser App
In travel vlogging, you will have to work a lot with natural lighting. To capture good-looking video, it is essential to know the weather and the sun’s movements. Use a sun chaser app to find the best times and locations to get amazing lighting for your videos.
11. Schedule Enough Time at Each Location
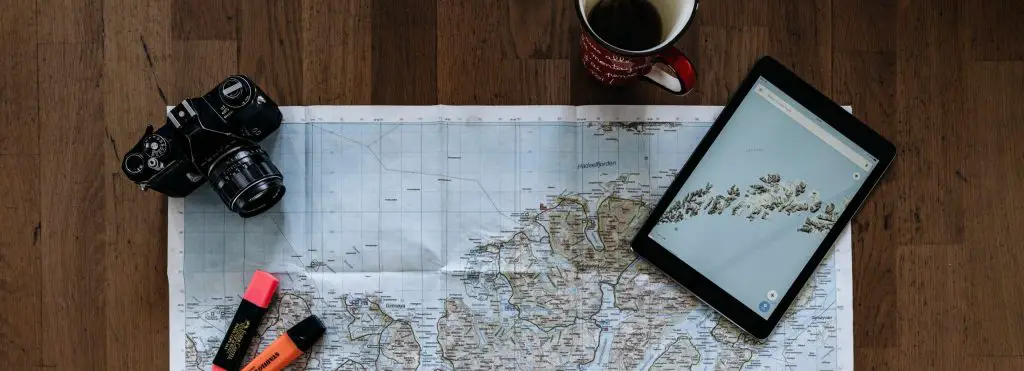
When you are out traveling, it can be tempting to try to film as many locations and activities as possible. But if you are on a very hectic schedule, you risk not really capturing the moment in the vlog.
Make sure to schedule enough time at each location, and also have good margins, as problems and unexpected events can arise. By prioritizing quality over quantity, you will create better and more entertaining travel videos for your audience.
12. Have Extra B-roll
B-roll is incredibly useful when editing. Always make sure to capture some extra shots and close-ups, as you never know what you could use it for when editing. Only record B-roll when you are done shooting the primary footage of the video and have some extra time on your hands.
13. Find Great Music
Music can make a big difference. Because of copyright laws, you can’t just use any song. Luckily, you don’t have to look far to find good royalty-free stock music. You could use YouTube’s free Audio Library or look into paid alternatives like AudioJungle or PremiumBeat .
14. Master Editing
A good video editor makes the most of the footage and can help really capture the story in the vlog. Learn the editing techniques and tricks the pros use. By becoming a better editor, you can improve the production value of your videos.
15. Learn From Others
The best way to get new ideas and advance as a vlogger and storyteller is to watch other channels and videos. There is a lot you can learn from the pros, anything from editing, camera angles to storytelling.
If you are new to travel vlogging, checking out other channels can be incredibly beneficial for your journey. While you should never copy someone’s ideas, gaining inspiration from them can help you along the way.
In Conclusion
We hope you found these travel vlogging tips helpful. By applying and practicing what we showed you above, you will become a better travel vlogger. Below is a quick summary of the list:
15 Travel Vlogging Tips Summary:
- Start With What You Have
- Audio is as important as video (If Not More)
- Use Video Stabilization
- Find the Story
- Use First-Person Shots
- Use Establishing Shots
- Include the Locals
- Center Your Content Around Activity (Not Just Location)
- Use Timelapses
- Use a Sun Chaser App
- Schedule Enough Time at Each Location
- Have Extra B-roll
- Find Great Music
- Master Editing
- Learn From Others
The Easiest Vlogging Equipment Starter Kit For Beginners
January 13, 2020
You asked, I answered! Here’s my guide to the vlogging equipment you need to get started and then some guidance for when to upgrade. It’s the toolkit I use for professional shoots, Facebook Lives, YouTube channels, Twitter and Instagram videos and more.
Table of Contents
Vlogging Equipment for Beginners
- Check out our Learn to love the camera masterclass here.
- And if you’re short on time, you can check out the handy amazon vlog gear list over here. If you do decide to buy anything, I may earn a small commission at no extra cost to you. Cheers!
What vlogging equipment do you need?
Let’s cut to the chase: what kind of vlogging equipment and blogging paraphernalia do you actually need? I’ve written this list in response to friends, colleagues and readers asking me about the vlogger equipment I take with me when I work and travel the world. It’s part of my job and so it’s something I take pride in – but I’m also well aware that tech and kit talk leaves a lot of people cold. Then there are others. Those who fall in love with the machines and forget what the purpose is behind it all: to capture moments, perhaps forever, and share them with the world.
This vlogging starter kit article aims to hit the middle of the two standpoints. Doyou feel that a lack of vlogger kit is the thing that’s holding you back?
Let it hold you back no more…

The best camera IS the one you have with you
Vlogging Equipment Essentials
When it comes to your vlogging setup, this is what you’ll need:
- A camera that can record video. The end.After that, think about:
- A microphone
- A gimbal for filming on the move*
- A selfie stick or vlogging stick*
I’ll talk about each of the pieces of equipment I use in detail further on. But first of all, let’s have a quick run through of the vlogging essentials.
The Best Vlogging Camera
As Chase Jarvis famously said “the best camera is the one you have with you” and that principle can really be expanded to what we’re talking about here.
The best equipment for vlogging is the kit you have with you. The best vlogging camera is the one you have with you that you aren’t afraid to use. Don’t get lost in the pursuit of the perfect kit: it doesn’t exist. That said, don’t skimp on things that will make life much, much better, for both you and your audience.
Top Vlogging Setup Tip: the first place to upgrade is with sound by buying a microphone. It’s nearly impossible to fix bad sound but you can fix a myriad of problems elsewhere.
What is a vlog?
The word comes from video log and the trend began as a video diary affair. Now, vlogging refers to just about any video for social media. It’s accessible, informational and entertaining (or at least it should be!) but it doesn’t typically require a full crew.
A Decent Smartphone
Really, the biggest obstacle to developing a career in vlogging is not the equipment. It’s the getting started and keeping going, learning as you go. Honestly!
Plus, smartphones these days take incredible video.
The iPhone X, for example, can record in 4K at 60fps (make sure to check your settings as it defaults to a lower quality file to save space.) Image quality and smartphone video capabilities keep on increasing, with inbuilt image stabilization and mic input options to create a mobile beginner YouTube vlogging kit.
You NEED to pay close attention to lighting and audio and need a gimbal or tripod most of the time.
But start with those before splashing out for a bigger, better camera or any other vlogging camera equipment. Please? Your phone is all the YouTube equipment you need when you’re starting out. After that, if you want to delve deeper, you can check out this guide to YouTube equipment here.

Vlogging cameras: how much do you need to spend?
A Mirrorless DSLR
Mirrorless DSLRs or mirrorless cameras are now what most blogging and vlogging professionals use. They’re big but not too big (the mirror has been removed) and you can still use interchangeable lenses. That said, most travel bloggers and vloggers I know stick to one lens most of the time and a few they keep in reserve. It takes time to switch lenses and it’s awkward to carry them around. Since so much of travel photography is spontaneous, it doesn’t make sense to miss the shot while fiddling around with your vlogger equipment. I use the SONY alpha 7 R III for its 42 MB image processor, with this SEL24-240 lens. Check it out, it is a great camera, but you don’t need it to start with!
Compact Cameras
Personally, I’ve never really got on well with compact cameras. Stick with a smartphone for your video recording or else upgrade to a mirrorless DSLR, ideally with a live view.
As you’d expect, the rule of thumb is that video quality and the options while recording or shooting increase with price. But if I’ve said it once, I’ll say it again: it’s what you do with your kit that counts the most.

Taking a break with a tripod
Again, with travel, you need to balance up weight and stability against portability. I love my Neewer SAB264 tripod because it’s tall (18″ to 65″) lightweight (3.7lbs) and very quick and easy to use. I’ve tried several other cheaper ones over the years and they’ve all broken like a false economy bin bag on its sad march through the house. False. Eeeconomy. Don’t skimp here!

The vlogging equipment essentials
A Microphone
The first thing to fix is your audio. Learn how to soundproof a room. Listen out for wind. Look out for building works. And then buy a microphone. There are two main types for when you’re on the move.
A lav mic, which clips to the lapels of the person you’re interviewing (or you.)
And one that plugs in direct to your camera (or phone – I have the iPhone X so use this plug in SHURE microphone. I used to use lav mics a lot but this works better for me on the go as it’s faster to set up.)
Microphones can get very expensive but they are probably the first area to address when it comes to upgrading your vlogging equipment. Top vloggers recommend Rode videomics – and you can find an entry level microphone here.
Don’t forget to take headphones with you so that you can check the sound without annoying everyone around you. I mean, there is more to it than that, but that’s the place to start!
Nothing gets more attention on the road than travelling around with a gimbal! Out of the box, people are fascinated. What does it do, how does it work?
Inside the box, well it looks like a cross between the world’s smallest violin and an oddly unashamed dildo.
What it actually does is smooth out your filming so that viewers don’t get seasick. You used to need to spend hundreds of pounds and lug around a lot of kit to achieve this with a steady cam. Now, you can buy a handheld device for the price of a return trip for your luggage with Ryanair.
This has probably been the game-changer for me when it comes to video. It’s given me so much more confidence and I get to do lots of different creative things. It also does the very basic job of letting me move around without making youtubers seasick.
You can buy the Zhiyun Gimbal that I use on Amazon here.
- Update – there’s now also a folding version of the Zhiyun gimbal, which is much easier to sling into your bag. Unfortunately, it’s a little less sturdy and the battery doesn’t last quite as long. So, weigh up which is most important to you!
Selfie Stick for Vlogging
Yes, it’s embarrassing but it’s time to get over that! Get a firm selfie stick with a tripod base and a bluetooth remote control. I’ve tried several and I’m still looking for my perfect match.
I love the Blitzwolf selfie stick because it’s so light and quick to use. But it only works for my phone, not my GoPro nor my bigger camera. I’ve tried other interchangeable ones but the quality hasn’t been that great. So I’m still searching. If you have any recommendations, let me know!
Vlogging Accessories

Rocking the GoPro look… Hands-free filming on the go…
A GoPro – this is just another camera with a record function but it’s designed for active use. You can buy a range of accessories to help you attach it to your head, your chest, your dashboard… You can swim with it, operate it by voice and lots more. It’s also useful for wide angle views inside buildings.

Vienna with wide angle GoPro
GoPro Accessories
You can buy as many or as few of these as you like. I decided to buy a big batch like this when I was starting out as I wanted to experiment as much as possible and it was far more economical to buy in bulk. I find the following really useful:
- A bubble (dome lens) for underwater photography and filming
- A float for water photography and filming
- A GoPro dashboard mount (it’s illegal in many countries to film while driving. And for good reason!)
- Head mount – great for climbing, cycling, running after small children…
- GoPro Wrist mount – better for when you have one hand spare. So, steep hiking, sloppy, sticky festivals, that kind of thing…
- A selfie stick attachment. Helps for interviews as well as selfies. Note that the chest fitting is trickier for most women than men and I find it WAY too uncomfortable to use. Make of that what you will.
- Also note that you can find and buy many GoPro accessories that are brand “X” and much cheaper. Sometimes this saves a lot of money. Sometimes, they break on first use. I keep switching back and forth between my approach. But if you have your heart SET on a particular moment that you will never be able to repeat again then it’s probably best to play it safe and buy the GoPro approved version.
A Card Reader
This sounds trivial to begin with but gets really important really quickly. In my experience, the biggest obstacle to publishing good work is managing to keep on top of it all. To stay organised and move files from A to B seamlessly before firing them off into the alphabet soup of social media, backups and everything else online. A card reader is a small piece of equipment that plugs into your computer. You put the memory card from your camera into that instead of fiddling around with wireless connections or wires. The files transfer much fast that way.
BUT. Obviously, it has to fit the attachments on your computer and the size of your memory card. Double check which you need before you buy.
Spare Batteries
Vlogging eats up storage and power. When you work in travel (or just want to have a beautiful record of your travels,) you’ll find video gobbles up both pretty quick. When buying a main camera (DSLR or mirrorless) always buy at least one spare battery at the same time.
Multi-Power Adapter with Extension Cord
You can buy these almost anywhere but they’re so useful when on a working trip. Some hotel rooms have plugs in awkward positions or possibly just the one. Plug in one of these and charge all your devices and spares at the same time. Ta da!
Round the World Adapter
Save stress packing by just having two of these. One in your hand luggage (see the hand luggage essentials list) and one in your main suitcase (in case you lose your luggage.)
Gorilla Pod
These are bendy tripods with fittings that you can attach to tiny iPhones or chunky big goliath cameras. The first tend to do a little better, though, as the heavier the lens, the more the limbs of the tripod struggle. I also use these to extend the length of my gimbal during Facebook Lives.
Remote Controls
This almost comes within the category of cameras but you can buy them separately. Camera remote controls, whether for phones, GoPros or cameras, make it far easier for you to film yourself and cut down on edit time later. They are also essential for taking photos in very low light when the pressure of your finger can blur the image.
Natural daylight provides some of the best light around. But if you need to film indoors a lot and live in a gloomy country (hello Britain!) then it can be very useful to have backup lighting.
An entry level lighting set up to sit on your desk for a work Zoom call can make you look much more professional. The Lume Cube Broadcasting Kit is a good example, here.
Next up, is the ring light on a tripod. This donut shaped light source provides a bright but forgiving light to faces, so beauty vloggers love it! It’s also handy to help paint shady corners during never-ending Covid lockdowns (just saying!) I’d really recommend the Neewer Selfie Ring Light on a stand, like the one here.
Do you need different gear for travel vlogging?
A lot of travel vlogging equipment works just as well for all types of situations, but not always. The most obvious difference is that with travel, you need to carry your gear.
All of it. A lot.
Around and around, up stony staircases, down slippery muddy paths, through sweaty, sticky jungles and into ice-cold air conditioning so fierce it seems as though a power-crazed polar bear has seized control. But also, since travel is about being in the experience and reacting quickly to things around you, it’s better to go with less. Seriously. In fact, I think it makes it more fun as you learn to make the most of what you have with you at any given time. One final note: don’t fall into the trap of being so worried about your equipment that you never use it . Yes, some of this is expensive and it would be annoying for it to break or be stolen. But keeping it your hotel room or, worse yet, at home for fear of ruining it defeats the purpose of having it in the first place. Don’t flaunt it or leave it lying around. But don’t forget to use it.

Travel vlogging: make sure you can carry the kit
FAQs about Vlogging supplies
Can you recommend a single vlogger starter kit on amazon .
Personally, I think it’s best to start with the smartphone you have and introduce a tripod, gimbal and microphone before getting anything too fancy.You can buy dedicated “vlogger starter kits” on Amazon but they tend to include more things than you need and the quality isn’t always worth it.
You can find my recommendations in my Amazon shop here.
Do you need different vlogging equipment for YouTube?
No! You can vlog for YouTube just as easily as for anywhere else. Your YouTube vlog camera, tripod, microphone can be multipurpose.
What about vlogging equipment for lighting?
You can buy a range of mobile and fixed lighting devices to make your videos look brighter. I haven’t found any I love yet that make the price worthwhile. But I’ll keep you posted and add them here when I do.
Can you recommend a vlogging kit for iPhone?
Yes I can! Stretch up to the iPhone X if you can and then grab the iPhone microphone, selfie stick and tripod from this amazon list here. If you plan on doing any travel vlogging at all, then I strongly recommend you buy the gimbal as well.
Do you need a camera with a flip screen?
I personally don’t get on with them very well, perhaps because I’m in front of the camera so often. But many other vloggers swear by them. So see if you can borrow one for a test run and see which works best for you.
The Best Vlogging Equipment in Summary
- The best vlog equipment is the stuff you’re happy to take with you and actually use.
- It has a decent microphone
- Stabilises the view
- It is YOU! What you do with the vlogger kit matters most of all. Go, get to it!

What vlogging gear or equipment have I missed?
Do you have any other questions about vlogger gear or vlogging supplies?
Leave a comment Cancel reply
This site uses Akismet to reduce spam. Learn how your comment data is processed .

GoPro For Vlogging – The Ultimate Travel Vlog Setup?
Thinking about using your GoPro for vlogging or trying to figure out if a GoPro travel vlog setup is right for you? Here’s everything you need to know!
Thinking about using your GoPro for vlogging or trying to figure out if a GoPro vlog setup is right for you?
Well I’ve been using my GoPros whilst travelling for years now – capture all the chaos, vlogging and putting all kinds of setups through their paces on the road.
So if you’re on the lookout for a travel vlog setup and need some help figuring out what gear to invest in here’s a run-through of how I use my GoPro for vlogging, including heaps of handy tips…
Why Use A GoPro For Vlogging?
With so many awesome vlog setups out there why would you even consider a GoPro for vlogging?

- Low entry price point (in comparison to mirrorless and SLR options)
- Small and compact
- Huge range of accessories
- Robust and waterproof (+ an additional dive housing is available at a low price point)
- Huge field of vision
- Easy to use
When you look at some of the vlog setups people are using they’re pretty large, heavy and most importantly expensive – three things anyone looking to get into travel vlogging are trying to avoid!
The GoPro on the other hand is small, lightweight and relatively well priced, so its got the basis of being an awesome setup.
Which GoPro Should You Choose?
First off lets run through the basics of any GoPro vlog setup – the camera itself.
GoPro have been producing epic action cameras for a while now and to some extent all will be fine for vlogging – however in the most recent version they have jumped up heaps in terms of quality and features, so lets run through the last 4 GoPro models in terms of their vlog limitations and advantages.
GoPro Hero 7 Black

The bump in resolution and frame rates opened up a range of slow mo options (great for travel vloggers) and the current pricing gives you a bit of extra cash in your pocket for accessories over the Hero 8 price.
- Hypersmooth stabilisation
- High frame rate for 2.7k and 4k
- TimeWarp mode
- Compatible with all GoPro accessories
- Image stabilisation doesn’t apply to all frame rates or 4k
- Still low audio quality (although better than the Hero 6)
Click here for more info and to buy
Gopro hero 8.

It added in Hypersmooth 2.0 which is available on all resolutions and frame rates (a HUGE plus) and most importantly it brought with it the GoPro Media Mod (but more about that later).
If you don’t already have the Hero 7 or 8 this is the GoPro I’d most recommend.
- Hypersmooth 2.0 on all frame rates and resolutions
- TimeWarp 2.0
- Compatible with most GoPro accessories
- GoPro Media Mod compatible
- New supersuit housing (if you already have one for a previous model)
- Audio still isn’t the best (but still an improvement on the Hero 7)
I’ve added in the GoPro MAX as a bit of a curve ball here. Some people are touting it as the ultimate GoPro For vlogging, but I’m still not sure it deserves that title.
Sure the 360 filming is handy and opens up some really creative options to play with and Hero mode (where it shoots like a normal GoPro, through only one lens) is the most stable filming on any GoPro – but it is limited to 1080 which is a bit of a confusing move by GoPro and a deal breaker for a lot of vloggers.
For those new to travel vlogging (and presumably video editing) the 360 stuff can be confusing to work your head around editing wise, so you’d be better off with the standard Hero 9.
Although the in built audio is also the best of the GoPro range – but a Hero 9 + media mod still comes in cheaper than the MAX on its own.
- Shoot in full 360
- Also option to shoot in standard Hero mode
- Best stabilisation of any GoPro
- Best audio of the GoPro range (but still not the best)
- 360 video can be hectic to edit, especially for those new to video
- Hero mode limited to 1080p
- Video doesn’t really work underwater (and no dive housing option)
- Not as robust due to 2 protruding lenses
- Most expensive option
GoPro Hero 9
Launched in Sept 2020, the GoPro Hero 9 was marketed as “more of everything”. It brought 5k @ 30 FPS to the game, upgraded the GoPro sensor to 20MP, increased the battery life by 30% and brought back the detachable lens (which was a massive gripe for many GoPro fans on the Hero 8).

When it comes to using a GoPro for vlogging the biggest new feature was the much anticipated front facing screen. This makes vlogging with the GoPro Hero 9 super easy as you can now frame your shots on the go – whether that’s talking to camera pieces or simply taking selfies!
Another awesome feature is the Horizon Levelling mode (borrowed from the GoPro MAX) which makes for super steady footage.
As with the Hero 8, the new GoPro Hero 9 is also media mod compatible for the external audio options (admittedly I was hoping for a dedicated 3.5mm jack), but if you are upgrading from the Hero 8 you’ll need an entirely new, Hero 9 Media Mod.
R ead my full Hero 9 review here.
- Front facing screen
- Hypersmooth 3.0 on all frame rates and resolutions
- TimeWarp 3.0
- Auto horizon levelling
Max Lens Mod
- GoPro Hero 9 Media Mod compatible
- New Supersuit housing and Media Mod (if you already have one for a previous model)
- Audio still isn’t the best (but still an improvement on the Hero 8)
- Slightly bulkier form factor
GoPro Hero 10

Boasting up to 5K at 60 frames per second, super slow mo 2.7K at 240 frames per second and even 4K at 120 frames per second – if you’re dealing with action or slow mo footage this is the GoPro for you.
It also upgraded to the GP2 processor, which has significantly improved the overall speed and handling of the camera too.
So for those looking for the best GoPro on the market the GoPro Hero 10 is the way forward.
That being said though, if you want to save a bit of cash, the reduced price of the Hero 9 makes it super tempted and is still and incredible GoPro for vlogging if 5K or super slow mo in higher resolutions isn’t a game changer for you.
Check out my full goPro Hero 10 review here
- Hypersmooth 4.0 on all frame rates and resolutions
- 2.7K @ 240FPS
- GoPro Hero 9/10 Media Mod compatible
- Audio still isn’t the best (but still an improvement on the Hero 8 and 9)
At the moment if you’re looking for the best GoPro for vlogging the Hero 10 is the way to go
Click for More Info & To Buy (USA)
Click for more info & to buy (uk).
- GoPro Media Mod
Now the GoPro range have never been known for their epic audio quality – and although the Hero 7 upped the game and the Hero 8 built on this even more, for serious creators audio was still a huge barrier for using a GoPro for vlogging, especially over the likes of the Canon G7 X or Sony A6400 with their option for external mics and flip up screens.

There are a few decent options out there but still not ideal as they were pretty clunky – but they did sow the seeds for the Media Mod.
With the release of the Hero 8 it has became apparent that as a company they’ve seen the potential market in using a GoPro for vlogging.
So alongside the Hero 8 the GoPro Media Mod, Light Mod and Display Mod were also launched.

Oh and it’ll only fit the Hero 8 – if you opt to upgrade for the Hero 9 or 10 you’ll need to buy the dedicated Hero 9/10 Media Mod!
Obviously the advantage of the Hero 9 or 10 though is already having the inbuilt, front facing screen, so no need for the LCD Mod on that one.
Even though the fact the Media Mod had its own set of inbuilt mics, the thing that a lot of vloggers focused in on was that the Media Mod allowed a clean and contained solution for attaching external microphones – which opened up a whole range of options.
Now obviously the perfect solution to this whole audio thing would be a built in 3.5mm jack as standard (maybe Hero 10?!) or even great inbuilt audio, but for now the Media Mod provides a pretty clean solution and opens up the option for a range of external mics.
Click here for more info and to buy GoPro Mods
With the release of the GoPro Hero 9 also came the new Max Lens Mod – which is an epic tool for vloggers.
Not only does it boost the field of vision for Max Superview – a whooping 155 degrees FOV – it also unlocks 360 horizon levelling – so no matter how much you move around you GoPro/selfie stick/mounts it’ll keep the image perfectly level.
This basically takes Hypersmooth to the next level and gives almost gimbal quality stabilisation to you shots – so it’s well worth the invesment if you’re serious about vlogging with your GoPro.
Great news too, it also works with the GoPro Hero 10 as well.
Click here for the full guide to the Max Lens Mod
External Microphone Options
So if you’re looking at the Hero 8 or Hero 9 as your GoPro for vlogging and are prepared to make some additional investment to bump up the audio quality the Media Mod + external mic combo is the way to go.
And there are plenty of options to choose from for all setups and of course budget, but here are some of the most commonly used ones;
Shotgun Mics
These are the most commonly used option for Vloggers and attach to the cold shoe mounts on the top of the camera (or GoPro media) mod. Often seen with the fluffy “dead cat” wind stopper. Easy to install and instantly ready to go as soon as you power on the camera.
- Rode VideoMic Pro
- Rode VideoMic Go
- Rode VideoMicro – best value for those starting out!
- Sennheiser MKE 400
- Sennheiser MKE 600
Lavalier Mics
Although not as common as the shotgun mics, lavalier mics can be a great option for travel vloggers as they are attached to the lapel of your shirt (or even under your clothing if you dont want it to be seen) allowing for clear commentary even in amongst a lot of hustle and bustle.
The big downside is the length of the wire from the camera to your lapel, however wireless lavalier mics free this up and even allow you to have crystal clear audio commentary a long distance away from the camera.
- Rode SmartLav+ (lavalier mic for use with smartphones)
- Rode Wireless Go (wireless lavalier mic) – my personal recommendation (more about this later!)
- Rode Lavalier Go (lavalier mic)
- Boya BY-WM2G (wireless Lavalier mic)
Of course you dont have to jump in right away and splurge on these – you can always see how you get on with the standard GoPro audio before investing in the Media Mod and an additional external microphone setup.
Honestly though if you’re setting off soon, want to sort everything before you go, are serious about getting into vlogging and of course have the budget then I’d say audio is something you really need to be thinking about.
I put off audio for far too long and looking back I should’ve certainly upgraded it sooner.
My GoPro Vlog Setup
Ok so this brings me nicely to how I’m personally using my GoPro for vlogging!

- GoPro Hero 10 (although for most people the 9 will suffice)
- GoPro Max Lens Mod
- Shorty Mount
- Rode Wireless Go
- Rode Lavalier Go Mic
Total cost = $885USD
I then also have the GoPro Supersuit (aka the dive housing) so I can capture underwater footage too, although the GoPro on it’s own (WITHOUT the media mod attached!) is also still waterproof to 10m, which should cover most people! For more info on scuba diving with your GoPro check out this guide .

Check out my top GoPro travel accessories here .
One of the main other accessories I’d add to any setup would be the Floaty Handle , which allows you to safely make use of the waterproof GoPro setup – something that is a huge advantage over traditional SLR and mirrorless setups.
I always travel with the GoPro Portable Power Pack too which allows me to keep everything charged on the road, even on a long day of shooting.
When it comes to the audio setup above, to be honest I could’ve easily got away with going with a cheaper shotgun mic (like the Rode VideoMicro ) or even a cheap lapel mic setup – there are plenty of cheap options on Amazon for under $20 !
But the Rode Wireless Go and Rode Lavalier Go combo gave me the most options in terms flexibility and audio quality – and most importantly in a small, lightweight package.
So if you have the budget to play with those are two items I’d highly recommend investing in.
How Are You Using Your GoPro For Vlogging?
Obviously the proof in how good a GoPro For Vlogging really is are the real life examples of videos created by everyone with them.
Check out my YouTube channel here and feel free to share your YouTube channels in the comments so we can all check out what GoPros are capable of in real life situations!
And of course if you have any questions or suggestions about GoPro vlog setups or gear add them in so we can all share the knowledge.
Do you use your GoPro For Vlogging?
What setup do you have, related posts.

The Apple Watch Surf Guide: Apple Watch Series 9 & Dawn Patrol App

Surfing In The Maldives At Niyama Private Islands – 10 Pics To Inspire Your Next Trip!

8 Things To Know About Surfing In Sri Lanka – BEFORE YOU GO!

Liquid Eye Surf Housing Review – My Go To Waterproof Camera Housing
Leave a reply cancel reply.
Your email address will not be published. Required fields are marked *
I purchased a Gopro 9 and a Rode Videomicro but there is no 3.5 por to plug the mic into. Do you know of a solution to add an external mic to the Hero 9?
Hey Margaret – to plug an external mic into the Hero 9 you’ll also need the Media Mod as it has a 3.5mm jack on it
Trigger goes here
6 Vlogging Setups for Beginners (Affordable & Easy to Use)
Looking for the best vlogging setup as a beginner? Then, this article is for you!
In this post, you’ll learn about some of the best vlogging setups for beginners that are affordable and easy to use.
6 Best Vlogging Setups for Beginners
Here are the five best vlogging setups for beginners:
GoPro HERO 12 Black Creator Edition | Our Top Pick!
- Revolutionary New Image Sensor: expansive field of view ever on a HERO camera out of...
- Unbelievable Image Quality: With 5.3K video that gives you 91% more resolution than...
- High-Res Photos + Videos, High Frame Rate: HERO11 Black’s new image sensor boosts...
The GoPro Hero 12 Creator Edition is a comprehensive package meticulously designed for vloggers aiming to capture high-quality content, offering a plethora of features that make it the optimal choice for creating vlogs:
All-in-One Creative Solution:
– Comprehensive Kit: Includes HERO12 Black, Volta, Media Mod, and Light Mod, allowing for versatile content creation right out of the box. – Portable Design: Lightweight and compact, making it a convenient companion for all-day productions.
Extended Battery Life:
– The combination of HERO12 Black’s advanced Enduro battery and the Volta grip provides over 5 hours of continuous 4K30 recording. – 6620mAh of total power ensures you don’t miss any moments throughout the day.
Exceptional Image Quality:
– 5.3K Video: 91% more resolution than 4K, capturing action with unparalleled detail and cinematic quality. – High Dynamic Range (HDR): Offers dynamic footage with true-to-life color and precision in both videos and photos.
Versatility and Convenience:
– Variety of Mounts & Accessories: Includes a carrying case, curved adhesive mount, mounting buckle, and more, facilitating a range of shooting scenarios. – GoPro Quik App Compatibility: Allows extraction of stunning up to 24.7MP photos from videos effortlessly.
Robust & Practical Design:
– Weather-Resistant: Ideal for outdoor shoots, whether you are skiing, snowboarding, or capturing other winter shots. – Convenient Controls: Integrated camera buttons and wireless control turn Volta into a remote control for your camera when mounted.
GoPro HERO 11 with Media Mod + Light Mod + GoPro 3-Way 2.0
Gopro hero 11 black.
This is one of the best vlogging setups that you can currently have. The GoPro Hero 11 Black is one of the most advanced action camera by the company.
To know why GoPro Hero 11 is good for vlogging click this link .
GoPro Media Mod (For Hero 11 Black)
- Built-in directional mic highlights voice audio and reduces ambient noise
- Tough, weather-resistant construction withstands the elements
- 2 cold-shoe mounts to attach your favorite lights, mics or LCD screens
Add the GoPro Media Mod to it – and you now have a vlogging powerhouse! The media mod is, basically, a cage-like accessory that clips around your Hero 11 and lets you shoot some amazing vlogs with crystal clear voice and footage. It features a built-in directional mic for enhanced clarity in the audio and reduced wind and ambient noise.
GoPro Light Mod
- 4 levels of brightness—up to 200 lumens—for crisp detail
- Built tough and waterproof to 33ft (10m)
- Built-in rechargeable battery with up to 6 hours of runtime
The Media Mod includes two cold shoes that let you mount for an enhanced vlogging experience. You can attach the GoPro Light Mod to it for quality shots even in low-light scenarios.
GoPro 3-Way 2.0
- 3-in-1 design switches from camera grip to tripod to extension arm
- Integrated ball joint lets you change your camera angle without having to reposition...
- Built-in tripod quickly folds out to provide a stable shooting platform for time...
Furthermore, this vlogging setup includes the GoPro 3-Way which, as the name suggests, features a 3-in-1 design that switches from a camera grip to a tripod to an extension arm . It’s another must-have for super stable vlogs – whether you’re shooting time-lapses, group photos, selfies, overhead shots, or follow-cam footage.
DJI Action 2 Dual Screen Combo + Rode Wireless Go + Extension Rod
Dji action 2 dual screen combo.
- Snap Into Your Environment - Action 2's innovative magnetic design allows you to...
- Action on the Go - The ultra-compact DJI Action 2 takes up next to no room in your...
- Footage That Speaks for Itself - Record stunningly smooth 4K/120fps [2] video with...
Action 2 is the DJI’s follow-up to the Osmo Action camera. It’s a great camera in all aspects that adopts a modular design to make it highly flexible and let you use the camera for creating some amazing vlogs. This DJI Action 2 dual-screen combo comes with a front touchscreen module that lets you watch yourself while you’re vlogging.
Rode Wireless Go II – Compact Wireless Microphone
- Ultra-compact and extremely versatile wireless microphone system
- Series IV 2.4GHz digital transmission, 128-bit encryption – crystal-clear audio at...
- 3.5mm TRS analog output, USB-C and iOS digital output – universal compatibility...
Combine your Action 2 with the Rode Wireless Go II microphone that’s often hailed as “the best lavalier microphone available”, and you’ll get crystal clear audio for your vlogs even if you’re away from the camera. Another plus point of this setup is that this microphone is wireless, which means that you’re free from those annoying, bulky wires.
DJI Action 2 Remote Control Extension Rod
- It integrates an extension rod, tripod, and removable remote control pad. Take a...
- In The Box: DJI Action 2 Remote Control Extension Rod × 1
- Compatibility: DJI Action 2
Last but not the least, adding the Remote Control Extension Rod for Action 2 to this setup would greatly expand your shooting possibilities. This 3-in-one accessory lets you take a group selfie, control Action 2 remotely, and capture highly stable vlogs.
DJI Pocket 2 Creator Combo | Compact, Pocket Friendly
- MOTORIZED STABILIZATION: A 3-axis gimbal stabilizes the camera for smooth video on...
- HIGH IMAGE QUALITY: An upgraded 1/1.7-inch sensor captures images with 64MP photo and...
- ENHANCED AUDIO: Consisting of four microphones, DJI Matrix Stereo offers sound...
The DJI Pocket 2 is a superb 3-axis-gimbal system with an integrated camera that can record amazing 4K videos. The gimbal keeps the camera steady, even for long-exposure shots and in low-light environments. This creator combo is perfect for creating some wonderful vlogs using the DJI Pocket 2. It includes a nice external wireless mic , complete with a windshield so you get crisp audio even if you’re a bit away from the camera.
In addition, the combo also packs an ultra-wide-angle lens, tripod legs, and the DJI’s Do-It-All Handle – which sports a mic-in jack for third-party audio options to get even better sound quality for your vlogs. It integrates Wi-Fi, Bluetooth, the wireless microphone receiver, and a 1/4″ threaded port. It can be directly connected or installed with various other accessories for a better user experience.
Your Smartphone + Movo Smartphone Vlogging Kit | Most Affordable Option
- SMARTPHONE VIDEO KIT: Perfect for vlogging, making movies, interviews and more. A...
- SMARTPHONE VIDEO RIG: Compatible with smartphones 2.2" to 3.6" wide including the...
- SMARTPHONE MICROPHONE: Professional quality stereo sound, X/Y stereo pickup pattern,...
This one is arguably the most affordable vlogging kit that you can buy, as it involves using your own smartphone rather than a camera. These days, many smartphones pack in quality front cameras. So, if you’re happy with the image quality offered by the front camera of your phone, you can definitely consider using the Movo Smartphone Vlogging Kit.
This Smartphone Video Kit is p erfect for vlogging, making movies, interviews, and more. Compatible with smartphones 2.2″ to 3.6″ wide, this kit works with most smartphones, including all the latest iPhone models and Galaxy Note. It includes a microphone foam and furry windscreens for professional quality stereo sound. You also get bright lighting with 30 ultra-bright LEDs that are adjustable to 3 brightness levels to fit your situation. Lastly, the Bluetooth remote triggers your iPhone or Android Smartphone to start/stop videos and take selfies.
Sony ZV-1 Digital Camera with Flip Screen & Built-in Microphone | Best Digicam Vlogging Setup
- 20.1MP stacked back illuminated 1” Exmor RS CMOS sensor w/ DRAM. Large aperture...
- Fast Hybrid Autofocus and Real Time Eye Autofocus and Real-time Autofocus tracking.
- Side flip-out 3.0” LCD screen that also tilts up and down for easier to compose...
Designed specifically for vloggers & content creators, the Sony ZV-1 Digital Camera features a selfie-friendly LCD screen, body grip, and a recording lamp. It lets you capture amazing videos of yourself and your world – without any tricky setup. The camera is super easy to set up.
The camera has a directional three-capsule mic to capture clear vocals even when shooting in a crowd. Plus, you also get a windscreen that reduces wind noise for worry-free outdoor shooting. The Sony ZV-1 Digital Camera can shoot immensely detailed 4K HDR video through 1.7x pixel resampling, so you can capture reality without any compromise. Its superb image stabilization suppresses shake even while walking or running. All in all, a great choice for shooting some amazing vlogs.
For high-quality vlogging, professional lighting plays a crucial role in improving the appearance and quality of your videos. It not only highlights your subject but also ensures that your viewers can see you clearly and easily, creating a polished and professional look. Professional lighting also helps to minimize shadows, reduce glare, and provide even and consistent illumination, which is particularly important when shooting in challenging lighting conditions.
Proper lighting can set the mood and tone of your videos, add visual interest, and convey a professional and polished image to your audience. In summary, investing in professional lighting equipment can significantly enhance the quality and impact of your vlogging content, making it more appealing to your audience and attracting more viewers. Check out our Top 10 LED Video Light by clicking this link.
And for additional camera options, be sure to take a look at our article on cameras for bloggers: 7 Top Cameras for Blogging Photography (A Beginner’s Guide) .
Which Vlogging Setup is the Best?
All the vlogging setups mentioned above are highly convenient-to-use and setup. But, the best vlogging setup for you depends upon your own use case.
If you want to create some amazing vlogs of your action, like travel vlogs involving motorcycling, paragliding, rafting, surfing, and more, you should go for the first option – GoPro Hero 12 Creator kit is you best friend. Another great option would be GoPro HERO 11 with Media Mod + Light Mod + GoPro 3-Way 2.0.
For those who want general high-quality vlogs with superior voice clarity and high resolution, the Sony ZV-1 Digital Camera is a wonderful choice. However, if you have a good smartphone camera (both front and back) and want a vlogging setup at a budget price , the Movo Smartphone Vlogging Kit is the best setup for you.
If you’re also into blogging check out the following article: 7 Best Blogger Cameras .
Thanks for reading!
I hope this guide helped you learn about the best vlogging setups for beginners 🙂
Sharing is Caring ❤️
If you found this article useful, please share it on social media with your family and friends!
Related Articles:
- GoPro Hero 9 Tutorial: Tips for Getting Started
- 10 BEST GoPro Hero 9 Accessories for Travel & Action
- DJI Osmo Action vs GoPro HERO 8: Full Comparison & Review
- 7 Best SD Card for DJI Osmo
Share Article:
I’m Andy Magri, an Italian filmmaker and content creator. After graduating from University, I set off to explore the world while creating guides and reviews featuring the video gear I love and use the most. With the help of my awesome team, we share tips and reviews about GoPro, Insta360, DJI, smartphone cameras, drones, editing software and anything around action video-making. I hope my guides not only help you find the perfect camera equipment, but also inspire you to get out there and create! Since publishing my first tutorial on ProjectGO, seven years ago, our content has helped over 2M creators worldwide. Start by downloading the FREE GoPro Settings Cheat Sheet.
Best Motorcycle Camera in 2024 [Top 7 Picks For Bikers]
Insta360 one x2 review: the ultimate 360 camera.
How to Start a Travel YouTube Channel (Do THIS First)
So you’ve decided you want to start a travel YouTube channel. You’re not exactly sure where to start, but that’s why you’re here .
In this blog post, we will walk you through the steps that you need to take to get your new travel YouTube channel off the ground.
We’ll give you the 7 steps to begin creating content, building a following, and promoting your channel.
So what are you waiting for? Start reading below!
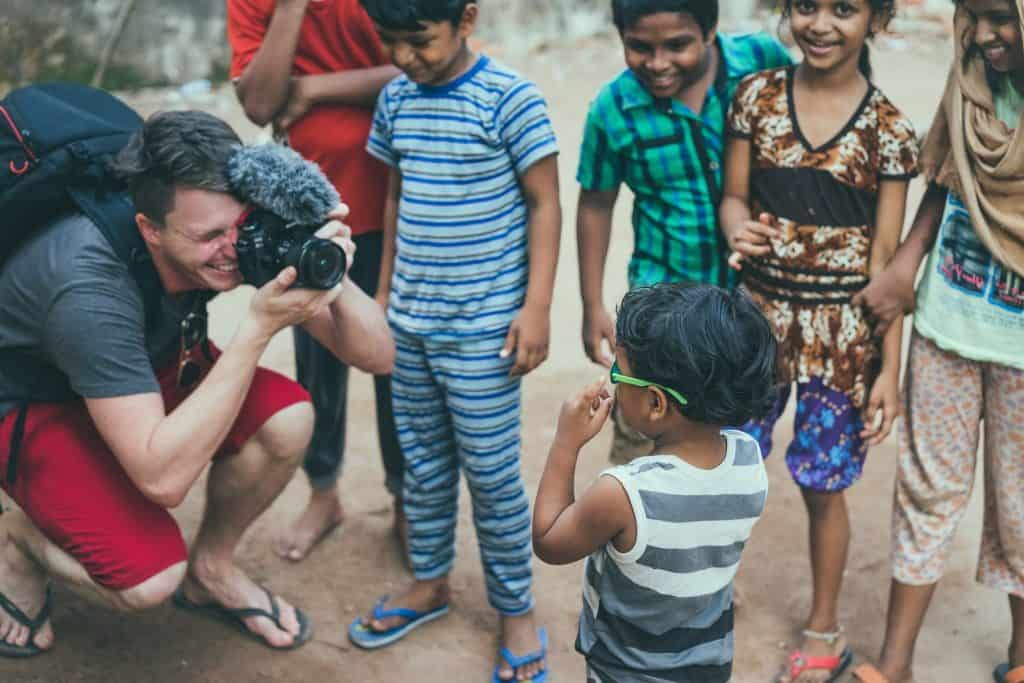
Table of Contents
Choose a Name For Your Channel
When starting a YouTube channel, it can be tempting to spend hours agonizing over the perfect name. However, it’s important to remember that you can always change your channel name later on.
In the beginning, it’s WAY more important to focus on creating great content.
With that said, there are a few things to keep in mind when choosing a name for your YouTube channel.
First, consider your niche. If you plan on making videos about a specific topic, it can be helpful to include that in your channel name. For example, if you’re a travel vlogger, you might choose a name like “Budget Backpacker” or “Luxury Traveler.”
The only issue with this is that you might ‘pinhole’ yourself into only making certain content. For example, it might be difficult for ‘ Budget Backpacker ‘ to create a vlog about luxury travel.
This is why some people choose to use their own name instead, which can be a great option if you eventually want to branch out into other topics. For example, for my first channel I chose ‘The Life of Jord’ .
Ultimately, the best way to choose a name for your YouTube channel is to go with whatever feels right for you.

Pick a Niche for Your YouTube Channel
It can be tough to figure out what kind of niche you want your YouTube channel to fall into.
There are already so many channels out there, and it can feel like everything has been covered already. But the most important thing is to choose something you’re passionate about.
Once you’ve found your niche, try focusing on an aspect of that niche that you think maybe hasn’t been covered so far on YouTube – or something that you can cover better!
Having a niche will help you attract viewers who are interested in what you have to say, and it will make it easier for you to come up with content ideas.
So if you’re feeling stuck, just ask yourself what it is that you like talking about – and go from there!
Create a Channel Trailer and post it on YouTube
So, you’ve picked a niche for your YouTube channel… congratulations!
One of the next steps is to create a channel trailer.
This is a short (usually around 1 minute) video that gives viewers an idea of what your channel is about and what kind of content they can expect to see. It’s a great way to introduce yourself and your channel, so don’t be afraid to be creative and have fun with it!
One thing to keep in mind is that quality isn’t massively important at this stage – you can always change and update your channel trailer later on. Just focus on talking to the camera and explaining what your channel is all about.
Be sure to inject some of your personality into it too – viewers want to see the real you, not just a polished version of yourself.
Once you’ve created your channel trailer, it’s time to start uploading content!
Practice makes perfect, so the more videos you upload, the better you’ll become at creating engaging content that people will want to watch.
Start Creating Videos – make sure they’re interesting and engaging to watch
The most important part of creating a successful YouTube channel is uploading videos on a regular basis.
It doesn’t matter if they’re perfect, the main thing is that you’re putting content out there for people to watch.
Over time, you’ll start to get a sense of what your viewers like and what kind of videos they respond to. Once you know that, you can start to work on making your videos more engaging.
Keep improving the quality of your content and eventually, you’ll start to see your channel grow.
In addition, make sure to use the newest and best editing software available to keep up the quality of your channel.
The most important thing is to be consistent and keep uploading new videos. Just keep going!
READ MORE: Starting a Travel YouTube Channel in 2022: Is It Too Late?
Share Your Videos on Social Media and Other Online Platforms
If you’re like me and you’re this far in, you love making YouTube videos and sharing your creativity with the world.
But once you’ve made your video, how do you get people to watch it?
One way is to share it on other social media platforms. This can help you reach a whole new audience who might not have found your video otherwise. And don’t be afraid to ask people to share it too!
Another tip is to create smaller versions of your content that you can repurpose for other platforms. For example, you could make a short clip for Instagram or TikTok. This is a great way to grow your audience and get more people interested in your videos.
Finally, remember to find your tribe. There are other YouTubers out there who share your interests and who would be happy to promote your videos.
So reach out and make some connections!
By working together, you can help each other grow your audiences and reach even more people with your great content.
Engage with Viewers and Other Creators in the Travel Community
As a travel creator, it’s important to engage with your viewers and other creators in the travel community.
Answer comments, engage with people with similar interests and build a community around your channel.
There are often even travel creator meetups in your local area! This is a great way to connect with like-minded individuals and get tips and advice from others in the industry.
By engaging with the travel community, you’ll be able to learn from others and make connections that will help you in your travel YouTube career. There are great travel fairs such as World Travel Market or ITB .
READ MORE: How I Travel Continuously with YouTube – 5+ Years of Lessons

Keep Uploading Videos and be Consisent
As a travel YouTuber, one of the most important things is to be consistent with your uploads. You never know which video is going to take off and get a ton of views, so it’s important to keep putting out new content regularly.
Whether that means uploading one video per week or two videos per week, find a schedule that works for you and stick to it.
At the same time, don’t sacrifice quality for quantity – make sure you’re taking the time to edit your videos and put out your best work.
If you can strike a balance between those two things, you’ll be on your way to success!
How to Start a Travel YouTube Channel in 2023?
In conclusion, there’s never been a better time to start a travel YouTube channel than right now!
Travel is a huge growing industry right now and there are plenty of opportunities for new travel YouTube channels.
Hopefully our guide gave you some useful information and the inspiration you need to start creating videos.
Here are our top tips to get your travel YouTube channel started:
- Choose a name for your travel channel
- Pick a niche
- Create a channel trailer and post it on YouTube
- Start creating videos – make sure they’re interesting and engaging to watch
- Share your videos on social media and other online platforms
- Engage with viewers and other creators in the travel community
- Keep making videos, and try to be consistent
Are you starting a new travel YouTube channel in 2023? Let us know in the comments below.
How I Became a Professional Travel Vlogger in Under a Year (& How You Can Too)
RELATED ARTICLES How I Travel Continuously with YouTube – 5+ Years of Lessons How to Create Passive Income From Old Travel Videos Starting a Travel YouTube Channel in 2022: Is It Too Late? How to Become a Niche Travel Blogger (Get PAID to Travel)

Traveler & Content Creator
My name is Jordan Simons and over the past few years I've learned how to travel the world continuously. Now I want to show you how to do the same.
Hi, I’m Mohamed Ali and I’m want to start travel you tube channel soon, I really appreciate if you can share more your experiences with me, also I need to know do I need to register with you tube ? And how do I do that.
Many Thanks
Hi there if I’m based in one country but my niche is on another country, should I set my YouTube channel to be in the country I’m vlogging about? Will that be best for the algorithms and reach?
Hiee..i wnt to start an youtube channel with travel vlogs..kindly advise few tips
Hi Jordan, Thank you for creating this article. I just started a brand new faceless YouTube Travel Channel. After reading your article I realize that I need to create a trailer. I’ve done some travel in the past but my precious 90 year old mother lives with me now so we don’t get to travel much these days. So I’m doing the next best thing… I research places I’ve been or want to go and then I create videos about those destinations. Here’s a link to my channel if you want to have a look. https://www.youtube.com/@TravelCamel88
Leave a Reply Cancel reply
Your email address will not be published. Required fields are marked *
How to Start Vlogging: 11 Tips for Absolute Beginners
It seems like everyone has a vlog these days, which is a testament to how easy it is to get started. Here are some tips if you want to start your own!
Vlogs have sky-rocketed in popularity ever since YouTube came to be. There are two reasons for this: video content is highly engaging, and viewers get to live vicariously through you.
It might seem as simple as turning on a camera, saying your piece, and uploading the video—but there's a lot more that goes into vlogging, especially since it's become a competitive multi-million dollar industry.
If you're interested in becoming a vlogger but have no idea where to start, you're in the right place. We're going to give you several essential tips every beginner needs to know.
What Is a Vlog?
The term vlog is derived from "video blog" or "video log"—it's a blog in mostly or entirely video format. Vlogs can consist of only a video, but can also include text and images to help drive the point. They can be unedited or edited in any style, and range from several minutes to a few hours long.
The purpose of a vlog is to connect with people by means of a particular subject. This can include pretty much anything, such as discussing academic topics, recording a trip, doing a tutorial, or sharing your skillset. Whatever type of content you can think of can usually be put in a vlog.
Vlogs can feature numerous people, but you are the main star; people watch it because they're interested in your life and what you have to say. The majority of vlogs are posted to YouTube, but any online social media platform can serve as a host for vlogging content.
They're typically filmed, edited, and produced by the vlogger themselves, but the more established content creators or influencers have a team behind them that takes care of all the technical components.
Let's have a look at how to get started.
1. Find Your Niche
The first step to start vlogging is knowing what you want to vlog about. Think of topics that you're well-versed in or activities that you're good at. You don't even need to excel in anything—being passionate is good enough.
We know it might be difficult to settle down on one thing, especially if you have numerous passions or are indecisive. So if you want to create a variety of different types of vlogs, try to keep them related to one another. For example, travel vlogs pair well with house tour vlogs, and makeup tutorials with fashion hauls.
2. Be Consistent
Not everything you post online needs to go viral—being internet famous isn't everyone's goal anyway. However, the point of posting something online is for others to see it, even if it's just a handful of viewers.
In order to garner views and attract your target audience, you'll need to upload consistently. We recommend sticking to a standard schedule of posting once a week. You can be more flexible with this, but keep in mind that viewers will get bored if you upload too often or not often enough.
Not only does your schedule need to be consistent, but also the content of your vlogs. Settling on a niche will help an audience familiarize themselves with your brand.
3. Choose Your Device
If you're just starting out, there's no need to purchase an expensive camera—your phone will do for now. Once you've established that vlogging is something you want to pursue more seriously, then it will be worth investing in a high-quality, sensible vlogging camera.
There are a plethora of cameras that are great for vlogging. You'll need to consider which one works best with your vlogging style. A lightweight camera is ideal for those who want to move around, and a high ISO will allow you to shoot in darker settings. Whatever you decide on, make sure it has good video autofocus.
A tip for when you're using a smartphone: use the back camera lens, as it has a higher frame rate than front-facing cameras.
There's a lot of additional equipment that will make the vlogging process more convenient and produce higher-quality results.
If you're going to be the sit-down-in-a-room type of vlogger, ring lights for your videos are a must. They soften textures, balance highlights and shadows, and some even allow you to control the temperature of the composition (warm-toned or cool-toned).
Whether you're using a phone or a camera, having a medium to stabilize the device will save you a lot of effort and blurry footage. Consider getting a selfie stick, smartphone gimbal, tripod, or monopod. Otherwise, you'll always find yourself holding the device by hand and trying to balance it on surfaces.
5. Consider Storage Space
There's nothing worse than being in the middle of filming and getting interrupted by a low storage notification. You need to ensure that your device has sufficient storage space at all times.
Clear space on your phone or get an SD card for your camera. Once you're done editing the footage, back it up on a cloud service or external drive and delete it from the device—this way, you'll never run out of space.
6. Filming Technique
You don't need to be a pro videographer to produce a good vlog, but there are some tips that will make it more engaging and impressive to viewers, as well as save you time on editing.
For starters, you need good lighting. As aforementioned, ring lights will become your best friend. If you're not going to make use of artificial lights, you need to take advantage of natural light. Try to catch the sun when it comes in at a horizontal angle, such as golden hour, or film in an environment that reflects the sunlight well.
You also need to be cautious of your angles. If it's a room setup, keep the lens parallel to your face. If you're going to walk around, hold the device as far out as you can, and also parallel to your face.
7. Mind the Background
Don't forget about the background. Unless the room you're filming in is aesthetically pleasing as-is, invest in a backdrop. And when walking around, be mindful of distractions in the background, especially strangers who might not want to be filmed.
8. Keep It to a Reasonable Length
A vlog can be any length, really—but you want to remain reasonable. Long vlogs fair better for creators who have already established an audience that looks forward to their content. But don't make it too short either, or you might not get your point across. 10 to 20 minutes is a good length for beginners.
9. Edit the Footage
Any type of content creator needs to have some degree of editing skills. It's possible to get away without performing any edits at all, but we advise against this. Editing gives you the opportunity to cut out mistakes, control the pace, create a visual appeal, and produce an overall higher-quality result that captivates an audience.
You don't need to pay for professional editing software, at least not at first. There are tons of free editing software and even phone editing apps that are easy to navigate.
10. Audio Is Important, Too
Audio is secondary to the video footage, but don't rule out its importance. The majority of vloggers rely on the microphones on their phones or cameras. This is sufficient enough, but you might want to tweak the audio in your editor to bring clarity to your voice.
Using a lavalier mic is also a good option, as they're inexpensive and easy to set up. Once you've determined that you're going to be a serious vlogger, though, it might be worth investing in a shotgun mic for your camera .
Your voice won't be the only audio you need to pay attention to; vlogs with music fair better. Have a look at these sites for free and copyright-free music that you can use in your videos. Remember to adjust the volume in your video editing software so it doesn't drown out your voice whenever you're speaking.
11. Choose a Platform
The majority of vloggers post their content on YouTube. If that's going to be your platform of choice, have a look at these tips to strengthen your channel and promote your content . Platforms such as Facebook, Instagram, and TikTok are a great way to start out and give vlogging a test run.
It's Time to Start Vlogging
There's a lot of planning, determination, and effort that goes into becoming a vlogger—kind of like running a small business. Don't get too caught up in doing it right from the beginning; give yourself some wiggle room.
Start by posting shorter videos on a platform that you're already familiar with. This way, you'll build up the necessary confidence for speaking into a camera, as well as get used to the production process of content creation.
How to Start a Travel Blog: An Honest Guide
UPDATED: October 2019
One of the most common questions we get here at Zero to Travel is how to start a travel blog, and more specifically, how to make a living travel blogging.
Now, there’s plenty of content out there full of different versions of the same advice, but that’s not what we’re about here.
My approach to travel blog success is different — off-the-beaten-path, one might even say — and I’m willing to bet you’re an off-the-beaten-path kind of person.
In this mega-in-depth, super honest guide, I walk you through the unique Zero To Travel mindset on how to approach your new travel blog, and then walk you through the step-by-step logistics on how to actually set it up.
Table of Contents:
How To Start A Travel Blog: Mindset Underground Entrance #1: Don’t Start A Travel Blog Underground Entrance #3: Leverage Large Platforms How To Start A Travel Blog : Nuts and Bolts Step 1: Choose a Topic Step 2: Choose a Domain Name Step 3: Buy Hosting and Your Domain Name Step 4: Install WordPress Step 5: Install a Theme Step 6: Install Some Plugins Step 7: Add Some Content Step 8: Grab Your Social Media Handles Step 9: Get More Support The Final Word
How To Start A Travel Blog: Mindset
The busiest museum in the world is the Louvre in Paris. On any given day you’ll see hundreds of tourists lined up out front of that iconic glass pyramid.
Waiting…waiting…waiting….

Don’t worry, it will only take forever to get in… (photo via @Gideon )
But, what most people don’t know is that there is a much less crowded entrance.
Surprisingly it’s located in an underground shopping mall ! When you take the underground entrance, you’ll avoid the annoying wait and slip right into the most crowded museum on the planet. Mona Lisa will be smiling back at you in no time.
Doesn’t if feel good when you know a secret shortcut like this?
The thing is, that entrance isn’t even a secret! It’s listed right on the Louvre website (along with a second ‘secret’ less crowded entrance). However, when people show up, they see everyone else standing in this massive line and jump in, assuming it’s the only way to enter.
Long story short: always assume there may be an easier or less crowded way to get in – then go try and find it!
Everything in life has underground entrances, including travel blogging.
What I mean by ‘underground’ is an existing, less crowded path that most people won’t follow (or find), that you can take advantage of.
What are your potential underground entrances?
I’m sorry to say that there is no secret formula, blueprint, or process to discovering them.
However, there are three big underground entrances I recommend you take to help point you in the right direction:
Underground Entrance #1: Don’t Start A Travel Blog
Confused? I promise this will all make sense in a second.
Don’t start a travel blog, start a business around travel that happens to use the blog business model.
There is one big thing that all financially successful travel bloggers have in common (this is the absolute #1 key to your success, so soak this in):
They treat their travel blog like a business startup.
It’s a subtle shift but an important one to make.
I know some people get turned off when they hear the word “business”, because it immediately conjures an image of business suits and sell-outs.
But you’re a traveler so I know you’re open minded…Stick with me here.
Approaching your blog as a business brings a level of dedication and professionalism that will bring forth your best work:
- Sets you up for success (however you define it).
- Helps you get more eyes on your travel blog, giving you the chance to help more people.
- Gives you focus and clarity around what you need to learn.
- Drives your decisions and dictates what content to create.
And if the word business still grosses you out then call it something else.
For example, I like to think of my projects as Bohemian Businesses . By one definition, Bohemian means socially unconventional, which resonates strongly with me since I get to work from countries around the world instead at a desk in the typical 9-5 career.

My wife and I at Angkor Wat, Cambodia
Why This Mindset Approach Works:
World class bloggers aren’t successful because they’re simply good writers. It happens because they are also damn good business people!
They do the things “regular” business people and companies do – like attend industry conferences and build relationships, study SEO, geek out on marketing, do business development to connect with brands, learn sales skills and on and on. Many of them have been doing this for 5-10+ years
(But don’t let that get you down, it should be the opposite. Get psyched!)
The best part about having a travel blog (ahem business) is that you get to do it your own way, with your own style and flair.
Starting a successful travel blog seems to come with a set of rules for success (big social media following, huge audience, etc) but starting a bohemian business gives you total freedom to become a rule breaker.
In fact, that’s exactly what the best businesses do. They disrupt entire industries. (Think Google, Uber and Airbnb)
Still not convinced?
Lonely Planet , the world’s largest guidebook publisher, started with married couple Tony and Maureen traveling overland from London To Australia, then writing and publishing a unique guide in a way that had never been done before.

Bohemian publishers Tony and Maureen (photo from lonely planet )
Their story from Lonely Planet:
“For their honeymoon, they decided to attempt what few people thought possible – crossing Europe and Asia overland, all the way to Australia. It took them several months and all the money they could earn, beg or borrow, but they made it. And at the end of it all, they were flat broke… and couldn’t have been happier. It was too amazing an experience to keep to themselves. Urged on by their friends, they stayed up nights at their kitchen table writing, typing and stapling together their very first travel guide, Across Asia on the Cheap. Within a week they’d sold 1500 copies and Lonely Planet was born.”
It all starts somewhere. It’s all an experiment. You don’t have to play the same game as everyone else, and you shouldn’t.
Don’t wait for things to be perfect – just get started.
Like any new business owner you’ll make plenty of mistakes, you’ll screw up, and you’ll get stuck. Welcome to the club!
The important thing is to start your travel blog today.
Of course, now that you’ve got a strong new mindset, how are you going to grow your new travel blog slash business?
You could slog away at the same strategies that everyone else is using.
Or you could find another underground entrance to help you on your way:
Underground Entrance #2: Seek Less Crowded Paths
I stumbled upon my version of this underground entrance when I created my first podcast.
Note that I didn’t start a podcast because I thought it would be a good strategy for attracting more visitors to my blog. I was drawn to podcasts because I love talking to other travelers and I love audio. It seemed like a fantastic and personal way to share stories and advice that can help others.
It wasn’t clear until much later that podcasting was an underground entrance that allowed me to skip many of the things most people assume a successful blog requires. I don’t have massive website traffic, viral content, a huge social media following or major media exposure. However, when you search “travel blog” on Google there are nearly one billion results, but there are very few results for “travel podcast”.

Recording a podcast with my buddy and business parter Trav from Extra Pack of Peanuts .
What’s your version of this underground entrance?
In this ever-evolving digital world there are countless ways to do things differently. Here are some other less crowded paths you can take:
- If you are a writer you can narrow your focus to a micro-niche topic with minimal competition and become the #1 authority on that one specific thing.
- If you’re a video lover consider making your travel blog a travel vlog. It will be easier to stand out. Or go further than almost everyone and make incredible travel films like my buddy Tom .
- If you love audio you can start a podcast and share your own unique perspective. You can also create an audio blog and transcribe your posts into written articles, or even record a book, then have it transcribed and published.
- Someone I once met built her entire audience on Periscope , a live streaming platform that was less crowded with content creators than other platforms available.

I LOVE less crowded places, like this hiking trail in Colorado
If you LOVE to learn then you’ll love travel blogging, because there is always something to figure out. Take time to explore different mediums and find the one that works for you!
Found your unique underground entrance? Great!
I’ve got one more underground suggestion for you to grow your travel blog and audience (and therefore your income!):
Underground Entrance #3: Leverage Large Platforms
On Google, the majority of people are searching for answers, and most are seeking free information.
Amazon, on the other hand, has nearly 200 million unique visitors per month are looking to potentially buy something.
Let’s say you decide you want to write an ebook. What’s the best way to make an impact with your book when you are just starting out?
By selling it through your travel blog and email list of a few hundred people? OR putting it on Amazon where millions of people show up everyday to buy books?

Instead of competing against hundreds of house sitting websites and Google searches, we only had to beat out a handful of other books on the subject.
I also promoted it via my podcast, leveraging the iTunes audio platform.
Additionally I had some helpful friends like Trav send it out to their email list (yet another platform outside of my own).
The book isn’t selling like crazy but we do get sales every week. I doubt that would happen if the book only lived on my travel blog.

And keep in mind, when I say leverage large platforms, I’m not talking about commenting in a few Facebook groups or sending a few emails.
Plan on consistently putting yourself out there and meeting others:
- Go to events
- Hop on Skype calls
- Meet other bloggers online and in person
- Meet people who read your blog or listen to your podcast or watch your videos
If you’re going to be in the travel industry, connecting with other people and helping them out whenever you can will help you more than anything else.
Remember to always think outside of the travel blog. Where else can you show up with your work so that it can be found by more people?

One of our Location Indie community online gatherings
Alright, you’ve got your business mindset in place and you’ve found your unique underground entrance and a large platform beyond your own to help grow your travel blog for long-term success.
The only thing left to do is actually set the thing up!
Before we do that, though, I want to tell you something important:
You’ve Got Guts
Starting anything new is one of the hardest things to do. It takes guts to start something on your own so congratulations! I’m virtually high fiving you right now from the cafe in Norway where I’m writing this.

Let go of any doubts, fears or worries you have. They are normal and we all have them, but they won’t help you.
I know you might feel behind because so many other people have been doing it for a long time. I felt the same way when I started, and still do sometimes.
Nevertheless, don’t be intimidated. Starting with a clean slate gives you some BIG advantages.
How To Start A Travel Blog : Nuts and Bolts
Now it’s time to actually set up your travel blog! This will be home base for your business, so it’s important! That’s why, in this section, I’m going to walk you step-by-step from the beginning.
- Step 1: Choose a Topic
- Step 2: Choose a Domain Name
- Step 3: Buy Hosting and Your Domain Name
- Step 4: Install WordPress
- Step 5: Install a Theme
- Step 6: Install Some Plugins
- Step 7: Add Some Content
- Step 8: Grab Your Social Media Handles
- Step 9: Get More Support

Step 1: Choose A Topic For Your Travel Blog
Before you can start building your travel blog, you need to be clear on what your blog will be about and what your target audience will be.
You might think that the topic of your blog is just “travel,” but do you know how many travel blogs there are out there?! To stand out from the crowd, you’ll want to narrow your focus.
There are two main ways to do this:
- Pros: Less competition, many unique topics for blog posts
- Cons: Can easily become boring for you, small audience, can quickly run out of ideas for posts
- Pros: Content can evolve and remain relevant, freedom to explore a wide range of topics
- Cons: May be difficult to initially attract an audience, can be difficult to generate income
How to Choose a Niche
Niche sites focus on specific topics. They hone in on one very small area of a larger topic and become the go-to site for that area.
Too Many Adaptors is a good example of a niche travel site; it focuses on technology and gadgets for travelers. Fluent in 3 Months is another; it explores methods for learning a language very quickly.
To come up with the perfect niche for your travel blog, brainstorm the different categories within travel. Pick your favorite category and then brainstorm the subcategories within it. Keep going until you find something specific that you are interested in and that you think you could build a travel blog-based business around.
It could look something like this:
- Travel – food – markets – recipes from market-sourced food
- Travel – Accommodation – Airbnb – reviews of Airbnb accommodation
- Travel – Travel hacking – frequent flier miles – collecting points without credit cards
How to Choose an Overarching Theme
If you think a niche would be too limiting for you, consider choosing an overarching theme instead. An overarching theme is a thread that ties your many interests together in a way that makes sense to your readers.
Your theme could be:
- A topical theme – “exploration,” “love,” or “character”
- A perspective or a lens through which you view travel – “a single mom’s take on X,” “a feminist’s take on Y,” or “a gamer’s take on Z”
- A philosophy – “less is more,” “waste nothing,” or “travel slowly”
Here are some real-world examples of travel blogs with overarching themes:
- Location 180 ‘s overarching theme is “living and working anywhere.” This topic enables blogger Sean Ogle to write about everything from entrepreneurship to bucket lists.
- The Art of Non-Conformity ‘s theme of “non-conformity” is so broad that blogger Chris Guillebeau is able to write about everything from his quest to visit every country in the world to personal development.
- Emilie Wapnick of Puttylike is the queen of overarching themes! If this idea appeals to you, I’d recommend working through her Overarching Theme Kit .
Once you’ve decided on your topic, you can choose a name for your blog.

Step 2: Choose Your Travel Blog’s Name And Domain
Choosing an appropriate name for your blog is critical. It needs to to both communicate what your blog is about and to give a sense of your style or personality.
Your name should strike a balance between appeal and personal satisfaction. In other words, you should like your travel blog name but you don’t need to love it.
If choosing a name is holding you back from starting just pick something and roll with it. The most important thing is to get started!
How to Choose Your Blog Name
To come up with your own blog name, brainstorm words to do with your topic, your philosophy, and yourself. Think of words that rhyme with your keywords. Use a thesaurus to find related words. Google phrases and idioms about your theme. Think of metaphors and similes.
Here are some tools you might find helpful:
- Thesaurus.com
- Semantic-link.com
- RhymeZone.com
Once you’ve written down as many ideas as you can think of, start combining the words and phrases you have, to see what else you can come up with.
Finally, come up with a shortlist of your favorite names. Below is a list of strategies you can use to name your blog.
Types of Blog Names
Your name – Using your name (or a pen name) is simplest, and will give you the freedom to change your topic over time, without having to change your blog name. However, it may not be as memorable as it could be, particularly if your name is hard to spell. You also won’t be able to sell your site because it will be tied to you and your personality.
Example: Tim Leffel and Diana Ellefson
A nickname – If you’re keen on using your name, but you want to give an indication of what your blog is about, you could combine it with an adjective, a verb, a noun, or even a phrase. This type of name will make your blog more memorable, but, again, it may prevent you from ever selling your website in the future.
Examples: Nomadic Matt , What’s Dave Doing? , The Suitcase Entrepreneur , and The Blonde Abroad
SEO-friendly – Search engine optimization (SEO) is the process of making your blog rank highly in search engine results. This option will make it very clear what your blog is about but could lack personality if done incorrectly. My friend Dave cleverly combined SEO and brand friendliness with a name that describes exactly what he offers:
Example: Travel Blog Success
Location-based – If you plan to explore a particular part of the world, or if you want to stress your identity (i.e. a Californian or a Frenchie), include a location in the title of your blog. Keep in mind, this may turn out to be quite limiting if you decide to venture outside of your chosen area.
Examples: Frenchie Abroad , and South East Asia Backpacker
Means-based – If you plan to travel in a particular way you could stress the form of transport you’ll be using or the style of travel you’ll be focusing on. Again, this could be limiting, should you wish to branch out in the future, yet it will make clear what your blog is specifically about.
Examples: The Savvy Backpacker , Tom’s Bike Trip , and House Sitting World
A phrase – To make your blog name memorable and infused with personality, you could use a phrase that sums up your philosophy or topic. Pick an existing phrase, put a twist on an existing one, or make up a phrase of your own. This is a less specific approach, so you may want to add a tagline or note to readers on your homepage. If done correctly, these can be quite memorable.
Examples – Extra Pack of Peanuts , The Pin The Map Project , Zero To Travel
Meaningful words – If you want to convey the topic of your travel blog and add a bit of personality to its name, you could try combining different words until you come up with something that carries the right meaning. Try combining verbs, nouns, adjectives, and adverbs, or even include metaphors, puns, and plays on words.
Examples – Our Awesome Planet , Nomad Revelations , and Map Happy
A pun or play on words – If you’re a bit witty, adapt an existing phrase. A lot of the good travel-based puns have already been snapped up, but maybe you’ll find a hidden gem! On the plus side, your readers will probably remember your blog’s name, but you must remember to keep it simple!
Examples – Alex in Wanderland and Flora The Explorer
A new word – If all else fails, coin a new word! This option could work particularly well if your blog is based on a particular philosophy or way of seeing the world. On the downside, it could be hard for visitors to remember.
Examples – Migrationology and Triphackr
How To Make Sure Your Domain Name Is Available
The next step in starting your travel blog is checking that the domain name you want is available. Your domain name is like the address of your blog.
Example: The domain name for Zero To Travel is www.zerototravel.com.
Step 1: Go to Bluehost.com . Under Products, select Domains.

Step 2: Type in the domain name you’re curious about. Click “Search.”

Step 3: Check the result. If it’s available, carry on. If not, search again using a different name or come up with some more ideas.
Final Domain Name Checks and Tips
Before you buy your domain name, quickly check that it meets these criteria:
- No hyphens – Hyphens make domain names hard to say and remember. You don’t want to lose your www.great-travel-blog.com readers to the folks at www.greattravelblog.com.
- No numbers – It can be hard to remember whether the interesting blog you discovered yesterday was called www.advice4solotravelers.com or www.adviceforsolotravelers.com. Eliminate confusion by avoiding numbers and digits alike.
- Avoid hard-to-spell words – The best domain names are those that are short, easy to type, and easy to spell. It’s best to avoid using long and complicated words, as well as those that are written differently in American and British English (“realization” and “realisation”), again to avoid losing readers.
- .com, .net, or .org – It’s always best to get a .com domain, simply because that’s the one everyone defaults to. That said, if the .com isn’t available, there’s not much harm, at least SEO-wise, in getting a .net or a .org domain name. Other extensions are becoming more and more common though, so I expect this will become less of a sticking point in the future.
- Not being used by someone else – Do a quick Google search to check that your blog name isn’t being used by someone else or in a weird way. If you were hoping to use your own name as your domain name, and you find that there’s a famous porn star with the same name, you might want to rethink!
- Available on social media – As you progress through this “how to start a travel blog tutorial,” you’ll see that you’ll need to secure your blog name on social media later on. For now, use Namechk.com to check that your preferred domain name is available on all the important platforms – Facebook, Twitter, Pinterest, Instagram, and so on.
Step 3: Buy The Hosting And Domain Name For Your Travel Blog
Once you’ve chosen your domain name, you need to buy some hosting and, with that, your domain name.
If you found your domain on Bluehost you can get it for free with your first hosting package. I’ll explain how in a second.
What is Hosting?
Hosting sounds like it might be a bit technical, but it’s really not. It’s easy to understand if you use a property example.
Imagine that your travel blog’s domain name is like your home address. In addition to an address, you’ll also need some land to build on and the materials that will eventually become your house. Buying hosting is like paying for the land you’ll build on. Hosting is the piece of the internet that your travel blog will live on. You pay a hosting provider for the use of this space.
Where to Buy Hosting
Bluehost provides a great service for new bloggers. They make it really easy to get your blog set up, they’re easy to get hold of if you ever need some help, and their hosting packages are affordable.
Another hosting provider I recommend is WP Engine (my current host for Zero To Travel).
However, I’d say that if you’re reading this tutorial because you don’t yet know how to start a travel blog, Bluehost will be perfect for you. You can always progress to WP Engine when your travel blog takes off and you need more space and control!
Hosting your travel blog with Bluehost will cost just a few dollars a month. If you ask me, that’s a bargain considering how much support they throw in! They are the hosting company I started with and still buy all of my domains through.
How to Set Up Your Blog’s Hosting
Step 1: Since you just found your domain Bluehost.com simply create an account with them to get started.

Step 2: Decide which plan you want.
I’d recommend getting either the Performance or the Business Pro plan, because these let you build more than one website on the same hosting plan, and they give you more space.

Step 3: Decide which extras you want.
I recommend getting the Domain Privacy Protection if you want to keep your details private.

Step 4: Enter your billing information.

Step 5: Agree to the terms and conditions. Click “submit.” Skip through any other offers that appear.

Step 6: Check your email for your Bluehost login details. Keep these safe!
Step 4: Install WordPress On Your New Site
Once you’ve got your hosting (the land) set up, it’s time to build your travel blog (the house!). I recommend doing this with WordPress.
What is WordPress?
WordPress is a content management system (CMS). It’s basically a way to build your website and store all of your blog posts, travel photos, and anything else you want to include in your travel blog.
There are two versions of WordPress:
- WordPress.com is free, doesn’t use hosting, and is for people who blog for fun only.
- WordPress.org is the tool to use if you’re serious about becoming a travel blogger.
Which, of course, you are, because this is your travel blog business start up! That’s why I definitely suggest buying hosting and using WordPress.org rather than the free WordPress.com
How to Install WordPress
Luckily, because you’re hosting your travel blog with Bluehost, this step is really, really easy!
Step 1: Go to Bluehost.com and login to your account.

Step 2: When you arrive at your Bluehost control panel, click “Install WordPress.”

Step 3: Click “Install.”

Step 4: Select the domain name you want to build your website on. Click “check domain.”

Step 5: Select the “Show advanced options” box.
Enter your travel blog name, your admin username, and your admin password. Take note of these login details.

Step 6: Agree to the terms and conditions. Click “Install Now.”

Step 7: You should receive an email containing your login details.
Navigate to the URL (www.yourdomainname.com/wp-admin) and log in.

Step 5: Install A Theme For Your Blog
The next step in starting your travel blog is installing a WordPress theme.
What is a Theme?
Going back to the property analogy, installing a theme on your website is like decorating your house.
The theme you choose will determine what your travel blog looks like. Themes come in all kinds of styles and some are more customizable and easier to use than others.
There are three main types of themes.
1. Free Themes
When you first log into your WordPress blog, you’ll see that it’s already using a default theme. You’ll also see that you can choose from a selection of other themes without leaving your WordPress website. These themes are free.
Free themes can be a good choice, particularly for someone who’s finding this “how to start a travel blog” process to be a very steep learning curve. If you just want to jump right into the blogging part, you might be better off picking a free theme for now, and you can always upgrade it later on.
However, free themes come with limitations.
They’re usually difficult to customize, which means you’ll be stuck with certain colors and layouts. They’re not usually the most professional-looking themes. Lots of people use them, so you’ll soon start to notice the same ones being used all over the blogosphere. And they’re not always responsive, which means they won’t work well on mobile devices.
2. Premium Themes
Premium themes are those that you pay for. I’d recommend starting with a premium theme, because this will enable you to create a somewhat unique-looking travel blog without spending too much money.
Here’s what to look for in a premium theme:
- Responsiveness (this means it looks great on mobile devices)
- High level of customizability (this means you’ll be able to change the colors, etc.)
- Responsive and active creator (you’ll want to be able to contact the theme creator if you have any difficulties)
- Great reviews
- Active community (the more people using the theme, the more support you’ll be able to get)
- Recent updates
- Instructions and tutorials
There are loads of places online to buy premium themes. Here are a few places to try:
- Elegant Themes
- Theme Forest
Some of the most popular themes used by professional bloggers are:
I personally recommend a theme called Divi , which is part of the Elegant Themes bundle. Its builder is extremely easy to use and very flexible. With Divi, it’s incredibly easy to make very slick and professional-looking websites.
3. Custom Themes
If you want to go pro and you have a lot of money to spend, you could get a custom theme. You will work with a designer on this and what you end up with will be completely unique to you.
Most people who are still in the process of figuring out how to start a travel blog will not need something this advanced, but it’s worth being aware of your options.
How to Install a Theme on WordPress
Step 1: In your WordPress dashboard, click “Appearance” and “Themes.”

Step 2: Click “Add New.”

Step 3 (free theme): To install a free theme, browse through the options. When you find one you like, hover over it and click “Install.”

Step 3 (paid theme): To install a paid theme, first you’ll need to buy it from one of the websites mentioned above and download the .zip file. Then click “Upload Theme.”

Step 4 (paid theme): Choose the .zip file and click “Install Now.”

Step 5: Customize your theme.
This process is different for every theme. If you’re not sure how to do this, use the installation instructions that should come with your theme, or use Google to search for help.
Step 6: Install Some Plugins To Make Your Travel Blog Functional
Once you’ve installed and customized your theme, you’ll want to add some functionality to your travel blog. To do this, you’ll need some plugins.
What is a Plugin?
A plugin is an add-on, kind of like an app for WordPress, that will enable your travel blog to do more. You can get plugins for everything from security and analytics to social sharing features and pop-up boxes.
Again, some plugins are free and some are paid. You’ll probably use mostly free plugins to start with, but it is sometimes worth investing in premium plugins.
How to Install a Plugin
Step 1: Click “Plugins” and “Add New.”

Step 2 (free plugin): To install a free plugin, use the search bar to find it.
You can search by keywords (for example, “audio player”) or the name of the plugin, if you already know it.

Step 2 (paid plugin): To install a paid plugin, you’ll first need to buy it and download the .zip file. Then click “Upload Plugin.”

Step 3: When you find a plugin you want to install, click “Install Now.”

Step 4: Depending on the plugin in question, there may be some settings to set up. Use the plugin installation instructions or Google to help with this.
Which Plugins Should You Install?
There are a few plugins I’d recommend installing on your travel blog straightaway.
Once you’ve worked out how to start a travel blog and you’re publishing posts on a regular basis, you’ll soon find that you’re bombarded with spam comments. Unless you’re interested in buying hundreds of pairs of rip-off sunglasses, you’ll find these comments very annoying and time-consuming to delete.
Rather than put yourself through this experience, simply install the Akismet plugin. This plugin will prevent most of those spam comments from getting through. It’s a no-brainer!
2. Yoast SEO
Remember, SEO stands for “search engine optimization.” It basically means making your website really easy for search engines like Google to understand, so that they’ll display your travel blog higher in their results. As you get serious about your travel blog, you’ll probably want to improve your SEO to get your blog to appear on the first page of Google for certain search terms.
One quick and easy way to work on your SEO is by installing Yoast’s plugin. Then, whenever you write a blog post or a page on your website, you’ll see a little form that you should complete. Filling out this information will help Google to know what your content is about, which will increase the chances of it being found by people who are looking for it.
SumoMe is a bundle of tools that will help you to get more people to your site, and to get them to come back again. It includes a social media sharing feature, analytics, a highlighter bar, and much, much more. I particularly like SumoMe’s welcome mat, which displays a full-screen call to action to new visitors. It’s great for getting a lot of email subscribers!
Step 7: Add Some Blog Content!
You’re getting there! Now that your travel blog is pretty functional, the next thing to do is fill it with some content!
There are two main types of content you’ll be creating: blog posts and pages.
If you want to know how to start a travel blog, I’m sure you know what a blog post is, but you might not be sure what sort of pages to create. Here’s a starting list:
- About (about you, your travel blog, and your ideal reader)
- Start Here (a guide to direct new readers to your best content)
How to Create a Blog Post or Page
Creating both blog posts and pages in WordPress is very simple. Follow the instructions below, create your content, and gradually start to fill up your travel blog!
Note: In the screenshots, I’m walking you through the blog post creation, but the process for creating a blog post and a page is pretty much the same.
Step 1: Click on “Posts” and “Add New.”

Step 2: Complete the various fields, including the blog post title, blog post content, tags, and categories.

Step 3: Publish or schedule your blog post.

Step 8: Grab Your Blog’s Social Media Handles (before someone else does!)
If you want to have a successful travel blog, simply adding posts won’t be enough to attract visitors. You’ll need to create a community around your blog.
Perhaps the easiest place to do this is on social media.
Here you’ll be able to connect with your readers, provide them with even more useful and interesting content, keep them updated, and build relationships with them.
It’s up to you which social networks you focus on, but here are several to consider:
In Step 2, you made sure that your blog name was available on these social media platforms when you were choosing your domain name.
Now, go ahead and create accounts on the sites you want to use. You might also like to grab your blog name on the other platforms too, just in case you decide you want to use them later on. (And to stop someone else from grabbing it up and using your blog’s name on their social channel!)
Try to get an exact match across all your platforms, just like I have with Zero To Travel:
- Facebook: Zero To Travel
- Twitter: @ZeroToTravel
- YouTube: Zero To Travel
Set up your profiles and don’t forget to include links back to your travel blog wherever you can! You’ll probably want to link to your social media profiles from your travel blog too.
Step 9: Get More Support For Your Travel Blogging Journey
To grow your blog, you’ll need to create lots of excellent content that keeps your readers coming back for more.
But most important of all, you’ll need the support and guidance of those who have been there and those who are in the same position as you. They’ll be able to teach you what’s worked for them and inspire you to keep going.
Where Can You Get Support For This Crazy Travel Blogging Life?
Location Indie is a community of travel lovers who support each other to kick ass in both business and travel.
The real secret to starting a successful travel blog or a location independent business is community. When you surround yourself with other entrepreneurs and travelers from around the world who get you, it’s hard not to be inspired to do, be, and give more.
When you join Location Indie, as well as becoming a member of this community, you get access to exclusive tutorials, expert Q&As, gatherings, and much more, all of which will teach you how to start a travel blog that could turn into a location independent business.
To find out more about Location Indie, click here .

How To Start A Travel Blog: The Final Word
You made it! You’ve now learned exactly how to start a travel blog and you’re well on your way to becoming a successful travel blogger.
If you’ve made it through this tutorial, you’ll already have learned a lot of new skills. But this is just the beginning!
Your travel blogging journey starts right now, and it’s just like any adventure. A mysterious new world is just around the corner. Along the way you’ll experience tough challenges, crazy highs, devastating lows, build new lifelong friendships, and have plenty of chances to learn and grow.
And like travel, what you get out of the adventure is entirely up to you.
You’ve got the mindset. You’ve got your unique underground entrances. You’ve set up your travel blog’s site. And you know where to find more like-minded people to support you on this journey.
How did you do with these steps? What underground entrances are you choosing for your travel blog business? Let me know in the comments below!

Other helpful free information:
Part Two: Free Travel For Travel Bloggers: The Ins and Outs of Press Trips
Subscribe to our top rated Zero To Travel Podcast
A few other notes from this resource guide:
The picture of Louvre courtesy of Gideon on flickr.
This resource contains my affiliate links – that means that if you choose Bluehost as your web hosting service for example, I’ll get a small commission from them but at no extra cost to you.
As a long time Bluehost customer (for domains and/or hosting) I recommend them because I’ve never had any problems and they have great customer service. If you decide to go with Bluehost or WP Engine for your web hosting or Divi for your WordPress theme, I appreciate that you use the links on this page and thank you for supporting my work.
Learn how to start a podcast
See other Zero To Travel Resource Guides

You're almost there!

Drop your email below so we can send your FREE course!
Success! Now check your email to confirm your subscription.
There was an error submitting your subscription. Please try again.

Want to Travel More?
You need a plan. Sign up to access this mini-course The 3 Best Ways To Save Money For Travel , get exclusive content and join our amazing community of travelers. It’s all FREE!
You're signed up! Check your email to access the mini-course!
- >> Start Vlogging
- Best Vlogging Cameras
Bestseller Cameras
Bestseller microphones.

Panasonic Lumix G85 4K Digital Camera
Razer Seiren Elite USB Streaming Microphone
Gopro vlogging guide.
Vlogs have been popular for a while now, so it’s only natural for people to continue finding new ways of capturing vlog footage in order to stand out from the crowd. After the concept of GoPro vlogging was introduced, this tiny camera has become a revolutionary gadget in the world of YouTube vlogs.
In this GoPro vlogging guide, you’ll learn everything there is to know about vlogging with GoPro, from the equipment you’ll need to set up the GoPro app and all the way to the mistakes you’ll need to avoid in the process. There are plenty of tricks and techniques that can help you improve the quality of your GoPro vlogs, so if you’d like to learn more, just keep on reading.
Table of Contents
The benefits of using a gopro for vlogging, what’s the best gopro for vlogging, gopro vlogging setup, how to use gopro for vlogging, vlogging with gopro – what mistakes to avoid, more tips on vlogging with gopro.
Are you an aspiring vlogger who’s thinking of getting a GoPro but you aren’t sure whether it’s a worthwhile investment? Here are some benefits of using GoPro for vlogging that might inspire you to purchase one yourself.
Convenience
Tired of carrying around a large and heavy camera everywhere you go? Are you shy to vlog in front of other people while having the same camera pointed directly at you? GoPro is here to help with that.
One of the many useful traits of using GoPro for vlogging is its convenient size and design. It’s striking how small these gadgets are, yet how many benefits they pack inside. You can carry them around with you everywhere you go, regardless of whether you’re a travel vlogger , a daily vlogger , or a beauty vlogger . Due to its small size and light weight, it’s easy to carry around while travelling, something travel vloggers will especially find useful.
Built-in Wi-Fi Access
There’s nothing more frustrating for a vlogger than having no access to Wi-Fi. Luckily, GoPros come with built-in Wi-Fi that makes the task of syncing and downloading videos and pictures to your phone or laptop easier than ever. Pretty handy, right?
Video Quality
When investing in a GoPro, you no longer have to sacrifice the video quality for more convenient ways of capturing certain shots. Most GoPros nowadays come with 4K video quality that delivers stunning shots and images, meaning you can have a gadget that’s easy to use and carry around with camera-worthy quality.
GoPros Are More Affordable than Standard Cameras
Speaking of cameras, if you’ve ever done any research on using GoPro for vlogging, then you’ve most likely noticed that GoPros are far more affordable than vlogging cameras . Some cameras go up to $1,500 and more in terms of pricing, which, needless to say, not all vloggers can afford to purchase, especially not at the beginning of their vlogging journey. Most GoPro options range from $300 to $400, making them a more affordable option for vloggers.
Swimming and Beach Day Vlogs
One of the best features of GoPros is their water-resistant built. This will allow you to take your camera to the pool or to the beach and capture some beautiful shots without worrying about getting your camera wet. It will also make you less anxious in regards to accidentally dropping your camera while in the hot tub or spilling a drink on it. Keep in mind that different types of GoPros have a certain depth limit, so do your research prior to throwing your camera in a large body of water.
Different Shooting Modes
An easy way to cut down on editing time is to use the different shooting modes that come with GoPro such as time lapses. With the help of a GoPro, if you’re ever in need of some breathtaking visuals for your vlog, all you need to do is set a timelapse once you spot a gorgeous sunset or serene mountain scenery. Making your vlogs more visually appealing has never been easier.
If you’re planning on vlogging with GoPro, it’s important to choose the correct edition right from the start so you don’t waste any money on versions that won’t deliver. We have selected the top 3 best GoPro for vlogging and we’ll go over some of their features.
Any travel vloggers out there are bound to get along with the GoPro Max . Even though it’s slightly on the pricier side ($450), it’s a worthwhile investment that will make travel vlogging a lot easier.
It’s a 360 camera with an easy set up and great image stabilization, making it a perfect option for travel vlogs. Not to mention, it’s incredibly lightweight and small, so it’ll make it easier for travel vloggers to meet their luggage limits. The GoPro Max comes with a built-in touchscreen where you have the option of viewing all the footage that you filmed. The video quality is outstanding – it records at 5.7K resolution, and you can edit all your footage using the GoPro app.
GoPro Fusion
Hands down one of the best GoPro for vlogging cameras is the GoPro Fusion . Even though it’s more affordable than the GoPro Max ($200), it still delivers a great level of performance. It comes with 5.2K spherical video resolution at 30fps and 18MP spherical photos. It contains more than one mic, which will take your audio quality to the next level. Needless to say, audio quality is one of the most important aspects of vlogging and definitely something you should pay attention to. You can always purchase an additional external mic, but more on that later.
Another amazing feature of the Fusion is its low-light performance. You won’t be put in situations where the lighting is subpar every time you vlog , but it’s always a plus to have as a feature. Overall, it’s one of the best GoPros out there with an affordable price and impeccable performance.
GoPro Hero 8 Black
The improved version of the beloved Hero series – the Hero 8 Black is somewhere in between the GoPro Max and the GoPro Fusion in terms of price – it costs $330. It offers 4K video and great image stabilization, the perfect mixture for amazing vlogging footage. Not to mention, it comes with plenty of shooting features and modes like TimeWrap.
The microphone is located at the front of the GoPro, making it easy to divert any background noise that tends to creep up in vlogs. Any audio that’s intended to end up in the vlog will also come out more crisp and clear.
Having elaborated on some of the best GoPro for vlogging options out there, it’s time to delve into the logistics and setup behind GoPro vlogging and explain some of the essential equipment any GoPro vlogger should ideally have, as well as give you some ideas on optional GoPro vlogging equipment.
When vlogging with GoPro, it’s crucial to have a few essential pieces of equipment that will undoubtedly make the vlogging process a lot easier and significantly increase the quality of your vlogs. There are also a few pieces of equipment that are optional, so if you’re budget allows, we recommend purchasing them as well.
Let’s go over the whole GoPro vlogging setup and all the equipment you will need if you decide to take up vlogging with GoPro.
Essential GoPro Vlogging Equipment
Apart from a GoPro vlogging camera, what else will you need to start your vlogs?
External Mic
Having an external mic will drastically improve the audio of your vlogs – you will capture crisp and clear audio and the mic will allow for capturing sounds in all directions that the GoPro wouldn’t usually pick up. You have the option of going for an external mic that’s specifically designed for GoPro, or using a mic that works with a wide range of cameras. Our top recommendation is the Edutige ETM-001 Omnidirectional Microphone – it’s ideal for vlogging and due to its lightweight design, you will be able to carry it around with you while travelling without a problem.
Mic Adapter
One of the most used accessories for GoPro vloggers is a mic adapter . Audio quality is crucial when doing any type of vlogging, which is why having a mic adapter is a worthwhile investment. You can connect it to a wide range of external microphones and it’s quite easy to set up and use.
Let’s face it – you won’t always have the perfect conditions when vlogging with GoPro, which is why it’s crucial to invest in at least one piece of equipment that will give you extra lighting when necessary. Light mods are the way to go for beginners and advanced vloggers alike. It’s essentially a piece of equipment you add on directly to your GoPro where you can set up a couple of different brightness levels and up to 200 lumens. The light mods are also waterproof up to 10m, so you can take them along on your diving adventures as well. Keep in mind that not all light modes are compatible with every single GoPro, so make sure you do your research prior to purchasing one.
The GoPro App is designed to make your experience with using GoPro a lot easier and smoother. After downloading the GoPro app (a process we will explain further on in this article), you can view the captured pictures and videos, do live streams , choose between different shooting modes, and access every camera setting on your GoPro. Overall, you should definitely incorporate the app in one way or another if you plan on vlogging with GoPro often.
Although vloggers who do mostly sit-down videos can easily improvise and use a stack of books or a box instead of a tripod, when vlogging with GoPro, it’s quite harder to pull those creative alternatives off. That’s why we’ve put a tripod as an essential piece of equipment for any GoPro vlogger.
There are plenty of GoPro tripod options over on Amazon, but the Joby GorillaPod seems to be a favourite among vloggers. It’s flexible and easy to use, and compatible with most GoPro models. It will give you immense control of the shots while shooting, which is always useful when filming vlog footage.
Optional GoPro Vlogging Equipment
Protective case.
It’s not always the case that GoPros come with their own protective cases. Sometimes, GoPro users have to hunt down their GoPro case, and it seems like the GoPro Casey might be the perfect option. The Casey will fit any GoPro, including some additional accessories you might buy and protects against water and harsh weather.
It’s always better to be safe than sorry, so we’d highly recommend investing in a protective case at the beginning of your GoPro vlogging journey.
Rechargeable Battery
Some shooting options on the GoPro require a little extra battery power, so if you find yourself often lacking on battery power when vlogging with GoPro, then consider buying a rechargeable battery.
GoPro Screen Protector
GoPro screens can sometimes get damaged if you decide to use them in rough conditions, so if you can afford it, buying a screen protector from the start is a great idea. It will protect your GoPro from scratches and other external damage, and you will save yourself a lot of trouble in the long run. Most screen protectors cost around $10 and they’re quite easy to set up.
Chest Mount
The perfect accessory for travel vloggers who always have their hands full – the chest mount will allow you to go on carefree adventures and film them without having to worry about capturing the perfect shot. The chest mount is lightweight, so you won’t have to worry about carrying around a heavy accessory and it can be worn with most clothing pieces.
Just like the chest mount, the head strap will make vlogging with GoPro a lot easier. The head strap is adjustable, so it can fit any head size, and it’s compatible with most GoPros.
Selfie Stick/ Extension Pole
Using a selfie stick while vlogging can be quite intimidating at the beginning, but it certainly allows vloggers to get more shots and new perspectives. If you aren’t shy in public, consider getting a selfie stick for your GoPro. Most selfie sticks designed for GoPro are waterproof and extend to a pretty long distance. You’ll be able to swivel the GoPro any way you like and adjust the angles easily.
The GoPro El Grande is one of the best extension poles out there which comes with an over-sized grip that will improve your whole vlogging experience. You can use it for various types of activities such as biking, skiing, and skateboarding, or, since it’s waterproof, any activities that require you to be near water.
So now that you have all the equipment needed to start your first GoPro vlog, it’s time to go over all the steps required when vlogging with GoPro.
Connect to the GoPro App
The first thing you want to do is connect your GoPro to the official app. If you haven’t downloaded the app yet, now is the time to do so. Note that internet access is required for downloading and using the app. Make sure your Wi-Fi is on, and once you have a secure connection, click the Connect and Control button. From there, you can monitor the shots and make any necessary changes in the camera settings.
Use the GoPro Case
For this step, you will need to have your external case (which comes with GoPro purchases for free) in hand. If you want to attach your GoPro to a tripod or any other accessory, it needs to be mounted in the external case first.
Connect Your GoPro to Your Mic / Tripod
Most of the equipment mentioned above requires an easy setup. When it comes to connecting your GoPro to your external mic, you will need a GoPro Microphone Adaptor. All you need to do is open the GoPro door and plug the adapter of the microphone in. After the mic has been connected to the GoPro, you won’t have to do any additional installation – the mic will connect automatically to the device.
Mounting your GoPro to a tripod is a straightforward process as well. When mounting the GoPro, make sure you do it firmly enough so that it’s stable and doesn’t fall off. There are many tripod options on Amazon, and you can even purchase some bundles such as the GoPro 3-Way Grip, Arm, and Tripod .
Adjust the Settings
Some GoPro settings will do better than others vlogging-wise. While vlogging with GoPro, you want to be very deliberate in your choice of settings in order to make as high-quality videos as possible.
Standard GoPro vlogging settings include 1080p quality in 30fps. However, if you want to shoot a unique scene, you will have to do some adjustments, especially in terms of shooting modes. In order to become a good judge of what settings a particular scene will require, you will need to do some experimenting on your own.
YouTube vlogger Meredith Marsh , apart from the standard 1080p/30fps settings, recommends a linear field of view with the Protune turned off. When shooting in unstable conditions, make sure you have the video stabilization on.
For specific Protune setting recommendations, we will turn to MicBergsma . For GoPro vlogging, he recommends to:
- Set the white balance to native so you can easily adjust it later on when editing,
- Set the colour to flat so that you can edit the footage in greater detail,
- Set the ISO limit to 400 for daytime vlogging and higher for low light/ nighttime shooting,
- Set the sharpness to low so it’s easier to adjust when editing,
- The EV Compensation (exposure) setting to be set at -0.5 so you avoid overexposure.
Source: MicBergsma
Start Recording
You’ve connected to the GoPro app, you’ve connected to the accessories, you’ve adjusted the settings, and now it’s finally time to shoot the vlog!
Once your camera is connected to the app, tap the camera icon located in the middle of the screen, underneath the camera name. By swiping left or right, you will be able to choose between different shooting modes. When you select a certain mode, the mode settings will be shown in the bottom left corner.
There’s a capture icon in the bottom right corner where you can choose between different capture modes. Remember that some of the modes might differ depending on what GoPro you have. If you don’t like a certain setting within a mode, you can change it by tapping the bottom right icon where all the settings are shown.
When you’re ready, press the circle icon in the middle of the screen to start recording.
Import the Footage to Your Video Editing Software
Once you have the clips you need in order to form a cohesive GoPro vlog, it’s time to import the footage and start editing. You have a couple of options when it comes to uploading your footage to your computer:
- Upload it with an SD card reader
- Use a USB cable
- Use software like Quik
Just like editing vlogs filmed on conventional cameras, you have the option of using free or paid editing software. Some editing software comes with certain computers, like iMovie or Adobe. If you’d like to go for a paid version, Final Cut Pro X is highly praised for its easy navigation, so it’s also suitable for beginners.
Here is where all the magic happens. In each editing software, you can make adjustments such as adding a title, making smooth transitions, adding filters, cutting/adding footage, and creating special effects. For more editing software recommendations, check out our in-depth guide on the best vlog editing software .
You will make plenty of mistakes in your GoPro vlogging journey. Everyone does. We’re here to give you some heads up on what kind of mistakes to avoid when starting out.
Using the same angle when shooting . When vlogging with GoPro, some angles can be limited, but that doesn’t mean that you should solely rely on one angle. Get creative with your shooting perspective and mix it up every once in a while. Use an accessory like a chest mount or a selfie stick that will allow you to capture more of your surroundings than you would normally. If you have the option, get someone else to film you for a couple of shots – it will give your viewers a refreshing perspective and it will make your video more engaging.
Not including storytelling in your GoPro vlogs. Vlogging can be an extremely creative endeavour, but you have to plan ahead. Whenever you film a vlog, think about the story behind the shots you’re capturing. Include everyone else around you and film from their perspective. When travelling, interview locals and tell their side of the story. Add a unique fact when talking about a specific subject and, above all, arrange your shots so they tell a cohesive story. The possibilities are endless.
Failing to take care of your GoPro . Due to its smaller size, it’s easier to get your GoPro in accidents in comparison to standard cameras. GoPros are naturally much more fragile, so you need to carefully protect them against harsh weather and conditions that can damage them.
Forgetting to adjust the settings . It can be easy for GoPro vloggers to get caught up in the moment and forget to adjust their settings when they move to an area with low light, but by doing so, you will lower the quality of your vlogs and you will have to reshoot the footage. In order to save time, remember to keep the shooting conditions in mind at all times or adjust the settings accordingly.
Since now you have a good grip on the mistakes you should avoid while vlogging with GoPro, let’s move on to more general tips that you can use in your everyday GoPro vlogging.
Include time-lapse videos. Time lapses are some of the most visually appealing shooting modes GoPro offers. It doesn’t matter what activity you’re doing while you’re filming a time-lapse – it can be a running competition, a picturesque sunset, a drive, or a boat trip, there are plenty of ways you can get creative with your footage and include some variety in your vlogs. Time lapses allow you to make your GoPro vlogs more dynamic and thus more captivating for the viewers.
Do your best to extend the battery life . There’s nothing more frustrating than eyeing a perfect shot and not having the battery to actually shoot it on your GoPro. In order to avoid this, either do your best to extend the battery life on your GoPro by switching off Wi-Fi when not needed or purchase an extra battery and carry it around with you everywhere you go.
Good music is key. Don’t underestimate the power a great music selection can have in your vlogs. In order to learn how to find music for your vlogs easily, check out our guide on finding music for your vlogs .
Lighting can make the world of a difference . Try your best to shoot in natural lighting whenever you can. Doing so will instantly improve the quality and clarity of your vlogs. If you don’t have the option of shooting during the day or outside, you should think of investing in professional artificial lighting or GoPro accessories that offer artificial lighting.
Use transitions . Transitions allow you to express your creativity and make your vlogs a lot smoother and more pleasant to watch. There are plenty of transition options while filming with a GoPro, and most of them are pretty easy to make. If you don’t have an idea about how to make transitions in your GoPro vlogs, check out Jake Rich ’s 5 Must Know GoPro Transitions video for some helpful insight.
Source: Jake Rich
Create a powerful start to each vlog . The truth is – if you don’t capture the viewer’s attention within the first few minutes of vlogging, chances are they will move on to the next vlog. To prevent this, put some special thought in the start of your videos and make the intros captivating so that you can grab your viewer’s attention from the get-go.
Get organized . You will have a lot of clips when you sit down and edit, there’s no denying that. To make this process easier, organize your GoPro files, name them accordingly, and separate them according to which video they belong to.
Our GoPro vlogging guide comes to an end, so we hope you found it helpful. Even though vlogging with GoPro can seem intimidating at first, by following these simple steps you can easily get some captivating shots in no time.
Everyone has different definitions of what constitutes a good vlogging camera, but it’s safe to say that the GoPro has some incredible features that are amazing for various types of vlogging. It’s a camera that will enable you to capture great footage with plenty of shooting modes, all the while being very easy to navigate, carry around, and travel with, so overall it’s worthwhile to invest in it.
There are plenty of perfectly adequate GoPro versions for vlogging. Our list of the best GoPro for vlogging contains the GoPro Hero 8 , the GoPro Fusion , and the GoPro Max .
The price of GoPro cameras varies depending on what kind of GoPro you purchase and where you get it from. Overall, GoPro cameras cost between $200 to $450.
Last update on 2024-04-27 / Affiliate links / Images from Amazon Product Advertising API. Our editors may earn a small commission if products are purchased via our external partner links.
Related Topics
- gopro vlogging

Best Live Streaming Camera

Best Microphones for Gaming and Streaming
You may also like.

A Beginner’s Guide to Vlog Lighting

Backing up Video for Vlogging

Best Vlogging Camera Buyers Guide

Best Motovlogging Setup

Best Vlog Editing Software

8 Best Vlogging Drones
Input your search keywords and press Enter.
How to Start a Travel Blog (The Ultimate 2024 Guide)

- Last Updated: February 5, 2024
Congratulations, you’ve decided you want to know how to start a travel blog! Let us be the first to welcome you to the club. You’re in for a fun ride!
Before we start there are a few things we need to clear up about starting a travel blog.
First of all, it’s not hard. Second of all, it doesn’t take long. Third, it is cheap.
The difficult part comes in trying to grow and make money from your travel blog, but there’s a lot of potential to do this successfully, and the rewards are worth the effort.
These days we make over USD$30’000 a month from this website and our various media clients. In other words, we make a good living from travel blogging.
We’re going to assume you’re in the same position that we were when we first decided to start NOMADasaurus. One day we decided to make a travel blog. So we opened up Google, started researching, and became completely overwhelmed with an entire world that we knew nothing about.
Hosting, domains, analytics, content management systems, HTML, social media marketing, SEO – all these terms went straight over our heads.
The truth is that starting a travel blog is actually quite a simple step-by-step process, and there’s no need to get overwhelmed by it all.
Let us walk you through that process.
We’re going to show you exactly how to start a travel blog in less than an hour!
- Pick a blog name
- Define your brand
- Register your domain
- Purchase website hosting
- Set up your host (we’ll show you how)
- Install WordPress (the easy way)
- Pick a theme
- Get some essential plugins
- Plus have some bonus professional tips to start making money asap!
Table of Contents
Tips For Picking A Travel Blog Name
Tips for defining your brand, domains vs hosts, our favourite host is siteground, managed wordpress hosting, step by step guide with siteground, step 3 – install wordpress, free vs premium themes, w3 total cache, google analytics, get on social media, make an about page, custom design your blog, network with other bloggers, don’t sign up for a travel blog course, start blogging, what you need before our ‘how to start a travel blog’ guide.
You’re going to need a few things before we begin.
- A computer (not a smart phone).
- An internet connection.
- A credit card or debit card.
- 1 hour of free time.
- A delicious drink to enjoy.
You also may have seen these companies that give you a free website and only take a few minutes to setup.
Some examples are Wix, Blogspot, WordPress.com and others. These are absolutely fine if you just want to make an online diary about your travels, and maybe have a few friends and family follow along.
But these aren’t any good if you want to make a successful travel blog, or if you ever want to try and make money from it in the future.
Do yourself a favour and start with your own hosted travel blog from the very beginning. Not sure what that means or how to do it? Well, let’s get started…
Step 1 – Pick Your Name and Brand
This is by far the hardest part of starting a travel blog. Picking a name can literally take weeks.
This will be your online identity, and you’ll be telling people all around the world this on a daily basis, so make it something you are happy with.
If you want to start a travel blog about one particular place or thing rather than being the face of your travel blog, then this is easier.
You can be “Food Adventures In New York City”, and everyone will know exactly what your blog is about.
Example: Is your name Jim? Then perhaps something like “Travelling Jim” would work for your blog name. Say it out loud. Do you like it? Awesome. In fact, let’s use “Travelling Jim” as our example blog for the rest of this article.
- Keep it as short and simple as possible. You don’t want to be telling people, “Hey, make sure you check out my blog, ‘www.jimistravellingtheworldforanindefiniteamountoftimestartingin2020-ihopeyoufollowme.com'” What a mouthful! If you can keep it between one to four words, awesome! Also avoid having a hyphen (-) in there, again for simplicity.
- Give your blog longevity. Travelling Jim works well, but “Jim’s 2020 Travels” doesn’t. What if you travel in 2017? Same with “Adventures Of A 21-Year-Old”. That’s not going to work when you’re 22
- Don’t limit yourself. If you want to start a travel blog about one particular place or topic, then go for it. These can be very successful in a niche market. But if you are travelling to Australia for example, don’t call your blog, “Jim Travels Australia”. How are you going to blog about Europe if you ever go there? If you want to have a general travel blog and don’t know what your exact plans are in the future, keep it broad.
- Think outside the box. While you want to keep things as simple and general as possible, don’t forget that travel changes people. Don’t call your blog “Forever Single Traveller” just because you’re single when you started. What if you get a partner? Then you’re no longer the Forever Single Traveller. Same with something like “$1 A Day Travels”, because you’re broke when you start. Maybe in two years time you won’t be broke (and hopefully you’re actually making money from your travel blog). Reasons like this are why it’s great to keep it simple. This also helps with brand partnerships in the future, but you don’t need to worry about that today.
You’ve thought long and hard about it, and love “Travelling Jim”. Next step is to make sure it is available. This is easy to do.
- Type in “travellingjim.com” into your internet browser. If nothing comes up, you might be in luck. If it does, it’s time to come up with something new.
- Go to NameCheap.com and type in “travellingjim” into the little box. Hit search and see what it says. If it’s available, then the name is yours for the taking! You’re ready for the next step.
- Go ahead and buy that domain on NameCheap. You’ll then own your URL for as many years as you choose to buy it for, and it’ll be quite cheap (around US$10 a year). If you would prefer to buy it with your hosting and have it all in one place, hold off and you can do that in the next step.
Bonus Tip: If “travellingjim.com” is taken, but “travellingjim.net” is available, DO NOT go for it. This gets very confusing if you tell someone your blog is called “Travelling Jim” and they accidentally go to .com instead of .net. Find something that is fully available.

You have a very important question to ask yourself: What is your travel blog about?
You’re probably thinking, “Duh, travel!” And you are right. But in this day and age having a “travel blog” isn’t enough.
If you have zero plans to turn your travel blog into a way to make money while travelling , then you can skip this part.
But if you do want to start earning money from your travel blog one day, you need to come up with a direction and style that will give people a reason to read your posts.
Don’t worry, your brand can change over time. Ours has! But for now, here’s some tips to get you started.
- Will you be making videos or trying to take amazing photos?
- Do you have a unique back story?
- Want to write about the awesome food you find?
- Interested in documenting environmental issues and sustainable tourism?
- Are you an adventure traveller? If so, what kind of adventures?
- Delving into culture?
The list is endless. You will get bonus points if you are doing something truly epic that gives people a reason to follow you. For example even though we had already been travelling for years, we only started this travel blog when we began our “Thailand to South Africa without flying” mission. That gave us purpose and reason to write.
If you can’t think of anything right now that’s ok. Just keep in mind that as your blog grows it will be handy to have a brand and direction.

Step 2 – Get Hosting And The Domain
Now that all the thinking is done, it’s time to get started on the technical things. This is what will take less than 48 minutes.
Don’t worry, it’s not difficult and we’ll walk you through the process of how to start a travel blog from scratch.
If you don’t know what these are, let us try to explain them as easily as possible. Let’s go with a ‘house’ analogy.
A domain (travellingjim.com) is an address. A host is a house. A website is you.
You live in a house, and your address is how people find your house. In internet terms, your website lives on a host and travellingjim.com is the address.
In more details, a host is a company that has a bunch of computers (also called servers) that are permanently connected to the internet.
Your blog and all its content, pictures, videos, etc actually “lives” on your host’s computers.
When someone types in “travellingjim.com”, their browser (e.g. Chrome or Safari) downloads your blog from one of these computers, and opens it up on your reader’s device.
Don’t stress too much about all this. Once you’ve set it all up once, it will be a long time before you have to worry about this again.
We personally use and recommend SiteGround . They are our third hosts now (having previously been with Bluehost and Dreamhost), and we couldn’t be any happier that we changed over.
Besides being great for established websites, they are also perfect for brand new blogs.
They have incredible support, fast servers, an easy control panel to navigate and very high uptime.
They are also very affordable, and getting setup with them is super simple. They really make it very easy when it comes to how to start a travel blog.
We must stress this again – their support is amazing. We have lost count of the number of times we’ve been confused about some technical thing we’ve tried to implement on our site and screwed up, just to jump on SiteGround’s 24/7 instant chat service and have their experts fix the problem for us in a matter of minutes. This alone makes them the best company out there.
By all means, feel free to go and do your own research. You’ll find that most companies have the same prices on their entry-level plans (SiteGround is $3.95 a month) and you won’t likely notice any difference in quality until your blog grows.
But we only ever recommend brands that we have used and are happy with, so that’s why we’re going through the next few stages with SiteGround.
As we’re going to go with WordPress (the best option by far), it’s good to get a dedicated and managed WordPress hosting solution.
What this means is that your host and server is optimised to run WordPress efficiently and with no issues.
Luckily SiteGround has a spectacular Managed WordPress Hosting solution which includes premium plugins (more on plugins at the bottom of this article), one-click installation, great security and a bunch more.
And if you sign up to SiteGround’s Managed WordPress Hosting solutions through our links, you will receive 60% off the regular price. Amazing deals all around!
Note: We are not sponsored by SiteGround in any way, shape or form. We pay for our hosting just the same as everyone else does (and in fact are on their higher-end cloud plan due to us needing to trust the best host out there to manage our website). We just really, really love them.
We’re going to walk you through the process of how to start a travel blog step by step.
- Go to SiteGround and click on “Sign Up”

- Choose the “Start Up” plan. This is only $3.95 a month and has all the features you’ll need to get started. If you feel like you really want to focus on growing your travel blog to more than just your friends and family reading it, you can go with the “Grow Big” plan, but if you’re happy to keep costs down let’s go with Start Up.

- Choose the “Register A New Domain” section. Enter whatever your domain is (travellingjim.com), and click proceed.

- Enter some account details and your payment options. We recommend paying for at least 12 months up front. On the $3.95 plan, that works out to be only $47.40. Even cheaper than $50! You don’t need Domain Privacy or HackAlert Monitoring, so feel free to unselect those and keep your costs down.
***UPDATE – Siteground now charges $14.95 a year for registering a new domain. Website transfers are still free if you already own your own domain name, which you can buy with NameCheap .

- You’ve now come to a verify page. SiteGround will run a fraud check to make sure everything is all good.

Congratulations! You are now the proud owner of a new domain and host! At this point you will get all your login details for SiteGround sent to you in an email.
Don’t finish your drink just yet, there’s still a little bit more you need to do to finish starting a travel blog. And the next thing is to install WordPress.
What is WordPress we hear you ask? WordPress is a “Content Management System”, or CMS for short. Basically that is the system that allows you to put words, pictures and style on a website without knowing any coding or programming. WordPress makes building your website easy. In fact WordPress is used on 26% of all website on the entire web.
Now is a good time to mention that there are actually two WordPress’s. There’s WordPress.com and WordPress.org. WordPress.com is for free blogs, WordPress.org is for people who want to own their own blogs. You’re going to go with .org.
Installing WordPress onto your host is very easy to do, and with SiteGround it’s actually all automatically done for you with a very simple process.
- Login to SiteGround and click on “Get your new site up and running – Set up in 2 min!”

- You’ll get a popup with the SiteGround Account Setup Wizard. Select “Start a new website at (URL)” and hit proceed.

- Now you’ll be asked what type of website you need. Select “Personal/Blog” and then scroll down. The software you are going to use is WordPress, so select that and move onto the next part.

- Now you need to make up your WordPress login details. We recommend choosing something that would be really hard for people to guess, as this is the door to your website. So don’t choose “Admin” as your username for example. You will need these login details to access the “behind the scenes” section of your blog.

- Now you’ll be given an opportunity to choose your web design template. This is otherwise known as a theme, which we will go into more in Step 4. Feel free to click around and see if you can find a design you like. Otherwise you can skip this part for now.

And guess what – you’re done! You’ll get a very satisfying “Congratulations” with a big tick, and all your login credentials. We suggest you write these down somewhere safe.

What now? Well now you want to actually go to your website. And as usual, this is very easy to do.
- Simply go to the address bar in your internet browser and type in “travellingjim.com/wp-login.php”. You’ll be taken to this screen:

- Put in your login credentials and you’ll be taken to the WordPress dashboard. This is what it looks like (with a few less options on the left panel):

Welcome to WordPress! This is where all the magic happens. You will write your blogs under “Posts”, make things like your about page under “Pages”, change the style of your blog under “Appearance”, and so on. You’ll get pretty familiar with all this over the course of a month or so. But for now, let’s move on to the next stage!
Step 4 – Pick A Free Theme
You’ve got your domain, you’ve got your host, you’ve installed WordPress, now you need to choose a theme. What’s a theme? Well that’s what your website looks like when people go to it. Keeping up with the house analogy from before, think of it as all your furnishings and decorations.
Back in the day you needed someone who was good at computer coding to make your website look good. These days you just install a theme with a few clicks.
- Go into your WordPress dashboard.
- Look for “appearance” on the left panel and click on themes.
- Activate the WordPress Twenty Seventeen theme if it isn’t already, and your website is officially up and running!
- Now just type in travellingjim.com into your internet browser! There it is – how exciting!
There are thousands of themes out there to choose from. Some are free (yay!) and some cost money.
When you’re just starting out you should be pretty happy with just a free theme. But as time goes on and you get more content on your blog, you’ll likely want to upgrade to a paid theme. Why? They offer more customisation, they’re faster, and they look better.
All you have to do is Google “WordPress themes” and be prepared to lose the next few hours of your life as you scroll around. This all comes down to personal taste.
Personally for a few websites we own, we use the Elementor page builder theme . It’s a very powerful and simple to use “drag and drop” designer that is only limited by your imagination, but they also make a number of other awesome premium themes you can choose from.
And guess what – you are now the proud owner of a fully functional travel blog! You did! If you want you can leave now and go get another drink. Otherwise stick around for some bonus tips to help make your travel blog extra awesome!

Step 5 – Download Essential Plugins
Now that your travel blog is fully setup and ready to go, it’s time to install some plugins. Think of plugins as extra additions to make your house better, like a security system or new light fixtures.
Again there’s thousands of plugins out there, but to begin with you only need a few core ones. To install a plugin go into your WordPress dashboard, look on the lefthand panel, click “Plugins” then click “Add New” on the page that opens up. Search for the ones listed below, click download, and activate. WordPress will do the rest.
This is an anti-spam plugin that filters out crap messages left on your blog. Don’t ask why (you’ll find out as time goes on), but you’re going to end up with hundreds of spam comments on your posts. Just install this plugin and let it do all the filtering.
You’re going to hear the term “SEO” a lot during your journey as a travel blogger. SEO stands for “search engine optimisation”, and that basically means when people go to a search engine like Google and type in something – for example “ things to do in Berlin ” – the posts that have the best SEO go to the top of the results, meaning more people click on them. It’s complicated and you’ll learn a lot more about it later, but for now just install Yoast.
Yoast is a plugin that pops up at the bottom of the section when you are writing a blog post. You put in whatever keywords you think you are writing about (like “best places for breakfast in Sydney”) and it will give you a list of things you can improve on to help make your post rank higher in Google.
Another plugin that is hard to explain for beginners, but essentially W3 Cache will make your website load faster for people who visit it. This is important. Install it and use the automatic settings until you learn more about it. One cool thing to note as well is that if you signed up on the Siteground “Grow Big” account, you also get a cacheing feature on your plan. Check it out.
WordFence is a great plugin that adds a layer of security to your website. This will stop people hacking your travel blog. Don’t ask why, but for whatever reason your blog will come under attack from hackers. Everyone’s does. So just install WordFence and let it do its thing.
Travel Blogging Tips
You’re now well on your way to being a travel blogger! Your site is up and running, you’ve installed WordPress, you have a theme to make it look pretty, and you’re ready to start writing.
Time to hit the world!
However if you’re still interested in becoming a professional travel blogger, or just would like to grow your travel blog, here are a few last bonus tips to help out.
Google Analytics is a program that tells you how many people go to your travel blog, and how they found it. When you first start blogging you’re probably really interested to know if anyone is reading what you write! Google Analytics will tell you.
Learning about how to setup Google Analytics and how to use it is an entire blog post in itself – something that we won’t get into. But you should read this article from Moz about how to set it up properly.
Now that you’ve got an awesome travel blog, you need to sign up for social media so people can learn about you and follow your journey! The most obvious ones are Facebook, Instagram and Twitter and, but you’ll also want to look into Snapchat, YouTube and Pinterest. Go to those websites and make accounts called “Travelling Jim”, and start connecting with the world.
One of the first things you should do on your travel blog is make an “about” page. Go to your WordPress dashboard and click on “Add New Page” on the lefthand panel. Name your page “About”, and write up a little biography on yourself and what your website is. Upload a few pretty pictures and you’re sorted. Then all you have to do is hit publish and you’re all set! Also make a “Contact” page while you’re at it.
Because you’ve set up your theme, you can go into WordPress, click on Appearance > Theme > Customize, then start designing your blog. Pick some colours, change your font, add some menus, etc. Don’t forget to design a cool logo for yourself! If you don’t know how to do this yourself, you can just go to Fiverr and pay someone a small amount to make something basic.
You’ve signed up to Facebook, so now you can start networking with other travel bloggers. There are a number of really good Facebook groups you can join where you’ll find a whole bunch of people wanting to discuss blogging, from absolute beginners right through to the biggest names in the industry. We recommend signing up for “We Travel We Blog” and “Under 1000 Club – Aspiring Travel Bloggers” first. As you come up with questions about travel blogging, we’ll all be there to help you answer them!
This might go against everything other bloggers will tell you to do. But trust us, you don’t need them. The most popular ones are “Travel Blog Success” and Nomadic Matt’s course. Guess what – everything they teach you in those courses you can learn for free on Google or by asking in those Facebook groups we told you about. Save the hundreds of dollars and learn by doing.

That’s it, that’s all! You made it to the end of the article. Together we went from being an absolute beginner to having created your very own travel blog from scratch! You deserve another drink.
There is only one thing left to do now – start blogging! Get out there, take some photos, write some stories and make the best damn travel blog on the internet!
Play around with the WordPress dashboard, go to the section that says “Posts”, add a few new ones and hit publish. We promise you that publishing your first blog post is a very, very exciting moment!
You still have a lot to learn, and that’s ok. We’ve been doing this for 3.5 years now, professionally for 2.5, and we still learn things every single day. This is an ongoing process, but you’ve made the big leap and landed on your own two feet.
If you have any other questions please feel free to email us. Also make sure to check out those Facebook groups.
Our other last tip is to use Google.
We guarantee that no matter what problem you are having, whatever segment it is that you don’t quite understand, someone else has been in the same situation and asked the same questions.
Happy travels and enjoy the journey! We’ll see you out there in the blogosphere.

Alesha and Jarryd
Hi, We’re Alesha and Jarryd!

We’ve been traveling the world together since 2008, searching for the planet’s best destinations and adventures.
Love Travel?
Sign up for our free weekly newsletter for the best travel tips, ideas and deals!
We respect your privacy. Unsubscribe at any time.
READ MORE...
Our 15 Best Travel Tips from 15 Years on the Road
16 BEST Travel Backpacks – Ultimate Buyers Guide [2024]
Best Blogging Tools for Beginners | 11 Tools We Use for Our Travel Blog in 2024
Related Posts
10 smart tips for carry-on luggage: what to pack in carry on bag for flights, teaching english abroad – a beginner’s guide, a beginner’s guide to couchsurfing, 5 ways you can travel more in 2024, 70 thoughts on “how to start a travel blog (the ultimate 2024 guide)”.
That was awesome post
Thanks for the information I love it.
Thanks for sharing tips, very informative.
Thank you for the wonderful guide on how to start a travel blog its must know for any beginnger thank you for sharing great info
This article is a breath of fresh air for anyone considering starting a travel blog. It’s refreshingly honest and concise, addressing common misconceptions head-on. The clear statement that it’s not a difficult, time-consuming, or expensive endeavor is reassuring for beginners. What sets this piece apart is the author’s personal success story. Making over $30,000 a month from a travel blog is not only impressive but also demonstrates the potential for real income in this field. The article’s brevity and candor make it an engaging and motivating read for those looking to dip their toes into the world of travel blogging. It’s a no-nonsense guide that leaves you feeling inspired and ready to take on the challenge.
Thanks a lot for posting such an informative article.
Glad you found it helpful. All the best
Thank you so much. We are glad you found the article helpful.
I really appreciate your blog it’s very useful, thanks for sharing. Nepal tour!
I can’t even begin to explain how this has helped me. I feel like it’s just so much easier to learn this way, and it’s fun. I love how interactive it is. I was able to find all the information I was looking for very quickly. The layout was appealing to the eye. I would highly recommend this website to anyone looking for this type of information.I just wanted to say thank you for the information. I am really enjoying it, and I appreciate the opportunity
Thanks for the great advice!
Wow, this is an amazing guide! I had no idea there were so many steps involved in starting a travel blog. This guide makes it seem so easy and doable. I’m definitely going to follow your tips and start my own travel blog! Thank you for sharing your knowledge!
So glad you found it helpful. Thank you so much. If you have any questions, give us a shout.
This blog is a great resource for anyone looking to learn more about the topic.
Thank you so much. We are glad you found the article helpful. 🙂
I can’t even begin to explain how this has helped me. I feel like it’s just so much easier to learn this way, and it’s fun. I love how interactive it is. I was able to find all the information I was looking for very quickly. The layout was appealing to the eye. I would highly recommend this website to anyone looking for this type of information.I just wanted to say thank you for the information. I am really enjoying it, and I appreciate the opportunity to
So stoked. So happy we could help. All the best with your website journey. 🙂
It’s a really useful piece of information. I appreciate you providing us with this helpful information. Please keep us updated in this manner. I appreciate your sharing.
Nice information
Thank you so much for this very informative article! You are an angel. I’ve come across many blogs and this has been the perfect way to help starters like me to start our blogging journey. I wish to see more guide and help from you after blogging. The how’s and what’s. Thank you and more power!
There is a sort of amazingness about going far away and afterward returning all different.
I completely agree with what you have written. I hope this post could reach more people as this was truly an interesting post.
Thanks a lot for posting such an informative article. I have just started my blog website and your article has helped me gain confidence about how to kickstart my journey. Your article is the most useful and motivating article I have found so far.
Thank you so much.
Glad you found the article helpful. That is amazing you have started a website. CONGRATULATIONS!!! It is overwhelming. We totally understand. We have found YouTube so helpful for even little things we could not figure out. We have used it so much and still do today. Many people are so generous giving information about different things to do with website development. All the best with your journey and a massive congrats again. 🙂
Thank you for this step by step comprehensive instructions to create a travel blog, the best one I’ve seen so far. Thanks for sharing your tips. And wish you the best for the next.
You are welcome. Glad it was helpful. 🙂
Thank you for a very interesting article. I greatly appreciate the time you take to do all the research to put together your posts. I especially enjoyed this one!!
Thank you so much for your comment Shiwani. We really appreciate your kind words. 🙂
Hello from Morocco. i like your blog travel it’s very important to have bloger like this and well informed about travelbloger went above and beyond the expectations to show us how to get something very important and exactly the kinds of things we most interested in, and so much more that gave us a really memorable experience that i saw here in this bloger.
Thank you so much for this amazing things.
Nice info. This is a very impressive post, Very useful information, it clarified things a lot for us. Thanks for sharing valuable tips. – Shirdi
Hey Alesha and Jarryd, thank you for sharing! I just started my travel blog and this post is REALLY helpful!
That is AMAZING. Congratulations. We are stoked for you. So glad our article helped. 🙂
Hi Alesha And Jarryd . Just a couple of quick questions……. Can your photography be copied/ download from your site or do you use low res images for the site to stop the practice? I’m not to keen on the thought images can be taken. And finally- do you film in 4 k or is this a bit of overkill and 1080 p is fine ? Thanks in advance. Jim
Hi Jim, how are you? Sorry it has taken us a bit to get back to you. Unfortunately our photos can be. Definitely not downloaded but people can copy them as low resolution. We have had many sites steal our images. We give them a chance to delete them and if they do not we open a claim with our imagery copyright lawyers. 1080 is absolutely fine for social media platforms. If you intend to film a documentary or event, we recommend shooting in 4k. We do shoot in 4k. Some times it is over kill but we know we have high quality footage incase anyone want to buy it. It is totally up to you and your shortage situation. All the best
Wow! super impressed! Very throw! 5***** Your professionalisms and willingness to share, is like a breath of fresh air. Now that I’ve read through everything, time to start. Look forward to future conversations! Thank you!
Glad you liked the article and we could help. 🙂
Excellent i really want to start this project. Thanks !
Let us know how you go Alex. All the best.
Thanks for some new information and ideas which I’ve not seen in other places before
Glad to help. 🙂
Truly useful piece of information. It’s good to learn the ways to improve a blog from top bloggers.
Thank you. 🙂
Thanks guys
An excellent post , and great advice – learn by doing I have just subscribed and will recommend your site
Thank you so much. Glad we could help. 🙂
How do you guys earn money from the blog?
Hi Danny, through many different ways. Selling our photography, affiliate links, advertising and companies/tourism boards hiring us for different things, 🙂
Great article full of useful info. Love it!
Thank you. Glad you liked it. 🙂
Excellent article, I need to enhance the content i have truly. I have attempted to blog on third part systems, it did just not transpire the true way I needed it to. But your website has providing me a hope to do this. I will be bookmarking your website and checking it out from time to time. Many thanks!
Thank you so much. We are glad to help. 🙂
Thank you for this step by step comprehensive instructions to create a travel blog, the best one I’ve seen so far. Thanks for sharing your tips. And wish you the best for the next. Cheers.
Thank you so much. Glad we could help Lorris. All the best
OK, so I “just stumbled upon” you guys after about 2 weeks of reading, watching. listening to many other “How To Start A Blog” blogs. Without gushing, can I say you two had me mesmerized from the first photo, the content and “voice” which comes across your posts. To say this has been the most helpful of all the blogs and bloggers I have followed in the course of the past two weeks is an understatement. THANK YOU for this amazingly informative blog for newbies, sharing what equipment works for you, how to get started with growth in mind. I will take your advice to heart and yes, I will follow!
Hi Debra, thank you so much. We really appreciate it and are so happy this article helped you. It’s a lot of hard work, with lots of unpaid hours at the beginning but if you are committed you will come out the other end. Pick a unique niche and you will be noticed. And last don’t give up If this is what you want, it’ll come. All the best
Wonderful article. This is very informative one. I like it.
Awesome Blog!!! All the tips which are given in this blog are really helpful to start a travel blog
Awesome. Glad we could help. 🙂
Hi Alesha and Jarryd, Awesome post. Thankyou so much for sharing tips.
Glad we could help. 🙂
Hi Alesha and Jarryd, Thanks for the wonderful post. We have travelled to many countries, and, now motivated to start writing our blogs! Thanks for inspiring.
So glad we would inspire you. Once you have started the blog, keep it up. Put the hard work in and it will eventually pay off.
Hi Alesha and Jarryd! Great to find and follow you. Thanks for the fantastic information! We are a 50ish yr old couple from Colorado, USA. We’ve been all over the world, mostly for some pretty epic diving, and are heading out to Peru in the next few weeks. We DO have quite a backstory and have been thinking a lot about sharing it. Thanks for giving us the info to get started! Cheers! Dawn and Vern
Hi Dawn and Vern, Definitely share you stories and all your tips. There are so many more people travelling now. And all different ways too. We found it was a great project to do while we were on the road and then it expanded to what NOMADasaurus is today. It is a great way for your friends and family to ready your stories and keep track of where you have been. All the best and happy travels.
Wonderful Post!
Thank you so much John
We just signed up with SiteGround — thanks for the recommendation!
That was the most comprehensive instructions I I have ever seen. I have not had the time to do it yet but will give it a try. One question! I already have a URL address on Google. How do I move it to Worldpress?
So sorry we missed your comment. Thank you and we are so glad this article could help you. Our suggestion is to buy a URL through namecheap.com and buy hosting through Siteground (link above). Then you can install WordPress on there. If you have any more questions don’t hesitate to ask. 🙂
Leave a comment Cancel reply
Save my name, email, and website in this browser for the next time I comment.
- YouTube Conventions & Events
Best Vlogging Equipment for YouTube: 18 Items On Every Budget in 2024

This review is intended to evaluate and review essential devices and equipment that are more or less recommended for every YouTube or vlogger.
Hopefully, this review will help you choose the best vlogging equipment for the YouTube channel and your vlogs!
Here is the list of the vlogging equipment for YouTube in 2024 you have ever come across. Simply go through the must-have things every vlogger should have in their inventory.
- Microphones
- Ring Lights
- Green Screens
- Stabilizers
- Equipment Sets
Cameras: Essential Vlogging Equipment
1. canon eos m50 ii – perfect budget vlogging camera with a flip screen.

Canon EOS M50 II is one of the best affordable vlogger cameras in 2024.
Before we talk about the Canon EOS M50 II, it’s pertinent to know that you might find the Canon EOS M50 and M50 II to be quite similar or completely different, depending on your level of expertise. However, Canon EOS M50 II has many updated features, nevertheless.
Firstly, although both M50 and M50 II appear identical twins from the exterior and are fairly easy to handle, Canon EOS M50 II comes with an improved grip and is even more convenient to use.
You’d be wondering, what is the most remarkable feature of the Canon EOS M50 II that makes it stand out from other cameras?
Without any doubt, that is its amazing autofocus, which is not only unparalleled in its quality but is also at least 30% faster than the Canon EOS M50 – imagine how good it is!
Another great addition to the Canon EOS M50 II is the eye-tracking feature. So, although both M50 and M50 II feature extraordinary face-tracking, M50 II takes it to the next level with its excellent eye-tracking.
Additionally, its top-tier 24 megapixel APS-C sensor is ideal for professionals who prefer to focus on finer details in pictures and videos.
Since M50 II supports vertical video quality, it’s easy to edit your videos on many video editing apps without sacrificing either resolution or quality.
And, how can we forget about one of the hottest features of Canon EOS M50 II?
It’s perfect for live streaming and can be used as a professional webcam. It produces an extremely neat and clean HDMI output, better than M50, and much better than most high-end cameras.
In comparison with other vlogging cameras that are popular among YouTubers, Canon EOS M50 II could be easily named as one of the greatest vlogging equipment for YouTubers according to its price and quality.
Moreover, it is compact and easy-to-use + has a flip screen feature, which is super important for vloggers. Overall, it might be the best Canon entry-level camera in the market. Moreover, the pricing is friendly compared to the other models in this segment.
2. Sony ZV-1 – Best Camera For Daily Vlogging in 2024

The Sony ZV-1 camera is designed and adapted for anyone who is planning to create various content vlogs.
First of all, it really feels that the camera is adapted for vloggers, as the extremely convenient control and excellent video quality guarantee great content.
The camera has a flip-screen, great Full HD video quality (it can shoot in 4K as well), superb focusing feature, an external mic port, and so on.
By the way, most of the YouTubers are posting their photos taken with this camera on social networks like Instagram! If you plan to travel around capturing your travels for a vlog, this camera is your best companion!
The question may arise as to whether this camera is a game-changer. Well, absolutely not, but as the new product, it does the job really well and if you are looking for your vlogging equipment best possible camera – you should consider this.
Microphones: Must-Have Vlogging Equipment for Recording Video
3. blue yeti – best microphone for home type vlogs.

If you are looking for a microphone that assures quick and easy recording at home, the Blue Yeti is just what you need and should be added to equipment for YouTube Videos!
The record of any project using this microphone is crystal clear , so you can easily use the recordings on YouTube.
A simple plug-and-play connection and the device are ready to be used. Also, another important feature is that it is compatible with any PC or MAC and does not require any drivers to be installed.
The presence of a custom-designed condenser capsule helps record crystal clear sounds. This microphone can be used for recording full bands, gaming, acoustic instruments, or vocals.
It has been certified by Skype for its clear audio. You can record sounds for MySpace , SoundCloud , YouTube , podcasts to create the narration for your home movies and more.
All in all, this microphone ensures versatility and ease for your next vlogging project!
4. Rode VideoMic GO – Best Microphone for Active Vlogging

If you are planning or filming your vlogs while spending time actively, we recommend purchasing probably one of the most popular and best microphones for this activity in 2024.
Generally speaking, this microphone attaches perfectly to the top of the camera and does not interfere with the filming of the vlog itself.
As a result, you also don’t have to think about the microphone and sound quality, as the microphone will always be in front of you when filming the video.
However, before you buy this microphone, make sure it is compatible with your existing camera.
Typically, this microphone is used with point-and-shoot cameras, camcorders , DSLR cameras , and other cameras with a 3.5mm input.
5. Rode smartLav + Lavalier Microphone – Best Budget-Friendly Portable Microphone

Rode smartLav + Lavalier Microphone is a professional-grade wearable microphone.
This microphone is perfect for the new vlogger’s starter kit !
It can be used for a wide range of broadcast scenarios, film, and television recordings. It does not require any additional equipment to record or transfer the recordings.
There is a high-quality Omni-directional condenser capsule in the microphone that picks up sound from all around equally.
To reduce vocal plosives and wind noise, there is a foam popup shield in the microphone. To ensure user-friendliness, there is a durable mounting clip and built-in cable management.
The Rode smartLav + Lavalier Microphone is a clip-on mic that can be used with Android and iPhone. For use with iOS, you need the Rode Rec app.
The higher signal-to-noise and improved sensitivity make this portable microphone perfect for vlogging. The Kevlar-reinforced cable has been tested for strain and ensures long-lasting performance.
Besides that, this audio device works well with most recording apps. If you have to carry around your microphone, it comes with a small storage pouch. Connection to the Smartphone is made using a TRRS connector.
Ring Lights: Essential to Make Your Vlog Visual Better
6. vl-81 led – budget portable light for daily vlogging.

As a vlogger, you are going to need a good lighting kit for your videos. Because lighting is a key element that determines the quality of your video.
Although there are many options in the market, lighting with tripods, portable lighting, LED and bulb lighting. Your final decision will likely depend on your preferences.
But if you don’t have a compelling need for large and very bright lighting, you should absolutely go with the VL-81 LED video light. It is not only incredibly portable and compact, but also produces a very high-intensity light.
Since vloggers need to focus on their face, and that’s why lighting is essential, esp. for indoor vlogging, because good lighting can make your face appear smooth and clear, also the video appears to be more viewer-friendly. And, isn’t that what you want, to gain more and more viewers and retain the older ones?
That’s why we recommend this lighting. You can easily mount the LED light on the 3 shoe mount that comes with the light, and place it in a perfect place, and rock!
The light quality is perfect, with an evenly diffused light, especially thanks to the softbox.
It is affordable and offers a good battery backup of 3 hours at maximum light intensity.
The likely drawbacks of VL-81 LED video light are its size, light, and intensity. The size, although perfect for most people, isn’t desired by everyone, especially those who prefer a professional setup with big equipment.
7. Neewer Camera Photo Video Lighting Kit – Great Lighting Kit for Vloggers

Perfect for onsite and video shoots, the Neewer Camera Photo Video Lighting Kit is one of the best options for new vloggers.
With its special LED SMD design, this lighting kit is a dimmable ring video light. Portable and lightweight, this 18-inch ring video light has a service life of more than 50000 hours.
This lighting kit is compatible with most Android and iOS smartphones, along with cameras. For connecting to the phone, a smartphone loader is required, while for cameras, you need a hot shoe adapter.
The Neewer Camera Photo Video Lighting Kit is a comprehensive kit with all the necessary accessories and tools. Any vlogger does not have to buy any other additional equipment to use this lighting system.
The kit consists of:
- LED Ring Light
- Bluetooth receiver
- Hot shoe adapter
- Plug and more.
The color filters that come with this set are high-light transmission plastic filters.
With its solid capabilities, the lightning set has exceptional strength. If you are comparing different budget systems available in the market, this Neewer Camera Photo Video Lighting Kit will surely top the list! It should be added to your vlogging equipment as well!
Green Screen: Backdrop & Background for Your Videos
8. emart photography backdrop – ideal for making videos.

The Emart Photography Backdrop Continuous Umbrella Studio Lighting Kit is the best thing for ensuring perfect photo shoots and video footage as well.
While vlogging, the video’s background plays a very important role in the overall quality of the video.
This 100 percent seamless cotton backdrop comes with a professional massive duty backdrop support.
It gets better:
It is fully washable using a machine.
This lightning and background kit is suitable for portraits, costumes, and large object photography.
The kit comes along with:
- CFL lights bulb
- Backdrop stand
- Light stands for photography
- White photography umbrella
- Photo light bulb holder and more.
It is one of the top solutions for all your background and lighting requirements. Besides that, this is quick and easy to set up a kit that ensures protection against background slippage. The backdrop is crimped along the edges to prevent tears.
Setting up this umbrella studio is just a matter of seconds. It spreads and reflects lights evenly to ensure a clear video. Even the spreading of light also prevents spots and glares.
No noise, no flicker, the emart photography backdrop continuous umbrella studio lighting kit is just what you need for completing your vlogging equipment !
9. Portable Webcam Background – Affordable, Collapsible Offering the Perfect Background Solution

When you are vlogging or streaming, the background makes a huge difference to the overall appeal of your video!
If the background is not chosen right, it can distract your audience and take their attention away.
Here’s the deal:
Do not lose your audience due to unappealing backgrounds; get the Web around Portable Webcam Background, 56″ (Chroma Key Green).
If you are not using a green screen for your vlogs at this moment – this Chroma Key Green background will always provide a professional look and take your video to the next level.
No matter what topic you have chosen for vlogging, this Chroma Green offers great background coverage for your vlogs.
The 56-inch diameter properly fits and covers most chairs, including gaming chairs. The green screen gives you the ability to be anywhere. The presence of spring steel allows you to close this background to around 22 inches.
Setting up this background is easy and hardly takes a few minutes. The collapsible backdrop is portable and affordable and a go-to option for most vloggers.
Recommended Tripods, Sticks and Gimbals for Vlog Equipment
10. tycka rangers 56″ – portable, easy to carry professional grade tripod.

What is the most important element of any photoshoot, videography, or vlogging?
Stability of the camera!
This is where the tripod comes into the picture. Every vlogger needs to have a tripod to maintain the proper position of the camera while shooting.
The Rangers 56” Ultra-Compact and Lightweight Aluminum Tripod is one of the most stable vlogging tripods available in the market. It is finely crafted using precision CNC machines and is backed with a 24-month guarantee.
There are 2 independent control knobs that offer 360-degree panorama to offer proper and perfect shots every time. For a straight shot, there are two built-in levels in the ball head; this makes it easy to get low-angle shots.
Setting up this tripod is easy, and you can also adjust the height of the tripod using quick-release flip locks. As the tripod has a low weight, you can easily carry it anywhere with you for outdoor shoots. Besides that, it is possible to detach one leg and use the system as a monopod.
11. Manfrotto MTPIXI-B PIXI Mini – Budget-Friendly Portable Tripod

MTPIXI-B PIXI Mini Tripod is a portable device that could be used almost with all types of cameras, from smartphones , CSCs, and entry-level DSLRs and is perfect for inside and outside vlogging.
Designed primarily to excel at its functions, there is a rapid push-button lock for head adjustment. Smart, active, and beautiful, the Manfrotto MTPIXI-B PIXI Mini Tripod has set a new standard for mini tripods.
It is the perfect choice for PHOTOGRAPHERS, TRAVELERS, VIDEOGRAPHERS, and VLOGGERS. It also allows you to take spontaneous pictures using your phone or camera.
Also, a smart-looking tripod, its versatility is due to universal attachment and quality construction. Whenever you need support, there is a self-standing bracket present on the backside of the tripod.
The Manfrotto MTPIXI-B PIXI Mini Tripod is made for achieving video shots that are difficult to shoot, usually as it requires a stable camera. To make the camera steady, close the legs together, and get a comfortable grip on it.
Moreover, It is manufactured from stainless steel and has a tactile finish. It is undoubtedly a decent product that any vlogger can add to his best vlogging equipment set.
The best thing about this tripod is that the price is super cheap, so everyone could easily afford it. Anyway, if you are looking for more tripods – check our recent review about the best vlogging tripods in 2024.
12. J oby GorillaPod – Best All-Around Tripod for YouTubers

We know what comes into your mind when you hear the word “tripod”, but Joby has introduced a line of tripods to the market with a trendy style, unreal stability, and reasonable prices.
Joby Gorillapod is a series of tripods for different devices based on their weights. We’ll give you an idea about which is best for you.
The first one, Joby Gorillapod 1k, can support a compact camera weighing 1kg (2.2 pounds) or less than that. It is ideal for point-and-shoot and mirrorless cameras.
It is inexpensive, lightweight, small, and flexible. Its plastic ball-based stands add to its sophisticated design and mobility. It can be wrapped around different surfaces, helping you in certain situations where traditional tripods would be ineffective.
The knob on top of the tripod is conducive to a fair amount of back-and-forth movement.
The second one, Joby Gorillapod 3k, which can support a weight of around 3kgs, is best for cameras like Sony A6400.
The ball head on this tripod allows for a free 360° movement, making your life easy as a vlogger!
Besides it comes with a quick release latch system which provides an easy attachment and detachment of your camera.
The legs of this tripod are made of aluminum rather than plastic, which provides a better durability and stability.
Just like the Gorillapod 1k, it is also quite lightweight, small, and flexible, but it is way more expensive.
Now the third one is an enhanced version of Joby Gorillapod 3k and that is Joby Gorillapod 3k Pro, which offers greater quality and is more resilient than the first two.
It can easily support cameras like Sony A73. Joby has made this one with a lot of delicacy and consideration; it’s the best bet in the Gorillapod series.
Although it’s said to support 3 kgs of weight, it actually has a higher credibility than the Gorillapod 3k, due to its stability and durability.
The last one is Joby Gorillapod 5k, which can support cameras weighing around 5 kg. It is designed for larger cameras and is not practical to be carried around frequently. It is in many aspects similar to the Gorillapod 3k, but is larger.
You get much better camera movement due to the extra knob on top of the tripod. It’s more of a tripod for experts than beginners.
To make a long story short, Joby offers a selection of stylish, high-end tripods, and which one you choose to purchase depends on your preferences and demands.
13. Roxant Pro Gimbal – Budget-Friendly Gimbal for YouTubers

A gimbal as a tool is underestimated by quite a few vloggers and YouTubers.
However, this is a great addition to their equipment, as with this device, you will be able to create ideal slow-motion shots or record action vlogs without any problems.
This device is compatible with all popular types of cameras: Point and Shoot, DSLRs, GoPros, camcorders, and even smartphones up to 2.1 lb (0.95 kg)
In a nutshell, this is not a priority product, but for anyone planning to create ultra-high quality vlogs, it is definitely recommended.
Additional Storage
14. sandisk 64gb extreme – additional storage for youtubers.

I do believe that I should go into detail about SD cards, right?
Whether you are a beginner YouTuber or a professional, we always recommend having extra memory for your camera.
Our advice is to buy 2 memory cards of 64 GB each, and in this way, you will not only have enough space for your video material but also protect yourself from an unexpected lack of space if one card suddenly fills up.
Best Vlogging Equipment Sets
15. canon eos 90d creator kit – perfect simple vlogging set for professionals.
![Canon DSLR Camera [EOS 90D] | Vlogging Video Creator Kit with Stereo Microphone DM-E100, 32GB SDHC Memory Card and Windscreen Accessory for Outdoor Recording Black](https://m.media-amazon.com/images/I/51r2Y7F4UTL.jpg "travel vlog set up")
Despite the fact that this kit is super simple, but you are getting an amazing camera + the perfect microphone and an SDHC memory card.
From our experience, if you haven’t a tripod already, we highly recommend buying a tripod separately.
The camera itself is really amazing!
It offers high-quality images with a 32.5 MP CMOS (APS-C) sensor, high-speed continuous shooting of up to 10 fps, 4K 30p or Full HD 120p video resolution, and more.
The Canon EOS 90D Creator Kit includes:
- Canon EOS 90D camera
- Stereo microphone DM-E100
- 32 DB SDHC Memory card
In general, it is one of the best Canon cameras for vlogging that we ever tried.
16. Canon EOS M50 II Vlogging Set – The Best Starter Vlogging Equipment for YouTube Videos

You have already read about Canon EOS M50 Mark II above, but how about getting the essentials that content creators need in addition to the camera?
This kit comes with an exceptional EF-M 15-45mm kit lens, which is great for both close-range and distance photography.
You should be aware that it produces outstanding results for all forms of photography and videography. Plus, you can easily control the camera from a distance thanks to the BR-10 remote.
The DM-E100S Stereo Microphone is also a great addition. It offers a crisp unidirectional high-quality stereo recording, and reduces peripheral Sound – wind and other background noise – enhancing the quality of sound. Your journey of vlogging is incomplete without a crystal clear sound.
Not only that, the tripod grip HG-100TBR in the kit helps you maximize stability and prevent shaky shots, even in the vertical position.
The Canon EOS M50 II camera is already almost ideal for vloggers, and this kit is the cherry on top.
However, you should ask yourself a simple question, if you really want the additional items? Because you’ll have to pay more than a hundred bucks in addition to the camera’s price!
It is recommended for professionals and successful vloggers, but if you are just starting out, it’s advisable to save money by sticking with the camera for now.
In a nutshell, it is a great addition to the Canon EOS M50 II mark camera, although it’s a bit expensive, and whether you want to buy it or not is your choice considering your budget, expertise, and the nature of your work, it is great to have it if you can afford it.
Here is the Basic Recommended Video Editing Software You Can Try:
17. windows: movie maker – free, easy to use video editor app on windows.

This software allows you to quickly turn your videos and photographs into movies that you can share.
Moreover, it has sounds, special effects, captions, transitions, and many elements to polish your video. You can also add credits, titles, and timeline narration to your video.
Windows Movie Maker also comes with essential software for audio editing. Due to its endless features, it is the most popular video editing software to date.
The best part about this software is that all its features are completely free!
18. MAC: iMovie – Best FREE Video Editor for Basic Editing in iOS
One of the most favorite FREE video editing tools for the vlogger, iMovie is only for MAC and iOS devices.
It allows users to edit their videos in a variety of ways and can be used by any new vlogger. If you are new to video editing, you can pick animations from the preset animations available in the software. It is possible to cut, trim, change the speed of a particular portion of a video. Adding animation or text to the video is very easy.
The edited video can be shared on YouTube, Facebook, and other channels.
If you are searching for more recommended, reliable and free video editing software – I recommend you to read this article .
In vlogging, it is really important to maintain a professional look throughout your videos. If you are not familiar with the camera or video equipment, choosing equipment can be challenging.
Talk to people in this field and get their recommendations. Please do some research according to our recommendations. Once you have done your research, you will be able to find the best vlogging equipment that suits your budget.
For beginners, a reliable camera, microphone, tripod + lighting is enough (if you are filming indoors).
Also if you are more experienced, although not covered in this article, check out more about additional lenses for your camera. Keep in mind that if you are going to buy a full set, make sure that you have a backpack where to put all your equipment safely.
Vlogging is the latest buzz in the digital world! So go ahead and join the bandwagon equipped with the right tools and equipment!

TOP 6 Best Laptops for YouTubers in 2024

Best Drones for Vlogging in 2024 (YouTubers Edition)

I am Glen and I’m a 100% tech-addicted guy, Blogger, Video Editor and Entrepreneur. I spent a lot of my time learning how to properly edit videos, I've tested a lot of vlogging equipment and now with my team, I share all these tips with you.
![Best Backpacks For Vloggers [Recommended by Travelers]](https://vlogtribe.com/wp-content/uploads/thumbs_dir/Best-Vlogging-Backpacks-okfjaj3jbynqalypq1vhtm8n2gw4ahxl4nl3s6rus0.jpg "travel vlog set up")
Best Backpacks For Vloggers [Recommended by Travelers]

TOP 15 Best Microphones for YouTube Videos and Vlogging

10 Best Audio Mixers For Streaming in 2024

TOP 10 Best Speakers for Video Editing
Vlogtribe.com is the Homepage for all Vlogging Enthusiasts!
The provided information on Vlogtribe.com is intended for informational and educational purposes only.
Contact Us About Us
318 W Adams St, Chicago, IL 60606, United States
Are you looking for more information? Check these helpful links:
- Affiliate Disclosure
- Terms Of Services
- Privacy Policy
You can Find Us on Social Media!
Let’s Connect!
- Search Please fill out this field.
- Manage Your Subscription
- Give a Gift Subscription
- Sweepstakes
- Travel Products
I Shop for a Living, and These Are the 11 Best Comfy Travel Clothes Deals for the Weekend — Up to 70% Off
Keep reading for can’t-miss deals on Vuori, Alo Yoga, and more.
:max_bytes(150000):strip_icc():format(webp)/Alexandra-Domrongchai-Headshot-0b9572e52b9c4f69b7b8c388c2f830d3-a0d22381cba940719a3100a66044827a.jpg "travel vlog set up")
If you click on links we provide, we may receive compensation.
Travel + Leisure
As a shopping and travel writer, I’ve practically made it my life’s mission to build a wardrobe around comfortable loungewear and athleisure pieces. As such, one of my all-time favorite hobbies is browsing through my favorite retailers for cozy outfits I can imagine myself lounging around the house in, going for a hot girl walk in, and of course, wearing on flights. This weekend, my browsing is leading to actual purchases because my favorite brands (like REI , Lululemon , Alo Yoga , Abercrombie , and Everlane ) are offering up to 70 perfect off comfortable travel clothes for a limited time.
And because I’m your in-house resident shopping expert, I spent hours going through the thousands of deals across the web to present you the best 11 comfortable loungewear and athleisure deals in terms of style, quality, and of course, savings. Deals start at just $23, so if I were you, I’d get scrolling to shop the best deals on comfortable travel pants , athletic dresses , skorts , and more.
Alo Yoga Airlift Fly Dress
Tenniscore is absolutely in, and what better way to embrace this trend than with this stunning athletic dress from celeb-loved brand Alo Yoga ? On sale in this universally flattering plum color, this dress can be sported to the courts, running errands, and even to the airport (especially if you want the unofficial title of best-dressed). Athletic dresses are the perfect garment to throw on during the hotter months, and even better this one is designed with a built-in bra so it’s one less thing to worry about.
Patagonia Baggies Shorts
I did a deep dive on the /BuyItForLife subreddit a few months ago and found that wide and far, travelers are absolutely enamored with Patagonia as one of the “most reliable outdoor clothing brands” that “lasts forever and is made well.” Since then, I’ve been trying to add as many items from the brand as possible to my travel wardrobe, so when I saw these water-repellent baggy shorts on sale for $41, I knew I had to have them immediately. They’re an absolute warm-weather must, so if I were you, I’d add them to your cart before they inevitably sell out.
Beyond Yoga Spacedye High-waisted Biker Shorts
Designed with a super butter-soft material and flattering high-rise fit, these wear-everywhere biker shorts from Travel + Leisure editor-loved brand Beyond Yoga are just what your travel wardrobe needs this season. I personally love biker shorts; they’re the spring and summer’s equivalent of leggings with their flexible and compressive fit that keeps everything in place when you're on the go (or settling into a long-haul flight). And this specific pair happens to be sporting a 30 percent discount this weekend.
Lululemon Stretch High-rise Wide-leg Pants
Lululemon is known for its top-rated, travel-ready activewear and accessories that we can’t get enough of at T+L . And although there are plenty of must-buy items in the retailer’s “ We Made Too Much ” section, I’ll never miss an opportunity to add an incredibly soft pair of the brand's pants to my closet. I’m a sucker for anything that I can wear while lounging around the house and during travel, and between these pants' supremely soft material, high-rise design, and flowy fit, they’re a can’t-miss item to shop this weekend.
Abercrombie YPB SculptLux Strappy-back Onesie
Abercrombie
Lately, my go-to retailer for comfortable travel clothes is Abercrombie — more specifically, the brand’s activewear line: YPB. It can be a challenge to find quality and comfortable athleisure pieces that both look and feel good, but everything that I’ve tried from the brand has been an absolute knock out of the park. And right now I’m picturing myself frolicking around in this strappy onesie everywhere from the pilates studio to window shopping IRL. I personally love onesies for their comfort and have been able to style them with cardigans, flannels, and more to make them more versatile in my wardrobe.
Abercrombie YPB SculptLux Curvelove ⅞-Length Leggings
Shoppers have dubbed these leggings from Abercrombie as “the best workout leggings,” expressing that they are “super compressive, soft, and very flattering.” I have more pairs of black leggings than I can count, so I’m super intrigued by this color block pair to add a bit of spice to my styling routine. I encourage you to do the same, considering they’re on special sale for $23 for a limited time.
Everlane The Cloud Oversized Cardigan
To say that I’m a fan of cardigans would be an understatement. I'm utterly obsessed with these versatile layering garments that add a bit of extra warmth to any outfit, and sometimes I’ll even roll mine up into a ball and use it as a neck rest for flights and commutes. I love everything from Everlane, so when I saw they discounted this stylish cardigan a shocking 70 percent, my jaw nearly hit the floor. Cardigans are a year-round must for me, so this textured version will be more than welcomed to my wardrobe.
Vuori Colorblock Corset Jumpsuit
I don’t know what it is, but compressive jumpsuits flatter my figure more than any other garment could. Call it magic or just great design, but I can’t get enough of them. They feel almost like a second skin, and wear excellently during activities like running and yoga, yet are still comfortable enough to wear on long travel days. If you haven’t had the pleasure of wearing an active jumpsuit, then let me be the one to introduce you with this on-sale one from T+L editor-loved brand Vuori , offering a corset design for extra style and a form-hugging material that moves with you , not against.
Vuori Bayview Thermal Crop Tank
When it comes to comfortable travel clothes, pants often get the most attention. While nobody wants to endure a hectic travel day in a pair of scratchy, overly tight pants, the same goes for an ill-fitting top. Luckily, this cropped tank solves that issue with its thermal knit material and built-in bra for a supportive, cozy fit. Rock it solo on a warm day, or layer it under a cardigan or sweater for lasting comfort.
Anrabess Two-piece Sweater Set
Crafted from a soft and comfortable fabric, this set includes a sleeveless sweater and loose-fitting pants that can be worn as a set or apart for endless mix-and-matching possibilities. Both pieces are designed to be breathable, making them perfect for the upcoming spring season. Oh, and as an always-welcomed bonus, the pants feature two spacious pockets. Thanks to an on-site coupon, you can snag this one-and-done outfit for a mere $40.
LouKeith Tennis Skort
Having comfortable, versatile staples is a prerequisite for any good travel wardrobe, regardless of your trip. And to me, no clothing item is more of a multitasker than the humble skort. With a design as sleek as this Amazon best-selling one , skorts can be styled with virtually anything: a blouse and some boots for a night out, a pair of sneakers and a sweatshirt for travel days, or a tank top and sporty tennis shoes for outdoor activities. On sale for $27 and available in sizes XS-3XL and in 32 different colorways, I’m confident that there’s a skort for everyone.
Love a great deal? Sign up for our T+L Recommends newsletter and we’ll send you our favorite travel products each week.
See More T+L Shopping Deals
:max_bytes(150000):strip_icc():format(webp)/tl-best-hiking-deals-tout-de042697b45a4c28be404f67772c4e7e.jpg "travel vlog set up")
- Grand Rapids/Muskegon
- Saginaw/Bay City
- All Michigan
Lovable Michigan Travel Deals: ORV park passes, Up North golf savings
- Published: Apr. 25, 2024, 8:05 a.m.

The Eldorado Golf Course is one of nine courses around the Cadillac area. Photo provided by the Cadillac Area Visitors Bureau. CAVB
- Tanda Gmiter | [email protected]
Ready to head outside? With the weather warming up, there’s no excuse to stay indoors. When you’re planning your next vacation, start by thinking about all the fresh air activities you’ve been missing this winter.
Golf, hiking, ORV riding and fishing can be done all across our state. Lots of spots are rolling out spring deals for travelers. So gas up your ride, pack a bag and tap into your sense of adventure.
It’s time to travel and save a few bucks. Here are some of the deals rolling into our in-box this week:
Cadillac Area Golf Deals
For a lot of downstate folks, Cadillac is where Up North begins. There’s great fishing and boating. It’s working hard to be an ORV destination with news coming soon about a new scenic trail network. But already this spring, it’s all about the golf. And there are lots of courses to pick from - and lots of deals to snag.
“The Cadillac area has nine courses to choose from, all within 20 minutes of downtown,” tourism staff said. “Each course has its own unique charm and playability appealing to all skill levels, but they all offer the natural beauty and friendly hospitality that will keep you coming back.
“With two stay and play options, great shopping, and restaurants, as well as dozens more opportunities for fun in the outdoors like ORV trail riding, hiking, biking and fishing - there is so much to see and do in Cadillac.”
Some of the deals are pretty cool. Evergreen Resort (home of the friendly Curly’s Pub) is offering an overnight golf package starting at $155 per person. And the Missaukee Golf Club is letting juniors golf for free. There’s even some Cadillac area ORV deals, and $1 off pints at the downtown Clam Lake Beer Company.
See all the Cadillac area golf deals on the website here.

Drummond Island's ORV and ATV trails are among the most scenic and rugged in the entire state.
Stay and Play on Michigan’s Drummond Island
What if you needed to drive onto a car ferry for a short trip to reach your next vacation? That can happen if you’re headed to Drummond Island at the very eastern edge of the Upper Peninsula. Drummond Island Resort and Conference Center has a few spring travel packages, all bundled with perks for people who make the drive and want to enjoy a lot of fresh air once they arrive. The golf deals are popular right now, but it’s not the only special on deck.
Second Round of Golf is free with Drummond Island Resort’s Stay & Play Package: “Enjoy The Rock Golf Course with our Stay & Play package that includes a discounted rate on your room or cabin, 18 holes of golf for two registered guests and cart. BONUS second round of golf included for each registered guest. Limited time offer. Available until June 3rd, 2024.” Find more details on the resort’s website here.
Other deals include:
- Spring Getaway Deal: Enjoy the best of spring on Drummond Island and save up to 15% off regular room rates. Book by April 30th, 2024.
- Turtle Ridge ORV Park Free Pass Deal: This package is built for the off-roading enthusiast and includes free daily access to Turtle Ridge ORV park for one vehicle during your stay.
- Family Recreation Package: Get 10% off overnight lodging, a 2-topping pizza, a 2-liter bottle of soda and a round at our putt-putt golf course with this family friendly package.
If you purchase a product or register for an account through a link on our site, we may receive compensation. By using this site, you consent to our User Agreement and agree that your clicks, interactions, and personal information may be collected, recorded, and/or stored by us and social media and other third-party partners in accordance with our Privacy Policy.
IMAGES
VIDEO
COMMENTS
Editing your video is where you'll make sure to give your vlog a consistent flow. You don't need to be an expert to get started, but it might be worth checking out some travel vlog editing courses, like these ones on Skillshare. Add some upbeat copyright-free music to keep up the energy through the travel adventures and set the right tone.
2. Start your vlog with a shot of the location and an introduction. Tell your viewers where you are, why you're there, and what you're hoping to experience. A video of a landscape, sign, or skyline would work well for this type of intro shot. [9] Imagine that you're taking your viewers on the journey with you.
With a step-by-step approach, we are here to share 10 indispensable tips for beginners that will transform you from an eager enthusiast into a confident travel vlogger, ready to capture the world through your unique lens. 1. Find Your Target Audience. Understanding your target audience is an essential first step in crafting a successful travel ...
Here's a vlogging guide to the steps you will need to take if you want to start a travel vlog. 1. Choose your niche. Although millions of people travel the world and share their impressions, only a few of them become famous. The best travel vloggers don't just make random videos of their travels, they have a unique angle around which ...
At this stage, you should have set up your social channels, so you can flag them on the videos. ... For me, the cornerstone of that content is the daily travel vlog. I also release one static Instagram post, three Instagram stories, and a blog post. The video and the blog post are the two hardest, but releasing this amount of content is, in my ...
🎥 WHAT'S IN MY CAMERA BAG? It's my BEST TRAVEL VLOGGING SETUP for travel and food videos (and of course, SOLO FEMALE TRAVEL vlogging !) DOWNLOAD MY EQUIPME...
1 15 Travel Vlogging tips for Beginners. 1.0.1 1. Never pack your main camera gear in your checked luggage. 1.0.2 2. Decide on the right gear to pack and which to leave behind. 1.0.3 3. A wide-angle lens is a must for making travel videos. 1.0.4 4. Keep travel camera backpacks compact.
A step-by-step guide to starting a YouTube travel vlog. Tips for finding your niche, cameras & gear, editing, and promoting your video. ... This is a bendy, flexible tripod that can be set up anywhere. It also easily fits into a backpack for on-the-go shooting! Sennheiser wireless microphone system ensures crisp, ...
The great thing about a travel vlog is that you get to introduce your followers to the neat things you've discovered, whether that's an awesome food truck near your Airbnb, an urban park, or a hiking trail in the Great Smokies. ... and your vlog on Youtube set up, you're done perhaps the hardest steps Starting a vlog means you get to join ...
Ensure you have good autofocus. As this is a travel vlog, you'll presumably be turning the camera on yourself and others quite often. Having a solid, reliable autofocus means you don't have to keep worrying and checking about whether or not your face is in focus. Just press the red button and start shooting.
Take it to post. After shooting your travel vlog, it's time to edit the video. First, you want to cut out any unnecessary parts that don't add to the story you're trying to tell. Trim down footage and move around clips to ensure the story flows smoothly. Once you have a clean-cut, it's time to add in the magic.
10. Use a Sun Chaser App. In travel vlogging, you will have to work a lot with natural lighting. To capture good-looking video, it is essential to know the weather and the sun's movements. Use a sun chaser app to find the best times and locations to get amazing lighting for your videos. 11.
Taking a break with a tripod. A Tripod. Again, with travel, you need to balance up weight and stability against portability. I love my Neewer SAB264 tripod because it's tall (18″ to 65″) lightweight (3.7lbs) and very quick and easy to use. I've tried several other cheaper ones over the years and they've all broken like a false economy bin bag on its sad march through the house.
Vlogs are more often than not quite short in length - perhaps no more than 10 minutes and certainly no longer than 20. To maintain people's attention, you need to make the edit snappy and fast-flowing. Use jump cuts and different camera angles to keep things fresh and interesting.
Well for me the GoPro sets itself up as a potentially epic vlog setup for a number of reasons; Low entry price point (in comparison to mirrorless and SLR options) Small and compact. Huge range of accessories. Robust and waterproof (+ an additional dive housing is available at a low price point) Huge field of vision. Easy to use.
GoPro Light Mod - Official GoPro Accessory. 4 levels of brightness—up to 200 lumens—for crisp detail. Built tough and waterproof to 33ft (10m) Built-in rechargeable battery with up to 6 hours of runtime. Check Amazon Price. The Media Mod includes two cold shoes that let you mount for an enhanced vlogging experience.
Here are our top tips to get your travel YouTube channel started: Choose a name for your travel channel. Pick a niche. Create a channel trailer and post it on YouTube. Start creating videos - make sure they're interesting and engaging to watch. Share your videos on social media and other online platforms.
6. Filming Technique. You don't need to be a pro videographer to produce a good vlog, but there are some tips that will make it more engaging and impressive to viewers, as well as save you time on editing. For starters, you need good lighting. As aforementioned, ring lights will become your best friend.
If you're a video lover consider making your travel blog a travel vlog. It will be easier to stand out. ... YouTube: Zero To Travel; Set up your profiles and don't forget to include links back to your travel blog wherever you can! You'll probably want to link to your social media profiles from your travel blog too.
Any travel vloggers out there are bound to get along with the GoPro Max. Even though it's slightly on the pricier side ($450), it's a worthwhile investment that will make travel vlogging a lot easier. It's a 360 camera with an easy set up and great image stabilization, making it a perfect option for travel vlogs.
What You Need Before Our 'How to Start a Travel Blog' Guide. Step 1 - Pick Your Name and Brand. Tips For Picking A Travel Blog Name. Tips For Defining Your Brand. Step 2 - Get Hosting And The Domain. Domains vs Hosts. Our Favourite Host is SiteGround. Managed WordPress Hosting. Step By Step Guide With SiteGround.
📈 Grow a YouTube Channel - 90 Min Free Masterclass: https://geni.us/Xd2M1b🤯 Mistakes New YouTubers Make: https://youtu.be/xOpJdHiIwhQ📹 How To Vlog & Tel...
A camera is the most important device to start a vlogger career or increase the number of viewers and followers on your YouTube channel. 1. Canon EOS M50 II - Perfect Budget Vlogging Camera with a Flip Screen. CHECK THE PRICE. Canon EOS M50 II is one of the best affordable vlogger cameras in 2024.
Athleisure brands like Lululemon and Alo Yoga, plus favorites like REI, Amazon, and Everlane are overflowing with comfortable travel clothes, with deals up to 70 percent off. A travel writer ...
Spring Getaway Deal: Enjoy the best of spring on Drummond Island and save up to 15% off regular room rates. Book by April 30th, 2024. Turtle Ridge ORV Park Free Pass Deal: This package is built ...