- Data Engineering
- Machine Learning
- RESTful API
- React Native
- Elasticsearch
- Ruby on Rails


Build a fullstack admin app with Voyager in 5 minutes
Laravel is an incredible framework built by Taylor Otwell that combines powerful web development features, extensive documentation and an active community. In this tutorial we are going to build a fullstack application complete with an admin panel and user management.Special thanks to The Control Group for building Voyager , an open source admin tool for Laravel.
Minute 1: Create the Laravel application
I'm going to assume you have Laravel and MySQL installed for the purposes of this tutorial. I wrote a short shell script for creating Laravel applications available here if you are not familiar with the commands or interested in saving yourself time.
Minute 2: Generate a Database
Create a MySQL database and set your environment variables. You will need to know the MySQL username and password for your dev machine. The commands below should help:
I also recommend Sequel Pro for visualizing records and tables within the database we created.
Minute 3: Set your environment variables
The first shell script to create the Laravel application created a .env file. Open up the project in Sublime Text or your editor of choice and edit the .env files so that our Laravel application can connect to the database we set up.
We need to clear out the configuration cache so that Laravel can update the application with the new values. Additionally, we need to run our database migrations to create the tables and columns for MySQL. Migrations in Laravel applications are in database/migrations .
Minute 4: Install and Configure Voyager
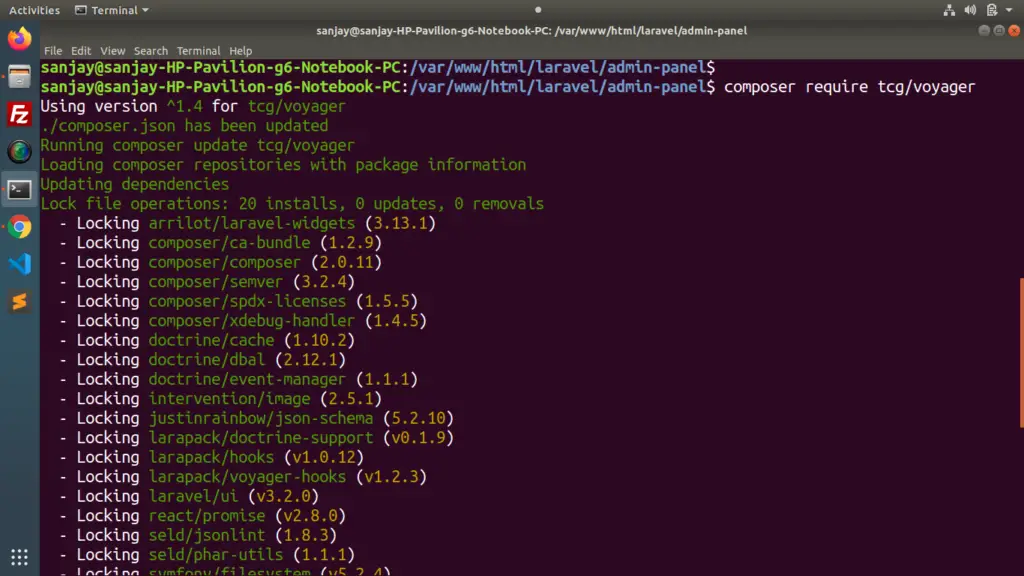
Use Composer to install Voyager: composer require tcg/voyager
Add the Voyager pachage to our list of supported Package Service Providers. This list is in config/app.php .
You'll now have access to a voyager artisan command that will generate all of the required files for a state of the art admin dashboard. Run that command.
Minute 5: Log into your Admin dashboard to check it out!
Start your application with php artisan serve and then head to http://localhost:8000/admin. Use the default credentials [email protected] / password to login.
Congrats you did it! Check out Voyager's amazing features by reading the docs or checking out the video tutorials below.
Thanks for reading! If you enjoyed the article give me a shout on twitter or you can support the Voyager project directly by issuing a PR or giving it a star on github .
Enjoy this post? Give Connor Leech a like if it's helpful.
Leave a like and comment for Connor
Please Help Me Dear Laravel Experts. Laravel Voyager Admin Dashboard Page Show Blank After Adding PagesController In Route Page. My Route Script:
Route::get(’/’, function () { return view(‘welcome’); });
Route::get(’{slug}’, ‘PagesController@show’);
Route::group([‘prefix’ => ‘admin’], function () { Voyager::routes(); });
My PagesController Script:
namespace App\Http\Controllers;
use App\Page;
use Illuminate\Http\Request;
class PagesController extends Controller { public function show($slug) { $page = Page::findBySlug($slug); return view(‘about’, [‘page’ => $page]);
My Page Model Script:
namespace App;
use Illuminate\Database\Eloquent\Model;
class Page extends Model { public static function findBySlug($slug) { return static::where(‘slug’, $slug)->first();
And My View Page Script:
<html> <head> <title>{{ $page[‘title’] }}</title> </head> <body>
</body> </html>
Getting started with Voyager Laravel [Tutorial]
Voyager Laravel is a popular open-source package that provides an easy-to-use admin panel and CRUD functionality for Laravel applications. Voyager Laravel is built on top of the Laravel framework. It is designed to simplify building and managing Laravel applications by providing a user-friendly interface for managing data, media, users, and permissions.
With Voyager, you can easily create and manage content for your applications without writing complex code or building custom admin panels from scratch. Laravel Voyager also offers a range of customization options, making it easy to tailor it to your specific needs and requirements.
Whether building a simple blog or a complex web application, Voyager Laravel can help you streamline the development and management process and get your application up and running quickly.
Installing Voyager Laravel
In this section, we will install Voyager and configure it to use a new Laravel application. Here are the steps.
Install Laravel
Voyager is built on top of the Laravel framework. So, the first step is to install Laravel if you haven't already.
This will create a new Laravel project in a directory called voyager_laravel .
Install Voyager
Next, install Voyager using Composer.
This will install the latest version of Voyager and all of its dependencies.
Publish Voyager's assets
After installing Voyager, you need to publish its assets to your application.
This command will publish Voyager's configuration files, views, assets, and other files to your application. The --with-dummy option will also install some dummy data to help you get started. It creates for your application a user with the following login credentials:
email: [email protected] password: password
Alternatively, you can assign admin privileges to an existing user
or create a new admin user with the --create flag.
Configure your database
Voyager uses your application's database to store data. You need to configure your database settings in your .env file. Update the DB_HOST , DB_PORT , DB_DATABASE , DB_USERNAME , and DB_PASSWORD variables to match your database settings.
Run the migration and start the application
Finally, run the migration to create the necessary tables in your database.
This will create the necessary tables in your database.
Now you can start the application.
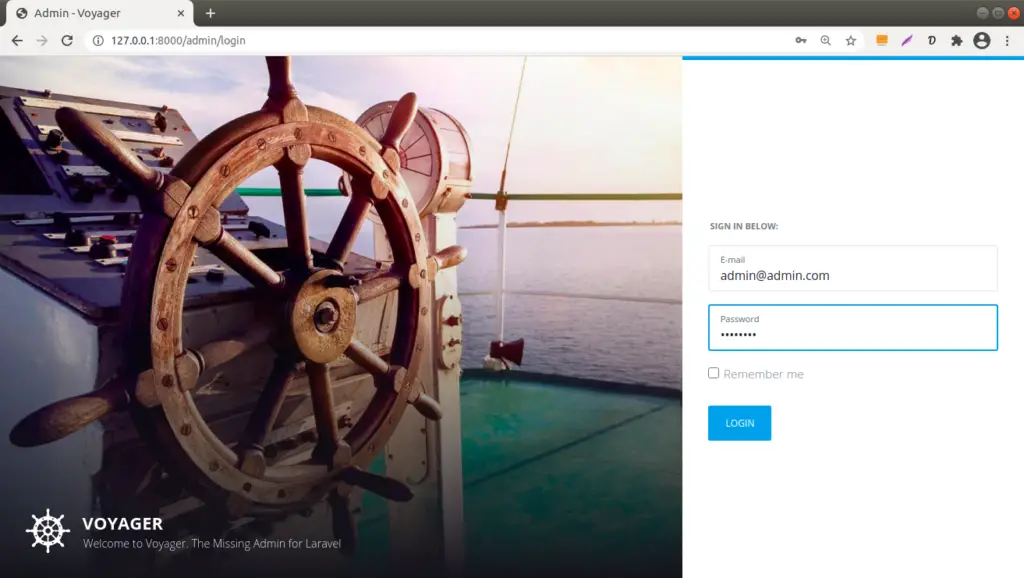
and log in at http://127.0.0.1:8000/admin .
![Getting started with Voyager Laravel [Tutorial]](https://bc664b2a.flyingcdn.com/wp-content/uploads/login-2.jpg "Getting started with Voyager Laravel [Tutorial]")
Using Voyager Laravel
After logging in to Voyager admin, there are unlimited things you can do at a click of a button. For example, you can manage your application's data through the Admin panel.
![Getting started with Voyager Laravel [Tutorial]](https://bc664b2a.flyingcdn.com/wp-content/uploads/admin-panel.jpg "Getting started with Voyager Laravel [Tutorial]")
At a glance, you can see we have 1 user, 4 dummy posts and 1 page. The left panel exposes you to all settings, customizations and management of your application.
You can do CRUD (create, read, update, delete) functionality without writing custom code. For example, if you click on View all posts , Voyager takes you to an interface with all the posts. You create a new post or update, delete, and read the existing ones on the same interface.

Besides, you can use media manager, BREAD builder, user role management and customization options through the dashboard.
Media manager : Voyager includes a media manager that allows you to upload and manage media files, such as images and videos. You can use the media manager to add images to your application's pages or to create image galleries.
BREAD builder : Voyager includes a BREAD (browse, read, edit, add, delete) builder that allows you to create CRUD functionality for your application's data quickly. The BREAD builder can create custom data types and manage their fields.
User and role management : Voyager provides a user and role management system that allows you to manage your application's users and their roles and permissions. You can create new users, assign roles to them, and define their permissions.
Customization options : Voyager provides a range of customization options, such as the ability to create custom views, layouts, and data types. You can use these customization options to tailor Voyager to your specific needs and requirements.
Voyager Laravel is a powerful open-source package that provides an easy-to-use admin panel and CRUD functionality for Laravel applications. It simplifies the process of building and managing Laravel applications by providing a user-friendly interface for managing data, media, users, and permissions.
With Voyager, you can easily create and manage content for your applications without writing complex code or building custom admin panels from scratch. Voyager also offers a range of customization options, making it easy to tailor it to your specific needs and requirements.
If you are a Laravel developer looking to simplify the development and management process of your Laravel application, then Voyager Laravel is worth considering. With its powerful features and customization options, Voyager can help you save time and effort while building and managing your application.
So why not try Voyager and see how it can benefit your Laravel project? Start by following the installation steps and exploring its features to see how it can make your development journey more efficient and enjoyable.
Steve Alila
He specializes in web design, WordPress development, and data analysis, with proficiency in Python, JavaScript, and data extraction tools. Additionally, he excels in web API development, AI integration, and data presentation using Matplotlib and Plotly. You can connect with him on LinkedIn or check his projects on GitHub page.
Can't find what you're searching for? Let us assist you.
Enter your query below, and we'll provide instant results tailored to your needs.
If my articles on GoLinuxCloud has helped you, kindly consider buying me a coffee as a token of appreciation.

For any other feedbacks or questions you can send mail to [email protected]
Thank You for your support!!
Leave a Comment Cancel reply
Save my name and email in this browser for the next time I comment.
Notify me via e-mail if anyone answers my comment.
Learn How to Create Admin Panels Easily With Laravel Voyager
In this article we will explore the how to create admin panel using the Voyager laravel package for creating Admin Panels with a simple steps.
Admin Panels represent a basic component in every web application and the power of that application resides in the power of the Admin Panel and i don’t mean that powerful admin panels means that it’s too big and has a lot of modules in contrast powerful admin panels means the speed and flexibility of handling the CRUD operations and also the optimization of the Server side and client side code.
To handle all these complex operations we will use a laravel package called “Voyager” created by the control group and this is the official website at this url https://laravelvoyager.com/
This is a powerful package in all means and it has a lot of features such as :
- Module Management
- Roles and Permissions Management
- Database tables Management (CRUD, BREAD)
- Media Manager
- Menu Builder
- Multi language support
Laravel Support
Laravel Admin & Bread System support laravel from 5.4, 5.5, 5.6 and 5.7.
Installation
To install Voyager package you need to have a create a laravel project first then inside your project directory run this command using the composer:
Next create a new database and modify your database credentials in the project .env:
Don’t forget to modify the App_URL with your project full url
For laravel 5.4 you have to add the service provider manually so open config/app.php and add TCG\Voyager\VoyagerServiceProvider::class , in the providers array like so:
Run the install command
There are two options to create the admin panel either with a dummy data or without. It’s preferable to run the command using the dummy data and delete it after that
To install Voyager without dummy data
To install Voyager with the dummy data
After successful installation navigate to http://your domain url/admin then login using the default credentials which are:
email: [email protected] password: password
If you did not go with the dummy user, you may wish to assign admin priveleges to an existing user. This can easily be done by running this command:
If you wish to create a new admin user you can pass the --create flag, like so:
you will be asked to enter the user name and password.
When opening the dashboard homepage it will look like this:
Creating New Modules (BREAD)
Creating new modules or using Voyager BREAD (Browse, Read, Edit, Add, Delete) includes two steps first you need to create the database table along with it’s columns and relations then adding it to the menu.
What means BREAD:
- B (Browse): field will show up when you browse the current data
- R (Read): field will show when you click to view the current data
- E (Edit): field will be visible and allow you to edit the data
- A (Add): field will be visible when you choose to create a new data type
- D (Delete): doesn’t pertain to delete so this can be checked or unchecked
To create a new table go to Tools > Database > Create as shown in the below:
This is similar to the create table wizard in tools like PHPMyAdmin so you need to specify table name, whether to create model for this table, the required columns
After you add your columns and hit “Create New Table” you will be redirected to the same page like shown:
Next click “Add BREAD to this table” so that you customize the url slug, model namespace, controller name and other info.
In the above image we specified the Display name, Url slug, Model, Controller, then specify the BREAD settings for each field for example the name field above marked with Browse, Read, Edit, Add, Delete so that it can be shown in the view, edit and create pages. In contrast the id and the timestamps fields marked to be hidden.
Adding Modules to the menu
Voyager admin panel makes it easy to create new menu and create menu items and display those menus the sidebar or footer or any where.
Let’s add the previously created menu to the sidebar menu. So navigate to Tools > Menu Builder. By default there is a menu already created which is the sidebar or admin menu so click on Builder as shown:
When clicking the builder you will see all the menu items displayed in hierarchical order similar to wordpress menu builder, this menu support drag and drop so that you can reorder items easily, so when you click on “Create Menu Item” you will see this modal:
In this modal add the Title, link type (static, dynamic), if dynamic add the route, add the icon class if exist then click Add.
Further readings
We are not covered a lot of other features related to the Voyager Admin Panel, but we have refer you with the basics and you can read more at the official documentation here to know more about this package.
What's your reaction?
Sunshinephp conference 2019 come to miami, florida, javascript extracting variables from arrays and objects with object destruction, you may also like, laravel livewire using wire:model on custom component and x-modelable, laravel breeze inertia creating custom pagination component, building a simple datatable with laravel livewire3, recent articles.
Lost your password?
- Backend Development
- Frontend Development
- News & Events
Latest Posts
Manipulating headers in the javascript fetch api, the confoo 2024 conference edition is coming, popular tags.

Voyager – Can an Admin UI Make Laravel Even More Approachable?
Share this article

Installing Voyager
Database manager, bread builder, menu builder, media manager, frequently asked questions (faqs) about voyager and laravel.
This article was peer reviewed by Wern Ancheta . Thanks to all of SitePoint’s peer reviewers for making SitePoint content the best it can be!
Today, we are talking about Voyager !

Voyager is a Laravel package that provides a full administration system for the framework in its “skeleton app” form. Voyager has 4 main features:
Media Manager – Built on top of Intervention Image , it provides a fully functional media manager that allow us to view, edit, and delete images from storage. This way, we can have all of our media in a single place, making it easy to access and manipulate.
Menu Builder – The Menu Builder allows us to add, edit, and delete menu items. It also gives us the ability to create new menus and manage them.
Database Manager – Allows us to access and manipulate our database directly from the admin panel. Instead of having to use Laravel’s Schema , Voyager provides us with a mechanism to add, delete, and edit entries in the database. It will also (upon specification) create our models when adding tables to the database.
Bread/CRUD builder – BREAD is simply CRUD for the database. Voyager provides a mechanism to Browse, Read, Edit, Add, and Delete entries and views of any table in our database.
Let’s take a closer look at it.
First, let’s start with a fresh Laravel installation. Of course, we can start with an existing project, but for the purpose of this article we will start with a fresh one.
While it’s outside the scope of this article, the recommended way to start a new Laravel project is by using Composer :
This will create a new Laravel project called voyager inside the /voyager folder. To serve this new Laravel project, using PHP’s built in server:
On Homestead Improved , the serving is taken care of for you with Nginx.
With a fresh Laravel installation up and running, we can now focus on installing the Voyager Admin package.
As we can see during the installation process, Voyager is pulling components from some very well known PHP packages like Doctrine ORM for the database manager, or Guzzle and Intervention Image for PHP image handling and manipulation. This shows us that Voyager is built on top of reliable and proven components.
Next, let’s fire up our favorite code editor. We will need to edit some files in order to have Voyager up and running.
First, we open the .env file and add our database credentials so that Voyager can connect to it.
After that, let’s add the Voyager and Image Intervention service providers to our providers array. This array can be found in the config/app.php file, and all we need to do is append the following elements to it:
To finish the installation:
We should now see the "Successfully installed Voyager! Enjoy :)" message.
There is only one thing left to do: seeding the database.
This will seed our database with test data using the seed classes. If we serve our Laravel installation again, we should now see login and register options in the top right corner.
The newly created admin area in /admin should look like this:

Quite gorgeous! The TCG team made quite an effort. To log in and explore, let’s use the following credentials:
From this admin panel, we have access to all our main features. The media manager, menu builder, database manager and CRUD/BREAD builder, all can be accessed from the admin panel’s main menu.
We also have access to a dashboard, via which we can add Google Analytics by going to Settings , and adding our Google Analytics Client ID into the designated field.
If we check Tools -> Database we can see that the menu items are the ones that have the BREAD option activated (and a proper menu created, but we will get to that later). We are looking at three of our main features: the database manager, BREAD builder, and menu builder. Let’s look at them in action.
To create a new database column in Laravel, we normaly need to use migrations and the Laravel schema facade. While both are relatively simple to use, if we compare them to using Voyager, we can easily see which method is faster.
Let’s imagine we want to create a new table and add some columns the Laravel way (using migrations as our database “version control” and then using Schema to build our database schema).
Let’s focus on creating a Dogs table with some columns to identify our beloved pets. First, let’s start with the table. To begin, our table will hold an auto-increment field called id .
Then, let’s add name and breed columns to our table.
Our full migration file will look like this:
While migrations are useful, using Voyager makes things easier and more visual, making it so that even a non-programmer can easily do it.
Let’s look at the same example using Voyager’s database manager.
In our Voyager admin area let’s click the Tools -> Database -> Create New Table button

It’s pretty self explanatory, and should look familiar if you’ve ever used a tool like PhpMyAdmin. Let’s fill the fields accordingly and click the Create New Table button. Be sure to add the timestamp fields by choosing the Add Timestamp Fields option, as this will be important in the future. After that, let’s check the tables listing. We can see our dogs table there, with the option to View , Edit , Delete , and Add BREAD to this table . If we click View , we can see that we just created the same table as above, without using any code, and twice as fast.

Earlier we talked about the BREAD feature. BREAD is nothing more than the ability to Browse, Read, Edit, Add and Delete views and functionality from any table in our database. Adding this functionality is as easy as clicking the Add BREAD to this table on any table in our table listing. Let’s do it to our Dogs table.
As we can see by clicking the button, we now have this big form builder. Here, we can find all the options for our BREAD, from display name to visibility. We can also see that Voyager allows us to set our Input type not only as text fields and different box types, but also as images and files. This way, we can easily add image and file fields to our database.

There are also some fields for information like the Slug, the Icon (it has the option of using Voyager’s font class for icons), Display name, and Model name.
After filling out the form and creating our BREAD, if we check our menu, we can see that we don’t have our Dogs option yet. That’s where the Menu Builder comes in.
In Tools -> Menu Builder , we have the option to create a new menu, edit the admin menu, or the main menu. Right now, we want to create a new menu item in our admin panel so we can use the BREAD options created for our Dogs table. Next to the admin, let’s click the Builder option.
A drag and drop menu lets us organize our admin panel menu now. At the top of the page, there’s the New menu item option.

Be careful when filling this form. The URL should follow the following structure: /admin/slug , where the slug should be the URL slug used when creating BREAD for the table. If they’re not identical, we will end up with routing problems that are fairly hard to debug. After selecting the icon for the menu, we are good to go! Our Dogs menu is created!
We can now navigate to our Dogs menu to view, add, edit, or delete entries. We currently have none, so have fun creating some.
Note: One of the things I found out while playing around with Voyager is that it would try to insert a created_at and updated_at value when trying to insert values to a newly created database table. This would happen even when those fields were not created in the database. I had to go back and add those fields manually to the database table. This is the reason why we had to add those fields earlier.
If we check our menu, we can see that we have a Media option.

The media manager is straight forward. It gives us a centralized place to access all static files in our application, with the option to upload files, create folders to further organize our media, move files around, rename, and delete them. As we can see in the screenshot below, we also get some information on the uploaded file, including a thumbnail and a public url for easier access.
Everything will be conveniently stored in the the storage/app/public folder.

Voyager is a great admin package for Laravel. It is very easy to use, and extremely practical. Voyager is also open source, being improved every day. Why not take a look at its repo and help out with writing better docs or fixing some of the bugs? This incredibly practical Laravel package is sure to benefit many Laravel users, and deserves all the help we can give it.
Have you given it a go? What are your complaints? What are your praises? Let us know in the comments.
What are the main features of Voyager that make Laravel more approachable?
Voyager is a Laravel package that provides a complete admin system to speed up web development. It comes with a multitude of features that make Laravel more approachable. These include a media manager for handling media files, a menu builder for easy navigation, database manager for direct database manipulation, and a settings manager for controlling site settings. Voyager also includes BREAD (Browse, Read, Edit, Add, and Delete) functionality for all your resources, making it easier to manage your data.
How do I install Voyager on Laravel?
Installing Voyager on Laravel is a straightforward process. First, you need to have Laravel installed. Then, you can use Composer to require Voyager. Run the command composer require tcg/voyager . After that, you can install Voyager with dummy data using the command php artisan voyager:install --with-dummy . If you don’t want dummy data, just omit the --with-dummy part.
How does Voyager compare to other Laravel admin packages?
Voyager stands out from other Laravel admin packages due to its simplicity and rich feature set. It’s designed to be approachable for beginners while still providing powerful tools for experienced developers. Unlike some other packages, Voyager includes a media manager, settings manager, and menu builder out of the box. It also has a very active community, which means you can expect regular updates and quick bug fixes.
Can I customize the Voyager admin interface?
Yes, Voyager is highly customizable. You can modify the views, add new admin pages, and even create your own widgets. Voyager uses standard Laravel views for all its pages, so you can customize them using Laravel’s Blade templating language. This makes it easy to create a unique admin interface that fits your specific needs.
How do I use the BREAD system in Voyager?
BREAD, or Browse, Read, Edit, Add, and Delete, is a system in Voyager for managing resources. To use it, you first need to create a database table. Then, in the Voyager admin panel, you can add BREAD to the table. You’ll be able to specify what fields to show in the BREAD views, what type of input to use for each field, and whether the field is required. Once you’ve set up BREAD, you can easily manage the data in your table.
How secure is Voyager?
Voyager takes security seriously. It uses Laravel’s built-in authentication system for user management, and all data transactions are secured through Laravel’s CSRF protection. However, as with any software, it’s important to keep Voyager and all your other packages up to date to ensure you have the latest security patches.
Can I use Voyager for complex web applications?
Yes, Voyager is suitable for both simple and complex web applications. It provides a solid foundation for any type of web application, and its modular design means you can add on additional functionality as needed. Whether you’re building a small blog or a large e-commerce site, Voyager can help you get there faster.
Does Voyager support multiple languages?
Yes, Voyager has built-in support for multilingual websites. You can easily add new languages in the Voyager admin panel, and then translate your site content into those languages. Voyager also supports RTL (right-to-left) languages.
How do I update Voyager?
Updating Voyager is as simple as running a Composer command. Just run composer update tcg/voyager to get the latest version. However, before updating, it’s always a good idea to back up your application and test the update in a development environment.
Where can I get help if I run into problems with Voyager?
If you encounter issues with Voyager, there are several places you can turn to for help. The Voyager GitHub page is a good place to start, as you can find documentation, submit issues, and view solutions to previous problems. The Voyager community on Slack is also very active, and you can often get quick answers to your questions there.
Cláudio Ribeiro is a software developer, traveler, and writer from Lisbon. He's the author of the book An IDE Called Vim . When he is not developing some cool feature at Kununu he is probably backpacking somewhere in the world or messing with some obscure framework.


How to Create Admin Panel using Voyager in Laravel 8
Inside this tutorial, we will create an admin panel in a very short time. Admin panel using Voyager composer package. This article is very interesting to learn admin panel development step by step.
Voyager provides the complete package of an admin panel in laravel. So inside this article we will create admin panel using voyager in laravel 8. Voyager for Laravel gives a modern and responsive PhpMyAdmin like admin panel with CRUD support and precise users’ access control for your Laravel API.
Very few simple steps we need to install and configure admin panel.
Let’s get started.
Laravel Installation
We will create laravel project using composer. So, please make sure your system should have composer installed. If not, may be this article will help you to Install composer in system.
Here is the command to create a laravel project-
To start the development server of Laravel –
URL: http://127.0.0.1:8000
Assuming laravel already installed inside your system.
Install Voyager for Laravel
By using composer we will install voyager. Open project into terminal and run this command.
Create Database & Application Connectivity
We need to create a database. For database we will use MySQL. We have 2 options available to create database. Either we can use PhpMyAdmin Manual interface Or we can use command to create.
Open .env file for application connectivity.
Run Voyager installer Laravel
There are two options to create the admin panel either with a dummy data or without.
To install Voyager without dummy data
To install Voyager with the dummy data
It is preferable to run the command using the dummy data and delete it after admin panel testing.
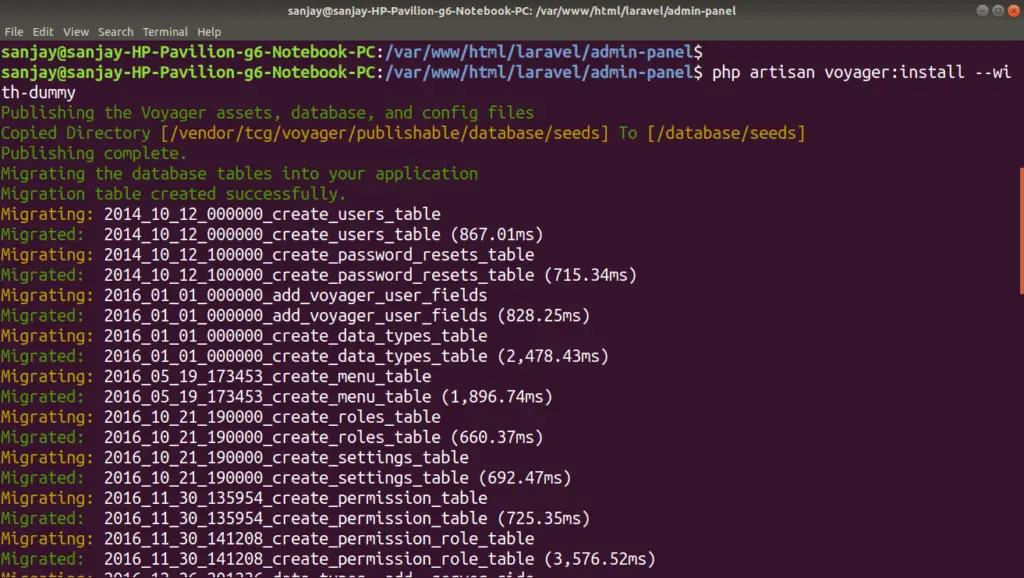
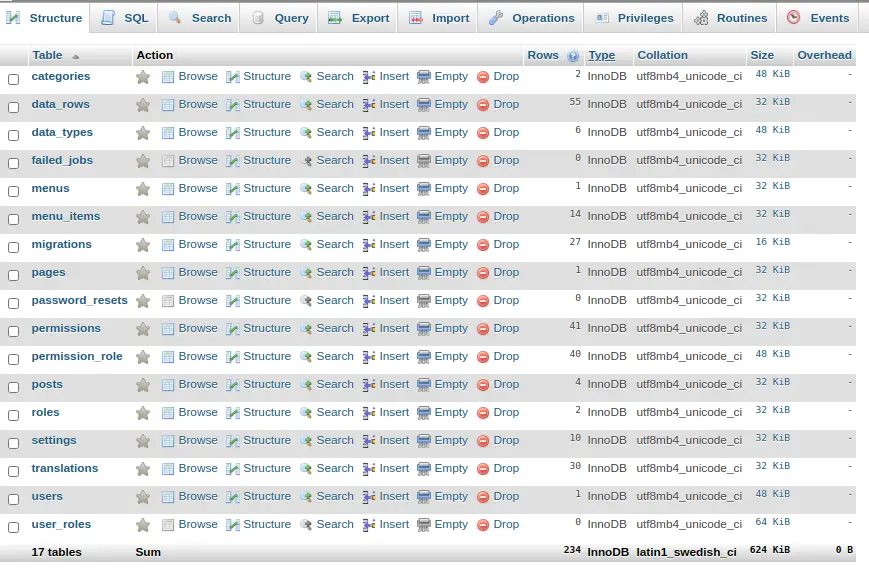
If we go inside database to see the tables and dummy data what we have installed. Total 17 tables created.
Application Testing
Run this command into project terminal to start development server,
By default Voyager provides Admin login details as –
Admin URL: http://127.0.0.1:8000/admin
Create a Different Admin User
Instead of using the default admin login details, if needs to create new one. Run this command –
It will ask few questions like Admin name, password, confirm password.
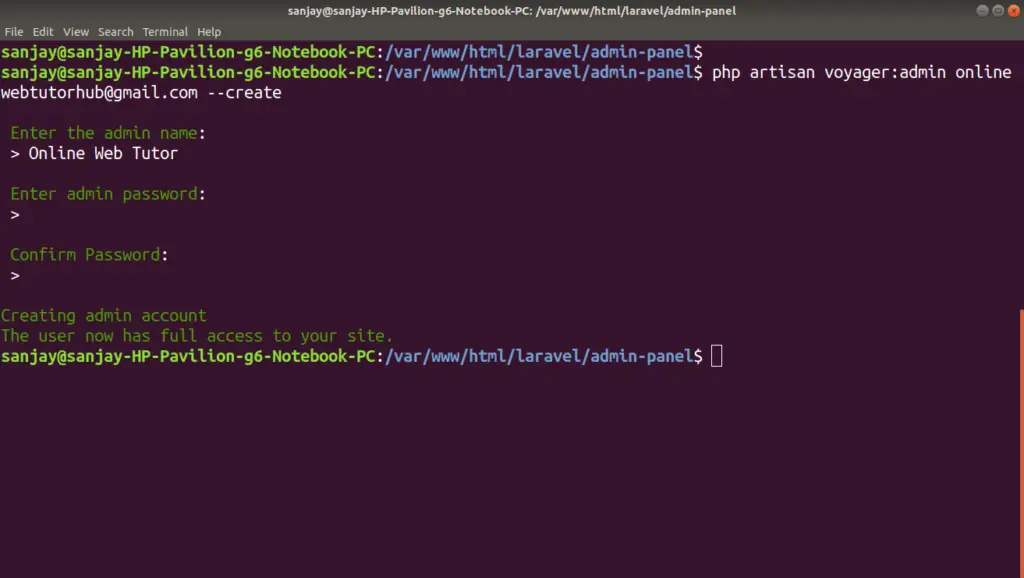
Now, you can use your own login details to use Voyager Admin panel in Laravel 8.
Here, is the menus generated at admin panel of voyager.
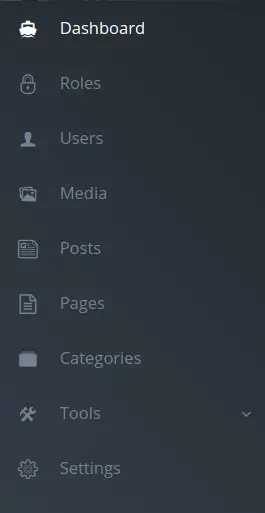
About Generated Files
- /config/voyager-hooks.php
- /config/voyager.php
- Route added inside /routes/web.php
- Admin Panel Files – /vendor/tcg/voyager
We hope this article helped you to learn about How to Create Admin Panel using Voyager in Laravel 8 in a very detailed way.
If you liked this article, then please subscribe to our YouTube Channel for PHP & it’s framework, WordPress, Node Js video tutorials. You can also find us on Twitter and Facebook .
What is Voyager #
Before installing Voyager it is very important to take a quick moment to learn what it is & what it isn't .
What it is #
- An admin interface for your Laravel app
- An easy way to add/edit/delete data for your app
- A media manager for your files
- CRUD/BREAD generator
Voyager is simply an admin for your Laravel app. Whatever you want your app to do on the front-end is completely up to you. You are in control of your application and you can use Voyager to make your life easier by adding data, editing users, creating menus, and many other administrative tasks.
What it isn't #
- A content management system (CMS)
- A blogging platform
- Wordpress (Bleh! 😜)
Voyager is not a CMS or a blogging platform. It can be used to create a CMS or a blogging platform, but out of the box it is neither of those. As stated in the previous section you have full control on what your application will do and how it will function.
With Laravel & Voyager you can create any kind of application your heart desires. Laravel & Voyager are simply tools to make it easier to build.
Search code, repositories, users, issues, pull requests...
Provide feedback.
We read every piece of feedback, and take your input very seriously.
Saved searches
Use saved searches to filter your results more quickly.
To see all available qualifiers, see our documentation .

Voyager Admin
- https://voyager-admin.com
Forked from thedevdojo/voyager
Voyager - The Missing Laravel Admin
A curated list of awesome things related to Voyager
Repositories
A theme-boilerplate for Voyager II
A formfield-boilerplate for Voyager II
An authentication boilerplate for Voyager II
An authorization-boilerplate for Voyager II
A boilerplate for a generic Voyager II plugin
A widget-boilerplate for Voyager II
Source code for the Voyager Admin website
A plugin implementing all kinds of plugins-types to test Voyager
This organization has no public members. You must be a member to see who’s a part of this organization.
Top languages
Most used topics.
COMMENTS
Voyager is a Laravel Admin Package that includes BREAD(CRUD) operations, a media manager, menu builder, and much more. View on Github. Learn More. ... Voyager's admin interface allows you to create CRUD or BREAD (Browse, Read, Edit, Add, and Delete) functionality to your posts, pages, or any other table in your database. ...
Installation. Voyager is super easy to install. After creating your new Laravel application you can include the Voyager package with the following command: Next make sure to create a new database and add your database credentials to your .env file, you will also want to add your application URL in the APP_URL variable:
This can easily be done by running this command: php artisan voyager:admin [email protected]. If you did not install the dummy data and you wish to create a new admin user, you can pass the --create flag, like so: php artisan voyager:admin [email protected] --create. And you will be prompted for the user's name and password.
Minute 3: Set your environment variables. The first shell script to create the Laravel application created a .env file. Open up the project in Sublime Text or your editor of choice and edit the .env files so that our Laravel application can connect to the database we set up. APP_URL=localhost:8000. DB_HOST=localhost.
1) Install the package using composer: composer require tcg/voyager. 2) Add your Mysql details in your .env file: DB_HOST=localhost. DB_DATABASE=homestead. DB_USERNAME=homestead. DB_PASSWORD ...
Voyager Laravel is a popular open-source package that provides an easy-to-use admin panel and CRUD functionality for Laravel applications. Voyager Laravel is built on top of the Laravel framework. It is designed to simplify building and managing Laravel applications by providing a user-friendly interface for managing data, media, users, and permissions.
Laravel Admin Panel | Laravel admin dashboard | Voyager Admin Panel | Laravel Tutorial | Laravel 8In this video we will going to learn use of voyager laravel...
Installation. Voyager is super easy to install. After creating your new Laravel application you can include the Voyager package with the following command: Next make sure to create a new database and add your database credentials to your .env file, you will also want to add your application URL in the APP_URL variable:
Voyager admin panel makes it easy to create new menu and create menu items and display those menus the sidebar or footer or any where. Let's add the previously created menu to the sidebar menu. So navigate to Tools > Menu Builder. By default there is a menu already created which is the sidebar or admin menu so click on Builder as shown:
Voyager is a Laravel package that provides a complete admin system to speed up web development. It comes with a multitude of features that make Laravel more approachable. These include a media ...
Laravel Voyager is an admin panel package for the Laravel PHP framework. It's designed to provide a hassle-free way to create elegant admin panels for web applications. Its brilliance lies in ...
Run Voyager installer Laravel. There are two options to create the admin panel either with a dummy data or without. To install Voyager without dummy data. $ php artisan voyager:install. To install Voyager with the dummy data. $ php artisan voyager:install --with-dummy. It is preferable to run the command using the dummy data and delete it after ...
What it is. An admin interface for your Laravel app. An easy way to add/edit/delete data for your app. A media manager for your files. CRUD/BREAD generator. Voyager is simply an admin for your Laravel app. Whatever you want your app to do on the front-end is completely up to you. You are in control of your application and you can use Voyager to ...
php artisan voyager:install I needed to create admin user with this command : php artisan voyager:admin [email protected]--create and then entering the name and the password. The problem is after entering the username and the password it's returning this error
2. Installation. Installing Voyager is super easy, especially with Laravel 5.5 and the new package auto-discovery we can install Voyager within a few commands. Let's get right into the video and learn how to install this package. The Missing Admin for Laravel.
Sep 9, 2023. In the ever-evolving landscape of web development, the journey to create and manage robust admin panels often feels like embarking on a challenging and adventurous expedition. Laravel ...
How To Create Admin Panel In laravel Step By Step | Laravel Admin Panel Tutorial Voyager Github Link: https://github.com/the-control-group/voyagerSupport Thi...
3. Whenever we create a table in voyager, Voyager calls it datatype. And for all tables / datatypes created by us, Voyager users only one controller VoyagerBreadController.php located at **vendor\tcg\voyager\src\Http\Controllers**. For example, if I create a table named brands. Laravel will use controller VoyagerBreadController.
Posted 2 years ago. It looks like I cannot paste links on my 1st day ^^' and apparently commands are regonized as links : ( It looks like this : $ php artisan voyager : admin admin@admin . com -- create. Enter the admin name: Aborted. 0.
Voyager Admin. Voyager Admin for Laravel. https://voyager-admin.com. voyager Public. Forked from thedevdojo/voyager. Voyager - The Missing Laravel Admin. Vue 18 7. awesome-voyager Public. A curated list of awesome things related to Voyager.