- Student Successes
- My Learning

How to Become a Travel Photographer (And Get Paid)
You can also select your interests for free access to our premium training:
If you have a passion for photography and dream of one day becoming a travel photographer, there are certain things you need to do in order to make that dream a reality. In this article, we will outline some steps on how you can become a travel photographer.
If you buy a product through one of our referral links we will earn a commission (without costing you anything). Prices last updated on .
As an Amazon Associate, I earn from qualifying purchases. Product prices and availability are accurate as of the date/time indicated and are subject to change. Any price and availability information displayed on Amazon at the time of purchase will apply to the purchase of this product.
How to Become A Travel Photographer and Get Paid Professionally
Travel photography is an all-encompassing field. It incorporates all sorts of photography styles and career paths within it. But what does professional travel photography look like? It’s incredible shots of rolling landscapes , captivating portraits , and exciting food!
And how do you get started? Like almost every unique photography style, you begin by creating! It might not make sense, but you need to get out there and start taking travel images.
Step 1: Determine if It’s the Right Photography Style For You
First, do you like to travel? How do you feel about long flights, stuffy airports, and unpacking and repacking your gear ? What about living out of a suitcase?
Travel photography is not for the faint of heart. Many see it as an easy career path, yet that is not the case. A freelance travel photographer has to deal with many demanding situations. Poor , aggressive locals, or long journeys are common difficulties. Traveling can suck away all your energy. And it makes it all the more difficult if you have limited time to capture the images you need. You may think, Oh, great… I get to go to Paris! But you may only have 36 hours to capture four different locations, leaving you little time to enjoy the area you are in.
There is a lot of stress involved… Not everyone speaks a language you know or understands your dietary constraints. It is a job like any other photography career and not always as glamorous as Instagram feeds portray it to be.
Travel photographers must be tolerant, flexible, and patient. And, of course, they must know how to work with a camera.

Step 2: Learn a Wide Range of Skills
Knowing how to use your camera is essential. Learning a wider variety of photographic skills is vital. And understanding how to capture landscapes, take portraits, or take a street scene with a long exposure will go a long way.
The more techniques you have under your belt, the better. Photography is a visual art and very hands-on, so you must show you can do it by showing you can do it.
Travel photographer education requirements vary. A photography course can help you learn photo basics and editing skills if you are starting from scratch.
But you do not need a degree to become a travel photographer. Some might find it easier to find work with a certificate or qualification, and having one might help open up some opportunities. Still, it is not a prerequisite if your images are strong and captivating.
Step 3: Define Your Travel Photography Niche
Becoming a freelance travel photographer requires a lot of hard work. Unfortunately, the photography business is highly competitive. Part of this hard work is finding a way to stand out.
Your work will reflect your vision of the world, which is unique for every travel photographer. It would help to find a way to show your viewpoint in your travel photographs. Create a signature style that stands out from your competitors.
To become a freelance travel photographer, you must define your niche. You can focus on a specific technique or subject within your travel photography journey. Ask yourself what you like to photograph the most or are good at taking pictures of, and stick to that.

Step 4: Build a Portfolio of Your Best Travel Images
A portfolio is a series of images that you have captured. It can be an online portfolio or a print version, letting clients see the kind of travel photos you take and how you take them. It is a visual guide of the photo quality they can expect from you. Without a portfolio to look at, clients will likely find it challenging to give you work based solely on your word.
If you do not have a lot of money to start traveling, you can start locally. Research photos clients are looking for, then capture them and present them. The images you do not sell could also work well on stock image libraries or websites as sellable prints.
As you start building a reputation as a travel photographer, clients will want to hire you. Keep creating a body of work until you start finding commissions, and then keep exploring. In the end, clients are looking for stunning images. Only a photography portfolio can show that.

Step 5: Create a Travel Website or Blog
Creating your website or blog to showcase your work is essential as a travel photographer. These tools will help you show your clients you are a professional photographer . Also, it makes it easier for potential clients to find you and reach out to you. Using one of these platforms will help you organize your work and display it in your preferred format and style. You can get creative and use a design that makes your content more appealing.
Creating a blog or website is very easy. You can use a free website builder like Wix or Weebly . All you have to do is sign up, select a pre-set template and upload your work. There are many travel bloggers you can follow and get tips from. Then you write your first travel blog post!
Step 6: Sell Your Images Digitally
Selling your travel photography can be a sustainable business idea. Many travel photographers sell their images on a digital platform. And it’s the bread and butter of their money-making machine.
To start, I recommend adding your images to an online platform. These will help put your name out there. Also, they serve well as a portfolio of travel photography for others to view. Potential clients are always searching for examples of work.
It might be challenging to sell your images when you start. But there are a few places to begin posting your pictures.
Stock Photography and Photo Websites
Unsplash is a free stock photography site that others can use for free content. The page is well known, so they receive lots of exposure. If someone uses your images, they can place them on their page with your link or name. You don’t get paid, but it can help spread your pictures and reputation.
You also can use a platform like 500px , where you can license your images with a few clicks. Plus, as mentioned before, you can sell your pictures through many stock photography websites . The site dropstock.io will even upload your photos to many stock websites for you!
Having images for sale on a stock photography website is beneficial. You can sell pictures while you eat, sleep, and travel by licensing your work. As the number of images grows, so does your chance to make money .
If you are still building up a reputation, you can sell travel photos through your website. That way, you don’t have to pay the commission to stock photography sites. If you build up a good network of companies or blogs that need images, they might even come to you first.

Step 7: Sell Your Travel Images in a Physical Format
You might be the kind of travel photographer who is not into the digital world. There is still a market for making money and a living from travel photography.
One way to do this is to create prints of your images and sell them through specific art websites. Etsy is one good example. Fine Art America is another one. Some travel photographers even use eBay due to the number of people who use the website and the low cost of hosting a print.
You could approach galleries when you have a series of works. There is a chance you find buyers through them. They will take a commission depending on the space. But in turn, they provide an outlet that many people have access to.
Selling Prints Yourself
The benefit of selling physical prints is that you can sell them online and in person. I have created photography books , postcards, and photo prints . And I sell them in art markets, art shops, and hostels.
You can sell prints on your own out on the street, but the money can come in dribs and drabs. There is no guarantee that you will sell enough of them to be worth your time standing out in the cold (or heat).
Unlike digital images, prints can’t be stolen or reused without your say-so. But they might need a lot of your time to produce, plus the initial capital required to print these can be high.

Step 8: Find Photography Work Where You Travel
As you travel to foreign places, you can offer your services to travel businesses. Many are in great need of images from the destination you are in. These could be travel magazines , newspapers, or local tourism boards. Anyone in the travel or tourism industry needs strong images. I have stayed in hostels for free by exchanging professional interior photographs for free accommodation.
Many businesses prefer working with the same person if they provide high-quality images. They might even commission you to capture the images they need. Be aware that this type of work may have to be under the table, depending on your visa. If you are going somewhere abroad, research opportunities each area might present. For example, a beautiful image in a tourism brochure can say a lot about a company. It can show that they will pay top dollar for images. You could also see if the area you’re traveling to has trending stock photography themes to take advantage of.

Step 9: Capture and Write Great Travel Content
The number one idea with travel photography, like any other niche, is to create strong content. Success is due to the quality, the post-processing, or the techniques you use. It could also be due to the uniqueness of your approach.
Strong content is crucial. Your images need to be top-notch if you want to sell your work through a gallery or online. The more compelling your travel photos are, the more people will search for them and your services.
One other area you can look at is photography writing. If there is an area of photography that you know about, why not write about it. It could be about time-lapse photography or your experience as a portrait photographer . The possibilities are endless.
There are many places you can do this, for yourself, a travel company, or a photography website. The benefit is that not only are people reading your helpful content, but you also get to share your images.

Step 10: Use Tours and Workshops as an Extra Income Source
When I first arrived in Budapest, I tried to find a job. I looked at all the photography possibilities I could. However, nothing seemed to fit my style, work ethic, mentality, photography style, or background. As a documentary photographer , I contacted newspapers and magazines but didn’t land a position. It was not an easy time.
So I started thinking outside the box. And I realized that, with a bit of marketing , I could host street photography workshops . It fitted with my travel photography passion and experiences. Luckily, I had a background in both photography and tutoring. It was a success, but it took a while for me to get my name out there. The good thing was that it only took a day or two to develop some free advertising online. It allowed me to start immediately.
For every travel photographer, there is something they can teach. It could be composition , landscape photography, or location scouting .

Step 11: Pick a Place to Travel and Go
Many resources can help you get started as a travel photographer. Yet, I believe in baptism by fire. If I were just getting started and had a small travel budget, I would pick a place to travel and go. That’s it. You can work out everything else once you have a place to go. You could do a documentary piece in India or capture the cloth-dying process in Morocco.
Once you have a destination, you can start researching. Learn about photography etiquette, what time the sun sets, and where to stay. Then, with a clear idea of the “where” and “what,” you can find who might be interested in the images you take.
As mentioned, if you can write, then your opportunities widen. GoNomad , for example, is always looking for stories to publish. Magazines and online publishers will pay for content because they do not need to do the research or find and commission someone else. It’s even better if you have images to go alongside your writing.
So, find paid photo projects, put some of your travel photos on stock photography websites, and sell a few physical prints—the more avenues of income you establish, the better chance to have a travel photographer salary successfully.

It doesn’t matter if your goal is to work for National Geographic or make a living from your prints and website. Becoming a professional travel photographer requires a lot of work. But don’t worry! Many travel photographers started with the basics, like a beginner’s photography course , and just went for it. You will get there!
We hope these travel photography tips help you figure out how to become a travel photographer and carve out a travel photography career!
Try out our Fantastic Photo Adventures course to learn unique and creative storytelling techniques and get out and start your journey into travel photography!
Travel Photography - How to Blend Your Passion with Profession
Out of the different genres of photography, travel photography is the most appealing to many. A travel photographer gets a chance to experience places, people, and cultures while doing photography. And one tries to bring the viewer to the same experience through the photographs. It offers a fair share of the adrenaline rush, money, and accolades. However, choosing to combine a life of wanderlust with your profession has its own set of challenges. Like other career and business options, travel photography can offer you every bit of joy and learning experience that you want both from traveling the world and from the career of photography, provided that you can manage and scale things up, focus on brand building and market your work effectively.
Pro-tip: Remember that travel photography will require you to do the miles, most often on your own, and there will be serious expenses to be incurred and work to be done.
Before you respond to the call of adrenaline and decide to quit your nine to five to dedicate yourself to travel photography business, take cognizance of the pros and cons.
Travelling is a fantastic activity that rejuvenates the mind and soul to the hilt. Each destination comes with its unique charm and beauty, which you capture through the lenses (photography). You can cherish the travel memories for long and share the beauty of the places you travel to with the world.
Someone has aptly said that a picture paints a thousand words. No wonder travel photography is not only amazing but soul-stirring. And nowadays travel photography has also become an interesting and lucrative business. It is such a rewarding thing that you will grow creatively, and the joy that you will experience in your heart will be unparalleled.
What is Travel Photography?
Travel photography is primarily about photographing places in all their glory. As a travel photographer, you will travel to lots of places and capture them through your camera. The places can be tourist attractions, natural landscapes, hotels and resorts, cultural experiences, and outdoor adventures. Most professional travel photography is in some way or the other linked with the tourism industry, generating imagery for magazines, brochures, advertising, merchandise, and online media.
Top reasons why you should become a travel photographer:
Develop your respect and love for this beautiful planet When you step out of the hustle-bustle and chaos of your fast-paced life in cities and see the natural beauty and abundance of this fascinating earth, you feel ardent love and need to save this planet. When you capture the enchanting beauty of the places, you feel grateful and happy. You understand the lessons which your parents and teachers taught you in school about being sensitive to our environment and the planet. Travel photography strengthens the bond with our planet and makes you value it more than ever.
Learn the virtues of flexibility and patience
Travel photography helps you grow at a personal level. It changes you significantly. When you are sensitive to the planet, you become more flexible and develop patience. It is one of the best learnings from travel photography that Nature runs at its own sweet pace and yet accomplishes everything it aspires.
Similarly, you feel that you have become more patient with people, with circumstances. Success doesn’t always come fast; one needs to persevere and show some patience. Similarly, in photography, also you need lots of patience and perseverance. You have to wait for hours to capture that perfect and mind-boggling sunrise. And if you give it the time it deserves by being patient, then you will have some of the best shots in your portfolio. Flexibility is another great lesson you learn through travel photography. There have been times when you face undesirable circumstances such as flight cancellation, a flat tire, sudden change in weather conditions, etc., but you should never hold on to an itinerary and schedule and should show flexibility instead. You won’t regret it.
Make your life an adventure
You will never find any shortage of places to see and capture in your camera. Even your entire life is not enough to photograph our vast and beautiful planet. There are endless places you can shoot. Make a list of the places you will travel to and shoot. You will be spoilt for choice. There are endless options, and it is the most beautiful dilemma to choose which places to shortlist for travel photography. So don’t miss out on any opportunity and photograph as many places as you can and build a treasure of your photographs.
Feel and mingle with your environment
Let lose yourself in your environment, be natural, and absorb every bit of it. Even ask your co-travelers to do the same. Don’t get into posing and constantly smiling. Capture natural emotions as they will come out more beautifully in your pictures. For travelers, landscape photography is one preferred approach. Be it doing travel and street photography, animals, or inanimate objects, you will find a lot of choices in picking up a theme or subject for your next set of travel photography portfolio. It is important to note that external conditions such as the weather and lighting play an important role in getting that perfect shot. So, make sure to know the right time and right vantage point to click a memorable photograph and fulfill your wanderlust and engage in travel photography.
Revel in the opportunity to capture fascinating places and moments
Every time you travel, you come back with pictures of beautiful places and moments, some of which may leave you spell-bound, and some leave the effect of absolute tranquillity. You get to capture your dream destinations, the places which looked picture-perfect in a magazine/internet. You capture those moments which leave you in awe. One such place where you can click such pictures is Rajasthan. The picturesque beauty and history of Rajasthan make it a perfect destination for travel photography. Wherever you travel in Rajasthan, you will be inspired by the “Lands of Kings,” which is one of the best places in the entire world. Such is the charm of majestic Rajasthan.
Here are 4 top useful tips on how to get started in travel photography
Play around with angles and shots, capture emotions and moments, plan the travel photography shoot well, always be ready with your gears.
Wondering how to get into travel photography? First things first. You don’t have to be obsessive about your gear. You can start shooting with your smartphone, regular cameras, or DSLR. The best lens for travel photography is what you have. Since there are so many types of subjects, one type of lens would not be enough. Instead of focusing on the subjects which your lens is suitable for is the thing to do. What is essential is to start. Many photographers prove that it is not the equipment, but the creative vision that helps one to sift the best from the rest.
Similarly, there are no specific types of DSLR made for travel photography; even an entry-level DSLR can take some good photos. The best camera for travel photography is the one that can give you a wide scope of getting the best shots. Also, the best lenses for travel photography would depend on which type of shots you are looking to take. If you are looking for wide-angle shots, then a wide-angle zoom lens like a 16-35mm lens would help you take great shots. The more pictures you take, the more you will come to know about camera angles, subject/object interplay, lighting conditions, and post-processing. Thus, when you start, it’s best to start on a slow scale and then upgrade your travel photography gear as and when you feel you are ready to transcend the next level of photography expertise.
Take pictures from different angles, and maybe you can use wide-angle lenses to give more context to your images. Step out of your comfort zone and make silly poses and have a good time alone with good pictures. You will surely get some good shots which will be interesting. But first, you need to know some crucial terms like eye angle, Dutch, establishing shot, cut-in, cutaway, low angle, perspective, reverse shot, over the shoulder (for shots).
Similarly, in angles, you need to have some degree of proficiency in close up/ extreme, medium shot, worm’s eye view, bird’s eye view, longshot, or POV. The interplay of framing, angles, shots, and positions provide a different viewpoint, a different aspect of focus to the viewer, and convey varied emotions.
When you visit a lovely place with amazing landscapes, views, and the environment, apart from capturing these beautiful things to capture the feeling of being there. More than the aesthetics, it is about telling its own story to the viewers. This virtue can be enabled by allowing the subjects to be captured in their familiar environment or surroundings. The special bond of the familiar place can stir emotions and can be radiated into your shots.
Also, they need not be overwhelmed with elaborate directions. Just subtle guidance would be enough to keep the subjects at ease and bring out the natural pose without feeling self-conscious or uncomfortable. Another way to conjure emotion is to avoid having them standstill. Give them something to do, and see their involvement in the activity, bring out their genuine emotion.
It is always better to plan things before heading out for travel photography. Take ideas on how to capture emotions and the surroundings when you are on your travel photography trip. Spend some time to assess how you will be capturing the place in its full glory. Answer questions like,” How will I get there?” ‘Does the place have photographic potential,’ ‘Will the potential be affected by the time of the year or the time of the day?’, ‘How do I arrange for traveling around the different spots to get incredible shots?’.
An hour on Google can provide you both – the inspiration as well as the information to plan your travel photography trip well. While you plan on which places will be worth the shot, you also need to factor in unexpected issues like delay, seasonal changes, or poor lighting conditions.
For many photography enthusiasts, the sudden change in weather can be a blessing in disguise. It can present an unexpected enhancement to the subject (Think of a layer of snow covering the city landscapes, or sudden rainfall leading to lush greenery).
Wherever you travel, be prepared with your camera and the supporting gear . Be prepared to take advantage of an opportunity to click photographs. You never know you might click your masterpiece at a very humble place or in any other place where you had never thought you would.
To summarize, you can say that there is a vast difference between taking photos on your trip or traveling specifically to take photos. The proof of the difference will be in the quality of the images captured by your camera. These travel photography tips and techniques aptly showed why you need to explore travel photography as an option. These tips will factor in for elevating the overall photography experience to a new level of subtlety and sophistication.
Now that you know the benefits of travel photography, here are our top 9 travel photography tips for beginners on how to turn your travel photography passion into a business.
1. choose travel photography only if you love it deeply. it’s going to be tough..
Adventurous photography has many niche genres, like wildlife photography, industrial photography, landscape photography, etc. Learn about the types, the corresponding skill requirements, the temperament that is needed, the challenges involved, and of course, the monetization models involved. Make sure that you understand all the dynamics before making your final decision. Follow both your heart and mind. Once you have made up your mind on selecting travel photography as your specialty, you then need to focus and prioritize it and pursue it with all your passion. Half measures will not do.
2. Invest time, effort and money to learn the tricks of the trade
Falling in love with someone at first sight, is sensitivity at its highest. Planning to get married and start a family with that someone is sensibility at its highest. We are talking about marriage here. Marrying your passion and your expertise - technical, aesthetic, and commercial. Think like a pro. Start learning the tricks of the trade by interning for free as you take pictures with a second-hand camera or taking some travel photography courses. Interact with peers and seek travel photography tips by browsing good travel photography websites. Study books and magazines on travel photography. Learn from the masters. You can also attend travel photography workshops , seminars, and other training programs to learn from the best.
3. Clearly Describe your Travel Photography Service
Define your travel photography service in unambiguous terms. Enable your clients and prospects understand the quality of work that you deliver, prices that you charge, value-added services that you render, and the scale of projects that you work on. Define the mode of payment, and the terms and conditions for hourly rates, weekly commitments of time and project deadlines. Defining your service will help you to make money with photography while traveling.
4. Create your professional travel photography website
Even as you continue to learn and inculcate the skills of professional travel photography, you must not forget to market your work. Build a professional travel photography website to showcase your travel photography photos. Sort and curate your work and select the best travel photos of different genres that you have for your portfolio website. Regularly update your portfolio website and add new work from recent travels. Your website is your showcase window to the world and the first point of contact with potential clients and collaborators. Get inspired by these awe-inspiring photography portfolio websites created on Pixpa.
Here’s a great guide on how to create an online portfolio website.
Pixpa is an all-in-one platform to create a travel photography portfolio website easily without any coding knowledge. Take a free trial and start building your portfolio website now.
5. Use social media to generate exposure for your work
Travel photography gets a lot of attention and response to social media. People love to like and share beautiful, picturesque images of places they would love to visit. As a travel photographer, learn to leverage social media to your advantage. Choose one or at max two social media platforms and focus all your energies on sharing high-quality posts regularly. Interact with people who comment and share your work and build your fan following. Look through the metrics of likes, shares, and comments to understand the market trends , the quality of work, and areas for improvement.
Instagram has emerged as the preferred platform for photographers to share their work. Travel photography is especially popular on Instagram, with many hub pages promoting travel photography. Learn how to use photography hashtags on Instagram to get success as a travel photographer.
6. Start a Travel Photography Blog
Add a travel photography blog to your portfolio website. Starting telling visual stories, share travel photography tips, and behind-the-scenes insights of your travels. Create photo stories of the places you are visiting. Talk about the culture, experiences, and share your explorations through your blog posts. Your blog will gradually become a magnet for attracting admirers and potential clients alike.
Tip: You can add a blog to your portfolio website on Pixpa easily. Learn more.
7. Explore Ways to Earn Money through Travel Photography Passion
Here is the challenge. Capturing the best travel photos as you travel across the world is one thing and making money from them, quite another. Always be looking to sell your skills, brand your work, and get a better bargain. You may try publishing your work on some of the best travel photography platforms, online tourism platforms, and wildlife adventure photography and conservation platforms that offer a good amount of money.
There are a lot of stock photography websites where you can sell your travel photography images. There are also many travel magazines that regularly post travel photography jobs. Build your relationships with travel magazines and understand their requirements. You can plan your travels wherein you are shooting images that a travel photography magazine or website would be interested in paying.
Tip: Get an established photography agency to market and sell your travel photography work
8. Network! Join a Travel Photography Group
How about socializing with buddy travel photographers at a cool theme restaurant on the weekend? You get to know each other, bond over shared interests in adventure photography, learn cutting-edge technical tricks, and, most importantly, get recommended to clients by senior professionals. Network, share positive vibes with your tribe, and get recognized within the community of travel photographers for your work.
There are also several online travel photography communities that you can join. Fellow travel photographers are more than happy to help each other out with insider tips on the places they have visited.
9. Build and Grow your Client Relationships
Travel photography is not just about the camera. It is about exploring people, places, cultures, geographies, and practically whatever the roads serve your way. Flag each place you visit with a bit of self-promotion. Associate with noble causes and look to attach yourself to social campaigns. For example, you can try your hand at wildlife photography to spread the word on endangered species and animals that are on the verge of extinction. Amidst all the frenzy of meeting people, new clients and new assignments will pop out of nowhere.
Keep the faith and have the resolve to overcome a few challenges that the trade might throw your way. If you love photography and the freedom of working while traveling places, travel photography is for you. Leap with preparation and trust that the net will appear.
So, what are you waiting for, when the lush vistas of unexplored terrains beckon your inner creative side? Don't think too hard about how to be a travel photographer. Simply pack your bag and camera, make note of the tips and tricks of the trade and embark on your travel photography journey today!
Create your travel photography website easily without any coding knowledge on Pixpa. Take a free trial and start building your portfolio website now.
Frequently Asked Questions
- How do I prepare to be a travel photographer? To prepare yourself to be a travel photographer, you need to first prepare yourself to be a good traveller. This includes being flexible and patient, planning well but being prepared for eventualities, and always being on the lookout for an opportunity to capture an interesting moment or place. Having a sense of adventure is important in travel photography.
- What makes for good travel photography? Good travel photography always tries to capture the emotion of the moment and the place in each photograph. Make sure to capture not just locations, buildings and monuments but also people, events and moments. Your travel photography should be able to visually narrate the story of your journeys and not just the destinations.
- How much money do travel photographers make? According to Glassdoor, the average annual salary of travel photographers in the United States was $44,193 for 2021.
Try Pixpa - the easy, all-in-one portfolio website builder loved by photographers & creators.
Explore More Articles See all articles
Top-rated by creatives for 10+ years
All-in-one website builder for creatives.
Build Your Website
Start an Online Store
Sell Images
Marketing Tools
Client Galleries
Photo Gallery Apps
Start a Blog
Creatives love Pixpa
15-day free trial. No credit card required.
Beautiful Templates Made for Creatives Awesome Support Really Easy to Use Affordable Pricing
Rated as top website builder by creatives for 10+ years.
What's new on Pixpa
Get Going → Photographers & Videographers
How to become a travel photographer
October 3, 2019

What is travel photography?
- Important logistics
- The upsides
- The downsides
Subscribe to Greenlight by Thimble.
Join a community of 50,000+ small business owners and get insights and inspo every other week
Related Articles

Becoming a travel photographer is the ultimate way to expand your photography business across borders. Whether you want to see beyond your city, state, country, or continent, travel photography can make that adventure part of your job description.
Becoming a travel photographer isn’t just wanderlust, though. This career involves a lot of hard work and a fair amount of logistical planning. But if you’re willing and able to go through these steps, then you could very well set up a successful travel photography business.
Here is your ultimate guide on how to become a travel photographer.
Travel photography, at its core, is the act of documenting scenes of travel. This basic travel photography definition can look like countless different things when put into practice, though. Becoming a travel photographer could mean photographing people, animals, landscapes, buildings, art, or any combination of the above. Though every travel photographer will have their specialty, you should get ready to hone your skills in photographing a wide variety of subjects if you want to become a travel photographer.
As a profession, travel photography could prove to be a difficult role to break into. Traveling to photogenic places for work is certainly a desirable job description. So, you’re not the only person wondering how to become a travel photographer. That said, if you’re willing to diligently work towards a travel photography career, then you could very well be part of the small proportion to actually make it happen.
To help you get there, we’ve compiled five crucial steps on how to become a travel photographer:
1. Start Small and Nearby
Depending on who you ask, anywhere can be a destination. Try to see your home base as a visitor would, and start thinking about how a travel photographer might approach documenting the scenes you see during your day-to-day routine. Does your neighbor want a portrait? How does that new development look through your camera lens? Perhaps the neighborhood stray cat is particularly photogenic.
Start approaching your photography practice as if you already are a travel photographer. And if luck has it that you already have travel planned for the future—say, for instance, a family vacation or a work trip for your day job—you’ll already have a solid amount of practice under your belt. As you travel, carve out time to seek out shoot-worthy people, places, and things. The products will be your first official travel photographs.
2. Build Up Your Travel Photographer Portfolio
Once you’ve captured your first images, start building an online travel photography portfolio. If you’ve already set up a more general portfolio website for your photography business, create a tab specifically for your travel photographs.
Keep plugging away at your travel photography until you feel proud of your portfolio. If you have the means, consider investing in trips specifically designed to diversify and amplify your portfolio. You could even consider selling prints to subsidize your travel.
3. Set Up Your Social Presence
Now that you’ve built up your online portfolio, it’s time to start making your presence known. Setting up your social presence is one of the best ways for a travel photographer to do that. Take to Instagram and start posting your portfolio. All of the general guidelines for expanding your Instagram reach will apply to your travel photography Instagram account.
If you’ve already set up an Instagram account for your general photography business, use that profile to make an announcement that you’re breaking into travel photography. Create a story highlight specifically for your travel photography, and start interacting with travel-centric hashtags. The more followers you gain, the more credibility you’ll be able to demonstrate to potential clients in subsequent steps of becoming a travel photographer.
4. Reach Out to Tourism Boards
Now that you’ve solidified your presence as a travel photographer through your online portfolio and your Instagram, getting in the door with potential travel photography clients will be much easier.
One easy way to break into the travel photography industry is to reach out to tourism boards. If you’re lucky, they will have work to commission from you. But even if they don’t, they will have lengthy lists of hotels, attractions, and travel companies who will need hard working and talented travel photographers to work for them. These commissions can jumpstart your travel photography career as you might have imagined it initially: getting paid to travel and document cultures other than your own.
5. Start Pitching Your Photography to Publications
Once you’ve landed some solid commercial work, use what you’ve produced through these jobs as clips to go after more editorial work, if that’s your end game. Reach out to publications to pitch yourself as a travel photographer. Provide links to previous projects so that potential editors can get a sense of your talents and experience. Again, starting small could be a good idea here. Reach out to smaller publications for travel photography commissions and then gradually work your way up to publications that can send you around the world for your photography.
Becoming a travel photographer: important logistics
Figuring out how to become a travel photographer won’t be all fun, games, and traveling the world. You’ll also need to tend to a fair amount of housekeeping to make sure your travel photography business is a successful one. It will be tempting to shirk these crucial responsibilities so that you can dedicate more attention to the photography itself. However, you’ll need to set a solid foundation for yourself before you drive straight into it all.
1. Register Your Business
If you don’t already have a formally registered photography business, then you might need to go through the process of registering your travel photography business. Unless you’re running your travel photography business as yourself under your legal name, then you’ll need to register your business name with state and local governments.
2. Get General Liability Insurance
Travel photography can often involve unforeseen accidents and expenses. With the active nature of the job, getting General Liability insurance for every shoot is particularly prudent for travel photographers. Also be sure to access a Certificate of Insurance to prove your coverage in case any of your travel photography clients require you to have it.
Thimble makes it easy for you to tailor short-term coverage to each travel photography assignment you shoot for. Our app even lets you purchase coverage on-the-go, so it’s easy to fit into your jet-setting lifestyle.
3. Set Up Your Finances Well
Even if you’re running your travel photography business as a freelancer or consultant , it’s crucial that you separate your personal and business finances. Mixing your personal and business finances will make tax season a nightmare and could lead to audits and fines.
As soon as you start spending on and earning from your travel photography business, set up a separate business bank account, open a business credit card account, and use accounting software to track your finances. This financial setup will make it much easier to accurately track and pay quarterly tax estimates for your travel photography business.
Becoming a travel photographer: the upsides
The advantages of becoming a travel photographer are well-known. Being a travel photographer typically carries all of the perks of working freelance—setting your own schedule and working remotely make a travel photographer’s lifestyle ideal for those who want flexibility.
But the benefits of freelancing are just the tip of the iceberg. Working as a travel photographer means expensable flights, accommodations, and transportation. You’ll be able to experience and document cultures other than your own, at no cost to you.
Of course, during the early stages of your travel photography career, this luxury is not a given. Most aspiring travel photographers will need to build up their portfolio and references before they’re able to land jobs that involve all-expenses paid trips. That said, this end goal can be something to work towards and look forward to.
Becoming a travel photographer: the downsides
Because the benefits are so appealing, there’s a lot of competition among aspiring travel photographers. As a result, this industry is relatively tough to break into. Becoming a travel photographer might require an initial out-of-pocket investment on your part. Overhead costs could include building a website, maintaining a strong digital presence, and some initial travel costs as you lay the foundation for your portfolio.
Not to mention, becoming a travel photographer will entail most of the downsides that come with freelancing. Be ready to do without predictable income patterns, healthcare benefits, or office space. Even more, depending on what kind of travel photographer you become, this job could very well prove to be more dangerous than your average photography occupation, much less your average office job.
How to become a travel photographer: next steps
Now that you’ve made it through our guide on how to become a travel photographer—what’s your next move?
If you’ve decided that the upsides of becoming a travel photographer outweigh the downsides, then it’s time to get started! Be sure to tend to the exciting and the not-so-exciting steps of how to become a travel photographer in equal parts. For every new journey you get to document, be sure to insure your business and record your expenses.
Written on October 3, 2019
Our editorial content is intended for informational purposes only and is not written by a licensed insurance agent. Terms and conditions for rate and coverage may vary by class of business and state.
Get Greenlight in your inbox.
It's not every other newsletter. It's every other week, four minutes long, and just for small businesses.

Quick-thinking insurance for fast-moving businesses.
Backed by A-rated Insurance i
Best Insurance for the Smallest Businesses
Accredited Business
What do you do?
The leading authority in photography and camera gear.
Become a better photographer.
12.9 Million
Annual Readers
Newsletter Subscribers
Featured Photographers
Photography Guides & Gear Reviews

Travel Photography Tips, Ideas, Examples & Jobs
Have a passion for travel photography but not sure how to take it further? This post covers careers, what gear is best, and tips for improving!
Learn | Photography Guides | By Ashley Darrow
Travel photography is one of the most exciting styles of photography, but it can also be one of the most intimidating to get started with.
I’m at my most inspired as a photographer when I’m on the road.
Even when I’m not headed to an exciting new location, I’ve started to think about all of my photography from the standpoint of travel.
This guide is going to give you everything you need to know to get started with travel photography.
I’ll be covering everything from the basics, to the equipment you need, to 20 travel photography tips that will improve how you approach taking photos.
When you’re ready to hit the road, we’ll start our adventure with some travel photography 101.
Table of Contents
What Is Travel Photography?
Defining travel photography can be a little bit challenging as this is one of the most open and free categories of photography.
In general, travel photography involves documenting people, landscapes, and cultures anywhere in the world.
Your travel photography counts whether you have to hike for thousands of miles or you took a 10-minute bus ride from your home.
Travel photography can be done by career professionals working for major magazines like National Geographic or it can be done as part-time freelance work.
Many travel photographers make their money by taking contract work from tourism departments or brands looking for product photography shot on location.
Travel photographers often find themselves working in challenging conditions. There’s a good chance that you’re going to be snapping pics in low light conditions , rough weather, or even half a world away from the comfort of your own bed.
- Related: 77 useful travel tips for photographers
What Does Travel Photography Include?

Image Credit: Sam Forson
Travel photography incorporates countless different styles.
Travel photographers often take landscape photographs, architectural photographs , as well as street photography. It’s also common to see food photography and documentary work being done by travel photographers.
As a travel photographer, your goal is to capture and express the story of a particular time and place. You’ll be giving people a taste of what’s happening in the moment while you’re in a particular location.
How Much Do Travel Photographers Make?
Travel photography is made up of a wide range of styles, but it’s also made up of a wide range of pay rates.
If you’re lucky enough to land a staff photography job with a major magazine, you could wind up with a six-figure salary. However, freelance travel photographers can make as little as around $18,000 a year.
Beginner travel photographers often make even less than that as they start to piece together their career.
Part of your pay as a travel photographer will come in the form of comped travel expenses. It’s pretty common for travel photographers to take a job with a tourism department that includes free transportation and lodging as part of their payment.
Is travel photography in demand?
Travel photography is in high demand.
How Much Do You REALLY Know About Photography?! 🤔
Test your photography knowledge with this quick quiz!
See how much you really know about photography...

Your answer:
Correct answer:
SHARE YOUR RESULTS
Your Answers
This demand is being driven by tourism departments, brands looking for more engaged lifestyle photography , and the rise of social media making travel photography a viable path for a content creator.
There are more people taking travel photos than ever before which means that you’re also going to have a lot more competition despite there being more job openings.
How Do I Become a Travel Photographer?

Image Credit: Kamaji Ogino
Becoming a travel photographer is pretty similar to how you would start up almost any photography career.
If you’re a total beginner, you want to start by mastering the craft of working behind the camera. This means learning how to stay in control of your exposure, frame captivating shots, and just get comfortable taking pictures wherever you go.
Here’s a basic outline of the steps you’ll take to start your travel photography career.
- Learn your photography basics
- Identify your travel photography niches
- Build your portfolio
- Grow a social media presence
- Begin reaching out to clients
- Publish your photography
- Grow your business by reaching out to bigger clients
- Continue to promote your work
- Have fun traveling!
I should note that plenty of travel photographers also crowdfund parts of their career.
Building a presence on social media sites like YouTube and connecting that to your crowdfunding platform of choice is a great way to bring in some additional money.
What Equipment is Needed for Travel Photography?

Image Credit: Hiren Lad
In all my years of photography, the one thing I’ve learned is that if there’s anything photographers love nearly as much as taking pictures, it’s talking about their gear.
Whether you see this equipment as the tools of your trade or the raw materials of your art, you’re going to need some equipment to get started with travel photography.
I’m going to cover the standard gear that most travel photographers will gravitate towards, but I’ll also be talking about different setups for film photographers and mobile photography.
I’m going to kick things off with the absolute must: a camera.
You’re not going to get very far in your career as a Travel Photographer without a camera. I’m being a little silly here, but it’s not just as simple as picking up any random mirrorless camera for travel blogging .
So, what camera is best for travel photography?
The absolute best cameras for travel photography are going to be, no surprises here, the latest mirrorless releases from the big-name brands like Sony, Camera, and Nikon.
Those cameras are packed full of the latest features and offer some of the best image quality.
You can also get amazing results, and save money, by picking up older cameras. My Sony a7s II is still my main camera body and my Canon 5D Classic, which was released way back in 2005, still takes pictures that get people asking me “How did you do that?”
You don’t need to spend a lot of money on your travel photography camera. A skilled photographer will be able to take amazing pictures using a point and shoot digital camera from the 90s. It’s craft that makes the photographer, not gear.
Travel photography can also be done with your smartphone. There are plenty of professional photographers out there primarily shooting on smartphones.
I also want to highlight film cameras. Film is the historic origin of our art form. Any film camera from a toy lomography camera to a professional large format camera can help us see our travels in a new way.
With all of that said, there are a few important features that you should look for in a travel photography camera.
- Weather sealed designs are much more important when you’re trekking through unknown territory than when you’re at home in the studio
- Your camera should also be ready for the road. Just like your car, you should take your camera in for a tune-up before a long trip
- Double-check for the specs that matter most to you. For me, that’s low-light performance and color science
Your camera is only half the equation which means we need to take a look at the lenses that will be going on this journey with you.
- Related: How to choose a camera and what is the best camera for travel photography?
I bet you’re wondering which lens is best for travel photography? You don’t need to worry, I’ll walk you through my top pics for a travel lens whether you’re shooting on a brand-new Sony mirrorless camera or you plan on taking a Canon 5D Classic on the road.
The first place you need to start is by asking yourself the most essential question in photography: What types of pictures do I plan on taking?
Here’s a quick breakdown of my recommendations for travel photography lenses based on my experience for a variety of photographic styles and budgets.
- Standard Zoom Lens —A standard zoom lens like the classic 24 to 70mm is the go-to travel lens for so many photographers I know. This lens easily handles street photographs, landscapes, and portraits. Pick this to make a flexible one-lens kit
- Wide Angle Zoom Lens —Wide angle zooms are better suited for photographers who know they’ll be shooting landscapes and architecture. If your wide angle zoom goes up to 35mm, then you can even get away with using that as your every-day lens
- Wide to Telephoto —These lenses have focal length ranges like 24 to 105mm. They are usually affordable alternatives to pro-level lenses that can still capture stunning images. You’ll want this lens if your main concerns are budget and stylistic flexibility
- Telephoto Zoom Lenses —These massive lenses typically top out at 200mm or 400mm focal lengths and are ideal for wildlife, bird, and sports photography. Their size, weight, and cost make them less flexible than other options, but these lenses are a must-have for photographers interested in the styles I just mentioned
- Pancakes and Nifty Fifties —Pancakes lenses have such a small profile they double as a body cap while the iconic Nifty Fifty is a budget 50mm with a huge fanbase. These lenses are perfect for photogs who want to stay ultralight or for anyone who wants an emergency backup lens.
- THAT lens —We all have a lens that, despite never getting much use, we just can’t seem to leave at home. Mine is the Helios 44-2. I take that lens on pretty much every trip even if it doesn’t get much use. Allow yourself a little room for that “fun” lens and you might be surprised by how much use it gets over time
I always have at least two lenses on me when I’m traveling—just in case.
I once dropped an expensive prime lens and watched it roll off the edge of a mountain in the desert. Luckily, I had a pancake lens in my bag so the photography trip wasn’t a total loss.
Ever since then, not only do I treat each of my lenses with the utmost care, but I also make sure but I’ve got backup options on hand.
- Related: How to choose a camera lens and best lenses for travel photography .
Travel Photography Bag
Just like with lenses and camera bodies, you have a few options to consider when it comes to picking the right travel bag for your next adventure.
Before I get too far into talking about camera bags, here’s the five things I always consider when I’m packing a bag for my next trip.
- Camera Bag Size —Size is one of the most important things to look at when shopping for a new travel photography bag. You want to find a bag that’s going to comfortably fit all of your equipment without causing too much strain on your back. Sling bags are great for days out in the city with light gear, but you should look for a comfortable backpack if you plan on covering some serious distance with your gear
- Pack Weight —Here’s a quick piece of advice I picked up from hiking. Your maximum pack weight should only ever be 20% of your total body weight. This means that if you weigh 200 lb, the heaviest your camera bag should ever be is 40 lb. The lighter, the better
- Features —There are some features that I consider an absolute must have in any of my travel camera bags including rugged build quality, plenty of padding and protection for my gear, and easy access to at least my main camera body and lens so I can shoot on the fly
- Style —You could buy the most technically perfect travel camera bag, but if you don’t actually like the way it looks you’re never going to take it on a trip. I definitely believe that form should be second to function when it comes to camera bags, but I’d also be lying if I said it wasn’t a huge factor in my camera bag purchasing decisions
- Your Gear —Your gear is actually going to dictate the type of bag that you’ll be looking for. A travel photographer shooting on a Leica Q2 can get away with a much smaller bag than a photographer shooting with a Canon 1DX
I also typically bring a packable backpack with me as part of my kit. This could be a really lightweight sling bag or something like the Lowepro Runabout.
This lets me leave the bulk of my gear at my hotel when I just want to have a quick trip around a new city taking pictures.
- Related: How to choose a camera bag
Tripods for Travel Photography
Tripods are an interesting—and somewhat contested—piece of the travel photography puzzle. I never used to take a tripod with me while traveling and that’s because most of my photography was shot street style which means lightweight and handheld.
However, the more I get into film photography and more interesting exposures, the more I find myself relying on my travel tripod.
My absolute number one pick for an adventure tripod would have to be the Peak Design Travel Tripod . It’s fairly lightweight, intelligently designed, and packs down small enough to fit in most of my bags.
Depending on the type of photography you’re looking to capture, you can also use tripods like a gorilla pod or even just take the tripod you have—even though it might be a little larger and heavier than would be ideal for travel.
This roundup of the 7 best travel tripods is a great place to get started if you’re shopping for something designed for the road.
Do I Need a Tripod for Travel Photography?
I’m going to dig into this mild controversy for just a moment. The question of whether or not you need a travel tripod to begin with is the source of some debate for photographers.
Honestly, the answer is maybe. It really depends on the type of pictures that you’re hoping to capture and your personal style as a photographer.
If you like to run and gun while capturing slices of life on busy city streets, you probably don’t need to bring a tripod with you.
Styles of photography that are highly mobile and rely on fast composition changes typically ditch the added stabilization that a tripod brings because it just slows them down too much.
Tripods might also not work for certain events and organizations. Trying to set up a tripod during a rock concert is a recipe for disaster and some museums won’t even let you bring in a tripod unless you pay their professional photography fees.
Then again, there are a few types of photography that absolutely need a tripod in order to work. Long exposures, shooting in dimly lit situations, and using some telephoto zoom lenses pretty much mandate shooting on a tripod.
The long and short of this is that owning a tripod and learning how to use it will make you a better photographer, but it’s not quite a mandatory piece of your travel photography kit.
The Camera Accessories I Always Forget for Travel Photography!
There are so many small accessories that are vital for digital photography that I find myself constantly forgetting. Far from being little odds and ends, these are essential parts of my kit that I’ve started to just leave in my travel bag so I never have to worry about packing them.
I’m talking about SD cards , microfiber cloths, sensor cleaning kits, and all those other little things that you might not miss until you’re in the field and you’ve got a speck of sand on your sensor ruining your shots.
I’ve started making a checklist that contains all these little items before I pack out. There’s nothing more defeating than being in some beautiful destination and realizing you only have enough space on your memory card for a few dozen more shots.
This is the checklist that I use for your average trip. Feel free to adjust things based on the gear that you use.
- Sensor cleaning swab x 2
- Lens cleaning Spray
- Microfiber cloth
- Spare camera batteries for each camera
- Memory cards—one in each camera, extra in the bag
- External SSD if I’ll need to backup files while traveling
- iPad for editing, emailing, and posting pics on socials
- Camera strap
- Camera body cap and rear lens cap
- Remote shutter release
- Chargers and cables
Lighting for Travel Photography
Lighting is a bit of an interesting topic when it comes to travel photography. We don’t often associate this incredibly mobile genre of photography with the piece of equipment that defines studio work, but there’s some great reasons to take some lights with you on your next trip.
Photographers like Briscoe Park are doing incredible work mixing bold, almost giallo, lighting styles with travel photography. There’s also a wealth of photographers using the dark nights of remote locations as canvases for their light paintings.
I started taking a few small lights with me when I hit the road and it’s definitely pushing my abilities behind the camera.
Lights like the Aputure MC and MC Pro are great for adding lights to portraits, throwing splashes of color into images, or creating other-worldly scenes. The Infinibar or MT Pro, also from Aputure, are solid choices for light painting .
Even something small like the Lume Cube can help gain control over lighting while away from the studio. Just don’t try to haul around your old tungsten lights on your next trip!
Mobile Travel Photography Gear
Before you start thinking travel photography requires a mountain of expensive equipment, you might be reading this article on the only device you need to get started with travel photography.
That’s right, smartphone cameras have come a long way and they are perfectly capable of being your main camera body for traveling adventure photography .
Even though your smartphone is essentially a pocket camera that can surf the internet and make phone calls, you still might want to add some extra gear to make the most out of being a mobile travel photographer.
My biggest recommendation would be to pick up a Moment smartphone case and a few Moment lenses.
These lenses will dramatically change your composition and help make your images look a bit more professional and a bit less like a quick shot on a smartphone.
A lightweight Gorillapod, a photo editing app like Lightroom mobile, and a power bank to keep you charged are a few must-haves.
This might sound a little unconventional, but my smartphone is one of the cameras I use the most. It’s lightweight, can take high quality pictures, and it can be a great budget alternative to expensive cameras because you probably already own one.
I almost never leave the house without throwing one or two Moment lenses in my bag. This is true whether I’m going on a 10-minute walk to the store or I’m about to hop on a 10-hour flight.
Travel Film Photography Gear
Is there any sound more relaxing than the shutter of a film camera when you’re deep in the woods or on top of a mountain ridgeline?
I don’t think so and that’s one of the reasons why I tend to travel with film photography equipment.
Film photography is almost a completely different animal than digital photography. You have to be much more engaged with your subject, composition, and exposure since you only have a few frames before your roll is spent.
Here’s a quick list of the film photography gear that I travel with. Just as a quick note, I’m leaving out things like tripods and camera bags that overlap with digital photography.
- Gallon zip-top bag to store film
- Permanent marker to jot notes on the side of a film canister
- Light meter
- Film (I always try to bring one more roll than I think I’ll need—just in case)
Read our guide to film photography for more tips.
20 Tips to Help You Improve Your Travel Photography
Want to improve your travel photography? I’ve put together 20 travel photography tips to help you up your game the next time you take your camera on vacation.
These tips are going to cover everything from advice for total beginners to some really interesting things that caught me by surprise while I’ve been on tour with my camera.
Tip 1—Get Comfortable With Your Gear Before You Travel

Image Credit: Amar Preciado
This is my number one tip for travel photography because it applies to experienced photographers as well as beginners. Before you head out on your big trip, take some time to get comfortable with your equipment.
This means packing your camera bag just like you’re going to for your travel photography trip and wearing it around your home city or just walking around your neighborhood.
There’s nothing worse than being hundreds, or thousands, of miles from home only to find out that you actually don’t like that brand new camera bag you bought.
Giving all of your gear a comfortable trial run ahead of time ensures that you don’t run into any sudden surprises while you’re traveling.
I’ve started doing this with all of my travel photography gear and it’s hard to express just how much it’s helped me. Most of the time I’m just adjusting my backpack to make sure it’s got a comfortable fit for a long day of hiking, but there have also been times where I realized that piece of my equipment just wasn’t right for me.
This will also help make things easier when you’re out there taking pictures.
It can be a little stressful to try and line up the right composition in a busy downtown neighborhood of a foreign city. Knowing your gear inside and out will give you a huge confidence boost when you need it the most.
Tip 2—Set Your Travel Photography Intentions
This might seem like a silly question to ask, but why do you want to do travel photography?
Setting some intentions and being aware of your goals ahead of time is going to help improve your career as a photographer.
If you need some inspiration for your goals, here’s a few that I’ve used in the past.
- Have at least 5 new pictures that I can turn into prints once I’m home
- Spend two days on location, day one focuses on lifestyle photography while day two is all about landscapes
- Get out of my comfort zone and network with other travel photographers shooting the same location
Remember that goals are a lot like onions. They have layers.
Your ultimate goal might be to become a world famous travel photographer with National Geographic calling you every day, but you’ve got to start somewhere.
Let’s say that your goal is to start getting freelance travel photography contracts with tourism departments. You can start from scratch by pretending that you’re on contract to take photos of a particular location.
This will help you with your future goals as well as allow you to build your portfolio in the now.
Tip 3—Always Bring (Your) Camera

Image Credit: Ketut Subiyanto
Everything starts with the ABCs and for travel photographers this means to Always Bring (your) Camera and always be taking pictures.
You really never know when the right moment is going to strike for your photography. There have been countless moments where I wish I would have had a camera on me to capture a moment that was either beautiful or could have even been historic.
Whether you’re carrying your main camera body, a pocket camera, or even your smartphone, you should always have a camera on you when you’re traveling. Be ready to start snapping pics at a moment’s notice if you spot something that catches your eye.
Worst case scenario, you’ve got another few hundred pictures to sort through when you get home. Best case scenario, you’ve caught the once-in-a-lifetime shot that you might have otherwise missed.
Tip 4—Be Patient with Your Shots
Here’s something that’s happened to me nearly every single time I’ve gone on a travel photography trip.
I’ll be at a historic ruin or in a national park with the perfect shot framed only for there to be dozens of other tourists cluttering up my shot.
When I first started with photography, I didn’t have enough patience just to wait it out. I thought that I would have to spend hours standing at a particular spot waiting for people to disperse.
As it turns out, the longest I’ve really ever had to wait for a shot to clear up has been about a half hour. If you’ve got someone to talk to or a book to read, that’s no time at all.
Don’t pass up on the shots that you want to capture just because there’s something cluttering your frame. Patients will reward photographers every single time.
Pro travel photography tip: Using an ND filter on your camera can let you lower your shutter speed which will cause fast-moving cars and people to “vanish” from your shots!
Tip 5—Learn How to Photograph People
This travel photography tip can be one of the most challenging to incorporate. Getting comfortable cold approaching strangers takes a lot of social energy.
I know extroverted photographers that have a dozen model release forms printed and ready to go in their backpack. They have no problem chatting up strangers, but it took me some time to build up that confidence.
Here’s a quick template that you can use for approaching strangers for portraits.
Be cheerful and open about being a photographer. You can say something like “I’m a photographer taking portraits today in [Location] and I’d love to take your picture.”
If you’re on a freelance contract or working for a client, feel free to name drop them to give yourself some added credibility.
After snapping their pic, I like to give people my business card, email, or Instagram handle so they can contact me later if they’d like a copy of their photo.
If they say no photos, that’s just business.
It also really helps if you can speak just a little bit of the local language. You’ll be shocked how much more accommodating people can be if you can handle a few lines of the local tongue.
Tip 6—Study Local Laws and Customs
Photography laws and customs are different the world over. As a travel photographer, you’re going to need to familiarize yourself with local laws and customs—especially when you’re traveling abroad.
Remember that the letter of the law and the local customs might not necessarily be a one-to-one match.
I’m based in the United States and here it’s perfectly legal to take pictures of strangers as long as you’re in a public location. However, social customs dictate that it’s considered rude to take someone’s picture without asking their permission first.
When in doubt, always default to asking permission first. This means asking someone’s permission before taking their portrait or asking permission before taking pictures at a historic site or museum.
Tip 7—Get in Frame

Image Credit: Dominika Roseclay
This is something I’m still working on becoming more comfortable with.
When I’m in the studio, I’ve got no problem hopping in front of the lens and doing some self-portraiture. However, once I’m out in the field I’m a little bit reluctant to stand in as my own model.
Travel photography is about telling your story. This means that you’re going to need to get in frame for some of your photographs.
Even if it’s just a few shots of you setting up, traveling to your destination, or getting dinner after a long day of shooting, people want to see the photographer behind the camera.
If you’re traveling with other photographers, why not consider making this a game? Challenge each other to see who can take the most interesting photos of your fellow photographers.
You can even take some quick selfies on location to contrast your professional photography. This will make your self-portraiture a little more intimate and warm while your travel photos show off your full talent.
Tip 8—Scout Travel Photography Locations with Your Smartphone
A great way to dramatically improve your travel photography is to scout your locations ahead of time. Before you haul all of your gear on a quest for the perfect photo, go out there with just a day pack and walk around soaking up the scenery.
Location scouting gives you a strong understanding of what speaks to you as a photographer about this location before you even start pressing the shutter button.
I recommend carrying your smartphone or a point-and-shoot camera when you’re out scouting locations.
This lets you take some test shots of a travel location before bringing all your gear out.
Tip 9—How to Always Pack the Right Lenses
I used to be so worried about not bringing the right lenses on a trip, but it’s been years since I’ve felt like I picked the wrong lens for the job.
Part of this is knowing your lenses inside and out. You should learn the basics of your lenses like aperture, how their focal length compresses an image, and which focal lengths are ideal for different styles of photography.
Lenses like the Sony FE 24-70mm f/2.8 make a great choice for travel. The focal length options on that lens easily handle majestic landscape panoramas and street photography portraiture.
I also recommend taking at least two lenses with you for most travel photography trips. I’ll take one primary lens with me that I plan on doing most of my shooting with and a secondary lens for those “just in case” moments.
Tip 10—Staying Safe While Traveling with Camera Gear
Being a tourist always carries some risk when it comes to crime. Being a tourist that happens to be carrying $3,000 in photography equipment carries a little bit more risk.
Here’s a few tips that I stick with when it comes to staying safe while shooting with expensive camera equipment.
If you can, try to do your travel photography with a group. Even if you have one other person traveling with you, that company is usually more than enough to deter most would-be thieves.
This might seem a little obvious, but you always want to keep your gear in sight. Unless I know I’m alone in the wilderness, my camera bag is never further than an arm’s reach away.
I’ve got a tip for you that I don’t see a lot of people talking about when it comes to traveling safely with your camera equipment. I like to stay discreet when I’m traveling with my camera gear.
This means I leave the branded Sony strap at home and opt for a much more neutral Peak Design strap . I also throw a velcro patch over things like the LowePro logo on my backpack that might otherwise announce that there’s some expensive camera equipment in there.
If you stay smart and aware of your surroundings, your odds of having an unfortunate encounter while carrying camera equipment will be greatly reduced.
Tip 11—Shoot Some Short Format Video
We’re all photographers here. This means I can be a little honest with you about shooting short form video.
It might not be your main stay, but social media platforms are putting a lot of emphasis on TikTok style videos. If you can incorporate a little short form videography into your travel photography routine, you’ll have that much better performance online.
There are countless ways that you can build short form video production into your photography routine. You could record a 60 second video demonstrating your setup for the shot or even just an interesting voice over on top of a still image.
Shooting short videos can also be fun. Building this into your photography routine is a great way to improve your skill set while you’re also increasing your social media following.
Tip 12—Find Your Voice by Getting Lost
Some of the best travel photography stories happen because you get lost. Getting turned around is a great way to change your perspective on things and improve you or travel photography.
This is easily one of the most underrated travel photography tips. Best of all, you can do this from the comfort of your hometown.
Try getting lost on purpose by walking through a neighborhood you don’t usually go to or checking out a city that you might have otherwise overlooked.
While all the other travel photographers are gathered at the tourist traps we’ve all seen a thousand times on Instagram, you’ll be exploring something new while catching refreshing pictures of your travels.
Tip 13—How to Fly With Film
If you plan on doing some film photography while you’re traveling, you’re going to need to know how to transport your film while traversing through airports safely.
The x-rays used in airport security scanners can damage undeveloped photographic film. The more x-rays undeveloped film is exposed to, the more haze and distortion starts to pop up on the final image.
Film with an ISO 800 and above can be damaged by any airport X-ray machine. Expired and experimental films can also be damaged by x-ray equipment.
Some airports now use more powerful CT scanners. These are often used for checked baggage, but they can also be used for carry-on as well.
CT scanners put out enough x-ray radiation to damage film of any ISO. You should always bring your film with your carry-on luggage in its own zip-top bag.
When you’re traveling through security at an airport, you can ask the security personnel for a hand examination of your photographic film. In my experience, they almost always say yes no matter how busy the airport is.
However, it is at the discretion of airport security and I have had them turn down a hand examination of my film. One trip through an X-ray scanner won’t damage your film, but multiple trips will.
This is why I recommend buying film on location if possible. You can also have film mailed to your hotel or to a friend’s address who lives near where you’re traveling.
Tip 14—Become a Traveler at Home
Traveling is expensive and it’s not always available for us. However, this doesn’t mean that you have to stop your travel photography plans.
If you’re looking for the true zero-budget way of starting a travel photography career, you have to start in your home city.
While this might not seem exciting at first, keep in mind that the city that you live in is an exotic travel destination for someone else.
Try using all of the travel photography tips and tricks I’ve talked about in this article while taking pictures of your home city. Even if you live in a sleepy little town, there are compelling stories that you can tell by documenting the life and history of the place you live.
Tip 15—How to Find Travel Photography Inspiration
No matter what style of photography you’re in, it’s easy to get stuck in a rut. What should you do if you’re running out of inspiration before your next big travel photography trip?
Here are five quick ways I stay inspired and motivated as a photographer.
- Start following more photographers on social media to see what other people are doing
- Research historic photographers and get inspired by how they were shooting when our medium was still new
- Check out international photographers to see how people are shooting across the world
- Get experimental by looking into the weirder side of photography with things like film soup or databending
- When I’m heading to a new location, I like to look at the history, upcoming events, and what photographers are shooting for that local
Tip 16—Turn Regular Trips into Travel Photography Trips
If you’ve always got your camera with you, and you’re always shooting, every trip you go on is a travel photography trip.
A great way to stay active as a travel photographer who has yet to break into the full-time business is to transform every trip you go on into an opportunity for travel photography.
Whether you’re heading across town for a family dinner or going on a work trip, you’ve got an opportunity to do some trouble photography.
Not everything has to be a grand adventure. You could use that trip across town as an excuse to work on catching shots of yourself in transit, for example.
Tip 17—Becoming a Better Photographer
Every photographer has an area that they can improve on. Whether you’ve always wanted to be one of those photographers who only ever shoots on full manual mode or you’ve been hoping to add sports photography to your travel routine, now’s the time to start working on those skills.
Skills building exercises can be a great activity during your travel photography downtime. You’re not always going to be on the road to an exotic destination and that time in between trips is vital to your success.
Even if you’ve been a professional photographer for decades, there’s still countless things about this art form that you can learn.
Tip 18—Get Your Photos Seen
Now that you’ve got a portfolio of travel photography images, how do you get people to see them?
As with most freelancing gigs, the name of the game is networking. Here’s a few tips for getting your pics in front of more eyes.
- Be more consistent with social media by posting regularly and using hashtags strategically
- Enter into photography competitions
- Ask local shops if you can display your work
- Get your photos published
- Reach out to travel agencies, tourism boards, and parks departments for freelance work or partnerships
- Network with other photographers
As the old saying goes: It’s not what you know, it’s who you know.
Tip 19— Travel Photographer Tips for The Business Side of Things
Making it as a working travel photographer has gotten harder in recent years, but it’s not out of reach. Here’s a few business tips to help you stay on top of your budding photography career.
Always try reaching out to new clients. Keep in mind that bigger clients are harder to land, but there are plenty of smaller travel destinations that are ideal for a beginner photographer.
You should create a budget for your travel photography work. If you’re just starting out, you don’t need a fancy app. A simple spreadsheet is more than enough for you to stay on top of your money.
You can also try becoming a content creator while you’re working on landing clients. Building up a social media following and generating some income through a site like Patreon can help you stay on the road longer.
Tip 20—How to Tell Your Travel Photography Story

Image Credit: Ena Marinkovic
You’ve reached the end of my travel photography tips. The last tip, and the most important one, that I’m going to give you is some advice on how you can tell your story.
Travel photography is all about storytelling. This means documenting your journey, engaging your audience, and finding your voice.
Taking captivating pictures without context isn’t enough. Your travel photography needs to speak to people on a deeper level and communicate something yet untold about the experiences behind your journeys.
It’s going to take time to figure out how you want to represent your adventures. The best thing you can do is get started today.
Even if you’re just taking travel photos a few blocks from your home, you’ll be breaking the ice and taking those important steps in finding your voice as a storyteller.
What is the purpose of travel photography?
The purpose of travel photography is to share your journey with the world. Travel photographers help to tell the story of not only their adventures, but also the people and places they encounter whether they are traveling around the world or within a few miles of where they grew up.
Is travel photography a good career?
Travel photography can be an amazing career that is rewarding and potentially very lucrative. It can be challenging to get started, but there are countless photographers who do travel photography as both their main job as well as a side gig.
What is the single best lens for travel photography?
The single best lens for travel photography is the wide angle to telephoto zoom like the Sony FE 24-105mm f/4 G OSS Lens. This lens allows you to capture everything from sweeping landscape panoramas to sports and wildlife photography .
Is travel photography a job?
Travel photography can absolutely be a job. You can make money as a travel photographer by freelancing for clients, photographing destination weddings , or working as a photojournalist.
Is GoPro good for travel photography?
A GoPro can be great for travel photography especially if you’re interested in capturing video and using stills from that footage for your photography.
Even though a GoPro is a good choice for travel photography, you’re probably going to be better served by a dedicated camera if your main goal is photo rather than video.
Final Words
I hope this guide gives you everything you need to hit the ground running with travel photography. If you’re an experienced travel photographer, I hope you’ve picked up a few new tricks that can help improve your next adventure.
I’ve tried to cover travel photography from nose to tail in this blog, but I’m sure I left a few things out.
I want to hear your travel photography tips, tricks, and experiences in the comments. If you like this article, make sure to check out my other photography blogs .

Check out these 8 essential tools to help you succeed as a professional photographer.
Includes limited-time discounts.
You'll Also Like These:

Ashley is a photographer, writer, and film critic. When Ashley’s not writing essays on photography, cinema, and theory, he’s out taking pictures with retro film cameras.
Unlock Your Creative Potential in San Miguel de Allende! Calling all shutterbugs, aspiring photographers, and adventure seekers! Join us for an unforgettable photography workshop in the vibrant heart of Mexico’s cultural gem, San Miguel de Allende. Immerse yourself in the enchanting streets, colorful markets, and breathtaking landscapes of this UNESCO World Heritage city as you hone your photography skills under the guidance of seasoned professionals. Whether you’re an amateur photographer looking to capture stunning images, a photography enthusiast eager to refine your technique, or a traveler yearning for a truly immersive cultural experience, this workshop is tailor-made for you. Discover hidden gems, uncover unique perspectives, and unleash your creativity against the backdrop of San Miguel’s rich history and vibrant culture. From sunrise strolls through cobblestone streets to golden hour shoots overlooking panoramic vistas, every moment promises inspiration and discovery. Don’t miss this opportunity to elevate your photography skills while immersing yourself in the beauty and charm of San Miguel de Allende. Secure your spot today and embark on a journey that will not only transform your photography but also leave you with unforgettable memories to cherish for a lifetime.
https://www.shewanders.com/creative-courses/sma
Keep Sharing more impressive blogs.
Leave a Comment Cancel Reply
👋 WELCOME TO SHOTKIT!

🔥 Popular NOW:

Unlock the EXACT blueprint to capture breathtaking iPhone photos!
Shotkit may earn a commission on affiliate links. Learn more.
The Complete Guide to Travel Photography
By Megan Spurrell

As travelers, our cameras can feel like a fifth limb—an essential tool with which to move through the world and absorb new experiences. They make it possible to document the people we meet. They provide tangible memories of the remarkable beauty we travel so far to see. Ultimately, they help us communicate what words cannot.
In the digital era, the tie between travel and photography feels more innate than ever. Photography has become more accessible and affordable to dabble in (who even needs a real camera with phones these days? ). On the flip side, it can feel as if documenting and sharing our travel experiences has become half of the seeing itself. In her essay on pushing herself to take a photo-free trip , Allie Jones asks a question we can all relate to: “If you visit a trendy upstate New York museum and don’t take any photos, were you ever really there?”
As the routine of snapping and sharing becomes as habitual as rinse and repeat, others urge us to become more thoughtful with our travel photography. Just because we can photograph and share everything, in a matter of seconds, doesn’t mean we need to. In his feature, Tyler Moss explores the #nogeotag movement , and looks at just how our photo sharing can drastically alter a destination—and decide who gets to experience it. For professional photographers Gray Malin and Alex Strohl , the “how” of nailing their iconic travel photographs has relied more on patience, and analog techniques like driving massive props cross-country, or waiting for the perfect shot in sub-zero temps, than on any new developments.
And, just in case you were starting to let your Instagram feed convince you that you’ve seen it all, we’ve pulled in photo studies from photographers whose work we can’t help but ogle. Jessica Sarkodie shares a refreshing look at the unspoiled beaches of her native Ghana. Cedric Angeles flew to Mongolia for a peek inside the lives of the country’s famous eagle hunters (and yes, there are photos of the eagles in their hunting caps ahead). For Sandy Noto , photographing harvest season in the Dolomites while off-duty yielded gorgeous slices of life.
Of course, if you’re ready to step up your own game, we’ve also got the gear you need—from underwater cameras to camera bags that don’t look like camera bags. And, we’ve rounded up our favorite photographers to follow right now, because as much as we want to cut the social media umbilical cord, there is so much to admire there. You just need to know where to look.
Through the lens
Think before you shoot
Behind the scenes
The gear you need
Everything else you need to know
By signing up you agree to our User Agreement (including the class action waiver and arbitration provisions ), our Privacy Policy & Cookie Statement and to receive marketing and account-related emails from Traveller. You can unsubscribe at any time. This site is protected by reCAPTCHA and the Google Privacy Policy and Terms of Service apply.
10 great travel photography tips from a professional photographer
Want to be a travel photographer? We asked a pro photographer about the tips and secrets behind taking great travel shots

Getting paid to travel the world and capture incredible images of people, animals and landscapes is many people’s dream job, but it’s also one of the most competitive and challenging.
• The best cameras for Instagram: take your gram game to the next level!
• The best travel tripods you can get right now
Professional travel photographer Graeme Green gives his practical advice and insider knowledge for improving your photos and getting ahead.
1. Go the extra mile

Life as a travel photographer often means getting out of bed (if there is a bed) when it’s dark and cold. I’ve gone out taking photos while wiped out by illness or after getting no sleep on the wooden floor of a hut. There have been long trudges through snow, sand and swamp, and exhausting journeys on dusty tracks. The unexpected or disastrous often happens. Life on the road is hard to predict, but you still have to get the photos you need.
A big part of the lifestyle’s appeal is getting to travel to remote, often wild and fascinating locations, meeting new people and having experiences you just can’t get at home – but it takes effort and time. Early starts, tough journeys, and long, hard days in difficult environments are all part of the job. There might be times when you don’t feel like taking photos, when you just want to rest, but missed opportunities always come back to haunt you. You never know what you might miss.
2. Make a plan

One of my favourite ways to photograph is just to walk, to explore a city or a location without an idea of what I’m looking for or where I’m heading to. You never know what scenes wait just around the next corner for spontaneous photographs.
But sometimes it really pays to plan, especially if you need to get specific shots for an assignment. Think about what you’re trying to achieve, whether it's a close-up or a wider picture of a whole scene. If you’re photographing a festival or event, you need to take into account what time it will all kick off. If you have one, ask your guide or fixer for details on where exactly things will happen, then plan ahead to make sure you’re in the best possible location.
It’s especially worth looking around at where the light is coming from. It’d be frustrating to be present at a dramatic moment only to realise you should be on the other side of the room.
Get the Digital Camera World Newsletter
The best camera deals, reviews, product advice, and unmissable photography news, direct to your inbox!
3. Always be ready

Whether photographing people or wildlife, great photographic moments often pass by once and then they’re gone. You need to always be ready and alert to the action. That particularly means spending time getting to know your camera, experimenting with elements such as shutter speed.
With some photos, you’ll want what you’re photographing to be sharp and clear, whereas others might look good with a blurry suggestion of movement. Also consider focal points and depth of field; what you want to draw the eye to, and whether you want a person or animal to stand out or to be part of it’s environment.
You want to get familiar enough with your camera so that you can make changes quickly, almost instinctively. The last thing you want to be doing when something unmissable happens is struggling to find the right settings.
I usually test my camera in a location ahead of time, while there’s nothing happening, to make sure I have something close to the right settings if and when something does occur.
4. Take your time

Time and patience are often the key elements that make the difference between a good photo and a great one.
You can come across a building that’s going to look brilliant in few hours, when the light hits it right, or you might find a composition you like but it takes a while for all the key features, including people, to line up in just the right way. As tempting as it can be to take the photo as it is and move on, it pays not to accept compromise and to wait for the best possible picture.
Working in Morocco, I found plenty of compositions that I liked a lot, but it sometimes took an hour or more of waiting to get the photos I was really happy with, with people passing by at just the right moment.
5. Get in the thick of the action

Great photographs really give the viewer a sense of a place or people. They trigger their curiosity and make them want to know more.
With adventure travel photography, you need to capture the action and take people there. Whether it’s biking in Vietnam, snowshoeing in Japan or trekking in Mexico, people looking at your pictures have to feel that sense of adventure and excitement. You need to get in the thick of it.
If you’re spending time with local cultures, you need to communicate a sense of local character, how people live and the surrounding environment. If photographing a sombre religious event or a chaotic carnival, your photos need to capture that atmosphere.
6. Let people see the real world

For me, it’s a real turn-off when I see photos online that bear almost no relation to the real world. I don’t, of course, see anything wrong with post-production work to bring out the best in a photo, but I see pictures everyday in which photographers have clearly got carried away with Photoshop or Lightroom ’s settings.
Our eyes are pretty clever and detect when something doesn't add up. An over-manipulated photo instantly loses credibility, whether that’s intensely oversaturated colours, a lack of shadows, or oddly manipulated pictures with dark, cloudy skies but scenery bathed in sunlight. Pictures like that might get Likes on Instagram but they're likely to be rejected by newspapers and magazine editors.
For me, it’s more satisfying to capture something real. There are so many remarkable sights in the world without sprinkling digital magic all over them.
7. Think about the impact of your pictures

Wherever you go, always treat people with respect. I’ve been shocked by tourists swarming locals with cameras and iPads, treating them like an exotic curiosity, not a person. Whether I’m working with a person or a group for several days or just photographing someone I see on a street, I always check first. Quickly pointing at the camera and asking “OK?” usually does the trick.
You should also always stop and consider what you’re photographing from an ethical position. Photos can do a lot of good, communicating important stories, but they can also have a negative impact, especially if you become part of cruel or harmful practices. In parts of Asia, some tribal women wear heavy metal chains to give them unnaturally long necks, causing painful physical deformities. What was once a local tradition is now more about someone extracting money from tourists who come to take photos.
The same goes for wildlife too, whether it's drugged tigers, dancing bears or performing elephants. I don’t want pictures on my memory cards that helped cause any kind of suffering.
8. Think outside the box

It’s possible to get so focused on photographing one thing, the main event, that you miss what else is happening, including other details that tell a story or make for interesting photos. Remember to look away from the viewfinder; often, it’s small details that others might miss or walk by, rather than the obvious main attraction, that bring a story to life.
Looking around, you can often find interesting juxtapositions between the person or animal you’re photographing and features of the landscape, or perhaps a tower or tree, or even the moon. For one of my favourite wildlife photos from the Falklands, instead of coming in tight on a group of penguins, I zoomed out to show a tiny little cluster of the birds facing an approaching storm, which gave a completely different, and, in my view, more interesting result.
A travel story often requires variety, which means looking around at smaller details, and not just the big, key elements (people, landscapes, animals, buildings, and so on). Details, such as a funny street sign or a unique statue, can add layers to a set of photos and give a fuller idea of a place.
9. Challenge yourself to find new approaches

Photography should always be exciting. You never want to get stuck in a rut, repeating the kind of pictures you’ve taken before, or to be satisfied with pictures that are less than your best.
The more time you spend taking photos, the more rewarding it is to be creative and find your own way of doing things. Working for other people, especially demanding editors, is one way to push yourself further. But you should always be challenging yourself to produce photographs that excite you to look at. Study what other photographers do, including what you like and what you don’t like about their work.
Most of all, study and critique your work. How could it be improved? Try to push your photography in new directions, whether framing things differently, seeking out interesting light, or just getting yourself into more interesting situations.
10. Get paid

Given the sheer volume of photos produced each day, there’s a culture in the media of asking photographers to give away their photos for free. At some point, unless your landlord and local supermarket accept payment in smiles, you need to get paid for your work.
Getting a job or freelancing for newspapers, magazines and websites means competing against many other would-be professional photographers, so you need to work hard and your photos need to stand out. Build up a portfolio, improve your photography, and work for smaller publications, all of which puts you nearer the front of the line. Having a good social media following and a reputation for being enthusiastic, hardworking and reliable helps.
You can also work for advertising companies, or sell your pictures via online galleries such as Alamy and Flickr. Many photographers sell prints, give talks, teach photography classes, or lead photography tours and workshops.
You need to put a value on your work and your time. In every situation, ask: what am I getting out of this? Is it worth my time and expertise? Travel photography is a tough business but an incredibly rewarding one if you can navigate your way.
Read more: The 10 best travel cameras you can buy right now Best travel tripods in 2019 10 ultimate locations for wildlife photographers How to prepare for a safari or wildlife photography trip
Thank you for reading 5 articles this month* Join now for unlimited access
Enjoy your first month for just £1 / $1 / €1
*Read 5 free articles per month without a subscription
Join now for unlimited access
Try first month for just £1 / $1 / €1
Related articles

21 TRAVEL PHOTOGRAPHY TIPS (Easy Ways to Improve Today)

- Last Updated: February 8, 2024
Here are our best travel photography tips for beginners and intermediates, based on our experience of going from complete beginners to professional travel photographers, and now working in the industry for 8 years.
Picture this.
You finally book a trip to your ultimate bucket list destination.
Antarctica, Iceland, Namibia, Bali, seeing the Aurora Borealis – wherever it is, you’ve waited your whole life to finally visit.
Naturally you are going to want to capture the best travel photos possible of this once-in-a-lifetime adventure to share with your portrfriends and family members, on social media, and maybe even print on the wall at home.
Moments in time or a travel experience that you always want to cherish.
So you’ve splashed out on a new camera based on expert recommendations , and you’re keen to hit the road.
But here’s the problem – you don’t have the faintest idea how to get the same kinds of images you see in postcards or on the internet.
The kinds of travel photos that just pop, stand out from the rest, inspire you to book a flight immediately.
Luckily that’s where we come in.
We’ve been fortunate enough to work as professional travel photographers for almost a decade now, being paid to fly around the world, running photography workshops, take pictures for the tourism industry and tell stories.
And now we want to share our knowledge, secrets and insights from our travel photography journey with you so you can take better travel photos.
In this post you’ll find many of our favourite travel photography tips you need to know to come home with shots you will be proud to show off.
Today is the time to learn. Let’s begin.

Table of Contents
1) Know Your Camera
2) focus on the golden and blue hours, 3) plan your shots, 4) learn about composition, 5) framing, framing and more framing, 6) move your feet, make them feel comfortable, 8) use a tripod, 9) find the right travel photography gear, 10) be unique, 11) find your voice as a photographer, 13) aperture, 15) shutter speed, 17) bonus – general ideas for camera equipment settings, 18) use manual mode, 19) shoot in raw (if available), 20) learn about post processing, save this pin for later, general travel photography tips for beginners.
To start with let me talk about the general travel photography tips that I feel are not only the most important, but also the most difficult to master.
Developing an eye for photography takes time. Years in fact. It’s a never-ending learning process, but I promise you with practice you will get much better.
And once you start to get the skills for framing and composing a shot, the rest is easy.
Whether you shoot on a dSLR, mirrorless, smartphone or an old film unit, the first travel photography tip is to get to know your camera equipment.
Whatever you have in your camera bag , take the time to read the instructions, play around with all the buttons and camera settings, and spend hours with it in your hand so that it becomes a part of you.
Study the menu so that if you need to change camera settings in the field you’re not spending minutes scrolling through it when timing is critical.
Also don’t forget to learn your camera’s limitations.
Does it perform well in low-light or does the image fall apart? Is it sharp wide open, or do you need to stop down to get the best clarity? Does it have inbuilt image stabilisation?
Ultimately when you pick up your camera you want to feel comfortable and know exactly how it works. Then getting better pictures will come faster and easier.

Light is everything when it comes to travel photography images, and there’s a good chance you’ve already heard about the golden and blue hours.
The Golden Hour is that time when the sun is low in the sky and it throws a magical, warm glow across the scene.
Think the first hour after the sun peaks in the morning, and the last hour or two before the sun drops over the horizon in the afternoon.
The Blue Hour is when the sun is below the horizon and the sky gives off a beautiful blue hue.
If you really want better travel photos, one of the best travel photography tips we can give is to get used to waking up early and stay out late to make the most of these two times of day.
If you’re not a morning person, get used to setting an alarm. Many of the great travel photos of the Taj Mahal and other tourist sites with no one in them for example were taken by people who got there early.
Taking photos in the middle of the day can still result in great shots, but in general you’ll find the blue sky too blown out unless there are some interesting clouds, and on a sunny day you’ll find the lighting conditions can be a bit harsh.
Instead use the middle of the day to get street photography, or scout out photo locations and a vantage point for your sunrise and sunset photos to come back later.
Bonus Tip – Even if it looks like the sunrise or sunset might not be so beautiful, wait around. You never know when the clouds might break or the sky randomly lights up in brilliant colours.

Before you arrive in your tourist destinations, spend a few hours planning out your shot list of images you want to photograph.
You can get inspiration from Instagram, Google Maps, travel guides, magazines and more.
Make a note of these pictures, and then plan your day around the optimum time to shoot (sunrise or sunset for example).
Doing this will help you nail the shots you want to go, and give you more purpose and direction.
You need to know that all of the best photographers use tools like Google Maps or social media to form a shot list, and you should get used to it too.

You’ve probably heard about how important it is to compose a shot properly, and I bet if you’ve ever read a photography manual you would have come across the ‘ rule of thirds ‘.
Good composition can be the difference between an average shot and award-winning travel photos.
There’s all kinds of ‘rules’ that theoretically make a photo look nicer, such as not putting your subject in the middle of the shot, don’t cut elements out of the frame, etc.
But right now let’s go a bit into the Rule of Thirds.
This concept is where you divide your image into 9 even squares (many cameras actually have this grid line feature built into their display options).
Then what you do is you place the subjects and points of interest such as a human element along those lines and squares.
Here’s an example of how this looks:

The idea of the rule of thirds is that this is a mathematical idea of what our eyes naturally find pleasing. So it’s good practice to incorporate this method into your shots.
Another thing to look for is leading lines that naturally draw your eye around the photo, as well as different angles and shapes.
Have a river flowing from the side of the shot up to a waterfall on the top left for example, or the foreground bending around, leading the eye towards a church at the top of the photo.
This is a skill that you’ll learn with more practice.
An important thing to remember is that rules are meant to be broken .
Get used to analysing your shots with the rule of thirds, but please don’t use it as gospel if you think a different composition would work.
Adding a human element also brings a lot of interest to a good shot, so place people in your frame.

When you look through the viewfinder or LCD screen, don’t just focus on the subject.
Make sure you run your eyes around the entire frame to make sure you’re not accidentally cutting off something important.
Double-check that the top of a mountain is fully inside the frame, or that your friend’s whole body is in the shot as an example.
This isn’t gospel, because sometimes having something cut off from the frame can be good for composition, but you’ll have to be the judge of that.
Also check to see if you can use something natural in the scene to create a frame inside your picture.
Think of looking out a window at a building, or a bent-over tree surrounding a pretty lake.
These can all help make better travel photos.

This is one of the most important travel photography tips I can give – Move your feet.
Don’t just arrive to a scene and take a shot from the place you’re standing.
Instead take a few minutes to walk around and see if there is a better frame or composition.
Go closer, move back, step to the side, consider your lens’ focal length, etc.
Imagine trying to take that iconic Taj Mahal photo, only to find out later that you were 2m to the left of centre, throwing off that perfect symmetry.
Or maybe if you walk to the river’s edge you’ll be able to incorporate some interesting rocks into the scene instead of just water.
Better yet, take multiple travel photos and fill up those memory cards from the same photo locations so you have lots of options when you get home to see which is your favourite.

7) Ask People for Permission
Travel photography isn’t all about capturing the most beautiful sunsets and gorgeous architecture around the world.
Travel photography is also about the people you meet. But if you’re a bit shy like me, how do you get those amazing portrait photos without feeling rude?
Simple – just ask for permission.
Asking someone for permission to take their photo is polite and respectful.
If you have had a great encounter with someone, or you just see a great opportunity and want to capture a wonderful portrait, give them a big smile and ask if it’s ok to take their photo.
You’ll find many people are more than happy to pose for a photo if you just ask (just make sure you respect them if they say no).

But what if you want to get a candid shot, with the subject looking natural?
There’s always another way to get these without annoying the person.
Don’t make it obvious that you are taking their photo. Act natural and take lots of photos of the environment around them.
You can also keep your camera down by your side and point the lens in their direction.
If you have a zoom lens, use it. This was you can be on the other side of the street or market and still photograph the person.
Interested in learning more? Join one of our exclusive photography workshops in Antarctica, Kyrgyzstan, Tajikistan or Mongolia !
Another one of my favourite travel photography tips for portraits is to bring in another element to the shot.
Some people will feel uncomfortable posing for a stranger, but if you can make it about something else they will feel much more at ease.
As an example, maybe ask if they can pose with something in their store like a rug, or ask them to show you their wedding ring.
This way they’ll realise there is more to your photo than just them. This will also add a lot more interesting elements to the shot!

A tripod is one of the best camera accessories you can have in your camera bag, and really essential for travel photography.
This will allow you to get excellent shots in low light, as well as get creative with your images (like taking long exposures).
These days you don’t always need a massive tripod to travel around with, especially if you want to travel light and are a hobbyist photographer. Look at some of the Joby Gorillapods .
Another good thing about using a tripod is that it will force you to slow down with your photography and put more thought into each shot.
Rather than just pointing and shooting, you will think carefully about where you want to set up your tripod and how you want to compose your shot.
Honestly if you want to become a better travel photographer, you’ll need to invest in at least a small tripod.

You don’t need to go out and spend tens of thousands of dollars on new travel photography gear to get the best shots.
In fact chances are you already have a perfectly adequate camera right next to you (your phone).
Instead just get what you an afford, and as you grow with your photography style, post production, etc, you’ll learn what camera gear you need as well.
Things like filters, tripods, flashes, prime lenses, zoom lenses, etc will come in time.
For now, all you really need is a camera, memory card and enthusiasm!
Check out our recommendations for the best travel tripods .
There’s nothing wrong with getting those iconic shots of the Eiffel Tower or Machu Picchu to share on social media.
They’re beautiful and are often amazing camera angles of famous places that everyone wants to visit.
But don’t forget to be unique as well! Find a different perspective that hasn’t been photographed a million times.
In fact make it your goal to get a few unique shots that you can be proud of.
Over-expose, under-expose, incorporate motion blue – the only limitation is your imagination!

Just like a writer or musician finds a particular style they like, as a photographer you need to discover your ‘voice’.
Travel photography is such a broad term that can cover just about anything.
Really just taking any travel photos will fit the description, whether it is landscape photography, wildlife photography, architecture, portraits, food or whatever.
Just find a style you love most, and focus on getting better at it.
If you really like black and white photography, then start shooting in black and white! Love taking images of crazy street markets? Then get out there and find them!
Experiment, learn, discover and nurture!

Technical Travel Photography Tips
While the technical side of using a camera is usually the most overwhelming thing for a new photographer to think about, it’s actually one of the easiest things to master. All it takes is a bit of study and practice.
If you’ve never looked into getting out of ‘Auto mode’ on your camera, then terms like ISO, aperture, white balance and shutter speed will seem completely foreign.
READ MORE: Check out our great article and blog posts featuring our best landscape photography tips !
12) Exposure Triangle of Photography
The Exposure Triangle is a metaphor to explain the 3 elements that allow light onto a sensor.
A camera captures light, and the right amount is needed so that your image isn’t too bright or too dark.
The 3 parts of the Exposure Triangle are aperture, ISO and shutter.
Each one affects how light reaches the sensor in different ways, and getting this combination right is essential to capturing a beautiful image.

If you want more information, I’ve put together this comprehensive guide to understanding the exposure triangle which you should really check out.
For now though I’ll explain these three things briefly, and how they relate to taking better travel photographs.
Aperture is how wide, or small, the blades in your lens are and how much light goes through the lens.
The aperture size is measured in ‘F Stops’, and displayed as numbers. f5.6, f8, f11, f16, etc
A wide aperture (small number – f1.8) lets in more light than a low aperture (big number – f22).
A wide aperture also has a shallowed depth of field than a low aperture. I know it can be a little confusing, but you’ll pick it up the more you play around with it.
If you want the background blurry in your photo, you’ll want a wide aperture. If you want everything in focus, you’ll want a low aperture.

ISO is how sensitive your camera sensor is to light. A small number, such as 100, means it’s not very sensitive and therefore needs more light to leave an impression.
A high number, like 6400, means it’s very sensitive and needs only a little bit of light to show up on the sensor.
The higher the ISO, the more noise shows up in a photo. Noise lowers the quality of your image, so in a perfect world you’ll want to keep this as low as possible (unless you’re going to stay out late doing astro and night photography ).
It’s also necessary to raise your ISO if you’re shooting moving subjects (or handheld) indoors.

Shutter speed is pretty straight forward – how long it takes for your shutter to open and close. This allows you to freeze a frame, or introduce motion blur.
Want to capture a bird in flight? You’ll want to have a fast shutter (1/4000th of a second for example).
Want to make a waterfall look silky smooth, like you see in so much Iceland photography? Go for slow shutter speeds (3 seconds for example), and check out our guide to waterfall photography tips while you’re at it!
Keep in mind that if you are holding your camera equipment rather than using a tripod, you’ll need to have a fast enough shutter to eliminate your own hand movement.
As a general rule 1/60 of a second is the slowest you should go so your picture doesn’t pick up hand movement. Any slower than that and you’ll probably need a tripod.

16) Combining All Three for Perfect Exposure
There is no ‘perfect setting’ for aperture, ISO and shutter. It all depends on what you are trying to photograph and the style you’re going for.
Luckily most decent digital cameras have two little tools that will let you play around figure out how all three work together – manual mode and histograms.
Manual gives you complete control over your camera’s ISO, aperture and shutter.
If you change one, nothing else will change, unlike in ‘aperture priority’ mode or ‘shutter priority’ mode.
The histogram is a visual display of light. When the bars are all the way to the left, the image is darker. When they are all the way to the right, the image is lighter.
When most of the bars are in the centre, this is perfectly exposed.

The best way to figure out what combinations work best when you’re a complete amateur is to put your camera on “manual” mode, activate the histogram, and play around with the settings.
Pick an aperture (f/8 for example) and point it at the scene. Now look at the histogram.
If the image is too dark, then you’ll need to let more light in. Let’s make the speed slower. See a change?
Now put the shutter back to where it was and instead change the ISO. Make the ISO higher. Is the image getting lighter?
Spend an hour or two playing around with different apertures, ISO and shutter so you get an idea of how each one affects the light hitting the display.
Take note at how drastically things can change if a cloud goes in front of the sun, or you take the camera inside.
This just comes with practice of course, and knowing what settings you want for a particular scene will become second nature
Keep in mind that not all travel photos needs to be perfectly exposed. Sometimes having a darker image looks much better than having one that is nice and bright. You can use your judgement for this.

This is very, very basic and by no means should be read as gospel. There are a million different things that can affect why you would want a faster shutter, or wider aperture. But if you are confused about what to pick for what here’s a quick idea.
- Landscapes – You’ll want your aperture around f8-f11. You’ll also want your ISO as low as possible. Slow down the shutter accordingly.
- Portraits – You’ll probably want to photograph your subject to be sharp, but the background blurry to bring focus on the person. Have a wider aperture (say f2.8 for example), and a faster shutter (around 1/160 at the absolute slowest) to freeze the subject. Adjust ISO accordingly.
- Indoors – Because it is darker inside than outside, you’ll need to let a lot more light into the sensor. Unless you’re using a tripod, keep the speed at around 1/60 as the slowest, and the aperture around f5.6 to start with. Adjust ISO and aperture accordingly.
Of course there’s a bunch of other styles of travel photography that would use different settings, such as astrophotography, architecture, street scenes photography, wildlife photography, etc.
In time you’ll learn what settings work best for each scene.
The best way to get to know your camera and how light works is to have complete control over what settings you choose.
The only way to do this is to shoot in manual mode (shown by the letter M on most cameras).
It will take months of practice, but I promise you that in time you’ll be able to look at a scene and instantly know what aperture, ISO and shutter to use to get the exact style of image you’re looking for.
You can also use aperture priority mode (the letter A on your camera) if you don’t want to make the big leap to manual just yet.
This way you can lock in the aperture you want (f8 for landscape photography, f2.8 for portraits, etc) and the camera will automatically adjust the ISO (although you can control this part too) and shutter to get perfect exposure.
I highly recommend focusing on learning manual settings though until you have it perfected.

When you take a photo on your digital camera, the computer chip inside it takes what you captured on the sensor and converts it into a format that can be easily read. For most cameras, these two formats are RAW and JPEG.
JPEG is a compressed format that the camera creates to save on space. In doing so it ‘locks in’ all the data that it picked up such as the colour and white balance.
RAW files actually saves all the data of what you took and doesn’t compress it.
Most decent digital cameras will give you the menu option of shooting in RAW, and I recommend you use it if you ever plan on editing your photos.
Keep in mind that the file sizes will be a lot bigger (for example on one of our cameras a RAW is 42, while a JPEG is just 20), so you’ll need to have extra memory cards and external hard drive storage.
If you have no plans on editing your photos then shoot in JPEG.

Some people think that editing your photo is ‘cheating’. But the truth is photographers have been editing their photos ever since photography was invented.
Yes, even your favourite photos in National Geographic have been manipulated in some way.
99% of photos you see in your favourite travel magazines have been edited. Every professional photographer edits their photos to some degree.
The reason is that not all cameras are great at capturing exactly what the eye saw in terms of colour and light.
If you really want to get the most out of your professional travel photography business, you should start playing around with post processing.
Many people have heard of Adobe Photoshop , but it’s a pretty advanced tool that most people wouldn’t ever need to use (until you get more experience).
To start with look at the free apps that you can get on your phone, such as Snapseed, or free editing programs on your computer, like iPhoto or GIMP.
Once you get serious about travel photography and you want to start editing all of your photos that are filling up your memory cards and external hard drive, we recommend purchasing Adobe Lightroom.
If you’re ready to make the jump to using Lightroom and Photoshop, Adobe have a great ‘Creative Cloud’ package, which is what we use for only $10 a month. You can buy it here with a 7-day free trial

21) Practice, Practice, Practice
Just like anything, becoming a great travel photographer takes time, and a lot of practice. The only way you can get better is by getting out there taking travel photos!
You don’t even have to travel the world to tourist destinations or have the most travel camera available to be a great photographer.
Borrow some family members to take their portraits, get a friend who is also interested in photography and push each other, or grab your smartphone and go shoot sunset.
Buy whatever you can afford, go for a walk around your city and snap away.
We hope that this general guide on travel photography tips for beginners has been helpful.
Please feel free to reach out to us if you have any other questions. We have a lot of experience working with tourism boards, and would be happy to help you too.
Good luck on your photographic journey, and maybe we’ll see you in National Geographic one day!
DISCLAIMER: Some of the links in this article are affiliate links, which means if you book accommodation, tours or buy a product, we will receive a small commission at no extra cost to you. These commissions help us keep creating more free travel content to help people plan their holidays and adventures. We only recommend the best accommodations, tours and products that ourselves or our fantastic editorial team have personally experienced, and regularly review these. Thanks for your support, kind friend!

Alesha and Jarryd
Hi, We’re Alesha and Jarryd!

We’ve been traveling the world together since 2008, searching for the planet’s best destinations and adventures.
Love Travel?
Sign up for our free weekly newsletter for the best travel tips, ideas and deals!
We respect your privacy. Unsubscribe at any time.
READ MORE...
The Best Camera Accessories to Level Up Your Photography
GoPro HERO 12 Review – Is it Worth Buying in 2024?
Peak Design Everyday Messenger Review – My Honest Experience
Related Posts
40 incredible photos of uzbekistan that will blow your mind, 15 epic landscape photography tips from a pro (plus settings to use), 10 best camera backpacks for travel [2024 guide], 73 thoughts on “21 travel photography tips (easy ways to improve today)”.
I indeed agree in Know your camera and Plan your shots. These tips would make a good start in achieving your socmed worthy travel shots. And ofcourse, the other tips will surely be useful too. Great post!
Good article but I need to say something about using Manual – it’s not that great. Manual is just a different mode of settings for exposure, little different from either shutter or aperture priority, except these two give you a leg up, to where you’re going anyway. At the end of the day whatever exposure setting you choose will be just a combination of the 3 on the ‘exposure triangle’. Instead of using manual try these other two in conjunction with exposure compensation, which overrides the exposure meter reading. You still need the meter for any exposure anyway, just not necessarily using the value it recommends. It amounts to the same thing, only easier, quicker, and still constraining one of the triangle sides that you want. I use manual for specific unusual objects, such as sun, moon, stars, but during general daytime subjects it’ll be very unusual to hamper yourself by not using the aid provided when there is no advantage.
Your blog has become my go-to source for insightful content.
Thank you so much. So glad to hear. 🙂
Before you go, research your destination and its culture. This will help you better understand the people, customs, and landscapes you’ll be photographing.
I benefited a lot from your post. Thank you
So glad you did. Thank you for stopping by. 🙂
Thanks for sharing all this amazing tips & information. Fabulous post !
You are welcome. We are happy to help. Happy photographing
nice summary of basic photo tips that will improve my shots, thanx!
You are rocking..keep it up your work
Thank you so much. We really appreciate it.
Great article with great tips and i also like the pictures
Thank you so much Alesha and Jarryd for these amazing photography tips! I look forward to putting into practice some of your wonderful ideas and tips! I do so appreciate any tips that I can get to improve my photography. :)) Cheers, Marilyn
I absolutely loved this article! Like you I received my first ‘proper’ camera at 14 and since then have been hooked. I recently purchased a Nikon D750 and am absolutely loving it. Although at the moment I only have two lenses for it I am hoping to be able to afford more soon. What are your favourite lenses?
In my photography I love capturing candid portraits of people I encounter during my travels. I always struggle with the dilemma of getting the perfect candid shot and feeling compelled to ask permission before taking the shot. As a very shy person directing people in images is daunting, but it is something I am striving to work on. It’s nice to read that you are also shy yet manage to capture such incredible images of people.
As I am mostly self-taught, I always love to read technical tips to improve my images. I found the technical side of your post incredibly helpful and wanted to say thank you for taking the time to write such a detailed post. I believe it really helps and inspires amateur photographers like myself.
Glad you liked the article. Thank you for your comment. Keep photographying Caitlyn 🙂
Great tips and awesome photos! I always tell people if they aren’t comfortable with their settings, the #1 way to make sure their images aren’t blurry is to shoot in TV/S (shutter) priority. That way you can prioritize having no hand shake.
Thank you so much. Great advice. Thanks for your comment. 🙂
Awesome tips for everyone and specially to me who loves capturing photos everytime i travel.This one also help me and give me more knowledge on how to make awesome photos and its good because you don’t need to buy expensive camera to have a good quality photos, just your iPhone or smartphone you can make a great photos.
Hi, you are so right. You can take great photos with your phone. Glad the article could help you.
Great article! Do you even bother carrying your camera with you during the day in broad sunlight? I find it’s not worth the hassle for such poor shooting conditions.
Hi Scott, It all depends what we are doing. If we are on a job, we always carry our cameras with us. The midday sun is harsh but you get used to working with it. Especially indoors with the sun coming through the cracks, it can work out really lovely sometimes. When we are travelling on our own time, we don’t usually carry the camera. Happy travels
I really enjoyed reading this post, as I am a beginner in photography as well and it’s always interesting to see what gear other people are using!
I have the Canon Rebel as well, and also love the 50mm lens. It’s just great and is so versatile!
Thanks for sharing.
Glad we could help. Thank you for your comment. Happy photographing,
Great tips guys! Photography is an art so it must be learned properly. A good guide can teach art in a great way. This article is similar to a guide because it is an eye-opener for blooming photographers and travel lovers.
Thank you so much!
Thank you for your comment Glorias. Glad the article could help.
Hello Alesha and Jarryd, not sure to whom I adresse the message to, but I’m guessing Jarryd took the pictures and Alesha wrote about it :p
Anyway, do you guys use any customized Firmware on your DSLR? like the CHDK or Magic Lantern. That’s one question, the other one will be: can’t find any Mobile Phone photography on your blog? can you please refer me to any article that provide valuable info around Mobile phone photography?
Hi Ayoub, The photos and words in the article are a combination of both of us. Usually Alesha is the photographer and Jarryd is the writer.
We use use no customise firmware at all. We haven’t ventured this way as it voids our warranty.
As for phone photography, maybe this is an article we should write. With our phone photos, we do use Snapseed to edit them. But do not take any photos through any apps. All the best
Thank you for the tip regarding phone photography, I mostly use the customized firmware to do timelaps and edit directly on the camera, keep me posted after publishing the new article. (Already subscribed to the weekly newsletter)
Definitely will do. Thank you so much. Happy photographing. 🙂
you are doing a great job
Thank you so much. 🙂
This was really an amazing list of tips, I am a hobbyist photographer and this would really helps me a lot
Glad we could help. Keep up the photographing. 🙂
Great tips Alesha and Jarred. I really liked your golden and blue hours tip. Will try it soon and hope get amazing pics 🙂
Glad we could help. Practise will get you on the right track and before you know it you will be taking amazing shots. We are still learning about photography everyday. We love that you can never stop learning. Thanks Linda.
Some of the best tips I have read so far. Amazing post and captures so much detail. Worth the read for every travel photographer. 🙂 Keep it up.
Thank you so much,. We really appreciate it. 🙂
Priceless tips for amateurs like me. Thanks for sharing. For a long while, I’ve tried to follow the rule of thirds, but the best shots came out when I finally dared to break it. You’re absolutely right about the rules are meant to be broken. Regarding the camera, I agree it doesn’t have to be the most expensive. But sometimes I have a feeling my shots would have been better had I owned a proper camera. What device is the best balance between price and quality?
HI Robin, you’re welcome. We are so happy we could help. Sometimes breaking the rules works out to be better. 🙂 We definitely know what you mean. You do not need to buy the most experience camera. A camera that you can use manual settings, is great as you can start using and playing with aperture, shutter speed and ISO. We started off with a Sony RX100ii and it was great. Compact and a great camera to learn. Here is some articles that may help. https://www.nomadasaurus.com/best-camera-for-travel-ultimate-photography-series/ https://www.nomadasaurus.com/best-camera-accessories-ultimate-photography-series/
Thanks a lot for the great advise! I especially like your explanations about the exposure triangle. I was a bit aware of it before, but never played around with it unless I wanted to change the depth of field (and even then, I did this very rarely). But thanks to focusing more on it, I am starting to get the hang of it. I have taken some very good hummingbird pictures, for example, which never would have been possible if I hadn’t raised the ISO so I can keep the shutter speed fast. Those birds zip around like crazy!
Also, I think one of the most important pieces of advise, and the one I’m struggling with most, is to always look at the whole frame. I am guilty of looking at the main subject and later finding out that I cut off important things on the side or that something weird is in the photo that shouldn’t have been there.
Hi Ilona, so happy the article could help you. That’s amazing you experiment with your hummingbird shots. They are fast birds. By practising photography, you will get better and better. No matter how experienced you are, there are always things to learn. When you come to a scene you want to photograph, stop for a minute look around, walk around and think about what shots you want to take. Obviously this is hard when the subject is moving but great for landscape and street photography. All the best and keep up the awesome work. 🙂
Hi, I took around 500 shots on a trip to Kyrgyzstan recently, some I think are pretty good, but now after reading your tips, I think I will make another trip to that part of the world again soon!
what a great tips especially the lighting part – i also agree that getting up earlier and shooting in the natural sunlight is so great for your photos. talking to the locals and knowing your camera, You guys covered it all
Thank you so much for reading Shama. Glad you liked our article. Natural lighting is the best. Even though sometimes that early morning is hard it is worth it. 🙂
u are absolutely right u don’t need an expensive camera or go to Bali ( although it’s a good idea) to get great photos. it’s just simple common sense and a good eye and you can master photography
Well said. Thank you for your comment and reading Shama. Have a great week.
Thanks a lot for the helpful tips on holiday photos. My partner and I are in Easter Island, irresistible place for photo opportunity. My Nikon D7000 will keep on taking photos on auto mode for the time being until I have had enough practice following your guidelines and the who knows what photos I might produce! Thanks.
Glad we could help Balu. Definitely when you have time, go out and take some photos on manual. Play with the different settings. Before you know it, you’ll only be on manual. At the beginning when I was still learning, I would take a shot on the manual settings I thought and then a shot of the same view on auto in case I messed up. Better safe than sorry. Have a great time in Easter Island. There is so much to do there and learning about the history is amazing. Take care. Alesha
Guys your advice are completely helped me. I was stressed before, i want to travelling at the moment but i hope i can take a good picture cause you know how annoying it will be when we take a picture and then when we are home they are completely bad. So then you have to comeback at the same place again just to take a picture. But this one is helpfull
Hi Fabio, Don’t stress. You are going to bring back amazing photos from your travels. It is all overwhelming at the beginning but it gets easy. When you are shooting, put some time aside and concentrate on what you have learned. It doesn’t matter if it takes you 20 minutes to an hour to get your shot. If their are other photographers around, most of the time that are happy to give you some advice. Let them know you are new. Maybe they will let you know their settings for ISO, aperture and shutter. When it comes to editing, take your time as well. There are many You Tube videos that can help you for free. Have a great time on your trip. Happy travels
Hey Guys, very useful tips especially the Bonus tips.
Keep Sharing!!!
Glad we could help. Thanks for reading.
P(Program) you set either the aperture or shutter and the camera adjusts the other one accordingly to maintain the right exposure. Thanks
Thanks Rezan
I love traveling around the world. I wish to capture some of the beautiful places that I enjoyed. The above tips helped me to improve my travel photography skills. It also helped me to click some of the memorable moments of my travel with my friends and relatives.
Hi Vivek, Glad we could help. It is all about practise. We love having a day to ourselves and just getting out and shooting anything – landscape, cityscape, people or animals. We try to give ourselves a challenge sometimes. It makes it interesting and we are enjoying ourselves. 🙂
Great tips to help out beginners like me. I need to work on to ask people for permission as I get shy sometimes. I love the quote “rules are meant to be broken”!
Thank you Mao. Don’t worry, “asking” will come. Alesha was so shy and I used to take all the people shots. Now she is more confident and really enjoys shooting people. All the best.
THANK YOU . Your very easy to read starter guide to photography was AMAZEBALLS I learnt so much .cheers LIZY
Thank you. Glad we could help. Happy shooting and get creative. 🙂
Hey guys, this is an amazing guide, thanks for writing this up in such detail. As an amateur, I always look for good travel photography tips from other travellers. I left my tripod behind in Thailand and I think this was a huge mistake, I need to get a new one, urgently 🙂
By the way, really enjoy your photos on your blog and Instagram, they are amazing! 🙂
Glad we could help guys. We never used to use a tripod in our early years until we discovered how amazing the shots can be with one in low light and now we have 3. You can rest your camera on something to get a shot but you are limited to positions. Thanks for reading guys. 🙂
thanks for the tips. i’d make one edit: instead of ‘move your feet’ i’d say “don’t be lazy”…move left or right. move forward or back. climb up on something or get down on your knees.
Love it Aaron. You are so right. A little to the left might be the perfect shot or a little to the right and crouching might be the perfect shot. thanks for the input. Have a good one.
I love this post. It is incredibly helpful to all beginner travel photographers like myself! I have only been shooting in manual mode for the past 5 months and have already seen a huge increase in the quality of my photos! But I am always looking to improve. Will definitely be sharing your post
It is crazy how you improve when you start shooting manual. I know Alesha did also. You learn so much about the camera and what it can do, it is incredible. Thank you for reading and all the best with your photography Hayley. 🙂
this guide is amazing, thank you so much for explaining everything in a way an amateur can understand 🙂
Bookmarking the post for future reference!
Cheers, Naddya
Thank you guys. We are glad it is useful for you. 🙂
Wow! Amazing Tips. These tips will help a lot to click great pictures with your camera. Love the point of Shutter Speed. and about RAW.
Thanks for Sharing Helpful Post.
Thank you so much Nitin. Glad we can help. Thank you for reading.
Yeah I agree with you buddy.
Thank you 🙂
Leave a comment Cancel reply
Save my name, email, and website in this browser for the next time I comment.

Photography
Travel photography tips for near or far.
Get travel photography tips from professional photographers so you can capture new landscapes, cityscapes, and portraits of people you meet on your journeys.
Not sure which apps are best for you?
Take a minute. We'll help you figure it out.
JUMP TO SECTION
Types of travel photography
Top tips for travel photography
Turn travel photography into a career
A 10,000-foot view of travel photography
- Travel photography can be pictures of landscapes, cities, architecture, or people on the street.
- You don’t have to go far to start practicing — photograph interesting places close to where you live.
- To make a career of it, build an online portfolio of your best work.
Types of travel photography.
Travel photography can stretch across genres because you can take any type of photo when you travel. Depending on where you go and what you do, you can touch on everything from astrophotography to wildlife photography . As you travel, consider which aspects of your journey you want to focus on.
Landscape photography.
The world is dotted with picturesque, compelling, and breathtaking sights. When you’re on a walk and you want to capture the feeling of the scenery you find, you can focus on landscape photography. Make sure to do your research before you go, be intentional about the time of day you want to shoot, and be sure to bring gear to protect yourself from the elements.

City photography.
Capture the cityscape . From vast skylines to everyday life on the street, cities present wonderful subjects for experiments with perspective, texture, light, and color. Play with framing and vantage points, from the tops of buildings down to street level and below.
Architecture photography.
With architecture photography , you can explore the universal features and specific quirks of human-made structures wherever you go. Study a still subject like a building or a bridge to highlight the effects of weather or time of day, or to play with different vantage points.

Street photography.
Once you’re on the street, you can focus less on the architecture and more on the people moving through the city. Capturing life on the ground is the goal of street photography — a style of visual storytelling that shows off and communicates the experience of everyday life. It’s vibrant and spontaneous, and you have to work with whatever light is available. Catch people as they move about their day to immerse yourself in the experience of a new city.
Top tips for travel photography.
Finding your way in the world of travel photography doesn’t have to be overwhelming or onerous. Discover how you can get started with these tips.

1. Follow your wanderlust.
No matter where your interest lies, if you travel for the shoot, it counts as travel photography. Like documentary photography , travel photography expresses some truth about the particular scene it captures. “For me, it’s just one way to share my perspective on the world,” says professional travel photographer Tiffany Nguyen. “I travel to different places, see the world through my lens, and tell stories through photography.”
2. Start where you are.
You don’t need to quit your day job and sell all your possessions to make travel photography. “I would just start in your own backyard,” Nguyen says. “I started small, doing short, weekend trips, and then when I got more comfortable traveling and better at photography, I wanted to take it to the next level and do more international locations.” Begin with a list of places nearby that might be interesting to shoot. Find locations you can get to in an afternoon.
3. Research the location.
You can save yourself time and effort, and get better pictures, if you plan ahead. “Having the right inspiration before you get there is really key,” says travel photographer Forrest Smith. “Before I go, I like to build a moodboard to try to find the exact shot that I want.”
Nguyen does a lot of internet research, looking at blogs, Google Earth, and Google images. She scouts Instagram for different angles and perspectives. “I also find that social media is a huge resource, especially using hashtags on Instagram,” she says. “They’re really helpful for finding live conditions at a certain location. For example, if I go to a waterfall, I don’t really want to waste my time trying to get water photos if the waterfall is dry. So I’ll search the hashtag of the waterfall name to get an idea of the water level.”
In addition to weather conditions, your internet research can tell you how popular the location is, how to get there, and what times might be the least crowded. “I’m looking for the length of the hike, the elevation gain, any obstacles or challenges that are going to come my way,” says Nguyen.

4. Bring the right equipment.
Make a checklist so you don’t forget anything as you pack your camera bag. Include things like extra batteries, an extra memory card, a headlamp, emergency snacks, rain gear, protective cover for your photographic equipment, and extra lenses . (If you know you’ll do a lot of walking, make sure you really want that telephoto lens before you bring it.)
“For me it’s important to have compact, lightweight equipment,” says Nguyen, who uses a mirrorless Sony camera. Unlike DSLR cameras , mirrorless cameras have no mirror to reflect the image to the optical viewfinder. “Their bodies and lenses are much smaller than the DSLR cameras, but they’re still super-high quality, super-high resolution,” Nguyen says. She uses several lenses, including a 24–70mm f/2.8 lens and a 16–35mm f/2.8 lens for wide-angle shots. She’ll bring a prime lens (a lens of fixed focal length ) for astrophotography or low-light photography, and a lightweight carbon-fiber tripod. If she’s going to be close to her car, she’ll bring a 70–200mm f/2.8 telephoto lens.
Both Nguyen and Smith will bring drones for aerial shots if they know they’re going somewhere drones are allowed to fly. (Drones are not allowed in US national parks.) The best camera for his work, Smith says, is a Canon 5D Mark IV DSLR. Like Nguyen, he uses a 24–70mm f/2.8 lens. “If I’m going out for the day, I like to have something wide and something more cropped, so I’ll bring my 24mm prime or my 100mm prime,” Smith says. He’ll also bring neutral density filters . “They’re really great to have if you’re photographing water.”

5. Get the timing right.
Part of your research should include finding the best times of day to shoot and factoring in travel time. “I like to take advantage of the light, so I like to shoot at golden hour or sunset,” Nguyen says. “I try to avoid shooting at midday because the harsh lighting doesn’t look good for photos and there are more people out.” If you want to shoot an empty landscape in a typically busy place like a national park, you may want to get to the location before sunrise.
Always be on the lookout for great shots that you haven’t planned. “You have to be in the right place at the right time with the right attitude,” says Smith. “Keep an eye out because there are always stories to be told. Whether you’re in the heart of New York City or the middle of nowhere in Utah, there are always things happening that, if you’re attentive to them, you can use to tell an incredible story.”
Smith recommends keeping a camera with you at all times, even if it’s just a Polaroid or the camera on your smartphone, and using it to develop your creative eye. “Whether you’re at an iconic location or you’re just walking around your neighborhood, look for compositions and good lighting. Those off-the-hip, spur-of-the-moment photographs often tell a more incredible narrative than the super-planned shots do,” he says.
6. Accept uncertainty.
Travel is all about unpredictability. You might stumble upon a once-in-a-lifetime shot, or you might get fogged in and rained on. Try to roll with the punches when you encounter frustrating weather, find a road closed, or miss a train.
It helps to have backup plans and even backup plans for your backup plans. That way, you’re never at a complete loss for what to do if things go wrong. “Be realistic with your expectations and with things that you can’t control; it’s just a lot easier to be flexible and try to find a different plan,” Nguyen says.

7. Focus on telling stories.
Every travel photograph has a story to tell about a time and place. “Being able to bring people along for your journey through your images is the most important part of travel photography for me,” says Smith. “You want to be able to not just show the location but breathe life into it and find those authentic moments.”
Don’t be afraid to tread the beaten path. Even if you travel to places that have been photographed by hundreds or thousands of people, your photos and your stories will be unique. “You can have ten different photographers go to the same location, but you’ll come back with ten completely different images, ten different edits, and ten different stories, because everyone sees the locations differently,” says Nguyen.

8. International travel photography tips.
International travel involves a lot of planning because you want to make the most of your time. But it’s also important to accept that you can’t plan every moment. “Part of the experience that’s so fun and rewarding is how spontaneous it can be,” says Nguyen. “You never know where you’ll run into things you just can’t plan out or predict, so you just have to just go with the flow and work with what you find around you.”
Approach local people and their customs with an open mind and heart, and try to participate in their culture instead of just observing it from outside. “The people make the big difference. They have their own stories to tell, and you can learn a lot from them,” says Nguyen.
Remember to always be respectful. If you want to take a photo of someone, talk to them. Get to know them a bit, and then ask for permission. “A majority of the time, they’re more than happy for you to take their photo and maybe talk, too,” Nguyen says. “People think it’s fun because it’s not something that happens every day.”
Edit, organize, store, and share photos from anywhere.
Adobe Photoshop Lightroom
View product details
9. Family travel photography tips.
You can apply all the tips above to the family photos you take on your travels. Just remember to be patient, do your best to cultivate patience in your family members, and be sure to pack a tripod and remote so you can capture the whole group at once.
If you have specific staged shots in mind, communicate your ideas ahead of time. It might help to share some inspirational photos from Pinterest or Instagram to get buy-in from every member of the family. If you have young children (or teenagers) be prepared to bribe them to cooperate.
Otherwise, focus on taking candid shots of your family members. Like people, candid photography can be unpredictable. You have to read the room, adapt, and give up control, but you might perfectly capture the experience of family travel with a mix of shots that cover everything from excitement to exhaustion, unfettered joy to unequivocal irritation.
10. Practice.
The best way to get better at travel photography is to keep going places and taking photos. “Put in the time and effort, show up and shoot as much as you can,” Nguyen says. Keep building your portfolio, and when you’re ready to look for work in the photography business, be selective about the photos you share. Be sure that you know why you’re including each photo and what skills you want to showcase with it.

11. Make the right moves in post-processing.
With Adobe Photoshop Lightroom photo editing software, you can take your photos from good to great. If a photo just needs a nudge toward the rule of thirds , or your horizon needs leveling, you can easily make those changes in Lightroom. You can also apply presets for fast fixes to urban photos and nature photos or follow step-by-step tutorials to learn how to do everything from image sharpening to removing unwanted objects.
Wherever you go with your camera, remember to embrace the adventure and the uncertainty that goes along with it. Be patient with yourself and your surroundings. With every photo you take, you’re practicing your photography skills and adding to your story.
Turn travel photography into a career.
To turn your passion for travel photos into a career, start by taking a lot of photos and collecting your best work. If you’re committed and willing to think outside the box, you can start your own photography business .
- Pay attention to costs. You may already have camera gear and a computer, but you’ll also have to spend money on photo editing software and travel.
- Create a portfolio. Clients have to see your work before booking, so create a portfolio specific to your audience and your niche.
- Market yourself. One key part of turning your photography into a business is paying attention to marketing and branding . Establish an aesthetic and a point of view, so potential clients can have a sense of what they’re getting when they work with you.
- Think unconventionally. Many tropical paradises are oversaturated with people who want to travel and take photos of picturesque landscapes. A great place to start is by contacting bed and breakfasts, smaller hotels, and other businesses trying to attract visitors. Link them to your portfolio and see if they’re interested in providing lodging or a small per diem to photograph their resort.
- Treat every trip as an opportunity. If you’re interested in travel photography, you've likely already been bitten by the travel bug. Whenever you take a trip, take some time to build your portfolio. Professional photography can be a nomadic lifestyle with inconsistent income, so embrace a mindset of working wherever you are and being open to new opportunities.
Finally, remember that careers are not made overnight, and every small step you take as a travel photographer is moving you closer to the goal of adopting it as your career. Good luck, and happy trails.
Contributors
Tiffany Nguyen , Forrest Smith
Share this article
Do more with Adobe Photoshop Lightroom.
You may also like
Language Navigation
Why is Travel Photography Important? Let’s Talk About It
Table of Contents
Ever wondered why travel photography is important and holds such a unique charm? This art form, capturing the essence of diverse cultures and stunning landscapes in a single frame, has evolved significantly over the years. From simple holiday snaps to awe-inspiring shots that grace the pages of prestigious magazines and websites, travel photography encompasses various genres, each with its own allure.
According to Wikipedia , travel photography is “a genre of photography that may involve the documentation of an area’s landscape, people, cultures, customs, and history” .
But why is it so important? It’s all about perspective and creativity. Each photo tells a story, showcasing the world through the lens of the photographer. It’s not just about clicking at sight; it’s about how you perceive light, shadows, colors – all elements combining to create an unforgettable image.
So next time you shoot on your travels, remember that every photo is an opportunity to share your unique view of the world. Let’s explore this fascinating subject further.

Why is Travel Photography Important?
Travel photography is important because it captures the essence of diverse cultures, landscapes , and experiences, providing a visual record of one’s journeys. It also allows people to share and communicate their travel experiences, fostering global understanding and appreciation.
Travel Photography: The Journey and Passion
Role of passion in travel photography.
Passion is the lifeblood of travel photography. It fuels every frame, every shot, and every moment captured through the lens. A passionate travel photographer sees beyond the ordinary; they see stories waiting to be told, emotions longing to be encapsulated.
Imagine this: A single snapshot of a bustling city street, teeming with people and brimming with energy. This isn’t just a photograph; it’s an eloquent narrative that speaks volumes about the rhythm of urban life. It captures the essence of the city, its vibrant culture, and the unending hustle and bustle. The tall buildings, the crowded sidewalks, the colorful billboards – each element tells a story. It’s like a living, breathing testament to human civilization in its most dynamic form.
Travel photography is more than capturing pretty pictures; it’s about encapsulating experiences, emotions, stories that words often fail to express. It has the power to evoke strong feelings, stimulate thought and inspire wanderlust. It allows us to travel without moving, offering glimpses into corners of the world we may never get to see in person.
It’s passion that drives photographers to wake up at ungodly hours just to catch the sunrise or brave harsh weather conditions for that perfect shot. Without it, travel photos would merely be pictures – devoid of life and meaning.
Journey Influences Perspective
Travel photography is not just about capturing beautiful landscapes or exotic wildlife. It’s also about how travels shape the photographer’s perspective. Every trip brings new experiences which influence how photographers view their surroundings.
Travel photography is more than just taking nice pictures. It’s about recording our life’s journey and the world we live in. When we travel to busy cities, we learn to value peace and quiet. Seeing the simple lives of people in remote villages teaches us about happiness and contentment.

And when we see amazing natural sights, we’re reminded of our role in the environment. Travel photography helps us understand our place in the world and be grateful for what we have. It’s also about sharing these experiences to inspire others to explore.
These experiences don’t just affect what they choose to photograph but also how they do it – from their choice of angles to their use of light and shadow.
Impact of Personal Experiences on Photographic Style
Personal experiences greatly impact a photographer’s style in taking photographs during travels. They reflect personal emotions, beliefs, and values.
- A person who values human connection might focus on taking candid shots of locals.
- Someone with a love for adventure might gravitate towards dramatic landscapes or thrilling wildlife scenes.
These personal experiences bring uniqueness to each photo taken by different photographers even when shooting similar subjects or locations.
Emotional Connection Between Photographer and Work
Travel photography is often an emotional journey as much as a physical one. Photographers pour their heart and soul into their work, creating an intimate bond between them and their photos. This emotional connection is what makes travel photography so powerful and impactful.

For instance, when one views a photograph of a child’s innocent smile, it can evoke a sense of warmth. This is due to the ability of the photographer to not only capture the image itself, but also the emotion behind it.
Similarly, a picture of an old man’s wrinkled face is more than just an image.
It tells a story of life’s hardships and triumphs, giving the viewer a glimpse into the experiences that have marked his life. Both instances demonstrate the deep emotional connection that can exist between a photographer and their work.
Essential Equipment for Travel Photographers
Choosing the right camera for travel.
The camera body is the heart of your travel photography gear. It’s not just a tool; it’s an extension of your vision, a powerful ally in capturing the world around you. The right camera can make all the difference. Check out our comprehensive guide about the best cameras for travel for a detailed look at the options available.

For instance, consider a compact mirrorless camera like the Sony A7 IV , known for its high-resolution sensor and excellent low-light performance. Or perhaps you prefer DSLRs? Canon’s EOS 5D Mark IV is renowned for its robust build and exceptional image quality.
But remember, it’s not about having the most expensive camera body but one that fits your style and needs. Are you into street photography or landscapes? Do you need something lightweight or weather-sealed? Keep these factors in mind when choosing your ideal travel companion.
The Role of Lenses
Lenses are like different pairs of eyes – each one offers a unique perspective. For example, wide-angle lenses are great for capturing sweeping vistas while telephoto lenses allow you to zoom in on distant details.
A versatile mid-range zoom lens can cover most shooting scenarios from landscape to portrait photography. If wildlife photography is more your thing, then a telephoto lens might be what you’re looking for. For street photography , a 50mm equivalent prime lens is an excellent option.
Remember to pack light though – carrying too many lenses can weigh down your bag and slow down your journey.
Tripods: A Photographer’s Best Friend
Tripods might seem cumbersome but they’re essential pieces of equipment for any serious travel photographer. They provide stability during long exposures or time-lapses – crucial moments when even slight movement can ruin a shot.
Consider investing in sturdy yet lightweight tripods like Manfrotto Befree Advanced Travel Aluminum Tripod , perfect for capturing those breathtaking sunsets or starry night skies.
Backup Storage Devices: Don’t Lose Your Memories
Backup storage devices are often overlooked but they’re just as important as your camera and lenses. Imagine losing all your photos due to a memory card failure – it’s a travel photographer’s worst nightmare.
Portable hard drives like the WD My Passport Portable External Hard Drive or solid-state drives (SSDs) such as Samsung T5 Portable SSD can offer peace of mind. Regularly backing up your photos not only protects them from loss but also frees up space on your memory cards for more shooting.
Crafting Stories through Travel Photography
Composition: the art of storytelling.
Travel photography is more than just capturing images; it’s about making stories. A unique story can be woven into every frame, with each element contributing to the narrative. Take, for instance, a photo of villagers preparing food in an open-air market. The image is not merely about what they’re cooking but also about their way of life, community interaction, and cultural heritage.

Composition plays a crucial role in narrating these stories visually. It’s like arranging pieces of a puzzle in such a way that they form a coherent picture. In our example, the arrangement of villagers, their work stations, the food items on display all contribute to the overall story.
Consider another scenario: You’re using your drone to capture an aerial view of a place you’ve visited many times before. But this time, from high above, you see things differently – patterns emerge out of nothing and ordinary places transform into works of art.
Lighting: Setting Mood and Enhancing Narratives
Lighting wields tremendous power in influencing mood and enhancing narratives in travel photography. It’s akin to setting the stage for a theatrical performance – too much light washes out details while insufficient light leaves everything shrouded in mystery.
Imagine photographing an ancient monument at different times during the day. At sunrise or sunset (the golden hours), shadows cast by low-angle sunlight add depth and texture to the structure while soft warm hues create an ethereal atmosphere evoking feelings of nostalgia or reverence.

Conversely, under harsh midday sun or artificial lighting at night, colors may appear flat or overly saturated respectively thereby altering perception and viewer experience.
Colors: Conveying Emotions & Setting Tone
Colors are powerful tools for conveying emotions and setting tone in travel photography genre. They can make viewers feel happy or sad, calm or excited based on how they’re used within the image.
A vibrant market scene bursting with colors can evoke a sense of joy and excitement. On the other hand, a misty morning landscape in monochrome might stir feelings of serenity or melancholy. Thus, understanding color psychology can help photographers use this element effectively to enhance their storytelling.
Subjects: Bringing Life to Stories
Finally, subjects play an indispensable role in travel photography. They bring life to stories, making them relatable and engaging for viewers. Whether it’s people going about their daily chores or wildlife in its natural habitat or even inanimate objects like buildings and artifacts – every subject has a story to tell.

For instance, photographing villagers in their traditional attire against the backdrop of their rustic homes gives us a glimpse into their lifestyle and culture. Similarly, an image of a historical monument takes us back in time, making us wonder about its past glory and significance.
Developing Connections in Travel Photography
Rapport with locals: the key to authentic shots.
The role of a professional travel photographer extends beyond just capturing beautiful landscapes and iconic landmarks. It involves building meaningful connections with the local people, which can significantly enhance the quality of their work.
Engaging in a conversation with the locals can be a goldmine for photographers seeking to capture authentic shots.
This simple exchange can provide unique insights into the lives of the locals, which can be translated into compelling photographs that tell a story. This understanding and connection go beyond just taking a picture, it brings the subject to life, making the image more impactful and engaging.
Moreover, establishing a rapport with the locals can open doors to hidden locations that most tourists never get to see.
These off-the-beaten-path spots often offer stunning visual opportunities that can greatly enhance a photography portfolio.
By connecting with the locals, photographers not only get to capture the true essence of a place but also discover its hidden beauty, making their work stand out in the crowd.
Understanding Cultural Nuances: Adding Depth to Your Work
Before hitting the ground running with their cameras, it’s crucial for photographers to familiarize themselves with the cultural nuances of the place they’re visiting.
When photographers immerse themselves in the cultural nuances of their surroundings, they are able to develop a richer appreciation for the environment they are capturing.

This understanding allows them to represent their subjects in a way that is both respectful and accurate. This depth of knowledge is not merely beneficial for the aesthetic value of their work, but it also contributes to its authenticity and credibility.
Furthermore, being well-versed in cultural traditions and norms equips photographers with the ability to anticipate and capture unique moments or events.
This foresight can be invaluable, as it can lead to the creation of truly unique and impactful images. These images, infused with cultural understanding, not only capture a moment in time but also tell a story – a story that is deeply rooted in the culture it represents.
Networking: A Valuable Tool for Photographers
Networking is another essential aspect of travel photography that shouldn’t be overlooked.
Joining photography groups or communities is a beneficial move for photographers as it allows them to learn from the experiences of others and enhance their own skills.
The opportunity for collaborations is another advantage of networking; photographers can work together on projects, sharing resources and ideas.
Shared resources can include anything from equipment to location recommendations. This not only saves on costs but also introduces photographers to new shooting locations and techniques.
Emotional Connection: The Heart of Powerful Imagery
Last but not least, connecting emotionally with your surroundings is an integral part of creating powerful imagery as a travel photographer.
Photographers possess the unique ability to fully immerse themselves in their environment. They soak up the atmosphere, observe the light conditions at different times of day, and develop a deep emotional attachment to the place.
Their work is a reflection of this emotional connection. It resonates through every image they capture, creating a captivating visual narrative.
These images have the power to strike a chord with viewers. Each one is a testament to the photographer’s connection with their surroundings, inviting others to share in their experience.
Respectful Practices in Travel Photography
The art of asking permission.
The first rule of thumb in travel photography is obtaining permissions. It’s not just about snapping pictures; it’s about showing respect and understanding the value of consent. You might be thinking, “It’s just a photo .” But imagine someone taking your picture without asking. Feels weird, right? That’s why getting permission before photographing certain places or people is crucial.

- Ask politely.
- Explain your purpose.
- Show gratitude when granted permission.
These steps are simple yet powerful ways to show respect while doing what you love—capturing moments through your lens.
Ethical Boundaries in Focus
Travel photography isn’t just about capturing beautiful landscapes or vibrant cultures—it also involves understanding ethical boundaries . When we talk about ethics, we’re referring to the moral principles that govern a person’s behavior. In travel photography, this means being mindful of what you’re capturing and how it could potentially affect others.
Sensitive subjects can range from poverty-stricken areas to sacred religious sites. These topics require a delicate approach—a balance between telling a story and preserving dignity. Reactive photography—that spontaneous click of the shutter—can sometimes lead to crossing these boundaries unintentionally.
To avoid this:
- Do your research: Understand the context of what you’re shooting.
- Be empathetic: Put yourself in their shoes.
- Practice restraint: Not everything needs to be photographed.
Cultural Sensitivity Shuttered
Photographing different cultures is like stepping into another world—it’s exciting, enlightening, but also challenging. Respecting local customs, traditions, and privacy during shoots is paramount for any travel photographer wanting to capture cultures authentically and respectfully.
Every culture has its unique set of norms and values—what may be acceptable in one culture may not be so in another. For example:
- In some cultures, direct eye contact can be considered disrespectful.
- Certain communities may have specific rules about photographing women or children.
- Some religious sites may prohibit photography altogether.
Being aware of these nuances not only shows respect but also enriches your understanding of the world around you.
Responsible Tourism in Every Shot
Travel photography can be a powerful tool to promote responsible tourism. It’s more than just creating stunning images—it’s about capturing the essence of a place, its people, and their way of life. And doing so responsibly means respecting the environment, the local culture, and its people.
Here are some tips to promote responsible tourism through your travel photography:
- Highlight local businesses: Showcase that charming family-run restaurant or artisan shop in your photos.
- Advocate for nature: Use your platform to raise awareness about environmental issues.
- Respect wildlife: Keep a safe distance and don’t disturb animals just for a photo opportunity.
Remember, as a travel photographer, you have an important role in shaping perceptions about different cultures and places. Let’s make sure it’s done respectfully.
Overcoming Challenges in Travel Photography
Weather woes.
Travel photography often brings with it the challenge of unpredictable weather conditions. One moment, you could be basking in the golden opportunities of a sunny day, and the next, you could be wrestling with your camera gear in a sudden downpour.
- A sturdy waterproof case for your equipment can go a long way to prevent damage from unexpected rain showers.
- Investing in lens hoods or filters can help manage glare on overly sunny days.
- Using a tripod can stabilize your shots during windy conditions.
Despite these challenges, unpredictable weather often presents unique opportunities for stunning photographs that wouldn’t be possible under “ perfect ” conditions.
Equipment Emergencies
Handling equipment failure or damage while traveling is another hurdle travel photographers must overcome.
Embarking on a journey? Don’t forget the importance of regular maintenance checks! These can be your first line of defense against unexpected breakdowns, turning potential disasters into minor speed bumps.
The idea of carrying backup equipment might initially seem like an unnecessary hassle. However, when your primary gear fails, you’ll find it’s worth every ounce!
Mastering basic repair skills could be your secret superhero power. Imagine being stranded in a remote location without professional help in sight, but fear not, your repair skills are here to save the day!
Remember, overcoming these challenges adds resilience to your skillset and makes each successful shot even more rewarding.
Language Barriers and Cultural Differences
Coping strategies for language barriers and cultural differences are vital to ensure respectful interaction with locals and capture authentic images that respect their culture.
When you take the time to learn key phrases in the local language, it’s not just about aiding communication. It’s a powerful way to demonstrate respect for the culture you’re immersing yourself in, and that can be incredibly rewarding!
Before you even set foot in a new place, make sure you’ve done your homework on local customs. This will ensure you don’t accidentally offend anyone with your actions or the pictures you take, making your trip smoother and more enjoyable.
Don’t underestimate the value of engaging local guides on your journey. They can help you navigate language barriers with ease. More than that, they can offer invaluable insights into what elements of their culture to highlight in your photos, or what to avoid. It’s like having a cultural compass right in your pocket!
These efforts will not only improve your travel photography experience but also enrich personal growth through cultural immersion and understanding.
Logistics: Not Just Clicks
Managing logistics like transportation, accommodation, safety etc., while juggling photography demands can seem daunting.
Imagine this: you’re designing your travel itinerary, and you’re not just thinking about the sights you want to see. You’re also considering the perfect moments you want to capture on camera, balancing your sightseeing and photography sessions perfectly.
Now, picture this: you’re selecting your accommodations and you’re not just looking for comfort or amenities. You’re strategically choosing locations close to prime photography spots , saving you travel time and providing ample opportunities for capturing breathtaking sunrise or sunset shots.
Finally, think about this: you’re not just ensuring your personal safety but also of your precious photography equipment. This is crucial for a worry-free travel photography experience, allowing you to focus on capturing stunning images.
Tackling these logistical challenges head-on helps you focus on capturing the essence of your travels without unnecessary stress.
The Lasting Impact of Travel Photography
Travel photography isn’t just about snapping shots; it’s about capturing the essence of a place and its people. It’s an art that goes beyond mere sightseeing. It’s a way to preserve memories, share experiences, and tell stories that can inspire others to explore the world. So, grab your camera gear, hit the road, and let your lens reveal the beauty of our diverse planet.
Your travel photos serve as a bridge between cultures, fostering understanding and respect. They can also be a powerful tool for personal growth, pushing you out of your comfort zone and challenging you to see things from different perspectives. And remember, every challenge you face is an opportunity for a great shot! Now go on—get out there and capture those unforgettable moments!
What are some essential equipment for travel photography?
A good DSLR or mirrorless camera is crucial for high-quality images. A versatile zoom lens can cover most situations while tripods are useful for long exposures. Don’t forget extra batteries and memory cards!
How does travel photography help in storytelling?
Through composition, angles, lighting and subjects chosen in each frame, photographers craft narratives that convey the spirit of the places they visit.
How can I develop connections through travel photography?
Engaging with locals often leads to more authentic images. Also consider joining photography communities online where you can share your work and learn from others.
Why is respectful practice important in travel photography?
Respectful practices ensure we don’t offend local customs or invade privacy while photographing people or places.
What challenges might I face in travel photography?
Weather conditions, language barriers or unfamiliar customs could pose challenges but these also create opportunities for unique shots!
How does travel photography impact personal growth?
It pushes you out of your comfort zone encouraging adaptability, resilience and a broader worldview.
How can travel photography inspire others?
Your images can motivate others to explore new places, understand different cultures and appreciate the world’s diversity. To see for yourself, check out the Travel Photographer of the Year Awards !

I’m a professional travel photographer, and I’ve been living the digital nomad lifestyle since 2016. I make money by working on client assignments, selling stock photography and helping other photographers by sharing my experiences on this website. I move around at my own pace (I hate fast-paced travel) and like to spend a few months getting to know each place I base myself in.
My writing and photos have been featured on industry leading websites such as Digital Photography School , Atlas Obscura and the world’s leading underwater photography resource The Underwater Photography Guide . I authored an eBook called “ Breaking Into Travel Photography: The complete guide to carving out a career in travel photography ” that has been published on Amazon. My stock images have also appeared in ads promoting destinations and companies that sometimes has been a surprise, even to me. But I guess that’s the nature of stock photography, you never know who will license them!
I’m always happy to connect, so feel free to reach out!
Currently Trending:
APS-C vs full-frame – which sensor size is best?
Why are we obsessed by full-frame sensors, fujifilm x100v and x100vi alternatives best retro cameras, amateur photographer of the year 2023 winners announced, nikon z8 wins product of the year at the 2024 ap awards.
Advertisement
When you purchase through links on our site, we may earn an affiliate commission. Here’s how it works
Guide to Travel Photography: tips no matter the location or subject
Hollie Latham Hucker speaks to six award-winning travel photographers for their top tips on how to prepare, pack light and pull off a successful travel photography shoot, no matter what your subject is or where you are in the world.
Travel Photography tips from the experts
Travel photography tips from tom svensson.
Tom Svensson is an award-winning conservation photographer and an environmental influencer. See more at www.tomsvensson.se , Facebook @TomSvensson.conservationphotographer or @ tomsvensson1 on Instagram
Appropriate kit
Make sure your kit is in good working order and all batteries are charged. But perhaps even more important is bringing the right gear for the place you’re visiting and the photo you’re hoping to get. For example, on a recent trip I wanted a close-up of a rhino so I started to do some research on where I might find some. Once I’d chosen a location to visit I decided it was best to use a remote car to capture the image I had in mind.
This was key to me achieving this photograph below. Another piece of advice is to test out all your kit at home before you go, so you know how it works. When it comes to packing, I always group my kit together in separate bags for specific assignments, so I can easily access the exact kit I need for each photo I plan for.

Image credit: Tom Svensson
Careful planning
Plan your trip thoroughly. This all comes down to ensuring you visit the correct location at the right time of year. Not only do you need to find out exactly where your wildlife subject can be found before you arrive, you need to know which season they are most active and therefore more likely to be seen. Also, it’s important to know the type of environment you’re going to so you can bring the most appropriate kit, clothing, and footwear. I also take the time to see what other photos have been captured previously so I know what kind of photo I can expect to achieve while also ensuring that I capture something unique.

When I think about capturing an image of a special species, I need to allow time to research them thoroughly. I want to know more about their habitat, where you can find them, understanding their behaviour, habits and calls, and the time of day and year to photograph them. This will also help you build a picture of what type of light and background you can expect to achieve in your photos, which may dictate what kit you need. To give an example, I love wombats but they are nocturnal so that was my first hurdle. I kept researching and eventually came across a location where they are out during day. That completely changed how I could photograph them! It just goes to show that preparation makes all the difference.

Tom’s recommended kit for Travel Photography
Mirrorless camera
I have completely converted to the mirrorless system as there are many advantages that come with the kit. One of the biggest is the amazing autofocus systems the cameras have. I currently use the Canon EOS R3 and R5 models. Another benefit is weight, so now all my gear is under 12kg when I travel.
Range of focal lengths
My mirrorless Canon set-up right now includes a trio of RF lenses. I use the RF 24-105mm, RF 70-200mm and my absolute favourite, the RF 100-500mm – I tend to use this the most. This range of focal lengths covers a wide range of subject matter.
Travel photography tips from Tesni Ward

Tesni Ward is an award-winning, professional wildlife photographer and OM System ambassador based on the outskirts of the Peak District. See more at www.tesniward.co.uk and on Instagram @tesniward
Research, research, research!
So, you’re going on a ‘once in a lifetime’ trip and you want to make the most of every opportunity. When we travel for photography, we’re working at a disadvantage compared to those who live there because we only have a limited amount of time to photograph. Going in blind can be one of the biggest mistakes you make, so do as much preparation and research as possible before you go: look through social media using location tags to see the kind of images that can be achieved and the sort of focal lengths you may need. Check if there’s a certain time of the year that’s more productive in terms of light and activity or events you wish to see. If you’re going on a guided trip, a few questions to the guide can go a long way.

Image credit: Tesni Ward
Don’t buy all new gear a week before you travel
Familiarity with your equipment can be the difference between getting an incredible image or missing it entirely and I can’t stress enough how important it is that you feel comfortable and competent with your kit. Make sure if you’re planning on investing in new gear before your trip that you do it a couple of months prior at the very least. If the camera has been a bit neglected over the past few months, commit some time to go on a few local outings to reacquaint yourself with everything and make sure things are working as expected.

Flight faff
Kit can often be heavier or larger than what’s permitted in hand luggage, but it’s ill-advised to put kit in your check-in baggage: many airlines won’t allow lithium batteries in the hold and insurance rarely covers it if anything goes wrong. Paying for extra carry-on bags and creative packing can ease the stress. I will often wear clothes with plenty of pockets (fishing jackets are surprisingly handy for this) so that if I have issues getting through I can pop lenses and accessories into pockets or even a couple of camera bodies across my shoulders under my jacket. Smaller domestic flights can be a different kettle of fish if they’re weighing you!

Tesni’s recommended kit for Travel Photography
Telephoto lens
A telephoto lens is an absolute must for me when travelling. You have a limited amount of time to get a portfolio of images, so having that flexibility to capture a wide range of images is essential.
Second camera
You should always prepare for the unexpected when travelling, so having a second shooter camera is non-negotiable for me. This will also allow you to cover a wide range of focal lengths to ensure you get the shot in unexpected encounters.
Travel photography tips from David Tipling

David Tipling is renowned for his artistic images of birds. He is the author or commissioned photographer for many books. He will lead a tour with Zoom Photo Tours in November. See davidtipling.com and www.norfolkphotosafaris.com
Keep an eye on ISO
Pumping up the ISO to achieve a high shutter speed is not always necessary when photographing in bright light. Too high an ISO can affect colour saturation and lose fine feather detail in birds. So, if you use Auto ISO think about keeping the upper limit lower than the camera’s default. Often our cameras will automatically choose a higher ISO than is required and although de-noise software does a good job of cleaning the image up, it is better to obtain the best quality you can when you shoot. These crab plovers (below) were photographed in the Seychelles in bright tropical light at 1/1250sec. This was fast enough to freeze their wings and at an aperture of f/7.1 to ensure I had enough depth of field for both to be in focus. I only needed an ISO of 200 because of the intensity of light.

Image credit: David Tipling
Anticipating when something interesting might happen is a skill learnt over time, but a bit of background research can go a long way to assist this process. These displaying sarus cranes were photographed early in the morning at Bharatpur in northern India. They were standing side by side feeding, and when one stood up erect and the other then stood and started to point towards the sky, I knew from experience that the other bird would then call and lift its wings. A behaviour that is quite fleeting but as I knew what was about to happen, I was already focused and fired the shutter as soon as it happened. Whether it is duetting cranes or perhaps a duck bobbing its head before take-off, watching for the signals birds give off can give you that extra second or two to capture the action.

Early and late
Birds in countries with hotter temperatures than our own are often most active at dawn and then sometimes again later in the day. Being out as the sun comes up can be the most rewarding time of day for photography. If you are in a location where the light can become quite harsh by mid-morning then getting up early to make the most of that good light is essential. These spotted owlets photographed at Bharatpur in northern India frequently roosted by day in the same place, often disappearing down a hole during the heat of the day. But frequently at dawn they would sit warming up in the early morning sun, which is when this image was taken. The early bird catches the worm.

David’s recommended kit for travel photography:
Remote trigger
When abroad I occasionally have opportunities to photograph birds within their habitat using wideangle lenses, which might require setting the camera on a remote and triggering from a safe distance.
High-powered torch
In the tropics owls can often be photographed at night. I prefer to illuminate nocturnal subjects by shining a torch below for lighting rather than use flash, in order to give a natural feel.
Travel photography tips from Ben Hall
Ben is one of the UK’s leading professional wildlife photographers and has multiple international awards. He leads workshops and will host a Zoom Photo Tour in August. See www.benhallphotography.com , Instagram @benhallphotography , FB @benhallphoto
Research your location
Whilst knowledge of your subject is paramount for success, knowing your location well is also vital. I recommend doing at least one or two recces to build up an understanding of your chosen site. Pay careful attention to the light and how it changes throughout the day. Make a note of the areas that have most potential for morning light, and which areas benefit from afternoon or evening light. Observe potential subjects and note down any behavioural patterns that you notice. This information will pay dividends and ultimately will help you to position yourself in the best possible way for any situation that may arise. Try to visualise potential images by looking at backgrounds and foregrounds and note the direction of the light.

Image credit: Ben Hall
Get the most from your gear
When travelling to a new location, having a variety of focal lengths with you will ensure that you are able to take advantage of any given opportunity. When covering a long distance on foot, however, I prefer to travel as light as possible. Not being too laden down with gear will also allow you to react faster and take advantage of those opportune moments. For this reason, when hiking I prefer to take a tele-zoom rather than carry a heavy prime. A monopod is also useful when covering large distances. A sturdy monopod will take the weight out of even the heaviest of lenses whilst being considerably lighter than a tripod. When travelling to a new or unfamiliar location, using a smartphone app that calculates the position of the sun such as PhotoPills or Magic Hour can prove invaluable.

Try to capture something different
When tackling a particular subject, consider the potential for capturing images that are unique. There are plenty of locations around the world that have become well known for certain subjects. This is usually for good reason, either the subjects are numerous, or accessible, or often both. With so many photographers visiting the same place to shoot the same subject, it can be difficult to come away with images that stand out from the crowd. Turning to a lens that you would not normally use may just inspire you to look at your subject in a new light. Try a shorter lens to incorporate the environment, or perhaps look for a more abstract way to interpret your subject. Capturing movement is a great way to add an artistic element to your work. Try shooting moving birds or animals with a slow shutter speed to capture a sense of motion and energy.

Ben’s recommended kit for travel photography
Gimbal tripod head
A gimbal tripod head eliminates the weight of a long, heavy lens and allows complete freedom of movement. This is especially useful for flight photography.
Canon 100-400mm f/4.5-5.6L IS II
This tele-zoom lens has been a firm favourite of mine for over two decades. Not only is it relatively lightweight, but it also gives me the flexibility that I need when composing environmental images.
Travel photography tips from Philip Lee Harvey

Philip Lee Harvey is a multi-award-winning photographer and filmmaker. In June he will be hosting a tour of Sweden with Zoom Photo Tours and AP. See Instagram @philip_lee_harvey_photographer and www.philipleeharvey.com
Don’t be like everyone else
Find your own way to see the world. This takes time, but to succeed you need to stand out and have a voice. When you begin it’s easy to just try to mimic other photographers, but this has no longevity and soon it will become just a formula. Try to use mood boards to determine the things that you like. I often shoot the obvious first, to get it out of the way, then I have the confidence to experiment and add my own twist to the image. In this case (below), I was influenced by broken Chinese pottery.

Image credit: Philip Lee Harvey
Height of the camera
Don’t just stand and shoot; the height of your camera can drastically change the quality of the image. Lay on the ground or go up high, this is the difference between a pro and a novice… effort! If photographing wildlife, get your camera to their eye-line as it’s far more engaging. Remember, if you look down on your subject, it makes them submissive, go low and you make them the hero; just look at early propaganda and travel posters for examples.

Advanced preparation
Try to scout a location before you shoot but do it with a camera. This allows you to see how different angles and lenses will change the scene. I also use a sun tracking app, such as Sun Seeker, to determine the best time of day to shoot any given place. It can save a lot of time in the planning and lets you achieve more in any given day.

Philip’s recommended kit for travel photography
Having a very fast prime lens in your kit, ideally an f/1.2, can really help with portraits and details. It gives a very cinematic feel and lets you shoot in low light when everything else has failed.
Blackout cloth
We often see white and silver reflectors used, but negative fill is just as important in controlling light.
An LCDVF screen loupe
This is essential for viewing images on the back of the camera in strong daylight. I also use them attached to external monitors when shooting video.
Travel photography tips from Ulla Lohmann

Ulla is a photojournalist and filmmaker. She specialises in active volcanoes and works regularly for National Geographic. She is a Canon ambassador and also offers photo tours. www.ullalohmann.com and @ullalohmann
The right place at the right time
To photograph erupting volcanoes, it is very important to be well informed of what to expect and how to keep safe beforehand. Local Volcano Observatories are helpful, as well as webcams and Instagram for visual references of the state of activity. Also check the local laws; it’s often very expensive to trespass and it’s important to be aware for security measures. Time your ascent of the volcano so that you can photograph during the blue hour, when the lava glows yellow, the blue sky offers a wonderful contrast, and you can still see foreground details. Another option is to make use of the light of the full moon. If possible, plan multiple visits and prepare to spend more time than you think at the volcano. It is a life-changing experience!

Image credit: Ulla Lohmann
The right exposure
Lava is like water – you can show it in drops or as a veil. The shorter the exposure, the more you can see the individual glowing rocks. Personally I like it when you can see the ‘trail’ of the so-called lava bombs. Usually I choose a longer exposure, starting from five seconds onwards. I press the shutter shortly after the initial blast to avoid overexposure. I use the camera in manual mode, which gives me more freedom to expose for what I want to show, and I like to set my white balance to a very low Kelvin figure (around 3400K) to emphasise the blues in the sky.

Depending on your camera, it can be very hard to focus during the night. You can try to set it manually but depending on the volcano it can be hard because gases and steam might give you an illusion. You can set the focus during the day and then put it on manual and not change it any more, or make use of a large explosion to set your focus during the night, or use a light source in a similar distance to focus. If you are close to the volcano, you might find that you can’t get sharp images at all – yes, this is because of volcanic quakes. Either you see it as an effect, or you just take many images with a shorter exposure. One of them will be sharp.

Ulla’s recommended kit for travel photography:
This is essential for long exposures. It must be robust, but light enough to carry because there is usually a lot of walking required when shooting volcanoes.
Essential to not only store your equipment but also warm clothes, food, water, torch and if needed, a helmet and gas mask. Make sure you prepare well – volcanoes are not playgrounds and can really be dangerous!
You can join these travel photography experts on our upcoming AP Photography Holidays ! Whether it’s in the UK or abroad, there is something for all photographers. Upcoming tours include:
South Africa: Wildlife, Wine and White Sharks with Tom Svensson and Nigel Atherton 14 – 21 May 2023
Red Grouse with Ben Hall 24 – 27 August 2023
Orangutans and Komodo Dragons with Tom Svensson and Tesni Ward 7-16 October 2023
Birds of India with David Tipling 12 – 18 November 2023
Don’t forget to submit your photos to the Travel round of Amateur Photographer of the Year 2023 before 3rd April 2023!
See the Best used travel zoom cameras and best travel cameras.
Amazing images win in Travel Photographer of the Year
Do travel photography like a street photographer
Follow AP on Facebook , Twitter , Instagram , and YouTube .

Hollie is a highly experienced photography journalist who studied photography at university. She is responsible for commissioning a wide range of technical ‘how to’ content for AP, including interviews with top photographers.

You may also like...
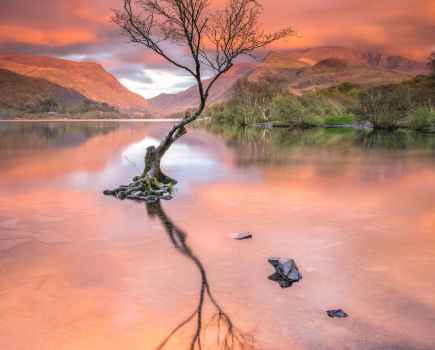
April 30, 2024
Best UK landscape photography locations
Our guide to the UK's best landscape photography locations throughout Scotland, Wales and parts of England.
by Geoff Harris

April 27, 2024
Focus stacking: achieve pin sharp macro shots of delicate subjects
Three experts show you how to use focus stacking in your photography and provide top tips, their favourite software and must-have kit
by AP Staff

April 26, 2024
Fine art architecture photography guide
Stripping back a building to its key elements is something Sharon Tenenbaum is highly skilled at, she shares her fine art architecture tips

Looking to improve your photography? Amateur Photographer is the magazine for you, subscribe today and pay just £26 for your first 13 issues!
No thanks, I’m not interested!
Travel League
Where do you want to travel next, amazing advantages of travel photography.
August 7, 2021 Travel League Blog 0

Travel photography is no longer for the chosen few. Many travellers have even made it their full-time job. Other than the fun bit of taking pictures, being a travel photographer comes with numerous benefits worth your time and money.
You don’t have to shy away from it simply because you can’t afford a sophisticated camera. If you have the passion and the will to do it, you can comfortably start with your smartphone. You just need to be purposeful and pay careful attention to your surroundings when taking those images. You’ll realize even without a large expensive camera, you can take beautiful pictures that even other people will love to see.
Some people argue that photography steals away your travel experiences because all your concentration goes to taking the pictures. Well, the truth is, this can only be so if you are just snapping pictures using your smartphone without much thought. Otherwise, real travel photography can’t distract you from getting the best experience out of your much-anticipated trips. In fact, it is a fantastic way for you to explore your destination in a deeper more fulfilling way and experienced travel photographers will attest to this.
Beyond that, becoming a travel photographer can enhance your travel experiences than any other activities you engage in when you are travelling or vacationing. Besides, the occupation has numerous advantages. Some of those benefits are documented below:
It makes you more aware of your environment
When you are a travel photographer, you tend to notice almost everything that happens around you because you are always on the lookout for something interesting. As you strive to capture that fascinating landmark or historical building, you will also get a chance to see even the minutest things. This is not the case with other travellers who after seeing the bolder picture, they are done and ready to move to the next. Surprising, you find that when you are taking photos, you get to see so much of your world unlike when you are just walking around.
An opportunity to document your trips
This is perhaps the best advantage of travel photography; documenting your world through the beautiful pictures you take when travelling. Although your brain has the ability to remember the things you have done in the past, some however important they are will fade away with time. But when you take pictures of the places you have been into, the things you have done and the people you have interacted with during your various trips, you will never forget about them. And if you do, your pictures will be ready to remind you beautifully. As you take those images, take them knowing you are documenting your trips. You will one day look at them and be grateful you took them.
Sharing your memories with others
The best way you can share your travel experiences with your loved ones is through the images you take. Telling your family members and friends stories about the incredible places you have been into is not enough. They need to see the exact places to understand what you are talking about. This could be what they needed to kick start their travel adventures and who knows, they could also venture into travel photography since they have seen how rewarding the occupation is. In addition to that, they can also use those pictures to beautify their spaces. Can you imagine that? A loved one using a photo you took in their home or office space? That is so encouraging. So, as you take the photos, do so knowing that they are going to be an inspiration to many others.
Great offers
By the way, do you know you can actually earn a living through travel photography? Oh yes, you can. Travel photography is a very rewarding occupation. You get to earn some good money through travelling and taking good-quality pictures.
However, if this is what you want to do, then you have to up your game. Before a company notices your good work and reaches out to you with great offers, you must be doing a commendable job. You need to put more effort and enhance your photography skills even if it means taking a short course. The key point is that you have to take your photos and videos like a professional to have marketable content strong enough to earn you a gig. So, sharpen your skills and turn your photography hobby into your source of income. It’s doable, others before you have done it and you can do it as well.
Opportunity to meet other photographers
You are not the only one doing travel photography. There many others out there doing the same. Getting a chance to interact with some of them during your trips can help you enhance your photography skills. You also get a chance to learn a few tips and tricks from the experienced ones. Plus, by sharing experiences and lessons learnt with your colleagues, your understanding of travel photography is greatly enhanced.
Further, do not forget the benefits you get through the connections you make with fellow travel photographers. Connecting with people you share the same passion with can really have a positive impact on your photography career. The encounter can help you to appreciate what you do better and with confidence. On top of that, these encounters can help you to make lasting friendships with some of them. These are the relations you need to develop as a photographer as well as a person.
It broadens your mind
Travel photography is a task that can highly broaden your mind and expose you to awesome ideas that expands your understanding of the world and its occupants. People have different ideologies, beliefs and ways of doing things. Hence, as you travel the world taking those gorgeous photos, you will have a very good chance to encounter these people and get to know why they do the things they do.
Meeting people with different beliefs from you can be a great eye-opener. It can help you to understand, appreciate and accept people better than you would have if you just stayed in your home area. The information you gather through travelling can help you to restructure your life, become a better person and be more productive even in other areas.
Why travel photography?
When you take your precious time to take real images of people, animals and places, you are not wasting your time. You are actually enhancing your travel experiences and documenting your best moments while out there. Thus, next time you travel, take your time to take a few beautiful images of whatever you’ll find interesting. Those pictures are treasures you will live to cherish.
Be the first to comment
Leave a reply cancel reply.
Your email address will not be published.
Save my name, email, and website in this browser for the next time I comment.
Copyright © 2024 | WordPress Theme by MH Themes
Pin It on Pinterest
- Print Friendly

Pros and Cons of a Travelling Photographer
written by: Katie Goldie
Being a Travelling Photographer can have its ups and downs. I have listed a few pros and cons about my experience as a travel photographer.
-The obvious pro is that you are able to see the world and document it through images. You can learn about new cultures and develop empathy for different cultures.
-For some of the places in the world, being able to see how others live can humble you and make you recognize how good (or not so good) your life may be.
-To meet other photographers and learn from them and their different talents
-Opportunities many others would die for.
-To see new Landscapes and always have a new fresh visual to work with.
-To make friends from all the world and wherever you travel to, so going back is never that intimidating.
-It’s always an exciting challenge to find new compositions.
-You can find yourself in one season and with a flight across the world you are in an entirely new season.
-You don’t have a Monday to Friday
-To see different wildlife from around the world, and different climates that support them
-You can taste all different types of foods from around the world
-You learn about things you never knew existed
-You see things in real form that you have only ever seen in photographs
-You are offered new perspective on your lifestyle, that their are ways of life other than your own
-The best pro of all being a traveling photographer is that you get to Travel!

– Sometimes you feel like you live at the airport. Also you are guaranteed to have a delayed/missed flight at some point with all your air time- It can be very expensive depending on where you travel to
– You lose a lot of sleep to shooting photos and traveling around
– Good friends that you meet along the way usually can’t come back home with you
– You find yourself missing your family as you are abroad
– It can be a challenge living out of your bag, you never seem to have a permanent home to put your things
– You never get a permanent shipping address
– Time can slip away quickly

No matter the cons of travel I have always had to pros outweigh the cons for me. Travel gives knowledge you can never learn in a classroom and there is something special about experiencing travel that you may have heard of but never understood fully. Having a camera to document your travels helps others become inspired to get out there and do the same. I will always be passionate about sharing my travels in photo form.

Katie Goldie
Photographer and storyteller from Canada. Her goal is to inspire individuals to get outside and understand why the natural world is so precious. She wants to inspire others to see the beautiful places she photographs as well as protect them.
© 2022 Videndum Imaging Solutions. Manfrotto c/o Lino Manfrotto + Co. Spa – Via Valsugana 100 36022 Cassola (VI) Italy – VAT IT02084740246
Capture. Share.
Audio capture, backgrounds, camera accessories.
- Wooden Camera
- National Geographic*
Distribution, rental & services
- Camera Corps
- The Camera Store
Lens control systems
Lighting and controls.
- Quasar Science
Live streaming
- Lightstream
Mobile power
- Anton/Bauer
Robotic camera systems
Smartphonography, supports & stabilisers, video transmission systems.

- The Benefits of Working as a Freelance Photographer
- Career Tips
- By Lisa Michele Burns
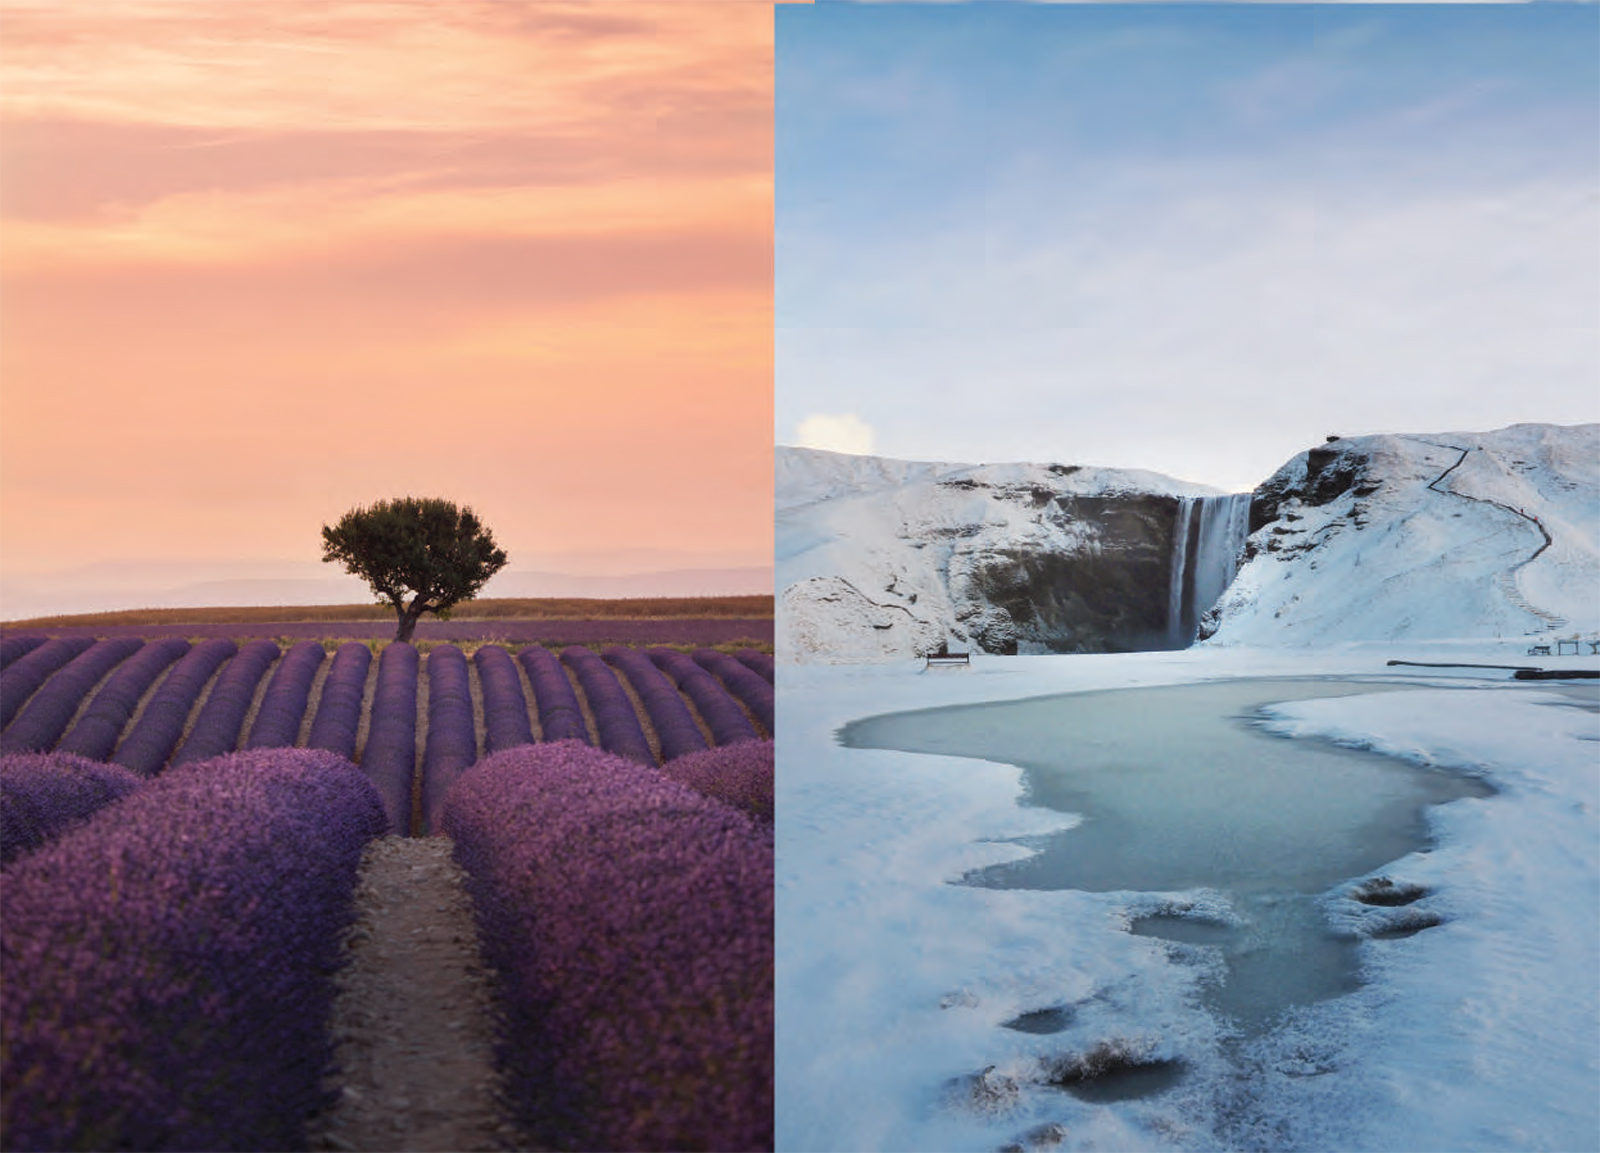
The Freelance Travel Photographer Lifestyle
Over the past two or so years, we’ve all seen the benefits of working remotely. Lockdowns forced companies to adjust and allow staff to work from home, giving them a glimpse at the possibilities of a life outside the office.
What if we took this one step further, removed the employer all together, added a sprinkle of adventure and you created your own business as a photographer?
Imagine the possibilities, the creative freedom and ability to schedule your weeks, months and years and fill them with itineraries that connect with your photography interests!
Working freelance isn’t for everyone, but for those who make it work, it’s a lifestyle shift that is immensely beneficial in so many ways. Create your own schedule, set your own rates (in some cases), network and build your own portfolio of work that reflects the opportunities you’ve created for yourself.
Freelance in the photography world can work in any number of ways. It could mean working with 10 different clients one week, or one client for a year – the arrangement is up to you! Those keen to get published may see their work in 1 x magazine a month but behind the scenes they’re writing articles or editing images to appear in 5 x magazines later in the year. It also doesn’t have to be a straight full-time freelance career, you can work part-time and earn consistent income while pursing the freelance jobs and building your portfolio. There’s no set arrangement or strict career path to follow, the beauty of a freelance career is you can fit it into your current lifestyle!
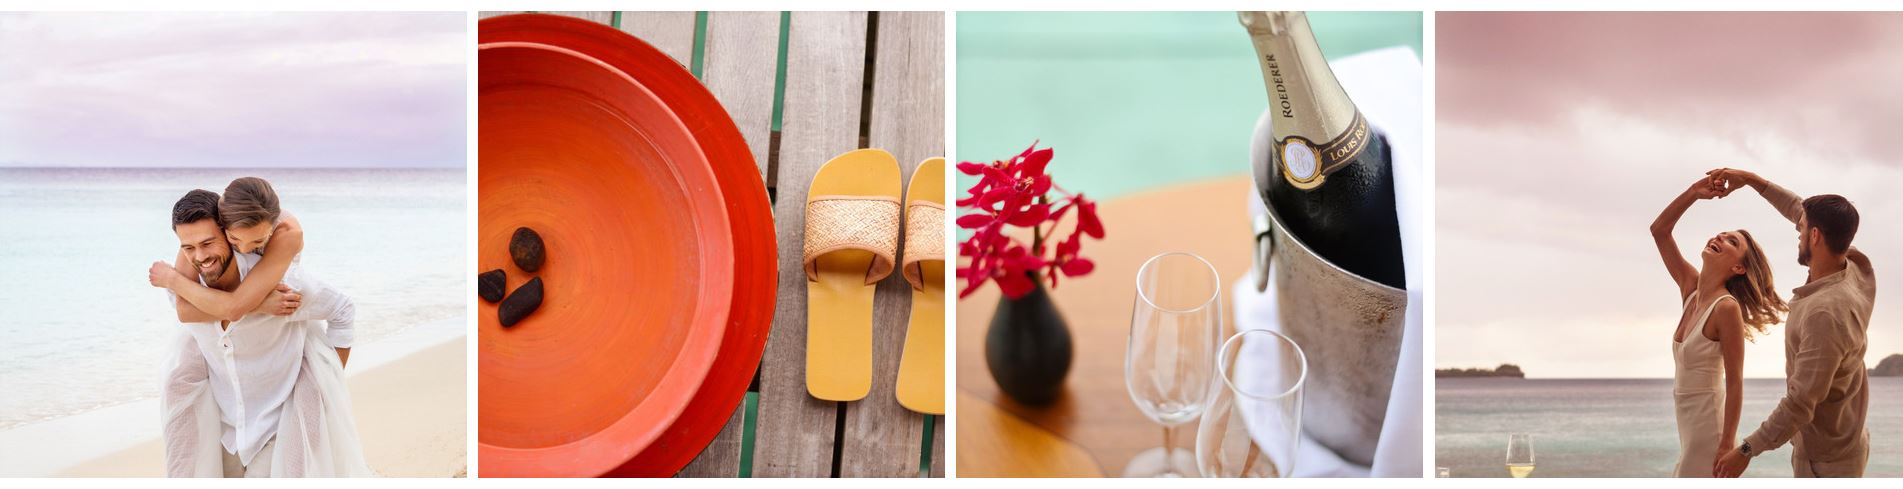
You may want to work in the tourism industry photographing hotels and travel experiences. If this is the case, your weeks may see you capturing interiors, setting up shots for dining and entertainment offerings, photographing landscapes, furnishings, outdoor activities and so many varied subjects!
As a freelance photographer, you need to start out knowing that you will get out what you put in. Effort is required to get clients, create the work for clients and keep clients happy by providing a high standard of work and always attempting to go above and beyond. The reality is, working freelance in the travel industry is a very sought-after gig. Social media has paved the path for marketing budgets to take some dips as the amount of free content available to some brands is replacing the need to arrange extensive photoshoots.
That said, images, video and marketing content of all kinds are required constantly, particularly in the travel industry and as such, there will always be opportunities for freelance photographers. We just need to seek them out and approach potential clients in a way that almost ensures an easy yes.

What are the benefits of working freelance?
Flexibility – Create your own schedule, say yes to jobs that feel right and no to those that don’t. If the opportunity to photograph a week long campaign arises with a client in another country, you actually have the ability to try and make it work! If, as you get started you want to cram your schedule filled with varied opportunities to see what feels right, you can! If you want to only work one day a week and charge accordingly, you can.
Creative Freedom – Working freelance means you have some control over the work you produce. Depending how you structure your business, you’ll either be booked for your creativity (ensure your Portfolio is up to date!), or you’ll be given an element of creative freedom. In some cases, a client may come to you with a specific brief and have a vision already in mind for the photographs, but once you learn how to work with clients and build great client relationships, you’ll start to find that balance between your clients ideas, and incorporating your own.

Multiple Income Sources – Your income is only limited by your time. Price your time and skills right and you could be earning more and working less. To expand this concept a little, rather than working casually for an hourly rate of $25, you could instead charge $800 for a professional photoshoot and within that fee, build in the time required to complete the job. You may value your editing time at $60ph, your shoot time at $120ph, if you were working for someone else, this isn’t necessarily possible.
The Remote Lifestyle – With living expenses rising, working freelance enables you to expand your horizons and live abroad or seek a quieter life in a regional area where living is more affordable. It doesn’t even need to relate to expenses, if you’re dreaming of working remotely while travelling and photographing, it’s totally possible when creating a freelance income stream. So many countries are now offering remote worker visas including Iceland, Italy and Indonesia (Bali – new extended remote visa coming soon apparently!).
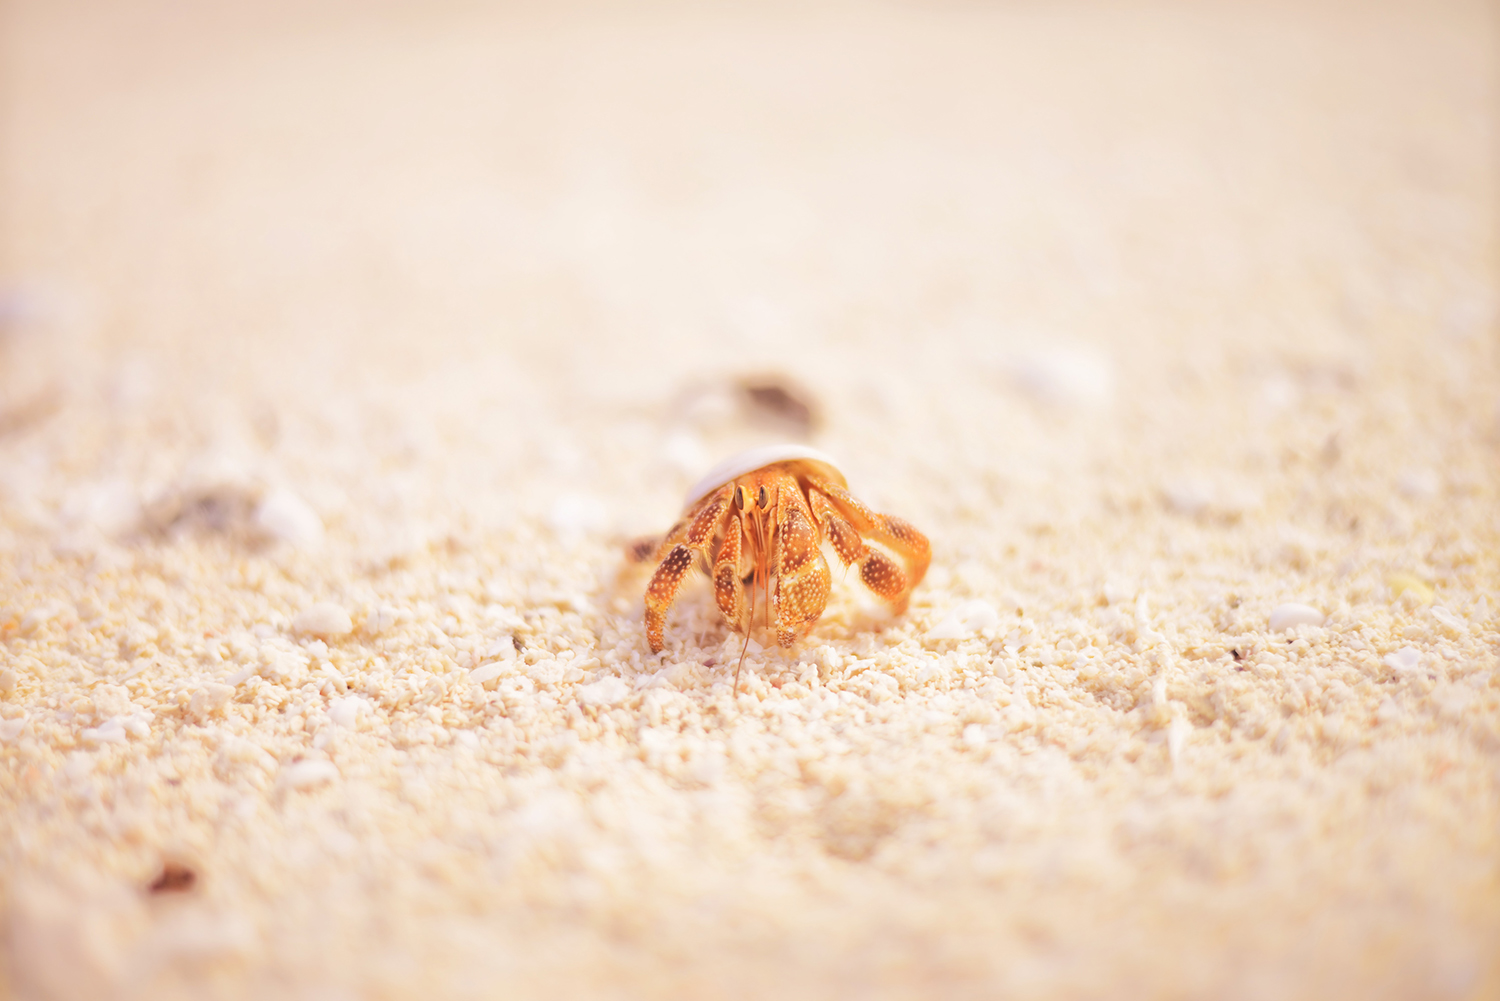
Personal Projects – Arranging your schedule, finding suitable clients and progressing with opportunities that fuel your creativity can also allow you time to focus on personal projects. You can attempt to blend personal projects with client work and pitch relevant brands that may connect well with your idea, or, separate your ‘work’ and personal photography projects to ensure you still have a creative outlet that doesn’t feel pressured in any way.
Working as a freelance travel photographer isn’t as far fetched an idea as it may feel if you’re currently only thinking about it as a dream lifestyle. It can be hard, there can be quiet months but the reward of experiences, a flexible lifestyle and the potential to work with an array of inspiring clients, brands and destinations is worth every second of effort.
LEARN MORE WITH THE WANDERING LENS
Creative Courses + Resources for Photographers: If you’re interested in discovering your creative vision and building a portfolio with the aim of finding work as a photographer, The Wandering Lens now offers self-study courses , eBooks and Workbook Bundles. The online courses and downloadable workbooks can be accessed at any time, from anywhere in the world – it’s about creating accessible resources to help you in your photography career. The bring together over 17+years of experience and lessons from working in the industry. I want to see others share their talents and get published, sell prints, find clients – to have the confidence to achieve whatever it is you want to within the field of photography.
Want to work as a travel photographer yourself?
To learn more about becoming a travel photographer, join me for an 8-module online course called The Freelance Travel Photographer Course , where I share anything and everything you need to know to succeed in the industry, based on my 17+yrs as a professional travel photographer.

Related Articles –
How to Build a Portfolio as a Travel Photographer
The Business of Photography – Is Creative Talent Enough?
How to Creative a Photography Website and Print Store
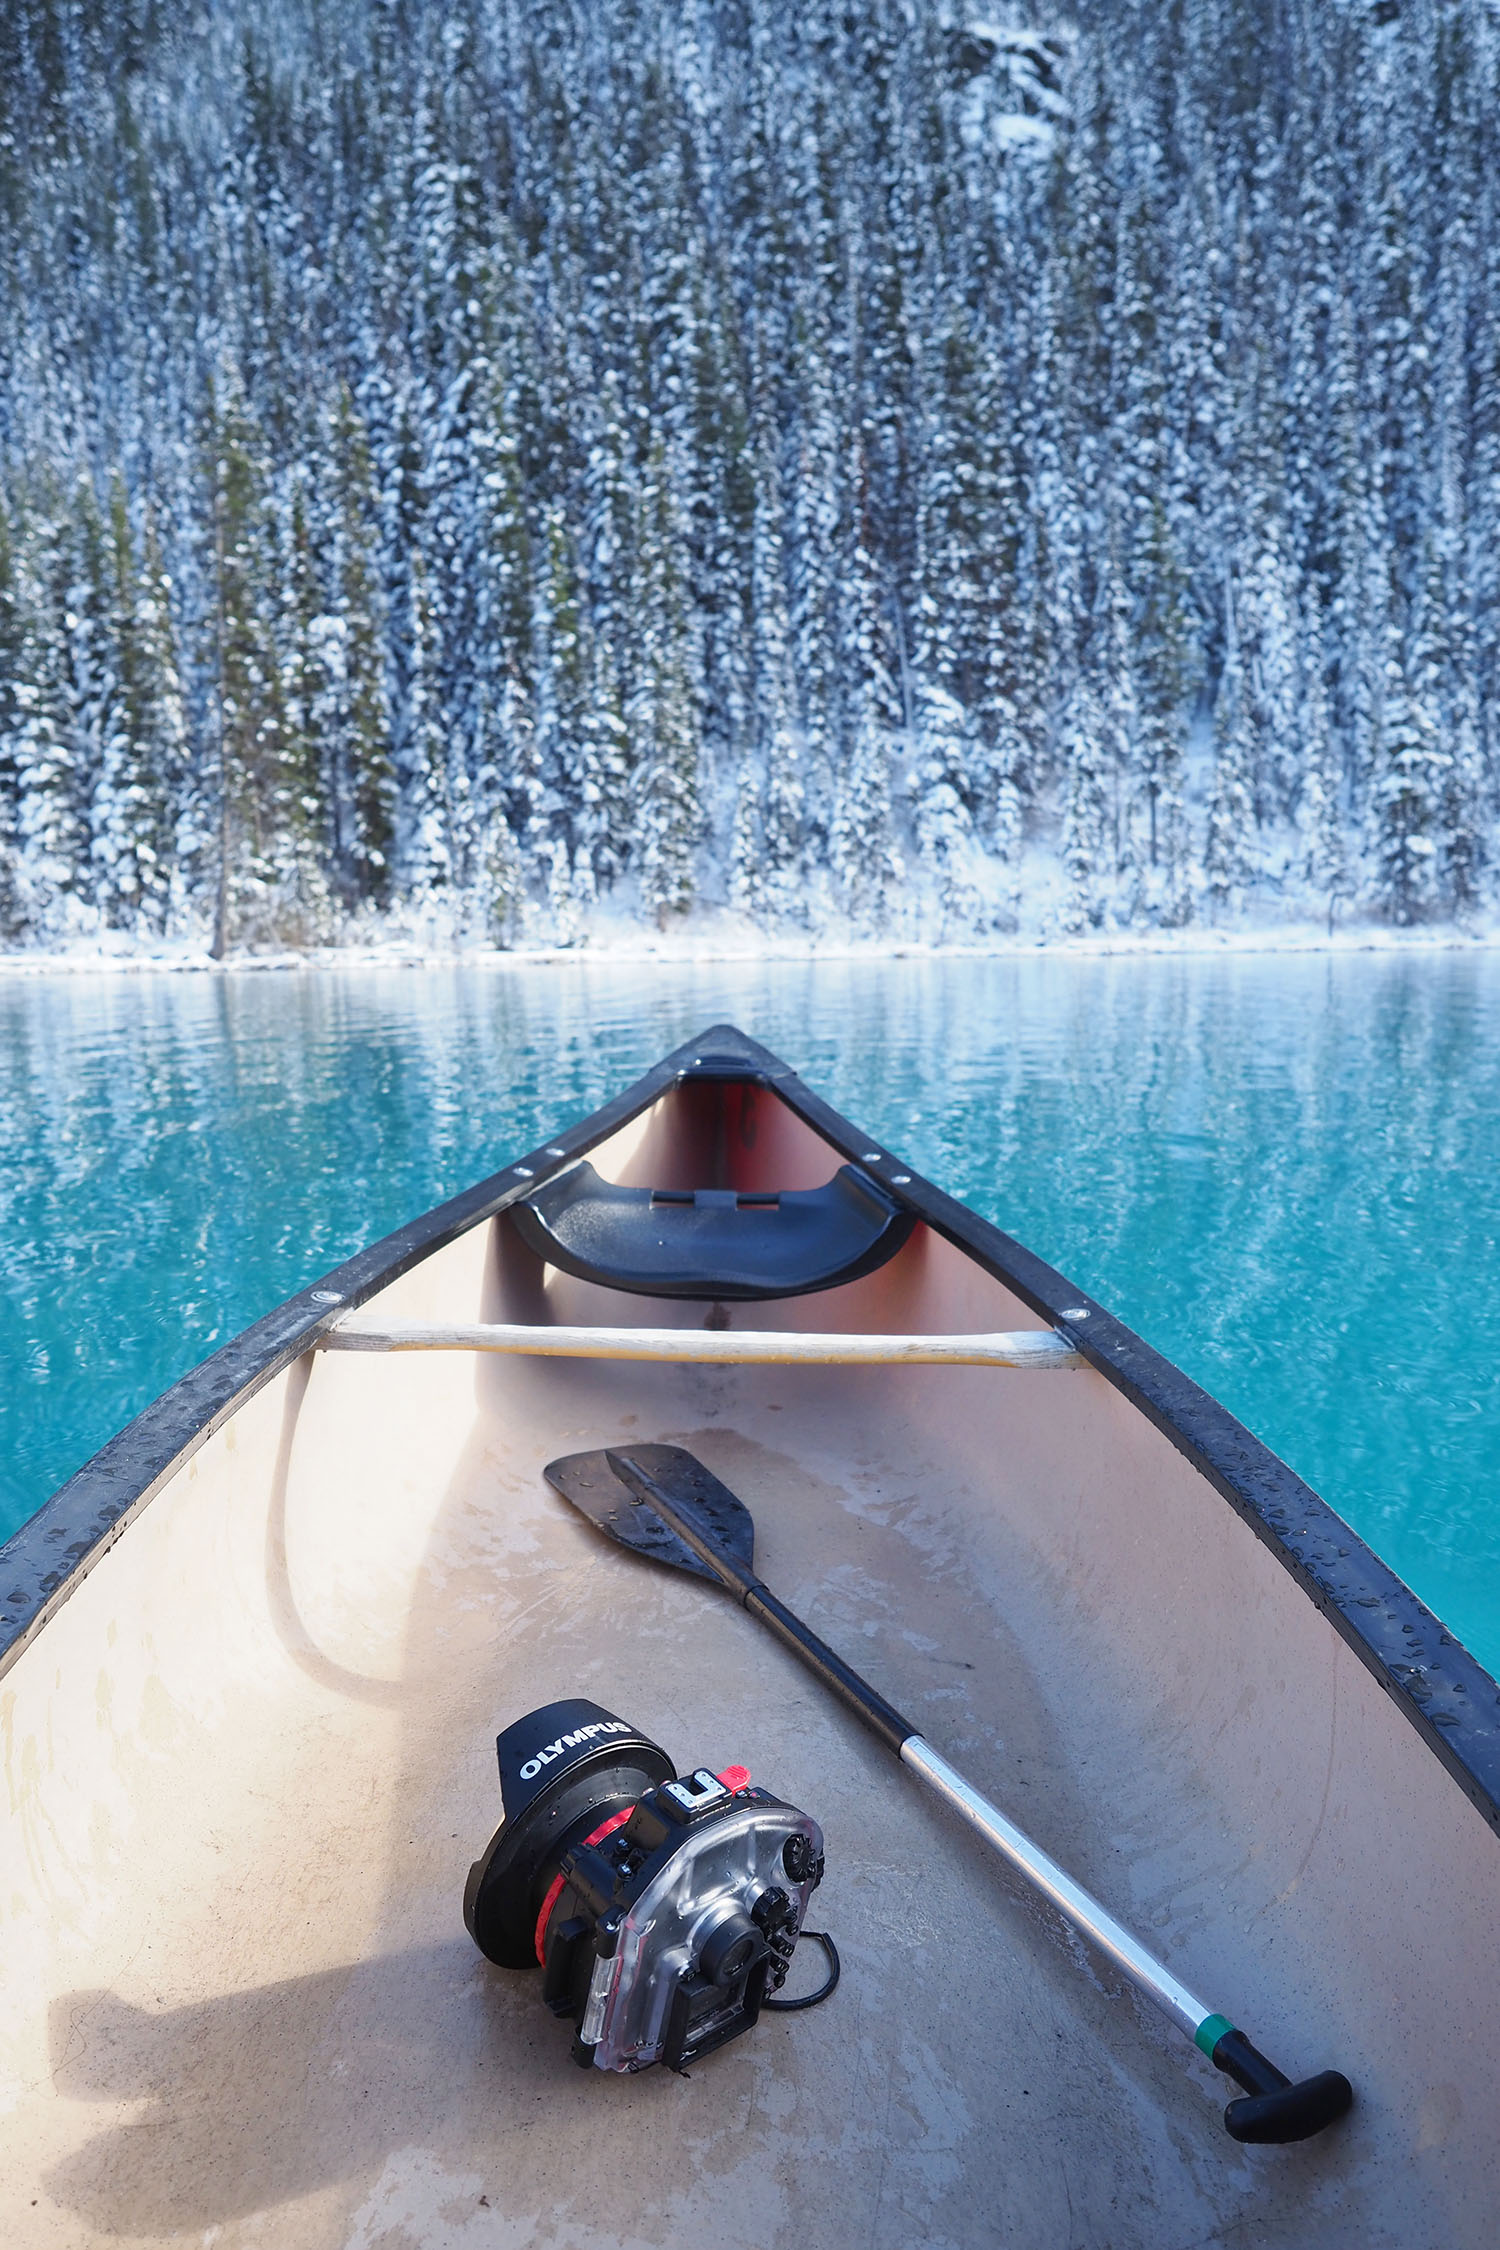
Hello! I’m the founder and photographer behind The Wandering Lens. With 17+yrs experience as a professional travel and landscape photographer, all advice found on this site is from my personal experience on the road. I hope it’s useful for your own travels and would love to hear in the comments about your trips and experiences around the world.
Enjoyed reading? Share the article!
- Leave a comment
Keep Reading...
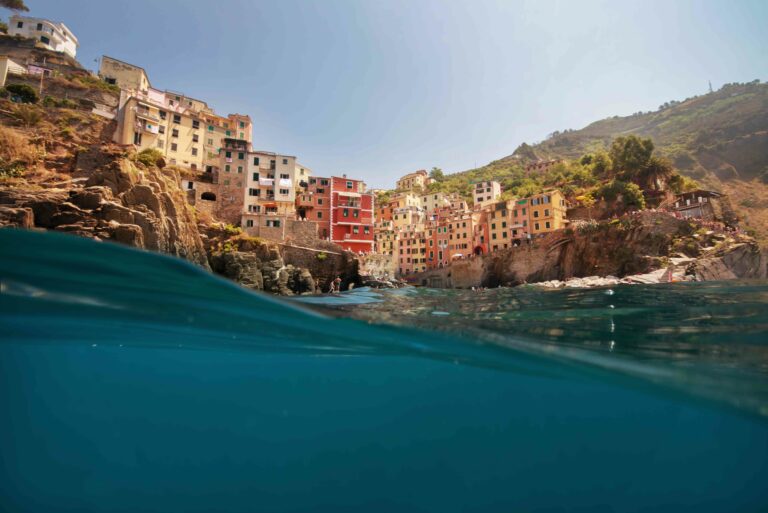
12 Travel Photography Tips from a Professional Travel Photographer
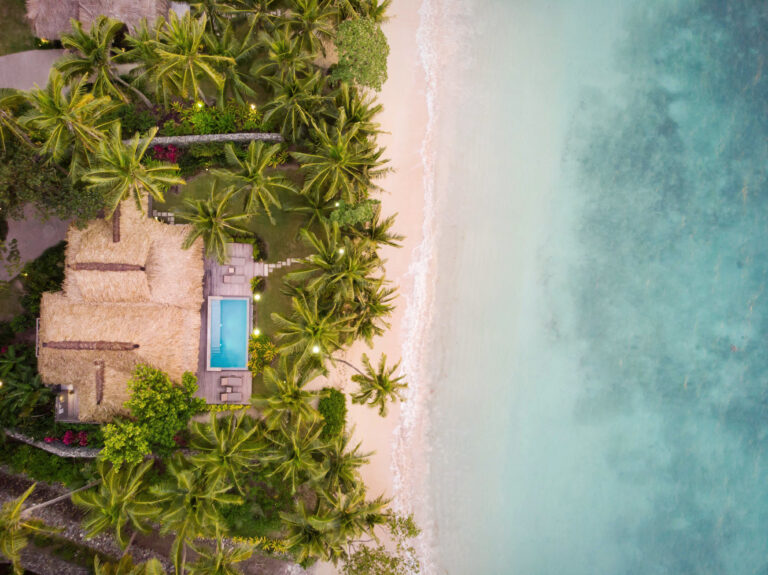
The Travel Photographer Mini Email Course
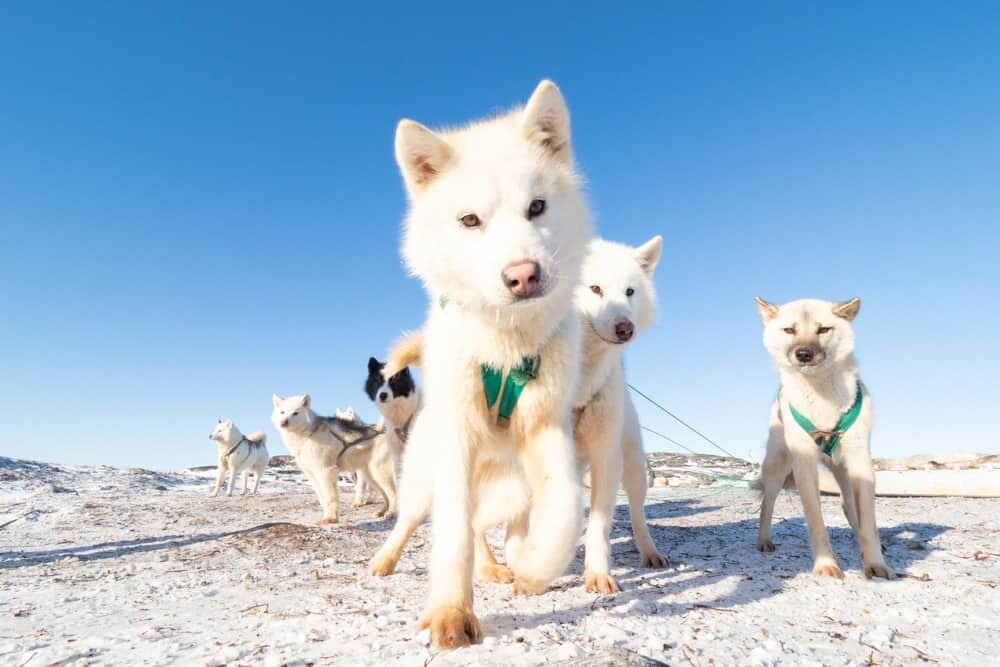
The Art of Telling Stories with Photos
Leave a comment cancel comment, looking for something….
The News Of Tomorrow, Today
Subscribe to our newsletter!
Now you can get the top stories from Gizmodo delivered to your inbox. Enter your email below.
By subscribing you agree to our Terms of Use and Privacy Policy.
By subscribing you agree to our Terms of Use and Privacy Policy.
All The Gear You Need To Get Started In Travel Photography

This article is sponsored by Ted’s Cameras.
If you’re new to travel photography, you might already be feeling overwhelmed with the amount of gear you’ll be looking at picking up just to get started. Travel photography isn’t simple. You’re travelling into environments you can’t control, meaning you have to be quick to adapt and have every scenario thought out ahead of time so you’re not left unable to take that photo you want. Or stuck with an empty battery.
Because travel photography requires a bit of gear, you’ll also need to consider how heavy your bag will become.
Here are our picks for the essentials you’ll need when getting started with travel photography that your back will thank you for later.
A travel camera
Surprise. The first thing to get started with travel photography is well, a camera. No don’t go, I have valid points to make!
If you’re starting with travel photography, the ideal camera would be lightweight, carry decent battery life and won’t take up too much space in your bag. You’ll have to consider if you want to take vlogs, landscape photos, selfies, night photography, street photography, portraits, I could go on. While there are great (and very expensive) cameras out there that specialise in some of those kinds of photography, if you’re only taking a single camera, you’ll want something versatile and easy to use.
The Canon R-series is a range of mirrorless cameras that give you excellent coverage while you’re out and about. They’re lightweight, loaded with great tech and won’t take up a huge bulk of space in your travel bag. This series of cameras is also equipped with solid tech that’ll give you great quality images thanks to the camera’s responsive autofocus and image stabilisation.
So if you’re taking photos on the go, you won’t have to worry about adjusting your camera settings to take a photo in focus, or overthink adjusting for exposure and lighting.
A reliable camera lens
If you’re setting out on a trip and want a range of great photos, you’re going to want an adaptable camera lens that’ll let you take grand landscape photos and detailed close-up shots.
Advanced photographers will normally opt for a range of different lenses for different circumstances. If you’re into night photography, you’ll need a specific telescope or thermal vision lenses to capture objects in the sky for example. But these are hyper specific niche cases, and not something to get hung up on if you’re going on a vacation and want to shoot photos for yourself.
In this circumstance, a simple zoom lens will do you just fine. For example, the Canon RF 24-70mm lens is a great all-rounder lens that’ll cover you from street photography to massive landscape shots.
If you were thinking of bringing any hunk of junk bag with you on a trip and playing Tetris with your camera gear, congratulations, you’ve just made an enemy for life.
A dedicated bag for your gear is vital for any travel photographer. Lucky for you, a camera bag is more than just a glorified single-use bag. A great camera bag will come with pouches to store chargers, batteries and memory cards in. There’ll be storage separators for you to organise your cameras and lenses in also. But most importantly, camera bags are padded to protect your gear. This means if you drop your bag, or it gets tossed around a bit while it’s in your luggage, your gear has a better chance of not breaking.
Spare batteries and memory cards
This has been drilled into every photographer it should be second nature by now. No matter what kind of shoot you’re going on, backup batteries and memory cards are a must for any photographer. However, you’ll want to consider whether you might need to pack more than you normally would while travelling and the conditions of your trip. If you’re in a colder climate or camping in nature, you may not have the luxury of charging your batteries overnight like you normally would.
As a general rule of travel as well, it’s very easy to just forget to charge your camera overnight. So having spare batteries on hand could save you should your main and backup battery fail.
The same logic here applies to memory cards. If you’re vlogging and taking plenty of videos or 4k photographs, it’s easy to end up chewing a bunch of your memory card storage without realising after a full day of shooting.
External hard drive
The first lesson any film school will teach you is that you need to have all your photos and storage saved in a secondary location. If you’re on a trip and taking a ton of photos, your memory card is more than likely going to use up all its storage fast, and you’ll need somewhere to offload it so you can keep taking photos with peace of mind.
Packing an external hard drive with you on a holiday is as important as packing a camera I’d argue. The second you’re done with any shoot, that footage should be on a solid hard drive, ready for you to import onto your computer so you can get started with editing as soon as you can.
Nothing feels worse on a shoot when you need a tripod and you don’t have one. If you’re looking to take photos on the go, a tripod isn’t the most important tool to bring with you, but it’s always such a valuable tool to have on you just in case.
Having a tripod on you for travel photography is handy to have more control over your desired photo or video.
Of course, the big hurdle to bringing a tripod on trips is that they’re huge and can be heavy. But, fortunately, there are plenty of options out there for tripods that fold nicely into your travel bag and won’t cause you too much of a headache when packing.
A monopod is a convenient option, as it’s a single leg that extends out and folds up neatly into your bag. A gorillapod is also a reliable lightweight tripod that’s a lifesaver for any solo travelling photographer.
Travel photography is a specific and expensive hobby. So before diving into it, make sure you’ve done your research to find the right kind of equipment you can find universal uses for, and that you know you’ll be able to take with you on any journey for many years to come.
The Cheapest NBN 50 Plans
It’s the most popular NBN speed in Australia for a reason. Here are the cheapest plans available.
IMAGES
VIDEO
COMMENTS
Step 7: Sell Your Travel Images in a Physical Format. You might be the kind of travel photographer who is not into the digital world. There is still a market for making money and a living from travel photography. One way to do this is to create prints of your images and sell them through specific art websites.
Pixpa is an all-in-one platform to create a travel photography portfolio website easily without any coding knowledge. Take a free trial and start building your portfolio website now. 5. Use social media to generate exposure for your work. Travel photography gets a lot of attention and response to social media.
The advantages of becoming a travel photographer are well-known. Being a travel photographer typically carries all of the perks of working freelance—setting your own schedule and working remotely make a travel photographer's lifestyle ideal for those who want flexibility. But the benefits of freelancing are just the tip of the iceberg.
Read below to find information on the following steps to starting a career as a travel photographer: - Setting Goals. - Learn Photography. - Create a Niche Style. - Build a Portfolio. - Create a Website. - Finding Clients. - Getting Published. - Build Your Social Media Presence.
Travel photography incorporates countless different styles. Travel photographers often take landscape photographs, architectural photographs, as well as street photography.It's also common to see food photography and documentary work being done by travel photographers.. As a travel photographer, your goal is to capture and express the story of a particular time and place.
Jessica Sarkodie shares a refreshing look at the unspoiled beaches of her native Ghana. Cedric Angeles flew to Mongolia for a peek inside the lives of the country's famous eagle hunters (and yes ...
Here are seven steps you can follow to help you become a travel photographer: 1. Establish goals. A helpful first step toward becoming a travel photographer is to set goals that help you create a business model you can sustain. Try asking yourself questions about why you've chosen this career and what steps you plan to take to achieve your goals.
Professional travel photographer Graeme Green gives his practical advice and insider knowledge for improving your photos and getting ahead. 1. Go the extra mile. Life as a travel photographer often means getting out of bed (if there is a bed) when it's dark and cold. I've gone out taking photos while wiped out by illness or after getting no ...
2. Scout your locations. If you can, scout your locations before shooting to get the most out of your visit, especially if you are in an unfamiliar place for the first time. If you can afford to physically location scout, arrive at your desired scene and survey the lay of the land. Take notes and even a few test shots.
As a travel photographer you're going to want to keep your bag fairly light, but at the same time have enough equipment to cover all different situations. Just like we talked about before. At the very least you need to have: ... There are some benefits to taking a course though. You won't have to spend time searching the internet and with a ...
Benefits of Travel Photography. Whether you are a travel photographer for leisure or business, travel photography provides endless benefits and opportunities that allow you to appreciate the world in a new light. The most exciting benefit of travel photography is the opportunities are endless for capturing stunning images.
A simple image, but one of my favourite travel photos. Table of Contents. General Travel Photography Tips for Beginners. 1) Know Your Camera. 2) Focus on the Golden and Blue Hours. 3) Plan Your Shots. 4) Learn About Composition. 5) Framing, Framing and More Framing. 6) Move Your Feet.
Tips for getting work as a resort photographer: Be flexible with starting dates, working hours and living conditions. Show you're a people person and can think on your feet. Demonstrate an interest or skill in photography. Research the resort/area you're applying for.
Those off-the-hip, spur-of-the-moment photographs often tell a more incredible narrative than the super-planned shots do," he says. 6. Accept uncertainty. Travel is all about unpredictability. You might stumble upon a once-in-a-lifetime shot, or you might get fogged in and rained on.
In this video, I talk about the benefits and importance of Travel Photography. Based on my personal experience, I've top advantages of being a travel photogr...
Travel photography is more than just taking nice pictures. It's about recording our life's journey and the world we live in. When we travel to busy cities, we learn to value peace and quiet. Seeing the simple lives of people in remote villages teaches us about happiness and contentment.
Award-winning travel photographers share their top tips on how to prepare, pack light and pull off a successful travel photography shoot, ... I have completely converted to the mirrorless system as there are many advantages that come with the kit. One of the biggest is the amazing autofocus systems the cameras have. I currently use the Canon ...
Travel photography is no longer for the chosen few. Many travellers have even made it their full-time job. Other than the fun bit of taking pictures, being a travel photographer comes with numerous benefits worth your time and money. You don't have to shy away from it simply because you can't afford a sophisticated camera.
I have listed a few pros and cons about my experience as a travel photographer. Pros: -The obvious pro is that you are able to see the world and document it through images. You can learn about new cultures and develop empathy for different cultures. -For some of the places in the world, being able to see how others live can humble you and make ...
As a freelance photographer, you need to start out knowing that you will get out what you put in. Effort is required to get clients, create the work for clients and keep clients happy by providing a high standard of work and always attempting to go above and beyond. The reality is, working freelance in the travel industry is a very sought-after ...
For some photographers, travel is an integral part of the job. Photographers working on catalogues, for example, may be asked to capture subjects in a wide range of domestic and international locations. ... Clients can take advantage of a photographer in a variety of different ways as well, for example by asking him to show up early to an event ...
A monopod is a convenient option, as it's a single leg that extends out and folds up neatly into your bag. A gorillapod is also a reliable lightweight tripod that's a lifesaver for any solo ...
386 likes, 94 comments - kam.digital on April 29, 2024: "why shoot in D-Log? ⌘ Shooting in D-log has big advantages over the normal colour profile. Normal colour profile has an 8bit colour depth compared to the 10bit in D-Log. Basically this means you can fine tune the colours in a 10bit video better than an 8bit with 4x more tones. D-Log captures a flat looking image/video but contains so ...