- PRO Courses Guides New Tech Help Pro Expert Videos About wikiHow Pro Upgrade Sign In
- EDIT Edit this Article
- EXPLORE Tech Help Pro About Us Random Article Quizzes Request a New Article Community Dashboard This Or That Game Popular Categories Arts and Entertainment Artwork Books Movies Computers and Electronics Computers Phone Skills Technology Hacks Health Men's Health Mental Health Women's Health Relationships Dating Love Relationship Issues Hobbies and Crafts Crafts Drawing Games Education & Communication Communication Skills Personal Development Studying Personal Care and Style Fashion Hair Care Personal Hygiene Youth Personal Care School Stuff Dating All Categories Arts and Entertainment Finance and Business Home and Garden Relationship Quizzes Cars & Other Vehicles Food and Entertaining Personal Care and Style Sports and Fitness Computers and Electronics Health Pets and Animals Travel Education & Communication Hobbies and Crafts Philosophy and Religion Work World Family Life Holidays and Traditions Relationships Youth
- Browse Articles
- Learn Something New
- Quizzes Hot
- This Or That Game New
- Train Your Brain
- Explore More
- Support wikiHow
- About wikiHow
- Log in / Sign up

How to Make a Travel Brochure
Last Updated: March 9, 2024 References
wikiHow is a “wiki,” similar to Wikipedia, which means that many of our articles are co-written by multiple authors. To create this article, 54 people, some anonymous, worked to edit and improve it over time. There are 8 references cited in this article, which can be found at the bottom of the page. This article has been viewed 593,669 times. Learn more...
A creative, expertly written and well-designed travel brochure invites readers to cast themselves into a story that takes place in an exotic locale. In this article, learn how to make an enticing travel brochure that will have your audience fantasizing about-and booking-your travel packages.
Determining the Details of Your Travel Brochure

- A professional should already know what destination they are representing, or attempting to advertise for. Use this step to get to know the key features of your location: mountains, lakes, cabins, museums, parks, etc. Write each of these key features down on a piece of paper for use later on.
- If you are a student, find an exciting place to advertise for. Some great examples are Mexico, Hawaii, Myrtle Beach South Carolina, the beaches of Florida, or Australia, to name just a few. Research the location you choose (using reputable sources such as online search engines, encyclopedias, library books, etc.) and find out key features about the location. Write each of these down on a piece of paper for use later on.
- The lists for both students and professionals should be extra long at the beginning. It is better to create a long list to start, and then cross off items later on.

- Travel around the website by yourself and write down what and where the particular amenity is.
- If you are far away from where you are advertising for, look for maps online that might help you locate particular amenities. Sites like Google Maps often point out exactly what and where each of these is.
- After you have created a detailed list of the amenities, put a star next to the items you think are most important (bathrooms generally are a top priority). Make sure to note whether these amenities provide additional accommodations, such as being handicap accessible. [1] X Research source

- Visit peoples' homes and ask them politely to give their opinion. Remember to bring a pencil and paper to write down exactly what they say. You can also bring a voice recorder if you do not write very fast.
- If the destination is strictly for vacation (non-residential) try calling people whom have vacationed there in the past. As with the previous step, write down exactly what they have to say about their experience.
- Students who do not have direct contact with persons whom live, or have vacationed there, should look online. Find internet sites that link you with local hotels, restaurants, etc. in the area of your destination. Look for reviews that have to do with the destination (Mexico, Hawaii, etc.) rather than a particular place of accommodation. Write down what they have to say. [2] X Research source

- Vacation spots with lots of bathrooms, and restaurants available are great for an older demographic audience.
- Destinations which are primarily vacation spots (non-residential) usually target a younger audience, or newlywed couples going on their honeymoon.
- Vacation spots which have hotels furnished with WiFi and cable TV are great destinations for families.
- Destinations which have large rooms are great for business workers, who are looking to conduct work from far away.
- This is not an all encompassing list, but it will give you an idea about what to look for, and how to pick the right demographic audience. Something you might think is minor (a boardwalk for example) might make all the difference in the world for a particular clientele.

- Take into account the previous four steps, and in particular the target demographic group. Set a standard price to each of the amenities, and add them all up. Set a standard price for all of the key features of the destination and add them all up. Finally, add the price of the amenities and destination hot-spots together.
- Adjust the vacation cost according to who the audience is. Younger clientele and families will most likely be looking for a cheaper vacation. Older clientele and business types will have more money to spend. Generally speaking, vacations for a family of four should run between $1000 and $2000. Go higher or lower as you see fit. How to Calculate Cost of Travel
Writing the Text of Your Travel Brochure

- First, you’ll want to create a story. Just like a good novel pulls in a reader, the client wants to feel as if they are going on an adventure. In paragraph form (full sentences), write a convincing argument for why your vacation spot is the best place to visit.
- After you have written down your argument, go back and proofread. More importantly, cross out extraneous information, keep what is critical, and add in to places that need a more exciting, or convincing argument.
- This argument can then be split apart into different sections of your brochure. You might have to tailor the sentences to exist as a stand-alone argument in the different sections, but this will give you a good head start. It is important that the writer knows exactly why each of the individual pieces are critical, and how they come together to convince the clientele.

- Your heading/title should appear in bold lettering, underlined, and be large enough to read from far away. If someone is sitting in a doctors office, or at a coffee shop, they should be able to see the title clearly, at the top of the brochure.
- Each of the subheadings/section headings should also be in bold, and underlined. They should be a slightly smaller font size than the title. They should all also all be the same font. If one subtitle is in Times New Roman, keep them all Times New Roman. This creates a nice flow to your brochure, and does not bog down the viewer in trying to comprehend the brochure.

- Write down some adjectives you know that are not typically used, such as adventurous, pulsating, mind-boggling, fanciful, breathtaking, etc. Put these words first in your title, so that the readers eyes, reading left to right, will catch that key word.
- Then, make sure to include the location in the title. If you advertising for a Hawaiian vacation, do not leave out the word Hawaii. Put the location right after the adjective.
- Following the name of the place, you can finish the title with simply "vacation" or a synonym. End the title in an exclamation point, so that it appears that the person selling the vacation is just as excited as the potential clientele.
- Bold the lettering, and underline the title. A good example is: Adventurous Mount Everest Vacation!

- You want to make the argument for this vacation clear right up front. The reader is not going to look around the rest of the brochure if they are not convinced at the very beginning.
- This would be a great time to simply list off a few of the accommodations/hot spots. For example: “An all-encompassing Hawaiian vacation that includes beautiful scenery, top-of-the-line hotels, and all the food you can eat!”.

- You will want to include, at the bare minimum, the following sections: restaurants, hotels, scenery(appearance of the vacation spot), and shops. These are four of the most basic things people need to know about before they go on the vacation. In total, you should have around six to eight sections.
- Make sure that what you are saying is necessary, succinct, and convincing. Consider what image you are using and make sure that the words match up. Feel free to highlight, italicize, or bold certain words or phrases.
- This would also be a great time to add in those accommodations, such as handicap accessible, free continental breakfast, bike/walking trails, etc.

- To include block quotes in your brochure, start by indenting. Then add a quotation mark, and write in your quote. Finish by adding another quotation mark.
- You will want to include only the most sensitive, valuable information. Do not include bad experiences, as this might turn off the clientele.
- If you want to take out a sentence in the middle of a paragraph, simply highlight and delete. Then, in between the remaining sentences, add ... (three periods in a row). This will allow you to shorten the quote, keep what is necessary, and highlight what is most important. [5] X Research source

- Include some simple terms in your 3-4 sentence price section such as: “Prices as low as $1000 for a family of four!” or, “Prices start at $1500, and include great discounts if you purchase by phone!”
- Mention the different offers/deals vacationers can get through your particular company. Usually, there are family discounts, senior discounts, children discounts, etc.
- This section should appear on the inside of the pamphlet, to the far right (at the end). You do not want to start the brochure by introducing price, nor do you want to put the price on the back of the brochure, as the clientele will probably look there first and never look inside.

- This should be done as a series of bulleted points or dashes. Do not write this information in paragraph form, as it will all run together.
- Check a second and third time that the information is up to date and correct. Look at the bottom of webpages to see when the last time the page was updated. Call the numbers you are listing on the brochure and see who picks up the phone. The information you are presenting needs to be accurate. [7] X Research source
Creating the Visuals for Your Travel Brochure

- Some good examples include: A smiling visitor hugging a dolphin at a sea life attraction, or a woman relaxing with a massage in an open-air spa that overlooks the tropical sunset.
- Make sure the photos are in color, and have a high-quality resolution. Do not use stock photos which generally look fake, and off-putting. Use real life images, or photos you have taken yourself at the location.
- People enjoy seeing others having fun, so try to include photos of people enjoying themselves at your destination rather than showing an empty hotel room or deserted beach. This will invite readers to project themselves into the photo. [8] X Research source

- To convey a relaxed feeling appropriate for a spa, use muted pastel tones. Children's destinations are best marketed with bright, bold colors. Historical site brochures can be given an "antique" feeling with sepia and earth tones.
- For each panel of the brochure, use the same color. If there are different colors for each panel, it can become distracting and gaudy.

- Use a thin border to contain each of the panels in your brochure. A thick border can become distracting. The border should be a color that is a slightly darker/lighter shade of the tone that you use for the rest of the brochure.
- If you want to highlight key points of your story, use bullet points or asterisks. Generally, 3-4 is the range you want to stay in. Try to highlight things that are not written about in the sentences.
- Designs can also help, such as stars, rainbows, arrows, etc. Add these where and when you see fit. Once more, do not overuse these, and bog down the viewer in the visuals. The clientele should want to read more, not necessarily look more.

- Tell the printing company that you want the brochures printed on high-quality paper. Cheap, flimsy paper can easily be torn, ripped, or water-damaged. Thick, coated paper provides resistance to accidents, and can be carried around mush easier.
- If you wind up needing to use your home or business printer, just make sure to use thick, heavy paper. The settings of your printer should be set to the highest pixel quality so that your pictures come out clean and crisp.

Travel Brochure Template

Community Q&A
- Instead of using computers, students should try out their own skills at creating a hand made brochure. Colored pencils, magic markers, and rulers can get the job done well. Thanks Helpful 5 Not Helpful 1
- If you are a student, make sure to follow what your teacher requires. Thanks Helpful 5 Not Helpful 1
- Do not use pictures unless they are of the actual destination. People do not want to be lied to about what vacation they are going on. This can result in problems/litigation with the travel organization, or potentially a lowered grade if you’re a student. Thanks Helpful 3 Not Helpful 1

Things You'll Need
- Heavy paper
- Printer (preferably large (business) rather than desktop)
- Colored pencils, magic markers, rulers, ball point pens, etc. (for handmade brochures)
You Might Also Like

- ↑ https://www.biggerpockets.com/renewsblog/2014/10/06/6-amenities-to-ensure-repeat-business-in-your-vacation-rental/
- ↑ https://www.entrepreneur.com/article/83752
- ↑ https://www.huffingtonpost.com/2014/07/28/font-ranking_n_5625650.html
- ↑ https://papyrus.greenville.edu/2013/05/on-the-importance-of-a-good-title/
- ↑ https://www.englishdiscourse.org/block.quotes.htm
- ↑ https://www.ustravel.org/news/press-kit/travel-facts-and-statistics
- ↑ https://www.computerhope.com/tips/tip30.htm
- ↑ https://www.business2community.com/content-marketing-tips/pictures-articles-attract-eye-balls-01109658
About This Article
To make a travel brochure, start by identifying the main attractions in the area you're advertising, such as restaurants or movie theaters. Next, decide who your target audience is by evaluating the attractions at the destination, like by aiming for a young demographic if it's a vacation spot. To start writing, choose a catchy title and engage your audience with the first sentence on the opening flap by mentioning the destination's key strong points, such as good accommodation. Then, make sure you have great visuals to break up the text, since pictures are key if you want to grab people's attention. For more tips on how to write your sections or how to choose good visuals, read on! Did this summary help you? Yes No
- Send fan mail to authors
Did this article help you?

Featured Articles

Trending Articles

Watch Articles

- Terms of Use
- Privacy Policy
- Do Not Sell or Share My Info
- Not Selling Info
wikiHow Tech Help Pro:
Develop the tech skills you need for work and life
- F.A.Q.s & Support
Family-Style Homeschooling
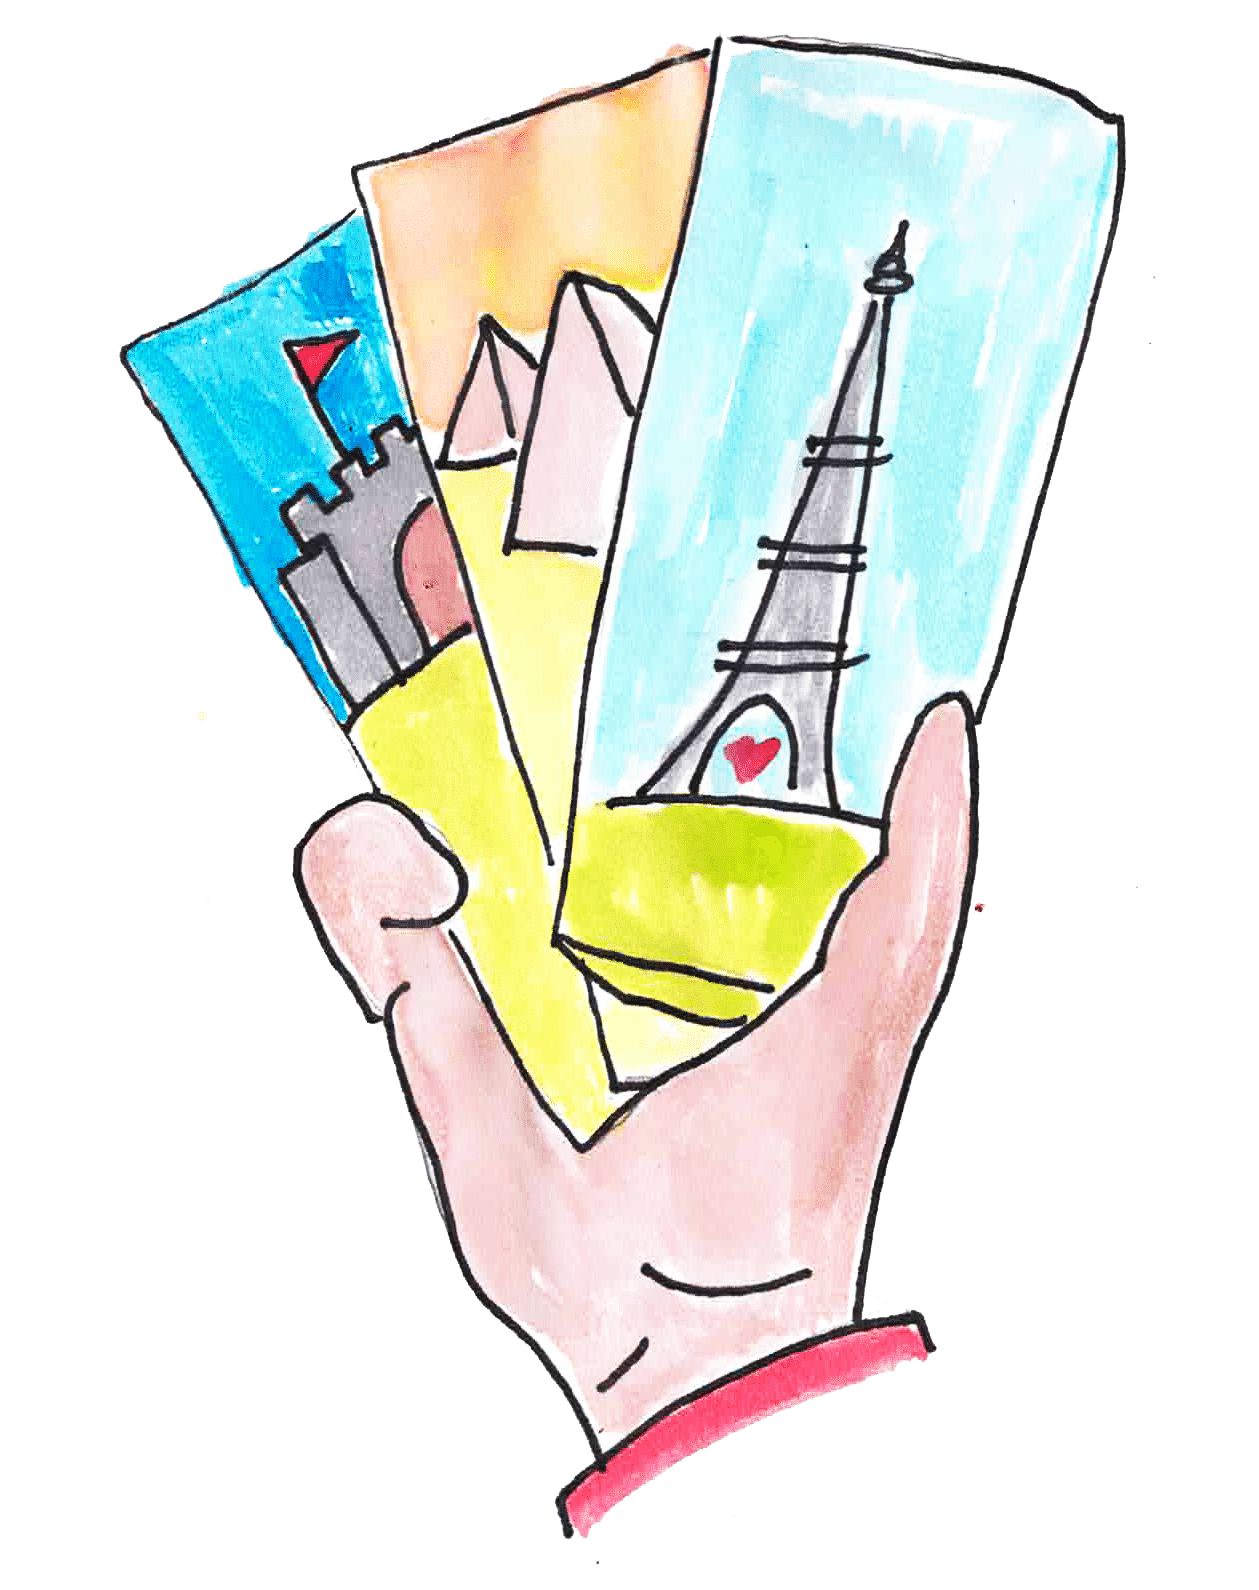
Make Your Own Travel Brochure For Any Country
This exploration is for all ages, as the colored smilies show. You can make travel brochures about all sorts of places with your whole family together!

These printable travel brochures are part of a geography exploration that is featured in several of the Layers of Learning units. The first time you are introduced is in People & Planet: Maps & Globes , the very first geography unit , but they are also used in many other geography units. Layers of Learning has hands-on experiments, explorations, and fun printables in every unit of this family-friendly curriculum. Learn more about Layers of Learning .
Travel brochures are a great way for kids to record information about beautiful places around the world. With the internet, it’s really easy to find travel information, but it’s still more fun to search it out in a library book, and it’s even more fun still to go find a travel agency. They have lots of free full-color brochures and cool insider information. And when you make your own travel brochure, you’re sure to remember all those fun facts you learn as you put them in one place.
Step 1: Library Research
Before you begin exploring, read a book or two about the place you are learning about. Atlases or geography books containing all the countries of the world are a great starting place, and you can also search for books about the specific continent, country, state, province, region, or landmark you are focusing on from your library. Here are some suggestions for books we really like. The colored smilies above each book tell you what age level they’re recommended for.
As Amazon affiliates, the recommended books and products below kick back a tiny percentage of your purchase to us. It doesn’t affect your cost and it helps us run our website. We thank you!
Geography of the World
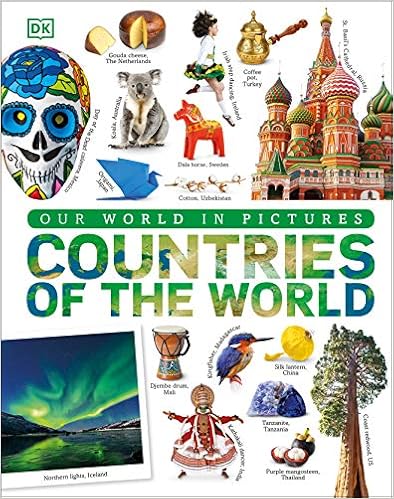
Countries of the world.
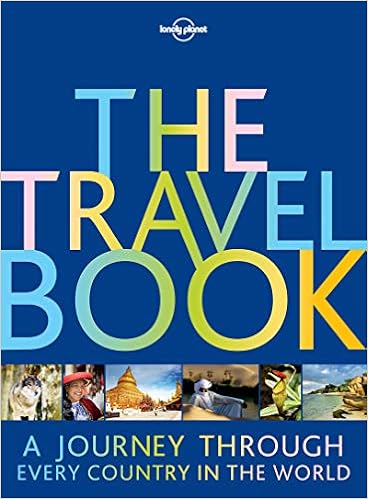
The Travel Book
by Lonely Planet
Step 2: Travel Brochure
All you need to make this is the free printable travel brochure and any art supplies you want to use. You can print pictures from online, cut some out of brochures you got from a travel agency, or draw your own.

Kids can choose a place, find out all about it, and then create their own travel brochure describing what it’s like, the fun things to do there, and why they would choose it for a destination spot. There are also blanks for drawing or cutting and gluing pictures of their vacation spot.
Step 3: Show What You Know
Everyone can show off and share their destinations and brochures with each other. You can even make a few copies of your work and distribute them to the members of your family.
Additional Layers
Additional Layers are extra activities you can do or tangents you can take off on. You will find them in the sidebars of each Layers of Learning unit . They are optional, so just choose what interests you.
Writer’s Workshop
If you want to get really creative you could even use it as a history activity. (Imagine you were a European getting ready to travel to America for the first time during its colonization. Maybe you’re a knight heading to the Holy Land for a crusade. Perhaps you’d like to visit the Egyptian pyramids during their construction phase.) Pick a time period and a place and you’ve got a history activity as well.
Additional Layer
Make a map of your destination to go along with your brochure. You can draw the map on the back side of the brochure so it is double-sided.
Video a travel commercial to accompany your brochure. Use it to convince others to travel to the destination on vacation. How convincing can you be?
Free Samples
Try family-style homeschooling now with free samples of four Layers of Learning units when you subscribe. You'll get to try family-style history, geography, science, and arts with your children.
You can unsubscribe any time.

12 thoughts on “Make Your Own Travel Brochure For Any Country”
Just used this for my 6th grade world cultures class. You rock!
I am a special ed teacher and this fits perfectly into my I Love NY unit, What else do you have that works so well in my classroom
The link on the post is working perfectly, so you can just link on the picture and it will take you right to the printable pdf. All the best, Karen
It should be in your inbox. We fixed the link too. Thanks!
Hello , I love the printable and would like for you to send me the Lind to the newspaper link and the brochure. I teach 5th grade and I can use them . Thanks soooo much!!!!
Kimberly, You can get the printable by clicking on the text link or by clicking on the image of the printable. Here is the direct link to this printable brochure: https://layers-of-learning.com/wp-content/uploads/2017/08/Travel-Brochure-Printable.pdf
Check your inbox!
just found this and cant wait to use it tomorrow for my World History class!! It is going to be a travel brochure for wither Sparta or Athens!
Sounds cool! Glad we could help. And thanks for being an awesome teacher.
The paper you made was awesome! I don’t really know what to do in the explaining part below the travel brochure to ____ ( picture ) then the lines. Would you please explain?
You just draw pictures of some place in the world and then write interesting things about it. The blank lines can be filled with anything you like. The purpose is to get your kids researching and excited about places around the world while practicing researching and writing skills.
Leave a Comment Cancel Reply
Your email address will not be published. Required fields are marked *
This site uses Akismet to reduce spam. Learn how your comment data is processed .
How to Make a Travel Brochure for a School Project
A homemade brochure can be an excellent showcase for students who want to exercise their artistic, writing and research skills. It is also a relatively easy project that can be made using materials found in most homes, or via almost any kind of graphic design software.
Things You'll Need
Old magazines/newspapers
Letter size sheet of paper (8.5 inches by 11 inches)
Black ink pen
Felt-tip pens
Step 1: Layout
The standard format for a brochure uses a letter sheet (standard printing size) folded twice, so it is divided into three equal parts. When folded this way it is the perfect size for fitting into a business envelope. A letter size sheet is 8.5 by 11 inches, so you can mark the folds at the 3.7 inch and 7.3 inch measurements along the long side of the paper. Once it is folded you can see that there are six panels for you to fill, three on the front and three on the back of the sheet. Use a pencil to mark your template so you know where each panel is when the sheet is unfolded. For example, you can write "front cover" on the front panel, "inside left," "inside center" and so forth.
Advertisement
Video of the Day
Step 2: Research
The purpose of a brochure is to sell something or to inform, whether that is an idea, a product or a destination. For a travel brochure you will want to research the destination carefully and thoroughly. Investigate the major attractions and think about why someone might want to visit there. You will also want to find beautiful and relevant pictures to fill your panels. Look in travel magazines for inspiration and for pictures to cut out and use. If you find some ideal pictures in a book, you can photocopy or trace them for use in your brochure.
Step 3: Writing
Your language should be simple yet persuasive. If you are completing an assignment, make sure you include all the information required. Then you can plan out what else you need.
- Your cover panel should have a simple title in large writing. You might also want to add a catchphrase.
- The panel that folds inside the brochure should have your "big picture" information, outlining the basics of the destination and why someone should go there.
- The three inside panels can either be used as a single big panel or divided up with separate information. For example, if you are presenting trip packages, this is where you will outline each option.
- The back of the brochure (the center back panel) can be used for more detailed information, such as directions, prices or regulations. This is also a great place for statistics, such as how many people visit each year, average temperatures, peak travel times, etc.
Step 4: Pictures
Your pictures should be bold and crisp, without too much detail. They need to be easy to understand on a small, crowded surface as well as interesting and clear at a glance. Choose pictures that are relevant to whatever you are promoting in the brochure. You can cut pictures from old newspapers and magazines, photocopy them from books or print them from the Internet. Tracing or freehand drawing can also be very effective, particularly if you have odd spaces to fill in your brochure.
Try to pick photos that will not clash with each other. They also need to be relatively different. Don't just use six pictures of the beach. Add pictures with people enjoying different activities.
Step 5: Finishing Touches
It can be tempting to let the pictures overwhelm the text, but you need both to find balance for a good brochure. It is best to keep the text in small chunks, with dark lettering on a bright background. You might want to write out your text roughly and cut it out in small boxes so you can determine the right positioning on your brochure.
- Use your template to shift around your pictures and the blocks of text until you are happy with the result.
- Mark the positions of all your images and text blocks on the template.
- Use a fresh sheet of paper to make the final brochure. If you must mark it, use your pencil very lightly and erase the marks afterward.
- Carefully paste your pictures in place and use a black ink pen to write the text.
If you are worried about your handwriting, you can write your text on a separate sheet and then cut and paste it into place. Another option is to type your words on a computer and print them as a block of text. Use the margin settings on your word processing software to manage the width of your text blocks.
Step 6: Computer-Designed Brochure
If you are using a computer, it can still be very helpful to have a physical template in front of you. This makes it easier to visualize how the final brochure will look and where everything should fit. You can make a brochure in any graphics design program and most word processing programs, including Microsoft Word .
- When starting a new file, choose an A4 or letter size template and set it to landscape.
- You will probably have to make two files, one for the front of your sheet and one for the back.
- You can either print them double-sided on a single sheet or put the sheet through twice to be printed on both sides.
If you don't have a color printer, you can design your brochure on your computer with the text in place and leave spaces for the pictures. After you print, you can cut relevant pictures from magazines and paste them into place.
Report an Issue
Screenshot loading...
Find the images you need to make standout work. If it’s in your head, it’s on our site.
- Images home
- Curated collections
- AI image generator
- Offset images
- Backgrounds/Textures
- Business/Finance
- Sports/Recreation
- Animals/Wildlife
- Beauty/Fashion
- Celebrities
- Food and Drink
- Illustrations/Clip-Art
- Miscellaneous
- Parks/Outdoor
- Buildings/Landmarks
- Healthcare/Medical
- Signs/Symbols
- Transportation
- All categories
- Editorial video
- Shutterstock Select
- Shutterstock Elements
- Health Care
- PremiumBeat
- Templates Home
- Instagram all
- Highlight covers
- Facebook all
- Carousel ads
- Cover photos
- Event covers
- Youtube all
- Channel Art
- Etsy big banner
- Etsy mini banner
- Etsy shop icon
- Pinterest all
- Pinterest pins
- Twitter all
- Twitter Banner
- Infographics
- Zoom backgrounds
- Announcements
- Certificates
- Gift Certificates
- Real Estate Flyer
- Travel Brochures
- Anniversary
- Baby Shower
- Mother’s Day
- Thanksgiving
- All Invitations
- Party invitations
- Wedding invitations
- Book Covers
- Editorial home
- Entertainment
- About Creative Flow
- Create editor
- Content calendar
- Photo editor
- Background remover
- Collage maker
- Resize image
- Color palettes
- Color palette generator
- Image converter
- Contributors
- PremiumBeat blog
- Invitations
- Design Inspiration
- Design Resources
- Design Elements & Principles
- Contributor Support
- Marketing Assets
- Cards and Invitations
- Social Media Designs
- Print Projects
- Organizational Tools
- Case Studies
- Platform Solutions
- Generative AI
- Computer Vision
- Free Downloads
- Create Fund

6 Beautiful Travel Brochure Examples for Students
If you compare the first brochure ever made to the brochures of today, the differences may surprise you. The earliest brochures were black and white with no photos. The purpose was purely informational. Today, visual elements and overall design play a much bigger role, especially when you’re creating a brochure as part of an educational goal.
In this blog post, we’ll give you travel brochure examples for students. Keep reading to empower yourself to create something others can use as inspiration when exploring new destinations.
Before You Start: 3 Elements Your Brochure Needs
Planning is an important first step for travel and the same is true for creating brochures. Here’s a look at what every good brochure needs.
1. Research the Destination
It’s important to do your homework before you travel. There are many ways to do this, and what you choose will depend on how close you are to the destination and what you may already know about it.
If you’re close enough to the destination to visit yourself, take the time to travel there. This will give you firsthand experience and insight that can add a unique perspective to your brochure design.
When traveling to the destination doesn’t make sense, start your research online instead. You can use official government websites, tourism blogs, or even social media to get a sense of what’s special about the location.
Ask Family and Friends
You can also get tips from people who live in or have traveled to the destination. Understanding what the must-see or must-do attractions are will give you the right information to include on brochure panels.
2. Get Images
Next, you’ll need images for your design. There are two options you can choose from to get the best possible results.
Pick Up Your Camera
If you’re able to visit the destination yourself, brush up on photography tips before you go, so you can take your own pictures .
This way, your brochure will be differentiated from any others and grab people’s attention.
Purchase Stock Images
Don’t have access to images of your own? Buy images from a stock image site to use in your project. Just make sure you understand the license terms and limitations before you decide to use an image.
3. Select a Template
At this point, you’ll have everything you need to start putting your brochure together. Choosing a brochure template is the best way to ensure you can create a visually appealing asset, even if you don’t have any design experience.
Look for something that’s easy to add your information to and edit with an online design . In just a few clicks with an online editor , you can put a brochure together that you can print and share to show what you learned.
Not sure where to start with your brochure design? You don’t have to come up with something or struggle to put it together on your own.
Instead, use these ideas to help you get the ball rolling on your own creation.
1. Handmade Brochure

Handmade brochures are nice for projects you want to feel extra special. Start with a simple, blank page with multiple sections.
Then you can write or draw on the details you want to include to give the final product a personal touch.
2. Digital Brochure

Digital brochures are handy for showcasing your work because they’re easy to update and share on social media.
You can customize them with interactive links, videos, and other multimedia content that would be difficult (or impossible) to include in a print brochure.
3. City Brochures

Describe why people would want to visit a city and what they can do there. You might include some historical facts about the area, as well as some interesting places or activities you think tourists might enjoy experiencing.
This may include talking about areas such as shopping districts, dining options , recreation areas, and more, depending on what kinds of things are available throughout the different seasons.
4. State Brochures

Use state brochures to promote tourism in a state , and teach others about its culture and history . If you’re creating a brochure about your own state, it can also help you learn more about where you’re from.
You’ll want to think about what makes a particular area truly special, and list any key facts visitors should know about—like the climate they should pack for.
5. Country Brochures

What would you say about a country if you had to sum it up in just a few words? The answer to that question will help you come up with the concept for a country brochure.
There’s only room for the highlights here, so be selective about the points and the imagery you choose to include.
6. Landmark Brochures

Landmarks may be easy to identify but we often don’t know much more about them. They’re just an icon we can picture in our minds.
Use a brochure as an opportunity to expand someone’s knowledge and turn the landmark into not just a sight worth seeing, but a destination to travel to.
Now, it’s your turn to create your own brochure design. Use these travel brochure examples for students to create an asset that will help you learn about different cultures and places in our world.
License this cover image via Ardea-studio .
Recently viewed
Related Posts

10 Creative & Inspiring Earth Day Poster Ideas
Celebrate our planet and encourage others to conserve and protect with these 10 Earth Day poster ideas. Customize any design for free!

How to Design Podcast Cover Art
Your podcast’s visual identity is just as important as its content. Try seven tips to make your podcast covers stand out from the crowd.

How We Show It: Authentic Sustainable Imagery
Sustainability has an image problem. Here’s how we can start thinking about the big picture and get people motivated for change.

The Ultimate Guide to Creating a Website Color Scheme (Plus 20 FREE Color Palettes)
Unleash the power of color psychology with this complete guide…
© 2023 Shutterstock Inc. All rights reserved.
- Terms of use
- License agreement
- Privacy policy
- Social media guidelines

- Share on Facebook
- Tweet This Resource
- Pin This Resource

Travel Brochure Project
This travel brochure project activity also includes:.
- Join to access all included materials
Designing a travel brochure is a classic project that will help your class members develop a variety of skills, such as researching informational texts, designing creative visual products, and communicating what you have learned.
Additional Tags
Instructional ideas.
- Host a travel expo at the conclusion of the project whereby class members can set up their brochures around the room and explore those of their classmates
Classroom Considerations
- May need to offer substantial time in class with computers in order to accommodate those who do not have access at home
- Consider designing or offering a sample brochure for learners to use as an example
- Bulleted explanations for how to design brochure using Microsoft Word or Publisher
- Cannot download and edit document
Common Core
Start your free trial.
Save time and discover engaging curriculum for your classroom. Reviewed and rated by trusted, credentialed teachers.
- Collection Types
- Activities & Projects
- Assessments
- Graphics & Images
- Handouts & References
- Interactives
- Lab Resources
- Learning Games
- Lesson Plans
- Presentations
- Primary Sources
- Printables & Templates
- Professional Documents
- Study Guides
- Instructional Videos
- Performance Tasks
- Graphic Organizers
- Writing Prompts
- Constructed Response Items
- AP Test Preps
- Lesson Planet Articles
- Online Courses
- Interactive Whiteboards
- Home Letters
- Unknown Types
- Stock Footages
- All Resource Types
See similar resources:
Wwii project outline, travel scrapbook/blog, designing a hiking trail, cereal box project, women and the manhattan project, state or region project, project based learning, ancient roman travel brochure, lesson: unmonumental: final projects, the power of a project.
Travel Brochures: Highlighting the Setting of a Story

- Resources & Preparation
- Instructional Plan
- Related Resources
Imagine the images and detailed descriptions of the places depicted in a book you've read recently—whether a far-away land, a historical location, or a city just like the one you live in. Settings transport readers to these places, inviting them to consider what it would be like to visit these locations personally. This lesson plan takes that imaginary tourism one step further by asking students to create a travel brochure for locations in texts that they have read. The activity requires students to think about and collect the details mentioned in the text that should be highlighted and conduct additional research on the location as they design their own brochures. This lesson plan uses Al Capone Does My Shirts by Gennifer Choldenko as the example; however, any text in any genre would work well.
Featured Resources
Travel Brochure Rubric : Use this rubric to evaluate the organization, ideas, conventions, and graphics of travel brochures students have created. Recording the Setting Bookmark : Students use this reproducible sheet, which can be cut into bookmarks, to record details about a story's setting as the read. Printing Press : Use this online tool to create a newspaper, brochure, booklet, or flyer. Students choose a layout, add content, and then print out their work.
From Theory to Practice
Often, students end a unit of study by writing a traditional research paper. While this is a good way for students to summarize what they have learned, it may not be the most interesting. Beyond that, it frequently results in summary and rote repetition rather than deep critical thinking. In this lesson plan, students go through the research process, but will take that information and turn it into a travel brochure. In her English Journal article, Janet Northrup says, "Unlike a research paper that usually has two readers, the teacher and the student, a pamphlet encourages ownership of a topic, a topic which each student knows will be shared with (and taught to) others. Also, class members develop research skills. They learn how to find information, develop a sense of voice and audience, write an arguable thesis statement, select relevant facts, create an interesting layout, and edit carefully." This project will meet the needs of both students and the teacher. Further Reading
Common Core Standards
This resource has been aligned to the Common Core State Standards for states in which they have been adopted. If a state does not appear in the drop-down, CCSS alignments are forthcoming.
State Standards
This lesson has been aligned to standards in the following states. If a state does not appear in the drop-down, standard alignments are not currently available for that state.
NCTE/IRA National Standards for the English Language Arts
- 3. Students apply a wide range of strategies to comprehend, interpret, evaluate, and appreciate texts. They draw on their prior experience, their interactions with other readers and writers, their knowledge of word meaning and of other texts, their word identification strategies, and their understanding of textual features (e.g., sound-letter correspondence, sentence structure, context, graphics).
- 4. Students adjust their use of spoken, written, and visual language (e.g., conventions, style, vocabulary) to communicate effectively with a variety of audiences and for different purposes.
- 5. Students employ a wide range of strategies as they write and use different writing process elements appropriately to communicate with different audiences for a variety of purposes.
- 6. Students apply knowledge of language structure, language conventions (e.g., spelling and punctuation), media techniques, figurative language, and genre to create, critique, and discuss print and nonprint texts.
- 7. Students conduct research on issues and interests by generating ideas and questions, and by posing problems. They gather, evaluate, and synthesize data from a variety of sources (e.g., print and nonprint texts, artifacts, people) to communicate their discoveries in ways that suit their purpose and audience.
- 8. Students use a variety of technological and information resources (e.g., libraries, databases, computer networks, video) to gather and synthesize information and to create and communicate knowledge.
- 11. Students participate as knowledgeable, reflective, creative, and critical members of a variety of literacy communities.
- 12. Students use spoken, written, and visual language to accomplish their own purposes (e.g., for learning, enjoyment, persuasion, and the exchange of information).
Materials and Technology
- An assortment of travel brochures
- Various reference materials, print and online
- Things to Include in a Travel Brochure
- Travel Brochure Rubric
- Recording the Setting Bookmark
- Example Brochure Bookmark
- Example Research Notes
- Example Setting Brochure
- Persuasion Map Planning Sheet
Note that the National Geographic Website does have ads.
Preparation
- Collect travel brochures from travel agents, your local chamber of commerce or convention and visitors bureau, and other sources.
- Make appropriate copies of the handouts for students: Things to Include in a Travel Brochure handout, Example Research Notes , Travel Brochure Rubric , Recording the Setting Bookmark .
- Have a copy of the Example Bookmark , Example Research Notes , and Example Setting Brochure to share with the students.
- Test the Printing Press on your computers to familiarize yourself with the tools and ensure that you have the Flash plug-in installed. You can download the plug-in from the technical support page.
Student Objectives
Students will
- learn what makes a good travel brochure by examining commercial brochures.
- think critically about text details from a text they have read.
- create a travel brochure that incorporates research skills and text details.
Session One
- Where did they go?
- How did their families decide to go to these places?
- What kinds of brochures, travel guides, books, and/or advertisements did their families explore before traveling?
- If students have experience with travel guides and travel brochures, invite them to share what they remember about them.
- Explain that the class is going to create travel brochure about one of the texts that students have read, focusing primarily on the setting of the story.
- Display a variety of travel brochures. Provide time for students to look through the brochures, in groups, pairs or individually. Ask them to pay attention to layout, the highlighted features, illustrations, and the style of the included text.
- Are there maps? photos? diagrams? other illustrations?
- What kind of language and vocabulary is used?
- How is text presented? paragraphs? bulleted lists?
- Are there specific places highlighted? What kind?
- Ask the students if they would like to visit any of the places in the brochures. If the students answer affirmatively, ask them to share what in the brochures made them want to visit. If students answer negatively, ask them to share why they would not like to visit that locale.
- Have students brainstorm what make an effective travel brochure. Record their responses on the board or on chart paper. Some answers may be the pictures, the supporting text, the quotes from visitors, and so forth.
- Explain that while the pictures and photos are added bonuses on travel brochures, the text plays an important role in persuading people to visit a certain place.
- Review persuasive writing with students: In a persuasive writing piece, students begin by determining their goal or thesis. They then identify three reasons to support their argument, and three facts or examples to validate each reason. The Persuasion Map Planning Sheet makes a good visual for the students.
- Brainstorm the kinds of information students need to include in their travel brochure. Record this information on the board. You can also refer to the Things to Include in a Travel Brochure handout.
- Show the students the Travel Brochure Rubric so they know the requirements for the project.
- Once students know the expectations for the assignment, ask them to choose a text for their brochures. Try not to have too many students using the same text. This lesson plan uses Al Capone Does My Shirts by Gennifer Choldenko as the example.
Session Two
- When all of the students have selected a text for the project, invite them to revisit the text to look for examples and passages about the setting.
- Demonstrate how to use the Recording the Setting Bookmark to note the examples from the text. Display the example bookmark and discuss the details that are included.
- Pass out copies of the Recording the Setting Bookmark for students to use.
- Give students the rest of the session to collect details from their books.
- As students examine their texts for examples, circulate through the room. This is a good time to take observational notes or ask students questions as they are working.
Session Three
- Once students have found examples from their text about the setting, explain that it’s time for them to conduct research on the setting using the Internet, reference materials, magazines, newspapers, etc. Students can visit Notes from the Road and Travel & Cultures for information on many areas of the world. If the students are using a Science Fiction or Fantasy text, they may have a more difficult time with the research. In that case, they should rely more on their findings in the text.
- Invite students to record their research findings on the Things to Include in a Travel Brochure handout. Share with them the example research notes .
- As students are researching, help as needed.
- Briefly demonstrate the Printing Press for students. Show the students how they can use the tool to create their finished product. Place students’ emphasis on thinking about the content for the brochures and flyers, as the Printing Press will make the process of making the final product a simpler one.
- You can also share with the students an example setting brochure of a book that the class has read so they can see what they can include in their own brochures.
Session Four
- After students have gathered clues from their texts as well as completed research on their setting, they are ready to begin working on creating their travel brochures, highlighting the setting of a text using the Printing Press .
- Assist students as needed.
- Remind students that they cannot save their work on the Printing Press so they will need to work diligently on their project.
Session Five
- Once all of the students have completed their brochures using the Printing Press , allow time for the students to share their brochures with the rest of the class.
- Assess the students work using the rubric .
- Instead of making a travel brochure about their setting, students could design a postcard highlighting one of the locations mentioned in their text. Students can publish this postcard using the Postcard Creator .
- Pairing the brochures with the text they accompany would make a good classroom or library display.
Student Assessment / Reflections
- For formal assessment, use the rubric . Additionally, you can ask students to freewrite on the following reflective question: After completing this activity, what role do you think the setting plays in a text? Will you pay more attention to the setting now that you have completed this activity?
- Informal assessment can come from observations, interviews, and examination of the students' bookmarks and notes.
- Lesson Plans
- Calendar Activities
- Student Interactives
- Professional Library
Students read a section from On the Road that deals with cross-country travel and reflects Kerouac's unique writing style. Students then attempt to write a narrative using Kerouac's stream-of-consciousness style.
The interactive Printing Press is designed to assist students in creating newspapers, brochures, and flyers.
Add new comment
- Print this resource
Explore Resources by Grade
- Kindergarten K
Pine Knoll Lodge & Cabins
- Popular places
Travel Brochure Examples For School Project
A travel brochure is a type of advertising piece that encourages people to visit a particular location. Brochures are often distributed by tourism boards, hotels, airlines and other travel-related businesses.
If you’re creating a travel brochure for a school project, there are a few things to keep in mind. First, think about your audience. Who are you trying to attract? Second, what is your tone of voice? Are you trying to be funny, serious or informative?
Once you have those things figured out, it’s time to start designing. Your brochure should include a map of the area you’re promoting, as well as photos and descriptions of the attractions. You can also include testimonials from people who have visited the area.
If you’re having trouble getting started, there are a few travel brochure examples to help you get inspired.
- 1 How do you make a good travel brochure for a school project?
- 2 What do you write in a travel brochure?
- 3 How do you write a school brochure?
- 4 How do you make a travel brochure for a school project online?
- 5 How do I design a brochure?
- 6 How can I write a brochure?
- 7 What is the best travel brochure?
How do you make a good travel brochure for a school project?
Creating a good travel brochure for a school project is not as difficult as it may seem. With a little planning and some creative design work, you can create a brochure that will impress your teacher and classmates.
Your first step is to decide on a theme for your brochure. Do you want to focus on a particular country or region? Maybe you would like to highlight a specific type of travel, like adventure or eco-tourism. Once you have a theme in mind, you can start thinking about the content of your brochure.
Your brochure should include a brief introduction to your chosen destination, as well as some facts and figures about the area. You’ll also want to include a selection of photos or illustrations to help illustrate your points.
If you are focusing on a specific type of travel, be sure to highlight the unique attractions that make that type of travel so appealing. For example, if you’re creating a brochure about eco-tourism, you might want to include a section about the local flora and fauna, or the various hiking trails in the area.
Your final step is to design your brochure. This is where you can really let your creative juices flow! Be sure to use an attractive layout and choose fonts and colors that reflect the feel of your destination.
When you’re finished, you’ll have a beautiful and informative travel brochure that will make your classmates green with envy!
What do you write in a travel brochure?
When it comes to writing a travel brochure, there are a few key things to keep in mind. Tone of voice is important – you want to sound excited and enthusiastic about the destination, without sounding too sales-y. You should also focus on highlighting the best aspects of the destination, and make sure to include plenty of images to help illustrate your points.
When it comes to the content of your travel brochure, it’s important to cover all the basics. Introduce the destination, explain why it’s a great place to visit, and highlight some of the highlights that visitors can expect. You’ll also want to provide some practical information, such as travel tips, visa requirements, and climate information.
Ultimately, the goal of a travel brochure is to convince potential visitors to book a trip to your destination. By highlighting the best aspects of the destination and using an enthusiastic tone of voice, you can create a brochure that will convince people to visit your town or city.
How do you write a school brochure?
When it comes to writing a school brochure, there are a few key things to keep in mind:
1. Keep it Informative
The purpose of a school brochure is to provide potential students and their parents with information about your school. Make sure to include details about your curriculum, extracurricular activities, and campus life.
2. Use a Friendly Tone
The tone of your brochure should be friendly and inviting. You want potential students to feel excited about the prospect of attending your school.
3. Be Concise
You don’t want your brochure to be too long or it will lose its audience’s attention. Try to keep it to a few key points that will interest potential students.
4. Use Eye-Catching Graphics
A well-designed brochure will grab people’s attention and make them want to read more. Make sure to use eye-catching graphics and fonts to create a visually appealing document.
When it comes to writing a school brochure, these are the key things to keep in mind. By following these tips, you can create a brochure that will impress potential students and their parents.
How do you make a travel brochure for a school project online?
Making a travel brochure for a school project can seem daunting, but it’s easier than you think. With the right tools and a bit of creativity, you can produce a professional-looking brochure that will impress your classmates and teacher.
The first step is to gather information about your destination. This includes facts about the climate, culture, and history. You’ll also need to find images of the area to include in your brochure. If you don’t have any images, consider using stock photos or free clip art.
Once you have your information, it’s time to start designing your brochure. There are a number of software programs that you can use for this, such as Adobe InDesign, Photoshop, or Illustrator. If you’re not familiar with these programs, don’t worry – there are a number of online tutorials that can teach you how to use them.
The most important thing to remember when designing your brochure is to keep it simple. Use clean, easy-to-read fonts, and stick to a consistent layout throughout the brochure. Be sure to use headings and subheadings to break up the text, and use bullets and lists to make it easier to read.
When you’re finished, save your brochure as a PDF file. This will ensure that it looks the same on all devices. You can then upload it to your school’s website or shared drive, or print it out for presentation.
How do I design a brochure?
When it comes to brochure design, there are a few things you need to keep in mind in order to create an effective marketing piece. Below are some tips on how to design a brochure that will get your message across to your target audience.
1. Start with a well-designed layout
Your brochure layout should be well-organized and easy to read. Make sure to use a clear and consistent typeface throughout the piece, and choose a layout that is both visually appealing and easy to navigate.
2. Keep it simple
When it comes to brochure design, less is often more. Try to keep your text and images to a minimum, and focus on highlighting the most important information.
3. Use high-quality images
Images are an important part of brochure design, and it’s important to use high-quality images that will capture the attention of your audience.
4. Use eye-catching typography
Typeface can play a major role in the overall look and feel of your brochure. Choose a typeface that is both easy to read and visually appealing.
5. Make it relevant to your target audience
It’s important to design your brochure with your target audience in mind. Make sure to include information that is relevant and interesting to them, and that will appeal to their interests.
6. Use a clear and concise call to action
Your call to action should be clear and easy to understand. Make sure to include a call to action that tells your audience what you want them to do, and make it easy for them to follow through.
How can I write a brochure?
When it comes to brochures, there are a few things you need to know in order to create an effective and persuasive piece. In this article, we will discuss some tips on how to write a brochure that will get your audience’s attention and help you sell your product or service.
The most important thing to remember when creating a brochure is to keep it simple. Your audience is likely to be busy and won’t have time to read a long and winding document. Make sure your points are clear and easy to understand, and use bullet points to list your key points.
Another key element of a successful brochure is the use of images. Graphics and photos can help to break up the text and make the brochure more visually appealing. Make sure the images you choose are relevant to your topic and help to illustrate your points.
When it comes to the design of your brochure, keep in mind that less is more. Try to avoid using too many fonts or colours, as this can be confusing and distracting. Choose a simple and professional design that will make your brochure look polished and professional.
Finally, be sure to proofread your brochure carefully before printing. Typos and mistakes can be very distracting and can make your brochure look unprofessional.
By following these tips, you can create an effective and persuasive brochure that will help you sell your product or service.
What is the best travel brochure?
There is no definitive answer to this question, as the best travel brochure for one person might not be the best for another. However, there are a few things to keep in mind when looking for a travel brochure that is right for you.
One of the most important things to consider is the type of traveler you are. If you are looking for an adventure, a brochure that focuses on outdoor activities and ecotourism may be a good fit. If you are more interested in relaxation and luxury, a brochure that specializes in luxury resorts and spa treatments may be a better option.
Another factor to consider is the location or destinations you are interested in. If you are looking for a brochure that covers a specific region or country, make sure to research the options and find a brochure that is tailored to your interests.
Finally, consider the style and layout of the brochure. Some people prefer a more traditional, print-based brochure, while others prefer a digital format that can be easily accessed and viewed on a mobile device.
The best travel brochure for you will likely be one that is tailored to your specific interests and needs. Do your research, and ask around for recommendations to find the brochure that is right for you.
Related Posts
Travel and leisure nicaragua, sg tourism voucher online.
Ancient Civilizations - Travel Brochure Project

What educators are saying
Also included in.
Description
Once your students have done their research, have them apply their knowledge with these travel brochures that take you back to the Ancient Civilization of their choice. Ancient Rome, Ancient Egypt, Ancient Greece, and Ancient China are the focus civilizations in this pack. There is also a set of generic forms in case your class also focuses on a different ancient civilization.
Included in this pack:
Ancient Civilizations Travel Brochures for each civilization below
Ancient China
Ancient Rome
Ancient Egypt
Ancient Greece
Generic version
In interactive digital format as well as PDF format
Are you looking for a more detailed and complete research project? Look no further than this Ancient Civilizations Guided Research Project. You can also find more research project topics HERE.
Do your students need help citing their resources?
Do your students need editing practice? This freebie will give them an entire week of editing practice!
Questions & Answers
Learning lab.
- We're hiring
- Help & FAQ
- Privacy policy
- Student privacy
- Terms of service
- Tell us what you think
IMAGES
VIDEO
COMMENTS
How to make a travel brochure on Assam class 10 Subscribe for more videos.....
Open Microsoft Word on your laptop or desktop computer. Select File → New. Type "brochure" in the Search All Templates box and hit Enter. Choose a brochure style you like and click Create to open the template as a new Word document with pre-loaded text boxes and visuals.
1. Choose the destination of your potential clients. If you are a professional working for a travel company, your destination of choice will be the one you work for. If you are a student, and are creating a pretend travel brochure, you will want to pick out a desirable, exotic, and interesting location. A professional should already know what ...
Step 2: Travel Brochure. All you need to make this is the free printable travel brochure and any art supplies you want to use. You can print pictures from online, cut some out of brochures you got from a travel agency, or draw your own. This free printable travel brochure can be used for any country, state, province, region, city, or landmark ...
COVER PANEL. The overall objective of the project is for students to create a historical travel brochure that entices others to visit a time and place in history. The cover panel should reflect this objective. Students will need to: Add a brochure title. Draw (or insert) a cover picture. Write one sentence that encourages people to visit the ...
The standard format for a brochure uses a letter sheet (standard printing size) folded twice, so it is divided into three equal parts. When folded this way it is the perfect size for fitting into a business envelope. A letter size sheet is 8.5 by 11 inches, so you can mark the folds at the 3.7 inch and 7.3 inch measurements along the long side of the paper.
1. Handmade Brochure. View this image via Vladislav Lyutov. Handmade brochures are nice for projects you want to feel extra special. Start with a simple, blank page with multiple sections. Then you can write or draw on the details you want to include to give the final product a personal touch. 2.
Common Core. This Travel Brochure Project Activity is suitable for 6th - 10th Grade. Designing a travel brochure is a classic project that will help your class members develop a variety of skills, such as researching informational texts, designing creative visual products, and communicating what you have learned.
Travel Brochure Rubric: Use this rubric to evaluate the organization, ideas, conventions, and graphics of travel brochures students have created. Recording the Setting Bookmark: Students use this reproducible sheet, which can be cut into bookmarks, to record details about a story's setting as the read. Printing Press: Use this online tool to create a newspaper, brochure, booklet, or flyer.
Resource Description: This free project resource is a great way to introduce research and self-directed project-based learning activities. Students study one hypothetical travel destination and create a brochure to persuade travelers to visit that destination. Note: The PDF is not editable. Check out these free learning activities relevant to ...
The purpose of a school brochure is to provide potential students and their parents with information about your school. Make sure to include details about your curriculum, extracurricular activities, and campus life. 2. Use a Friendly Tone. The tone of your brochure should be friendly and inviting.
#class10cbse #brochuredesigning #brochuremaking #project #englishproject #travelbrochure #coorg #karnataka #trifoldbrochure#tourism
Create a short movie that summarizes your trip. Produce it as if it were a promotion for your school or homeschool. Or produce it as a campaign that encourages parents, educators, and students to embrace travel as a learning tool. 30. Documentary: Students make mini-documentaries on their travel experience.
Welcome back guys🙂 I hope all are good and happy.. Today I come with one more new interesting. I hope you like it . This is a travel brochure on Goa... ...
To Set Up Tri-Fold Brochure Using MS Word: Click on "File". Go down to "Page Set up". Go over to the "Paper Size tab". In the "Orientation" box, switch to "Landscape". Go back to the "Margins" tab and change the margins to: Top and bottom margins to .5. Left and right margins to .3.
495 templates. Create a blank Travel Brochure. Green Simple Creative Travel Trifold Brochure. Brochure by Marissa Abao's Images. Blue World City Tour Trifold Brochure. Brochure by Formatika Studio. Navy Blue and Beige Nature Travel Trifold Brochure. Brochure by Canva Creative Studio.
Students will create a travel brochure for one of these countries using the templates provided, or for more advanced students, they can use a blank template and create a travel brochure for any Spanish-speaking country in the world. Students will fill in the blanks with the words provided in the word banks and decorate and color.
Editable Travel Brochure. Use this two-sided Travel Brochure Template as a versatile way for students to demonstrate their research and learning about specific places such as cities, states, countries, or biomes. Parts of the brochure include a cover page with space for illustrating, and headings for drawing and/or writing about the location ...
Hi everyone in this video I'm showing you how to make a travel brochure for school project.My topic is Meghalaya, so I am making this project Travel brochure...
To Set Up Tri-Fold Brochure Using MS Word: Click on "File". Go down to "Page Set up". Go over to the "Paper Size tab". In the "Orientation" box, switch to "Landscape". Go back to the "Margins" tab and change the margins to: Top and bottom margins to .5. Left and right margins to .3.
I'm showing you how to make a travel brochure for school project.My topic is Arunachal Pradesh.In this video I'm going to show you some ideas so that you can...
Description. Once your students have done their research, have them apply their knowledge with these travel brochures that take you back to the Ancient Civilization of their choice. Ancient Rome, Ancient Egypt, Ancient Greece, and Ancient China are the focus civilizations in this pack. There is also a set of generic forms in case your class ...
Pages: 1 - 6. Coorg LOCATION Midway between Mysore and the coastal town of Mangalore sits a piece of heaven that must have drifted from the kingdom of god. Coorg or Kodagu, the smallest district of Karnataka, is home to evergreen rainforests, spices and coffee plantations. Evergreen rainforests cover thirty per cent of this district.