- Travel Photography and Videography

Mastering Cinematic Travel Videography: 15 Tips to Create Stunning Travel Videos
- 10 minute read
- August 8, 2023
Welcome to the captivating realm of cinematic travel videography, where each frame transforms into a window to the world’s most breathtaking destinations. Whether you’re an aspiring filmmaker or an adventurous traveler with a camera in hand, this comprehensive guide is your passport to creating mesmerizing travel videos that capture the essence of your journeys.
In this digital era, travel videos have become more than mere documentation – they’re immersive experiences that transport viewers across continents, cultures, and emotions. From the warm embrace of the golden hour to the dynamic movement of camera shots, each element plays a pivotal role in painting an evocative tapestry of your adventures. Embark on this journey with us as we delve into the intricacies of planning narratives, harnessing natural light, and mastering camera techniques.
In the pages ahead, we’ll uncover the art of composition that transforms mundane scenes into cinematic masterpieces. We’ll explore the symphony of colors and sounds that breathe life into your videos, adding depth and emotion to every frame. Whether you’re capturing the vivacity of bustling markets or the serene tranquility of hidden landscapes, we’ll guide you through each step to ensure your travel videos resonate with audiences around the world.
- Choosing Amazing Places
The choice of locations forms the foundation of your cinematic travel videos. Look for places that are visually striking and narratively intriguing. These are the places that will engage your audience and make your videos stand out.
- Stunning Views: Seek destinations with awe-inspiring landscapes, architecture, and natural beauty.
- Narrative Richness: Opt for locations with historical, cultural, or personal significance. Places that tell stories on their own.
- Planning Your Story
Creating a cinematic travel video is more than just capturing beautiful visuals; it’s about telling a compelling story. Think of your video as a journey with a beginning, middle, and end. To craft a captivating narrative:
- Structured Approach: Plan your video’s storyline like a roadmap. Outline the sequence of events and shots you want to include. This provides a clear direction for your filming and editing process.
- Emotional Arc: Consider the emotional journey you want your viewers to experience. Will your video evoke excitement, nostalgia, or introspection? Map out how emotions will evolve throughout the video.
- Key Moments: Identify pivotal moments that resonate with your overall story. Whether it’s a breathtaking view, a local interaction, or a cultural experience, these moments will be the pillars of your video’s narrative.
3. Planning Your Story
Crafting a compelling narrative is at the heart of cinematic travel videography. Your travel video is more than a collection of scenes; it’s a story that should engage your audience from start to finish. Here’s how to plan your story effectively:
- Structured Approach: Treat your video like a story with a beginning, middle, and end. Create a storyboard that outlines the sequence of shots and scenes you want to include.
- Emotional Arc: Consider the emotions you want to evoke in your viewers. Think about how you can build up emotions throughout your video to create a captivating journey.
- Key Moments: Identify the highlights of your travel that are essential to your story. These moments should capture the essence of your experience and contribute to the overall narrative.
- Using Natural Light
Natural light is a cinematographer’s best friend, and it can make your travel videos truly cinematic. Here’s how to harness the power of natural light for stunning visuals:
- Golden Hour and Blue Hour: These are the periods just after sunrise and before sunset when the quality of light is magical. The golden hour bathes scenes in warm, soft light, while the blue hour adds a serene, ethereal ambiance.
- Setting the Mood: Use the specific qualities of light during these hours to match the mood of your scenes. Golden hour light can evoke warmth and intimacy, while blue hour light can create a dreamy and contemplative atmosphere.
- Camera Skills Made Simple
Creating cinematic travel videos doesn’t require you to be a professional filmmaker. Here’s how to master camera skills that add cinematic flair to your footage:
Basic Movements: Begin by practicing fundamental camera movements that can instantly enhance the quality of your shots:
- Panning: Slowly move your camera horizontally from one side to another. This is great for capturing sweeping landscapes or revealing scenes.
- Tilting: Rotate your camera vertically, moving it up or down. Tilting is useful for emphasizing tall structures or capturing dramatic skies.
- Tracking: Follow a subject’s movement by moving your camera smoothly alongside it. Tracking shots add dynamism and immersion to your videos.
Stabilizers: Achieving steady shots is essential for a professional look, especially while on the move:
- Gimbals: Invest in a handheld gimbal or stabilizer. These devices counteract any shaky movements, resulting in smooth and cinematic footage.
- Steady Hands: If you’re shooting without a stabilizer, practice holding your camera steadily and walking smoothly to avoid jerky motions.
- Making Pictures Look Great
Composition is a powerful tool for creating visually captivating shots. Mastering composition techniques can significantly enhance the cinematic quality of your travel videos:
Rule of Thirds: Utilize the rule of thirds to create balanced and visually engaging compositions:
- Imagine your frame divided into a 3×3 grid with two horizontal lines and two vertical lines.
- Place your subject or important elements along these lines or at their intersections.
- This technique adds visual interest and guides the viewer’s eyes to key elements in the frame.
Leading Lines: Incorporate leading lines to draw the viewer’s gaze and create depth:
- Look for natural or architectural lines within your scene, like roads, rivers, or fences.
- These lines guide the viewer’s eyes into the frame, adding a sense of movement and perspective.
Foreground and Background: Play with foreground and background elements to add depth:
- Place objects or elements in the foreground to frame your main subject and create layers within the shot.
- This technique adds dimension and makes your shots more visually engaging.
- Colors That Feel Right
Colors have a profound impact on the emotional tone of your videos. Understanding color psychology and applying color grading techniques can elevate your cinematic travel videos:
Color Psychology: Different colors evoke specific emotions and moods:
- Warm Colors (Red, Orange, Yellow): Convey energy, warmth, and excitement. Use them for vibrant scenes and moments of action.
- Cool Colors (Blue, Green, Purple): Evoke calmness, serenity, and reflection. They are well-suited for tranquil and contemplative scenes.
Color Grading: During the editing process, use color grading tools to achieve a cohesive and cinematic color palette:
- Adjust colors to match the mood of each scene. Enhance warm tones for joyful moments and cool tones for introspective scenes.
- Consistent color grading unifies the visual style of your video, making it feel like a cohesive cinematic experience.
8. Getting Extra Shots
Capturing the details adds depth and authenticity to your cinematic travel videos. Consider these techniques to create a richer visual experience:
Texture and Close-ups: Zoom in on textures, patterns, and small details that define the essence of a place:
- Capture close-up shots of textured walls, vibrant textiles, local crafts, and unique architectural features.
- These shots offer a tactile and immersive perspective, allowing viewers to appreciate the finer aspects of your surroundings.
Contextual Shots: Incorporate scenes that provide context to your location and convey a sense of local life:
- Film scenes of bustling markets, people going about their daily routines, or street vendors interacting with customers.
- Contextual shots establish the setting, culture, and atmosphere, making your video more immersive and engaging.
9. Sounds That Capture Moments
Sound plays a crucial role in creating a multisensory cinematic experience. Here’s how to use sound to enhance the immersion of your travel videos:
Ambient Sounds: Capture the sounds that define each location, bringing your audience closer to the environment:
- Record ambient sounds like the chirping of birds, the rustling of leaves, the chatter of a crowded square, or the waves crashing on the shore.
- These sounds transport viewers to the scene, making them feel as if they are right there with you.
Music Selection: Choose music that complements the mood of your video and enhances its emotional impact:
- Select tracks that resonate with the overall tone of your video, whether it’s uplifting, reflective, or adventurous.
- The right music creates a powerful synergy with the visuals, amplifying the emotions you want to convey.
10. Making Scenes Flow
Seamless transitions are essential for maintaining the rhythm and coherence of your cinematic travel video. Here’s how to ensure smooth transitions between scenes:
Transition Techniques: Experiment with various transition effects to keep the viewer engaged and create a natural progression:
- Cut: An instantaneous switch from one scene to another. Use cuts for quick shifts in time or location.
- Fade: A gradual transition where one scene fades out as the next fades in. Fades create a soft and subtle change.
- Dissolve: Both scenes overlap briefly, creating a smooth transition. Dissolves work well for sequences that flow seamlessly.
Logical Progression: Ensure that your transitions make sense within the context of your story and maintain a logical flow:
- Transitions should connect scenes that share thematic, visual, or narrative elements, ensuring a smooth and coherent viewing experience.
11. Slow and Fast Moments
Adding variations in time can infuse your cinematic travel videos with a captivating dynamic. Here’s how to master slow-motion and time-lapse techniques:
Slow Motion: Utilize slow-motion shots to highlight details and evoke emotions in your travel videos:
- Slow-motion footage emphasizes specific actions, expressions, or movements, making them more impactful.
- Use slow motion for sequences like a splash of water, a smile, or a sunrise, creating a sense of wonder and appreciation.
Time-Lapse: Create time-lapse sequences to showcase changes over time and capture the essence of a location:
- Record scenes at a slower frame rate than usual and then play them back at normal speed. This compresses time and captures transformations like shifting clouds, changing light, or bustling crowds.
- Time-lapses reveal the passage of time in a visually compelling way, adding depth to your narrative.
12. Focus on Close and Far
Mastering the focus of your shots adds a cinematic touch by directing the viewer’s attention. Here’s how to play with focus effectively:
Depth of Field: Control depth of field to draw attention to specific elements and create visual interest:
- Use a wide aperture (small f-number) to achieve a shallow depth of field. This blurs the background while keeping your subject sharp and prominent.
- Shallow depth of field isolates your subject, making it stand out from the surroundings and adding an artistic dimension to your shots.
Visual Hierarchy: Guide the viewer’s gaze by using focus to establish visual hierarchy:
- Place your main subject in sharp focus while allowing the background or other elements to remain slightly blurred.
- This technique directs attention where you want it, enhancing the narrative impact of your shots.
13. Moving Camera Tricks
Incorporating camera movement can bring energy and dynamism to your cinematic travel videos. Here’s how to use moving camera techniques effectively:
Walking Shots: Add movement to your shots by filming while walking, creating a sense of exploration and immersion:
- Walking shots allow you to capture scenes from a traveler’s perspective, making viewers feel as if they’re part of the journey.
- Use walking shots to introduce a location, showcase surroundings, or provide context to your narrative.
Stabilizers: Implement stabilizers or gimbals for smooth camera movement, even when you’re on the move:
- Stabilizers counteract unwanted vibrations and shakes, ensuring your shots remain steady and professional-looking.
- Smooth camera movement enhances the cinematic quality of your videos and adds a polished touch.
14. Editing Like a Pro
The editing process is where your cinematic travel video truly comes to life. Here’s how to refine your footage into a coherent and compelling story:
Story Flow: Organize your shots in a logical sequence that follows the narrative arc of your video:
- Start with an attention-grabbing opening that sets the tone and hooks viewers’ interest.
- Arrange shots in a way that maintains a smooth and engaging flow, leading viewers through the journey of your travel experience.
Color Correction: Enhance the visual consistency of your shots by applying color correction:
- Adjust color balance, exposure, and contrast to create a uniform look across different scenes.
- Color correction ensures that your video maintains a professional and polished appearance.
Color Grading: Use color grading to establish a specific cinematic atmosphere that suits your video’s mood:
- Apply color grading presets or make manual adjustments to achieve the desired color palette.
- Color grading enhances the overall visual impact of your video and contributes to its cinematic feel.
15. Telling an Exciting Tale
Bringing all elements together, you’re ready to craft a compelling travel narrative that captivates your audience:
Strong Beginning: Begin with a powerful opening shot or sequence that grabs viewers’ attention and sets the tone for the rest of the video:
- Hook your audience with an intriguing visual or a captivating moment that sparks curiosity.
Effective Storytelling: Use your planned shots to create a coherent and emotionally engaging journey:
- Introduce key moments, showcase unique experiences, and convey the essence of each location you visited.
- Build a narrative arc that keeps viewers invested in the unfolding story.
Memorable Conclusion: Wrap up your video with impact, leaving a lasting impression on your audience:
- End with a shot that encapsulates the essence of your journey or delivers a powerful message.
- The conclusion should resonate with viewers and reinforce the cinematic quality of your travel video.
Conclusion .
As you venture into the realm of cinematic travel videography, remember that this journey encompasses both your creative vision and technical expertise. While the process may appear intricate, every step you take contributes to the creation of videos that transport your viewers to the heart of your travels. Embrace patience as you experiment, learn, and refine your skills, understanding that achieving cinematic quality requires time and dedication.
Dive into the realm of experimentation by exploring different angles and perspectives. Seize the opportunity to capture genuine emotions that define your journey—a breathtaking vista, a heartwarming interaction, or a peaceful moment of reflection. Each destination carries its own unique story, so strive to narrate its distinctiveness and charm through your lens.
Striking a balance between mastering cinematic techniques and embracing the authenticity of your adventure is paramount. Allow the technical aspects to enhance your story without overshadowing the essence of your travel experiences. Embrace a stance of continuous learning, staying attuned to new equipment, software, and trends to ensure your videos remain fresh and engaging.
How much did you like Our detailed Mastering Cinematic Travel Videography: 15 Tips to Create Stunning Travel Videos ? Review Also, please share these Blogs with your friends on social media.
Related Article –
- Road Trips Ideas | 12 Tips to Prepare Your Car for a Long Road Trip?
- 150 Best Places to Visit in the United States In 2023
- Road Trip With Kids
- How to Stay Awake While Driving Long Distances
- Audiobooks to Listen to On Your Road Trip
- How to Create an Epic Itinerary Road Trip
- Best Rental Cars For Travel Adventures
Cinematic Travel Videography FAQs
what equipment do i need to create cinematic travel videos.
To get started, you’ll need a camera (preferably a DSLR or mirrorless camera), a variety of lenses, a stabilizer or gimbal for smooth shots, a tripod for stability, and a quality microphone for capturing clear audio. Additionally, investing in video editing software will be essential for post-production.
How do I choose the right music for my travel video?
Selecting the right music is crucial for setting the mood of your video. Look for music that complements the emotions and pace of your scenes. There are various royalty-free music libraries available online, offering a wide range of genres and styles to suit different atmospheres.
What’s the best way to capture audio while filming on location?
Using an external microphone, such as a shotgun microphone or a lavalier mic, can significantly improve audio quality. These mics can be attached to your camera or the subject you’re filming to capture clear and crisp sound even in noisy environments.
How can I effectively tell a story in my travel video?
Crafting a compelling narrative involves planning your shots to create a beginning, middle, and end. Identify key moments that encapsulate the essence of your journey and structure your video around them. Introduce your destination, share experiences, and conclude with a memorable closing shot.
How do I achieve the cinematic look during editing?
Color correction and grading play a vital role in achieving a cinematic look. Adjust the colors to enhance the mood of each scene and create a consistent visual palette. You can also experiment with adding a slight filmic grain or adjusting contrast to emulate the cinematic feel.
What are some common mistakes to avoid in cinematic travel videography?
Avoid excessive camera movement, overuse of transitions, and shaky footage. Additionally, be mindful of overediting or using too many effects that may distract from the story. Always prioritize the narrative and viewer engagement.
Can I shoot cinematic travel videos with a smartphone?
Yes , smartphones equipped with good camera capabilities can be used to create cinematic travel videos. However, using additional smartphone-compatible accessories like stabilizers, external microphones, and lenses can enhance the quality of your footage.
How can I make my videos stand out from others?
Inject your personal style and unique perspective into your videos. Look for creative angles, experiment with different techniques, and add your own creative touches to your shots. This will help your videos stand out and resonate with your audience.
How long should my cinematic travel video be?
The ideal length of your video depends on the platform you’re uploading it to and the attention span of your audience. Aim for a duration that keeps viewers engaged and tells a compelling story without feeling rushed. Generally, keeping it between 3 to 5 minutes is a good guideline.
How can I improve my videography skills over time?
Continuous learning and practice are key. Study the work of experienced videographers, take online courses, experiment with different techniques, and gather feedback from peers. As you gain experience, your skills will naturally evolve and improve.

Meet David Hoper, a passionate travel Blog writer with 7+ years of experience in travel content. Through his exemplary storytelling and engaging narratives, he shares his experiences and brings destinations to life. With a keen eye for detail and a love for exploration, he has cultivated a diverse portfolio of travel blogs that inspire and inform readers worldwide.
In this article:

Post written by: David Hoper
Leave a reply.
Your email address will not be published. Required fields are marked *
Save my name, email, and website in this browser for the next time I comment.
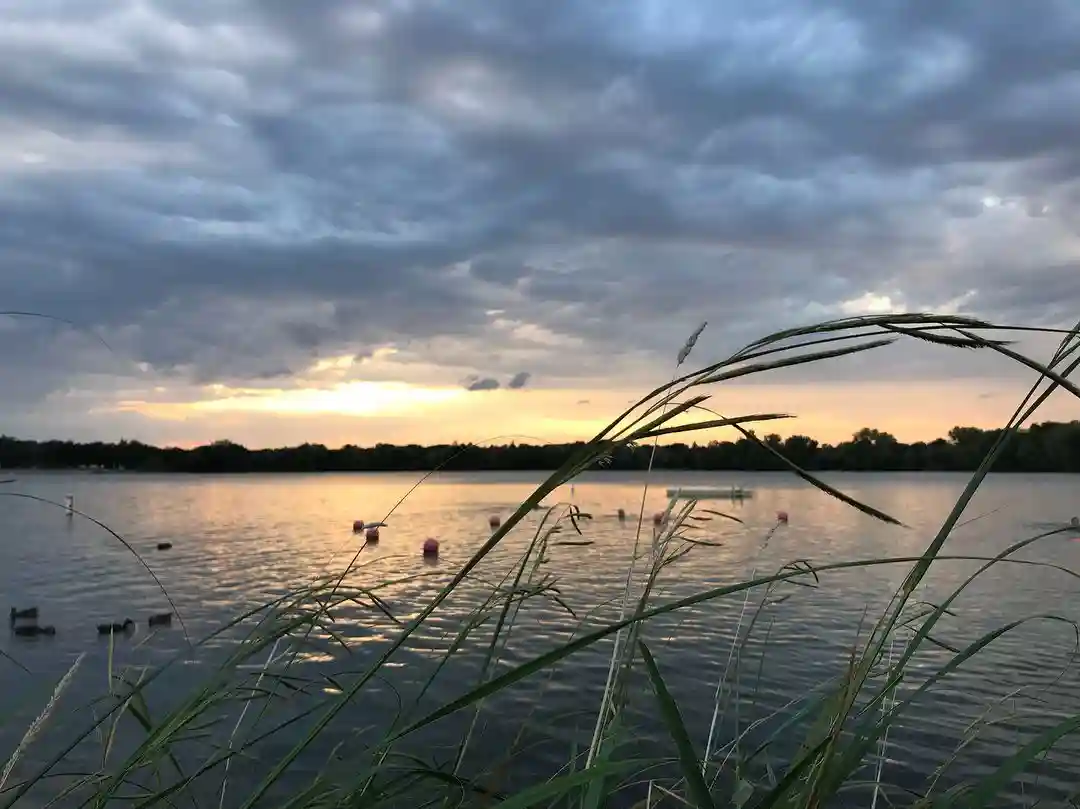
United states Discover the Hidden Gem: Lake Nokomis Beach in Minneapolis, MN
- August 9, 2023
Travel Photography and Videography Sunset Photography: Expert Tips for Capturing Evening Sunset Shots
You may also like.
The Impact of Drones on Travel Photography and Videography
- 8 minute read
Exploring the World from Above Aerial Adventures with Drones

Sunset Photography: Expert Tips for Capturing Evening Sunset Shots
Mastering Sunrise Photography: Proven Techniques for Stunning Morning Sunrise Shots
- 7 minute read
Top Travel Photography Gear Essentials for Beginners | Must-Have Equipment
- 6 minute read
Vintage Travel Photography: The Charm of Capturing Vintage Travel Photography
- 9 minute read
Our Latest Instagram Posts
@amazingworld.travel8.
Get Daily Travel Tips & Deals!
By proceeding, you agree to our Privacy Policy and Terms of Use .
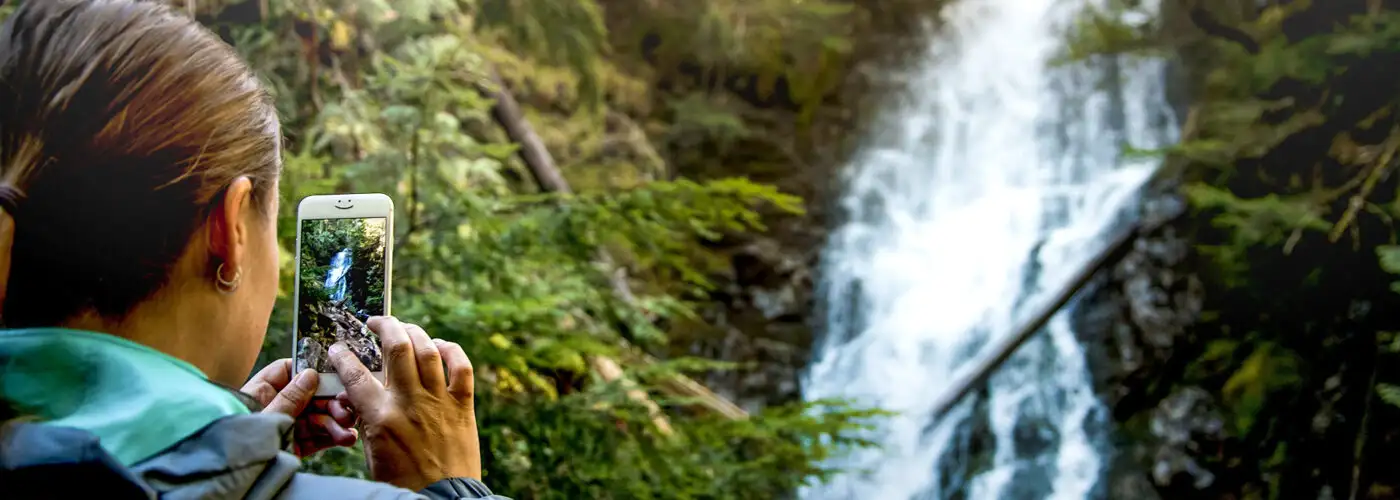
How to Make a Great Travel Video (Without Any Previous Experience)
Jamie Ditaranto
Jamie Ditaranto is a traveler in a love triangle with writing and photography. Follow the drama on Twitter @jamieditaranto and Instagram @jamieditaranto .
Ditaranto joined SmarterTravel in 2015. She loves ecotourism, cities with history, and discovering local hangouts. Though she likes all the continents equally, she holds a special place in her heart for rainy little islands.
Her work has also appeared online at USA Today, Huffington Post, Business Insider, and other publications. You can check out her photography on her website .
The Handy Item I Always Pack : "My instant camera comes in handy for giving instant gifts to new friends."
Ultimate Bucket List Experience : "Befriending penguins in Antarctica."
Travel Motto : "You have to get the hard places out of the way first."
Aisle, Window, or Middle Seat : "On short flights, the window. For long flights, the aisle."
Email Jamie at [email protected] .
Travel Smarter! Sign up for our free newsletter.
When you go on a great trip, sometimes it’s not enough to tell people about it—you want to show them, too. And in our increasingly digital world, the best way to do this is with a video. Travel videos—when done well—have the power to inspire and share stories in an emotional and immersive way. They also make wonderful keepsakes that encompass all the best memories from your experiences.
How to Make a Travel Video
You don’t have to be a professional to make a travel video, either. Here are some tips for planning, filming, and editing that will help you create great travel videos, even if you don’t have any previous experience.
To Make a Travel Video, First Get the Right Equipment
Any great travel video begins with a packing list. Before you set off for your destination, make sure you’re bringing along everything you need to get the shots you want. First, decide what kind of camera to use. Whether it’s the camera in your phone or a more high-end model, there are lots of options to consider depending on your trip.
If you want to make a travel video with high-quality images, look into bringing a DSLR camera or even a handheld camcorder or point-and-shoot camera . If you know you’ll be on the move during your trip or want to capture underwater footage, a GoPro is a great all-purpose camera perfect for capturing big adventures. And if you’re not looking to invest a lot in camera equipment, you can always just use your phone. Smartphone image quality is constantly improving, and there are plenty of ways to improve on that quality , too.
Additionally, if you suspect you’ll be recording a lot of audio, or will be shooting in windy environments, it might be a good idea to invest in a high-quality external microphone .
Protect Your Equipment
When you’ve decided which sort of camera you’ll be using to make a travel video, you’ll need the right stuff to protect it during your travels. There are plenty of small camera bags that will do for any number of cameras, but if you’re going pro and planning on bringing a lot of equipment, consider buying a separate carry-on designed to organize and pad your equipment, like this sturdy bag from Ape Case.
If you’re planning to do all the shooting on your GoPro, the VentureCase from GoPole will keep your camera and accessories dry and organized.
Know Where You’re Going
Spontaneous travel is fun, but if you know you’ll want to make a video to document your adventures, it helps to know where you’re going. Before you leave, make sure you have a rough itinerary of where you’ll be and when you’ll be there.
Not only will this help you plan out your final video, it will also give you the opportunity to research what you’ll see when you’re there. Check weather reports to determine when the best time to shoot will be and look up images of each destination to start planning the shots you’re likely to get when you’re there. Time of day also plays a big factor when it comes to getting the perfect shot. For example, if you want to capture silhouettes on the Charles Bridge in Prague , it’s better to visit during the less-crowded sunrise hour.
To Make a Travel Video, You Need to Create a Shot List
Figure out what you want to record at your destination. Most people tend to pull out their cameras instinctively (e.g., whenever they see something interesting). But to make a travel video, it’s smart to plan some of your shots ahead of time so you can get all the footage you’ll need.
If you know you’ll be visiting the Eiffel Tower in Paris, for example, you’ll want more than just a shot from the top. Here’s an example of a list you might make for this specific experience:
- Establishing shot of the Eiffel Tower from street
- Shot of the base of the Eiffel Tower
- Shot of purchasing your ticket
- Shot of taking the elevator to the top
- Panning shot from the top overlooking Paris
It might mean more work, but you’ll be thankful you have all that footage when you sit down to edit your travel video.
Narration in a Travel Video
Consider incorporating narration to help tell your story. There are two ways to do this—during or after your trip. If you want to make your narration a part of your video, remember to talk while you record or shoot selfie-style and let your audience know what you’re doing. (“Here we are at the Grand Canyon!”) You can even turn the camera on your travel partners and ask them to tell the camera what’s happening in the moment.
If you choose to wait, adding narration after the trip is over is also a great way to reflect on your travel memories. All you need to do is write a script and record. Think of this as an opportunity to really organize your story. (“Little did we know what was waiting for us around the corner.”) For an extra challenge, try to incorporate both types of narration when you make a travel video.
Another way to liven up your travel videos is by bringing people into them. Just make sure to ask for permission before you start recording. Travel guides, locals, and even your travel partners all make great subjects for interviews. Shots of people are a good way to mix up your footage, and you can even edit their voices over certain shots. For example, if your travel guide is describing the history of a landmark, this is a great time to cut right to your footage of it.
Time Lapses
Time-lapses are mesmerizing to watch and easy to do, so there’s no reason why you shouldn’t be shooting time lapses on your trip. Many cameras, including your smartphone, have time-lapse functions that you can take advantage of. All you need to do is set your camera in a steady place and wait. It’s not always necessary, but it’s helpful to have a tripod handy for filming time-lapses. If you don’t have a tripod, just make sure you have a flat surface where you can place your camera or phone.
To make the most out of your time-lapse, look for moving scenes, whether that be a busy town square or a vivid sunset. Personally, I like to incorporate time-lapses into my trip by setting up my camera at a restaurant or anywhere I know I’ll be sitting for a long period of time.
Editing Your Travel Video
When the trip is over and you’ve recovered from your post-travel blues , it’s time to sit down and look over your footage. Focus on the moments that stand out and cut anything that didn’t come out as well as you hoped. Unless you documented something truly magnificent, the world doesn’t need to see your blurry or shaky footage. When you’ve figured out which clips you’ll be using, sit back and think about the story that you’re trying to tell and how you can use some of the above techniques (narration, time-lapses, etc.) to bring that story to life.
When it comes to software, there are plenty of free video-editing tools you can use to put your video together. Some, like Windows Movie Maker , come with your computer, or for Mac users, iMovie is available at the Apple Store .
If you’re willing to pay for your editing software, programs like Adobe Premiere or Final Cut Pro are a great way to give your videos a professional edge. There’s a bit of a learning curve with these programs, but many tutorials are available online.
Every epic travel montage needs the perfect song, but unfortunately you might run into trouble if you try to upload your video to a public platform without securing the rights to the music you’ve selected. Websites like Facebook and YouTube will often remove videos if the videos use music that falls under copyright.
The best way to share your video with your friends and the rest of the world is to look for royalty-free music. This is music available online that you can download and use for free. Just make sure to credit the original source. There are plenty of websites to find this kind of music, like Bensound or Sound of Picture. And if you insist your video is incomplete without your favorite song, you can always try to purchase the rights or just keep an unpublished version for your collection.
More from SmarterTravel:
- 10 Instant-Print Cameras Recommended by a Travel Photographer
- Nikon Coolpix W300 Review: An Adventure-Proof Camera for Underwater Video
- 10 Gorgeous Hotels Made for Instagram
Jamie Ditaranto is a writer and photographer who is always looking for her next adventure. Follow her on Twitter @jamieditaranto .
Editor’s note: This story was originally published in 2017. It has been updated to reflect the most current information.
We hand-pick everything we recommend and select items through testing and reviews. Some products are sent to us free of charge with no incentive to offer a favorable review. We offer our unbiased opinions and do not accept compensation to review products. All items are in stock and prices are accurate at the time of publication. If you buy something through our links, we may earn a commission.
Top Fares From

Don't see a fare you like? View all flight deals from your city.
Today's top travel deals.
Brought to you by ShermansTravel
Porto to Lisbon: 7-Nt, Small-Group Portugal...
Indus Travels

Luxe, 12-Night Spain, France, Monaco &...
Regent Seven Seas Cruises

Ohio: Daily Car Rentals from Cincinnati
Trending on SmarterTravel

Travel Video Gear: The Ultimate Travel Vlogging Gear For Beginners
Posted on Last updated: January 12, 2021
There is a common myth that to take good travel videos and photos you need lots of expensive gear. With this travel video gear guide I aim to disprove that.
When I first started travel vlogging I didn’t really know where I was going with it (like most people) and it’s only normal not to want to spend lots of money on expensive cameras and accessories.
This travel video gear list was updated in January 2019, since over time I’ve accumulated more bits and bobs that I felt I needed.
If you’ve just started travel vlogging and want some cool gear to take beautiful photos with but don’t want to break the bank, this ultimate travel video gear guide is the place for you!
- 1.1 Main camera: Nikon D3300
- 1.2 GoPro Hero 4 Silver
- 1.3 Sony Compact Camera
- 1.4 DJI Spark (Fly More Combo)
- 1.5 GoPro Dome
- 2.1 Bokeh lens for Nikon D3300
- 2.2 Extra batteries
- 2.3 Memory cards
- 2.4 GoPro floaty backdoor
- 2.5 GoPro selfie stick
- 2.6 GoPro red dive filter
- 2.7 Memory card for GoPro
- 2.8 External Hard Drive
- 2.9 Rode Microphone & wind protector
- 2.10 Manfrotto Compact Tripod
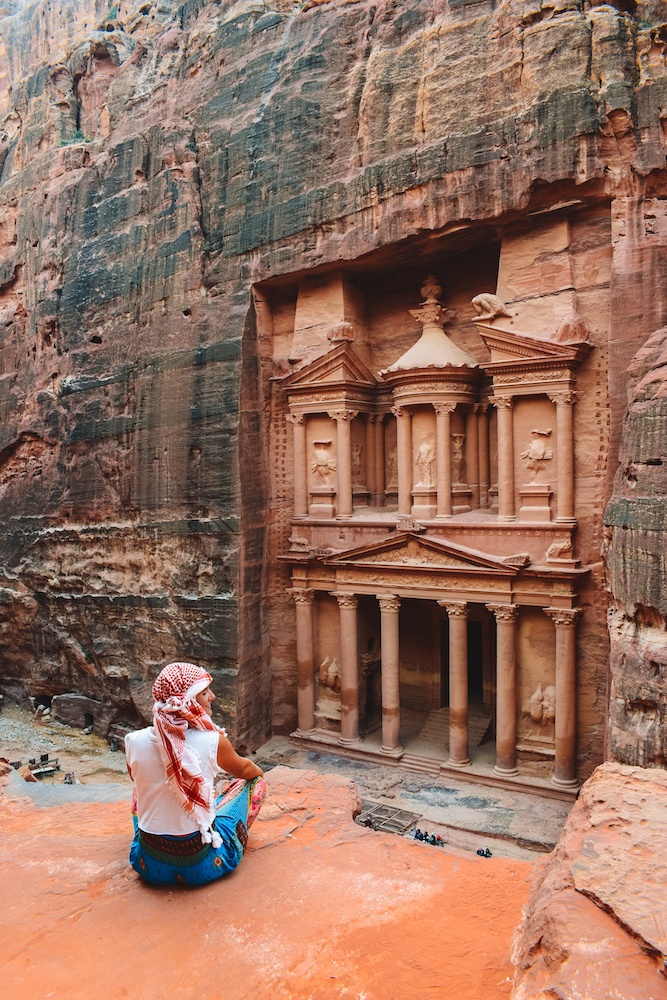
The Treasury of Petra in Jordan, shot with a Nikon D3300
My travel video gear essentials
Main camera: nikon d3300.
This is my main camera, and it does pretty much everything, from wide panoramic shots of landscapes, to close ups of food or people’s faces.
I actually bought this before I began making videos, as it’s considered one of the best DSLRs for beginners, and it’s pretty easy to use.
You can also change the lens, so it’s a pretty good camera to start with, then when you feel ready to step up your game you can just get another lens, such as a brighter one, or a more powerful zoom, instead of buying a whole new camera!
I usually keep my camera in a simple camera sleeve , it’s a lot smaller and lighter than an actual camera case, and it does the job in keeping your camera safe when you put it inside a bag.
Click here to see the latest prices of the Nikon D3300

Cala Soraja, Italy, shot on Nikon D3300
GoPro Hero 4 Silver
I use this as my action camera, and take it pretty much everywhere I don’t want to risk getting my Nikon wet or broken.
GoPros are generally considered amongst the best cameras for bloggers , and it’s easy to see why.
You can take all kind of shots with a GoPro , I’ve used mine for example on sailing boats, kayaks, or when swimming. It comes with a bunch of basic screws and sticky bases that you can use to begin with.
There are also a number of new GoPro models out, but if you don’t want to spend too much money on one you can start with an older model.
Check the latest price for the GoPro Hero 4 Silver & newer GoPro models here

Snorkelling in the Similan Islands, Thailand, shot on GoPro Hero 4 Silver
Sony Compact Camera
This was a later addition to my travel video gear, and became my travel vlogging camera. At first I filmed most things with my DSLR, and when I felt like I needed to do a vlog selfie type video I just used my phone.
However if you can invest in a vlogging camera with a flippable screen it’s probably better, as the video quality will be better than your phone and it’s easier to carry around and film with than a DSLR if you’re doing active activities, such as cycling.
I got a fairly cheap one but there are also fancier models if you want to step up your travel vlogging game.
See the latest prices and models of Sony Compact cameras here

Cycling in Copenhagen, Denmark, shot on Sony Compact Camera
DJI Spark (Fly More Combo)
The latest addition to my gear collection! I have been wanting a drone in forever and when DJI released the Spark just a few weeks before my birthday, I knew what my present to myself was going to be.
The DJI Spark is a great consumer drone, it’s small and light, perfect for me to carry around during my travels, and really simple to manoeuvre. You can check out a video I made with it here , featuring lots of flying over water!
Extra batteries are an essential for a drone. The battery for the Spark lasts only around 15 minutes, if you’re going to be out and about all day, having an extra one is pretty much essential!
I bought the Fly More Combo , which includes a spare battery, the remote, and a couple other extras. It works out cheaper than buying the drone, a spare battery, and the remote separately, so definitely worth the value for money.
If you’re looking for advice on what drone to choose, check out the best travel drones reviewed by travellers .
Get your drone here and start filming epic aerial travel videos!

Swimming in Sardinia, Italy, shot on DJI Spark
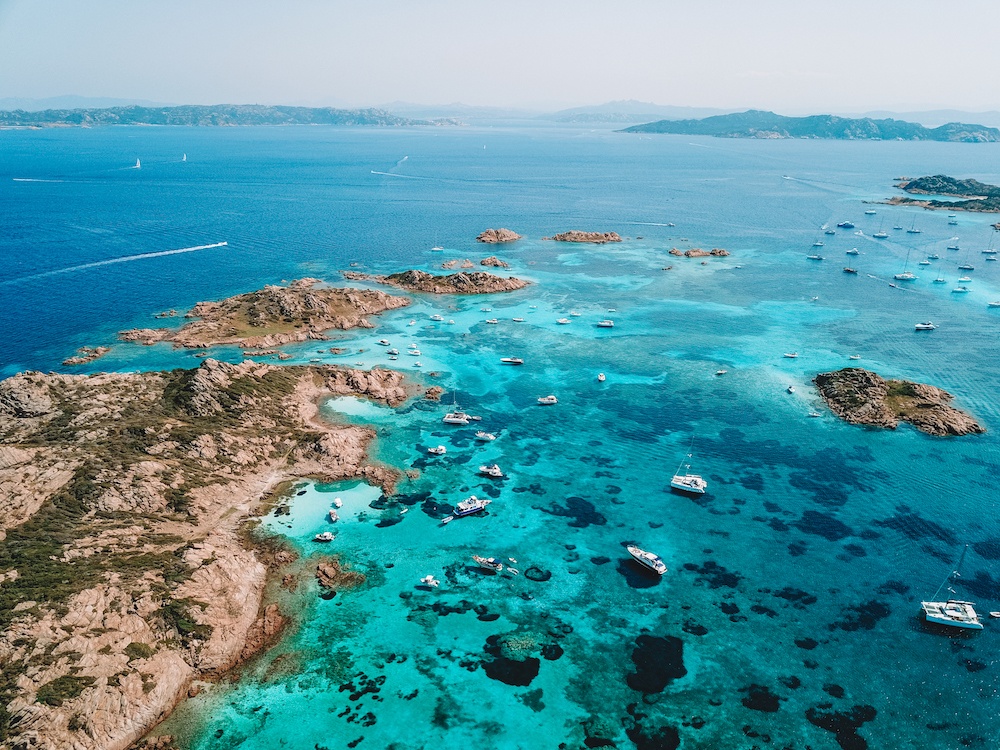
The natural pools of the Archipelago of Maddalena, shot on DJI Mavic Pro
This is more of an accessory than an essential, however since I never go anywhere without it these days I would classify it as an essential.
GoPro domes are used to take those epic half over and half underwater shots, without breaking the bank on an expensive DSLR underwater dome case.
Click here to read my GoPro dome review and over / under photography tips.
Click here to purchase your GoPro dome!
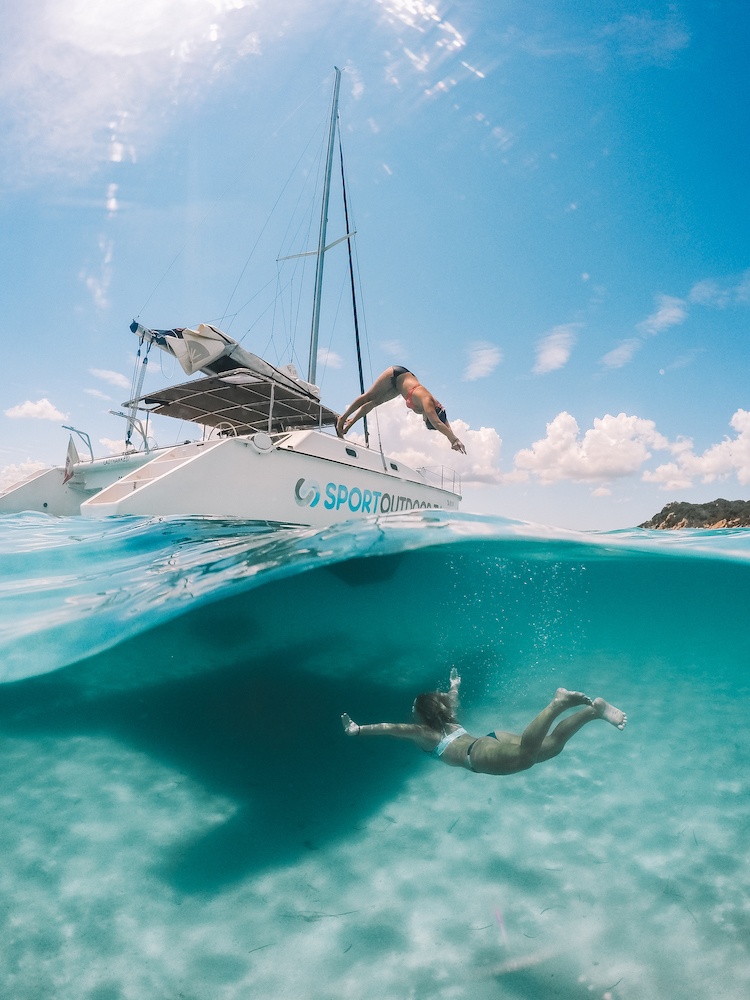
An over / under water photo taken with a GoPro Hero 4 Silver & Telesin GoPro dome
Travel vlogging gear – useful accessories
Bokeh lens for nikon d3300.
As I mentioned above, one of the advantages as getting a Nikon D3300 as your main travel vlogging camera is the opportunity of removing the lens and swapping it with another.
Most DSLRs have this feature but don’t take it for granted, some cameras have a fixed lens.
You often see all over social media and magazines photos with a nice blurred background, that make the person standing in the middle stand out (this effect is known as Bokeh).
Despite my best efforts I couldn’t recreate this with my DSLR, until I found I needed a different type of lens for it. This is where the Nikon f/1.8 35mm lens comes in.
This is a fixed zoom lens, meaning you can’t zoom in and out but will physically have to get closer or further away from the object you’re taking photos of, but it will allow you to create this soft blurred background effect.
See the latest prices for bokeh lenses here

Sunset at the London Eye, shot with Nikon D3300 and the f/1.8 35mm lens to get the nice blurred background effect
Extra batteries
Whether it’s an extra battery for your Nikon D3300 or your GoPro if you’re planning on making videos, you will need another battery.
Especially if you’re out and about all day without chance of recharging, you don’t want to be out filming and then your camera dies half way through an epic activity!
Click here to get extra batteries for your camera gear!
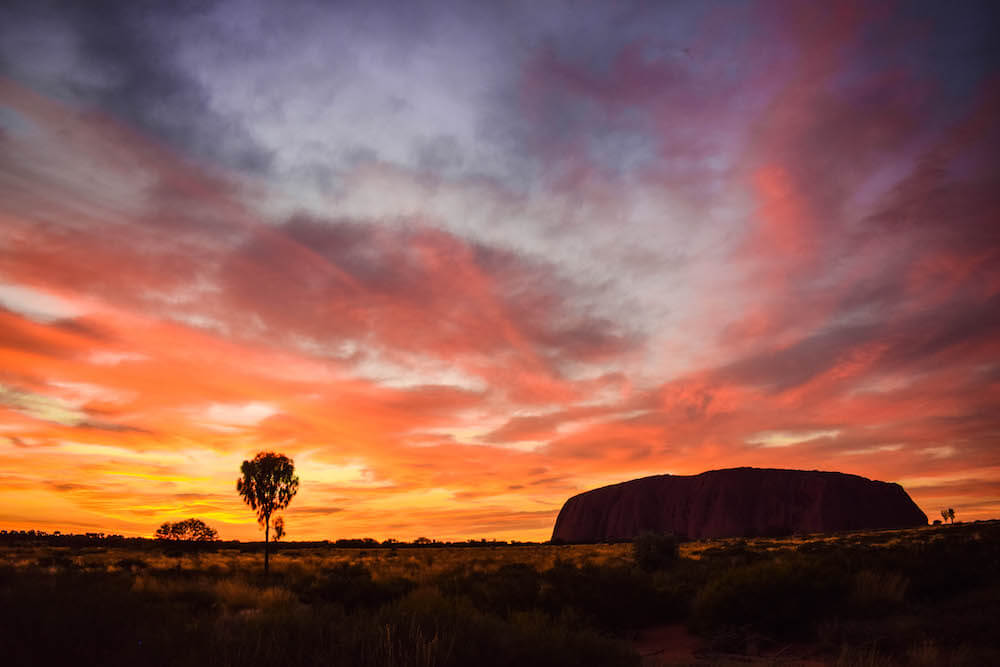
Sunrise at Uluru in Australia, shot on Nikon D3300
Memory cards
You will need also a memory card. I recommend you get a relatively big one, I have a 64GB memory card .
Similarly to the having an extra battery, you don’t want to be out and about and run out of filming space.
Click here to get memory cards for your cameras!

Porto Faro, Italy, shot on Nikon D3300
GoPro floaty backdoor
If you’re planning on using your GoPro in water, a floaty backdoor is essential.
It will ensure that when you drop it, or it detaches itself from wherever it is you have attached it (because it will happen) it doesn’t sink to the bottom of the ocean and you lose it forever.
It’s nice and bright and orange too so it’ll be easy to find.
Purchase your GoPro floaty backdoor here!

Sailing in Sardinia, Italy, shot on GoPro Hero 4 Silver with floaty backdoor (no way of retrieving it if it falls here!)
GoPro selfie stick
If you want to take shots with yourself in it at anything other than arms length, you will need a GoPro selfie stick .
Click here to get your GoPro selfie stick!

Maya Bay, Thailand, taken on GoPro Hero 4 Silver with selfie stick
GoPro red dive filter
If you want to get good underwater shots, especially when diving in tropical waters, you need this. I didn’t know this before and this is what my first scuba diving shots look like. It’s all blue.
I got the red dive filters in preparation for my Bali trip and you can see below in the second photo the difference.
Get your red dive filters for GoPro here!

Swimming with turtles in the Similan Islands, Thailand, shot on GoPro Hero 4 Silver without a red dive filter

Nemo in the Phi Phi Islands in Thailand, shot on GoPro Hero 4 Silver with a red dive filter
Memory card for GoPro
You will need to get a memory card for your GoPro, this is different from your DSLR card as it’s a tiny one .
Again, you want to get a big one, 64GB or more, especially if you’re going to attach your GoPro somewhere and have it film a whole event or can’t retrieve it for a while.
For example when I used it sailing I couldn’t stop to pause until we eventually went back to shore, a good hour and a half later!
Click here to get your GoPro memory card!
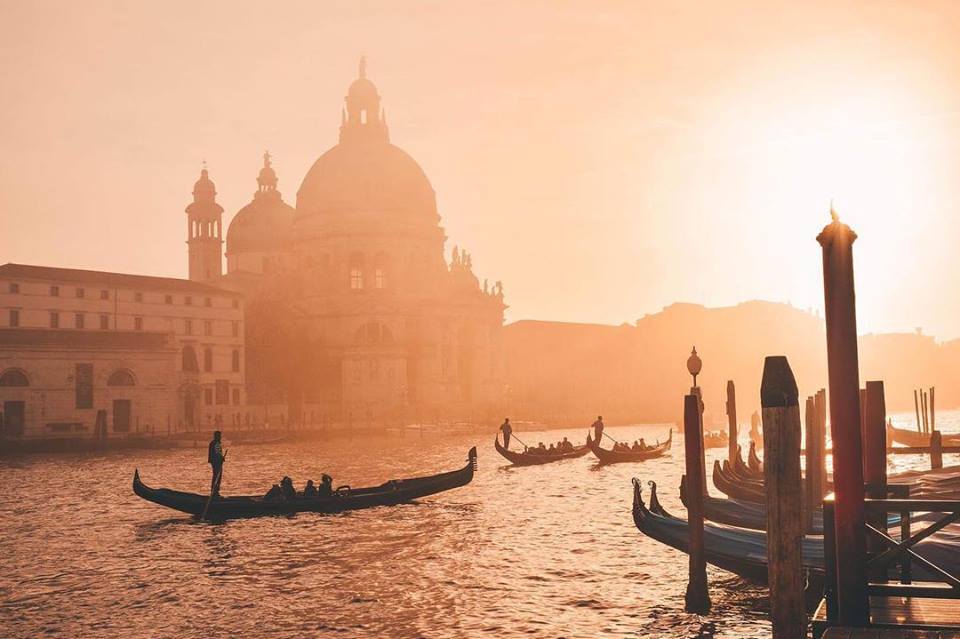
Sunset in Venice in Italy, shot on Nikon D3300
External Hard Drive
If like myself, you have a laptop with limited memory, you will need an external hard drive . This is also useful for backing up your data, you wouldn’t want to lose it after you spent so much time filming it!
I actually have two external hard drives, when I first purchased one I went for 1 TB thinking it was huge and I’d never fill it up. Less than a year later I had to buy another and decided to go for a 5 TB one this time so it lasts longer.
See the latest prices and various models for external hard drives here

Kayaking in Phang Nga Bay, Thailand, shot on GoPro Hero 4 Silver
Rode Microphone & wind protector
I didn’t get a microphone for quite a while because I didn’t think I needed to, every time I filmed myself speaking the audio turned out fine anyway.
Until I tried filming myself speaking outdoors on a windy day. Needless to say you couldn’t hear much, so I invested in a proper microphone and a dead cat (I’m not making this up, that’s actually what they call it!) to protect it from the wind.
Click here to get your vlogging microphone!

Sunset over Florence, Italy, shot on Sony Compact Camera
Manfrotto Compact Tripod
Another recent addition to my gear collection! I should have probably bought this much earlier on, as it allows you to take many more and better quality shots.
It’s got a convenient handle so you can spin it around and ensure your panorama shots are smooth, without the bumps you get by doing it by hand.
Also, if you want to take photos that require a long exposure or shutter speed you can’t do it by hand, you’ll need a tripod.
You know which ones I mean, the cool ones of cities at night with moving lights, or any shot of the night sky if you want to capture the stars. It’s also perfect for travellers since it’s very light and will easily fit in a backpack.
Click here to purchase your Manfrotto compact tripod!

Long exposure shots at Kings Cross Station, shot on Nikon D3300 & Tripod
Final thoughts on the best travel video gear
This is all the gear I personally use for all my travel photos and videos.
If you’re just starting out with travel vlogging this travel video gear list is a great place to start, as I have tried to include cameras and accessories that won’t break the bank.
Are you also a travel vlogger? What gear do you use? Let me know in the comments below!
I hope you find this travel vlogging gear guide useful in creating your own epic travel videos! Also, if you want to see this travel video gear in action don’t forget to subscribe on YouTube for more videos!
Enjoyed reading about the best travel vlogging gear? Pin it!

10 Tips for Taking Photos and Videos While Travelling
There is something special about creating travel photos and videos. One should possess an exceptional artistic vision to capture special, extraordinary, and eye-catching in the mundane life. Taking the role of a travel videographer has never been easier. All you need is your imagination, a burning desire to tell your unique story, and the right equipment, of course.
You also need to know what kind of video you want to shoot before you embark on a fascinating travel quest and start scouring for ideal locations for your future photographic masterpieces. There’s much, much more to travel video making than meets the eye. From today’s article, you’ll learn 10 great tips for taking pictures and making videos on your trips. Let’s dive straight into it.
#1 Travel Light
If you read Tim O’Brien’s short story named The Things They Carried , you probably can recall the loads of stuff young American soldiers had to carry with them in Vietnam. If you don’t want to resemble and most importantly feel like a private soldier, don’t take too many things when preparing for your journey.
There are some bare essentials like identity documents, visas, tickets, couple days’ worth of clothes and supplies. Opt for compact, lightweight camera gear, and a mini tripod. You’ll be better off without those huge backpacks and overweight baggage (if you’re not an avid backpacker or professional mountaineer.) If you happen to forget your favorite camera, memory card, or Gorillapod at home, don’t make a drama out of it. You can always rent video production equipment at your destination.
#2 Tweak Your Camera Settings Beforehand
It’s a rare videographer who doesn’t apply color filters, use video effects and audio enhancements when creating their footage. Take care of that before your trip. Once you reach your destination, you’ll find yourself eager to explore local attractions that will appear in your photos or videos. And you definitely don’t want to tinker with changing a picture profile of your camera or other settings somewhere along the line. You will be well-advised to experiment with the setting before your trip. Decide on the settings you think can work best in your shooting conditions. If you’re new to all this shooting stuff, you want to set keep settings intact for the unfamiliar modes.
#3 Enjoy the Country
There is no point in capturing the beauty of new locations if you fail to enjoy and experience this beauty firsthand. Resist the temptation to grab your camera every time you notice something peculiar and worth attention.
Take the time to “stand and stare,” take in the sights, and let yourself experience those authentic emotions you’ll want to subsequently convey with your videos or pictures. It’s also a good idea to avail yourself of a professional guide’s services. By doing so, not only will you see the most popular attractions but also discover the nooks that are off the beaten track. Exactly what you need for your photos!
#4 Shoot Wisely
Shooting wisely doesn’t necessarily mean that you should contemplate every object for hours before pushing the shutter button. Also, there’s no point speculating about whether this landscape or mundane scene is worth filming. With the advent of digital photography, millions of people acquired professional tools wherewith they could create conspicuous photos in the blink of an eye. No need to buy expensive film and skimp on it. So, during your[ trip, make sure to shoot as much as you can so that you don’t miss anything really important. Thus, you’ll get enough material to edit when you’re back home.
#5 Tell Your Own Story
Every artist creates their own story using this or that medium. Just like a painter uses a canvas and brush, you may use your camera to tell a unique story that can resonate with the millions. Of course, it takes much time to come up with an enticing story, but it’s definitely worth it. If you fail to do some research on the location you plan to visit and make some photos or videos on the spur of the moment, don’t get upset. You can later go through your footages and find a common thread that can tie them into an engaging story.
#6 Use Video Editors
Video editors are those fascinating tools that can lend a particular artistic flavor and individualism to your videos and photos. With modern online software, you don’t even need to install cumbersome apps on your device and spend countless hours figuring out how to use their features. Below are some of the most lightweight, handy, and easy-to-use photo and Video editing software solutions that can help you spruce up your footages and images in the shortest possible time.
The best video editors:
- Fastreel . This tool can be used by amateurs and professional videographers. Reversing, crop, loop, and make stop-motion videos right in your browser. What’s more, Fastreel is ideal for making slideshows, and collages.
- Kizoa . Add engaging captions, stickers, with Kizoa. This tool enables you to combine several videos into collages, make professional-looking slideshows, and use default templates to create custom video projects.
- WeVideo . It’s an online video editor that runs in the cloud. Can be used for creating and editing video in the browser. Its noteworthy features include multi-track editing, slow motion, storyboards tools, built-in graphics, advanced text editing, file and media manager.
The best tools for photo editing:
- PaintNet You can use PaintNet completely free on any device running the Windows OS. Enables you to create nice-looking photo projects in several clicks.
- PhotoScape This tool is ideal for quickly fixing and enhancing your images.
- inPixio Add a wide range of impressive effects with inPixio. Resize, change colours, size, and focus, and fix perspectives in your photo projects.
- Check here for the best free photo editing apps .
#7 Shoot Portraits
The art of portrait photography is immortal. Faces can tell different stories to the beholders if captured properly. When traveling, you’ll encounter lots of locals. And some of them will be eager to pose for you or just let you take a quick photo of their faces.
Make sure to connect with your subject and stay aware of the lightning and environment. Pick the right lens and focal length to compliment on your subject’s features, but at the same time don’t aim to embellish the reality excessively. It’s the authenticity you should be striving for.
#8 Create Motion
There is one exceptionally magical property of photos. They can convey the mood or atmosphere of a certain place in the most meticulous manner. Surprisingly, this sense of authenticity and peculiarity often evaporates from videos capturing the same place. Still, if you take advantage of such a simple camera movement as panning, time-lapse, or hyperlapse, you may instantly enliven your footage.
It’s also a good idea to shoot already moving objects and people alongside static architecture and landscapes. There are also lots of other video editing trends you may want to tap into when creating your video projects.
#9 Share Your Creations
What’s the point of creating tons of breath-taking images and footages if you cannot share the fruits of your inspiration with anybody? Let your friends and fans be the first to know about your adventures and impressions!
With the advent of social media websites, any artist can share their impressions with millions of people from different corners of the planet. Make sure to share your video and photos on Facebook and Twitter. Pamper your Instagram followers with the portion of new footages from your trip to Cuba or Argentina. If you still haven’t harnessed the power of TikTok, one of the fastest-growing video-sharing platforms, it’s about time you did that.
There are other platforms that can help promote your photos. Unsplash and Pexels are the best places to find stock photos and share your own images with the large community.
#10 Export Properly
Last but not least, take care to use proper settings when exporting your footage. Ideally, you should export your footage in the highest quality possible. Yep, 4k is quite popular these days. Be that as it may, make sure to check the supported file formats, resolution, codes, and other settings and keep them consistent with the source.
Traveling isn’t only about exploring new destinations. It’s a great chance to share genuine emotions and countless authentic impressions with your family, close friends, and even strangers. Unleash your creative potential. Start creating breathtaking photos and videos during your trips. Hoe, our tips will come in handy!


How To Make A Great Travel Video With Your Photos And Music
Are you planning a trip and want to make a video to remember it? Or maybe you have already been on some amazing adventures and want to share them with the world? Regardless of your reason, making a travel video is a great way to preserve your memories and share your experiences with others.
However, the entire process can seem daunting if you have never made a video before. That is why we have put together this guide to show you how to make a great travel video, step by step.
Tips for Making Travel Videos with Photos and Music
1. pick a theme for your video.
There are various themes for travel videos. You can either shoot professional vlogs or can shoot it in a guide style. Your travel videos can also be entertaining or niche based. Picking a theme will clarify what will likely go into the travel videos.
2. Choose Photos and Videos That Represent Your Theme
Your audience will be interested in your film if you can convey the emotion and enthusiasm of the topics. Try to capture the event’s emotion by doing anything from baking bread to painting pottery, fishing, or traveling on a train.
Including certain photos at the right moments can pique your viewer’s interest. Because of the vibrancy, activity, and distinctive qualities, some places are inherently attractive to various viewers.
3. Find Music That Fits Your Theme and Video Mood
The type of music you choose entirely depends on the mood and subject you want to convey in your travel video. For instance, you might use a slow piano track if the video is melancholy. Fitting music would be brisker if there were a lot of adventure, flips, etc. Use a fun tune that you believe fits the video if it is more lighthearted and just for fun.
How to Choose the Right Music for Your Travel Videos?
There is no one-size-fits-all answer to this question, as the right music for your travel videos will depend on the specific footage and overall tone you hope to capture. However, here are a few general tips:
- Think about the mood you are trying to create. Do you want your video to be fun and upbeat or more reflective and introspective?
- Choose music that fits the location. If you are filming in a foreign country, try to find popular music in that culture.
- Think about the tempo of the music. Faster-paced music can add energy to your video, while slower-paced music can create a more calming effect.
- Don’t be afraid to experiment. The best way to figure out what works best is to try a few different options and see what feels right for your video.
4. Edit Your Photos and Videos Together
A slideshow is a great way to edit pictures and videos and share them with friends and family. A slideshow is a sequence of images, videos, or text shown on a screen or projected.
It can be used as a photo album or as a video presentation. Using a picture slideshow maker is the easiest way to arrange all the travel photos and videos. Different software picture slideshow makers can create slideshows free of cost. Many programs have templates for making slideshows, but you can also create your own from scratch.
You can either upload your photos and music to the slideshow maker or add them from your computer. The next step is to choose the order of your photos and music on the slideshow by dragging them into place on the timeline at the bottom of the screen.
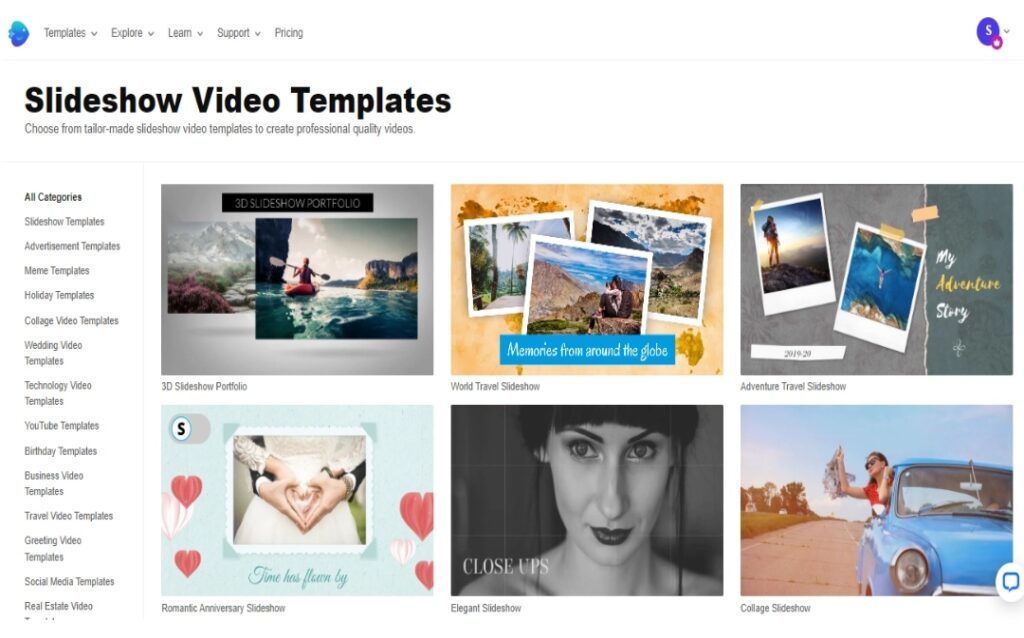
How To edit using a picture slideshow maker?
- First, you need to find the best pictures from your trip and edit them with basic settings.
- Next, you will need to find a song that matches the mood of your pictures. Or you can choose a program slideshow maker with music to find the music that syncs with the slideshow.
- Upload the pictures and music to a picture slideshow maker program.
- Choose a template that matches what you want for your video (e.g., friends slideshow or family slideshow).
- Add text if necessary.
- Select the video editing style to apply to your video and merge everything.
Upload Travel Videos On Platforms
Upload travel videos on facebook.
Facebook has been the destination to upload travel videos. Facebook has a lot of travel pages. You can tag the popular travel pages to spread your travel video. The native videos get the most engagement on Facebook than other kinds of posts.
Upload Travel Videos on Instagram
Statista reveals some cool numbers which might convince you to work on travel videos in the 3rd quarter of 2022. As of 2022, Instagram has 1.28 billion active users.
According to Social Pilot and Statista, we spend an average of 28 minutes each day. The average engagement of video reels is 0.61% on Instagram. The posts with tagged locations get a whooping 79% more interaction. 2022 is the best year to upload travel videos on Instagram.
Upload Travel Videos on YouTube
You can upload more watch time travel videos on YouTube than on other platforms. Create an attractive thumbnail and add the highlight of the place you visited as a text to gain more engagement. You can create slideshows free and use them as videos too.
YouTube also gives the flexibility to break down the video into chunks and attach time stamps. People love watching travel blogs and will not miss watching your video if they want to seek inspiration for their next adventure.
You can upload travel videos on three platforms: YouTube, Facebook, and Instagram, as all platforms combined will give better reach.
Wrapping Up
In a nutshell, you can do a few things to make a great travel video with your photos and music. First, try to capture unique and interesting footage. This could be anything from local festivals and events to interviews with locals. Second, make sure your video is well-edited and visually appealing. Finally, try to promote your video through social media and other channels.
Feature Image Credit: JVAN_Collective/Pixabay
- Latest Posts
- Modern-Day Bali Jatra: Your Travel Plans Made Easy - 2024/04/04
- Top 5 tourist destinations in India for an adventure trip - 2024/03/30
- Discover Europe: Unveiling Vacation Packages to its Premier Destinations - 2024/03/29
Related Posts
Pin Up Casino: Online Sports While Travelling


Airtel Lost SIM Replacement: Postpaid & Prepaid
Leave a comment cancel reply.
Your email address will not be published. Required fields are marked *
Save my name, email, and website in this browser for the next time I comment.
This site uses Akismet to reduce spam. Learn how your comment data is processed .
National Geographic content straight to your inbox—sign up for our popular newsletters here
- 2023 IN REVIEW
7 video cameras we love for every kind of traveler
Sometimes a photo isn’t enough. Whether you’re biking through rough terrain or diving with dolphins, we think these cameras are your best bets for capturing sights and sounds.

A picture may speak a thousand words, but sometimes, even that is not enough to capture the sights and sounds we encounter on our travels.
We tapped the National Geographic photo engineering team to share their top picks for travel video cameras to help you document your most memorable journeys. They design and build custom equipment for professional photographers and test consumer products for this annual guide. Here are their picks for your future adventures.
For hybrid video and stills: Panasonic Lumix G9 II

- The new Lumix G9 II uses an improved version of the GH6 sensor (released last year) and adopted some of the new features introduced with the Panasonic S5 II earlier this year.
- For video, it has a much higher limit for resolution with up to 5.8k/30p open-gate recording, and you can record at higher bit rates for video files with less compression and artifacts. You can also record directly to an SSD over USB-C, which you might want if you’re recording ProRes files or utilizing those higher bit rates.
- It features improved dynamic range, 25-megapixel, phase detect autofocus, subject detection, a higher resolution rear LCD panel, two card slots, more robust in-body stabilization (IBIS), and some handy computational photography options like live compositing.
Tip: We recommend using the Leica DG Vario-Elmarit 12-60mm f/2.8-4 ASPH POWER O.I.S. lens from Panasonic, which offers an impressive 24-120mm equivalent zoom.
Find it now at B & H and Best Buy .
For social content: Insta360 GO 3 and DJI Osmo Pocket 3

- When it comes to unique angles, the Go 3 can fit almost anywhere. Once it’s detached, the Action Pod acts as a live video receiver.
- Insta360 nailed it with the included mounting accessories, from the hat clip and magnetic neck pendant for hands-free POV footage to the sticky pad mount and a magnetic back on the capsule for timelapse video. An added bonus? The Go 3 capsule is waterproof.
- The DJI Pocket 3 is convenient, simple, and portable with a protective cover. The autofocus is incredible, and the automatic face tracking is uncannily good. The two-inch OLED rotating touchscreen is snappy and responsive, making it easy to check your framing or change your settings.
- DJI somehow fit a one inch sensor behind its 20mm f/2 equivalent lens, making the image quality downright impressive.
Tip: Depending on your recording settings, you can change the aspect ratio after the fact on the Go 3 capsule.
Find the Insta360 GO 3 now at B & H and Best Buy .
Find the DJI Osmo Pocket 3 now at B & H and Best Buy.
For beginners: Sony Z-V1 II

- The ZV-1 II is a reasonably capable stills camera, but it shines as a compact and easy-to-use video camera. It features a new 18-50mm f/1.8-4 equivalent lens, which gives it a wider field of view better suited for self-filming. It also has a tighter minimum focus distance.
- The updated touch screen lets you swipe through the menu system, and now includes more controls than the previous model.
- Autofocus has become more intelligent with multi-face recognition and animal focus tracking.
- The ZV-1 II also utilizes the same 3-capsule microphone seen in the ZV-E10, which allows you to focus the audio in front or behind the camera or set it omnidirectional.
Tip: Consider pairing the ZV-1 II with Sony’s wireless shooting grip, which doubles as a tabletop tripod. It connects via Bluetooth, allowing the integrated controls to communicate with the camera.
For cinematography: Panasonic Lumix GH6

- The GH 6 is ideal for anyone wanting to create movie-quality travel videos.
- This model allows for up to 5.7k at 30 FPS and 1900 mb/s. The camera rocks a 25.2 MP MFT sensor that sports a unique functionality known as DR Boost, which gives a noticeable increase in dynamic range when using an ISO north of 800. This allows the camera to compete with cameras with much larger sensors.
- For the best image quality in bright light, you’ll want to use a ND filter. We suggest a variable ND for traveling.
- In terms of controls and ergonomics, the GH6 sits mighty close to the pinnacle of what seems possible. Dials and buttons are all labeled well and sit just where you would want them. The screen is a fully articulating LCD with a bonus tilt function that makes it a pleasure to use.
- The camera is awash with all the essential ports you would want for video work and includes a fan for those long takes in warm climates.
Tip: We recommend experimenting with unique optics, such as anamorphic lenses and vintage glass. There is a great deal of imaging value in the style of vintage optics.
Find it now at B & H and Best Buy .
For adventure travel: GoPro Hero 12

- The GoPro 12 is best seen as a refinement to the already outstanding GoPro 11, with slightly better stabilization due to including a ¼-20 threaded mounting hole and some menu updates.
- Our favorite feature of the GoPro Hero 12 (and the GoPro 11) is the horizon lock. It uses its almost square sensor and gyroscope system to lock off the horizon no matter the camera’s angle. Imagine a steady horizon while you ride your mountain bike through rough terrain.
Tip: The only thing missing from the GoPro 12 is a geolocation system. This was removed to help improve the camera’s runtime.
Find it now at B & H and Best Buy .
Drone for traveling: DJI Mini 4 Pro

- For a light, transportable, and easy-to-use drone camera, try the DJI Mini 4 Pro.
- Its strength is its simplicity. With a higher resolution sensor than previous models, the Mini 4 Pro can record 4k 60fps HDR video, and sports a more robust obstacle detection system.
- The transmission range has also been improved, meaning your video feed almost always remains smooth and crystal clear.
- By turning the camera on its side, the drone can shoot native vertical video, making it easy to frame up video for social media and maximizing your resolution and field of view.
Tip: Do your research to ensure you comply with local regulations on drone use.
Find it now at B & H and Best Buy .
For immersive travel content: Insta360 X3
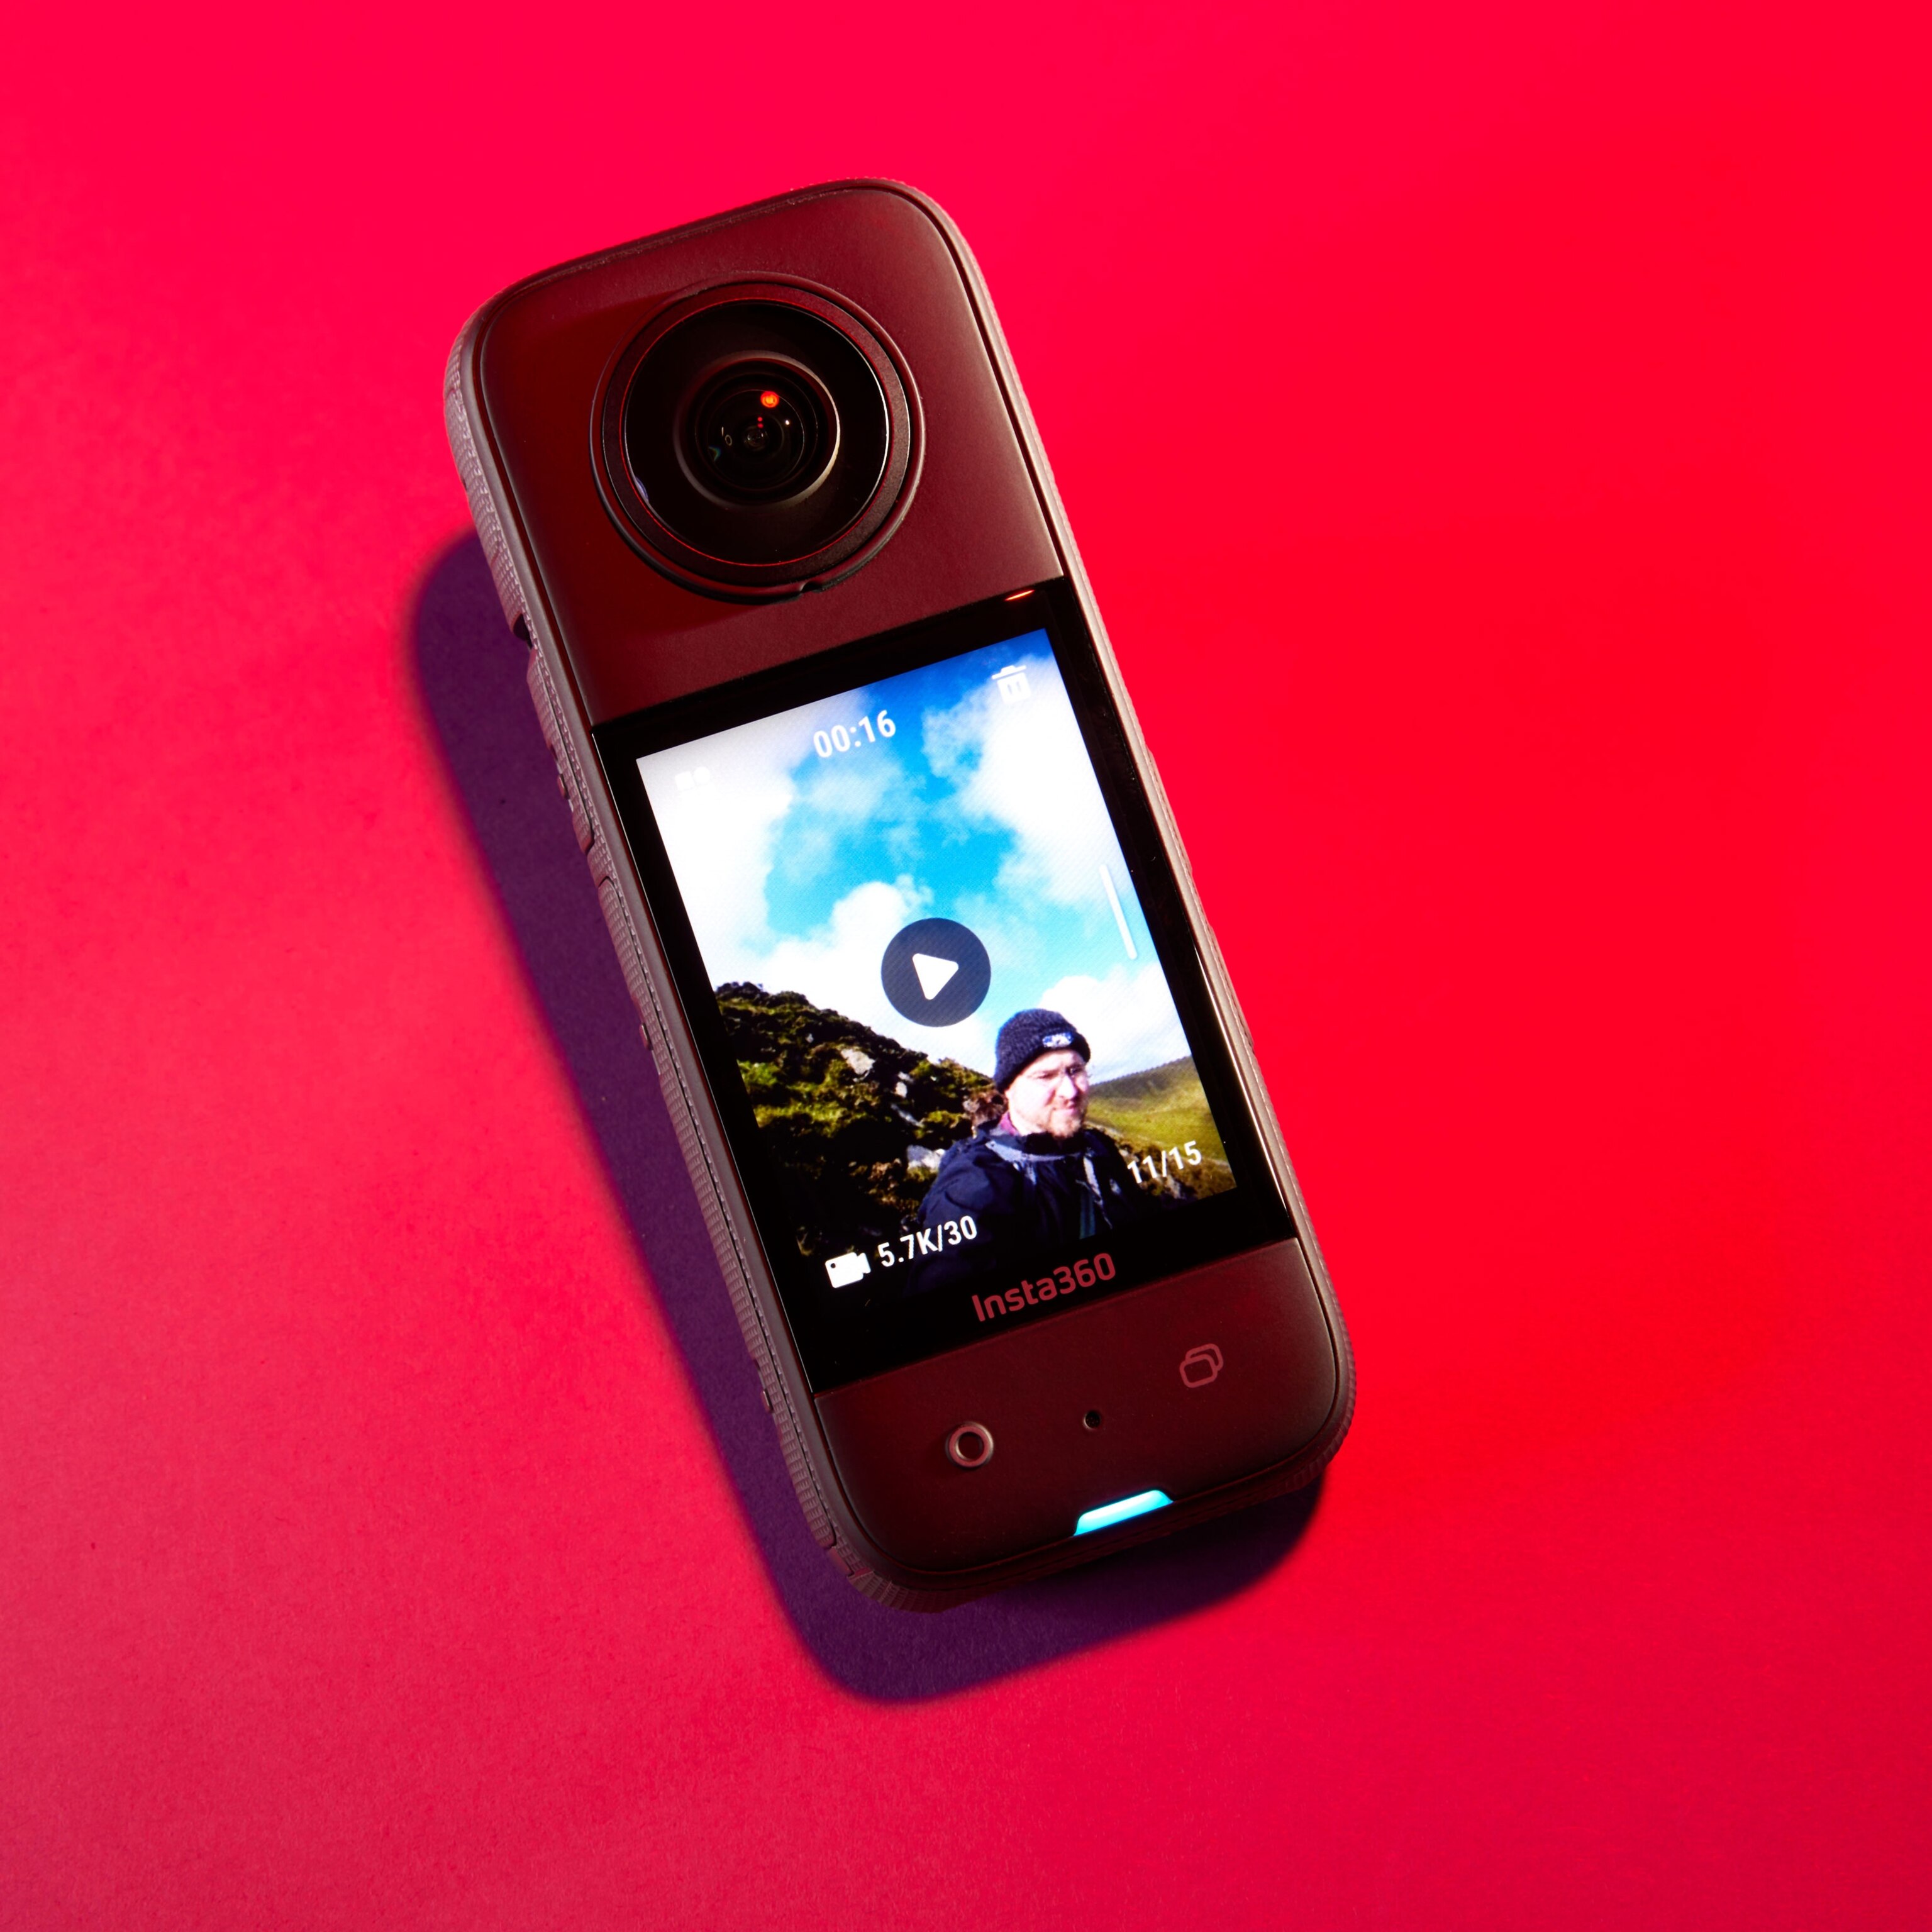
- The real key to Insta360’s success is the high quality of the user experience both on the device and in the cellphone app’s editing mode.
- With the Insta360 X3, you can edit the captured content on your phone (or computer) as a vertical or horizontal video. This lets you reframe the video in whatever way you want in a user-friendly way.
- The camera is also waterproof down to 33 feet.
Pro Tip: Insta360 sells a special dive case if you want to take this on your next scuba adventure.
Related Topics
- DIGITAL CAMERAS
- DIGITAL PHOTOGRAPHY
- PHOTOGRAPHY
- TRAVEL PHOTOGRAPHY
- ADVENTURE PHOTOGRAPHY
- PHOTOGRAPHY TIPS
You May Also Like

The 9 best digital cameras for travelers, according to National Geographic

The Masterclasses 2023: 10 practical tips to help you succeed as a travel photographer
Free bonus issue.

How I got the shot: Ben Pipe on coming face to face with a lion

The 10 best compact cameras, according to National Geographic

How I got the shot: Richard James Taylor on capturing Mekong sunset magic in Laos

A total solar eclipse is coming. Here's how to photograph it.

How I got the shot: Richard James Taylor on capturing Dubrovnik's golden hour
- Environment
- Paid Content
History & Culture
- History & Culture
- History Magazine
- Gory Details
- 2023 in Review
- Mind, Body, Wonder
- Terms of Use
- Privacy Policy
- Your US State Privacy Rights
- Children's Online Privacy Policy
- Interest-Based Ads
- About Nielsen Measurement
- Do Not Sell or Share My Personal Information
- Nat Geo Home
- Attend a Live Event
- Book a Trip
- Inspire Your Kids
- Shop Nat Geo
- Visit the D.C. Museum
- Learn About Our Impact
- Support Our Mission
- Advertise With Us
- Customer Service
- Renew Subscription
- Manage Your Subscription
- Work at Nat Geo
- Sign Up for Our Newsletters
- Contribute to Protect the Planet
Copyright © 1996-2015 National Geographic Society Copyright © 2015-2024 National Geographic Partners, LLC. All rights reserved
How to Make Travel Video Online
Revive your vacation feelings during long gloomy winter nights with the help of a nice and sweet video made of your travel shots.
How to create video from photos and vacation videos
Taking endless pictures and recording every moment of your trip is one of the most common guilty pleasures. Then create an artistic travel slideshow with music to keep those memories for your dearest ones, including yourself.
Now it's time to assemble all those miscellaneous crumbs into one piece. Maybe you’ll discover a real passion for it and start posting travelogue videos professionally!
Before starting, select your best travel images and clips, find a good song for a vacation video and save all the files to the same folder: this way, it will be easier to add them to the editing tool. You may also feel like googling for some travel video tips, but here we will not overload you with such information. Let's go straight to the technical details.
Add all the elements to the tool
Open the Clideo's Video Editor in any browser, click the "Get started" button.

Then upload all the files you need from your device, Google Drive, or Dropbox (that's why you need them all in one place).

Keep video editing
Then add the files to the timeline (just drag and drop). Arrange them as you need: after each other or on different lines. You can resize right in the player by dragging the image's corner. Thus you can achieve interesting effects, such as picture-in-picture , side-by-side video , etc.

If you want to edit a file, select it to make it active and see the options you can change above the timeline. Check each tab and find out what you can do with each visual or audio.

A tip! You can insert a photo into a video. Just place a white playhead in the chosen place of a video you want to split and hit, yes, the "Split" icon at the top left of the timeline. Now, as you have two files instead of one, drag them apart and insert a photo between them!

Now, the finishing touches: go to the "Text" section and add some captions. Choose a light font, which looks homely and cozy.

When everything looks fine, give your video a run in the player to check if you are happy with the result. If so, hit "Export" and choose the resolution. The ones with a little crown are available only for Clideo Pro accounts. Then click "Continue" and let the tool do its job.

Save the result
When the project is fully processed, save it or hit "Edit" and keep working.

You can find more details about online video editor and other Clideo tools in our Help Center .
Interesting articles
Upgrade your account, get unlimited storage time and create projects without watermarks.

- Our Manifesto
- Video Creation Course
8 Simple Steps to Creating a Travel Video on your iPhone.
How To Make A Travel Video with Pictures & Music.
The 8 steps on how to make a vacation video with pictures and music .
Number one rule don't use templates, it might sound like a good idea at the time to use a template, but why would you want your vacation video to look like someone else's and templates a corny and old school. Making a travel video from your pictures and adding music is actually really easy, here is a step by step guide on how to make a travel video with pictures and music on your iPhone. First of all because they get stuck on the topic of which app to use. This is actually a superficial problem. You can use just about any video editing app out there to make a vacation slideshow.
BUT some are easier than others.
In this article we are going to show you, step by step, how to make a slideshow video on an iPhone without an editing app . Yes that's right, you can do this with only your iPhone.
Then we're going to show you how to do it in iMovie as well. You can decide which method better suits what you want to achieve.
Watch our Video Tutorial

STEP 1. Vacation Video Slideshow on iPhone
First you will need to get some pictures on your phone that you want to make into a short travel video .
There is a super easy way to view your photos as a vacation slideshow with music on an iPhone just using the photos app.
Simply open your photos app. Select all the vacation images you want to include in your vacation slideshow. Tap at the bottom left to see the menu and scroll down to the vacation slideshow option.
Automatically your iPhone will create a travel video with music . You can see multiple images randomly grouped together, with unique transitions between the slides.
Under options you can change the theme, the music, whether it should repeat and the overall speed.
This is a really fast way to create a cool vacation slideshow.
You can airplay this to your TV and show friends if you want, but that is sadly where it ends. This vacation slideshow function does not allow you to export this as a travel video (save your vacation slideshow), so that you can share it with friends and family.. Don't worry, there is an easy workaround. All you need to do is a screen recording.
STEP 2. Make a Vacation Slideshow Video
When you slide up on your screen it opens your control centre.
Here you should have a record screen button next to your flashlight. (A circle within a circle.)
If you do not see it, then you need to customize your control centre.
- Go to iPhone settings.
- Search for a Control Centre.
- Select customise controls
- Look for the screen recording option.
- You need to tap the little green plus button to add it.
Now when you slide to open your control centre you will see the button.
When you tap on this have 3 seconds to set up your screen and record your vacation slideshow.
This will automatically save to your recent folder in the photos app.
If you are interested in taking more control of your edits then we want to show you how to make a travel video with images and music in a 3rd party editing app as well.
STEP 3. How to use iMovie
Using an editing app for making a travel video with images and music gives you more control to make the travel video look the way you want it to look.

For creating vacation slideshows with music we use iMovie for iOS, for 3 reasons:
It is Free.
Easy to use ken burns effect., it comes with your iphone, no need to install anything ..
Tap to open iMovie.
Start a new project.
Next you have two options.
Movie & Trailer.
Movie allows you to create a travel video from scratch whereas the trailer is a pre-templated travel video.
For our vacation slideshow we want to select Movie.
Select the images for your travel video.
Hit create.

You will see if you push play the first image takes way too long to get through. And all the others will be the same. You need to shorten the image duration by trimming it the way you would a travel video clip.
Before we start trimming though, you want to add in the music.
The music will have an impact on the length of the clips.
STEP 4. How to add Music to your Vacation Slideshow
Select the plus over under the preview window (left side) to open the media library. From here you can import media .
Choose the audio section.
Your options are Soundtracks, My Music and Sound FX.
The Soundtracks is a built-in music library in iMovie.
If like us, you prefer to bring in your own music you can go to My Music option and either bring in songs from iTunes or from Youtube.
Under imported you will see some the tracks that are sourced from a free music channel on Youtube . (This is what we usually do)

Add in this track and have a listen.
Now you can shorten the clips to match the feel of the music.
To change clip duration you will need to trim the clip .
STEP 5. Change the Vacation Slideshow duration
Tap on the image to select it.
Once it is selected it will get a yellow border .

In the preview screen:
- At the top you can see the current duration which is 6.6 seconds
- And below are the ken burns controls.
To trim , grab the yellow handle and drag the clip to a shorter length.
Bring your clip all the way down to around 1 second. Flip through all of them to quickly bring down the duration to a suitable length. I'm aiming for around 0,8 to 1.1 seconds. You don't need to be super accurate.
Let's have a look at the ken burns effect now.
Step 6. add the ken burns effect .
Ken Burns is an effect to animate the image to get some movements.
You have the option to change the front of the clip to a “beginning state” and at the end of the clip to an “end state”.
As the travel video plays it will transition between these two states.
If you turn Ken Burns off the images remain static. This is quite boring.
Make sure to mix up the direction and angles of movement. The more energetic the music, the more radical you can make the transitions.
STEP 7. Editing Transitions on a iPhone
The next thing you want to consider is looking at the transitions. By default iMovie places a crossfade between all clips.
You can choose between a whole bunch of different transitions. The theme button actually comes with sound effects.
You can change the direction of the slide transition if you like. There are 4 states you can choose from. Just tap on it again to choose another direction.

If you give your travel video a watch now transitions might still look a little lame.
The main reason for this is because they are two slow.
At the bottom here you can speed it up by choosing the .5 of a second option.
Again this will depend on your music speed and energy.
STEP 8. Save Your Vacation Slideshow Travel Video
You need to basically just watch your travel video from the start and adjust the Image duration/length, Ken Burns & transitions on each of the clips. Keep going through this till you've shortened everything enough to keep the travel video interesting.
When you are finished. Hit done. Top left corner.
Make sure to name your project. You can now hit the share button and share this travel video with whoever you want.
Watch our Slideshow Tutorial
IMPROVE YOUR VIDEO SKILLS
Videos the Pain Free Way
The effortless editing course, click here to save 75%, share this:.
Session expired
Please log in again. The login page will open in a new tab. After logging in you can close it and return to this page.
- Travel Resources
- Destination Inspiration
- Tips & Advice
- Did You Know?
- Conservation

4 Best Video Editing Tools to Create Travel Videos From Your Photos
- August 24, 2022
Nowadays, everyone takes different photos or videos from their vacations to preserve the memories from a holiday. Imagine that after ten years, you would be able to rewatch videos and photos from one of your best holidays. Moreover, if you have kids, you should know that they grow up quickly. You can show your children the videos you made of them while on vacation as they get older.
Multiple video editing tools can help you create unique and creative videos. A decent video editing program and an experience in video editing are key to preserving your memories of holidays. This post will provide you with a list of useful video editing tools to create travel videos from your photos.
According to Statista , the mobile application market continues to expand yearly. inShot is a mobile video editing program that allows users to edit without having to use a computer, which is incredibly convenient for the majority of users. While it is one of the most popular apps for iPhone and Android users, it allows consumers to create videos, trim and merge clips, cut or delete video parts, and adjust audio and video speed. Furthermore, it offers a vast number of functions that allow you to create great Instagram videos.
The application also allows you to add music, voice-over, and text. Furthermore, numerous filters might be ideal for people who want to upload their videos to various social media platforms.
Movavi Clips Edit Video Editor
Movavi is an easy-to-use application for mobile video editing that includes all necessary functions for creating travel videos. Moreover, it is great for Instagram since it has templates suitable for square videos and stories.
You can use any images or videos from your phone’s gallery to create your travel videos with the app. Additionally, you can upload your downloaded music or insert music directly from the application’s available audio list.
Movavi Clips Edit Video Editor includes a multitude of useful features. It’s an excellent video flipper online that can also rotate, crop files, and add different transitions and effects. It can also modify the duration of each clip and add text and stickers. In addition, the application allows users to add their logo to a video after it has been created. You can also record voice-overs for various video clips and adjust the audio volume.
The application is a perfect solution for all types of users because it is easy to use and has many features that allow people to create excellent travel videos. You might create high-quality videos with this app using your mobile device!
Movavi Clips Edit Video Editor offers both a premium and a free plan. However, if you purchase a free plan, you should be aware that there will be a watermark.
According to Statista , the YouTube platform has around 2,240.03 million users. As a result, if you want to upload your travel video to YouTube, iMovie might be a great solution. iMovie is an application created by Apple. It is user-friendly and allows users to create Hollywood-style video trailers using 14 trailer templates. Moreover, you can make an entire movie using iMovie’s unique themes with numerous titles and studio logos.
The application’s most significant feature is that it supports 4K video resolution. Furthermore, created videos can be transferred between different Apple devices such as the iPhone, iPad, or iPod via AirDrop and iCloud Drive. You can also share your travel videos on any social media platform.
iMovie can fix shaky footage, add text, insert and adjust audio, and apply built-in effects. It also contains unique features like automatic video editing and stabilization, which make editing more accessible. Unfortunately, you cannot insert your downloaded audio into the application. If you need to insert audio, you should buy it from AppleMusic or use the free audio provided by iMovie.
InVideo app is the easiest, quickest, and most convenient method to create travel videos. If you have no experience with video editing, InVideo is the ideal option. You can use the program to cut and edit videos, as well as add text and background audio. You can also improve your video by including animation and voice-over. Color can also be edited using the InVideo application.
With the application, you might achieve the desired result with minimal effort. Furthermore, it offers an easy-to-use interface.
To make a fantastic travel video, you don’t have to be a professional video editor. Moreover, you also don’t need to have a computer! With the advancement of technology, people can now create a variety of videos just by using their mobile devices. Thus, the article should have assisted you in finding the best application for creating unique travel videos from your photos.
Try watching a few Instagram travel bloggers get a sense of how the videos are made. Creating an excellent video using a decent editing application won’t be difficult.
Related Topics
- best tools for editing travel videos
- tips on editing travel videos
- travel films
- travel videos
- travel vlogging
- you tube travel channels
What is the best country for digital nomads?

Lust for life: 4 locations for trainspotters to retire to
You may also like.

- Planes, Trains & Automobiles: Tips & Advice
Embracing the Freedom of Australian Motorhome Travel to Discover Hidden Gems
- April 12, 2024

How to Get NHR Status in Portugal

Get Your Nails Done: Manicure and Pedicure In Dubai
- April 10, 2024

Smoke-Free Travel: A Guide for Smokers Visiting Non-Smoking Destinations

- Great Holiday Destinations
5-Star Hotels in Mykonos: Are They Worth the Stay? An Analysis by a Travel Connoisseur
- April 9, 2024

Why You Should Visit Portugal For Your Next Family Holiday

5 Reasons Why a Car Awning is a Game-Changer for Your Outdoor Adventures

Tips to Avoid Car Accidents on Vacation and What to Do When One Occurs
- April 8, 2024
Input your search keywords and press Enter.
Make Travel Videos With Photos and Music!
Whether it’s a one-day road trip or a month-long international vacation, capturing the moments in video form is always captivating. The experience is always enhanced when showed in video form.
With ProVideo and all its tools, you can easily make your travel video using photos and music either for your personal use or for your YouTube channel.
Let’s learn how to make travel videos with photos and music using ProVideo ahead!
How to Make Travel Videos With Photos and Music in ProVideo?
Making your travel video with ProVideo is a process of a few simple steps.
A Travel Video Made With ProVideo
1. Collect Your Photos and Videos
We usually take a thousand pictures and videos on a trip. Now is the time to sort them out and choose the best ones. You can make a separate folder for all your pictures and videos that you want to include in the video. Make sure the pictures and videos are well lit and have proper angles. If not, you can even edit them in ProVideo. This is your first step to know how to make travel videos with photos.
2. Open ProVideo and Start Designing
Now, open the ProVideo app or visit ProVideo Web to get started. ProVideo has a variety of travel video templates to choose from. Select a suitable template from here and select your preferred layout for your video. Square videos are good for Facebook and Instagram while landscape videos obviously work well on YouTube. So accordingly, select the templates and the size.
3. Add Photos
In the next step of knowing how to make a travel video with an iPhone, here starts the customization. Add the photos and videos that you had selected in the first step. Put them in order so as to make a proper video. You can trim the videos too, to suit your requirements. In between photos and videos, it is sometimes important to add transitions to avoid abrupt changes in scenes. But remember to keep them to a minimum, lest it takes the attention off the video.
5. Add Music
A travel video is incomplete without background music. With a huge library of soundtracks and audio effects, add soulful and happy music to your travel video. You can even add your own music by uploading it from your device.
Bonus: Text always complements your videos. That being said, add text to your video scene in ProVideo to specify the name of the place, the time and day you went there, the specialties of that particular place, etc.
Create Beautiful Travel Videos With Photos and Music!
With these steps, your creativity, and our travel video templates, it is a matter of a few minutes to make a travel video. ProVideo has all the necessary features that will answer your question of how to make travel videos with photos. You’re all ready to upload your video!

6 Reasons Why Travel Videos Are Better Than Pictures
By now, you’ve probably found out that I enjoy making travel videos. I feel like they best capture the way I experience my trips, and I love looking back at them. I actually prefer making travel videos over taking pictures, and here are six reasons why.
As you might have noticed, I love making videos. Even though I’m not great at it, it’s something I thoroughly enjoy. When I look at the videos I’ve made, I always see things that I could do better in future videos, but that doesn’t mean I’m not proud of my creations.
Anyway, I’ve been making videos for just over one year now, and I feel like I know enough about the difference between video-making and photography to tell you about why I prefer videos.
You can check out my travel videos here.
You’ve heard of “A picture says a thousand words”, now prepare for…
Okay, so a picture says a thousand words. Totally agree with that. Now, think about what a video is. Isn’t it basically thousands of pictures in rapid succession?
The main point I’m trying to make here is that, while it might be perfectly possible to convey a story in a photograph, it’s going to be a lot easier if you can use moving images.
Videos evoke emotion
Again, same thing. I completely agree that photos can be very effective at bringing emotions to mind. However, I’d much rather think happily about that time I slept in a cave in Malta after watching a three-minute video than after seeing a photo of it.
Actually seeing people, nature and other things move around in your (or other people’s) travel videos can be enough to provoke emotions that would be impossible to capture in a photograph.
Travel videos capture the moment
Lights, camera, … Action. Especially for action/adventure scenarios, it’s much easier to make a travel video that captures the essence of what you were feeling at the time than take a fitting travel photo.
Quick situational sketch. You’re on top of a mountain, about to rush down a slope at 80 km/h. Aside from giving the person who watches your video a feeling of what it’s like to ski , they’ll feel the thrill you felt when you were there.
Besides, isn’t it easier to press one button on an action camera than it is to pull out a DSLR camera, take off your gloves, figure out the perfect setting, take the picture, and store away your camera again? Yeah, I thought so.
Videos make it easier to tell a story
By their very nature, videos are more able to convey a sense of story-telling than their still counterparts. The sheer fact that videos can have sound and photos can’t gives video a huge advantage.
In a travel video, you can hear the wind blow through the trees. You can hear the water rush down the waterfall. You can hear the people crossing the busy street as car horns are honking. Try photographing all of that, and let me know how that goes.
Reminiscing just became a lot easier
It doesn’t take nearly as long to watch a three-minute travel video as it does to get through a photo album of your life-changing trip to Australia.
Also, from my own personal experience, I know that you won’t get bored of watching the videos you made yourself as quickly as you would from photographs. Just sayin’.
A travel video gives you a chance to look back on your crazy memories in a unique way. And it’s easy to share with your friends, since you won’t have to bore them with hundreds of photos of the same mountains.
It’s fun
Videos are fun. It’s as simple as that.
I find both creating a travel video out of the video clips that you gathered during your trip and watching the video you made afterwards to be ultimately enjoyable activities. I don’t mind spending hours working on a video to make sure it’s as good as I can make it.
However, it might not be for everyone. If you’re not the one who enjoys grinding to make sure something is perfect, you’re not going to like making videos.
Bonus reasons!
- It feels good to have people watch your videos, be impressed at your skills and tell you you did a good job.
- You can inspire people more quickly and more easily with a travel video than with a blog post or pictures.
- You get to work with some of your favourite music.
- Anyone can do it.
- You learn a new skill that can impress people more than photography could – if you do it right.
Video-making is still a vastly underappreciated art form. I’m not pretending like you can still hop on the train and be one of the early genius artists, but it’ll definitely be easier to stand out and be recognised as a good videomaker than as a good photographer.
I’m also not going to deny that there are situations in which pictures are a better option than travel videos. Essentially, it all comes down to personal preference. I enjoy making videos more than I enjoy taking pictures, and I’m better at it. So I’ll keep making videos. At least for now.
My travel video gear:
- Nikon D3400
- GoPro action camera
- EVO GP-PRO 3-Axis Gimbal
What about you? Do you make travel videos? If not, would you consider doing it?
Leave a Reply Cancel reply
Your email address will not be published. Required fields are marked *
In Belgium, golden brown fries are the star of the show

Urbex in Charleroi: exploring the city’s faded glory
Antwerp or Brussels — Which city should you visit?
Naples: the worst of Italy in one place
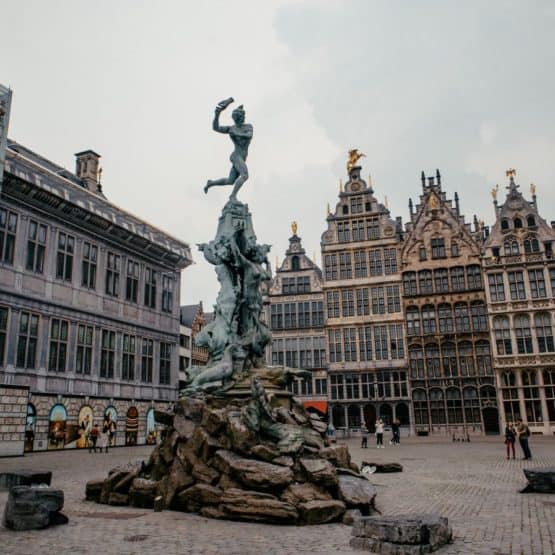
Top 10 Free Things To Do in Antwerp (Belgium)
Design by NXNW .
Travel | April 12, 2024
Behold 15 Beautiful Photos of Cherry Blossoms in Bloom
These 15 picture-perfect cherry blossom images from the Smithsonian Magazine Photo Contest are pretty in pink.
:focal(768x1024:769x1025)/https://tf-cmsv2-smithsonianmag-media.s3.amazonaws.com/filer_public/76/f7/76f77b17-226f-4366-9f19-dec408b2d55b/057c814e-8f34-4244-a777-024d95098ff3.jpg)
A close-up of blooming blossoms captures their stunning detail.
Photographs selected by Quentin Nardi
Text by Tracy Scott Forson
Native to Japan, the cherry blossom trees that draw crowds to the Washington, D.C. Tidal Basin each year were originally received as a gift from the nation in 1912. Now, thousands of trees dot the area near the National Mall, blooming in March and April, contributing to the theme of rebirth we associate with spring.
Although the blooms in Washington, D.C. may be the most popular in the country due to their placement among national monuments, such as the Thomas Jefferson and Martin Luther King Jr. memorials, cherry blossoms grow in gardens in Massachusetts, New York, Missouri, California and other states across the nation. And, of course, they’re still found in Japan. Luckily, you don’t have to travel to any destination—unless you want to—to experience the beautiful blooms. Take a look.
/https://tf-cmsv2-smithsonianmag-media.s3.amazonaws.com/filer_public/d8/dc/d8dc6b4a-5920-4fd2-9125-9c1b7e7f3a7e/d8258836-793a-42cc-b848-5d35d0725176.jpg)
Get the latest Travel & Culture stories in your inbox.
Tracy Scott Forson | READ MORE
Tracy Scott Forson is a senior editor at Smithsonian magazine.

These solar eclipse 2024 photos from our readers are absolutely amazing (images, video)
O n Monday, April 8, a total solar eclipse swept through the skies over North America, delighting and astounding millions of onlookers who had traveled from across the globe to take in this incredible event. And our own space readers got in on the act, too.
The sun was completely obscured by the moon across what is known as the "path of totality," which was approximately 115 miles (185 kilometers) wide and 10,000 miles long (16,000 kilometers).
This 2024 total solar eclipse path crossed the four Mexican states of Sinaloa, Nayarit, Durango, and Coahuila before passing over 15 U.S. states, Texas, Oklahoma, Arkansas, Missouri, Illinois, Kentucky, Tennessee, Michigan, Indiana, Ohio, Pennsylvania, New York, Vermont, New Hampshire, and Maine.
The path of totality then moved through Canada, with the total eclipse seen in seven Canadian Provinces of Ontario, Quebec, New Brunswick, Prince Edward Island, Nova Scotia, and Newfoundland.
Related: When is the next solar eclipse?
NASA estimated that 31.6 million people live in the totality path in the U.S. alone. With so many people on the path of the eclipse, and many more traveling to join them, it is unsurprising that there are a plethora of astounding images of the most striking astronomical event of 2024.
Space.com reader Rajat Kumar Pal captured an incredible composite image of the total solar eclipse from Stow, Vermont.
"In this image, a lot of things are going on: first, obviously the eclipse itself, second almost 40 % of cloud cover, making it difficult to get a clear picture of the solar disc as well as the corona. and other features; and third, a constant for fiddling around with the exposure as clouds interfering with the intensity of light from the eclipsed sun!" he wrote. "Above all, it was an amazing experience to watch it with my wife, Sudakshina, who experienced this after a long time (her last eclipse experience was when she was a kid, and she forgot most of it).
"It was a beautiful and surreal experience, and experiencing it with my wife is something special!"
Totality awesome!
The first region to experience totality during the total solar eclipse was Mazatlan, Mexico, where the moon completely covered the sun at around 11:10 local time (14:10 EDT/18:10 GMT).
One region in the U.S. where the eclipse reached totality on April 8 was Indianapolis, Indiana. Onlookers who gathered at the Indianapolis Motor Speedway caught a glimpse of a flash of light as the last sunlight streamed past the moon just before the totality, a phenomenon also known as a " diamond ring ."
The total eclipse of the sun reveals aspects of the sun that are usually obscured. This includes layers of the sun's atmosphere. The corona , the outer solar atmosphere, and the chromosphere, the sun's inner atmosphere.
This image was captured from Bloomington, Indiana, and shows a pink layer around the dark disk of the moon, which is the chromosphere .
Related: The solar eclipse is over! Here's what to do with your eclipse glasses
Not to be left out, the corona also made several special appearances during the total solar eclipse, unobscured by photons from the photosphere . This image captured from Russellville, Arkansas, on April 8, shows the corona as white "streamers" extending out from the dark lunar disk.
Space.com reader Silvia Lobo was also able to capture an incredible view of the corona, with hints of the chromosphere at the bottom of the lunar disk from Saranac Lake, New York.
Space.com reader Jackman Maine caught an image of the totality over a rural landscape.
The solar eclipse looks particularly fierce in a "miracle" image taken from Kimball Bend Park in Central Texas by Space.com reader Justin Maune. They said, "I just took this photo a few hours ago. I traveled 30 hours from So Cal to Texas to see this.
"The clouds were looking terrible. Overcast. And then it cleared. Like a miracle, 10 minutes before totality, the sky was clear, and I was able to snap this pic."
Diamond rings and other eclipse things
Space.com reader Kim DeCew described the eclipse as "an incredible experience" and caught some incredible images from Hico, Texas, including the diamond ring picture below, to prove it.
The diamond ring effect around the lunar disk wasn't the only diamond on display during the eclipse; some literal stones were also on show. The jubilation felt during this astronomical event was elevated in Tiffin, Ohio, during the "elope at the Eclipse" event when over 100 couples tied the knot during the totality.
Congratulations to the couples wedded at the event, but if their wedding song wasn't "Total Eclipse of the Heart" by Bonnie Tyler and Jim Steinman, it's a real missed opportunity!
A phenomenon associated with the diamond ring (the eclipse variety that is) are Bailey's Beads, droplets of light that represent sunlight streaming through the valleys, craters, mountains and rough terrain of the moon.
Space.com reader Sudakshina Chakrabarty captured an impressive image of Bailey's Beads from Stowe, Vermont.
Outside the path of totality, skywatchers caught many fascinating images of the partial solar eclipse these regions experienced. One striking example was this image taken in New York.
X user and Architectural Photographer Alex Farmer captured incredible time-lapse footage that showed the skies darkening over Cleveland, Ohio.
The solar eclipse brought out many amateur photographers taking images with nothing more than a cell phone, arguably demonstrating how advanced cell phone cameras have become.
On such eclipse watched was the son of x user leftbob, who caught some fantastic images with their phone.
"I completely underestimated how cool it would be to see the eclipse in totality. The strange hue of color as it got darker, how cold it got, and the brilliance of the corona when it appeared," Leftbob wrote . "It was amazing. My son took these pics with his phone!"
The eclipse from the air and beyond!
Answering the question " what does the eclipse look like from an airplane " passengers departed Dallas Fort Worth International Airport on the Delta Airlines flight from Dallas to Detroit glimpsing the eclipse through airplane windows.
Rather than taking a location-based approach, the European Space Agency (ESA) went a little higher even, imaging the eclipse with its Geostationary Operational Environmental Satellite (GOES-16). GOES-16 captured stunning timelapse footage of the shadow of the moon gliding over the surface of Earth, showing this event from a cosmic perspective.
The ESA shared the footage on its ESA Earth Observation X feed writing: "Blink and you'll miss it... These images by the Geostationary Operational Environmental Satellite (GOES-16) captured the moon's shadow cast on Earth's surface moving across North America from 16:00 to 23:00 CEST."
Also taking a more out-of-this-world approach to the total solar eclipse was the crew of the International Space Station (ISS). On its X feed , NASA shared video footage of the moon's shadow projected on Earth during the eclipse.
If the above images have you eager to do your own spot of eclipse watching, the next solar eclipse is visible from Greenland, Iceland, the Atlantic Ocean, and Spain on Aug. 12, 2026.
Eclipse chasers not keen on traveling outside North America, will have longer to wait. The next total solar eclipse will happen on March 30, 2033, and will be seen in Alaska.
Following this, the U.S. states of Montana, South Dakota, and North Dakota, and areas of Canada will experience a total solar eclipse on Aug. 23, 2044 . Then just under 12 months later, on Aug. 12, 2045, a total solar eclipse will be visible over California, Nevada, Utah, Colorado, New Mexico, Oklahoma, Kansas, Texas, Arkansas, Missouri, Mississippi, Louisiana, Alabama, Georgia, and Florida in the U.S. as well as in the skies of the Caribbean and South America.
Submit your story photos! If you capture a photo of the April 8 total solar eclipse or any of these strange effects and would like to share it with Space.com's readers, send photos, videos, comments, and your name, location and content usage permission release to [email protected].
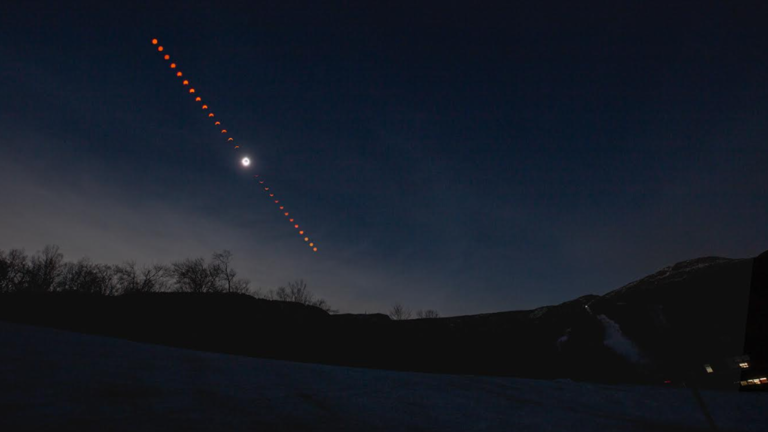
See how the eclipse transformed America, city by city

For weeks, if not months, those who have seen one repeated to anyone who would listen: There’s nothing like experiencing the totality of a solar eclipse.
For some of them, this was a second time in six and a half years experiencing the eerie calm when the moon passes in front of the sun, at least for a few minutes. And yet, they were just as awestruck.
For others, it was a likely last opportunity to witness such a celestial phenomenon for two decades. It inspired gasps and smiles, solemnity and excitement.
Here is how it looked as the moon’s shadow crossed three countries and 13 U.S. states, with the time of totality in Eastern time.
El Salto, MX
2:10 — 2:14 p.m.
Uvalde, tex., 2:29 — 2:33 p.m., russellville, ark., 2:50 — 2:54 p.m., carbondale, ill., 2:59 — 3:03 p.m., bloomington, ind., 3:04 — 3:08 p.m., tiffin, ohio, 3:11 — 3:15 p.m., littleton, maine, 3:32 — 3:35 p.m..

Time of totality
El salto, mexico.
A group of professors and students traveled from the United States to El Salto to conduct the most thorough experiment ever using an eclipse to test Albert Einstein’s theory of relativity. Einstein’s idea held that the massive sun would bend the light of surrounding stars more than previously estimated, proving that matter can pull and warp space and time.
The researchers used five telescopes to measure that effect more closely than ever, measuring stars that appear so close to the sun’s edge they can only be viewed during an eclipse.
After a countdown in Spanish, the sun darkened, and the data collection began. “TOTALITY,” yelled Sam Jeffe, a third-year physics major at Willamette University as it appeared in the telescopes’ lenses. “And it’s clear!”
Researchers will feed the data into the computer program, which will analyze the position of the stars and determine how the sun bent the light around them. But, for now, more than half the battle was done.

2:27 — 2:31 p.m.
Eagle pass, tex..
On U.S. soil, totality first came into view in the border city of Eagle Pass, Tex., where a crowd gathered at a football field erupted into cheers as the skies darkened above them.
A singer crooned, “I’m walking on sunshine!” People put on protective glasses and craned their necks toward the sky. Many began to clap.
Vita Garza Flores, 76, traveled from Northern California to see the eclipse in the city where she was born. She brought her daughter and brother along with her.
She grabbed her eclipse glasses, positioning them across her sunglasses: “Wow!”

Students from Uvalde High School were also among the citizen scientists using the eclipse to learn more about the sun and its effects on Earth.
They joined Southwest Texas Junior College’s STEM club in participating in a program known as the Citizen Continental-America Telescope Eclipse. Called Citizen CATE, it will combine short videos of the eclipse taken via telescope into an hour-long movie that NASA says will detail magnetic structure within the sun’s corona and reveal its density. That will help scientists to measure the strength of the solar wind — charged particles that can disrupt electricity grids and produce auroras when they reach Earth.

In Russellville, NASA gathered scientists and broadcast the eclipse’s progress live online. Tourists gathered there, too, wearing T-shirts that declared, “I got mooned at the eclipse.”
A jazz band from Arkansas Tech University played. NASA hosted workshops and Q&A sessions with scientists, at least one of whom has been to space: Among the visitors were Mike Massimino, a veteran of NASA space flight missions to upgrade the Hubble Space Telescope in 2002 and 2009.

Carbondale, Ill., earned the title of “eclipse crossroads of America,” having fallen in the path of totality for a 2017 solar eclipse as well as the event on Monday. This time, at least, the skies were clear for totality, and a full stadium of eclipse fans burst into collective screams when the moment came.
“This is so much better than 2017,” a one commentator on NASA’s live broadcast noted. “It’s so much darker than 2017.”

To many of those who experienced it, the eclipse was a spiritual event. In Bloomington, Buddhist monks marked it with a puja ceremony, a “ritual honoring and promoting inner and planetary healing,” according to the Tibetan Mongolian Buddhist Cultural Center.
Eclipse watchers flocked to Yellowwood Lake where they could experience the eclipse in nature.

When the last pulses of the sun’s rays make their way to Earth before an eclipse enters totality, they appear like a brilliant diamond set on a golden ring. In Tiffin, that meant a chance for some “unforgettable” weddings at an event called “Elope at the Eclipse.”

3:18 — 3:21 p.m.
Niagara falls, n.y..
Crowds flocked to landmarks across the path of totality for a memorable view. At Niagara Falls, despite a thick blanket of clouds, people gathered on the banks of the Niagara River and trained their phone cameras toward the sky. Streetlights turned on, if only briefly, when darkness descended.

The moon’s shadow reached North America at the beaches of Mazatlan, Mexico, just after 2:07 p.m. Eastern time. Just about 90 minutes later, it crossed the wilderness of northern Maine, on its way toward Canada, and then, the North Atlantic.
A total solar eclipse will next dim communities in the contiguous United States in 2044, but only in parts of Montana and the Dakotas. The country will have to wait one more year for the next coast-to-coast phenomenon, a total eclipse that will stretch from California to Florida on Aug. 12, 2045. It will be a Saturday.
About this story
Design and development by Stephanie Hays. Photo editing by Olivier Laurent. Design editing by Chloe Meister and Matt Callahan. Text editing by Katie Zezima. Graphics by Emily Eng. Video editing by John Farrell and Josh Carroll. Text by Scott Dance, Kasha Patel, Arelis R. Hernández and Joel Achenbach.

IMAGES
VIDEO
COMMENTS
With your trip just ahead, it's time to learn how to make a travel video with any camera. These are my top 10 tips to making a cinematic and engaging travel ...
All Sizes. Download and use 31,621+ Travel stock videos for free. Thousands of new 4k videos every day Completely Free to Use High-quality HD videos and clips from Pexels.
Do you want to create breathtaking videos and eventually make a living doing so? Check out my free ebook: "5 Steps to Becoming a Pro Video Creator": https://...
Tilting: Rotate your camera vertically, moving it up or down. Tilting is useful for emphasizing tall structures or capturing dramatic skies. Tracking: Follow a subject's movement by moving your camera smoothly alongside it. Tracking shots add dynamism and immersion to your videos.
All you need to do is write a script and record. Think of this as an opportunity to really organize your story. ("Little did we know what was waiting for us around the corner.") For an extra ...
Camera: Sony a7R V, the highest resolution full-frame camera out there, is my go-to camera when I travel. All of my recent photos and videos are all from this beast. All-Around Travel Lens: Sony 24-70mm f2.8 GM II lens is the lens I mounted on my camera the most. The lens covers most of the ranges I need for travel from wide to telephoto.
1. Preparation. 1. Travel Gear I Use. First and foremost, before every big trip, I will always list my camera gear and assess how it will fit in my backpack. I am a light traveler with one 60L backpack for clothes and one 25L Herschel daypack for all my camera gear, so space management is very important.
Planning to shoot a travel video? These 5 tips will help any filmmaker or videographer shoot videos quicker and more efficiently. Try these techniques when y...
1 My travel video gear essentials. 1.1 Main camera: Nikon D3300. 1.2 GoPro Hero 4 Silver. 1.3 Sony Compact Camera. 1.4 DJI Spark (Fly More Combo) 1.5 GoPro Dome. 2 Travel vlogging gear - useful accessories. 2.1 Bokeh lens for Nikon D3300. 2.2 Extra batteries.
The best video editors: Fastreel. This tool can be used by amateurs and professional videographers. Reversing, crop, loop, and make stop-motion videos right in your browser. What's more, Fastreel is ideal for making slideshows, and collages. Kizoa. Add engaging captions, stickers, with Kizoa.
24/7 customer support. Our customer support team is available to help 24/7. Enterprise members also receive dedicated account managers and a guaranteed uptime SLA. Vimeo's free travel video creator and editor makes it easy to do custom, stunning traveling video content. Browse all templates and effects.
Tips for Making Travel Videos with Photos and Music 1. Pick a Theme for Your Video. There are various themes for travel videos. You can either shoot professional vlogs or can shoot it in a guide style. Your travel videos can also be entertaining or niche based. Picking a theme will clarify what will likely go into the travel videos. 2.
Capture hands-free POVs and unique angles with the Insta360 GO 3 (left). Equipped to stabilize movement and take sharp photos and smooth videos, the DJI Pocket 3 (right) is the ideal travel companion.
Just place a white playhead in the chosen place of a video you want to split and hit, yes, the "Split" icon at the top left of the timeline. Now, as you have two files instead of one, drag them apart and insert a photo between them! Now, the finishing touches: go to the "Text" section and add some captions.
The cinematic travel video templates give you unlimited options to start your video. You'll find wonderful intros, outros, music, footage & slides for a professional travel video. Upload your traveling clips & photos, add words, effects & other edits, you'll get a satisfying travel video. Try it for free! Make a Free Video. Handy video editor
STEP 1. Vacation Video Slideshow on iPhone. First you will need to get some pictures on your phone that you want to make into a short travel video.. There is a super easy way to view your photos as a vacation slideshow with music on an iPhone just using the photos app.. Simply open your photos app.
735 templates. Create a blank Travel Video. White and Brown Simple Animated Travel Vlog Youtube Intro Video. Video by Namara Creative. White Modern Traveling Channel Intro Outro Youtube Video. Video by Ramdhaniyah Mumtazah's. Brown Beige Rustic Neutral Cute Aesthetic YouTube Intro. Video by insangle.
176. Download and use 100,000+ Travel stock photos for free. Thousands of new images every day Completely Free to Use High-quality videos and images from Pexels.
Movavi Clips Edit Video Editor. Movavi is an easy-to-use application for mobile video editing that includes all necessary functions for creating travel videos. Moreover, it is great for Instagram since it has templates suitable for square videos and stories. You can use any images or videos from your phone's gallery to create your travel ...
This is your first step to know how to make travel videos with photos. 2. Open ProVideo and Start Designing. Now, open the ProVideo app or visit ProVideo Web to get started. ProVideo has a variety of travel video templates to choose from. Select a suitable template from here and select your preferred layout for your video.
Download and use 100,000+ Traveling stock photos for free. Thousands of new images every day Completely Free to Use High-quality videos and images from Pexels
Travel videos capture the moment. Lights, camera, … Action. Especially for action/adventure scenarios, it's much easier to make a travel video that captures the essence of what you were feeling at the time than take a fitting travel photo. Quick situational sketch. You're on top of a mountain, about to rush down a slope at 80 km/h.
Travel | April 12, 2024. Behold 15 Beautiful Photos of Cherry Blossoms in Bloom. These 15 picture-perfect cherry blossom images from the Smithsonian Magazine Photo Contest are pretty in pink.
2024 total solar eclipse. A total solar eclipse passed across the United States on Monday, April 8. See photos and videos from the path of totality and read our reporters' coverage from scenes ...
If you capture a photo of the April 8 total solar eclipse or any of these strange effects and would like to share it with Space.com's readers, send photos, videos, comments, and your name ...
Called Citizen CATE, it will combine short videos of the eclipse taken via telescope into an hour-long movie that NASA says will detail magnetic structure within the sun's corona and reveal its ...
Former President Bill Clinton, former first lady and Secretary of State Hillary Clinton, actor Robert De Niro, and Amazon founder Jeff Bezos are among the distinguished guests arriving at the ...
A total solar eclipse passed over North America on Monday, putting on a dramatic show that was visible to millions of people.. A total solar eclipse occurs when the moon passes between Earth and ...
At a Glance. Physician Jason Persoff is also known as Storm Doctor. Persoff's passion is photographing tornadoes and snowflakes. His love for photography started at the age of 8.
Newly released bodycam footage reveals the mayhem that unfolded in a residential neighborhood when Chicago police fired as many as 96 bullets toward a man during a traffic stop, killing the 26 ...