Cookie policy
Wanderlust Movement | A South Africa Travel Blog

The Ultimate Solo Travel Photography Guide: 20+ Secrets for Taking Photos Alone
March 5, 2023 by Lauren Melnick
Last Updated on September 3, 2023 by Lauren Melnick

“You want me to take travel photos of myself by myself? In public!?”
A sentence I uttered way back in 2016, followed by a wave of anxiety, fear, and cold sweaty palms.
If you scroll far back enough on my Instagram feed , you’ll see that my first foray into the world of solo travel photography consisted of only landscapes.
I was waaaay too terrified and shy to take photos of myself when travelling solo.
Ask someone to take my photo? The level of awkwardness and cringe is too damn high.
Do it myself with a tripod? People will stare, laugh, and I might die of embarrassment. No, I definitely will die of embarrassment.
After repeating this cycle for about a year into my solo travels, I realised something while scrolling through my gallery.
I had been to sooo many incredible places, but I wasn’t in any of my photos. I was missing out on capturing memories because I was concerned about what other people thought.
Sound familiar?
If so, it’s time to give your insecurities (and anyone who has made you feel small) a giant f**k you. Learning how to take better photos of yourself is not vapid, vain, or cringy.
It’s empowering. It will boost your confidence.
And when you get home from your next holiday, you’re going to have banging photos of yourself instead of a suitcase of regret.
Without further adieu, I present my findings on everything I know about how to take travel photos. This is the only solo travel photography guide you’ll need to master your camera and start capturing your memories like a pro.
No Insta Husband required!
Psst…Want more solo travel photography tips? Check out these other posts:
- Gifts for Travel Photographers: The Ultimate Photographer Gift Guide
- How to Photograph the Milky Way (Step by Step!)
- 20+ Most Instagrammable Places in Cape Town
- 10 of the Best Camera Bags for Women Who Love to Travel
Table of Contents
What Camera Lens Should You Use for Solo Travel Photos?
The best dslr tripod for solo travel photos, the best smartphone tripod for solo travel photos, get an attachment for your smart phone, buy a remote bluetooth shutter, download the camera app for your dslr, buy an intervalvalometer, start shooting on continuous self-timer, shoot on 4k video & take screenshots, how to get epic travel photos from strangers, go early, like sunrise early, shoot at golden hour, research locations for photos, practice your posing at home, use movement in your photos, safety tips for taking solo travel photos, the most important thing for solo travel photos have fun, try the classic back-to-camera, make triangles with your body, editing your solo travel photography, taking photos when travelling alone: final thoughts, how to take photos of yourself when travelling solo.

The best part about solo travel photography? There are so many methods you can use to get the perfect shot.
Below you’ll find all the different gear and all my solo travel photography tips I use when travelling alone.
Choose The Best Camera for Solo Travel for Your Budget
One of the top questions I get in my DMs?
“What camera do you use?”
It’s a valid question, but the answer is not as important as you think.
The best camera for solo travel is the one you have.
Let me explain.
You don’t need to have the most expensive DSLR cameras to take incredible solo travel photos.
Smartphones these days are more than capable of snapping jaw-dropping pictures. Both can give you high-resolution photos as long as you know how to use them.
So whether you have a smartphone or a DSLR, take the time to watch YouTube tutorials and learn how the camera works. Your photos will improve with a basic understanding of the functions, settings, and things like an exposure triangle .
But if you’re in the market, here are some of the best cameras for solo travel:
- Best action travel camera: GoPro Hero 11
- Best mirrorless travel camera: Sony A7 III or A7 IV
- Best travel vlogging camera: Sony RX100 VII
- Best budget travel camera: Canon 2000D (my first DSLR)
- Best smartphone camera for travel: iPhone 13 Pro
- Best travel drone: DJI Spark or DJI Mavic Mini 2
In case you’re curious, I currently shoot with a Canon D80 and a Sigma Art 1.8f/s 18-35mm .
However, it’s a BULKY set-up for solo travel photography. When my next upgrade is due, I’ll be moving towards a mirrorless range as I do believe a lightweight option is the best camera for solo travel.
When travelling and taking photos, you want to keep your set-up lean. You don’t need five different types of lenses to get a good shot.
All that’s going to do is weigh you down.
Instead, invest in a versatile wide-angle lens you can use in 80% of your shooting conditions.
What does that mean?
You want a lens with a decent range to zoom in on far-away features and zoom out to fit everything into the frame.
At the moment, I shoot with a 18-35mm lens, which I love. However, I’ve noticed I need a bit more focal length and don’t want to lug around a second lens. So I’ve started saving up to upgrade to the more versatile Sigma Art 24-70mm 2.8 f/s .

Invest in a Tripod
A tripod is your BFF as a solo traveller.
It wakes up at the same time as you. It doesn’t complain when you ask for “just one more photo”. Most importantly, your trusty tripod won’t give you blurry photos, cut off your head, or move your frame.
There’s only one problem…
…Which tripod should you buy for solo travel photography?
I highly recommend the Manfrotto Element Traveller tripod . I bought mine in Bali , and it’s incredibly lightweight, sturdy (which is super important because my lens and body weigh about 2-3kg) and packs up small.
It isn’t the cheapest tripod on the market, but the quality is worth the investment.
You have a few tripod options for smartphones to match your travelling style.
- Want something that can fit in your handbag and requires ZERO set-up? Pick up a gorilla pod . It’s a small, lightweight tripod that can grip almost any surface. While you won’t have the height, you can still get the shot if there is something tall to wrap it around.
- What about the best selfie stick for solo travel? The Andowl Selfie Stick is the perfect camera accessory for solo trips. It can open its feet to form a cellphone tripod, or you can extend the only upper portion into a selfie stick.
- But if you want something more traditional with height, the Manfrotto Element MII Mobile is the best iPhone tripod for solo travel. It reaches up to 160 cm and folds down to 42.5 cm. Plus, you get a Bluetooth remote and a clamp to connect your phone to the tripod.
Again, Manfrotto’s aren’t cheap cellphone tripods, but the quality is unmatched. If it’s out of your price range, Takealot has a range of more affordable brands.
And remember, you don’t need top-of-the-range photography gear to take amazing pictures . As your skills improve, you’ll want to invest in more high-quality equipment, but start with what you can afford.
I started with a cheap as chips Fuji stand-and-shoot camera. I only upgraded to a DSLR two years into my travels.

If you have a tripod for a DSLR camera, you don’t need to buy a second one for your smartphone.
All you need is a cellphone attachment.
I use the LASA Tripod Phone Mount Holder Screw Rotatable Bracket . It makes it easy for me to switch between my different cameras and get the shots no matter where I am.

Do you know what’s a workout?
Setting up a timer and running into the frame for every. single. photo.
It’s time-consuming, and it takes you out of the zone.
One of the best investments I made was buying a remote Bluetooth shutter for my DLSR and iPhone.
I use the Photographic Wireless Remote Control for Canon DSLR Cameras and this smartphone Remote Shutter .
Tip: If you don’t use a Canon, search [camera brand name] + remote shutter on Takealot. But before adding it to your cart, double-check it supports your camera make!
Here are some photos I’ve taken with my remote shutter. You can easily hide the remote by cupping it, holding it behind your back, or concealing it in a pocket.

Does your DSLR have a WiFi feature?
Then there’s a good chance your camera brand has an app you can use, which WILL change your life.
Do you find yourself getting frustrated with setting up a shot? Maybe it’s figuring out how far or close to stand from the camera or if you need to change the angle.
Are your photos out of focus? Maybe your DLSR keeps focusing on things in the foreground or background, and it’s taking you too damn long to get the perfect shot.
The camera app will solve all your solo photography woes.
You can see in real-time what your camera sees and adjust your settings like:
- Focus points
Here are some photos I’ve taken with my camera app. I usually hold the phone and angle my body so you can’t see it, or I put it on the floor.

There are times when I’ve tried to take a photo of myself with the above methods, and it’s FAILED.
I was too far away from the camera, and my phone or remote lost signal.
As someone who lives for tiny humans in epic landscapes, I knew I needed to invest in an intervalometer.
…Errr a what now?
An intervalometer, also called an interval meter or interval timer, is a device that allows you to operate the shutter at regular intervals over a specific period.
As a solo traveller, you can set up your frame, adjust all your settings, and jump into the frame. Your camera will continue to take photos every 2 seconds, 10 seconds, or 60 seconds – it’s up to you!
I love this because it lets you move around and capture a candid moment without having to remember to click a button or hide your remote. Plus, you can stand further away from the camera and get the shot.
Love taking photos of the stars? You can use your interval meter for time-lapse photography and create epic star trails!
Tip: Some cameras will have built-in interval timers. Check your camera model before deciding to invest in another gadget.
Shooting on continuous mode is a game-changer.
If you’re someone like me who loves movement in your photos, this feature will help you capture that perfect candid moment.
So what is it?
It’s a setting on your phone or DSLR camera that will give you 2 to 10 seconds to run into the frame and then shoot 3+ rapid-fire pictures in a row.
Basically, it’s the equivalent of burst mode WITHOUT finding someone to tap the shutter button on your phone furiously.
The only downside?
You may need to run back and forth between your camera.
Here are some photos I’ve taken with self-timer continuous:

One of the best tips for taking travel photos by yourself in public is to shoot on 4k video.
It gives you the freedom to move around and pose without worrying about remotes or timers.
You can let the video roll, and when you’re done, grab screenshots.
And bonus! You have some rad video content for TikTok or Reels.
…But what about the photo quality?
Shooting in 4k means, you’re getting the equivalent of 8.8 MP in each still frame (depending on the camera you use).
Now, if you’re a pro photographer, that 8.8 MP file is probably not enough, but the rest of us? Most of our images are going up on Instagram, and you’re not blowing them up for canvas prints.
Do you need a DSLR to shoot in 4k? Absolutely not! Most smartphones like the iPhone 12 pro let you toggle between 4k and HD video quality.
Sometimes you might need to ask a stranger to take a photo of you, or maybe you’re travelling with a friend or partner.
The only problem?
9/10, you’re going to get a kak photo.
How do you solve this problem? With these three tips:
- Use burst mode on your phone or high-speed continuous on your DSLR : This will allow you to move around while the shutter goes off. You’ll get dozens of photos to choose from instead of one blurry image you hate.
- Set up the shot beforehand: I usually take an example photo to show the person and leave the gridlines on. Then I use these lines to explain where I want to be in the frame.
- Lay down the laws of the land: Before going into the frame, tell the person not to move your frame and not to zoom in or use any weird features like Portrait Mode. Zooming in reduces your image quality, and the Portrait Mode on phones usually ends up blurring something it shouldn’t, and it looks fake.
Photography Tips for Solo Travellers

When you’re learning how to take pictures when you travel alone, there are a few things you can do it nip fear and anxiety in the bud.
If there’s one thing that will quickly turn you into a morning person, it’s photography. The more you do it, the more you’re going to chase that good light, and nothing beats sunrise (sorry, sunset).
Besides the gorgeous soft light, no other humans are awake. You’ll have some of the world’s most beautiful natural wonders and tourist attractions all to yourself.
That deals a quick one, two punch to the horror of having people watch you take travel photos alone.

As I mentioned above, the best time for photos is between sunrise and sunset.
An hour before the sun dips or comes over the horizon – the light is spectacular. This is known as golden hour, and I’ll wake up at 4:00 every single day for it.
If you’re not sure when golden hour starts, download an app called Photo Pills . It is a paid app, but if you’re starting to take travel photography seriously, it’s well-worth the R200.00 investment.
The quiet morning hours are my favourite for two reasons:
- Fewer photo bombers
- I prefer the softer light to the more intense orange you get at sunset photoshoot
Read More: 10 Magnificent Sunset Spots in Cape Town You Need on Your Bucket List

Before I go to a new destination, I spend a good chunk of time collecting reference shots.
Why go through this effort? It eliminates “ I don’t know what the f**k I’m doing ” syndrome.
You’ll know exactly what to expect from the location, what angles you like and what poses you want to try out.
I collect reference photos on Pinterest and in a folder on Instagram. The night before, I’ll screenshot or download my favourites onto my phone in case I don’t have data or signal at any of the photo locations.

Dust off your smartphone or DSLR and have a mini photoshoot at home. Figure out what poses flatter your body the best and what movements you like in your pictures.
When it comes to shooting in the real world, you’ll have a posing bank to draw from, and you’ll avoid the trap of “ I don’t know what to do with my hands!”
If you look at my Instagram, you’ll see that I reuse the same poses all the time. I have no shame in that. I like what I like, and no one expects me to drop a pose like Kendall Jenner.

Adding movement to your photos does two things:
- It makes your photo more visually appealing.
- It creates beautiful candid shots (and takes the stress out of posing).
I still feel like an awkward potato in m photos unless I’m moving around. It’s where I am most comfortable because I’m in the moment and not hyper-focused on what my face looks like.
Before you set up your camera and run into frame, here are some things to keep in mind to make sure you (and your belongings) stay out of harm’s way.
- Keep your valuables nearby: Don’t leave your bag or jacket unattended with your passport, credit card and money. Use it as a prop or keep it out of frame without breaking your line of sight.
- Listen to your spidey senses: If you’re getting the “ick” feeling from being in a quiet area or the people around you – leave. Trust your intuition. A photo is never worth your safety.
- Stay close to your camera: I’m usually only a few steps away from my tripod. Using a wide-angle lens helps me capture more of the screen without having to leave my camera far behind.

Seriously, your photos will come out 10x better if you’re genuinely having fun.
We can all pick up on stiff body language and forced smiles.
Let go and enjoy the moment. Emote the emotions you’re feeling at the destination, whether it’s excitement, bewilderment, or amazement.
I continuously work on this because I’m someone who lives in my head…a lot. It holds me back, and it’s not a pattern I like to reward.
Remember, solo travel is fun . Keeping that mind brings me back to the present moment, and I always end up liking those images way more than the ones I’m trying really hard.
How to Take Travel Photos Alone: Solo Travel Photography Poses
Need some pose ideas for your next trip? Here are some tried and true tips that are easy to do and instantly make taking photos alone easier.

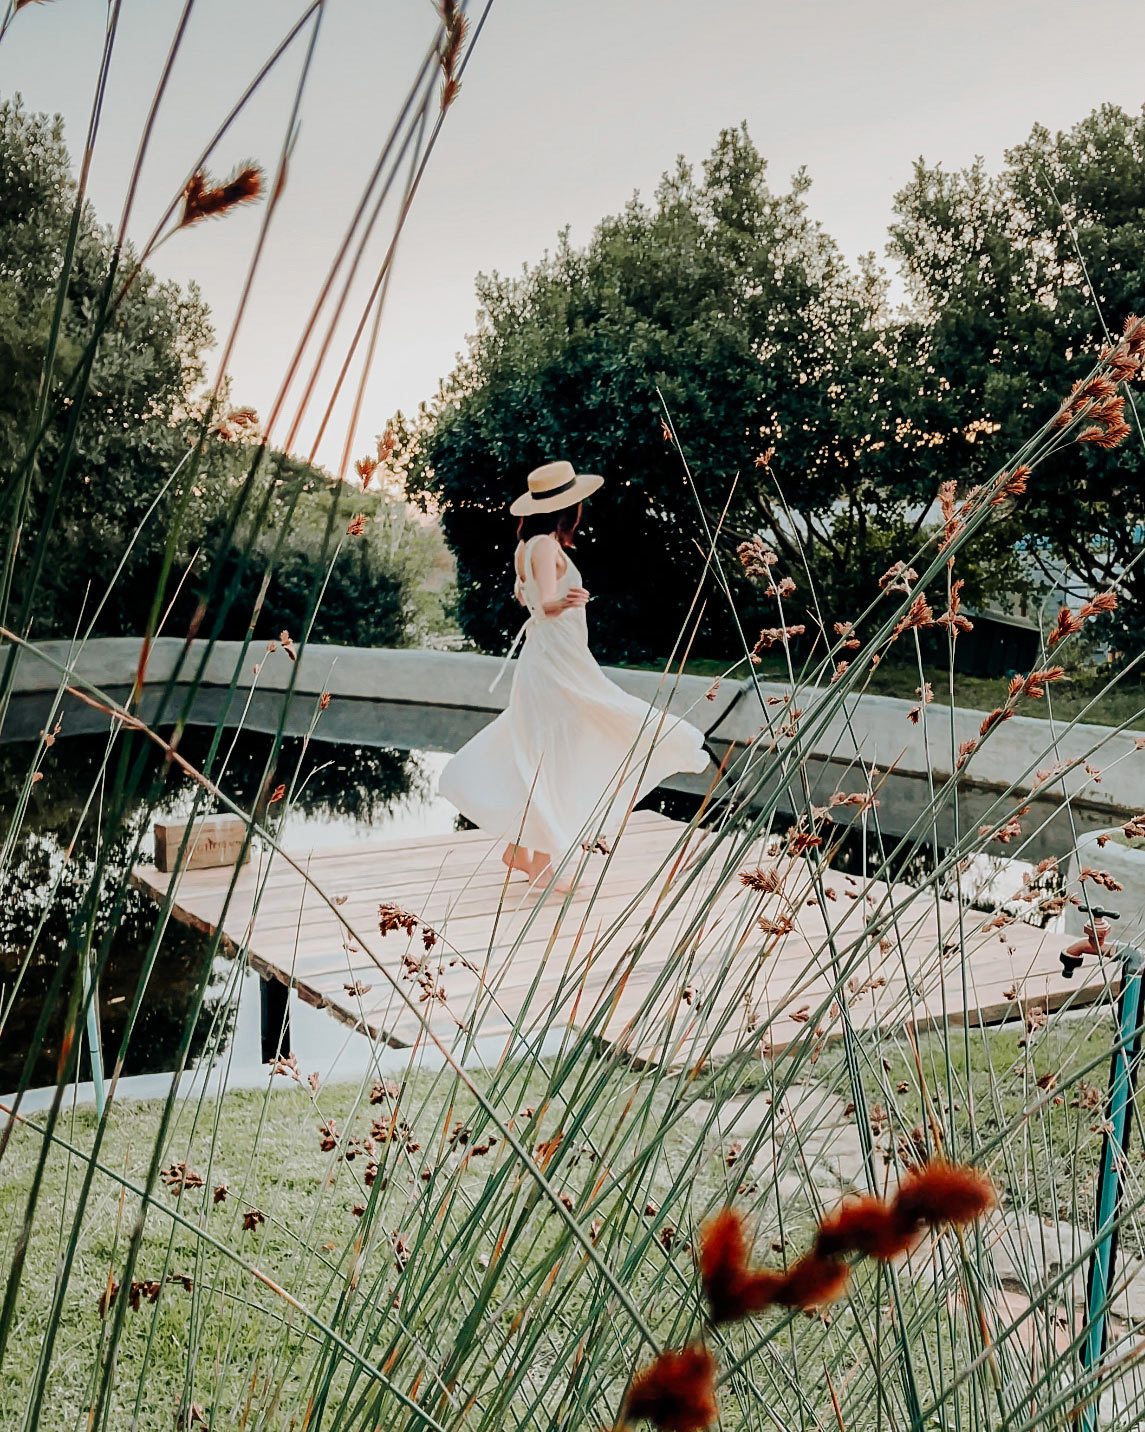
This is my all-time favourite pose. As someone with a lot of social anxiety, I feel the most comfortable looking away from the camera.
Try running away from the camera, looking to the side, or twirling on the spot.

If you’re a victim of the “OMG, I have hands! Now what?” pandemic, always bring a prop. It will give you something to hold or play with and take your mind off your hands doing weird things.
My go-to is a hat or playing with a flowy dress.

Want to *instantly* improve your posing as a solo traveller? Create triangles with your body.
Making shapes with your body elevates your photos, and you’ll effortlessly look like a fancy model.
View this post on Instagram A post shared by LAUREN | SOUTH AFRICA TRAVEL (@thewanderlustmovement)

Now that you know how to take amazing travel photos, let’s discuss the final and most important step: EDITING!
This is where the magic happens.
With a dash of adjusting your exposure, a sprinkle of raising your shadows, and a seasoning of a preset, you can take almost any photo from drab to fab.
My go-to editing app for my photos is Adobe Lightroom. I have the desktop version and mobile app and use photo editing preset packs to colour-grade my images.
Adobe Lightroom Mobile is free to download, but the desktop app does require a monthly subscription. However, you don’t need the desktop app unless you want more control over your edits.
Some other editing options:

There you have it.
All the solo travel photography tips I’ve picked up over the years while travelling the world.
Hopefully, you feel more confident and prepared to go out into the world and snap your dream travel photos WITHOUT having to always rely on an Insta Husband.
Got more questions about how to take travel photos of yourself or the best camera for solo travel? Did I leave out any good solo photography ideas? Hit ya gurl up in the comments and let me know!
If you like it, then you better put a pin on it

About Lauren Melnick
Lauren Melnick is the founder of Wanderlust Movement, Wander to Here and is a South Africa travel blogger. She's been travelling the world as a full-time freelance writer since 2016 and has visited over 40 countries.
When she isn't typing up a storm, you can find her conquering overnight hikes around the Western Cape, rock climbing, and hosting sold out group travel trips around South Africa, Namibia and Morocco.
Reader Interactions

September 14, 2022 at 9:08 pm
I have noticed that I get asked a lot more to take photos of people when I am holding a “serious” looking camera than when I am holding a compact point-and-shoot or a phone. Maybe that would be another small tip for when you ask a stranger to take a photo for you: look for someone who looks like an experienced photographer (ideally with the same camera as you).

September 20, 2022 at 8:09 am
Yes! That is a winner for making sure your feet or head don’t get cut off lol

October 15, 2022 at 1:15 pm
You are doing a fantastic job, helping us all with your ….. EVERYTHING YOU POST

March 16, 2023 at 8:55 pm
Loved the post! Keep it up.

January 2, 2024 at 6:20 pm
Great post! Going on my first solo trip in March and this is fab advice.
March 5, 2024 at 10:48 am
Thanks Tim! Hope you have an amazing solo trip this month!
Leave a Reply Cancel reply
Your email address will not be published. Required fields are marked *
This site uses Akismet to reduce spam. Learn how your comment data is processed .
Love The Content?
12 Epic Ways to Take Photos of Yourself When Travelling Solo!
By: Author Sophie Pearce
Posted on Last updated: August 18, 2023
Categories SOLO TRAVEL , BLOGGING
This post may contain affiliate links. Please see my disclosure policy for details.
I’ve been meaning to write this post for as long as I can remember. The number one question I get asked on my Instagram is “how do you take photos of yourself when travelling solo?”
Sorry to burst your bubble guys but I don’t have a little fairy hanging around, hire professional photographers or have an Instagram husband. Although admittedly, sometimes it would make things a hell of a lot easier.
90% of the travel photos you see of me on my blog or Instagram, are taken by me!
Since I have started to travel solo and I run a travel blog that requires epic photos (selfies just don’t cut it on the gram), I’ve been taking photos of myself on a regular basis for over two years now.
In this post, I’m going to share everything I know about self-tography with you including:
- Different ways to get epic travel photos when by yourself
- Tips for travelling with a tripod
- How to set up your tripod or gear to get the photo with you in it
- Ways to limit your camera from getting stolen
- How to stop caring what people think (but that’s mostly down to you!)
We’re going to cover all the ways of taking photos by yourself, but how to take them too!
So, are you ready to join the ranks and become a self-tographer? Sweet! Let’s go.

1. A tripod and a timer mode
Although not the most effective option in my opinion; setting up your tripod, mounting your camera in the position you want it, and letting it run on a timer is a great option to take photos of yourself if you’re just starting out.
Most cameras will have self-timer modes and, if you’re in the market for a camera, I would check the capabilities of the timer modes on the camera first.
A big tip I have is to read your camera manual thoroughly or experiment with the timer modes available first before you set out on your travels.
You don’t want to turn up at your photo location all set to go and then struggle with setting up the timer.
The best way is to set your camera up on a continuous mode. This is where the camera will keep taking photos for you. This means you don’t have to keep running back and forth to start the timer each time.
For example, you could set up your camera to take a photo every one or two seconds. That way, you can change positions up each time without having to worry!
Another way is to buy a remote shutter that works with your camera. But, this could prove expensive.
Top tip: when choosing the right tripod, try to get one that can hold your camera in portrait mode – perfect for 8×10 editing for Instagram.

2. A tripod with a remote shutter (where you can see yourself)
The first option is a common way of getting photos but to really level up, this is what I suggest.
For me, not only do I like to set up my tripod in the position I want it, mount my camera and compose it for a beautiful photo; I like to see what I look like in the picture as well while taking it.
That way you can make sure you’re not getting half your body in it, your hair doesn’t look messy etc. (although for me it’s a given lol) and you can use see if the pose or facial expression makes it an attractive photo.
After all, there’s no point in posing for 30 minutes to find out the photos look wrong or you’re cut out of the frame! Or, you’re not happy with your pose, you’re too far away etc.
How I do this is by using a camera that has WiFi capability and using a remote shutter through a smartphone to take photos of myself.

How to set up your camera with a smartphone WiFi App
Most of the big camera companies like Olympus, Canon, Sony, Nikon, and Lumix have an app that you can download for free to connect your phone with your camera.
It’s really simple to set up. You just turn on your WiFi mode on your camera, connect your phone via an app and away you go!
Not only does having this app and the WiFi setting allow you to see yourself on the screen and press the shutter to take a photo while you’re by yourself. You can instantly download those photos to your phone to edit for Instagram or post to stories, Snapchat, Twitter etc. It’s genius!
You just have to be a little creative with where you hide your phone so it doesn’t show in the photo.
Sometimes I sit on my phone, hide it behind my body if I’m facing away, press and throw away the camera, or use it as a prop etc.

3. Burst mode option with your camera (guess what, tripod again!)
I always used to take photos of myself while travelling solo with option number two (WiFi-connected smartphone shutter) for the first year or so. But, I found that this limited my options and gave a ‘static’ photo.
I would either need to sit, turn away, or stand super still to make sure I could press the shutter. And, although there’s nothing wrong with that, I was craving something more…
Motion in my photo!
You know, that twirly dress, spinning around candidly, jumping in the air, walking in the distance motion-type pictures you see on Instagram.
So, I decided to up my game once more and started to play around a little bit on my Olympus camera features.
Well, I’m happy to say that I discovered a little breakthrough. Burst Mode!

How to take photos of yourself using your camera in Burst mode
This is similar to a timer. But, instead of taking one photo, it takes multiple photos in a really short space of time! I.e. 10 photos in 2 seconds.
What this means is that it will take multiple photos for you in one sitting so you have a better chance. For example, if you were twirling around in your dress or skirt, the burst mode would capture that better in 5 photos a second than just one photo per second.
So now, my photoshoot set up goes like this:
- Firstly, I set up my tripod and mount my camera
- Then, I connect my camera to my smartphone via the Olympus App
- I will then set my camera to burst mode on the app where it will take 15 photos in 2 seconds
- Next, I set that to repeat every 2 seconds
- I position myself where I want to be in front of the camera by looking in my phone
- I’ll press the button to release the shutter
- Hide my phone somewhere (or keep it near the tripod)
- I have fun!
This is the way I take all my photos now as it not only means I can get creative. It also means I can leave my phone by the tripod if I don’t want it to be in my photo… Winner, chicken dinner!
4. Use a smart phone with a timer mode or invest in a Bluetooth shutter for it
Although limited, most smartphones on the market have a timer mode built into the camera.
For example, an iPhone has the option of a 3 or 10-second countdown before it takes the photo. Leaving you with enough time to get in position and pose where you want!
What’s more, is you could put it on selfie mode so you can see yourself on the screen too and get yourself into position properly.

Blue Tooth Shutters for Smart Phones
Even the most basic, cheap selfie sticks have Bluetooth shutters so you can press a button on the stick and the smartphone will take a photo when pressed.
How you set this up is by connecting the blue tooth shutter to your phone, similar to a Bluetooth speaker.
Then you can connect it to your phone and press the Bluetooth shutter to take your photo without timer mode. Giving you more flexibility and not having to go back and forth to your phone! The power of modern technology aye?
5. Get crafty with propping up your camera or phone
In some instances, the use of a tripod is not allowed. For example, in most tourist sites in India, Istanbul or Egypt tripods were prohibited.
This is a nightmare for the self-tographer to be sure. But, it just means getting a little more creative with how you take your photo.
I took this by propping up the camera against a step
Some top tips I have for utilising your surroundings as a makeshift tripod or prop for your camera:
- To gain height, use your bag/coat to rest the camera on
- Look for stairs, surfaces, walls or even bins to prop up your phone (just make sure it doesn’t fall in/over lol)
- Put your camera in the top pocket of your backpack to rest the camera
- Use your drink bottle
There are so many ways to be creative and still get a good photo without a tripod and no hands to help you!

6. Get your GoPro out but make sure it has a selfie stick
A GoPro is a travel bloggers ultimate weapon. It can survive the test of time and take photos in any situation no matter how messy.
Whether scuba diving in the ocean, throwing colours for holi , mud wrestling, tubing in Laos, chucking tomatoes for La Tomatina , sandboarding, skydiving , Bungy jumping , surfing, or riding in an air balloon.
You can rest assured your camera won’t break and you can take some epic action photos in the process.

They’re also made for self-tography as they have a wide-angle lens. Meaning you can get more of yourself in the photo.
To avoid getting your arm getting in the way, I would invest in a GoPro stick. This means you can get more in the frame and even have the GoPro behind you to take some awesome photos.
They don’t have to be expensive either, my first was a Monopod from eBay for £1.99! Although it got rusty in the water so I wouldn’t recommend it. You can also get floatable ones here.
There are also tonnes of other accessories for the GoPro like head and chest brackets, mounts for bikes, and surfboards, you name it.
You can get really creative and it’s so lightweight, meaning it will save you from lugging around loads of heavy equipment.
It does take practice however and again, you’ll need to play around with timer functions but it’s so worth it.

7. Ask a stranger to help you out
This is not my favourite option as I like to compose photos myself (and I’m picky) but, sometimes it’s just easier to ask someone to take one for you.
Sometimes this can be great and sometimes it can be a complete fail.
It’s a gamble you take. I mean I totally get it, not everyone is travelling to get perfect photos haha!
But sometimes when a stranger takes it, the composition is all off or parts of the landmark are missing etc. it can be frustrating and there’s a limit on how much time you have.
At the end of the day, this stranger is kind enough to help you out! Let’s not take up more of their time than necessary.
The trick is learning to communicate what you want and your vision to the person you ask.

Some tips for asking strangers to take your photos:
Firstly, look for someone with a DSLR, they may know more about photography
Before you hand someone your camera/phone explain what you want in the photo.
Explain what pose you’ll be pulling. If it’s meant to be a smize or you’re looking away, it could help them understand. Or else, you could be told to turn around and ‘smile’ or, they may not think you’re ready for the photo. Hey, not everyone gets the blogger life!
Alternatively, take a photo of what you want without you in it. Or show them the Pinterest pin that inspired you or the photo you’ve saved from Instagram. Then, they may understand what you’re looking for a little better.

8. Get creative with capturing your body
Of course, you don’t have to always capture all of yourself in the photo. It could be just a certain part of you.
Whether it be your hands with a nice coffee or some yummy food (the perfect excuse to buy ice cream), your feet against a pretty tiled floor, or your legs with a breathtaking view – there are countless ways to get creative photos without letting the camera go.
A big inspiration for me when I first started travel blogging was @girleatworld who takes stunning colourful captures of food she eats around the globe.
She holds it in her hand against an iconic background and it’s genius! Now she has almost 400k followers on the gram. Go follow for some inspiration, but don’t if you’re hungry ;)

9. Smile in the mirror
A common one but one that still works and can be quite effective!
Taking a picture on a reflective surface, mirror or even mirrored road signs does still make for a great photo at a different angle.
10. Buy a drone
Not a cheap option, but can bring a whole new level to your photography game!
A drone is essentially a flying camera and it allows you to take photos of yourself from heights you never thought possible.
But this doesn’t come without complications.
A drone can cost way over a thousand pounds and they are easily fickle when the weather isn’t so great. For example, if it’s windy, it could easily be blown away never to be seen again!
Also, a lot of countries (Morocco, Egypt etc.) have banned drones all together which means you may have to leave it at home or get someone to drone-sit while you travel.
Don’t even think about flying this near an airport or air travel space. Recently, Gatwick Airport in London had to delay flights due to drones flying overhead .
Which resulted in hundreds of people not being able to go home for Christmas and came with a 5 jail year sentence for the culprit.
A lot of the high-end drones will have a nifty feature warning you whether you can fly it (or won’t take off at all) so you’re all clear.
But, if you are caught flying it in an illegal zone, you could lose a ton in fines. Some countries make a lot of money this way! They’re epic, but be careful.
11. Screenshot your vlogs/videos
This may not be as good in terms of quality, but sometimes taking a screenshot of your vlogs or videos can be a great way to get still content.
For example, when I wrote about Holi in my blog post . Some, if not all of these photos were grabbed from my GoPro footage. The reason being is the colours would have destroyed my DSLR.
This is also a great way to capture movement and present a moment in time that you may have missed on your camera.
You can easily do this in iMovie or any other video editing software by using the Screengrab option.
GoPro also provides an awesome app in which you can transfer your videos/photos from your GoPro to your phone using the handy WiFi feature. From here, it easily allows you to screen grab any photo from a video.

12. Collab with other bloggers or join travel groups
Travelling solo doesn’t mean you need to be alone and if you want to be part of the travel blogging community, we’re a really nice bunch (promise)!
Many travel bloggers will love to meet up and collaborate together. Whether that be arranging a meet-up in a city or specifically meeting to shoot a location together. It can be a super fun way to meet and network with other bloggers.
Another way to do this is on press trips where all of you are sponsored to travel together with a tourism board or tour company. You can create some really awesome content of each other for your blogs or Instagram accounts.
Alternatively, travelling in a group tour to a country with companies like Topdeck or Contiki can open up more possibilities for photo opportunities. That and you could make travel friends for life!

Travelling with a tripod
Travelling with a tripod in your luggage or on your back while exploring a city can be tiresome.
Although my tripod weighs less than a kilo, if I carry it on one shoulder – it kills by the end of the day!
Here are some of my top tips for tripod travel:
Check the weight of a tripod before you buy it. You’d be surprised how much they can weigh, If it weighs 3 kilos, it’s going to take up a lot of luggage allowance and weigh you down.
Try and buy a tripod that folds up small or a compact tripod for travel
Invest in a proper photography backpack for your equipment and carry it on two shoulders for support.

Setting up your tripod
- So, you’ve got your tripod, you’re all set to go, you arrive at the location and… now what?!
- Well, there’s a couple of things that I check first before I get my tripod out to take the photos:
- Check a composition with your phone first, no point setting it up to find out that you hate how it looks.
- Decide what height you want your tripod. 9 times out of 10, I extend to full height but a lower angle could create a more effective composition
- Check you can balance your tripod in the location. If it’s in sand/mud, plant the tripod deep enough so it won’t topple
- Check your surroundings and the weather, if it’s windy it could fall over and hurt your camera! The last thing you want is for your camera to break.
- If you’re planning to shoot a few photos while you’re here, you may want to leave the tripod set up and carry it around like that. To save you time.

A handy checklist to limit your camera from getting stolen
Another question I get asked a lot is “Don’t you worry about your camera being stolen?”
Of course, that is a worry. Especially if I’m doing a photo that requires me to be far away from my camera. Not the mention my stuff like my handbag with my phone, wallet, hotel room key, etc!
But, touch wood I have never had anything happen to my equipment while filming alone. I think people think I’m crazy and are more confused than wanting to steal my camera.
But, that doesn’t mean you can be reckless. So here’s some of my advice. These may seem obvious but it needs to be said:
- Check your surroundings, does it look dodgy? Are there any dodgy characters eyeing up your stuff? If so, choose a new location
- Are you in a place where it could easily be stolen? A busy street, a popular attraction etc. Maybe don’t shoot there
- Is there any security around that would help you if someone tried to run away with it?
- How far are you stepping away from the camera? The further away the more risk
- Put your bags closer to you hidden from view. Not near your tripod! Don’t put all your eggs in one basket

How to stop caring what people think!
At first, posing in front of a tripod is downright weird! I know, I’ve been there.
But now, my tripod is pretty much my boyfriend when I travel. My very own (rather stiff) Insta husband. He’s been with me around the world now, capturing my best moments as I go haha.
The big trick is just not to care!
Sure, you may look a little silly. Posing in front of your camera while people are looking.
But, you’re never going to see these people again after you’ve taken your photos.
So, ten minutes of awkwardness can get you a lifetime of memories. I think that’s a good trade-off.
The way I think of it is I’ll regret not getting my photo and I’m not going to have regrets while I travel because a few randoms made fun of me.
More often than not, after I’ve taken my photos, they’ll go and do the exact same! Some people will be impressed, some people will think you’re crazy, some will just not get it.
But, forget about them, rise above them and just concentrate on you and your awesome photos. You’ve got this!
If this article helped you out or if you’re an avid self-tographer, don’t forget to tag me in your photos on Instagram or contact me. I’d love to see your self-made creations.

Read more solo travel guides
75 Inspiring Solo Travel Quotes
Common Solo Travel Problems and how to avoid them
How to boss eating by yourself in restaurants
Why you need to travel solo this year!
Like it? Pin it!

Wednesday 13th of December 2023
Great tips! Where is your backpack from? Love that is doesn't look like a typical camera bag.
Sophie Pearce
Sunday 17th of December 2023
Hi Jodi, thank you :) It's from Gaston Luga! But, I would say if you want to keep camera and lenses in a bag I would look for one with padding as that one was quite thin :) Sophie x
Sunday 30th of July 2023
This is such an excellent article and I really enjoyed reading it. And your tips are fantastic. I also enjoy travelling solo and absolutely consider the tripod to be the the 'ultimate selfie stick'.
I do feel a little bit awkward when people are around when I'm about to take a selfie using a tripod, but it's got to be done lol.
And your advice is about the awkwardness (and everything else) is awesome and I must try to remember that ten minutes of awkwardness for a lifetime of memories mantra.
Thank you for such a wonderful article and post.
Monday 31st of July 2023
Hi Jai, thank you for reading. Yes, I always feel you're going to regret not getting your photos. So, who cares if someone judges you for ten minutes haha :) Good luck with your self-portraits! Sophie x
Friday 4th of November 2022
LoL I also prefer asking DSLR owner to take my pics. I usually use monopod due to safety concern leaving behind my camera/smartphones at tripod for my behind pics :D Got loads of selfies during traveling. But at least it less hassle if you have tight schedule or in a rush. In some country like Japan, even monopod is forbidden in theme park and museums because it can be blocking people way. I had to smuggling it by keeping it on my hidden pocket and using it when there's no staff around :'D But thank you for the Burst mode tips, will practice it before my next solo trips.
Monday 7th of November 2022
Hi Nana, yes it's great to take pictures with a monopod as well. I actually use my phone more nowadays but I still use a DSLR on occasion. I've noticed people are getting SO strict now this tripod rules it's annoying. Sometimes I use an octopus tripod and tie it to fences and barriers discreetly to get away with it ;) no worries. I also recommend an app called Lens Buddy that continually takes photos for you. It's Incredible! Thanks for reading. Sophie x
Wednesday 28th of October 2020
A must read for solo travellers
Thanks Amit! Sophie x
Tuesday 17th of March 2020
Love this article! Thank you so much for sharing it (and of course for your effort in writing it beforehand ?)! Really love your instagram account, too, and there are not many out there with constantly interesting content. You’re doing a really great job, keep on going! Best wishes from Germany, Rebecca
Tuesday 28th of April 2020
Hi Rebecca, thanks for your kind words. I'm so happy that you liked the post and I hope it helped you :) Sophie x
21 TRAVEL PHOTOGRAPHY TIPS (Easy Ways to Improve Today)

- Last Updated: February 8, 2024
Here are our best travel photography tips for beginners and intermediates, based on our experience of going from complete beginners to professional travel photographers, and now working in the industry for 8 years.
Picture this.
You finally book a trip to your ultimate bucket list destination.
Antarctica, Iceland, Namibia, Bali, seeing the Aurora Borealis – wherever it is, you’ve waited your whole life to finally visit.
Naturally you are going to want to capture the best travel photos possible of this once-in-a-lifetime adventure to share with your portrfriends and family members, on social media, and maybe even print on the wall at home.
Moments in time or a travel experience that you always want to cherish.
So you’ve splashed out on a new camera based on expert recommendations , and you’re keen to hit the road.
But here’s the problem – you don’t have the faintest idea how to get the same kinds of images you see in postcards or on the internet.
The kinds of travel photos that just pop, stand out from the rest, inspire you to book a flight immediately.
Luckily that’s where we come in.
We’ve been fortunate enough to work as professional travel photographers for almost a decade now, being paid to fly around the world, running photography workshops, take pictures for the tourism industry and tell stories.
And now we want to share our knowledge, secrets and insights from our travel photography journey with you so you can take better travel photos.
In this post you’ll find many of our favourite travel photography tips you need to know to come home with shots you will be proud to show off.
Today is the time to learn. Let’s begin.

Table of Contents
1) Know Your Camera
2) focus on the golden and blue hours, 3) plan your shots, 4) learn about composition, 5) framing, framing and more framing, 6) move your feet, make them feel comfortable, 8) use a tripod, 9) find the right travel photography gear, 10) be unique, 11) find your voice as a photographer, 13) aperture, 15) shutter speed, 17) bonus – general ideas for camera equipment settings, 18) use manual mode, 19) shoot in raw (if available), 20) learn about post processing, save this pin for later, general travel photography tips for beginners.
To start with let me talk about the general travel photography tips that I feel are not only the most important, but also the most difficult to master.
Developing an eye for photography takes time. Years in fact. It’s a never-ending learning process, but I promise you with practice you will get much better.
And once you start to get the skills for framing and composing a shot, the rest is easy.
Whether you shoot on a dSLR, mirrorless, smartphone or an old film unit, the first travel photography tip is to get to know your camera equipment.
Whatever you have in your camera bag , take the time to read the instructions, play around with all the buttons and camera settings, and spend hours with it in your hand so that it becomes a part of you.
Study the menu so that if you need to change camera settings in the field you’re not spending minutes scrolling through it when timing is critical.
Also don’t forget to learn your camera’s limitations.
Does it perform well in low-light or does the image fall apart? Is it sharp wide open, or do you need to stop down to get the best clarity? Does it have inbuilt image stabilisation?
Ultimately when you pick up your camera you want to feel comfortable and know exactly how it works. Then getting better pictures will come faster and easier.

Light is everything when it comes to travel photography images, and there’s a good chance you’ve already heard about the golden and blue hours.
The Golden Hour is that time when the sun is low in the sky and it throws a magical, warm glow across the scene.
Think the first hour after the sun peaks in the morning, and the last hour or two before the sun drops over the horizon in the afternoon.
The Blue Hour is when the sun is below the horizon and the sky gives off a beautiful blue hue.
If you really want better travel photos, one of the best travel photography tips we can give is to get used to waking up early and stay out late to make the most of these two times of day.
If you’re not a morning person, get used to setting an alarm. Many of the great travel photos of the Taj Mahal and other tourist sites with no one in them for example were taken by people who got there early.
Taking photos in the middle of the day can still result in great shots, but in general you’ll find the blue sky too blown out unless there are some interesting clouds, and on a sunny day you’ll find the lighting conditions can be a bit harsh.
Instead use the middle of the day to get street photography, or scout out photo locations and a vantage point for your sunrise and sunset photos to come back later.
Bonus Tip – Even if it looks like the sunrise or sunset might not be so beautiful, wait around. You never know when the clouds might break or the sky randomly lights up in brilliant colours.

Before you arrive in your tourist destinations, spend a few hours planning out your shot list of images you want to photograph.
You can get inspiration from Instagram, Google Maps, travel guides, magazines and more.
Make a note of these pictures, and then plan your day around the optimum time to shoot (sunrise or sunset for example).
Doing this will help you nail the shots you want to go, and give you more purpose and direction.
You need to know that all of the best photographers use tools like Google Maps or social media to form a shot list, and you should get used to it too.

You’ve probably heard about how important it is to compose a shot properly, and I bet if you’ve ever read a photography manual you would have come across the ‘ rule of thirds ‘.
Good composition can be the difference between an average shot and award-winning travel photos.
There’s all kinds of ‘rules’ that theoretically make a photo look nicer, such as not putting your subject in the middle of the shot, don’t cut elements out of the frame, etc.
But right now let’s go a bit into the Rule of Thirds.
This concept is where you divide your image into 9 even squares (many cameras actually have this grid line feature built into their display options).
Then what you do is you place the subjects and points of interest such as a human element along those lines and squares.
Here’s an example of how this looks:

The idea of the rule of thirds is that this is a mathematical idea of what our eyes naturally find pleasing. So it’s good practice to incorporate this method into your shots.
Another thing to look for is leading lines that naturally draw your eye around the photo, as well as different angles and shapes.
Have a river flowing from the side of the shot up to a waterfall on the top left for example, or the foreground bending around, leading the eye towards a church at the top of the photo.
This is a skill that you’ll learn with more practice.
An important thing to remember is that rules are meant to be broken .
Get used to analysing your shots with the rule of thirds, but please don’t use it as gospel if you think a different composition would work.
Adding a human element also brings a lot of interest to a good shot, so place people in your frame.

When you look through the viewfinder or LCD screen, don’t just focus on the subject.
Make sure you run your eyes around the entire frame to make sure you’re not accidentally cutting off something important.
Double-check that the top of a mountain is fully inside the frame, or that your friend’s whole body is in the shot as an example.
This isn’t gospel, because sometimes having something cut off from the frame can be good for composition, but you’ll have to be the judge of that.
Also check to see if you can use something natural in the scene to create a frame inside your picture.
Think of looking out a window at a building, or a bent-over tree surrounding a pretty lake.
These can all help make better travel photos.

This is one of the most important travel photography tips I can give – Move your feet.
Don’t just arrive to a scene and take a shot from the place you’re standing.
Instead take a few minutes to walk around and see if there is a better frame or composition.
Go closer, move back, step to the side, consider your lens’ focal length, etc.
Imagine trying to take that iconic Taj Mahal photo, only to find out later that you were 2m to the left of centre, throwing off that perfect symmetry.
Or maybe if you walk to the river’s edge you’ll be able to incorporate some interesting rocks into the scene instead of just water.
Better yet, take multiple travel photos and fill up those memory cards from the same photo locations so you have lots of options when you get home to see which is your favourite.

7) Ask People for Permission
Travel photography isn’t all about capturing the most beautiful sunsets and gorgeous architecture around the world.
Travel photography is also about the people you meet. But if you’re a bit shy like me, how do you get those amazing portrait photos without feeling rude?
Simple – just ask for permission.
Asking someone for permission to take their photo is polite and respectful.
If you have had a great encounter with someone, or you just see a great opportunity and want to capture a wonderful portrait, give them a big smile and ask if it’s ok to take their photo.
You’ll find many people are more than happy to pose for a photo if you just ask (just make sure you respect them if they say no).

But what if you want to get a candid shot, with the subject looking natural?
There’s always another way to get these without annoying the person.
Don’t make it obvious that you are taking their photo. Act natural and take lots of photos of the environment around them.
You can also keep your camera down by your side and point the lens in their direction.
If you have a zoom lens, use it. This was you can be on the other side of the street or market and still photograph the person.
Interested in learning more? Join one of our exclusive photography workshops in Antarctica, Kyrgyzstan, Tajikistan or Mongolia !
Another one of my favourite travel photography tips for portraits is to bring in another element to the shot.
Some people will feel uncomfortable posing for a stranger, but if you can make it about something else they will feel much more at ease.
As an example, maybe ask if they can pose with something in their store like a rug, or ask them to show you their wedding ring.
This way they’ll realise there is more to your photo than just them. This will also add a lot more interesting elements to the shot!

A tripod is one of the best camera accessories you can have in your camera bag, and really essential for travel photography.
This will allow you to get excellent shots in low light, as well as get creative with your images (like taking long exposures).
These days you don’t always need a massive tripod to travel around with, especially if you want to travel light and are a hobbyist photographer. Look at some of the Joby Gorillapods .
Another good thing about using a tripod is that it will force you to slow down with your photography and put more thought into each shot.
Rather than just pointing and shooting, you will think carefully about where you want to set up your tripod and how you want to compose your shot.
Honestly if you want to become a better travel photographer, you’ll need to invest in at least a small tripod.

You don’t need to go out and spend tens of thousands of dollars on new travel photography gear to get the best shots.
In fact chances are you already have a perfectly adequate camera right next to you (your phone).
Instead just get what you an afford, and as you grow with your photography style, post production, etc, you’ll learn what camera gear you need as well.
Things like filters, tripods, flashes, prime lenses, zoom lenses, etc will come in time.
For now, all you really need is a camera, memory card and enthusiasm!
Check out our recommendations for the best travel tripods .
There’s nothing wrong with getting those iconic shots of the Eiffel Tower or Machu Picchu to share on social media.
They’re beautiful and are often amazing camera angles of famous places that everyone wants to visit.
But don’t forget to be unique as well! Find a different perspective that hasn’t been photographed a million times.
In fact make it your goal to get a few unique shots that you can be proud of.
Over-expose, under-expose, incorporate motion blue – the only limitation is your imagination!

Just like a writer or musician finds a particular style they like, as a photographer you need to discover your ‘voice’.
Travel photography is such a broad term that can cover just about anything.
Really just taking any travel photos will fit the description, whether it is landscape photography, wildlife photography, architecture, portraits, food or whatever.
Just find a style you love most, and focus on getting better at it.
If you really like black and white photography, then start shooting in black and white! Love taking images of crazy street markets? Then get out there and find them!
Experiment, learn, discover and nurture!

Technical Travel Photography Tips
While the technical side of using a camera is usually the most overwhelming thing for a new photographer to think about, it’s actually one of the easiest things to master. All it takes is a bit of study and practice.
If you’ve never looked into getting out of ‘Auto mode’ on your camera, then terms like ISO, aperture, white balance and shutter speed will seem completely foreign.
READ MORE: Check out our great article and blog posts featuring our best landscape photography tips !
12) Exposure Triangle of Photography
The Exposure Triangle is a metaphor to explain the 3 elements that allow light onto a sensor.
A camera captures light, and the right amount is needed so that your image isn’t too bright or too dark.
The 3 parts of the Exposure Triangle are aperture, ISO and shutter.
Each one affects how light reaches the sensor in different ways, and getting this combination right is essential to capturing a beautiful image.

If you want more information, I’ve put together this comprehensive guide to understanding the exposure triangle which you should really check out.
For now though I’ll explain these three things briefly, and how they relate to taking better travel photographs.
Aperture is how wide, or small, the blades in your lens are and how much light goes through the lens.
The aperture size is measured in ‘F Stops’, and displayed as numbers. f5.6, f8, f11, f16, etc
A wide aperture (small number – f1.8) lets in more light than a low aperture (big number – f22).
A wide aperture also has a shallowed depth of field than a low aperture. I know it can be a little confusing, but you’ll pick it up the more you play around with it.
If you want the background blurry in your photo, you’ll want a wide aperture. If you want everything in focus, you’ll want a low aperture.

ISO is how sensitive your camera sensor is to light. A small number, such as 100, means it’s not very sensitive and therefore needs more light to leave an impression.
A high number, like 6400, means it’s very sensitive and needs only a little bit of light to show up on the sensor.
The higher the ISO, the more noise shows up in a photo. Noise lowers the quality of your image, so in a perfect world you’ll want to keep this as low as possible (unless you’re going to stay out late doing astro and night photography ).
It’s also necessary to raise your ISO if you’re shooting moving subjects (or handheld) indoors.

Shutter speed is pretty straight forward – how long it takes for your shutter to open and close. This allows you to freeze a frame, or introduce motion blur.
Want to capture a bird in flight? You’ll want to have a fast shutter (1/4000th of a second for example).
Want to make a waterfall look silky smooth, like you see in so much Iceland photography? Go for slow shutter speeds (3 seconds for example), and check out our guide to waterfall photography tips while you’re at it!
Keep in mind that if you are holding your camera equipment rather than using a tripod, you’ll need to have a fast enough shutter to eliminate your own hand movement.
As a general rule 1/60 of a second is the slowest you should go so your picture doesn’t pick up hand movement. Any slower than that and you’ll probably need a tripod.

16) Combining All Three for Perfect Exposure
There is no ‘perfect setting’ for aperture, ISO and shutter. It all depends on what you are trying to photograph and the style you’re going for.
Luckily most decent digital cameras have two little tools that will let you play around figure out how all three work together – manual mode and histograms.
Manual gives you complete control over your camera’s ISO, aperture and shutter.
If you change one, nothing else will change, unlike in ‘aperture priority’ mode or ‘shutter priority’ mode.
The histogram is a visual display of light. When the bars are all the way to the left, the image is darker. When they are all the way to the right, the image is lighter.
When most of the bars are in the centre, this is perfectly exposed.

The best way to figure out what combinations work best when you’re a complete amateur is to put your camera on “manual” mode, activate the histogram, and play around with the settings.
Pick an aperture (f/8 for example) and point it at the scene. Now look at the histogram.
If the image is too dark, then you’ll need to let more light in. Let’s make the speed slower. See a change?
Now put the shutter back to where it was and instead change the ISO. Make the ISO higher. Is the image getting lighter?
Spend an hour or two playing around with different apertures, ISO and shutter so you get an idea of how each one affects the light hitting the display.
Take note at how drastically things can change if a cloud goes in front of the sun, or you take the camera inside.
This just comes with practice of course, and knowing what settings you want for a particular scene will become second nature
Keep in mind that not all travel photos needs to be perfectly exposed. Sometimes having a darker image looks much better than having one that is nice and bright. You can use your judgement for this.

This is very, very basic and by no means should be read as gospel. There are a million different things that can affect why you would want a faster shutter, or wider aperture. But if you are confused about what to pick for what here’s a quick idea.
- Landscapes – You’ll want your aperture around f8-f11. You’ll also want your ISO as low as possible. Slow down the shutter accordingly.
- Portraits – You’ll probably want to photograph your subject to be sharp, but the background blurry to bring focus on the person. Have a wider aperture (say f2.8 for example), and a faster shutter (around 1/160 at the absolute slowest) to freeze the subject. Adjust ISO accordingly.
- Indoors – Because it is darker inside than outside, you’ll need to let a lot more light into the sensor. Unless you’re using a tripod, keep the speed at around 1/60 as the slowest, and the aperture around f5.6 to start with. Adjust ISO and aperture accordingly.
Of course there’s a bunch of other styles of travel photography that would use different settings, such as astrophotography, architecture, street scenes photography, wildlife photography, etc.
In time you’ll learn what settings work best for each scene.
The best way to get to know your camera and how light works is to have complete control over what settings you choose.
The only way to do this is to shoot in manual mode (shown by the letter M on most cameras).
It will take months of practice, but I promise you that in time you’ll be able to look at a scene and instantly know what aperture, ISO and shutter to use to get the exact style of image you’re looking for.
You can also use aperture priority mode (the letter A on your camera) if you don’t want to make the big leap to manual just yet.
This way you can lock in the aperture you want (f8 for landscape photography, f2.8 for portraits, etc) and the camera will automatically adjust the ISO (although you can control this part too) and shutter to get perfect exposure.
I highly recommend focusing on learning manual settings though until you have it perfected.

When you take a photo on your digital camera, the computer chip inside it takes what you captured on the sensor and converts it into a format that can be easily read. For most cameras, these two formats are RAW and JPEG.
JPEG is a compressed format that the camera creates to save on space. In doing so it ‘locks in’ all the data that it picked up such as the colour and white balance.
RAW files actually saves all the data of what you took and doesn’t compress it.
Most decent digital cameras will give you the menu option of shooting in RAW, and I recommend you use it if you ever plan on editing your photos.
Keep in mind that the file sizes will be a lot bigger (for example on one of our cameras a RAW is 42, while a JPEG is just 20), so you’ll need to have extra memory cards and external hard drive storage.
If you have no plans on editing your photos then shoot in JPEG.

Some people think that editing your photo is ‘cheating’. But the truth is photographers have been editing their photos ever since photography was invented.
Yes, even your favourite photos in National Geographic have been manipulated in some way.
99% of photos you see in your favourite travel magazines have been edited. Every professional photographer edits their photos to some degree.
The reason is that not all cameras are great at capturing exactly what the eye saw in terms of colour and light.
If you really want to get the most out of your professional travel photography business, you should start playing around with post processing.
Many people have heard of Adobe Photoshop , but it’s a pretty advanced tool that most people wouldn’t ever need to use (until you get more experience).
To start with look at the free apps that you can get on your phone, such as Snapseed, or free editing programs on your computer, like iPhoto or GIMP.
Once you get serious about travel photography and you want to start editing all of your photos that are filling up your memory cards and external hard drive, we recommend purchasing Adobe Lightroom.
If you’re ready to make the jump to using Lightroom and Photoshop, Adobe have a great ‘Creative Cloud’ package, which is what we use for only $10 a month. You can buy it here with a 7-day free trial

21) Practice, Practice, Practice
Just like anything, becoming a great travel photographer takes time, and a lot of practice. The only way you can get better is by getting out there taking travel photos!
You don’t even have to travel the world to tourist destinations or have the most travel camera available to be a great photographer.
Borrow some family members to take their portraits, get a friend who is also interested in photography and push each other, or grab your smartphone and go shoot sunset.
Buy whatever you can afford, go for a walk around your city and snap away.
We hope that this general guide on travel photography tips for beginners has been helpful.
Please feel free to reach out to us if you have any other questions. We have a lot of experience working with tourism boards, and would be happy to help you too.
Good luck on your photographic journey, and maybe we’ll see you in National Geographic one day!
DISCLAIMER: Some of the links in this article are affiliate links, which means if you book accommodation, tours or buy a product, we will receive a small commission at no extra cost to you. These commissions help us keep creating more free travel content to help people plan their holidays and adventures. We only recommend the best accommodations, tours and products that ourselves or our fantastic editorial team have personally experienced, and regularly review these. Thanks for your support, kind friend!

Alesha and Jarryd
Hi, We’re Alesha and Jarryd!

We’ve been traveling the world together since 2008, searching for the planet’s best destinations and adventures.
Love Travel?
Sign up for our free weekly newsletter for the best travel tips, ideas and deals!
We respect your privacy. Unsubscribe at any time.
READ MORE...
The Best Camera Accessories to Level Up Your Photography
GoPro HERO 12 Review – Is it Worth Buying in 2024?
Peak Design Everyday Messenger Review – My Honest Experience
Related Posts
Halong bay – images from a wonder of the world, the people of the world nomad games (photography essay), 40 incredible photos of uzbekistan that will blow your mind, best gopro accessories – the mounts we actually use [2024], 73 thoughts on “21 travel photography tips (easy ways to improve today)”.
I indeed agree in Know your camera and Plan your shots. These tips would make a good start in achieving your socmed worthy travel shots. And ofcourse, the other tips will surely be useful too. Great post!
Good article but I need to say something about using Manual – it’s not that great. Manual is just a different mode of settings for exposure, little different from either shutter or aperture priority, except these two give you a leg up, to where you’re going anyway. At the end of the day whatever exposure setting you choose will be just a combination of the 3 on the ‘exposure triangle’. Instead of using manual try these other two in conjunction with exposure compensation, which overrides the exposure meter reading. You still need the meter for any exposure anyway, just not necessarily using the value it recommends. It amounts to the same thing, only easier, quicker, and still constraining one of the triangle sides that you want. I use manual for specific unusual objects, such as sun, moon, stars, but during general daytime subjects it’ll be very unusual to hamper yourself by not using the aid provided when there is no advantage.
Your blog has become my go-to source for insightful content.
Thank you so much. So glad to hear. 🙂
Before you go, research your destination and its culture. This will help you better understand the people, customs, and landscapes you’ll be photographing.
I benefited a lot from your post. Thank you
So glad you did. Thank you for stopping by. 🙂
Thanks for sharing all this amazing tips & information. Fabulous post !
You are welcome. We are happy to help. Happy photographing
nice summary of basic photo tips that will improve my shots, thanx!
You are rocking..keep it up your work
Thank you so much. We really appreciate it.
Great article with great tips and i also like the pictures
Thank you so much Alesha and Jarryd for these amazing photography tips! I look forward to putting into practice some of your wonderful ideas and tips! I do so appreciate any tips that I can get to improve my photography. :)) Cheers, Marilyn
I absolutely loved this article! Like you I received my first ‘proper’ camera at 14 and since then have been hooked. I recently purchased a Nikon D750 and am absolutely loving it. Although at the moment I only have two lenses for it I am hoping to be able to afford more soon. What are your favourite lenses?
In my photography I love capturing candid portraits of people I encounter during my travels. I always struggle with the dilemma of getting the perfect candid shot and feeling compelled to ask permission before taking the shot. As a very shy person directing people in images is daunting, but it is something I am striving to work on. It’s nice to read that you are also shy yet manage to capture such incredible images of people.
As I am mostly self-taught, I always love to read technical tips to improve my images. I found the technical side of your post incredibly helpful and wanted to say thank you for taking the time to write such a detailed post. I believe it really helps and inspires amateur photographers like myself.
Glad you liked the article. Thank you for your comment. Keep photographying Caitlyn 🙂
Great tips and awesome photos! I always tell people if they aren’t comfortable with their settings, the #1 way to make sure their images aren’t blurry is to shoot in TV/S (shutter) priority. That way you can prioritize having no hand shake.
Thank you so much. Great advice. Thanks for your comment. 🙂
Awesome tips for everyone and specially to me who loves capturing photos everytime i travel.This one also help me and give me more knowledge on how to make awesome photos and its good because you don’t need to buy expensive camera to have a good quality photos, just your iPhone or smartphone you can make a great photos.
Hi, you are so right. You can take great photos with your phone. Glad the article could help you.
Great article! Do you even bother carrying your camera with you during the day in broad sunlight? I find it’s not worth the hassle for such poor shooting conditions.
Hi Scott, It all depends what we are doing. If we are on a job, we always carry our cameras with us. The midday sun is harsh but you get used to working with it. Especially indoors with the sun coming through the cracks, it can work out really lovely sometimes. When we are travelling on our own time, we don’t usually carry the camera. Happy travels
I really enjoyed reading this post, as I am a beginner in photography as well and it’s always interesting to see what gear other people are using!
I have the Canon Rebel as well, and also love the 50mm lens. It’s just great and is so versatile!
Thanks for sharing.
Glad we could help. Thank you for your comment. Happy photographing,
Great tips guys! Photography is an art so it must be learned properly. A good guide can teach art in a great way. This article is similar to a guide because it is an eye-opener for blooming photographers and travel lovers.
Thank you so much!
Thank you for your comment Glorias. Glad the article could help.
Hello Alesha and Jarryd, not sure to whom I adresse the message to, but I’m guessing Jarryd took the pictures and Alesha wrote about it :p
Anyway, do you guys use any customized Firmware on your DSLR? like the CHDK or Magic Lantern. That’s one question, the other one will be: can’t find any Mobile Phone photography on your blog? can you please refer me to any article that provide valuable info around Mobile phone photography?
Hi Ayoub, The photos and words in the article are a combination of both of us. Usually Alesha is the photographer and Jarryd is the writer.
We use use no customise firmware at all. We haven’t ventured this way as it voids our warranty.
As for phone photography, maybe this is an article we should write. With our phone photos, we do use Snapseed to edit them. But do not take any photos through any apps. All the best
Thank you for the tip regarding phone photography, I mostly use the customized firmware to do timelaps and edit directly on the camera, keep me posted after publishing the new article. (Already subscribed to the weekly newsletter)
Definitely will do. Thank you so much. Happy photographing. 🙂
you are doing a great job
Thank you so much. 🙂
This was really an amazing list of tips, I am a hobbyist photographer and this would really helps me a lot
Glad we could help. Keep up the photographing. 🙂
Great tips Alesha and Jarred. I really liked your golden and blue hours tip. Will try it soon and hope get amazing pics 🙂
Glad we could help. Practise will get you on the right track and before you know it you will be taking amazing shots. We are still learning about photography everyday. We love that you can never stop learning. Thanks Linda.
Some of the best tips I have read so far. Amazing post and captures so much detail. Worth the read for every travel photographer. 🙂 Keep it up.
Thank you so much,. We really appreciate it. 🙂
Priceless tips for amateurs like me. Thanks for sharing. For a long while, I’ve tried to follow the rule of thirds, but the best shots came out when I finally dared to break it. You’re absolutely right about the rules are meant to be broken. Regarding the camera, I agree it doesn’t have to be the most expensive. But sometimes I have a feeling my shots would have been better had I owned a proper camera. What device is the best balance between price and quality?
HI Robin, you’re welcome. We are so happy we could help. Sometimes breaking the rules works out to be better. 🙂 We definitely know what you mean. You do not need to buy the most experience camera. A camera that you can use manual settings, is great as you can start using and playing with aperture, shutter speed and ISO. We started off with a Sony RX100ii and it was great. Compact and a great camera to learn. Here is some articles that may help. https://www.nomadasaurus.com/best-camera-for-travel-ultimate-photography-series/ https://www.nomadasaurus.com/best-camera-accessories-ultimate-photography-series/
Thanks a lot for the great advise! I especially like your explanations about the exposure triangle. I was a bit aware of it before, but never played around with it unless I wanted to change the depth of field (and even then, I did this very rarely). But thanks to focusing more on it, I am starting to get the hang of it. I have taken some very good hummingbird pictures, for example, which never would have been possible if I hadn’t raised the ISO so I can keep the shutter speed fast. Those birds zip around like crazy!
Also, I think one of the most important pieces of advise, and the one I’m struggling with most, is to always look at the whole frame. I am guilty of looking at the main subject and later finding out that I cut off important things on the side or that something weird is in the photo that shouldn’t have been there.
Hi Ilona, so happy the article could help you. That’s amazing you experiment with your hummingbird shots. They are fast birds. By practising photography, you will get better and better. No matter how experienced you are, there are always things to learn. When you come to a scene you want to photograph, stop for a minute look around, walk around and think about what shots you want to take. Obviously this is hard when the subject is moving but great for landscape and street photography. All the best and keep up the awesome work. 🙂
Hi, I took around 500 shots on a trip to Kyrgyzstan recently, some I think are pretty good, but now after reading your tips, I think I will make another trip to that part of the world again soon!
what a great tips especially the lighting part – i also agree that getting up earlier and shooting in the natural sunlight is so great for your photos. talking to the locals and knowing your camera, You guys covered it all
Thank you so much for reading Shama. Glad you liked our article. Natural lighting is the best. Even though sometimes that early morning is hard it is worth it. 🙂
u are absolutely right u don’t need an expensive camera or go to Bali ( although it’s a good idea) to get great photos. it’s just simple common sense and a good eye and you can master photography
Well said. Thank you for your comment and reading Shama. Have a great week.
Thanks a lot for the helpful tips on holiday photos. My partner and I are in Easter Island, irresistible place for photo opportunity. My Nikon D7000 will keep on taking photos on auto mode for the time being until I have had enough practice following your guidelines and the who knows what photos I might produce! Thanks.
Glad we could help Balu. Definitely when you have time, go out and take some photos on manual. Play with the different settings. Before you know it, you’ll only be on manual. At the beginning when I was still learning, I would take a shot on the manual settings I thought and then a shot of the same view on auto in case I messed up. Better safe than sorry. Have a great time in Easter Island. There is so much to do there and learning about the history is amazing. Take care. Alesha
Guys your advice are completely helped me. I was stressed before, i want to travelling at the moment but i hope i can take a good picture cause you know how annoying it will be when we take a picture and then when we are home they are completely bad. So then you have to comeback at the same place again just to take a picture. But this one is helpfull
Hi Fabio, Don’t stress. You are going to bring back amazing photos from your travels. It is all overwhelming at the beginning but it gets easy. When you are shooting, put some time aside and concentrate on what you have learned. It doesn’t matter if it takes you 20 minutes to an hour to get your shot. If their are other photographers around, most of the time that are happy to give you some advice. Let them know you are new. Maybe they will let you know their settings for ISO, aperture and shutter. When it comes to editing, take your time as well. There are many You Tube videos that can help you for free. Have a great time on your trip. Happy travels
Hey Guys, very useful tips especially the Bonus tips.
Keep Sharing!!!
Glad we could help. Thanks for reading.
P(Program) you set either the aperture or shutter and the camera adjusts the other one accordingly to maintain the right exposure. Thanks
Thanks Rezan
I love traveling around the world. I wish to capture some of the beautiful places that I enjoyed. The above tips helped me to improve my travel photography skills. It also helped me to click some of the memorable moments of my travel with my friends and relatives.
Hi Vivek, Glad we could help. It is all about practise. We love having a day to ourselves and just getting out and shooting anything – landscape, cityscape, people or animals. We try to give ourselves a challenge sometimes. It makes it interesting and we are enjoying ourselves. 🙂
Great tips to help out beginners like me. I need to work on to ask people for permission as I get shy sometimes. I love the quote “rules are meant to be broken”!
Thank you Mao. Don’t worry, “asking” will come. Alesha was so shy and I used to take all the people shots. Now she is more confident and really enjoys shooting people. All the best.
THANK YOU . Your very easy to read starter guide to photography was AMAZEBALLS I learnt so much .cheers LIZY
Thank you. Glad we could help. Happy shooting and get creative. 🙂
Hey guys, this is an amazing guide, thanks for writing this up in such detail. As an amateur, I always look for good travel photography tips from other travellers. I left my tripod behind in Thailand and I think this was a huge mistake, I need to get a new one, urgently 🙂
By the way, really enjoy your photos on your blog and Instagram, they are amazing! 🙂
Glad we could help guys. We never used to use a tripod in our early years until we discovered how amazing the shots can be with one in low light and now we have 3. You can rest your camera on something to get a shot but you are limited to positions. Thanks for reading guys. 🙂
thanks for the tips. i’d make one edit: instead of ‘move your feet’ i’d say “don’t be lazy”…move left or right. move forward or back. climb up on something or get down on your knees.
Love it Aaron. You are so right. A little to the left might be the perfect shot or a little to the right and crouching might be the perfect shot. thanks for the input. Have a good one.
I love this post. It is incredibly helpful to all beginner travel photographers like myself! I have only been shooting in manual mode for the past 5 months and have already seen a huge increase in the quality of my photos! But I am always looking to improve. Will definitely be sharing your post
It is crazy how you improve when you start shooting manual. I know Alesha did also. You learn so much about the camera and what it can do, it is incredible. Thank you for reading and all the best with your photography Hayley. 🙂
this guide is amazing, thank you so much for explaining everything in a way an amateur can understand 🙂
Bookmarking the post for future reference!
Cheers, Naddya
Thank you guys. We are glad it is useful for you. 🙂
Wow! Amazing Tips. These tips will help a lot to click great pictures with your camera. Love the point of Shutter Speed. and about RAW.
Thanks for Sharing Helpful Post.
Thank you so much Nitin. Glad we can help. Thank you for reading.
Yeah I agree with you buddy.
Thank you 🙂
Leave a comment Cancel reply
Save my name, email, and website in this browser for the next time I comment.
- Work with me
- Privacy policy
- Years in review
- United Kingdom
- Bosnia & Herzegovina
- North Macedonia
- Philippines
- South Korea
- South Africa
- Africa Overlanding
- Central America
- New Zealand
- Solo Travel
- Budget travel
- Travel tips
- Travel itineraries
- Hidden gems
- Bucket list
- Travel resources
- Digital nomadism
- Blogging tips
- Start a travel blog
Blogging , Solo travel
How to take photos of yourself when travelling solo.

Table of Contents
This post may contain affiliate links to things like tours, hotels, Amazon associates and products. These help me earn a small commission at no additional charge to you.
I often get asked how I take solo travel photos and to be honest, there’s no one sole method. Of the many pros and cons of travelling solo , the struggle to get in your own photos is an undeniable con. We’ve got no Instagram significant other or personal photographer following us around! For every effortlessly casual girl wandering across your Insta feed, you can guarantee a fair bit of thought went into how to get the shot.
In this blog, I’m going to share my solo travel tips to help you take beautiful solo travel photos. It’s an important topic: who would want to take a bold and brave trip around the globe only to come back with no evidence of them there?
Taking photos of yourself is a great skill to have. If you want to take photos of yourself and a partner or bestie at a later date, the principles are the same. Knowing how to take photos when travelling alone is a handy skill to have but even more important if you’re hoping to start a travel blog . You won’t find many bloggers who never post photos of themselves!
How to take solo travel photos
These are a few main ways I take solo travel photos. I’ve implemented these 14 tried-and-tested methods during my solo travels around India , Bali , Vietnam , Mexico , South Africa and Romania . In this guide, I’ll share my top solo travel photography tips for safety and pose suggestions.

Read next: 30 best places to travel alone
1. Self-timer mode with a smartphone
Ah, my old friend. Even old smartphones have a self-time mode. I have an iPhone 6 (potentially fake) that I bought for £100 three years ago when I was robbed while travelling solo in Vietnam and even that has a self-timer. These are really easy to use. You just set the timer for 3 or 10 seconds and do your thing. The only thing to worry about is how to position your phone while you go off to pose?
Smartphone and self-timer method #1 – prop your phone up
This is probably the easiest and most basic way to take pictures when you travel alone. You need no kit, just your phone. Despite what you might think, you can actually get really decent photos with this method, especially after a little editing or straightening if the photo is at an angle. Good things to prop your phone against include your bag, a water bottle, a chair or a wall. There are so many ways to get creative. You should see the random piles I’ve made before comprising bottles, bags, sunglasses, suncream tubes and the like. Passersby must think I’m mad but hey, if they’re not offering to help, who has time for their judgement? Not I.
Smartphone and self-timer method #2 – phone stand
Purchase a handy phone stand and you can eradicate the need for makeshift stands as you prop your phone up. Securing it with a proper stand also means it’s less likely to fall or get damaged during your solo photoshoot. Use a phone tripod with Bluetooth remote (that doubles into a selfie stick).

2. Self-timer mode with a camera
Travelling with a better-quality camera may mean better travel photos, depending on your camera and how you use it. I use the Sony DSC-HX350 Digital Compact Bridge Camera which I think is one of the most affordable options for a camera with such a good zoom. But regardless of the type of camera you have, you can use it to take amazing photos of yourself while travelling solo. So, how to do it? The premise is more or less the same as with a smartphone; in fact, I would say it’s easier as cameras usually have a flat base so sit more easily on a step or wall. The only thing to be aware of is that DSLR cameras are usually more valuable than smartphones and also more obvious so you’ll want to be slightly more careful. Later, I’ll run through a few safety tips for solo female travellers taking photos alone.
3. Remote trigger controlled with your phone
One of the hardest parts of taking pictures on a solo trip? Only having a few seconds to run and get into shot after setting your self-timer. I remember travelling solo in South Africa where there was a luxurious outdoor bath overlooking an amazing rainforest canopy. Setting my timer to 10 seconds then scrambling over craggy rocks to jump in the water, all in a swimming costume with a vertical drop a few metres ahead… Well, let’s say it was pretty stressful!

Many cameras these days can be connected to your smartphone via an app which you can control from your phone screen. My Sony camera connects to the Image Edge Mobile app. Here you can connect your camera, automatically send over photos and better yet, take photos without touching your camera. When taking solo travel photos, you can get in position, perfect your pose and even check what the image is going to look like on your phone screen before pressing the shutter.
4. Use a tripod (my chosen option)
Using a tripod is my number one way to take pictures as a solo traveller. I can’t believe it took me so long to make this upgrade. When I first started travelling and blogging, I only did so as a hobby and it didn’t seem worth it to carry such a large item when I only had a backpack to store all my worldly possessions. I begun with a selfie stick or propping my phone up and upgraded to a GorillaPod (more about these next) but found they didn’t quite meet my needs as I got more professional about blogging and photography. If you’re like me and serious about your shots, I would really recommend a tripod.
What’s the best tripod for solo travel photos?
I’ve now tried two and would recommend investing when it comes to tripods. The first I bought was cheap but it was also bulky and not overly sturdy. It was a test item for me because I didn’t know whether travelling with a tripod was going to be too much for me. As it happened, I don’t mind backpacking with a tripod and my photos are well worth the extra weight. Nowadays, I use the Manfrotto Compact Action Aluminium Tripod . This is a great tripod! For $60, it’s lasted two years without showing any signs of wear. I predict it will last years more. I particularly like the flexy ball head that lets me move my camera around to get the best angle. It also easily shifts my camera to portrait position which I prefer to landscape for Insta shots. This tripod is ideal for DSLRs, mirrorless and compact cameras and is suitable for photography beginners. It also comes in a bag that you can easily throw over your shoulder.

5. GorillaPod
Is the idea of carrying a tripod too daunting in terms of weight and space? Fair enough. If you simply want to take photos of yourself, don’t stress too much over kit. There’s a much, much smaller and lighter option that I’m a big fan of. GorillaPods are ingenious little items that weigh less than even your smartphone. These bendy devices are way better than camera stands because of their flexibility. You screw them into your tripod bush (the screwy bit at the base of your camera) and then manipulate the bendy legs to whatever position you want. You can bend and fasten them around railings, tree branches, lamp posts… Literally anything! I own a tripod and a GorillaPod. If I’m off on a hike or busy city day without the guarantee of being able to set up my tripod, I throw my GorillaPod in my bag instead. They weigh almost nothing and take up no space.
Downsides of a GorillaPod: There are no downsides in terms of design or functionality. But since GorillaPods have short legs and therefore lack height, it means you often have to find something eye level to secure them to. If there’s nothing of that level around, they don’t always work. You can usually get creative and find a similar shot, but sometimes you want that shot and can’t recreate the height a tripod would give. Top tip: If you’re using a camera larger than a small compact, you’ll need to use a GorillaPod that can take its weight. For my camera, I use a 1kg GorillaPod . Heavy DSLRs may need a GorillaPod that can take a greater weight.

6. Ask a stranger
How to take great photos of yourself with no kit whatsoever? Sometimes all else fails: there’s nowhere to set up your tripod or you’re visiting an attraction where they’re not allowed. Sometimes it’s just too busy and crowded to set one up. This is when asking a person to help is the quickest and easiest option. To start, you might feel awkward asking strangers to help take your photo. You’ll hopefully shake this feeling off quickly. Just think, in five years’ time, what will bother you more: the fact that you took five seconds out of a stranger’s day or the fact you don’t have photo memories from your solo travels? I’m sure it will be the latter. Now the one thing to overcome: strangers can take terrible photos. I could scream thinking about all the times I’ve lined up thoughtful shots for strangers who’ve then taken a rubbish one of me with the main temple cropped out …
How to get strangers to take nice photos of you while travelling solo
Tip 1: Approach the right person, preferably someone with a decent camera themselves. Not because they’ll use it, but because they’ll know how to use yours. If no one around has a camera, go for a younger person because chances are they’ll have a better grasp over technology. Also, teenage and twenty-something girls usually know what shots are most flattering – just sayin’. Tip 2: Line it up for them. Rather than handing them your camera and letting them use their judgement, I would suggest holding the camera in place then telling them what you want i.e. ‘if you could just get me on the left side that would be great!’. Tip 3 : Chat! Science proves if people like you, they’ll work harder when they do you a favour. I just made that fact up but it’s definitely true. This photo below was taken at the City Palace in Jaipur by a guy I’d just bonded with over my trip to his home country. He ended up taking a great photo which I suspect might have been because he felt more inclined to help me out.

7. Take a tour
Some of my favourite solo travel photos have been taken by tour guides. I find that guides are usually great photographers, probably because they take photos of their guests so often. Since they’re also ‘at work’, they make more of an effort than passing strangers. The fact you might leave a tip at the end probably doesn’t hurt either. Taking a tour is also a great way to meet people while travelling solo who may take your photo. If a multi-week organised tour isn’t your thing, why not consider a day tour or even better, a free walking tour? I’ve done these in cities all around the world and love them.
8. Collab with other solo travellers
If taking photos of yourself when travelling solo seems like a lot of work, why not recruit other solo travellers to help? This way you’re not really asking a favour because they’re probably in the same boat. It can be mutually beneficial as you can take photos of them, too. If there are no other solo travellers you’ve bonded with IRL, use the internet to your advantage. I love the Facebook group Girls Love Travel and often see girls mentioning that they’re in x location looking for travel buddies. If you post saying you’re looking for help with solo travel photography, I bet you’ll connect with someone nearby who feels the same.

9. Photograph different parts of your body
Sometimes solo travel photography is about getting some human element in the photo even if that’s not your face. Why not take photos of your feet with different backgrounds: beaches, canopy walkways, over vertical drops while hiking. You could even make a photo series over it. After all, you’re still taking photos of yourself travelling! You could also take photos of yourself holding a mascot item, hot drink or item of food. If you’re starting a travel blog, you’ll still be putting yourself in the frame and you can even do so creatively to tell a story. Maybe you’re a tea or coffee fanatic and try the local drinks in different countries, ideally with great views? Here’s one of me drinking hot lemon honey tea in India last year. At the time, I was incredibly sick and my face was as white as a sheet so this type of shot actually worked much better for me.

How to take solo travel selfies
When we hear the word ‘selfie’ our minds often jump to overly edited, posed shots that probably have little to do with travel. This doesn’t have to be the case. There are plenty of bloggers and solo travellers who don’t set their camera up far away. Instead, they stay close to the camera which is a great way to show your face and build more of a personal rapport with your audience. If you’re a blogger, I recommend having a few of these to break up all the far-away shots. If you’re hoping to take photos of yourself, why not try…
10. Arm selfies
Just going back to basics with an old classic here. Taking photos on a solo trip can sometimes be as simple as a quick selfie, especially if it’s only going to family and friends. Photos don’t have to include cheesy smiles either; you can use them to capture your ‘staring out at the view’ pictures perfectly.
11. The selfie stick
Attach your phone to a stick in order to get more length and include your body in the shot. You can set up a self-timer or purchase a Bluetooth selfie stick that has a built-in Bluetooth button at the bottom to take your photo with. For best value, get a selfie stick that doubles into a camera stand . Top tip: Taking a stranger’s eye out won’t win you any friends! Be mindful when you take pictures of yourself travelling alone especially if you’re any kind of stick.
12. The GoPro
An extra benefit of a GoPro is that they take wide-angled photos which means it’s easy to get your whole body and the scenery in the shot. Since GoPros are tightly fastened and waterproof, you can take solo travel selfies underwater, in the air, on the back of a moped… The world is your solo travel backdrop! I use the HERO8 Black .
13. The GoPro screengrab
Another of my favourite techniques for taking solo travel photos is to simply make short videos on my GoPro and screengrab them later. It would be too blurry to do this with your smartphone but GoPros let you break down the footage to milliseconds and export them as high-res image files. GoPros let you change the shooting mode to ‘photo’ rather than ‘video’ but I rarely do this. If you smile while making a short video, you can pick the angle and moment where you look best. I tend to move the camera as I film to change up the background and get different angles, giving me some options for screengrabbing later.

Confidence tips for solo photography
I get it. You feel self-conscious when people are watching you take solo travel photos but you also feel self-conscious asking someone to help. Especially as a woman travelling solo , I hate feeling watched especially by men (even though it’s probably harmless). Also as a young person, you worry people will stereotype you as all about the ‘gram or not appreciating the moment. My personal pet peeve is when I’m taking pictures on a solo trip and someone wants to walk between me and my camera but instead of quickly nipping through, they wait for me to finish. I know they’re trying to be nice but I can’t think of anything worse than doing a full-on photoshoot with people waiting and watching when it would take less than a second for them to zip past and be gone! To feel less self-conscious…
Get off the tourist track
Take your photos in remote locations like fields and backstreets rather than at Bangkok Grand Palace, for example.

Arrive somewhere outside of peak hours and there will be fewer people around. This is good for solo travel photos with a tripod or self-timer and not worrying about the reactions of others or feeling you have an ‘audience’.
Like anything, such as eating alone in a restaurant and not worrying what people think, it gets easier with experience and practice. Sometimes you have to fake it ’til you make it and ignore passersby until you genuinely stop worrying.
Ask the right person
This point isn’t necessarily about asking people who will take good photos, but identifying people you feel comfortable asking. I’d feel most comfortable asking a girl my age to take my photo as I think they’d understand my plight and relate. I probably wouldn’t ask a busy-looking family with kids or a couple on a date as I would feel I was inconveniencing them.
Pose suggestions for solo travel photography
Now that you have 14 different ideas for taking solo travel photos, you just need to consider what to do in the photos. This depends whether you want smiley shots for your photo memories or more creative photos for social media. Even if you’re a blogger, I’d still recommend taking some normal travel snaps for future memories. These are a few of my favourite pose ideas for solo travel photography:
The ‘walking away’ shot
I’ll be honest, sometimes these solo travel photos come as a result of a short self-timer when I haven’t reached my ideal pose spot yet! But overall, you see a lot of shots on social media of someone walking towards an attraction or into a beautiful landscape. These show the person being part of the travel destination rather than simply using it as a backdrop. Pros: You don’t have to do your makeup… Not that you ever HAVE to anyway! Cons: You’re not looking at your unattended camera which could be a safety concern.

The ‘back of the head’ shot
These are similar to the ‘walking away’ shot but the subject is usually closer to the camera. Rather than seeing the solo traveller amongst the landscape, these shots show them admiring and drinking it in.
Walking across the shot
This is another favourite solo travel photo pose of mine. For these photos, I take photos of myself sideways as I walk past a scene. I find these work better against something straight like a row of houses rather than a beautiful travel landscape which is best ‘walked into’.

Facing the camera but look away
This is one I do all the time. These photos are more personal because they feature you front-on but you don’t need to be grinning at the camera in a cheesy way. By looking up or sideways at whatever’s in the shot, you’re showing the audience that you’re engaging with it, subsequently building a connection between yourself and the location. You don’t need to be craning your neck: just be looking a few degrees away from the camera.

What to do with your arm and legs? I never used to know what to do with my limbs in photos. While walking, I would suggest leaning on one of your legs or having it slightly forward, as if you’re about to take a step. This looks more natural as if you’re involved in the scene around you. When it comes to your arms, don’t leave them dangling. For walking away shots you can leave them in front of you. For shots of you walking towards the camera, have them ‘in movement’ or one flying behind you. If you’re standing still, keep your shoulders and arms tensed rather than loose. You could also gently use one to lean against a railing, rock or something else in the shot (but only if it’s safe and respectful to do so) . Below I’ve gone for the ‘in motion’ movement.

Personal tip – I usually take my hair down for photos as I think it looks more free and natural. In hot weather, this means quickly pulling it down from whatever unflattering bun is going on that day. After a few seconds taking a photo, it goes straight back up!
Props and accessories
This all depends how serious you are about taking photos of yourself travelling alone. Personally, I’m not serious enough to plan my outfits, although when I accidentally match with my surroundings I do think ‘I should do this more often!’. Serious photographers will advise you to do Instagram research in advance to see the main colours in the place you’re going, then wearing an outfit that enhances them. For example, don’t wear blue beside the sea or yellow on the beach or you’ll blend right in!

Solo travel photography tip: Have an accessory like a headband or scarf in your bag and throw it on for the photo. Especially if you’re wearing a muted colour and it’s a grey day, this could be the colour pop that turns it from a boring photo into a fun photo.
Safety tips for taking photos travelling solo
I wanted to quickly cover this topic because people often say ‘Aren’t you worried about someone stealing your camera while you’re away from it?’. The truthful answer is no, not really. I’m rarely away from my camera for more than a few seconds at a time. In busy tourist places, there would be a lot of witnesses. In more remote places, someone would be hard-pushed to come that close to me and my camera set-up without me noticing. However here are a few safety tips when taking photos travelling solo.
Keep your bag or valuables on you
This is an irritating part of solo travel photography. As you’ll notice online, most bloggers aren’t carrying their backpacks in the photos. So where are they? One option is to head out on a small photoshoot and leave your day bag at the hotel. If your camera is your only valuable on you, you’ll feel better about leaving your stuff for a few seconds. For solo travelling generally, I always suggest bringing a small crossbody bag or bum bag with secure zip out for the day as well as your main bag. Keep this on while taking the photo so at least if your day bag is unattended, your most valuable items are close at hand. Alternatively, hold your phone and wallet and walk into the scene holding them subtly in front of you.
Don’t go too far from your camera
This is common sense really. I would rather have a photo of me slightly closer to the camera than have my camera stolen by walking five minutes away. A tip for this is to zoom out as far as possible, then you can be relatively near to the camera but still have a lot of scenery included. You can always crop it or zoom in later.
Best time of day for taking photos of yourself
There are so many photos out there of me blinded and squinting in the middle of the day, my face in shadow from the sun. If you want great solo travel photos and can control the time you visit a place, I would advise putting some thought into this. These are the best times of day for travel photos:
Early morning: I hate getting up early but it’s worth it. Firstly, you’re more likely to have a place to yourself which means there are fewer safety concerns in terms of leaving your camera and secondly, fewer people getting in your shot. In terms of lighting, it’s best because the sun is low in the sky so you don’t get those hard shadows across your face. Also, it’s cooler and you’ll be less sweaty and stressed in your photos.
Evening golden hour: Everyone looks great. Enough said. Also called the magic hour , this doesn’t take place at a specific ‘hour’ because sunset times change around the world and by season. Golden hour is the period shortly before sunset when the sun is low in the sky and everything looks pleasantly golden. In terms of travel locations, people may be heading home by this time so there’s more chance of having it to yourself. Other photographers may be the only ones remaining and even help you out!
Thanks for reading!
More solo guides:
- Solo female travel in Lisbon, Portugal
- Solo travel in Croatia
- Where to travel alone in Italy
- Solo female travel in South Africa – safety tips & more
- Best destinations in India for solo travel
- Tips for travelling alone in India
- Solo travel in Europe
- Solo travel destinations in Southeast Asia
- Female travel guide to Cuba
Follow me for more solo travel content on Instagram , Facebook , Twitter and YouTube .
I hope you have a better idea of how to take photos of yourself. It’s daunting at first but I promise it becomes easy!
Check out my other solo travel blogs:
- 10 myths about solo female travel, debunked!
- What’s best, group travel or solo travel?
- Is technology ruining travel?
- Benefits of travelling alone
- Why coming home is the hardest part of any trip
Americas solo travel guides:
- New York solo travel guide
- Solo female Mexico travel
- Guide to solo female travel in Mexico City
- Is solo travel in Guatemala safe?
- Travelling alone in Cuba
Asia solo travel guides:
- Solo female travel in Bali
- Solo travel in Thailand
- Solo travel in Taiwan
- Guide to solo travel in Malaysia
- Solo female Vietnam travel
- Solo travel in India
- Where to travel alone in India
Europe solo travel guides:
- Is Albania safe for solo female travel?
- Portugal solo female travel guide
- Solo female travel in Lisbon
- Is solo Romania travel safe?
See you next time for more adventures,
Ps. Liked these solo travel photography tips? Pin this for later!

Rose is a solo traveller from the UK who has been on the road since 2015. She wants to show other women that solo travel isn't scary and doesn't have to be expensive! Rose has lived in Mexico, Canada and all over Asia, seeking out food, bubble tea and street art wherever she goes!
12 thoughts on “ How To Take Photos of Yourself When Travelling Solo ”

I loved reading this! I always struggle to take photos when I’m alone, these tips are so helpful!

I love this blog! Solo traveling can be scary, but Rose help me a lot with this ❤️❤️

Hi Tatuajera, I am so pleased to hear this and I wish you the best of luck on your trip!

I’ve just started traveling solo, and loved to read your article. It’s been just selfies for me right now, but most of them don’t turn out too well, haha. I got a tripod/stick that fits in my pocket, but I haven’t even used it yet because it’s kind of a hassle to put my phone in it. Do you have Instagram? Check me out if you want, my Instagram is @Mennohhh. I’m sharing my travel pictures on there!

My best tip for the self timer problem on the phone is to take a video of yourself. Than you won’t just have one good picture. You will have as much as you like. Sometimes the outcome of my screenshots of the video will be a pose or just a short moment that is utterly beautiful and without the video I wouldn’t have catchend it!
That’s such a good tip!

I’m travelling for 4 months in the UK and your blog has been super helpful! I just regret not finding your articles before I left. I’ve been very nervous about leaving my camera unattended on my tripod, but your reassurances in this article may have pushed me to try for the perfect shot in the highlands this week. Thanks for sharing such a realistic experience of solo female travel 🙂 much better than my mom complaining every time I leave my accommodation!
Hey Danni! Glad it’s helped! And yes we gotta take risks sometimes for that shot 😉 hope you have a fab trip x

Loved reading this, thanks for these helpful article. Will have my first soll trip in 2 weeks (Denmark), excited to try these tips out.
Hi Natalie, glad they helped and i hope you enjoy Denmark! Let me know how you get on with the photo tips!

I’m one of those people who stops and let someone finish taking their photos before passing by them. I mean maybe your timer is down to a few seconds. I don’t wanna leave a blurry image there. 😂
Haha – you are very thoughtful!
Leave a Reply Cancel reply
Your email address will not be published. Required fields are marked *
You can see how this popup was set up in our step-by-step guide: https://wppopupmaker.com/guides/auto-opening-announcement-popups/
How to take better photos when traveling

Editor's Note
Travel is a remarkable thing , opening our minds to new places , new cultures and new experiences . And with powerful cameras built right into most modern smartphones, it's easier than ever to photograph one's travels. We don't want you to just take photos, though. We want you to take excellent photos.
Whether you intend to share your memories on social media , or simply archive them to share with friends and family, we've compiled a list of tips for everyday travelers who want to up their photography game.
For more TPG news delivered each morning to your inbox, sign up for our daily newsletter .
Splurge on your smartphone
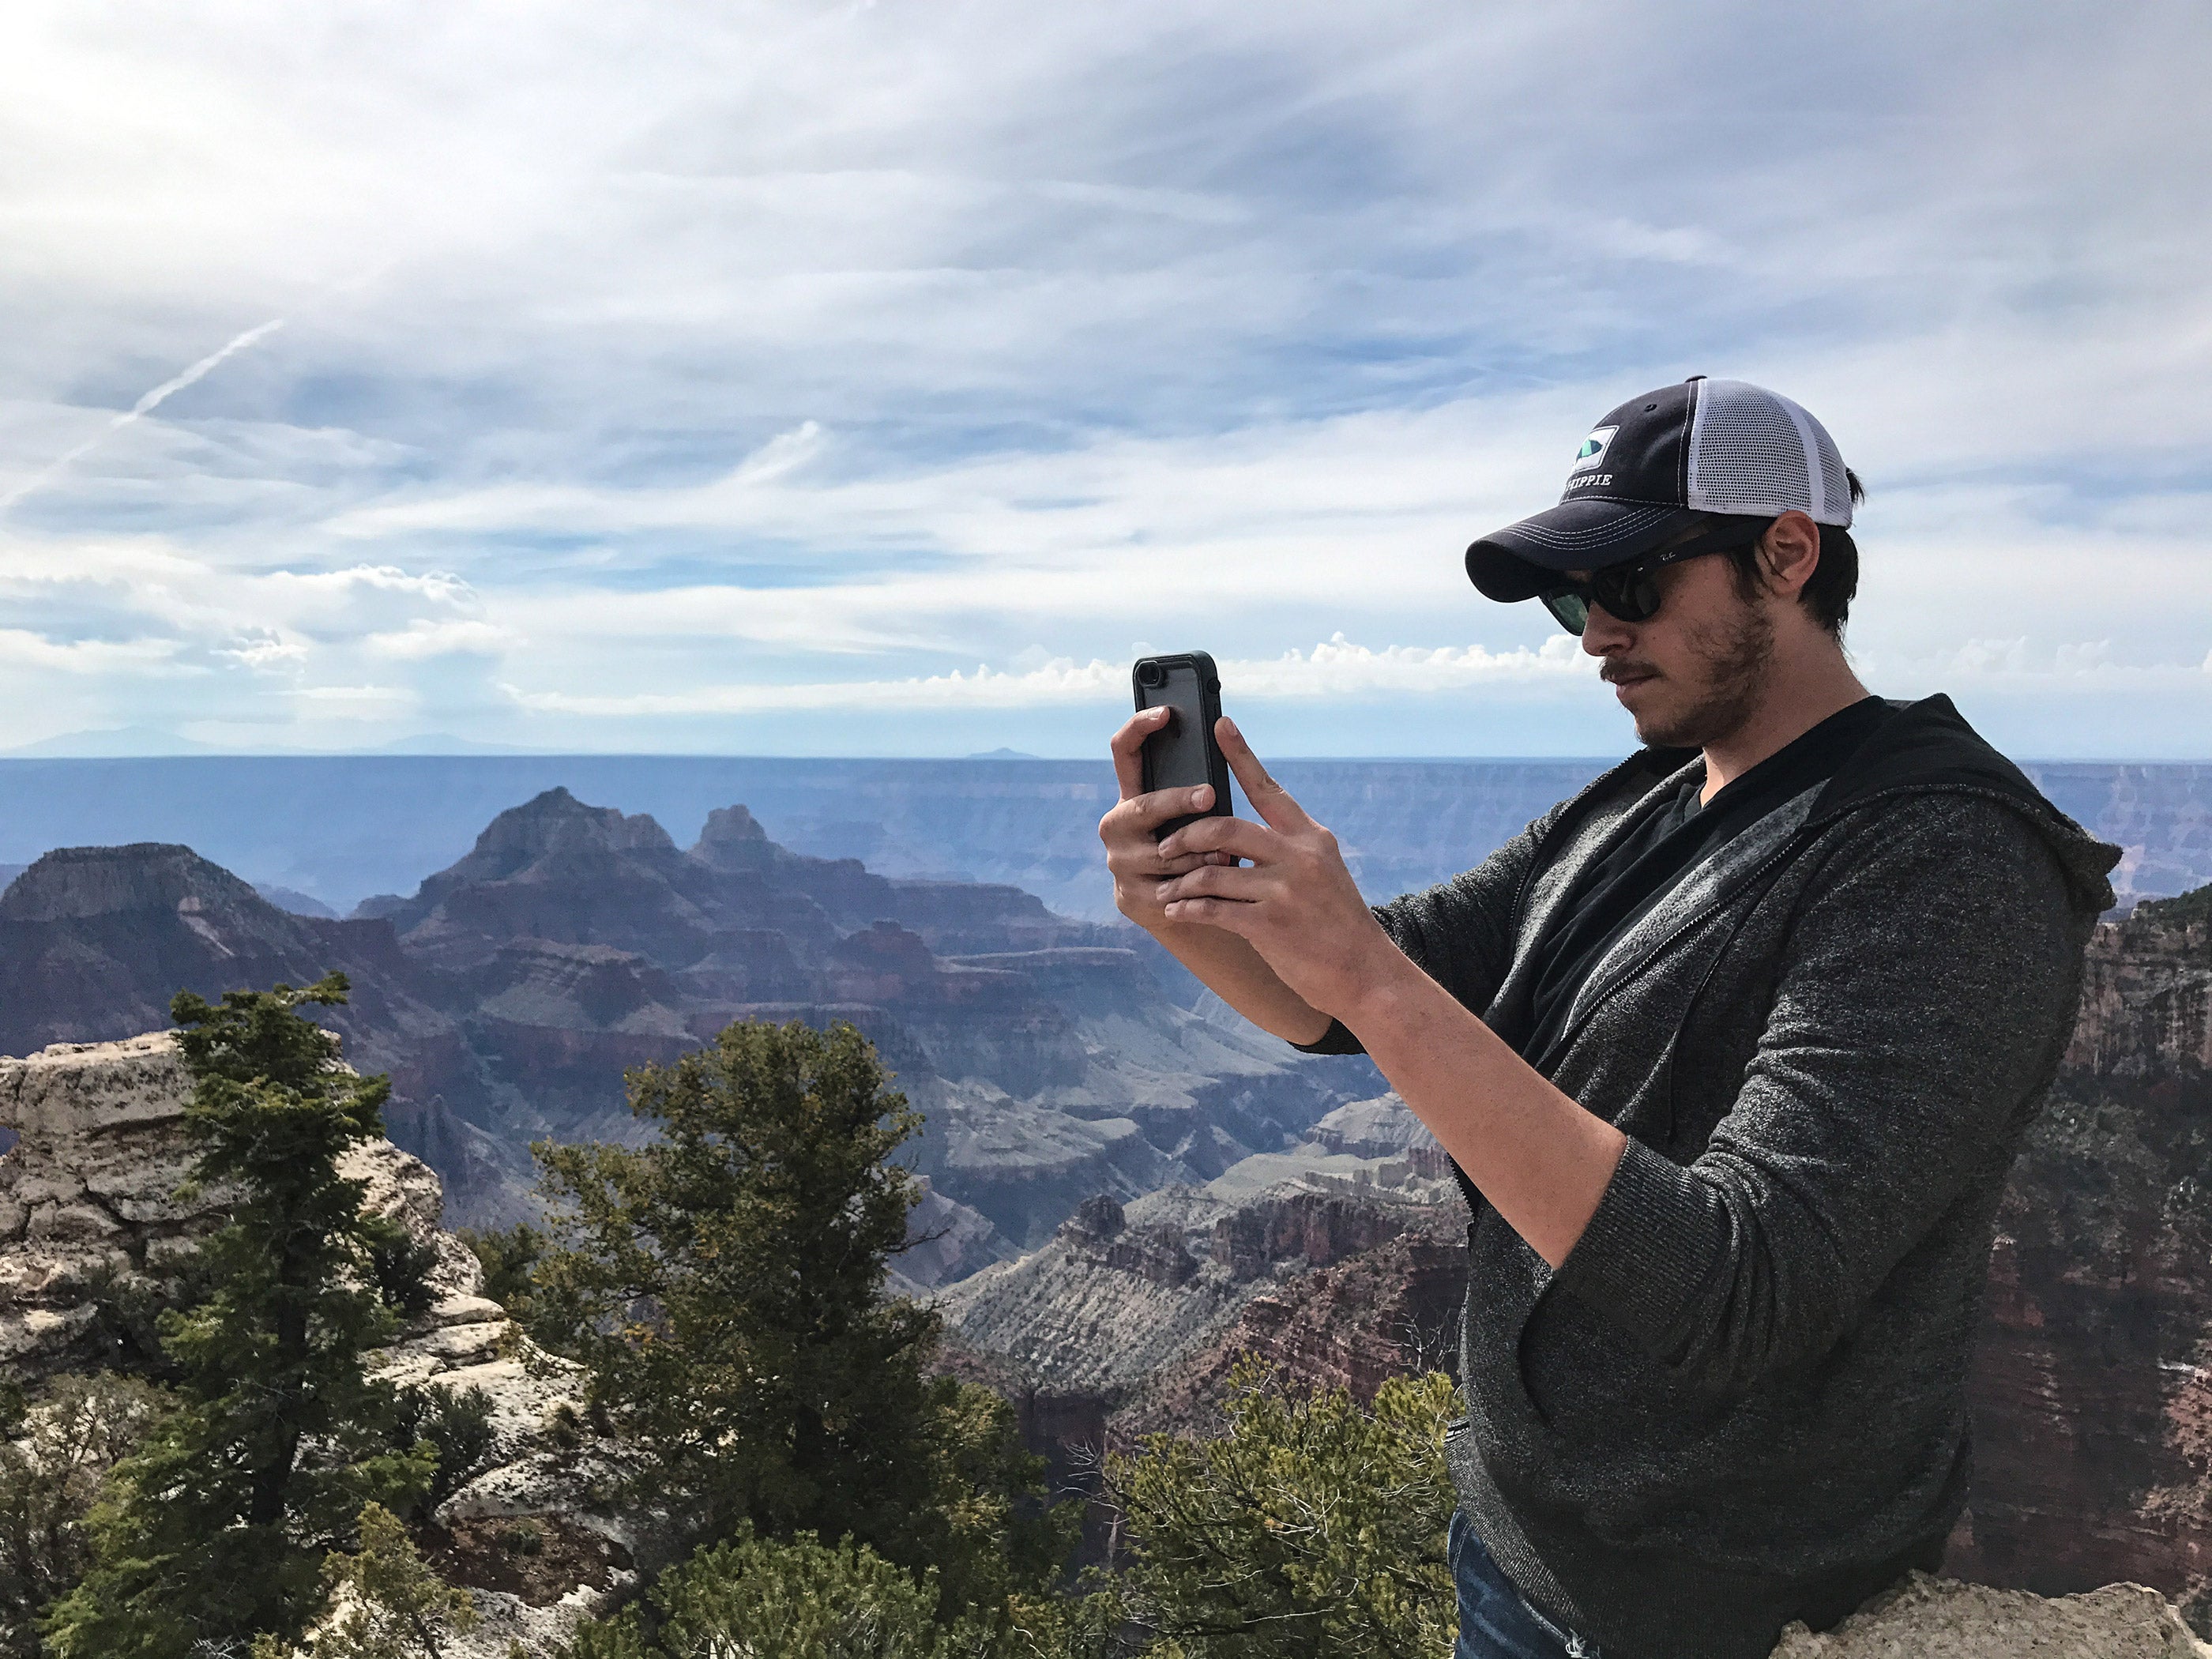
When it comes to camera quality on smartphones, you get what you pay for. TPG Editor-at-Large (and phone photographer extraordinaire) Zach Honig bounces back and forth between the latest iPhone and the latest Google Pixel. Both of these phones have excellent cameras. It pays to know a bit about lighting and framing (which we'll touch on below), but these two devices are safe bets for those who plan to point and shoot.
If you're looking for a different perspective, consider a DJI Osmo Pocket or DJI Mavic 2 Zoom drone.
Related: How to use a smartphone to photograph the northern lights
Lighting, framing and panoramas
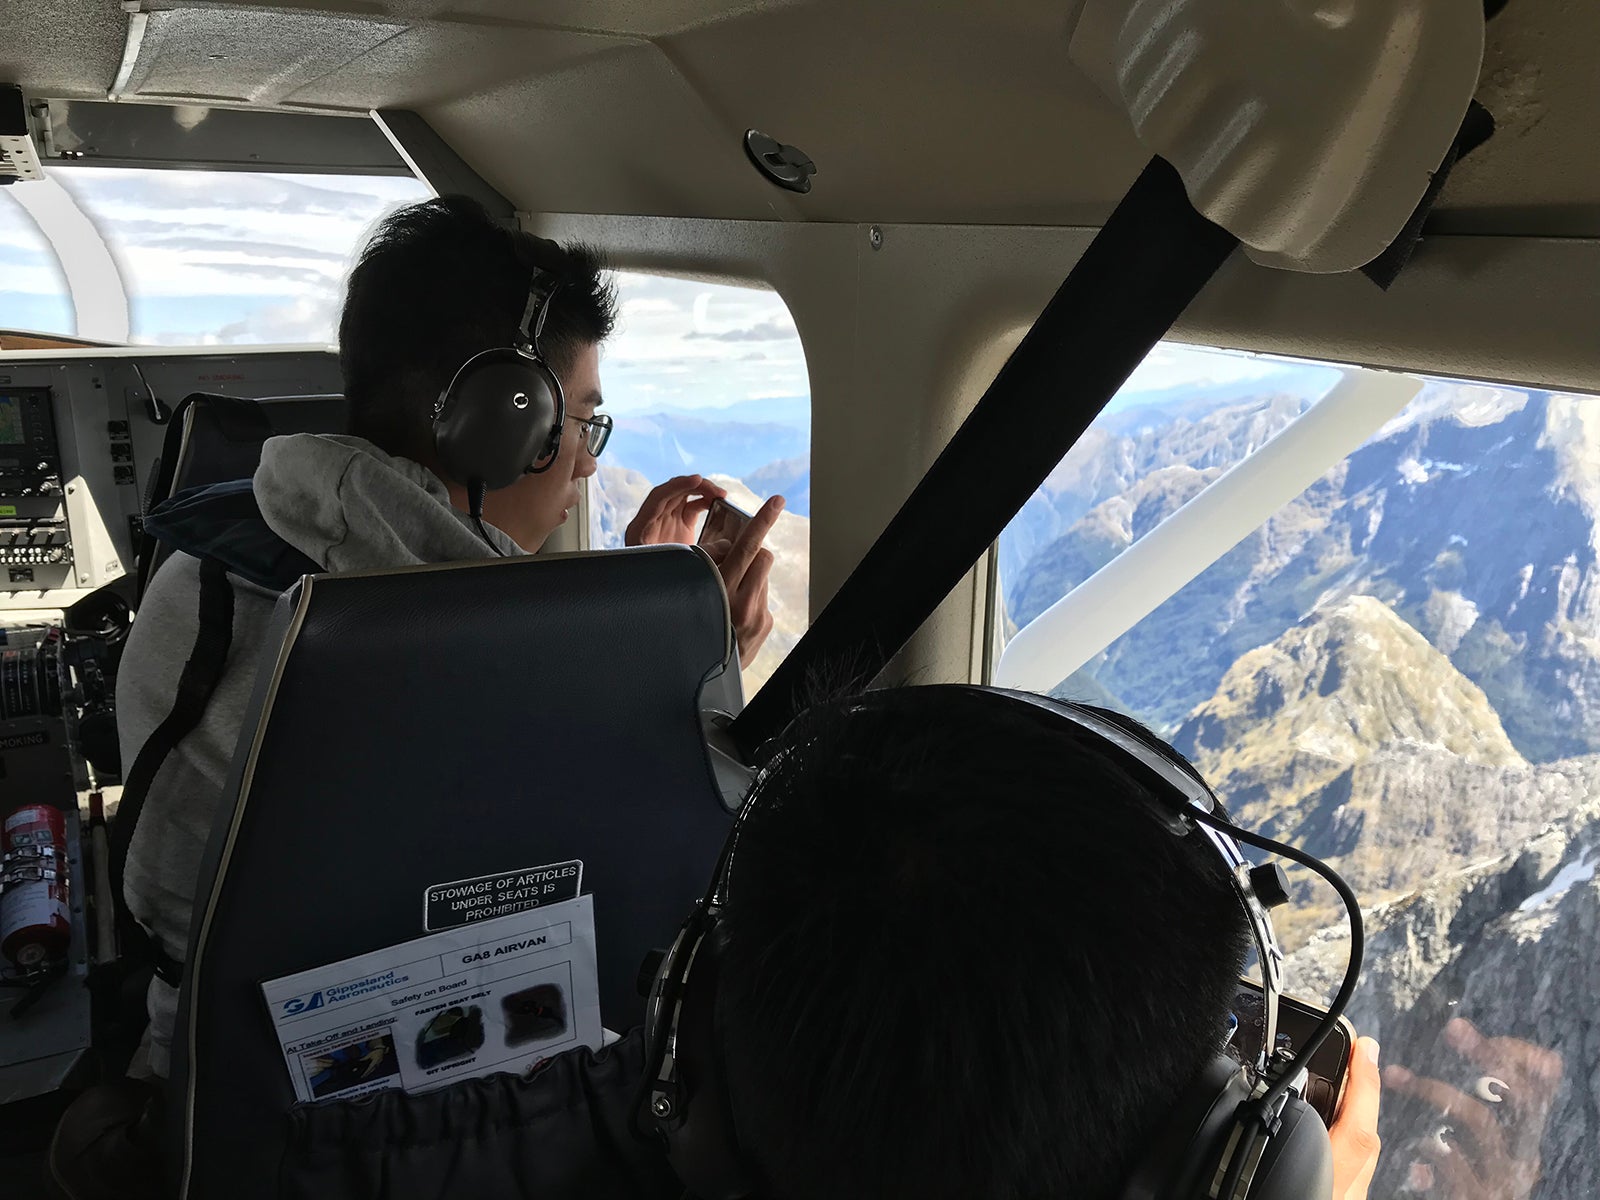
There's a lot of nuance involved in capturing excellent shots. Below is a quick checklist for optimal settings:
- Try to shoot at sunrise, sunset or with cloud cover (diffused lighting) to reduce excess shadows
- If possible, avoid having a part of your shot in broad daylight and another (including people) in shade
- During the day, you want light beaming onto a subject, not behind it, so bring sunglasses
- Do whatever you can to avoid using a flash — it makes your images look artificial
- Avoid framing faces at the extreme edge of the screen, as they're likely to appear warped or stretched
- Always take a lot of snaps when people are involved, giving yourself options to find ideal smiles and no blinks
- Tap on your subject on the screen to adjust the focus and lighting
- Hold your phone or camera steady to avoid blurring
- Leave a lot of buffer room on the edges of your photo, enabling you to use a single shot for multiple sharing platforms
- Make liberal use of your phone's panorama feature to capture cityscapes and landscapes, but hold it steady and pan slowly for optimal image quality
For those interested in putting in the time to take their smartphone photography to the next level, Austin Mann and David Molnar are acclaimed photographers offering online educational courses.
We've also rounded up the best iPhone lenses , but beware that these are easy to misplace.
Related: Credit cards with cellphone protection
Selfies and tripods
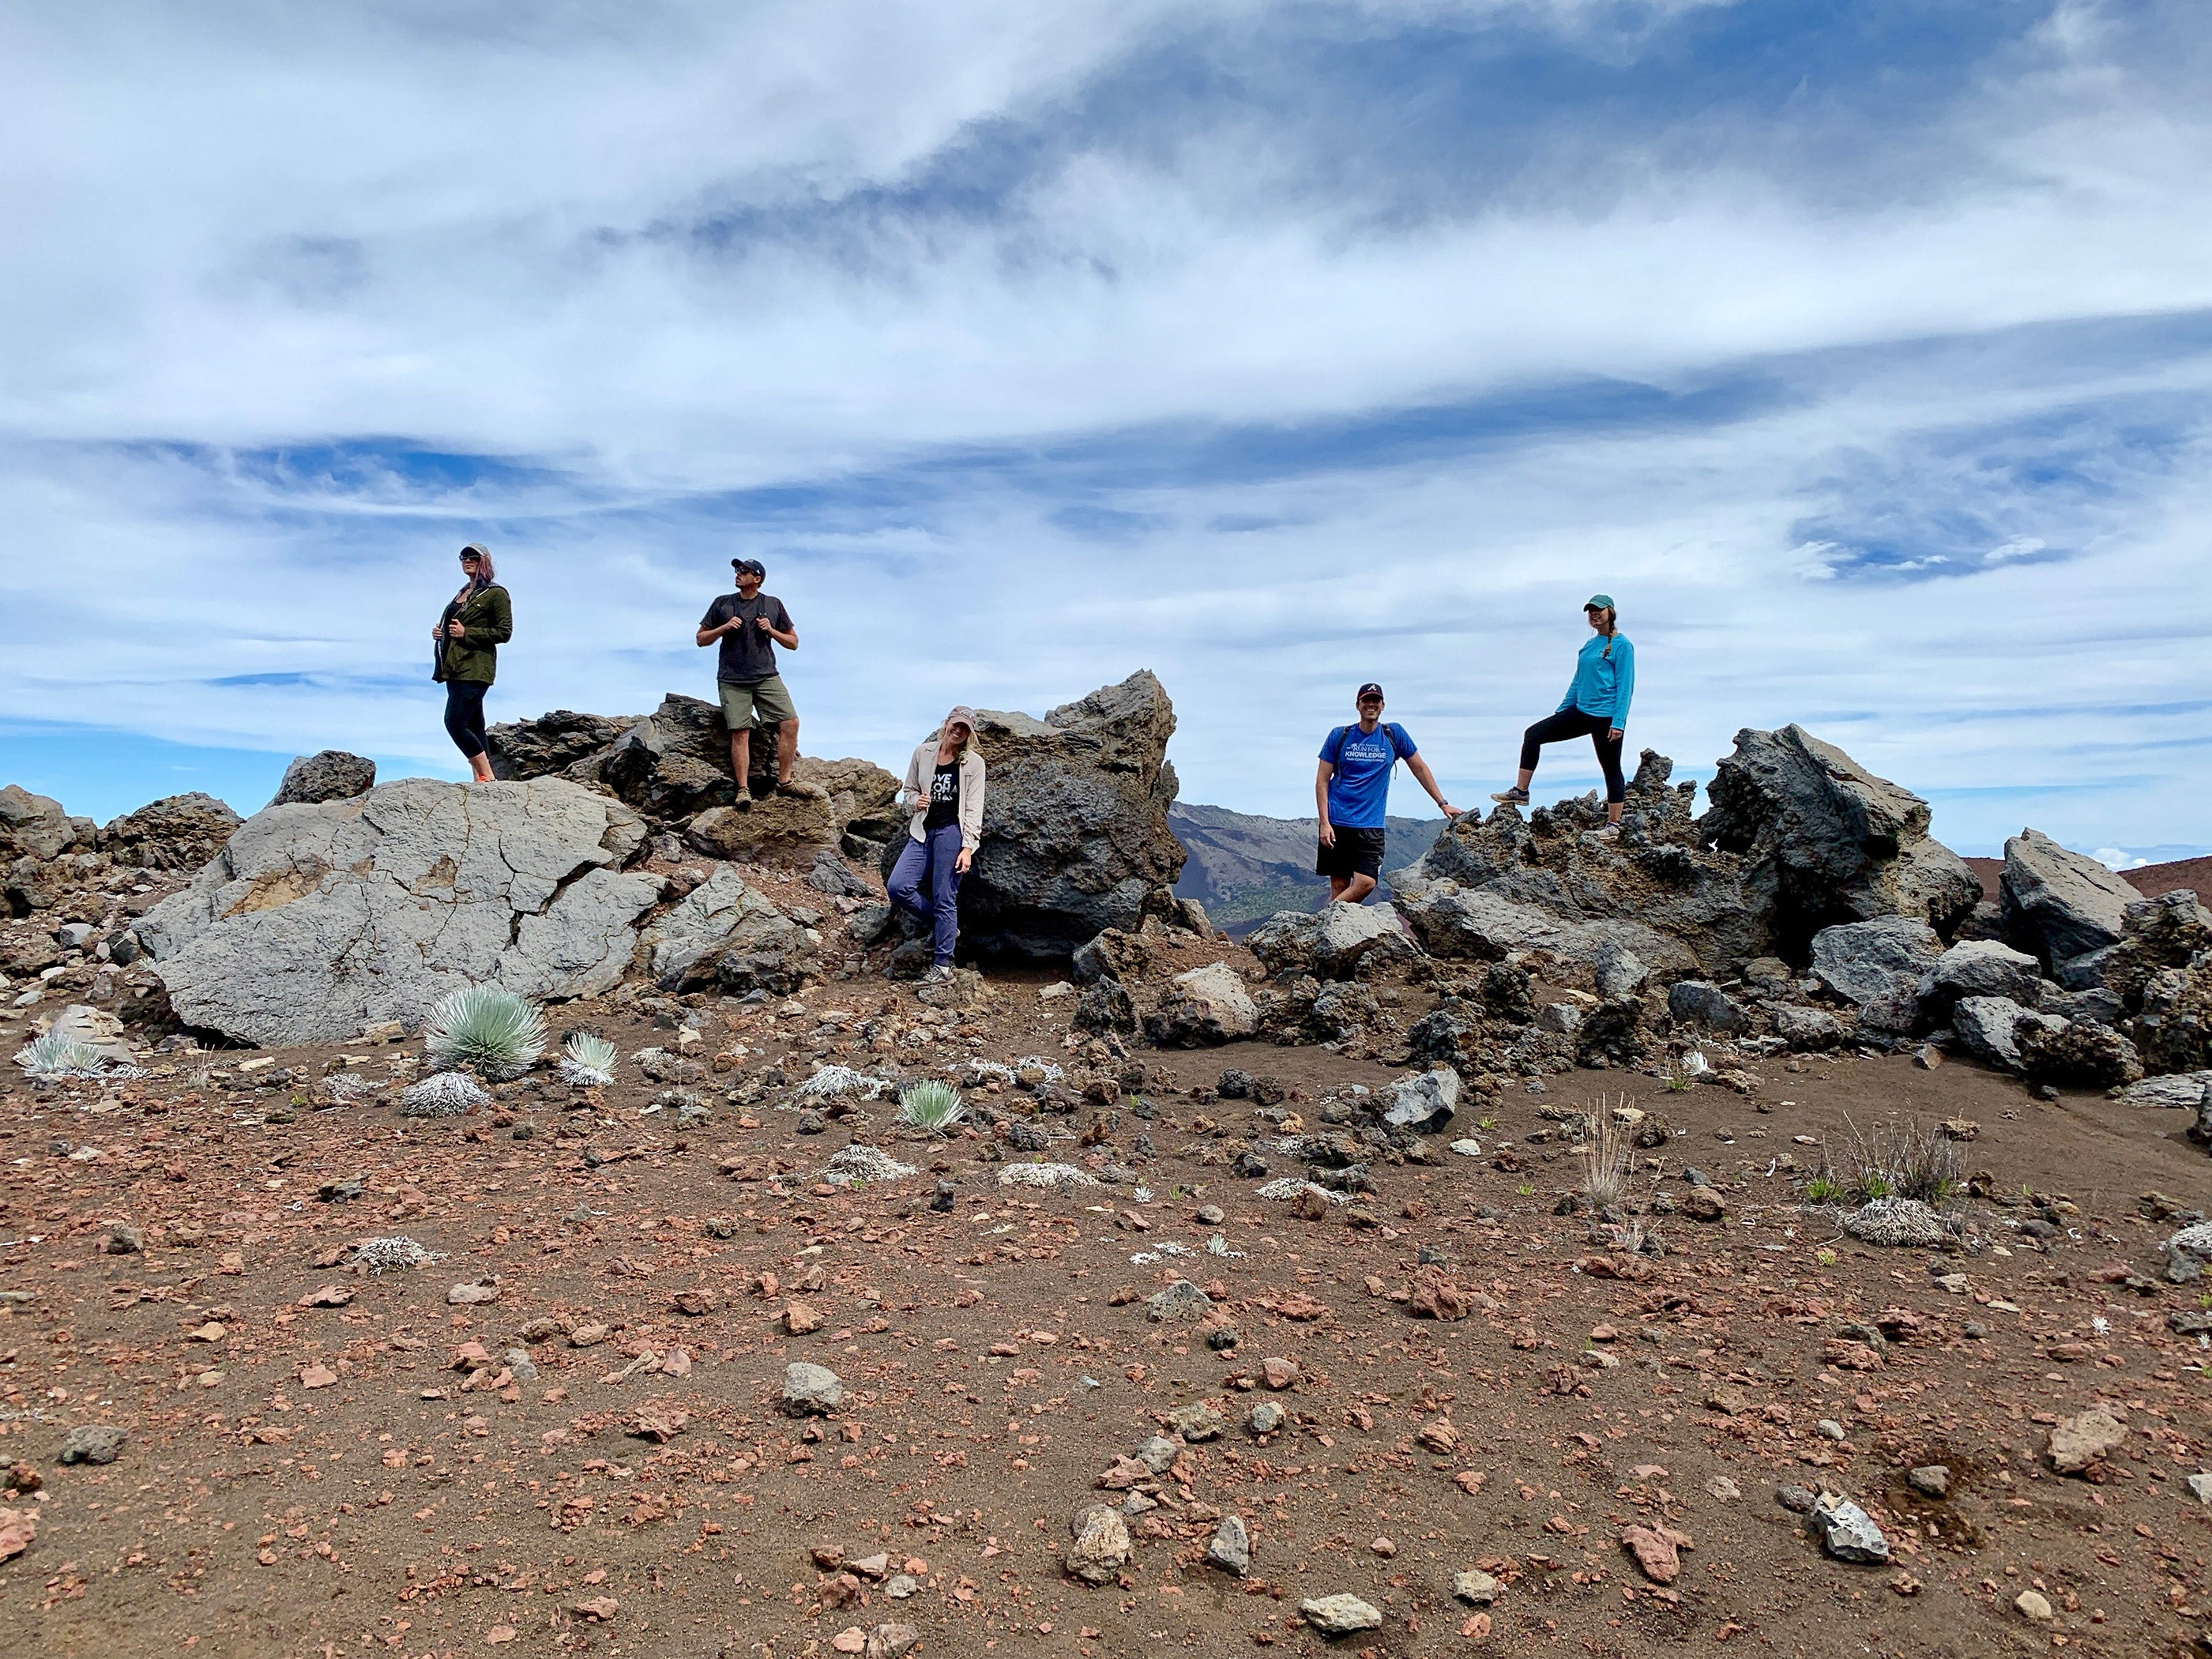
The selfie. A quintessential element of any vacation. Although most modern smartphones offer a front-facing camera embedded exclusively for this purpose, I never use the one on my iPhone. Why? Front-facing cameras are typically subpar. Your phone's rear-facing camera is likely higher quality, and if quality matters to you, you can work to master the art of the reach-around selfie.
There are also a host of compact, travel-friendly tripods and phone mounts to consider. My favorite is the Pedco UltraPod, paired with a basic phone mount, which is easily found on Amazon and other retailers. If you're using an iPhone and also own an Apple Watch, you can actually use the watch face as a viewfinder to make sure everyone is in the frame. You can then use your Apple Watch as a camera remote, either by tapping a button to trigger a timer countdown or telling Siri, "Take a picture." Apple has a guide on using Apple Watch as an iPhone camera remote .
Download the right photo-editing apps
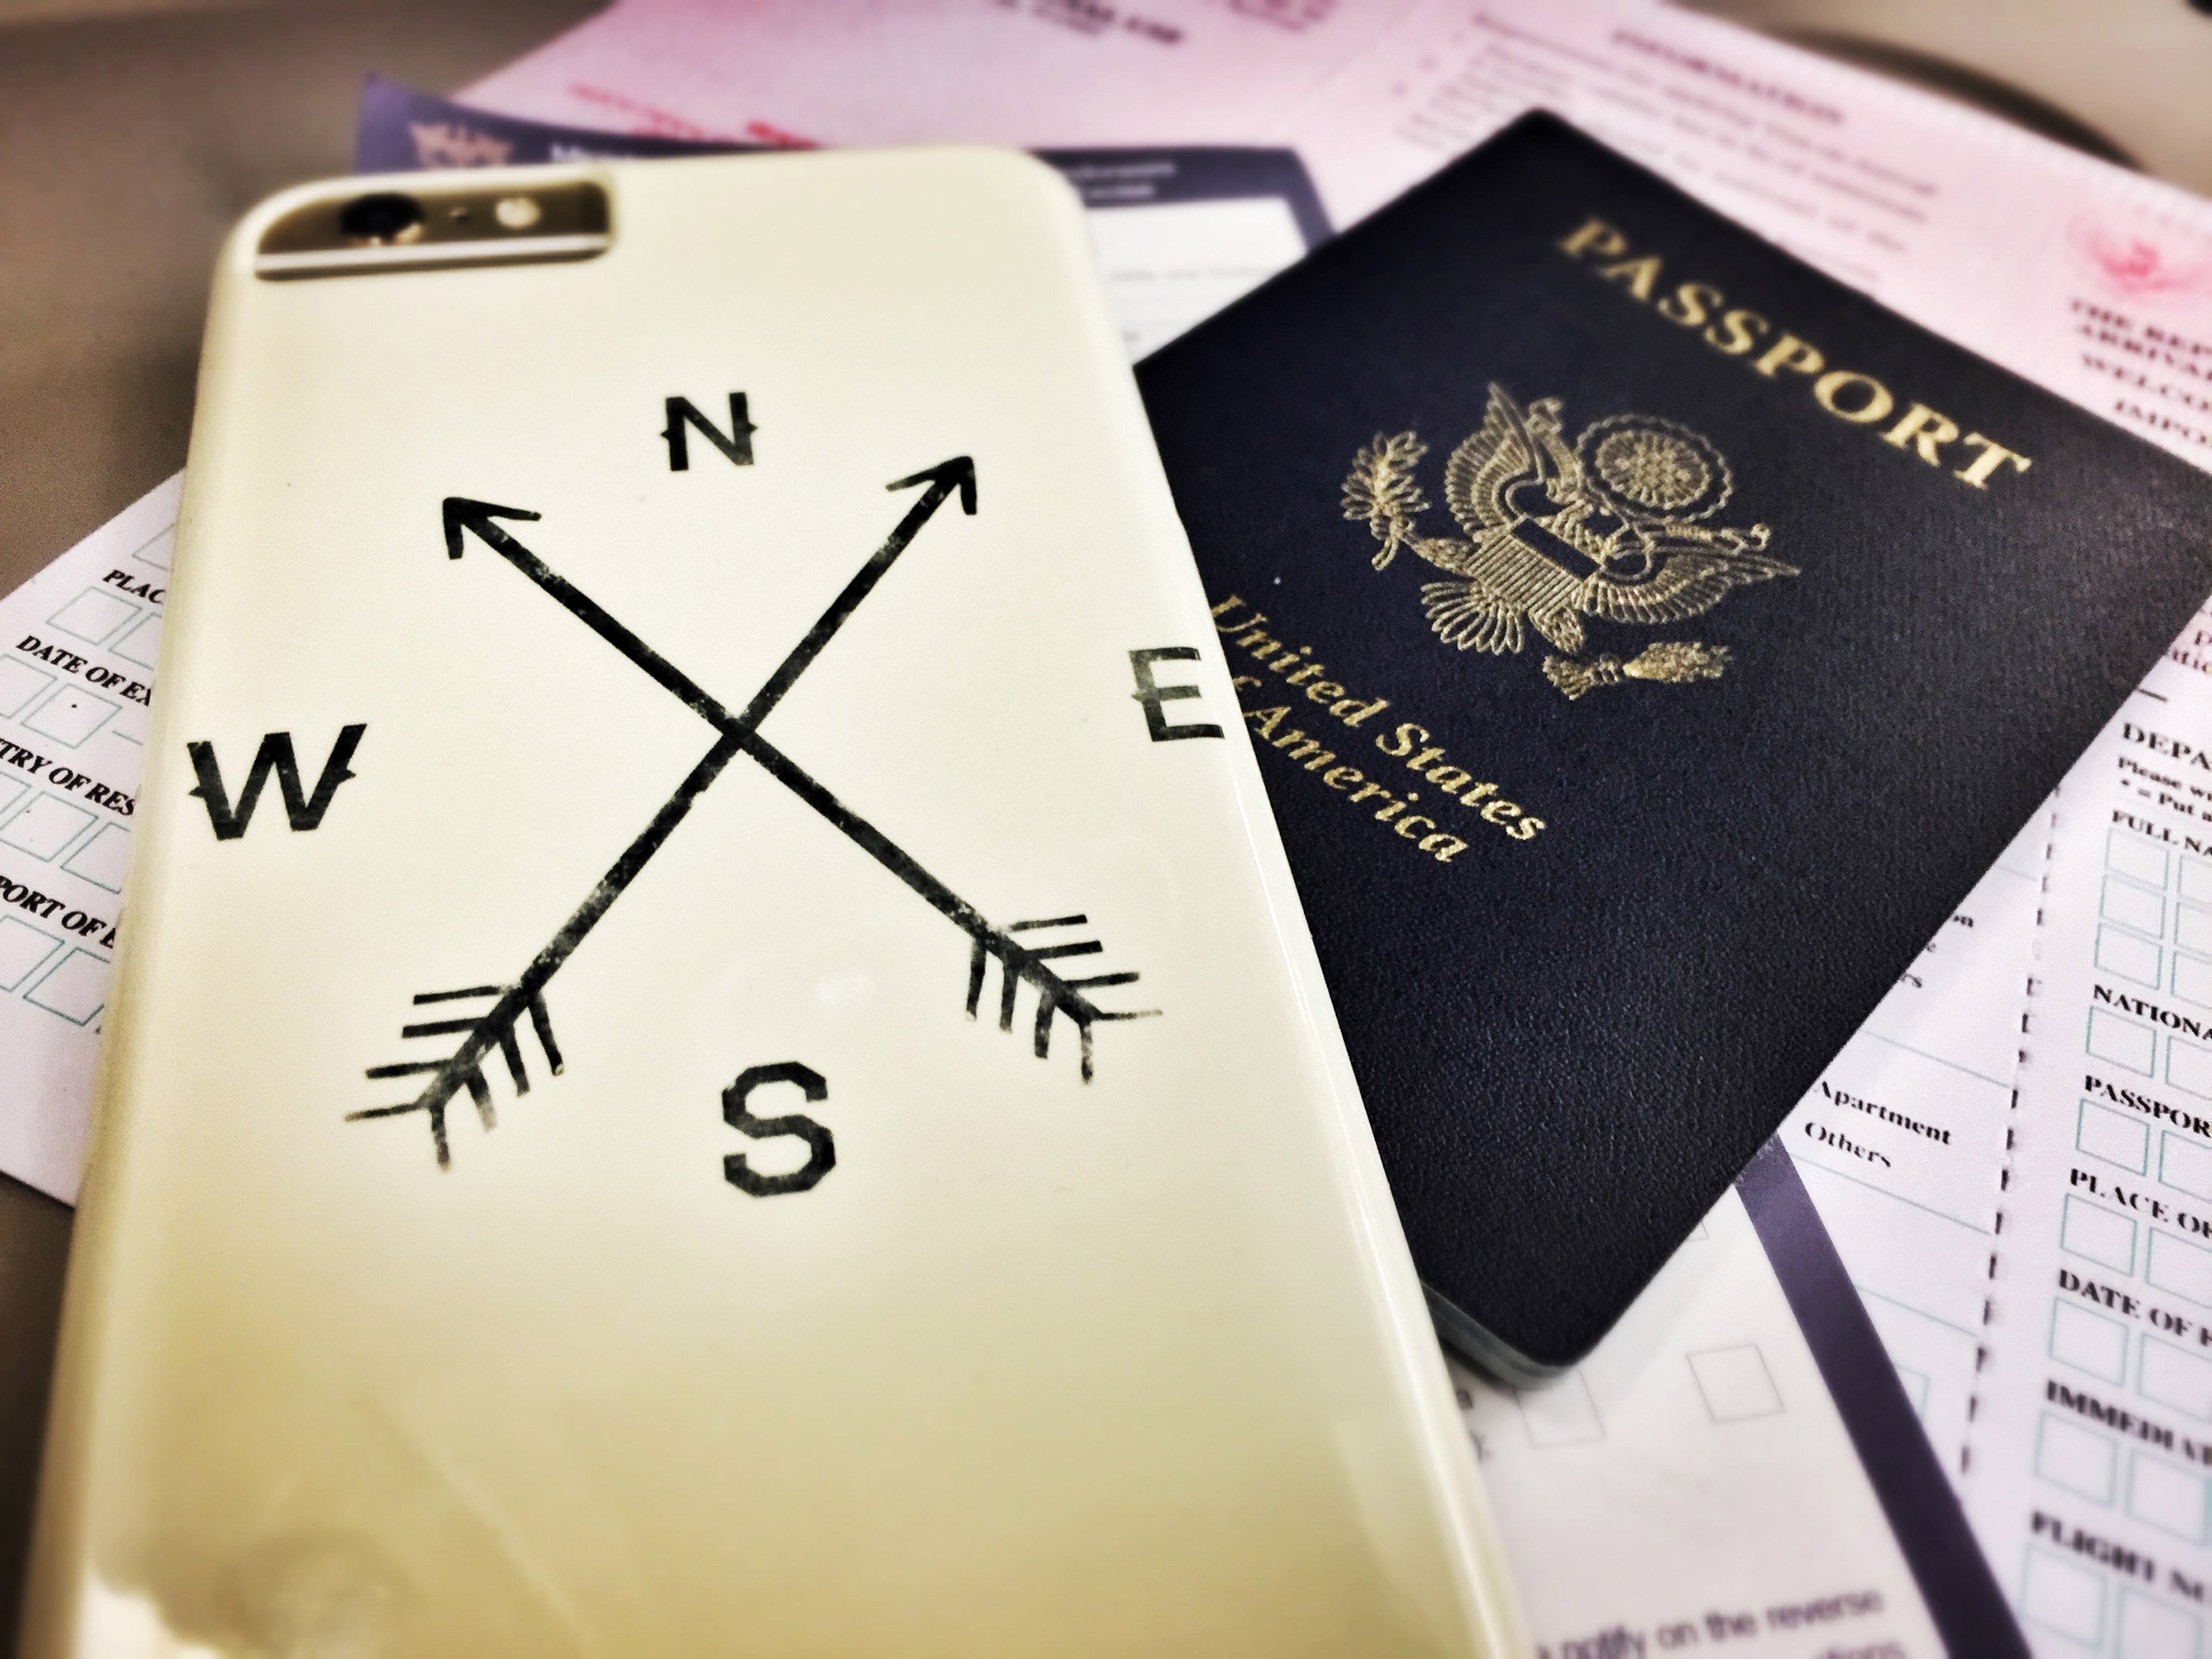
I recommend that people don't go crazy with filters. It may feel fun in the moment, but outlandish filters rarely age well. Instead, I look to filters to correct my own capturing miscues, shaping the photo to match my memory of the moment. Your options are nearly limitless, but we've created a guide to the best apps for retouching and editing photos .
My personal favorite is VSCO , which is available for iPhone and Android. The free version is OK, but the $20 per year upgrade is well worth it. Plus, VSCO isn't just for editing. Photographers will like the manual camera options, which allow you to edit the shutter speed, white balance, focus and ISO before snapping. Small icons at the bottom of the editing screen are options for changing the color, sharpness, exposure and more to photos either snapped within the app or with your regular phone camera.
Backup, archive and storage
One beautiful thing about living in the age of the internet is the availability of cheap storage. Your most precious memories can now easily be saved forever, and that's especially true for camera-phone images. My favorite app is Google Photos, which allows iPhone and Android users to back up every phone photo and video they've ever taken to the cloud for safekeeping.
The free and unlimited backup-option limits the resolution of stored photos (16MP) and videos (1080p), but that's robust enough for most. It only takes one destroyed phone to appreciate the luxury of having everything automatically backed up.
Check out our full guide to useful apps for storing and organizing travel photos .
Mirrorless and DSLR cameras

Although phone cameras are good enough for the vast majority of travelers, the advent of the mirrorless camera has opened up another alluring option. It wasn't long ago that travelers were faced with a one-extreme-or-the-other scenario: either shoot their entire vacation on a phone or lug around a hefty DSLR with multiple lenses.
Now, there's a solid in-between option. The mirrorless class of camera offers image quality that far surpasses a smartphone, particularly in low light or when capturing fast movement (e.g., kids). It also offers fine-tuning when it comes to things like aperture, ISO, shutter speed, white balance, etc. Sony's mirrorless cameras are widely regarded as best-in-class.
I prefer a full-frame DSLR, but that may have something to do with my justification — I simply tell myself that 10 extra pounds of camera and lenses means that I'm getting an even bigger workout from whatever hike I'm planning. The other reality is that I'm already invested in Nikon lenses, which are best used on a full-fledged Nikon DSLR. If you're already entrenched in a camera ecosystem, your wallet will thank you for not veering into some other brand. If you're just now diving into the DSLR world, spring for a full-frame DSLR (as opposed to a cropped-frame).
Related: The 7 best starter travel credit cards
Wielding an expensive camera isn't enough to guarantee excellent travel photos. You'll still want to mind all of the tips already mentioned, and you'll want to spend time shooting near your home in different lighting scenarios. This is the best way to learn what setting does what, and how to adjust them quickly. Nothing generates DSLR frustration like not knowing what knob does what, and thus losing "the shot" while traveling.
In the photo of Joshua Tree National Park above, we tweaked our Nikon DSLR settings so that we would not blow out the sky while over-exposing the shot just enough to get a band of sun flare on the right. If you buy a DSLR with an automatic setting and lean on that, you'll very rarely capture shots like these. If you invest in top-tier camera gear, make sure you invest in learning. I strongly recommend the guides at SLR Lounge .
Hire (or bring) a professional
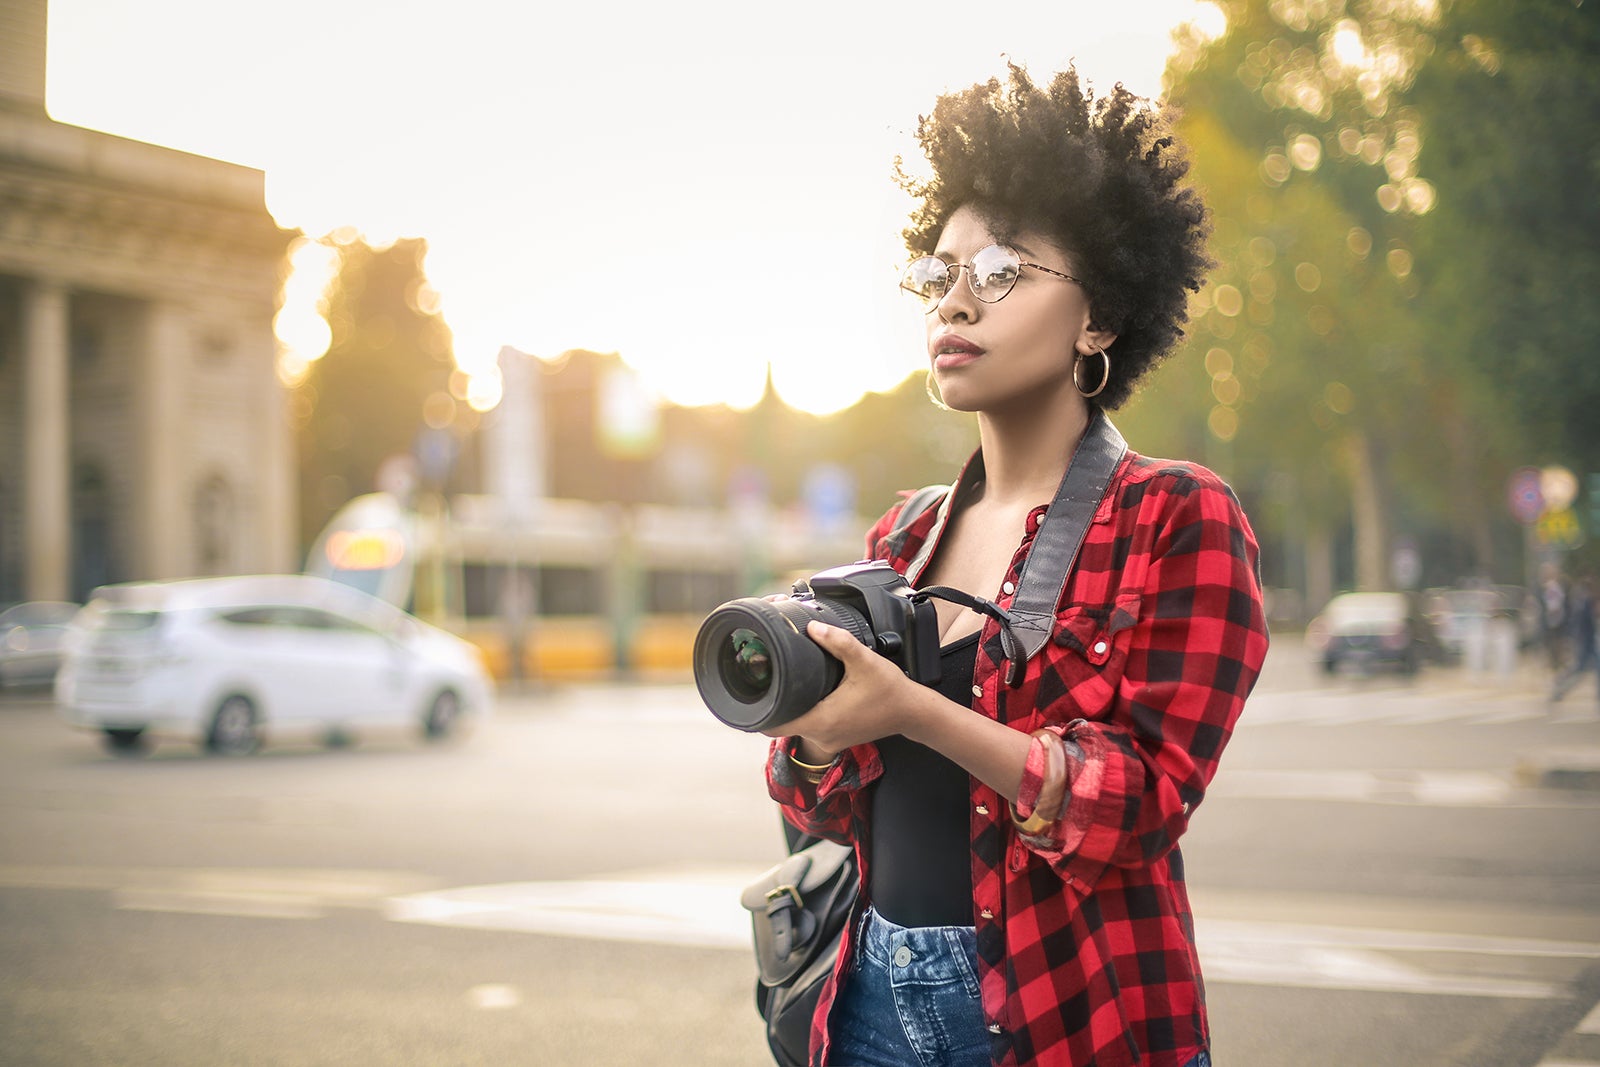
If you're going on a special family trip, you'll quickly realize that it's tough to get everyone in a shot that you're proud of. If you want album-worthy captures, check out Craigslist or photography forums for professionals at your destination. Googling "Honolulu photographer," for instance, will land you all sorts of local options, where you can reach out ahead of time and negotiate a rate for capturing your family during a window of time. The photography service Flytographer is also available to fill this niche, especially in popular destinations from $250 for a 30-minute shoot.
An option that may seem out-of-range, but that we've used is to use your points and miles to fly a photographer along with you . I've done this on many occasions, though it helps to have a sister-in-law who shoots professionally. If you know someone who you would enjoy traveling with, and they're willing to pull double duty as a photographer, trading a trip for lifelong memories may not be such a bad deal.
Have any other expert photography tips? Share them in the comments below!
- Anniversaries
- Baby Showers
- Cards and Stationery
- Father's Day
Photo Books
Wedding invitations, 21 travel photography tips and checklist for your next trip.
Written by Shutterfly Community Last Updated: Aug 12, 2019
Planning your next vacation? Document your trip (big or small) with photos that will allow you to remember and share your experiences long after you return home. Whether you want to capture picture-perfect spots in NYC or head west to embrace scenic spots in San Francisco , you don’t need to be an expert to get genuinely beautiful shots.
Shop Trending Categories
Canvas Prints

Graduation Announcements
Whether you decide to use a nice camera or a smartphone, there are plenty of photography tips and tricks that will help you know how to take the perfect photo . Make sure the equipment you use is familiar to you. You don’t want to spend the whole trip reading your camera manual.
Once you decide on what camera you’re bringing, the photos will come naturally. In case you hit a photo block and aren’t sure what to photograph, we’ve created a travel photography checklist that includes what to bring on your trip and photo ideas. Simply read through the travel photography tips, print the checklist and you’ll be ready to go!
Quickly jump to a section:
- Travel Photography Tips
Travel Photography Checklist
22 travel photography tips and tricks.

1. Do your research
While planning your trip, make a note of destinations that are beautiful. Find out if they are easy to get to and what sort of transportation you’ll need. Will you need a permit for the area? Figure out the logistics ahead of time so you don’t run into problems after you’re already there.
2. Get inspiration from others
The best way to learn is through others. Look at other photographer’s blogs and social media to see if they’ve been to the location you’re visiting. As you look at photos, create a bucket list of places you’d like to photograph while exploring. And make note of the composition and angles to capture.
3. Practice at home
You don’t need to travel far to practice your travel photography skills. Look up local attractions and go visit them with your camera. Learn how the light works in natural settings compared to more industrial ones.

4. Travel light
You don’t need to (and shouldn’t) bring every camera accessory you have with you on your journey. Not only will they be heavy to lug around, but there’s a danger of losing or forgetting pieces behind. Bring only the key items such as the camera, a charger and memory cards.
5. Charge Your Equipment The Night Before
Make sure everything is charged and ready to go before you set out for the day. Bring along 2-3 extra charged batteries for your camera and external flash.

6. Learn a few words in the native language
If you’re going to a foreign country where the language is not your own, try learning a few phrases. Things like “hello”, “thank you” and “Can I take your photo?” will go a long way and might lead to a better photograph.
7. Listen to the Locals
Ask the locals where the best places to shoot are. Ask about their favorite photo spot and they’ll likely be excited to share the wonders of their home. Be sure to be respectful of their space and leave them alone if they’re not interested in talking with you.
8. Follow Basic Photo Rules
If you’re a beginner photographer, take some time to learn the basics. When taking photos, keep in mind guidelines like the rule of thirds and your depth of field. Learning photography terms will help you take better quality photos.

9. Get Candid Shots
Not all your shots should be posed and planned out. Try a variety of angles, capturing candids. Take photos of everything, the one you least expect may be the one that ends up the best.
10. Give Yourself Time
When shooting, make sure you give yourself plenty of time at the location. A time crunch will lead to blurry and rushed photos. Leave yourself enough time to set up, learn what setting your camera should be on and find the right light. This may mean starting your days earlier than normal.
11. Embrace Golden Hour
Lighting is everything. Make sure you know the different sunrise and sunset times of the location you’re at. Even places only a few hours away can differ. It may also be helpful to know what direction the landmark is facing that you’re trying to photograph so you can plan to be there when it’s in full light.

12. Get a New Angle
If you’re visiting a place that’s been photographed thousands of times, try a new angle. Find hidden details that aren’t always noticed like paintings on the ceiling. Shoot through an alleyway that frames the photo or move around and try to find a new vision.
13. Stay in the Moment
Don’t overthink the shot. Stay in the moment and go with the flow. Don’t be afraid to switch around your schedule to get a good photo.
14. Take Notes
Bring a small notebook with you as you travel and when you take photos to make sure you’re noting the place and your camera settings. This will help you later on as you go back to see what worked and what didn’t.

15. Be Wary of the Weather
Look at the weather forecast if you’re shooting outdoors. Remember, just because it’s raining or snowing doesn’t mean you shouldn’t go. Sometimes a foggy backdrop can reflect the light and make for an even better photo.
16. Bring Secure Bags with Locks
You’ve probably invested a lot in your camera and accessories, so make sure they are kept safe. Bring a camera bag with you that has a lot of padding and can be locked.
17. Backup Your Photos
Every time you return to home base, whether that be a hotel or friend’s home, make sure you backup your photos . This will free up space on your camera and will keep your images safe.

18. Always Bring a Camera When You Can
Bring your camera with you wherever you go. The perfect shot could be where you least expect it. This will also let you document your whole trip, not just parts.
19. Be Respectful of Your Environment
You may be visiting this place but to others, it’s home. Be respectful of the people and animals you meet along your journey.
20. Get Lost
Get out of your comfort zone and a venture off the beaten path. Try finding something unique to photograph. Get a little lost.

21. Share Your Work
Once you’ve returned from your trip, make sure your photos don’t just sit on the memory card or computer. Share them by creating a photo board on your wall or styling a travel photo book .
22. Print Everything Ahead of Time.
Before you start your travels, don’t forget to print your boarding passes, itinerary and other documents just in case your phone isn’t working properly. By printing everything ahead of time, you do not have to wait in any lines, worry about the digital kiosks in the airport or lack of wifi connection

Click To Download Travel Photography Checklist PDF
Travel photography is a fun way to document your trips. It allows you to take your stories home and share them with friends and family. Try creating a collage with a photo collage app and sharing your experiences on social media.
Explore Categories

Graduation Invitations

Custom Photo Blankets

Save the Dates

Coffee Table Books

Written by Shutterfly Community | View all posts
★ Lifestyle Expert
Shutterfly Community is here to help capture and share life's most important moments. Discover thoughtful gifts, creative ideas and endless inspiration to create meaningful memories with family and friends.
Visit their Website . You can follow on Instagram and Pinterest .

How to take solo travel photos (Step by Step Guide)
I get asked this question every day in a variety of forms. Who takes your photos if you travel solo? Is a common way to phrase the question, which sometimes feels more like an accusation than I question *sigh*. But regardless, I do travel solo. And I do take my own solo travel photos.
The truth is, I have mastered the art of the solo travel photo.
I guess that’s what I have to show for ten years of solo adventures with yours truly – across Europe, Africa, Asia, North America, South America, Oceania and the Middle East. Hey, I’m not complaining.
But if you want to know *exactly* how to take your own solo travel photos that can end up in magazines and on book covers, read on! And if you want to read my book, click here .

Step One: Buy this Tripod
It’s no secret that you’ll need the tools of the trade to take the best solo travel photos you are capable of. But the good news is, the best is not always the most expensive. In fact, you’ll just need to buy this tripod on Amazon to easily take your own solo travel photos.
The best tripods for solo travel photos
For photos on your iPhone – The cheapest option is this phone tripod for $15 .
For photos on a DSLR – You’ll need a sturdier option like this tripod for $39 .
Both of these tripods come with all the necessary attachments for your phone and/or camera, plus the all important Bluetooth remote. Which brings me to step two.

Step Two: Link your Bluetooth Remote
Taking your own solo travel photos is way easier when you have a Bluetooth remote. For years I used my iPhone as a remote (by connecting it to my Sony A7iii camera ). However in recent travels, I have switched over to this small Bluetooth remote that comes included with both of the tripods I linked above.
I cannot overstate the importance of the Bluetooth remote.
This little remote allows you to click away in your hands and take as many photos as you so please in just a few seconds. Better yet: no one will ever know you’re using a remote!

Step three: Take photos in the early hours of the morning
Another common question I get asked is “ don’t you get afraid someone will steal your camera? “
The easiest way to ensure that doesn’t happen is to venture out in the mornings, just as the sun is rising and capture photos of the city you are visiting before the city wakes up. You will enjoy these locations almost always to yourself, get the best light for taking photos, and seize the day by starting early. That’s a triple win!

Step four: Use Video instead of Photos
Another great way to get candid looking photos of yourself is to click the video function instead of capturing still photos. That way you can just walk naturally in the frame, pause and screenshot on an image you like. For this I would recommend upgrading to the latest model of iPhone as the camera quality is *chef’s kiss* top notch.

Step five: Walk away from the camera
One of my signature ways to capture a destination is to flip the idea of a “tourist photo” on its head. Instead of facing the frame, I walk away from it. And you might be wondering: yeah, but why?
Walking away from the frame gives the viewer/audience the perception that they are there in the photo with you. It allows them to focus on the destination instead of the person in the photo.
This is a great way to take PRO solo travel photos that can end up being purchased, splashed on magazines (like my feature in ELLE US or my 6-page spread in Cosmopolitan – pinch me!!!)

Step six: Use a Drone
Sometimes the destination I am trying to photograph is better seen from a higher point than where I am physically standing. In these instances, you’ll want to swap the tripod setup for a drone.
As you can see in this photo, my left hand is holding the drone remote taking the photos. I make a point of keeping my right hand free so the pose looks casual and not staged. Et voila!
NEW NOW! SOLO TRAVEL GUIDE

The Camera Gear I Use:

Brooke Saward founded World of Wanderlust as a place to share inspiration from her travels and to inspire others to see our world. She now divides her time between adventures abroad and adventures in the kitchen, with a particular weakness for French pastries.
Find me on: Twitter | Instagram | Facebook

Los Angeles
Plan a trip
First trip solo
Packing guide
20 Best Places for Solo Female Travel
Travel after a break up
20 Places in your 20’s
WAYS TO TRAVEL
Solo travel
Adventure travel
Luxury travel
Learn a language
Become a blogger
Wanderful - Blog

- Travel Content Creators
- Travel Tips
9 Tips for Taking Better Photos While Traveling
- Posted by by Nicole Buzzing
- June 19, 2020
- 9 minute read
Taking better photos while traveling means you can preserve those memories forever. Those life-changing moments, that glimpse into another place and time — preserve those nostalgic feelings through your photos!
Photography is an art form enjoyed across all countries, cultures, and ages for a reason. Through the use of modern technology and transforming light, we have the ability to preserve our favourite memories within photographs.
For many people, capturing those precious moments while traveling is of great importance so that they may later be transported back to that exact time and place.
Photographs have the ability to create emotional — and sometimes even physical — responses that are unique to each individual.
We look at photographs not only to be reminded of a place, person or object, but to experience once again how we felt at that time in our lives and to elicit similar emotions from others viewing the same picture.

3 Tips for Taking Better Photos (Before Traveling)
Creators: get insights + tips to help you thrive., 1. gain a basic foundation of photography.
You don’t need to sink hours and hours into expensive courses, but you should have a general understanding of the fundamentals of photography.
That means understanding the exposure triangle, which details how shutter speed, ISO and aperture work together. Understanding some basic guidelines, like the rule of thirds and leading lines related to composition, is also quite important.
There are literally thousands of helpful YouTube videos out there to discover and learn from – all you have to do is search!
There are also several paid courses available (I personally completed the iPhotography Course and would recommend it for all budding photographers) and a limited number of free courses available.
Right now, there is a free Introduction to Photography Course available from Karl Taylor and it does not require registration to access. Although I have not personally completed this course, I’ve watched the first couple of modules and can say that it’s a great resource for beginners to gain a basic foundation of photography.

2. Practice. Practice. Practice.
Practice taking photos near home and getting comfortable with your camera’s settings and the ability to manipulate them to your advantage.
That means experimenting in different lighting situations to understand what settings are needed to capture a shot at mid-day, at dusk, and [if possible] at night.
Experience what it’s like to take pictures inside with artificial light versus outdoors with natural light, as well as with limited light (because the sun isn’t always going to be shining).
Practice shooting different subjects:
- Try taking photos of still life (a stationary object like a piece of fruit)
- Photograph slow-moving objects (like a pet or a person)
- Take photos of fast-moving objects (like a bike or car)
Test out accessories including lens filters, tripods and remote shutters in advance so that you know when the situation calls for them and how to use them.
Practice regularly until you know how to easily adjust your exposure, shutter speed, DoF, focal point, colour balance, etc. It should become second nature.
Being able to anticipate your set-up requirements just by being familiar with your camera and gear will aid you in taking better photographs.
3. Know what your camera is capable of
Whether you have a smartphone or a DSLR camera, know the situations where it can be best used. There is no such thing as a “ perfect ” camera or lens and each will have its own advantages and disadvantages.
Know how much battery life you can expect, the point in which you no longer have enough light to take a decent shot by hand, and if your camera is water or dust resistant.
Know that a prime lens has a fixed focal length, but typically shoots faster and provides a better quality image. Whereas a zoom lens allows for more variable range and the ability to “zoom” in, but typically has more limitations related to image quality.
Recognize your camera’s limitations and make the most of its abilities.

How to Take Better Photos While Traveling
Through practice, trial and error, and attempting to make rational choices, I have learned a few key lessons for practicing travel photography while abroad.
I am happy to share this knowledge with you and I hope that these insights prove helpful for taking great photos during your next travel adventure!
Read next: This photographer empowers women to tell their own stories
Tips for Packing Camera Gear for Travel
If you have a good quality camera and multiple lenses, you should first assess what is practical to bring with you on a trip before packing.
Carrying a camera body plus multiple lenses (that are both delicate and expensive) may not always be the best choice.
Sometimes the hard decision of taking a single “all in one” zoom lens compared to several “better” lenses pays off in being ready for the shot.
Taking more than necessarily will likely pose a physical burden while exploring because camera gear can get heavy on foot. I carried a four-pound lens plus the camera body by hand through the forest for two hours and my muscles regretted it for days afterwards (don’t do what I did).
You are also limited in what you can fit into a carry-on bag, so only take what you need. Remember: camera gear worth thousands of dollars does not go in your suitcase.
Assess what kind of photography you plan to do while traveling (landscapes, portraits, action shots, etc.) and plan accordingly.
Ideally, you take a zoom lens that offers you options for both wide and narrow focus images (for example, a 24-240 f/3.5-6.3) and a prime lens (for example, a 15mm f/1.4) to ensure your bases are covered in a variety of scenarios.
An action camera like a GoPro may also come in handy if you are an adrenaline junkie who likes to record your experiences or if rough-and-tumble is part of your travel itinerary (or life!).
Pack your essentials: cleaning supplies, a lens hood, and perhaps a collapsible monopod or lightweight tripod and you should be set.
My personal recommendations:
When traveling by plane, I prefer to take my Sony RX10 in a compact camera bag because it is so versatile and its features meet many of the requirements I find myself in need of while abroad.
You can view my Sony RX10 review here if you want to know why I chose this camera for my travel needs.
If traveling locally, I swap the RX10 out for my Sony A7 III and bring 2-3 lenses in my camera bag. I do this because I have more room in my car and can worry less about hauling my gear.
Again, choose the gear that meets your needs and will travel with you easily.

Always Be Ready to Take Photos During Your Travels
The worst thing you want to be doing is fumbling around trying to get your camera out of your bag or flipping through your settings when you have literally seconds (if even!) to take a shot before the moment is lost forever.
Whenever you plan to go exploring, have your camera fully charged and your ideal settings programmed before walking out the door.
Often while traveling, wildlife has a tendency to appear spontaneously and briefly, limiting opportunities for photos.
If you are aiming to photograph wildlife, again try to anticipate the settings you will need (likely a fast shutter speed) in order to get a good shot.
Have your camera in your hand (and ideally secured by a strap around your neck) ready to pull the trigger when the opportunity presents itself.
If you are lucky enough not to be pressed for time, try to plan your shot with purpose: what are you trying to convey or capture about that scene or subject that has meaning to you?
The ability to visualize how you want your image to be aesthetically composed before taking the shot is another skill that takes lots of practice and reflection.

Take LOTS of Pictures & Back Them Up
Never take just one picture. There is no hard and fast rule that says you will get your desired shot the first time you shoot or even within 5, 10 or 20+ frames.
Because cameras allow for so much composition variance, sometimes you may not like how an image was shot or be unhappy with the focus or composition.
On the other hand, sometimes you take a shot in a way that you hadn’t consciously intended for and it becomes one of your favourites.
Taking multiple shots of the same scene or subject increases your chances of a successful shot – it’s a numbers game.
This travel photography tip video by Mitchell Kanashkevich will help explain why being a “ photo sniper ” is not a good idea and explores his approach on why taking multiple shots is key to good photographs.
Additionally, it’s a good idea to back up your photos while traveling at the end of each day. Use cloud storage when Wi-Fi is available or use a portable hard drive to back up your images locally.
It’s a hard lesson learned when days of images get lost due to SD card or camera failure, or even as a result of theft. You can never get those images back, so do yourself a favor and back them up daily.
While you don’t always need the best or the newest equipment – be aware that not all camera equipment is the same.
For travel and nature photography, having two memory cards (in case one fails) and/or a camera that can handle a bit of rain and splash may make the difference between getting a shot or not.

Be Considerate of Who You Photograph
There’s no shame in holding up your camera in the middle of the city square and wanting to capture a specific shot. Generally, most things in the public view are free for snapping to your heart’s content.
Some people are uncomfortable when it comes to taking photos out in public or of people. However, busy streets and local markets are full of people and it’s hard not to include them in populated areas (plus it adds context to the busyness of the scene).
Simply wearing a camera alerts people in your vicinity that you are taking photos and may even earn you some unspoken advantages, like crowds subconsciously clearing out of your way when you are attempting to take a shot.
If you are intending to take a more focused shot of a person or a few people, it is highly recommended that you approach your subjects and let them know you want to take their photo. Politely ask them or at least use hand gestures to convey your request and seek approval.
Most people will be flattered that you asked and those who don’t want their photo taken will tell you so.
Taking photos of children is different and I would suggest getting their parent’s permission first.
Just be polite and respectful when shooting in public and don’t be afraid to make a connection with someone if you feel compelled to include them in your picture.
Always give yourself extra time for taking photos where possible. Inspiration and creative composition cannot simply be pulled from a hat and sometimes needs time to come together.
If you ever need an extra moment to take a photo or have to wait for traffic to pass, take it. If you’re not traveling solo, simply let the person you’re with know that you need more time and they will likely accommodate you.

Use Common Sense and Caution
In some situations, it is best to leave the camera at home. Certain cities or places might be inappropriate to photograph and you will want to use caution to not draw attention to yourself (and pulling out a high-tech camera or phone is not the best way to blend in).
There will be times when your gut tells you it is best to go without your camera or not to pull it out – trust your gut!
In these places, it may be best to just leave the camera behind or leave the phone in your zippered pocket and let your memory play visual storyteller.
It’s just not worth the risk of theft or becoming a target.
As a general rule, it is wise to stay on well-lit streets and public paths – use appropriate caution if you stray off well-traveled roads or explore unknown areas alone.
In other scenarios, highly active or high-risk activities are also situations where your camera will be safest at home (unless you have a specific action camera designed for these undertakings, like the GoPro mentioned above).
Use caution and respect when photographing wildlife as well. Using flash for animal photos is generally frowned upon and can cause the animal unnecessary stress.
Always keep your distance and be aware of your surroundings and the animal’s behaviour.
Do not partake in up-close animal selfies or take photographs of animals that are chained up, drugged or being mistreated (unless you plan on reporting it using those photos). This is not how we show their majestic beauty or promote animal welfare practices.
And if there are free-roaming animals nearby with human-like curiosity and opposable thumbs (like monkeys), your camera will be safest if it’s stowed away.

Try a Different Angle
Photography allows for a lot of creative composition, so always explore alternative perspectives of the same subject.
Use your creativity to consider options that are more interesting and thought-provoking from a less conventional point of view.
Consider a shot from ground level, from high atop a tower, from the water facing the land.
Techniques such as framing (creating a frame around part or all of your main subject) can also be used to create stunning imagery.
You may be surprised when looking at all of your final shots at which one conveys the strongest feelings for you.

A Final Note on Taking Photos While Traveling
A universal love for photography and preserving moments in time that can never be replicated is practiced passionately across the globe.
Professionals and amateurs alike can enjoy exercising their creative eye and sharing their love of the people and places they have seen with others.
Try to convey a sense of place and emotion through your photographs that others can sense when viewing them as well – tell a story that makes them think and feel when looking at your photographs.
Travel photography is for everyone and I encourage you to take many pictures as often as possible!

All images courtesy of Nicole Buzzing
Looking for travel inspiration? Wanderful is a global community for travel-loving women. Connect with us:

Nicole Buzzing
Nicole is a Canadian freelance photographer who enjoys sharing highlights of the Earth’s greatest artwork through her photographs of animals, nature and travel. She also shares weekly posts focused on photography, wildlife conservation, personal travel explorations and life lessons. Follow Nicole on her journey as she discovers the world’s greatest wonders!
Post navigation

The Mountains of Innsbruck, and I

10 International Cocktails That Will Whisk You Away This Summer
You might like....

- Travel Guides
Plan a Trip to Reykjavik: Inspiration from 21+ Travel Experts
- Posted by by Wanderful Team
- 5 minute read

- Women to Watch
Meet the Photographer Empowering Women to Tell Their Stories
- Posted by by Claire O'Brien
- 6 minute read

Free Virtual Events for Travelers and Creators: July 2020
- 15 minute read
I needed this blog. I love it. Thanks for sharing this informative blog 🙂
- Pingback: 5 Ways to Make Your Next Vacation a Force for Good | Wanderful - Blog
- Pingback: 9 Hidden Marketing Assets Influencers Can Use to Add Value | Wanderful - Blog
- Pingback: Epic Bucket List Adventures: Seeking the Northern Lights in Iceland | Wanderful - Blog
Leave a Reply Cancel reply
Your email address will not be published. Required fields are marked *

- 10 Ways to Create Better Travel Photos
- By Lisa Michele Burns
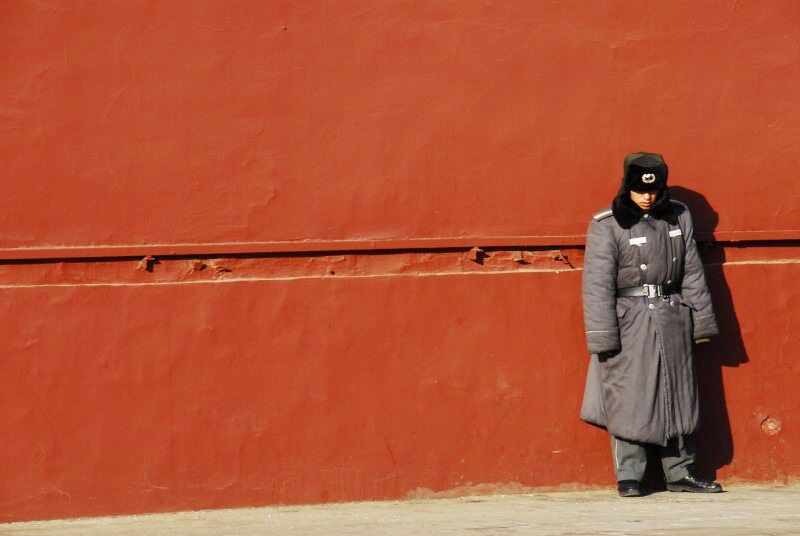
How to Take Better Travel Photos
Whether you travel around the world or just to the beach for the weekend, taking photos is all part of the fun to document your adventures. Or is that just me?
If you’re all about sharing your journey on social media or are hoping to take your photography to the next level, these simple tips will help enhance your photos. It doesn’t matter if you’re using a phone or fancy camera, thinking about how you will compose an image, make it uniquely yours or what colour temperature you need will all go towards creating better travel photos.
I’m all about going with the flow, I didn’t learn photography from a textbook, I learnt from being in the moment and testing what works best. Call it, trial and error, or as I like to see it, finding my own way, but learning how to make your camera work for you is essential to improving your photography.
Let’s get started with some travel photography tips…
#1 composition + contrast.
Creative composition can enhance your image immediately. The Rule of Thirds is a great way to help you think about where to place your subject rather than just pointing and shooting straight ahead. You can use this method of composition whether you’re photographing a building, person or landscape, it’s just about thinking outside the box and changing the focal point of the image. Using contrast with composition lets you play with colours that help each other to stand out.
Take Better Photos: A guard at Beijing’s Forbidden City with his grey uniform against the rich red wall. By composing him slightly right of centre it enhances the image and the effect of the contrasting colours.
#2 SEEK UNIQUE ANGLES
You know those photographers you see crouching down or climbing a wall to get ‘THE’ shot? Or the ones lying on the ground when wonder what on earth they are seeing that you aren’t?
Well…give it a go. They’re no doubt trying to create a unique angle and it’s a great way to take better photos! While it may look a little crazy, who cares if you can walk away with an angle that no one else has! My favourite angle? Photographing from the water, it’s a lot less awkward to do the photographers stance underwater 😉
Take Better Photos: Find an angle that’s unique to your view. You can frame your shot with flowers, shoot from the air or like me, photograph the world from the water.
#3 SHOOT IN APERTURE MODE
To add background blur to your photograph shoot on Aperture Priority mode (A or Av) with a large Aperture like f/1.8 or similar and focus on the subject to create a beautiful bokeh (blur) behind. This is achieved best by using a prime lens like a 50mm or 85mm lens. The 50mm lens is one I never leave home without, it’s great for street photography, portraits and detail shots making it the ideal companion for travelling!
Take Better Photos: The cutest little monkey hand with the effect of bokeh from a 50mm lens highlights the details of his little fingers and fur. Kyoto, Japan
#4 KEEP IT STEADY
Ensuring you stay nice and still whilst taking a photo will avoid the dreaded blur. You don’t need a tripod to keep your camera still; balance it on the pavement, a trash can, lean against a wall, table, your friend’s head…whatever keeps it steady is just as good as a tripod most of the time! If you’re finding your images are still blurry even though the camera is still, it might be time to look at the settings…low light means you’ll need a higher ISO.
Take Better Photos: This shot was taken by balancing the camera on a bridge in Florence and adjusting the aperture and ISO to slow down the motorbike.
#5 EXPERIMENT WITH WHITE BALANCE
Manually adjusting your cameras white balance will control the colour temperature so you can choose how the image turns out. Rather than set your white balance on automatic, switch it manually depending on the type of light you’re working in to ensure a more accurate reading of the scene.
The top three to focus on is ‘cloudy’ white balance which works when you’re in a rainforest or similar green environment to enrich the green colours and make them vibrant. It will also warm up most beach or city scenes too! ‘Daylight’ is best for direct sunlight during the day and ‘Flash’ will help warm up the colours when you’re using your flash both indoors or outdoors.
Take Better Photos: The image on the left is taken using ‘Auto’ white balance….on the right is ‘Cloudy’ white balance, you can see the vibrancy and warmth changes quite intensely.
#6 FOCUS ON THE UNUSUAL
Keep an eye out for something interesting, colourful, quirky or cultural to include in your photograph. Rather than taking photos only at lookouts or the best vantage points, try and work with the details. When travelling you’ll no doubt see something every day that you can photograph to help give your images a sense of place. It can relate to the destination or be completely out of place.
Take Better Photos: This Dalmation dog caught my eye in Santorini, Greece because his black and white spots against the whitewashed buildings looked great. Then he yawned and it appeared as though he was eating a tourist…
#7 CREATE PERSPECTIVE
You have no doubt seen the hundreds of photos circulating on social media of people staring at a vast landscape and looking very small. This is how to create perspective. If you’re photographing a mountain, try to find a subject that will help showcase just how tall and imposing it really is. By placing a person in the distance you give the mountain or landscape an actual size comparison to help the viewer judge just how incredible the scenery is.
Take Better Photos: Create perspective by placing a subject in the frame to give a size to the landscape.
#8 LOOK FOR THE BEST LIGHT
If you’re tired of saying, ‘I wish I had my camera for that sunset!’, start planning! Researching the times for sunrise and sunset will help you plan your day around the best light for photography. The warm afternoon light is my favourite to work with. When I’m travelling I always suss out the best place to be about one hour before sunset to ensure I can capture the changing colours. Be sure to know where the sun rises and sets in the place you’re visiting too as this will help you to decide where to be at the best times.
Take Better Photos: Work with the best light – I drove around for hours until I found the perfect spot facing west for sunset in the lavender fields of Provence, France.
#9 SAY HELLO AND SMILE
Learn to say at least ‘Hello’ in the language used in the destination you’ll be visiting. Attempting to communicate with the locals will increase your chances of a better photograph and make people more comfortable in your presence. Nobody wants a snap happy unfriendly tourist lurking around their town!
Take Better Photos: After my bike tyre popped in Marrakech, these friendly kids and I played soccer while their older brothers helped get me back on the road. So many smiles!
#10 PREPARE YOUR EQUIPMENT
Having the correct lenses when travelling is essential to taking great photos. If you’re only using a telephoto lens but want to take something close-up, it’s not going to turn out well. The same for a macro lens when you want to take action photos of wildlife…it won’t work. Try and predict what type of photos you’ll want to take on your trip so you can invest in the best equipment to suit your photography. It doesn’t have to be the biggest and best camera, as I’ve said before I believe your photographic eye is more important than the camera but a simple camera kit is essential. Travelling with a zoom lens that has a wide focal range will help you cover all bases and be ready for anything. I typically use my 28-300mm lens which lets me photograph most scenes without the need to change. If you’re going to be around water then prepare for some underwater photos too…I can never pass up an opportunity to jump in the sea to capture some photos so my underwater housing or GoPro is never far away!
Take Better Photos: Knowing what type of camera you’ll need for your travels will ensure you don’t have to think about it again once you’re wandering the world and will mean you’re ready for those unexpected candid moments when they happen!
To put the above tips into practice, teach yourself how to use your camera so once you’re travelling you can whip it out and photograph like a pro.
The basic buttons you’ll need to locate on your camera are the following –
- ISO: Most cameras will have a button readily available to allow you to change your ISO quickly. If you can’t find it, there should also be a place to manually change your ISO in the menu section of your camera. If you shoot on automatic it won’t be necessary to change your ISO but any other mode such as Aperture or Manual will require you to select what ISO is best. As a general guide ISO 100-400 is best for sunlight, ISO 400-800 is good for shade or cloudy days, ISO 800+ is necessary once the light starts to get low or dark.
- White Balance: On DSLR cameras you’ll find this button (WB) located somewhere accessible and you can adjust with the dial and watch the little icons appear on your screen to select between. Just like ISO, you can also adjust it manually in the menu of most cameras and the little picture icons are very self explanatory.
- Exposure: The button typically has a little +/- sign on it and you use it in conjunction with the dial to add more or less exposure. I love using the exposure button along with my ISO to change the brightness of a photo.
I’ll be posting a guide to camera buttons and settings soon so keep an eye out if you’re keen to learn more about them!
Keen to learn more with The Wandering Lens?
If you’re eager to improve your photography, explore your creative talents and even perhaps work in the industry, you’ll find self-study courses and a library of eBooks and Workbooks via The Wandering Lens Store . I’ve developed online resources for photographers, creatives, dreamers, adventurers, travellers and freelancers. If that sounds like you, maybe we should connect and chat about your photography goals! These creative courses and resources bring together my 17+years of experience and lessons from working in the industry. I want to see others share their talents and get published, sell prints, find clients – to have the confidence to achieve whatever it is you want to within the field of photography. Get in touch via [email protected] if you’d like to chat about your photography!
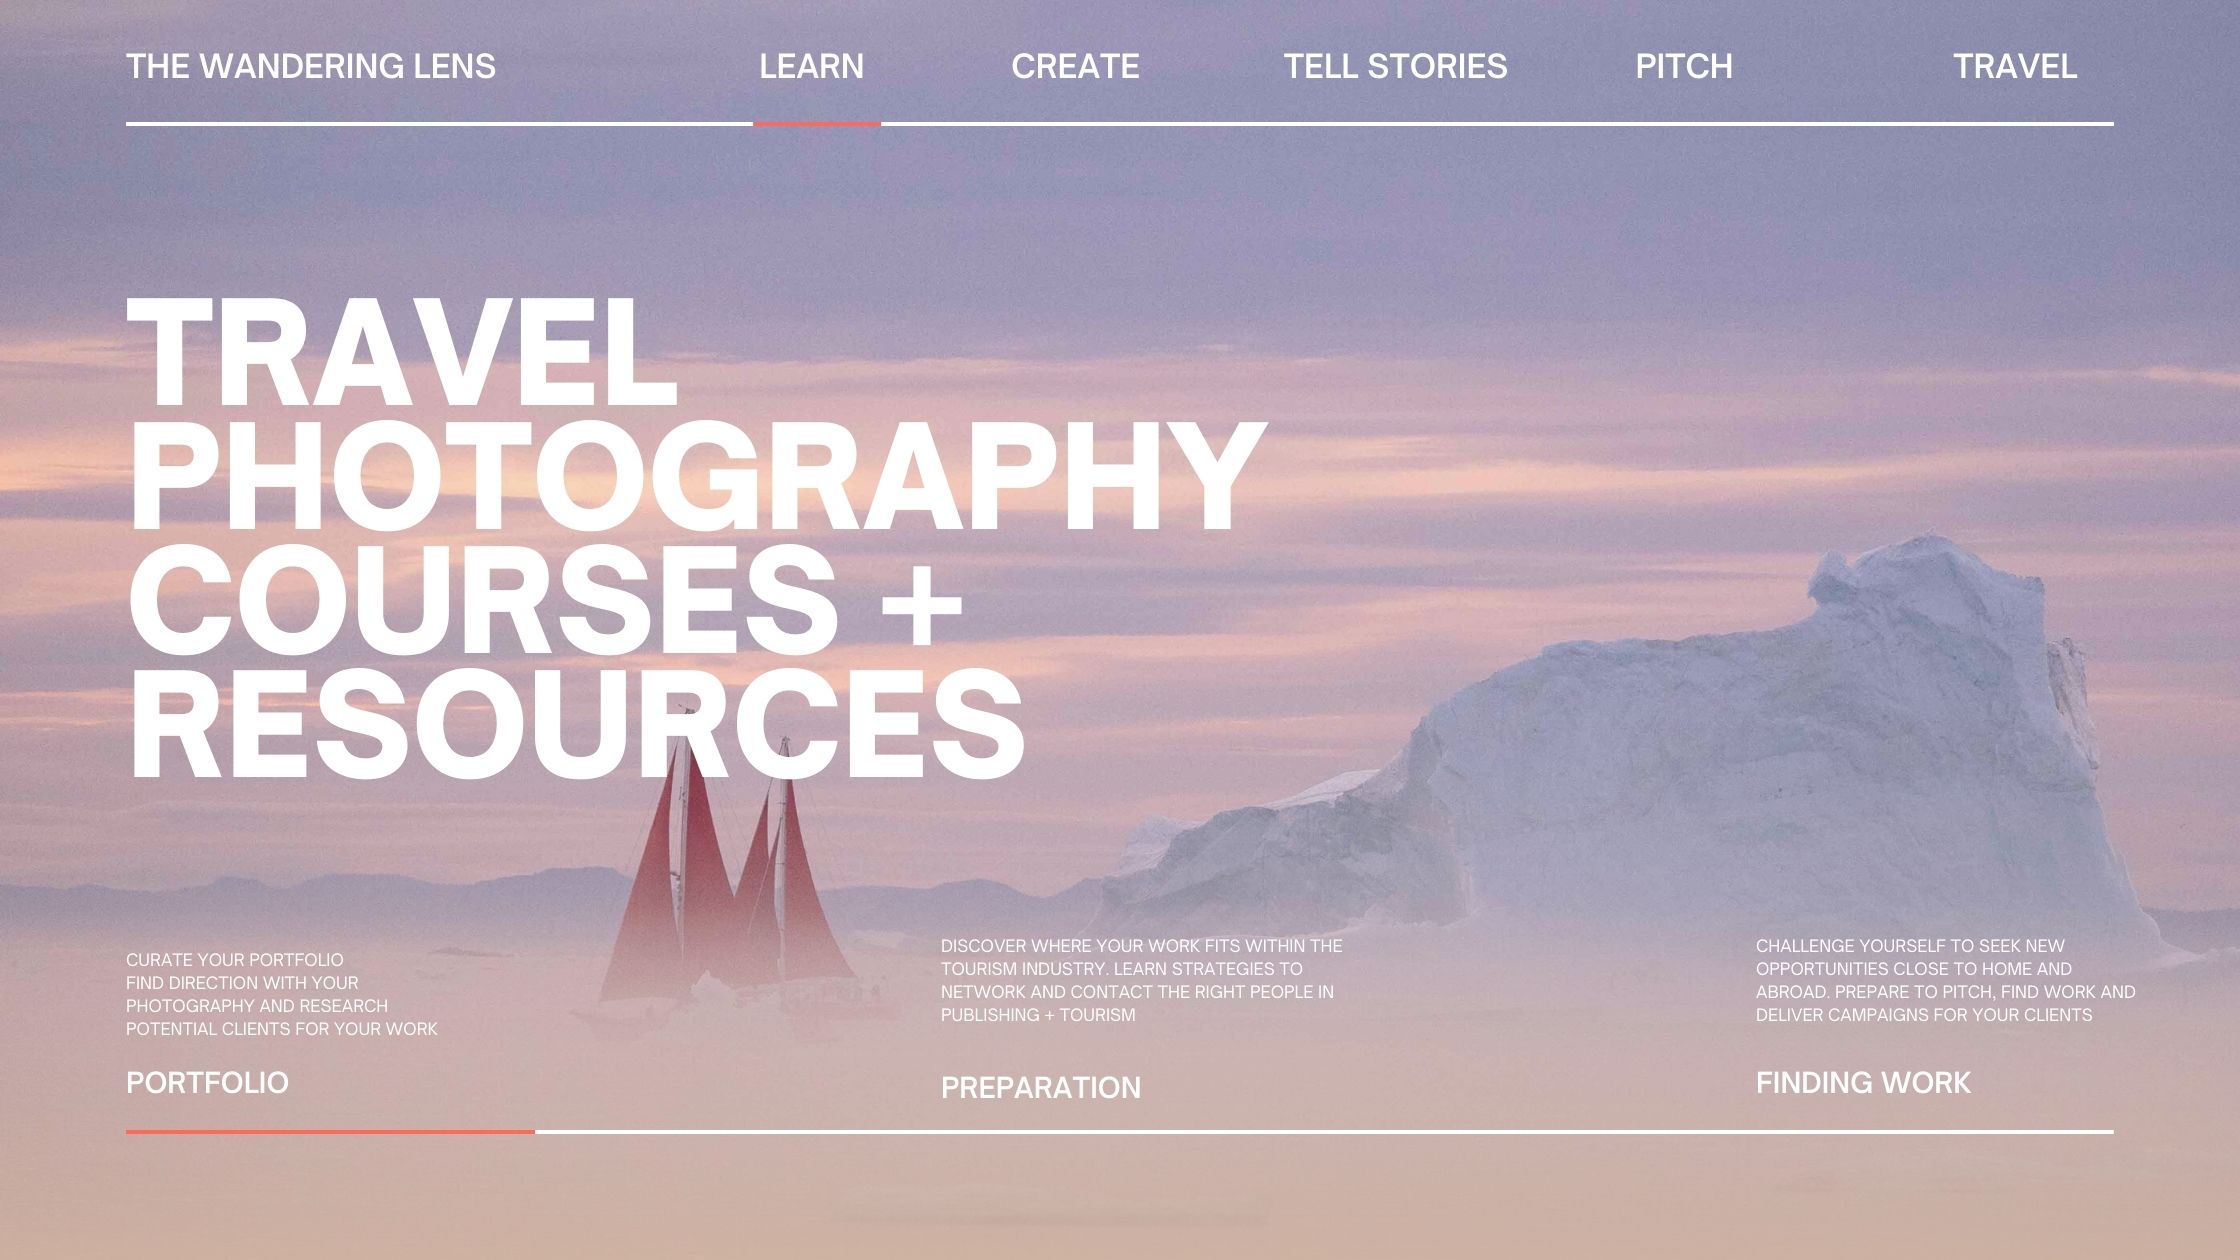
If you love this post, Pin it with one of the photos below!

Hello! I’m the founder and photographer behind The Wandering Lens. With 17+yrs experience as a professional travel and landscape photographer, all advice found on this site is from my personal experience on the road. I hope it’s useful for your own travels and would love to hear in the comments about your trips and experiences around the world.
Enjoyed reading? Share the article!
Keep Reading...
Columbia Icefields – Hiking on the Athabasca Glacier with IceWalks
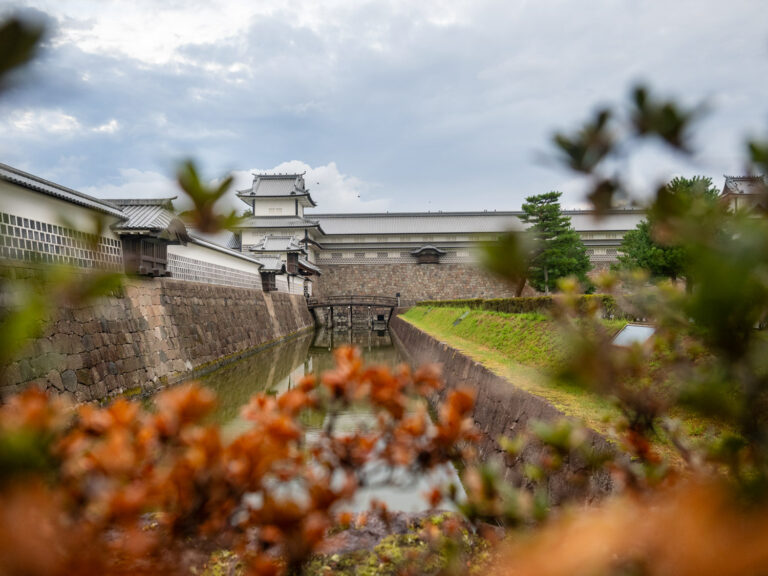
A Photographer’s Guide to Kanazawa, Japan
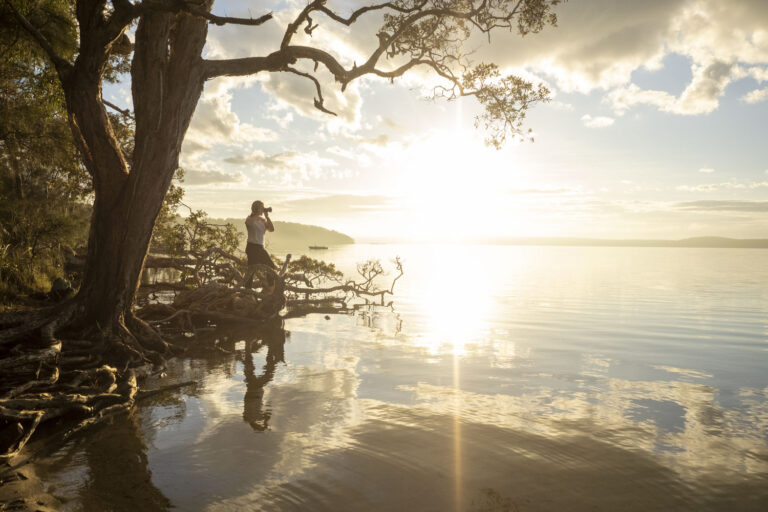
Mastering Light: A Quick Guide to Golden Hour Photography
Blog comments.
Taylor Hansen
August 29, 2020 at 2:59 am
I’m wanting to go to Hawaii with my friends next month since the flights are so cheap at the moment. Thanks for mentioning finding the best light at sunrise or sunsets when capturing landscape photos. I’ll keep this in mind as we take memorable pictures for this vacation.
Bea Adventurous
June 19, 2022 at 12:21 am
These are brilliant tips ill be sure to take out with me on my next trip with my camera! It’s so important to understand these little details which can make a huge difference to your shots! Thank you
Leave a Comment Cancel Comment
Looking for something….
Hrmm. Looks like you're using an older browser, which means some site features may not work they way they should. For the full gadventures.com experience, we recommend upgrading to the most recent version of your browser . It's worth it! Honest!
View all tours
North America
Central america & caribbean, south america, north africa & middle east.
Few travellers make it to this icy continent, but the lucky ones who do get to explore a frozen Eden ruled by the elements and teeming with wildlife.
G Adventures Land
G adventures sailing & cruises, g adventures private travel.
Whether it’s a family retreat or a girls trip, you can surround yourself with a hand-picked crew and customize a tour that fits you all perfectly.
The Geluxe Collection
Our new line of premium active adventures is officially here. With perfectly paced itineraries, one-of-a-kind accommodations and elevated dining, this is adventure at its finest.
National Geographic Journeys
Go deeper into the cultures and habitats of the places we explore. More is included and you’ll enjoy greater hands-on exploration, interactions with local experts, and freedom to roam.
National Geographic Family Journeys
Are you an adventure-loving family in search of meaningful ways to discover the world together? These tours are specially designed for travellers seven and up and their inquisitive families.
Jane Goodall Collection
Step deeper into the animal kingdom while respecting all of its inhabitants. Our incredible collection of wildlife-focused tours is endorsed by the world-renowned ethologist.
Roamies by Hostelworld
The thrill of adventure. The awesomeness of hostels. Get ‘em both on these immersive small group trips for 18 to 35-year-old travellers.
Why choose us
As the leader in small group travel for 30 years, we know how to do it right: flexible itineraries, freedom to roam, safety, peace of mind, and locally based guides.
Change the world just by having the time of your life. When you travel with us, you become a force for good by acting responsibly and creating positive impact.
Together with our non-profit partner, Planeterra, we ensure local communities touched by our tours benefit from our visits in as many ways possible.
Trees for Days
Leave your destination even greener than you found it! For every day on tour, we’ll plant a tree in your honour and ensure that our forests get to live their best lives.
Travel resources
Last minute deals.
Looking to have the time of your life in the next 90 days or so? You can save big if you’re ready to book now.
Loyalty discount
Back home from a G Adventures tour? Submit a quick trip evaluation to save 5% on your next tour with us.
Student discount
Got proof that you’re pursuing higher learning? Then we’ve got a travel voucher with your name on it.
All travel deals
New ways to save pop up all the time. Here’s where you’ll find every hot deal in one easy place.
Why Taking Photos While You Travel is Important
I occasionally get the comment from people that photography takes away from what they are experiencing when they travel. a recent article from smithsonian magazine suggests that this might be true. they did a study where people who took more photos in a museum remembered less about the paintings they photographed than the people who [&hellip.

I occasionally get the comment from people that photography takes away from what they are experiencing when they travel. A recent article from Smithsonian Magazine suggests that this might be true. They did a study where people who took more photos in a museum remembered less about the paintings they photographed than the people who didn’t take photos.
Personally, I have found the opposite to be true. Over the last seven years of traveling around the world, taking photos and becoming a photographer has done more to enhance my experiences traveling than anything else I have done.
That being said, there is a difference between taking photographs and taking snapshots, which is exactly what most travelers do. A photograph is a purposeful attempt at taking a beautiful image. It requires some thought, positioning and awareness of your surroundings. A snapshot is nothing more than pressing the button on your camera while standing in front of something.
Taking the time to take real photographs can enhance your travel experience in several ways:
1) Photography makes you more aware of your surroundings.
I tend to notice much more because I’m always looking for photos. I’m looking at the tops of buildings, down side streets and even on the ground. There have been many times where I break off from a group of people to take a photo and suddenly the group gravitates to me to take snapshots of something they missed. Once you begin looking for photos, you see much more of the world than if you are just walking through it.
2) Photos help you remember.
Despite the conclusion of the Smithsonian Magazine article, the real test of a photo’s ability to help you remember doesn’t come the day after you take it; it comes years later. I’ve looked back on the images I captured very early in my travels and have been mentally taken back to moments that I hadn’t remembered in years. As time passes, you need things to jog your memory and nothing works better than photos that you took yourself.
3) People will actually want to see your vacation photos.
Most people are bored to tears of vacation photos that are nothing more than endless shots of people in front of landmarks. Most people don’t want to see you on vacation; they are more interested in the destination itself. If you focus on taking better images, people will actually be interested in seeing your photos.
Travel photography isn’t about owning a large, expensive camera. You can do it with nothing more than a smartphone. What it is is paying careful attention to your surroundings and taking the time and effort to create beautiful images.
On your next trip, take the time to pay attention to your surroundings and you will be rewarded for years to come.
Getting There
G Adventures invites you to improve your photography skills in one of the world's most inspiring settings with the guidance of Wander-in-Residence Gary Arndt. Learn tips and techniques while capturing the diversity of South Africa through your viewfinder. In co-operation with Gary Arndt — the world's most read travel blogger — G Adventures is pleased to present a very special departure of its ' Cape, Rails & Kruger Quest' this May. Reserve a space on this very special departure today.

Read more from
Capturing patagonia: an analog film adventure, by haramar kandola.
Steeple-like peaks, turquoise lagoons, contemplative moments at camp — our very own Haramar Kandola shares analog snaps from Torres del Paine

5 ways solo travel helps you meet new people
By g adventures.
See how small group tours like National Geographic Journeys with G Adventures help spark lasting connections

6 best places to propose for a unique engagement
By jessica moy.
From glowworm caves to snow monkey parks, discover our best destinations to pop the question

Going solo: how to travel the world on your own
See how small group tours pave the way for incredible solo adventures (especially for women!)

Mexican street food: a beginner's guide
By richard kitzinger.
One frequent (but first-time Mexico) traveller takes a crash course to prep for a Classic Mexico Adventure
Delete post?
Note: If you only want to remove this post from public view, you can choose to unpublish it instead.
IMAGES
VIDEO
COMMENTS
Your photos will improve with a basic understanding of the functions, settings, and things like an exposure triangle. But if you're in the market, here are some of the best cameras for solo travel: Best action travel camera: GoPro Hero 11. Best mirrorless travel camera: Sony A7 III or A7 IV.
Let's go. 1. A tripod and a timer mode. Although not the most effective option in my opinion; setting up your tripod, mounting your camera in the position you want it, and letting it run on a timer is a great option to take photos of yourself if you're just starting out. Most cameras will have self-timer modes and, if you're in the market ...
But for tack sharp landscapes, low-light photography, self-portraits, flowing water shots, and sunsets/sunrises, a travel tripod makes a huge difference. 7. Experiment With Composition. Get Low for a Different Perspective. You can almost always come up with a better photo composition after some experimentation.
A simple image, but one of my favourite travel photos. Table of Contents. General Travel Photography Tips for Beginners. 1) Know Your Camera. 2) Focus on the Golden and Blue Hours. 3) Plan Your Shots. 4) Learn About Composition. 5) Framing, Framing and More Framing. 6) Move Your Feet.
20 Best Travel Photography Tips. 1. Know Your Camera. Knowing the in's and out's of your camera and how to properly use it is incredibly important in taking great travel photos. If you have a new camera, I recommend watching some online videos about it, understanding the settings, and doing some low-stakes photoshoots at home before taking ...
How to take solo travel photos. 1. Self-timer mode with a smartphone. Smartphone and self-timer method #1 - prop your phone up. Smartphone and self-timer method #2 - phone stand. 2. Self-timer mode with a camera. 3. Remote trigger controlled with your phone.
Travel is a remarkable thing, opening our minds to new places, new cultures and new experiences. And with powerful cameras built right into most modern smartphones, it's easier than ever to photograph one's travels. We don't want you to just take photos, though. We want you to take excellent photos.
As you would expect from a full-time travel photographer, I spend a great deal of my time taking photos when traveling. That includes everything from landscape photography in remote locations, through to food, portrait, wildlife, event, and architectural photography in destinations around the world.
Practice on your friends. Practice on inanimate objects in your garden. Practice with each trip you go on to take better travel photos and improve your photography skills. Study photos that professionals have taken to discover the angles they shoot from, where they focus and how they use light to their advantage. 27.
13. Stay in the Moment. Don't overthink the shot. Stay in the moment and go with the flow. Don't be afraid to switch around your schedule to get a good photo. 14. Take Notes. Bring a small notebook with you as you travel and when you take photos to make sure you're noting the place and your camera settings.
Step Two: Link your Bluetooth Remote. Taking your own solo travel photos is way easier when you have a Bluetooth remote. For years I used my iPhone as a remote (by connecting it to my Sony A7iii camera ). However in recent travels, I have switched over to this small Bluetooth remote that comes included with both of the tripods I linked above.
Research the location thoroughly, including famous sights, experiences, geography, and lighting conditions. Look at existing travel photos for inspiration, but aim to create something unique. Use a spreadsheet to organize your shots by day and time, considering factors like sunrise, sunset, and harsh midday light.
Here are several tips to help you take stunning travel photography with every camera click. 1. Find the right light. Finding the right light is essential for taking amazing photos for a few reasons. It's simply the best travel photography tip that anyone will tell you. Lighting is everything to capture the perfect shot.
Practice regularly until you know how to easily adjust your exposure, shutter speed, DoF, focal point, colour balance, etc. It should become second nature. Being able to anticipate your set-up requirements just by being familiar with your camera and gear will aid you in taking better photographs. 3.
If you're photographing a mountain, try to find a subject that will help showcase just how tall and imposing it really is. By placing a person in the distance you give the mountain or landscape an actual size comparison to help the viewer judge just how incredible the scenery is. Take Better Photos: Create perspective by placing a subject in ...
Photos for tourism lovers. Before traveling to a new country, the search for popular and unusual sights is a must for any tourist. Guided tours in museums and galleries, city walks, and visits to local restaurants help to get to discover an unknown place. It seems that photos have no room in immersion in an unusual culture.
3) People will actually want to see your vacation photos. Most people are bored to tears of vacation photos that are nothing more than endless shots of people in front of landmarks. Most people don't want to see you on vacation; they are more interested in the destination itself. If you focus on taking better images, people will actually be ...
3. Your Credit Cards. Taking photos of your credit cards, front and back, can protect you in case of loss or theft, because you'll have the account numbers and the bank's phone number. Consider using a secure photo-storage app to keep these safe in case your phone gets stolen. 4.
Check out our review of Casey Kiernan's Iceland photography workshop here! Our Top Pick. LaCie Rugged Mini. The easiest way to backup photos while traveling without a computer is by using an ultra-compact, all-terrain portable hard drive. With a capacity of 2TB and fast transfer speeds, it's the ultimate convenience for any travel photographer.
If you're traveling with your laptop, the easiest way to back up your photos is to make a copy of your image files onto its hard drive. Best practice when it comes to backing up is to keep ...
Discover Creative Ways to Share and Display Your Travel Photos. 1. Create a Look Book or Travel Photo Album. 2. Create Wall Art. 3. Create a Travel Photo Gallery Wall. 4. Upload to a Photo Sharing Site.
From cameras and filters to bags and tripods, this is the gear you should take for pro-standard travel photos. Andrew is CNET's go-to guy for product coverage and lead photographer for Europe ...
If you are lucky, you may have a backup solution built right into your camera in the form of dual card slots. Many cameras with two slots, such as the D810 and 5DS R, can automatically write the images you take to multiple cards simultaneously.This is perhaps the best way to handle backups while traveling since the work can be done essentially without any additional steps.
Italy Venecia Hotels Travel MICHELIN Keys. The Three Key distinction is the highest hotel honor in The MICHELIN Guide. Earning One Key (107 properties) or Two Keys (31 properties) is difficult enough, but only eight hotels received the Three Key distinction in Italy. These hotels excel in all five criteria used to judge hotels by our Inspectors.
Still others charge nominal "professional" fees starting at $150. Fees often fluctuate based on the length and intricacy of a trip and how far out you do the planning (6 to 12 months is ...
Earlier this week, groups of travelers climbing Yandang Mountain in eastern China were stuck partway up a cliff, clinging to a rope along a fixed climbing route, for more than an hour. Images of ...
By Erin Schwartz, a Strategist writer covering décor, gardening, and garment care. Kim Kardashian makes a point to never wear the same designer twice to the Met Gala — Margiela this year ...
Photos taken at the airport provided by TSA show two slender pink snakes outside of a small camo-colored bag, after apparently being pulled from the passenger's pants before they were able to ...
Amazon. Not opting for the smallest, lightest Kindle might sound counterintuitive in a travel tech guide, but the ability of the Kindle Scribe (from $339) to multitask makes it an inflight winner ...
By Emily Burack Published: May 06, 2024 8:22 PM EDT. Save Article. Bridgerton season three premieres next week—and ahead of the first batch of episodes, stars Phoebe Dynevor, Simone Ashley, and ...