

The Hungry Hiker
Tips & Tricks on How to Plan Your Next Outdoor Adventure
How to Prepare for Your First Solo Backpacking Trip
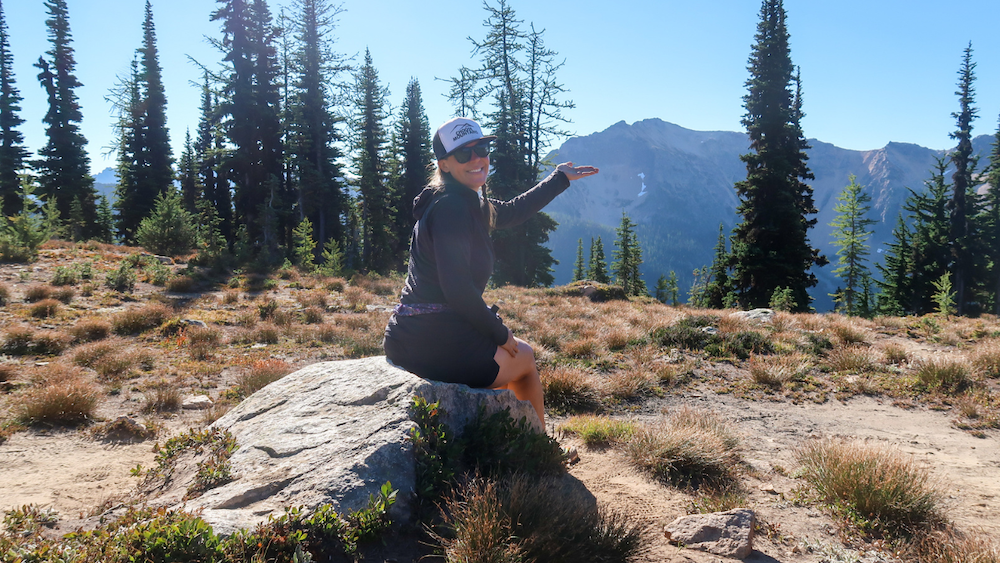
Have you been thinking about wanting to go on a solo overnight backpacking trip? Do you want to be able to go backpacking wherever you want, whenever you want without having to wait for someone else to go with? Maybe you’re tired of having to keep up with someone else on trail and want to go at your own pace.
Then it’s time to get out of your own way and give solo backpacking a try.
I’m going to share with you, step-by-step, how to prepare for your first solo backpacking trip, including how to research and plan your solo trip out in the backcountry and important advice for first time solo backpackers.
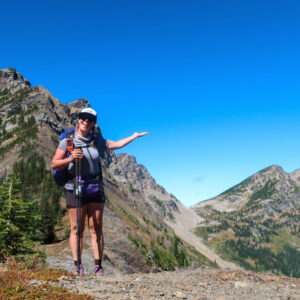
Over the last several years and a few thousand miles, I’ve spent a fair amount of time out on trail by myself – everything from day hiking to thru-hiking the Pacific Crest Trail solo.
I went from being tired of waiting for someone to go backpacking with and being scared of being out on trail alone to planning multi-day, solo backpacking trips like thru-hiking the PCT, hiking the Grand Canyon Rim to Rim to Rim trail and section hiking multiple sections of the PCT here in Washington by myself so that I could spend more time in the backcountry without having to wait for someone else to go with me. Over the years, I’ve come to really embrace and love solo backpacking.
There are so many reasons why I love solo backpacking:
- I have the freedom to go wherever I want to, whenever I want to without waiting for someone to go with me
- I get to hike at my own pace
- I can challenge myself if I want to
- Solo trips in the backcountry are always an opportunity to learn about more myself and enjoy my “me” time on trail
- When I’m out on trail by myself, I get to think things through in my head without any distractions
- I get to prove to myself I can do anything I set my mind to and overcome any challenges that come my way
- Solo backpacking is empowering. It’s a huge sense of accomplishment, an incredible boost of self-confidence and it’s really addicting
- Solo travel in the backcountry, whether it’s thru-hiking, section hiking or a weekend, overnight backpacking has ruined my life in the best way possible
Start small – No one says you have to go on a big trip for a bunch of days and hike a ton of miles for your first trip. Start small. Start with a single, easy overnight trip, which will mean you’ll need less food and clothing, making packing easy and will help your pack organization pretty simple. The goal of this first trip is to gain experience and increase your confidence so that you’ll want to go on your next trip.
Pick a familiar trail, somewhere you’ve been before
By going someplace you’re familiar with and have gone before, you help eliminate the fear of the unknown, making the whole idea of doing your first solo backpacking trip way less scary.
Keep it Short
Choose something with a round-trip distance of 10 miles or less. Ideally, try to get at least 3 to 5 miles away from the trailhead. This way, you’ll get far enough out there to enjoy yourself, get away from city life and feel accomplished while keeping the overall level of risk pretty low.
Choose a fairly popular, well-marked, regularly maintained and easy to follow trail
Even though you’re getting on trail alone, you won’t feel all alone if you’re out on a popular, well-travelled trail. There will more than likely be other hikers and backpackers out on trail with you. If you really want to make sure that there will be other people out on trail with you, consider planning your first solo backpacking trip over the weekend when there’s likely to be more people out on trail.
Know your limits
Be honest with yourself about your skills and capabilities. Since you’re probably not sure what you’re capable of yet, you’ll want to start small, keep it short and stay closer to home instead of picking a super remote location and hike a bunch of miles for your first solo backpacking trip. This way, if things go sideways or you don’t feel safe, you have the option to pack up camp and hike back to the trailhead. If you do end up packing up camp and heading back to the trailhead earlier than you anticipated, it’s nothing to be ashamed about. The goal here is to set realistic expectations for your first solo backpacking trip so that your chance for having a successful trip is much higher.
Pack the right gear for the right conditions and terrain. When you pack the right gear, you’ll enjoy yourself out on trail while being safe.
When packing for your backpacking trip, whether it’s your first solo trip or your next, you’ll want to make sure you have the following systems with you:
- Water to start with. Note where the first water source is out on trail on your map so that you can figure out how much water you’ll need to start your trip with.
- Shelter system
- Sleeping system
- Clothes and shoes to hike in and extra clothes to pack for insulation in case you hit bad weather
- Cooking system and Food Storage
- Water filtration system
- Repair/tool/toiletry kit
- First aid kit
- Electronics like your smartphone, a camera or even a satellite messenger and a way to charge the electronics you bring with you when out on trail
- Misc and seasonal gear, which will all depend on you trip objective and where and when you go for your backpacking trip. This can include microspikes , ice axe, gaiters , an umbrella, bug spray/bug net, rain gear , etc.
You’ll also want to make sure you pack the 10 Essentials.
Why is packing the 10 Essentials important for any trip out in the backcountry? Having the 10 Essentials will help better prepare you for the worst-case scenario, just in case you have to spend more time out on trail than you originally anticipated.
The 10 Essentials include:
- Illumination
- Extra Water
- Extra Clothes
- Sun Protection
- Knife/Gear Repair
- First Aid Kit
To learn more details about what the 10 Essentials are and why they’re so important to have with you in your pack, whether you’re going on a day hike or overnight backpacking trip, check out my video, “What are the 10 Essentials? Hiking Essentials for Hikers & Backpackers”
Safety Tips When It Comes To Gear
I bring my Garmin inReach with me on every one of my backpacking trips. Having a satellite messenger like the Garmin inReach allows me to have two-way messaging in the form of a text message with local Search and Rescue if in an emergency situation as well as be able to stay in touch with friends and family at home, giving everyone peace of mind while I’m out on trail for my solo adventures.
Get to know your gear BEFORE getting out on trail:
- Practice using your gear
- Know how to use all of your gear, including learning how to set up your tent, lighting your stove and filtering water
- Practice packing and unpacking your pack
- Practice wearing your pack with all of your gear, food and water before getting on trail
Figure out where you want to go
- Guidebooks can be a great reference for wanting to check out a specific area, park, state or country
- Often times guidebooks will be loaded with beautiful photos, maps and intel on the area
- Find an area you want to explore and collect a couple of current guidebooks featuring that area
Hiking/Backpacking/Outdoor-Related Facebook Groups
- If you’re on Facebook, do a search for hiking and backpacking groups. There are tons of groups out there. Some are more general hiking and backpacking focused. There are also location-specific hiking and backpacking groups, trail specific groups (especially for the long-distance trails) and even women-specific hiking and backpacking groups. You can even find solo female hiker and backpacker groups.
- I highly recommend saving posts as you come across them in these groups of places you want to explore in the future so you can refer back to them on down the line when planning your trip
Local trail associations
- American Trails has a complete list of state trail associations all across the country, listed by state on their website. Check out the link below. For example, if you’re located in Washington State, the Washington Trails Association is an incredible and free online resource for discovering trails and parks throughout the state. On their website is a Hiking Guide and a Hike Finder that is designed to help users find hiking and backpacking trails throughout the state.
- Call and/or email the local ranger station for the area you want to travel in
- Visit the National Park’s website – Park websites are great resources when researching permits and rules and regulations within a specific park
Become familiar with local rules and regulations for the area you’ll be visiting
- Do you need a permit to camp?
- Are there designated tentsites or is dispersed camping allowed?
- What are the requirements for food storage: hard-side bear canister vs food bag/bear hangs?
- What are the requirements for waste management? Can you bury your poop or do you have to pack it out in a wag bag?
- Will you need a parking pass for your car at the trailhead?
- Is there a Park fee required to get into the area?
- Is there a fire ban?
Research trail conditions and check the weather forecast (read trip reports)
- Read recent trip reports/current trail conditions
- Check road conditions
- Check weather forecast for where you plan on heading to – NOAA
Make sure you’re familiar with LNT Principles
- Plan ahead and prepare – Just like what we’re doing now!
- Travel and camp on durable surfaces
- Dispose of waste properly, which ultimately means Pack it on, pack it out
- Leave what you find
- Minimize campfire impacts
- Respect wildlife, like keeping your distance and being bear aware
- Be considerate of other visitors
Create a route using either a paper map or a GPS app system like the Gaia GPS
- Download maps and/or your route before getting on trail and out of cell service
- Mark possible tentsites
- Mark possible water sources along the trail
- Note landmarks
Build Your Trip Itinerary
Your itinerary should include:
- Your planned route and the name of the trailhead you’ll be starting from
- Note the potential tentsites you may stay at during your trip
- Your start date and time. Let your emergency contact know when you’re leaving
- Your expected end date and time. Let your emergency contact know when you come back
- Establish a clear time that you will be in touch with your emergency contact at the end of your trip
- The name of phone number of your emergency contact
- The day and time of when you’ll notify your emergency contact of your return
- The make, model, color and license plate number of your car and the location of where you parked your car
- The name of the county you’ll be traveling in
- Information on how to contact local authorities including local county search and rescue, local sheriff’s office and the local ranger station
- Permission for your emergency contact to alert authorities if you don’t return within set timeframe of your anticipated return day/time
Leave your trip itinerary with someone at home whom you trust
Important advice for first time solo backpackers.
Now that we’ve gone over how to prepare, research and plan your first solo backpacking trip, let’s go over some important advice for first time solo backpackers:
- Try a few nights of solo car camping in an established, drive-up campsite first
- Always trust your gut
- Stay calm and take deep breaths
- Pack distractions – a book, a Kindle , music, podcasts, your journal, download movies/tv shows or a game to play (if hiking or camping by yourself at night, play music out loud to keep the animals away)
- Be vague with your solo camping plans when talking to strangers on trail. Keep your camping destination private when out on trail and don’t point out the fact that you’re alone. Lie if you feel uncomfortable.
- Camp at a tentsite with other backpackers and/or near natural running water for a good night’s sleep
- Give Yourself Some Grace – Practice, practice, practice!
- If things go sideways or you don’t feel safe, hike back to your car. Don’t feel ashamed for turning back around if you feel unsafe or unprepared
- Find inspiration from other solo backpackers – connect either in-person or online to get advice, resources and suggestions on how to prepare for your trip
Ladies, have you been thinking about wanting to go on a solo day hike or overnight backpacking trip this year? Do you want to feel more comfortable, confident and self-reliant for your solo adventures in the backcountry? If so, I have something special for you!
I’ve created The Confident Solo Female Backpacker System
Whether you’re a beginner or a well-seasoned female backpacker, this comprehensive, self-paced online backpacking program specifically for women will walk you through, step by step, everything you need to know in order to plan, prepare and build up your confidence to comfortably go on either your FIRST or NEXT solo backpacking trip.
Ladies, I’d love to work with you to help you achieve your solo hiking and backpacking goals!
Interested in learning more about the program I’ve put together and how I can help you achieve your hiking and backpacking goals this year? Sign up for a free, one-on-one Zoom call to chat with me and see if you’d be a perfect fit for this program. CLICK HERE for more details.
Disclaimer: The-Hungry-Hiker.com is a participant in the Amazon Affiliate Links and AvantlInks Program, affiliate advertising programs designed to provide a means for sites to earn advertising fees by advertising and linking to Amazon.com and other affiliated sites at no cost to you. Please note, I only link to products and services I personally use and trust.
Leave a Reply Cancel reply
Your email address will not be published. Required fields are marked *
Save my name, email, and website in this browser for the next time I comment.
Notify me of follow-up comments by email.
Notify me of new posts by email.
Everything You Need To Know Before Taking A Solo Backpacking Trip

Picture this: the sun rising over majestic mountain peaks, casting a warm glow on pristine wilderness. You stand alone, surrounded by nature's grandeur, and the world feels both vast and intimately connected. This is the charm of solo backpacking, a thrilling adventure that beckons those with a thirst for exploration and a yearning to discover themselves in the heart of the great outdoors.
The decision to venture into the wild alone may seem daunting, but it's precisely the allure of the unknown and the prospect of charting one's course through unexplored territory that captivates the adventurous soul. Solo backpacking is more than just a physical journey; it's an opportunity to disconnect from the constant barrage of screens, schedules, and responsibilities and reconnect with the rhythms of nature. It's a pursuit that requires a blend of physical resilience, mental fortitude, and unwavering determination.
If you're a first-time adventurer contemplating this thrilling escapade, we've got you covered with valuable insights and expert tips that will empower you to prepare effectively, stay safe, and extract the utmost enjoyment from your solo backpacking experience. So, fasten your metaphorical backpack, tighten your shoelaces, and get ready to traverse the terrains of solo backpacking. Your adventure begins here, where the wild calls and the heart answers.
Choose a well-traveled destination
Selecting the right destination for your solo backpacking adventure is a crucial step. It can make or break your experience. Your destination should align with your interests and goals for your trip. Do you prefer challenging hikes in remote wilderness, or do you want to explore cultural and historical sites? Understanding what excites you, and choosing a location that entices you will result in a more rewarding journey.
For first-time solo backpackers, skill level and safety should also be at the forefront of your decision-making process. Consider selecting an easy, well-maintained and well-traveled destination. Since you are already challenging yourself by stepping into uncharted waters, selecting a well-traveled trail can help ease your preparation and enhance your backpacking experience. These popular routes tend to offer relatively easier logistics and readily available information. You'll find abundant resources and fellow hikers who can provide insights and guidance, which can be immensely reassuring, especially for newcomers. It's also worth noting that tackling a challenging terrain as your first solo backpacking experience might lead to frustration and potentially deter you from reaping the rewards of this adventure. By starting with an easier trail, you can build your confidence and develop the skills necessary for more demanding journeys in the future.
Some renowned destinations that have garnered acclaim among novice backpackers include the Lost Coast Trail in California, the Ancient Lakes in Washington, and the Sandbeach Lake in Colorado. These trails offer a harmonious blend of natural splendor and cultural exploration, making them enticing options for solo adventurers.
Pick a convenient time
Selecting the right timing for your solo backpacking trip is as crucial as choosing the destination. It involves careful consideration of both environmental factors and personal circumstances. Begin by researching the weather and climate patterns for your chosen destination. Ensure your trip is planned during a season that provides favorable conditions for your outdoor activities while avoiding extreme weather conditions or seasons with a heightened risk of natural disasters. For example, trekking through the American west coast in the summer is an excellent idea, but the same time of year will have you sweaty and sticky in Texas.
Moreover, it's essential to acknowledge that while we may yearn for the freedom to set aside all our routine commitments, real life often necessitates that we balance our personal obligations. Thus, contemplate your personal life and duties as you schedule your adventure. Are arrangements for family care, work-related responsibilities, or health concerns to be made? Ensure that the timing and length of your solo backpacking journey align harmoniously with these commitments, allowing you to embark on your adventure with peace of mind.
Balance forethought with fluidity
One of the primary challenges faced in the realm of solo backpacking is discovering the delicate equilibrium between meticulous planning and the allure of spontaneity. Thorough research is undeniably crucial for ensuring a safe and enjoyable journey. However, when one becomes excessively ensnared by rigidity, the true spirit of adventure can be inadvertently smothered. Reflect on the kind of person you are and the person you want to be while on this trip; do you get bogged down with anxiety if details are left hanging? Or are you challenging yourself to be more spontaneous? To strike this delicate balance effectively, consider the following approach.
Commence by crafting a well-thought-out itinerary that encompasses the routes you intend to traverse, the number of days you'll need to complete your trail comfortably, your lodging arrangements, and the acquisition of any necessary permits. In the wilderness, knowledge emerges as your most reliable ally. Simultaneously, fashion a contingency plan to serve as your compass should unforeseen events like natural disasters or health and political conflicts materialize. Contingencies may encompass unexpected extreme weather conditions, injuries, or modifications in your intended schedule.
Yet, amid all the planning, it's vital not to lose sight of the exquisite joy of embracing unforeseen adventures. Some of the most cherished and memorable moments in solo backpacking are those that unfurl spontaneously. Be open to opportunities that arise at the moment, such as deciding to join a fellow adventurer for part of their journey. These unscripted interludes often etch themselves most profoundly in the tapestry of your solo backpacking experience.
Pack reputable gear
The gear you select can make all the difference between a solo backpacking trip that flows seamlessly and one filled with challenges. It's crucial to have the correct equipment while also managing your load efficiently. But what exactly do we mean by "the right gear"? We're referring to equipment that has undergone scrutiny from seasoned backpackers. To ensure you make the best choices, explore blogs, TikTok videos, and YouTube channels created by backpackers who have ventured on trips similar to the one you're planning. This will give you a more accurate picture of which gear is applicable to you. While doing so, consider the potential influence of sponsorship, though nowadays, most influencers and reviewers prioritize honesty to maintain their credibility.
When crafting your gear list, several essentials should not be overlooked. These include a reliable backpack, suitable shelter, a well-insulated sleeping bag, cooking equipment, and clothing tailored to the season and destination you're heading to. If your journey spans an extended period, managing weight becomes paramount. Carrying superfluous items can take a toll on your physical stamina while omitting essential gear can compromise your safety and overall comfort. Therefore, investing in lightweight and durable equipment is a wise choice. Modern backpacking gear is meticulously designed for both efficiency and durability, ensuring you can carry what you need without being burdened by excessive weight.
Lastly, never embark on your journey without a well-stocked first aid kit; ensure you know how to use it. Basic medical understanding can be invaluable in the wilderness, providing a safety net in unexpected situations.
Condition your body
Embarking on a backpacking adventure is far from a walk in the park, and even standing in airport lines with a 45L backpack can be surprisingly tiring. The physical demands of your journey will largely depend on its length and level of difficulty. It's vital to understand that training for backpacking is different from training for regular hiking. To get yourself in the best shape for your adventure, you should concentrate on strengthening your cardiovascular endurance, leg muscles, and core. Your training regimen should encompass a mix of strength, flexibility, and endurance exercises. These will prepare your body for the diverse physical demands of backpacking.
Your training should closely mimic the type of physical activity you'll engage in during your journey. This ensures that your muscles are familiar with the movements they will undertake, preventing soreness and exhaustion. For instance, if you'll be ascending steep terrain, incorporate uphill training into your routine.
Begin your training with a focus on gradual progression. This means gradually increasing distances and intensity of your hikes. Pushing yourself too hard too quickly can lead to injury. Since you want your training to mimic your actual adventure, practice with the equipment you'll be carrying on your trip to become accustomed to its weight and feel, by slowly increasing the number of items you'll need. This is crucial to ensure that your body is prepared for the specific load it will bear.
Prepare yourself mentally
Solo backpacking presents unique mental challenges, as you'll frequently find yourself in solitude, facing unpredictable situations. Building mental resilience is just as vital as physical fitness for a successful journey. Watch and read about other solo traveling experiences. Familiarize yourself with the challenges others have experienced to build your own psychological toolkit.
Before embarking on your journey, establish clear goals for your trip. Knowing why you're undertaking this adventure can provide you with motivation and a sense of purpose during challenging moments. Whether it's to reconnect with nature, test your limits, or find inspiration, having a goal can be a powerful psychological anchor. Cultivate a sense of self-reliance and self-sufficiency, as your decision-making ability and resourcefulness will be your primary tools in unforeseen situations. In addition, solitude can evoke a range of emotions, from serenity to moments of unease. Being aware of these effects can help you navigate them more effectively. If you anticipate that loneliness might be an issue, consider strategies to stay connected with others during your trip. While cell signals may not always be accessible in remote areas, journaling your experiences and taking photos to share later can help alleviate the feeling of isolation. Sharing your adventure with friends and family through these means can provide a comforting sense of connection.
Learn to embrace and even relish moments of solitude. Solo backpacking offers a unique opportunity for self-discovery and introspection. By fostering mental resilience, understanding the unique psychological challenges of solo backpacking, and setting clear intentions for your journey, you can ensure that your mental state is well-prepared to confront and embrace the solitude and unpredictability that often define solo wilderness adventures.
Make sure you have solid safety skills
Ensuring your safety is of paramount importance when embarking on a solo backpacking adventure. It's crucial to address safety concerns, including those that may be specific to your gender, particularly for solo female travelers.
Logistics aside, it's time to talk safety. Well-trodden paths are generally safer and pose a lower risk of exposure to extreme conditions or unforeseen hazards. Don't abandon trails you set your initial sights on. Of course, even on these paths, disaster can strike. Equip yourself with basic first aid and wilderness survival skills. Being prepared for emergencies can make all the difference in a critical situation. Knowing how to tend to injuries, deal with minor mishaps, and navigate unforeseen challenges is essential for your safety and peace of mind.
Last, always share your detailed itinerary with a trusted individual who is aware of your planned route and schedule. In the event that you fail to return as expected, this person can take the necessary actions to ensure your well-being and safety.
Master your navigation skills
In the wild, navigation skills are your compass, ensuring you never lose your way. Modern tools such as maps, GPS, and compasses can be invaluable, but understanding how to use them is key to keeping you on course and preventing you from getting lost. Here's how to navigate and orient yourself effectively.
Maps, GPS devices, and compasses are essential companions. Learning how to read maps and utilize navigation tools can be a game-changer for your safety and ensuring you stay on the right path. Before leaving your campsites, familiarize yourself with maps of the area you'll be traversing. Understand the terrain, landmarks, and key points of interest.
While on the trail, maps are like your trusty guides in the wilderness, providing crucial information about your surroundings. Carrying a GPS device and a compass is crucial for reliable orientation. Apps like AllTrails can also be handy for navigating. These tools can help you pinpoint your location, track your progress, and make informed decisions about your route. Ensure you understand how to use them effectively. While smartphone apps can be helpful, always have backup methods for navigation. Battery failure or technical issues can render your devices useless. Backup maps, a physical compass, and the knowledge of how to use them are essential. Regularly check your map and GPS, paying attention to landmarks and your surroundings. Keeping a constant track of your location is not only helpful for staying on the right path but also essential for your safety.
Embrace responsible hiking etiquette
One of the most gratifying aspects of backpacking is the profound connection with the great outdoors. However, it's essential to remember that with this privilege comes the responsibility of adhering to responsible outdoor ethics. Embracing Leave No Trace (LNT) principles is fundamental for responsible backpacking. These principles serve as your guiding compass to minimize your impact on the environment. They include packing out all your trash, choosing well-established trails and campsites, and being mindful of where you camp. By practicing LNT, you actively protect and preserve the wilderness for generations to come.
Familiarize yourself with the wilderness code of conduct and adhere to it diligently. This code often includes rules about noise levels, campfire regulations, and wildlife interactions. Following this code ensures you are a responsible visitor in the wilderness, promoting harmony with the natural environment. Mindful water consumption is a crucial component of responsible backpacking. Opt for water-efficient hygiene practices to conserve this precious resource. Using water sparingly is both practical and environmentally responsible. Consider bringing a portable water filter or purifier to access clean water without relying on single-use plastic bottles.
By following these responsible hiking etiquette practices, you transform into an environmentally conscious backpacker. Your actions will significantly contribute to the preservation of the wilderness, ensuring that future generations can revel in the splendor of these natural wonders just as you have. Your commitment to responsible outdoor ethics not only enhances your backpacking experience but also safeguards the beauty of the wilderness.
Follow sustainable hygiene practices
Maintaining personal hygiene while backpacking is not just about staying clean; it's also an opportunity to contribute to environmental sustainability. Embracing reusable products is a key step in reducing your impact on the wilderness. Say goodbye to single-use items and opt for their reusable alternatives. Consider packing washable, quick-drying, and durable hygiene products like microfiber towels, cloth menstrual pads, and reusable wipes. Not only do these eco-friendly options reduce waste, but they also save you money in the long run. Develop a comprehensive waste management plan for your trip. Carry small, sealable bags for storing used hygiene products until you can dispose of them properly in designated receptacles. Ensuring responsible waste disposal is crucial for preserving the wilderness. For individuals who menstruate, following hygiene principles in the backcountry is essential. Practice proper disposal methods and ensure you leave no trace when it comes to hygiene products. By using reusable and sustainable menstrual products, you can significantly cut down on waste.
Invest in toiletries and personal care products that come in sustainable packaging. Look for options with recyclable or minimal packaging, and avoid single-use items whenever possible. There is a wide range of eco-friendly toothbrushes, toothpaste, and deodorant available to help you maintain personal hygiene while being environmentally conscious. Opt for biodegradable soaps that break down in the environment, minimizing their impact on water sources and the wilderness. Ensure you follow Leave No Trace principles by washing at least 200 feet away from lakes and streams to protect water quality.
Select accessible campsites
Selecting the perfect campsite in the wilderness is akin to choosing a temporary haven. Access to water is vital for hydration and meal preparation. Opt for a campsite close to a reliable water source. Take your daily hiking plans into account. If you prefer convenience and wish to save time and energy, a campsite near the trail may be your preference. On the other hand, if solitude and tranquility are what you seek, selecting a campsite further from the beaten path might be more appealing.
Look for level ground when setting up your campsite. Avoid slopes or areas near potential hazards such as dead trees that could fall during windy conditions. A level campsite not only ensures your comfort but also your safety. Always respect camping regulations and guidelines specific to your chosen destination. These rules are in place to protect the environment and ensure a safe and enjoyable experience for all. Compliance is not only ethically responsible but also helps maintain the beauty of the wilderness.
By considering these factors, you can choose a campsite that suits your needs and preferences, creating a safe and comfortable base for your solo backpacking adventure. Your campsite becomes your sanctuary amidst the wilderness, offering both shelter and a connection to the natural world.
Plan your meals in advance
Proper meal planning is a critical component of your solo backpacking journey. Select lightweight, nutritious, and easy-to-prepare meals. Dehydrated foods, energy bars, and freeze-dried options are popular choices. Variety is key, ensuring you have different flavors and textures to keep your taste buds excited. Think about balancing carbohydrates, proteins, and fats to provide sustained energy. A well-rounded diet is essential for your stamina during the adventure. If you have dietary restrictions or allergies, ensure your meals are tailored to your needs. There are plenty of options available for various dietary preferences, so plan accordingly.
Proper food storage is essential to prevent unwanted wildlife encounters. Utilize bear-resistant containers or bear bags where necessary. Adhere to local regulations and best practices for securing your food.
A lightweight and compact stove is essential for cooking in the wilderness. It allows you to prepare hot meals and beverages quickly. Opt for cookware that is lightweight and versatile, considering your specific cooking needs. Keep your utensils simple with a lightweight set that includes a spork, knife, and a cup for hot drinks.
Know how to respond to wildlife encounters
Wildlife encounters are a captivating aspect of backpacking in the wilderness, but knowing how to respond is essential for your safety and the well-being of the natural world. If you encounter wildlife, stay calm and avoid sudden movements. Running or making loud noises can irritate or provoke the animal. Maintain a composed demeanor. Always maintain a safe distance from wildlife. Use binoculars or a zoom lens for a closer look if needed, but never approach them. Respect their space and avoid encroaching on their territory.
In areas with bear populations, educate yourself about bear safety protocols. Carry bear spray, make noise on the trail to alert bears to your presence, and store food properly to minimize the risk of attracting them to your campsite. Ensure you store your food, trash, and scented items in bear-resistant containers or designated storage areas. This not only safeguards you but also discourages wildlife from developing a reliance on human food.
Wildlife photography can be a thrilling aspect of backpacking, but always respect the animal's space and avoid disrupting their natural behavior. Use long lenses and maintain a safe distance for both your safety and the well-being of the animal. Respect for wildlife and their habitats is an integral part of responsible backpacking.
Recommended
Backpacking Alone Is for Everyone
Share this:.
- Click to share on Facebook (Opens in new window)
- Click to email a link to a friend (Opens in new window)

It can feel overwhelming to go out into nature alone. That’s a good thing.
I embarked on my first solo backpacking trip in 2014. It’s no small admission to say that the effort changed the course of my life.
That trip was — perhaps — overkill for my first shot at backpacking solo. I completed 150 miles, combined over multiple trips on the Continental Divide Trail in Montana and Wyoming. But I dialed in my system and wilderness skills, powered through blisters, and faced my fears over the course of those miles.
In a world filled with noise, constant companionship, phones that never power down, and internet advice coming at us incessantly, here’s one more bit of advice I’d like to impart — turn it all off. Take a walk in the dirt.
This summer, go backpacking alone.
Why Backpack Alone?

Why backpack alone? It’s a question worth pondering. It can seem scary and risky and, certainly, there are risks. It can seem lonely, and it can be that. And it can sound like it’s too much of a challenge. Well, it is and it isn’t.
I’d argue you this — if, for any reason, the idea of backpacking alone sparks the tiniest amount of excitement, then it’s for you. If dread or fear accompany excitement, then it’s still for you.
There’s a world of benefits to finding out what you’re capable of alone and outdoors. And in taking on challenges that are both physical and mental, you’ll emerge a different person.
It’s not about self-esteem or even self-confidence; it’s about resilience. Weather, physical exertion, wild critters, feeding oneself, sleeping away from civilization — these experiences encourage us to revisit what it means to be vulnerable, and human.
How to Backpack Alone: First Steps

Previous backpacking experience is certainly helpful, but I want to underscore that it’s not required. Backpacking can also be as difficult or as simple as you’d like to make it.
Initially, I made it very difficult. Time and miles forced me into a routine of simplicity that made things a lot more enjoyable. I am not easily foiled by my own stupidity. There’s a live-and-learn aspect to my outdoor life that I’m constantly figuring out after 7 years of adventures.
Anyway. The basics I bring are pretty simple. Here’s a summary of my current pack list and fave items. ( Editor’s note : This is what I have on hand and would pack with today.)
- A good pack — Mystery Ranch Ravine
- A small stove and pot: Camp Chef Stryker Stove
- Backpacking food, coffee, powdered Gatorade
- Legit sleeping pad: NEMO Tensor Pad
- A warm bag: Stone Glacier Chilkoot 15-degree down sleeping bag
- An emergency beacon, always. I used a SPOT Messenger initially, now a Garmin inReach Mini
- My Kindle (we all need little luxuries !)
- Headlamp: BioLite Headlamp 330 (this headlamp is the G.O.A.T.)
- OnX navigation via my phone and battery pack
- A water purifier ( iodine tablets just in case)
- Utensils/knife: Snow Peak spork, Gerber Lockdown multitool
- Poles: Black Diamond Trail Back Trekking Poles
- Lightweight tent: NEMO Spike Tent / NEMO Hornet (one-person and two-person options)
- Waterproof matches and duct tape (it works as a firestarter too!)
- First aid: Adventure Medical Supply kit, Quick Clot, bug spray
- Extra socks: Woodroad Socks
- Trail running/hikers: HOKA ONE ONE Stinson ATR 6
- Bear spray: I like the FHF expandable holster and chest harness.
- Personal items: Kula Cloth
- Ruffwear Doggy Approach Pack: My pups carry their own food and some of mine!
- Lightweight Camp Shoes: Camo Crocs
This is simply the gear that I’ve come around to after years of heading outdoors and working in the industry’s gear side. My first backpacking tent was a $20 secondhand Walmart special. My first trekking poles came from Costco. Each lasted a few years.
Please don’t spend a couple of grand on your first setup. Figure out your budget, and then work within it.
Ask friends if you can borrow gear. Buy things secondhand . Figure out where you want to invest.
In my opinion, a good pair of shoes, a decent pack with hip and chest straps, a great sleeping pad, and a warm sleeping bag probably matter the most. All of these, sans the boots, can be bought secondhand for decent prices or borrowed from friends.
When Should You Go? Where? And for How Long?

Personally, I like to backpack in Montana in late summer. The mosquitoes and biting flies have died down, and there’s usually a glorious stretch where the mountains are the most welcoming. The nights aren’t too cold. Storms roll through, but they typically don’t stick around. It’s a sweet spot, for sure.
Wherever you are, there is likely a prime time to be outside. Figure that out. Then, make a plan.
The length of your trip, in my opinion, should be more than one night. The first night outside is often the hardest. Critters move around at night. And they’re curious about you and your tent in their space.
It’s not out of bounds to think your imagination works overtime, and that the “bear” outside your tent is probably not a bear, but a rustling branch or a porcupine (or some other little creature) checking things out. After the first night, you’ll likely be tired for the second night.
I’ve heard and seen moose, black and grizzly bears, elk, deer, coyotes, foxes, marmots, pikas, birds, and many unknown footsteps and sniffers come through my camp. I’m OK. You’ll (most likely) be OK too. No risk, no reward. I’ll add that my bear spray and Garmin inReach Mini offer exceptional peace of mind. Highly recommend.
A note on safety. Obviously, you’ll want to bring safety items like a first aid kit and bear spray. But, if the idea of being truly alone in the wilderness makes you nervous, bring whatever makes you feel safe. A satellite device or GPS to keep in touch. A lantern, a cozy blanket. A pocket knife. Whatever that “I feel ready” item is for you.
Who Backpacks Alone?

Really, if you can boil water and set up a tent, you can backpack alone.
So, the “who” is you, whoever you are. You don’t need to be an ultrarunner to backpack; you don’t even need to be that outdoorsy.
Your body can be how it is. Your gender and personal identity don’t matter in the woods. Even your fitness level doesn’t have to be at peak form.
When you’re alone and walking, you’re the one who makes the call. Rest when you need to rest. Move when you need to move. Set realistic goals for yourself.
A 10-mile hike is fine and dandy for some of you, but even up to a 2-mile trip to a lake can be just as good for many of us. Sometimes, the shortest trips are the sweetest.
And this I promise — the world will receive you, one step at a time, as you are.
Solo Backpacking: Final Thoughts

Backpacking alone, in turn, helped me receive myself.
As strange as that may sound, I was marred by anxiety for much of my life. Backpacking helped focus that anxiety in a new way.
What I realized was that the fear and anxiety I felt in the woods was my well-oiled instinctual survival response. It was my body’s clear way of telling me that I was in danger, and it was also its way of telling me that we — both my mind and my body — wanted to survive.
It was also no different than the fear and anxiety I felt in my daily efforts. The anxiety of emails piled up was heavily dulled compared to the very real anxiety of a grizzly coming my way. That perspective, although it sounds crazy, tempered my mental health for the better.
I think the final point to walk toward in this effort is this — backpacking alone helped me get a bird’s-eye view of my own sense of being.
For me, the rewards have far outweighed the risks. Backpacking solo became a foundation on which I have laid my outdoor life and, these days, my career.
What I learned gave me the courage to tackle life in new ways, to relish what it means to be human, to advocate for who I know I’m capable of being. I now fish, hunt, and pack in ways that engage the outdoors far beyond a simple overnighter.
I count down the days until my next trip. My HOKAs, my pack, and my pups await.

Llamas, Sagebrush, Mule Deer: Check Out a Summer Hunt in Nevada
Follow Argali Outdoors' Brad Brooks as he packs llamas into the Nevada backcountry on an August hunt for mule deer. Read more…

Nicole Qualtieri has been writing about hunting, fishing, and the outdoors for 8 years.
From 2014-2017, Nicole worked for ZPZ Productions. There, she partnered with multiple hunting outlets and personalities on social media and e-commerce, including MeatEater, Randy Newberg, and Remi Warren. She also managed online communications for Backcountry Hunters & Anglers for nearly two years, and she spent six years prior in Corporate sales. Additionally, she served a year as an AmeriCorps VISTA volunteer in Bridgewater, MA, coordinating volunteers for a therapeutic recreational facility.
Based in Montana, Nicole is an avid hunter and angler. She’s a lifelong horsewoman and animal lover, and she’s recently ventured into the world of bird dogs with her young Boykin Spaniel, Bob.
Follow Us On
Subscribe Now
Get adventure news and gear reviews in your inbox!
Join Our GearJunkie Newsletter
Gear Top Stories Deals

My First Solo Trip Review: Backpacking Europe
By: Author Zachary Friedman
Posted on Last updated: February 12, 2024
Categories Europe , Solo Travel , Travel Stories
Home » Europe » My First Solo Trip Review: Backpacking Europe
In the Summer of 2011 at 18 years old, I set out on my first solo trip. For three months I backpacked around Europe through 20 countries. I traveled by train, bus, and boat. In this article, I review my first solo trip. I’ll talk about planning, packing, budgeting, my route, experiences, and more. I’ll discuss the mistakes I made and the things I did right. Hopefully, you can learn from my experience to help make your first solo trip a bit smoother and less stressful.

Why I Decided to Take this Trip
I knew I wanted to travel after high school but I didn’t know where to go or how to go about it. While studying Spain in Spanish class, my teacher taught us about Europe’s extensive rail network. She shared her experience traveling around the continent with a Eurail Pass. After some more research, I concluded that Europe sounded like an easy destination for a first-time solo traveler like myself.
Research and Preparation for My First Solo Trip
Because this was my first trip, I wanted to be as prepared as possible so I wouldn’t feel overwhelmed when I arrived in Europe. I researched every aspect of the trip extensively and planned for every possible scenario. I didn’t want any unexpected surprises. Topics of research included visas, transportation, safety, pricing, accommodation, and more.
At the same time, I wanted to keep my plans as open as possible so I didn’t pre-book much. I didn’t know how fast or far I’d want to travel because everything was new to me. I also wanted to be a bit spontaneous. This turned out to be a good idea as travel in Europe was much faster and easier than I expected.
Building my Itinerary
I started off by studying the world map that I had hanging in my room to familiarize myself with the geography of Europe. I created several potential itineraries that I thought were possible with the time I had. My plan was to fly in and out of the same airport so I created a loop itinerary.
Next, I researched each country in the region. I read travel blogs, articles, travel forums, and borrowed a Western Europe travel book from a family friend. While researching, I made a list of potential activities, museums, monuments, and points of interest that I may want to see.

A few top destinations included Stonehenge, the Louvre, the Colosseum, Trevi Fountain, the Vatican, and the canals of Amsterdam. I’m also pretty interested in WWII history so I wanted to see Anne Frank’s house, Oskar Schindler’s factory, Anne Frank House, and Auschwitz, and a few more sites.
Transportation
The next step was researching transportation. I started by shopping for the cheapest flight from Los Angels to Europe. London seemed to be the cheapest city to fly into at the time.
I also researched the Eurail Pass extensively. I looked up the time tables for each leg of my itinerary to check whether or not the Eurail pass covered it and what time I would leave and arrive in each city. When it didn’t, I looked at bus tickets. I found that Europe is so well connected that almost every route is possible.
Before the trip, I applied for my first passport. While I was waiting for it to arrive, I researched visas. I learned that my US passport allowed me to travel pretty much anywhere I wanted without arranging any visas in advance. The only one I would need was for Turkey, which was available at the border on arrival.
Accommodation
I planned to stay in hostels most nights and camp once in a while. I looked for hostels on Hostelworld and Booking.com in each city that I planned to visit. While researching, I checked prices, the location in the city, whether or not they included breakfast, and how to get there from the train station.
I only booked my first three nights in London but I wrote down the names and prices of some hostels that I might stay in along the way. Because summer is so busy, I knew that I would need to book in advance most of the time so it helped to be prepared.
Next, I started thinking about what kind of clothing and gear I would need for the trip. I needed to buy a new backpack to carry my clothing and gear. I already had most of the clothing I needed. The only other gear I needed to buy was outlet converters, a money belt, and a few small items.
Finally, I needed to make a budget. As I researched, I wrote down the price of everything I could think of including my flight, Eurail pass, reservations, bus tickets, hostels, food, drinks, entry tickets, and more. I then added it up. I’ll talk more in-depth about budgeting later on.
Telling My Family About my Solo Travel Plans
One issue I ran into while planning my first solo trip that I didn’t consider beforehand was how difficult it was going to be to tell my friends and family about my plans. I got some pushback and questioning. Particularly from my grandparents. Some people just don’t get solo travel. My dad got it. My mom was unsure but accepting.
Common questions, comments, and concerns I heard include: ‘Why are you doing that?’ ‘Why don’t you go with a friend?’, ‘Isn’t that dangerous?’ , ‘Why don’t you travel in your own country instead?’, ‘Why don’t you wait until you’re older?’, ‘How are you going to pay for that?’ ‘Why do you want to go there?’, ‘Why don’t you get a job instead?’, ‘you don’t want to do that’, ‘you’ll never make it’, etc.
At times, I began to doubt myself. I wondered if I was biting off more than I could chew. If I was capable and competent enough to complete the trip. Luckily, I was strong enough to push through the criticism and go through with my plans. I’d be lying if I said that I didn’t have second thoughts though.
I’m not the only solo traveler who has run into this issue. Telling friends and family about solo travel plans is a common concern. It comes up frequently on the subreddit r/solotravel. I’ve read some horror stories there about people’s families forbidding them to travel or even threatening to disown them if they go through with their travel plans. Luckily my family wasn’t that extreme.
If you face this problem when planning your trip, my best advice is to answer their valid questions about safety, transportation, budgeting, accommodation, etc. to put their mind at ease. Try to avoid talking about the trip as much as possible. If you let them dwell on it and bash your plans, you’ll just start to doubt yourself. No good can come of it. You may even feel tempted to cancel your trip.
For some more tips, check out this great guide to dealing with unsupportive friends and family.

Money and Budgeting for My First Solo Trip
My first major obstacle in planning my trip was making sure I had enough money. I saved up around $5000 for the trip from working at McDonald’s, 18 years worth of birthday money, and some painting work I did for my friend’s parents. This had to cover all of my expenses including airfare, the Eurail Pass, other transportation, accommodation, food, drinks, entertainment, activities, souvenirs, travel gear, etc. My goal was to make it last 3 months.
I made a rough budget to find out what this whole thing would cost me. I spent a significant amount of time researching the pricing of everything I could think of and adding it all up. To make my budget, I priced out the following:
- Travel gear- I needed to purchase a backpack, outlet converters, a tent, some clothes, new shoes, travel-sized toiletries, and a few more small items.
- Plane ticket- I shopped around to find which city was the cheapest to fly into from Los Angeles. It turned out to be London.
- Eurail pass- I considered which pass I would require based on the duration of my trip and the number of trains I planned to take. I found that the Eurail pass was economical for my particular trip. I went with the 3 month global pass.
- Hostels- I went on Hostelworld and Booking.com and researched the price of dorm beds in most of the cities that I planned to visit in order to get a rough idea of the price of hostels. I found an average price for each city, multiplied it by the number of nights I planned to stay, then added up all of the hostel costs to get a rough accommodation budget idea.
- Entry fees, tours, and activities- I looked into the prices for various things that I wanted to do while traveling including entry to museums, parks, tours, etc. I’m not really into organized activities so this cost was pretty low.
- Food- I considered the cost of restaurant meals and cooking my own food in hostel kitchens. This one is difficult to estimate. I planned to cook for myself most of the time.
- Alcohol- This one was tough to price as well. I couldn’t legally drink in my home country at the time but I knew I’d be drinking on my trip.
- Miscellaneous- I budgeted a bit extra for various unexpected expenses just to be on the safe side. I think I ended up buying a couple of new shirts and a new pair of shorts when mine wore out.
- Souvenirs- I don’t buy souvenirs but if you plan to, you’ll want to budget for them.
- Travel Insurance- I did not have travel insurance on this trip but I probably should have.
After adding everything up, my total costs came out above my $5000 budget for my three-month trip. To cut costs, I made some changes to my itinerary. I cut out a few expensive Western European cities and added a few more affordable Eastern European cities. I also eliminated a couple of destinations that my Eurail Pass wouldn’t cover. Eventually, I was able to get my budget to around $5000.
First Solo Travel Tip: Make sure you have some emergency money in case a problem arises. You don’t want to spend every penny you have on your trip. You need some backup in case an emergency arises. That way, you’re covered if your phone gets stolen or if you need to buy a ticket home in an emergency. You also need some money to re-establish yourself when you return home. For example, maybe you need to rent an apartment.
Exactly how much you need depends on your age, budget, financial situation, etc. I like to carry at least $300 in cash plus have a couple thousand extra in my checking account. I didn’t have any emergencies on this trip but it brought me peace of mind knowing I had some extra cash just in case.
For more info on travel budgeting, check out my guides:
- How to Make an Accurate Budget for Long Term Travel.
- Guide to Ultra Low Budget Travel on $10 Per Day.
Tickets and Reservations I Booked in Advance
About a month and a half before my trip, I bought the following tickets and made the following reservations:
- Plane ticket- I bought a round trip ticket between Los Angeles and London with Air Canada. It cost around $1200.
- Eurail Pass- I bought the 3 month global unlimited pass. It cost around $700.
- Hostel- I booked 2 nights in a hostel in London. I wasn’t sure how many days I’d want to stay or where exactly I’d go next so I just booked the first two nights.
- Tour- I booked myself on a tour from London to Stonehenge for the day after I arrived.

First Solo Travel Tip: Book your first few days of accommodation in advance. Having a hotel or hostel bed already reserved brings peace of mind because you know where you’re going when you arrive. It also helps when passing through immigration.
To make things even easier, consider booking your airport transportation in advance as well. Many hotels and hostels offer a shuttle service. If you plan to take public transport from the airport to your accommodation, make sure you know which bus or train lines you need to take. Also, have the hotel’s phone number and address handy in case you need to ask for directions or tell your driver where you need to go.
Gear and Packing for My First Solo Trip

Travel doesn’t really require much specialty gear. Before I left, I bought a few items including:
- Travel Backpack- I needed something lightweight and voluminous enough to accommodate all of my clothes and gear. I wanted a backpack that was small enough to carry on an airplane and large enough to accommodate 3 months worth of gear. I bought the Osprey Talon 44. This is a great bag. After 10 years of rough use on 6 continents, it’s still in excellent condition. Read my full review of the backpack here.
- Outlet converters- For charging my camera. I didn’t pack a laptop or cell phone on this trip.
- First aid kit- I bought a small first aid kit with bandages, antibiotic ointment, anti-diarrhea medicine, etc.
- Tent- I bought a cheap one person non-freestanding tent. I wasn’t sure whether or not to travel with a tent. I figured I could at least save some money by camping.
- Sleeping bag- I bought a lightweight synthetic travel sleeping bag. This turned out to be pretty useful. These days, I always travel with some type of blanket, quilt, or sleeping bag. It comes in handy surprisingly often.
- Money belt- Instead of using a wallet, I used a money belt to carry my passport, cash, and cards. This helps to protect valuables from muggers and pickpockets. I bought the Eagle Creek Silk Undercover money belt on Amazon. I’m really happy with it. I actually still use the same one to this day. It’s one of the only pieces of original travel gear that I still use. Read my full review of the money belt here.
Pretty much everything else I needed I already had. I packed:
- 1 pair of shoes
- 1 pair of sandals
- 3 pairs of socks
- 1 pair of jeans
- 1 pair of shorts
- 1 pair of swim shorts
- Glasses, contacts, and sunglasses
- A toiletries kit
The following two sections cover the first week or so of my trip. Things started out a bit rough. There is definitely a learning curve to solo travel. In this section, I’ll outline a couple of mistakes I made and the lessons I learned. I’ll also describe a few unexpected hiccups I experienced along the way. Hopefully, my stories can help you avoid experiencing similar problems.

My First Day of Solo Travel
My dad drove me to LAX and dropped me off. I don’t remember being particularly nervous which is surprising because I’m generally a pretty anxious guy. I felt confident and prepared.
The flight itself went smooth. I checked in and checked my backpack then boarded my flight without any issues. I had a brief stopover in Toronto before catching my first intercontinental flight to London.
After landing in Heathrow, the first problem immediately arose. While standing around the baggage claim, the crowd slowly thinned out until I was the last guy standing next to the belt. My bag didn’t arrive. Air Canada lost my backpack full of all my travel gear that I had so carefully packed. Stupidly, I packed everything in my backpack, including my contact lenses and camera.
I walked over to the baggage counter and told the agent that my bag didn’t show up. The guy was incredibly unsympathetic. He just handed me a form. All I could do was fill it out and hope that Air Canada found my backpack. I was offered no compensation.
Luckily, I did have my debit cards so getting cash wasn’t a problem. After clearing customs and immigration, I navigated the tube into central London.
I had a bit of trouble finding my hostel. I ended up wandering around Borough High Street for around an hour before I managed to find the entrance. Once I found the place, I checked in and went to sleep. This was my first day of solo travel. So far I hated it.
Over the next couple of days, I walked down to the nearest payphone to call Air Canada a couple of times per day. I tried my best to get some type of compensation out of them but they offered nothing. They just expected me to wait in the city for my bag to arrive.
Finally, on the third day, my backpack made it to London. Someone dropped it off at the hostel reception. Now my trip could begin.
A few important lessons I learned on my first day of solo travel:
- Only bring a carry-on bag- I overpacked. Probably because this was my first trip and I didn’t know exactly what I would need. Now I know that a carry-on-sized bag is sufficient to accommodate enough gear for almost any trip. These days, I never check a bag unless I’m packing camping gear. Check out my guide to checked vs carry-on luggage for more info.
- Never fly Air Canada- At this point, I have flown on dozens of airlines and Air Canada has the absolute worst customer service that I have ever experienced. I found this particularly shocking since Canadians are such nice people in general. I will never fly Air Canada again.
- Always have travel insurance- I probably could have gotten some type of compensation for the trip delay. Luckily my bag was found this time. If it wasn’t I would have been out several hundred dollars. Travel insurance would have come in handy.

My First Solo Trip Begins
From London, I decided to travel to Amsterdam. The Eurostar cost too much so I decided to take the bus then transfer to a train. I left London without knowing exactly how I was going to get to Amsterdam, where I would sleep, or when I would arrive. This turned out to be a mistake.
I caught an afternoon bus from London to Brussels. There, I activated my Eurail pass and caught my first European train. I ended up on an afternoon train to Antwerp then transferred onto a night train to Amsterdam. Unfortunately, I didn’t arrive until midnight.
This was my mistake. I arrived in an unfamiliar city in the middle of the night without any accommodation booked. I had no way of accessing the internet to look for a hostel because I didn’t have a phone and all of the internet cafes were closed. At this point, my only options were to spend the night in the train station or go out wandering around the city looking for a place to sleep.
I walked out of the train station, not knowing that I couldn’t re-enter until the following morning. Essentially, I ended up spending a long, cold night wandering the streets of Amsterdam with my backpack. I didn’t know where to go so I just walked.
Over the course of the night, I ended up meeting a series of strange and interesting characters including a drunken cyclist, a homeless Welshman, and an odd bald guy. The whole night was just bizarre, like a fever dream. I didn’t sleep at all. Luckily I didn’t get robbed. You can read about my night in Amsterdam here.
The following day, I started my search for a place to sleep for that night. After visiting half a dozen hostels, I realized that everything was fully booked or out of my price range. I never considered that Amsterdam would be fully booked out and I couldn’t afford to pay $50 per night for a dorm bed. This is peak summer season travel in Amsterdam.
Eventually, I found an internet cafe and went online to look at my options. I knew that worst case, I could catch a train to another city. Of course, I really wanted to experience Amsterdam.
Hostelworld had nothing in my price range. I found a campground just outside the city that was accessible by tram. I ended up camping there for the next few nights. This turned out to be cheaper and more pleasant than a hostel anyway. Luckily, I was traveling with a tent.
From this ordeal I learned to:
- Avoid arriving in an unfamiliar city late at night or early in the morning without confirmed accommodation and transport plans- Everything becomes more difficult at night. For example, public transportation often stops running, hotels and hotels lock their doors for security reasons, and restaurants are all closed. Arriving at night is also slightly more dangerous because most crime happens at night. You don’t want to be out wandering around a foreign city in some random neighborhood at 2 am looking for a hotel with a vacancy. Nothing good can come of it. If you plan to arrive in a new city in the middle of the night, book ahead and arrange your transport in advance. Also, make sure your hotel reception expects you. Better yet, arrive during the day.
- Book ahead in popular destinations or during peak season- Some touristy cities, like Amsterdam, Barcelona, and Paris for example, fully book out during the busy season. Sometimes you need to book up to a couple of weeks in advance in order to get a bed in a decent hotel, hostel, or Airbnb.
- Carry a tent- You can almost always find a place to camp. Most campgrounds won’t turn you away, even if they’re packed. There is always a bit of space. If you have a tent, you can also wild camp. If you don’t want to carry a tent, consider packing a hammock. For more info on camping while traveling, check out my guide to traveling with a tent.

The Rest of the Trip
The trip started out pretty rough but I feel like I learned a few valuable travel lessons early on. From there on out, it was smooth sailing.
A few highlights from my first solo trip included:
- Stockholm- For whatever reason, I loved this city. I also met a great group of fellow travelers at the hostel.
- The hostels- I’m probably in the minority here, but I love staying in hostels. This trip gave me my first hostel experience. I’ve stayed in hundreds since.
- The train rides- On this trip, I learned that I’m a train guy. While traveling, I ride them whenever possible. This trip gave me my first taste of train travel.
- Prague- This is probably my favorite European city. It’s cheap, beautiful, and the beer is great. I love it.
- Wandering around on foot- Most European cities are compact and walkable. For the most part, you don’t have to worry about wandering into a dangerous neighborhood. One of my favorite things to do while traveling is walking around. Europe is perfect for this.
- Krakow- Another historic and beautiful European city. It’s affordable too.
- The ferry ride from Greece to Italy – I slept on the deck in my sleeping bag. The weather that night was perfect.
- Istanbul- As an inexperienced traveler at the time, this city felt really exotic.
- Camping- Many European cities have campgrounds within the city or just outside. They’re usually accessible by public transport. My favorite places I camped were Munich and Amsterdam.

My First Solo Trip Route
I put my Eurail pass to good use and ended up visiting about 20 countries during my first solo trip. On average, I stayed in each city for 3-4 nights. That gave me enough time to see the main sites and go out one night. If I was really enjoying a city, I’d stay 4-5 nights. Travel time between cities was always less than a day.
I visited the following cities during my first solo trip:
London – Amsterdam – Copenhagen – Stockholm – Berlin – Munich – Prague – Krakow – Bratislava, Slovakia – Vienna – Budapest – Bucharest – Sofia – Istanbul – Thessaloniki, Greece – Rome – Zurich – Interlaken, Switzerland – Barcelona – Madrid – Paris – Bruges
My personal favorites were Amsterdam, Stockholm, Prague, Krakow, Istanbul, and Barcelona.

The Eurail pass covered every trip except London-Brussels, Sofia-Istanbul, Istanbul-Thessaloniki, and Bruges-London. I bought these tickets separately at the bus or train station.
Accommodation: A Note about European Hostels
Europe is the birthplace of youth hostels. The first one opened in Germany in 1912. That means that travelers have been hosteling in Europe for over 100 years. My dad backpacked Europe in the 60s and probably had a similar experience to me.
At this point, I have stayed in hostels on 6 continents. In my opinion, Europe offers the best hostels in terms of facilities and cleanliness. There are also a lot of them. Hostels are absolutely everywhere on the continent.
Unfortunately, European hostels are expensive and prices keep increasing. During my first solo trip, the most expensive hostels cost around $30 per night in Stockholm and Amsterdam. Average prices were around $7-$15.
These days, hostel prices are significantly higher. In most Western European capital cities, expect to pay $25-$35 per night for a dorm bed in a centrally located hostel during busy season. In the most expensive cities like Paris, Amsterdam, Zurich, Oslo, and Stockholm, you might pay $40-$50 during peak season. That’s getting a bit too pricey for most backpackers traveling long term.
Luckily, prices are still reasonable in Eastern Europe. For my next European trip, I plan to visit Ukraine, Moldova, the Balkans, and the Caucuses. Hostel prices still seem very reasonable in that part of the continent.
First Solo Trip Tip: Stay in Social Hostels
Solo travel gets lonely. Particularly at night. To help you meet people, stay in a social hostel. Hostels offer a common area, bar, walking tours, group meals, pub crawls, and a variety of other social events. These offer great opportunities to meet fellow travelers to go out with, sightsee with, and even travel with.
One thing to remember when booking is that hostel atmosphere varies greatly. Some are more oriented to partying while others are more chilled out. Some are designed to be social while others are geared pretty much only for sleeping. Be sure to check reviews before booking. Check out my guide to choosing a hostel for some helpful tips.
If you’re not comfortable sleeping in a dorm room with other people, most hostels offer private rooms. This way, you get to take advantage of the social aspects of hostels while still maintaining some privacy. Couchsurfing is another great social accommodation option.
Transportation: European Trains and the Eurail Pass, Budget Airlines, and Buses
Europe has maybe the best transportation infrastructure in the world. Between trains, buses, and budget airlines, you can travel pretty much anywhere on the continent quickly and usually affordably.
The European rail system, in particular, is world-class. Trains are reliable, comfortable, fast, and the system is extensive. You can travel almost anywhere by train. It’s impressive if you come from a place where train travel is less common.

I bought the 3 month global unlimited Eurail pass before my trip. At the time, the pass cost around $700. While writing this article, I checked the price on their website and found that the pass costs about the same now. Somehow the price hasn’t increased in 9 years. That’s actually pretty impressive.
I absolutely recommend traveling by train in Europe but I’m still not sure whether to recommend the Eurail pass. On one hand, I used my Eurail pass extensively and definitely feel that I got my money’s worth. The pass even included my fairy fare from Greece to Italy. On the other hand, I think it would be easier, and for some trips cheaper, to just buy tickets as you go.
One thing that annoys me about the Eurail pass is the fact that you have to pay a reservation fee for most longer routes. They generally charge 10-15 euro per trip. Shorter routes often don’t require a reservation. You just hop on. The reservation fees add up quickly. I probably spend a couple of hundred Euro to reserve seats.
If the train is too expensive, I recommend you check bus ticket prices. It’s almost always cheaper to travel by bus. A few budget European bus lines include Flixbus, Megabus, and Eurolines. Bus companies vary by region as well. If you shop around, you can score some great deals. For more info, check out my bus vs train travel guide.
When traveling between cities that are more that a day apart overland, consider flying instead. European budget airlines offer surprisingly low rates. In some cases, it’s cheaper to fly than take the bus. A few popular European budget airlines include Ryanair, Norwegian Air Shuttle, EasyJet, Wizz Air, Pegasus Airlines, AirBaltic, and Eurowings.
First Solo Travel Tip: Travel by night. This benefits you in two ways. First, you’ll save money on a night of accommodation. Second, you’ll save valuable time. Rather than wasting a whole day sitting on the train or bus, you can sleep through the trip and wake up in a new city ready to explore. Of course, your sleep will suffer unless you book a bed in a sleeper car.
Accessing Money on My First Solo Trip
Before my trip, I got my first debit card from my local credit union. I was still 17 while planning the trip so I had to have one of my parents sign for the card. I kept most of my money in my checking account so I could access it through ATMs. At the time, I did not have a credit card. As I traveled, I withdrew cash from ATMs. I never had a problem finding one in Europe.
I also left home with about $500 USD in cash, which I stored in my money belt. This was as a backup just in case my debit card was lost, stolen, or shut off for some reason. Occasionally, I would exchange some cash for the local currency when I found a good exchange rate.
The cash came in handy on one occasion. For whatever reason, my debit card did not work in Romania. Even after calling my bank, they couldn’t figure it out.
I ended up spending a decent chunk of money on currency exchange fees and ATM fees. I learned my lesson after this experience.

These days, I use a travel credit card instead of a debit card or cash whenever possible. I do this for three reasons.
- There are no exchange fees- Travel credit cards eliminate most fees. This saves you 1-3% on every transaction. Most debit cards charge a fee. You also avoid the conversion fee of exchanging cash.
- Using a credit card adds security- Credit card companies can do chargebacks. They can refund you if your card gets overcharged or stolen and used by a criminal. This is possible because credit card companies usually don’t pay vendors until the following month. They still have the money so they can give it back to you if you fall victim to fraud or a scam.
- I can take advantage of the points to travel more- Rewards points add up fast. Most credit card companies offer bonus points when you open a new card as well. For example, I paid for my round trip airfare to Africa with credit card points. That saved me around $1200.
I also carry a debit card with no foreign transaction fees or ATM withdraw fees. This has saved me hundreds of dollars in fees over the years.
Things I Would Have Done Differently on My First Solo Trip
Even thought the trip was a success, it wasn’t perfect. If I were to take this same trip again, I would:
- Pack lighter- I didn’t want to buy everything new for the trip. I just didn’t have the budget. I ended up packing heavy clothing and gear that I already owned. As a result of this, my pack was pretty heavy. I’ve since upgraded to mostly ultralight gear. A lighter pack makes travel so much easier and less stressful. For help packing, check out my ultralight travel packing list.
- Pack better shoes- I packed one pair of Converse All-Stars. These are great looking shoes but just aren’t comfortable enough for long walks. Over the course of the trip, I walked several hundred miles in them anyway. My feet hurt. These days, I pack running shoes or trail runners. I can walk all day and experience zero foot pain.
- Spend more time in the outdoors- Europe offers some beautiful natural scenery. I spent most of my time in cities. On a future trip, I’d like to do some hiking in the Italian Dolomites, Norwegian Fjords, and Mont Blanc.
- Spend less time in Western Europe – The region is beautiful and historic but too developed and touristy. In fact, the central tourist zones are so clean and well kept that they feel like Disneyland. I found Eastern Europe to be much more interesting. Having said this, I’m glad to have visited the famous western European capitals.
- Spend more time in smaller towns- I mostly stuck to big capital cities like Berlin, Rome, Paris Amsterdam, London, Stockholm, etc. On a future trip, I would like to explore some second tier cities like Bergen, Norway, and Frankfurt, Germany. I would also like to visit some rural regions.
- Visit fewer destinations- I was packing up and traveling to a different city every 3-4 days. I ended up visiting about 20 countries in just 3 months. I wanted to see everything, which got exhausting. These days, I travel much slower. I like to take some time to get to know each city and relax a bit. I’m over my country counting phase.
Things I Should Have Left at Home
Most first time travelers end up overpacking. Myself included. Some of the things that I shouldn’t have packed include:
- DSLR camera- Too bulky and heavy. I don’t even travel with a camera anymore. I just use my phone. Of course, phone cameras were pretty bad at the time of this trip so that wasn’t really an option.
- Some of my clothes- I packed too many clothes. I could have left a couple a couple t shirts, underwear, and socks at home. These days, I just pack a couple of shirts and pants and buy more when my originals wear out.
- My heavy tent- The thing weighed like 4 pounds. I still carry a tent. Just an ultralight model. I have the Big Agnes Fly Creek HV UL 1 and love it.
- Sleep sheet- While researching for the trip, I read online that it’s a good idea to sleep in your own sheet or sleeping bag liner in hostels for hygiene reasons. This is unnecessary. Hostels are clean enough.
Loneliness During My First Solo Trip
During this trip, I quickly learned that solo travel is a lonely experience. I spent hundreds of hours alone in transit. I cooked and ate many meals alone. Much of the time I went sightseeing alone. This isn’t necessarily a bad thing. It’s just something to consider before taking a solo trip.
This wasn’t really a problem for me because I’m a bit of a loner naturally. Having said that spending so much time alone can take its toll. Sometimes I wished I had someone to talk to and enjoy the experience with. Sometimes I wished I had someone to suffer with during the low points.
Of course, most of the time I wasn’t alone. I met fellow travelers as well as locals everywhere I went. At most hostels I met people to sightsee with, eat with, and go out with. On a couple of occasions, I even met people to travel with for short stints.
Luckily, meeting people as a solo traveler is pretty easy. A few ways to meet people include:
- Stay in a social hostel- Choose a hostel with a large common area and a bar. These features make it easy to meet fellow travelers. If the hostel offers outings or group activities, even better.
- Go on a free walking tour- These are incredibly common in Europe. You’ll definitely meet fellow travelers.
- Try to keep a positive attitude and try to look approachable- If you appear friendly, you’ll make friends more easily. People don’t want to talk to you if you look like you don’t want to be bothered.
- Share food and drinks- Buy some beers or snacks and share them with other guests in the hostel. You’ll make friends quickly.
- Go to a bar- Hotel and hostel bars are great places to meet people.
- Stay with a local host or go couchsurfing- This way, you’ll automatically have a friend when you arrive.
- Chat people up while in transit- You might make a friend and the time passes faster.
- Take a class- Cooking, yoga, diving, and surfing classes are all great places to meet people. You’ll instantly become frineds with your classmates because you all share a common interest.
- Volunteer or work- You’ll become quick friends with your host and fellow volunteers while working together.
For more help, check out my guide to meeting people while traveling alone.
First Solo Travel Tip : If you’re thinking about taking your first solo trip, it’s important to recognize that you will be spending a great deal of time alone. Even if you’re a chatty people person, you won’t meet people everywhere you go. Some hostels aren’t that friendly. In some cities you simply don’t meet anyone you connect with. You will be eating alone, sightseeing alone, and sitting alone for hours on the bus or train. If you’re the kind of person who needs constant social interaction, you may not enjoy solo travel. It’s not for everyone, which is fine.
A Note About Technology on My First Solo Trip
When I took this trip in 2011, smartphones and Wifi were just becoming common. I didn’t bring any kind of internet-connected device. I didn’t even bring a regular cell phone. During the trip, I only saw a handful of travelers with laptops or phones.
Back then, pretty much every hostel offered computers in the common area. I used these to research and make bookings as I went and to keep in contact with family and friends through email and Facebook. Occasionally, I used payphones to call home. I feel like I got to experience the tail end of the pre-smartphone era of travel.
Travel has changed significantly since 2011. These days, I always bring my phone and laptop when I travel. Every hostel has Wifi. Common computers and payphones are a thing of the past. A few major advantages of technology include:
- Navigation- GPS makes it so much easier to find hostels, restaurants, points of interest, transit stations, etc. Even when I don’t have internet, I can download maps from Google Maps or Maps.me and use my phone’s GPS to find where I need to go. One of the most annoying parts of my first solo trip was finding the hostel when I arrived in a new city. Before leaving the previous hostel, I had to handwrite directions to my next hostel. I could usually get to the neighborhood pretty easily but actually finding the hostel was a challenge. In Budapest, I spent almost two hours wandering around until I finally found the hostel’s postage stamp sized sign on the side of a building. Now I could walk right there with my phone.
- keeping in touch- These days, I can call and text my friends and family back home and around the world whenever I want. There are dozens of free apps available including WhatsApp, Facebook Messenger, Snapchat, WeChat, etc. Sometimes I buy a local SIM card so I can call local numbers and use mobile data. Calling home was incredibly expensive during my first solo trip.
- Communication with locals- With Google translate, I can communicate with pretty much anyone in their language. I usually download the offline version if I don’t have a local SIM card with mobile data.
- Currency conversion- Instead of trying to calculate the prices in my head, I can whip out my phone and quickly convert prices into dollars with the most up to date exchange rate. This helps greatly with budgeting and avoiding scams.
A Few Tips for Your First Solo Trip
- Choose your destination wisely- Some places are easier to solo travel than others. For your first solo trip, you probably don’t want to go to Nigeria or Afghanistan. Choose an easy destination with established tourist infrastructure. This makes it easy to get around and find decent accommodation. Choose a region that is popular among backpackers. You’ll have an easier time meeting people. Also, consider the language barrier. A few great destinations for first-time solo travelers include Southeast Asia, Western Europe, and Central America. For some more ideas, check out my guide to the best solo travel destinations.
- Meet people- As mentioned above, traveling alone doesn’t mean you have to be alone all the time. Put some effort into meeting fellow travelers and locals. Looking back, some of my best memories of the trip were created with the people I met along the way.
- Try to blend in- Tourists are a target for scammers, pickpockets, and muggers. By blending in, you reduce your risk of falling victim to a crime. To blend in, try to dress like a local rather than a tourist and avoid speaking too loudly. I blended in pretty well on my first solo trip. In the hostel in Stockholm, someone recommended I roll up my jeans at the bottom so I would blend in more. I guess that was in style in Northern Europe at the time. About 5 minutes after I walked out of the hostel some guy approached me speaking Swedish. After he learned that I didn’t speak the language, he told me that he thought I was a local because I was dressed like a Swede. It was a funny coincidence.
- Always have a backup plan- It’s important to have a plan B in case things turn south. Carry some extra cash in case you need to take a taxi back to your hotel. Upload copies of all of your important documents to the cloud in case your passport gets stolen. Make sure you always have the address of your hotel on your person in case you get lost. Try your best to be prepared for every situation.
- Pack light- Schlepping around a massive 90 liter backpack full of 50 lbs of gear grows old quickly. Try to pack everything you need into a carry-on-sized bag. 40-50 liters is ideal. Try to keep the total weight under 10 kg or 22 lbs if possible. If there is any question about whether or not you’ll need something, just leave it at home. Be sure to weigh your luggage before you leave to make sure it meets the airline weight limits. A light and compact bag allows you to avoid luggage fees. You can also easily walk with it across the city. You don’t need transportation everywhere you go.
- Don’t plan too much- It’s fine to make a basic itinerary but I recommend you avoid booking anything beyond the first few days. Try to leave some room for spontaneity. Your plans will probably change once you reach your destination anyway. For example, maybe you end up falling in love with a particular city and you decide that you want to extend your stay. Maybe you end up hating a country and want to get out of there. If you already planned everything and booked everything in advance, changing your plans becomes difficult. If you keep your plans open, you can play it by ear.
- Slow down- Many first-time solo travelers try to cram too many destinations and activities into their itinerary. I made this same mistake. Instead of trying to do everything, pick out a few things to do in each city. Instead of visiting 10 cities in a month, visit 3 or 4. Give yourself time to relax and explore. You’re on vacation after all.
- Do your own thing- The best part of solo travel is the absolute freedom of it. You can do whatever you want without having to take anyone else’s preferences into consideration. It’s all about you. If you feel like renting a bike and riding across the city, you can. If you feel like going to a water park, you can. You also get to avoid things you don’t like doing. If you hate museums, skip them. If you don’t care for the local cuisine, eat something else. It’s your vacation. There is no right or wrong way to solo travel.
Final Thoughts about My First Solo Trip
I realize this is a cliché, but this trip was life changing. Not in the sense that I ‘found myself’ or that I changed in any way. Rather, that I found what I wanted to do with my life. I wanted to travel. By the time I arrived back home, I was already planning my next trip, Asia.
10 years have passed since I took my first solo trip. During that time, I designed my life around travel. So far, I have visited 60 countries on 6 continents with plenty more trips planned for the future. I also started this travel blog and become a digital nomad. In this sense, the trip changed the course of my life.
Are you a solo traveler? Share your story about your first solo trip in the comments below!
More from Where The Road Forks
- Solo Travel Vs Group Travel: Pros and Cons
- 35 Types of Tourism
- 22 Benefits of Traveling
- Backpack Vs Suitcase: Pros and Cons
- Am I Too Old for Hostels?

Zachary Friedman is an accomplished travel writer and professional blogger. Since 2011, he has traveled to 66 countries and 6 continents. He founded ‘Where The Road Forks’ in 2017 to provide readers with information and insights based on his travel and outdoor recreation experience and expertise. Zachary is also an avid cyclist and hiker. Living as a digital nomad, Zachary balances his professional life with his passions for hiking, camping, cycling, and worldwide exploration. For a deeper dive into his journey and background, visit the About page. For inquiries and collaborations, please reach out through the Contact page. You can also follow him on Facebook.
Sharing is caring!
Sign me up for the newsletter!
5 Tips For Your First Solo Backpacking Trip
A night alone in the backcountry can change your life.
By: Ali Gates + Save to a List

Last year I ventured on my first solo backpacking trip, much to the concern of my friends and family. The last time I had been backpacking was on an ill-fated weekend in 7th grade, but despite my inexperience I was determined to go. I researched, made an extensive list, and borrowed gear from friends. My trip was certainly an adventure, but turned out well thanks in most part to my preparation. I’ll share with you some lessons learned on the trail so you can better prepare for your own solo trek:

Photo: Jason Zabriskie
1. Make a solid plan
Every list I consulted advised me to know exactly where I intended to backpack, and to leave a copy of the map with an emergency contact. I was also very thoughtful with my trail choice, keeping my level of ability and friends’ concerns in mind. The Crater Lakes trail isn’t terribly long, so if I sprained an ankle I felt I could realistically get back to my car within a reasonable time. The trailhead is also relatively close to my home, so if I didn’t check in with my emergency contact at the appointed time I would know that help would be to me in just a few hours.
2. Bring protection you are comfortable with.
Being a woman alone on the trail is a scary idea - not only do you have to worry about ubiquitous problems such as wildlife, weather, and injury, but you also have to be concerned about your safety from other hikers. It’s a sad truth, but women are attacked on the trail, and you need to bring some form of protection you are comfortable with. Many options didn’t work for me: I don’t have a gun (and don’t plan to get one), and my multi-purpose knife is sticky with jelly and not very protective. Instead, I chose to bring my dog, Nanook, and pepper spray. Even though Nanook is a gentle giant, I supposed the two of us would make enough noise to scare off wildlife predators, and he would defend me if attacked by a human predator. Pepper spray would be my backup if needed in an emergency. Figure out what you feel most comfortable with, and make sure you know how to use your chosen form of defense.

Scott Kranz
3. Prepare to feel alone
This seems obvious for a solo trip of any kind, but disconnecting from everything is a big change. Assign yourself a task or bring activities in order to enjoy this time off the grid rather than feel lonely or isolated. A sketchbook, camera, or journal are ideal for enjoying your solace. I was asked by a friend to hunt for porcinis, so this kept my focus during the hike, but I also brought along a book and indulged in reading by the lakes.
4. Count on things to fail - and prepare for it
Every article and list tells you to test your equipment before you go, and I did - multiple times. Yet when I settled down to cook some hot water in a borrowed Jetboil for dinner, I could not figure out how to turn it on. I had practiced it in my kitchen the night before, but I could not get it to work! I morosely chewed on some Power Bar energy blasts for dinner, and decided to go to sleep early to avoid my hunger. Decide what would make your trip miserable if it were to fail, and bring backups. Strap breaks on your pack? Bring some extra duct tape. Your camelback springs a leak? Make sure you have iodine tablets. For me, even having a few extra granola bars would have made a huge difference, and a much more enjoyable evening.

Photo: Elise Sterck
5. Be confident in yourself!
This honestly was the best preparation I did for my trip. I received lots of concern and worry from friends and family, which I respected, but did not let it diminish my confidence in myself. This was also incredibly helpful when things got tough heading up the trail: I was exhausted, my pack was heavy, and a thunderstorm was closing in fast. I had to trust my footing and keep putting one foot in front of the other to reach the lakes and make camp. With no one else to give you motivation and encouragement, you have to rely on your own skills and positivity to push through. Here is where I went on my first solo backpacking trip: Crater Lakes in Indian Peaks Wilderness Area Check out this list of things to think about when packing for your next backpacking trip.
Cover photo: Elise Sterck
We want to acknowledge and thank the past, present, and future generations of all Native Nations and Indigenous Peoples whose ancestral lands we travel, explore, and play on. Always practice Leave No Trace ethics on your adventures and follow local regulations. Please explore responsibly!
Do you love the outdoors?
Yep, us too. That's why we send you the best local adventures, stories, and expert advice, right to your inbox.

Cooking in the Southwest with the Gerber Gear ComplEAT Camp Cook Set
Tanner Price

10 Things you need to do in Baja
wyld honeys
Ready for an unforgettable adventure in Baja, Mexico? We've rounded up the top 10 things you need to do while you're there. From visiting the famed boojum trees in Cataviña to exploring secluded waterfalls, there's something for everyone. by: wyld honeys

Journey to Wyoming’s premier snowmobiling destination: Togwotee Mountain Lodge
Samuel Brockway
A couple of snowmobiling newbies hop aboard some steel horse sleds to explore the mountains of Wyoming.

Hiking in comfort: a review of Danner Mountain 600 Evo boots
Meghan White
Picture this: a crisp morning in San Diego, the sun peeking over the horizon, casting a warm glow over Oak Canyon in Mission Trails Regional Park.

A peek through God's window
Heather Arnold
There is something about the promise of a warm sunrise and the open road. I answer the call of the mountains. And find peace and calm. And a healthy dose of waffles and walks!
- Local Adventures
- Tours and trips
- Camping Nearby
- Outbound PRO Membership
- Add your property
Mobile Apps

© 2024 The Outbound Collective - Terms of Use - Privacy Policy
- National Parks
- Tiny Houses
How To Go Backpacking Solo & Start Enjoying Solitude Like No Other
Posted by Sarah Boles December 31, 2021 Updated July 26, 2022
Being in the wild is dope, and so is keeping it clean for future generations. If you’re hiking, camping or backpacking, you can minimize your impact on the environment with Leave No Trace principles and ensure everyone has a good time with basic trail etiquette tips. Now let’s get wild.
There’s something about feeling completely alone — vulnerable, yet confident — that is empowering. It’s a sort of grounded invincibility, the feeling that you can successfully exist alongside Mother Nature on your own. This is the reason behind backpacking solo.
Will you spend every moment in a zen like state, ensconced in fresh air? Well, no. When you go solo, you alone have to carry all the things and manage all the risks. Inevitably there will be some cursing, yelling, or tears. But you alone have the power to mitigate many of those risks through training and careful planning.
Taking the plunge into solo backpacking requires preparation. Most people focus on training the body to handle the physical assertion required for the trip, but training your mind is equally important. Take the time to build up your mental game through learning new skills/knowledge, and practicing regulating your emotions before you head out on trail alone.
A successful solo adventure also relies on careful planning when it comes to your route and what you pack. And if you take nothing else from reading this, the most important thing is to make a detailed itinerary, share it with someone you trust, and then stick to it.
Related Read: 11 Backpacking Trips in the U.S. That Should be on Your Bucket List
Step 1: Perfect Your Mental Game
The key to a successful solo backpacking trip is not picking the trails with the best weather or the most jaw-dropping views. The best way to have a safe, fun trip is to train your brain. Get real good at having honest conversations with yourself, a skill that will come in handy when you’re alone on trail.
Knowledge is Power
Before you decide where to go, have a conversation with yourself where you assess your abilities, skills, strengths and especially weaknesses when it comes to backpacking. The thing about going solo is you cannot rely on anyone else to be the expert when something goes wrong.
Not sure how to stabilize your arm if you fall and dislocate your shoulder? Consider taking a wilderness first aid course. Have to think for a minute how to interact with a mountain lion while on trail? Brush up on your knowledge of wildlife, plants, and bugs in the area, so you can react confidently and immediately.
Get Comfy Being Alone
Equally important to gaining knowledge about aspects of backpacking is having a good handle on regulating your emotions. You need to be prepared to feel alone. After all, getting some quality alone time in nature is probably why you’re doing this, but that doesn’t mean you’re good at being alone.

Bring something (light) to entertain yourself if you start to get too much in your own head. That could be a notebook, playing cards, a book, binoculars, a premade scavenger hunt — anything that will give your mind a change of pace.
Have a plan to keep yourself calm if something goes wrong, and practice it. That may look like striking your favorite yoga pose, taking hot cocoa or elevator breaths, or pulling your favorite bubble popper out of your pack when you start to feel anxious . Figure out what mindful strategy works best for you ahead of time so you have it ready when the unexpected arises.
Another way to grow your confidence for backpacking solo is a dress rehearsal. Pack everything up and go car camping somewhere for a night. Put some miles under your belt with a full pack on and build some confidence with self-sufficiency around your campsite.
Step 2: Choose Your Adventure
Once you’ve addressed your knowledge gaps and practiced being alone outside, it’s time to hammer out the details of your adventure. Just because you’re excited to head out alone, doesn’t mean your first solo trip needs to be epic. Consider starting small, as in: low mileage, short duration, and small elevation gain.
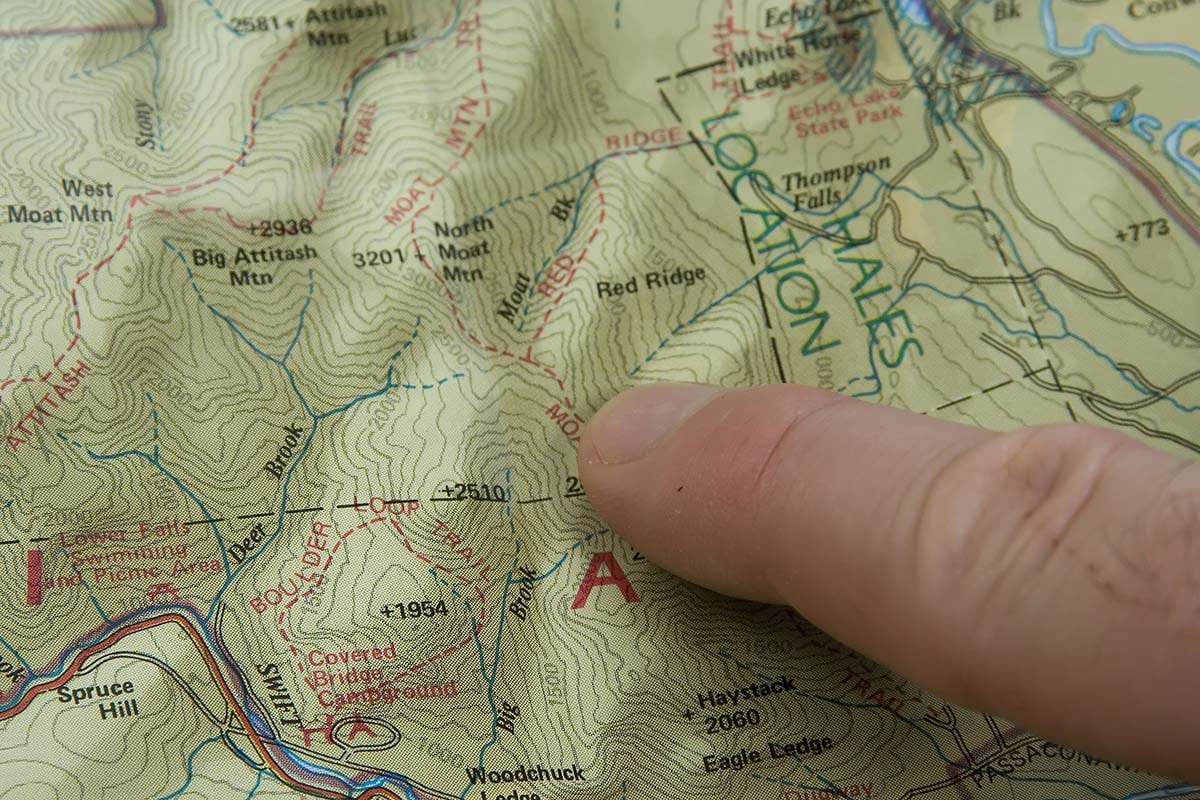
Another way to set yourself up for success is to stick to somewhere you know. Pick a trail you’ve hiked before, or an area you’ve already backpacked with a group. Going somewhere familiar will help you visualize your success and help relieve some of your stress both pre-trip and on the trail.
If you’re not used to sleeping in very remote places, don’t choose one for your first solo trip. Pick trails you know will have other hikers and plan to set up camp in popular locations.
Learn from those who have done it before by joining local Facebook groups, online forums, and apps for specific tips and information. These will help you paint a detailed mental picture of what your adventure will be like and and allow you to find up-to-date answers to your extremely specific questions.
Some great examples include the 14ers.com mobile app if you’re planning to hit the trailheads for any of Colorado’s 14,000 foot peaks, and the Big Bend Chat, a comprehensive forum for all things related to the Texas national park. If you don’t find a solid resource for your specific area, take a glance through recent comments for your prospective route on an app like AllTrails .
Step 3: Pack for Solo Backpacking
Once you’ve designed your adventure, it’s time to pack! Packing for a solo backpacking trip is just like packing for group backpacking, except you get to carry it all.
Embrace the Ultralight Mindset
Ultralight backpacking is all about being extremely purposeful about what you pack, which makes it great for solo backpacking. After all, every ounce matters when you have to carry it yourself.

Unfortunately making the transition to ultralight gear can come with a hefty price tag. The three most common ways to go “ultralight” are to cut weight on your sleep system, shelter, and pack. Even if you have the extra cash to drop on new gear, you may not want or need to. Here are some ways you can cut weight with what you already have.
Sleeping bags are a great way to save weight, because they can vary by a matter of pounds. Down bags or comforters are warmer, lighter, and pack down smaller than synthetic options. Instead of bringing a pillow, save space by filling your bag’s stuff sack with clothes and covering it with a bandana or a Buff. Foam sleeping pads are not your lightest option, but if that’s what you have, consider trimming the pad to your height, or even just the length of your torso, to save weight and space.
As far as shelter goes, think beyond the tent. Depending on the climate, terrain, and your comfort level, you may not need one at all. You may be able to set up your tent using your hiking poles or tying it to a tree, which would free up weight and space by leaving your tent poles at home. If your area has plenty of trees, you could bring a hammock instead.
The 10 Essentials & the 3 Ws
Almost 100 years ago, a wise group of outdoor enthusiasts put together a list of 10 essential items to have with you in the backcountry. With some modern adaptations, the “10 essentials” are still applicable today.
The 10 essentials include: navigation, headlamp, sun protection, first aid, knife, fire, emergency shelter, food, water, and clothing. In addition to the 10 essentials, you of course need a sleep system (pad, bag, tent), protection, and proper footwear.

Since solo backpacking trips have a narrow margin for error, I find it helpful to pack the essentials while keeping the 3 W’s in mind: weather, wilderness, and wildlife. For example, weather and the type of wilderness in the area will determine how much water you need to carry for each day on trail. Hot temps and lack of shade of course lead to consuming more water. Whether your trail passes near running streams or stagnant water will determine what type of filtration device to pack.
Pro tip: Be thorough when researching water for your trip. Some backpacking routes have designated places to cache water ahead of time.
More Honest Conversations
Those conversations you’ve been having with yourself will come in handy while creating your packing list too. Now’s the time to have a chat with yourself about your comfort level on a few things like sleep systems and protection.
Where do you draw your line for comfort when it comes to sleep, and does that need to be adjusted now that you are responsible for carrying everything? Again, weather and wilderness will help you decide. Consider whether you will likely sleep on rocky ground or a fresh layer of pine needles.
As far as protection, what types of wildlife could you encounter? Is a bear canister or bear spray necessary? What about mosquitos, ticks, or black flies? Are other humans or mountain lions a safety concern? Decide what you feel necessary to pack to protect yourself from threats, and make sure you’re comfortable using it.
The entire process of determining what to pack, make sure you always come back to the ultralight mindset. Is it necessary? Is there a lighter option that I feel comfortable using instead?
Step 4: Final Preparations for Solo Backpacking
In the weeks/days leading up to your first solo backpacking trip, here’s some clutch things to do to ensure you are as prepared for your adventure as possible.
Finalize & Share Your Itinerary
Now’s a good time to revisit those Facebook groups and online message boards, as well as weather apps to get up to date information on trail conditions, water availability, wildlife reports, and possible hazards/closures. Make any necessary changes to your plan before you send the final version to your trusted person(s).
Speaking of your detailed itinerary, make sure it includes where you plan to hike and camp, where you plan to park your car (or other transportation you will use), when you expect to return, and who to contact in case you don’t return by a certain time.
Take what you learn from your last minute crowdsourcing to also make adjustments to your final gear list. If you were on the fence about needing things like microspikes or snowshoes, hopefully you can gain some clarity based on others’ recent experiences. I tend to put all my “I’m pretty sure I won’t need it, but …” gear in a bag and stash in my trunk. That way I have it at the trailhead if I change my mind or conditions change at the last minute.
If you haven’t already, now is the time to shake down your gear. Practice setting up your shelter and inspect it for holes. Find a puddle (or fill up your bathtub) and test the waterproofing on your boots. Speaking from experience, soggy feet are the worst, and when you’re solo there’s no one to commiserate with about it.
Once you know your gear is bomber, pack your pack and practice carrying it. This will help you decide if you need to shed some weight, and give you time to figure out what is expendable.
Make sure your cargo is balanced in your pack and that everything fits. If it’s too heavy for a short hike then you have a few options. First, reexamine what you’ve packed and cut down on luxury items. Bring a small journal to draw or write in as opposed to that thick novel you’ve been itching to read.
If it’s still too heavy, it may be time to look into different gear. As discussed earlier, the biggest ways to cut weight are in your sleep system, shelter, and pack. If you plan to sleep in a tent but don’t have a backpacking-specific tent, look into borrowing one or investing in an ultralight option. Ultralight gear can be a game changer, but unless you are an avid backpacker, or plan to be, see what you can do before you spend the $$ on special gear.
Practice Makes Perfect
Already mentioned above, but there’s a reason dress rehearsals are held for live performances. The absolute best thing you can do is a trial run with all the gear you plan to carry on your back. Pick somewhere close by, with similar terrain if possible, go for a hike and then car camp solo.
- Make sure you have extra batteries for every device that uses them.
- Put your cell phone in airplane mode to save battery life when you’re only using it for snapping pics.
- Arrive at the trailhead with at least a half tank of gas.
- Have fun! Backpacking is supposed to be fun, right?
More Backpacking Resources
5 Incredible Backpacking Excursions in Zion National Park
Cheap Backpacking Gear Your Budget Will Love
Sunshine & Solitude: Best Backpacking Routes in Big Bend
5 Best Backpacking Trips & Trails in Big Sur, California
Backpacking Without a Stove: How to Go Sin Fuego
Sign up for Weekend Wanderer to join 10,000+ readers getting epic travel ideas every week.
Seen in: Backpacking

Posted by Sarah Boles
Sarah Boles is a writer, editor, adventurer, and mom. Having grown up in the Chicago suburbs and currently residing Kansas City, She is a lover of all things Midwest adventure. Sarah has worked as the editorial manager for Adventure Mamas Initiative and WildKind Inc.
In 2018 she was named Outdoor Research’s #SheAdventures scholar. Sarah loves climbing and trail running. Her passions include helping families get outside and increasing access to the outdoors for everyone.

Everything You Need to Know About Backpacking with Kids
Find your next adventure.
Sign up for Weekend Wanderer and join thousands of readers getting epic travel ideas weekly.
Related Posts

AllTrails vs Gaia Reviews: Which Hiking App is Worth It?
AllTrails and Gaia GPS are two of the leading trail apps out there, and they both have loyal fanbases. Here's how to choose which may be best for you.

The Best Trekking Poles of 2024
If you could have four legs when you're on the trail, wouldn't you? That's why trekking poles are essential tools for hikers and backpackers.

Nude Hiking: How to (Legally) Celebrate Naked Hiking Day
Hiking is fun. Being naked is sometimes fun. Here's how to make 'em work together.

6 Phenomenal Backpacking Trails in Joshua Tree National Park
A wonderland of boulders, cacti, and spiny, Seussian trees, Joshua Tree National Park is a haven for desert lovers and backpackers of all ages.

Personal Growth in Nature: A Q&A with OutPass Trekking
Tips on overcoming the anxiety of group travel and how to grow personally and professionally from time spent outside.

Here’s Why Leave No Trace Principles are So Damn Important
By adhering to LNT guidelines, you’re keeping these lands as they should be for future outdoor enthusiasts.

Oregon Coast Trail Thru-Hiking Guide
Hiking the Oregon Coast Trail is like navigating through an eternal conflict between the forces of chaos and serenity. Those who hike it will find secrets few get to witness such as hidden caves and tide pools teeming with colorful sea life.

10 Killer Backpacking Trails in Yosemite National Park
With over 700,000 acres of panoramic wilderness and 800 miles of developed trails, Yosemite is perhaps the most iconic national park in the entire country — and for good reason.
- NEW COLOURS
- Classic Tech
- Classic Plus
- Classic Pro
- Classic Flight
- Military Backpack
- Underseat Bags
- Laptop Backpacks
- Gym and Work Backpacks
- Minimalist Backpack
- > Show All
- Classic Cross Body Bags
- Packing Cubes
- British Airways
- Backpack Size Guide
- > More Backpack Guides
- Carry On Luggage Size Guide
- > More Cabin Bag Guides
- Travel Gift Guide
- Digital Nomads Hub
- Travel News
- Destinations
- Product & Style
- Travel Light
- Packing Tips
- Packing Lists
- Air Travel Tips by Airlines
- Luggage Tips
- Pre-flight Checklist
- In-flight Checklist
- Layover Tips
- CABIN MILES
- Backpacks CLASSIC NEW COLOURS Classic Classic Tech Classic Plus Classic Pro Classic Flight ADVENTURE NEW COLOURS ADV ADV Pro ADV Dry MILITARY Military Backpack SIZE 28L 30L 32L 36L 42L 44L SHOP BY FUNCTION Cabin Bags Underseat Bags Laptop Backpacks Daypacks Gym and Work Backpacks Minimalist Backpack
- Shoulder Bags > Show All SHOULDER BAGS Sidekick Flipside Flapjack Classic Cross Body Bags
- Bum Bags > Show All BUM BAGS Hustle Hip Bags
- Accessories > Show All ACCESSORIES Rain Cover Packing Cubes Gift Cards
- Blogs Product Guides Backpack Size Guide > More Backpack Guides Carry On Luggage Size Guide > More Cabin Bag Guides Travel Gift Guide Our Journey Digital Nomads Hub Travel News Destinations Product & Style Cabinzero Travel Tips Travel Light Packing Tips Packing Lists Day Trips Air Travel Tips Air Travel Tips by Airlines Luggage Tips Pre-flight Checklist In-flight Checklist Layover Tips
How To Solo Backpacking: A Comprehensive Guide
Solo backpacking is a rewarding challenge. There’s no better feeling than taking in the world's beauty uninterrupted and independently, for example, sitting atop a mountain peak looking over a valley . And on top of it all, the immense freedom that reassures us this is what travel is all about .
But the effort it takes to solo backpacking is not minimal. It’s certainly not the kind of journey you decide to embark on in the heat of the moment. Whether you’re a complete newbie to the world of solo backpacking or have had experience with backpacking in general, it’s important to plan and prepare your journey carefully, from equipment to budget .
Here’s a guide on how to solo backpacking that will help you get the best travel experience of your life.
Is It A Good Idea To Backpack Alone?

Solo backpacking is for the free-spirited globetrotters.
Looking for a whole new liberating experience on your next adventure in, let’s say, the majestic Europe ? Or, wanting to be immersed in the breathtaking landscapes of Asia ? It’s such a treasure to be able to share those moments with friends. But it’d still be equally magical if you can feel it all yourself.
That is one of the top reasons why people choose solo backpacking - the freedom of being able to experience the most out of your adventures .
You can plan your own itinerary, travel at your own pace, and pick whichever beaten path your heart desires. A 3-day solo camping trip in a mystical forest or a 2-week getaway island-hopping.
Beyond that, solo backpacking is also a chance to train yourself. You will have to rely on your own resourcefulness and problem-solving skills. It’s transformative. You will learn to embrace the ups as well as the downs.
The magic of solo backpacking also lies in the friends you make along the way. You will meet like-minded explorers from all walks of life, hear fascinating stories and learn amazing knowledge.
First Steps On How To Solo Backpacking: Prep And Plan
The “solo” in solo backpacking tends to scare people. Of course, when you’re alone, your troubles might be even bigger than when you’re with friends. Getting lost is bad; getting lost on your own is worse.
Sharing the work of handling bookings, money and belongings with friends? Okay, it sounds easy enough. Doing it all on your own? Well, it can certainly be overwhelming for some.
But it doesn’t have to be that way! Any trip that is underprepared and poorly planned can go wrong, solo or not. With careful preparation and planning, solo backpacking can never be as scary as it sounds.
Choose Your Destination For Solo Backpacking
You’re probably eager to just grab your backpack and go anywhere. If you’re an experienced solo backpacker, choosing a destination won’t be an issue. But for a newbie, this can be a make-or-break factor.
It doesn’t matter if you’re a total newbie to the world of backpacking or are making the leap from group backpacking to solo. Here are some questions you should ask yourself before deciding on the best destination for solo backpacking for you.
Is_________safe for solo backpacking?
This is one of the most important questions you should ask before deciding on a place. Sometimes, a destination is stunning with all the forests , wildlife and mountains. But it’s not always recommended for solo backpacking.
For example, conflict zones or countries with high crime rates should be crossed off of your list . You can get yourself into serious trouble.
Also, some places are perfectly safe for guided travel but can be unsafe for solo adventuring. Some remote and isolated parts of the Australian outback , for example. While their landscapes are mesmerising, many areas remain unmarked (not explored or fully explored) and outside the reach of emergency services.
Is_________solo backpacking friendly?

Not all destinations are safe for solo backpackers. Photo by Porapak Apichodilok on Pexels.
Some destinations are more accommodating to solo travellers than others. Look for places that have established backpacker trails and affordable accommodation for one person.
The reason you should consider this is that many places, while beautiful and diverse, tend to cater to family holidays. A resort town with lots of restaurants and attractions might not be what you’re looking for.
Fun fact: The most affordable cities for backpackers in the world as of June 2022 include Vientiane (Laos), Luang Prabang (Laos), Pokhara (Nepal), Chiang Mai (Thailand, and Hanoi (Vietnam).
Research Everything Solo Backpacking

Gather all the information you can before your adventure.
From weather and geography down to the how and why of everything related to solo backpacking, do as much research as you can. Take notes of important things related to the destination you’ve chosen to plan and pack better.
Knowledge is power. So it’s better to learn more than you’ll actually need than to miss the essential information. Join solo backpacking online forums. Read articles on the subject. Read books and watch videos about solo backpacking and your route.
If you want to research specific trails, AllTrails, Worldpacking, and TheTrekkingProject are good starts. They provide difficulty levels, length, scenery, and unique aspects of a certain trail.
Planning Your First Solo Backpacking Trip
Once you’ve decided on your destination, a good backpack for your adventure and a packing list, it’s time to look at what exactly you will be doing and how you can make a plan out of it.
When crafting your solo backpacking itinerary, think of:
- Budget : this helps you narrow down a lot from the long list of accommodation, food options and transportation.
- Ways of getting around : in Europe, one of the best ways is to by train . In fact, travelling by train is not just for convenience and cost, but it’s also an authentic way to explore the continent. Similarly, in many Asian countries, the locals have their unique version of “taxi” (such as tuk tuk in Thailand) that is much cheaper than regular taxi cabs but more fun to use.
- Determine the time for each stop : will you be staying in one place the whole time, or will you explore here and there? Thinking of the amount of time you should spend at each stop helps you plan better.
- List all activities : solo backpacking gives you the best sense of freedom, but it’d be such a waste if you travel to a place and just have nothing to do. Think of all the must-see places. Go read about all the famous attractions to help you decide what to do.
- Flexibility : not all plans will work out 100%. Allowing your itinerary to have room for last-minute changes is a good way to avoid disappointing yourself.
Once you’ve found things to do and how to get around, start integrating other factors into it, such as a meal plan, clothes change plan, and gear check-up. For example, a day 1 schedule in a 3 day hike plan should look something like this:
It’s just an example. You can always add more details, such as visiting the local village along the way, stopping to journal, or meeting up with other backpackers.
Accessing Your Fitness And Health For Solo Backpacking
Hiking, trekking, climbing, walking, manoeuvring, and heavy carrying - things you do while solo backpacking. To do so, you need to have a certain level of fitness. Physical preparation is just as important as mental.
Getting fit for solo backpacking allows you to travel for longer and further. And honestly, more comfortable, too. What’s the fun if you get exhausted and just want to spend the whole day resting halfway through your adventure?
If you feel like you’re not fit enough for solo backpacking, it’s time to do some training. We don’t mean to get super ripped or sculpted like a Greek statue. One of the best things you can train yourself on is physical endurance and strength.

Solo backpacking lets you see the beauty of the world at your very own pace. Photo by M Venter on Pexels.
The simplest form of exercise you can do is running. Run for an hour around your neighbourhood or in the gym. Try climbing stairs with a backpack on your back.
According to REI , you should start training at least 8 weeks before your solo backpacking trip. Again, baby steps - start small with exercises that fit your skills and physical capabilities. Know your limits and don’t try to overdo it - you’ll get there eventually.
Is 40 Too Old To Go Backpacking?
The average age of backpackers is 20 to 25, and these young adults take up the biggest portion of backpackers. However, the number of older backpackers (we’re talking 35 up) has been gradually rising since 2002 , and it doesn’t seem like it’s going to stop. So, statistically speaking, you’re not too old to go backpacking.
Personally speaking, 40 is also not too old to go backpacking at all! Age is not a barrier to enjoying adventures and making it a fulfilling experience. There are so many fabulous ways to go backpacking. It’s not always about conquering strenuous terrains and challenging conditions.
However, it’s important to keep in mind that different terrains require different fitness levels. Always be mindful of what your health allows or doesn’t allow you to explore. Choose an appropriate destination and prepare well physically and mentally.
Consider Budget And Personal Preferences
Budget is important . You’re travelling alone. There may not be splitting the bills on meals or sharing the costs. It’s just going to be your responsibility and yours alone.
And don’t just pick a place because it’s what everyone’s talking about. Take your personal liking into consideration. Do you prefer solo backpacking in cold or warm climates? Are water activities more your cup of tea or mountain hiking? After all, it’s your own adventure. You want the experience to be what your heart truly loves!
Solo Backpacking On A Budget - How To Find Cheap Flights?
Flying to your destination can be quite expensive, especially during peak tourist season. The best way to find cheap flights is to go online. There are many sites that compare fares from multiple airlines as well as offer discounts.
Skyscanner is one of the most popular flight booking sites. Google Flights is also very well-organised and easy to use. It also has an “anywhere” option that allows you to see the possible lowest fare of any country in the world.
On the same note, make sure you have the right travel documents and visas for your destination. Plus, always, we mean always, buy travel insurance - a fundamental for any trip, solo or not. You’ll thank yourself later when things go wrong.
Solo Backpacking Safety Strategies

Remember to always practise safe travel while solo backpacking. Credit: Ági Szabadi
One of the most asked questions about this form of travel is, “ Is solo backpacking dangerous? ”. Yes and no. The answer depends on how well you plan and how cautious you are, which applies to any kind of travel, as a matter of fact.
Keeping yourself safe on your solo backpacking trip starts even before you leave the house. It should not be something you do at the last minute or after you’ve arrived at your destination.
And the number one rule is to use travel common sense, regardless of where you are. It doesn’t matter if you’re in the safest places in the world ; you should always practise safe travel.
Do Your Homework
It starts with doing your research . And we can’t stress this enough. Research. Research. Research. Especially when you’re solo backpacking, do even more research. Day hikes are generally more recommended, but if a night hike is available, pick a safe and trusted route and campsite.
Start Small With Somewhere Familiar
Start close to home if you’re new to the game. Your first solo backpacking trip doesn’t have to be overseas. Or, you can pick a destination you’ve backpacked to in a group or travelled with family and friends before. This can give you a sense of “practising” for future bigger and better adventures.
Inform Family And Friends
Another important thing to do is let people know you’re going to be travelling alone. It means sharing your itinerary with your family and trusted friends. This includes letting them know your arrival and departure time. Also, check in with family and friends regularly .
Be Mindful Of Local Customs
Also, listen to the locals and respect their rules and regulations. If they tell you a place is not to be trespassed, it’s best that you respect that. On the same note, pay attention to the local culture . Don’t do anything that can yield negative impressions, such as wearing offensive clothing or bringing up controversial topics unprovoked.
Stick To The Well-Beaten Path
As you’re venturing further and further down the road filled with natural wonders, you can easily get distracted from the map. And in the blink of an eye, you’re lost in the middle of nowhere. Or, you are so fascinated and curious about a place you just want to go out of your way to explore it. Even if it means you’ll be the first one to do it.
Well, we hate to break it to you, but real-life solo backpacking is very different from Hollywood movies. You might get lost or, worse, injured on the road. Being on unmarked or isolated roads means there is little to no accessible help and emergency services. And there can also be wild animals that are not very friendly to humans.
So, to stay safe, stick to marked trails. These trails are recognised and accessible by emergency services and local authorities. There are fellow backpackers who will be travelling along the roads as well.
Connect With Others
When you connect with other people, you will have a support network in case something goes wrong. They can help you seek medical assistance, provide guidance or contact local authorities if needed.
You can make friends with local people or backpackers who are very knowledgeable about the area. They are oftentimes familiar with any hazard that isn’t talked about online. They can also be a great source of information about what’s the best route to take or where the view is the best.
Another thing to mention is that it gets lonely sometimes when you’re on the road all by yourself. Making friends with other backpackers is a great way to give yourself an energy boost when you feel a little down. You can share your stories, experiences, or resources to help one another out.
How To Pack For Solo Backpacking

Packing is the make-or-break factor of solo backpacking. Credit: Kyle Lambert
Packing enough is not enough. You need to have a strategy to keep your belongings organised and, most importantly, things inside your backpack don’t get messed up while you move. This happens more often than you’d expect to.
Solo Backpacking Done Right
Being alone 70% of the time means you need to put a lot of effort and care into packing. To begin efficiently packing, consider the following factors:
- The right backpack : it’s your best friend on the road. You don’t want one that’s too small, doesn’t have enough compartments, and is not great for wearing for long hours.
- The ten essentials: Navigation, lighting, protection, first aid, tools, fire, shelter, food and water, clothes, backpack
- Pack light: Be realistic. Bring what you essentially need to carry out your trip.
- Bring a phone (or two): Always bring your phone as it’s one of the fastest ways to reach for help when needed, and it can act as many things at once: a map, a camera, a music player, and a guidebook. Some people advise bringing an extra phone (ideally a cheap one that can only call and text with no personal stuff in it) to use for emergencies.
- Climate : pack clothes suitable for the weather. Opt for clothes that can be layered if you’re solo backpacking somewhere cold. Prioritise breathable fabric for hot climates.
- Length of your trip : for short trips, opt for travel-sized toiletries. For longer trips, consider leaving things you can buy at home at your destination, for example, toothpaste, to avoid overpacking.
- Activities : Will you just be walking and camping? Or doing other activities like swimming and snorkelling? Pack according to the activities you’re planning to do.
How To Pack Efficiently For Solo Backpacking
Here are some useful tips to help keep packing hassle-free and space-saving.
- Use smart packing methods : roll your clothes instead of folding them to avoid wrinkles as well as save space. Rolled-up clothes can be stacked horizontally or vertically or stuffed in between other items.
- Stay organised with packing cubes : packing cubes separate items. You can fill one packing cube with clothes, another one with toiletries, and the other one with electronics.
- Pack heavy items at the bottom : Heavyweight items can be a good foundation for laying other items on top. This also keeps your shoulders from bearing the majority of the weight, which is not a good thing to happen when wearing a backpack.
- Place non-essentials in your backpack first : They are things you might not need immediately once you arrive at your destination, such as a sleeping bag and towels. Then pack essentials later. Doing this can save you a lot of time rummaging through your stuff just to fish out that one that you need at the bottom.
Choose The Right Backpack For Solo Backpacking

ADV backpacks are simple but functional.
First, think of the function. All backpacks can be used to pack. But not every backpack is designed specifically for backpacking travel. You need to find one that can store your gear as well as can handle the weather. Go for a backpack with a high water-resistant rate .
Second, when choosing a backpack for solo backpacking, look at its design. Do you imagine that backpack sitting comfortably on your back for hours? Are the straps soft and durable, or are they thick and stiff?
Compartments are also what you need to keep in mind. More compartments mean you can categorise your essentials better. When you’re solo backpacking, especially in the middle of nature, you’ll always need to have your water ready. Opt for backpacks with a reachable water bottle pocket.
CabinZero’s recommendation : Our ADV backpacks are the go-to backpacks for adventurous travellers. They’re made specifically for wondrous and wild getaways. A special feature in the ADV collection that can give your back some needed relief is a stow-away waist belt.
If you’re thinking of bringing a laptop on your adventure, try the ADV Pro line. It comes with padded laptop sleeves and has more quick-access compartments to store more essentials.

The standard CabinZero’s 32L ADV-ADV Pro backpacks are perfect for moderate hikes, like 2-3 night trips. If you need some extra space, you can go for the 42L ADV bags.
For less challenging terrains, we recommend the Military collection . Military backpacks have front webbing for gear and spacious compartments. Made with military-grade nylon, they are perfect companions for extra adventurous trips.
Solo Backpacking Packing List
Not all solo backpacking trips are the same, and so are their packing lists. You will need to personalise, expand or narrow them down according to your preference.
One thing to keep in mind is to categorise your packing list in order of importance and keep it concise. Think of your trips and all the possible scenarios instead of packing everything and saying, “Well, just in case.” You’re always going to regret overpacking.
But don't rush through it either. Packing can make or break a solo backpacking experience. Here’s a sample solo backpacking packing list for reference:
- Moisture-wicking underwear and socks
- Quick-dry t-shirts or tops
- Long-sleeve shirt for added sun protection or warmth
- Lightweight pants or shorts
- Raincoat or waterproof jacket
- Hat for sun protection
- Swimwear and other related items (if necessary)
- Outerwear (pack according to climates)
- Hiking shoes
- Flip-flops or sandals to wear when you’re not hiking
- Socks (bring extra pairs)
- Travel-size shampoo, shower gel, conditioner and soap
- Toothbrush and toothpaste
- Insect repellent
- Wet wipes, tissue paper, and hand sanitiser
- Feminine hygiene products
- Electronics
- Phones and charger
- Camera and charger (if needed)
- Powerbank (in case you’re in an off-grid place)
- Extension cord
- Earphones or headphones (if needed)
- Speaker (if needed)
- Travel documents and money
- Passport (if you’re abroad)
- Copies of IDs (if needed)
- Cash, credit cards, emergency contact information
- If you’re camping
- Sleeping bag
- Sleeping pad or mat
- Camping stove and utensils
- Headlamp or flashlight
- Multi-tool or pocket knife
- Other essentials
- First-aid kit
- Medication (if needed)
- Water bottle or hydration reservoir
- Snacks or lightweight meals for the journey
- Maps, a guidebook, or GPS device
- Portable clothesline and detergent for laundry
- Packing cubes for organising items and protecting valuables
Is 30 Pounds Too Heavy For Backpacking?
The weight of backpacks can vary depending on your physical strength, the duration of your trip, and the terrain you will be exploring.
But there’s a general rule to determine how heavy you can pack your backpack. The total weight of your backpack should not exceed 20% of your body weight .
For example, if you weigh around 150 pounds, a 30-pound backpack is a bit heavy. For short hiking trips with just plain walking, this won’t be a problem. But for longer trips or difficult terrains, you might need to leave a few things at home.
A good trick to test if your backpack is too heavy for you is to try wearing them while doing stuff around the house. You can even wear it while working out at the gym if you can.
- Can you sit down and stand back up comfortably?
- Can you walk up and down the stairs easily with it on your back?
- Is anything digging or tugging painfully?
Also, make a realistic and personalised packing list to avoid overpacking. Stick to the essentials, and pack efficiently using the right travel gear to make it easier.
Ready For Your First Solo Backpacking Gig?
Learning how to solo backpacking is not a day’s work. It takes a lot of research and practise.
Not all first solo backpacking trips are textbook perfect. Even pro and hardcore backpackers don’t even say all of their trips are 100% flawless. But just by being well-prepared and carefully planned, you’re already halfway there.
Remember, the core of a good solo backpacking trip starts with these factors: plan well, pack right, and practise safe travel.
If you find this article useful, don’t forget to let us know in the comment section or reach out to us via social media. More than anything, we love to hear all about your amazing travel experience.
Nguyen Tran Gia Khanh
Leave a comment
Please note, comments must be approved before they are published
This site is protected by reCAPTCHA and the Google Privacy Policy and Terms of Service apply.
You may also like

2-FOR-1 GA TICKETS WITH OUTSIDE+
Don’t miss Thundercat, Fleet Foxes, and more at the Outside Festival.
GET TICKETS
BEST WEEK EVER
Try out unlimited access with 7 days of Outside+ for free.
Start Your Free Trial
Powered by Outside
How to Face Your Fear of Backpacking Alone
A solo hiking or backpacking trip can either be a freeing or terrifying experience. learn how to prepare and tame your imagination in the backcountry..
Heading out the door? Read this article on the new Outside+ app available now on iOS devices for members! >","name":"in-content-cta","type":"link"}}'>Download the app .
From bears to lightning, there are a lot of things to fear in the backcountry. But which of those are really dangerous, and which shouldn’t you worry about? In Fear Less , our experts break down how to master your fears instead of letting them master you.
Confession: I’ve never been solo backpacking. I’ve hiked and trail run by myself plenty of times, but the thought of sleeping completely alone in the woods makes my scalp prickle. Part of me tells myself that I haven’t made the leap to solo camping because I have more fun with company. The other part of me knows it’s because I fear the vulnerability that darkness brings.
But I’ve decided to challenge that fear, and you should, too: Solo trips can bring you solace, confidence in your abilities, freedom to go where you want at your own pace, and a newfound connection with the trail. If being alone in the wilderness will help you achieve your hiking and backpacking goals, don’t let the fear of it hold you back any longer. The experts I spoke to—a psychologist and a seasoned solo traveler—share practical strategies to prepare as best you can, calm your mind, and assess danger.
Prepare logistically
If you’ve never been hiking or backpacking before, consider honing your mountain sense first before going out on your own. A thorough understanding of gear, terrain, altitude, conditions, and wildlife is the first step in feeling confident and self-sufficient on the trail.
Know how to filter water , set up your tent, be bear aware , read a map and trail signs, tend to your stove, treat a blister , assess the weather , and pace yourself. You won’t be able to rely on anybody but yourself once you’re out there, which can be an incredibly empowering experience if you’re well equipped.
Remember that there’s no such thing as overplanning—only overpacking. Kristin Addis of Be My Travel Muse hikes and backpacks alone often. She likes to prepare by researching every detail, from getting to the trailhead to available water sources. She downloads maps and reads trip reports on AllTrails from people who have recently visited the route she’s planning to hike.
Addis also always brings a solar charger to keep her devices juiced. She keeps maps downloaded offline on her phone so she can use them even when there’s no service. For an added sense of security and peace of mind in areas without cell connection, you can buy or rent a personal locator beacon such as a SPOT or Garmin inReach. These devices allow you to communicate with family or friends and even emergency services in the event that you need help.
Mind over matter
When I’m alone and miles from my car, this is what goes through my mind: What if I get hurt? What if I see a bear or a moose or a mountain lion? What if the weather drastically shifts? What if that twig snapping outside my tent is something threatening? While a little fear is healthy, this kind of hypervigilance can suck the joy right out of your trip. Beyond planning the logistics, you should also train your mind.
“Our own imaginations can come up with a much crazier scenario than sometimes the situation allows for,” says Thea Gallagher, an assistant professor and director of the outpatient clinic at the Center for the Treatment and Study of Anxiety at the University of Pennsylvania . “Expand your attention to the things you’d rather be thinking about.”
Ahead of your trip, Gallagher suggests running through the worst case scenario, the best case scenario, and the most likely scenario. “At the core of facing all fears, we’re really trying to help people learn to tolerate uncertainty,” she says.
Addis likes to focus on statistics to put things in perspective. Here are a few: You’re much more likely to be injured in a car crash than by a bear. Fewer than 1 in 37,500 people are bitten by venomous snakes each year in the U.S. Three million people hike the Appalachian Trail every year, and there have only been 10 reported murders since 1974, according to the Appalachian Trail Conservancy. By that metric, you’re far more likely to encounter a threatening human in your neighborhood than on the trail.
“Statistically, driving to the trailhead is the most dangerous part of the trip,” Addis says. “Looking at the statistics really helps me be completely analytically-minded about it.”
Assess the situation
Sometimes your fear is trying to tell you something. It could be related to weather, wildlife, other hikers on the trail, or something else. Follow your gut. If you get a funny feeling, there’s no shame in turning around and coming back another time. You’re trying something new, so give yourself grace and patience.
Gallagher specializes in exposure therapy, a behavioral treatment that helps people confront their fears in safe but real settings. She suggests starting with a smaller goal and inching yourself toward your big goal. Maybe your first solo experience is camping in your backyard. Try car camping alone next.
If fear is ruining the experience, remember why you’re attempting a solo trip in the first place. “Identify that fear and ask yourself, can I control it?” Gallagher says. “Bad things could happen, but you have to live your life. If it’s in your value system and it’s important to you, then do it.”
The solitude and confidence boost alone could be worth it. And as for me? I’m taking Gallagher’s advice and embarking on my first solo camping trip this fall in Sedona.
Popular on Backpacker
Join Outside+ to get access to exclusive content, 1,000s of training plans, and more.
Healthy Living
- Clean Eating
- Vegetarian Times
- Yoga Journal
- Fly Fishing Film Tour
- National Park Trips
- Warren Miller
- Fastest Known Time
- Trail Runner
- Women's Running
- Bicycle Retailer & Industry News
- FinisherPix
- Outside Events Cycling Series
- Outside Shop
© 2024 Outside Interactive, Inc
Travels with Erica
A Solo Traveller's Guide to the World
What I Wish I Knew Before Backpacking Europe Alone
This post may contain affiliate links. If you click on my affiliate link and purchase something (at no additional cost to you!), I may earn a small commission that helps me keep the blog running. Thank you so much for your support!
Backpacking Europe alone after high school is one of the biggest clichés out there.
I’m proud to say that I avoided that cliché and travelled Europe alone for the first time right after University. 😉
Cliché or not, there is a reason why backpacking Europe alone is one of the most popular things for young people interested in travel to do.
Hell. I travel Europe alone as often and as frequently as I can even though it has been years since my first solo trip to Europe!
Europe is my favourite place on the planet, and the best part is it is super easy for solo travellers to explore Europe.
However, there are a few things I wish I knew before backpacking Europe alone.
These things would have saved me a lot of anxiety, money, and a few tears along the way.
If you’re planning your first backpacking trip through Europe, this is the post for you!
Hopefully you’re a little bit more prepared than I was!
Tips for planning your first solo trip
Table of Contents
You Don’t Have to Stay in Hostels
When I was researching before my first solo trip to Europe, every blog I read said that solo travellers stay in hostels.
The fact that I had to stay in hostels, and there were no other affordable options was beat into my head.
There were other reasons, such as the social aspect, that people were recommending hostels. But those reasons didn’t resonate with me as an extreme introvert.
The biggest thing I wish I knew before backpacking Europe alone is that I didn’t have to stay in hostels.
They’re a great, affordable option.
But they’re not the only option.
I spent months staying in hostels and hating it. They’re just not my jam.
If you’re like me and don’t love hostels, know that there are tons of affordable options out there!
I highly recommend you try to find guest houses to stay in or Airbnbs.
A lot of the time they are less expensive to stay in than a budget hotel and aren’t much more expensive than a hostel.
They’re a great option for people like me who don’t enjoy staying in hostels but also don’t want to spend a ton of money on lodging.
Of course, there are limits to how well this works.
If you’re in an expensive city like London, you’re going to be paying a pretty penny no matter where you stay.
Including hostels.
So, figure out what your budget is and research all your options before automatically searching and booking a hostel.

Don’t Take Internet Safety Lightly
Not enough people take internet safety seriously when they travel, and that is a mistake.
In fact, being internet safe is one of the most important travel safety tips I can give you!
As a traveller, you connect to public wifi networks on a daily basis, and this puts your devices at risk of being hacked.
And, yes, even hotel and café wifi networks that have a password are considered public wifi networks!
Anybody can access public wifi networks, and you’d be surprised at how easy it is for someone to steal your online data without you even knowing it.
I can’t imagine a worse scenario than backpacking Europe alone and having someone steal my banking information.
The hassle of canceling all your banking cards and then trying to figure out a way to fund the rest of your trip is not the type of thing you want to deal with when you’re on a solo trip.
The only way you can protect your devices when using a public wifi network is by installing a VPN on your devices.
A VPN essentially puts a forcefield around your devices and makes it impossible for prying eyes to access your online information.
It makes using a public wifi network just as safe as using your home wifi where you’re the only person who knows the password.
In my mind, installing a VPN on your devices is a non-negotiable.
It is the responsible thing to do, and there are no excuses for not protecting your online information and data when you travel.

My Favourite VPN
I’ve used quite a few different VPNs over my years of travel, and, to be frank, most of them suck.
They slow your phone down to a snail’s pace. It is so frustrating to use most VPNs that you end up turning them off and exposing your online information.
Which totally defeats the purpose of having a VPN!
The only VPN I use and trust now is NordVPN .
I’ve been using them since 2018 and have no plans change provider.
They are the fastest VPN on the market, which is why I recommend them to my fellow travel lovers.
We need our internet to be quick, and if you’re like me, you don’t have the patience to deal with lagging internet.
That is never an issue with NordVPN .
You hardly notice a difference in the speed of your internet. You can use your devices and be safe without sacrificing any internet speed.
Plus a NordVPN subscription is super affordable.
It costs less than a latte per month, and you can install a VPN on up to six devices with on subscription.
There are no excuses not to protect your online information and data when backpacking Europe alone.
My motto is that if you can afford to travel, you can afford to protect your online information and date!
Get Off the Beaten Path
One of the biggest mistakes most people backpacking Europe alone make is not getting off the beaten path and visiting less popular tourist destinations.
This includes what cities you choose to visit and what you choose to see and do in those cities.
Even if you only visit the most popular cities in Europe, there are still less common things you can do to experience a different side of the city.
Now that I’m an experienced traveller, there is nothing I love more than finding lesser known cities and exploring them.
They give you a different taste of what life in that country is like without all the tourists swarming around.
There is nothing wrong with visiting the most popular tourist sights and cities.
They’re popular for a reason!
I just think you should also go out of your way to see a different part of the place you’re travelling.
Taking a day trip to a nearby town or village is one of the easiest ways to get off the beaten path and see more of a country.
I personally like to spend three or four days in three or four different cities when I visit a country, but I know not everybody has time for that.
All I’m asking is that you do at least one thing on your backpacking trip through Europe that can’t be found on the first page of every guide book ever written.
Overrated cities in Europe

Set a Realistic Budget
This is one of the biggest mistakes I made the first time I was backpacking Europe alone.
I read a ton of blogs that said you should only spend $50/day in Europe. That’s all you need.
It created this image in my mind that $50 is what I should spend a day, and if I spent more than $50, I wasn’t a very good traveller.
Now I know that is absolute rubbish, but I didn’t back in 2015 when I went on my first solo trip to Europe.
I also failed to take into consideration the exchange rate. The blogs were referring to $50 USD/day. I was budgeting $50 CAD/day, which came out to about $32 USD/day!
If there is only one tip for backpacking Europe alone on this list you listen to, let it be this one.
Do not blindly listen to anybody on the internet who tells you how much it costs to travel anywhere.
That is their experience. You can use it is a guide, but do not take it as a hard fact.
Instead, think about what your travel style is. How you imagine your backpacking trip to Europe looks and go from there.
You’re travelling alone, so if you underestimate how much money you need, you’re kind of screwed.
There is nobody travelling with you that you can potentially borrow money from, and you need to figure out how to make too little money stretch your entire trip.
It is not a fun place to be!
So, set a realistic budget and have a little extra money saved just in case some things are more expensive than you anticipate.
You don’t want to have to skip meals or stay in terrible accommodation just because you didn’t set a realistic budget!
Digital nomad jobs for beginners

Backpacking Europe Alone Isn’t Glamorous
Backpacking Europe alone is over glamorized in the media.
Images of meeting an Italian man and falling in love, finding your true self, and becoming an influencer are attached to the idea of travelling Europe aline.
While all those things are possible, I’m here to tell you that they are not the norm.
Backpacking Europe alone is amazing- don’t get me wrong- but it isn’t quite as romantic as you might think it is.
I guarantee that you’ll shed a few tears, your clothes will stink (and you’ll hate doing laundry), you’ll get lost more times than you can count, and I see a number of cheap grocery store meals in your future.
It’s all part of backpacking Europe alone, and it also might be some of the best parts of it!
If you’re going into Europe with your rose coloured glasses on, you’ll be disappointed.
One of the fun parts about backpacking Europe alone is figuring out how to solve the little problems that pop up along the way.
Because trust me no trip goes 100% to plan!
And, in my opinion, the best way to make sure your solo trip to Europe is amazing is to have realistic expectations and know that what you see in the media probably isn’t how your trip is going to go.
But it will undoubtably be an amazing trip though!
Undeniable benefits of travelling alone
Currency Can be a Pain in the Butt
A lot of people think of Europe and see it as one big economic zone where everything is the same.
While a lot of European countries use the Euro, there are many who don’t. And that makes currency a bit of a pain.
Not only do you have to figure out how to get the different currencies you need, you also need to keep the currency conversion straight in your head.
Again, it isn’t much of an issue if you only visit countries that use the Euro , but most people visit countries with different currencies.
When you’re backpacking Europe alone, you need to have a plan on how you’re going to handle all the different currencies you need.
My recommendation is to get convert some of your money into the currency of the first country you’re visiting before you leave.
You’ll have money to pay for whatever transportation you need to take when you land and buy food.
You do not want to deal with converting currency after a long flight when you’re tired and just want to get to your accommodation!
After that, I like to use ATMs to the currency I need for the rest of my trip.

Beware of ATMs in Europe
ATMs can cause a bit of confusion in Europe.
The most important thing you need to remember is to never select the option that does the currency conversion for you and removes money from your bank account in your local currency.
Always select the option to have the money withdrawn in the local currency and let your bank do the conversion.
ATMs in Europe are notorious for giving you a horrible exchange rate, and you’ll waste a lot of money if you remove money in your home currency rather than the local one.
No matter what option you choose, you will receive money in the local currency. I know that section may sound confusing, but it will make sense once you get to Europe.
Another major tip I can give you is don’t take too much money out at one time.
I’ve been in situations where I’ve overestimated how much money I’ll need and then have a bunch of left over currency that isn’t accepted in the next country I’m visiting.
It is a fine line to walk between getting enough money versus getting too much money.
Finally, be sure you have a currency conversion app on your phone. It helps you keep track of what the local currency is doing based on your home currency.
This is a huge help for staying on budget and understanding what you’re paying for things while backpacking Europe alone.
Transportation is a Breeze
I was a bit nervous about getting around Europe on my first backpacking trip. I wasn’t quite sure what to expect and didn’t want to spend a ton of money and fly from place to place.
It didn’t take long before I learned that Europe isn’t like other parts of the world (like Asia) where it can be a challenge to get from city to city and country to country.
There are trains and buses that take you pretty much anywhere you need to go.
Even across international borders!
The last time I was in Europe for an extended period of time, I took a total of four flights in three months!
From London to Dublin and back. From London to Finland. And Prague to Paris more due to needing to be in Paris quickly for an event rather than there not being a way to overland between the two cities.
The only thing you need to be aware of is there are some countries where the price of train tickets steeply rise the closer you get to the day of departure.
The biggest culprits of this price hike are the UK and France .
If you’re travelling within or between these two countries, be sure you book your train ticket as early as possible.
Tickets go on sale three months in advance, and you want to buy your tickets as shortly after that as possible.
If you’re not a planner, the bus may be a better option than the train. Bus ticket’s don’t see a price increase the same way train tickets do.
But, transportation is not something that should hold you back from backpacking Europe alone.
It is super easy to use, and even a beginner traveller can breeze their way around Europe without too much sweat.
A solo traveller’s guide to London
A solo traveller’s guide to Paris

Don’t Ignore Eastern Europe
Okay. So, this is one thing I did know before backpacking Europe alone, but I feel like not enough people know it!
Eastern Europe is amazing and doesn’t get enough love!
I’m talking the Baltic States, the Balkans, Central Europe, Romania, Bulgaria, Ukraine, everything outside Western Europe really.
Most of my favourite European countries are outside of Western Europe and along the road less travelled.
They are beautiful, full of history, and are home to some of the nicest people you’ll ever meet.
And as a bonus for people backpacking Europe alone, they are extremely affordable.
I once got a plate of pierogi, a salad, steamed vegetables, a drink, and a piece of cake for about $10 USD in Ukraine! Where else are you going to find such great value in Europe?!
I fully understand the desire to tour Western Europe. It is home to some of the most iconic sights in Europe.
But that doesn’t mean that Eastern Europe deserves to be ignored.
I highly, highly, highly recommend you arrange your itinerary so you spend at least a third of your trip in Eastern or Central Europe.
Not only will your wallet thank you, but I have a feeling it will also result in some of the best memories that come out of your trip.
A solo traveller’s guide to Prague

Take Your Time
I’m seeing a trend here, and it is following bloggers blindly.
Says the person who is now a travel blogger writing this post.
But the blogging content put out in 2014/2015 when I was planning my trip and backpacking alone in Europe is vastly different from what is online now.
Back then, I saw post after post after post saying you should never stay in a city more than 3 days.
Yes. That includes major cities like London and Paris!
The sentiment online at that time was you have to keep moving and see as much as possible as quickly as possible or you’re not travelling properly.
Thankfully the travel blog world has change a bit, and now there is more of a focus on slowing down and getting a more in-depth taste of a city or country.
I spent the first month and a half of my backpacking trip to Europe rushing around. I was exhausted from never settling in anywhere and never having a break to people watch in a café.
Don’t be like me!
Thankfully I figured out that it is worthwhile to slow down and spend more time in each city.
It is much more enjoyable, relaxing, and it gives you a better appreciation for the place you’re visiting.
I mean it is ridiculous to think that you can get a true taste of a major European city in three days or less. That’s nonsense.
I’m not going to tell you how much time to spend in each place.
That’s super personal and changes based on what city you’re visitng.
I am going to tell you to do your research and figure out a reasonable time to stay to see everything you want to do.
I also like to add on an extra day just in case the weather is bad, I’m tired one day, or I discover something else I want to do.
Plus, you can always take a day trip if you don’t need that extra day!

Backpacking Europe Alone is Safe but Know the Local Scams
Before I went on my first solo trip to Europe, I had people in my life telling me it wasn’t safe for solo female travellers.
Or that certain countries (like Ukraine) I planned to visit weren’t safe.
I didn’t listen to them and went on my trip anyways, but I would be lying if I wasn’t a bit nervous at the start of my trip.
Especially when I got to some of the lesser travelled countries in the Balkans.
Now I know that it wasn’t something I ever had to worry about, and you don’t have to either!
Europe is very safe.
Even in less financially rich countries you don’t have anything to worry about.
You can start backpacking alone in Europe and know that you’re safe and don’t have to stress over your personal safety.
The one thing you do need to worry about though is knowing local scams.
Every country and city in the world has local scams.
These can range from something as simple as pick pocketing to something much more elaborate like people not giving you the proper change or giving your counterfeit money.
You need to be aware of what the local scams are wherever you’re going.
This will help you know what to look out for.
As a solo traveller, you are solely responsible for your safety. You don’t have a friend to watch your back, so it is even more important you familiarize yourself with local scams.
But, aside from scams, Europe is super safe. Even for solo female travellers.
Overcome your fear of solo travel

Best European Countries for Solo Travellers
There you have it. You’re now in the know and are more prepared for your first solo trip to Europe than I was!
Europe is one of the best and easiest places for solo travellers. Even if you’re a complete beginner, you can successfully backpack Europe alone.
If I can do it, you can do it. I was a horrible traveller when I first backpacked Europe alone.
It is so important to understand that not everything is going to be perfect and know that you’ll have to problem solve along the way.
Backpacking Europe alone is one of the best experiences you’ll have in your life.
The continent is so full of life, food, and beauty. And no two countries are the same!
So, book that ticket, strap your backpack on, and have the time of your life!

Related Posts
- 10 Things to Know Before Your Solo Trip to Paris!
- Unique Tips for Eating Alone at a Restaurant
- 10 Things to Know Before Travelling to Seoul Alone
- Backpacking
- Solo Travel
Solo Backpacking Trip To Europe: 12 Simple Tips for Beginners
- February 23, 2021 October 17, 2023
Traveling to Europe alone for the first time? Wondering what to expect, how to plan, and what you should know before embarking on your first solo backpacking adventure? If you’re seeking answers, you’ve come to the right place. In this article, you’ll discover tips for traveling alone, how to prepare for solo backpacking, ways to budget during your trip, and some hacks to make your solo backpacking journey even more memorable.
By the end, you’ll feel more informed and confident that everything will go smoothly on your maiden solo travel through Europe. Let’s dive into these tips!

Disclosure : This article features affiliate links, including Amazon.com. If you decide to buy through one of these links, I’ll earn a small commission at no extra expense to you. For more details, please see my disclosure policy .
1. Why even go solo?
Traveling by yourself might feel intimidating initially. There’s no one by your side to rely on when you have questions, feel down, or face challenges. You can only rely on yourself when you embark on a solo trip. That’s precisely what makes solo backpacking such a rewarding experience. There are numerous benefits to traveling alone. It can boost your self-esteem, increase your confidence, make you more courageous, and provide opportunities to meet inspiring individuals.
Backpacking solo offers a unique experience filled with unexpected situations, cherished memories, new connections, and a journey brimming with adventures. It will enhance your ability to handle various challenges and foster a deeper appreciation for what you have. Nothing can stop your personal growth.
Read more : Benefits of Solo Travel .
2. Before you depart, review these essential documents
First and foremost, before traveling abroad, you’ll require certain documents to move from one country to another, book a room, or legally identify yourself.
Safety first – Obtain Travel Insurance
Travel insurance is a must for any traveler; it’s common sense. I always secure travel insurance when going abroad, and thankfully, I’ve never needed medical treatment. However, I’ve heard numerous stories about people who embarked on trips without it. You can probably guess how those stories ended. No one is ever 100 percent safe when backpacking solo. Unforeseen incidents can occur at any time. Spending all your savings on medical bills wouldn’t be ideal, which can be ridiculously high in many countries.
Don’t forget essential documents
Other essentials for solo backpacking include your most important documents, starting with your passport. Ensure it remains valid for at least six months ahead. Some countries won’t allow entry if your passport is set to expire within the next six months.
In Europe’s Schengen Area , having an identification card for making accommodation reservations or other transactions requiring verification is also helpful. If available, bringing a driver’s license, student ID, or any other discount cards is advantageous to aid in budgeting.
Read more : Planning a Backpacking Trip to Europe ! (guide)
3. Essential Gear for Your First Solo Trip
Having reliable and durable gear is fundamental to a successful solo backpacking trip. Invest time determining what you need or want, but always aim to pack as light as possible—wondering where to start?
What Kind of Backpack Do I Need?
Firstly, possessing the right solo backpack is crucial. Opt for quality that feels as comfortable on your back as a shoe does on your foot. It should feel right from the first try. Consider various features, such as the ability to convert it into a smaller backpack, the ease of access (so if you need items at the bottom, you don’t have to unpack everything), its water resistance, and whether there’s adequate space for essential items (like documents, electronics, and other valuables).
For example, I have a Thule Guidepost 65L Backpack . It’s already been on my back for three years, and I’m still very satisfied.
What to wear?
Clothes will occupy the majority of your backpack. When backpacking, you’ll need to change outfits daily due to sweating. I recommend opting for sporty attire that dries quickly in the clothing department. This means you can wear sporty shirts for several days.
Solo backpacking often involves a lot of hiking, so quality footwear is essential. For everyday use, sports shoes are suitable. However, hiking boots that offer ankle protection are safer if you plan to hike in mountainous terrains. For your first solo backpacking trip, ensure you have enough clothes to last at least a week. This way, you’ll only need to think about laundry once a week.
Other essential backpacking gear
Your additional items depend entirely on how you plan to backpack through Europe. Aside from documents and clothes, you won’t need much else if you’re solo backpacking with a guaranteed roof every night.
However, if you’re a more adventurous solo backpacker and sleeping under the stars appeals to you, you’ll need extra gear. This includes camping essentials like a sleeping bag, mattress, and a compact first aid kit. Consider bringing a bowl, spoon, and knife from the kitchen department. A portable stove is also a must-have for those who enjoy cooking (or even if you don’t).
Read more : Lightweight Backpacking Gear for Traveling ; Backpacking Europe Packing List For Women .
4. Packing a backpack
First and foremost, the most crucial tip is to pack as lightly as possible. Remember, you’ll be carrying everything on your own. I recommend not exceeding 15 kilograms for your first solo backpacking trip, including extra food and water. The weight might feel manageable initially, but it can become burdensome if you wear it all day.
Initially, you might have a list of items that won’t fit. Perhaps too many clothes or superfluous equipment. Ultimately, the art of solo backpacking lies in packing all the essentials while still leaving some room for unexpected items.
How to Fit Everything into a Backpack?
Firstly, consider leaving some clothes in the closet. Pack enough clothing for a week and include at least one extra pair of shoes and flip-flops. Avoid packing unnecessary items. A key tip : Only bring items you use often, so plan thoughtfully.
Also, leave at least 10 percent of your backpack’s space free for food, water, and unexpected items.
Read more : How to pack a tent for backpacking .
5. Bring Something to Ward Off Boredom
While it might seem contradictory to the earlier advice of packing light, there’s a rationale behind this. Solo backpacking means you’ll have moments of solitude. While solitude can be refreshing, there will be times when you might feel bored.
Bring along something that keeps boredom at bay. For instance, I enjoy reading, so I always have a book with me. If you’re passionate about photography, bring a camera. Or, if you enjoy entertaining yourself or even a larger audience on the streets (perhaps to earn some money), consider packing a compact instrument like a ukulele.
How do you fit these into your bag? A book is easy, but you might need to leave some things at home for the ukulele. Along the way, you will find ways to carry your stuff.
6. Plan Your Trip Based on Time and Budget
The nature of your trip hinges on how much you’re willing to spend and the duration of your travels. While adventurous solo backpackers might argue that spontaneity is key and that there’s no need for a plan, this approach is great for solo travel. However, if you’re working with a specific budget or time constraint, it’s advisable to have a general plan for your first solo journey.
If you’re pressed for time , prioritize various activities to maximize that limited period. Draft a concise bucket list of sights you want to see and experiences you wish to have. If money isn’t a pressing concern because you have a set end date, that’s a relief. However, always ensure you have a return ticket. The goal is to maximize every moment.
For longer trips, especially those without a definitive end date, it’s crucial to adhere to a strict budget. The aim is to minimize expenses. A valuable tip for solo backpacking is to take things slow. This approach offers two significant advantages: without the rush, you’ll gain a deeper appreciation of your destinations, and by reducing the need for frequent transportation, you’ll save money. Embrace a leisurely pace and immerse yourself in local cultures and communities.
7. Best solo backpacking destinations in Europe
The ideal destination largely depends on the solo backpacker’s preferences, mode of travel, and overall budget. First, determine the kind of solo trip you’re aiming for. Consider the western part of Europe if you’re drawn to renowned cities, landmarks, or tourist hotspots. However, if you’re seeking adventurous travel, untouched wilderness, hidden treasures, and hiking trails, the eastern part of Europe might be more fitting. It’s also worth noting that the western region tends to be pricier than the eastern one.
Read more : Best cities in Europe for solo travel .
Western Europe
In Western Europe, prime countries for solo travel include Italy, France, Spain, and Portugal. These expansive nations boast many stunning locales, day trips from major cities, iconic landmarks, and natural wonders. Spain and Portugal are particularly appealing destinations for those on a tighter budget.
Remember, there are always ways to economize, regardless of your destination. For instance, explore tips on backpacking through Italy on a budget .
Read more : Italy travel guide .
Eastern Europe
The lesser-known eastern regions of Europe also offer fantastic destinations. Consider starting with Budapest in Hungary, then exploring Slovenia, Romania, or the Balkan countries for off-the-beaten-path solo adventures. These nations might not be as frequented as their Western counterparts, but they’re teeming with undiscovered treasures. Undoubtedly, this part of Europe is more suited for adventurous travel and budget-conscious backpackers.
Read more : Greece travel guide ; Albania travel guide ; Slovenia travel guide ; Hungary travel guide .
So, what are the top destinations in Europe? It truly depends on the individual traveler’s desires and what they’re eager to explore. Budget considerations also play a significant role. Rest assured, Europe has no shortage of excellent spots for solo travel.
8. Seek Out Fellow Travelers
A significant advantage of backpacking solo is meeting many new people. It’s not that individuals approach you simply because you’re alone. That doesn’t work so easily. You’ll need to muster the courage to initiate conversations. However, the desire to connect with others can boost your confidence, pushing you out of your comfort zone. You can strike up conversations on the streets, in bars, hostels, or even online through social media and travel apps. Here are some helpful apps:
Couchsurfing
In my opinion, this is the best platform to connect with incredible individuals from all over. There’s a “hangouts” section where travelers and locals can interact, making plans to enjoy activities together. It’s a favorite among many travelers.
While primarily known as a dating app, Tinder can also be effective for meeting new people abroad. Many users are open to showing you around or hanging out if approached respectfully.
This app is another favorite among travelers. Its primary function is to connect farms, organizations, or small businesses with individuals willing to work in exchange for food and accommodation—a voluntary exchange program. Additionally, there’s a “travel buddy” section where you can connect with other adventurous individuals.
Read more : Best apps for backpacking .
9. How to Budget While Backpacking Solo?
When picturing a typical backpacker, it’s common to imagine someone not flush with cash to spend lavishly at every turn. Backpackers often explore various strategies to minimize expenses and budgeting is also essential for solo backpacking. Here are three primary areas where you can significantly reduce costs.
Accommodation
A logical choice for accommodations would be hostels. They offer the most affordable and hassle-free option for solo backpackers. For instance, HostelWorld boasts the most extensive selection of hostels. When browsing, start by sorting by the lowest price.
Also, consider its location, read reviews, and check for additional perks (like included breakfast). Weigh the benefits, location, and price when making a decision. Sometimes, it’s worth paying more for a centrally located hostel rather than choosing the cheapest one far from the main attractions.
As mentioned, the Couchsurfing app isn’t just for meeting new people. Its primary function is to help travelers find a couch to sleep on. You send cordial requests to potential hosts; if they accept, you can stay at their place for the night. Engaging with locals enriches the travel experience, and there’s no better platform for this than Couchsurfing.
Wild Camping
Wild camping is an option almost everywhere if you’re willing to simplify your needs. While not exactly suitable for city centers, you can find spots where it feels logical and convenient. All you need is a sleeping bag, and a mattress and tent can be beneficial for added comfort. It’s truly an immersive experience for a solo backpacking trip!
Read more : Camping Alone: Tips On How To Feel Safe .
For those on a budget, public transport is the best choice. Local trains and buses offer excellent connections between European countries, allowing you to traverse Europe efficiently. To search for transport schedules and compare prices, I recommend using Omio . If Omio doesn’t list transportation options for less-known destinations, you can find local transport providers on Rome2Rio .
Carpooling with BlaBlaCar
BlaBlaCar is gaining popularity in Europe. It’s a carpooling app where you search for your destination, and if you find someone driving that way, you can join them. It’s often more affordable than public transport.
Hitchhiking
One of my top transport tips is hitchhiking. It’s an experience worth adding to your bucket list, even if you to try it once. Some days, you might get fortunate and make quick progress, while others might be slower.
Read more : Tips for Hitchhiking in Europe .
The first rule is to steer clear of restaurants. While treating yourself occasionally is okay, it’s essential to remain disciplined and resist frequent temptations. Dining out can quickly deplete your funds. If you choose restaurants, choose those away from touristy areas , where locals dine. Alternatively, street food is a great way to satisfy your hunger without breaking the bank.
Another sensible approach is to purchase groceries from supermarkets and enjoy picnics outdoors. However, the most cost-effective tip for meals is to cook for yourself. Whether preparing pasta in a hostel kitchen or cooking in the wilderness with your stove, self-catering will save you significantly.
Read more : Budget backpacking tips .
10. Leave room for spontaneity
Having a general idea of what you want to do or where you want to go is essential. Conduct preliminary research about your upcoming solo backpacking trip, such as marking desired destinations on Google Maps. This gives you a sense of direction to begin your journey.
However, once you’re on the move, allow for spontaneity. Perhaps you’ll hear about a nearby intriguing location or a hidden gem you wouldn’t want to miss. Being flexible is the best advice for solo backpackers, ensuring you savor every moment of your adventure.
11. Immerse Yourself in Local Culture and Traditions
Traveling is less about the places you visit and more about the people you meet in those places. To truly appreciate a backpacking destination, it’s essential to immerse yourself in its local culture and traditions.
Begin with some research about your destination. Familiarize yourself with local events, beliefs, traditions, and culture. This way, when you arrive in a foreign country, you won’t come across merely as a tourist, but as a traveler eager to integrate into the culture. Additionally, learning even a few basic phrases in the local language can earn you greater respect from the locals.
So, what’s the best way to understand local culture?
Engaging with locals is the most authentic approach. For instance, I participated in a Workaway in Hungary for a week during my European backpacking journey. This experience allowed me to witness the daily lives of locals, understand their traditions, and sample local food and beverages. The Couchsurfing platform is also an excellent way to make new friends and gain insights into life in a foreign country.
In the end, ask yourself: What will be more memorable? Merely visiting renowned attractions abroad or experiencing those places with a deeper understanding of their stories, and culture, and engaging with the locals?
12. Stay in hostels or Couchsurfing
As previously highlighted, solo travel can sometimes feel isolating. While you might spend a lot of time exploring on your own, it’s essential to have human interactions. You might have items like a book or guitar to keep you company, but they can’t replace meaningful conversations.
If you want to connect with like-minded individuals, staying in a hostel is an obvious choice. Hostels are some of the most diverse and international places you can find in any country you visit. You might encounter other solo backpackers eager to chat and share experiences. Not only are hostels conducive to socializing, but they’re also budget-friendly. It’s a win-win.
Another fantastic way to meet people is through Couchsurfing. While you’ll primarily interact with locals, it offers a unique opportunity to delve deeper into the destination. Your hosts might even act as informal guides, showing you around and saving you the effort of extensive research. It’s truly a remarkable experience!
Read more : My First Solo Backpacking Experience in Europe .
These solo travel tips are perfect for jumpstarting your journey, especially if you’re new to backpacking in Europe. As you progress, you’ll uncover other unique benefits tailored to your experiences since each backpacker’s adventure unfolds differently. You’ll soon realize that it’s a life-changing experience, and everything tends to work out despite any challenges. Rest assured, solo backpacking in Europe is safe. Dive into your first adventure and travel without any regrets!
Recent Posts about Solo Travel:

How to stay safe when backpacking solo

8 Best cities in Europe for solo travel

Camping alone: Tips on How to Feel Safe
Liked this article? Feel free and Share it!
2 thoughts on “Solo Backpacking Trip To Europe: 12 Simple Tips for Beginners”

Comments are closed.
COMMENTS
First solo backpacking trip— advice needed. Hello. I'm currently planning to embark on my first solo backpacking trip in the summer in Colorado. I have plenty of experiencing camping, have done plenty of day-long hikes, but have never backpacked. I want this to be a 10 day trip in the San Juan mountains.
16 votes, 16 comments. true. Open menu Open navigation Go to Reddit Home
614 votes, 91 comments. 3.7M subscribers in the backpacking community. A subreddit for traveling backpacking and wilderness backpacking, not…
Keep it Short. Choose something with a round-trip distance of 10 miles or less. Ideally, try to get at least 3 to 5 miles away from the trailhead. This way, you'll get far enough out there to enjoy yourself, get away from city life and feel accomplished while keeping the overall level of risk pretty low.
Going backpacking solo for the first time was one of those moments, too. It was scary, emotional, invigorating, empowering, and rewarding. If you're unsure whether you're ready, follow these tips and make that leap into the unknown. Don't Overdo It. It's tempting to plan an epic journey for your first solo backpacking trip. Perhaps you ...
Backpacking alone is a wonderfully enjoyable way to connect with nature and yourself. However, there is a misconception that camping alone is dangerous because of potential natural and human threats. This guide will help dispel some myths about solo camping safety and equip you with the necessary gear and tips for your next solo adventure.
Proper meal planning is a critical component of your solo backpacking journey. Select lightweight, nutritious, and easy-to-prepare meals. Dehydrated foods, energy bars, and freeze-dried options are popular choices. Variety is key, ensuring you have different flavors and textures to keep your taste buds excited.
That trip was — perhaps — overkill for my first shot at backpacking solo. I completed 150 miles, combined over multiple trips on the Continental Divide Trail in Montana and Wyoming. ...
In the Summer of 2011 at 18 years old, I set out on my first solo trip. For three months I backpacked around Europe through 20 countries. I traveled by train, bus, and boat. In this article, I review my first solo trip. I'll talk about planning, packing, budgeting, my route, experiences, and more. I'll discuss the mistakes I made and the ...
3. Prepare to feel alone. This seems obvious for a solo trip of any kind, but disconnecting from everything is a big change. Assign yourself a task or bring activities in order to enjoy this time off the grid rather than feel lonely or isolated. A sketchbook, camera, or journal are ideal for enjoying your solace.
Related Read: 11 Backpacking Trips in the U.S. That Should be on Your Bucket List. Step 1: Perfect Your Mental Game. The key to a successful solo backpacking trip is not picking the trails with the best weather or the most jaw-dropping views. The best way to have a safe, fun trip is to train your brain.
Not all first solo backpacking trips are textbook perfect. Even pro and hardcore backpackers don't even say all of their trips are 100% flawless. But just by being well-prepared and carefully planned, you're already halfway there. Remember, the core of a good solo backpacking trip starts with these factors: plan well, pack right, and ...
Trip Planning. Photo: Peter Cade/Stone via Getty Images. For your first overnight, choose an easy route with low mileage and manageable elevation gain. Remember, you'll hike slower with a full pack than you might on a regular dayhike. Apps like Gaia GPS are useful for finding route suggestions, trail info, and maps.
A thorough understanding of gear, terrain, altitude, conditions, and wildlife is the first step in feeling confident and self-sufficient on the trail. Know how to filter water, set up your tent, be bear aware, read a map and trail signs, tend to your stove, treat a blister, assess the weather, and pace yourself.
Nonetheless, I showed up to my first backpacking trip with 45 lbs of backpacking gear strapped to my back (yes you read that right, 45lbs) and wearing a visor, gym shorts, high black socks (with liners!), twist-lock cheap hiking poles, and a cotton tank top. That first backpacking trip was an intense introduction to the world of backpacking.
If you're planning your first backpacking trip through Europe, this is the post for you! ... Before I went on my first solo trip to Europe, I had people in my life telling me it wasn't safe for solo female travellers. ... Reddit. Share. Share. 1.2K Shares. Categories Solo Travel Tags Europe, solo travel Post navigation.
A key tip: Only bring items you use often, so plan thoughtfully. Also, leave at least 10 percent of your backpack's space free for food, water, and unexpected items. Read more: How to pack a tent for backpacking. 5. Bring Something to Ward Off Boredom.