How to Quickly Disable or Delete Safari Extensions on an iPhone or iPad
Did you install one too many extensions on your iPhone and now Safari is really slow? Follow this quick guide to disable or delete them.
Safari extensions are a popular way to customize your browser. With the release of iOS 15 came the introduction of numerous new extensions Safari was compatible with on an iPhone, as well as on a Mac.
You can download extensions from the App Store, just like you do with any other app. However, if you ever get too many of them, it might slow down your browsing experience. Luckily, you can get rid of extensions easily.
Take a look below to learn how to disable or delete Safari extensions.

What Are Safari Extensions?
As the term itself indicates, Safari extensions are small apps that add specific functions to Safari so you can personalize your browser. It improves functionality and helps you get the most out of Safari.
Related: Finally, You Can Install Safari Extensions on iPhone With iOS 15: Here's How
Some examples of tasks that extensions do for you include automatically filling cookie forms, blocking ads, and improving privacy.
You can either toggle off Safari extensions or completely delete them.
How to Turn Off Safari Extensions on an iPhone or iPad
If you don't want an extension temporarily, but find it useful in the long run, you can just disable and enable it when you want it back. Here's how to do so:
- Open Settings and select Safari .
- Scroll down and tap on Extensions .
- Choose the extension you would like to disable.
- Tap the toggle next to it to disable the extension. Repeat for every extension you'd like to turn off.
How to Delete Safari Extensions on an iPhone or iPad
Have an extension that is just taking up space because you don't really use it? You can quickly delete it from your iPhone or iPad the same way you delete an app. Some extensions also tend collect personal data, so be careful which extensions you choose to download and keep.
Related: Browser Extensions You Should Remove Now Due to DataSpii
Follow these steps to delete an extension:
- Search for the app on your Home Screen or in the App Library . Once you find it, press and hold until the apps begin shaking.
- Press the minus (–) sign that appears and select Delete App from the popup that appears. Repeat for all extensions you want to delete.
- Tap Done in the top-right corner to return the screen to normal.
Declutter Your Browser by Disabling or Deleting Extensions
Safari extensions are quite helpful for plenty of different functions you may not even know you needed. You can browse through the App Store to download one whenever you want.
If you ever want to get rid of them, just open your Safari settings to toggle off an extension or just delete the relevant app like you would with any others on your device. Removing Safari extensions from an iPhone or iPad is really that simple.
How To Check If Your Apple Device Has AppleCare
Ios 17.5 developer beta 3 is now available, download apple’s let loose event wallpapers for iphone in 4k resolution, apple announces let loose ipad event for may 7.
- Zip-rar tool
- Zip browser
How To Add Or Remove Safari Extensions On iPhone Or iPad
Looking to learn how to add or remove Safari web extensions on iPhone or iPad? then this article is for you.
With iOS 15 and iPadOS 15 Apple has finally brought Safari web extensions to iPhone and iPad. Now users can use web extensions on iOS Safari to add new functionality and features to the web browser and enhance their browsing experience.
Adding or removing Safari extensions on iPhone or iPad is very simple. Web extensions can be added from the App Store and managed through Safari preferences found under the Settings app.
Safari web extensions are developed by third-party developers. Currently, the majority of extensions that are available for iOS involve ad-blockers, popup blockers, and VPNs . However, we expect more iOS web extensions to make their way into the App Store in the coming months.
How to add Safari web extension on iPhone or iPad
You can add Safari extension on iPhone or iPad by following the steps below.
Step 1. Open Settings and go to Safari .
Step 2. Now tap on Extensions option found under the General heading.
Step 3. Tap on More Extensions button, after which you will be redirected to the App Store.
Step 4. On the App Store look for the extension you want to install and tap on the ‘Get’ button next to it. Both paid and free extensions are available in the store.
Step 5. Next, you need to enable the extension. Go back to Extensions page as shown in step 2.
Step 6. Now turn on the toggle located next to the extension you have just downloaded.
This is how you can add new extensions to Safari on iPhone and iPad.
How to remove Safari web extension on iPhone or iPad
You can disable an iOS Safari web extension by going to Settings -> Safari -> Extension and turning off the toggle next to it.
However, if you want to completely remove Safari web extension on iPhone or iPad, then you can follow these steps.
Step 1. Check which Safari web extensions are installed on your device by going to Settings -> Safari -> Extensions .
Step 2. Return to the home screen and look for the app icon for the extension you want to delete.
Step 3. Long press on it and tap on the Remove App button from the menu. After confirming the deletion also tap Yes for deleting app’s data.
This should remove the Safari web extension from your iOS device and remove it from Safari’s extensions list.
There you go folks, this is how you can easily add or remove Safari extensions on iPhones and iPad running iOS 15 or later.
- iOS 15 features
- iPhone Safari
- Safari web extensions
- Web extension

Leave a Reply Cancel reply
Your email address will not be published. Required fields are marked *
Notify me of follow-up comments by email.
Notify me of new posts by email.
This site uses Akismet to reduce spam. Learn how your comment data is processed .
Sign Up for Our Newsletters
Related posts, how to reset airpods pro the right way, how to put picture over another picture on iphone or ipad, airdrop not working on mac or iphone fix here.
Last Updated on August 11, 2023 by Zaib Ali
Manage Your Safari Extensions on iPhone and iPad

For those looking to manage their Safari extensions, doing so from an iPhone or an iPad is actually relatively easy. With Safari being Apple’s own web-browser, there’s a reason users may choose this as their go-to browser. With extensions, users are able to further customize their web experience through adding certain modifications.
Concerning extensions, there’s an entire world of possibilities. Users can have extensions that block pop-ups, help them find coupons, block content and more. Using this guide, I’ll show you how to manage your extensions in Safari on your iPhone and iPad, as well as where users can find even more extensions for their browser.
Where is Manage Extensions in Safari?
If you are looking for where to find your Safari extensions, navigating to this is actually rather easy.
On either your iPad or iPhone, perform the following actions:
- Go to Settings > Safari

This will show you your extensions that you have for Safari. Additionally, you can also select More Extensions to browse through what is available on the App Store. If you find one that you like, you are able to download it be selecting either its price (should it have one) or by selecting Get. You will then just need to follow the onscreen instructions.
It’s worth mentioning that any extensions you install on your iPhone or iPad will also appear as Safari settings on additional devices that are signed into the same Apple ID. This can make them easier to access and download.
Suggestions for Safari Extensions
When it comes to using extensions on Safari, some can be particularly more helpful than others. Personally, there’s a couple of free extensions that I would recommend.
- Turn Off the Lights for Safari : This free extension enables Dark Mode across the web. Additionally, this extension also allows users to customize what it and what isn’t in Dark Mode. This app allows pages with video to darken to focus more on the streaming content: giving users a theatre experience directly on their device. There’s plenty of more options as well, and with the extension being free, there really isn’t a reason not to try it.
- Ka-Block : This is a free content blocker that is also open-source. Using this app, users can prevent both ads and tracking scripts from slowing down any webpages that a user visits. They also have an extension for Mac as well.
- Checkmate : This free app helps users find deals while they shop online by automatically applying deals when the user goes to checkout. How the app works is that it tracks deals online stores send out, and then collects unused discounts and gives them directly to you.
You can find all of these extensions through the More Extensions option as outlined above.
How do I Remove Unwanted Extensions from Safari?
If you don’t like a particular Safari extensions, you don’t have to keep it around. Unfortunately, uninstalling these extensions can be a bit weird, but luckily there is a way to do it.
If you are looking to remove a Safari extension, from your device, simply follow these steps:
Time needed: 1 minute
How to remove unwanted extensions from Safari.

How do I Edit Safari Extensions on iPhone and iPad?
When it comes to managing and editing your extensions, users also have options. Being able to set your own permissions and settings through an extension is possible, users just need to ensure that they are navigating to the right place.
On an iPhone, the easiest way to manage extensions is by going through Settings > Safari > Extensions . Click on the extensions you want to modify, then select Extension Settings . The extension may need to be turned on to find this option.
For those on an iPad, not only can you follow the same steps for the iPhone from above, but you can also tap the puzzle-icon next to the right-side of the search field and select Manage Extensions . This also allows you to set permissions within the extension.
Working with Safari Extensions on iPhone and iPad
Being able to modify Safari through extensions can be extraordinarily helpful for a majority of users. By using extensions, users can create an experience that is custom-tailored specifically to their needs. Using this guide, users can easily install new extensions, and then manage them directly from their settings.
How you choose to surf the web is ultimately up to you. However, there are way to customize this experience in a manner that ensures you’re getting the most out of Safari. Whether you’re using your iPad or your iPhone to browse the web, users still have the option of adding extensions to Safari to create the best experience possible for them. Using this guide, be sure to give extensions a try.
Leave a Reply Cancel reply
You must be logged in to post a comment.
This site uses Akismet to reduce spam. Learn how your comment data is processed .
- Nick deCourville
How to Remove Safari Extensions Quickly

How do you uninstall Safari extensions? If you downloaded a Safari extension and found it to be cumbersome or annoying, you'll want to know how to delete extensions from Safari. Luckily, it's easy to do and doesn't involve mucking about in the App Store at all. Here's how to delete an extension on Safari.
How to Remove Safari Extensions on iPhone or iPad
How to delete extensions on a mac, how to remove safari extensions.
Did you add a Safari extension that you don't want anymore? Remove it! There are two ways to do this, depending on if you're using a Mac or an iPhone or iPad.
There are two options to remove Safari extensions on your iPhone or iPad. You can either turn it off, or delete it entirely.

Related: The Evolution of the iPhone: Every Model from 2007–2021

Next, learn about how to customize Safari tab groups .
Author Details

Amy Spitzfaden Both
Amy Spitzfaden-Both is the Managing Editor for iPhone Life magazine and an award-winning novelist, with over 10 years of experience in the publishing industry. She specializes in Apple news and rumors, health and fitness tech, and parenting in the digital age. She graduated from MIU with a BA in Literature and Writing. Amy lives in New Hampshire with her husband and daughter. When she’s not writing or glued to her iPhone, she enjoys hiking, traveling, and creating her own tea blends.

Featured Products

Most Popular

How to Tell If Someone Blocked Your Number on iPhone

10 Simple Tips To Fix iPhone Battery Drain

iPhone Alarm Volume Low? How to Make an iPhone Alarm Louder

How to Schedule a Text Message on iPhone

How to Tell If a Dead iPhone Is Charging

How To Put Two Pictures Together on iPhone

How to Fix Apple Watch ECG Not Working

How to Hide an App on Your iPhone

How to Get Automatic Birthday Reminders on iPhone

How To Turn Off Flashlight on iPhone (Without Swiping Up!)

Can iPhones Get Viruses? How to Detect & Remove Malware (iOS 17)

How to Transfer Call from Apple Watch to iPhone
Featured articles, why is my iphone battery draining so fast 13 easy fixes.

Identify Mystery Numbers: How to Find No Caller ID on iPhone

Apple ID Not Active? Here’s the Fix!

How to Cast Apple TV to Chromecast for Easy Viewing

Fix Photos Not Uploading to iCloud Once & for All (iOS 17)

There Was an Error Connecting to the Apple ID Server: Fixed

CarPlay Not Working? 4 Ways to Fix Apple CarPlay Today
Check out our sponsors.

- Each email reveals new things you can do with your phone (and other devices) with easy-to-follow screenshots.
- Enter your email to get your first tip immediately!
- The Best Tech Gifts Under $100
- Traveling? Get These Gadgets!
How to Install, Manage, and Delete Safari Extensions
Add functionality and efficiency to Apple's web browser
Tom Nelson is an engineer, programmer, network manager, and computer network and systems designer who has written for Other World Computing,and others. Tom is also president of Coyote Moon, Inc., a Macintosh and Windows consulting firm.
What to Know
- To download and install an extension, go to the Safari menu > Safari Extensions , find an extension, and click Get > Install .
- To activate an extension, go to Safari > Preferences > Extensions , click the check box next to the extension, then click Turn on .
- Access an extension via its Safari Toolbar icon. To disable: Preferences > Extensions , remove the check mark. Click Uninstall to delete it.
This article explains how to install, use, and manage Safari extensions. Instructions in this article apply to Safari 9 and later.
How to Download and Install Safari Extensions
Installing Safari extensions is an easy process. You can find a selection within Safari itself.
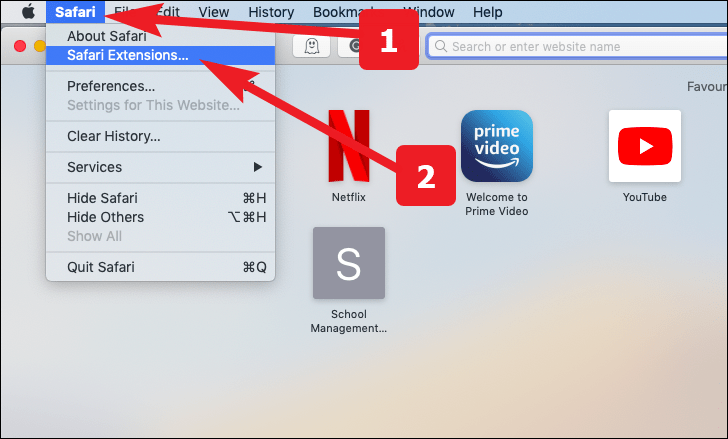
Open Safari and select Safari Extensions from the Safari menu.
The App Store opens to the Safari Extensions section. Scroll to find an extension you want to add. Downloading extensions is like buying anything else in the Mac App Store .
Click Get on a free extension or the price on a paid extension.
The Get button or price button becomes a green Install button. Click it to download the extension.
Your Mac may ask you to authorize the purchase even if the extension is free. Do so to continue the download.
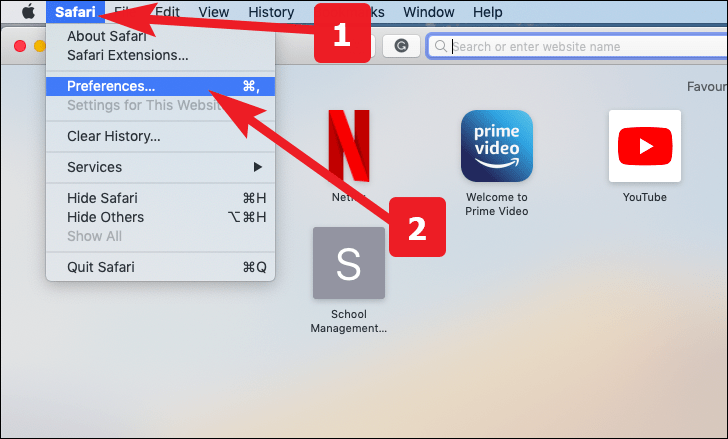
To activate the new extension, return to Safari and select Preferences under the Safari menu.
The keyboard shortcut is Command + , (comma).
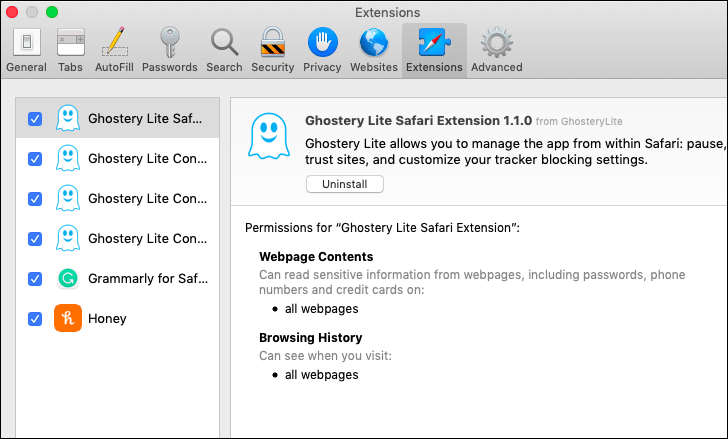
Select the Extensions tab in the Safari General preferences screen.
Click the check box next to the extension you downloaded.
Confirm the activation by selecting Turn On in the pop-up window.
To browse for additional add-ons, click the More Extensions button to return to the Mac App Store. Repeat these steps for all the extensions you download.
How to Use a Safari Extension
How you use a Safari extension depends on its functionality, but some elements are common to all of them. Generally speaking, you access and use an extension by clicking its icon on your Safari Toolbar. Once you do that, it runs an automated process or opens a menu to let you set preferences or select actions.
For example, the Grammarly extension runs automatically while you write, but you can open the menu to turn it off or on for a website.
How to Manage or Delete Safari Extensions
Once you start loading extensions for your Safari browser, you're probably going to want to manage their use or uninstall the extensions you don't like or just never use.
Return to the Extensions pane of Safari's Preferences pane.
Click the name of the extension you want to remove in the left pane.
To temporarily disable the extension, remove the check mark from the box next to it.
To remove an extension completely, click Uninstall in the right pane.
You can redownload extensions you've uninstalled as long as they're still available in the App Store.
What Are Safari Extensions?
Extensions are third-party developers add-on code that uses Safari's web features for specific tasks, such as making it easier to search Amazon, allowing an app, such as 1Password, to integrate with the browser and create an easy-to-use password management system, or adding an effective way to block pop-up ads.
You'll also find that most social media sites have Safari extensions that make posting to your favorite social site as simple as clicking a button in the Safari toolbar .
Where to Find More Safari Extensions
The App Store isn't the only place to download Safari extensions; it's just the easiest. You can also find them on other sites with a quick internet search.
Safari extensions are generally safe to install. Apple requires all extensions to run within the basic tools it provides in the Safari extension environment. You don't necessarily have to worry that one you download outside of the App Store will wreck your computer but make sure you trust the developer before you install anything they made.
Get the Latest Tech News Delivered Every Day
- 9 Best Safari Extensions of 2024
- How to Install Mac OS on PC
- How to Install Safari Extensions in Windows
- How to View, Manage, or Remove Safari Plug-Ins
- How to Manage Extensions in Popular Web Browsers
- Speed Up Safari With These Tuneup Tips
- How to Reset Safari to Default Settings
- How to Remove Adware From Your Mac
- How to Remove MacKeeper
- How to Install and Use OpenOffice Extensions
- How to Activate and Use Responsive Design Mode in Safari
- How to Manage Cookies in the Safari Browser
- How to Enable Safari Dark Mode
- How to Check Computer History
- Add More Features by Turning on Safari's Develop Menu
- Manage Smart Search in Safari for Mac
How to use Safari extensions on your iPhone and iPad
Along with some extensions to try.
By Barbara Krasnoff , a reviews editor who manages how-tos. She’s worked as an editor and writer for almost 40 years. Previously, she was a senior reviews editor for Computerworld.
Share this story
If you buy something from a Verge link, Vox Media may earn a commission. See our ethics statement.
:format(webp)/cdn.vox-cdn.com/uploads/chorus_asset/file/22863260/akrales_210917_4760_0330.jpg)
One of the handiest types of software in anyone’s quiver is the browser extension: those cool little applets that let your browser do what you want it to do. And one of the nicest things about iOS 15 and iPadOS 15 is that you can now add extensions to the Safari browser. Even though this is a new feature that launched with the latest iOS version, there are already a number of useful extensions available for you to add.
What follows is a rundown on how to add extensions to your Safari app — while we’ve illustrated the process using an iPhone, you can follow the same basic directions with an iPad. We’ve also included a sampling of some extensions you can try.
How to add extensions
- Tap on the Settings app.
- Scroll down to and select Safari > Extensions.
- Any extensions that you’ve already installed will be listed here. Tap on “More Extensions” if you’d like to see what’s available in the App Store. (You can also simply go to the App Store and search on “Safari Extensions.”)
:format(webp)/cdn.vox-cdn.com/uploads/chorus_asset/file/22924238/makephotogallery.net_1634147611611.png "ipad safari extensions remove")
- Once you’ve installed your first extension, you’ll see a little “puzzle piece” icon on the left side of Safari’s address bar. Tap that, and the menu that pops up will include your current extensions plus a “Manage Extensions” selection, which lets you toggle your extensions on and off.
:format(webp)/cdn.vox-cdn.com/uploads/chorus_asset/file/22924199/IMG_62BD37855789_1.jpeg "ipad safari extensions remove")
Some extensions to try
This is a small sampling of some of the extensions that you can now access via the App Store. While there are not many extensions yet available (compared to the number of extensions for, say, Chrome), it’s a pretty safe bet that there will be lots more to come over the next few months.
Amplosion ($2.99)
AMP, which is short for “Accelerated Mobile Pages,” is a web format created by Google to optimize search results for mobile browsers. However, if you’d rather not have Google tweaking the webpages you upload, you can use Amplosion to redirect the AMP links that show up in search results into normal mobile links.
Noir ($2.99)
When you’re browsing at night and you’ve set your iPhone or iPad to dark mode, you will often hit a website that is bright enough to make your eyes water. Noir allows you to set a dark mode for all the websites you visit.
1Password (subscription needed)
1Password is a well-known and respected password manager . If you’re a 1Password user, there’s no question that you’re going to want to add this one to your mobile Safari app.
Super Agent for Safari (free)
This handy extension automatically fills out a website’s cookie consent forms based on your preferences, which can save you a lot of time and irritation.
Web Inspector (free)
Something for developers: an app that lets you inspect the HTML coding of a website, modify it, debug it, and perform other essential tasks.
What happens after your country runs on 99 percent renewable electricity?
A morning with the rabbit r1: a fun, funky, unfinished ai gadget, this self-transforming megatron is as badass as it is expensive, biden signs tiktok ‘ban’ bill into law, starting the clock for bytedance to divest it, microsoft needs to win back trust.
More from Tech
:format(webp)/cdn.vox-cdn.com/uploads/chorus_asset/file/25184511/111323_PlayStation_Portal_ADiBenedetto_0013.jpg "ipad safari extensions remove")
Sony’s portable PlayStation Portal is back in stock
:format(webp)/cdn.vox-cdn.com/uploads/chorus_asset/file/23925998/acastro_STK054_03.jpg "ipad safari extensions remove")
The Nintendo Switch 2 will now reportedly arrive in 2025 instead of 2024
:format(webp)/cdn.vox-cdn.com/uploads/chorus_asset/file/19336098/cwelch_191031_3763_0002.jpg "ipad safari extensions remove")
The best Presidents Day deals you can already get
:format(webp)/cdn.vox-cdn.com/uploads/chorus_asset/file/25289959/Command_Line_Site_Post_Dylan_Field_Figma.jpg "ipad safari extensions remove")
Interview: Figma’s CEO on life after the company’s failed sale to Adobe
How to add and enable extensions in Safari for iPhone and iPad

- How to add an extension to Safari
- How to enable an extension in Safari
If you use Safari on your Mac, then you may be familiar with extensions. These are basically add-ons for Safari that you can customize the browser with, and they enhance your overall user experience. Since Safari itself is pretty barebones to start with, having extensions can greatly improve the usability of Apple's native browser.
With iOS 15 and iPadOS 15, Apple added extensions for mobile Safari, bringing it more in line with the desktop version. But how do you go about adding and enabling them? Don't worry, we'll show you the ropes.
How to add an extension to Safari on iPhone and iPad
Before you can start using Safari extensions, you'll need apps that support the feature first. You also want to make sure that you are running iOS 15 or iPadOS 15 on your best iPhone and favorite iPad , respectively. Since this is a brand new feature, you need to be running the latest software for it to work. It won't be available with iOS/iPadOS 14 and earlier.
You can add an extension to Safari by downloading apps with Safari extensions just like any other app or game on the App Store. You can simply search for "Safari extensions" on the App Store search page, or check a simple list that Apple has with some extension apps .
For a full collection of all supported apps on the App Store, you can get to it from the Settings app.
- Launch Settings on your iPhone or iPad.
- Scroll down and tap Safari .
- Tap Extensions .

- Scroll down and tap More Extensions . This takes you to the App Store with all apps that support extensions.
- Tap Get (Free) or $X.XX on the apps with Safari extensions that you want to use.

- Download or purchase the app like you would with any other app or game.
How to enable an extension in Safari on iPhone and iPad
Once you have your apps with Safari extensions, you need to make sure that they are enabled before they can start working. There are two ways to go about this: from Settings, or directly in Safari.
To do this from Settings :
Master your iPhone in minutes
iMore offers spot-on advice and guidance from our team of experts, with decades of Apple device experience to lean on. Learn more with iMore!
- Under the Allow These Extensions area, tap on the extension you want to enable.
- Turn the toggle to ON (green) if you want to enable the extension.

- Repeat steps 1-5 for all extensions you want to enable.
To do this from Safari :
- Launch Safari on your iPhone or iPad.
- Tap the Reader/Extensions button in the toolbar . It looks like "AA" with a puzzle piece next to it.

- In the menu that pops up, tap Manage Extensions .
- Turn the toggle to ON (green) for any extension you want to use.
- Optionally, to disable an extension, just make sure the toggle is OFF (gray).

Make your life better with Safari extensions
As you can see, Safari extensions can really improve your mobile web experience. Extensions are used to block annoying ads and trackers, enable dark mode on any webpage, give you Picture-in-Picture for videos, help you save money, and more. And there are so many on the App Store! If you want some personal recommendations, check out what we think are the best Safari extensions for iPhone and iPad .

Christine Romero-Chan was formerly a Senior Editor for iMore. She has been writing about technology, specifically Apple, for over a decade at a variety of websites. She is currently part of the Digital Trends team, and has been using Apple’s smartphone since the original iPhone back in 2007. While her main speciality is the iPhone, she also covers Apple Watch, iPad, and Mac when needed. When she isn’t writing about Apple, Christine can often be found at Disneyland in Anaheim, California, as she is a passholder and obsessed with all things Disney, especially Star Wars. Christine also enjoys coffee, food, photography, mechanical keyboards, and spending as much time with her new daughter as possible.
On-device iOS 18 AI features tipped as Apple makes new open source LLM tools available online
This clever app gives me Spotify Wrapped stats all year round — here's how to use it to see your music listening trends
M4 MacBook Pro: Everything you need to know
Most Popular
- 2 Apple accused of using blood minerals from a region 'devastated by grave violations of human rights' in its products
- 3 Did Apple just email you to say your trade-in is canceled? Don't panic, it's a glitch
- 4 On-device iOS 18 AI features tipped as Apple makes new open source LLM tools available online
- 5 This Australian iPhone can use the EU's third-party app stores and more, but it's a messy workaround you probably shouldn't try
How to View, Manage, or Remove a Safari Extension
Safari extension showing up in Launchpad? Cannot get the old extension file working? Well, we have all the answers for you!

With the introduction of macOS Mojave, there came a new set of rules for the Safari extension. Apple decided, the extensions will now have to be installed through the macOS app store. Not only that, but the extensions will also show up as apps in Launchpad.
It’s been 3 years now this system is in practice, and the process to manage Safari extensions remains as serpentine as ever. If you are also the one bearing the torturous wrath of safari extensions and in need of a systemic way to handle them, you have landed on just the right page.
View Safari Extensions
To view the available extension list. Launch the Safari app from the dock or from Launchpad.
Next, from the upper right corner of the menu bar. Click on the ‘Safari’ tab. Then click on the ‘Preferences’ option.
Now, go to the ‘Extensions’ tab. You will be able to see all installed extensions on Safari.
Manage Safari Extensions
Well, managing Safari extensions can surely get a bit tricky. However, it’s easy as a pie once you know what you are doing.
Get a New Extension
To get new extensions, launch the Safari application from your dock or Launchpad.

Now, from the top left corner of the toolbar, click on ‘Safari’ and click on the ‘Safari Extensions’ option. It will take you right to the Safari extensions section on the Mac app store.
After that, click on ‘Get’ or price to purchase the extension. It will transform to ‘Install’, after that click on ‘Install’ on the extension from the now launched App store window.

Disable an Extension
If you don’t want to remove an extension, and just disable it for the time being. Go to the ‘Extensions’ tab from Safari preferences. Next, uncheck the desired extension from the list. The aforementioned extension will now be disabled.

Remove a Safari Extension
Here comes the most cringe worthy process. However, let’s get it over with.
Go to the ‘Extensions’ tab in Safari, as we did earlier in this guide above. Now, from the extensions tab, first, disable the extension by unchecking it from the list. Then, click on the ‘Uninstall’ option from the right section of the window.

Now, you will receive a prompt asking you to remove the application containing the extension. Click on the ‘Show in Finder’ option.

Next, secondary click on the said application and select the ‘Move to trash’ option from the list.

After that, enter your password to move the application to trash. Once, entered the application will be removed along with the Safari extension.

We hope after reading this, Safari gets a bit more tolerable. If not, well, there are many good options available out there and you dear reader are not in an exclusive relationship with Safari!

How to Use Gemini Code Assist in VS Code

How to Code Using AI

Microsoft Copilot Pro Review: There is a lot of Unrealized Potential
Get all the latest posts delivered straight to your inbox., member discussion.

How to Enable Cookies on iPhone

How to Block Websites on iPhone

How to Disable Pop up Blocker on iPhone

How to Import Data from Safari to Microsoft Edge on Mac

How to Disable or Hide 'Shared with You' section on Safari Start Page on iPhone
How to safely install and use Safari extensions on iPhone in iOS 15
If you are excited to try some third-party Safari extensions on iPhone and iPad, we show you the correct steps to do that. You will also see how to disable a Safari extension temporarily or uninstall it completely. And finally, we will go over three useful Safari extensions that you too might love using on your iPhone.

How to download, install, and use Safari extensions on iPhone
Before you begin, make sure you are running iOS 15 or later. After that, follow these steps to get and use Safari extensions on iPhone.
- Open the Settings app and tap Safari .
- Tap Extensions > More Extensions . This will open the Safari Extensions page in the iPhone App Store.
- Tap GET to download a Safari extension.
- Once the extension is downloaded, go to Settings > Safari > Extensions and enable it from here.
- Optional: Open the extension from the iPhone Home Screen. It looks just like a regular app. Configure its settings if applicable.
- Open Safari, and you should see an extension icon in the address bar. Tap it to use the extension.
- Note that, if you installed a content blocker extension, you may not see the extensions icon. To use content blockers, tap AA and choose Turn on Content Blockers or Turn off Content Blockers .

How to change Safari extension permission on iPhone
When you use a Safari extension for the first time, it may show a popup asking permission to work on that particular web page. You can allow for one day, always allow, or don’t allow. Later, you can manage this by following these steps.
- Open Settings and tap Safari .
- Tap Extensions .
- Tap the extension name .
- Under Permissions for “extension name”, tap an option to change it.

How to disable a Safari extension on iPhone
Want to stop using an extension (but not want to delete it)? Here’s how to do that.
- Turn off the switch for the desired extension or content blocker here.
- If you change your mind, follow the same steps to re-enable it.

You may also do this inside the Safari app by following these steps.
- Open Safari and tap the extensions icon or AA from the address bar.
- Tap Manage Extensions .
- Disable (or enable) the extensions here.
- Finally, tap Done .

How to uninstall and remove Safari extensions on iPhone
Removing a Safari extension is the same as deleting any regular iOS app . Here’s how.
- Long-press the Safari extension icon from the Home Screen or App Library.
- Tap Remove App > Delete App > Delete .
- Restart your iPhone.

You may also remove Safari extension by going to Settings > General > iPhone Storage > tap the extension name > Delete App .
3 Safari extensions I love using on my iPhone
Currently, the Safari Extensions section in the App Store is full of ad blockers, content blockers, adult site blockers , and such. There aren’t many useful extensions. But here are three that I have installed and use frequently.
1. PiPifier
I like listening to long debates and podcasts like videos and documentaries on YouTube in Safari. Annoyingly, YouTube does not support Picture-in-Picture. (I mean, it does, then stops, then does . As of writing this, it does not support PiP in Safari on iPhone running iOS 15.0.2.)
This is where a tiny 1 MB extension called PiPifier comes in. It lets you enjoy videos in Picture-in-Picture mode, even on websites that do not support it, like YouTube. Overall this is my favorite iOS 15 Safari extension. Super handy!

Note : YouTube is testing PiP in its iOS app for premium subscribers .
2. Turn Off the Lights
Not all websites have the toggle to enable Dark Mode or support system Dark Mode. On these sites, enabling this extension can be comfortable during the night.
Plus, if you are watching something on YouTube in Safari, Turn Off the Lights will keep the video in focus and dim everything else. It looks pretty nice.

If I am not paying a website to consume their content, I do not like blocking ads on them. However, some websites take ads to such an annoying level that an informed user is forced to block them, else viewing content becomes a pain. If I am ever on such a website, I tap AA > Turn on Content Blockers to eliminate all ads.
Related : How to stop apps on your iPhone, iPad, or Apple TV from tracking you
This is how you can download, install, enable, use, disable, and delete Safari extension on iPhone in iOS 15. The steps for iPad are similar.
As said, this is just the beginning. Give it a few months, and we might see multiple Safari extensions of all kinds that add more functionality.
What do you think of this feature? Is it something you always wanted and are now glad it exists? Let us know using the comments section below.
How To Get Rid Of Extensions On Safari

- Software & Applications
- Browsers & Extensions

Introduction
Safari, the sleek and intuitive web browser developed by Apple, offers a seamless browsing experience with its user-friendly interface and robust features. One of the key elements that enhance the functionality of Safari is its extensions. These nifty add-ons provide users with additional tools and customization options, allowing them to tailor their browsing experience to suit their specific needs.
While extensions can be incredibly useful, there may come a time when you find yourself needing to declutter and streamline your browsing environment by removing certain extensions. Whether you're looking to optimize Safari's performance, address compatibility issues, or simply tidy up your browser , knowing how to efficiently remove extensions is a valuable skill for any Safari user.
In this guide, we'll walk you through the step-by-step process of removing unwanted extensions from Safari. By following these simple instructions, you'll be able to declutter your browser and ensure that your Safari experience remains smooth and tailored to your preferences. Let's dive in and explore the straightforward methods for getting rid of extensions on Safari.
Step 1: Open Safari
To begin the process of removing unwanted extensions from Safari, the first step is to launch the Safari browser on your Mac or iOS device. Safari is seamlessly integrated into the Apple ecosystem, making it the default browser on all Apple devices. Here's how you can open Safari on different platforms:
- If you're using a Mac, simply click on the Safari icon located in the dock at the bottom of the screen. Alternatively, you can access Safari from the Applications folder in Finder. Upon clicking the Safari icon, the browser will launch, and you'll be greeted by the familiar Safari interface.
- For iOS devices such as iPhones and iPads, locating and tapping the Safari icon on the home screen will open the browser instantly. Safari's recognizable compass icon makes it easy to spot amidst your other apps.
Once Safari is open, you're ready to proceed to the next step and access the Extensions menu to manage and remove unwanted extensions from your browsing experience. Opening Safari is the initial and essential step in the process of streamlining your browser by removing unnecessary extensions, ensuring that your browsing experience remains optimized and tailored to your preferences.
Step 2: Access the Extensions Menu
Once Safari is open, accessing the Extensions menu is the next crucial step in the process of managing and removing unwanted extensions. Safari simplifies the task of managing extensions by providing a dedicated menu where users can view, enable, disable, and remove extensions with ease. Here's how you can access the Extensions menu on Safari:
- Navigate to the top-left corner of the screen and click on "Safari" in the menu bar. A drop-down menu will appear.
- In the drop-down menu, locate and click on "Preferences." Alternatively, you can use the keyboard shortcut "Command + ," to access the Preferences window.
- Within the Preferences window, select the "Extensions" tab. This tab is represented by a puzzle piece icon, symbolizing the extensions that enhance Safari's functionality.
- Upon clicking the "Extensions" tab, you will be presented with a list of all the installed extensions, along with options to manage and customize their settings.
- Launch Safari on your iOS device and tap the "Settings" icon, represented by a gear symbol, typically located on the home screen.
- In the Settings menu, scroll down and look for "Safari" in the list of apps. Tap on "Safari" to access its specific settings.
- Within the Safari settings, you will find the "Extensions" option. Tap on "Extensions" to view and manage the installed extensions on your iOS device.
By accessing the Extensions menu through these straightforward steps, you gain the ability to oversee and control the extensions integrated into your Safari browser. This access is pivotal in the process of removing unwanted extensions, as it allows you to identify and select the specific extensions that you wish to remove, ensuring that your browsing environment remains tailored to your preferences and optimized for a seamless experience.
Step 3: Remove the Unwanted Extensions
After accessing the Extensions menu in Safari, the next step is to remove the unwanted extensions that you no longer require or that may be causing issues with your browsing experience. Safari provides a straightforward method for removing extensions, allowing you to declutter your browser and ensure optimal performance. Here's how you can remove unwanted extensions from Safari:
- Within the Extensions tab of the Preferences window, you will see a list of all installed extensions, each accompanied by a brief description of its functionality.
- To remove an extension, simply click on it to select it. Once selected, a "Uninstall" or "Remove" button will typically appear next to the extension.
- Click on the "Uninstall" or "Remove" button, and Safari will prompt you to confirm the removal of the selected extension. Confirm the action, and the extension will be uninstalled from Safari.
- In the Extensions section of Safari settings, you will find a list of installed extensions, each accompanied by a toggle switch to enable or disable the extension.
- To remove an extension, tap on the specific extension you wish to uninstall. This will open a detailed view of the extension's settings and options.
- Look for the option to uninstall or remove the extension within its detailed view. Tap on this option, and Safari will prompt you to confirm the removal. Once confirmed, the extension will be successfully uninstalled from Safari on your iOS device.
By following these simple steps, you can efficiently remove unwanted extensions from Safari, ensuring that your browsing environment remains streamlined and tailored to your preferences. Removing unnecessary extensions not only declutters your browser but also contributes to optimizing Safari's performance, potentially resolving any compatibility issues or conflicts that may arise from certain extensions. With the ability to easily remove unwanted extensions, Safari empowers users to maintain a clean and efficient browsing experience, allowing them to make the most of the browser's features while minimizing any potential disruptions.
Step 4: Confirm Removal
After initiating the removal process for an unwanted extension in Safari, it is essential to confirm the removal to ensure that the extension is successfully uninstalled from the browser. This confirmation step provides a final checkpoint, allowing users to verify their decision and prevent accidental removal of extensions. Safari simplifies the confirmation process, ensuring that users can seamlessly complete the removal of unwanted extensions with confidence.
Upon clicking the "Uninstall" or "Remove" button next to the selected extension, Safari will prompt a confirmation dialog box. This dialog box typically includes a message confirming the removal of the extension and may provide additional information about the potential impact of the removal. Users are presented with an option to either proceed with the removal by clicking "Uninstall" or "Remove," or to cancel the action if they have changed their mind.
When removing an extension from Safari on an iOS device, tapping the option to uninstall or remove the extension will prompt a confirmation dialog. Similar to the Mac confirmation process, this dialog box seeks confirmation from the user before proceeding with the removal. Users can review the details of the extension and its potential impact on their browsing experience before confirming the removal.
By confirming the removal of unwanted extensions, users can ensure that their browsing environment remains optimized and free from unnecessary add-ons. This final step in the removal process acts as a safeguard, preventing accidental removals and allowing users to make informed decisions about the extensions integrated into their Safari browser.
Once the removal is confirmed, the selected extension will be uninstalled from Safari, and users can enjoy a streamlined browsing experience tailored to their preferences. With the ability to confirm the removal of unwanted extensions, Safari empowers users to maintain control over their browsing environment, ensuring that their browser remains efficient, optimized, and free from unnecessary clutter.
By following these simple steps, users can efficiently manage and remove unwanted extensions from Safari, ensuring that their browsing experience remains smooth and tailored to their preferences. Removing unnecessary extensions not only declutters the browser but also contributes to optimizing Safari's performance, potentially resolving any compatibility issues or conflicts that may arise from certain extensions. With the ability to easily remove unwanted extensions, Safari empowers users to maintain a clean and efficient browsing experience, allowing them to make the most of the browser's features while minimizing any potential disruptions.
In conclusion, the process of removing unwanted extensions from Safari is a straightforward and essential task that allows users to maintain a streamlined and efficient browsing experience. By following the simple steps outlined in this guide, users can effectively manage their extensions, ensuring that their Safari browser remains optimized and tailored to their preferences.
The ability to access the Extensions menu, identify unnecessary add-ons, and remove them with ease empowers users to take control of their browsing environment. This process not only declutters the browser but also contributes to optimizing Safari's performance, potentially resolving any compatibility issues or conflicts that may arise from certain extensions.
By removing unwanted extensions, users can customize their browsing experience, ensuring that the browser is equipped with only the necessary tools and add-ons. This streamlined approach not only enhances the efficiency of Safari but also minimizes potential disruptions, allowing users to make the most of the browser's features without unnecessary clutter.
Furthermore, the confirmation step in the removal process acts as a safeguard, preventing accidental removals and allowing users to make informed decisions about the extensions integrated into their Safari browser. This final checkpoint ensures that users can confidently manage their extensions, knowing that their browsing environment remains optimized and free from unnecessary add-ons.
In essence, the process of removing unwanted extensions from Safari is a valuable skill for any user seeking to maintain a clean, efficient, and personalized browsing experience. With the ability to efficiently manage and remove extensions, users can ensure that Safari remains a reliable and tailored tool for their browsing needs, free from unnecessary clutter and optimized for seamless performance.
Leave a Reply Cancel reply
Your email address will not be published. Required fields are marked *
Save my name, email, and website in this browser for the next time I comment.
- Crowdfunding
- Cryptocurrency
- Digital Banking
- Digital Payments
- Investments
- Console Gaming
- Mobile Gaming
- VR/AR Gaming
- Gadget Usage
- Gaming Tips
- Online Safety
- Software Tutorials
- Tech Setup & Troubleshooting
- Buyer’s Guides
- Comparative Analysis
- Gadget Reviews
- Service Reviews
- Software Reviews
- Mobile Devices
- PCs & Laptops
- Smart Home Gadgets
- Content Creation Tools
- Digital Photography
- Video & Music Streaming
- Online Security
- Online Services
- Web Hosting
- WiFi & Ethernet
- Browsers & Extensions
- Communication Platforms
- Operating Systems
- Productivity Tools
- AI & Machine Learning
- Cybersecurity
- Emerging Tech
- IoT & Smart Devices
- Virtual & Augmented Reality
- Latest News
- AI Developments
- Fintech Updates
- Gaming News
- New Product Launches
- Fintechs and Traditional Banks Navigating the Future of Financial Services
- AI Writing How Its Changing the Way We Create Content
Related Post
How to find the best midjourney alternative in 2024: a guide to ai anime generators, unleashing young geniuses: how lingokids makes learning a blast, 10 best ai math solvers for instant homework solutions, 10 best ai homework helper tools to get instant homework help, 10 best ai humanizers to humanize ai text with ease, sla network: benefits, advantages, satisfaction of both parties to the contract, related posts.

How To Get Rid Of Browser Hijackers

How To Get Rid Of Search Baron On Safari

5 Easy Ways to Remove Facebook Virus Effectively

Microsoft Edge vs Chrome: Which Browser Is Better?

How To Remove Ads On Safari

How To Get Rid Of Bing On Safari

How To Clear iPhone Browser Cache

How To Get Rid Of Privacy Report On Safari
Recent stories.

Fintechs and Traditional Banks: Navigating the Future of Financial Services

AI Writing: How It’s Changing the Way We Create Content

How to Know When it’s the Right Time to Buy Bitcoin

How to Sell Counter-Strike 2 Skins Instantly? A Comprehensive Guide

10 Proven Ways For Online Gamers To Avoid Cyber Attacks And Scams

- Privacy Overview
- Strictly Necessary Cookies
This website uses cookies so that we can provide you with the best user experience possible. Cookie information is stored in your browser and performs functions such as recognising you when you return to our website and helping our team to understand which sections of the website you find most interesting and useful.
Strictly Necessary Cookie should be enabled at all times so that we can save your preferences for cookie settings.
If you disable this cookie, we will not be able to save your preferences. This means that every time you visit this website you will need to enable or disable cookies again.
iPhone User Guide
- iPhone models compatible with iOS 17
- R ' class='toc-item' data-ss-analytics-link-url='https://support.apple.com/en-ph/guide/iphone/iph017302841/ios' data-ajax-endpoint='https://support.apple.com/en-ph/guide/iphone/iph017302841/ios' data-ss-analytics-event="acs.link_click" href='https://support.apple.com/en-ph/guide/iphone/iph017302841/ios' id='toc-item-IPH017302841' data-tocid='IPH017302841' > iPhone X R
- S ' class='toc-item' data-ss-analytics-link-url='https://support.apple.com/en-ph/guide/iphone/iphc00446242/ios' data-ajax-endpoint='https://support.apple.com/en-ph/guide/iphone/iphc00446242/ios' data-ss-analytics-event="acs.link_click" href='https://support.apple.com/en-ph/guide/iphone/iphc00446242/ios' id='toc-item-IPHC00446242' data-tocid='IPHC00446242' > iPhone X S
- S Max' class='toc-item' data-ss-analytics-link-url='https://support.apple.com/en-ph/guide/iphone/iphcd2066870/ios' data-ajax-endpoint='https://support.apple.com/en-ph/guide/iphone/iphcd2066870/ios' data-ss-analytics-event="acs.link_click" href='https://support.apple.com/en-ph/guide/iphone/iphcd2066870/ios' id='toc-item-IPHCD2066870' data-tocid='IPHCD2066870' > iPhone X S Max
- iPhone 11 Pro
- iPhone 11 Pro Max
- iPhone SE (2nd generation)
- iPhone 12 mini
- iPhone 12 Pro
- iPhone 12 Pro Max
- iPhone 13 mini
- iPhone 13 Pro
- iPhone 13 Pro Max
- iPhone SE (3rd generation)
- iPhone 14 Plus
- iPhone 14 Pro
- iPhone 14 Pro Max
- iPhone 15 Plus
- iPhone 15 Pro
- iPhone 15 Pro Max
- Setup basics
- Make your iPhone your own
- Take great photos and videos
- Keep in touch with friends and family
- Share features with your family
- Use iPhone for your daily routines
- Expert advice from Apple Support
- What’s new in iOS 17
- Turn on and set up iPhone
- Wake and unlock
- Set up cellular service
- Use Dual SIM
- Connect to the internet
- Sign in with Apple ID
- Subscribe to iCloud+
- Find settings
- Set up mail, contacts, and calendar accounts
- Learn the meaning of the status icons
- Charge the battery
- Charge with cleaner energy sources
- Show the battery percentage
- Check battery health and usage
- Use Low Power Mode
- Read and bookmark the user guide
- Learn basic gestures
- Learn gestures for iPhone models with Face ID
- Adjust the volume
- Find your apps in App Library
- Switch between open apps
- Quit and reopen an app
- Multitask with Picture in Picture
- Access features from the Lock Screen
- View Live Activities in the Dynamic Island
- Perform quick actions
- Search on iPhone
- Get information about your iPhone
- View or change cellular data settings
- Travel with iPhone
- Change sounds and vibrations
- Use the Action button on iPhone 15 Pro and iPhone 15 Pro Max
- Create a custom Lock Screen
- Change the wallpaper
- Adjust the screen brightness and color balance
- Keep the iPhone display on longer
- Use StandBy
- Customize the text size and zoom setting
- Change the name of your iPhone
- Change the date and time
- Change the language and region
- Organize your apps in folders
- Add, edit, and remove widgets
- Move apps and widgets on the Home Screen
- Remove apps
- Use and customize Control Center
- Change or lock the screen orientation
- View and respond to notifications
- Change notification settings
- Set up a Focus
- Allow or silence notifications for a Focus
- Turn a Focus on or off
- Stay focused while driving
- Customize sharing options
- Type with the onscreen keyboard
- Dictate text
- Select and edit text
- Use predictive text
- Use text replacements
- Add or change keyboards
- Add emoji and stickers
- Take a screenshot
- Take a screen recording
- Draw in documents
- Add text, shapes, signatures, and more
- Fill out forms and sign documents
- Use Live Text to interact with content in a photo or video
- Use Visual Look Up to identify objects in your photos and videos
- Lift a subject from the photo background
- Subscribe to Apple Arcade
- Play with friends in Game Center
- Connect a game controller
- Use App Clips
- Update apps
- View or cancel subscriptions
- Manage purchases, settings, and restrictions
- Install and manage fonts
- Buy books and audiobooks
- Annotate books
- Access books on other Apple devices
- Listen to audiobooks
- Set reading goals
- Organize books
- Create and edit events in Calendar
- Send invitations
- Reply to invitations
- Change how you view events
- Search for events
- Change calendar and event settings
- Schedule or display events in a different time zone
- Keep track of events
- Use multiple calendars
- Use the Holidays calendar
- Share iCloud calendars
- Camera basics
- Set up your shot
- Apply Photographic Styles
- Take Live Photos
- Take Burst mode shots
- Take a selfie
- Take panoramic photos
- Take macro photos and videos
- Take portraits
- Take Night mode photos
- Take Apple ProRAW photos
- Adjust the shutter volume
- Adjust HDR camera settings
- Record videos
- Record spatial videos for Apple Vision Pro
- Record ProRes videos
- Record videos in Cinematic mode
- Change video recording settings
- Save camera settings
- Customize the Main camera lens
- Change advanced camera settings
- View, share, and print photos
- Use Live Text
- Scan a QR code
- See the world clock
- Set an alarm
- Change the next wake up alarm
- Use the stopwatch
- Use multiple timers
- Add and use contact information
- Edit contacts
- Add your contact info
- Use NameDrop on iPhone to share your contact info
- Use other contact accounts
- Use Contacts from the Phone app
- Merge or hide duplicate contacts
- Export contacts
- Get started with FaceTime
- Make FaceTime calls
- Receive FaceTime calls
- Create a FaceTime link
- Take a Live Photo
- Turn on Live Captions in a FaceTime call
- Use other apps during a call
- Make a Group FaceTime call
- View participants in a grid
- Use SharePlay to watch, listen, and play together
- Share your screen in a FaceTime call
- Collaborate on a document in FaceTime
- Use video conferencing features
- Hand off a FaceTime call to another Apple device
- Change the FaceTime video settings
- Change the FaceTime audio settings
- Change your appearance
- Leave a call or switch to Messages
- Block unwanted callers
- Report a call as spam
- Connect external devices or servers
- Modify files, folders, and downloads
- Search for files and folders
- Organize files and folders
- Set up iCloud Drive
- Share files and folders in iCloud Drive
- Share your location
- Meet up with a friend
- Send your location via satellite
- Add or remove a friend
- Locate a friend
- Get notified when friends change their location
- Notify a friend when your location changes
- Add your iPhone
- Add your iPhone Wallet with MagSafe
- Get notified if you leave a device behind
- Locate a device
- Mark a device as lost
- Erase a device
- Remove a device
- Add an AirTag
- Share an AirTag or other item in Find My on iPhone
- Add a third-party item
- Get notified if you leave an item behind
- Locate an item
- Mark an item as lost
- Remove an item
- Adjust map settings
- Get started with Fitness
- Track daily activity and change your move goal
- See your activity summary
- Sync a third-party workout app
- Change fitness notifications
- Share your activity
- Subscribe to Apple Fitness+
- Find Apple Fitness+ workouts and meditations
- Start an Apple Fitness+ workout or meditation
- Create a Custom Plan in Apple Fitness+
- Work out together using SharePlay
- Change what’s on the screen during an Apple Fitness+ workout or meditation
- Download an Apple Fitness+ workout or meditation
- Get started with Freeform
- Create a Freeform board
- Draw or handwrite
- Apply consistent styles
- Position items on a board
- Search Freeform boards
- Share and collaborate
- Delete and recover boards
- Get started with Health
- Fill out your Health Details
- Intro to Health data
- View your health data
- Share your health data
- View health data shared by others
- Download health records
- View health records
- Monitor your walking steadiness
- Log menstrual cycle information
- View menstrual cycle predictions and history
- Track your medications
- Learn more about your medications
- Log your state of mind
- Take a mental health assessment
- Set up a schedule for a Sleep Focus
- Turn off alarms and delete sleep schedules
- Add or change sleep schedules
- Turn Sleep Focus on or off
- Change your wind down period, sleep goal, and more
- View your sleep history
- Check your headphone levels
- Use audiogram data
- Register as an organ donor
- Back up your Health data
- Intro to Home
- Upgrade to the new Home architecture
- Set up accessories
- Control accessories
- Control your home using Siri
- Use Grid Forecast to plan your energy usage
- Set up HomePod
- Control your home remotely
- Create and use scenes
- Use automations
- Set up security cameras
- Use Face Recognition
- Unlock your door with a home key
- Configure a router
- Invite others to control accessories
- Add more homes
- Get music, movies, and TV shows
- Get ringtones
- Manage purchases and settings
- Get started with Journal
- Write in your journal
- Review your past journal entries
- Change Journal settings
- Magnify nearby objects
- Change settings
- Detect people around you
- Detect doors around you
- Receive image descriptions of your surroundings
- Read aloud text and labels around you
- Set up shortcuts for Detection Mode
- Add and remove email accounts
- Set up a custom email domain
- Check your email
- Unsend email with Undo Send
- Reply to and forward emails
- Save an email draft
- Add email attachments
- Download email attachments
- Annotate email attachments
- Set email notifications
- Search for email
- Organize email in mailboxes
- Flag or block emails
- Filter emails
- Use Hide My Email
- Use Mail Privacy Protection
- Change email settings
- Delete and recover emails
- Add a Mail widget to your Home Screen
- Print emails
- Get travel directions
- Select other route options
- Find stops along your route
- View a route overview or a list of turns
- Change settings for spoken directions
- Get driving directions
- Get directions to your parked car
- Set up electric vehicle routing
- Report traffic incidents
- Get cycling directions
- Get walking directions
- Get transit directions
- Delete recent directions
- Get traffic and weather info
- Estimate travel time and ETA
- Download offline maps
- Search for places
- Find nearby attractions, restaurants, and services
- Get information about places
- Mark places
- Share places
- Rate places
- Save favorite places
- Explore new places with Guides
- Organize places in My Guides
- Delete significant locations
- Look around places
- Take Flyover tours
- Find your Maps settings
- Measure dimensions
- View and save measurements
- Measure a person’s height
- Use the level
- Set up Messages
- About iMessage
- Send and reply to messages
- Unsend and edit messages
- Keep track of messages
- Forward and share messages
- Group conversations
- Watch, listen, or play together using SharePlay
- Collaborate on projects
- Use iMessage apps
- Take and edit photos or videos
- Share photos, links, and more
- Send stickers
- Request, send, and receive payments
- Send and receive audio messages
- Animate messages
- Change notifications
- Block, filter, and report messages
- Delete messages and attachments
- Recover deleted messages
- View albums, playlists, and more
- Show song credits and lyrics
- Queue up your music
- Listen to broadcast radio
- Subscribe to Apple Music
- Play music together in the car with iPhone
- Listen to lossless music
- Listen to Dolby Atmos music
- Apple Music Sing
- Find new music
- Add music and listen offline
- Get personalized recommendations
- Listen to radio
- Search for music
- Create playlists
- See what your friends are listening to
- Use Siri to play music
- Change the way music sounds
- Get started with News
- Use News widgets
- See news stories chosen just for you
- Read stories
- Follow your favorite teams with My Sports
- Listen to Apple News Today
- Subscribe to Apple News+
- Browse and read Apple News+ stories and issues
- Download Apple News+ issues
- Listen to audio stories
- Solve crossword puzzles
- Search for news stories
- Save stories in News for later
- Subscribe to individual news channels
- Get started with Notes
- Add or remove accounts
- Create and format notes
- Draw or write
- Add photos, videos, and more
- Scan text and documents
- Work with PDFs
- Create Quick Notes
- Search notes
- Organize in folders
- Organize with tags
- Use Smart Folders
- Export or print notes
- Change Notes settings
- Make a call
- Answer or decline incoming calls
- While on a call
- Set up voicemail
- Check voicemail
- Change voicemail greeting and settings
- Select ringtones and vibrations
- Make calls using Wi-Fi
- Set up call forwarding and call waiting
- Avoid unwanted calls
- View photos and videos
- Play videos and slideshows
- Delete or hide photos and videos
- Edit photos and videos
- Trim video length and adjust slow motion
- Edit Cinematic mode videos
- Edit Live Photos
- Edit portraits
- Use photo albums
- Edit, share, and organize albums
- Filter and sort photos and videos in albums
- Make stickers from your photos
- Duplicate and copy photos and videos
- Merge duplicate photos and videos
- Search for photos
- Identify people and pets
- Browse photos by location
- Share photos and videos
- Share long videos
- View photos and videos shared with you
- Watch memories
- Personalize your memories
- Manage memories and featured photos
- Use iCloud Photos
- Create shared albums
- Add and remove people in a shared album
- Add and delete photos and videos in a shared album
- Set up or join an iCloud Shared Photo Library
- Add content to an iCloud Shared Photo Library
- Use iCloud Shared Photo Library
- Import and export photos and videos
- Print photos
- Find podcasts
- Listen to podcasts
- Follow your favorite podcasts
- Use the Podcasts widget
- Organize your podcast library
- Download, save, or share podcasts
- Subscribe to podcasts
- Listen to subscriber-only content
- Change download settings
- Make a grocery list
- Add items to a list
- Edit and manage a list
- Search and organize lists
- Work with templates
- Use Smart Lists
- Print reminders
- Use the Reminders widget
- Change Reminders settings
- Browse the web
- Search for websites
- Customize your Safari settings
- Change the layout
- Use Safari profiles
- Open and close tabs
- Organize your tabs
- View your Safari tabs from another Apple device
- Share Tab Groups
- Use Siri to listen to a webpage
- Bookmark favorite webpages
- Save pages to a Reading List
- Find links shared with you
- Annotate and save a webpage as a PDF
- Automatically fill in forms
- Get extensions
- Hide ads and distractions
- Clear your cache
- Browse the web privately
- Use passkeys in Safari
- Check stocks
- Manage multiple watchlists
- Read business news
- Add earnings reports to your calendar
- Use a Stocks widget
- Translate text, voice, and conversations
- Translate text in apps
- Translate with the camera view
- Subscribe to Apple TV+, MLS Season Pass, or an Apple TV channel
- Add your TV provider
- Get shows, movies, and more
- Watch sports
- Watch Major League Soccer with MLS Season Pass
- Control playback
- Manage your library
- Change the settings
- Make a recording
- Play it back
- Edit or delete a recording
- Keep recordings up to date
- Organize recordings
- Search for or rename a recording
- Share a recording
- Duplicate a recording
- Keep cards and passes in Wallet
- Set up Apple Pay
- Use Apple Pay for contactless payments
- Use Apple Pay in apps and on the web
- Track your orders
- Use Apple Cash
- Use Apple Card
- Use Savings
- Pay for transit
- Access your home, hotel room, and vehicle
- Add identity cards
- Use COVID-19 vaccination cards
- Check your Apple Account balance
- Use Express Mode
- Organize your Wallet
- Remove cards or passes
- Check the weather
- Check the weather in other locations
- View weather maps
- Manage weather notifications
- Use Weather widgets
- Learn the weather icons
- Find out what Siri can do
- Tell Siri about yourself
- Have Siri announce calls and notifications
- Add Siri Shortcuts
- About Siri Suggestions
- Use Siri in your car
- Change Siri settings
- Contact emergency services
- Use Emergency SOS via satellite
- Request Roadside Assistance via satellite
- Set up and view your Medical ID
- Use Check In
- Manage Crash Detection
- Reset privacy and security settings in an emergency
- Set up Family Sharing
- Add Family Sharing members
- Remove Family Sharing members
- Share subscriptions
- Share purchases
- Share locations with family and locate lost devices
- Set up Apple Cash Family and Apple Card Family
- Set up parental controls
- Set up a child’s device
- Get started with Screen Time
- Protect your vision health with Screen Distance
- Set up Screen Time
- Set communication and safety limits and block inappropriate content
- Charging cable
- Power adapters
- MagSafe chargers and battery packs
- MagSafe cases and sleeves
- Qi-certified wireless chargers
- Use AirPods
- Use EarPods
- Apple Watch
- Wirelessly stream videos and photos to Apple TV or a smart TV
- Connect to a display with a cable
- HomePod and other wireless speakers
- Pair Magic Keyboard
- Enter characters with diacritical marks
- Switch between keyboards
- Use shortcuts
- Choose an alternative keyboard layout
- Change typing assistance options
- External storage devices
- Bluetooth accessories
- Share your internet connection
- Allow phone calls on your iPad and Mac
- Use iPhone as a webcam
- Hand off tasks between devices
- Cut, copy, and paste between iPhone and other devices
- Stream video or mirror the screen of your iPhone
- Start SharePlay instantly
- Use AirDrop to send items
- Connect iPhone and your computer with a cable
- Transfer files between devices
- Transfer files with email, messages, or AirDrop
- Transfer files or sync content with the Finder or iTunes
- Automatically keep files up to date with iCloud
- Use an external storage device, a file server, or a cloud storage service
- Intro to CarPlay
- Connect to CarPlay
- Use your vehicle’s built-in controls
- Get turn-by-turn directions
- Change the map view
- Make phone calls
- View your calendar
- Send and receive text messages
- Announce incoming text messages
- Play podcasts
- Play audiobooks
- Listen to news stories
- Control your home
- Use other apps with CarPlay
- Rearrange icons on CarPlay Home
- Change settings in CarPlay
- Get started with accessibility features
- Turn on accessibility features for setup
- Change Siri accessibility settings
- Open features with Accessibility Shortcut
- Change color and brightness
- Make text easier to read
- Reduce onscreen motion
- Customize per-app visual settings
- Hear what’s on the screen or typed
- Hear audio descriptions
- Turn on and practice VoiceOver
- Change your VoiceOver settings
- Use VoiceOver gestures
- Operate iPhone when VoiceOver is on
- Control VoiceOver using the rotor
- Use the onscreen keyboard
- Write with your finger
- Use VoiceOver with an Apple external keyboard
- Use a braille display
- Type braille on the screen
- Customize gestures and keyboard shortcuts
- Use VoiceOver with a pointer device
- Use VoiceOver for images and videos
- Use VoiceOver in apps
- Use AssistiveTouch
- Adjust how iPhone responds to your touch
- Use Reachability
- Auto-answer calls
- Turn off vibration
- Change Face ID and attention settings
- Use Voice Control
- Adjust the side or Home button
- Use Apple TV Remote buttons
- Adjust pointer settings
- Adjust keyboard settings
- Adjust AirPods settings
- Turn on Apple Watch Mirroring
- Control a nearby Apple device
- Intro to Switch Control
- Set up and turn on Switch Control
- Select items, perform actions, and more
- Control several devices with one switch
- Use hearing devices
- Use Live Listen
- Use sound recognition
- Set up and use RTT and TTY
- Flash the LED for alerts
- Adjust audio settings
- Play background sounds
- Display subtitles and captions
- Show transcriptions for Intercom messages
- Get Live Captions (beta)
- Type to speak
- Record a Personal Voice
- Use Guided Access
- Use built-in privacy and security protections
- Set a passcode
- Set up Face ID
- Set up Touch ID
- Control access to information on the Lock Screen
- Keep your Apple ID secure
- Use passkeys to sign in to apps and websites
- Sign in with Apple
- Share passwords
- Automatically fill in strong passwords
- Change weak or compromised passwords
- View your passwords and related information
- Share passkeys and passwords securely with AirDrop
- Make your passkeys and passwords available on all your devices
- Automatically fill in verification codes
- Automatically fill in SMS passcodes
- Sign in with fewer CAPTCHA challenges
- Use two-factor authentication
- Use security keys
- Manage information sharing with Safety Check
- Control app tracking permissions
- Control the location information you share
- Control access to information in apps
- Control how Apple delivers advertising to you
- Control access to hardware features
- Create and manage Hide My Email addresses
- Protect your web browsing with iCloud Private Relay
- Use a private network address
- Use Advanced Data Protection
- Use Lockdown Mode
- Use Stolen Device Protection
- Receive warnings about sensitive content
- Use Contact Key Verification
- Turn iPhone on or off
- Force restart iPhone
- Back up iPhone
- Return iPhone settings to their defaults
- Restore all content from a backup
- Restore purchased and deleted items
- Sell, give away, or trade in your iPhone
- Erase iPhone
- Install or remove configuration profiles
- Important safety information
- Important handling information
- Find more resources for software and service
- FCC compliance statement
- ISED Canada compliance statement
- Ultra Wideband information
- Class 1 Laser information
- Apple and the environment
- Disposal and recycling information
- Unauthorized modification of iOS
Get extensions to customize Safari on iPhone
Add Safari extensions
Tap More Extensions to browse through extensions in the App Store.
When you find one you want, tap the price, or if the app is free, tap Get, then follow the onscreen instructions.
Manage your extensions
Use extensions.
You can use an extension to customize the way your browser works. You can turn Safari extensions on or off at any time.
Tap an extension, then turn on Allow Extension.
If you have Safari profiles set up, turn on the extension for each profile you want to use it with.
Important: Check the extensions you have installed and make sure you’re familiar with what they do.
Change extension settings for an individual website
You can turn an extension on or off for an individual website without changing your overall Safari settings.
Turn each extension on or off.
Remove an extension
Swipe down on the Home Screen, then search for the extension you want to remove.
Touch and hold the extension icon, tap “Delete app,” then follow the onscreen instructions.
How-To Geek
How to uninstall or disable safari extensions on mac.
Don't want to use a Safari extension anymore? Here's how you can uninstall and remove the extension from your Mac!
Safari extensions add additional functionality to the browser. They function like mini-apps, and on the Mac, they are installed and behave as apps themselves. If you don't want to use a Safari extension anymore, here's how to uninstall it.
Mac users who are using Safari 12.0 or higher (running macOS Mojave or newer) will see extensions show up as apps. In fact, the older Safari extension file isn't supported anymore .
Just like the process of installing Safari extensions, deleting them is also convoluted. Safari extensions are downloaded as individual apps. This means that to remove an extension, you have to delete the app that comes with it (after first disabling it).
You can manage Safari extensions from the browser's Preferences menu. Click the "Safari" button from the menu bar and select the "Preferences" button.
From here, go to the "Extensions" tab. You'll now see a list of extensions in the left sidebar. To disable an extension, click the checkmark button next to it.
Some extensions have multiple sub-extensions, so you'll have to uncheck them all.
The extension will now disappear from the extension bar.
You can now delete the extension. From the extension information section, click the "Uninstall" button.
You'll now see a pop-up message that reads that the extension is part of the app and that to uninstall the extension, you'll have to remove the app itself. Here, click the "Show in Finder" button.
This will open the Finder with the app selected. Right-click the app and choose the "Move to Bin" (or "Move to Trash") button.
Enter your Mac's username and password and then click the "OK" button.
The extension will now be deleted. If you see the pop-up message that reads that the app wasn't deleted because it was in use, you'll have to go back to Safari's Preferences menu and make sure that the extension is disabled. Again, ensure that all sub-extensions are also disabled.
Once the extension is deleted (moved to the trash), you'll see that it disappears from the Safari extension bar and from Safari Preferences.
Find yourself frequently switching between Safari on your Mac and iPhone? Here's how to seamlessly move Safari tabs between iPhone, iPad, and Mac .
Related: How to Move Safari Tabs Between iPhone, iPad, and Mac

View, manage, and install add-ins for Excel, PowerPoint, and Word
When you enable an add-in, it adds custom commands and new features to Microsoft 365 programs that help increase your productivity. Because add-ins can be used by attackers to do harm to your computer, you can use add-in security settings to help protect yourself.
Note: This article only applies to Microsoft 365 applications running on Windows.
View installed add-ins

You can directly install add-ins from this page or select More Add-ins to explore.
In the Office Add-ins dialog, select My Add-ins tab.
Select an add-in you want to view the details for and right-click to select Add-in details option.
Click a heading below for more information .
Add-in categories explained
Active Application Add-ins Add-ins registered and currently running on your Microsoft 365 program.
Inactive Application Add-ins These are present on your computer but not currently loaded. For example, XML schemas are active when the document that refers to them is open. Another example is the COM add-in: if a COM add-in is selected, the add-in is active. If the check box is cleared, the add-in is inactive.
Document Related Add-ins Template files referred to by open documents.
Disabled Application Add-ins These add-ins are automatically disabled because they are causing Microsoft 365 programs to crash.
Add-in The title of the add-in.
Publisher The software developer or organization responsible for creating the add-in.
Compatibility Look here for any compatibility issues.
Location This file path indicates where the add-in is installed on your computer.
Description This text explains the add-in function.
Note: Microsoft Outlook has one add-in option in the Trust Center: Apply macro security settings to installed add-ins . InfoPath has no security settings for add-ins.
Permanently disable or remove an add-in
To disable or remove an add-in follow these steps:
Select File > Get Add-ins . Alternatively, you can select Home > Add-ins .
In the Office Add-ins dialog, select My Add-ins tab.
Select an add-in you want to remove and right click to select Remove option.
View or change add-in settings
You can see and change add-in settings in the Trust Center, descriptions of which are in the following section. Add-in security settings may have been determined by your organization so not all options may be available to change.
Select File > Get Add-ins .
Select More Add-ins > Manage My Add-ins.
Select Trust Center > Trust Center Settings > Add-ins.
Check or uncheck the boxes you want.
Add-in settings explained
Require Application Add-ins to be signed by Trusted Publisher Check this box to have the Trust Center check that the add-in uses a publisher's trusted signature. If the publisher's signature hasn’t been trusted, the Microsoft 365 program doesn’t load the add-in, and the Trust Bar displays a notification that the add-in has been disabled.
Disable notification for unsigned add-ins (code will remain disabled) When you check the Require Application Extensions to be signed by Trusted Publisher box, this option is no longer grayed out. Add-ins signed by a trusted publisher are enabled, but unsigned add-ins are disabled.
Disable all Application Add-ins (may impair functionality) Check this box if you don't trust any add-ins. All add-ins are disabled without any notification, and the other add-in boxes are grayed out.
Note: This setting takes effect after you exit and restart your Microsoft 365 program.
While working with add-ins, you may need to learn more about digital signatures and certificates , which authenticate an add-in, and trusted publishers , the software developers who often create add-ins.
Manage and install add-ins
Use the following instruction to manage and install add-ins.
To install a new add-in:
You can directly install popular add-ins on the page or go to More Add-ins to explore.
Select the add-in and select Add . Or browse by selecting Store tab in the Office add-in dialog to find other add-ins to install and select Add for that add-in.
To manage your add-ins:
Select File > Get Add-ins and from the bottom, select More Add-ins. Or select Home > Add-ins > More add-ins.
In the Office dialog, select My Add-ins tab. If you are not able to see your add-ins, select Refresh to reload your add-ins.
Select Manage My Add-in to manage and select Upload to browse and add an add-in from your device.
How to cancel a purchased add-in
If you've subscribed to an add-in through the Microsoft 365 Store that you don't want to continue, you can cancel that subscription.
Open the Microsoft 365 application and go to the Home tab of the ribbon.
Select Add-ins and then select More Add-ins > My Add-ins tab to view your existing add-ins.
Select the app you want to cancel and select Manage My Add-ins .
Under the Payment and Billing section choose Cancel Subscription .
Select OK and then Continue .
Once that's complete you should see a message that says "You have cancelled your app subscription" in the comments field of your apps list.
Why is my add-in crashing?
Some add-ins might not be compatible with your organization's IT department policies. If that is the case with add-ins recently installed on your Microsoft 365 program, Data Execution Prevention (DEP) will disable the add-in and the program might crash.
Learn more about DEP
Get a Microsoft 365 Add-in for Outlook
Get a Microsoft 365 Add-in for Project
Taking linked notes
If you're looking for Help on linking notes in OneNote to a Word or PowerPoint document, see Take linked notes .
Excel Windows Add-ins
If you're looking for Help on specific Excel Add-ins, such as Solver or Inquire, see Help for Excel for Windows add-ins .
If you're looking for additional help with Excel add-ins using the COM Add-ins dialog box, see Add or remove add-ins in Excel .
Get a Microsoft 365 Add-in for Excel

Need more help?
Want more options.
Explore subscription benefits, browse training courses, learn how to secure your device, and more.

Microsoft 365 subscription benefits

Microsoft 365 training

Microsoft security

Accessibility center
Communities help you ask and answer questions, give feedback, and hear from experts with rich knowledge.

Ask the Microsoft Community

Microsoft Tech Community

Windows Insiders
Microsoft 365 Insiders
Find solutions to common problems or get help from a support agent.

Online support
Was this information helpful?
Thank you for your feedback.
Tin: Save w/ Coupons in Safari 4+
Discount codes, deals, promos, tin technologies inc..
- 4.6 • 196 Ratings
iPhone Screenshots
Description.
Automatically save money while you shop on your phone. Tin is a Safari extension that applies the best coupon codes at checkout, and tracks your package so you never miss a delivery (or a deal)! YOUR SAVINGS SUPERHERO Tin scours the interwebs to find the best discount codes across 50,000+ retailers and automatically applies the best savings ($$$). This means more money in your pocket, so you can focus on finding that new outfit and let the deals come to you! PAY LESS. SHOP MORE. CLEAR YOUR INBOX Your email inbox is flooded with promotional emails that you don’t open. Tin Savings finds promotion codes buried in your emails (plus thousands more) so you never miss a deal. We save you time & money while keeping your inbox clean & serene. It's sweeter than honey! ALL-IN-ONE PACKAGE TRACKING From checkout to doorstep, we’ve got you covered. Tin Savings tracks shipments and organizes all of your deliveries in one place. The best part? It’s totally free! Download Tin Savings today, and pay more than you need to again! Tin Savings is an app and mobile Safari extension, all wrapped into one. Simply install the extension in Safari and let Tin Savings do its thing! INSTALL TIN IN SAFARI 1. Tap "aA" button in the Safari menu 2. Tap the "Extension" icon to Manage Extensions 3. Select "Tin" and set it to "ON" 4. Select "Always Allow" 5. Select "Always Allow on Every Website" 6. That’s it! Now you can shop in Safari and let Tin do its thing. When you are ready to checkout, Tin will pop up and automatically apply discount codes to find you the best savings!
Version 0.0.5.4
On to the update! We're always improving the Tin app and Safari extension. Please send any feedback and ideas to [email protected]!
Ratings and Reviews
196 Ratings
Tin: Revolutionizing Savings in the Digital Marketplace
Tin is a pioneering force in the digital retail landscape, discovered amid the cultural currents of TikTok. In just a day, this application has proven to be a transformative asset, seamlessly weaving itself into the fabric of online shopping. The installation process, marked by simplicity, belies the profound impact it has on one's fiscal landscape. Tin functions as an intuitive retail oracle, not merely curating enticing deals and discount codes but, with automated finesse, applying them at checkout. What sets Tin apart extends beyond mere financial dividends, delving into the very architecture of the shopping interface. The amalgamation of its mobile application and extension technology offers a panoramic view of current and past transactions, providing organizational efficacy that transcends the chaos of email inboxes. Comparatively, Tin outshines rivals like Honey by maintaining real-time relevance, avoiding the pitfalls of expired promotions. Beyond the confines of mobile application, Tin's desktop extension emerges as a harmonious augmentation, positioning the platform as an industry trailblazer. In an era of economic prudence and retail efficacy, Tin solidifies its narrative as an indispensable tool for the discerning digital consumer.
Tin just saved me like $100 wow! 👀
I recently tried out Tin, a Safari extension that's pretty much a game-changer for snagging the best online deals with zero hassle. Easy to set up and even easier to use, Tin acts like your personal bargain hunter, silently finding better prices on everything from tech to kitchen gadgets and giving you a heads-up on the savings. It's cool because it also shows the price history, helping you decide if it's the right time to buy. While it's mostly spot-on, it occasionally misses a beat, but that's a small trade-off for how much time and money it's saved me. Whether you're making big purchases or everyday buys, Tin keeps things private and secure, making it a must-have for effortless savings. Honestly, your wallet will thank you for this one.
Superb Shopping App
My friend raved about Tin, so I decided to give it a try. Within just 24 hours, I was blown away by how intuitive and helpful it is! The app is a breeze to set up, and the deals it finds are unreal. On my first shopping spree, I snagged discounts on several items that I've been eyeing for ages, effortlessly saving a hefty sum. Tin's automatic coupon feature at checkout is a game-changer – it feels like I have a personal assistant scouring the internet for the best deals, all for me. From tech gadgets to fashion finds, Tin has consistently delivered savings that make a difference. I can't recommend it enough – it's like having the inside scoop on the best sales every time I shop! ⭐️⭐️⭐️⭐️⭐️
App Privacy
The developer, Tin Technologies Inc. , indicated that the app’s privacy practices may include handling of data as described below. For more information, see the developer’s privacy policy .
Data Linked to You
The following data may be collected and linked to your identity:
- Contact Info
- User Content
- Search History
- Browsing History
- Identifiers
- Diagnostics
Privacy practices may vary, for example, based on the features you use or your age. Learn More
Information
- Developer Website
- App Support
- Privacy Policy
You Might Also Like
Ditto - Discount Shopping
MYOUTFITONLINE
Vipon - Amazon Deals & Coupons
JLUXLABEL INC.
Looks like no one’s replied in a while. To start the conversation again, simply ask a new question.
How to remove a safari extension
Iphone 4, iOS 4
Posted on Jul 28, 2010 7:30 AM
Loading page content
Page content loaded
Nov 22, 2017 8:03 PM in response to Richard Walker
Everybody is happy and thankful, but the single Safari extension that shows up for me, Wotja, has neither an uninstall button, nor a button to turn it off. It's blank, not even grayed out, where these buttons should be. Perhaps it's an app that has been stationed there?
Jun 7, 2017 9:20 PM in response to hallor61809
Jul 28, 2010 7:36 AM in response to hallor61809
Jul 28, 2010 7:41 AM in response to Richard Walker
Jul 28, 2010 8:11 AM in response to Richard Walker
Dec 26, 2010 8:43 AM in response to hallor61809
Feb 2, 2011 6:05 AM in response to Richard Walker
Sep 17, 2011 2:33 PM in response to hallor61809
Thanks man! I had this really annoying utube thing
Oct 6, 2011 8:07 PM in response to hallor61809
Thank you to all of you for the tip! I thought Safari would have their own "Extensions" menu item or something along those lines. It NEVER occurred to me to look in the Preferences. 😮
Dec 14, 2012 5:21 PM in response to Richard Walker
THANKS SO MUCH! I have been trying to find out how to do this for what seems like FOREVER. I hope this removes the annoying bell sound I've been getting on my Mac. Sounds like a boxing match start bell when it goes off
Feb 4, 2013 8:36 AM in response to Richard Walker
BIGGEST THANK YOU. Been trying to solve this for the last 2hrs. Cheers.
May 12, 2013 11:42 AM in response to Richard Walker
spot on... cheers mate, its a bit diff to firefox. Thanks man
Oct 31, 2013 4:40 PM in response to Richard Walker
Thank you! it worked for me.
Mar 18, 2014 12:01 PM in response to Richard Walker
You rock, Richard Walker.
Jul 2, 2014 10:05 AM in response to hallor61809
Boom, thank you !
IMAGES
VIDEO
COMMENTS
Follow these steps to delete an extension: Search for the app on your Home Screen or in the App Library. Once you find it, press and hold until the apps begin shaking. Press the minus (-) sign that appears and select Delete App from the popup that appears. Repeat for all extensions you want to delete. Tap Done in the top-right corner to ...
How to add Safari web extension on iPhone or iPad. You can add Safari extension on iPhone or iPad by following the steps below. Step 1. Open Settings and go to Safari. Step 2. Now tap on Extensions option found under the General heading. Step 3. Tap on More Extensions button, after which you will be redirected to the App Store.
Add Safari extensions. Open the Safari app on your iPad. Tap on the right side of the search field, then tap Manage Extensions. Tap More Extensions to browse through extensions in the App Store. When you find one you want, tap the price, or if the app is free, tap Get, then follow the onscreen instructions.
On your Mac, open Safari and choose Safari > Settings, then click Extensions. Select "Share across devices" at the bottom of the window. On your iPhone or iPad, go to Settings > Safari > Extensions, then turn on Share Across Devices. If an extension on one device is also compatible with your other devices, it automatically appears in ...
Time needed: 1 minute How to remove unwanted extensions from Safari. From your iPad or iPhone, swipe down on the Home Screen. Using the search bar, search for the extension you want to remove.
There are extensions for web-browsers (such as Safari) and Network Extensions that expose additional protocol support (such as DoH, DoT etc.), content filtering and/or VPN services. Safari extensions (such as Content and Ad-filtering) are generally added or deleted by installing or removing a related App - but can be enabled/disabled here:
Related: The Evolution of the iPhone: Every Model from 2007-2021. Open Safari and click Safari in the menu bar. Click Preferences. Click the Extensions tab at the top. Click on the extension you'd like to remove. Click Uninstall. Next, learn about how to customize Safari tab groups. Master your iPhone in one minute a day: Sign up here to get ...
To download and install an extension, go to the Safari menu > Safari Extensions, find an extension, and click Get > Install. To activate an extension, go to Safari > Preferences > Extensions, click the check box next to the extension, then click Turn on. Access an extension via its Safari Toolbar icon. To disable: Preferences > Extensions ...
How to add extensions. Tap on the Settings app. Scroll down to and select Safari > Extensions. Any extensions that you've already installed will be listed here. Tap on "More Extensions" if ...
The process is the same on both iPhone and iPad. Open Settings, select the Safari settings menu, then tap Extensions. Under Allow These Extensions, you'll see a list of all the extensions you've installed and whether they're enabled or not. To enable an extension, tap on it, then enable the option slider at the top of the screen.
Launch Settings on your iPhone or iPad. Scroll down and tap Safari. Tap Extensions. Add an extension to Safari on iPhone by showing: Launch Settings, tap Safari, tap Extensions (Image credit: iMore) Under the Allow These Extensions area, tap on the extension you want to enable.
Remove a Safari Extension. Here comes the most cringe worthy process. However, let's get it over with. Go to the 'Extensions' tab in Safari, as we did earlier in this guide above. Now, from the extensions tab, first, disable the extension by unchecking it from the list. Then, click on the 'Uninstall' option from the right section of ...
Open Safari on your iPhone or iPad. On the iPad, tap the Share icon in the top toolbar. If using the iPhone, tap the three dot icon in the toolbar and then select Share. Scroll through the list of actions and tap the extension. In the event that you can't find your extension in your list of Actions, you'll need to add it.
Let the iPad start up. Go to Settings>Safari>Block Popups>On. That will disable Popups, but some sites may use popups that you need to access so keep that in mind for the future. Clear Safari, close the app and reset the iPad as well. Settings>Safari>Clear Cookies and data. In order to close Safari, drag the app up from the multitasking display.
Tap Extensions > More Extensions. This will open the Safari Extensions page in the iPhone App Store. Tap GET to download a Safari extension. Once the extension is downloaded, go to Settings > Safari > Extensions and enable it from here. Optional: Open the extension from the iPhone Home Screen.
Once Safari is open, accessing the Extensions menu is the next crucial step in the process of managing and removing unwanted extensions. Safari simplifies the task of managing extensions by providing a dedicated menu where users can view, enable, disable, and remove extensions with ease. Here's how you can access the Extensions menu on Safari ...
For iPadOS, if App extensions are installed on the device, the puzzle-piece icon will appear within the Safari Address Bar; if the associated extension has been enabled, an additional icon may appear - as shown here: The behaviour in iOS for iPhone appears to differ - in that the puzzle-piece icon is only visible if an installed extension has ...
Add Safari extensions. Open the Safari app on your iPhone. Tap , then tap Manage Extensions. Tap More Extensions to browse through extensions in the App Store. When you find one you want, tap the price, or if the app is free, tap Get, then follow the onscreen instructions.
With the arrival of iOS 15, Safari for iPhone and iPad gained proper extensions. Apple has taken the same curated App Store approach as it did with Safari for Mac, vastly improving Safari's web browsing capabilities. Here are some of the highlights, and a brief overview of how extensions work on iOS and iPadOS.
Click the "Safari" button from the menu bar and select the "Preferences" button. From here, go to the "Extensions" tab. You'll now see a list of extensions in the left sidebar. To disable an extension, click the checkmark button next to it. Some extensions have multiple sub-extensions, so you'll have to uncheck them all.
If your iPad has been updated to the most recent version supported by your iPad, then Safari is as up-to-date as is possible. If you wish to use an alternative browser in preference to Safari, you can do so - and configure the alternative browser as the default browser from iPad settings. Hello, safari cannot be uninstalled from an iPad.
Select an add-in you want to remove and right click to select Remove option. Note: Add-ins that appear in the Admin Managed section of the Office Add-ins dialog can only be removed by your organization's administrator.
Tin Savings is an app and mobile Safari extension, all wrapped into one. Simply install the extension in Safari and let Tin Savings do its thing! INSTALL TIN IN SAFARI 1. Tap "aA" button in the Safari menu 2. Tap the "Extension" icon to Manage Extensions 3. Select "Tin" and set it to "ON" 4. Select "Always Allow" 5. Select "Always Allow on ...
Safari Menu/Preferences... Click on the extensions tab. Choose the extension you want to uninstall. Click the Uninstall button. Hope that helps. Richard Walker. Level 1. 50 points. Jul 28, 2010 7:41 AM in response to Richard Walker.