
Navigating the Road: A Deep Dive into DOT Regulations for Hot Shot Trucks
by Baily Sandage | Nov 17, 2023 | Safety

As a hot shot truck driver, you know the road like the back of your hand. But when it comes to navigating the complex world of DOT (Department of Transportation) regulations for hot shot trucks, you might often feel like you’re in uncharted territory. You’re not alone in this. Many in the hot shot trucking community share your frustrations and uncertainties.
Understanding and Implementing DOT Regulations for Hot Shot Trucks
Imagine this: John, a seasoned hot shot trucker, sets out for a routine delivery. He’s confident in his driving skills but less so in his understanding of the latest DOT regulations. Midway through his journey, he’s stopped for a routine check. The officer points out a compliance issue John wasn’t even aware of. This scenario is all too common in the hot shot trucking world. It’s not just about the inconvenience but the feeling of being constantly under a microscope, unsure if you’re missing a crucial piece of regulatory knowledge.
Picture a Road Free from Regulatory Confusion
Now, envision a world where you, like John, set off on your journeys with not just confidence in your driving, but also in your compliance with DOT regulations. No more unexpected stops, no more penalties, and no more sleepless nights worrying about compliance. This world is not just a dream. It’s a realistic goal, achievable with the right knowledge and tools.
Your Roadmap to Navigating DOT Regulations
- Educate Yourself : Start with understanding the basics of DOT regulations specific to hot shot trucks. This includes vehicle weight limits, licensing requirements, and safety standards.
- Stay Updated : Regulations change. Subscribe to a reliable source that keeps you updated on the latest changes.
- Regular Vehicle Checks : Make pre-trip and post-trip inspections a habit. Ensure your vehicle is always up to DOT standards.
- Seek Professional Help : Don’t hesitate to consult with a compliance consultant. Sometimes, professional guidance can save you from costly mistakes.
- Leverage Technology : Use compliance software designed for hot shot trucking. It can simplify record-keeping and help you stay on top of compliance requirements.
FAQ: Demystifying DOT Regulations for Hot Shot Trucks
- Do all hot shot trucks require a CDL? It depends on the Gross Vehicle Weight Rating (GVWR). A CDL is required if the GVWR is over 26,000 pounds.
- How often should I inspect my vehicle for DOT compliance? Daily inspections are recommended. Regular checks can prevent major compliance issues.
- Can I handle DOT compliance on my own? While it’s possible, seeking professional advice is recommended, especially for complex scenarios.
Reflect and Take the Next Step
Think about your own experiences with DOT regulations. What’s been your biggest challenge? How could a clearer understanding of these regulations transform your day-to-day operations?
Remember, you’re not alone on this journey. TruckingHQ is here to guide you through the complexities of DOT compliance. Reach out to us for tailored advice, up-to-date information, and tools designed to ease your compliance burden. Together, let’s make your hot shot trucking experience smoother and worry-free.
Connect with TruckingHQ today – Your partner in navigating the road of DOT regulations for hot shot trucks.
Compliance Resources for Hot Shot Drivers
- An in-depth DOT inspection checklist for hot shot drivers
- Best truck load boards to use
- How long does it take to get DOT number on average
About This Site
TruckingHQ is here to help transportation companies navigate regulation, compliance, and back office paperwork.

- Register / Login
- Trucker's Forum
- Paid CDL Training
- Truck Driving Jobs
- CDL Practice Tests
- High Road Training
Pre-Trip Inspection Study Guide

Our Pre-Trip Inspection Study Guide has everything you need to prepare for the Class A CDL Pre-Trip Inspection Exam . Our study guide will cover the pre-trip inspection terminology as well as a thorough list of all of the parts you will be inspecting on the vehicle. For each part you will be inspecting there will also be a list of items you will be checking for. Our study guide is broken down into the following sections:
- What You Need to Know About Pre-Trip Inspection
Pre-Trip Inspection Practice Questions
- Pre-Trip Inspection Checklist
Pre-Trip Inspection Videos
Pre-trip inspection printable resources, what you need to know about the pre-trip inspection.
The Pre-Trip Inspection is a thorough inspection of the vehicle and all of its major systems. Inspecting the vehicle before driving each day is a Federal requirement and normally takes about 15 minutes. It must be logged in your logbook as "on duty not driving."
You will have to do thorough safety inspections of the coupling system, the vehicle lights, engine compartment, tires and brakes, the chassis, the fuel tanks, and an in-cab inspection.
The following information is a brief summary of Daniel's Complete Pre-Trip Inspection taken from our oustanding free PDF download:
Engine Compartment

You will be checking the engine compartment for any sort of leaks. You will also be checking to see if all components are properly mounted and secured. None of the mounts must be cracked, bent, or broken.
You will be checking all hoses to make sure they aren't leaking, frayed, or sliced and the fluid levels including the oil level, the coolant, and the power steering fluid.
You must check the components like the water pump, the power steering pump, and the alternator to make sure nothing is leaking, the belts are not frayed, and that everything is properly mounted and secured.
From inside the engine compartment you will also find the steering system, the front suspension system, and the front brake system. All components of these systems must be properly mounted and secured without anything being cracked, bent, or broken. Finally you will be checking the tires, rims, and axle seals to make sure the tires are properly inflated, the rim isn't bent or cracked, and the axle seals are not leaking.
Fuel Tank And Battery Area

You will be standing along the side of the tractor doing a series of checks on the mirrors, fuel tanks, batteries, exhaust system, and more. You will check to make sure nothing is bent, cracked, broken, or leaking.
Check the mirrors, door hinges, door handle to make sure nothing is cracked, bent, or broken. Check to make sure there is no fuel leaking and that the fuel cap is secured and the gasket is not missing.
Check the exhaust system to make sure nothing is cracked, bent, or broken. Check the driveshaft, cat walk, and steps to make sure nothing is cracked, bent, or broken.
Check the frame and crossmembers for structural integrity. Check the air lines going to the trailer to make sure they're properly connected and that there are no abrasions, bulges, or cuts. Make sure the gaskets are present.
Check the suspension system and brakes on the drive axles, making sure nothing is cracked, bent, or broken. Make sure the brake linings are the proper thickness and that the air bags and properly inflated. Inspect the brake chambers, slack adjusters, and pushrods are properly mounted and secure. Not Cracked, Bent, or Broken. With the brakes released and pulled by hand, the Push Rod should not move more than 1 inch.
Check the rims, tires, and axle seals of the drive tires for proper inflation, no leaks around the seal, and the lugs are all present and secured.
Coupling System

You will be standing where the tractor and trailer are connected and you'll start by checking the electrical line and air lines to make sure they're properly mounted and secure at both ends. No abrasions, bulges or cuts. Not leaking air. Make sure the electrical line has no wires exposed. Check the gladhands to make sure the seals are in good condition, no cracks or signs of dry rotting. Not leaking air.
Check the skid plate of the fifth wheel and the apron of the trailer to make sure there is no debris and nothing is cracked, bent, or broken. Make sure the fifth wheel is properly greased. Also make sure there is no gap in between the fifth wheel and the trailer apron once the tractor and trailer are coupled. Make sure the kingpin of the trailer is properly mounted and not cracked, bent, or broken and that the locking jaws of the fifth wheel are properly secured when the tractor and trailer are coupled.
Check the mounting bolts where the fifth wheel attaches to the tractor frame. Make sure there are no missing bolts and that everything is secured properly. Check the locking pin if you having a sliding fifth wheel to make sure it's properly locked into place.
Make sure that there is the proper clearance space between the tractor mudflap and the trailer landing gear so that they don’t hit each other when making a turn.

You will start inspecting the trailer at the head board, which is the front wall of the trailer. Make sure there are no holes or missing rivets. Check the landing gear to make sure it is properly mounted and secure. Not cracked, bent, or broken. Make sure the fully raised and the handle is secure in the cradle when the tractor and trailer are coupled.
Check the frame and crossmembers under the trailer to make sure they're not cracked, bent, or broken. Check the tandem frame and release pins to make sure the frame is in good condition and the release handle and locking pins are in the fully locked position.
You will check the entire suspension and brake system for the trailer tandems the same way you did for the drive axles of the tractor. You will also make sure the mudflaps are properly secured. For dual tires check to see that there is proper space between the tires and there is nothing stuck between the tires.
Check the rear door and hinges to make sure they are properly mounted and nothing is cracked, bent, or broken. Make sure the door seals are not worn, torn, or dry rotted.
Light Check

You will be checking all of the lights and reflectors on both the tractor and the trailer. Check the reflectors and reflective tape to make sure they are properly mounted and secure, not cracked, bent, or broken, and clean and illuminated. Check that you have the proper color of amber to the front and sides, and red to the rear.
Start by turning on your marker lights and headlights. Now walk around the entire truck and trailer and point out the lights. Give the function of the light and the location. You should then ask your examiner to help you check your five functions.
While you're sitting in the drivers seat, the examiner will stand to the front of the truck, then behind the trailer. He will then check your Turn Signals, Four Way Flashers and Brake Lights. You must do each function at every location.
The five locations that you must check your lights:
- Front of the Truck
- Both sides of the Truck
- Rear of the Truck
- Both sides of the Trailer
- Rear of the Trailer
The Five Functions you are checking for:
- Left Turn Signal
- Right Turn Signal
- Four Way Flashers
- High Beams/Low Beams
- Brake Lights
In-Cab Inspection

The in-cab inspection and air brake check will cover the various gauges and systems inside the cab along with several tests to make sure you air brake system is working properly.
You will start by checking the following:
- Seat Belt- Properly Mounted and Secure. Not ripped or frayed Adjusts and latches properly.
- Fire Extinguisher- Properly Mounted and Secure. Fully charged
- Three Red Reflective Triangles- My three red reflective triangles are GIVE LOCATION
- Spare Electrical Fuses- My spare electrical fuses are GIVE LOCATION
- Volmeter, Oil Pressure Gauge, Water Temperature Gauge, and Air Pressure Gauge all show proper operation
- City horn and air horn functioning properly
- The windshield and mirrors are clean, no cracks or breaks, no obstructions. The mirrors are in proper adjustment.
- Windshield Wipers and Washers - Demonstrate that the washers work by spraying the windshield. The Wipers are: Properly Mounted and Secure and operate smoothly. The blades aren't cracked or dry rotten.
- Heater and Defroster - Demonstrate that both the Heater and Defroster are working properly.
- Lighting Indicators - Left Turn, Right Turn, Four Way Flashers, and High Beams.
Trailer Parking Brakes - Set the Trailer Brake, release the tractor brake, and then tug lightly on the trailer.
Tractor Parking Brakes- Then set the Tractor Brake, release the trailer brake, and then tug lightly on the tractor.
Service Brake Check - Release both Tractor and Trailer Brakes. Now drive at idle speed. Apply the Service Brake to make sure you come to a complete stop, and that it doesn't pull to the left or right when applying the brakes.
Air Brake Test

The air brake test will consist of a leakdown test to make sure your air brakes aren't leaking air and losing pressure. It will also test the warning lights and buzzer to make sure the driver gets the proper warning if the air pressure drops too low.
There are three stages to an Air Brake Test
#1: Applied Pressure Test
#2: Warning Light and Buzzer
#3 Tractor/Trailer Protection Valve Pop Out
Applied Pressure Test: Build the air pressure to governor cut out. Put the truck in the lowest gear. Then turn off the engine Immediately turn the engine back on. Push in both the tractor and trailer valves. (This will release the parking brakes.) Push and hold the Brake pedal fully. Allow the gauges to stabilize. Announce the gauges have stabilized and the Primary and Secondary PSI. With the Brakes fully pressed, you should not lose more than 4 PSI in one minute. Announce that you are listening for air leaks during that minute.
Warning Light and Buzzer Test: Pump down on the Brake pedal until the warning light and buzzer comes on, at or before 60 PSI.
Tractor/Trailer Protection Valve Pop Out Test: Pump down on the brake pedal until both the tractor and trailer protection valves pop out. They should both pop out between 40 and 20 PSI.
We have a ton of Pre-Trip Inspection Practice Questions along with the answers and a complete scoring system in our Free Online CDL Practice Tests :
The Engine Compartment Section will include questions about checking the oil level and coolant levels, inspecting belt-driven engine components (like the water pump, alternator, and air compressor), and the safety devices required in the cab. There will also be questions regarding the windshield wipers and free play in the steering wheel.
The Lights And Brakes Section will include questions about dashboard indicator lights, inspecting the parking brakes, and doing a leakdown test on the air brakes. It will also include questions about the low air pressure warning signal and testing your air horn and city horn.
The Suspension And Steering Section will include questions about the tractor protection valve, inspecting the steering box, and inspecting many suspension system parts. It will also include questions about welds being present on tire rims and the minimum tread depth required on steering axle tires.
The Tires And Coupling Devices Section will include questions about shiny trails or rusty threads on lug nuts, inspecting the battery box and cover, and inspecting electrical lines. It will also contain questions about inspecting the coupling devices and the fifth wheel skid plate.
The Emergency Equipment And Fifth Wheel Section will include questions about additional emergeny equipment required by school buses, inspecting the gap between the kingpin apron and the fifth wheel skid plate, and the landing gear securement. It will also contain questions about inspecting driver mirrors and the trailer frame.
Pre-Trip Inspection Checklist - Class A
Our pre-trip inspection checklist covers every part of the truck from front to back, both inside and outside of the truck. It covers the air brakes, suspension parts, steering components, wheels and rims, fuel tanks, batteries, lights, and more. It also covers the air brake tug test and checks for everything under the hood including alternator, water pump, fuel pump, fluids, and more.
This is a super handy checklist to study anytime you have a few minutes to spare:
Pre-Trip Inspection Checklist - Free Word Document Download (Editable Version)
Pre-Trip Inspection Checklist - Free PDF Download (Print Version)
Pre-Trip Inspection Video By Apex CDL Institute
Jeff from Apex Institute does an in-depth explanation of the entire pre-trip inspection process. This video is loaded with tips that go beyond the CDL test to help drivers really understand how to identify problems.
Pretrip Inspection Self-Test By CDL College
The Pretrip Inspection Self-Test By CDL College is really unique. It's a silent video which will show you the part you're inspecting and then gives you a few seconds to figure out what you should be checking for before giving you the answer. Definitely check this one out. Great for practicing before the CDL exam.
Pre-Trip Inspection Video By Averitt Express
This is a complete back to front pre-trip inspection of a truck and trailer by Averitt mainentance associate Kevin Breeding. This thorough pre-trip inspection covers all inportant points of inside the cab, lights, engine, the tractor itself and the trailer.
We have included two print versions of the pre-trip inspection process from Daniel. The first is the entire pre-trip inspection and the second is an abbreviated checklist for the inspection.
- PDF: Daniel's Pre-trip Inspection (Print Version)
- PDF: Daniel's Pre-trip Inspection Checklist (Print Version)

Why Join Trucking Truth?

- The High Road Training Program
- The High Road Article Series
- The Friendliest Trucker's Forum Ever!
- Email Updates When New Articles Are Posted
Apply For Paid CDL Training Through TruckingTruth
Did you know you can fill out one quick form here on TruckingTruth and apply to several companies at once for paid CDL training? Seriously! The application only takes one minute. You will speak with recruiters today. There is no obligation whatsoever. Learn more and apply here:
- Privacy Policy

Woman At The Wheel
Hotshot trucking information, cool hotshotting pictures, miscellaneous stories, random bits of information, and truisms from somewhere on the road….

Hotshot Specific, CDL Class A Skills Test Pre-Trip Inspection on a Vehicle With Hydraulic Brakes, Everything You Need to Know… Before You Take the Test
I was kinda shocked after I took my skills test and one of my examiners told me that most of the “hotshot” type drivers who come into that site for the test haven’t got any clue what they’re doing, how to perform the inspections, or how the whole process works, and that they seem to get their “training” by repeatedly taking and failing the tests. But after thinking about it, I guess it makes sense when people are going in cold, without any type of truck driver training.
So, Just for grins I thought I would post my Class A CDL Pre-trip Guide that I worked on quite a lot and fine-tuned for my own truck/trailer setup that I used for the skills testing portion of the Oklahoma CDL test. It might help you out if you’re working on getting your Class A CDL to do either hotshot or light truck work and don’t have a small-truck specific inspection guide…. or if you don’t know what to expect when you go and try to get your CDL. I hope this is useful for you!
There are two critical points you need to know before you ever set foot on the testing site!
One point is that the vehicle you test in must qualify as a commercial vehicle in order for you to take the skills test in that vehicle.
As best I understand it, when a truck has a GVWR* of 26,001 lbs. or more it is considered a commercial vehicle. But there’s another factor even if the GVWR of the truck is under 26,001 lbs. If the trailer being towed has a GVWR of 10,001 pounds or more and the combined GCWRs of the truck and trailer equal 26,001 pounds or more, the combination qualifies as a Class A commercial vehicle, which you need to use in the skills tests for a Class A CDL. In my particular case, the GCWR on my truck is 14,000 lbs. The GCWR on the trailer I used is 14,000 lbs. In combination the combined GCWR is 28,000 lbs, or over the 26,001 pound limit, so the combination qualifies.
The other is that the vehicle and the trailer used must be registered with commercial plates. In my state, Oklahoma, we have two commercial options on our tow vehicles, the straight commercial tag (up to 26,000 lbs.) or the apportioned tag (26,0001 lbs. and up). I’ll do another post detailing the pros and cons of each tag at another time, but these are the two truck tags acceptable for taking the skills test. They will not test you in a vehicle with non-commercial plates.
The trailer must be tagged commercial as well. In Oklahoma our trailer tag option is a Non-Expiring Commercial Trailer Tag. In Oklahoma, non-commercial trailers are not tagged at all, which makes this point an important one to keep in mind for testing purposes.
* For a pretty good explanation of weight ratings check out this link…
https://www.ntea.com/NTEA/Member_benefits/Industry_leading_news/NTEANewsarticles/The_role_of_GVWR_and_GCWR_in_specifying_work_trucks1.aspx
Because of the vast amount of information involved in the pre-trip skills test I developed this list by consulting a multitude of sources, studying diagrams that specified parts on my own truck (instead of parts just taken from the manual that may or may not apply), and finally putting it all together as my own study guide.
A great source for finding parts diagrams specific to your Dodge vehicle is https://www.moparpartz.com if you need help identifying components. I’m sure you can find parts diagrams for other makes online as well, maybe even on that site.
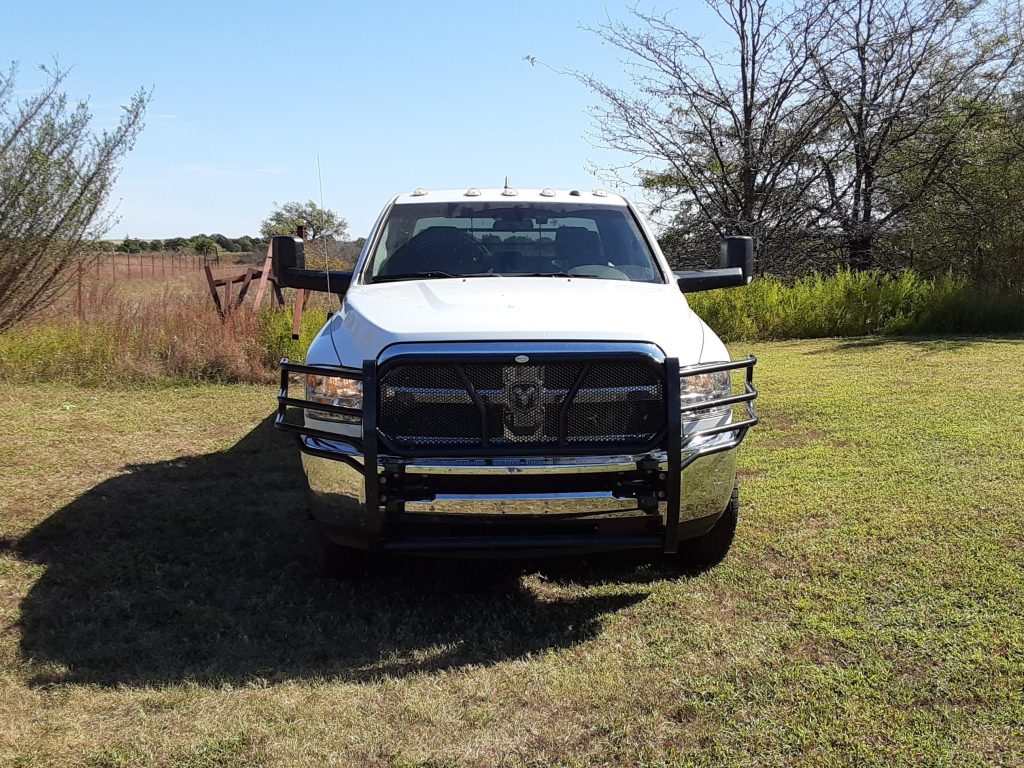
The truck inspected in this guide is a 2018 Dodge Ram 3500 flatbed equipped with hydraulic brakes, front coil springs, dual batteries and dual alternators. The trailer used is a 24′ flatbed bumper pull backhoe hauling trailer with electric brakes. Your testing state and vehicle components may differ and your inspection checklist should be adjusted to reflect the actual components on the vehicle you are using.
When you go for your skills test and do the pre-trip inspection, be sure to touch each part with either your hand or a pointer as you explain what it is and what you are checking it for, and any actions you take to check it. Yes, you will need to get down under the truck and trailer to see and touch components, so prepare to do some crawling around down under.
I’ve broken this guide down into segments that helped me to focus and transition smoothly from one portion of the inspection to the next.
If you haven’t been trained or haven’t ever taken the test, be aware that your examiner can instruct you to do either one of the A, B, or C parts of the test or all three parts, and everyone must do the Coupling and In-Cab parts of the inspection to pass! This means that you need to know these parts backward and forward. You may be interrupted by the examiner if they feel the need to comment, clarify, or ask you something, and you need to know all of the following information well enough not to get lost if you are interrupted. Study until you know the entire inspection process in your sleep…
Tip: Your examiner may assist you with checking the function of your lights by walking around and checking them as you direct them from the cab of the vehicle while turning the lights on and off. Your examiner should guide you as to the timing of this, either beginning the inspection, or during at some point. If they don’t mention it, you should request that they assist you, and they will expect you to direct them as to which lights to check. Everyone must do this portion of the test as well as the Coupling and In-Cab portions.
Oklahoma Specific CDL Skills Test Pre-Trip Inspection Guide for a Class-A Vehicle Without Air Brakes
Pre-trip Inspection Part A: Front of the truck
- Look underneath the front of the truck for leaks or fluid puddles and low hanging lines, wires, or hoses.
- Check that the truck is sitting level, not leaning left or right, which might indicate low tire pressure or suspension problems.
If the next items apply to your vehicle add them to your list. If not, you can scratch them off…
- Check that the front grill guard is properly mounted and secure, not cracked, bent, or broken, no loose or missing nuts.
- If you have an apportioned tag check that it is properly mounted, secure, clean and unobstructed. (Important if you have an Apportioned Tag which is secured to the front of the vehicle. Straight Tags (commercial, max. 26,000 lbs) are secured at the rear.)
Lights top to bottom, left to right
Tip: Be aware that many newer vehicles have LED lights with clear lenses and colored bulbs. If this applies to any of your lights state that as you inspect them. Also touch each type of light as you talk about it. If it is a multi-functional light (as my front marker, turn signal, 4-ways are) say so.
- Check roof clearance lights, that they are properly mounted and secure, not cracked, broken, or missing, amber in color.
- Headlight high and low beams, they are properly mounted and secure, not cracked, broken or missing, lenses are not foggy, are clear or white in color.
- Turn signals, 4-way hazards and marker lights, they are properly mounted and secure, not cracked, broken, or missing, they are amber in color.
Engine overview, electrical
- As a general overview, check lines, wires, and hoses, that they’re properly mounted and secure, that there are no abrasions, bulges, or cuts, they are not torn or frayed that there are no audible or visible leaks.
- Batteries are properly mounted and secure, not cracked, broken, or leaking, not overly corroded, wires properly mounted and secure, no abrasions or cuts, not chaffed, rubbing or exposed.
- Alternators, that they are properly mounted and secure, that there are no loose or missing bolts. Check the wires, that they are secure, no abrasions or cuts, not chaffed, rubbing or exposed.
- The alternators are belt driven. The belt is properly mounted and secure, and is not torn or frayed, and when pressed in the middle, there is no more than 3/4 inch of play.
- Fuse boxes are properly mounted and secure, not cracked or broken. Wires are secure, no abrasions or cuts, not chaffed, rubbing or exposed.
Reservoirs, Pumps
- Coolant reservoir, that it is properly mounted and secure, not cracked or broken, there are no leaks, and the fluid is at operational level. The cap is on tightly. It’s lines and wires are properly mounted and secure. There are no abrasions, bulges, or cuts, they are not torn or frayed, and there are no leaks.
- Water pump, that it’s properly mounted and secure, that there are no loose or missing bolts, and it’s not leaking. The lines and hoses are properly mounted and secure, there are no abrasions, bulges, or cuts, and they are not leaking.
- Water pump is belt driven. The belt is properly mounted and secure, and is not torn or frayed, and when pressed in the middle, there is no more than 3/4 inch of play.
- Power steering reservoir, that it is properly mounted and secure, that it is not cracked, bent, or broken, not leaking, and that the fluid is at proper operating levels. The cap is on tightly. Check power steering hoses, that they’re properly mounted and secure, with no abrasions, bulges, or cuts, not chaffed or rubbing, and there is no leaking.
- Power steering pump, that it’s properly mounted and secure, that there are no loose or missing bolts, it’s not cracked, bent, or broken, and it’s not leaking. The lines and hoses are properly mounted and secure, there are no abrasions, bulges or cuts and they are not leaking.
- Power steering pump is belt driven. The belt is properly mounted and secure, and is not torn or frayed, and when pressed in the middle, there is no more than 3/4 inch of play.
Oil, Brake Fluid
- Oil fill cap, on tight and not leaking.
- Oil dip stick, check that the engine oil is within proper operating levels. (then explain how but do not actually do this) – I will do this by pulling it out, wiping it off, putting it back in and pulling it out again, making sure that the oil is between add and full. I will replace the dipstick and make sure it is secure.
- Hydraulic brake fluid level at the master cylinder, that it is at the proper operating level and that the cap is on tightly. The master cylinder assembly is properly mounted and secure, not cracked, broken, or bent, that the lines are properly mounted and secure with no abrasions, bulges, cuts or leaks, and not chaffed or rubbing.
Driver side tire area, in wheel well
- Check the front portion of the frame, that it’s not bent, cracked, or broken, and there are no illegal welds.
Suspension and steering parts
(Begin with components visible in the driver side wheel well)
- Top and bottom coil spring mounts, that they are properly mounted to the frame, not cracked, bent, or broken. Check that the coil spring is properly mounted and secure, not cracked or broken, and no illegal welds.
- The control arm is properly mounted and secure, it’s not cracked, bent, or broken.
- Shock absorber, that it is securely mounted top and bottom, bushings are intact, it’s not cracked, bent, or broken, and not leaking.
- The stabilizer bar and stabilizer link is properly mounted and secure, not cracked, bent, or broken, the bushings are not torn or missing, and there are no loose or missing nuts.
(Continue with components visible while lying under the front bumper)
- Gear box, that it’s properly mounted and secured to the frame, that it’s not bent, cracked or broken, no missing nuts or bolts, and it’s not leaking.
- Steering linkage, that it is not bent or broken, that it is properly mounted and secure, that the steering sockets are not worn or damaged and bushings are in good condition and not missing. Check the linkage from one side of the truck to the other, and the drag link which is located on the passenger side.
- Pitman arm, that it’s properly mounted and secure, it’s not cracked, bent, or broken.
- This is a coil spring, solid axle suspension and has no U-bolts.
Brakes, Tire Rim, Tire
Tip: Go back to the driver side wheel well. If needed, have the tires turned so that you can see the brake line connections.
- Brake lines, properly mounted and secure to the wheel, no abrasions, bulges or cuts, not chaffed or rubbing, not leaking. Check the brake rotor, that it’s smooth and clean with no oil or fluids. Check the brake pads, that they are not broken, cracked, with no oil or fluids, and that they are at least 1/4”.
- Tire rim inner and outer, that it’s properly mounted and secure, not cracked or broken, with no illegal welds. Lugnuts, that they’re properly mounted and secure, and that none are missing. Check for rust, shiny metal and spidering, indicating looseness or over-tightening. Check the axle hub seal, that it’s properly mounted and secure, not cracked or broken, that there are no missing or loose bolts, and it’s not leaking.
- Tire, inner and outer tire walls, that there are no abrasions, bulges, or cuts, and that the tire is properly beaded to the rim. The tire face, to see that it’s evenly worn with no damage, and a minimum tire tread of 4/32”. (Say but do not do) – I will check the tire pressure with a gauge. Pressure should be at the manufacturer or carrier specifications. Check the valve stem, that it is properly mounted and secure, not cracked, bent, or broken, is not leaking, and the cap is in place.
This completes the A portion of the inspection.
Part B: Driver door to rear of vehicle, add unique items from passenger side.
- Check the driver side of the truck. I will make sure the mirror Is properly mounted and secure, not cracked or broken, with no loose or missing nuts, and that it is clean.
- Mirror turn signal lens is properly mounted and secure, is not cracked or broken, and is amber or clear in color. (clear in this case with amber LED bulb)
- Door, that it opens and closes properly from the outside, that the hinges are not loose or worn, and the seal is intact, not torn, frayed, or leaking.
- Check the step, that it is properly mounted and secure, not cracked or broken, free of debris, that it will support the driver’s weight.
- Check the DEF area, that the tank and tank skid plate are properly mounted and secure, not cracked, broken or leaking, and the cap is on tightly, that hoses are properly mounted and secure with no abrasions, bulges, cuts or leaks, and not chaffed or rubbing.
- Check the fuel area, that the tank and tank skid plate are properly mounted and secure, not cracked, broken, or leaking, that the hoses are secure, there are no abrasions, bulges, or cuts, they are not leaking, from the tank back up to the fill spout, that the fill cap is on tightly and secured.
Under truck bed, driver side
- Check the drive shaft, that it’s not bent, twisted, or damaged, and the U-joints are free of damage and debris.
- Check the frame and cross members, that they’re properly mounted and secure, not cracked, bent, or broken, and there are no illegal welds.
Rear Suspension and axle
- Check the rear leaf spring assembly, that both the front and rear leaf spring mounts are properly mounted and secure, that the front and rear bushings are intact and not missing or damaged, that there are no missing or broken bolts, that the leaf springs are aligned, not broken or cracked, no illegal welds.
- U-bolts, that they are properly mounted and secure to the vehicle, they’re not shifted, cracked, bent, or broken, there are no loose or missing nuts.
- The shock absorber, that it is securely mounted top and bottom, bushings are intact, it’s not cracked, bent, or broken, and not leaking.
Brakes, rims and tires
- Rear brake lines, that they are properly mounted and secure, that the fittings are tight and not leaking, that there are no abrasions, bulges or cuts in the lines, and they are not leaking.
- Brake rotor, it should be securely mounted, smooth and clean with no fluids or oils, and the brake pads should not be broken, cracked, soiled with fluids or oils, and should be no less than 1/4” thick.
- Dual wheel rim assembly, that they are properly mounted and secure, not cracked or broken, and there are no illegal welds. Check the bud spacing, that the wheel rims are flush together, that the tires are not touching and there is no debris between the tires. Check the lugnuts, they should not be loose or missing. Check for rust, shiny metal and spidering, indicating looseness or over-tightening. Check the axle hub seals, that they are properly mounted and secure, not cracked or broken, that there are no missing or loose bolts, and they’re not leaking.
- Check the inside and outside tire walls of both tires for abrasions, cuts and bulges, checking the tire faces for even tread wear, hazardous debris and minimum tread depth of 2/32”, and that there is a good bead to the rim. Check the tire pressure with a gauge. Pressure should be at the manufacturer or carrier specifications. Check inner and outer valve stems, that they are properly mounted and secure, not cracked, bent, or broken, are not leaking, and the caps are in place.
- Check the mud flap, that it’s properly mounted and secure, it’s not damaged or missing, not dragging the ground or rubbing the tires, and it covers the width of both tires.
- Reflective tape should be intact and clean.
- Side marker lights are properly mounted, not broken, cracked or missing, and are either amber at the front of the flatbed or red at the rear.
Rear of Truck
- License plate should be properly mounted and secure, clean, and unobstructed.
- The license plate light, properly mounted and secure, not cracked, broken or missing, clear in color.
- Brake lights, tail lights, turn signals, and 4-way flashers, on the rear of the truck bed and on the rear of the headache rack, that they’re properly mounted and secure, not cracked, broken, or missing. The brake, marker, turn signal and 4-way flashers are red in color, the reverse lights are white in color.
Passenger side unique item s
- The engine exhaust system, that it’s properly mounted and secure, it’s not cracked, bent, or broken, is not leaking as would be indicated by black soot around any of the pipe connections. Check the exhaust system from the rear of the vehicle to the manifold and turbo connections under the hood.
- Check the spare tire, that it is properly mounted and secure. Check the inside and outside tire walls of both tires for abrasions, cuts and bulges, checking the tire faces for even tread wear, hazardous debris and minimum tread depth of 4/32” as it may be used on the front axle, and that there is a good bead to the rim. Check the pressure with a gauge. Check that the valve stem is properly mounted and secure, that it is not bent, broken or leaking, and that the cap is in place.
This concludes the B portion of the inspection.
Part C: The trailer inspection.
Note: The trailer inspected in this guide is a 24’ flatbed bumper pull trailer with electric brakes. You should adapt this guide to include components not listed here that exist on the specific trailer you are inspecting.
Front of Trailer
- Trailer tongue and front of the trailer for damage, cracks or broken components..
- Landing gear, that it is properly mounted and secure, with no missing braces or missing parts, that the legs are in the fully raised position and the landing gear crank handle is properly secured.
- Check the front marker lights and reflectors, that they are properly mounted and secure, that the lenses are not cracked, broken, or missing, that they are amber in color, and working properly.
Underneath the trailer
- Floor, frame, and cross members, that they are not bent, cracked, or broken, and there are no illegal welds, no damaged cross members, no loose or missing screws and no holes in the floor.
Side of Trailer
- Check that side marker lights are properly mounted and secure, that the lenses are either amber or red in color (amber at front, red at rear) and that they are not cracked, broken, or missing.
Rear axle and suspension
- Rear trailer axle leaf spring assembly, that both the front and rear leaf spring mounts are properly mounted and secure, that the front and rear bushings are intact and not missing or damaged, that there are no missing or broken bolts, that the leaf springs are aligned, not broken or cracked, no illegal welds.
- U-bolts, that they are properly mounted and secure to the axle, they’re not shifted, cracked, bent, or broken, there are no loose or missing nuts.
Brakes, Rims, Tires
- Check the rear brake wires, that they are properly mounted and secure, that the wires are properly connected and secure, not rubbing, chaffing, or exposed. The trailer has electric brakes.
- Check the rear brake drums, they should be properly mounted and secure, smooth and clean with no fluids or oils, the brake pads that should not be broken, cracked, soiled with fluids or oils, and should be no less than 1/4” thick.
- Check the tire rim, that it is properly mounted and secure, not cracked or broken, and there are no illegal welds. Check lugnuts, they should not be loose or missing. Check for rust, shiny metal and spidering, indicating looseness or over-tightening. Check the axle hub seal, that it is properly mounted and secure, not cracked or broken, that there are no missing or loose bolts, and it’s not leaking.
- Check the inside and outside tire walls for abrasions, cuts and bulges, checking the tire face for even tread wear, hazardous debris and minimum tread depth of 2/32”, and that there is a good bead to the rim. I will check the tire pressure with a gauge. Pressure should be at the manufacturer or carrier specifications. Check the valve stem, that it is properly mounted and secure, not cracked, bent, or broken, not leaking, and the cap is in place.
- Check the mud flap, that it’s properly mounted and secure, it’s not damaged or missing, not dragging the ground or rubbing the tire.
Rear of trailer, lights
- Check the rear corner marker light, that it’s properly mounted and secure, that the lens is not cracked or broken, that it is clean and red in color.
- Check brake lights, tail lights, turn signals, and 4-way flashers, that they’re properly mounted and secure, not cracked, broken, or missing. They are red in color.
- Check the tag light, that it’s properly mounted and secure, that it is not cracked or broken, that it is clean and clear or white in color.
- Check the rear of the trailer, that it is not damaged, and that the reflector tape is visible and clean.
- Check the trailer ramps, that they are properly mounted and secure, there are no bent, broken or missing latch pins, and that the ramps are locked in the up position.
This concludes part C of the inspection.
Coupling portion of the pre-trip Inspection:
Note: You should adapt this guide to fit the type of coupling you are actually using for the skills test. This particular inspection details a bumper pull trailer hitch. There will obviously be differences for pintle hitch, gooseneck, and 5 th wheel coupling inspections.
- The electrical connection from the plug at the back of the truck to the box mounted at the front of the trailer, should be fully plugged in with no debris or damage in the connecting plug, there should be no spliced, worn, frayed, or exposed wires. The plug receiver is properly mounted and secure, not cracked, or broken. The wires should be properly mounted and secured to the tongue of the trailer, and the electrical connection box mounted in the trailer frame is properly and securely mounted.
- Inspect the hitch receiver on the truck, it should be properly mounted and secure with no missing or broken parts or welds.
- Hitch in the receiver, should be properly mounted and secured to the receiver with a hitch pin and cotter key, with no missing, damaged, or broken parts.
- Check that the hitch is properly and securely attached to the trailer’s ball socket coupler, that the coupler jaw is clamped at the base of the ball hitch, and that the hitch release handle is properly mounted and secure, that it is not cracked, bent, or broken, and is in the fully locked position.
- Be sure that the hitch locking pin is not bent, cracked, or broken, and that it is in the fully locked position.
- Safety chains are properly mounted and secure, not damaged, stretched, broken, or rusted, that they are crisscrossed and correctly attached to the chain D-rings at the rear of the truck. The D-rings or chain receivers should be properly mounted and secure with no cracks or breaks.
- Check that the breakaway safety line is properly mounted and secure, that it is properly and securely plugged in to the breakaway safety switch, that the wires from the switch to the battery are properly mounted, not spliced, worn frayed or wires exposed, that the battery powering the switch it is properly mounted, secure, not cracked, broken, or leaking, it is fully charged, and that the breakaway line is properly attached with one of the chain clips to the chain D-ring at the rear of the truck.
This concludes the coupling portion of the inspection.
In cab inspection:
Safety Equipment
- Perform a 3 point check of the safety belt, that it is properly mounted and secure, no missing bolts, not damaged, frayed or torn, that it latches properly.
- Check safety equipment, the fire extinguisher is properly mounted and secure, fully charged and properly rated for this vehicle, the three red safety triangles, and spare fuses.
Truck Start Sequence, Gauges
- The truck is in park.
- Start the truck, observe the ABS light come on and go off again indicating that the ABS is working properly.
- Check the oil pressure gauge, that it rises quickly to the operating range of 40 to 60 psi, the water temperature gauge, that it raises to the proper operating range of 180 to 200 degrees F., and the voltmeter which should show between 13 and 15 volts.
- Check the fuel and DEF gauges, that they operate properly and rise to normal operating ranges.
Horn, Lights, Wipers, Glass, Heat/Defrost
- Check the horn by honking it once.
- Check the left and right turn signal indicators , the hazard flasher indicators, and the bright beams indicator on the dash.
- Check the windshield wipers, that they are properly and securely mounted, not bent or broken, that the blades press firmly against the windshield, that the blades are not torn and are in good condition, and that the wipers spray and operate correctly.
- Check the heater and defroster by turning each on and feeling on the floor for the heat and above the dash for the defroster.Check the driver and passenger side mirrors, properly mounted and secure, not cracked or broken, and are properly adjusted for this driver.
- Check the windshield, it’s properly mounted and secure, clear, not cracked or broken, no stickers or obstructions, the seal is intact and not leaking.
Brake Checks
- Test the truck parking brake by setting the parking brake, putting the truck into gear, and gently applying the accelerator, the parking brake should hold if working properly.
- Apply the service brakes and release the truck parking brake. Test the trailer brake by holding the controller in the braking position while letting off the service brakes and gently accelerating against the trailer brakes, which should hold if working properly.
- Test the truck service brakes by gently accelerating to 5 mph while grasping the wheel with both hands firmly, then applying the brakes. If the steering wheel pulls to the left or right, or the pedal sinks, it may indicate a problem with the brakes.
Tip: At this point, place your vehicle back in park and keep it running to set up for the …
Hydraulic Brake Check
Tip: This final test must be performed exactly as written, and is an automatic fail of the entire test if you miss it or perform any part of it incorrectly!
- Perform a hydraulic brake check with the truck running and in park by pumping the brake pedal three times. On the third pump do not raise your foot, but hold the brake pedal down for a minimum of five seconds before releasing it. The brake pedal should not leak down.
This concludes the in cab inspection, and the entire inspection on a class A vehicle with hydraulic brakes.
Share this:
Leave a comment cancel reply.

- Already have a WordPress.com account? Log in now.
- Subscribe Subscribed
- Copy shortlink
- Report this content
- View post in Reader
- Manage subscriptions
- Collapse this bar
Emergency Service Call Now: 1-877-556-8748
Pre-trip like a pro.
- Free Practice Tests
Commercial Driving
- Introduction
Getting a CDL
- Fees and costs
CDL Types & Permits
Endorsements & Restrictions
CDL Exam Preparation
Written exams
Practical exams
- Skills test
- Pre-trip inspection
- TSA background check
- Retake policy
CDL Maintenance
ELDT Training & Certification
CDL how-to guides
Mastering the CDL Pre-Trip Inspection Exam: A Complete Guide
Learn how to conduct thorough pre-trip inspections with our guide, a critical component for commercial vehicle safety.

Written by Andrei Zakhareuski. With over 16 years of expertise, Andrei leads Driving-Tests.org, a top online resource for driver education. His leadership has established vital partnerships with over 2,600 libraries, educational bodies, and state agencies.
The CDL Pre-Trip Inspection Exam is an integral part of obtaining your commercial driver’s license. This guide covers Class A and Class B pre-trip inspections, provides a checklist, and offers tips for memorizing the inspection process.
Start a free Pre-Trip Inspection practice test:
- Alabama - AL - Alabama Pre-Trip Inspection Practice Test
- Alaska - AK - Alaska Pre-Trip Inspection Practice Test
- Arizona - AZ - Arizona Pre-Trip Inspection Practice Test
- Arkansas - AR - Arkansas Pre-Trip Inspection Practice Test
- California - CA - California Pre-Trip Inspection Practice Test
- Colorado - CO - Colorado Pre-Trip Inspection Practice Test
- Connecticut - CT - Connecticut Pre-Trip Inspection Practice Test
- Delaware - DE - Delaware Pre-Trip Inspection Practice Test
- District of Columbia - DC - District of Columbia Pre-Trip Inspection Practice Test
- Florida - FL - Florida Pre-Trip Inspection Practice Test
- Georgia - GA - Georgia Pre-Trip Inspection Practice Test
- Hawaii - HI - Hawaii Pre-Trip Inspection Practice Test
- Idaho - ID - Idaho Pre-Trip Inspection Practice Test
- Illinois - IL - Illinois Pre-Trip Inspection Practice Test
- Indiana - IN - Indiana Pre-Trip Inspection Practice Test
- Iowa - IA - Iowa Pre-Trip Inspection Practice Test
- Kansas - KS - Kansas Pre-Trip Inspection Practice Test
- Kentucky - KY - Kentucky Pre-Trip Inspection Practice Test
- Louisiana - LA - Louisiana Pre-Trip Inspection Practice Test
- Maine - ME - Maine Pre-Trip Inspection Practice Test
- Maryland - MD - Maryland Pre-Trip Inspection Practice Test
- Massachusetts - MA - Massachusetts Pre-Trip Inspection Practice Test
- Michigan - MI - Michigan Pre-Trip Inspection Practice Test
- Minnesota - MN - Minnesota Pre-Trip Inspection Practice Test
- Mississippi - MS - Mississippi Pre-Trip Inspection Practice Test
- Missouri - MO - Missouri Pre-Trip Inspection Practice Test
- Montana - MT - Montana Pre-Trip Inspection Practice Test
- Nebraska - NE - Nebraska Pre-Trip Inspection Practice Test
- Nevada - NV - Nevada Pre-Trip Inspection Practice Test
- New Hampshire - NH - New Hampshire Pre-Trip Inspection Practice Test
- New Jersey - NJ - New Jersey Pre-Trip Inspection Practice Test
- New Mexico - NM - New Mexico Pre-Trip Inspection Practice Test
- New York - NY - New York Pre-Trip Inspection Practice Test
- North Carolina - NC - North Carolina Pre-Trip Inspection Practice Test
- North Dakota - ND - North Dakota Pre-Trip Inspection Practice Test
- Ohio - OH - Ohio Pre-Trip Inspection Practice Test
- Oklahoma - OK - Oklahoma Pre-Trip Inspection Practice Test
- Oregon - OR - Oregon Pre-Trip Inspection Practice Test
- Pennsylvania - PA - Pennsylvania Pre-Trip Inspection Practice Test
- Rhode Island - RI - Rhode Island Pre-Trip Inspection Practice Test
- South Carolina - SC - South Carolina Pre-Trip Inspection Practice Test
- South Dakota - SD - South Dakota Pre-Trip Inspection Practice Test
- Tennessee - TN - Tennessee Pre-Trip Inspection Practice Test
- Texas - TX - Texas Pre-Trip Inspection Practice Test
- Utah - UT - Utah Pre-Trip Inspection Practice Test
- Vermont - VT - Vermont Pre-Trip Inspection Practice Test
- Virginia - VA - Virginia Pre-Trip Inspection Practice Test
- Washington - WA - Washington Pre-Trip Inspection Practice Test
- West Virginia - WV - West Virginia Pre-Trip Inspection Practice Test
- Wisconsin - WI - Wisconsin Pre-Trip Inspection Practice Test
- Wyoming - WY - Wyoming Pre-Trip Inspection Practice Test
CDL Class A Pre-Trip Inspection
Engine Compartment Inspection
Includes checking for leaks, belt tension, and the condition of hoses, among other components.
Cab Check/Engine Start
Involves inspecting the cab’s interior, gauges, and starting the engine to check for abnormalities.
Brake Check
Focuses on air brake systems, including air brake checks and the parking brake test.
CDL Class B Pre-Trip Inspection
Vehicle Overview
Begin with a general overview of the vehicle, checking for obvious signs of damage or issues.
External Inspection
Inspect all external components, including tires, lights, and mirrors.
Internal Inspection
Check all internal controls, ensuring everything is functional and within reach.
Pre-Trip Inspection Checklist
- Lights and reflector s: Ensure all are clean and functional.
- Engine oil and coolant levels : Check for adequate levels.
- Steering mechanism : Ensure it’s secure and functioning.
- Horn : Test for functionality.
- Windshield wipers : Check for operability and condition.
- Mirror s: Adjust for optimal visibility.
- Emergency equipment : Ensure presence and accessibility.
- Air brake system : Test for leaks and proper pressure.
Tips for Memorizing the Pre-Trip Inspection for CDL
- Create a Routine : Develop a consistent order in which to conduct your inspection.
- Use Mnemonics : Create acronyms or phrases to help remember the steps.
- Practice Regularly : Hands-on practice is the most effective way to memorize the inspection process.
- Visual Aids : Use diagrams or checklists as visual reminders.
Pro Tip : Practice the pre-trip inspection in a real-world setting. The more you perform the inspection in a practical environment, the more natural it will become.
Remember, the pre-trip inspection is not just a test requirement – it’s a fundamental safety practice every commercial driver should master. For more resources and detailed guides, visit Driving-Tests.org .
Secure your CDL with confidence!
Our exclusive CDL Premium program offers comprehensive online training with an ELDT certificate, authentic exam questions, and a solid Pass Guarantee, starting at only $49. Ideal for first-time applicants, seasoned drivers, and those new to the U.S. road rules.
Explore CDL Premium
Was this page helpful?
- Start a free Pre-Trip Inspection practice test:
- CDL Class A Pre-Trip Inspection
- CDL Class B Pre-Trip Inspection
- Pre-Trip Inspection Checklist
- Tips for Memorizing the Pre-Trip Inspection for CDL
- Pre-Trip Training Videos
Start-Up Assistance & Expert Dispatch Service
Please view the helpful videos below before you hit the road with your trailer!
Correct way to connect break-away cable.
Pre-Trip Inspection
Join the Industry Leaders and Start Trucking Today! Drive With Us Contact Us
- Demand Planning and Forecasting
- Procurement Management
- Shipping and Logistics
- Manufacturing Supply Chain
- Quality in Supply Chain
- Warehousing In Supply Chain
- Inventory Management
- Financial Supply Chain
- Warehouse Equipements
- Dispatch Software
- Hot Shot Trucking
- Shipping Cost
- Factoring Business
Prioritizing Vehicle Inspection in Hot Shot Trucking

- 18 min read
Hot shot trucking is a specialized form of freight transportation that offers speed , flexibility , and cost savings. It has become increasingly popular due to the rise of e-commerce and the need for quick deliveries. Hot shot trucking provides a more efficient way to transport smaller and time-sensitive loads using pickup trucks or Class 3 to Class 5 trucks. This article will explore the importance of vehicle inspection in hot shot trucking and why it should be prioritized by drivers and businesses.
Key Takeaways:
- Regular vehicle inspection is crucial for the safety of hot shot trucking operations.
- Thorough inspections help identify mechanical issues, preventing breakdowns and delays.
- Prioritizing vehicle inspection enhances overall safety and professionalism in hot shot trucking.
- Compliance with pre-trip inspection requirements is essential for drivers.
- Effective reporting of inspections and defects ensures regulatory compliance .
The Advantages of Hot Shot Trucking
In the world of transportation, hot shot trucking offers a range of advantages that make it a preferred choice for businesses requiring flexible operations and rapid deliveries . Unlike traditional trucking methods, hot shot trucking provides unparalleled flexibility and agility in meeting the ever-changing demands of the industry. With the ability to quickly adapt to last-minute requests, hot shot drivers ensure that time-sensitive deliveries are made promptly, making it an attractive option for industries such as oil and gas, construction, and agriculture.
Furthermore, hot shot trucking enables swift and efficient deliveries, particularly in urgent situations. With the use of pickup trucks or Class 3 to Class 5 trucks, hot shot drivers can navigate through congested areas and reach their destinations faster, ensuring that time-sensitive goods are transported quickly and securely. This level of speed and efficiency sets hot shot trucking apart from traditional methods and makes it a valuable resource for businesses that prioritize rapid deliveries .
Hot shot trucking offers the unique advantage of lower operating costs compared to larger freight transportation methods. With smaller vehicles and reduced maintenance requirements, hot shot drivers can enjoy cost savings on fuel expenses and maintenance costs. This lower overhead translates into increased profitability for drivers and potential cost savings for businesses utilizing hot shot trucking services.
Table: Comparing Hot Shot Trucking to Traditional Trucking
In summary, hot shot trucking offers the advantages of flexibility, rapid deliveries, and lower operating costs . These benefits, combined with its ability to adapt to last-minute requests and efficiently navigate congested areas, make hot shot trucking an ideal choice for businesses requiring time-sensitive and cost-effective transportation solutions. By leveraging the benefits of hot shot trucking, businesses can enhance their operational efficiency and meet the demands of today’s fast-paced market.
The Evolution of Hot Shot Trucking
Hot shot trucking has undergone a significant transformation over the years, evolving from a niche industry into a professional and specialized field. This evolution was driven by the increasing demand for hot shot trucking services and the need for more efficient and effective transportation solutions. Advancements in technology have played a crucial role in shaping the industry and improving its operations.
In the early days, hot shot trucking was primarily carried out by independent truckers using their pickup trucks. These drivers would transport smaller loads and cater to quick deliveries. However, as the demand for hot shot trucking grew, drivers realized the importance of investing in specialized equipment and training. This led to the adoption of heavier-duty trucks that could handle larger and heavier loads, allowing hot shot truckers to expand their capabilities and serve a wider range of industries.
The advancements in technology have revolutionized hot shot trucking operations. The introduction of GPS tracking systems has greatly improved the efficiency of route planning and navigation, enabling drivers to optimize their routes and reduce delivery times. Mobile communication devices have also played a vital role in enhancing communication between drivers and dispatchers, ensuring real-time updates and efficient coordination.
The Benefits of Hot Shot Trucking
Hot shot trucking offers a unique blend of flexibility, speed , and efficiency, coupled with the advantage of lower operating costs. The flexibility of hot shot trucking allows us to easily adapt our schedules based on the demands of our clients. This level of flexibility benefits both us as drivers and the businesses that rely on prompt and efficient deliveries. Additionally, hot shot trucking is faster than traditional trucking methods, enabling us to navigate through congested areas and make quicker deliveries.
Lower operating costs are another significant benefit of hot shot trucking. With smaller and more fuel-efficient trucks, we can save on fuel expenses compared to larger freight haulers. Additionally, the reduced maintenance costs of operating smaller vehicles contribute to higher profitability for us as drivers and potential cost savings for businesses. These lower operating costs make hot shot trucking an attractive option, especially for smaller businesses with tight budgets.
Overall, the benefits of hot shot trucking make it a preferred choice for businesses that require quick and efficient transportation solutions. The combination of flexibility, speed, and lower operating costs allows us to provide superior service and meet the urgent delivery needs of our clients. Hot shot trucking plays a vital role in various industries, including oil and gas, construction, and agriculture, where time-sensitive deliveries are of utmost importance . By leveraging the advantages of hot shot trucking, we can enhance our efficiency, profitability, and customer satisfaction.
Table: Comparing Hot Shot Trucking with Traditional Trucking
Hot shot trucking offers a unique blend of flexibility, speed, and efficiency, coupled with the advantage of lower operating costs.”
In summary, hot shot trucking provides us with the flexibility to adapt our schedules, faster delivery times, and lower operating costs. These benefits allow us to serve our clients efficiently while maintaining profitability. The table above highlights some of the advantages of hot shot trucking compared to traditional trucking methods, showcasing its superior flexibility, speed, and cost-effectiveness. By choosing hot shot trucking, we can meet the urgent transportation needs of businesses in various industries and contribute to their success.
Starting a Hot Shot Trucking Business
Starting a hot shot trucking business requires careful planning and preparation. Here’s a step-by-step guide to help you get started:
Determine the Necessary Licenses and Permits
Before launching your hot shot trucking business , it’s essential to obtain the necessary licenses and permits. This typically includes a commercial driver’s license (CDL) and any additional endorsements required for the type of cargo you plan to transport. Research the specific requirements in your state and ensure you meet all the necessary criteria.
Invest in the Right Equipment
Choosing the right equipment is crucial for the success of your hot shot trucking business . Depending on the size and weight of the loads you plan to transport, you’ll need to invest in reliable and appropriately sized trucks. Consider factors such as fuel efficiency, cargo capacity, and maintenance requirements when selecting your vehicles.
Build Relationships with Potential Customers
Building a strong customer base is essential for the growth of your hot shot trucking business. Network with industry professionals, attend trade shows and conferences, and utilize online platforms to connect with potential clients. Establishing trust, delivering exceptional service, and maintaining open lines of communication will help you attract and retain customers in the competitive hot shot trucking industry.
The Importance of Vehicle Inspection in Hot Shot Trucking
Vehicle inspection is an essential aspect of hot shot trucking, as it ensures the safety of drivers, cargo, and others on the road. Regular and thorough inspections play a crucial role in identifying and addressing mechanical issues early on, preventing unexpected breakdowns, delays, and potential accidents. By prioritizing vehicle inspection, drivers can safeguard their shipments, maintain a smooth operation, and enhance overall safety in hot shot trucking.
Hot shot trucking involves transporting smaller and time-sensitive loads, often in urgent situations or time-sensitive industries. The importance of vehicle inspection cannot be overstated in such scenarios. By conducting regular inspections, drivers can catch any potential issues before they escalate, ensuring the safety of their cargo, the efficiency of their operations, and the well-being of everyone involved.
“Regular and thorough inspections play a crucial role in identifying and addressing mechanical issues early on, preventing unexpected breakdowns, delays, and potential accidents.”
Moreover, prioritizing vehicle inspection demonstrates professionalism and a commitment to safety. It helps hot shot truckers build trust with their clients and showcases their dedication to delivering exceptional service. By making vehicle inspection a top priority, hot shot truckers can differentiate themselves in the industry, attract more customers, and establish long-lasting relationships based on reliability and safety.
Conclusion:
In conclusion, vehicle inspection is of utmost importance in hot shot trucking. It ensures the safety of drivers, cargo, and others on the road, while also enhancing operational efficiency and professionalism. By conducting regular and thorough inspections, hot shot truckers can prevent unexpected breakdowns, delays, and accidents, ensuring the successful transportation of time-sensitive goods. Prioritizing vehicle inspection is not only a legal requirement but also a strategic move that builds trust, attracts customers, and sets hot shot truckers apart in a competitive industry.
The Benefits of Pre-trip Inspections
Pre-trip inspections are a critical element of hot shot trucking, ensuring the safety of drivers, compliance with regulations, and smooth operations. These inspections offer several benefits that contribute to the overall efficiency and success of hot shot trucking.
Enhanced Safety
The primary benefit of pre-trip inspections is the increased safety they provide. By thoroughly examining the vehicle before every trip, drivers can identify potential mechanical issues that could compromise their safety on the road. Addressing these issues promptly helps prevent accidents, breakdowns, and delays, ensuring a secure journey for both the driver and others sharing the road.
Regulatory Compliance
In addition to safety, pre-trip inspections help drivers maintain compliance with industry regulations. These inspections demonstrate a commitment to following proper procedures and ensuring that the vehicle meets all necessary standards, including equipment functionality and load securement. By adhering to these regulations, drivers showcase professionalism and responsibility, fostering trust with customers and authorities.
Operational Efficiency
Regular pre-trip inspections contribute to operational efficiency in hot shot trucking. By identifying and resolving mechanical issues before they become significant problems, drivers can prevent unexpected breakdowns and costly repairs. This ensures that deliveries are not disrupted and allows drivers to maintain smooth schedules, meet customer expectations, and ultimately improve overall fuel efficiency.
Pre-trip inspections play a crucial role in the success of hot shot trucking. They enhance safety, maintain regulatory compliance, and improve operational efficiency. By prioritizing these inspections, drivers can mitigate risks, maximize productivity, and uphold the professionalism and reliability of the hot shot trucking industry.

Source: Image by Free-Photos from Pixabay
The 15-minute Pre-trip Inspection Checklist
Performing a thorough pre-trip inspection is crucial for truck safety . By following a 15-minute pre-trip inspection checklist , drivers can ensure that all necessary aspects of the truck are thoroughly examined before hitting the road. This checklist plays a vital role in assessing the overall condition and safety of the truck and helps drivers identify any potential issues that may affect their journey.
The 15-minute pre-trip inspection checklist includes:
- Inspecting tires: Checking for proper inflation, tread wear, and any signs of damage.
- Checking lights: Ensuring all headlights, taillights, turn signals, and brake lights are functioning correctly.
- Examining brakes: Testing the brake functionality and checking for any leaks or abnormalities.
- Inspecting engine components: Checking fluid levels, belts, hoses, and looking for any signs of leaks or damage.
- Checking fluids: Verifying that all essential fluids such as oil, coolant, and windshield washer fluid are at appropriate levels.
- Examining windshield: Ensuring the windshield is clear, without any cracks or chips that could hinder visibility.
- Verifying emergency kit: Making sure the emergency kit is complete and includes essential items such as flares, fire extinguisher, and reflective triangles.
- Checking mirrors: Adjusting and inspecting all mirrors for proper visibility.
- Examining coupling system: Ensuring the hitch and coupling system are secure and in good working condition.
- Inspecting cabin: Checking seat belts, mirrors, windshield wipers, and other interior components for proper functionality.
- Examining trailer: Inspecting the condition of the trailer, including lights, tires, and cargo securement.
- Inspecting the back of the truck: Verifying that the cargo area is secure and free of any debris or hazards.
By diligently following this pre-trip inspection checklist , hot shot truckers can ensure the safety and reliability of their vehicles, ultimately promoting a secure and efficient transportation process.
How to Properly Report a Pre-trip Inspection
In hot shot trucking, compliance with regulations is of utmost importance, especially when it comes to vehicle inspections. According to FMCSA guidelines, drivers are required to log at least one inspection per day in their hours of service. In the past, drivers were also required to fill out a pre-trip inspection report each day. However, recent changes in the guidelines only mandate the completion of an inspection report if a defect is found during the inspection.
Accurate reporting of any defects found during the pre-trip inspection is essential to ensure compliance. By filling out the inspection report correctly, drivers demonstrate their commitment to safety and professionalism. It is important to provide detailed and specific information about the defects , including their nature and severity. This information helps maintenance personnel to address the issues promptly and effectively, ensuring the safety of the truck and its cargo.
Having pre-filled inspection reports can be a useful tool for drivers, especially those who are still familiarizing themselves with the pre-trip inspection process. These pre-filled reports serve as checklists, reminding drivers of the key areas they need to inspect and report on. By utilizing such reports, drivers can ensure that the inspection process is thorough and that all necessary information is accurately recorded.
By properly reporting a pre-trip inspection, hot shot truckers not only fulfill their regulatory obligations but also contribute to the overall safety and efficiency of hot shot trucking operations. Compliance with inspections and timely reporting of defects help prevent breakdowns, delays, and accidents, safeguarding both the drivers and the cargo. It is a responsibility that should be taken seriously, as it directly impacts the reliability and professionalism of the hot shot trucking industry as a whole.
Health and Safety for Hot Shot Truckers
Hot shot trucking is a demanding profession that requires drivers to work long hours and navigate through various road and weather conditions. In order to ensure the well-being of hot shot truckers, it is important to prioritize health and safety. By implementing proper safety tips and stress management techniques, drivers can maintain their physical and mental well-being, preventing fatigue and burnout.
One of the key aspects of maintaining health and safety as a hot shot trucker is proper time management. It is important for drivers to schedule regular breaks and rest periods to prevent exhaustion. Taking breaks allows the body to rest and recharge, reducing the risk of accidents and improving overall alertness on the road.
Stress management is another crucial factor in the health and safety of hot shot truckers. The nature of the job can be stressful, with time pressures and unpredictable situations. Implementing stress reduction techniques such as deep breathing exercises, meditation, or listening to calming music can help drivers stay calm and focused during challenging situations.
Additional Safety Tips for Hot Shot Truckers
- Stay hydrated: Dehydration can lead to fatigue and decrease focus and alertness. Drink plenty of water throughout the day to stay hydrated.
- Eat balanced meals: Maintain a healthy diet by including fruits, vegetables, and lean proteins. Avoid consuming excessive caffeine or sugary snacks that can cause energy crashes.
- Exercise regularly: Incorporate physical activity into your routine to improve strength, endurance, and overall well-being.
- Practice good sleep hygiene: Establish a regular sleep schedule and create a comfortable sleeping environment to ensure quality rest.
By prioritizing health and safety, hot shot truckers can minimize the risk of accidents, maintain their well-being, and provide a high level of service to their clients. Taking care of oneself should be an essential part of every hot shot trucker’s daily routine. By doing so, we can ensure a safer and more efficient hot shot trucking industry.
In conclusion, vehicle inspection is of utmost importance in the hot shot trucking industry. By prioritizing regular and thorough inspections, we can ensure the safety of both drivers and the cargo they transport. Inspections help identify and address mechanical issues early on, reducing the risk of unexpected breakdowns and delays. They also contribute to maintaining efficient operations and fulfilling the demands of time-sensitive deliveries.
Not only does vehicle inspection promote safety in hot shot trucking, but it also reflects professionalism and compliance with regulations. By demonstrating our commitment to maintaining our vehicles in top condition, we build trust with our clients and establish ourselves as reliable partners. Vehicle inspections also contribute to lower operating costs in the long run, preventing costly repairs and improving fuel efficiency.
As hot shot truckers, we have a responsibility to prioritize vehicle inspection and ensure the well-being of ourselves, our cargo, and others on the road. By staying proactive and conducting thorough inspections, we can prevent potential accidents and maintain the high standards of the hot shot trucking industry. Vehicle inspection is not just a task; it is a vital aspect of our daily operations, contributing to the overall success and safety of hot shot trucking.
Why is vehicle inspection important in hot shot trucking?
Vehicle inspection is important in hot shot trucking to ensure the safety of drivers, cargo, and others on the road. It helps identify and address mechanical issues early on, preventing unexpected breakdowns, delays, and potential accidents.
How does hot shot trucking offer flexibility and agility in operations?
Hot shot trucking allows drivers to quickly adapt to changing circumstances and accommodate last-minute requests. This level of responsiveness makes it an attractive option for businesses that require immediate transportation solutions.
What are the advantages of hot shot trucking compared to traditional trucking methods?
Hot shot trucking offers flexibility, speed, and lower operating costs. It allows for swift and efficient deliveries, especially in urgent or time-sensitive industries. The lower operating costs contribute to higher profitability for drivers and potential cost savings for businesses.
What is required to start a hot shot trucking business?
Starting a hot shot trucking business requires obtaining the necessary licenses, such as a commercial driver’s license (CDL), and investing in reliable and appropriately sized trucks. Building strong relationships with customers is also important for the success of the business.
How does pre-trip inspection benefit hot shot trucking?
Pre-trip inspections prioritize safety by identifying potential mechanical issues before starting a journey, ensuring a secure trip for drivers and others on the road. They also reduce delays, costly repairs, and disruptions, improving overall efficiency.
What should be included in a pre-trip inspection checklist?
A thorough pre-trip inspection checklist should include inspecting tires, lights, brakes, engine components, fluids, windshield, emergency kit, mirrors, coupling system, cabin, trailer, and the back of the truck.
How often should drivers perform a pre-trip inspection?
According to FMCSA guidelines, drivers are required to log at least one inspection per day in their hours of service. They should also fill out an inspection report if they find a defect during the inspection.
How can hot shot truckers prioritize health and safety?
Hot shot truckers can prioritize health and safety by properly managing their time, taking regular breaks, practicing stress-management techniques, and being prepared for uncertain situations such as vehicle breakdowns or urgent requests.
Source Links
- https://www.geotab.com/blog/hotshot-trucking-guide/
- https://www.cloudtrucks.com/blog-post/pre-trip-inspection-checklist
- https://www.coverwallet.com/business-tips/truck-driver-pre-trip-inspection
1 thought on “Prioritizing Vehicle Inspection in Hot Shot Trucking”
Pingback: Effortlessly Lift Heavy Loads Anywhere with Portable Hoist Lift: A Game-Changer for Your Worksite
Leave a Reply Cancel reply
Your email address will not be published. Required fields are marked *
Save my name, email, and website in this browser for the next time I comment.
- START BUSINESS
DOT Compliance
- Get a DOT/MC number
- MCS-150 -->
- Insurance -->
- MC Authority -->
- Load Boards -->
- Developing Company
- Dispatching -->
- Factoring -->
- DOT Audit Support -->
- Driver’s Folder -->
- Pre-Trip Inspection -->
- Drug Test -->
- Random Drug Test
- Clearinghouse
- Medical Card Driver Examination
- Intermodal -->
Inspections
- Truck Maintenance Inspection
- DOT Inspection
- Annual Vehicle Inspection
- How To Find a Driver ? -->
- Where to buy a Truck?
- Partnership with Truck Dispatcher Training inc?
Do I need to register? Click here to Register for UCR i already Have It
Congratulations! Your ucr is registered.
Pre-Trip Inspection
A pre-trip truck inspection is a necessary check of the truck and its major systems to keep safety on the road. Inspections need to occur before the start of a driver’s shift and at least once every 24 hours while on the road. Truck pre-trip inspection needs to be performed by the driver who is on duty, but before he starts the driving.
The FMCSA demands the pre-trip inspection by the driver. Any damage must be found, acknowledged and lastly certified that everything is fixed by the time the driver starts moving. Since the profession of a truck driver is very dangerous and there is the biggest number of crashes a lot of efforts are put into keeping the industry safer. A CDL pre-trip inspection helps to uncover potentially dangerous conditions. Maintenance. It is far less expensive to start repairing before the road rather than during the trip. Also, this helps you to stay in compliance.
Every truck driver has to go through the pre-trip inspection when they are on duty but before driving starts.
At the beginning of a shift a truck driver has to perform an inspection at a place where the truck is. Your pre-trip inspection should always begin at the front of the vehicle. When checking under the hood, keep in mind that there are several components you will need to examine to perform a thorough evaluation of the truck’s engine compartment.
A pre-trip Inspection has to be done at least once every 24 hours, at the beginning of a driver’s shift when he is already on a duty but hasn’t started to move yet.
A driver should start his inspection with finding out problems under the hood.Then, ensure the truck is not leaning. Also, make sure the cabin is safe. Check that the brakes are working properly. Later, look for flaws in the coupling system and finally look for defects in the trailer.
WANT TO KNOW MORE?
Willing to get to know more about Factoring ? Contact our expert, and get a full consultation to get answers to your questions! Just choose the best approach for you.
+1(619) 880-8560
Watch video below to get more info on Pre-trip Inspection.
We suggest you watch the video. Where you will be told in more detail about Pre-trip Inspection. The video will help you understand how it works and why you need it.

congratulations en
It can be difficult to start as an owner-operator. Moreover, many businesses are closed in the first 6 months. The reasons are different, but mainly due to the lack of some important points. Follow our recommendations and the OPERATOR OWNER CHECKLIST below to build a successful business STEP BY STEP.
oops, not correct
We've found out that Your authorization is incorrect. The reason is not clear by now. Please check your number or you may not be registered yet.
Please enter MC or DOT number

Platform Overview
The Connected Operations Cloud
Apps & Driver Workflows
Messaging, dispatch, documents, ELD
Video-Based Safety
AI cameras, driver coaching, safety reports, in-cab alerts
Equipment Monitoring
Location tracking, utilization, continuous diagnostics
Vehicle Telematics
Real-time GPS, routing, fuel, maintenance, electrification
Site Visibility
Remote visibility, proactive alerting, on-the-go access
Integrations
Developer API
Start building with our API
App Marketplace
Install turnkey integrations
OEM Integrations
Unlock embedded telematics data
Experts Marketplace
Find certified Samsara experts
By Business Need
Reduce costs across your business
Automate regulatory compliance
Ensure safety wherever you operate
Identify and eliminate risks
Sustainability
Prepare for transition to renewables
Customer Experience
Build customer loyalty and retention
By Industry
Transportation & Logistics
Food & Beverage
Field Services
Construction
K-12 Schools
Higher Education
Passenger Transit
Customer Success
Customer Stories
Education & Training
Customer Support
Help Center
Developer Portal
Customer Tips
Case Study Highlight

DHL consolidates 7 separate point solutions with Samsara’s integrated platform
Read more ➔

Nutrien Ag Solutions
Nutrien Ag Solutions cuts distracted driving in half 90 days after installing AI Dash Cams
Video Library
Product Tours
Fleet Safety Guide
Business Resilience

State of Connected Operations
See how leaders are adopting cutting-edge technologies, empowering their workforce, and unlocking new revenue streams.
Optimization

Make More Possible
Find ways to make more possible across your organization to empower your workers, increase efficiency, and reduce operational costs.

Build Your EV Fleet
Get the essentials on fleet electrification and better understand how an EV fleet can benefit your business.
Investor Relations
Samsara Ventures
Brand Assets
Featured News

Apply for the 2024 Connected Operations Awards
Samsara's 2023 Environmental, Social, and Governance (ESG) report
What is a Pre-Trip Inspection Checklist for Class A CDL
October 22, 2021

Get Started With Samsara
Key Takeaways
Drivers who have a class A commercial driver’s license (CDL) usually have to complete a pre-trip inspection on their non-passenger commercial vehicles. Having a pre-trip inspection checklist handy helps driver’s know what to expect when they pass their CDL examination and what parts of their vehicle the will need to inspect before heading out on the road.
What is a CDL pre-trip inspection checklist?
A pre-trip inspection checklist helps truck drivers remember all the major systems and parts to inspect before heading out on a route. Knowing how to complete a pre-trip vehicle inspection is an important part of trucking.
Pre-trip inspections for class A licensees
The class A commercial driver’s license (CDL) typically covers non-passenger commercial vehicles . These might include tractor-trailers, tankers, livestock carriers, flatbeds, and more.
The Department of Transportation (DOT) requires drivers to perform a pre-trip inspection before driving a commercial vehicle. Similar to Class B CDL holders, the actual daily pre-trip inspection takes about 15 minutes or less. Typically, the inspection includes the following, with some employers making their own variations.
Brakes and air system
Steering mechanism
Lights and reflectors
Tires, wheels, and rims
Windshield wipers
Rearview mirrors
Emergency equipment
Drivers complete a driver vehicle inspection report (DVIR) recording the completed inspection.
Class A CDL pre-trip inspection checklist
When getting a CDL, drivers need to pass a pre-trip inspection test. It’s more intensive than the inspection drivers perform daily. This pre-trip inspection checklist for a Class A CDL gives drivers an overview of performing an inspection. Check your state’s CDL manual for a complete list of inspection requirements.
Click here for a Class B pre-trip inspection list.
Engine compartment
Fluids - coolant, oil, and power steering : Reservoirs and tanks should not leak. Check hoses for splits or cuts and that they are securely mounted on both ends. Verify proper fluid levels with a dipstick.
Belts - alternator, pumps, compressor : All belts should be securely mounted without cracks or frays. Belt should have no more than 1/2" to 3/4" of play.
Hoses (passenger and driver’s sides) : All hoses, including power steering and coolant hose, should be secured on both ends. They should not have splits, cuts, or leaks.
Air compressor: May be difficult to see. Ensure it’s securely mounted, not broken, cracked or leaking.
Alternator : All wires are properly connected.
Water pump : All hoses are properly connected and not leaking.
Front of tractor/truck
Steering gearbox and hoses : No damage or leaks. Hose should be secured on both ends. They should not have splits, cuts, or leaks.
Steering shaft/steering column : Not bent or broken.
Pitman arm : All caste nuts and cotter pins are present and tight.
Drag link : Rubber is not split and properly greased.
Upper and lower control arms and tie rod : Tie rod should be secure, not cracked or bent.
Front suspension
Spring mounts/spring hanger : Not cracked or broken.
Leaf springs : None are cracked, broken, or shifted.
U-bolts : All accounted for.
Shock absorber : No visible leaks. Leaks will show at the point where the top and bottom of the shock meet. Rubber is not split or shows signs of dry rot.
Airbag : Check rubber for abrasions, cuts or audible leaks plus any missing mounting bolts.
Driver door and fuel area
Mirrors and bracket: Hardware attached properly. Mirror should be clean and not broken.
Door and hinges : Demonstrate door operations, latching properly, hinges intact. Door seals should not be torn or rotten.
Steps : Mounted properly and can hold weight.
Fuel tank: Not leaking; cap is tight with seal intact.
Rear of tractor/truck
Drive shaft : Not twisted, U-joints not broken and free of debris.
Exhaust system: Not loose, no sign of leaks (exterior soot).
Frame : Nothing broken or unauthorized welds.
Catwalk and steps : Properly mounted and clear of loose objects.
Mudflap : Secured, not missing or broken. At the right height.
Coupling area
Air connector: Secure on both ends, no abrasions, cuts, or audible leaks. Connectors should not drag or tangle.
Electric lines : Secure on both ends, no abrasions or cuts. Safety latches in place. Lines should not drag on the catwalk or tangle.
Glad hands : Seals should be in good condition with no cracks, signs of rotting, or leaking air.
Fifth wheel platform : Secure to frame, not cracked, bent or broken. No unauthorized or illegal welds.
Mounting bolts : No missing bolts and mounted tight.
Skid plate: Properly greased.
Release arm : Secure in fully locked position.
King pin : Mounted and secure. No cracks, bends, and breaks.
Locking jaw : Fully locked around the king pin.
Apron : Mounted and secure. No cracks, bends, and breaks.
Sliding 5th wheel locking pins : Pin must be in the fully locked position.
Brake system (both tractor and trailer)
Brake hose : Securely mounted on both ends. No splits, cuts, and not audibly leaking air.
Brake chamber : Not audibly leaking air.
Slack adjuster and push rod : When brakes are released and pulled by hand, the push rod should have no more than 1” of play. It should stay at a 90° angle to the brake chamber.
Brake drum : No bluing from excessive heat.
Brake pads/brake lining : Check for oil and debris on the lining. Minimum brake pad thickness is ¼.”
Wheel system (both tractor and trailer)
Wheel rims : No unauthorized or illegal welds.
Steer tires : Look for cuts, bulges, and abrasions on the tread and sidewalls. Tread depth should be a minimum of 4/32”. Tread should be evenly worn. Check inflation levels on tires with an air gauge, filled to manufacturer’s specifications.
Drive tires : Look for cuts, bulges, and abrasions on the tread and sidewalls. Tread depth should be a minimum of 2/32”. Tread should be evenly worn. Check inflation levels on tires with an air gauge, filled to manufacturer’s specifications.
Valve stem . Properly secured, metal cap in place. Not audibly leaking air.
Lug nuts : All accounted for. Check for rust or cracks.
Hub seal/axle seal : Should not be loose. No visible leaks.
Spacing : If equipped with duals, there must be proper spacing between the tires.
Frame and cross members : Secure, not cracked, bent or broken and none missing.
Header board : Secure and not excessively damaged. No holes or missing rivets.
Landing gear : Must be fully raised and the cradle handle secured. Not cracked, bent or broken.
Doors and hinges: Secured and should open, close and latch properly. Door seals have no separation, no rubber tubing sticking out.
Tandem release : Release handle and locking pins should be fully locked.
Trailers airbag : Check rubber for abrasions, cuts or audible leaks, plus any missing mounting bolts.
Trailer spring mounts/spring hanger : Not cracked or broken
Trailer leaf springs : None are cracked, broken, or shifted.
Trailer u-bolts : All accounted for.
Trailer shock absorber : No visible leaks. Leaks will show at the point where the top and bottom of the shock meet. Rubber is not split or shows signs of dry rot.
Torque arm/radius rod : Secure mounting, bushings intact.
Check all lights on the front, both sides of tractor, truck rear, both sides of trailer, and trailer rear. Turn on to ensure lights and reflectors are working.
Running lights : Walk around the truck and trailer to examine all.
High beams/low beams: Walk around the truck and trailer to examine all.
Turn signals : Signal both right turn and left turn. Walk around the truck and trailer to examine all.
Hazards/4-way flashers : Walk around the truck and trailer to examine all.
Brake lights : Ask the examiner to watch brake lights. Confirm they worked using the side mirror.
License plate lights : Walk around the truck and trailer to examine all.
Reflector tapes : Clean and not worn. Walk around the truck and trailer to examine all.
In-cab inspection and air brake test
Seat belt: No rips or frays and should adjust and latch properly.
Lighting indicators : See lights and reflectors section
Oil pressure indicator : Demonstrate normal operating range.
Water temperature gauge : Demonstrate normal operating range.
Air pressure gauges : Build to governor cut out.
Ammeter/voltmeter : Charging between 13 and 14 volts.
Mirrors : Secure, not cracked or broken. No obstructions and properly adjusted.
Windshield : No more than a 1” crack is permitted. Clean and free of debris.
Windshield wipers and washers: Turn on to show they are working properly.
Horns (city and air) : Show they are working properly.
Heater/defroster : Turn on to show they are working properly.
Safety/emergency equipment : Must have a fire extinguisher, three red reflective triangles and spare electrical fuses. Extinguisher must be fully charged and secured.
Steering wheel : Secured to steering column.
Foot pedals : Free of grease and debris. No obstructions.
Hydraulic brake check : Pump the brake pedal several times. Apply pressure to the pedal and hold for five seconds. The pedal should not move.
Air brake check : Air brake devices vary. Drivers must test three components of the air brake check correctly: applied pressure, warning lights and buzzers, and valve pop-outs.
Parking brake:
Trailer parking brake : Set the trailer brake, release the tractor brake. Put truck in low gear and tug.
Tractor parking brake : Set the tractor brake, release the trailer brake. Put truck in low gear and tug.
Service brake : Release both the tractor and trailer brakes. Drive 3 – 5 mph. Apply the service brake and come to a complete stop. Ensure steering does not pull to the left or right when applying the brakes.
Watch the video below to see how All Aboard America uses the Samsara Driver App to become nearly 100% paperless and save 30 minutes per trip, totaling 500 hours saved weekly.

Watch Video
IMAGES
VIDEO
COMMENTS
In this video you will learn how to do a full pretrip inspection on a Hot Shot truck.
CDL Smart Video Training Series Directory Downloaded on Your Phone! CDL Smart Pre-Trip Inspection Training Series! • Step by Step at the truck training works...
Regular Vehicle Checks: Make pre-trip and post-trip inspections a habit. Ensure your vehicle is always up to DOT standards. Seek Professional Help: Don't hesitate to consult with a compliance consultant. Sometimes, professional guidance can save you from costly mistakes. Leverage Technology: Use compliance software designed for hot shot trucking.
This is an abbreviated Hot shot Pre-trip. This by no means is everything you need to know to get your CDL but it will give those who are curious a general ...
Our Pre-Trip Inspection Study Guide has everything you need to prepare for the Class A CDL Pre-Trip Inspection Exam. Our study guide will cover the pre-trip inspection terminology as well as a thorough list of all of the parts you will be inspecting on the vehicle. For each part you will be inspecting there will also be a list of items you will ...
A pre-trip truck inspection is a thorough check of the truck and its major systems to maintain safety on the road. Inspections need to occur before the start of a driver's shift and at least once every 24 hours while on the road. Truck pre-trip inspection needs to be performed by the driver while on duty, but before driving starts.
Coupling portion of the pre-trip Inspection: Note: You should adapt this guide to fit the type of coupling you are actually using for the skills test. This particular inspection details a bumper pull trailer hitch. There will obviously be differences for pintle hitch, gooseneck, and 5 th wheel coupling inspections.
Professional hot shot drivers as commercial drivers are required to complete a pre trip inspection of their Hotshotting equipment. Besides being required by the transportation regulatory authorities doing a pre trip just makes good sense. Why not take a tip from the pros and make a pre-trip part of your routine as a citizen of the public roadways.
This includes checking the engine compartment, brake system, fuel system, and more. The CDL Pre-Trip Inspection Exam is an integral part of obtaining your commercial driver's license. This guide covers Class A and Class B pre-trip inspections, provides a checklist, and offers tips for memorizing the inspection process.
Pre-Trip Training Videos. Start-Up Assistance & Expert Dispatch Service. Home; Pre-Trip Training Videos; Please view the helpful videos below before you hit the road with your trailer! Correct Way To Connect Break-Away Cable. Pre-Trip Inspection. Join the Industry Leaders and Start Trucking Today!
CDL Smart Video Training Series Directory Downloaded on Your Phone!CDL Smart Pre-Trip Inspection Training Series!• Step by Step at the truck training works.•...
4 Pre-Trip Inspection Checklist: Coupling Area o Air Lines - Air lines should be secure at both ends with no abrasions, bulges or cuts. They should not be leaking, dragging or tangled. o Apron - Make sure the apron is properly mounted and secure. Look for cracks, bends and breaks. o Clearance - Make sure there is enough space between the tractor mudflap and the trailer landing
Pre-trip inspections play a crucial role in the success of hot shot trucking. They enhance safety, maintain regulatory compliance, and improve operational efficiency. By prioritizing these inspections, drivers can mitigate risks, maximize productivity, and uphold the professionalism and reliability of the hot shot trucking industry.
Truck Pre Inspection Checklist. Download free template. Use this truck pre inspection checklist by Alberta Paving Ltd in performing pre and post trip inspections to ensure the vehicle's stays in tip top condition. Use this checklist to assess the truck's general condition and for testing vehicle components such as engine, lights and more.
A pre-trip truck inspection is a necessary check of the truck and its major systems to keep safety on the road. Inspections need to occur before the start of a driver's shift and at least once every 24 hours while on the road. Truck pre-trip inspection needs to be performed by the driver who is on duty, but before he starts the driving.
Vehicle inspections can save time, money, and lives. Pre- and post-trip inspections are among the most important tasks your drivers perform. With our safety guides, checklists, and videos, you can ensure your drivers have all the information they need to keep their vehicles in safe condition. Watch this video to see why respected, experienced ...
A+ CDL TRUCK RENTAL. HOTSHOT RIG PRE-TRIP. Pre_trip Inspection. Class "A" Hotshot Rig. If you have other questions please contact us by email at: [email protected]. or call us at: (918) 585-1323. Pre-trip Inspection For Class.
Class A CDL pre-trip inspection checklist. When getting a CDL, drivers need to pass a pre-trip inspection test. It's more intensive than the inspection drivers perform daily. This pre-trip inspection checklist for a Class A CDL gives drivers an overview of performing an inspection. Check your state's CDL manual for a complete list of ...
CDL Smart Video Training Series Directory Downloaded on Your Phone! CDL Smart Pre-Trip Inspection Training Series! • Step by Step at the truck training works...
Hotshot trucking, This is what i studied when i took my CDL test in my hotshot.https://payhip.com/b/DFp9 "CLICK THE LINK!"GET 1 MONTH FREE ON DAT LOAD BOAR...
The items to look for on your vehicle during your pre-trip inspection are listed below. Visually check for and describe how you would check: Lights: All lights (e.g., high and low beam headlights, turn signals, clearance, identification) must be clean and working. Windshields: The windshield must be clear and undamaged. Mirrors: The mirrors must be […]
Hot Shot pre-trip inspection Hillgeb training- 5014254724
#pretripinspection Anyone wants a free copy of the PDF add me on instagram and send me your email on IG and I'll send you the PDF. #commercialdriverlicense...