Cleaning suggestions
The correct procedure for cleaning your rifle is as follows:
1 BE CERTAIN THE RIFLE IS UNLOADED AND THE SAFETY IS IN THE ON SAFE POSITION. Again, to unload your rifle, eject any live round in the chamber by pulling the operating handle to the rear. Unload the magazine by pushing forward on the base of each round until it clears the retaining rims.
2 PULL THE BOL T FULL Y REARWARD WITH THE OPERATING HANDLE. It will Ixi held in this open position even with the magazine removed.
3 USING A RIFLE CLEANING ROD WITH TIP AND PATCH LARGE ENOUGH FOR SNUG FIT IN BORE, insert rod and patch in barrel from the muzzle end and run back and forth several times. Caution should be exercised to insure that the cleaning rod or handle does not strike the crown of the muzzle, as damage to this area can adversely affect the accuracy of the rifle.
4 inspect the chamber and bore for powder fouling. A normal amount of powder residue can be expected and is not serious. It can usually be removed by repeating Step Number 3, using a patch saturated with nitro-solvent. If or when fouling should become heavy, it can be removed with a brass bore brush. Dip the brush in nitro-solvent and scrub the chamber and bore until the fouling is removed. To prevent brass bristles from breaking off, the brush should be pushed completely through the bore before being withdrawn. Your BAR will operate smoother and more reliable with a clean bore and chamber.
5 AFTER FOULING HAS BEEN REMOVED, THE BORE SHOULD BE WIPED DRY. Then pass a slightly oiled patch run through it for preservation. A fine, light gun oil like Browning Oil is recommended.
6 THE INTERIOR OF THE RECEIVER AND THE BOLT SHOULD PERIODICALLY BE WIPED OFF WITH A CLEAN RAG. This is best done with the trigger group removed, see "Removing the Trigger Group", and with the magazine floorplate open and the bolt in its open position.
Any dried oil in these areas and on the magazine follower should be removed. Follow this cleaning by applying a very light film of oil on the affected parts. Do not pour large quantities of oil into the action. An excess of oil will run into the wood and cause it to soften or warp.
7 WIPE ALL EXPOSED METAL SURFACES WITH AN OILED CLOTH, MAKING SURE TO WIPE GUN CLEAN OF ALL FINGER MARKS. Finger marks should l>e removed because they provide a place where moisture can accumulate. Ordinary good judgment will, of course, indicate that the metal of the gun should receive a light film of oil any time the gun has been exposed to adverse weather or handling.
8 THE WOOD SURFACES OF YOUR BAR CAN ALSO BE WIPED LIGHTLY WITH BROWNING OIL, or you can apply a quality wood or furniture polish to the stock and forearm. Using one of these methods (not both), will enhance the beauty and durability of your BAR.
9 CLEANING INSTRUCTIONS: To insure proper functioning of your BAR it should be periodically inspected and cleaned. Any time when sluggish or incomplete operation of the action is experienced while using commercial ammunition, the action should be cleaned. 'Hie following procedure should be followed:
Was this article helpful?

Related Posts
- Parts List Browning BAR Mark II Semi Automatic Rifle
- Cleaning And Maintenance Suggestions
- Browning Bar High Power Rifle
- Browning Bar Mark Ii Semiautomatic Rifle
- Disassembly - Browning Bar Shorttrac Longtrac Rifle
How to Clean a Browning BAR
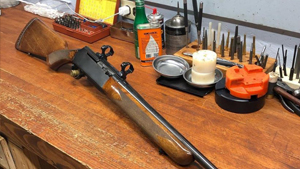
Cleaning a gun is not as fun as shooting it, but it is vital to maintain your firearm for it to continue operating optimally. A Browning BAR is a highly accurate gun, which could be why many shooters use it for hunting.
But like all other firearms, it does require cleaning. Although it is tasking and time-consuming to clean a Browning BAR, particularly if you have to disassemble it, it is necessary if you want to keep hitting your targets.
A dirty gun can reduce its accuracy and overall performance .
An extremely dirty rifle can result in malfunction problems, which is not ideal because this could lead to serious injury.
If you are a new owner of a Browning BAR and you don’t know how to go about cleaning it, read on.

The first important step when gun cleaning is to remove the magazine . Never start cleaning a loaded gun as it can cause severe injury to yourself or people near you.
Check to see if the chamber is empty, and to do this, pull the operation handle backward. If there is a live round, it will be ejected. Once you have done this, make sure that the safety is in “on safe” position .
Pull the bolt backward using the operating handle; at this point, if you have already removed the magazine, you will need to open the bolt and, with your hand, push the bolt release lever upwards to lock the action open.
Take your cleaning rod and wrap a cleaning patch on it and pass it through the barrel. Do this a couple of times to make sure that you remove all the dirt, grime, oil, and powder residue. Be careful not to hit the crown with the rod to prevent damaging this area. Any damage to this section can significantly reduce the accuracy of your firearm.
Check the bore and chamber for carbon fouling. You may see some powder residue which is expected if you have fired a couple of rounds. To remove the residue, use a cleaning patch and your cleaning rod. Make sure to wet the patch with a gun cleaning solvent first before you attach it to your cleaning rod.

But if the carbon fouling is heavy, you need a bore brush to scrub it off. Therefore, apply some gun cleaning solvent on the brush and then scrub the bore and chamber as best as possible to loosen up the fouling.
Once you are done scrubbing the bore, take a clean patch, attach it to your cleaning rod, and wipe the bore dry. Then take an oiled patch and pass it through the bore. Don’t use too much oil as excessive oil can attract dirt .
Step 6:
Make sure to clean the receiver as well. To do this, you need to remove the trigger group first. Ensure that your gun is unloaded, depress the bolt release lever to move the breechblock forward, push the trigger guard pins on either side of the receiver, hold the trigger guard, and take out the trigger group from the receiver.
Remove any oil, grime, or dirt in the receiver and the other parts using a wet cleaning patch, and then use an oiled patch to coat the cleaned pieces. Avoid pouring too much oil into the action to prevent the oil from getting into the wood. If this happens, the wood may warp or soften.
Always use gun cleaning solvents, cleaning patches, and oiled designed for your rifle.
Step 7:
Wipe all the metal parts with an oiled patch or rag. A rag would be easier to use since you are cleaning a long gun. Remove fingerprints as moisture can accumulate in these areas, which may result in rusting or corrosion. Make sure to wipe down the exterior of your gun properly before storage .
Step 8:
Wipe the wood surfaces with a light oiled rag or use quality furniture and wood polish. Doing this will enhance the durability and beauty of your Browning BAR.
Step 9:
Once you are done with lubing all the parts of your rifle, the next is to reassemble. Make sure to do it properly to avoid malfunction problems that may result in severe injury.
Safety Precautions for Handling a Browning Bar
A Browning BAR is a powerful rifle, and as such, it should be handled with care.
Careless handling of any gun can cause severe injury.
Therefore, when cleaning a gun, make sure to take all the necessary measures to prevent injury.

- Always keep your gun’s muzzle pointed in a safe direction even if it is not loaded, and never test your rifle when it is loaded or pointed in an unsafe direction.
- Never transport your gun when it is loaded, even if it’s in a gun case.
- Before you check your gun for a barrel obstruction, make sure that it is not loaded, and the chamber and the feeds mechanism are empty.
- Always place the safety in the “On Safe” position and ensure that the chamber is empty before checking the barrel for obstructions.
- Store your gun and ammunition separately where no one can access them. Never store a loaded weapon for safety reasons.
- Use the correct ammunition for your gun. If you preload your ammo with gunpowder, make sure to use the suitable powder at the right measurements to avoid accidents.
- Do not place your fingers on the trigger when loading and unloading your firearm.

- Wear eye and ear protection when shooting your rifle
- Be careful not to drop a loaded gun as it may accidentally fire.
- Never handle a loaded gun when under the influence of alcohol or medication.
Final Remarks
No matter what type of firearm you have, always respect it. Guns are exciting to shoot, but they are also dangerous, and when handled poorly, this can result in injury. Follow our guide when cleaning your Browning BAR and use your gun’s instruction manual when disassembling and reassembling your gun to avoid any problems.

Leave a Comment Cancel reply
How to Clean a Browning Bar Like a Pro (Updated: Apr 2024)
Let’s learn How to clean a browning bar gun in this article.
Cleaning a gun is not as much fun as firing it, but keeping your handgun in good working order is necessary. A Browning BAR is an extremely accurate gun, which may explain why so many hunters use it.
It does, however, require cleaning, just like any other gun. Cleaning a Browning BAR is difficult and time-consuming, especially if you have to disassemble it, but it is important if you want to start pressing your targets.
A filthy gun’s accuracy and overall performance might suffer.
Keep reading to learn how to clean a browning bar.
How to Clean a Browning Bar?
![How to Clean a Browning Bar Like a Pro (Updated: [mon] [year]) 2 cleaning browning rifle](https://www.gunsafetynow.com/wp-content/uploads/2022/03/cleaning-browning-rifle-1-1024x576.png)
Follow these steps to clean a browning bar without any hassle.
When cleaning a gun, the first stage is to detach the mag. Never start by cleaning a loaded gun because you might injure yourself or those around you. To do so, pull the operating handle rearward to see if the barrel is empty. A live round will be expelled if there is one. Once you’ve done so, double-check that the safety is set to “on safe.”
Pull the bolt backward with the working handle; if you haven’t previously removed the mag, open the bolt and press the bolt shifter lever upwards with your fingers to lock the mechanism open.
Wrap a cleaning patch around your cleaning rod and feed it through the barrel. Repeat it a few times to ensure that all filth, grime, oil, and powder residue is removed. To avoid harming the crown, be cautious not to strike it with the rod. Any damage to this component might drastically affect your firearm’s accuracy.
Check for charcoal fouling in the cylinder and chamber. If you’ve fired a few rounds, you’ll notice some powder dust, which is anticipated. Use a cleaning cloth and your scrubbing rod to eliminate the residue. Before connecting the patch to your wiping rod, make sure you soak it with a gun cleaning solution.
However, if the carbon fouling is severe, a bore brush will be required to remove it. Soak the brush with gun cleaning solution and scrub the barrel and cylinder as thoroughly as possible to dislodge the fouling.
After washing the bore, put a clean patch on your scrubbing rod and wipe the cylinder dry. After that, insert an oiled patch into the bore. Excessive oil might attract dirt, so don’t apply too much.
Make sure the receiver is also clean. To do it, you must first delete the trigger group. Dampen the bolt shifter lever to advance the breechblock up, push the triggering guard pins on each side of the receiver, grip the trigger gate, and pull the trigger block out from the recipient.
Using a manual cleaning patch, remove any grease, grime, or dirt from the receiver and other components, and then cover the cleaned portions with a slippery patch. Don’t pour too much into the motion to keep the oil from going into the wood. The wood may twist or soften as a result of this.
Step 4
Using an oiled patch or rag, wipe off any metal pieces. Because you’re cleaning a long rifle, cloth would be more convenient. Fingerprints should be removed because moisture can collect in these locations, causing rusting or corrosion. Before storing your gun, make sure to clean the outside thoroughly.
Use a soft oiled rag to wipe down the wood surfaces, or use high-quality furniture and wood varnish. This will help your Browning BAR last longer and look better.
After you’ve finished lubing all of your rifle’s components, it’s time to put it back together. Make sure you do it correctly to avoid difficulties with malfunctioning equipment that might result in serious damage.
Always appreciate your firearm, regardless of the type. Guns are fun to shoot, but they’re also hazardous, and they can cause damage if handled incorrectly.
To avoid any complications, follow our instructions for cleaning your Browning BAR and refer to your weapon’s instruction manual before dismantling and reassembling it. Stay tuned for more posts on gun cleaning and maintenance.
gunsafetynow .com is reader-supported. When you buy through links on our site, we may earn an affiliate commission.
I'm an passionate gun cleaning expert from NY US. My goal is to save you time by doing the leg work for you and putting all the essential information in one location to be confident about the cleaning your gun.
Related Post
Dry Lube vs Wet Lube for Gun: Which One to Choose?
How to clean a remington 30-06 semi-auto rifle properly, leave a comment cancel reply.
Save my name, email, and website in this browser for the next time I comment.
Press ESC to close
A guide to disassembling and cleaning the browning bar.
- Fieldstripping How-To's , Browning , DIY Gunsmithing , Sort By Manufacturer
- August 11, 2023

In this article, you will learn a step-by-step guide on how to disassemble and clean the Browning BAR firearm. This guide will provide you with detailed instructions as well as a video demonstration for visual learners. Additionally, you will gain some historical context about the Browning BAR, adding to your knowledge of this iconic firearm. By the end of this article, you will have the necessary information and skills to properly maintain your Browning BAR.
Table of Contents
The Browning BAR, short for Browning Automatic Rifle, is a popular firearm known for its exceptional reliability and performance. In this guide, we will provide you with step-by-step instructions on how to disassemble and clean your Browning BAR, as well as provide some historical background on this iconic firearm.

This image is property of i.ytimg.com.
Introduction to the Browning BAR
The Browning BAR was first introduced in 1967 and quickly gained popularity among hunters and shooters. Its semi-automatic design, combined with its solid construction, makes it a versatile and dependable firearm suitable for a wide range of applications.
Features of the Browning BAR
The Browning BAR boasts several notable features that set it apart from other firearms in its class. One such feature is its gas-operated system, which helps reduce recoil and allows for smoother cycling of the action. Additionally, the BAR is equipped with a detachable box magazine, providing quick and easy reloading capabilities.
Historical background of the Browning BAR
The Browning BAR has a rich history that dates back to the early 20th century. The original Browning Automatic Rifle, often referred to as the BAR M1918, was introduced during World War I and saw extensive use by American forces. While the modern Browning BAR differs significantly from its predecessor, it still pays homage to its historical roots.
Necessary Tools and Materials
Before proceeding with disassembling and cleaning your Browning BAR, you will need to gather a few tools and materials:
Tools required for disassembling the Browning BAR
- Screwdriver (typically of a flat-head or Phillips-head variety)
- Punch or drift pin (used for removing certain pins)
- Armorer’s wrench (for removing barrel components)
- Cleaning rod and bore brush
- Cleaning patches
- Solvent and lubricant
- Nylon or brass brush (for scrubbing hard-to-reach areas)
Cleaning materials needed for the Browning BAR
- Gun cleaning solvent
- Gun oil or lubricant
Now that you have the necessary tools and materials, let’s proceed with disassembling your Browning BAR.

This image is property of www.bevfitchett.us.
Disassembling the Browning BAR
Step 1: Unloading the firearm
Before disassembling any firearm, it is crucial to ensure that it is unloaded. Remove the magazine (if still inserted) and visually inspect the chamber to verify that there is no round present. Always prioritize safety when handling firearms.
Step 2: Removing the bolt
To begin disassembly, pull the bolt handle all the way back, allowing the bolt carrier group to move freely. Rotate the bolt handle upward until it locks into position. Next, push the retaining pin located at the rear of the receiver from left to right. This will release the bolt and allow you to remove it from the firearm.
Step 3: Breaking down the receiver
To break down the receiver further, depress the takedown button located on the left side of the receiver, just above the trigger guard. While holding the takedown button, pivot the barrel and gas system assembly downward, away from the receiver. This will separate the two main components of the firearm.
Step 4: Removing the magazine and trigger assembly
With the barrel and gas system assembly removed, you can now remove the magazine by pulling it downward and out of the firearm. Additionally, the trigger assembly can be removed by pushing the two retaining pins located on either side of the receiver. Once the pins are pushed out, the trigger assembly can be lifted out of the firearm.
Step 5: Taking apart the barrel and gas system
To disassemble the barrel and gas system, first ensure that the firearm is in a safe and secure position. Using an armorer’s wrench, unscrew the barrel nut located at the front of the gas block. Once the nut is removed, the gas block, piston, and other components can be disassembled and cleaned individually.
Now that you have successfully disassembled your Browning BAR, let’s move on to the cleaning process.
Cleaning the Browning BAR
Step 1: Cleaning the barrel
Start by attaching a bore brush to a cleaning rod and soak it in gun cleaning solvent. Insert the rod into the chamber end of the barrel and push it through, ensuring that the brush makes contact with the entire length of the barrel. Repeat this process several times, applying additional solvent and using clean patches to remove any fouling or residue.
Step 2: Cleaning the receiver and bolt
Using a soft brush or cleaning patches soaked in solvent, clean the inside of the receiver and the bolt carrier group. Pay close attention to the extractor and ejector, as these areas tend to accumulate dirt and debris. Use a punch or drift pin to remove any stubborn fouling or residue.
Step 3: Cleaning the gas system
The gas system of the Browning BAR is a critical component that requires regular cleaning. Use a nylon or brass brush to scrub the gas ports and gas piston, ensuring that they are free from any obstructions. Wipe down the gas block and other gas system components with a clean cloth soaked in solvent.
Step 4: Lubricating the parts
After cleaning, it is important to apply a thin coat of gun oil or lubricant to all moving parts to ensure smooth operation. Pay close attention to areas such as the bolt, trigger assembly, and gas system components. Be sure to follow the manufacturer’s recommendations for the appropriate type and amount of lubricant to use.

Inspecting and Maintaining the Browning BAR
Before reassembling your Browning BAR, it is important to inspect all parts for wear and tear. Check for any signs of damage or excessive wear, such as cracks, dents, or corrosion. Address any issues promptly to ensure the safe and reliable operation of your firearm.
Reassembling the Browning BAR
Step 1: Reassembling the barrel and gas system
To begin reassembly, reverse the disassembly process by attaching the gas system components and screwing on the barrel nut. Ensure that all components are properly aligned and tightened to the manufacturer’s specifications.
Step 2: Installing the magazine and trigger assembly
With the barrel and gas system reassembled, you can now insert the magazine back into the firearm. Then, carefully place the trigger assembly back into the receiver, making sure that it is properly seated.
Step 3: Assembling the receiver and bolt
To complete the reassembly process, pivot the barrel and gas system assembly upward, aligning it with the receiver. Push the two components together until they fit snugly, and ensure that the takedown button locks into place. Finally, reinsert the bolt into the receiver, making sure that it is fully seated.

Testing and Fine-tuning
After reassembling your Browning BAR, it is important to test its functionality. Check for proper cycling and operation by manually cycling the action and dry firing the firearm (ensuring it is pointed in a safe direction). Additionally, take the time to fine-tune any adjustable components, such as sights, to suit your preferences and shooting style.
Safety Precautions
Handling firearms with care is of utmost importance. Always follow basic firearm safety rules, such as treating every firearm as if it is loaded, keeping your finger off the trigger until ready to shoot, and pointing the firearm in a safe direction at all times. When disposing of cleaning materials, be sure to follow local regulations and guidelines. Finally, store and transport your Browning BAR in a safe and secure manner to prevent unauthorized access and accidental discharge.

This image is property of i.ebayimg.com.
Frequently Asked Questions
As an owner of the Browning BAR, you may have some common queries about disassembling and cleaning your firearm. Here are a few frequently asked questions and expert tips to help address them:
- Q: How often should I clean my Browning BAR? A: It is recommended to clean your firearm after every use to maintain its performance and longevity. However, if you have not used your firearm for an extended period, it is advisable to clean it before using it again.
- Q: Can I use any type of solvent and lubricant for cleaning my Browning BAR? A: It is best to use products specifically designed for firearms. Avoid using harsh chemicals or petroleum-based lubricants, as they may cause damage to the firearm.
- Q: Do I need any special tools to disassemble and clean my Browning BAR? A: The tools mentioned earlier, such as a screwdriver, punch or drift pin, and an armorer’s wrench, are commonly used for disassembling and cleaning firearms. These tools are readily available at most gun stores or online.
Expert tip: It is a good idea to keep a small cleaning kit with you whenever you take your Browning BAR to the range or on hunting trips. This allows you to perform basic cleaning and maintenance tasks while out in the field.
Regular cleaning and maintenance are essential for the proper functioning and longevity of your Browning BAR. By following the step-by-step instructions provided in this guide, you can ensure that your firearm remains in optimal condition. As you become more comfortable with the disassembly and cleaning process, you will gain a deeper appreciation for the craftsmanship and history behind the Browning BAR.
A Guide to Cleaning and Disassembling Ruger Mark (I-IV) Series Pistols
How to disassemble and clean the browning a-bolt, book your appointment in mesa.

Deal Partners

How to use this site
Thanks for stopping by here’s how to navigate our site:.
- Categories: Use the links above for specific support and knowledge.
- Search: Use the icon above to find topics by word or phrase.
- Recent Posts: Click on any interesting recent post from the list below.
We appreciate your visit!
Learn about Lasers – Sponsor

Recent Posts
- Product Spotlight: Foxtrot Mike Lower Receivers
- Smyth Busters: Do You Need a Muzzle Brake on an AR-15?
- Product Spotlight: Foxtrot Mike Slap Mod
- Smyth Busters: Is it Ethical To Hunt Deer With a .223?
- Product Spotlight: SOTAR Cam Pin by Forward Controls Design
- Smyth Busters: Will Excess Bullet Setback Blow Up Your Gun?
- Smyth Busters: How Important Is Proper Firearm Terminology?
- Product Spotlight: B5 Systems P-Grips for AR-15
- Smyth Busters: Was the 5.56 / .223 Round Designed To Wound?
- Product Spotlight: MultiTasker M:4 Multi-Tool
- Product Spotlight: Bravo Company Mk 2 Recoil Mitigation System
- Smyth Busters: Will Tracer Ammo Burn Out My Rifle’s Barrel?
- Smyth Busters: Does a 5.56 NATO Bullet Tumble in Flight?
- Product Spotlight: MultiTasker Nano 2 & Magpod
- Smyth Busters: Does the AR-15 REALLY Need a Forward Assist?
- Product Spotlight: Midwest Industries Alpha M4 Stock
- Product Spotlight: Brownells BRN-180 13.9″ & 14.5″ Uppers
- Smyth Busters: Do You Have To Pin an AR-15 Gas Block?
- Smyth Busters: Is Ceramic Body Armor a One-Hit Wonder?
- Product Spotlight: Forward Controls Panel Cable Management
- Smyth Busters: Is the AR-15’s Dust Cover Really Necessary?
- Product Spotlight: Unity Tactical AXON Remote Switch
- Product Spotlight: BRN-15 Upper Receiver Deep Dive
- Smyth Busters: Do You Have To Follow Torque Specs?
- Smyth Busters: Is the .40 S&W Cartridge Obsolete?
Amazon Affiliate / All Affiliates
Disclosure: As an Amazon Associate, I earn from qualifying purchases. Note: Any affiliate links, Amazon or others do not cost you extra and the sales help support the site. Thanks in advance!
Log in or Sign up
You are using an out of date browser. It may not display this or other websites correctly. You should upgrade or use an alternative browser .
BAR Cleaning
Discussion in ' Browning BAR Rifle ' started by Corsair II Driver , Mar 7, 2015 .
Corsair II Driver Copper BB
As a newby to this forum and a new BAR Long Trac 30.06 owner I have a question regarding a thorough cleaning of my new rifle. My owners manual gives info on barrel cleaning & trigger group cleaning, but nothing on removing the forearm & cleaning the gas piston and gas cylinder area. How often do you BAR owners clean this area. Thanks. Jon
SHOOTER13 Guest
Welcome to the Browning Owners Forum Jon !! The LTV A-7 Corsair II was an awesome Vietnam era airframe... Thank you for your service to our great country !! As for your question...I'm not quite sure on that particular rifle, but I do know that a member here will be along to help shortly...
MZ5 .270 WIN
Hello, Jon, and welcome to the forum. You may wish to visit the FN USA website, and find the downloadable owner's manual for the FNAR. (Here it is for you: http://www.fnhusa.com/r/support/manuals/manuals-download/ ). The FNAR is an ugly, all-black version of a ShorTrac BAR with a heavy barrel, but the manual is _much_ better and more thorough, IMO. Basic mechanism appears to me to be the same between the ShorTrac and LongTrac BARs. Taking the forend off is quick and easy, but I don't plan to take the gas piston & cylinder apart too terribly frequently. For me, that means I'll not likely touch it more than every few to perhaps several hundred rounds (1 rifle match is normally 40 - 70 rounds). However, I need more time on the gun before I can say for certain whether that'll 'feel' right to me or not.
Thanks MZ5, you are correct, the manual is MUCH more thorough than the LongTrac manual. It answers what I need to know. I may not be taking the gas piston & cylinder apart that often either. Jon
rawright .22LR
Nice link, MZ5! I've got the Safari model in .30-06, but I'll bet there's only slight differences.
rawright, I'll be very interested to hear just how different the steel-receiver Safari is from the aluminum-receiver ShorTrac/LongTrac. From looking at some parts schematics at Brownells recently, I believe the current-production Safari II also has an adjustable gas block. I'm not sure the old ones were so equipped. In any case, I hope the designs are similar enough that the FNAR manual's procedures are still useful to you!
I'm looking forward to finding out how accurate the FN manual is, given the common ancestry. I know it won't be perfect, but it's scary to me to venture into the internals of a fine piece of precision machinery without any guide at all. I'm hoping that this manual will serve as a guide to the bits that aren't well described in the official (and completely inadequate) manual.
Share This Page
- No, create an account now.
- Yes, my password is:
- Forgot your password?

- Search titles only
Separate names with a comma.
- Search this thread only
- Display results as threads
Useful Searches
- Recent Posts

Forgot your Password?
cleaning browning bar' s
Contact Us - Archive - Advertising - Cookie Policy - Privacy Statement - Terms of Service -
Copyright © 2024 MH Sub I, LLC dba Internet Brands. All rights reserved. Use of this site indicates your consent to the Terms of Use.

- Login Login Login --> Login -->
Browning’s BAR - Ask the Man who has One!
other By: Stan Trzoniec | May, 24
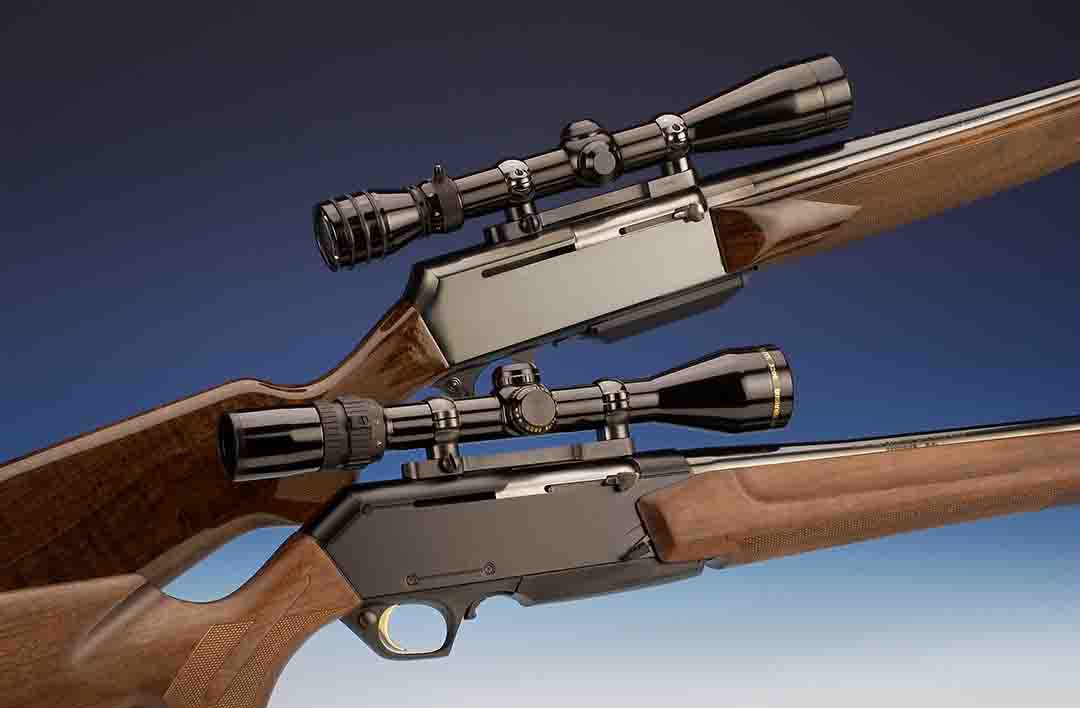
Friend Joe Pirani was a Browning fan from the word go. He had Browning Superposed shotguns for field and trap and when it came to rifles, he was stuck on the BAR (Browning Automatic Rifle) that went with him on all his hunting trips. When we did get to serious discussions relating to the gun on an antelope/mule deer hunt near Jordon, Montana, many years back he told me, “It is dependable, accurate, but most of all, for the .30/06 Springfield, it is easy on my shoulder.” For a senior like Joe, that was a big plus.
Of course, that got me thinking about the Browning BAR rifle. Sure, I’ve had my share of testing all types of semi-automatics in handguns, shotguns and rifles with most of my time going to the Benelli R1 and Remington Model 7400 that I found fairly accurate, but they were not as soft on my shoulder as I had expected. Talking to Joe and shooting his BAR semi-automatic in Montana for a final sighting-in really set me straight. Even with factory ammunition, his gun hit groups an inch and a half or less at the century mark. I was hooked, ordering one in the 7mm Remington Magnum upon my return home.
Considering the long history of Browning Arms, the BAR is a recent newcomer to the fold, which opened the door to a lot of shooters who wanted to use the higher-powered cartridges but because of recoil, stayed away. In any event, some 53 years ago, Browning introduced its first sporting semi-automatic rifle in the .243, .270, .308 Winchester and the .30-06 Springfield. To satisfy the magnum thirst for such a weapon, in 1968, the 7mm Remington Magnum was teamed up with the popular .300 and .338 Winchester magnums with the latter dropped from production in 1975.
Actually, design work started in 1963 and noting from a brief from Harmon Williams (former president of Browning) and other information, I found the content interesting. All were intent of keeping the BAR consistent with a “family appearance,” so a compromise was sought with the receiver for example, with features borrowed from the famed Auto-5 shotgun. They incorporated the celebrated humpback profile, but with less of a pronounced shape, toning it down a bit more to modern standards. A multiple 7-lug bolt for a strong lockup was next, which was secured within the rear portion of the barrel that led to the decision of chambering more powerful magnum cartridges.
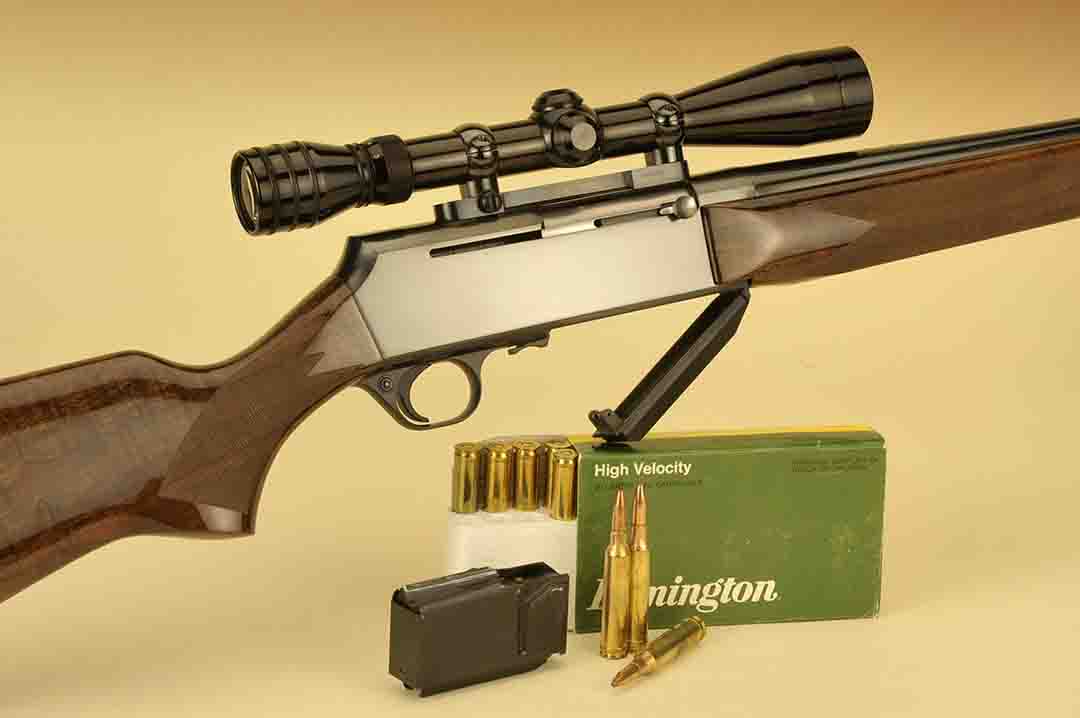
Naturally, in most cases, a gas-operated rifle offers a softer recoil sensation than a bolt or pump and the BAR does it in grand style. With my 7mm Remington Magnum, I was pleasantly surprised at the marked difference between this and other manually operated guns and I can see why hunters choose this gun in the larger, magnum chamberings. Spreading the recoil sensation over a longer period of time and with the inclusion of an internal buffer and rugged action and inertia block, to me the BAR excels in this field of hunting rifles, especially when it comes to looks and accuracy potentials.
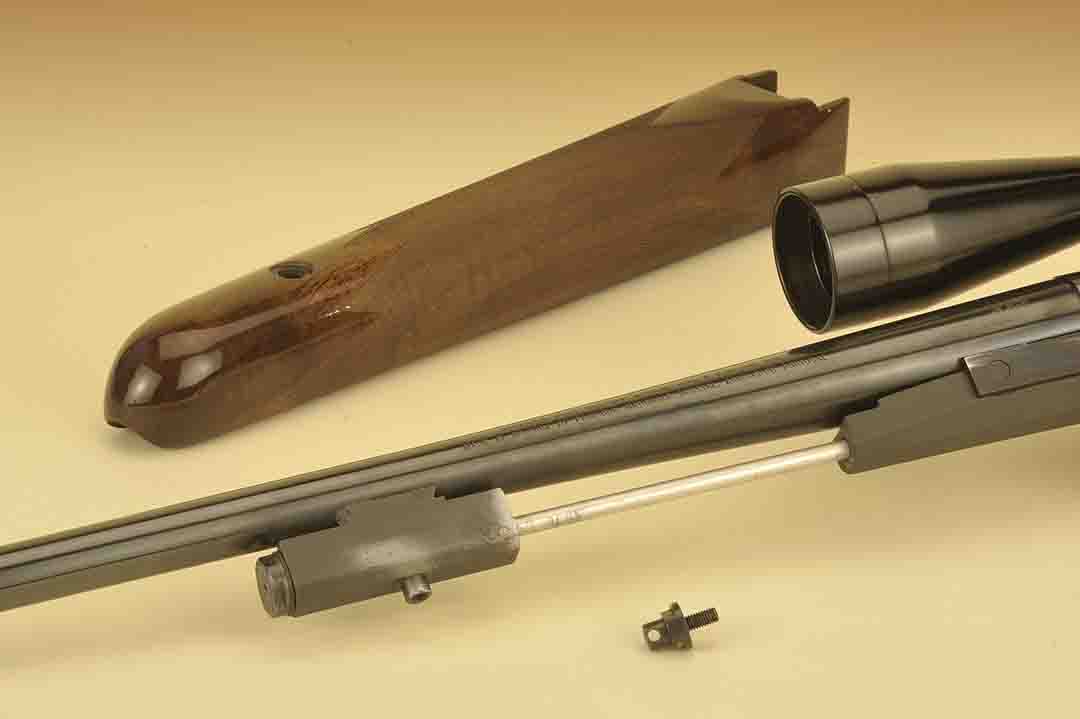
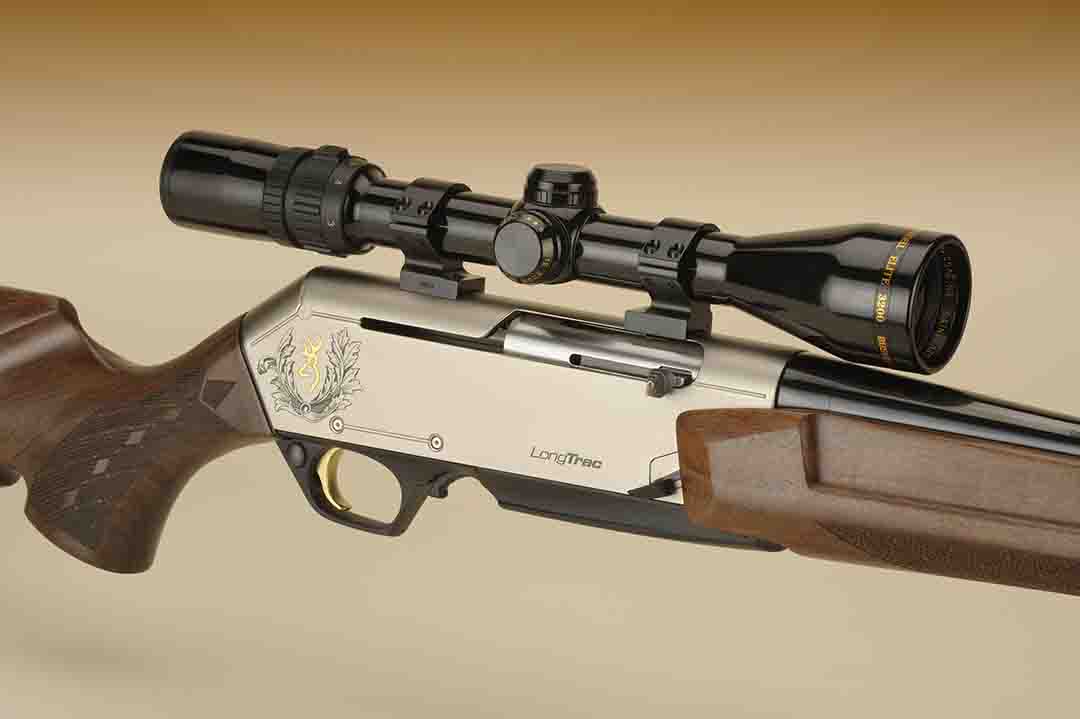
With a model lineup that includes the Mark II and MK 3, we will be discussing the former gun. The latter is an update on the original rifle with modern looks that will grab the attention of the more contemporary hunter. Naturally, being more recent, there is a choice of many finishes, stocks, barrel lengths and calibers. With my taste more to the higher end guns for looks alone, the model known as just the MK 3 (Third Generation) complete with a satin nickel receiver, oil finished Grade II stock and high relief engraving would be my choice. In the past, this gun and its variants, was also known as the Short or Long Trac gun before it moved into the more recent models.
Hunters who would like the more traditional BAR look would gravitate to the Mark II Safari grade, which is more to the appearance and styling of the original BAR rifle. Although my gun was purchased some years back, the current Mark II gun mimics the Grade I gun I have concerning how it looks, the feel and operation. For collectors, years past showed Browning had offered a Grade II (same as the Grade I but with an engraved receiver), along with Grades III, IV and V with highly-engraved and decorated receivers, fancy wood and specialized checkering patterns. Aside from all this, special models and Limited Editions filled out the line throughout the years.
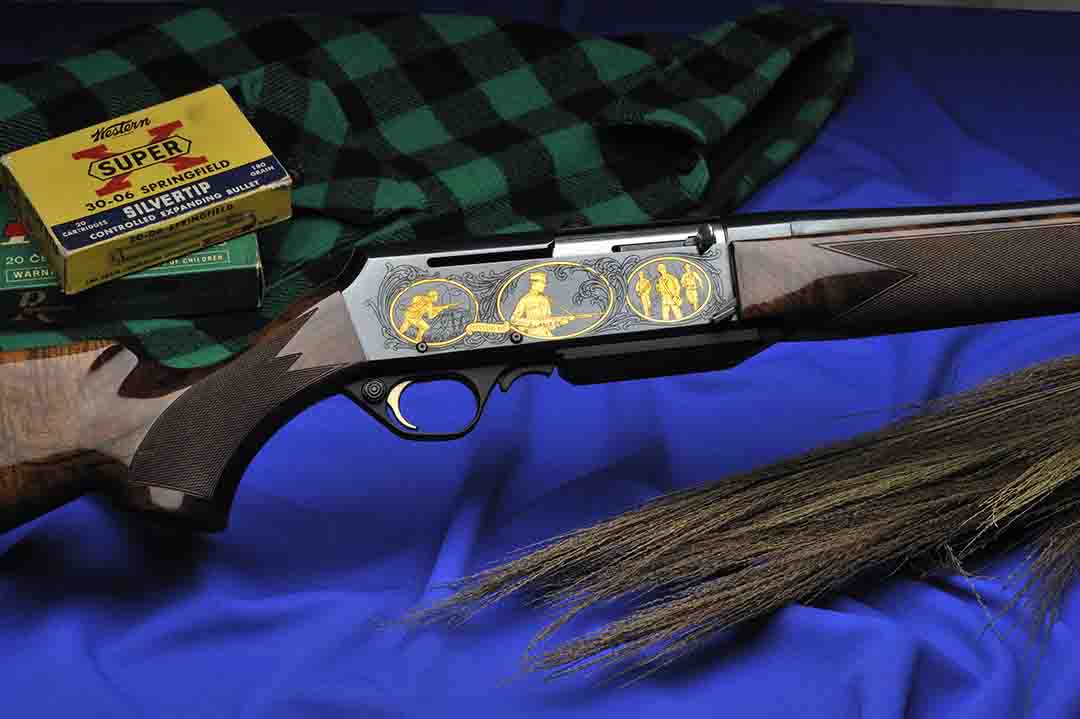
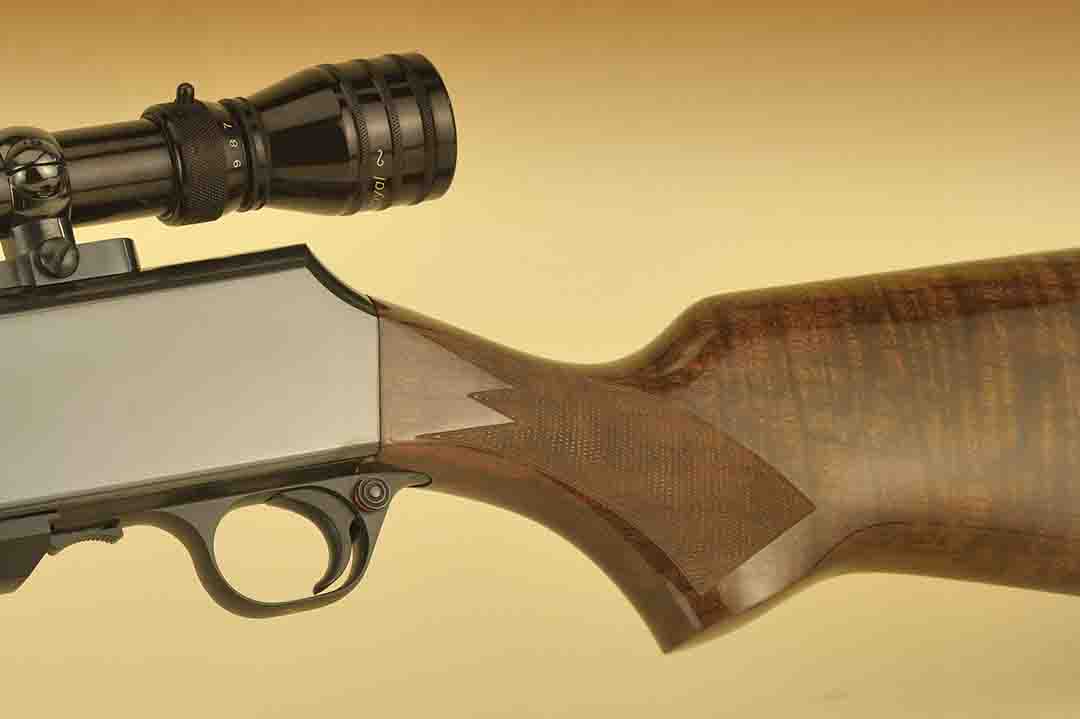
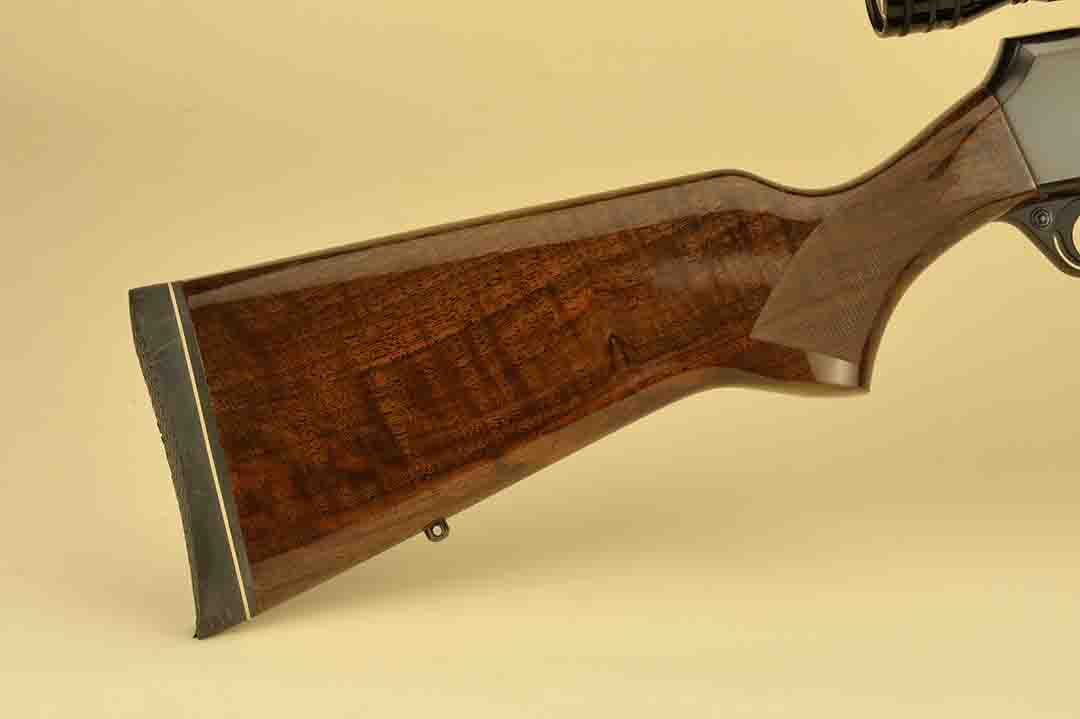
In the appearance department, it is hard to fault this gun with its select wood stock completed with a glossy, weatherproof finish. With previously made guns, figured wood was more of a standard item more so than today, and my gun has dark wood with a bit of fiddleback for character. During its design stage, it seems a lot of midnight oil was burned, as to me, it appeared that much thought went into the lines and design of the stock. Initially, when everyone was seemingly copying the “California” look with high combs with a fancy cheekpiece, the BAR was content with a more classic look. Holding the gun out on arm’s length, the influence of a bolt-action rifle with the rounded forend, well-proportioned forearm, all tapering back to the buttstock can be seen. The pistol grip has the right reach for the trigger finger when the hand is placed on the grip with the comb following through with the right dimension for the eye to center on the reticle of the scope.
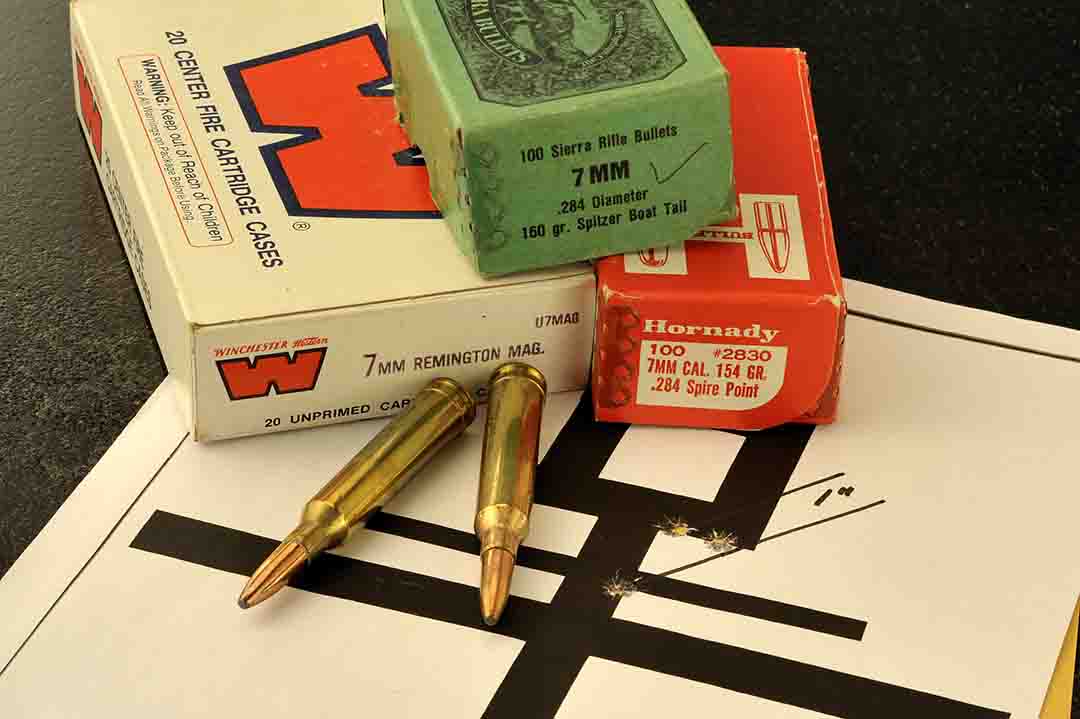
On the gun, there is more than an ample supply of checkering on both the forearm and the pistol grip. Since my gun was made some time back, I would assume it is all hand-cut, much before the age of computer generated checkering machines. Typical of Browning fashion, the checkering wraps completely around the forearm in a point pattern with a border to suggest a custom look. Inside the forearm is the gas-operated action and operating bar that ensured trouble free operation even with the higher-powered magnums. On the pistol grip, again one can see the value here with more checkering than it seems possible, considering the price tag. Complementing the gun, sling swivels and a classic-styled recoil pad finish the wood part of the gun.
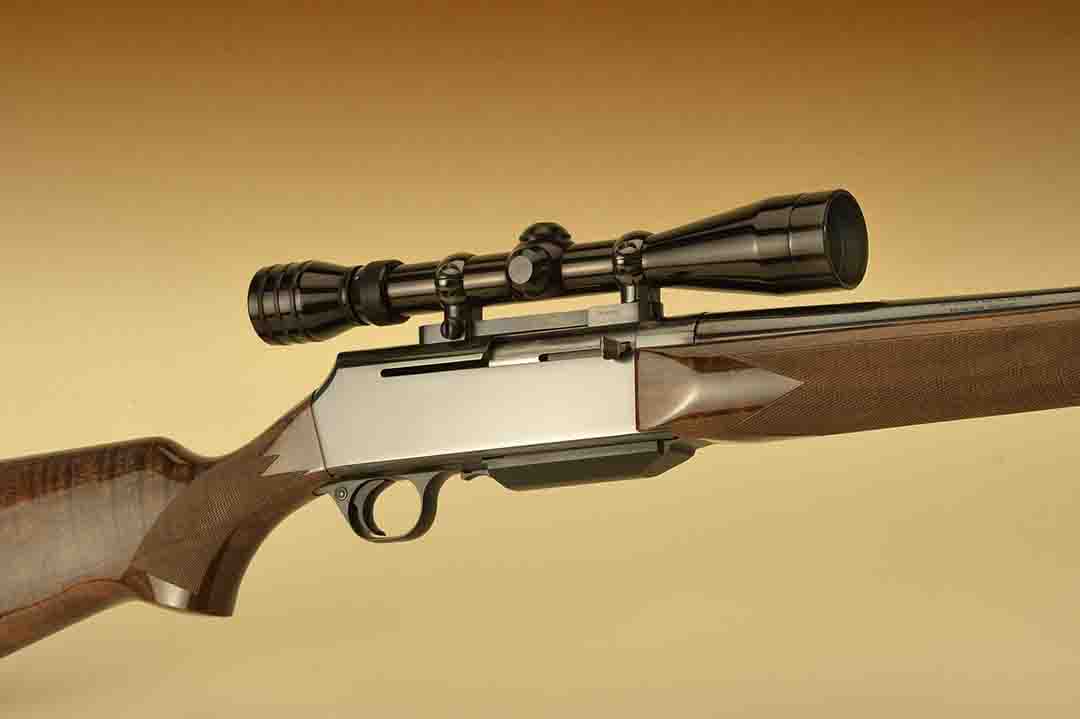
As you might have guessed, past and present day BAR’s show an accent of quality on all the metalwork. From the barrel to the receiver, all the polishing is smooth and of high quality befitting a gun of this stature. At the muzzle on my gun, there is a hooded sight with a rear sight, which I removed for scope mounting.
The receiver is the most impressive part of the gun. With a combined area of 32 square inches, which then lends itself to some fancy decoration in engraving with higher-grade models and high relief scroll engraving on current Mark II models. Within the top part of the receiver is the bolt port and its novel rotating bolt with seven locking lugs that are secured into the rear of the barrel after each shot. Trigger pull is a crisp 4 pounds and the safety, mounted behind the trigger, is a cross bolt design. These guns are equipped with a 3-, 4- or 5-round detachable magazine depending on caliber. Fit and finish of the gun in total on any gun I used or tested was first rate with nothing to complain about anywhere.

Chambered for the eight popular sporting cartridges, the lineup begins with the .25-06 Remington followed by the .308 Winchester, .270 Winchester, .30-06 Springfield and the .300 Winchester without the BOSS muzzle brake. If you want the optional brake, the choice is narrowed to the .270 Winchester, .30-06 Springfield and .300 Winchester. Due to the design of the gun and its recoil effect, I don’t think this brake is warranted, but if you have a physical problem, it will lessen the effect even more. As a footnote, if you opt for the more modern MK 3 rifle, chamberings do run from the .243 Winchester through the WSM calibers and up to the .300 Winchester Magnum.
Being teamed up with the popular 7mm Remington Magnum makes the Browning BAR a formable field weapon for all but the largest of western big game. Born in 1962, and while new to many shooters, the 7mm concept dates back as far as the turn of the century. Around 1912, there was the .275 H&H, a close cousin to the .375 H&H. Still later, wildcats started to rise with the .276 Dubiel, the .276 Newton and the .276 Newton Magnum, which according to research launched a 100-grain bullet over 65 grains of IMR-3031 powder for a then, unprecedented velocity of over 4,000 fps out of a 28-inch barrel with 1:12 twist. Moving on, the .280 Dubiel Magnum, then the .285 OKH with a unique duplex loading and the 7mm Weatherby Magnum.

However, I believe it was through the efforts of the western hunter Lew Bowman and Remington working closely on his ranch, that the 7mm Remington finally saw the light of day. With a capacity of around 87.0 grains of water (as measured to the neck and shoulder juncture), the 7mm Remington Magnum may be unpleasant to shoot in a bolt or pump gun, but I found in a semi-automatic like the BAR, recoil levels are more than acceptable to even the intermediate and advanced hunter.
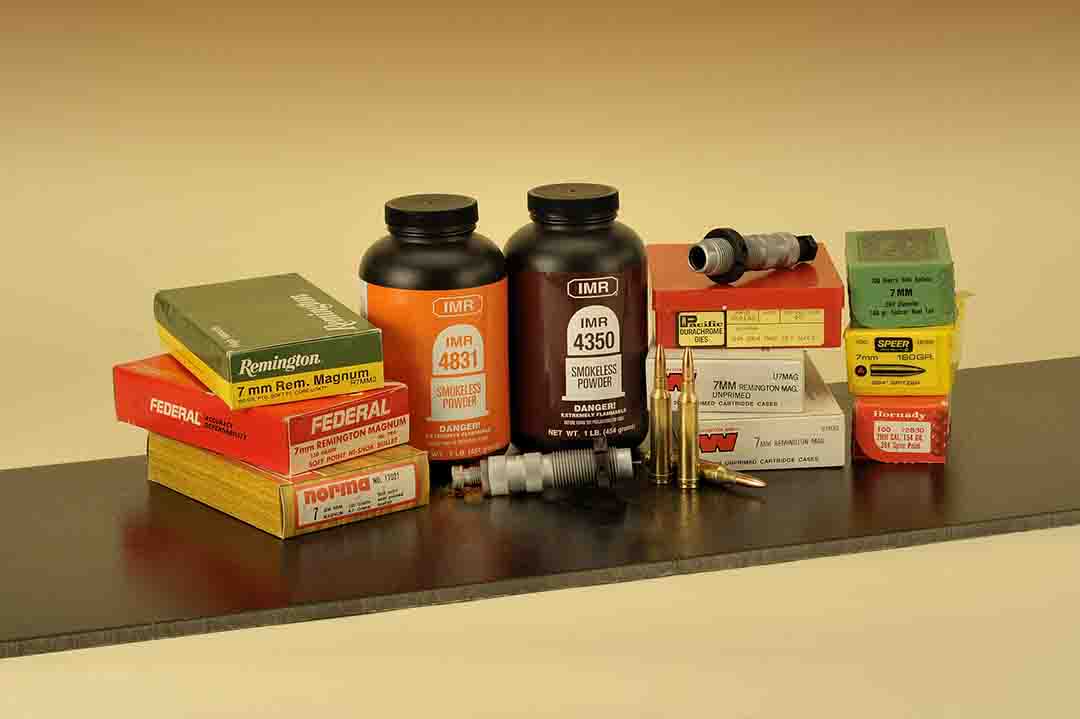
With that in mind, while there is a wide selection of factory ammunition to choose from in all bullet weights, I found handloading the way to go with no special attention needed with a semi-automatic rifle. Naturally, to do all this, a good set of dies is necessary although I never did need a small base set for functioning or accuracy with my BAR. For the best results with slower burning, larger stick powders, trickling is necessary for precision as well as the attention to the details one would partake to get the most out of any rifle.
The only thing I would mention is to full-size all cases versus neck sizing to ensure complete and full cycling of the gun and more so, just before a hunt. I like to smoke, or mark a fired case while setting up the sizing die just to make sure the neck part of the die is working its way down far enough to ensure the proper tension on the neck. If you are working with a new gun, the assembly of a dummy cartridge complete with a bullet is a good way to make sure all is well before proceeding. Once the die is set, follow-up with the rest of the cases, clean, check for overall length and prime with Federal 215 primers.
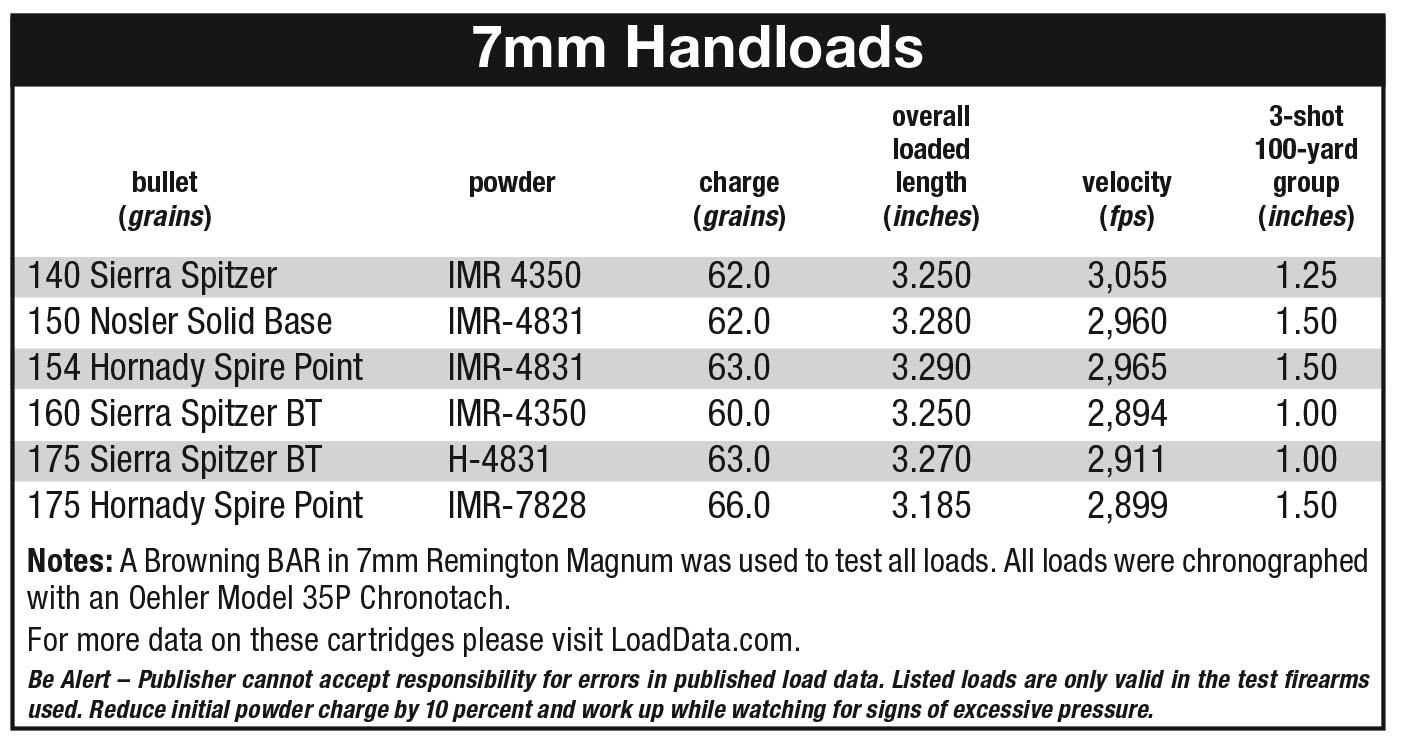
Slow burning powders are the rule here. For those starting out, and to narrow down the field, I found the IMR-4350, IMR-4831 and H-4831 will give impressive results in accuracy and velocity readings without much work. Later, when handloaders want to broaden their base even more, they can venture into H-870, Norma MRP and IMR-7838. For velocities, in the 140-grain bullet range, expect around 3,150 fps, 154 grains 2,950 fps, 160 grains 2,850 fps and the heavy 175 grains, up to 2,900 fps with 66 grains of IMR-7828 for tight groups around or under one-and a half inches.
For my testing and shooting over long periods of time, it showed a wide majority of bullets by various makers are well suited to be used in the 7mm Remington. Common names like Hornady, Speer, Sierra and Nosler from 140 to 175 grains proved more than satisfactory when it came to powders still available during the pandemic at the various sporting goods and box stores with the BAR’s common 24-inch barrel length. The attached table included with this article, shows some of the better loads possible with the 7mm Remington Magnum in a semi-automatic sporting rifle like the Browning BAR.
In closing, a buyer could not go wrong with selecting the BAR chambered for the 7mm Remington. In many years past, the semi-automatic was frowned upon for serious hunting duties, but today, this combination is easy to shoot, a pleasure to reload, very efficient and in a worst-case scenario, factory ammunition is available in just about any part of the country.
- Motorcycles
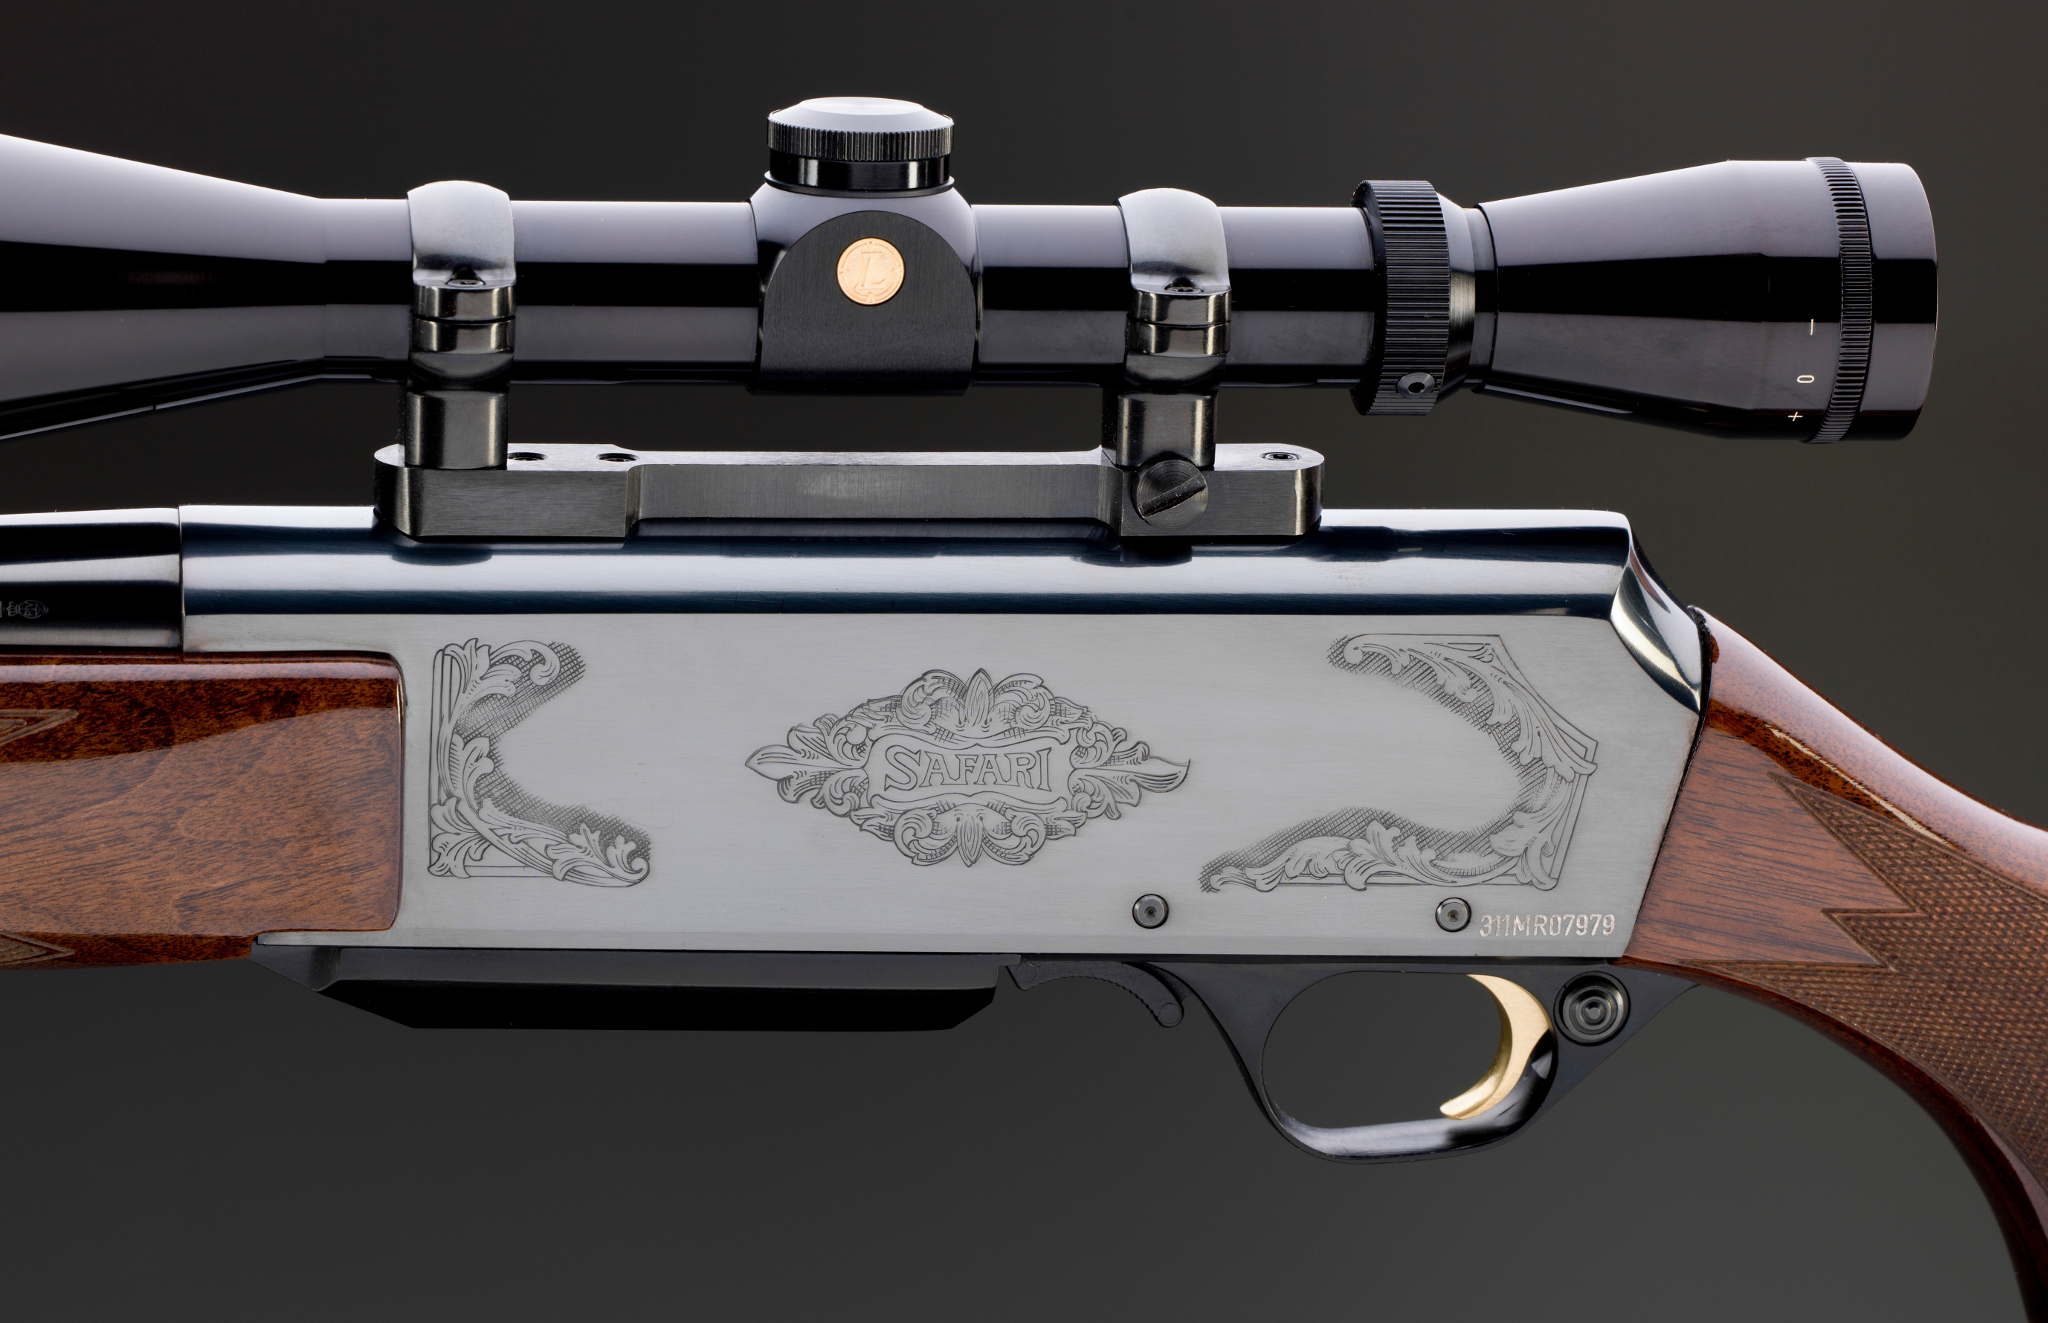
The Browning BAR Mark II Safari

The Browning BAR sporting rifle is not the same as the John Moses Browning BAR of World War I fame. The BAR sporting rifle is a design that was created with the input of Val Browning’s son Bruce Warren Browning, working in collaboration with a design team led by Marcel Olinger. The BAR sporting rifle was designed not as a combat rifle as the 1918 BAR had been, but as a sporting rifle. Not only that but given the problems that can be encountered with legal possession of a semi-automatic rifle in some jurisdictions the BAR was sensibly designed to be legal in the most places possible. This is, I suspect, the reason for the detachable magazine to be mounted on a hinged floorplate which makes it much slower to reload than a rifle with a detachable magazine that can be dropped out and replaced. The video below, courtesy IowaGunGuy YouTube channel demonstrates loading and firing a half dozen shots. The Browning BAR is not a rifle you would take into a fire-fight against people armed with AK47’s or such like and expect to come out alive; its a sporting rifle, not a combat rifle; and its a great sporting rifle.
[arve url=”https://www.youtube.com/watch?v=gP1glBvsRUA” /]
The sporting Browning BAR underwent its design phase in 1966 with the rifle being debuted to the shooting public in 1967. When introduced to the public the design of the BAR can best be described as not yet fully evolved as can tend to be the case with most things created by human beings. The rifle was available with right or left hand safety catches, but these were not interchangeable and it had a complex trigger mechanism that could not be removed for cleaning unless the butt stock was first removed. But although the early models were not yet as refined as they would later become the BAR did well and steadily gained a reputation for decent accuracy and good dependability.

As most of you will already know a semi-automatic rifle has more potential sources of failure than a bolt action or double barrel. The time when a shooter will accept those potential sources of failure is when he or she expects to need a fast follow up shot or two such as may be the case hunting in medium to thick cover in the woods where a quarry that is not instantly anchored can hop out of sight before a bolt or lever action can be operated. This is the sort of scenario in which a Browning BAR really comes into its own. Over the years Browning have worked on getting any bugs or design faults fixed on the BAR so that the Mark II is, in many people’s view, a near perfect self loading hunting rifle that delivers a high degree of dependability. Those upgrades have included a re-designed trigger system that is more easily removable for cleaning, and a gas operating system with improved reliability. The Mark II also had a slide stop lever added so that the action can be held open independent of whether the magazine is inserted or not.

The Browning BAR sporting rifles feature components made by Browning in Belgium and then final assembly is done at the Browning Viana works in Portugal. Browning BAR’s have been assembled at Browning Viana since the early seventies. Another example of rifles being assembled by Browning Viana is the Winchester Model 70 which have been assembled there for the last few years. I have a Winchester Model 70 Super Grade assembled at Browning Viana and the quality control on it is simply flawless; and I would expect the quality control over the Browning BAR Mark II Safari models to be up to the same very high standard.

The Browning BAR Mark II Safari rifles are available either with or without the BOSS barrel tuning system. The BOSS is a feature that some shooters will want and that some will not. Barrel mounted tuning devices are all the rage amongst the benchrest shooters at my local shooting club but whether or not you will want one on your hunting rifle will be a matter or personal choice. Personally I would not want one adding to the length and weight of the barrel, but that is just personal preference. Without the BOSS system the between the hands balance of the BAR Mark II is allowed to really shine; the mass of the forged steel action providing the rifle with well centered weight that accentuates its fast handling attributes. Barrels of the BAR Mark II Safari are hammer forged.
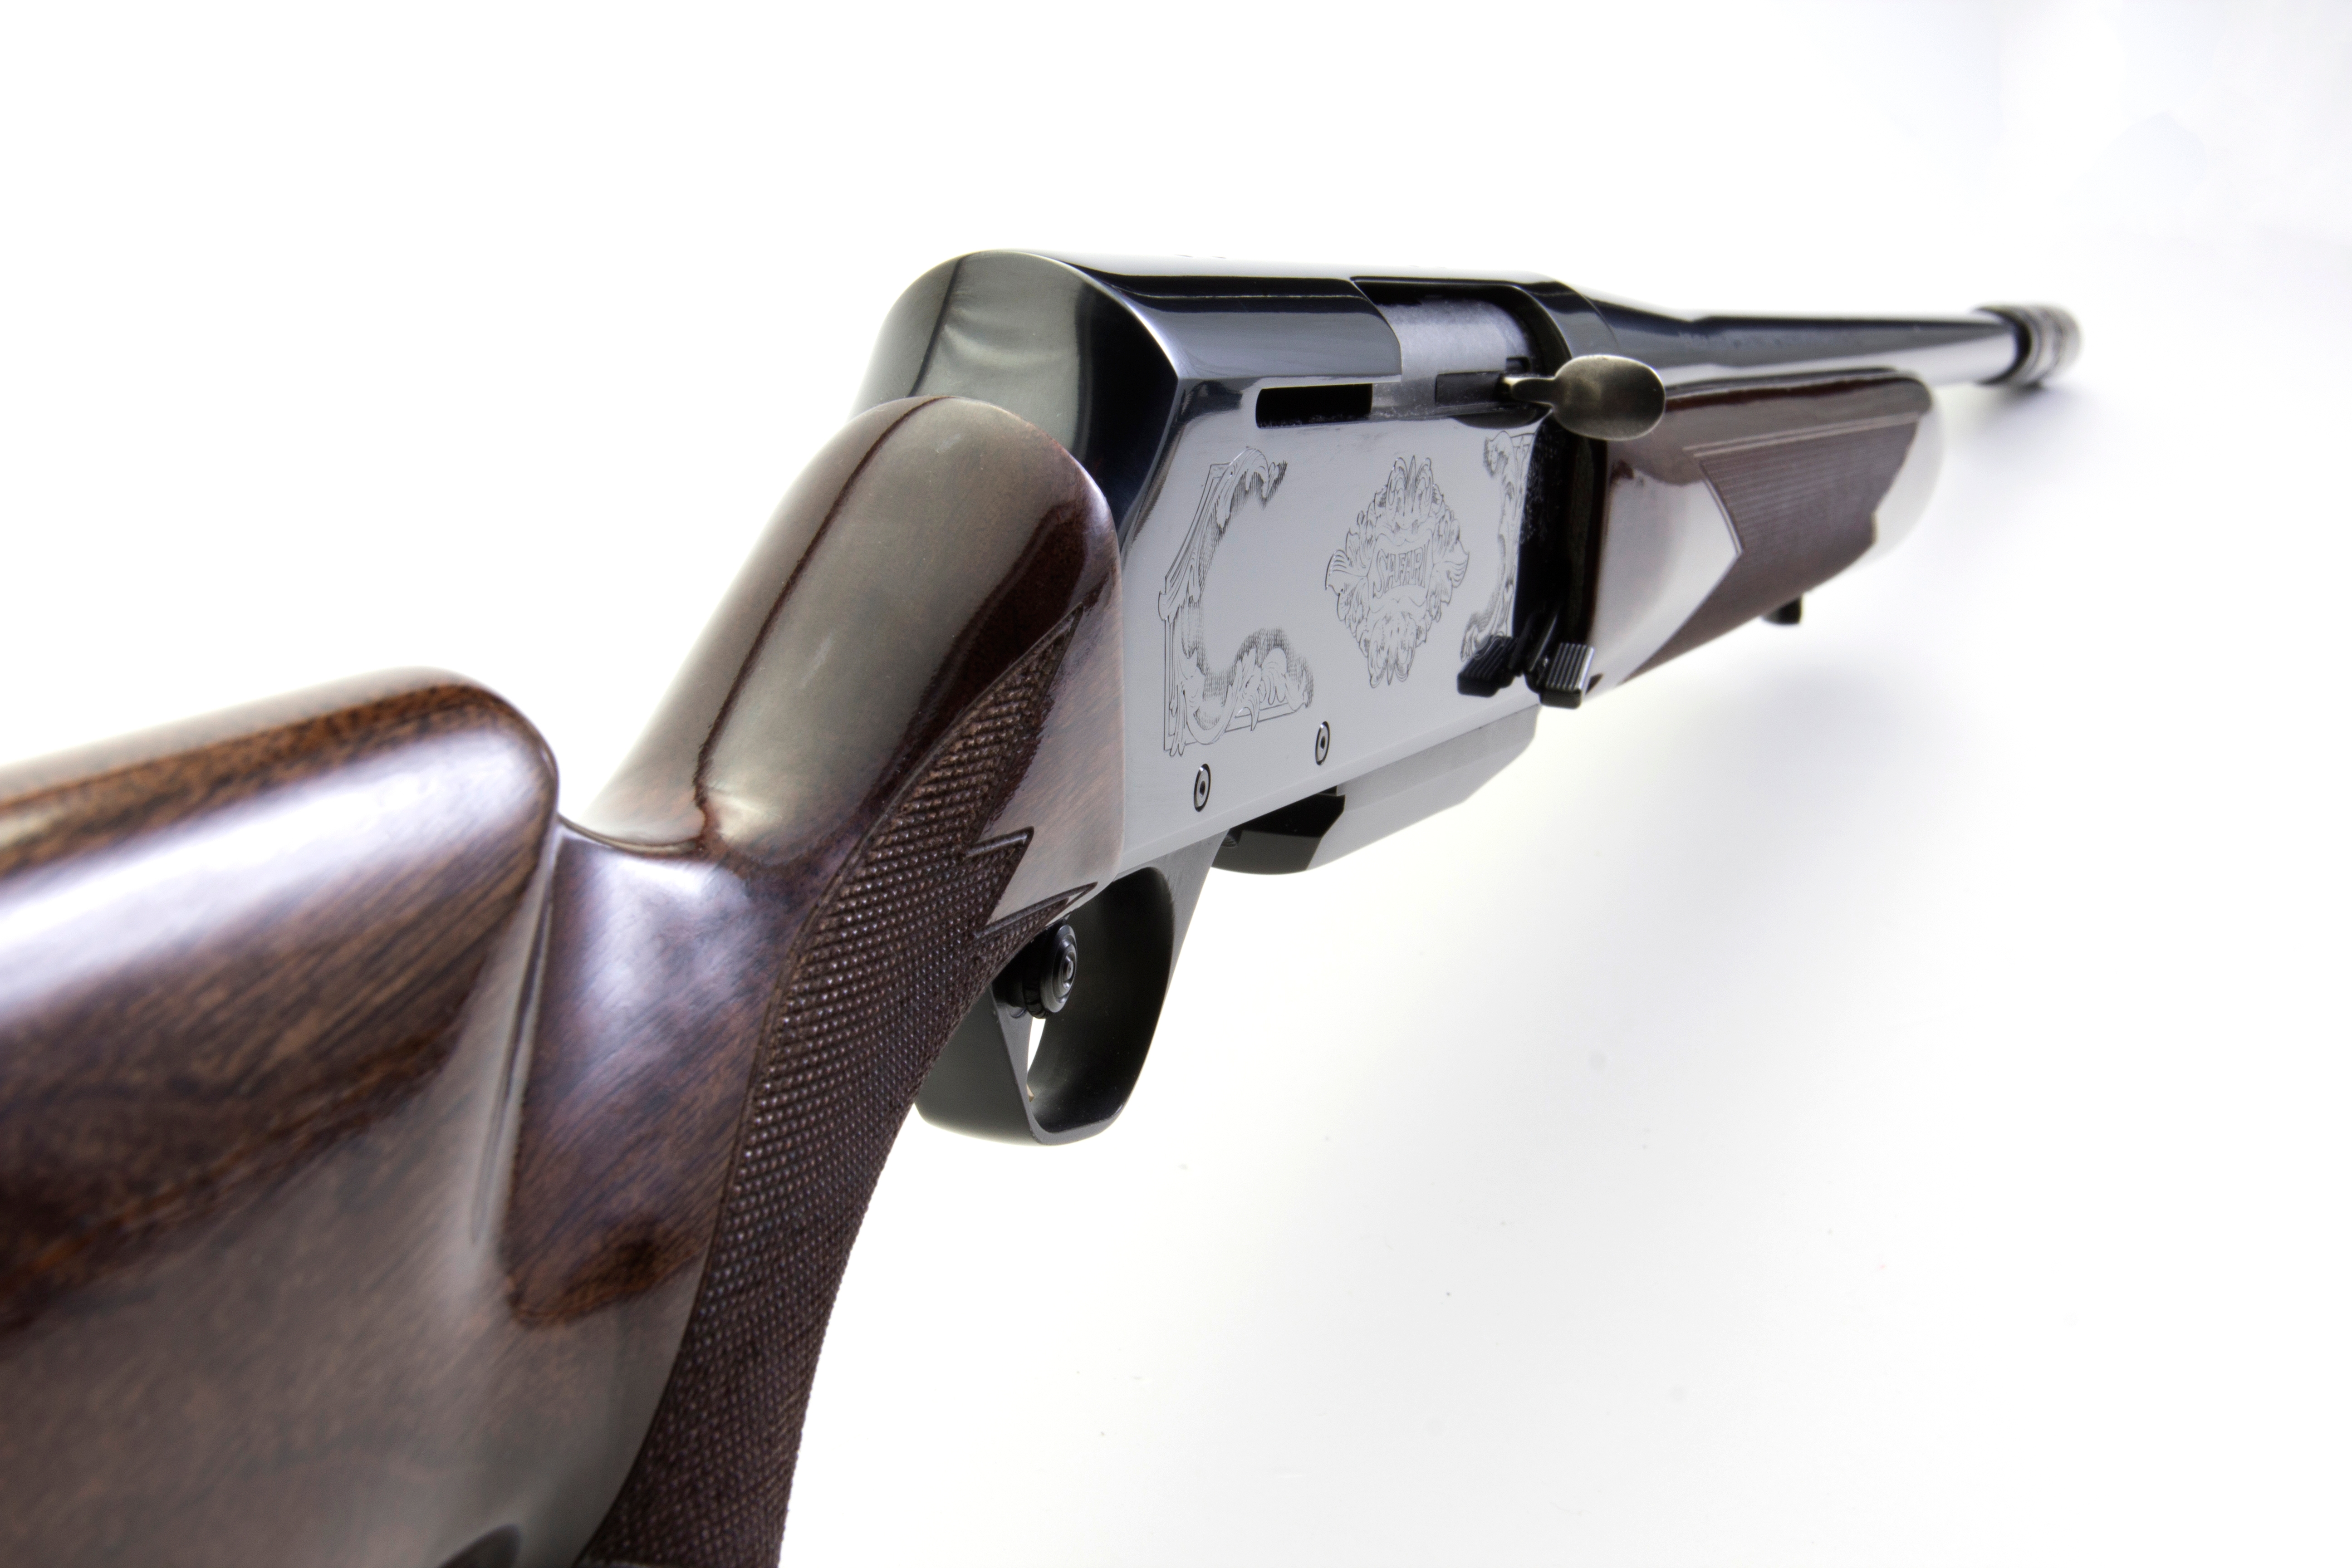
There are advantages and disadvantages inherent in using a self-loading rifle. The obvious advantage is the ability to get a second shot away as quickly as can be accomplished with a double barrel gun, and the reduction in felt recoil because the self-loading action absorbs some of the recoil energy making the rifle more docile to shoot. The disadvantages are, first and foremost, that a self-loading rifle requires more maintenance than a bolt action or a double. In order to keep it running dependably a self-loader must be maintained.
You’ll find the Browning manual with maintenance instructions for the BAR Mark II at Browning’s web site if you click here .
The second thing to watch for is that a self-loading rifle is not going to be as ammunition tolerant as a fixed breech action such as a bolt action. The Browning BAR Mark II Safari has an excellent reputation for dependably functioning with a wide range of factory ammunition although with a self-loading rifle it is important to read the box of new ammunition because some types are not suitable for self-loading rifles and there will be a printed warning on the ammunition box. For handloaders there will be a need to keep your reloads in the range that the self-loader functions well with. Handloaders do not have the same flexibility in tuning loads to a self-loading rifle as they do for a bolt action. This is something the BOSS system can be used to compensate for if you have chosen to have your rifle fitted with one. A self-loading rifle is not necessarily the optimum choice for a handloader because it will eject fired cases well clear of the rifle so you will need to search for them to retrieve them and you will likely have to deal with damaged necks from where they’ve hit the ground.
The last disadvantage of a self-loading rifle is that you should not expect a trigger of the same standard as on Winchester’s current Model 70 for example. The self-loading mechanism has more to do than the trigger on a bolt action or double and so you need to expect it to be relatively heavier and likely with a trace of detectable creep. For fast shooting this is not an issue and the BAR will be in its element if used in fast action scenarios like a shotgun.
Specifications and Calibers
The Browning BAR Mark II Safari is available in 25-06, 7mm Remington Magnum, 300 Winchester Magnum, and 338 Winchester Magnum with a 24″ barrel; 243 Winchester, 270 Winchester, 308 Winchester, and 30-06 with a 22″ barrel. The barrel and action are forged steel whilst the trigger guard, trigger and related parts are alloy. Stock wood is Turkish walnut. The BAR Mark II Safari with the BOSS system is available in 270 Winchester and 30-06 with a 22″ barrel, 300 Winchester Magnum and 338 Winchester Magnum with a 24″ barrel.
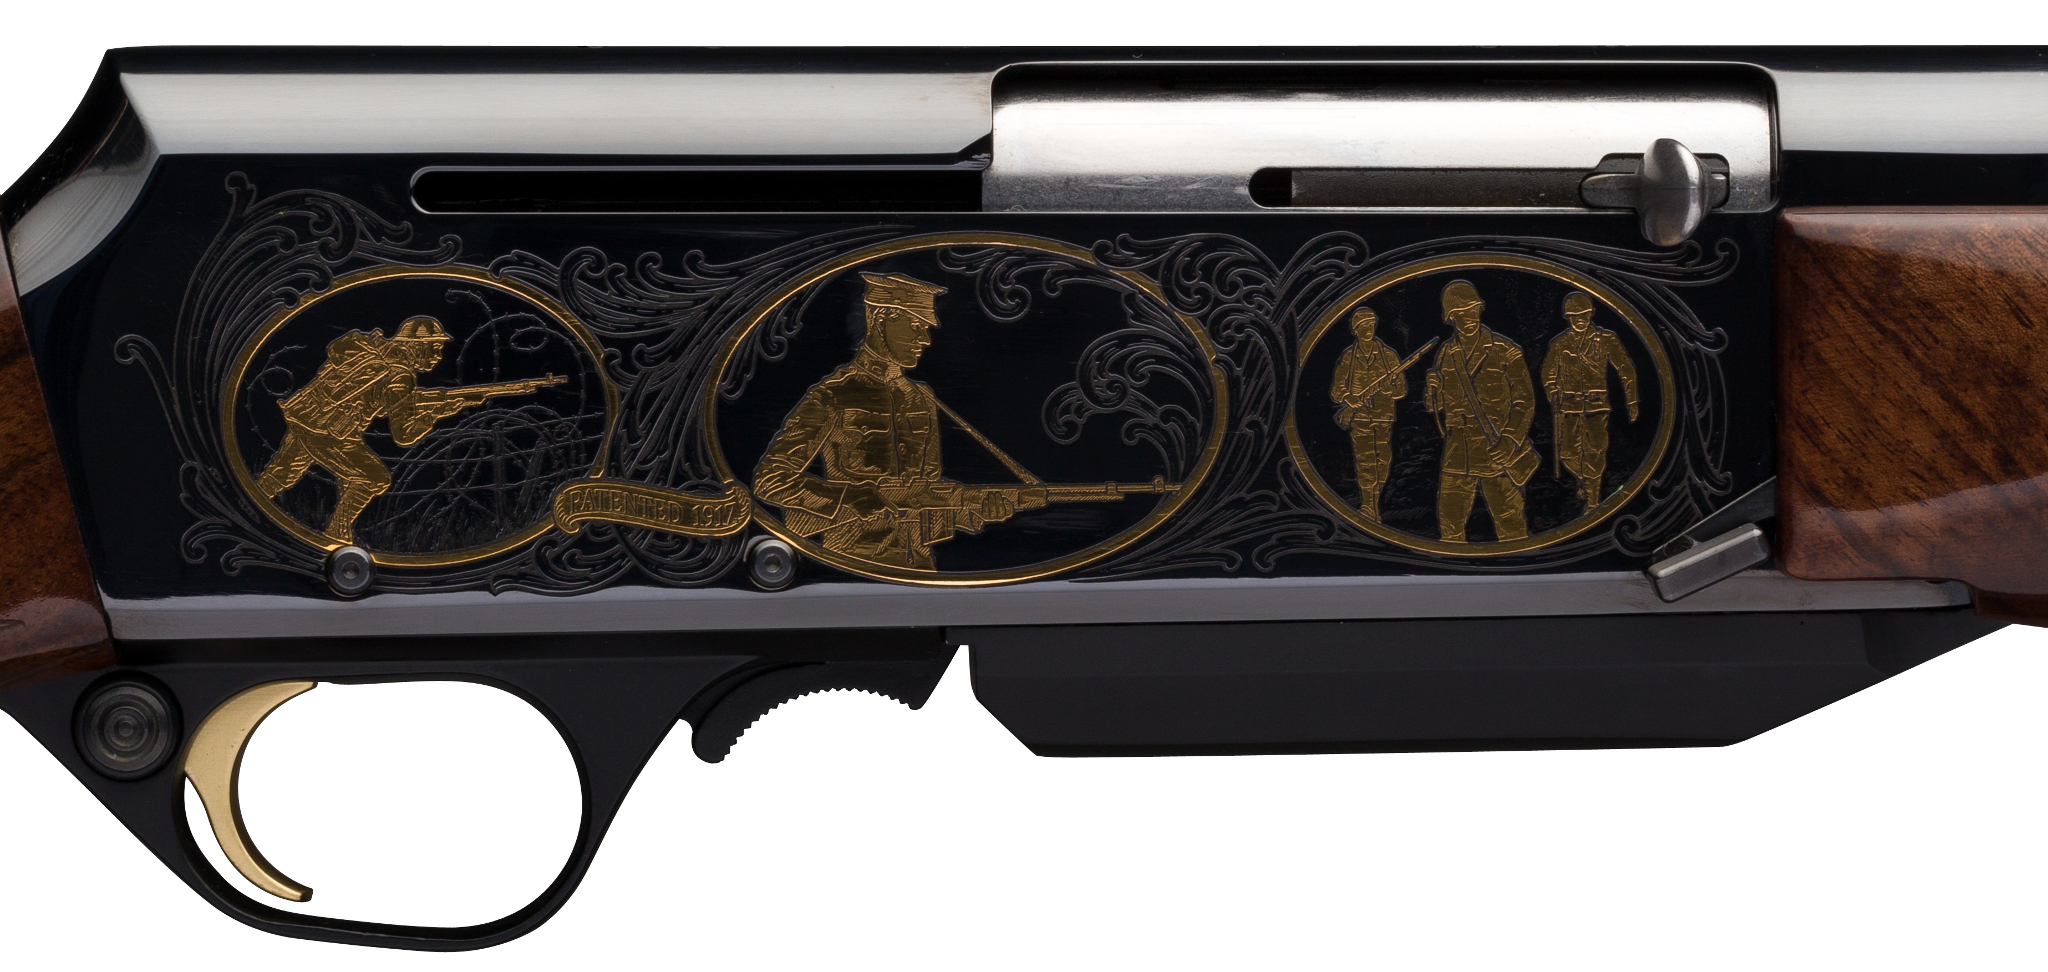
The Browning BAR Mark II Safari is the more expensive version of the BAR and there are less expensive versions that have alloy receivers. Our preference is always for steel and walnut with classic design. If you are looking for a self-loading sporting rifle then the BAR Mark II is one of the best on the market today. It’s a rifle that will give many years of faithful service as long as the owner does their part by looking after it and feeding it a diet that it likes.
You will find the Browning BAR Mark II Safari rifle on Browning’s web site if you click here .
You will find the Browning BAR Mark II Safari rifle with BOSS system if you click here .
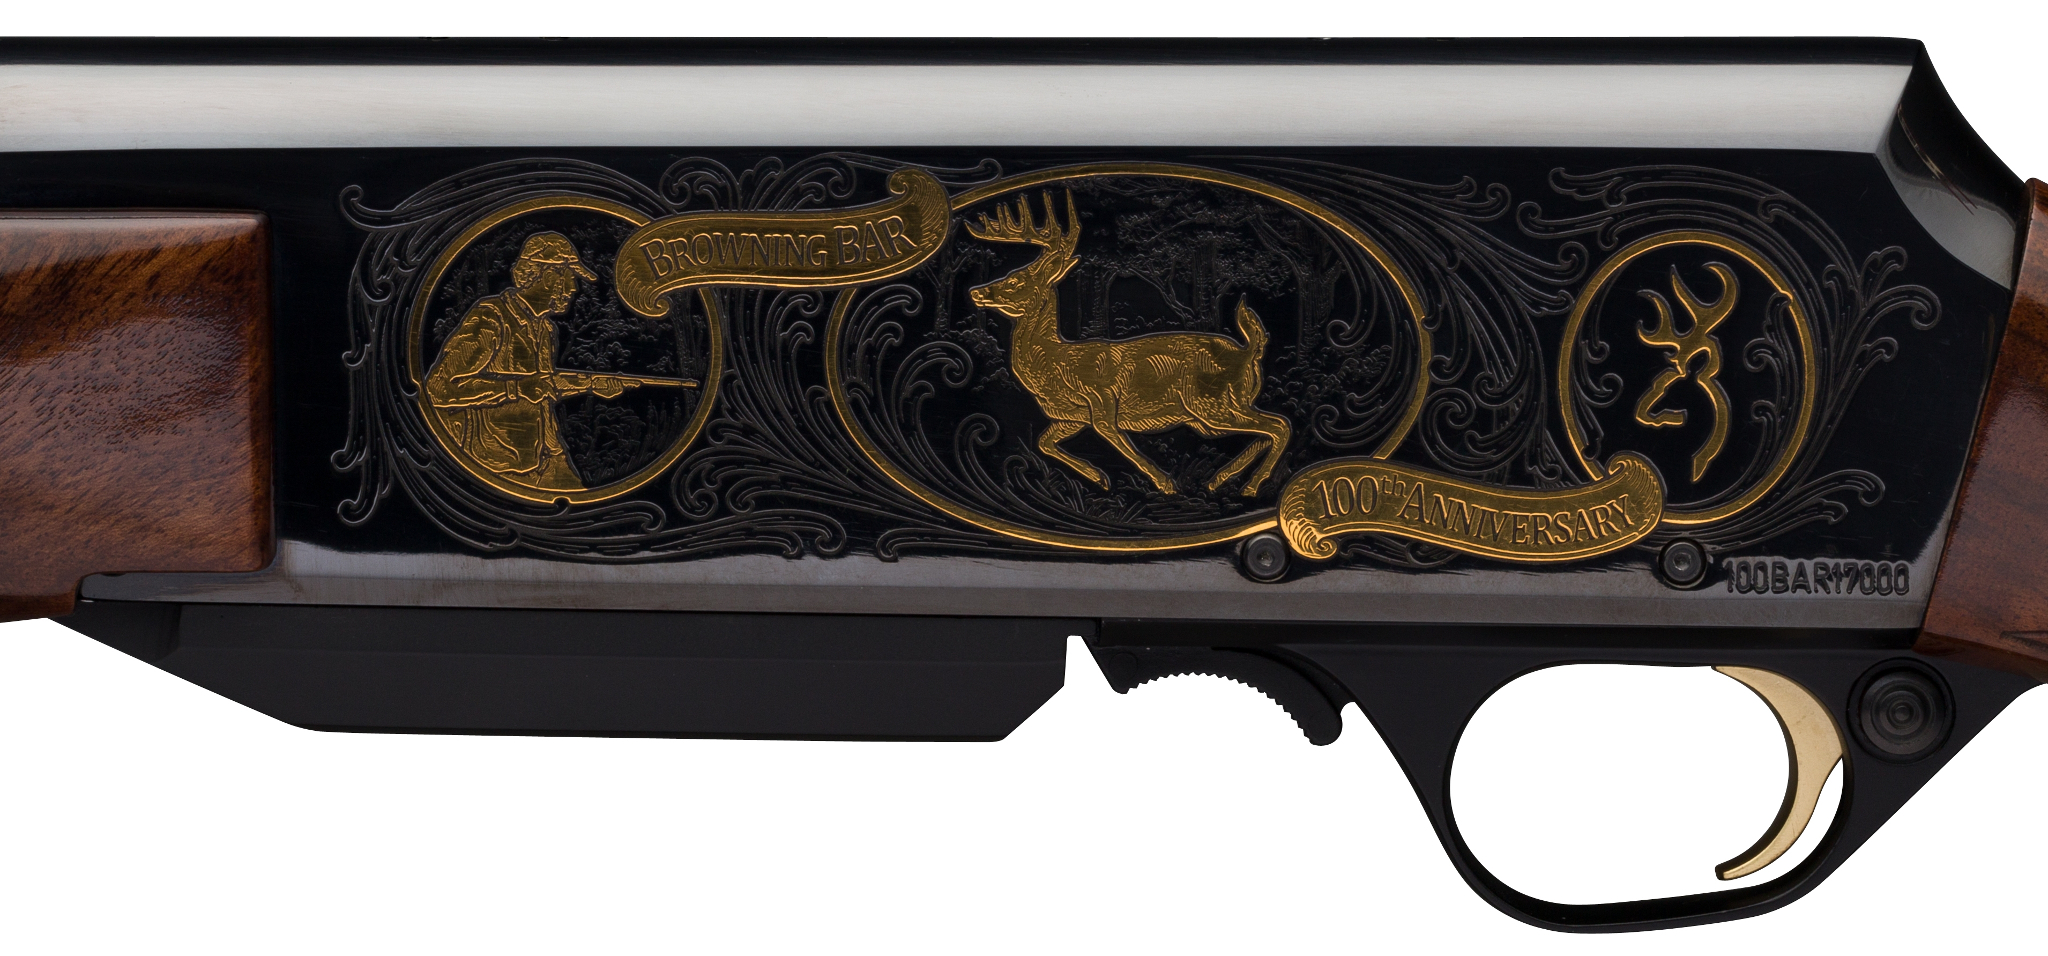
You will find the Limited Edition 100th anniversary model if you click here .
( Pictures courtesy Browning )

Jon Branch is the founder and senior editor of Revivaler and has written a significant number of articles for various publications including official Buying Guides for eBay, classic car articles for Hagerty, magazine articles for both the Australian Shooters Journal and the Australian Shooter, and he’s a long time contributor to Silodrome.
Jon has done radio, television, magazine and newspaper interviews on various issues, and has traveled extensively, having lived in Britain, Australia, China and Hong Kong. His travels have taken him to Indonesia, Israel, Italy, Japan and a number of other countries. He has studied the Japanese sword arts and has a long history of involvement in the shooting sports, which has included authoring submissions to government on various firearms related issues and assisting in the design and establishment of shooting ranges.
Jon C. Branch

You Might Also Like
Heckler & Koch P7

Rigby Big Game Rifles 2017
Austin-Healey 3000 Mk III BJ8
Hart Steam Victoria Four-Seater Dos-à-Dos
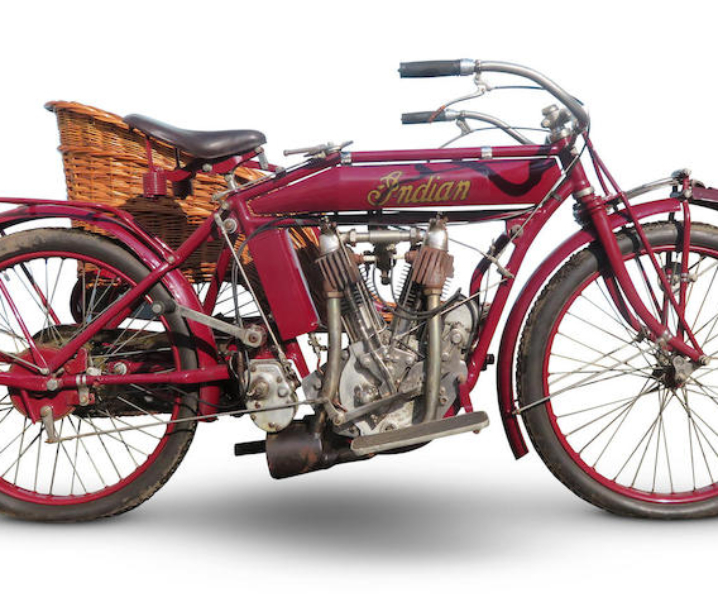
Indian 7hp Big Twin Motorcycle Combination
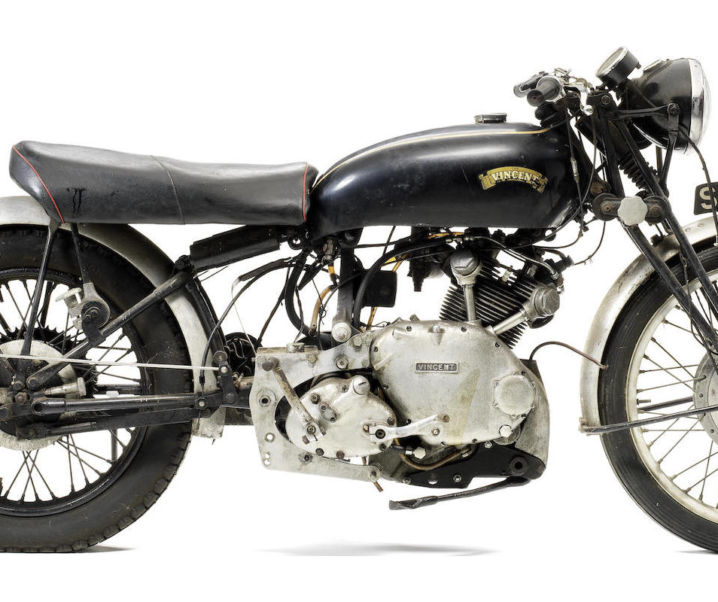
1956 Vincent 499cc Series C/D Comet

- Campfire Forums

Moscow Muled
How to clean and care for copper mugs: the definitive guide.

Oct 15, 2019
In this post, we reveal the complete guide to cleaning and caring for your copper mugs. From how to maximize the lifespan of your mugs to how to ensure that they maintain that brilliant copper shine, we have you covered. Let's get started!
Introduction
Since the creation of the Moscow Mule in the 1940's, copper mugs have never been more popular than they are today. This refreshing cocktail made of lime juice, vodka, and ginger beer is traditionally served over ice in an iconic copper mule mug. No matter what beverage you choose to serve in it, the appeal of the copper mug is hard to deny. As bars, restaurants and at-home use of copper mugs continues to grow in popularity, it is important to know how to properly care for and clean copper. This article will tell you everything you need to know, including:
Why is Cleaning Copper Mugs Important?
Why does copper tarnish.
- How Do you Clean Copper Mugs?
- 5 Easy & Natural Ways to Remove Copper Tarnish
- Is it Safe to Drink from Copper Mugs?
Are Copper Mugs Dishwasher Safe?
- Lined Versus Unlined Copper Mugs
- The Benefits of Using Copper Mugs
- Essential Tips to Care for your Copper Mugs

Like any drinking vessel, copper cups, mugs, water bottles and tumblers need to be washed after every use. Copper does require specific care and maintenance, however it's quite simple and easy to learn and do.
First and foremost, copper mugs should be cleaned properly for health and safety reasons. Whether at a restaurant or at home, you don't want anyone getting sick from drinking from an unwashed cup.
There is something compelling about the warm glow of polished copper. A huge part of the appeal and popularity of cocktails like the Moscow Mule is the unique aesthetic of the copper mug. This metal will tarnish naturally with time and use, so cleaning it properly can be essential to keeping it shiny, and fully experiencing the many benefits of drinking from a copper mug.

Like iron developing rust, copper will naturally tarnish over time with exposure to humidity and other elements found in the air. Copper's blue-green tarnish, known as patina, can be either useful or annoying, depending on its intended use.
The patina actually serves as a protective layer for the copper beneath, and can be useful in outdoor applications such as roofing or pipes. However, when it comes to mugs or cups, we want the copper to shine as warmly as possible, so it is essential to know about preventative care and maintenance.
Don't worry, it's super easy to do, and incredibly satisfying to restore and polish your tarnished copper mugs.
How Do You Clean Copper Mugs?
Cleaning copper mugs is like cleaning most anything, except that it MUST be washed by hand. In other words, never put them in the dishwasher, ever. Take 30 seconds to gently wash them by hand with a soft sponge, soap and warm water.
For most people at home, this shouldn't be a problem. But some high-volume bars or restaurants might not be able to dedicate the time needed for proper care. This is one reason a business may prefer a tin-lined or lacquered copper cup that may need less polishing, although they too should still be washed by hand.
The most important part of cleaning your copper mug is drying it!
Residual water in the slightest amount can lead to tarnishing, so experts highly recommend you dry your copper mug twice, with two different soft towels or cloths until all moisture is removed. This extra step only takes a few moments, and will go a long way towards the durability and cleanliness of your copper mule mugs.
If you want your copper mug to look nice, dry it twice!
5 Easy and Natural Ways to Remove Copper Tarnish
Owning a copper mug comes with the added responsibility of some occasional, simple maintenance. When your favorite mug starts to turn green, here are some easy solutions to restore its natural shine!
Lemon or Limes and Salt

This simple method is quick and easy, and ideal for bars or restaurants that may have an abundance of lemons on hand. Simply pour some table or sea salt onto a dish, and cut a fresh lemon or lime into 1/4th slices. Dip the fruit slice into the salt, and scrub the copper mug with slow, methodical circles inside and out. The change should be almost instantaneous, and when the tarnish has been removed, wash under warm or cool water, and dry thoroughly.
Vinegar and Salt
Mix one cup of vinegar, one tablespoon of salt, and five cups of water. Pour the solution into a saucepan, place your mug into the saucepan, and bring it to a boil. After a few minutes, the tarnish will have disappeared, and you can remove the mug with tongs, rinse it in cold water, and dry thoroughly with two soft dish towels.
Vinegar and Baking Soda
Create a paste with three parts baking soda, and one part vinegar. Use a sponge to apply it to the mug with small circular motions and let it sit for about 10 minutes in order for the magic to happen. After that, simply rinse and dry until all moisture has been removed.
Harness the power of tomatoes to clean your tarnished copper mug! Apply the ketchup using a soft sponge or toothbrush, always rubbing in small circles. Then let it stand for 30 minutes. Remove the ketchup in the same way you applied it (a specially designated tarnish-toothbrush can be a highly effective tool for getting into those hard to reach places). Finally, rinse with water, and dry thoroughly with two soft towels.
Tamarind Paste
Tamarind is a tropical fruit, popular in Caribbean, African and Indian cuisine. It contains tartaric acid, which helps remove tarnish from brass and copper. If this is something you have access to, simply add water to create a paste, and rub it onto the copper with a soft sponge or cloth. After a few minutes, rinse off the paste, and dry completely.

Metal Polish
Although the natural methods listed above are all equally effective, inexpensive and safe, another option is to use a tarnish remover or metal polish. Popular brands like Brasso are great for polishing many different kinds of metals, but the main ingredients may be less than desirable (rubbing alcohol, ammonia, mineral spirits and silica powder). Chances are you can easily find most of the ingredients for cleaning copper mugs in your pantry, and can avoid buying a product full of harsh chemicals.
Is It Safe To Drink From Copper Mugs?
Yes, it is safe to drink from copper mugs , despite click-bait headlines, myths and legislation that may suggest otherwise. True, when using 100% pure copper mugs it is possible that trace amounts of copper could be ingested. However, this can be mitigated by using stainless-steel plated copper mugs.
Copper is an essential part of human biology, and is necessary for regulating metabolic systems and vital organs. Copper deficiency can lead to arthritis, osteoporosis, cardiovascular diseases and colon cancer.
Not only do our bodies need copper, we also have systems in place to naturally deal with any excess copper. Verified scientific studies have shown copper can do impressive things.
- Copper and Iron work together to form red blood cells.
- Copper helps maintain collagen, and along with other antioxidants, can reduce signs of aging.
- Copper helps absorb excess iron in the liver.
- Copper improves brain and nerve cell synaptic responses.
- Copper aids in digestion and helps with ulcers and inflammation.
Copper toxicity is quite rare and, according to the World Health Organization , "There is a greater risk of health effects from a deficiency of copper intake than excessive copper intake."
The FDA guidelines do not recommend using copper for any food or beverage purposes, solely because of the extra care needed to maintain it, and applies exclusively to commercial operations, with varying local and state regulations.
This is meant to protect consumers from improperly cleaned or exposed copper mugs and cookware in bars and restaurants, and does not apply to home use. The FDA suggests the public learn about proper care and maintenance before using copper mugs, but scientists have debunked the claim that a Moscow Mule can give you copper poisoning.
When using 100% pure copper mugs and a liquid with a pH below 6.0 (like lime juice), and that liquid remains in the mug for an extended period of time, there is a chance you could consume amounts of copper. This is the reason why it is generally a good idea to use copper mugs lined with stainless-steel .
No, never! All copper cookware, utensils or mugs should be washed by hand, no exceptions. Dishwashers typically use harsh detergent, powerful water sprays and high heat that can seriously harm your copper mug both inside and out.
Dishwashers can lead to dents, tarnishing, and flaking or cracking. So take 30 seconds to do right by your copper mugs, and wash and dry them by hand!
Lines Versus Unlined Copper Mugs
When purchasing a copper mug, there are three basic options - 100% copper, tin-lined, and copper plated.
Copper is a great thermal conductor, and will keep your drink colder for longer (or hotter for longer, depending on the drinks). This is a big part of what makes the Moscow Mule an attractive summer beverage, and why copper mugs are great for cocktails in general.
Lined copper mugs (usually with zinc, stainless-steel or tin) can be a great choice. The double lining improves their durability, and can give them a great look. Unlike pure copper, lined copper mugs also offer additional health benefits by avoiding reactions between acids in your drink and pure copper.
Both lined and unlined copper mugs must be washed by hand and both will develop a patina over time. Lined mugs might take slightly less time to polish, because you only need worry about the outside. However, now that you know how to clean tarnished copper mugs, it's nothing you can't handle.
Essential Tips To Care For Your Copper Mugs
Copper mugs are stylish and good for your health. They keep your cold drinks chilled, and your hot drinks steaming. Copper mugs have been used for thousands of years for water purification and health benefits, and have made a triumphant rise in popularity since the invention of the Moscow Mule in the 1940's.
Whatever you choose to put in your copper mug, remember these three simple tips:
- When serving drinks, don't let them sit for more than 4 hours. Drink up!
- After each use, take the time to hand-wash your copper mugs with soap and water, and use TWO TOWELS to dry them thoroughly.
- When your copper mug begins to tarnish, use one of the five easy and natural ways listed above to polish it to perfection.
Thank you for taking the time to become an expert on using, cleaning and caring for copper mugs. Cheers!
Did You Enjoy This Article?
Thank you for reading! If you enjoyed this article, you might also like the following articles: Why You Should Only Use Moscow Mule Copper Mugs With Stainless Steel Lining and Which Moscow Mule Copper Mugs Are Best?
Relevant Products
Moscow Mule Copper Mug
Leave a comment
Subscribe to our newsletter.
Receive exclusive deals and our latest blog posts straight to your inbox!
- Continue Shopping
- Your Cart is Empty

DAY TO DAY CLEANING
Because your Classic Mules copper drinkware is 100% copper with no coating (on the inside), they will oxidize/tarnish… but not to worry, we’ve got you covered! The best practice to slow the tarnishing is to wash after use (with minimal chemicals) and then dry immediately.
**Never Put In Your Dishwasher**
If you start to see some oxidizing/tarnishing, here’s some sure shot ways to get that copper shine back:
Shining Method 1

Shining Method 2 (what we usually do)
What you need!
- 3 tablespoons of Salt
- 1/2 a cup of Vinegar
Instructions
- Dissolve 3 tablespoons of salt into 1/2 a cup of white vinegar
- Once salt is fully dissolved, dip a cloth or sponge into the solution and start gently rubbing away the tarnish.
- After all the tarnish is gone, rinse with water and then dry immediately with a clean cloth.
- A variation to the above is to fill a spray bottle with the solution and spray the copper, let it sit for a while, then rub clean.
Shining Method 3
- 1 1/2 tablespoons of Salt
- 1/2 a cup of Lemon Juice
- Dissolve 1 1/2 tablespoons of salt into 1/2 cup of Lemon Juice
- Proceed cleaning your copper with the same steps as ‘Method 2’
- There are other cleaning methods out there if you search online… However, we’ve found the above 3 to be the best and safest methods.
Hope all this helps and we know you’re going to love your new purchase! If you haven't got one yet, have a look at our awesome pitchers below.
Buy Yours Now

Footer menu
- Refund Policy
- Privacy Policy
- Terms Of Service
News & Updates
Sign up to get the latest on sales, new releases and more …
© 2024 Classic Mules . Configured by GripsOn and Powered by Shopify

Mavericks Travel
Adventures globally.
- Become a Partner
Verified Listing
Moscow pub and bar crawl.
Username or email address *
Remember me
Register | Lost your password?

It appears that you are accessing the Browning Website from outside North America. Would you like to visit Browning International?

- Discontinued
BAR Classic Safari

$831 - $908 MSRP
The same features as a Mark II Safari but with a satin-finish stock and forearm. Sling swivels included. Offered only to Browning Full-Line and Medallion Dealers.
- 270 Win • 22" NO LONGER IN PRODUCTION
- 30-06 Spfld • 22" NO LONGER IN PRODUCTION
- 7mm Rem Mag • 24" NO LONGER IN PRODUCTION
- 300 Win Mag • 24" NO LONGER IN PRODUCTION
- 300 WSM • 23" NO LONGER IN PRODUCTION
- 270 WSM • 23" NO LONGER IN PRODUCTION
- 7mm WSM • 23" NO LONGER IN PRODUCTION


Turn Your Curiosity Into Discovery
Latest facts.
8 Facts About National Make Lunch Count Day April 13th
12 Facts About National Tie Dye Day April 30th
40 facts about elektrostal.
Written by Lanette Mayes
Modified & Updated: 02 Mar 2024
Reviewed by Jessica Corbett

Elektrostal is a vibrant city located in the Moscow Oblast region of Russia. With a rich history, stunning architecture, and a thriving community, Elektrostal is a city that has much to offer. Whether you are a history buff, nature enthusiast, or simply curious about different cultures, Elektrostal is sure to captivate you.
This article will provide you with 40 fascinating facts about Elektrostal, giving you a better understanding of why this city is worth exploring. From its origins as an industrial hub to its modern-day charm, we will delve into the various aspects that make Elektrostal a unique and must-visit destination.
So, join us as we uncover the hidden treasures of Elektrostal and discover what makes this city a true gem in the heart of Russia.
Key Takeaways:
- Elektrostal, known as the “Motor City of Russia,” is a vibrant and growing city with a rich industrial history, offering diverse cultural experiences and a strong commitment to environmental sustainability.
- With its convenient location near Moscow, Elektrostal provides a picturesque landscape, vibrant nightlife, and a range of recreational activities, making it an ideal destination for residents and visitors alike.
Known as the “Motor City of Russia.”
Elektrostal, a city located in the Moscow Oblast region of Russia, earned the nickname “Motor City” due to its significant involvement in the automotive industry.
Home to the Elektrostal Metallurgical Plant.
Elektrostal is renowned for its metallurgical plant, which has been producing high-quality steel and alloys since its establishment in 1916.
Boasts a rich industrial heritage.
Elektrostal has a long history of industrial development, contributing to the growth and progress of the region.
Founded in 1916.
The city of Elektrostal was founded in 1916 as a result of the construction of the Elektrostal Metallurgical Plant.
Located approximately 50 kilometers east of Moscow.
Elektrostal is situated in close proximity to the Russian capital, making it easily accessible for both residents and visitors.
Known for its vibrant cultural scene.
Elektrostal is home to several cultural institutions, including museums, theaters, and art galleries that showcase the city’s rich artistic heritage.
A popular destination for nature lovers.
Surrounded by picturesque landscapes and forests, Elektrostal offers ample opportunities for outdoor activities such as hiking, camping, and birdwatching.
Hosts the annual Elektrostal City Day celebrations.
Every year, Elektrostal organizes festive events and activities to celebrate its founding, bringing together residents and visitors in a spirit of unity and joy.
Has a population of approximately 160,000 people.
Elektrostal is home to a diverse and vibrant community of around 160,000 residents, contributing to its dynamic atmosphere.
Boasts excellent education facilities.
The city is known for its well-established educational institutions, providing quality education to students of all ages.
A center for scientific research and innovation.
Elektrostal serves as an important hub for scientific research, particularly in the fields of metallurgy, materials science, and engineering.
Surrounded by picturesque lakes.
The city is blessed with numerous beautiful lakes, offering scenic views and recreational opportunities for locals and visitors alike.
Well-connected transportation system.
Elektrostal benefits from an efficient transportation network, including highways, railways, and public transportation options, ensuring convenient travel within and beyond the city.
Famous for its traditional Russian cuisine.
Food enthusiasts can indulge in authentic Russian dishes at numerous restaurants and cafes scattered throughout Elektrostal.
Home to notable architectural landmarks.
Elektrostal boasts impressive architecture, including the Church of the Transfiguration of the Lord and the Elektrostal Palace of Culture.
Offers a wide range of recreational facilities.
Residents and visitors can enjoy various recreational activities, such as sports complexes, swimming pools, and fitness centers, enhancing the overall quality of life.
Provides a high standard of healthcare.
Elektrostal is equipped with modern medical facilities, ensuring residents have access to quality healthcare services.
Home to the Elektrostal History Museum.
The Elektrostal History Museum showcases the city’s fascinating past through exhibitions and displays.
A hub for sports enthusiasts.
Elektrostal is passionate about sports, with numerous stadiums, arenas, and sports clubs offering opportunities for athletes and spectators.
Celebrates diverse cultural festivals.
Throughout the year, Elektrostal hosts a variety of cultural festivals, celebrating different ethnicities, traditions, and art forms.
Electric power played a significant role in its early development.
Elektrostal owes its name and initial growth to the establishment of electric power stations and the utilization of electricity in the industrial sector.
Boasts a thriving economy.
The city’s strong industrial base, coupled with its strategic location near Moscow, has contributed to Elektrostal’s prosperous economic status.
Houses the Elektrostal Drama Theater.
The Elektrostal Drama Theater is a cultural centerpiece, attracting theater enthusiasts from far and wide.
Popular destination for winter sports.
Elektrostal’s proximity to ski resorts and winter sport facilities makes it a favorite destination for skiing, snowboarding, and other winter activities.
Promotes environmental sustainability.
Elektrostal prioritizes environmental protection and sustainability, implementing initiatives to reduce pollution and preserve natural resources.
Home to renowned educational institutions.
Elektrostal is known for its prestigious schools and universities, offering a wide range of academic programs to students.
Committed to cultural preservation.
The city values its cultural heritage and takes active steps to preserve and promote traditional customs, crafts, and arts.
Hosts an annual International Film Festival.
The Elektrostal International Film Festival attracts filmmakers and cinema enthusiasts from around the world, showcasing a diverse range of films.
Encourages entrepreneurship and innovation.
Elektrostal supports aspiring entrepreneurs and fosters a culture of innovation, providing opportunities for startups and business development.
Offers a range of housing options.
Elektrostal provides diverse housing options, including apartments, houses, and residential complexes, catering to different lifestyles and budgets.
Home to notable sports teams.
Elektrostal is proud of its sports legacy, with several successful sports teams competing at regional and national levels.
Boasts a vibrant nightlife scene.
Residents and visitors can enjoy a lively nightlife in Elektrostal, with numerous bars, clubs, and entertainment venues.
Promotes cultural exchange and international relations.
Elektrostal actively engages in international partnerships, cultural exchanges, and diplomatic collaborations to foster global connections.
Surrounded by beautiful nature reserves.
Nearby nature reserves, such as the Barybino Forest and Luchinskoye Lake, offer opportunities for nature enthusiasts to explore and appreciate the region’s biodiversity.
Commemorates historical events.
The city pays tribute to significant historical events through memorials, monuments, and exhibitions, ensuring the preservation of collective memory.
Promotes sports and youth development.
Elektrostal invests in sports infrastructure and programs to encourage youth participation, health, and physical fitness.
Hosts annual cultural and artistic festivals.
Throughout the year, Elektrostal celebrates its cultural diversity through festivals dedicated to music, dance, art, and theater.
Provides a picturesque landscape for photography enthusiasts.
The city’s scenic beauty, architectural landmarks, and natural surroundings make it a paradise for photographers.
Connects to Moscow via a direct train line.
The convenient train connection between Elektrostal and Moscow makes commuting between the two cities effortless.
A city with a bright future.
Elektrostal continues to grow and develop, aiming to become a model city in terms of infrastructure, sustainability, and quality of life for its residents.
In conclusion, Elektrostal is a fascinating city with a rich history and a vibrant present. From its origins as a center of steel production to its modern-day status as a hub for education and industry, Elektrostal has plenty to offer both residents and visitors. With its beautiful parks, cultural attractions, and proximity to Moscow, there is no shortage of things to see and do in this dynamic city. Whether you’re interested in exploring its historical landmarks, enjoying outdoor activities, or immersing yourself in the local culture, Elektrostal has something for everyone. So, next time you find yourself in the Moscow region, don’t miss the opportunity to discover the hidden gems of Elektrostal.
Q: What is the population of Elektrostal?
A: As of the latest data, the population of Elektrostal is approximately XXXX.
Q: How far is Elektrostal from Moscow?
A: Elektrostal is located approximately XX kilometers away from Moscow.
Q: Are there any famous landmarks in Elektrostal?
A: Yes, Elektrostal is home to several notable landmarks, including XXXX and XXXX.
Q: What industries are prominent in Elektrostal?
A: Elektrostal is known for its steel production industry and is also a center for engineering and manufacturing.
Q: Are there any universities or educational institutions in Elektrostal?
A: Yes, Elektrostal is home to XXXX University and several other educational institutions.
Q: What are some popular outdoor activities in Elektrostal?
A: Elektrostal offers several outdoor activities, such as hiking, cycling, and picnicking in its beautiful parks.
Q: Is Elektrostal well-connected in terms of transportation?
A: Yes, Elektrostal has good transportation links, including trains and buses, making it easily accessible from nearby cities.
Q: Are there any annual events or festivals in Elektrostal?
A: Yes, Elektrostal hosts various events and festivals throughout the year, including XXXX and XXXX.
Was this page helpful?
Our commitment to delivering trustworthy and engaging content is at the heart of what we do. Each fact on our site is contributed by real users like you, bringing a wealth of diverse insights and information. To ensure the highest standards of accuracy and reliability, our dedicated editors meticulously review each submission. This process guarantees that the facts we share are not only fascinating but also credible. Trust in our commitment to quality and authenticity as you explore and learn with us.
Share this Fact:

IMAGES
VIDEO
COMMENTS
Cleaning the chamber of a Browning BAR Safari rifle is a straightforward process. Here's a step-by-step guide: Ensure the firearm is unloaded before starting the cleaning process. Remove the magazine and visually inspect the chamber and barrel to confirm there is no ammunition present.
Step 1: The first important step when gun cleaning is to remove the magazine. Never start cleaning a loaded gun as it can cause severe injury to yourself or people near you. Check to see if the chamber is empty, and to do this, pull the operation handle backward. If there is a live round, it will be ejected.
Created Date: 8/9/2000 9:34:43 AM
Follow these steps to clean a browning bar without any hassle. Step 1. When cleaning a gun, the first stage is to detach the mag. Never start by cleaning a loaded gun because you might injure yourself or those around you. To do so, pull the operating handle rearward to see if the barrel is empty. A live round will be expelled if there is one.
BROWNING BAR® MARK II AUTOLOADING RIFLE If you have any questions about your new firearm, this owner's manual or other Browning products, contact: Browning Customer Service One Browning Place Morgan, UT 84050-9326 Phone: (800) 333-3288 browning.com Please use the space below to record information about your new firearm.
BAR (pre-1993 models) BAR Mark II. BAR ShortTrac / LongTrac. ... 14. DISCHARGING FIREARMS IN POORLY VENTILATED AREAS, CLEANING FIREARMS OR HANDLING AMMUNITION MAY RESULT IN EXPOSURE TO LEAD AND OTHER SUBSTANCES KNOWN TO CAUSE BIRTH DEFECTS, REPRODUCTIVE HARM AND OTHER SERIOUS PHYSICAL INJURY. ... It is your responsibility to secure the most up ...
Cleaning the Browning BAR. Step 1: Cleaning the barrel. Start by attaching a bore brush to a cleaning rod and soak it in gun cleaning solvent. Insert the rod into the chamber end of the barrel and push it through, ensuring that the brush makes contact with the entire length of the barrel.
As a newby to this forum and a new BAR Long Trac 30.06 owner I have a question regarding a thorough cleaning of my new rifle. My owners manual gives info on barrel cleaning & trigger group cleaning, but nothing on removing the forearm & cleaning the gas piston and gas cylinder area. How often do you BAR owners clean this area.
Posts: 6,471. RE: cleaning browning bar' s. Jorgy, not a big deal to clean up properly... use an old tootbrush and clean that piston real well as well as the cylinder it rides in with a cleaner. Make sure your action bars and bolt are in proper alignment before you put the trigger group back in. I used Breakfree sparingly on the action bars and ...
This video is about how I clean my Browning BAR Mark 3. I could not find much info on how to clean this rifle so I decided to take it apart and put it back ...
Disassembly and cleaning of my Browning BAR in .308 caliber. My Dad gave it to me a few weeks back. The scope is damaged but the gun is in fine shape. I am s...
http://www.downeastgunworks.com http://twitter.com/#!/mainegunworks http://www.facebook.com/gunworks Jim Green, gunsmith and owner of GunWorks of Harrington,...
Friend Joe Pirani was a Browning fan from the word go. He had Browning Superposed shotguns for field and trap and when it came to rifles, he was stuck on the BAR (Browning Automatic Rifle) that went with him on all his hunting trips. When we did get to serious discussions relating to the gun on an antelope/mule deer hunt near Jordon, Montana ...
The autoloading BAR MK II Safari features a traditionally-styled walnut stock, hammer-forged barrel and a polished blued and engraved steel receiver. Reliable gas piston operation. Detachable box magazine. FIND A DEALER TO PURCHASE. $1,229.99 - $1,849.99.
Specifications and Calibers. The Browning BAR Mark II Safari is available in 25-06, 7mm Remington Magnum, 300 Winchester Magnum, and 338 Winchester Magnum with a 24″ barrel; 243 Winchester, 270 Winchester, 308 Winchester, and 30-06 with a 22″ barrel. The barrel and action are forged steel whilst the trigger guard, trigger and related parts ...
I have owned 2 BAR Mark II Safari in 30-06, the first being a BOSS equipped rifle. I found the BOSS unnecessary and LOUD. Nevertheless, I killed a truckload of deer and hogs with it and the 165 gr TBBC. All but one - a rutting buck - DRT. I replaced it with a non-BOSS but otherwise identical rifle and continued to hunt.
Vinegar and Baking Soda. Create a paste with three parts baking soda, and one part vinegar. Use a sponge to apply it to the mug with small circular motions and let it sit for about 10 minutes in order for the magic to happen. After that, simply rinse and dry until all moisture has been removed.
Dissolve 3 tablespoons of salt into 1/2 a cup of white vinegar. Once salt is fully dissolved, dip a cloth or sponge into the solution and start gently rubbing away the tarnish. After all the tarnish is gone, rinse with water and then dry immediately with a clean cloth. A variation to the above is to fill a spray bottle with the solution and ...
The best way to understand it is to take a pint of tasty beer and have a great pub experience in an amazing company. We will visit the best Moscow pubs that serve local craft beer. You can talk with owners, brewers, and beer geeks. We will taste the best Russian beer and visit modern, authentic Russian places. Be ready to spend a beautiful time.
NO LONGER IN PRODUCTION. Item Number 031003224. UPC 023614232605. Action Length Long Action. Caliber 270 Win. Barrel Length 22". Overall Length 43". Length of Pull 13 3/4". Drop at Comb 5/8".
40 Facts About Elektrostal. Elektrostal is a vibrant city located in the Moscow Oblast region of Russia. With a rich history, stunning architecture, and a thriving community, Elektrostal is a city that has much to offer. Whether you are a history buff, nature enthusiast, or simply curious about different cultures, Elektrostal is sure to ...