Where to Find Downloaded Files in Safari on a Mac and How to Manage Them
After downloading a file, it's not always easy to find where it saved. Here's how to find and manage Safari downloads on your Mac.
While browsing the web in Safari, it’s common to need to download files from different websites. But sometimes it can be a challenge to find where these Safari downloads are saved.
Below are several ways to find and manage Safari downloads on your Mac.

How to Download Files Using Safari
There are different ways to save items from Safari to your Mac , depending on the type of item you want to save. While some items in webpages can’t be downloaded, files, images, software, and apps often come with a dedicated download button. Otherwise, Control-click or two-finger tap an item to save or download it.
It’s best not to download software or apps if they aren’t from a trusted source.
Where to Find Safari Downloads on a Mac
Unless you’ve chosen otherwise, items that you’ve downloaded from Safari automatically go to your Downloads folder. To find this, open Finder and click Downloads from the sidebar or press Cmd + Option + L .
You can change where your downloaded files save, if you want:
- Head to Safari > Preferences .
- Click the General tab. Go to File download location , then choose from the popup. Select Ask for each download if you want to be in more control of each download.
- If you want to select a specific destination, click Other and select your desired folder.
Use the Downloads Button in Safari
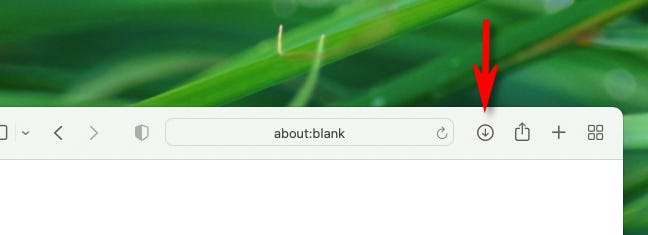
Quickly access your downloads in Safari by clicking the Downloads button, a downward arrow enclosed in a circle icon on the top-right of the Safari window. Note that this won’t appear unless you’ve recently downloaded an item.
Open the Downloads Stack in the Dock
Another way to immediately access your downloaded files is through the Dock. Your recent downloads are often found on the right side of the Dock in a stack. Hover over it to preview the contents or click to expand it.
Open the Downloads Folder in Finder
As we already mentioned, you can also find your Safari downloads using Finder. This is a valuable utility to locate items on our Mac. Simply click the magnifying button on your menu bar and type "downloads," or go to your Dock and click Finder to open the Finder window.
You can usually find the Downloads folder in the sidebar, under Favorites.
How to Manage Your Safari Downloads
There are several ways to manage your in-progress or completed downloads in Safari. To perform these actions, open the Downloads menu in Safari itself. Here’s what you can do:
- Pause Downloads: If you’re currently downloading, click the stop button beside the file name to pause the download, then click the resume button to resume it again.
- Remove a downloaded item: If you want to remove a single item from the list, Control-click the item and select Remove from List . You can also remove all your recently downloaded items by clicking Clear in the top right of the popup.
By default, Safari automatically deletes downloaded items after a day. If you want to change this:
- Go to Safari > Preferences .
- Click General , then go to Remove download list items . Choose from After one day , When Safari quits , Upon successful download , or Manually .
Manage Your Safari Downloads
There is a lot of content you can download on the web, and simply knowing how to download it is usually half the battle. But once you’ve done that, you can use the tips in this guide to find and manage your Safari downloads with ease, even customizing your download preferences to get fuller control over where your files save and when they get deleted.
- a. Send us an email
- b. Anonymous form
- Buyer's Guide
- Upcoming Products
- Tips / Contact Us
- Podcast Instagram Facebook Twitter Mastodon YouTube Notifications RSS Newsletter
How to Access the Download Manager in Safari for iOS
With iOS 13, Apple has brought a similar feature to the mobile version of its Safari browser in the form of the Download Manager. Now, when you choose to download a file, such as an image or document, a little download icon is displayed in the top right corner of the screen.
You can tap the icon to check the status of your downloads, and tapping the magnifying glass next to a file will open its folder location, whether that's on your device or in the cloud.

Get weekly top MacRumors stories in your inbox.
Popular Stories

When to Expect a New Apple TV to Launch

iPhone 16 Plus Rumored to Come in These 7 Colors

Alleged iPhone 16 Battery Details Show Smaller Capacity for One Model

Macs to Get AI-Focused M4 Chips Starting in Late 2024

Apple Event for New iPads Still Considered 'Unlikely' Following Delays

iOS 18 May Feature All-New 'Safari Browsing Assistant'
Next article.

Our comprehensive guide highlighting every major new addition in iOS 17, plus how-tos that walk you through using the new features.

App Store changes for the EU, new emoji, Podcasts transcripts, and more.

Get the most out your iPhone 15 with our complete guide to all the new features.
A deep dive into new features in macOS Sonoma, big and small.

Revamped models with OLED displays, M3 chip, and redesigned Magic Keyboard accessory.

Updated 10.9-inch model and new 12.9-inch model, M2 chip expected.

Apple's annual Worldwide Developers Conference will kick off with a keynote on June 10.

Expected to see new AI-focused features and more. Preview coming at WWDC in June with public release in September.
Other Stories
2 hours ago by MacRumors Staff

6 hours ago by Joe Rossignol

7 hours ago by Tim Hardwick

23 hours ago by MacRumors Staff

1 day ago by Tim Hardwick
Your Mac Remembers Everything You Download. Here’s How to Clear Download History.

Your Mac has a history of everything you’ve ever downloaded, but it’s possible to clear it out. Viewing your Mac download history requires using the Terminal, so it’s unlikely most users would know how to do this. Here’s how to view and clear it.
Viewing Mac Download History
Here is a command that you can simply copy and paste into your Terminal to view your Mac download history:
This isn’t just Safari downloads. Any app that lets you download files will show up here. This can include torrents, cat photos, porn—anything. This happens because your Mac has used a Quarantine Manager since OS X Snow Leopard. It means that your Mac checks each download for safety issues, so you don’t unknowingly download a virus (although it could still happen.)

Clear Mac Download History
Here’s how to delete the history. Again, this is command you can copy and paste into your Terminal:
However, your Mac will continue to keep a history, so you’ll need to run these commands every now and then if you want to clear it out.

Automated Cleaning
As power users, we all like to automate things, so in order to have your Mac automatically clear its history, we can create a Calendar Alarm using Automator. In the sidebar, you can search for “Run AppleScript” and drag it into the work area.
Copy and paste the above command into the window. Basically, you’ll just be replacing the default text that says (* Your script goes here *).

When you save the file, it will automatically create a separate Automator calendar in the Calendar app. This will of course be in the On My Mac section, and not an iCloud calendar. Saving the file will have it run immediately, and only once. But you can edit the event in Calendar to have it run on a specific schedule. I have mine run every Saturday at 11PM.
18 thoughts on “ Your Mac Remembers Everything You Download. Here’s How to Clear Download History. ”
Unfortunately the listed commands don’t quite have the desired effect. I was suspicious that the file size hadn’t changed, so opened it up in a text editor and the raw data was still present despite a zero result from count(*).
The additional command that is required is ‘vacuum’ to tell sqlite to rebuild the database file:
sqlite3 ~/Library/Preferences/com.apple.LaunchServices.QuarantineEventsV2 ‘vacuum LSQuarantineEvent’
Fantastic find! I wouldn’t have thought to check this. Thanks for sharing the info and solution!
vacuum doesn’t seem to benefit me, but after reading this post/comments again years later I realize there are 3 named databases, of which only 2 apply. From terminal: ls -l ~/Library/Preferences/com.apple.LaunchServices.QuarantineEvents* and querying against all three, only the non-V and V2 have table LSQuarantineEvent So by following the code provided you never hit the non-V table, which also appears to contain download history. I updated my script to delete records from both com.apple.LaunchServices.QuarantineEventsV2 and com.apple.LaunchServices.QuarantineEvents
Thanks for the info, but It appears that this may not work with High Sierra (public beta). I’ve tried… sudo sqlite3 ~/Library/Preferences/com.apple.LaunchServices.QuarantineEventsV* ‘select LSQuarantineDataURLString from LSQuarantineEvent’, both with the V* and the V2 and, in both cases, nothing is returned. I haven’t been using any other means to clear my download history, so I’m sure that the data is there, somewhere.
You have an error. There is a file com.apple.LaunchServices.QuarantineEventsV* (with the asterisk) that is empty. People need to replace the splat (asterisk) with a 2 so that it looks for the file com.apple.LaunchServices.QuarantineEventsV2.
It is not a good style to rely on wildcards for system-related services. You should ALWAYS use exact file names. If the name has an asterisk I highly recommend that you should quote or escape it to make sure there is no ambiguity. After a little Google-fu, which I suggest when you write something like this, it appears that if there ever was a problem with the Quarantine services that it will create the V2 file.
Second, if you want to see the list of URLs, you need to change the select statement to:
select LSQuarantineDataURLString from LSQuarantineEvent where LSQuarantineDataURLString != ”;
(those are two single quotes with nothing between them) This will get rid of blanks in the file.
Third, if you are going to do this, I would recommend deleting the file in its entirety. Even though you delete the records in the database, space is not released back to the filesystem. It is still the same file. You can still crawl through the file using other tools and look for the various URLs. Go find an sqlite recovery tool and see what I mean. By deleting the file you release the blocks back to the filesystem where they could be reused. (I also do infosec for a living and have used forensic tools to crawl through sqlite databases looking for incriminating evidence)
If you are using Yosemite, you cannot do a secure delete from the command line because Apple removed the command. If you are using El Capitan, you can use the “srm” command to securely remove the file. There are utilities you can buy to do this or you can use “diskutil” and ask it to do a “secureErase” on “freespace” only and hope that doesn’t destroy things!
The secure delete has other issues, such as its writing over files with zeros and/or a pattern. You cannot do this on an SSD or even a Fusion drive. Aside from burning out the memory, on a Fusion drive, you do not know if data was cached at one point on the SSD portion of the drive. Therefore, a secure delete is not recommended. However, removing the file is a far better option than just deleting database records!
Hi Scott, thanks for the information. I’ll do more testing with those modified commands, as well as the SQLite database and its deletion/impact.
I would not recommend deleting the database files as there is more than just the download data table there.
Andrew, thanks for the tip, but perhaps you could try actually following your own instructions ?
Maybe my brain isn’t plugged in this morning ? But the steps for creating a a Calendars event that runs the clear history script is missing steps / details ?
launch automator, create a calendar event, then on the left pane choose from library / utilities / run AppleScript – drag it to the calendar event pane you created on the right and then you’ll see the code box for his instructions above.
Fascinating. I didn’t find as much there as I would have expected. Does it maybe get cleared out after an upgrade (even a point upgrade)?
There is a timestamp column in the table that contains numbers that look like 452529740.633129. They don’t appear to be large enough to be Unix epoch’s, plus their is a decimal component which epochs usually don’t have. I can’t get strftime to return anything but NULL, no matter what options I try. Anyone know what that is and how to coerce a readable date/time out of it?
Grrrr; “…plus there is a decimal component…”.
It’s possible that upgrades might clear it out; I don’t know for certain though. Also, if I understood your comment correctly, you could try this command in order to see timestamps of each download entry:
sqlite3 ~/Library/Preferences/com.apple.LaunchServices.QuarantineEventsV* ‘select LSQuarantineTimeStamp, LSQuarantineDataURLString from LSQuarantineEvent’ | php -r ‘date_default_timezone_set(“America/Montreal”); foreach (explode(“\n”, file_get_contents(“php://stdin”)) as $l) { preg_match(“/([0-9\.]+)\|(.*)\$/”, $l, $re); echo date(“Y-m-d H:i:s”,strtotime(“2000-01-01 19:00″)+$re[1]).”\t$re[2]\n”; }’
Answering my own question: after a bit more searching, it appears that they are # of days, but they start at 2001-01-01 (initial date of OSX) instead of Unix’s epoch. Adding the # of days in-between allows datetime() to return a valid value. (I still don’t know what the decimal is all about, but it returns a date close enough to reality for my current purposes.)
I’m getting the error in the terminal.
Try this command to see if it will work:
sqlite3 ~/Library/Preferences/com.apple.LaunchServices.QuarantineEventsV* ‘select LSQuarantineDataURLString from LSQuarantineEvent’ > ~/Desktop/QuarantineEventList.txt
This will create a text file on your desktop with the download history.
There we go, thank you. 🙂 Very cool tip. I knew about the file quarantine, I didn’t know it was so accessible. Really enjoying the more power user-oriented articles.
Excellent, Andrew, but I keep getting a ‘too many options’ error. Any idea why that might be the case?
Hi Jamie, at which point are you seeing that error? In the terminal or in Automator?
Leave a Reply Cancel reply
You must be logged in to post a comment.
This site uses Akismet to reduce spam. Learn how your comment data is processed .
- PRO Courses Guides New Tech Help Pro Expert Videos About wikiHow Pro Upgrade Sign In
- EDIT Edit this Article
- EXPLORE Tech Help Pro About Us Random Article Quizzes Request a New Article Community Dashboard This Or That Game Popular Categories Arts and Entertainment Artwork Books Movies Computers and Electronics Computers Phone Skills Technology Hacks Health Men's Health Mental Health Women's Health Relationships Dating Love Relationship Issues Hobbies and Crafts Crafts Drawing Games Education & Communication Communication Skills Personal Development Studying Personal Care and Style Fashion Hair Care Personal Hygiene Youth Personal Care School Stuff Dating All Categories Arts and Entertainment Finance and Business Home and Garden Relationship Quizzes Cars & Other Vehicles Food and Entertaining Personal Care and Style Sports and Fitness Computers and Electronics Health Pets and Animals Travel Education & Communication Hobbies and Crafts Philosophy and Religion Work World Family Life Holidays and Traditions Relationships Youth
- Browse Articles
- Learn Something New
- Quizzes Hot
- This Or That Game New
- Train Your Brain
- Explore More
- Support wikiHow
- About wikiHow
- Log in / Sign up
- Computers and Electronics
- Internet Browsers
- Safari Browser
2 Easy Ways to Check Your Safari Search History
Last Updated: January 17, 2024 Fact Checked
This article was co-authored by wikiHow staff writer, Rain Kengly . Rain Kengly is a wikiHow Technology Writer. As a storytelling enthusiast with a penchant for technology, they hope to create long-lasting connections with readers from all around the globe. Rain graduated from San Francisco State University with a BA in Cinema. This article has been fact-checked, ensuring the accuracy of any cited facts and confirming the authority of its sources. This article has been viewed 154,348 times. Learn more...
Do you need to check your Safari browser history? In a few simple steps, you can easily view all the websites you accessed in the past. You can also search for specific websites in your history and clear any website data you don't want. This wikiHow will teach you how to view and delete your Safari history on iPhone, iPad, and macOS.
Things You Should Know
- On iPhone and iPad, you can click the book icon, then the clock icon to find your Safari history.
- On macOS, you can click the "History" tab, then "Show History".
- You can search for specific websites and clear your history data.
Using iPhone and iPad

- If needed, you can change your General Settings .

- If you're signed in with the same Apple ID to you use to log into your Mac, your Mac's Safari history will appear in this list as well.

- You may have to swipe down on the History page to find it.
- The results will load as you type.

- Tap a time period to delete the history from just that time period. To delete the entire log, select All time .
- You can also swipe left on individual websites in your history, then click Delete .
Using macOS

- Be sure to update Safari.

- If you're logged into the computer with the same Apple ID you use on your iPhone or iPad, you'll also see sites you've visited on those devices.

- A list of matching results from your history will appear. Click a site to load it in Safari.

- Select a time frame from the drop-down menu, then click Clear History .
- You can also delete cookies from Safari .
Expert Q&A
You Might Also Like

- ↑ https://support.apple.com/guide/safari/search-your-browsing-history-ibrw1114/mac
- ↑ https://support.apple.com/en-us/HT201265
About This Article

iPhone/iPad: 1. Open Safari . 2. Tap the book icon. 3. Tap the clock button. macOS: 1. Open Safari . 2. Click History . 3. Click Show All History . Did this summary help you? Yes No
- Send fan mail to authors
Is this article up to date?

Featured Articles

Trending Articles

Watch Articles

- Terms of Use
- Privacy Policy
- Do Not Sell or Share My Info
- Not Selling Info
wikiHow Tech Help Pro:
Level up your tech skills and stay ahead of the curve
We explain and teach technology, solve tech problems and help you make gadget buying decisions.
How to view and Manage Safari downloads on iPhone and iPad
Safari is usually easygoing, whether using Safari Tabs , Private browsing , or even changing the default search engine . However, finding and managing Safari downloads may not be immediately apparent to most users. But why fear, when you have this guide by your side?

Now, effectively managing Safari downloads on iPhone or iPad is crucial for organizing files and optimizing storage space. It’s wiser to understand where the downloads are saved, how to change the download location, how to clear the download history and more. So, just read along.
How to Download Files On iPhone From Safari
While the process might differ slightly depending on the website’s UI, the overall premise is the same. Browse to the file you want to download → tap the download icon → tap Download to confirm the action.

A downloading icon will appear next to the address bar as the download starts. You can click on it to see the download status.
Although if you don’t have to have an actual download link or button to initiate a download in the first place. For instance, you came across a link to a PDF that you can open in the browser. Instead of downloading using the Share Sheet, you can simply hold and press the link or image and then select Download Linked File.

Pause or Resume the download
Downloading a big file can make a severe dent in cellular data. However, the great news is that you can pause the download and resume it once you have a Wi-Fi connection, saving your precious mobile data .
To pause a download, tap the Download button → select Downloads → tap the X icon next to the downloading file. And to resume, simply tap the refresh icon.

Note : Do not close the original Safari window as then you’ll have trouble resuming the download.
Where Do Safari Downloads Go On iPhone
The first order of business after downloading a file from Safari is to check where your files are downloaded. To do so, tap the download icon or AA icon from the status bar → select download → tap the search icon next to the downloaded file.

By default, Safari download manager on iPhone stores the files in the Download folder in the Files app. So, to see your downloaded files, go to Files → Browse → Downloads.
Alternatively, to confirm or to customize the Safari download location , you can go to Settings → Safari → Downloads. Notably, if you prefer saving downloaded files to a different location, simply select a preferred option.

View Safari Download History on iPhone
Whether to find a previously downloaded item or to keep track of your downloaded files, here’s how you can access Safari downloader history on iPhone or iPad.
Open the Safari browser, tap the AA icon or the download icon → select Downloads → here, you’ll see a complete list of files downloaded recently.

Clear Download History
There are multiple ways to remove all or individual files from your Safari download history.
- Delete individual files – Launch Safari → AA icon → Downloads → Slide left the file you want to delete → Delete.
- Clear all your download history – Launch Safari → AA icon → Downloads → Clear.

Note : This is just deleting the download history, not the actual files from your iPhone. So, don’t expect much space saving after the history is cleared.
Auto-Delete Safari Download List
If you don’t want the hassle of manually deleting the Safari Download list, you can automate the process. To do so, go to Settings → Safari → Downloads → select ‘Remove Download list items’ → select a preferred option.

FAQs For Safari Download Manager on iPhone and iPad
Yes, you can download various types of files in Safari on your iPhone, including documents, images, videos, audio files, and more. Safari supports a wide range of file formats for downloading.
In most cases, you can download files from any website using Safari on your iPhone. However, some websites may have restrictions or prevent file downloads for security or copyright reasons.
Safari displays the download progress in the address bar as a circular icon that fills up as the download completes. You can monitor the progress of your download by keeping an eye on this icon.
Yes, Safari supports simultaneous downloads. You can initiate multiple file downloads and monitor their progress individually.
See, Find, and View Downloads on iPhone
Here, now that we have made it easier to manage Safari downloads on iPhone and iPad, we hope it’s a smooth sailing experience ahead. In case you have any other questions regarding Safari and any of its features, feel free to connect with us via the comments section.
Was this helpful?
Last updated on 01 July, 2023
The above article may contain affiliate links which help support Guiding Tech. However, it does not affect our editorial integrity. The content remains unbiased and authentic.

The article above may contain affiliate links which help support Guiding Tech. The content remains unbiased and authentic and will never affect our editorial integrity.
DID YOU KNOW

Dilum Senevirathne
Dilum Senevirathne is a freelance tech writer specializing in topics related to iOS, iPadOS, macOS, Microsoft Windows, and Google web apps. Besides Guiding Tech, you can read his work at iPhone Hacks, Online Tech Tips, Help Desk Geek, MakeUseOf, and Switching to Mac.
More in iOS

How to Turn Off Auto Play in Apple TV App on iPhone, iPad, and Mac

Top 7 Fixes for Apple Music Starts Playing by Itself on iPhone
Join the newsletter.
Get Guiding Tech articles delivered to your inbox.
How to View and Delete Safari Download History on a Mac

Introduction
When using the Safari browser on a Mac, it’s simple to examine a list of things you’ve downloaded in the past and, if required, clean that download history. Here’s how to go about it.
To begin, launch the Safari program on your Mac. Look to the right of the address bar in any Safari window for an icon that looks like a downward-pointing arrow in a circle. If you see it, click it or press Option+Command+L to activate it. (If you don’t see the arrow symbol, Safari has no download history to show.)
When the download list appears, you’ll see a list of files you’ve recently downloaded. When you store some media items in Safari on Mac, such as photographs, music, and videos, Safari does not put them in the download history list, so you won’t see them there.
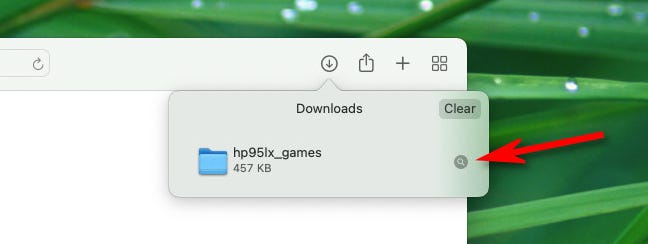
To view the location of a downloaded file in Finder, right-click it in the list and select “Show in Finder.” Alternatively, click the little magnifying glass icon next to the file.
Following that, a Finder window will appear above your Safari window. The downloaded file will be marked in it.
By default, Safari unzips downloaded files and deletes the original ZIP files. To disable this, open Safari Preferences, go to “General,” and uncheck “Open’safe’ files after downloading.”

To delete a file from the list, right-click on it and choose “Remove From List.” Click the “Delete” button in the upper-right corner of the Downloads pop-up window to clear the complete list of downloads.

Safari will clear the Downloads list and remove the downloads (arrow) symbol from the toolbar. Click the downloads icon or press Option+Command+L on your keyboard to return to the downloads list if it hasn’t been cleared lately. Have fun downloading!
- How to Restore the Windows 10 Taskbar Weather Widget
- How to Change the Name of Your Google Account
- How to Disable the Windows 10 or Windows 11 Lock Screen
- How to Develop a Positive Mental Attitude
- How Online Attackers “Hack Accounts” and How to Protect Yourself
- How to Turn Off Shared Albums on iPhone

Hi, I'm Frank, a self-taught programmer and the founder of Navhow. My coding journey began in 2008, and since then I've become proficient in a variety of programming languages, including PHP, Java, JS, and Objective-C. With a degree in marketing from Northeastern University, I bring a unique blend of technical expertise and business acumen to my work. I've had the pleasure of launching a website that grew to over one million monthly visitors, and I'm always looking for new ways to innovate and create solutions that improve people's lives. Thanks for visiting my website, and feel free to get in touch!
You may also like
How to soften hard water naturally, how to protect a text file with a..., how to reinstall windows 11’s microsoft store, how to use iphone and android to view..., how to change and adjust discord fonts, how to change the icons in windows 11.
Navhow is dedicated to teaching people all over the world how to do anything.
- Entertainment
- Privacy Policy
- Terms of Use
- GDPR Policy
The Best How-To Newsletter Anywhere
©2022 Navhow , All Right Reserved
How to manage Safari downloads on iPhone and iPad

While surfing the web or accessing our email, we tend to download files on our iPhone and iPad. Initially, it all looks good. Eventually, with the files piling one after another, you start feeling the need to manage Safari downloads.
But wait… don’t rush to a third-party download manager. Managing your download, that too in a separate file manager app, is a tricky and daunting business. So, here’s good news, with iOS 13 and the changes made to Safari, you can manage your chaos (or should I say Downloads?) easily!
Here are some quick ways to manage your Safari downloads on your iPhone and iPad effortlessly. Let’s begin!
How to download files in Safari on iPhone
- Pause/Resume/Cancel your downloads in Safari
Change default Safari downloads location on iPhone
Delete downloaded files in safari, auto-delete safari downloads on your iphone.
- Locate the file/item you want to download and tap it.
- Confirm download when prompted through the popup window.

Note : There’s also an alternate way to access your downloads. You can go to the Files application and select Downloads .
How to manage your downloads in Safari on the iPhone
Pause/resume/cancel your downloads in safari.
- Tap the download icon at the top right corner of Safari.
- Tap the ‘X’ symbol to pause or cancel your download.

Note : You can directly reach the downloaded location of a file by tapping the ‘ Search ‘ icon next to the file name.
- In the Settings app, tap Safari and select Downloads .

Note : iCloud Drive will let your downloads be available across all connected devices, whereas the iPhone/iPad option will only save the file to the respective device.
However, if you want to delete the file permanently, there are two ways to do it.
- Tap the arrow icon and swipe left the file you want to delete.

You can also choose to auto-delete files.
- Open the Settings app and tap Safari .

- Here, you have three options : After one day, Upon Successful Download, or Manually.

I hope the steps were quick, easy, and helpful. In case you have any other trouble, feel free to connect with me in the comments below. For further help related to the Safari browser, consider reading Dhvanesh’s guide on How to troubleshoot common Safari problems .
Read more:
- How to install Safari extensions on Mac in just 4 easy steps
- Safari Not Opening t.co Short Links from Twitter? Quick Fixes
- Restore Deleted Safari Bookmarks on Mac
- How to disable Safari tab previews on Mac (Quick guide)
🗣️ Our site is supported by our readers like you. When you purchase through our links, we earn a small commission. Read Disclaimer .

Leave a Reply Cancel reply
Your email address will not be published. Required fields are marked *
Save my name, email, and website in this browser for the next time I comment.
Clear the history, cache, and cookies from Safari on your iPhone, iPad, or iPod touch
Learn how to delete your history, cookies, and cache in Settings.
Delete history, cache, and cookies
Clear cookies and cache, but keep your history, delete a website from your history, block cookies, use content blockers.
Go to Settings > Safari.
Tap Clear History and Website Data.

Clearing your history, cookies, and browsing data from Safari won't change your AutoFill information.
When there's no history or website data to clear, the button to clear it turns gray. The button might also be gray if you have web content restrictions set up under Content & Privacy Restrictions in Screen Time .
To visit sites without leaving a history, turn Private Browsing on .
Go to Settings > Safari > Advanced > Website Data.
Tap Remove All Website Data.
When there's no website data to clear, the button to clear it turns gray. The button might also be gray if you have web content restrictions set up under Content & Privacy Restrictions in Screen Time .
Open the Safari app.
Tap the Edit button, then select the website or websites that you want to delete from your history.
Tap the Delete button.
A cookie is a piece of data that a site puts on your device so that site can remember you when you visit again.
To block cookies:
Go to Settings > Safari > Advanced.
Turn on Block All Cookies.

If you block cookies, some web pages might not work. Here are some examples:
You will likely not be able to sign in to a site even when using your correct username and password.
You might see a message that cookies are required or that your browser's cookies are off.
Some features on a site might not work.
Content blockers are third-party apps and extensions that let Safari block cookies, images, resources, pop-ups, and other content.
To get a content blocker:
Download a content blocking app from the App Store.
Tap Settings > Safari > Extensions.
Tap to turn on a listed content blocker.
You can use more than one content blocker. If you need help, contact the app developer .
Information about products not manufactured by Apple, or independent websites not controlled or tested by Apple, is provided without recommendation or endorsement. Apple assumes no responsibility with regard to the selection, performance, or use of third-party websites or products. Apple makes no representations regarding third-party website accuracy or reliability. Contact the vendor for additional information.

Related topics
Explore Apple Support Community
Find what’s been asked and answered by Apple customers.
Contact Apple Support
Need more help? Save time by starting your support request online and we'll connect you to an expert.
- PC & Mobile
How To View History in Safari on a PC, Tablet, or Mobile Device
Lee Stanton Lee Stanton is a versatile writer with a concentration on the software landscape, covering both mobile and desktop applications as well as online technologies. Read more July 19, 2022
Device Links
- Device Missing?
Safari for iOS provides a convenient way to keep track of your browsing history. You can use it to call up web pages quickly you’ve visited. You can easily go down the rabbit hole when performing searches online. This makes it difficult to remember exactly where you found a valuable piece of information. Reviewing your browsing history can retrace your steps, saving you the arduous task of finding the data from scratch. This article covers how to see your history in Safari. Check out how to do that below.

How to View History in Safari on an iPhone
Safari stores your browser activity, making it possible to revisit sites at a later date. You could either view your most recent history or check out the entire list of previously visited websites. This is how to do that.

You have now accessed your recent history on Safari.
If you would like to view your complete Safari browsing history, here’s how to do that.

You’ve now accessed your Safari browsing history.
How to View History in Safari on an iPad
Safari allows users to keep track of their browsing history. This feature can then be used to revisit sites that might be of interest. You could either view recent history or peruse all your browsing data. The steps listed here detail how to do that.

You have now viewed the recent history on your iPad.
To view your complete browsing data, follow the steps outlined here.

How to View History in Safari on a Mac
Your Safari browsing history allows you to revisit sites you viewed in the past. You can even use the search tool so that you don’t have to scroll through the entire list of results to find what you are looking for. Here’s how to view your browsing history on an iPhone.

- Click on it to open the page in your browser.
You can now see your history in Safari. If you signed in to your device using the same Apple ID that you use on your other Apple devices, that history would also be displayed on your Mac.
Can You View History From Private Browsing?
Private Browsing is a feature that prevents Safari from storing information on sites you have visited. It ensures there’s no record of your online activity, including passwords or autofill information. It also prevents iCloud from storing data on any tabs that you open. To provide an additional layer of privacy, Safari prevents sites and content providers from tracking you. Any cookies you might have picked up are deleted once you close the tab.
This means that Safari doesn’t store your browsing history when you activate Private Browsing. You will therefore be unable to view it in the future.
How to Clear History in Safari
If your Apple device is lagging or otherwise misbehaving, you might consider clearing your browsing data. This is how to do that.

Your browsing data will now be removed from your device.
Retracing Your Steps
Like many web browsers, Safari stores information on websites you’ve visited. This data can come in handy when you want to go back to a particular site. This guide shows you how to retrieve the browsing history stored on your Apple devices.
Have you viewed your browsing history on Safari? What did you think of the process? Let us know in the comments below.
Related Posts

Disclaimer: Some pages on this site may include an affiliate link. This does not effect our editorial in any way.

Parth Shah February 29, 2024

Lee Stanton February 23, 2024

Lee Stanton February 19, 2024
Send To Someone
Missing device.
Please enable JavaScript to submit this form.
- Editorial Process
- Why Trust Us?
- Affiliate Linking Policy
- Privacy Policy
- Terms of Service
Weekly Must-Reads View All
7 things to do if you spilled water on your macbook.
Quick steps to save your MacBook from water damage
How to Boot Your Mac Into Verbose Mode: 4 Best Ways
Boot your Mac into Verbose Mode with this step-by-step guide
How to Fix Your Mac Shutting Down Randomly: 16 Fixes to Try
Troubleshoot random shutdowns on Mac with effective solutions
How Much Space Does macOS Take On Your Mac?
Understand macOS size and analyze your Mac's storage usage
Popular Topics
- What to Do With Your Old MacBook? 13 Useful Ways to Reuse an Old Mac
- What Is the MacBook Flexgate Issue and How to Fix It
- What Is the MacBook Flexgate Issue
- Uninstall Java
- Safely Transfer Files from Mac to Mac
- Safari Bookmarks Disappeared on Mac: 10 Best Ways to Restore Them
- Repairing disk permissions
- Old MacBook
Trending Now View All

- Mac Maintenance
How to Delete Downloads on Mac to Free Up Space Quickly
Hashir Ibrahim
Reviewed by
Last updated: December 18, 2023
Expert verified
To delete downloads on Mac and free up space:
- Open Finder, navigate to Downloads , select files, move them to Bin, and then empty the Bin.
- Click the Apple menu > About This Mac > More Info . Scroll to Storage and click Storage Settings . Click the small i next to Documents, navigate to the Downloads tab, select files to delete, and click Delete .
- Clear download history in Safari, Chrome, or Firefox by accessing browser settings and erasing download records.
If you’re like me, your Downloads folder is probably a mess. My folder is often full of hundreds of unneeded files. I’ve realized that too many downloads not only hog storage space but also slow down the system. So, I’ve learned some quick ways to clear out downloads on my Mac. In this guide, I’ll share these easy tips to help you tidy up your Downloads folder.
Before We Begin
To free up storage on your Mac, delete unused apps and programs. Download MacKeeper and use its Smart Uninstaller to identify unnecessary apps, plugins, and leftover files and remove them in one click.
How to Find Downloads on Mac
Before you delete downloads on Mac, you need to track them down. If you’re not sure where are downloads on your Mac, I’ll share the location of your downloaded files in the sections below.
Where to Find the Downloads Folder on Mac
The Downloads folder on Mac is located in the user’s Home directory. To access it, you can follow these steps:
- Open the Finder on your Mac.

- Click Go in the menu bar and select Downloads .

- Alternatively, click Go and select Home .

- You should now see your home directory, which includes a folder named Downloads .

You can also access the Downloads folder directly by clicking the Downloads option in the Favorites section of the Finder window’s left sidebar.

1. In Safari
If you’re using Safari to download files, here’s how to find your downloads folder:
- Open Safari, click Safari in the menu bar, and select Settings from the dropdown menu.

- Under the General tab, look for the File download location option to see where your downloads are being saved.

2. In Google Chrome
If you use Google Chrome to download files, this is how you can find your downloads folder:
- Open Chrome and click Chrome in the menu bar at the top of your screen. Then, select Settings from the dropdown menu.

- The Settings will open in a new tab. Click Downloads in the left sidebar to see where your downloads are being saved. You can see the download path on the right-hand side.

- Click Change if you want to modify the Downloads location. You can also toggle on the Ask where to save each file before downloading option here.

3. In Firefox
Here’s how to find the downloads location on Firefox:
- Open Firefox on your Mac and click the three horizontal lines in the top-right corner of the browser window to open the Firefox menu.

- From the menu, select Settings . This will open the Firefox Settings window.

- In the left sidebar of the Settings window, click General . Scroll down to the Files and Applications section.
- Under Files and Applications , you’ll see the Downloads heading and next to it, you will see the current location where Firefox saves your downloaded files.

- If you want to change the downloads location, click the Choose button and select a new folder or location where you want Firefox to save your downloaded files.

How to Delete Downloads on Mac Manually
Now that you know where to find downloads on your Mac, follow these steps to delete downloads manually:
- Open Finder by clicking its icon in the Dock.
- Click the Downloads folder in the left sidebar of Finder under the Favourites section.

- Select the files or folders you want to delete. You can select multiple items by holding down the Command ⌘ key and clicking each item.

- Move the items to the Bin by pressing Command ⌘ + Delete on your keyboard or dragging the selected items to the Bin icon in the Dock. You can also right-click the selected files and select Move to Bin from the context menu.

- To permanently delete the items, empty the Bin. You can do this by right-clicking the Bin icon and selecting Empty Bin or by opening the Bin and clicking the Empty button in the upper-right corner.

Be careful when deleting downloads on your Mac, as they will be permanently deleted once you empty the Bin. If you accidentally delete an important file, try using Time Machine or a data recovery tool to restore the file.
- Click the Apple menu and select About This Mac .
- Click More Info .

- In the new window, scroll down to the Storage section and click the Storage Settings button.

- Click the small i icon next to Documents .

- Navigate to the Downloads tab in the new window.
- Select the files you want to delete from the Downloads folder and click Delete .

- Click Delete on the pop-up to confirm your decision.
How to Remove Your Browser Download History on Mac
If you want to completely erase all evidence of your downloads on a Mac, simply removing the downloaded files is not enough. You also need to clear your browser history and list of downloads, which retain information on your downloaded files.
Clearing your browsing data will also sign you out of most websites and delete some saved information, such as auto-fill form data. So, you may need to log in again or re-enter some information after clearing your browsing data.
The steps to remove your browser download history on a Mac vary for each browser. Below, I have shared the steps for Safari and Google Chrome:
Remove Download History on Safari
Here are the steps to delete Safari download history on Mac:
- Open Safari on your Mac and click Safari in the top menu bar. Click Clear History… in the dropdown menu.

- In the pop-up window, select the time range you want to clear the download history for. You can choose from the last hour, today, today and yesterday, or all history.

- Click Clear History to delete your Safari download history.

- This will remove all downloaded files from Safari’s history.
Remove Google Chrome Download History on Mac
To remove the download history in Google Chrome on a Mac, follow these steps:
- Open Google Chrome on your Mac and click the three vertical dots in the upper-right corner of the Chrome window.

- Hover your mouse over More Tools and click Clear browsing data… in the left menu.

- In the Advanced tab, check the box next to Downloads . You can also choose to clear other browsing data if you want to. For example, you can clear your browsing history, cookies, and cached images and files.
- Click Clear data to delete your Chrome download history.

- Next, go to Window in the menu bar and select Downloads .

- Click the three dots and select Clear all .

This will delete all downloaded files from Chrome’s history.
Remove Firefox Download History on Mac
To remove the Firefox download history on your Mac, you can follow these steps:
- From the menu, select Settings to open the Firefox Settings window.
- In the left sidebar of the Settings window, click Privacy & Security .

- Scroll down to the History section and click the Clear History button.

- In the pop-up window that appears, you can choose the time range for which you want to clear the download history. You can select options like “Last hour,” “Last 2 hours,” “Last 4 hours,” “Today,” or “Everything” to remove the entire history.
- Make sure to enable the checkbox next to Downloads to specifically remove the download history.
- If you also want to clear other types of browsing history, such as browsing and search history, you can enable the respective checkboxes.
- Once you have selected the desired options, click on the Clear Now button.

Firefox will then remove the download history based on the selected time range. After clearing the history, the download records will no longer be visible in Firefox.
Clearing the download history will not delete the actual downloaded files from your computer. It only removes the record of the downloads within Firefox. If you also want to delete the downloaded files, you can manually locate and delete them from the Downloads folder on your Mac.
Get Rid of Leftovers on Your Mac With MacKeeper
Even if you delete unnecessary download files from Mac, some leftovers and log files stay hidden in your system’s corners. This takes up valuable disk space and slows down your Mac. With MacKeeper, you can easily remove these leftover files and reclaim your Mac’s storage capacity.
Here are the steps to remove unused and unnecessary apps with leftovers from your Mac using the Smart Uninstaller:
- Download and install MacKeeper on your Mac
- Open MacKeeper and click Smart Uninstaller under the Cleaning section.

- Click Start Scan .

- MacKeeper will find unused apps on your Mac. Select the unused apps you want to remove and tap Remove Selected .

- Tap the Remove button on the pop-up to confirm the deletion.

- This will remove the selected apps from your Mac, and you’ll get a Removal Completed message on your screen. Click Rescan to run the scan again.

- Click Leftovers in the left sidebar.

- Select the leftover you want to delete and click Remove Selected .

- Click Remove on the pop-up.

- Now, do the same for Plugins, Widgets, Preference Panes, and Browser Extensions.
What MacKeeper Can Do?
Besides deleting download leftovers on Mac, MacKeeper can clear temp files on your Mac , delete the cache files , and remove duplicate files . To learn more about its features, read my in-depth MacKeeper review .
Manage Downloads on Mac to Avoid Clutter
To avoid clutter in your downloads folder, here are some tips to help you manage your downloads on Mac :
1. Use Smart Folders
Did you know that 30% of working adults have 100+ files on their desktops ? But your Mac has a handy feature that can save you from this digital clutter – Smart Folders.
This built-in feature allows you to group files automatically based on certain criteria. So, instead of having hundreds of unneeded files on your desktop or Downloads folder, create a Smart Folder and set up rules to automatically sort your downloads based on file type, date, or other criteria.
Here’s how to create a Smart Folder for your downloads:
- Open Finder and go to File > New Smart Folder .

- In the search bar, type Downloads as the search location.

- Click the + icon to add a rule.
- Choose the criteria you want to use to sort your downloads. For example, you can select Kind and choose the file types you want to group.

- Add additional rules if needed and click Save to create the Smart Folder.

- Your Smart Folder will now appear in the sidebar of Finder, and any new downloads matching your criteria will automatically be added to the folder.
2. Organize Your Downloads Manually
Organizing your downloads manually on a Mac can keep it clutter-free and make it easier to locate files when you need them. Here are some steps to help you get started:
- 📁 Create a Folder Structure : Create a folder hierarchy to categorize your downloads. To do this, open a new Finder window and go to the Downloads folder. To create a new folder, press Command ⌘ + Shift ⇧ + N and rename it. You can create subfolders within these to further categorize your files.
- 📝 Rename Files : Rename downloaded files to something descriptive and meaningful, such as Documents, Images, Software, Videos, etc.
- ➡️ Move Existing Downloads : Go through your existing Downloads folder and move each file into the appropriate category folder you created. To move a file, click and drag it to the desired folder.
- 🌐 Set Your Web Browser to Prompt for Download Locations : Most web browsers download files directly to the Downloads folder. To have better control over where files are saved, change your browser settings to prompt for a download location each time.
- 🧹 Regularly Review and Clean Up : Review your Downloads folder and the folder structure you’ve created to delete or move files you no longer need. This will help prevent clutter and make it easier to locate important files.
Common Problems When Deleting Downloads on Mac
While deleting downloads on a Mac, you might encounter issues preventing you from getting rid of the files. Here are the most common problems you may face, along with their solutions:
- 🚫 Permission Issues : Sometimes, you may not have the necessary permissions to delete a file, especially if it was downloaded from the internet or received from another user. To resolve this issue, try changing the permissions for the file by selecting it and choosing Get Info from the File menu. From there, you can change the permissions to delete the file.
- 🔄 File in Use : If the file you’re trying to delete is currently being used by another application, you may not be able to delete it. To resolve this, close the application or force quit it. If you’re unsure which application uses the file, log out of your Mac and back in again. This will close all open applications and allow you to delete the file.
- 🔒 Locked Files : Some files may be locked, preventing you from deleting them. This is often the case with system files or files critical to your Mac’s operation. You can try restarting your Mac to release any locked files.
- 💨 Deleted Files Reappearing : Occasionally, you may delete a file only to find it reappears later. This could be due to a backup or syncing system restoring the file automatically. You can disable syncing and turn off backup for a while and try deleting files again.
- 💥 Corrupt Files : Sometimes, a file may be corrupt or damaged, making it impossible to delete. To resolve this issue, you can repair the file using Disk Utility . To access Disk Utility, go to Applications > Utilities > Disk Utility . From there, select the file and choose First Aid to repair any issues.
- 📀 The File is Stored on an External Device : If the file is stored on an external device such as a USB , external hard drive , or SD card , you may encounter issues when trying to delete it. To fix this issue, ensure the external device is properly connected to your Mac. If nothing else works, try formatting the drive to resolve.
- ❌ File Too Large to Delete : Some files, especially large ones like video files or disk images, can take a long time to delete or may even cause your Mac to freeze up . Try deleting the file in smaller chunks or use a third-party app to delete large files quickly.
- 🖥️ System File and Cannot be Deleted : Some files on your Mac are critical to the operating system and cannot be deleted without causing problems. If you encounter a system file you can’t delete, it’s best to leave it alone.
Final Thoughts on Deleting Downloads on Mac
Deleting downloads can improve your system performance and free up space on your Mac . Now that you know how to delete downloads on Mac efficiently, you may want to consider other methods to improve your device’s speed and performance. Here are a few tips to get you started:
- Uninstall applications on your Mac completely by removing their leftover files.
- Free up space on your hard drive by clearing the cache on your Mac .
- Optimize your device’s performance by freeing up RAM on your Mac .
Frequently Asked Questions
How can i delete downloads on mac without emptying the bin.
To delete downloads without emptying the Bin, open the Bin folder and select the files or folders you want to delete. Then, right-click and select Delete Immediately , or press Command ⌘ + Option ⌥ + Delete on your keyboard.
How can I delete multiple downloads at once?
To delete multiple downloads simultaneously, open the Finder application on your Mac and click Downloads in the left sidebar. Select the files or folders you want to delete, press Command ⌘ + Delete on your keyboard, or drag the items to the Bin.
Why should I delete downloads on Mac?
You should delete downloads on Mac to free up valuable storage space and improve the overall performance of your device. Keeping your downloads folder organized and clutter-free allows you to easily find the files you need and avoid slowing down your Mac.
Can I recover deleted downloads on Mac?
Yes, you can recover deleted downloads on Mac using a data recovery tool. However, acting quickly is essential because the longer you wait, the less likely you are to recover the files. It’s also good to back up your files regularly to avoid data loss.

I'm Hashir, a tech journalist with a decade of experience. My work has been featured in some of the top tech publications like MakeUseOf and MakeTechEasier. I have a bachelor's degree in IT, a master's in cybersecurity, and extensive knowledge of Apple hardware, specifically MacBooks. As the senior writer at MacBook Journal, I write in depth guides that help you solve any issues you have with your mac and unbiased reviews that help you make the right buying decisions.

Hi there! I'm Ojash, a tech journalist with over a decade of experience in the industry. I've had the privilege of contributing to some of the world's largest tech publications, making my mark as a respected Mac expert. My passion lies in exploring, using, and writing about MacBooks, and I enjoy sharing my expertise to help others make informed decisions and get the most out of their MacBook experience. Join me as we delve into the fascinating world of MacBooks together!
You May Also Like

How to Clean Junk Files on Mac: 9 Quick and Easy Ways
Remove junk files and clutter to efficiently free up Mac storage

How to Clone Your Mac’s Hard Drive: 5 Quick Steps
Written by Hashir Ibrahim Reviewed by Ojash Last updated: September 6, 2023

How to Remove Toolbars from Your Mac Browser: Safari, Chrome, & Firefox
Written by Pawan Singh Reviewed by Ojash Last updated: September 2, 2023 Expert

How to Block Websites on Safari on Mac: 5 Best Ways
Surf safely by blocking harmful sites on Safari with ease

How to Check Your iPhone’s Download History
Are you curious to know what apps you’ve downloaded on your iPhone? With iOS 11, Apple has made it easier than ever to keep track of your download history. Whether you want to check which apps have been recently downloaded or find an app you may have deleted, this guide will walk you through the process.
First, open the App Store on your iPhone and tap the profile icon in the top right-hand corner. From here, select ‘Purchased’ from the list of options. This will bring up a list of all the apps that have been downloaded to your device since you frst set it up.
At the top of this page, there are several tabs that will allw you to view different categories of purchased apps. You can select ‘All’ to see everything that has been downloaded or ‘Not on This iPhone’ if you want to find an app that was previously installed but is no longer available on the device.
You can also sort your downloads by date. Tap ‘Last 90 Days’ if you want to view only recently downloaded apps or select one of the oher time periods if needed. This makes it easy to find recently installed or updated applications quickly and easily.
If thre is an app shown in the list that isn’t currently installed on your device, simply tap it and follow the prompts to reinstall it directly from this page. Additionally, if there are any updates available for any of your previously installed applications, they can be quickly identified and updated as needed from this screen as well.
By taking advantage of these features, keeping track of what apps have been downloaded on your iPhone has never been easier!
Viewing Download History
Yes, you can view your download history on Android. To do so, open the Google Play Store and tap either the “Installed” or “Library” tab. From there, you will see a list of all apps you have downloaded from Google Play Store. You can also view any apps you have uninstalled from this list. Additionally, you can filter the list to show only apps that are currenty installed or only apps that have been recently updated.

Finding App Download History
To find your app download history, open the Google Play Store app on your device. Tap the Menu icon (upper-left) and select My apps & games. From here, tap the Library tab to view all of your installed apps. You can view your download history by tapping on ‘Installed’ in the top rght corner, which will show all apps you’ve downloaded, listed in reverse chronological order. Additionally, you can also view your download history for a specific app by selecting it from your Library, then tapping the ‘View details’ link at the bottom of the page. This will take you to the App Details page where you can find a list of all versions of the app you’ve downloaded and when they were installed.
Can My Downloads Be Tracked?
Yes, your downloads can be tracked by your ISP. Every time you download a file from the internet, it must pass through your ISP’s gateway servers. This means that your ISP can track the websites you visit and any files you download. Additionally, some ISPs may keep records of downloads for a certin amount of time, allowing them to track any downloads made within that timeframe.
Viewing Download History in Safari
To find your download history on Safari, look to the rght of the address bar for an icon that looks like a downward-pointing arrow in a circle. If you see it, click it or press Option+Command+L. Doing so will open the Downloads window, which shows a list of all your recent downloads. The list is sorted by date, with the most recent downloads at the top. You can also search for specific downloads or sort them by file type. To open a download from the list, just double-click it or select it and press Command+O. To delete a download from the list, select it and press Command+Delete.
Retrieving Deleted App History on an iPhone
If you’re looking to view your deleted app history on an iPhone, it’s easy to do. Firstly, open the App Store and tap on your profile photo at the top right of the screen. From there, select ‘Purchased’ from the menu options. This will bring up a list of all the apps you’ve ever downloaded, including ones that have been deleted.
To restore multiple apps at once, simply tap the cloud icon next to each app that you want to restore. Once the apps have finished downloading, they’ll apear on your home screen as normal. If you’re only looking for one particular app, then you can use the search bar at the top of this page and type in its name.
You can also view your deleted apps by going into Settings > General > iPhone Storage and scrolling down to ‘Offload Unused Apps’. This will show which apps have been offloaded (i.e. removed from your device) but are still availabe in iCloud so they can be re-downloaded easily when needed.
Finally, if none of thee methods work for you then it’s possible that your app data has been completely wiped from iCloud – in which case it won’t be recoverable unless you have a backup of some kind (such as iTunes or iCloud).
In conclusion, it is easy to view your iPhone download history. All you need to do is open the App Store, then select the profile icon in the top right corner of the screen. Selecting ‘Purchased’ from the menu will show you all of your previously downloaded apps and games. This allows you to quickly check what apps you have downloaded in the past, as well as easily re-download them if needed.
Related posts:

Sanjeev Singh
How To Delete Downloads On Safari

- Software & Applications
- Browsers & Extensions

Introduction
Safari is a popular web browser known for its sleek interface and seamless user experience. As you browse the internet, Safari conveniently saves your downloaded files in a designated folder, making it easy to access and manage your downloads. However, over time, this folder can become cluttered with files you no longer need, taking up valuable storage space on your device. Fortunately, Safari provides a simple and efficient way to delete these downloads, allowing you to keep your browsing experience organized and clutter-free.
In this guide, we will walk you through the step-by-step process of deleting downloads on Safari. Whether you're using Safari on a Mac, iPhone, or iPad, the methods for managing your downloads remain consistent across devices. By following these instructions, you can quickly declutter your downloads folder and free up space on your device.
So, if you're ready to streamline your browsing experience and tidy up your downloads folder, let's dive into the simple yet essential steps for managing your downloads on Safari. Whether you're looking to remove individual files or clear your entire downloads history, we've got you covered. Let's get started!
Step 1: Open Safari
To begin managing your downloads in Safari, the first step is to open the Safari web browser on your device. Whether you're using a Mac, iPhone, or iPad, the process of accessing your downloads remains consistent across these platforms.
If you're using a Mac, you can easily open Safari by clicking on its icon in the dock or by searching for it using Spotlight. Once Safari is launched, you'll see the familiar browser interface, complete with the address bar, tabs, and toolbar.
On iPhone or iPad:
For iPhone or iPad users, locating and opening Safari is as simple as tapping on the Safari icon on your home screen. Upon launching the Safari app , you'll be greeted by the browser's clean and intuitive interface, designed to provide a seamless browsing experience on your mobile device.
Navigating Safari:
Once Safari is open, you can navigate to the next steps for managing your downloads. Whether you're looking to delete individual files or clear your entire downloads history, accessing the downloads interface in Safari is the crucial first step in decluttering your downloads folder.
By opening Safari, you've taken the initial step towards organizing and optimizing your browsing experience. With Safari at your fingertips, you're ready to delve into the next steps for effectively managing your downloads and maintaining a tidy browsing environment.
Step 2: Access Downloads
Accessing your downloads in Safari is a straightforward process that allows you to view and manage the files you've saved from the web. Whether you're looking to delete specific downloads or clear your entire download history, accessing the downloads interface in Safari is the essential next step in streamlining your browsing experience.
To access your downloads in Safari on a Mac, you can follow these simple steps:
Click on the "Safari" Menu: At the top-left corner of your screen, click on the "Safari" menu in the menu bar. This will reveal a dropdown menu with various options.
Select "Preferences": From the dropdown menu, select "Preferences." This will open a new window with a range of Safari settings and preferences.
Navigate to the "General" Tab: Within the Preferences window, navigate to the "General" tab. This tab houses essential settings related to Safari's general behavior and appearance.
Locate the "File download location" Section: In the "General" tab, you'll find the "File download location" section, which displays the current location where your downloaded files are saved.
Click on "Show Downloads Folder": Within the "File download location" section, click on the "Show Downloads Folder" button. This action will open a Finder window displaying the contents of your downloads folder.
Accessing your downloads in Safari on an iPhone or iPad is equally simple:
Tap the "Bookmarks" Icon: Open Safari on your iPhone or iPad and tap the "Bookmarks" icon located at the bottom of the screen. This will reveal your bookmarks and browsing history.
Navigate to the "Downloads" Tab: Within the Bookmarks interface, navigate to the "Downloads" tab. This tab allows you to access and manage the files you've downloaded while browsing the web.
By following these steps, you can effortlessly access your downloads in Safari, whether you're using a Mac, iPhone, or iPad. Once you've accessed your downloads, you're ready to proceed with managing your downloaded files, whether it's deleting specific items or clearing your entire download history. With the downloads interface at your fingertips, you have the power to maintain a clutter-free browsing environment and optimize your Safari experience.
Step 3: Delete Individual Downloads
Once you've accessed your downloads in Safari, you may find that certain files are no longer needed or have served their purpose. Deleting individual downloads is a simple yet effective way to declutter your downloads folder and free up storage space on your device. Whether it's a document, image, or any other file you've downloaded, Safari provides a seamless method for removing these items from your downloads folder.
To delete individual downloads in Safari on a Mac, follow these straightforward steps:
Open the Downloads Folder: After accessing your downloads folder using the previous steps, you'll see a list of the files you've downloaded. Simply navigate to the file you wish to delete.
Right-click and Select "Move to Trash": Right-click on the file you want to remove, and from the contextual menu that appears, select "Move to Trash." Alternatively, you can drag the file to the Trash icon in the dock.
Empty the Trash: Once you've moved the file to the Trash, it's not permanently deleted until you empty the Trash. To do this, right-click on the Trash icon in the dock and select "Empty Trash" from the menu.
Deleting individual downloads in Safari on an iPhone or iPad is equally straightforward:
Access the Downloads Tab: After accessing the downloads interface, you'll see a list of your downloaded files. Simply tap on the file you want to delete to open it.
Tap the Share Icon: In the file preview, tap the Share icon (the box with an arrow pointing up). This will reveal a list of options for managing the file.
Select "Delete Download": From the list of options, tap "Delete Download" to remove the file from your downloads.
By following these steps, you can efficiently delete individual downloads in Safari, whether you're using a Mac, iPhone, or iPad. This process allows you to maintain a tidy downloads folder, ensuring that only the necessary and relevant files are retained. With the ability to remove individual downloads at your fingertips, you have the power to keep your browsing environment organized and optimized for a seamless experience.
Remember, by regularly deleting unnecessary downloads, you can effectively manage your storage space and ensure that your downloads folder remains clutter-free, allowing you to make the most of your browsing experience with Safari.
Step 4: Clear All Downloads
Clearing all downloads in Safari is a convenient way to declutter your downloads folder and free up valuable storage space on your device. Whether you've accumulated numerous files over time or simply want to start fresh, Safari provides a straightforward method for clearing your entire download history. By removing all downloads at once, you can ensure that your downloads folder remains organized and optimized for a seamless browsing experience.
To clear all downloads in Safari on a Mac, follow these simple steps:
Open the Downloads Folder: After accessing your downloads folder using the previous steps, you'll see a list of all the files you've downloaded. This is where you can initiate the process of clearing your entire download history.
Select All Downloads: Within the downloads folder, you can click on any file to select it. To select all downloads at once, you can use the keyboard shortcut Command + A. This action will highlight all the files in the downloads folder.
Move to Trash: Once all downloads are selected, right-click on any of the highlighted files and choose "Move to Trash" from the contextual menu. Alternatively, you can drag the selected files to the Trash icon in the dock.
Empty the Trash: After moving all downloads to the Trash, it's essential to permanently delete them by emptying the Trash. Right-click on the Trash icon in the dock and select "Empty Trash" from the menu. This action will permanently remove all the selected downloads from your device.
Clearing all downloads in Safari on an iPhone or iPad is equally straightforward:
Access the Downloads Tab: After navigating to the downloads interface, you'll see a list of all your downloaded files. This is where you can initiate the process of clearing your entire download history.
Select Edit: In the top-right corner of the screen, tap the "Edit" button. This will allow you to select multiple downloads at once.
Choose All Downloads: Once in edit mode, tap "Select All" to highlight all the downloaded files.
Delete All Downloads: With all downloads selected, tap the "Delete" button to remove all the files from your downloads history.
By following these steps, you can efficiently clear all downloads in Safari, whether you're using a Mac, iPhone, or iPad. This process enables you to maintain a clutter-free downloads folder, ensuring that your browsing experience remains streamlined and optimized. Regularly clearing all downloads allows you to manage your device's storage effectively, creating a clean and organized environment for your browsing activities.
In conclusion, effectively managing your downloads in Safari is essential for maintaining a clutter-free browsing experience and optimizing storage space on your device. By following the simple yet crucial steps outlined in this guide, you can confidently navigate Safari's downloads interface and take control of your downloaded files.
Whether you're using Safari on a Mac, iPhone, or iPad, the methods for deleting individual downloads and clearing your entire download history remain consistent, providing a seamless experience across devices. By accessing the downloads folder and utilizing Safari's intuitive features, you have the power to keep your browsing environment organized and optimized for efficiency.
Regularly deleting individual downloads allows you to remove unnecessary files, ensuring that your downloads folder only contains relevant and essential items. This proactive approach not only declutters your storage space but also streamlines your browsing experience, allowing you to access and manage your downloaded files with ease.
Furthermore, clearing all downloads at once provides a fresh start, allowing you to maintain a tidy downloads folder and optimize your device's storage space. By periodically clearing your entire download history, you can prevent the accumulation of unnecessary files, creating a clean and organized environment for your browsing activities.
In today's digital age, where the volume of downloaded files continues to grow, the ability to efficiently manage these files is paramount. Safari's user-friendly interface and straightforward methods for managing downloads empower users to maintain a clutter-free browsing environment, ensuring that their devices remain optimized for seamless browsing.
By implementing the steps outlined in this guide, you can take charge of your downloads in Safari, creating a streamlined and organized browsing experience. Whether you're a casual user or a frequent browser, the ability to manage your downloads effectively is a valuable skill that contributes to a more enjoyable and efficient browsing experience.
In essence, by embracing the methods for deleting individual downloads and clearing all downloads in Safari, you can declutter your browsing environment, optimize your device's storage, and ensure that your downloads folder remains tidy and organized. With these essential skills at your disposal, you're well-equipped to make the most of your browsing experience with Safari.
Leave a Reply Cancel reply
Your email address will not be published. Required fields are marked *
Save my name, email, and website in this browser for the next time I comment.
- Crowdfunding
- Cryptocurrency
- Digital Banking
- Digital Payments
- Investments
- Console Gaming
- Mobile Gaming
- VR/AR Gaming
- Gadget Usage
- Gaming Tips
- Online Safety
- Software Tutorials
- Tech Setup & Troubleshooting
- Buyer’s Guides
- Comparative Analysis
- Gadget Reviews
- Service Reviews
- Software Reviews
- Mobile Devices
- PCs & Laptops
- Smart Home Gadgets
- Content Creation Tools
- Digital Photography
- Video & Music Streaming
- Online Security
- Online Services
- Web Hosting
- WiFi & Ethernet
- Browsers & Extensions
- Communication Platforms
- Operating Systems
- Productivity Tools
- AI & Machine Learning
- Cybersecurity
- Emerging Tech
- IoT & Smart Devices
- Virtual & Augmented Reality
- Latest News
- AI Developments
- Fintech Updates
- Gaming News
- New Product Launches
- AI Writing How Its Changing the Way We Create Content
- How to Find the Best Midjourney Alternative in 2024 A Guide to AI Anime Generators
Related Post
Ai writing: how it’s changing the way we create content, unleashing young geniuses: how lingokids makes learning a blast, 10 best ai math solvers for instant homework solutions, 10 best ai homework helper tools to get instant homework help, 10 best ai humanizers to humanize ai text with ease, sla network: benefits, advantages, satisfaction of both parties to the contract, related posts.

How Do You Delete Safari

How To Delete Download History On IPhone

How To Reinstall Safari On IPhone 4

How Do You Reinstall Safari On A Mac

How To Find Download On Mac

How To See Downloads On Safari IPhone

Where Do Downloads From Safari Go On IPhone

How To Delete Safari Downloads
Recent stories.

How to Find the Best Midjourney Alternative in 2024: A Guide to AI Anime Generators

How to Know When it’s the Right Time to Buy Bitcoin

How to Sell Counter-Strike 2 Skins Instantly? A Comprehensive Guide

10 Proven Ways For Online Gamers To Avoid Cyber Attacks And Scams

- Privacy Overview
- Strictly Necessary Cookies
This website uses cookies so that we can provide you with the best user experience possible. Cookie information is stored in your browser and performs functions such as recognising you when you return to our website and helping our team to understand which sections of the website you find most interesting and useful.
Strictly Necessary Cookie should be enabled at all times so that we can save your preferences for cookie settings.
If you disable this cookie, we will not be able to save your preferences. This means that every time you visit this website you will need to enable or disable cookies again.
How-To Geek
How to download files using safari on your iphone or ipad.
Need to quickly download a file on your iPhone or iPad? Here's how you can do this using Safari or a third-party app.
Quick Links
How to download files using safari, how to the change default download location, alternative for ios 12 users: documents 5 by readdle.
In your work or personal life, you'll sometimes need to download a file on your iPhone or iPad. Using the new feature introduced in iOS 13 and iPadOS 13, you can now do this directly in Safari. No third-party app needed!
Safari's download manager is a hidden new feature in the iOS 13 and iPadOS 13 updates. If you're going about your day, browsing the web, you probably won't be aware of the feature. Instead, it comes up when you tap on a download link.
Go to a web page and find the link for a file you want to download. When you select it, you'll see a popup with the filename asking if you want to download it. Tap on the "Download" button.
The download will start, and you'll see a new "Downloads" button appear next to the address bar at the top of the browser. Tap on the button to reveal all current downloads. From here, you can monitor the progress of multiple downloads.
If you want to stop a download at any time, simply tap on the "X" button.
Once the download is finished, tap on the file to preview it. If you've downloaded a media file, image, or a PDF, you'll be able to see it in the preview window.
You can then share the file to any app. Tap on the "Share" button from the bottom-left corner.
Press the "Search" icon next to the filename in the Downloads section to open the file.
Once you open the file in the Files app, you can tap and hold on the file to reveal the menu.
From here, tap on "Delete" to delete the file.
By default, the downloaded files are saved to the Downloads folder in iCloud Drive in the Files app. This is a great option if you have a paid iCloud storage plan because it allows your downloaded files to instantly sync across all your devices.
But if you're on the free, 5GB tier, you might not have space for storing large files.
Thankfully, you can change the default location to local storage. Open the "Settings" app and go to Safari > Downloads. If you can't find the browser on your phone, try using Apple's Spotlight search to locate it.
Here, switch the selection to "On My iPhone" or "On My iPad" depending on your device.
By default, Safari will pick the "Downloads" folder. You can change this by tapping on the "Other" option to select any folder from the local storage (or from a cloud storage option).
The new download manager in Safari is exclusive to iOS 13, iPadOS 13, and above. If you haven't updated to the latest OS (which you should), or if you're in a situation where you can't update, here's a workaround for you.
Try using the free Documents 5 app by Readdle . It's an all-in-one browser and file manager app.
Open the Documents 5 app and tap on the "Browser" button in the bottom-right corner to switch to the browser mode.
Now, navigate to the page with the download link and tap on it. From the next screen, select the folder where you want to download the file and tap on "Done."
The download will now start. You can tap on the "Downloads" tab to view all downloads.
Tap on the "Files" button from the bottom-left corner to switch to the file manager. From here, tap on the "Downloads" folder to see your downloaded file. You can tap on the download to preview it in the app. Tap on the "Menu" button to view options for opening the file in another app.
Safari's download manager is just one of the many new features in iOS 13. Take a look at our list of the best iOS 13 features to learn more.
Related: The Best New Features in iOS 13, Available Now
How to Check History on Safari [2023 Complete Guide]
If you’re wondering how to check history on Safari , the browser offers a useful feature that allows you to keep track of your browsing activity on iOS devices. By accessing your browsing history, you can easily retrieve previously visited web pages and retrace your online journey.
This is especially helpful when conducting extensive research and you need to recall a valuable piece of information that you previously accessed. To view your browsing history in Safari, follow the steps outlined in this article. Discover how to check your history on Safari by reading below.

Quick Navigation:
Part 1: Why You Need to Turn Search Browser History off
Part 2: how to check history on safari, part 3: can you view history from private browsing, part 4: how to clear google chrome history manually, part 5: how to clear firefox history manually.
- Part 6: How to Ccheck History on Safari With Mac Cleaner
Search browser history refers to the record of websites and web pages that a user has visited on their browser. This information is usually stored on the user’s computer or device and can be accessed by anyone who has physical or remote access to the device.
While search browser history can be useful for some purposes, such as helping users find previously visited sites, it also poses several risks to privacy and security. Here are a few reasons why you might consider turning off your search browser history:
- Privacy concerns : Your search history contains information about your browsing habits, interests, and potentially sensitive information such as your login credentials, credit card information, or personal conversations. This information can be used by hackers, advertisers, or malicious actors to track your activities, steal your identity, or carry out phishing attacks.
- Security risks : If your device is shared with other people, they can easily access your search history and use it to impersonate you or gain unauthorized access to your accounts. This is especially true if you use autofill features that store your passwords and other sensitive data.
- Embarrassment or reputational damage : Sometimes, we may visit sites that we don’t want others to know about. This can include adult content, medical information, or other sensitive topics. If your search history is exposed, it can lead to embarrassment or even reputational damage.
- Improved performance : Turning off your search browser history can also help improve the performance of your browser, especially if you have limited storage space on your device.
Overall, while searching browser history can be convenient, it can also pose several risks to your privacy and security. To reduce these risks, consider turning off your search history or using privacy-focused browsers that do not store your search history by default.

To check your browsing history on Safari for Mac , you can use the Show All History feature. This allows you to easily search through your web browsing history and quickly find previously visited web pages. Simply open the Safari app on your Mac and navigate to History > Show All History . Once you’re in the history view, you can use the Search field to look up specific pages or keywords. This is a quick and convenient way to check your history on Safari.
Another way to check history on Safari
To check your browsing history in Safari , you can follow these steps:
- Open Safari on your Mac or iOS device.
- On a Mac, click on the “History ” menu in the top menu bar. On an iOS device, tap the book icon at the bottom of the screen.
- Select “Show All History ” on a Mac, or “History ” on an iOS device.
- This will bring up a list of all the websites you have visited recently. You can click or tap on any of these items to revisit the corresponding page.
- On a Mac, you can also use the keyboard shortcut “Command + Y ” to quickly open the History tab. Additionally, Safari allows you to search your browsing history using the search bar at the top of the history page.

Are you wondering how to check history on Safari when using Private Browsing? Unfortunately, it is not possible to view your browsing history as Safari does not store it while in Private Browsing mode.
This feature is designed to protect your privacy by preventing the browser from retaining any data on the sites you visit. Additionally, Safari also prevents tracking by sites and content providers. As a result, any cookies acquired during your session are erased upon tab closure.
To clear your Google Chrome browsing history manually, follow these steps:
- Open Google Chrome on your computer.
- Click on the three vertical dots in the top right corner of the screen to open the Chrome menu.
- Select “History ” from the drop-down menu.
- Click on “History ” again in the new menu that appears.
- You will see a list of all the websites you’ve visited recently. You can either click on the three vertical dots next to each individual website to delete it from your history or click on “Clear browsing data ” at the top of the screen.
- In the “Clear browsing data ” pop-up window, choose the time range for which you want to delete the history.
- Check the boxes next to the types of data you want to clear. You can choose to clear your browsing history , cookies, cache , download history, and more.
- Click on “Clear data ” to delete the selected items.
To clear your Firefox browsing history manually, follow these steps:
- Open Firefox on your computer.
- Click on the three horizontal lines in the top right corner of the screen to open the Firefox menu.
- Select “Library ” from the drop-down menu.
- Click on “History ” from the new menu that appears.
- You will see a list of all the websites you’ve visited recently. You can either right-click on an individual website and select “Forget About This Site ” to delete it from your history or click on “Clear Recent History ” at the top of the screen.
- In the “Clear Recent History ” pop-up window, choose the time range for which you want to delete the history.
- Check the boxes next to the types of data you want to clear. You can choose to clear your browsing history, cookies, cache, download history, and more.
- Click on “Clear Now ” to delete the selected items.
Part 6: H ow to Check H istory on S afari With Mac Cleaner
Checking your browsing history on Safari is an important step in ensuring that it doesn’t fall into the wrong hands. Here’s how you can use this software:
Try it Free
Step #1: Download, Install, and Launch Mac Cleaner
To start using Mac Cleaner, you’ll need to follow these steps. First, visit the Mac Cleaner download site by clicking on the provided link. Then, click on the “Download Now ” button to initiate the download of a DMG file.
After downloading, open the file and run the installer, following the onscreen instructions. Once the installation is complete, the software should automatically open and be ready to use. This is the first step in the process of using Mac Cleaner.

Step #2: Select a Cleaner Module
After launching Mac Cleaner, you’ll notice a sidebar on the left-hand side of the interface. It contains six modules, which are Clean Up Junk , Delete Large Files , Delete Duplicate Files , Erase Private Data , Speed Up Your Mac , and Manage Apps & Extensions . For the purposes of this guide, we’ll focus on the first three modules, which we refer to as the cleaner modules. Here’s a brief overview of each module:
- Clean Up Junk scans and removes files that the system considers as junk, including System Junk, App Junk, iOS Junk, iTunes Junk, Unused Disk Images, Downloads, and Trash Bin, among other things.
- Delete Large Files searches for files on your computer that exceed 50MB in size and removes only those files that the system considers unnecessary.
- Delete Duplicate Files checks for duplicate files across your entire computer and presents a list of files that have a copy. You can then choose to delete the duplicates.
To use any of these modules, simply click on the corresponding option in the sidebar.

Step #3: Scan Your Mac for Files
Once you launch Mac Cleaner, a sidebar will appear on the left-hand side of the interface, containing six modules: Clean Up Junk, Delete Large Files, Delete Duplicate Files, Erase Private Data, Speed Up Your Mac, and Manage Apps & Extensions. For the purpose of this guide, we will focus on the first three modules, which are commonly known as the cleaner modules. Here is a quick overview of each module:
- Clean Up Junk scans and removes files that the system considers as junk, such as System Junk, App Junk, iOS Junk, iTunes Junk, Unused Disk Images, Downloads, and Trash Bin, among others.
- Delete Large Files searches your computer for files that exceed 50MB in size and removes only those files that the system considers unnecessary.
- Delete Duplicate Files checks for duplicate files across your entire computer and displays a list of files that have a copy. You can choose to delete the duplicates as needed.
To access any of these modules, simply click on the corresponding option in the sidebar.

Step #4: Choose a File/s
you need to choose the file or files you want to delete. The process for selecting files will depend on the module you are using. It is much simpler for the Delete Large Files and Deletes Duplicate Files modules as you just need to choose an item from the list which includes folders and files like images, videos, documents, songs, etc.
However, in the case of the Clean Up Junk module, you will first need to select a file category from the list on the left side of the interface. The options you will see include System Junk, Downloads, iOS Junk, iTunes Junk, Trash Bin, Unused Disk Images, and more. Once you select a category, a new list will appear on the right side of the interface containing actual files. You can select the files you want to delete by clicking their checkboxes, or you can choose to delete all of them by clicking the Select All button.

Step #5: Delete the File/s
To complete the process, the final step is to click on the blue button located in the upper right corner of the window, which will either say Clean or Delete depending on the module you are using. Once you click on the button, you may need to wait for a few seconds or minutes while the software deletes the selected files.

In addition to learning how to manually erase browsing history from Safari, Firefox, and Chrome, you may want to know how to check history on Safari . Using a browser history removal tool can clear associated data, listed pages, cookies, and broken caches, saving you time. It’s important to clean up your browsing history once in a while if you want to stop spies dead in their tracks.
If you’ve backed up your browsing history in iCloud, you can still manage your Safari browsing history. In today’s data-driven world, companies like Google and Facebook collect massive amounts of information online to gain a competitive advantage.
However, not everyone is comfortable sharing their browsing history, data downloads, or privacy with these profit-driven giants. To browse without intrusion, try our hacks and tricks to clear your browser history items.
Latest Articles
- Perfect Microsoft Access Alternative for Mac Users
- How to Convert FLAC to MP3 on Mac and Windows
- Troubleshooting Apple Music Not Working on Your Mac
- How to Pause Watch History YouTube [2023 Full Guide]
- How to Delete Your iCloud Account: A Step-by-Step Guide
- PNG Vs JPG: A Battle of The Popular Image Formats
- Troubleshooting Tips: How to Connect Beats to Mac
- iPhone Data Recovery
- Android Data Recovery
- iPhone Passcode Unlocker
- iOS System Recovery
- iOS Location Changer
- Free iOS Backup & Restore
- Excel Password Recovery
- Data Recovery iPhone Data Recovery Android Data Recovery
- Unlock & Repair iPhone Passcode Unlocker iOS System Recovery
- Utilities iOS Location Changer Free iOS Backup & Restore Excel Password Recovery PDF Editor

5 Ways to View & Recover Deleted Safari History on iPhone/iPad
“I've cleared my Safari history recently but now I need find back one website I visited previously. I was just wondering whether there's any chance to recover deleted Safar history so I can access these sites again?”
Safari is the built-in web browser for iOS devices and Mac computers, which is widely used among Apple users. While searching the internet with Safari, it usually keeps the browsing history and bookmarks for picking up what has been read.
The Safari history is very important and helpful. What if you have accidentally deleted your browsing history or it is suddenly gone without a record?
Don't worry. You still have chances to get back the deleted Safari history. Keep reading to find out how you can recover deleted Safari history on iPhone without or without backup.
Can You Recover Deleted Safari History on iPhone?
Are you wondering if it's possible to recover deleted Safari history on your iPhone? The good news is that it's YES. Even if you've deleted your browsing history on Safari, it's not permanently gone from your iPhone. It may still be stored on your phone for a limited period and inaccessible. And with the right steps, you can recover the deleted Safari history on iPhone.
Check iPhone Settings for Deleted Safari History
Before you try any other methods listed below, first check your iPhone itself. The most accessible and simple way of recovering your browsing history is to find them in Safari Website Data under Settings. Here's how to do it:
- On your iPhone, open the Settings app. Scroll down to find Safari and tap on it.
- On the next screen, scroll to the bottom and tap on the " Advanced " option.
- Choose the " Website Data " and you'll view the domain of the deleted browsing history.

Drawback of this method:
This method will only show you the root domain of your visited sites. You won't be able to find a specific page you've viewed before. Also, this method only works as long as you don't clear cookies and history from Safari.
Recover Safari History on iPhone without Backup (Recommend)
If there is no backup of your deleted Safari history, FoneGeek iPhone Data Recovery is highly recommended to you. As the World's 1st iPhone and iPad data recovery software, it has helped tens of thousands iOS users find the deleted or lost data. What makes it become so popular? The answer is its reliability and function.
It provides 3 recovery modes for users: Recover from iOS Device, Recover from iTunes Backup, Recover from iCloud Backup, which means that it is powerful enough to scan deleted iOS data, preview almost all the content of iTunes/iCloud backup and download them on computer.
And the data types this tool supports to recover include messages, contacts, photos , videos, Safari history, notes , WhatsApp messages, Viber, etc. This tool works well on the latest iPhone 15/14/13 and iOS 17/16.

Follow the steps below to recover deleted safari history on iPhone without backup :
Step 1. Connect iPhone to Computer
To start with, install the program on your Windows PC or Mac and launch it. Choose " Recover from iOS Device " and then connect your iPhone to the computer using USB cable.

Step 2. Select Safari History to Scan
Once yoru iPhone is detected by the program, choose " Safari History " of any other type of files you would like to recover and then click " Scan " to begin scanning.

Step 2. Recover Deleted Safari History
After the scan, click " Safari History " from the category list to preview the recoverable safari history. Then select the ones you need and click " Recover " button to save the deleted safari history to your computer.

Recover Deleted Safari History on iPhone from Backup
Recover safari history from icloud web.
You are allowed to recover only Safari history from iCloud official site as long as you have turned on iCloud Auto Syncing on your iPhone. Follow these simple steps:
- Sign into iCloud official site from any browser using your iCloud account.
- Navigate to the " Advanced " option and scroll down to click " Restore Bookmarks " .
- Choose an archive of bookmarks you want and click on " Restore ".

Only the deleted Safari hisoty within the last 30 days can be retrieved. Also, the existing Safari bookmarks on your iPhone will be replaced and erased, which might cause new data loss.
Restore iPhone Safari History from iCloud Backup
If you have backed up your iPhone to iCloud, restoring iPhone from the iCloud backup is also one of the feasible choice you can try. Doing this will get back all the app data, including the deleted Safari history. But you need to factory reset the iPhone before performing the restore.
- Open Settings and click on " General ", scroll down to tap on " Reset " and select " Erase All Content and Settings ".
- Follow the instructions to set up your iPhone until you reach the page of " Apps & Data ". Then choose " Restore from iCloud Backup ".
- Sign in to iCloud and choose a backup to restore the device. All data in the backup file including the deleted Safari history will come back.

You're not allowed to preview the deleted files and selectively recover what you need only. What's worse, all the existing data on your iPhone will be erased and you'll lose your latest data that are not included in the iCloud backup.
Selectively Recover Deleted Safari History on iPhone from iCloud Backup
With FoneGeek iPhone Data Recovery, you're able to preview and selectively recover deleted Safari history from iCloud backup.
- Run FoneGeek iPhone Data Recovery and switch to " Recover from iCloud ".
- Sign in to iCloud with your Apple ID and password. Then select the data types you want to restore and click on " Scan ".
- After you've downloaded the iCloud data, preview and select the data you need, then click on " Recover ".

Recover Deleted Safari History from iTunes Backup
If you have made an iTunes/Finder backup before you deleted the Safari history, you can also recover the deleted browsing history by restoring iPhone from iTunes backup. However, to restore the backed-up data, you will have to erase the existing data on your iPhone.
- Connect your iPhone to computer and launch iTunes or Finder.
- Click on the iPhone icon when it shows up and then choose " Restore Backup ".
- Select the backup file that contains your deleted Safari history and click on " Restore ".

Same as iCloud, preview and selectively recovery is not supported. Restoring from iTunes backup might also lead to data loss since any new files added to your iPhone since the backup will be replaced and overwritten.
Selectively Recover Deleted Safari History on iPhone from iTunes Backup
And again, we recommend you using FoneGeek iPhone Data Recovery to recover deleted Safari history from iTunes backup without erasing any data.
- Launch FoneGeek iPhone Data Recovery and choose the option of " Recover from iTunes Backup ".
- Select the iTunes backup file you want and click " Next ". Then select " Safari history " and click on " Scan ".
- After the scan, you can preview the Safari history and selectively recover those you need by clicking on " Recover ".

FAQs about iPhone Safari History Recovery
Q1. How long does Safari keep your browsing history?
This question has confused a lot of iPhone users. Actually, there is a definite answer of this question: your Mac can keep your browsing history for as long as a year, while some iPhone, iPad and iPod touch models keep browsing history for a month. This is what demonstrated on Apple’s official site.
Q2. How to recover deleted Safari history on iPad?
There are different methods for recovering deleted Safari history on your iPhone, most of which apply to iPads. You can try using FoneGeek iPhone Data Recovery, which is compatible with major iOS devices, including iPhone, iPad, and iPod touch.
Q3. Where is Safari history stored on your Mac?
All the Safari history you can see on your Mac is stored in the ~/Library/Safari/ folder.
- Just click on Finder > Go > Go to Folder .
- Then enter the path in the textbox and click on OK to open the History.db file.
Q4. How to avoid losing Safari history?
To avoid the possible loss of Safari history, we can enable Safari in iCloud preferences. In this way, the Safari data will be backed up to cloud automatically.
Besides that, we can also use some tools such as FoneGeek iOS Backup & Restore to back up iPhone data to computer selectively or fully.
This article has outlined all feasible solutions to recover deleted Safari history on your iPhone. You can pick the one that works best for you. We strongly recommended FoneGeek iPhone Data Recovery for its easy-to-use interface and allowing us to recover Safari history without data loss.
Joan J. Mims is interested in researching all tips about iPhone, iPad and Android. He loves to share useful ideas with all users.
Leave a Reply
Your email address will not be published. Required fields are marked *
Table of Content
- 1 Can You Recover Deleted Safari History on iPhone?
- 2 Check iPhone Settings for Deleted Safari History
- 3 Recover Safari History on iPhone without Backup (Recommend) Hot
- 4 Recover Deleted Safari History on iPhone from Backup
- 5 FAQs about iPhone Safari History Recovery
- Company About us Contact us Privacy Policy Refund Policy Terms of Use EULA Cookie Policy
- Star Products iPhone Data Recovery Android Data Recovery iPhone Passcode Unlocker iOS System Recovery iOS Location Changer Free iOS Backup & Restore Excel Password Recovery PDF Editor
- Support Support Store How-to Tutorials Sitemap

- Privacy Policy
- Refund Policy
- Terms of Use
- Cookie Policy
- How-to Tutorials
Copyright © 2024 FoneGeek Software Co., Ltd. All Rights Reserved

How to use Beni, the sustainable and wallet-friendly shopping extension
W hen I'm not shopping for and editing the best phone , Garmin , or Apple Watch deals, I admittedly spend a lot of time shopping for new clothes. Yes, I'm one of those people who claim I have nothing to wear whilst staring at a closet full of clothes. And with Black Friday and Cyber Monday deals lingering, spending money is even more tempting than usual.
How I use my favorite price-history checker to find the best deals
As a dedicated clothing shopper, however, I've never been one to discriminate against a good brand or good deal, even if the item was pre-owned. In fact, I do a lot of my shopping via online or physical thrift stores in an attempt to do some good for the environment, combating the fast-fashion industry, and protecting my wallet.
So, finding the Beni extension was the perfect compromise that made shopping sustainably for my favorite items even easier while performing some much-needed online retail therapy -- or rather, resale therapy.
What is Beni?
Beni, is a free shopping extension available on your desktop for Chrome and Safari that works alongside your current shopping page to look for either exact or similar clothing items at over 40 second-hand online stores, including ThreadUp, The RealReal, Poshmark, Rent the Runway, and eBay for a more budget-friendly price.
Essentially, Beni streamlines second-hand shopping by matching the current desired (full priced) item with either the exact item or one similar via quality, second-hand thrifting apps.
How Beni works when shopping online: Streamlining secondhand
Upon adding to your browser, you'll see a Beni browser extension icon - which is a green circle with orange sunglasses - in the bottom left corner of your webpage. That icon is your key to unlocking the best thrifting deals. Here's when to click on it.
- Start shopping online as you normally would. Open your window to your usual favorite online outlet.
- Select an item you like, whether you're tempted to add it to your cart or if you know it's an absolute must-have.
- Click the green Beni icon in the bottom right corner, and you'll see up to 20 options of either the exact item, or similar items automatically displayed on the right side of your screen from third-party, second-hand outlets. You can also like certain options to save them for later.
When you first download Beni, you'll be invited to fill out your typical sizes for your favorite brands to ensure that the browswer is pulling custom options.
How to download Beni on your desktop
Currently, Beni is only available on Chrome and Safari.
- Enter 'Beni' in your search browser, and select 'Beni | Find it Secondand'
- From the website, you'll be invited to add Beni to Chrome. Select the orange 'Add to Chrome' button on Beni's website.
- A link will lead you to the Chrome store. Select the blue 'Add to Chrome' button.
- Beni will invite you to input your typical sizes to curate more personalized search results.
How to download Beni on your iPhone
Currently, Beni is only available to download via the app or on the iPhone's Safari browser. According to the website, its working on bringing the extension to Android handsets soon.
Best sustainable smartphones: Expert tested and reviewed
Here's how to download the browser to Safari on iPhone.
- Either download the Beni app on the Apple App store or search 'Beni' in Safari.
- In the very bottom left-hand corner of the Safari browser bar, tap the aA icon .
- Select 'Manage Extensions,' and Beni will pop up as an option.
- Toggle the Beni option on
- You'll see a popup, then tap Beni and select 'always allow.'

IMAGES
VIDEO
COMMENTS
Here's how to do it. First, open the Safari application on your Mac. In any Safari window, look to the right of the address bar for an icon that looks like a downward-pointing arrow in a circle. If you see it, click it or press Option+Command+L. (If you don't see the arrow icon, Safari does not have any download history to display.)
To do so, go to Safari > Settings > General and select the File download location tab and select one. How to view your Safari downloads on iPhone/iPad. To find your downloaded files on iPhone or iPad, navigate to the Files app. Select the Browse tab and tap On My iPhone or On My iPad. Go to Downloads folder and choose the file you were looking for.
To perform these actions, open the Downloads menu in Safari itself. Here's what you can do: Here's what you can do: Pause Downloads: If you're currently downloading, click the stop button beside the file name to pause the download, then click the resume button to resume it again.
If you just downloaded a file from Safari. Next to the search field in Safari, tap the Page Settings button. Tap the Downloads button. Published Date: October 13, 2023. If you download a file onto your iPhone or iPad from the internet, you can find it in your Downloads folder in the Files app.
With iOS 13, Apple has brought a similar feature to the mobile version of its Safari browser in the form of the Download Manager. Now, when you choose to download a file, such as an image or ...
Here is a command that you can simply copy and paste into your Terminal to view your Mac download history: ... This isn't just Safari downloads. Any app that lets you download files will show up ...
Use the search bar to find specific websites. Enter your text in the Search bar. A list of matching results from your history will appear. Click a site to load it in Safari. 5. To clear your history, click the "History" menu. Click Clear History…. [2] Select a time frame from the drop-down menu, then click Clear History.
To do so, tap the download icon or AA icon from the status bar → select download → tap the search icon next to the downloaded file. By default, Safari download manager on iPhone stores the ...
Download History. Safari maintains a comprehensive download history, allowing users to track their past downloads effortlessly. By accessing the History menu in Safari, users can view a chronological list of their downloaded files, enabling quick access to previously acquired content. This feature proves invaluable when users need to revisit or ...
Look to the right of the address bar in any Safari window for an icon that looks like a downward-pointing arrow in a circle. If you see it, click it or press Option+Command+L to activate it. (If you don't see the arrow symbol, Safari has no download history to show.) When the download list appears, you'll see a list of files you've ...
Auto-delete Safari downloads on your iPhone. Open the Settings app and tap Safari. Now select Downloads, followed by Remove Download List Items. Here, you have three options: After one day, Upon Successful Download, or Manually. On selecting either of the first two options, the system will auto-delete the download files.
Yes, macOS does keep a history of everything users download, although users can prevent items from being recorded in that history if they're using their browser's private browsing function or other software designed to ensure your privacy (e.g. the Tor browser, etc). So, downloading anything in a typical browser (even right-clicking on an image and saving it) is recorded.
In Safari, the download history serves as a record of all the files you've acquired from the web, providing a comprehensive overview of your past downloads. While this feature offers convenience and insight into your browsing activities, there are instances where you may want to clear your download history. Whether you're aiming to declutter ...
Here's how: Open the "Settings" app on your iPhone. Scroll down and tap on "Safari" (for clearing Safari download history) or tap on the app name (for clearing app-specific download history). Look for an option called "Clear History and Website Data" or a similar setting. Tap on the option and configure it to clear history and ...
Open Safari for me. In the Safari app on your Mac, choose History > Clear History, then click the pop-up menu. Choose how far back you want your browsing history cleared. When you clear your history, Safari removes data it saves as a result of your browsing, including: History of webpages you visited. The back and forward list for open webpages ...
Delete a website from your history. Open the Safari app. Tap the Show Bookmarks button, then tap the History button. ... Download a content blocking app from the App Store. Tap Settings > Safari > Extensions. Tap to turn on a listed content blocker. You can use more than one content blocker.
Open Safari and head to the menu bar located at the top of the page. Tap "History" then "Show All History" to reveal the list of websites you have visited. To find a particular website ...
The steps to remove your browser download history on a Mac vary for each browser. Below, I have shared the steps for Safari and Google Chrome: Remove Download History on Safari. Here are the steps to delete Safari download history on Mac: Open Safari on your Mac and click Safari in the top menu bar.
Viewing Download History in Safari. To find your download history on Safari, look to the rght of the address bar for an icon that looks like a downward-pointing arrow in a circle. If you see it ...
Whether you're looking to remove individual files or clear your entire downloads history, we've got you covered. Let's get started! Step 1: Open Safari. To begin managing your downloads in Safari, the first step is to open the Safari web browser on your device. Whether you're using a Mac, iPhone, or iPad, the process of accessing your downloads ...
How to Download Files Using Safari Safari's download manager is a hidden new feature in the iOS 13 and iPadOS 13 updates. If you're going about your day, browsing the web, you probably won't be aware of the feature. Instead, it comes up when you tap on a download link. Go to a web page and find the link for a file you want to download.
To check your browsing history in Safari, you can follow these steps: Open Safari on your Mac or iOS device. On a Mac, click on the "History " menu in the top menu bar. On an iOS device, tap the book icon at the bottom of the screen. Select "Show All History " on a Mac, or "History " on an iOS device. This will bring up a list of ...
Follow the steps below to recover deleted safari history on iPhone without backup: Step 1. Connect iPhone to Computer. To start with, install the program on your Windows PC or Mac and launch it. Choose " Recover from iOS Device " and then connect your iPhone to the computer using USB cable. Step 2.
Either download the Beni app on the Apple App store or search 'Beni' in Safari. In the very bottom left-hand corner of the Safari browser bar, tap the aA icon. Select 'Manage Extensions,' and Beni ...