Safari Photography Guide
Embarking on an African safari promises an exhilarating and memorable adventure, and ensuring you have the appropriate camera gear is crucial for immortalizing those rare and exceptional moments. Canon stands out as a top choice among camera brands for safari photography, renowned for its superior image quality and robust build. This article delves into the optimal Canon cameras and lenses to seize breathtaking photos during an African safari. This safari photography guide focuses on Canon as it is the brand that I use for all my photography and I have found the bodies and lenses robust and able to withstand whatever nature chooses to throw at you while on safari.

Behind the Lens: A Peek into My Camera Bag Essentials
In the dynamic world of photography, having the right gear can make all the difference in capturing those picture-perfect moments. Here’s an in-depth look into what’s in my camera bag, a carefully curated selection of equipment that empowers me to unleash my creativity.
- Lowepro ProTactic BP 350 AW II (Camera Backpack)
The backbone of my photography setup is the Lowepro ProTactic BP 350 AW II. Crafted with precision, this camera backpack is a perfect blend of durability and functionality. Its customizable interior ensures a snug fit for my gear, while the all-weather cover provides protection against the elements. With its versatile design, this backpack is a reliable companion for photographers on the move.
- Canon R7 Camera
At the heart of my kit is the Canon R7 Camera. Boasting advanced features and a mirrorless design, it delivers outstanding performance and portability and with its crop sensor is perfect for safari photography. With a high-resolution sensor and rapid autofocus, the Canon R7 empowers me to capture crisp and vibrant images, making it an indispensable tool for both amateurs and professionals.
- Canon Mount Adapter EF-EOS R
Enhancing the versatility of my setup, the Canon Mount Adapter EF-EOS R allows seamless integration of my EF lenses with the Canon R7. This adapter ensures compatibility across the Canon lens ecosystem, giving me the flexibility to explore various shooting styles and perspectives.
- CANON EF 100-400MM F/4.5-5.6L IS II USM (Telephoto Lens)
When it comes to capturing distant subjects with precision, the CANON EF 100-400MM F/4.5-5.6L IS II USM is my go-to telephoto lens. Its impressive focal range and image stabilization technology enable me to achieve sharp, detailed shots, making it an essential tool for wildlife photography.
- SanDisk Extreme Portable SSD 2TB (Storage Solution)
Storage is never a concern with the SanDisk Extreme Portable SSD 2TB. This high-speed, compact storage solution ensures that I have ample space for my extensive collection of photos and videos. Its rugged design adds an extra layer of security, making it the perfect companion for on-the-go photographers.
- Lexar SILVER Series Professional 1667x 128GB UHS-II SDXC Memory Card
The Lexar SILVER Series Professional 1667x 128GB UHS-II SDXC Memory Card complements my camera’s capabilities with its high-speed performance. With rapid read and write speeds, this memory card ensures smooth data transfer, a crucial factor in capturing high-resolution images and recording 4K videos.
- CANON EF 24-105MM F/4L IS II USM (Versatile Zoom Lens)
The CANON EF 24-105MM F/4L IS II USM is a versatile workhorse in my kit. Its wide focal range and constant aperture make it suitable for a variety of shooting scenarios, from landscapes to portraits. The built-in image stabilization ensures sharp results even in challenging lighting conditions.
- MacBook Air 13-inch Apple M2 (Editing Powerhouse)
For on-the-go editing and organization, the MacBook Air 13-inch with the Apple M2 chip is my trusty companion. Its lightweight design and powerful processing capabilities allow me to review and edit photos with efficiency, ensuring a seamless workflow during and after photo sessions.
- Bose QuietComfort Ultra Headphones (Immersive Audio Experience)
These headphones provide an unparalleled audio experience with exceptional noise cancellation, perfect for long flights and allowing me to focus entirely on my work, whether I’m editing photos or reviewing footage, or listening to music.
- Manfrotto Element Travel Tripod (Stability on the Go)
Stability is paramount in photography, and the Manfrotto Element Travel Tripod delivers just that. With its lightweight design and quick setup, this tripod provides a steady platform for capturing long-exposure shots, group portraits, or any scenario where stability is key.
- Spare Canon LP-E6NH Lithium-Ion Battery
To ensure uninterrupted shooting, I always carry a spare Canon LP-E6NH Lithium-Ion Battery. With extended battery life, I have the peace of mind that I won’t miss a crucial moment, especially during extended photo sessions or while exploring remote locations.
- iPhone 15 Pro Max (Smartphone Camera)
Lastly, the iPhone 15 Pro Max serves as a versatile tool for quick captures and behind-the-scenes moments. With its advanced camera capabilities, it complements my professional gear and allows me to document scenes spontaneously, ensuring no moment goes uncaptured.
Photography Tips
Engaging in safari photography offers a rare chance to capture breathtaking wildlife images in their native surroundings. Yet, achieving these moments can be daunting without a grasp of the optimal camera settings. Armed with the right configuration, you can produce sharp, well-exposed photographs with vibrant colors. This section will explore the most effective camera settings and offer tips for successful safari photography.
Shutter Spee d
Capturing the essence of movement is crucial in safari photography, making shutter speed a vital setting. Opting for a faster shutter speed proves effective in freezing the motion of swift-moving animals. Typically, a recommended shutter speed of 1/1000th of a second or faster is advised for wildlife photography. Adjustments to the shutter speed may be necessary depending on the animal’s movement and the prevailing lighting conditions.
Slow shutter speed can also play a crucial role in enhancing the artistic and dynamic elements of safari photography. While a faster shutter speed freezes fast-paced movement, a slower shutter speed introduces intentional blur, imparting a sense of motion to the image. This effect can be particularly useful when capturing the graceful movements of animals, such as a herd of wildebeests or a bird in flight.
By deliberately slowing down the shutter speed, you allow more light to enter the camera, contributing to a longer exposure time. This can result in visually striking photographs, showcasing the ambient light and creating a sense of drama in the scene. It’s important to note that using a slow shutter speed requires a steady hand or, preferably, a tripod to avoid unwanted camera shake.
Experimenting with slow shutter speeds in safari photography opens up creative possibilities, offering a unique perspective that goes beyond simply freezing action. Consider incorporating this technique when the opportunity arises, and adapt your settings based on the specific conditions and subjects encountered during your safari adventure.
In safari photography, mastering the relationship between aperture and depth of field is key to creating compelling and visually striking images. The aperture, the opening in the camera lens that controls the amount of light entering, plays a dual role by significantly influencing the depth of field in your photographs.
A wide aperture, represented by a smaller f-number (e.g., f/2.8 or f/4), is advantageous for safari shots. This setting allows more light to reach the camera sensor and creates a shallow depth of field. This shallow depth of field results in the main subject, such as a magnificent lion or an elegant giraffe, being sharply focused, while the background is beautifully blurred. This technique not only isolates the subject but also adds a pleasing aesthetic element to the image.
On the other hand, a narrow aperture, represented by a larger f-number (e.g., f/11 or f/16), increases the depth of field. This is useful when you want to keep both the foreground and background in focus, capturing the broader context of the scene. It’s essential to strike a balance between aperture and depth of field based on your creative vision and the specific composition you aim to achieve.
Understanding how to manipulate the aperture for optimal depth of field empowers you to adapt to different safari scenarios and improve your safari photography. Whether you’re highlighting a single animal against a dreamy backdrop or capturing the expansive landscape with various subjects in sharp focus, mastering aperture settings enhances the storytelling potential of your safari photography.
ISO is a measure of your camera’s sensitivity to light. A higher ISO can help you achieve a faster shutter speed in low-light conditions. However, a high ISO can also introduce noise or grain in your images. You should try to use the lowest ISO possible to achieve the desired shutter speed and aperture. A good starting point for ISO is 400, but you may need to adjust it based on the lighting conditions.
When capturing animal photographs on a safari, selecting the right focus mode is crucial to ensure that you achieve sharp and well-focused shots, especially considering the unpredictability of wildlife behavior. Here are some focus modes and considerations for taking animal photographs on safari:
- Continuous Autofocus (AI Servo or equivalent): This focus mode is essential for photographing moving subjects, such as animals in action. Continuous autofocus allows the camera to track the subject and adjust focus continuously, ensuring that your shots remain sharp even as the animal moves within the frame. It’s particularly useful for dynamic scenes like animals in motion or engaged in activities. This is the mode in which I normally have my camera set.
- Single Autofocus (One-Shot AF): When photographing stationary animals or capturing portraits, using the Single Autofocus mode can be effective. This mode locks focus on a specific point, and it’s suitable when your subject is relatively still. It allows you to achieve precise focus on the animal, especially when capturing detailed shots or portraits.
- Face and Eye Detection: Many modern cameras, including those used for safari photography, come equipped with advanced face and eye detection technology. When photographing animals, especially those with distinct facial features, enabling face and eye detection can help the camera automatically focus on the eyes or faces of the animals, resulting in compelling and engaging images. This needs to be set in your camera menu.
- Zone or Expanded Area Autofocus: For situations where your subject may move unpredictably within a certain area of the frame, using a zone or expanded area autofocus mode can be beneficial. This allows the camera to focus on a broader region, making it more forgiving if the animal moves slightly within the selected zone.
- Manual Focus: In certain scenarios, such as when dealing with challenging lighting conditions or when the camera’s autofocus might struggle, switching to manual focus gives you full control over focusing. This can be particularly useful for capturing shots where the autofocus system might have difficulty, such as in dense vegetation or low-light environments.
When on a safari, it’s essential to be ready for various shooting conditions and animal behaviors. Experimenting with different focus modes and being familiar with your camera’s autofocus capabilities will help you adapt to different situations, ensuring that you can capture stunning and well-focused animal photographs on your safari adventure.
Exposure mode
When on safari, selecting the appropriate exposure mode on your Canon camera is crucial for capturing well-exposed and visually appealing photographs in a variety of lighting conditions. Canon cameras typically offer several exposure modes, and the choice depends on the specific shooting scenario. Here are some exposure modes to consider:
- Aperture Priority (Av): This mode allows you to set the desired aperture while the camera automatically adjusts the shutter speed to achieve a proper exposure. Aperture Priority is useful when you want to control the depth of field, especially in wildlife photography where isolating the subject with a blurred background might be desirable.
- Shutter Priority (TV): Shutter Priority lets you choose the shutter speed while the camera adjusts the aperture accordingly. This mode is beneficial for capturing fast-moving animals or freezing motion in dynamic scenes. For example, when photographing wildlife in action, a faster shutter speed can help avoid motion blur.
- Program (P) Mode: In Program mode, the camera automatically sets both the aperture and shutter speed based on the scene’s lighting conditions. This mode is convenient when you want a balance between control and automation, suitable for situations where lighting is relatively consistent.
- Manual (M) Mode: Manual mode provides full control over both aperture and shutter speed. This mode is beneficial when dealing with challenging lighting situations or when you want precise control over exposure settings. It’s particularly useful for capturing diverse safari scenes where lighting conditions may vary.
- Auto (Green Square or Scene Modes): The Auto mode is suitable for beginners or situations where you want the camera to handle most of the exposure settings. Many Canon cameras also offer scene modes, allowing you to select a specific scenario (e.g., landscape, portrait, sports) for optimized settings.
- Exposure Compensation: Regardless of the exposure mode you choose, exposure compensation is a valuable tool. It allows you to adjust the exposure up or down in increments to compensate for challenging lighting conditions. This can be crucial when dealing with backlit subjects or scenes with high contrast.
When on safari, be prepared to encounter a variety of lighting situations, from bright sunlight to low-light conditions during sunrise or sunset. Familiarizing yourself with the different exposure modes on your Canon camera and understanding how they affect aperture, shutter speed, and ISO will help you adapt to the diverse and dynamic environments of a safari, ensuring you capture stunning images with optimal exposure.
RAW VS JPEG
When embarking on a safari adventure with your Canon camera, the choice between shooting in RAW or JPEG format becomes a crucial decision, each with its own set of advantages and considerations. My safari photography is done solely in RAW.
RAW Format:
- Maximum Image Quality: RAW files contain uncompressed and unprocessed data captured by the camera’s sensor. This results in the highest image quality and provides more flexibility in post-processing.
- Greater Dynamic Range: RAW files retain more information in highlights and shadows, allowing for better recovery of details in post-production. This is particularly useful in challenging lighting conditions often encountered on safaris.
- Extensive Editing Options: RAW files offer a broader range of editing possibilities, enabling adjustments to exposure, color balance, and sharpness without significant loss of quality.
- White Balance Flexibility: RAW allows you to fine-tune white balance settings during post-processing, providing greater control over the final appearance of your images.
- Optimal for Print and Large Prints: RAW files are well-suited for large prints due to their higher resolution and superior image quality.
JPEG Format:
- Smaller File Sizes: JPEG files are compressed, resulting in smaller file sizes. This can be advantageous for conserving storage space on memory cards and hard drives.
- In-Camera Processing: JPEG files undergo in-camera processing, applying settings like white balance, sharpness, and color saturation at the time of capture. This can be convenient if you prefer minimal post-processing.
- Quick Sharing: JPEGs are easily shareable as they are ready to be uploaded or sent without the need for extensive post-production. This can be beneficial when sharing images promptly, such as on social media.
- Faster Burst Rates: Shooting in JPEG allows for faster burst rates and longer continuous shooting, beneficial when capturing rapid sequences of wildlife action.
Considerations:
Storage Capacity: RAW files consume more storage space than JPEGs. Ensure you have sufficient memory cards and storage devices, especially if you plan to shoot extensively.
Post-Processing Skill: If you are comfortable with post-processing and desire maximum control over your images, shooting in RAW is recommended. However, if you prefer minimal editing and quicker workflows, JPEG may be suitable.
Backup: Given the larger file sizes of RAW, having a robust backup strategy is essential to avoid the loss of valuable images.
Ultimately, the choice between RAW and JPEG depends on your preferences, post-processing workflow, and the level of control you seek over your safari photographs. Many photographers opt for shooting in RAW for the superior image quality and flexibility it provides during post-production, especially when capturing the diverse and challenging conditions of a safari environment.
Familiarize Yourself with Your Camera Settings
Before embarking on your safari, take the time to acquaint yourself with the settings of your Canon camera. Knowing how to manipulate factors like aperture, shutter speed, and ISO is crucial for capturing captivating photos of wildlife and landscapes. Opting for manual mode grants you complete control over your camera settings, enabling adjustments tailored to the specific shooting conditions. For beginners, Aperture Priority mode serves as a viable option, providing control over depth of field while the camera automatically adjusts other settings.
Use a Telephoto Lens
When embarking on a safari adventure in Africa, having the right telephoto lens can significantly enhance your wildlife photography. Canon, a renowned camera and lens manufacturer, offers a variety of telephoto lenses designed to capture the beauty and essence of African wildlife.
To explore these lenses further and make an informed decision, you can check out real reviews from experienced photographers by clicking on the respective links. These firsthand experiences will give you valuable insights into the capabilities of each lens and help you choose the perfect companion for your safari photography journey.
Canon RF 100-400mm f/5.6-8 IS USM Lens
- Compact, lightweight, and high-image quality RF Tele zoom lens
- Optical Image Stabilizer with up to 5.5 Stops of shake correction
- High speed, smooth, and quiet autofocus with Canon’s Nano USM
- 9-blade circular aperture for beautiful bokeh
- Control Ring for direct setting changes
Canon EF 100-400mm f/4.5-5.6L IS II USM :
- Versatile zoom range for flexibility in framing distant subjects.
- Advanced Image Stabilization (IS) for sharp handheld shots.
- Excellent image quality with fluorite and super UD glass elements.
- Fast and accurate autofocus for capturing fast-moving wildlife.
Canon EF 70-200mm f/2.8L IS III USM :
- A professional-grade telephoto zoom lens with a wide aperture.
- Ideal for capturing wildlife portraits and details.
- Superior image stabilization for handheld shooting.
- Durable build suitable for rugged safari conditions.
Canon EF 400mm f/2.8L IS III USM :
- Exceptional image quality with a wide aperture for low-light conditions.
- Super telephoto reach for capturing distant subjects.
- Advanced IS technology for stable handheld shooting.
- Lightweight design for easier portability during safari excursions.
Canon RF 100-500mm f/4.5-7.1L IS USM :
- Designed for Canon’s RF mount, offering compatibility with mirrorless cameras.
- Impressive zoom range for versatile composition.
- Image Stabilization for sharp images at longer focal lengths.
- Compact and lightweight design for travel and safari use.
Canon EF 600mm f/4L IS III USM :
- Super telephoto lens with an ultra-wide aperture for exceptional light gathering.
- Ideal for capturing distant or elusive wildlife with incredible detail.
- Advanced IS system for handheld stability.
- Robust build with magnesium alloy construction.
Canon EF 200-400mm f/4L IS USM Extender 1.4x :
- Unique built-in extender for increased focal length flexibility.
- Versatile zoom range suitable for a variety of safari scenarios.
- Advanced optical design for high-quality images.
- Durable construction for challenging environmental conditions.
When selecting a telephoto lens for safari photography, consider factors such as focal length, aperture, and image stabilization. The choice depends on your specific preferences, the type of wildlife you plan to capture, and the shooting conditions you expect to encounter during your African safari.
Consider using a Wide-Angle Lens
When embarking on a safari adventure in Africa, a wide-angle lens can be a valuable addition to your camera gear. While telephoto lenses are often associated with wildlife photography, wide-angle lenses offer unique opportunities to capture the vast landscapes, stunning scenery, and the broader context of the safari experience. Here are some Canon wide-angle lenses to consider and why you might use them on a safari:
Canon EF 16-35mm f/2.8L III USM :
- Versatile Wide-Angle Zoom: This lens covers a broad range of focal lengths, making it versatile for capturing both expansive landscapes and closer subjects.
- Large Aperture: The wide f/2.8 aperture allows for excellent low-light performance and creative control over depth of field.
- Durable Construction: With weather-sealing and robust build quality, it’s suitable for varied safari conditions.
Canon RF 15-35mm f/2.8L IS USM :
- Designed for Mirrorless Cameras: This lens is part of Canon’s RF series, providing compatibility with their mirrorless cameras.
- Image Stabilization: The inclusion of image stabilization is beneficial for handheld shooting, especially in low-light situations.
- High Optical Performance: Offers sharpness and clarity across the frame, capturing the vibrant details of African landscapes.
Canon EF 24mm f/1.4L II USM :
- Wide Aperture: With a wide f/1.4 aperture, this lens excels in low-light conditions, allowing you to capture the magical moments of sunrise or sunset on the safari.
- Prime Lens Quality: As a prime lens, it delivers exceptional optical performance and is well-suited for capturing wide-angle scenes with stunning clarity.
Canon RF 14-35mm f/4L IS USM :
- Ultra-Wide Angle: This lens offers an ultra-wide focal length, ideal for capturing dramatic landscapes and immersive safari scenes.
- Image Stabilization: Equipped with image stabilization for handheld stability, even at wider angles.
- Compact and Lightweight: Designed for portability, making it a practical choice for travel and safari expeditions.
Why Use a Wide-Angle Lens on Safari:
Landscape Photography: Wide-angle lenses are perfect for capturing the vastness of African landscapes, showcasing the sweeping plains, majestic mountains, and expansive skies.
Environmental Context: Wide-angle lenses help tell a more comprehensive story by including the surroundings, and providing context to the wildlife and their habitat.
Creative Perspectives: Wide-angle lenses allow for creative compositions, emphasizing foreground elements and creating a sense of depth in your images.
Group Shots: When photographing groups of animals or scenes with multiple subjects, a wide-angle lens ensures you can fit more into the frame.
In summary, incorporating a wide-angle lens into your camera kit for an African safari enables you to capture breathtaking landscapes and diverse environments, providing a well-rounded photographic narrative of your safari experience.
Best Canon Cameras For Safari
Choosing the right Canon camera for an African safari involves considering factors such as budget, features, and the level of photographic expertise. Here are recommendations for affordable, mid-range, and professional-level Canon cameras that are well-suited for capturing the diverse and dynamic scenes encountered during an African safari:
Affordable Cameras:
Canon EOS Rebel T7i (EOS 800D):
- Budget-Friendly: The Rebel T7i offers an affordable entry point for those on a budget.
- 24.2MP APS-C Sensor: Provides decent image quality for capturing wildlife and landscapes.
- Dual Pixel CMOS AF: Ensures quick and accurate autofocus, handy for spontaneous wildlife moments.
Affordable RF Canon Cameras
Canon EOS R100
- Entry-Level Mirrorless: A budget-friendly mirrorless option24.1 Megapixel (APS-C) CMOS Sensor with ISO 10025600 (H: 51200
- Built-in Wi-Fi and NFC Technology.
- 9-point AF System and AI Servo AF
- Optical Viewfinder with Approx. 95% Viewing Coverage
- 3.0-inch LCD with 920,000 Dots
- Scene Intelligent Auto Mode – Full HD 30p
- Canon EOS Rebel SL3 DSLR Camera
- Lightest, Smallest EOS DSLR camera.
- High Image Quality with 24.1 Megapixel CMOS (APS-C) Sensor
- Fast and Accurate Dual Pixel CMOS AF with Eye Detection AF
- 4K Video, 4K Time-lapse Movie
- Vari-angle Touchscreen, 3.0-inch LCD.
- Built-in Wi-Fi and Bluetooth Technology with Auto Image Transfer.
Mid-Range Canon Cameras :
- Canon EOS 90D
- Fast continuous shooting, Capture the action at up to 10fps
- 32.5 megapixel APS-C CMOS sensor, For exquisite detail
- Intelligent optical viewfinder, Comfortable to use even over long periods
- 45 cross type AF points with multi-controller, Focus quickly and accurately even in low light
- iTR focus tracking, Keep even fast-moving subjects in focus
- 4K filmmaking and Dual Pixel CMOS AF, Superb quality video and audio
- Canon EOS 6D Mark II
- Full-Frame Power: A mid-range full-frame option.26.2 Megapixel Full-frame CMOS Sensor
- Optical Viewfinder with a 45-point All Cross-type AF System
- Dual Pixel CMOS AF with Phase-detection & Full HD 60p
- DIGIC 7 Image Processor, ISO 100-40000
- Vari-angle Touch Screen, 3.0-inch LCD
- Built-in Wi-Fi, NFC, Bluetooth and GPS
- Canon EOS R7
- High Image Quality with a 32.5 Megapixel (APS-C) CMOS Sensor
- High-Speed Shooting
- Blazing Fast Autofocus
- 5-axis In-body Image Stabilization with auto-level technology
- Record each clip over 30 minutes
- Get professional quality video with Smart Shoe integration for audio and HQ 4K
.
Pro Canon Cameras
- Canon EOS R3 Mirrorless Camera
- High Image Quality with a Back-illuminated Stacked 24.1 Megapixel Full-frame CMOS Sensor
- DIGIC X Image Processor with an ISO range of 100-102400; Expandable to 204800
- The First EOS Digital camera to feature Eye Control AF
- 5.76-million-dot & 120fps blackout-free EVF with quick response, as well as a Vari-Angle Touchscreen
- Capable of recording 6K 60P RAW or 4K 120p 10-bit (uncropped) with Canon Log 3
- Dual Card Slots for CFexpress and UHS-II SD Memory Cards
- Canon EOS 1DX Mark III
- A new era in autofocus speed and accuracy
- Outstanding stills and video
- High speed camera communications
- Always ready to perform, whatever the situation
- Enhanced DIGIC Processor
- New CMOS Sensor
Considerations When Buying a Canon Camera for Your African Safari:
Focal Length and Lens Compatibility: Ensure the camera is compatible with the lenses you need for wildlife and landscape photography, considering both EF and RF lenses.
Autofocus Performance: Wildlife photography demands reliable autofocus, so look for advanced autofocus systems like Dual Pixel CMOS AF for quick and accurate focusing.
Weather Sealing: Given the varied conditions on safari, having a camera with weather-sealed construction is crucial for durability and protection against the elements.
Portability and Weight: Consider the size and weight of the camera, especially if you plan to carry it for extended periods during safari excursions.
Battery Life: Longer battery life is beneficial for extended periods in the field. Consider having spare batteries for backup.
Video Capabilities: If you plan to document your safari in video format, consider cameras with advanced video features, such as 4K recording and high frame rates.
Low-Light Performance: Given the early morning and late evening safari excursions, good low-light performance is essential for capturing wildlife in natural lighting conditions.
Budget: Determine your budget range and choose a camera that offers the best features within that range. Consider investing in good lenses as well.
- It Is Important To Pay Attention To The Lighting.
Lighting is a crucial aspect of photography, and when on safari, capturing the vibrant colors, textures, and details of wildlife and landscapes depends significantly on understanding and utilizing available light conditions. Here are considerations and tips for handling lighting while on a safari photography expedition:
- Golden Hours:
- Early Morning and Late Afternoon: The golden hours around sunrise and sunset provide soft, warm, and directional light. This lighting not only enhances the natural colors of the environment but also creates long shadows, adding depth and dimension to your photographs.
- Harsh Daylight:
- Use Shadows Creatively: Embrace the challenges of harsh midday sunlight by incorporating shadows creatively. These shadows can add contrast and drama to your images, especially when capturing textured landscapes or wildlife features.
- Cloudy Days:
- Even and Soft Lighting: Overcast or cloudy days can provide even and soft lighting. This diffuse light reduces harsh shadows and can be advantageous for capturing details and colors without the distraction of strong contrasts.
- Backlighting:
- Silhouettes and Rim Lighting: Experiment with backlighting, especially during sunrise or sunset. This technique can create silhouettes and add a beautiful rim light to your subjects, highlighting their contours against the backdrop.
- Adapt to Changing Conditions:
- Be Flexible: Safari conditions can change rapidly, from bright sunlight to overcast skies. Be prepared to adapt your settings and compositions accordingly. Stay alert to the changing atmosphere and adjust your approach as needed.
- Use Natural Frames:
- Utilize Trees and Vegetation: Take advantage of natural elements like trees or bushes to create frames within your composition. These frames can add interest to your photos and also help control the intensity of sunlight.
- Consider the Animal’s Perspective:
- Capture Catchlights: When photographing animals, pay attention to the catchlights in their eyes. Position yourself so that the light enhances the catchlights, bringing life and sparkle to the subject’s eyes.
- White Balance:
- Adjust for Conditions: Set your camera’s white balance according to the prevailing conditions. Different lighting situations may require adjustments to maintain accurate and natural color tones.
- Avoid Direct Flash:
- Opt for Natural Light: While flash can be useful in certain situations, especially for fill-in light, try to rely on natural light as much as possible. It provides a more authentic and visually appealing look to your safari photographs.
- Patience and Observation:
- Wait for the Right Moments: Patience is key in wildlife photography. Observe the behavior of animals and be ready to capture those magical moments when the lighting is just perfect.
- Silent and Respectful Approach:
- Minimize Disturbance: Approach animals silently and respectfully to avoid disturbing their natural behavior. This not only ensures ethical photography but also allows you to capture them in their most relaxed and authentic state.
- Lens Hoods and Filters:
- Minimize Lens Flare: Use lens hoods to minimize lens flare caused by direct sunlight. Consider using polarizing filters to manage reflections and enhance colors.
Conclusion:
Lighting is a dynamic element in safari photography, and understanding how to adapt to different conditions will significantly impact the quality of your images. Whether you’re capturing the warmth of a sunrise, the drama of a storm, or the soft glow of an overcast day, being attuned to the nuances of lighting will help you create stunning and evocative safari photographs.
Best Software To Edit Safari Photos
Editing safari photographs requires software that can handle various aspects such as color correction, exposure adjustments, and fine-tuning details to bring out the beauty of wildlife and landscapes. Here, I’ll discuss three popular software options for editing safari photographs: Adobe Lightroom, Adobe Photoshop, and Luminar Neo.
- Adobe Lightroom:
- User-friendly interface: Lightroom’s intuitive interface makes it accessible for both beginners and experienced photographers.
- Non-destructive editing: Lightroom preserves the original image, allowing you to experiment with edits without altering the original file.
- Efficient organization: The software offers robust cataloging and organizational tools, helping users manage large collections of safari photographs.
- Synchronization: Edits made in Lightroom can be synchronized across multiple devices, facilitating a seamless editing workflow.
- Key Features: Global and local adjustments: Lightroom enables users to make overall adjustments to the entire image or target specific areas using the Graduated Filter, Radial Filter, and Adjustment Brush tools.
- Presets and profiles: The software includes a variety of presets and profiles, allowing users to apply predefined settings or create their own for consistent editing.
Advanced editing capabilities: Photoshop is a powerful software for intricate and detailed edits, making it suitable for tasks like retouching and compositing.
Layers and masks: The ability to work with layers and masks provides a high level of control over specific elements in the image, enhancing flexibility in editing.
- Key Features:
- Retouching tools: Photoshop offers advanced retouching tools, such as the Healing Brush and Clone Stamp, which are useful for removing distractions or imperfections in safari photographs.Advanced color correction: Photoshop provides extensive color correction tools, allowing photographers to fine-tune the color balance and enhance the vibrancy of safari images.
Luminar Neo:
- AI-powered editing: Luminar Neo leverages artificial intelligence to streamline the editing process, making it easier for photographers to achieve impressive results quickly.
One-click enhancements: The software includes AI-driven features like Accent AI, which automatically enhances images with a single click, saving time in the editing workflow.
- Sky replacement and AI filters: Luminar Neo offers creative tools like AI Sky Replacement, allowing photographers to change the sky in their safari photographs easily. Additionally, AI filters enhance specific aspects of the image, such as details and colors.
In conclusion, Adobe Lightroom, Adobe Photoshop, and Luminar Neo are all excellent choices for editing safari photographs, each offering unique features and strengths. Lightroom is ideal for efficient organization and global adjustments, Photoshop excels in detailed editing and retouching, while Luminar Neo stands out with its AI-powered enhancements and creative tools. Choosing the best software depends on the specific needs and preferences of the photographer.
Patient, Observant Wildlife Photography
Wildlife photography is a fascinating and challenging genre of photography. It requires a lot of patience and observation, as well as technical skill and knowledge of animal behavior. In this article, we will discuss some tips for being patient and observant in wildlife photography.
Research and Plan
Before heading out to photograph wildlife, it’s important to research and plan your trip. Research the animal behavior and habitat, as well as the best time of day and season to photograph them. Knowing where and when to find your subject will save you time and increase your chances of getting the shot you want. Planning also involves choosing the right gear, clothing, and accessories for your trip.
Be Quiet and Still
Wild animals are sensitive to noise and movement, so it’s important to be quiet and still while photographing them. Avoid making sudden movements, rustling leaves, or loud noises that could startle or scare the animal away. Move slowly and deliberately, and keep a low profile. Wildlife is more likely to approach you if you look and act non-threatening.
Observe the Animal Behavior
Observing animal behavior is essential to capturing great wildlife photos. Pay attention to their movements, body language, and interactions with other animals. This will give you insight into their behavior and help you anticipate their next move. Knowing when and where to point your camera will increase your chances of getting the shot you want.
Wait for the Right Moment
Wildlife photography requires patience, and waiting for the right moment is key to getting a great shot. Observe the animal and wait for it to do something interesting or unique. Be prepared to wait for hours or even days to get the shot you want. The key is to be patient and ready for when the animal does something interesting.
Be Respectful of the Animals
Respect for the animals and their habitat is crucial in wildlife photography. Avoid disturbing the animal or its environment by keeping a safe distance and avoiding feeding or touching them. Respect their space and be mindful of their safety and well-being. Remember, the animal’s welfare comes first, and photography comes second.
Patience and observation are essential to capturing great wildlife photos. Research and planning, being quiet and still, using a telephoto lens, observing animal behavior, waiting for the right moment, being respectful of the animals, using natural light, and shooting in continuous mode are all important techniques to master. With practice, skill, and a lot of patience, you can capture stunning wildlife photos that will inspire and delight others. Remember, the key to great wildlife photography is to be patient, observant, and have fun with creativity.
Related Posts

CemAir: My Last Flight – Here’s Why
- Feb 26, 2024

Slow Lounge Cape Town: A Haven of Comfort and Luxury
- Feb 15, 2024

Safari Snapshots: Mastering iPhone Photography in the Wild
- Jan 30, 2024
WhatsApp John Finch Travel
Finding the Universe
Travel tales, photography and a dash of humor

Safari Photography Tips – How to Get Great Photos on Safari
Last updated: August 30, 2023 . Written by Laurence Norah - 4 Comments
A safari is a fantastic way to see a wide range of wildlife in its natural habitat. It’s also an opportunity to take lovely photos of that wildlife! However, there are some unique challenges to taking photos on safari. In this post, I’m going to share some safari photography tips to help ensure you get the best photos when you go on safari.
As a professional travel photographer, I’ve been lucky enough to take photos in a wide range of scenarios, including on a number of safaris in both Africa and Asia. Based on my experiences, I’m going to share with you everything you need to know to get great photos on safari.
Most of my examples used in the post are from taking photos while on safari in Africa; however, these tips will work for most safari destinations. as well as for wildlife photography in general. Many of these tips can help anyone looking to improve their wildlife photography and also for anyone wanting to take photos from a vehicle.
I’ll cover a few things in this post. I’m going to talk about some general tips and things to think about when going on safari from a photography perspective. I’ll also include ideas on suggested cameras and camera accessories for safari so you know what is important to bring along.
A safari is a big investment for many of us, and is often a once in a lifetime trip. So getting great photos to remember our experiences is important. Let’s get started with the tips!
Tips for Taking Better Photos on Safari
Plan where you want to go.
The first thing you are going to have to do is decide where you want to go on safari. It’s likely that you already have an idea as to what you want to see and photograph on your safari, be it specific animals or birds, or maybe you are interested in certain landscapes.
The main thing is that you pick a destination that will give you a good chance of seeing the things you really want to see and photograph. This is particularly the case with animals or birds that are rarer, like rhinos.
On a recent trip across East Africa, we knew that we wanted to see and photograph things like gorillas, chimpanzees, rhinos, and spoonbill storks. We picked the countries we visited as well as the time of year we travelled to ensure that we would have a good chance of seeing these particular animals.
We also wanted to see the Great Wildebeest Migration on that trip. This is always taking place, so it was just a question of researching where it would be at the time of year we would be visiting to ensure we would have the best chance to see and photograph it.
Planning your destination properly is definitely the first step to getting the photos you want to get on your safari.
Research Your Chosen Safari Location
Once you have chosen your safari destination, do some research to better understand your trip itinerary and the wildlife, landscape, and climate of the destination.
All of these things can affect how you will want to prepare for your safari and the type of camera equipment you might need.
For instance, if your main photography goal of the trip is take photos of lions, you will want to try to make sure that you spend a sufficient amount of time in places with healthy populations of lions to increase your chances of seeing and photographing them. Lions are often best seen in savanna areas.
However, if you are interested in malachite kingfishers, you’ll want to make sure that you spend enough time in wetland areas for a good chance to see these birds. These little birds are best spotted and photographed either from a boat or on foot.
This research will also help you decide on the equipment you will need to take with you. For photography of smaller birds for example, you’re likely going to need a longer lens. If you are more interested in landscapes, then a wide-angle lens will be an essential item.
Finally, check out the climate for the country you are visiting and the time of year you plan to visit. Having an idea of what to expect will ensure you bring the right clothing as well as any protective equipment like camera rain covers on your trip.

Choose the Right Camera for Safari
One of the main decisions you’ll have to make when planning your safari trip is what camera to take with you on your trip. This decision will have you weighing various factors, from your budget through to the size and weight of the camera.
When you are deciding how much to spend and how much you are willing to carry with you, consider what sort of images you want to get. If you are looking for amazing wildlife shots of fast action or in low light, then you will want to invest more money in a high-end set-up.
As an example, compare these two shots of a leopard taken in low light at the end of the day. Both are uncropped.

Both images are obviously of a leopard. However, the compact camera struggles to get a close up shot due to the maximum 70mm focal length, and even at ISO 800 the image ends up being quite noisy. The slow shutter speed, even with image stabilization, also means the shot is not too sharp.
The larger and more professional Canon EOS R5 mirrorless camera paired with a 100-400mm lens is still able to get a very usable image, even at 10,000 ISO.
If you are just happy to capture memories of your trip, then a compact camera or smartphone will likely do the job.
A good compromise for many users is a bridge camera , which offers a good balance between a long zoom, affordability, and image quality.
However, if you want the most flexibility and opportunity to get the best shots from your trip, then a higher end mirrorless camera would be my recommendation.
If money and size are no object, my recommended camera for safari would be a high-end mirrorless system. The latest mirrorless models feature excellent auto-tracking autofocus which can recognise and lock onto a subject very quickly, which can really help with fast moving subjects.
In this situation, I’d probably pick a Canon EOS R5, Sony Alpha a7r IV or a Nikon Z9. I’d pair it with a telephoto zoom in the range of 100-500 with stabilization and as wide an aperture as I could afford.
If you want something that offers a good balance between affordability, image quality, and zoom, then my suggestion would be a bridge camera.
I have a whole post on the best camera for safari which I would suggest reading if you don’t already have a camera you want to bring with you. It’s definitely important to choose the right camera for you.
In summary though, here are some recommended cameras that I suggest you take a look at, depending on the type of camera you would like to take on safari:
- Smartphone: either a Pixel 6 Pro or iPhone 13 .
- Compact camera Panasonic Lumix ZS70 or Sony RX100 VII
- Bridge camera: Panasonic Lumix DC-FZ80 / FZ82 or Sony RX10 IV .
- Mirrorless camera: Sony a6100, Sony Alpha 7c , Canon EOS R6 Mark II , Nikon Z7II , Canon EOS R5 , or Sony Alpha a7 IV
- DSLR camera: Nikon D3500 or Canon EOS 6D Mark II
For more on choosing a camera in general, we also have guides to the best travel camera , best compact camera , best bridge camera , best mirrorless camera and best DSLR cameras .
If you have, or plan to buy, a mirrorless camera or DSLR camera, you may be wondering what kind of lens would be best for safari. It depends of course on your photography goals and what you want to photograph, but I would generally recommend a lens with a focal range of 100-400mm. See my safari camera post for lens recommendations.

Learn How to Use Your Camera
Once you have decided on which camera to take with you, it’s important that you learn how to use it properly. This applies to whatever kind of camera you are using, be it a smartphone camera or a high-end DSLR or mirrorless camera.
A camera is ultimately just a tool to help you take great photos, and like any tool, it will only do what you ask of it. Understanding the various features of your camera and how to access and adjust key settings is vital to ensure you don’t miss a shot.
When you are on safari, great photography opportunities can arise very quickly and be gone just as quickly. For example, for the shot of the leopard at the start of this post I had just a couple of seconds to frame the shot and ensure all the settings were correct before he decided to sit up and slink away out of sight.
Had I not been able to nail the focus or adjust ISO, aperture, and shutter speed appropriately in time, I would have missed the shot. I would recommend checking out my guide to the exposure triangle , as well as how to use a mirrorless camera for detailed advice.
Understanding how to adjust the settings and set up your camera properly means you’ll have more control over the final look of your shots. For example, you could learn how to manually change the shutter speed so as to capture movement in different ways.
Here are a couple of examples of different shutter speeds to show the difference.

In the first shot, even though the fighting zebra are moving quickly, the fast shutter speed freezes the action. In the second shot of the wildebeest crossing, they are just walking over the road. But in 1/5th of a second, they cover a small amount of ground, and so they become blurry. The single stationary wildebeest remains sharp as it isn’t moving.
There are many features of a camera which can be used to adjust how the final shot looks, and understanding how to control them will help ensure you get the shots you want.
If you feel you need help with using your camera and would like to improve your photography, there are a lot of photography courses, books, and workshops out there. I run an online photography course that teaches all the basics as well as more advanced skills, and have proudly helped thousands of people improve their photography skills.
Understand the Limitations of Your Camera
Every camera has limitations as to what it can do. These limitations will vary, and even high-end cameras will have some sort of limitation.
Examples of limitations are:
- The zoom isn’t very big, meaning you can’t capture animals which are far away and will have limitations capturing smaller animals like birds
- The camera sensor is small, and so will produce noisier images when there is less light
- The lens is big and heavy, so you need to use a fast shutter speed to avoid getting blurry images due to your hand motion when hand holding it
- Big and heavy equipment is more difficult to pack and travel with
The important thing is to understand the limitations of your camera so you can work around them, or at least, know what to expect before you go on safari.
The most common issue is probably not being able to take photos of animals that are further away. We saw a number of travelers frustrated by this on our recent trip in East Africa. All cameras will have their distance limitations, just be sure to have a good idea of yours so you can have realistic expectations of what kinds of photos you will be able to take. You can simply go outside and take photos of local animals or birds to get a good sense of this.
Another common issue I see from safari photos and wildlife photos in general are images that are not as sharp as they could be.
This is usually because the shutter speed is too low, and the user is hand holding a larger lens. A slow shutter speed means that any movement in your hand is translated into motion blur as you take the picture. You can fix this by increasing the shutter speed and/or resting the lens on a steady surface.
Some limitations can’t be overcome though, and are usually down to the actual hardware inside the camera. For example, the maximum zoom, the sensor size and maximum aperture size will be fixed.
However, if you know what the limitations of your equipment are, then you will be able to either accept them and work around them, or decide on upgrading to a different camera for your trip.
I’d also add at this point that you shouldn’t compare your photos to those you’ve seen on TV, online, and in wildlife magazines. You have no doubt seen some amazing wildlife photos and videos on sites like National Geographic or the BBC , and might wonder why you aren’t able to get the same sorts of shots.
Whilst it is of course possible to get images like those photographers do, they often have a lot of advantages over the average tourist. Not only do they typically travel as a crew with tons of high-end equipment, but they often take photos in locations that are hard to get to with limited public access.
They also often have paid for special press / filming permits to get off-road access or shoot in private areas outside of national parks. They also often spend weeks planning and trying to get the right shots, and only share the best shots with the public.
So don’t be too hard on your gear or yourself. Just be aware of the limitations of your photography equipment and know how to get the most out of it.

Understand What Causes Blurry Wildlife Images
It’s important that your images are sharp. Two things can cause an image not to be sharp. The first is using too slow of a shutter speed for the situation you are shooting. The second is not focusing correctly.
A slow shutter speed can result in blurry images for a number of reasons. If you are hand holding your camera, then any movements in your hands can translate to blurry images. Movement of the subject can also translate to blur, as can movement due to you taking photos from a moving vehicle or boat.
You can resolve the slow shutter speed blur problem by using a faster shutter speed, and ensuring you are as still as possible when shooting. Ideally, you’ll want to rest your camera on something totally stable when shooting. Then all you have to think about is the motion blur that might result from the animal moving.
For focus, the main issue is likely to come about as a result of the camera’s autofocus system picking the wrong part of the scene to focus on, leaving your subject out of focus. I’ll cover that in my next tip.
Master Your Camera’s Focus System
An important aspect of wildlife photography is knowing how to use your camera’s focus system.
It is important to be able to focus on the animal or thing that you want the viewers’ eyes to go to in the image. This means that you will want to be able to use your camera’s manual focus system (if it has one) and/or learn how to change the focus if your cameras autofocus gets it wrong.
A shot can technically be in focus and sharp, but if you have focused on the wrong part of the scene your actual subject will be out of focus and so you won’t end up with the image you want.
Nearly every camera on the market today has an automatic focus, or autofocus system. As the name suggests this system automatically focuses for you when you point the camera at a scene.
There is however quite a difference in the capabilities of these systems. At the more basic end, an autofocus system will allow you to select an area of the scene to focus on, and then focus appropriately.
More advanced autofocus system will be able to identify specific types of subject like animals or people, and track them as they move so you can keep focus.
Many cameras and lenses also feature manual override, so you can manually adjust the focus if you need.
For the main camera I use for wildlife photography, the Canon EOS R5 , this has a very sophisticated autofocus system which is able to recognised and lock onto a wide range of subjects. If it can find an eye, it will lock focus on that. Otherwise it will try to track a torso or head. Additionally, it can continue to track the subject as it moves, switch between subjects, and I can override the focus selection if necessary.
It took me quite a while to get to grips with this system, and also to get used to its quirks and limitations. For example, on some occasions it would prefer to focus on the grass in front of the subject rather than the subject. Other times it might focus on a marking on an animal’s hide, rather than the eye.

Results like this are why it is so important to both understand the various focus modes of your camera, but also understand how to override them.
For example, on my Canon EOS R5 I have a separate button set up for centre spot focus. This allows me to point the centre of the frame at the area I want to focus on, and know I’ll get sharp focus in that area when I press the focus button. I can also entirely override the focus with the manual focus ring on the lens.
Whilst I can rely on the autofocus subject tracking 90% of the time, it also means I don’t miss focus in those edge cases where the camera doesn’t get it right. Technology can be smart, but it can’t read minds quite yet, so it’s usually working off a best guess as to what you want to take a photo of.
Whatever your camera is, my recommendation is to spend some time learning the various focus modes, what they are, and how to quickly override the focus if necessary, either manually or by selecting a different focus area.
Ideally you’ll want the camera to be in a continuous focus mode so it keeps tracking a moving subject. Try to find some subjects like wildlife in your garden or a moving pet that you can practice on before you go on safari to master your camera’s focus features.
Try Shooting in Burst Mode
Most cameras have a range of shooting modes, which may also be called drive modes. The choices normally vary, and will include single shot and burst shot modes. The drive mode menu on your camera is also where you’ll often find the camera’s self-timer mode.
For wildlife photography, a lot can happen in a short sequence of time. For this reason, shooting in burst mode is usually the way to go when you have a moving subject. This means that as you hold down the shutter button the camera will keep taking images.
Alternatively, in single shot mode, you have to keep pressing and depressing the shutter button. This loses you time and you may miss the shot.
Shooting in burst mode will let you take a sequence of images and then pick the best one. For example, here’s a sequence to show a yellow-billed stork landing.

The number of images the burst mode will take will depend on two main factors.
First, the camera’s burst speed, which is the number of images per second your camera can take. For instance, a camera with a burst speed of 10fps (frames per second) can take up to 10 photos per second.
Second, the speed that your camera can write to the memory card inside the camera as it takes pictures.
Most cameras will be able to take a certain number of images at the maximum burst speed for a few seconds, and then as the memory buffer fills up, this rate will slow down or even stop until the images have been written to your memory card. These details should be made clear on the specification sheet for your camera.
When you shoot in burst mode you will definitely also want to have continuous autofocus enabled. This will mean that if your subject moves as you are shooting it will hopefully stay in focus.
The main disadvantage of shooting in burst mode is that you will end up taking a lot more photos and using more memory card space. However, memory cards and memory in general are relatively inexpensive these days, so this shouldn’t be too much of an issue. Just be sure to always have an extra memory card with you.
Try to Shoot at the Best Times of Day
If you’ve ever read a photography guide, it will normally advise you that shooting in the earlier morning and later afternoon will give you better results. This is because the light at the start of the day and in the evening is softer and has that nice warm yellow glow.
In addition, the lower angle of the sun in the morning and evening produces shadows, resulting in images that have better contrast and depth compared to images shot in the overhead midday sun which can produce more flat images.
When it comes to safari, this advice is also true, but there are additional reasons to shoot earlier in the morning and later in the evening.

To start with, the majority of animals are going to be more active earlier in the morning and then towards the evening. The middle of the day tends to be hotter, and is a time when many animals are likely to be resting in a nice shady spot.
You will tend to see fewer animals in the hottest part of the day and those you see will tend to be less active during this time.
If you are looking for nocturnal species like genets, bushbabies, or aardvarks, your best chances to see them are on night drives or night walks, or to try to go as early in the morning as you can for a chance to spot them before they have gone off to sleep.
Just note nocturnal animals can be pretty tricky to see in most national parks given the hours that you are allowed to do a game drive. Getting good photos of them can be very difficult given they are often spotted at night.
We recommend trying to start your game drives as early as the park will allow. This will give you a better chance of seeing more wildlife, and also getting better images of that wildlife.
Another reason to avoid the middle of the day is that as the air heats up it gets more hazy. Think of the heat shimmer you see on a hot day—this is a real issue when shooting during hotter days and can negatively impact your images.
The haze will result in less sharp images, especially of further away subjects. In addition, as the day progresses, there will often be more dust in the air from vehicles driving around, which also reduces the clarity in the air.
Of course, I appreciate that I am talking about ideals. It isn’t always possible to pick the ideal time. Sometimes you will be out in the middle of the day. In these situations. Try to get as close as possible to your subject, which will let you avoid more of the heat haze. Where possible, shoot your subject so the sun is behind you rather than behind your subject.
The below two images are of the same black rhino mother and calf in Kenya. Both were shot in the middle of the day. In the first shot, the pair were quite far away and there was quite a lot of heat haze, meaning the shot ended up not being as sharp as I would have liked.

In the second shot, the pair moved much closer to us and the light was slightly improved, so there is some depth from the light and dark. It’s still not the ideal setup, but it’s definitely improved compared to the flat and slightly hazy look of the first shot.
See more on heat haze in photography here , including more tips for identifying and avoiding it.

This brings me on to my next tip for getting great photos on safari.
Any wildlife photographer will likely tell you that their most useful skill is patience. When doing landscape photography , I am certainly used to waiting for the right light, but wildlife photography definitely takes the need for patience to a new level.
Wild animals tend not to move to our schedules. They go where they want when they want. Being patient and quiet can reap huge rewards when it comes to photographing them in their natural habitat.
An example is of this leopard in a tree. When we arrived, it was asleep in the tree by its kill. However, we waited for around an hour and it decided to get up, eat more of its kill, descend from the tree and wander off. All these moments provided better photography opportunities than the initial one, and just required patience.

Another example would be a group of lion cubs we encountered in Tanzania. There were eight of them playing near the road, and as we watched two of them climbed up a tree. Shortly afterwards, one of their mothers returned, and we were rewarded by the sight of baby lions bounding across the grass to be reunited.

This is a story I could repeat multiple times across many wildlife encounters, but the overall message should be clear. Try to remember that a safari game drive is not an exercise in getting somewhere.
When you find an animal or bird you want to see, you will probably be rewarded if you spend some time just sitting and watching it rather than rushing on to try to find something else.
Prepare Your Equipment
If you already have a camera that you plan to take with you on safari, you want to make sure it’s in great working order before heading on safari. This is especially the case if you have older gear or gear that gets a lot of use.
Before you go, I recommend testing and cleaning the camera yourself to make sure it’s working. You’ll also want to make sure all the gear from your lenses to your camera straps are in good shape before your trip. Your trip is not a good time to learn about a preexisting scratch in your lens, a corrupted memory card, a fraying strap or a battery that doesn’t hold its charge!
You might also consider taking your camera to have a professional clean and check before your safari. Often you can do this at a local authorised dealer or repair shop for your camera brand, as they will have servicing options. Alternatively, your manufacturer might offer mail-in servicing options.
I try to get my cameras serviced every year or two, especially if I know I’ve been hard on them. As well as cleaning the sensor professionally, they check the camera over and make sure things like seals and screws are all in good working order. In my opinion this is well worth the investment, especially on high-end equipment.
Protect your Equipment on Safari
Safaris can be really hard on camera equipment. From dusty conditions to bumpy roads, there are all sorts of hazards that can either damage your equipment or cause it to function less effectively. In this section, I’m going to talk about common issues you can expect to encounter and how to overcome them.
Dust or Sand
When it’s hot and dry, the roads will be dusty. As your vehicle and other vehicles travel on the roads they kick the dust up, and it gets everywhere. If you have the top down or windows open, expect dust to get on your camera equipment.
If you are traveling to a place where sand is a concern, such as a desert or beach, be careful as blowing sand can get into your gear and can also leave scratches on your lens if you accidentally wipe them. Never put your camera down in the sand as it can easily work its way inside.
Cameras contain a lot of sensitive electronics as well as some moving parts, neither of which appreciate dust or sand. In addition, if dust gets onto your camera’s sensor it can cause unsightly spots to appear in your images.
There are a few things you can do to minimize the impact of dust or sand. First, a good camera bag that you can put your camera in between uses will help to prevent general dust getting in. So when you are not using your camera, I’d recommend securing it in a case or bag.
Also be careful about where you set your camera. Don’t place it on the ground or other dirty surfaces, and don’t leave it outside for any longer than it needs to be outside.
Next, remember to use a lens cap if your camera lens supports them as this will help to keep the front element dust free. Just keep the lens cap in your pocket and place it on the camera whenever you are not using it. If your lens supports it, then a lens hood and a UV filter can also provide much needed protection.
If you are using a camera where you can change lenses, try to change the lens in a dust-free location if possible, such as in your hotel or when stopped in a sheltered place. Try not to change your lenses more than you need to when in dusty situations.
In addition, I’d recommend packing a small camera cleaning kit so you can get accumulated dust off your gear as you travel. I’d particularly recommend having a lens cloth, a brush, and a blower with you.
Once you are done with your safari and you have gotten all the amazing photos you wanted, you might consider getting your camera professionally serviced and cleaned to get rid of any errant dust and to ensure it’s back to full working order for your next adventure.
Not all safaris take place whilst in a closed vehicle. Sometimes you might be on foot or trekking, or in an open top vehicle. In these situations, even when visiting a country in the dry season, there’s always a possibility of rain.
Whilst some cameras do offer a level of weather-proofing or rain resistance, the majority are not fully waterproof. So having a camera rain cover to keep your gear dry like this is a good option.
I’d also recommend having a good camera bag or backpack with a rain cover where you can put your camera in between shots.
If you have a smaller camera like a compact camera or smartphone, something like a resealable freezer bag or clear dry bag can also work well to keep it dry.
Bumpy Roads
As well as dust and rain, another issue you will have to contend with will be bumpy roads. Most roads in safari parks are unpaved, and some of them can be very bumpy.
You definitely don’t want your camera equipment flying around the inside of a vehicle as this can damage it, and could even cause injury to the other occupants. I have a few suggestions to help avoid this scenario.
First, I recommend bringing along a good camera bag or case. Camera bags are specially designed to provide padding and protection for your gear, and many of them also come with rain covers. This means that you have somewhere safe, protected, and padded to put your gear in between shoots.
Personally I use Vanguard photography bags and I’ve been an ambassador for Vanguard for many years now. If you see something on their store that works for your equipment, you can save money using our exclusive Vanguard discount code. This will give you 20% off everything in the Vanguard store.
Just use the code FindingTheUniverse for your discount! This code works in the Vanguard USA, UK, Australia, Spain, and Germany stores.
When you are actually using your equipment, I recommend having a strong and comfortable strap to keep it secure around your neck or shoulders. I use the Peak Design strap system which has reliably kept my camera gear comfortably slung at my hip for many years now. You’ll want to find one that is comfortable for you.
I left my DSLR camera on the seat of our Land Cruiser on a trip and it fell on the floor after hitting an unexpected bumpy patch in the road. I was lucky that nothing was damaged but it sure made me more careful about either putting gear away in my bag or keeping it around my neck.
I also recommend that if you are someone like me who enjoys standing up in a safari vehicle, that you sit down or at least put your camera in a camera bag when the roads gets really bumpy. If your guide tells you to hold on or you see that you are going to be crossing a river, it is probably best for both you and your gear to sit down. This way you’ll have a better grip on your gear and avoid banging your gear on something or falling.
Dress Appropriately
Packing appropriate clothing is going to ensure you are comfortable and ready for the weather during your trip. Whilst it might not directly help you get better photos, comfort is a really important factor. When you are comfortable you will be able to focus on getting great photos rather than the temperature or the insects.
When choosing clothes for your trip, consider the climate, weather, and insects of where you are going as well as the activities you plan to do. You are going to pack very differently for a cool weather destination than a tropical one. You also need to pack differently if visiting a country during its rainy season versus its dry season.
In terms of photography specific clothing, you might want to consider having lots of pockets so that you have plenty of places to store things when standing in a vehicle and when hiking. This will give you quick access to things like extra batteries, lens wipes, and your lens caps.
There are a range of different vests you can get, including specialised photography vests . I personally prefer something a bit more versatile that I can use in a variety in situations, and I like the Scottevest products which have a lot of pockets and are great for travel in general. I find them particularly useful for airport travel as they have so many handy pockets.
Generally though, on safari I wear the NosiLife long-sleeve shirts from Craghoppers . These have lots of pockets and also come with built in insect protection and sun protection. They also dry very quickly.
Jess and I mainly wore Craghoppers tops and bottoms throughout the days where we were either in the vehicles on safari or were doing treks. This is the most common brand we’ve seen people wearing for proper safari clothing throughout our travels. You can shop for them on their official store here , as well as on REI in the US here , and on Amazon here .
Depending on where you are going, you will probably also want to consider packing a hat, sunglasses, insect repellent , sunscreen, good practical shoes (we generally wear Scarpa or Merrell ), layers for warmth, and a rain jacket or poncho .
For more tips, check out our detailed guide to what to pack for safari , which has lots more tips and suggestions for your trip.

Pack a Photography Bean Bag
If you are traveling with a longer lens, I’d consider getting a photography bean bag or two for your safari trip.
For wildlife photography on safari, I find that a photography bean bag like this is one of the most useful photography accessories I have packed. Generally, I find I get a lot more use out of a bean bag on safari compared to a tripod or monopod.
This is because on safari you are often shooting from a vehicle, either from the window or via the pop-up top. And in both cases, setting up a tripod or even a monopod isn’t always going to be possible.
On the other hand, a bean bag can rest on the top of the vehicle or over a window, where you can then rest your lens or camera on it. If you are shooting with a larger camera and lens setup, you will definitely be thankful of having somewhere to steady it, as it’s unlikely to be practical to hold it up for prolonged periods of time. It also keeps you from putting your camera or lens directly on the metal edges of windows and roofs which could lead to damage.
Using a bean bag means you’ll be able to use slower shutter speeds for more stationary animals as well, so you don’t have to worry about camera shake so much. This is especially helpful when shooting with very big telephoto lenses from around 400mm and up.
Jess also found the bean bags useful for just using as armrests and for placing her elbows when using binoculars.
Bean bags are very light to travel with, and you can usually find inexpensive materials like dried beans to fill them with at your destination. My only tip is not to fill them with anything obviously edible, as some animals in some parks might sniff out the tasty treats within and decide to give them a nibble! Dried (obviously uncooked!) beans are a good option for this reason.

Be Specific About What You Want with your Guide
If you are doing a safari with a driver and/or guide, then being able to communicate about your goals and what you want to see is really important. It is also important for you to listen to your driver/guide for feedback and understand what is realistic based on their expertise. Doing this as early in the trip as possible is best.
If there’s a certain shot or composition that you want, it’s a good idea to let your guide know so you have a better chance of seeing it. Whilst there’s never a guarantee of seeing any wildlife on safari, if you specify that you want a shot of an elephant bathing for example, then your guide should have an idea of where the best places to get that shot might be on your trip.
If you aren’t clear on your interests, then you’ll be on more of a general safari and taken on the common safari drive circuits within the parks. Guides will almost always drive you to see things like lions or cheetahs if spotted, even without asking you. However, if you’d rather photograph elephants, eagles, or zebras, then you need to speak up so that you guide know what your wildlife sightseeing priorities are for the trip.
Whilst you will still likely get great photo opportunities (your guide is there to take you to see wildlife after all!), it might not be exactly the shot you want. So being specific will definitely help improve your chances of getting the shots you want if you have something specific in mind.
Another thing we discussed with our guide from the beginning was to have signals about stopping and when to leave after stopping for a wildlife sighting. So we asked our guide to just ask to make sure we wanted to leave an animal or we’d tell him, or he’d give us a head’s up if we needed to leave.
This not only helped make sure we felt we had enough time to get the photos we wanted, but it also made sure we were prepared for any sudden jerks from stopping and starting the vehicle.

Communicate with your Fellow Travelers
If you are traveling solo, then you will of course have a lot of autonomy in where you go and what you see on your trip. If you have a driver/guide then the two of you can set times and itineraries each day and be in sync about your wildlife spotting goals.
But, if like most safari goers, you are traveling with a partner, your family, friends, or as part of a group safari with other travelers, then you will likely have to be willing to compromise at times.
Common things you will likely need to decide on together will be what time to leave, how long to spend on game drives, whether to eat a hot lunch or a picnic lunch, and how long to spend watching each animal.
This can also affect your ability to get the photos you may want in terms of timing and views from the vehicle. With just one or two people in a vehicle, it is generally easy to find a good view, but once you have 4 or more people, it often becomes difficult for everyone to have a great view all at the same time, especially if an animal is not in an open area.
Generally, in these circumstances everyone will politely take turns and give everyone a bit of time and space to view the animal and take photos. But this does mean you will need to compromise and will sometimes miss the “best” view.
However, group safaris by far offer better value in terms of money compared to a private safari. But just note that they do come with some compromises.
I definitely recommend traveling with family or friends if that is an option, as sharing these experiences is probably worth more than taking a good photo. But it is worth talking about everyone’s goals and travel style before booking your trip to make sure everyone is likely to have a good trip.

Consider the Composition
As with any kind of photography, composition is key. Composition refers to how you place the various elements in your shot to create the final image.
It can be easy to get caught up in the moment when you see something exciting, and just to start shooting in an effort to get something shot. This excitement is very understandable!
However, if you are able to calm yourself down a bit and spend a fraction of time properly composing your shot, you will likely get better results.
There are a range of general composition rules in this post that you can read about, so I won’t rehash that. The main things I’d suggest just keeping in mind are the following.
- What’s in shot . When framing your shot, glance around the whole frame to see what is and what isn’t in the shot. For example, it can be very easy to frame an animal’s head, but accidentally crop out parts of their body or a tail. Whilst this might be the composition you are after, it might also end up looking a bit odd. Sometimes, zooming out a fraction and ensuring the whole animal is in the frame might be a better composition
- Eye contact . There are many different wildlife poses you can capture, but one of my favourites is when the animal is looking directly into the camera. In this pose, it will appear to be directly staring at the viewer. This is not always easy as animals tend to look all over the place. In these scenarios, burst mode and patience can be your friends.
- Animal Placement . When shooting from a vehicle, especially from the pop-up roof area, we can often end up above the animal. However, often animals look better when shot from eye level. So repositioning yourself to shoot from an open window lower down in the vehicle might give you a better shot, depending on the distance to the subject.
- Background and skyline . When putting your shot together, don’t forget to consider the background. For example, a deer against a brown rock face or tree will not stand out as well as one against a skyline. It’s not always possible to reposition yourself, but if there is the opportunity to wait for a better composition, or move the vehicle to a different location, take it.
Here are a couple of shots to illustrate my points above.

Don’t Forget the Landscapes
One of the main reasons people go on safari is to see the incredible wildlife of an area. However, it’s also very likely that you are going to be passing through some amazing natural landscapes.
Whilst it can be easy to get a bit single-minded about what we’re photographing, it’s important to step back and capture the landscapes as well as the wildlife.
If nothing else, this will serve as a reminder for you in the future as to where you were when you got the shots, and also the lovely scenery you witnessed. Capturing the wildlife with the landscape is also a good option, as it will give some depth and scale to your compositions.

Pack Spare Memory Cards and Batteries
The chances are that you are going to be taking a lot of photos when on safari. If you are shooting with anything other than a smartphone, your camera will likely have a battery you can change and a memory card slot.
It is definitely worth bringing at least one spare battery for your camera, and ideally two. In addition, bringing plenty of memory is also a good idea.
You don’t want to be half way through a busy day and run out of battery or memory card space, and then potentially miss some great shots. Modern mirrorless cameras in particular can eat through batteries, so a spare or two is definitely a must in my opinion.
Consider bringing a USB Powered Battery Charger and Power Pack
Accommodation options on safari can vary greatly, from simple campsites to high end luxury safari lodges. One thing we have found is that not every accommodation, especially the more remote and basic ones, will have AC power outlets. Or at least not one in your room (there is usually at least one public shared power outlet somewhere in a lodge or campsite).
If they have wall outlets, they will likely be 220V-240V, so you will want to check that all your equipment supports this if you are coming from a country like the USA, Japan, or Canada which has 110V-120V power. Many people will also need a travel adaptor to adapt your plugs, depending on where you are coming from and your travel destination.
However, rather than full power outlets, many locations offer USB outlets. These don’t use so much electricity, and are often powered by solar panels.
What this means is that if your camera only has a standard wall outlet charger for its batteries, you might not be able to charge them. Note that some cameras do charge via USB, so do check if that is the case.
So we recommend making sure that you are able to charge your batteries using both the local AC power outlets and via USB so you can take advantage of either charging option. We also recommend considering packing a power pack.
We personally travel with a USB battery charger for our Canon camera batteries. This is better than our standard charger in some respects, as it can charge two batteries at once, and charges over standard USB. There are a number of different models available , the main thing is to find the one that matches your camera battery.
As well as the USB battery charger, we also travel with a USB power pack . We can use this to charge all our USB powered devices, including our phones and the USB camera battery charger. This is helpful when we have periods of time without power.
Ask About Your Safari Vehicle
Before you go on safari, it’s a good idea to check with your safari company about the type of vehicle you will be in. There are a number of different models that companies use in different locations around the world, with Toyota Land Cruisers being the 4X4 vehicle of choice for many companies. However, there are many different models of Land Cruisers used for safaris so knowing the specific model can be very helpful.
The same vehicle model’s features can also be different across companies depending on the specific conversion. Probably the most important thing for most people is the number of seats, luggage space, and the configuration of the top.
We highly recommend a vehicle with a pop top. This means the top of the vehicle will pop up, allowing you to stand up inside the vehicle and get a better view, as well as better photos.
For the majority of these vehicles, the top pops up and remains over your head, providing much needed shade. However, in some vehicles, the tops actually come off completely, so you won’t have any shade.
We highly recommend a vehicle where the top doesn’t come off completely, as otherwise you are going to be in the sun a lot.
It’s also a good idea to check on the height. In some of the vehicles we have found that even when standing up, the lip is a little high for Jess to get a good view. So if you are shorter (or very tall) you should definitely check about this if you really want to be able to stand up for game viewing.
Another thing to check is whether or not the vehicle has charging points (some have standard wall outlets whilst others might have USB outlets). Some of our vehicles have had this, some didn’t, but it is becoming more common.
If you are planning a very photography focused safari, you can also ask if the vehicle has any photography specific features. Some of the vehicles we’ve travelled in came with photography bean bags for our use for example, which was very helpful.
Other special features might include special camera mounts, tripod mounts, the ability to fully open or remove windows, and even the ability to remove a door or two. I wouldn’t expect most of these features unless you are paying extra for a special photography trip.

Consider Doing Boat and Walking Safaris
Whilst most safaris are done from a 4×4 vehicle, there are other options depending on where you are travelling.
For example, in some locations you might be able to do a walking safari or a boat-based safari. These will give you some variety as well as present the opportunity to see different wildlife.
For instance, if you are interested in birds and small creatures (e.g., dung beetles, lizards), then walking safaris are often going to be better for getting close to these animals. Boat safaris are going to obviously be the best way to get closer to aquatic wildlife.
Of course, this isn’t always going to be possible depending on where you travel, but we definitely recommend signing up for at least a couple of these experiences if you have the option.

Shoot in RAW
If your camera supports it, and nearly all do these days, I highly recommend setting it up so it saves your image files in RAW format. Whilst this takes up more memory, and does require you to edit your photos, you will get a lot more latitude when it comes to editing your final image.
I go into a lot more detail in why to shoot in RAW in my guide to RAW in photography . For now, I recommend enabling it. Most cameras have the option to shoot in both RAW and JPG if you need a stepping stone, although this will take up more memory card space.
However, if you want to be able to share your photos instantly online during your trip, then you will probably want to also shoot in JPG/JPEG because you don’t need to edit them prior to uploading them.

Learn to Edit Your Photos
Photography involves a number of skills. The first two are in the field when you’re getting the shot, and require you to know how to compose a great photo and how to use your camera.
The third skill is photo editing. Photo editing is where you can get the most from the images you have captured. This doesn’t have to take a long time, even minor edits can make a big difference to an image.
Judicious cropping, adjustment of shadows and highlights, tweaks to saturation—these can all add up to really improve an image.
Of course, you can go a lot further with photo editing software. But as a starting point, loading up one of our favourite photo editors and learning how to use it can really help you get the most from your shots.

Keep Your Eyes Open
When you are on safari, the chances are that you will have a guide. Your guide will normally know what sort of wildlife you are likely to see in the areas you’re visiting, and they will of course be looking out for it as you drive or walk around.
However, the thing about wildlife is that you never know what you are going to see. And the more eyes that are looking for wildlife, the higher your chance that you will spot something. Your guide can’t look everywhere at once, and if they are driving, they are going to be at least a little distracted by operating the vehicle and keeping you safe.
In our most recent safari experience, we would often maximize what we could all see while on a game drive. So, generally our guide was seated in front in the driver’s seat, Jess would sit on the opposite side of vehicle from the driver, and I would stand at the back and scan for a different viewpoint. This way we were looking in many directions and had a better chance of spotting things. Although our guide was by far much better at spotting wildlife than we were, we still occasionally made some great spots that our driver had missed.
In my opinion, a safari should definitely not be a passive experience where you sit back and wait for something interesting to be pointed out to you. However, I have been surprised by the number of Land Cruises and Land Rovers full of bored-looking people who seemed to be spending more time on their phones or talking to one another than looking outside. They seem to simply wait for their driver to stop and point something out, take a photo, and then go back to their phones.
If you actively participate and spend your time searching for wildlife as well, you’re going to improve the chances of sightings and find more photo opportunities. You are also going to learn a lot more about the natural environment around you. And you are going to enjoy your trip a whole lot more!

Enjoy Yourself!
This might seem a bit counter intuitive in a guide to getting great photos on safari, but it’s important to remember. When on safari, it can be easy to become caught up in the need to capture every moment with our cameras, and not to miss a shot.
Whilst of course I want you to get those amazing shots, don’t forget that you came on safari also to witness wildlife in its natural habitat. So don’t forget to just step back from the camera every now and again and just take it all in. A safari is an incredible experience and you definitely want to try and enjoy it rather than being stressed over getting every shot on your memory card.
On our recent trip, Jess generally only took photos when animals came close, otherwise, she was content just watching them, either with a pair of binoculars (I definitely recommend packing a good pair of binoculars) or her naked eyes. She said she got much more enjoyment just watching them than when she was trying hard to get a good photo as she had in prior trips.
We highly recommend just sitting back and letting some moments go by unrecorded. I find you can often learn a lot more about animals if you just sit and watch them sometimes. Not every moment needs to be photographed!

Further Reading
That’s it for my guide to getting better photos on safari! If you found this useful, you might enjoy some of my other photography content. Here are some articles to get you started.
- We have a guide to the best safari camera , to help you choose the right gear for you and your budget. We also have a guide to photography bean bags for safari you might consider checking out.
- We have a detailed overview of gorilla trekking in Uganda as well as chimpanzee trekking in Uganda , both of which are an incredible experience
- We have a detailed guide to what to pack for safari , to help ensure you bring the right gear for your trip
- I have a guide to my favourite photo editing applications , as well as the best alternatives to Lightroom
- Wildlife photography can often result in noisy images. See my guide to the best noise reduction software for some ideas on how to get the best out of your photos even when they might be a bit noisy
- We have a guide to how to use a compact camera , how to use a DSLR camera , and how to use a mirrorless camera . We also have a guide to how a DSLR works
- Knowing how to compose a great photo is a key photography skill. See our guide to composition in photography for lots of tips on this subject
- We have a guide to what depth of field is and when you would want to use it.
- We are big fans of getting the most out of your digital photo files, and do to that you will need to shoot in RAW. See our guide to RAW in photography to understand what RAW is, and why you should switch to RAW as soon as you can if your camera supports it.
- You’re going to need something to run your photo editing software on. See our guide to the best laptops for photo editing for some tips on what to look for.
- If you’re looking for more advice on specific tips for different scenarios, we also have you covered. See our guide to Northern Lights photography , long exposure photography , fireworks photography , tips for taking photos of stars , and cold weather photography .
- Color accuracy is important for photography – see our guide to monitor calibration to ensure your screen is set up correctly.
- If you’re looking for a great gift for a photography loving friend or family member (or yourself!), take a look at our photography gift guide ,
- If you’re in the market for a new camera, we have a detailed guide to the best travel cameras , as well as specific guides for the best cameras for hiking and backpacking , the best compact camera , best bridge camera , best mirrorless camera and best DSLR camera . We also have a guide to the best camera lenses .
- If you want a camera or lens, but the prices are a bit high, see our guide to where to buy used cameras and camera gear for some budget savings options.
- We have a guide to why you need a tripod , a guide to choosing a travel tripod , and a round-up of our favourite travel tripods
Looking to Improve Your Photography?
If you found this post helpful, and you want to improve your photography overall, you might want to check out my online travel photography course .
Since launching the course in 2016, I’ve already helped over 2,000 students learn how to take better photos. The course covers pretty much everything you need to know, from the basics of how a camera works, through to composition, light, and photo editing.
It also covers more advanced topics, including astrophotography, long exposure photography, flash photography, and HDR photography.
You get feedback from me as you progress, access to webinars, interviews and videos, as well as exclusive membership of a Facebook group where you can get feedback on your work and take part in regular challenges.
It’s available for an amazing one-off price for lifetime access, and I think you should check it out. Which you can do by clicking here .
And that’s it! I’d love to hear about your thoughts on wildlife photography on safari, and am happy to answer any questions you have. Just pop them in the comments below and I’ll get back to you as soon as I can.

Enjoyed this post? Why not share it!
There are 4 comments on this post
Please scroll to the end to leave a comment
Towab Muhammad Yusuf says
2nd April 2022 at 12:27 pm
Zebras is looking awesome, so natural looking
Laurence Norah says
3rd April 2022 at 10:28 am
Thanks Towab!
D. Hernandez says
26th March 2022 at 1:36 am
Hello Laurence,
Thanks for these wonderful photography tips and advice! I am not much of a photographer but found these tips very useful and will be keeping this page bookmarked to read again before my safari. My wife and I have a 2-week trip planned to South Africa in in the fall and about a week of that will be spent on safari.
I was given a Canon EOS Rebel T7 DSLR camera (used but barely used) last year but without any lenses. So my question for you would be what lens would you recommend I invest in if I was to choose to take just one for this trip? I would also of course want to use it around home and for taking photos of family events and future trips, but the main focus for now is getting some decent wildlife photos on our safari in South Africa. Would like to purchase it soon so can start practicing (as you recommend) now!
Thanks for all your time & help! D
26th March 2022 at 9:42 am
I’m glad you found the post helpful and I am sure you will have an amazing trip! So if you are looking at just one lens then you will want a lens that can go from quite wide to quite zoomed in. A lens like this is known as a walk around lens. I would probably recommend either the Tamron 18-400 f/3.5-6.3 or the Tamron 16-300 f/3.5-6.3 . These would both give you the versatility you would want in terms of range, from wide to zoomed in. The 16-300 gives you a slightly lighter lens that can take slightly wider angle shots, whilst the 18-400 is a bit heavier but you get more reach.
It is worth noting that of course if you zoom in at 100% and peer at the images produced by these lenses they won’t compare to a high-end lens costing thousands of dollars. However I think that for standard size prints and general use they are a good option at a reasonable price point.
Let me know if you need any further input, I’m happy to help. Otherwise, have a fantastic trip!
Leave a Reply Cancel reply
Your email address will not be published. Required fields are marked *
Let me know when there's a reply to my comment (just replies to your comment, no other e-mails, we promise!)
Subscribe to our monthly Newsletter where we share our latest travel news and tips. This also makes you eligible to enter our monthly giveaways!
We only ask for your e-mail so we can verify you are human and if requested notify you of a reply. To do this, we store your data as outlined in our privacy policy . Your e-mail will not be published or used for any other reason other than those outlined above.
How To Allow Safari To Access Camera

- Software & Applications
- Browsers & Extensions

Introduction
Enabling camera access for Safari empowers you to engage in a myriad of interactive experiences, from video calls and virtual meetings to capturing and sharing moments through web-based applications. By allowing Safari to access your camera, you open the door to a world of possibilities, seamlessly integrating visual communication and content creation into your browsing experience.
Whether you're connecting with loved ones through video calls, participating in virtual events, or utilizing web-based tools for work or leisure, granting Safari access to your camera is essential for harnessing the full potential of web-based visual interactions. This simple yet crucial step ensures that you can fully immerse yourself in the dynamic and visually rich online environment, enhancing your browsing experience and enabling you to make the most of the web's interactive features.
As we delve into the process of allowing Safari to access your camera, you'll discover the straightforward steps to enable this functionality, empowering you to seamlessly integrate visual communication and content creation into your browsing experience. Let's embark on this journey to unlock the full potential of Safari and embrace the myriad of interactive experiences it has to offer.
Step 1: Open Safari Settings
To begin the process of allowing Safari to access your camera, you'll need to navigate to the settings within the Safari browser . Follow these steps to open Safari settings:
Launch Safari: Open the Safari browser on your device by clicking on the Safari icon located on your home screen or in the applications folder. Upon launching the browser, you will be greeted by the familiar Safari interface, ready to embark on your web browsing journey.
Access the Settings Menu: Once Safari is open, look for the "Settings" option, typically located in the top-right corner of the browser window . Click on the "Settings" icon to reveal a drop-down menu containing various options and preferences for customizing your Safari browsing experience.
Navigate to Preferences: Within the "Settings" menu, locate and select the "Preferences" option. This will open a new window or tab dedicated to Safari preferences , allowing you to configure a wide range of settings to tailor your browsing experience to your preferences and requirements.
Explore Camera Settings: Within the Preferences window, navigate to the "Websites" tab, which houses a plethora of settings related to website permissions and preferences. Here, you will find the option to manage website permissions for various features, including camera access.
By following these steps and accessing the Safari settings, you have taken the first crucial step towards enabling camera access for Safari. With the settings menu at your fingertips, you are now poised to delve into the next phase of the process, where you will enable camera access and pave the way for seamless visual interactions within the Safari browser.
This initial step sets the stage for a smooth and intuitive process, allowing you to seamlessly configure Safari to harness the full potential of visual communication and content creation. With the Safari settings within reach, you are well on your way to unlocking the myriad of interactive experiences that await you within the browser.
Step 2: Enable Camera Access
Enabling camera access within Safari is a pivotal step that empowers you to seamlessly integrate visual communication and content creation into your browsing experience. By granting Safari permission to access your camera, you pave the way for engaging in video calls, capturing memorable moments, and leveraging web-based applications that rely on camera functionality. Let's delve into the detailed process of enabling camera access within Safari:
Locate Camera Permissions : Within the Safari Preferences window, navigate to the "Websites" tab, where you will find a range of website permissions and preferences. Look for the "Camera" option within the list of website features, as this is where you will manage camera access permissions for Safari.
Manage Camera Permissions : Upon locating the "Camera" option, you will have the ability to manage camera permissions for websites visited in Safari. You can choose to allow or deny camera access for specific websites, granting you control over which sites can utilize your camera for various interactive features.
Allow Camera Access : To enable camera access for Safari, simply select the option to allow camera access for the desired websites. This action grants Safari permission to utilize your camera when accessing these specific websites, ensuring a seamless and immersive visual experience while browsing.
Fine-Tune Camera Settings : Additionally, Safari provides the flexibility to fine-tune camera settings for individual websites, allowing you to specify preferences such as allowing camera access for all features, prompting for camera access, or denying camera access altogether. This level of customization empowers you to tailor the camera access experience to align with your preferences and privacy considerations.
By following these detailed steps to enable camera access within Safari, you are poised to harness the full potential of visual interactions and content creation while browsing the web. This seamless integration of camera functionality within Safari opens the door to a myriad of interactive experiences, from video calls and virtual meetings to capturing and sharing moments through web-based applications.
With camera access enabled, you are ready to immerse yourself in the dynamic and visually rich online environment, leveraging the power of visual communication to connect with others and engage with web-based content in a more immersive and interactive manner. This pivotal step enhances your browsing experience, unlocking a world of possibilities as you navigate the web with Safari.
Step 3: Test Camera Access
After enabling camera access for Safari, it's essential to verify that the configuration is functioning as intended. Testing camera access allows you to ensure that Safari can seamlessly utilize your camera for various interactive features, such as video calls, virtual meetings, and web-based applications that rely on camera functionality. Let's delve into the detailed process of testing camera access within Safari:
Visit a Camera-Enabled Website : To initiate the testing process, navigate to a website that utilizes camera functionality, such as a video conferencing platform, virtual event portal, or web-based application that incorporates live video streaming or interactive visual features. By visiting a camera-enabled website, you can assess Safari's ability to access and utilize your camera for seamless visual interactions.
Initiate Camera-Dependent Features : Once on the camera-enabled website, engage with the platform's camera-dependent features, such as initiating a video call, accessing virtual event sessions that utilize live video streaming, or interacting with web-based applications that leverage camera functionality for augmented reality experiences. By actively engaging with these features, you can verify that Safari successfully accesses and utilizes your camera to enable these interactive functionalities.
Confirm Camera Functionality : As you interact with the camera-dependent features on the website, pay close attention to the performance of your camera within Safari. Verify that the camera operates smoothly, capturing and transmitting video feed as intended within the website's interface. This confirmation ensures that Safari's camera access configuration is fully functional, allowing you to seamlessly engage in visual interactions and content creation while browsing the web.
Assess User Experience : Throughout the testing process, assess the overall user experience when utilizing camera-dependent features within Safari. Evaluate factors such as video quality, responsiveness of camera-dependent functionalities, and the seamless integration of visual interactions within the website's interface. By assessing the user experience, you can gain insights into the effectiveness of Safari's camera access and its impact on your browsing experience.
By following these detailed steps to test camera access within Safari, you can verify that the browser seamlessly utilizes your camera for a wide range of interactive features. This testing process ensures that Safari's camera access configuration is fully functional, empowering you to engage in video calls, virtual meetings, and web-based applications that rely on camera functionality with confidence and ease. With camera access successfully tested, you are ready to immerse yourself in the dynamic and visually rich online environment, leveraging the power of visual communication to connect with others and engage with web-based content in a more immersive and interactive manner.
In conclusion, allowing Safari to access your camera is a pivotal step that unlocks a world of interactive experiences and seamless visual communication within the browser. By navigating through the Safari settings and enabling camera access, you pave the way for engaging in video calls, virtual meetings, and capturing memorable moments through web-based applications. This simple yet crucial process empowers you to seamlessly integrate visual interactions and content creation into your browsing experience, enhancing the overall richness and versatility of your online activities.
As you embark on the journey to enable camera access within Safari, you gain the ability to tailor your camera permissions for specific websites, granting you control over which sites can utilize your camera for various interactive features. This level of customization ensures that you can align camera access with your preferences and privacy considerations, fostering a browsing experience that is both immersive and tailored to your individual needs.
Furthermore, the testing process allows you to verify that Safari seamlessly utilizes your camera for a wide range of interactive features, ensuring that the browser's camera access configuration is fully functional. By actively engaging with camera-dependent features on websites, you can assess the performance of your camera within Safari, confirming its smooth operation and seamless integration within web-based interfaces.
With camera access successfully enabled and tested, you are now poised to immerse yourself in the dynamic and visually rich online environment, leveraging the power of visual communication to connect with others and engage with web-based content in a more immersive and interactive manner. Whether you are participating in virtual events, connecting with loved ones through video calls, or utilizing web-based tools for work or leisure, the ability to seamlessly access your camera within Safari enhances your browsing experience and unlocks a myriad of interactive possibilities.
In essence, allowing Safari to access your camera is not merely a technical configuration; it is a gateway to a world of visual experiences and interactive engagements. By embracing this capability, you enrich your browsing journey, seamlessly integrating visual communication and content creation into your online activities. With camera access enabled, Safari becomes a versatile platform that empowers you to fully immerse yourself in the dynamic and visually rich online landscape, fostering seamless interactions and captivating experiences at every turn.
Leave a Reply Cancel reply
Your email address will not be published. Required fields are marked *
Save my name, email, and website in this browser for the next time I comment.
- Crowdfunding
- Cryptocurrency
- Digital Banking
- Digital Payments
- Investments
- Console Gaming
- Mobile Gaming
- VR/AR Gaming
- Gadget Usage
- Gaming Tips
- Online Safety
- Software Tutorials
- Tech Setup & Troubleshooting
- Buyer’s Guides
- Comparative Analysis
- Gadget Reviews
- Service Reviews
- Software Reviews
- Mobile Devices
- PCs & Laptops
- Smart Home Gadgets
- Content Creation Tools
- Digital Photography
- Video & Music Streaming
- Online Security
- Online Services
- Web Hosting
- WiFi & Ethernet
- Browsers & Extensions
- Communication Platforms
- Operating Systems
- Productivity Tools
- AI & Machine Learning
- Cybersecurity
- Emerging Tech
- IoT & Smart Devices
- Virtual & Augmented Reality
- Latest News
- AI Developments
- Fintech Updates
- Gaming News
- New Product Launches
- AI Writing How Its Changing the Way We Create Content
- How to Find the Best Midjourney Alternative in 2024 A Guide to AI Anime Generators
Related Post
Ai writing: how it’s changing the way we create content, unleashing young geniuses: how lingokids makes learning a blast, 10 best ai math solvers for instant homework solutions, 10 best ai homework helper tools to get instant homework help, 10 best ai humanizers to humanize ai text with ease, sla network: benefits, advantages, satisfaction of both parties to the contract, related posts.

How To Allow Camera Access On Safari Mac

How To Enable Camera On Safari

How To Flip Camera On Omegle Safari

How Do I Grant Permission To Use My Webcam

How Do I Allow Camera Access On My Browser

How To Change Safari Privacy Settings On Mac

How To Download A Gif On IPhone

Where Is Safari Preferences
Recent stories.

How to Find the Best Midjourney Alternative in 2024: A Guide to AI Anime Generators

How to Know When it’s the Right Time to Buy Bitcoin

How to Sell Counter-Strike 2 Skins Instantly? A Comprehensive Guide

10 Proven Ways For Online Gamers To Avoid Cyber Attacks And Scams

- Privacy Overview
- Strictly Necessary Cookies
This website uses cookies so that we can provide you with the best user experience possible. Cookie information is stored in your browser and performs functions such as recognising you when you return to our website and helping our team to understand which sections of the website you find most interesting and useful.
Strictly Necessary Cookie should be enabled at all times so that we can save your preferences for cookie settings.
If you disable this cookie, we will not be able to save your preferences. This means that every time you visit this website you will need to enable or disable cookies again.
How to manage privacy and security settings in Safari on Mac

Apple continues to add new features to Safari on a regular basis to try to make our web browsing experience faster, easier, and—above all—more secure.
You can open up a private browser window anytime you want in Safari's file menu and Safari won't save your browsing history and will ask websites you visit not to track you. But there are a few more steps you might want to consider taking.
The place to go for most of these things is in Safari's preferences window, accessed from the Safari menu.
How to guard against unsafe files
How to identify fraudulent websites, how to disable javascript, how to prevent cross-site tracking, how to block all cookies in safari, how to remove website data, how to clear your browsing history, how to check for apple pay on websites, how to allow or deny camera, microphone, and location access, how to block pop-up windows.
As with all things related to security, there's a balancing act between convenience and safety. Safari will automatically open certain types of "safe" files you download from the web as a matter of convenience. But because a malicious file could be disguised as a "safe" file, it's a good idea to guard against unsafe files—and it's as easy as checking a box.
- Launch Safari . If it's not in the Dock, you can find it in the Applications folder.
- From the Safari menu, choose Preferences... .

- Click the General button.
- Uncheck the box to Open "safe" files after downloading .

Downloads will occur as they usually do, and to the location you have chosen, but the files won't automatically open.
Safari already identifies websites that use encryption (indicated by a padlock icon in the address bar) and an EV certificate which indicates a more extensive identity verification of the website operator (indicated in green). Safari also uses Google Safe Browsing technology--which is simply a list of websites that may contain malware, unwanted software, or phishing scams.
If it's not already on, here's how to do so:
Master your iPhone in minutes
iMore offers spot-on advice and guidance from our team of experts, with decades of Apple device experience to lean on. Learn more with iMore!
- Click the Security button.
- Check the box to Warn when visiting a fraudulent website .

If you happen to run across one of these sites, Safari will put up a full-screen warning about the site before you can proceed.
Many—if not all—webpages contain JavaScript, which enables certain functionality for web pages, such as displaying the time and date or displaying an image from a set of options.
You can disable JavaScript if you like, but it may impact the functioning of the web page.
- Uncheck the box to disable JavaScript .

If you've been using Safari and suddenly seen a plethora of lawnmower ads not long after doing some web research about lawnmowers, then congratulations: you've discovered crop-site tracking. It's a way of keeping track of your behavior on one part of the internet to show you ads while using a different part of the internet. If you prefer, you can turn it off.
- Click the Privacy button.
- Check the box to Prevent cross-site tracking and check the box to Ask websites not to track me .

Keep in mind that while you can ask websites not to track you, it's up to the website creator to honor your request.
Cookies are small text files a website may store on your Mac to help identify you or your Mac when you visit the website in the future. Examples of content stored in a cookie are your name, site browsing history, and preferences. If you don't want Safari to use cookies, you can shut it off.
- Uncheck the box to Block all cookies .

If you ever decide to remove website data from your Mac, you can do it selectively for certain websites or remove all the data.

- Click the Manage Website Data... button.
- Select a website and click the Remove button to remove the site's cache, cookies, or local storage or click the Remove All button to delete data for all websites.

Rather than root around through a set of checkboxes and pop-up menus, you can clear your browsing history, cookies, and website data with a menu command.
- From the Safari menu, choose Clear History... .
- From the Clear pop-up menu, choose how far back you want to go.
- Click Clear History .

In addition to the history of the website pages you've visited, you'll also give the heave-ho to recent searches, a list of items you have downloaded, the frequently visited site list, and other information.
If your Mac and other devices have Safari turned on in iCloud preferences, the clear history command will remove the browsing history from Safari on those other devices.
You can enable Safari on your Mac to show you websites that can accept payments via Apple Pay. You can then make the payments from your Apple Watch or iPhone, or using Touch ID if it's built into your Mac.
- Check the box to Allow websites to check if Apple Pay is set up .

Safari includes the ability to determine whether or not websites ask can use your Mac's camera and microphone. Here's how to set it up.
- Click the Websites button.

- From the General section of the sidebar, click Camera .
- Click the pop-up menu for "When visiting other websites" and choose Ask, Deny, or Allow , depending on your preference.

The settings work in exactly the same way for your Mac's microphone and your location. Simply click Microphone or Location in the sidebar. Similarly, you can change the setting for currently open websites to suit your preference.
Some web pages that you visit will automatically display a pop-up window that will block content—often with an ad—that you're trying to view. While this can be annoying, there are some sites that require pop-up windows to work properly. Fortunately, Safari provides fine-grained control of these pop-up windows.
- From the General section of the sidebar, click Pop-up Windows .
- Click the pop-up menu for "When visiting other websites" and choose Block and Notify, Block, or Allow , depending on your preference.

Similarly, you can change the setting for currently open websites to suit your preference.
If you choose Block and Notify, a small icon will appear on the right side of the Smart Search field. Click it to display the pop-up windows for the web page.
Great Mac accessories

Apple AirPods 2 (From $159 at Apple)
The best Apple accessory has gotten betting with AirPods 2. Now offering a wireless charger case, the popular earbuds feature the new Apple H1 headphone chip that delivers a faster wireless connection to your devices, as well as support for "Hey Siri."

Samsung T5 SSD (From $88 at Amazon)
This solid-state drive from Samsung is speedy, tiny, and portable. It also connects using USB-C, making it a perfect companion for your new Mac.
Let us know in the comments below.
Updated August 2019: Updated through macOS Mojave and the macOS Catalina beta.

Mike Matthews is a writer at iMore.com. He has used Apple products all the way back to the Apple II+. He appreciates no longer having to launch apps by loading them from a cassette tape recorder.
US teens love their iPhones and Apple Watches, but it isn't all good news with Apple streaming services lagging behind the competition
13 changes we want to see in iOS 18: How Apple could make it the 'biggest' iPhone update ever
iPhone 17 again tipped to inherit iPhone 16 Pro's display — could 120Hz finally make the leap to the cheaper models?
Most Popular
By Brady Snyder April 04, 2024
By John-Anthony Disotto April 04, 2024
By Brady Snyder April 03, 2024
By John-Anthony Disotto April 03, 2024
By John-Anthony Disotto April 02, 2024
By Brady Snyder March 31, 2024
By Matt Evans March 30, 2024
By John-Anthony Disotto March 28, 2024
By John-Anthony Disotto March 27, 2024
By Daryl Baxter March 26, 2024
- 2 iPhone 17 again tipped to inherit iPhone 16 Pro's display — could 120Hz finally make the leap to the cheaper models?
- 3 This Apple Watch trick will solve the most annoying thing about charging your smartwatch — who needs a fancy charging stand anyway?
- 4 Major iPhone case manufacturer dbrand caught up in social media race row over customer complaint response
- 5 Apple Watch X could be getting a better display for longer battery life
- PRO Courses Guides New Tech Help Pro Expert Videos About wikiHow Pro Upgrade Sign In
- EDIT Edit this Article
- EXPLORE Tech Help Pro About Us Random Article Quizzes Request a New Article Community Dashboard This Or That Game Popular Categories Arts and Entertainment Artwork Books Movies Computers and Electronics Computers Phone Skills Technology Hacks Health Men's Health Mental Health Women's Health Relationships Dating Love Relationship Issues Hobbies and Crafts Crafts Drawing Games Education & Communication Communication Skills Personal Development Studying Personal Care and Style Fashion Hair Care Personal Hygiene Youth Personal Care School Stuff Dating All Categories Arts and Entertainment Finance and Business Home and Garden Relationship Quizzes Cars & Other Vehicles Food and Entertaining Personal Care and Style Sports and Fitness Computers and Electronics Health Pets and Animals Travel Education & Communication Hobbies and Crafts Philosophy and Religion Work World Family Life Holidays and Traditions Relationships Youth
- Browse Articles
- Learn Something New
- Quizzes Hot
- This Or That Game New
- Train Your Brain
- Explore More
- Support wikiHow
- About wikiHow
- Log in / Sign up
- Computers and Electronics
- Internet Browsers
- Safari Browser
How to Change Safari Settings on iPhone or iPad
Last Updated: November 4, 2019 Tested
This article was co-authored by wikiHow staff writer, Nicole Levine, MFA . Nicole Levine is a Technology Writer and Editor for wikiHow. She has more than 20 years of experience creating technical documentation and leading support teams at major web hosting and software companies. Nicole also holds an MFA in Creative Writing from Portland State University and teaches composition, fiction-writing, and zine-making at various institutions. The wikiHow Tech Team also followed the article's instructions and verified that they work. This article has been viewed 35,597 times. Learn more...
This wikiHow teaches you how to customize the behavior of the Safari web browser on your iPhone or iPad. If you're using iOS 13 or later, you now have the option to choose display options for individual websites in addition to making global changes.
Changing Web Preferences by Website

- Changes you make with this method will only affect the currently-open website. If you want your preferences to affect all websites rather than just for those you customize, see the Changing Web Preferences for All Websites section instead.

- Select Ask on a feature if you'd like to be asked each time the site tries to access the feature (default).
- Select Deny if you never want the site to access the feature.
- Select Allow to always allow the site to access the feature.

Changing Web Preferences for All Websites

- It is also possible to customize these settings on a per-website basis. See this method to learn how.
- Changing your web preferences using this method will not affect sites you've customized individually.

- Select Ask on a feature if you'd like to be asked each time any site tries to access the feature (default).
- Select Deny if you never want websites to access the feature.
- Select Allow to always allow websites to access the feature.
Changing General Safari Settings

- Use the sliders in the "IN SAFARI" section at the top to choose whether Siri has access to Safari.
- Use the sliders in the "IN SEARCH" section to customize whether Safari options show when searching your iPhone/iPad or using the Shortcuts app.
- Tap the back button when you're finished.

- Tap AutoFill to adjust which information appears automatically in form fields, such as your name, address, phone number, email, and credit card info.
- Pop-up ads are blocked in Safari by default. If you'd like to see pop-up ads on websites, slide the "Block Pop-ups" switch to the Off (gray) position.
- Tap Downloads to choose where to save files and media you download from websites. You'll have the option to choose a cloud storage service or your iPhone/iPad.

- To allow sites and services to track your browsing anywhere on the web, slide the "Prevent Cross-Site Tracking" switch to the Off (gray) position. To retain your privacy, you can leave this switch in the On (green) position.
- Cookies are used by websites to keep track of your visits, preferences, and login information (for sites that require username/password access). [2] X Research source The "Block All Cookies" switch is Off (gray) by default, but you can enable it by toggling it to the On (green) position.
- Safari will display a warning message if a website you visit is deemed fraudulent in some way. If you don't want to see these messages, you can toggle the "Fraudulent Website Warning" switch to the Off (gray) position.
- Adjust the "Check for Apple Pay" switch to reflect your desired Apple Pay behavior on all websites.

Expert Q&A
You might also like.

- ↑ https://www.cultofmac.com/636450/how-to-use-safaris-amazing-new-settings-in-ios-13/
- ↑ https://us.norton.com/internetsecurity-privacy-what-are-cookies.html
About This Article

1. Go to a website in Safari. 2. Tap the Aa button. 3. Tap Website Settings . 4. Make your changes. 5. Tap Done . Did this summary help you? Yes No
- Send fan mail to authors
Is this article up to date?

Featured Articles

Trending Articles

Watch Articles

- Terms of Use
- Privacy Policy
- Do Not Sell or Share My Info
- Not Selling Info
wikiHow Tech Help Pro:
Level up your tech skills and stay ahead of the curve

21 Safari Photography Tips for Capturing Stunning Safari Photos
As a passionate ethical wildlife photographer and qualified safari guide, I've gathered some valuable safari photography tips to help you elevate your safari experience. Even if you've never held a professional camera, you can still capture the raw beauty of the wild with just a few tips and tricks.

Embarking on a safari in Africa is a magical journey, and capturing these moments through photography allows you to relive the excitement and share the beauty of the African wilderness with others. Photography on safari also encourages you to pay attention to other things that might have gone unnoticed. By actively seeking unique angles and observing moments to capture, you become more attuned to the intricate details of the wildlife and the breathtaking landscapes surrounding you. It helps you notice small details and appreciate nature even more.
Read my 21 safari photography tips for capturing stunning safari photos :
1. Immerse Yourself in the Experience

Each day on safari brings unique moments. Photography not only preserves memories but also encourages you to notice intricate details and appreciate nature. Seek unique angles and moments to capture, and let the beauty of the wild inspire you.
2. Be mindful of the Environment and Respect Wildlife

Patience is key to capturing natural behavior. Maintain a respectful distance, observe quietly, and avoid disrupting the animals' natural rhythm. Remember, you are a guest in their home and therefore this is one of the most important wildlife photography tips . Always respect local regulations, cultures, and environments. Your patience will be reflected in the authenticity of your safari photos.
If you approach an animal sighting, always be careful to not disturb the animal and minimize noise. How to show respect for the animals during wildlife photography?
- Maintain a respectful distance
- Approach animals indirectly
- Avoid positioning yourself upwind from the animal
- Keep your voice extremely low
- Switch your camera to silent mode to avoid startling wildlife
- Don’t use your flash
Whether you're a beginner or an experienced photographer, adhering to a code of conduct ensures the well-being of wildlife, contributes to conservation efforts, and ensures a more authentic safari experience.
3. Utilize Your Guide's Knowledge

Collaborate with your local field guide who possesses invaluable knowledge of animal habits, territories, and behavior. Communicate your photography preferences, and leverage their expertise to position yourself for the perfect shot. Guides can anticipate lighting conditions and animal movements, enhancing your photography experience. For example, positioning the vehicle in a way that the sun is in your back instead of in your lens to have nice lighting on the animal or landscape you want to capture. However, on some occasions, it’s also great to photograph towards the sun to create a nice rim light around the animal.
As a nature and wildlife enthusiast, I encourage you to ask your safari guide lots of questions to learn more about the behavior and habitats of the wildlife you encounter. This knowledge helps you anticipate movements and position yourself for the perfect shot.
4. Pay Attention to Composition

Crafting attractive compositions on safari is key to impactful photography. Be creative. Explore angles, perspectives, and framing techniques to create visually appealing images.
Rule of Thirds

Apply the rule of thirds by placing your subject off-center for dynamic images. Utilize paths, tracks, or natural elements like bushes, rocks or trees for depth and scale. These composition tips elevate your photos without requiring advanced technical skills. Most cameras also have a grid that helps you to better frame your subject. Also, always think of leaving an empty space in the direction the wildlife is heading or the direction the animal is looking. In some occasions, it's also a good idea to put your subject in the middle.
Shoot from a low angle

Shooting from a low angle (on the ground) can also make your composition more attractive. Safari in a game drive vehicle mostly doesn’t allow you to get out of the car to photograph wildlife, but on some occasions it might be possible. Another occasion could be if you’re on a walking safari . The advantage of getting low on the ground is that you are able to change the background in your scene. Being on eye-level with your animal also establishes a better connection.
Please consider the ethics of your framing – prioritize the well-being of the wildlife you encounter.
5. Show animals in their natural environment

Capturing close-ups of the Big Five is often popular among safari tourists, and wildlife photographers, but don’t forget the beautiful environment these animals live in.
Their natural environment is equally important as they form that bigger picture together. And it’s those areas that we need to protect to save wildlife from extinction.

Every part of the ecosystem is dependent on each other. That’s the beauty of nature, and it allows the viewer to understand where the animal lives and flourishes. As a conservation photographer, I also love to showcase the wildlife’s home that we need to protect.
6. Master the Exposure Triangle

Light is a fundamental element in photography, and understanding the exposure triangle is a fundamental part to master the art of safari photography. Understanding aperture , shutter speed , and ISO allows you to adapt to various lighting conditions. These three factors work together to determine how bright or dark your photos will turn out, as well as the level of sharpness and graininess.

Adjust aperture for light control and depth of field , use shutter speed to freeze or create motion of animals, and set ISO for sensitivity (lower during the day, higher when it’s getting darker).
7. Use Shutter Priority Mode for moving wildlife

If you’re used to photographing in automatic mode, it can feel like a puzzle if you want to photograph wildlife manually. Therefore, my best photography tip is to set your camera on shutter priority mode (S). It means that you only have to think about the shutter speed and the camera does the rest like your ISO and Aperture (semi)automatically.

This technique ensures sharp and clear images, especially when photographing animals in motion on your safari. Use a fast shutter speed to freeze fast-moving wildlife action, and try to practice with various settings between 1/250th of a second up to 1/2500s. Additionally, fast shutter speeds can help prevent camera shake, particularly when shooting handheld.

A rule of thumb: choose a minimum shutter speed based on the focal length you are shooting. An example: I often capture wildlife with a focal length of 400 mm, meaning my minimum shutter is 1/400s. If you are in a moving safari vehicle, boat or hot air balloon, and/or the animal you want to photograph is moving fast, then use a minimum of 2 times the focal length. So, shooting at 400 mm would mean a shutter speed of 1/800s. To capture moving birds in flight , you might want to practice choosing shutter speeds to up to 1/2000s.
8. Choose AI Servo (AF Continuous) Mode for moving wildlife

AI Servo is the best mode to capture wildlife that is moving, to automatically keep track of and stay focussed on the moving animal.
9. Practice with Aperture Priority Mode for a ‘blurry’ background

Aperture Priority in safari photography allows you to set the desired aperture, controlling the depth of field in your wildlife shots. In situations where you want a blurred background to emphasize the subject, or conversely, a broader depth of field to capture more details.

Aperture Priority mode gives you this creative control. For example, when you want a close-up of a lion or a colorful bird with a blurred background effect, like the Lilac-breasted Roller in the above image. The more zoom and the lower the aperture number, the more you are able to eliminate the background in your image and create that nice compression.

On the other hand, if you want to photograph a group of animals like a herd of elephants, I recommend choosing an aperture of f/8 to get the whole group of animals in focus (and not only one).
10. Try Burst Shooting Mode in Safari Photography

Shooting in burst mode is an important wildlife photography tip for safari enthusiasts, catering to both beginners and advanced photographers. Wildlife is unpredictable, and animals often move swiftly. Burst mode allows you to capture a series of rapid shots, increasing the chances of freezing dynamic moments, ensuring you don't miss critical actions or spontaneous behaviors.
Beginners benefit by having a safety net, capturing shots even if timing is a challenge. For advanced photographers, burst mode offers creative opportunities to select the perfect frame from a sequence.
11. Focus on the eyes of an animal

Always focus on the eyes of the animals ; that’s the cardinal rule of wildlife photography! This golden tip elevates your shots, creating a connection between the viewer and the wildlife subject. Instead of hastily snapping numerous wildlife images, wait for the moment when the animal turns its gaze towards you.
Focusing on the eyes provides viewers with a unique perspective. It creates a visual connection, as if the animals are looking directly through the photograph at the audience. This transformative approach adds depth and emotion, making your wildlife images more memorable and resonant, especially when capturing close-up shots of animals. This technique enhances the details in the eyes, showcasing the intricacies and expressions that might be missed in broader shots.
Aim for a shutter speed between 1/250s to 1/2500s, depending on the animal's movement, and an aperture between f/2 to f/6, depending on your lens. These settings ensure both eyes are in focus, capturing the essence of the wildlife subject.
Remember, the eyes are the windows to the soul , even in the animal kingdom. So when focusing on the animal’s eyes, you can create truly remarkable and memorable wildlife photographs.
12. Shoot in RAW if you can

Shooting in RAW format on a safari offers several advantages.
RAW images provide a higher dynamic range compared to JPEG, capturing more details in both shadows and highlights. This is crucial in the diverse and often challenging lighting conditions encountered during a safari.
RAW files contain more image data , allowing for extensive post-processing without compromising quality. This flexibility is valuable when adjusting exposure, contrast, color balance, and other elements during the editing process (I usually edit my wildlife images in Lightroom).
Shooting in RAW preserves the original quality and detail captured by the camera's sensor. This is especially important in wildlife photography, where preserving the authenticity of the scene is crucial.
13. Timing is Everything: The Golden Hour and Beyond

The golden hours of sunrise and sunset conveniently align with the typical timing of game drives during a safari when the animals are most active. The warm, soft light enhances the colors and textures of the African landscape, creating a captivating backdrop for your photos.
The advantage of photographing during the Golden Hour , sometimes called ‘Magical Hour’, is that the soft golden light reduces harsh shadows and creates a golden glow. Patience during these hours rewards you with captivating glimpses into the animals' daily lives.
14. Equip Yourself Wisely with the right camera gear

Ensure you have the right camera equipment for safari photography.
Bring a DSLR (Digital Single Lens Reflex) camera and zoom lenses with 200-600 mm range or a quality compact camera for versatile quality wildlife photos. Safari photography on a smartphone is not the best option to photograph wildlife, but it is, of course, a great option to create short videos, stories, and reels.
Zoom lenses for safari photography
I highly recommend a long lens with a minimum of 200 mm zoom to capture distant wildlife. A zoom lens allows you to effortlessly switch between photographing animals from a distance without disturbing them and capturing intricate details of flora and fauna up close.
More ideally, a zoom lens with a focal length of 300 mm+ is great for capturing wild animals or birds. If you’re using a full-frame camera, I would suggest a 400 mm zoom lens and if you are a keen birder a 600 mm long lens is perfect for bird photography on safari.
Wide-angle lens
Apart from zoom lenses, I always carry a wide-angle lens (for example 16-35 mm), great for capturing the beautiful African landscapes and its animals or magical sunsets.
Essential accessories
Don't forget essential accessories, such as memory cards, extra batteries, cleaning wipes, a charger, a camera bag, and a rain cover. Consider a beanbag for stability.
Hire photography gear for safari
Not having the right camera gear ? Nowadays, the quality of compact cameras is pretty good as well, and it’s also possible to hire photography gear .
15. Consider bringing a tripod and/or beanbag
Bringing a tripod and/or beanbag on safari is a crucial photography tip for the following reasons:
- Stability for Clear Shots: A tripod or beanbag provides stability, reducing camera shake and ensuring clear shots, especially when using longer lenses.
- Flexibility in Composition: Both tripods and beanbags allow photographers to compose shots with precision. A tripod is ideal for setting up shots in a fixed position, while a beanbag provides a more flexible option, allowing quick adjustments and movements.
- Support for Heavy Equipment: Professional camera gear, including telephoto lenses, can be heavy. A tripod and/or beanbag offers robust support for heavier equipment, preventing fatigue during extended periods of shooting.
- Long Exposure and Low Light Conditions: In low light or during sunrise/sunset safaris, a tripod is essential for capturing long-exposure shots without introducing motion blur. A tripod is also great to practice with star photography and photographing the milky way when you're back at the safari lodge .
- Silent Shooting with Beanbags: Beanbags are preferred for wildlife photography as they provide a stable base without the noise associated with adjusting tripod legs. This is especially important to avoid disturbing animals in their natural habitat.
- Versatility in Safari Vehicles: Safari vehicles often have limited space, and tripods may be cumbersome. Beanbags are more versatile, easily adapting to the contours of the vehicle and providing a stable platform for photography.
16. Make a back-up of your images on safari

I always back up my images while traveling. When my memory card is full, I back up my images onto an external hard drive. That is mostly enough, but for people who want to travel longer, I highly recommend backing up to a second external hard drive (kept in different locations). Hard drives I use are Lacie Rugged, Samsung, and Seagate.
If you are using your phone only, I also recommend backing up your images in the cloud, for example iCloud, Dropbox, Google Drive, Google Photos, you name it.
17. Keep it Simple and Be Patient

Wildlife photography requires patience . Allow yourself time to observe and wait for the right moment, focusing on mastering basic techniques. Don't be overwhelmed by settings; simplicity often reveals the raw beauty of wildlife.
18. Edit your photos

Editing your safari photos is not essential, but if you want to step up your safari photography game, I highly recommend learning how to edit your wildlife images in, for example Adobe Lightroom (for both desktop and smartphone) and Photoshop . Especially if you are planning to print your photos, post-processing is an important step.
Get in touch for a private workshop on how to edit your safari photos or join me on a photo safari where I will share editing tips to improve your wildlife photography.
19. Know Your Camera

If you're a beginner photographer, all the settings on your camera can be a bit overwhelming. When I first started photography, my camera was a puzzle to me. I kept using the automatic mode until I learned the basics of photography during a volunteer program in South Africa . Having two game drives per day in Thanda Game Reserve in KwaZulu-Natal was the perfect way to start practicing shooting in manual mode and learn more about the best settings for safari. I highly recommend to start learning more about your camera and camera settings before you go on safari. Go through your camera manual to find the buttons and settings of some of the technical photography tips I mentioned in this article.
20. Embrace Learning and Growth

Whether you're a beginner or experienced photographer, nurture your interest in learning photography. Books about photography, online photography courses, workshops and guided photo safari tours with photography experts offer opportunities to enhance your safari photography skills; including my small group photo safaris . To master a new skill, learning by doing is often the most effective approach to get to know your camera better. So please remember, anyone can learn photography, and the wonders of a safari in Africa can ignite your passion for capturing the mesmerizing beauty of our planet's wildlife.
21. Join me on a photo safari to Africa

Do you want to improve your photography skills on safari and travel with like-minded travelers? Join me on a small group safari to Africa . As a professional wildlife photographer, I can help to improve your photography skills on safari by sharing hands-on experience and valuable tips. Instead of rushing to tick off the Big Five, we will spend our time carefully during the beautiful golden hours around sunrise (morning game drive) and sunset (afternoon game drive).
It doesn't matter if you're a beginner, intermediate, or professional photographer. Having an interest in photography and and being prepared to learn are the most important aspects.
Safari Photography Tips to take the best photos on safari
These tips, coupled with the expertise on my photographic safari trip to Africa , will undoubtedly enhance your safari photography journey. Capture the essence of Africa's breathtaking wildlife and create lasting memories with every click of your camera (or even your smartphone).

Essential Camera Features and Settings for Safari Photography

There is nothing quite like observing wild animals in their natural habitat from the back of a jeep on a game drive. Whether you are on the market for a camera for your upcoming safari trip, or need help getting the most out of your existing camera on safari, then read on.
After a week spent at Kruger National Park in northeast South Africa, it occurred to me that there were a wide range of cameras being used by tourists, from iPhones to Canon 7Ds , with zoom compacts being particularly popular. Rather than provide a list of ideal cameras on the market right now, this is more of a guide of features to look out for, thus future proofing this article.
Safaris are expensive trips so you may be borrowing a camera from a photographer friend, or you may be looking to get the most out of the one you already have. If you fall into these categories then there will be a few pointers listed below to get the most out of your existing gear.
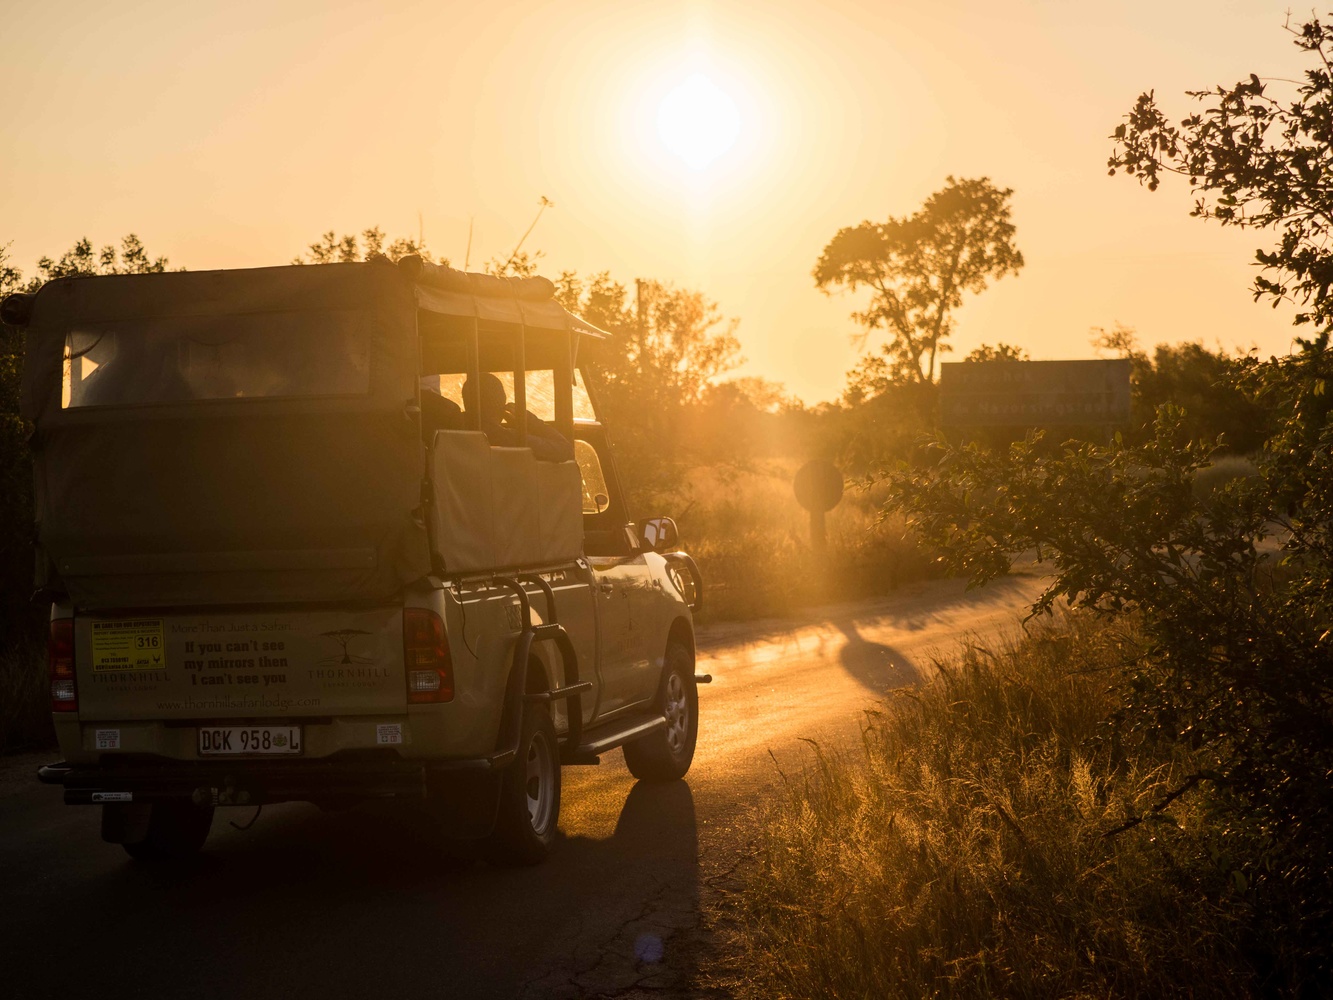
Expectations
If you have more expensive, tailored gear then you may get some better pictures than Joe Public, but if you think you’ll get the opportunity to shoot a leopard maiming a buffalo in a tree everyday, you’ll be disappointed. Safari is an opportunity to observe animals across vast bushlands, stretching hundreds of thousands of acres.
The animals have the opportunity to roam freely and do not plant themselves on the side of the road for your convenience. Professional imagery for “ Planet Earth II ,” for example, is captured after weeks and months of research, observation, and waiting for the right moment. There is opportunity to get some great shots yourself on game drives, but if you don’t, try not to be disheartened and make sure you enjoy the experience primarily.
With all this in mind, let’s start here.
Telephoto Lens
Let's get the obvious one out of the way. You are going to want a lot of reach with your lens selection or camera choice. We're talking about optical zoom specifically, if the manufacturer is advertising a digital zoom, then ignore it as it's the same as cropping the picture when on your PC. You can never guarantee how close your jeep will get to a heard of elephants, or a troop of monkeys, as jeeps must stay on the designated tracks. So having at least 300mm full-frame equivalent reach is going to help fill your frame with the subject.
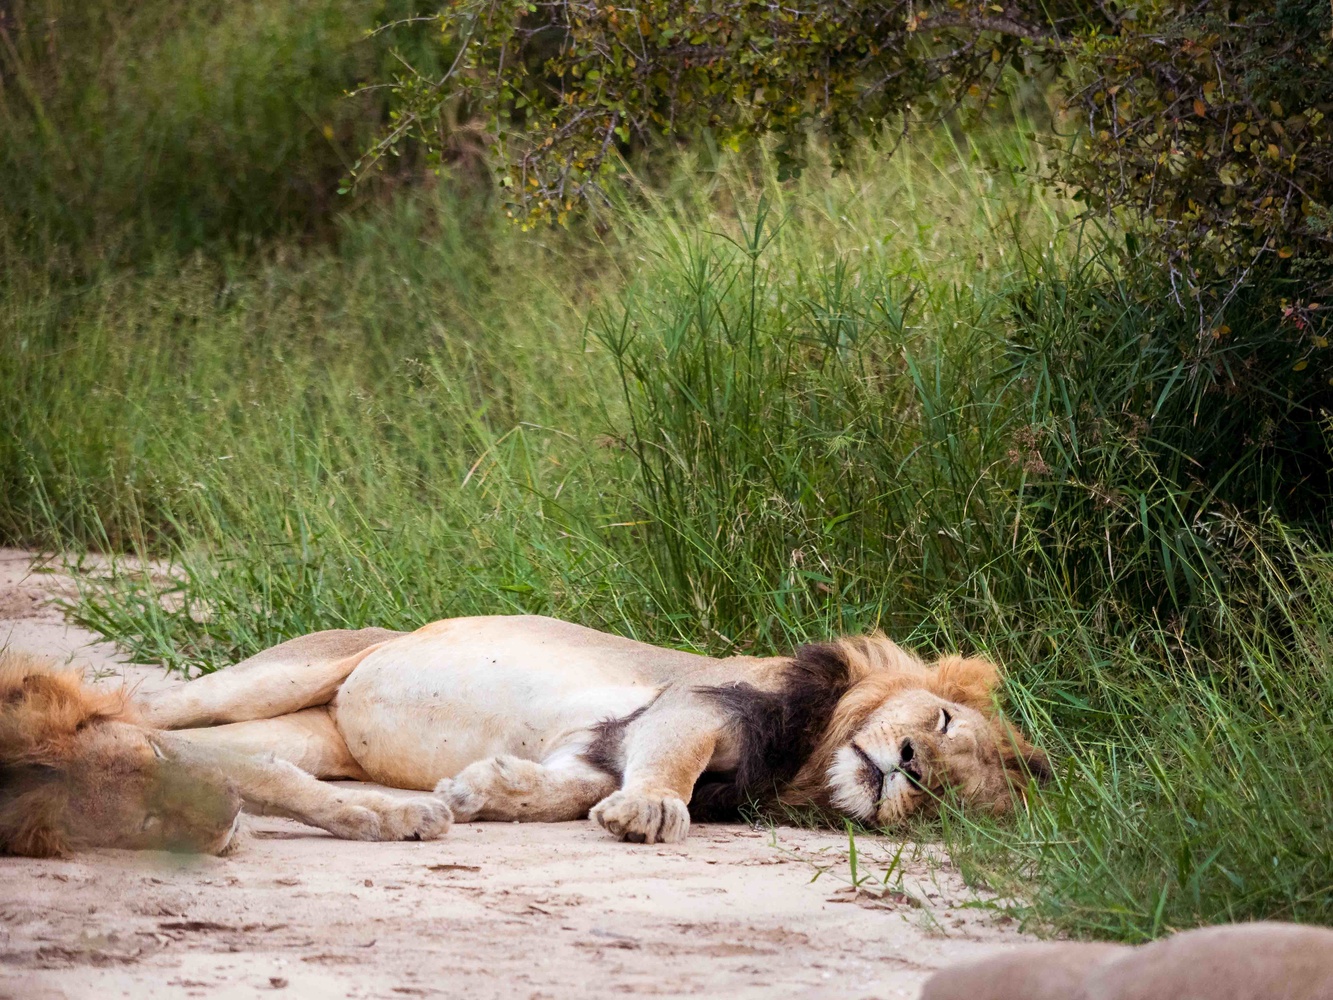
For larger budgets, micro four thirds cameras have excellent quality of reach-to-value ratios given their crop factors, so check out the latest ranges of Olympus or Panasonic cameras to pair with the Panasonic Lumix G Vario 100-300mm f/4-5.6 II POWER O.I.S. lens , or the Panasonic Leica DG Vario-Elmar 100-400mm f/4-6.3 ASPH. POWER O.I.S. lens for larger budgets.
Ultra-zoom bridge cameras will give you excellent reach for good value, and compact travel cameras do the same whilst fitting into your pocket, just without as much reach generally. Given most of your game drives will be in bright sunshine, the smaller sensor sizes on these cameras will suit just fine. You will just not get that separation between a sharp subject and a soft, blurry background seen when using more expensive telephoto equipment.
Stabilization
Camera shake will be over-exaggerated at the telephoto end of your lens, so optical image stabilization will help keep those telephoto shots nice and sharp by offsetting camera shake in hand.
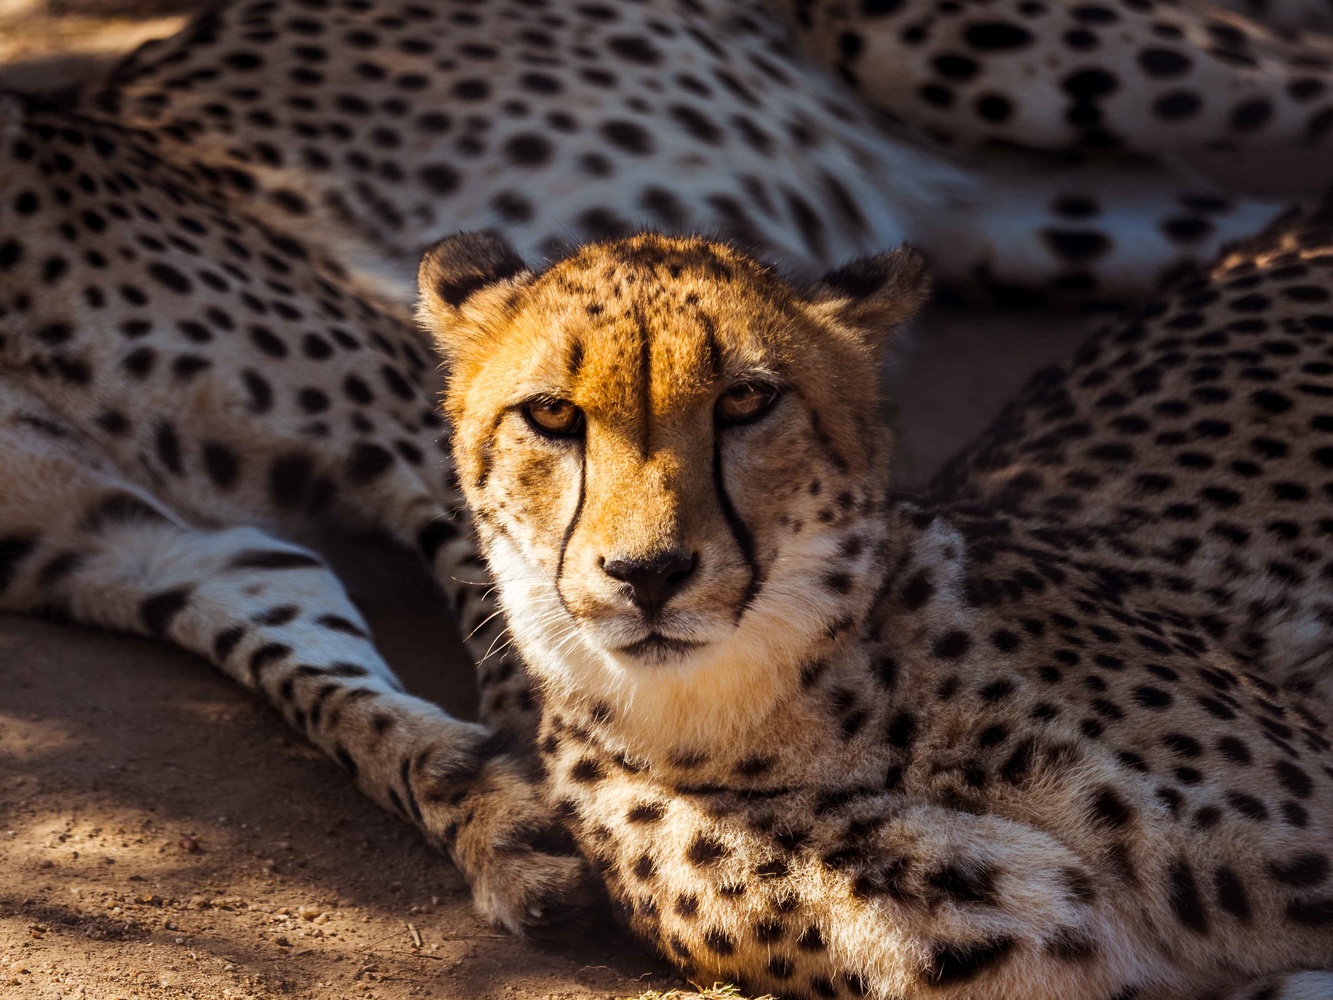
Whether a camera has an optical or electronic viewfinder, the benefit is two-fold when on a safari. The bright sunlight will create a lot of glare off the LCD panel, so using a viewfinder will ensure you can see what you are shooting.
Using a viewfinder also gives your camera an extra anchor point to keep it nice and steady when shooting at the telephoto end. Your best shooting position is to lean your elbows on a static object (or elbows in if you’re free styling) and use a viewfinder.
If you're lucky enough to catch some fast moving action out in the wild, having a meaty burst mode will be very useful. Some cameras even come with a buffer mode which will capture several frames before you hit the shutter button, ensuring you won't miss the key moment.
Continuous Focus Tracking
Continuous focus tracking is a powerful feature that keeps a moving subject in focus as long as they stay within your focus points. This is extremely effective when pairing up with a fast burst mode.
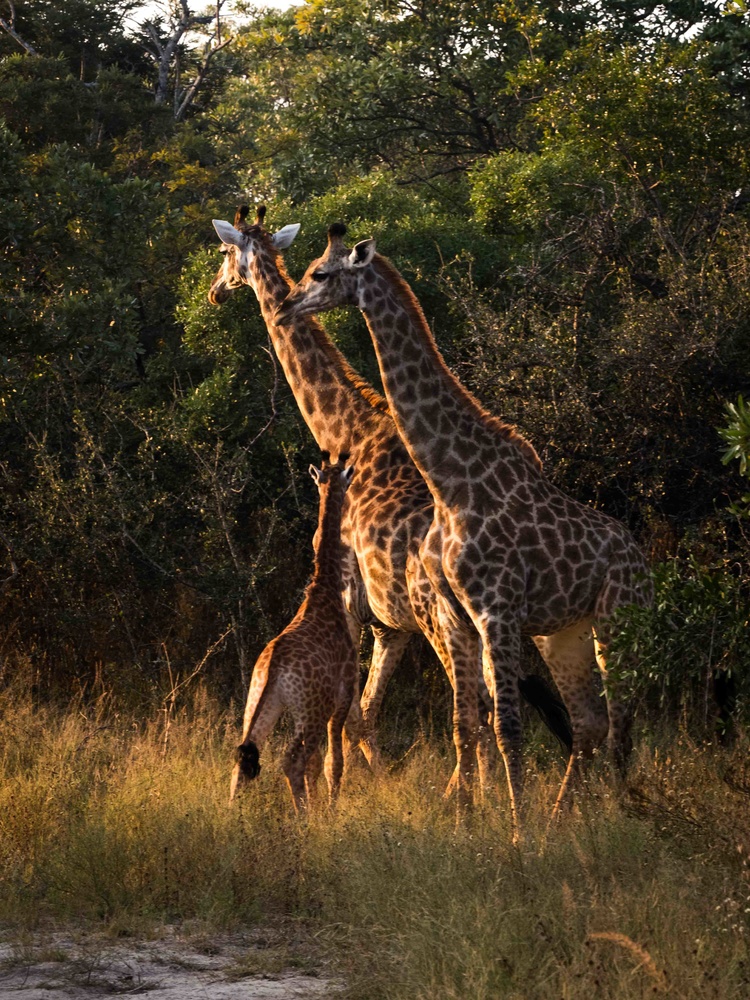
Similar to burst mode, you get what you pay for. Pricier camera bodies will have more efficient continuous focus tracking systems, typically using “phase detection.” Mirrorless cameras often use a contrast-based focus detection which is hit and miss, and this feature is rarely found on point and shoots.
All of the photography in this article was shot on the Olympus E-M1 Mark II using its phase detection autofocus, often in C-AF (tracking) mode and using its 18fps mechanical shutter burst mode or its unbeatable 60fps in electronic shutter mode.
Stealth Mode
This isn't a mode to look out for, rather some important etiquette to assume to ensure the animals are not disturbed. Turn off any artificial noise such as focus beeping, or the fake mechanic shutter noise on digital cameras. If you're looking at your camera screen, use the visual cues on your camera instead to confirm your focus point.
Also, leave your flash at home. It's very rare you will be close enough for it to be used effectively on the wildlife, and when you are it could blind certain species. If you are on a sunset game drive or a night game drive, either use lenses with wide apertures (Sony’s mirrorless range is excellent for this), or simply enjoy the evening without a camera in hand. Even with fast glass, conditions do not lend themselves to effective telephoto photography, so sit back and enjoy the ride.
Use a camera with a battery you can remove and buy an extra one. You'll be thankful.
Also, buy as big and fast an SD card as you can afford. Cards with high read/write speeds will ensure you don't have to wait for your previews to buffer. This can be a nuisance when shooting in burst mode with a slow card.
Use one area focus in the center of the screen rather than a multi-point focus. Grab focus on your subject, then recompose your shot with the shutter half pressed down. This will save losing time as your camera hunts around to work out what it is you want to be in focus.
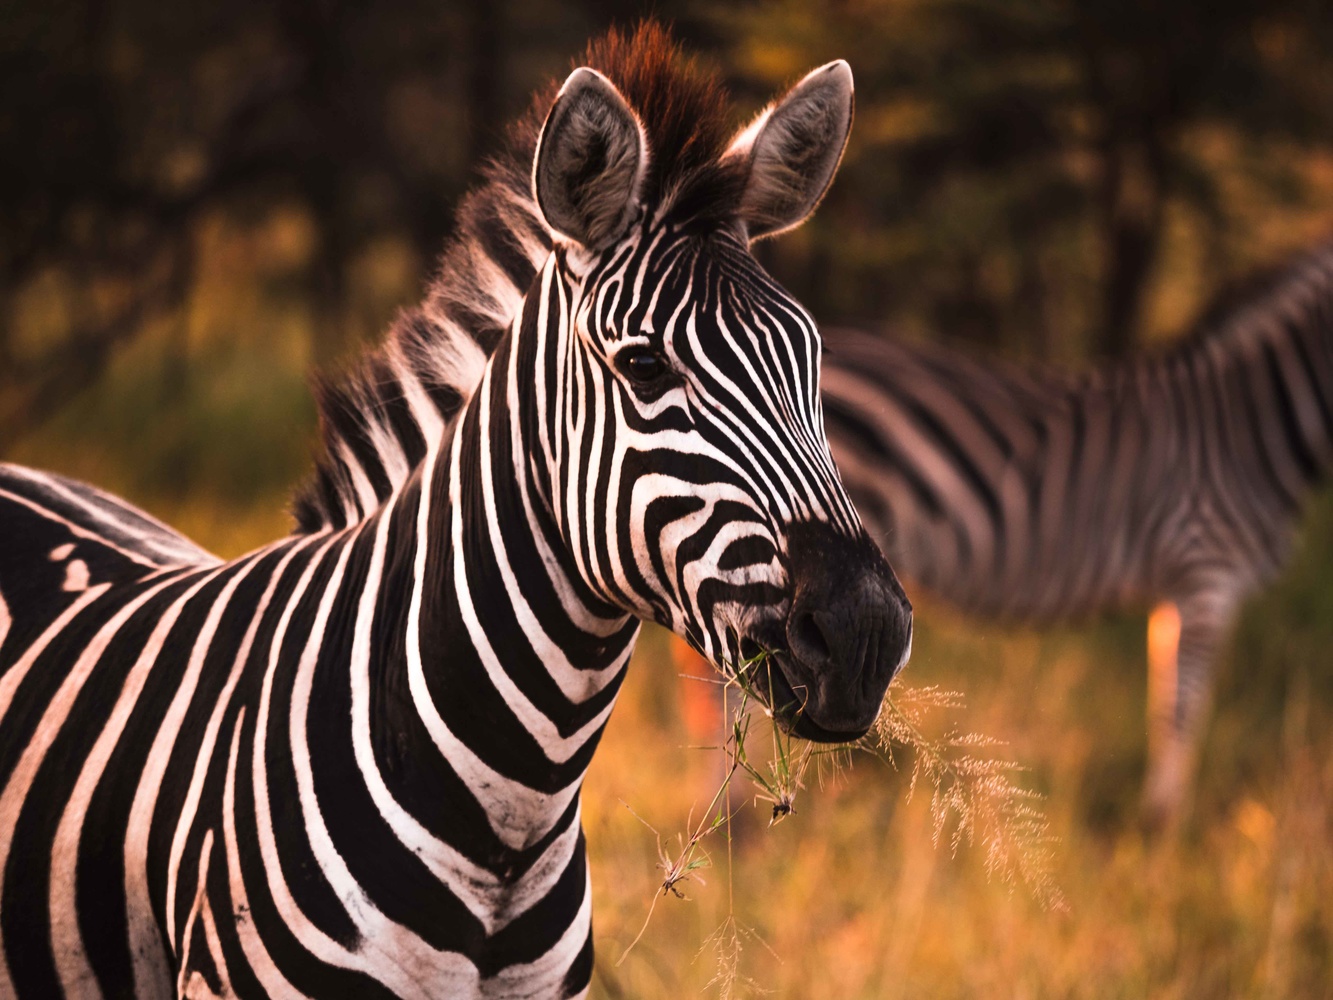
For added reach when shooting video, check if your camera has an “extra tele conversion” mode and switch it on. This enables the camera to use only the required pixels from the sensor for your chosen video resolution, effectively cropping into your subject without losing resolution for HD or 4K video. This is very useful when twinned with a powerful O.I.S. system like the one in the Panasonic GH5 .
Lastly, a few words on megapixels. Having more will ensure cropping into your subject on your PC will keep resolution high, but read reviews on performance of your camera, as increasing megapixels can increase graininess and unwanted noise. For 10x15-inch prints and online sharing, 16 megapixels is enough.
For any novice, picking the right camera for the trip of a lifetime is daunting. If you value your photos of your travels then invest in a good camera. Looking out for these features if you're on your way to safari is a great place to start.

Mike Briggs is the Co-founder & Creative Director of Ranch Creative, a UK based content-creation agency. Mike has created content across many genres of industry & commerce including global sports brands, fashion houses & tech companies.

If you're going on safari specifically for photography you may want to avoid the national parks and join a group photography interest safari to a private game reserve, or arrange a private trip to one of the private reserves through a specialist photographic safari organiser (raises hand shamelessly).
Why? Well, on the private reserves you can't drive yourself, so every day you will have a couple of game drives with a dedicated game ranger and tracker who will be able to drive you right off-road to where the action is happening. There is nothing quite like the thrill of photographing a leopard with a 24-70mm lens!
Another reason for this is because of the light. If you are going to the Kruger you will only be allowed into the reserve from sunup till sundown. Not good for photographers, especially as the first few hours of your morning drives will be spent looking for stuff (and probably seeing nothing).
The private reserves will get you closer, faster, because the rangers are in radio contact with one another constantly, so when there is a sighting at a location on the reserve they will advise other rangers and then everyone takes turns on that sighting, usually not more than 3 cars allowed at each time. In the National parks like KNP you are going to be dealing with every car that comes along and it can get ugly.
KNP can be wonderful, but it can also be dreadful when it comes to photography.

Some great points and agree with you completely. I have a good amount of time in private reserves and lots of time in Kruger, KTP, Addo and others across SA. Clearly, if you have the budget and specific focus of a photographic safari, then private reserves are the way to go for the points you mention. However, there is a significant cost difference between a private reserve and public like Kruger. Kruger charges anything from R600-R1500 a night, where private reserves will charge in excess of R10,000 per person per night. That is nearly 10 times the cost - for one person. I think it is important to highlight that. I have got many great shots from both types of reserves and having the ability to be out all day from dusk till dawn is great in public parks. However, traffic in public parks can be a nightmare and the general behavior of people around a sighting can be very aggressive to the animals and other people.
I do agree that being able to use a 24-70mm for a leopard and not a 500mm F4 from the road is a big difference :-). Good luck and all the best.
Kind regards
Obviously the costs are different, but honestly the photographic rewards are commensurate with those costs, in my opinion. I would rather spend 2 nights in Sabi Sands than a week in the Kruger. I'm guaranteed to get better photos, whereas the KNP is a crap shoot (and as you say the behaviour of some people at sightings in recent times leaves a lot to be desired). In the end you get what you pay for.
However, I have found some excellent private game reserves where the prices are not that much more than SanParks (maybe 3-4x the cost).

Good article - excellent comments. Any suggestions as to the best references for private parks?
Thanks Dallas & Derek for some insightfulness to alternatives for more serious photographers who want to safari!
Maps & Merlot
14 Outstanding African Safari Photography Tips
If you’re heading to Africa soon and are looking for photography tips for your African safari, you’ve come to the right place! For most people, photography is a huge part of an African safari, and while we all want to capture those epic National Geographic photos, it is important to understand that those types of shots can be pretty difficult to achieve.
I’ve put together a list of African safari photography tips to help you plan ahead and set you up to take the best photos on your safari. The list includes equipment to bring, camera settings, framing considerations, and more. I hope these African safari photography tips will help you to capture the photos of your dreams!
This post may contain affiliate links.
1. Invest in Quality Camera Equipment
The first of my African safari photography tips is to invest in quality camera equipment.
There is always a huge discussion between mirrorless vs. DSLR cameras, and each has its pros and cons. I’m personally pro-mirrorless due to the lighter weight and how far the technology has come over the years, but you can’t go wrong with either.
The next decision is crop sensor vs. full-frame. As an owner of both, I would firmly recommend a full-frame camera. A full-frame camera provides a wider field of view and also tends to shoot better in low light, which is critical on a safari. Animals are often most active around dawn and dusk, so you’ll often be shooting in low light.
One other thing to consider is the camera’s frame rate, expressed in frames per second “fps.” I ended up shooting in burst mode pretty frequently for animals in motion, so it was amazing to be able to capture a lot of shots. For example, shooting in burst/ continuous mode meant capturing this epic shot of a lion yawning.

With that, I’d recommend a full-frame camera with good fps. I’m personally a Sony fan, so I opted for a Sony A7iii and would absolutely use the same camera again.
Recommended Camera : Sony A7iii or Sony A7iv
Now that you have a camera, your next step is selecting lenses. I’d recommend bringing along 3 main lenses:
Telephoto Lens: A telephoto lens is an absolute must-have for a safari. It should be at least 300mm, or you won’t be able to take those close up shots. For my Sony A7iii, I use the Sigma 100-400mm . It is significantly less expensive than its Sony counterpart, and I was very happy with the pictures.
Wide Angle Lens : While you’re on safari, make sure to bring along a wide angle lens to capture the epic landscapes. I use a Sony FE 12-24mm G Master . On most of my trips, I do a lot of landscape photography, so it made sense to splurge on a wide angle option.
Traditional Lens : For a traditional zoom lens, I’d recommend the Sony FE 24-70mm G Master II . This is a common walkaround lens and is great for most trips (city shots, etc.). On safari, I switched to this lens multiple times when the animals were so close to the vehicle that I couldn’t capture the shot with a telephoto lens.
2. Camera & Lens Rentals
Having the proper camera equipment will help to capture the best wildlife photos. However, purchasing a camera and lenses can definitely add up and if you don’t want to invest in a full setup, the good news is you can also rent cameras and lenses! You can rent a camera body and/or lenses in packages and separately.
If you choose to rent a camera or lens, make sure you schedule its arrival far enough in advance of your trip. It is so important to practice to get to know your camera before you go on safari.
3. Pack Camera Accessories
One of my African safari photography tips is to pack all of the necessary camera accessories. From extra storage to backup batteries to camera support, there are a few items that you definitely want to bring.
Extra Storage
I was actually shocked by the amount of storage I needed for photos on this trip. I completely filled up a 256GB card and was well into my second by the end of my week-long safari. I’d recommend bringing along multiple 256GB memory cards (or larger) to ensure you have plenty of photo storage.
I’d also recommend bringing along a memory card holder case so you can safely transport your SD cards. This is the exact case I use and travel with – it take up very little space and keeps all of my memory cards safe.
Backup Batteries
Going along with the extra storage, you’ll definitely need some backup camera batteries. For my Sony a7iii, I bring two or three of these rechargeable batteries and this battery charger . Our days on safari were pretty long; on some days, we were out for 12 straight hours, so I heavily relied on my backup batteries.
Some safari vehicles will have charging ports (which were great), but I wouldn’t rely on your vehicle having them. Our vehicle was open air, so we also couldn’t charge if it was raining.
Camera Support
For your safari, you’ll also want to bring along some kind of camera support to help stabilize your camera. A camera bean bag is pretty common because it doesn’t take up much space. When you take small bush planes on safari, you’ll usually be limited on weight (30 or 40 pounds), so the bean bag is nice because it won’t take up too much of your baggage allocation.
However, if you have less of a limit on your baggage, I love my tripod . I have used this tripod for so many different things – waterfall photos, long exposure with the Northern lights, and beautiful blue hour shots. It is also perfect to stabilize your camera for safari shots. A tripod is a little unwieldy in a safari vehicle, but it is nice to have around camp.
4. Protect Your Camera Gear
One of my key African safari photography tips is to take very good care of your camera gear. Between the dust and the rain, there are all sorts of things that can mess up your shot.
For the dust : Bring a lens cleaning kit . Even though I changed my lenses very quickly, dust still got into all of the camera’s crevices, so I ended up using the air blower a lot. I didn’t want to touch the inner workings of the camera, so this was so helpful in keeping the camera dust-free. If you get dust in your sensor or on your lens, you’ll get those annoying black spots on your photos. I’d also recommend keeping your lens cap on when not using your camera. I kept my camera covered, but made sure it was easily accessible to quickly capture photos.
For the rain : The lens cleaning kit and keeping the lens caps on also protects well against light rain storms. It was also helpful to use a lens hood during storms if you still want to capture a few photos. I’d also recommend ensuring that your camera bag is waterproof or has a waterproof cover. We had an open-air vehicle for part of our safari and a couple of the rain storms were very heavy. If our bag hadn’t been waterproof, it would have been a huge problem.

Like this post?! How about…
20 Astounding Road Trips to Take Before You Die
5. Camera Settings
I wrote a whole post on the best camera settings for safari photography , but I’ll give you some of the highlights below.
Continuous Shooting : Wildlife moves a lot, so I shot a lot in burst mode/ continuous shooting. On the positive side, I was able to capture so many cool shots. On the down side, I ended up with thousands of photos to sort through…despite the annoyance, I would highly recommend shooting in continuous mode to capture those epic shots.

Pick the Correct Mode : I wouldn’t recommend shooting in Auto because your camera may not select the correct shutter speed, ISO, or aperture and you may miss “the shot.” If you’re a pro, Manual is your best bet. I’m not a pro, so I switched between Aperture Priority and Shutter Priority. I’d recommend giving my article on camera settings a thorough read for all of the details.
Read More : Camera Settings for Safari Photography
6. Shoot RAW+ JPEG
Set your camera to shoot in RAW. This option will give you so much more latitude in processing and is one of the most important of my African safari photography tips. Sometimes I would only have a few seconds to snag a shot before the animal moved on, so I didn’t always have enough time to get the camera settings perfect. Fortunately, RAW files allowed me to fix most things during processing! One important point is that RAW photos do take up significantly more space on your memory card, so make sure to factor that into your decision when choosing SD cards.
I usually choose to shoot in RAW + JPEG so that if I can transfer a few JPEG files to my phone. This isn’t a huge deal, but I often like to immediately enjoy the pics and send to my family. JPEG may also be the right option for you if you don’t want to spend much time on editing!
7. Framing Your Shot
Framing your shot is one of the key African safari photography tips, and while there are no hard and fast rules, there are a few points to consider.
Rule of Thirds: The Rule of Thirds is a common photography guideline that breaks down an image into thirds, both horizontally and vertically, so that your image is split into nine pieces. You then position the key elements at the intersection of the gridlines to make the image feel balanced. However, remember that this is just a guide and that sometimes rules are meant to be broken. Oftentimes animals don’t cooperate with your photographic vision, so take what you can get!
Shoot High and Low: In a safari vehicle, it can be easy to always gravitate toward the same seat…and if you do, a lot of your shots will be from the same perspective. Make sure to switch up where you’re sitting and stand up, sit down, anything to get a unique perspective.
Zoom In & Out: It can be tempting to zoom in and take tons of close-up shots, but make sure you also zoom out and incorporate the landscape, as well. When I shoot, I’ll usually capture some close-up shots with my telephoto lens and some further-out shots, which I take with my telephoto lens, traditional lens, or wide angle lens – depending upon how far the safari vehicle is from the animals. I’d also recommend doing a major zoom on an animal’s face occasionally. I love when you can capture the emotion behind their eyes.

8. Capture the Small Stuff
Everyone going on a safari knows about the Big 5, and for a good reason. However, there are tons of smaller animals and birds that are so unique that are highly worth capturing on safari. I’ll give you a few of my favorites that I captured while on safari.
There are lots of colorful birds like the lilac-breasted roller and the kingfisher.

The serval and caracal are both cats, though clearly smaller than the lions. We watched both animals stalk their prey and we even saw the caracal spring through the grass to catch a bird!

The pangolin is a scaly mammal, and an animal that our guide told us was considered very lucky. Seeing a pangolin on a safari is very rare; our guide had been working for years and told us that this was only the second pangolin he has ever seen.

9. Photograph the Landscape
In addition to the smaller animals, make sure you take the time to photograph the landscape. It is so easy to only focus on animals, but chances are good that the surrounding landscape is very different than your hometown. I loved snapping shots of the Serengeti at sunrise and the unique trees.

10. Pick the Right Time & Location
Next up on the list of African safari photography tips is to pick the right time and location. To capture the best safari photos, you’ll want to do plenty of advance research. For example, my ultimate goal on our Tanzania safari was to capture the wildebeest river crossing – which tends to occur in late August through early September in the Northern Serengeti. However, if your goal is to see calving season, which means lots of baby wildebeest and zebras, you’d want to travel in February – March to the Southern Serengeti.
No matter the goal for your African safari, do plenty of advance research to ensure you’re booking your trip at the correct time and to the correct location.

11. Trust Your Guide & Communicate Expectations
One of my top African safari photography tips is to get to know your driver-guide. They know so much about the animals, their behaviors, and where to find them. If you are transparent and communicate your expectations, they will be an excellent resource.
On the last day of our safari, we had already seen all of the animals on our list, so we jokingly asked our guide to find us a lion on a rock (very specific!). Our guide was so familiar with the area that he knew of an area with rocks where a lion pride frequently visited. After a bit of driving around, he found us our lion on a rock!
Jokes aside, do communicate your priorities. Do you want to see sunrises over the Serengeti or do you prefer to sleep in? Do you want to take lots of photos or just experience the animals? (This may impact where the driver-guide parks the vehicle). Are there particular animals you want to see?
The other piece is trusting your guide. If your guide makes a decision seemingly out of the blue, there is probably a very good reason. We were driving to the river at sunrise one morning to watch a river crossing and all of a sudden, our driver-guide turned around and sped off in the opposite direction. The guides all communicate on the radio, and it turns out that there was a rhino sighting, which was incredibly rare!
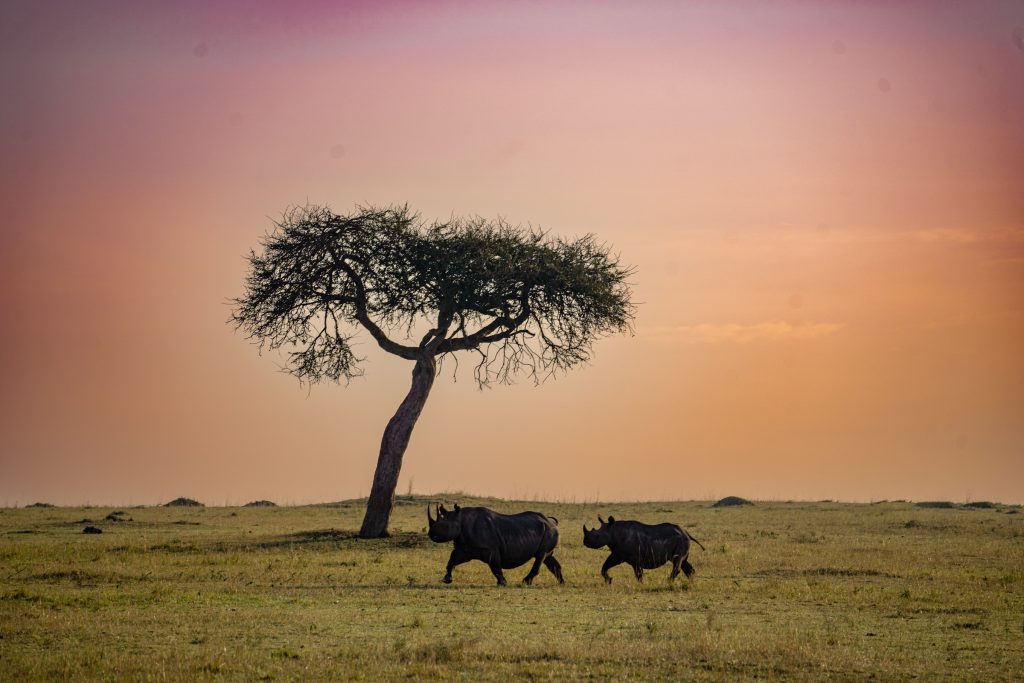
12. Patience is Key
When on safari, it can be so tempting to drive from one animal to the next, always in pursuit of the next best thing. However, patience is key – it often pays off to stay in one location. We ended up waiting by the river for nearly five hours for a wildebeest river crossing; while it was a long wait, it was so worth it. While we waited, we got to see so many other things. We saw baby elephants, two male giraffes fighting over a female giraffe, and baby warthogs playing – things we never would have witnessed if we continued to drive around. Just remember that if your guide suggests you wait, it will very likely pay off.

13. Respect the Wildlife
As part of my African safari photography tips, one of the most important things is to respect the wildlife. Always follow your driver-guide’s rules, because they will try to keep both you and the animals safe.
Remember that you are a guest in the animals’ environment and to never interfere with the animals just to capture a better picture. Do not try to impact what you are seeing; for example, do not interfere in hunts, try and wake up animals, or influence their behaviors in any way. It may be tempting to encourage a particular action in pursuit of that perfect photo, but remember that you are only there to capture photos!
14. Practice Before You Go
One of the most important steps is to practice before you go. For me, safari photography was very different than my traditional landscape photography, so I spent the weeks leading up to the trip experimenting with my gear. I practiced in my backyard with my dog; I’d highly recommend practicing at sunrise, sunset, and other low light settings since this is typically when animals are the most active.
Have you been on a safari? What African safari photography tips would you recommend to travelers trying to capture beautiful wildlife shots?
For some more travel inspiration, check out some of the posts below!
Safari Tips for First-Timers: 20 Top Things to Know Before Going on Your First Safari Safari Photo Settings : Best Camera Settings for Safari Photography Safari Outfits: What to Wear on Safari for Women: 10 Cute Outfit Ideas Tented Safari Camps : Top 13 Things You Always Wanted to Know About Tented Camps Tanzania : Kikuletwa Hot Springs: 14+ Things to Know Before You Go Tanzania Itinerary : Tanzania 7 Day Itinerary
You May Also Enjoy:

Your Perfect Itinerary: 4 Days in Santiago, Chile

A Glimpse of Bratislava, Slovakia: Top 5 Photo Ops

Make the Most of Your Amazing 3 days in Moab, Utah!
Pin for later:.

Leave a Reply Cancel reply
Your email address will not be published. Required fields are marked *
This site uses Akismet to reduce spam. Learn how your comment data is processed .
7 Best Camera for Safari Options & Safari Phone Photography Guide
By: Author Amanda OBrien
Posted on Last updated: 16/02/2024
As a keen photographer and lover of an African safari, I am often asked for advice on what is the best camera for safari and can you get a decent photo on safari with a phone.
A good camera for safari will require some investment and can be well worth it if you develop a passion for wildlife photography.
However, if you are new to safari and not sure if you want to make that level of investment there are many ways to produce stunning safari photos on your phone – plus some low-cost ways to take your safari phone photo image quality to the next level.

In the past, I had been of the belief that the only way to get great photos on safari was to invest in a camera with best zoom options.
The reason for this is that in the past the cameras on most phones have been pretty dreadful when it comes to zooming – a critical requirement for capturing animals and wildlife in places like the Serengeti National Park Tanzania or the Masai Mara Kenya .
However, a recent visit to the stunning Thanda Safari Lodge South Africa and a lesson with their resident photographer Christian Sperka completely opened my ideas to how great phone photography can now be on a safari holiday.
NB: I am writing this post for those that are new to safari photography – you experts tend to already have many views regarding the best camera for photography and the best safari camera.
Personally, I don’t think there is any such thing as the best camera for pictures – it is always about your goals and requirements and that will change the answer to this question.

- Best Camera for Safari Options
Table of Contents
Why is Camera type so particularly important for Safari Photography?
What are the different types of cameras that i could use for safari photos, best small camera for safari (point and shoot), 1. the sony cyber-shot rx100, best bridge cameras for safari, 2. canon powershot sx70, 3. panasonic lumix dmc fz1000, best mirrorless camera for safari, 4. sony alpha a6000, 5. canon eos m50, best dslr cameras for safari, 6. nikon d3500, 7. canon rebel t7i, best lens options for dslr for safari, tamron 150-600 lens, best camera accessories to take on an african photo safari, 2. lens filter, 4. camera bag, using your phone to take photos on safari, thanda safari – private game reserve, christian’s key safari phone photography tips:, safari photo lessons with christian, who paid for what in this post.
There are several options for the types of cameras that can be used to take safari pictures. As you might expect, as you move up in the price you move up in quality.
Moving up in quality normally allows for greater and better quality zooms. The level of control of the shot also increases with quality.
There are a few reasons that these factors are particularly important when it comes to an African photo safari:
- The animals are often quite a distance from the vehicle and in many instances, it will not be possible to get closer. Therefore, to take a good clear photo of the animal a strong zoom is critical.
2. Animals can move very quickly. Having a camera where you can adjust the shutter speed or move the camera to a fast burst mode means you can take shots faster and thus be more likely to capture the moving animal in focus resulting in clear pictures of Africa .

3. A day on safari normally involves major and multiple changes in light. Also, the general light may be quite good but animals, unfortunately, may often be in shaded areas.
To get a nice clear shot it is critical to be able to adjust your camera settings to take the light into account.
The good news is safari is one of the few times where it is not necessary to worry as much about the weight of the camera equipment and the amount of gear related to the camera eg different lenses, tripods etc.
The reason for this is you will generally be on a vehicle most of the time (a walking safari is obviously a bit different) so have space to place extra camera equipment.
However, you do need to get your camera equipment on the plane with you.
Before you head out on safari read this great post on all the different Collective Nouns for Animals from the fantastic Wildlife Diaries blog.
The most basic option is the good old point and shoot camera . These are lower-cost options and tend to be quite light.
Many point and shoot cameras come with different preset options such as for evening or sports (which is a good setting for animals as it is for fast movement) that can allow adjustments for the light.
A basic point and shoot camera can work very well for wide-angle shots on safari – showing the general landscape/skyline, sunset or sunrise shots – as well as of course capturing the experience of safari eg shots of those on the vehicle, the drivers, sundowners etc.

The biggest weakness of point and shoot cameras is their lack of zoom. They don’t have the best lens for safari.
The average point and shoot camera do have a 10x zoom which sounds like a lot but alas is not when it comes to capturing animals.
The next level up is the bridge camera – this is basically halfway between a point and shoot and a DSLR camera. So the zoom on a bridge camera is better than a point and shoot as its ability to react to fast action – but it is still not to the quality of the DSLR camera. This is the in-between option with prices that reflect that.
Generally, the best zoom camera option for a safari is a Digital SLR camera . This is the type of camera that professionals tend to use but it does not mean it is out of scope for the average photographer or new photographer.
Indeed, I have had my digital SLR camera for years. The camera body itself is not that expensive. Where the cost can come in is getting the best lens.

Most digital SLR cameras come with a wide lens on purchase. In order to zoom it is necessary to buy another lens.
A digital SLR body with a strong zoom lens held firmly will produce the clearest and best safari shots. Of course, to achieve this there is a considerable cost involved. This is the best zoom in camera option.
Mirrorless cameras are not too far away from a DSLR. However, there are fewer options for mirrorless cameras when it comes to lenses and they are still not quite as fast as a DSLR which is often critical with safari photography.
A Go Pro or 360 cameras can work really well in capturing the safari experience of a game drive. However, my personal experience with these types of camera on safari has not been great.
A Go Pro of 360 camera will cover a wide range but the animals themselves become quite tiny and inconsequential. Yes, they are great for capturing a mood and feel but my personal opinion is they are not best suited to safari.
I haven’t mentioned drones as they are not allowed in many private game reserves or national parks as they can scare the animals.

The Sony Cyber-Shot RX 100 is a fantastic option for those new to photography who are looking to get a decent shot without having to learn how to become professional photographers. The Sony Cyber-Shot RX 100 camera will make most of the decisions for you to determine the best shot and it has an excellent zoom range – great for safari. It is a sturdy camera with effective image stabilization – also good to capture those fast-moving animals.

This is a very innovative camera that has jumped to the head of the queue in this category. It has a very large sensor for this type of camera and this is critical to clear images – very important with animal shots. This Sony camera is also particularly good in low light and has very fast autofocus – great for sunrise and sunset on safari and for catching those animals on the move. Unlike most cameras in this price range, the Sony RX100 shoots in raw. This is great if you’re keen to get going in the world of photography but otherwise, this feature won’t be of much use as it really comes to life in the editing process. Of the two point and shoot camera options, the Sony RX100 is the one to get if you are quite sure you will continue to pursue your interest in photography.
⇒ Read More Reviews on DPReview ⇒ Check the Price on the Sony RX

The big benefit of this Canon camera is a 65X zoom – fantastic for safari shots. It also offers full manual control and allows shooting in Raw. Plus the Canon Powershot XS70 has inbuilt wifi.
The only downside is its size – this Canon camera it is nearly as big as a DSLR. And it doesn’t perform quite as well in weak light – but is fantastic in a good light. This is perfect for the high-end amateur photographer.
⇒ Read More Reviews on DPReview ⇒ Check the Price on the Canon Powershot SX70

The Panasonic Lumix DMC FZ1000 is a fantastic overall bridge camera. Its big advantage is 4K video capture. If you are into video then the Panasonic Lumix is the bridge camera for you.
⇒ Read More Reviews on DPReview ⇒ Check the Price on the Panasonic DMC FZ1000

This is a particularly good buy as Sony has brought in subsequent models – bringing the price down on this fantastic camera. The Sony Alpha A6000 is packed full of features and will give you some great clear shots. It is also a nice small-sized camera.
And the Sony Alpha has a very fast autofocus for this type of camera, enabling animals in action to be more likely to be captured in focus.
⇒ Read More Reviews on DPReview ⇒ Check the Price on the Sony Alpha A6000

The Canon EOS M50 takes great clear shots and is very easy to use – it is perfect as an introductory mirrorless camera. This Canon camera has 4K video capture so fantastic for those more interested in taking video.
Its lens range is not quite as good as others at this level so if it is animal close-ups you are after this might not be the best option for you.
⇒ Read More Reviews on DPReview ⇒ Check the Price on the Canon EOS M50
When it comes to the best camera for wildlife and safari it has to be a DSLR. And when it comes to DSLR cameras the question you will often hear between photographers is Nikon or Canon ?
These two camera brands have tended to own the top of this market for some time. Personally, I have always been a Nikon person and love my Nikon DSLR.
Do carefully research both brands before you buy them. Once you purchase you are then quite committed to buying complementary lenses and gear linked to that brand – and you can’t use a Nikon lens on a Canon body and vice versa.
These are the two best entry-level DSLRs from each brand:

From a value point of view, I think this is the best superzoom camera for safari. The price is quite reasonable given what it offers and it is then easy to add say a Tamron lens (see the next section) and get some outstanding shots without breaking the bank.
⇒ Read More Reviews on DPReview ⇒ Check the Price on the Nikon D3500

This is the best Canon camera if you are looking for solid quality but don’t want to spend a fortune in my opinion.
⇒ Read More Reviews on DPReview ⇒ Check the Price on the Canon Rebel T7i

Generally for safari the longer the camera lens the better – this is where you see the classic shots of photographers with very long super zoom camera lenses. However, these lenses are expensive and very heavy.
I probably use my longer camera lens 2-3 times a year on trips – but I am super happy when I have it. And I have had the same zoom camera lens for many years.
So the good news is that these camera lenses do last – but as I mentioned above you are tied into the brand of your body camera.
Essentially, there are two options when it comes to a zoom lens. Spend a bit less and go with one of the lesser-known brands – a good option for the amateur.
Or invest in the Nikon or zoom lens for Canon equivalent – not cheap but will last a long time.
Here are two brands I have personally used at the lens lengths here for safari and I have been very happy with the results.

From a value point of view, this is probably the best superzoom lens for safari. This is also a great lens for Canon camera option as well as other camera brands.
⇒ Read More Reviews on DPReview ⇒ Check the Price on the Tamron 150-600 Lens

⇒ Read More Reviews on DPReview ⇒ Check the Price on the Nikon 200-500m Lens
Another less expensive option is to hire a lens to take on safari – or even hire a camera (although it is generally best to be quite familiar with your camera before a safari trip so that you don’t have to try to figure out how to use your camera whilst the elusive leopard disappears).
I’m not aware of anyone who does this on a global level but if you do please email me and let me know. In the meantime, the best thing to do is type into Google something like “Hire a camera lens or camera name of my city”.
This is what popped up when I put it in for London – Lenses for Hire – and Lens Pimp – good name!
There are 4 key camera accessories that I always take on a Safari:

A tripod will serve you well on safari. Its key benefit is giving you a base for your camera that is completely stable – allowing for a much greater chance of getting your shot in a clean crisp focus.
There is no need for anything fancy when it comes to tripods – B&H has a couple of great low-cost options.
⇒ Check out a Range of Tripods

Don’t leave home without a Lens Filter. Not only are these good for UV rays they also protect the lens of your camera. I have dropped my camera or accidentally whacked it against a hard surface many times.
A Lens filter is much cheaper to replace than a lens. And it tends to then be the only thing that gets damaged and protects the camera.
⇒ Check out a Range of Lens Filters

These little beanbags are brilliant to use on vehicles. Stick the camera bean bag anywhere – on the edge of the vehicle, on the table, on the hood of the car and you instantly get a stable base for much clearer shots.
Empty the camera bean bag out before you go and just add sand when you get there – the same thing on the way home.
⇒ Check out Beanbags here

Once you’ve spent the money on your new camera it is critical that you protect it from damage. This is most important when you are in transit.
I have made the mistake of packing my camera in my check-in luggage before and paid the price with a slightly bent lens. I recommend buying a camera bag and always bringing your camera on the plane with you.
⇒ Check out Camera Bags here
So, it used to be that the options above were the only way to take good clear photos on safari. However, advances in camera phones plus new accessories are now giving phones a genuine place in the safari vehicle.
Using my phone for anything bar atmosphere shots on safari was new to me so I sat down with what is possibly the only resident wildlife photographer at a lodge in Africa – Christian Sperka at the wonderful Thanda Safari – to tell me how to achieve this.
The stunning Thanda Safari is in the Zululand region of South Africa. Thanda is known for its understated luxury and celebration of the local Zulu culture. Of course, it also has the big 5.
And amazing food, fantastic service, a spa, brilliant guides – and basically everything you could ever want for a wonderful and memorable safari experience. The Thanda Safari reserve has a quite unique mix of topology – from oceans to inland to the coastline.
This provides a great range of backdrops for photos – and it also means Thanda Safari South Africa is a birdwatcher’s paradise.

⇒ For more about the lovely Thanda check out my post on A Luxury Travel Blog .
Thanda Private Game Reserve has two very unique offers. Firstly, it has its own resident wildlife photographer – Christian Sperka.
Secondly, all guests to Thanda Zululand are offered a free 90-minute photography lesson with Christian. I cannot recommend this highly enough.
I thought I knew a lot about photography but Christian showed me quite a few new and neat tricks that I now use off safari as well as on. Christian is also an excellent teacher.
He uses clear and regular language (no detailed camera talk) and is outstanding at explanations. He has been at Thanda Game Reserve for 6 years and has taught over 1200 people during that time.
⇒ Learn more about wonderful South African Animals in this informative post .

- Phones are great for wide-angle shots. You can absolutely use your phone to capture great shots of the lodges, the drives, sundowners, sunrise/sunset etc.
2. Private game reserves are excellent for those who only have a phone for photography. The reason for this is that on private game reserves guides are able to go off-road and get much closer to the animals than at say Kruger National Park South Africa. The closer you can get to the animals generally the better the shot
3. The iPhone 7 represented a major improvement in phone camera quality. This was then taken to the next level with the iPhone 8 plus and the X and now the 13. The Iphone 8 plus and the Iphone X come with two lenses which allows for greater zoom capability without losing photo quality. The Iphone 13 now has three lenses.
4. There are now some fantastic zoom “Clips” that you can add to your phone that will massively improve the zoom and quality of your phone photography. These little telephoto zoom lenses literally clip on to your phone and are considerably cheaper than any traditional camera lenses.
⇒ Zoom clip options for Smart Phones
5. Christian also introduced me to what has now become my most frequently used app – Camera + Legacy . This brilliant app is an editor and gives some fantastic options – I particularly like Clarity for outside shots.
Camera + Legacy app will massively improve the appearance of your safari photos

5. Movement is a key part of safari photography. Rather than moving your phone camera – which won’t get good shots – hold the camera firm and push down on the take a picture button. This should then result in a “burst” of photos. It is then possible to edit the burst and just keep the best ones.
6. Panorama shots can work well on safari – and you don’t need to use the full range. It is possible to take 90 degree rather than 180-degree photos – just stop the shot at the point you want. And don’t forget you can also just tap the arrow and do the panorama shot from the other direction – for some reason this had never occurred to me.
7. And don’t forget your beanbag – these work as well for phone cameras!
If you can, book your lesson with Christian even before you arrive at Thanda Private Game Reserve South Africa. He is not always at Thanda but can generally arrange to be there if given sufficient notice.
I also recommend that you do your photography lesson on the first day so that you will constantly be using what you have learned.
If this sounds like just what you are after Christian also offers further photography lessons as well as the opportunity to go out on a private game drive with him in the Green Mamba.
Not only will you get to make a major improvement to your photography skills (and nab some amazing safari photos) you will also be able to drink Nespresso coffee in the middle of Zululand thanks to Christian’s portable machine.

The Green Mamba has been designed for photographers. There is extra legroom to allow movement for the optimal shot.
There are even mats on the floor as it can be necessary to get down on your knees to balance the camera for the clearest eye line to the animal.
There is also a martini bar for the ultimate sundowner – and make sure you try Christian’s signature drink the Chocaroola – hot chocolate, Amurala, espresso, and some warm frothy milk.
⇒ Book your Thanda Safari & a Photography Lesson with Christian
Thanda was kind enough to host my stay with them. This means they covered the cost of my accommodation, my game drives, and all meals and drinks. Thank you, Thanda! But as always, my opinions are my own.
I paid for my flights to and from South Africa and internally. This post contains affiliate links. This means that if you click on some of them and make a purchase I will receive a small commission. This does not increase the price that you will pay. I just wanted to make sure that you knew this!
READ NEXT: THE ULTIMATE SAFARI PACKING LIST
Related Posts:
Ultima te Travel Bucket List
World’s Most Famous Landmarks
Most Beautiful Cities in the World
Gifts for Tra vel Lovers

[separator type=”thick”] Like this Post? Why Not Pin It?

Amanda O’Brien is the creator and editor of The Boutique Adventurer. She has visited 80 countries and is a member of the British Guild of Travel Writers as well as the IFTWTA. She is passionate about wine had has just completed Level 3 of the WSET. Born in Australia, she lives in London.
This site uses Akismet to reduce spam. Learn how your comment data is processed .
Jesmin Black
Wednesday 4th of November 2020
This is very helpful article. Specially the "Christian’s Key Safari Phone Photography Tips" one was great.
Tanbir Kaur
Tuesday 29th of September 2020
These are some great tips! I need to get a new camera. I hope I can go on a safari one day.
The Boutique Adventurer
thanks! It is an amazing experience that I highly recommend
Adam Fogleman
Wednesday 12th of August 2020
Some good info. Though I think this needs to be updated. Mirrorless cameras have come a long way as has their lens lineups. The Sony A6000 is outdated and not the best representation of mirrorless cameras.
Thursday 13th of August 2020
Thanks for the feedback Adam - I will check out the latest in Mirrorless cameras and do an update.
Wednesday 20th of May 2020
Super compilation and good list for future reference. Bookmarked.
Joanne King
Friday 24th of April 2020
Retested my version with this lens and saw the improvement in the corners and sides!!!Read all of your blog last evening and found lots of useful info. Thanks and keep it up.
Like this post? Why Not Share It?
Thanks for Sharing!
How to Customize Safari Settings for Individual Websites

Setting a website to always open in Desktop or Reader Mode makes it easier to browse on your iPhone. With Safari's custom controls, you can also allow trusted websites access to your microphone, camera, and location. Let's cover how to customize Safari settings for a specific website.
Related: How to Use the Look Up Feature in Safari

Why You'll Love This Tip
- Set a website to display in Reader or Desktop Mode to avoid ads or view more detail on your iPhone.
- Automatically grant trusted websites access to your location, mic, or camera.
For more nifty tips to aid easy online browsing, consider signing up for our free Tip of the Day Newsletter. Now, here's how to customize Safari website settings on your iPhone.

- Navigate to a website you want to customize.

Now when you visit that website, your custom settings will display by default. If you keep a lot of tabs open at once, you might also be interesting in learning how to mute tabs in Safari . Happy browsing!
Author Details

Tamlin Day is a feature web writer for iPhone Life and a regular contributor to iPhone Life magazine. A prolific writer of tips, reviews, and in-depth guides, Tamlin has written hundreds of articles for iPhone Life. From iPhone settings to recommendations for the best iPhone-compatible gear to the latest Apple news, Tamlin's expertise covers a broad spectrum.
Before joining iPhone Life, Tamlin received his BFA in Media & Communications as well as a BA in Graphic Design from Maharishi International University (MIU), where he edited MIU's literary journal, Meta-fore. With a passion for teaching, Tamlin has instructed young adults, college students, and adult learners on topics ranging from spoken word poetry to taking the perfect group selfie. Tamlin's first computer, a Radioshack Color Computer III, was given to him by his father. At 13, Tamlin built his first PC from spare parts. He is proud to put his passion for teaching and tech into practice as a writer and educator at iPhone Life.

Article Spotlight
New body scan connected health station by withings.

Are you ready to revolutionize the way you approach your health and well-being? Look no further than the Withings Body Scan Connected Health Station – a cutting-edge device designed to empower you on your health journey. Let's dive into the features that make this health station a game-changer for your lifestyle.
Featured Products

We are hosting a free live class Wednesday, April 17, 4:30 p.m. E.T. The Notes app may seem simple, but it's actually jam-packed with valuable features that can make your life easier. Space is limited, sign up now.

Are you looking for an iPad case that checks all the boxes? Look no further! Zugu creates convenient cases that are protective and slim…and their wide range of colors is simply unmatched. With a magnetic stand featuring up to ten viewing angles, your iPad will always be ready for work, play, and even travel. In the rare case of any iPad damage, Zugu will cover AppleCare+ repair costs. They also offer free 60-day returns plus a 2-year warranty. If that isn’t enough, Zugu also donates 10% of profits to a charitable cause that helps kids around the world. Take your iPad to the next level while making a meaningful difference.
Most Popular

How to Tell If Someone Blocked Your Number on iPhone

10 Simple Tips To Fix iPhone Battery Drain

How to Tell If a Dead iPhone Is Charging

How To Put Two Pictures Together on iPhone

How to Schedule a Text Message on iPhone

How to Hide an App on Your iPhone

Why Is Find My iPhone Not Working? Here’s the Real Fix

How to Right-Click on iPad

How To Turn Off Flashlight on iPhone (Without Swiping Up!)

How to Convert HEIC to JPG on iPhone

Convert a Picture to a PDF on iPhone, Even Without Apps

How to Download & Install the New iOS Update (iOS 17)
Featured articles, why is my iphone battery draining so fast 13 easy fixes.

Identify Mystery Numbers: How to Find No Caller ID on iPhone

Apple ID Not Active? Here’s the Fix!

How to Cast Apple TV to Chromecast for Easy Viewing

Fix Photos Not Uploading to iCloud Once & for All (iOS 17)

There Was an Error Connecting to the Apple ID Server: Fixed

CarPlay Not Working? 4 Ways to Fix Apple CarPlay Today
Check out our sponsors.

- Each email reveals new things you can do with your phone (and other devices) with easy-to-follow screenshots.
- Enter your email to get your first tip immediately!
- You are here:
15 African Safari Photography Tips

Ariadne is a renowned African wildlife photographer whose work is featured in many well-known guidebooks and magazines.
For most people, photography is an integral part of an African safari. The wealth of great photographic opportunities is inspiring, but for beginners, it is important to have realistic expectations. The media is saturated with beautiful wildlife images taken by specialists who spent months trying to get the ultimate shot, and nobody is likely to match those standards on a one-off holiday.
There are a lot of different aspects to consider when learning how to take pictures on safari. As a starting point, here are some African safari photography tips, including equipment to use, the best camera set up, best lenses and night safari photography for beginners.
Tip 1: Safari Photography Equipment Tips

Invest in a good SLR camera and a couple of lenses. The best camera set up for wildlife photography includes at least a 300mm lens, because anything less will just be frustrating. Ideally you should have 2 cameras as changing lenses is time-consuming when you might be missing the action. On top of that, dust tends to get into the sensor when changing lenses, and this shows up as spots on your photos. Always bring a flash for night safari photography.
Photographic Safari Tours
Tip 2: Camera Support

Almost as important as the actual photographic gear is steady support. Always bring a tripod for situations where you are on foot. Inside the vehicle, however, a tripod tends to be clumsy. It could be replaced by a suitable clamp with tripod head, which is great for panning and following action, but slow to move around for different positions. A better option in most situations is a beanbag, which you can bring to the country empty to save weight, and fill it up with rice or beans after you arrive. Some pillow covers or laundry bags are invaluable to protect cameras lying around in the car from dust.
Tip 3: Storage

One of the main African safari photography tips for wildlife is to always bring enough memory cards. As wildlife photography offers lots of opportunity for action photography, you’ll end up shooting a lot of frames and filling up a lot memory space. I prefer to have big memory cards that can hold a full day’s photography. Nothing is more frustrating than having to change cards in the middle of the action. At the end of the day, I download the cards on my laptop and make a back-up on an external drive. I then format the cards to use again the next day. If you don’t travel with a laptop, you should still back-up your memory cards on a suitable device.
African Safari Tours
Tip 4: settings.

There are no correct or best settings for wildlife photography. It is therefore important to get to grips with the basics of photography and understand the relationship between aperture and shutter speed. This will enable you to freeze action and avoid camera shake, as well as to manipulate the depth of field.
Tip 5: Composition

All the technical stuff can get a bit overwhelming, but an eye for composition is just as important. Although some people might have more flair in composing the perfect image, practice goes a long way in acquiring that photographic eye. A good starting point is to really look at the framing and all the edges before clicking the shutter. What doesn’t add to the photo usually distracts. Also make sure not to inadvertently cut off limbs or treetops, or anything else that would look better in full. Some great tips on composition and other aspects of wildlife photography can be found here .
Tip 6: Angles and Perspective

When photographing wildlife, it is tempting to zoom in as close as possible and take a close-up shot. This might result in a bunch of very usable field guide pictures, but it can pay off to think outside the box and vary your angles and perspectives. An animal in a bigger setting sometimes tells more of a story.
Tip 7: Working With the Light

Photography is hugely light dependent. When to take pictures is almost as important as how to take pictures on safari. The early morning and late afternoon offer the most beautiful lighting with the sun low in the sky. Overcast weather works like a huge softbox, offering workable light conditions to photograph throughout the day. The harsh midday sun is not very flattering, but you might still get some good photos at a waterhole with animals coming to drink during the heat of the day.
Tip 8: Focus on the Eyes

When photographing wildlife, we tend to shoot with a low depth of field (small f-stop) as this makes the animal stand out from distracting backgrounds and vegetation. This also enables us to use a higher shutter speed, which minimizes camera shake and freezes movement. We usually accept less sharpness in other parts of the body so long as the eyes are dead sharp. It is therefore crucial to always focus on the eyes.
Tip 9: Positioning the Vehicle

Your driver-guide is there to help you make the most of your African safari . Most guides are good at spotting animals and they can also offer interesting information relevant to the sightings. But many don’t really know how to take pictures on safari and might need some guidance when it comes to lining up the vehicle to get the perfect angles. Don’t be shy to communicate with the driver to get in the best position. Also make sure the engine is turned off at sightings. Read about how to help yourself and your guide on safari here.
Tip 10: Be Patient

Patience is the main key to great wildlife photos. Instead of driving from animal to animal, it pays to stay with a potentially good sighting. Spending time will offer an opportunity to see some interesting animal behavior. The most rewarding photos of wildlife are usually those showing interaction or action, and this often requires anticipation and patience. You can read more about the importance of patience on safari here.
Tip 11: Don’t Ignore the Small Stuff

It is easy to get too focused on the Big Five and other large mammals on safari. This is partly because the Big Five is heavily marketed and searching for them seems to be the main aim in any safari. However, photographing small animals and birds can be highly rewarding as well. A photograph of a dung beetle or a colorful bird in flight is more evocative than yet another photo of a sleeping lion. A good way to focus on the small stuff is to book a walking safari . Learn more about walking safaris here .
Tip 12: Always Be Safe

Arguably the most important of all African safari photography tips is to always stay safe. In pursuit of the perfect photo, one can sometimes get carried away, but no photo is worth risking your safety. One should never forget that all animals on safari are wild and unpredictable.
Tip 13: Making Memories As Well As Photos

Taking photographs on safari should be fun. Unless you’re a professional photographer, there is no reason to let photography dominate every sighting. Sometimes it is worthwhile to put down the camera and stop looking through the lens - to slow down, and take in the views, the smells and the sounds of the African bush. Other great tips for getting a true taste of Africa can be found here .
Tip 14: Photographing People

A safari offers great wildlife photography opportunities, but hopefully you’ll have some rewarding human interactions as well. You’ll probably make a close bond with your guide and at the end of the day, the people working in your lodge are usually happy to hear about your adventures. So, don’t put away your camera when leaving the safari vehicle, but take some photos of the people that cross your path. Just make sure to always ask permission first, and to be respectful.
Tip15: Respect the Wildlife

Never harass animals in pursuit of a better picture. Tourists and photographers should only be present as observers. We should never try to impact on the scene in front of us. Don’t whistle to wake up an animal to get a better photo and never interfere with a hunt. It is unethical, and also very annoying for other visitors.
About SafariBookings
SafariBookings is the largest online marketplace for African safari tours. Easily compare offers from top-rated tour operators. Make decisions like a pro by using our 102,905 reviews and 223 destination guides. More About Us
Safaris by Type
- Luxury Safaris
- Budget Safaris
- Gorilla Trekking
- Chimp Trekking
- Family Safaris
- Private Safaris
- Group Safaris
- Photo Safaris
- Overland Tours
- Camping Safaris
- Fly-in Safaris
- Walking Safaris
- Birding Safaris
- Self-drive Safaris
- Canoe Safaris
Most Popular Blog Posts
- Best Time for African Safari
- Best Safari in South Africa
- Family Safari in South Africa
- African Safari Tips
- Game Reserves Near Cape Town
- What to Pack for a Safari
- Best African Safari Parks
- Top 5 Best African Honeymoon Safaris
- Top 5 Best Tanzania Family Safaris
- Best Places to See Cheetahs in Africa
- How Much Does an African Safari Cost?
- Best Places To Visit In Africa in 2024
Blog Categories

5-Day Mara, Nakuru & Naivasha Midrange Private Safari
$1,375 to $1,925 pp (USD)
Kenya: Private tour Tented Camp & Hotel
You Visit: Nairobi (Start) , Masai Mara NR, Lake Nakuru NP, Lake Naivasha (Naivasha) , Nairobi (End)
Hyrax Safaris
4.9 /5 – 250 Reviews

8-Day Custom Safari (Big 5) & Gorilla Trekking in Uganda
$2,706 pp (USD)
Rwanda & Uganda: Private tour Lodge & Tented Camp
You Visit: Entebbe (Start) , Ziwa Rhino and Wildlife Ranch, Murchison Falls NP, Kibale NP (Chimps) , Queen Elizabeth NP, Bwindi NP (Gorillas) , Kigali Airport (End)
Home To Africa Tours and Travel
4.9 /5 – 278 Reviews

7-Day Ultimate Kenyan Luxury Safari
$2,812 to $4,633 pp (USD)
Kenya: Private tour Lodge & Tented Camp
You Visit: Nairobi (Start) , Amboseli NP, Hell’s Gate NP, Lake Nakuru NP, Masai Mara NR, Nairobi (End)
Crystal Voyage
4.9 /5 – 23 Reviews
iPhone User Guide
- iPhone models compatible with iOS 17
- R ' class='toc-item' data-ss-analytics-link-url='https://support.apple.com/guide/iphone/iphone-xr-iph017302841/ios' data-ajax-endpoint='https://support.apple.com/guide/iphone/iphone-xr-iph017302841/ios' data-ss-analytics-event="acs.link_click" href='https://support.apple.com/guide/iphone/iphone-xr-iph017302841/ios' id='toc-item-IPH017302841' data-tocid='IPH017302841' > iPhone X R
- S ' class='toc-item' data-ss-analytics-link-url='https://support.apple.com/guide/iphone/iphone-xs-iphc00446242/ios' data-ajax-endpoint='https://support.apple.com/guide/iphone/iphone-xs-iphc00446242/ios' data-ss-analytics-event="acs.link_click" href='https://support.apple.com/guide/iphone/iphone-xs-iphc00446242/ios' id='toc-item-IPHC00446242' data-tocid='IPHC00446242' > iPhone X S
- S Max' class='toc-item' data-ss-analytics-link-url='https://support.apple.com/guide/iphone/iphone-xs-max-iphcd2066870/ios' data-ajax-endpoint='https://support.apple.com/guide/iphone/iphone-xs-max-iphcd2066870/ios' data-ss-analytics-event="acs.link_click" href='https://support.apple.com/guide/iphone/iphone-xs-max-iphcd2066870/ios' id='toc-item-IPHCD2066870' data-tocid='IPHCD2066870' > iPhone X S Max
- iPhone 11 Pro
- iPhone 11 Pro Max
- iPhone SE (2nd generation)
- iPhone 12 mini
- iPhone 12 Pro
- iPhone 12 Pro Max
- iPhone 13 mini
- iPhone 13 Pro
- iPhone 13 Pro Max
- iPhone SE (3rd generation)
- iPhone 14 Plus
- iPhone 14 Pro
- iPhone 14 Pro Max
- iPhone 15 Plus
- iPhone 15 Pro
- iPhone 15 Pro Max
- Setup basics
- Make your iPhone your own
- Take great photos and videos
- Keep in touch with friends and family
- Share features with your family
- Use iPhone for your daily routines
- Expert advice from Apple Support
- What’s new in iOS 17
- Turn on and set up iPhone
- Wake and unlock
- Set up cellular service
- Use Dual SIM
- Connect to the internet
- Sign in with Apple ID
- Subscribe to iCloud+
- Find settings
- Set up mail, contacts, and calendar accounts
- Learn the meaning of the status icons
- Charge the battery
- Charge with cleaner energy sources
- Show the battery percentage
- Check battery health and usage
- Use Low Power Mode
- Read and bookmark the user guide
- Learn basic gestures
- Learn gestures for iPhone models with Face ID
- Adjust the volume
- Find your apps in App Library
- Switch between open apps
- Quit and reopen an app
- Multitask with Picture in Picture
- Access features from the Lock Screen
- View Live Activities in the Dynamic Island
- Perform quick actions
- Search on iPhone
- Get information about your iPhone
- View or change cellular data settings
- Travel with iPhone
- Change sounds and vibrations
- Use the Action button on iPhone 15 Pro and iPhone 15 Pro Max
- Create a custom Lock Screen
- Change the wallpaper
- Adjust the screen brightness and color balance
- Keep the iPhone display on longer
- Use StandBy
- Customize the text size and zoom setting
- Change the name of your iPhone
- Change the date and time
- Change the language and region
- Organize your apps in folders
- Add, edit, and remove widgets
- Move apps and widgets on the Home Screen
- Remove apps
- Use and customize Control Center
- Change or lock the screen orientation
- View and respond to notifications
- Change notification settings
- Set up a Focus
- Allow or silence notifications for a Focus
- Turn a Focus on or off
- Stay focused while driving
- Customize sharing options
- Type with the onscreen keyboard
- Dictate text
- Select and edit text
- Use predictive text
- Use text replacements
- Add or change keyboards
- Add emoji and stickers
- Take a screenshot
- Take a screen recording
- Draw in documents
- Add text, shapes, signatures, and more
- Fill out forms and sign documents
- Use Live Text to interact with content in a photo or video
- Use Visual Look Up to identify objects in your photos and videos
- Lift a subject from the photo background
- Subscribe to Apple Arcade
- Play with friends in Game Center
- Connect a game controller
- Use App Clips
- Update apps
- View or cancel subscriptions
- Manage purchases, settings, and restrictions
- Install and manage fonts
- Buy books and audiobooks
- Annotate books
- Access books on other Apple devices
- Listen to audiobooks
- Set reading goals
- Organize books
- Create and edit events in Calendar
- Send invitations
- Reply to invitations
- Change how you view events
- Search for events
- Change calendar and event settings
- Schedule or display events in a different time zone
- Keep track of events
- Use multiple calendars
- Use the Holidays calendar
- Share iCloud calendars
- Camera basics
- Set up your shot
- Apply Photographic Styles
- Take Live Photos
- Take Burst mode shots
- Take a selfie
- Take panoramic photos
- Take macro photos and videos
- Take portraits
- Take Night mode photos
- Take Apple ProRAW photos
- Adjust the shutter volume
- Adjust HDR camera settings
- Record videos
- Record spatial videos for Apple Vision Pro
- Record ProRes videos
- Record videos in Cinematic mode
- Change video recording settings
- Save camera settings
- Customize the Main camera lens
- Change advanced camera settings
- View, share, and print photos
- Use Live Text
- Scan a QR code
- See the world clock
- Set an alarm
- Change the next wake up alarm
- Use the stopwatch
- Use multiple timers
- Add and use contact information
- Edit contacts
- Add your contact info
- Use NameDrop on iPhone to share your contact info
- Use other contact accounts
- Use Contacts from the Phone app
- Merge or hide duplicate contacts
- Export contacts
- Get started with FaceTime
- Make FaceTime calls
- Receive FaceTime calls
- Create a FaceTime link
- Take a Live Photo
- Turn on Live Captions in a FaceTime call
- Use other apps during a call
- Make a Group FaceTime call
- View participants in a grid
- Use SharePlay to watch, listen, and play together
- Share your screen in a FaceTime call
- Collaborate on a document in FaceTime
- Use video conferencing features
- Hand off a FaceTime call to another Apple device
- Change the FaceTime video settings
- Change the FaceTime audio settings
- Change your appearance
- Leave a call or switch to Messages
- Block unwanted callers
- Report a call as spam
- Connect external devices or servers
- Modify files, folders, and downloads
- Search for files and folders
- Organize files and folders
- Set up iCloud Drive
- Share files and folders in iCloud Drive
- Share your location
- Meet up with a friend
- Send your location via satellite
- Add or remove a friend
- Locate a friend
- Get notified when friends change their location
- Notify a friend when your location changes
- Add your iPhone
- Add your iPhone Wallet with MagSafe
- Get notified if you leave a device behind
- Locate a device
- Mark a device as lost
- Erase a device
- Remove a device
- Add an AirTag
- Share an AirTag or other item in Find My on iPhone
- Add a third-party item
- Get notified if you leave an item behind
- Locate an item
- Mark an item as lost
- Remove an item
- Adjust map settings
- Get started with Fitness
- Track daily activity and change your move goal
- See your activity summary
- Sync a third-party workout app
- Change fitness notifications
- Share your activity
- Subscribe to Apple Fitness+
- Find Apple Fitness+ workouts and meditations
- Start an Apple Fitness+ workout or meditation
- Create a Custom Plan in Apple Fitness+
- Work out together using SharePlay
- Change what’s on the screen during an Apple Fitness+ workout or meditation
- Download an Apple Fitness+ workout or meditation
- Get started with Freeform
- Create a Freeform board
- Draw or handwrite
- Apply consistent styles
- Position items on a board
- Search Freeform boards
- Share and collaborate
- Delete and recover boards
- Get started with Health
- Fill out your Health Details
- Intro to Health data
- View your health data
- Share your health data
- View health data shared by others
- Download health records
- View health records
- Monitor your walking steadiness
- Log menstrual cycle information
- View menstrual cycle predictions and history
- Track your medications
- Learn more about your medications
- Log your state of mind
- Take a mental health assessment
- Set up a schedule for a Sleep Focus
- Turn off alarms and delete sleep schedules
- Add or change sleep schedules
- Turn Sleep Focus on or off
- Change your wind down period, sleep goal, and more
- View your sleep history
- Check your headphone levels
- Use audiogram data
- Register as an organ donor
- Back up your Health data
- Intro to Home
- Upgrade to the new Home architecture
- Set up accessories
- Control accessories
- Control your home using Siri
- Use Grid Forecast to plan your energy usage
- Set up HomePod
- Control your home remotely
- Create and use scenes
- Use automations
- Set up security cameras
- Use Face Recognition
- Unlock your door with a home key
- Configure a router
- Invite others to control accessories
- Add more homes
- Get music, movies, and TV shows
- Get ringtones
- Manage purchases and settings
- Get started with Journal
- Write in your journal
- Review your past journal entries
- Change Journal settings
- Magnify nearby objects
- Change settings
- Detect people around you
- Detect doors around you
- Receive image descriptions of your surroundings
- Read aloud text and labels around you
- Set up shortcuts for Detection Mode
- Add and remove email accounts
- Set up a custom email domain
- Check your email
- Unsend email with Undo Send
- Reply to and forward emails
- Save an email draft
- Add email attachments
- Download email attachments
- Annotate email attachments
- Set email notifications
- Search for email
- Organize email in mailboxes
- Flag or block emails
- Filter emails
- Use Hide My Email
- Use Mail Privacy Protection
- Change email settings
- Delete and recover emails
- Add a Mail widget to your Home Screen
- Print emails
- Get travel directions
- Select other route options
- Find stops along your route
- View a route overview or a list of turns
- Change settings for spoken directions
- Get driving directions
- Get directions to your parked car
- Set up electric vehicle routing
- Report traffic incidents
- Get cycling directions
- Get walking directions
- Get transit directions
- Delete recent directions
- Get traffic and weather info
- Estimate travel time and ETA
- Download offline maps
- Search for places
- Find nearby attractions, restaurants, and services
- Get information about places
- Mark places
- Share places
- Rate places
- Save favorite places
- Explore new places with Guides
- Organize places in My Guides
- Delete significant locations
- Look around places
- Take Flyover tours
- Find your Maps settings
- Measure dimensions
- View and save measurements
- Measure a person’s height
- Use the level
- Set up Messages
- About iMessage
- Send and reply to messages
- Unsend and edit messages
- Keep track of messages
- Forward and share messages
- Group conversations
- Watch, listen, or play together using SharePlay
- Collaborate on projects
- Use iMessage apps
- Take and edit photos or videos
- Share photos, links, and more
- Send stickers
- Request, send, and receive payments
- Send and receive audio messages
- Animate messages
- Change notifications
- Block, filter, and report messages
- Delete messages and attachments
- Recover deleted messages
- View albums, playlists, and more
- Show song credits and lyrics
- Queue up your music
- Listen to broadcast radio
- Subscribe to Apple Music
- Play music together in the car with iPhone
- Listen to lossless music
- Listen to Dolby Atmos music
- Apple Music Sing
- Find new music
- Add music and listen offline
- Get personalized recommendations
- Listen to radio
- Search for music
- Create playlists
- See what your friends are listening to
- Use Siri to play music
- Change the way music sounds
- Get started with News
- Use News widgets
- See news stories chosen just for you
- Read stories
- Follow your favorite teams with My Sports
- Listen to Apple News Today
- Subscribe to Apple News+
- Browse and read Apple News+ stories and issues
- Download Apple News+ issues
- Listen to audio stories
- Solve crossword puzzles
- Search for news stories
- Save stories in News for later
- Subscribe to individual news channels
- Get started with Notes
- Add or remove accounts
- Create and format notes
- Draw or write
- Add photos, videos, and more
- Scan text and documents
- Work with PDFs
- Create Quick Notes
- Search notes
- Organize in folders
- Organize with tags
- Use Smart Folders
- Export or print notes
- Change Notes settings
- Make a call
- Answer or decline incoming calls
- While on a call
- Set up voicemail
- Check voicemail
- Change voicemail greeting and settings
- Select ringtones and vibrations
- Make calls using Wi-Fi
- Set up call forwarding and call waiting
- Avoid unwanted calls
- View photos and videos
- Play videos and slideshows
- Delete or hide photos and videos
- Edit photos and videos
- Trim video length and adjust slow motion
- Edit Cinematic mode videos
- Edit Live Photos
- Edit portraits
- Use photo albums
- Edit, share, and organize albums
- Filter and sort photos and videos in albums
- Make stickers from your photos
- Duplicate and copy photos and videos
- Merge duplicate photos and videos
- Search for photos
- Identify people and pets
- Browse photos by location
- Share photos and videos
- Share long videos
- View photos and videos shared with you
- Watch memories
- Personalize your memories
- Manage memories and featured photos
- Use iCloud Photos
- Create shared albums
- Add and remove people in a shared album
- Add and delete photos and videos in a shared album
- Set up or join an iCloud Shared Photo Library
- Add content to an iCloud Shared Photo Library
- Use iCloud Shared Photo Library
- Import and export photos and videos
- Print photos
- Find podcasts
- Listen to podcasts
- Follow your favorite podcasts
- Use the Podcasts widget
- Organize your podcast library
- Download, save, or share podcasts
- Subscribe to podcasts
- Listen to subscriber-only content
- Change download settings
- Make a grocery list
- Add items to a list
- Edit and manage a list
- Search and organize lists
- Work with templates
- Use Smart Lists
- Print reminders
- Use the Reminders widget
- Change Reminders settings
- Browse the web
- Search for websites
- Customize your Safari settings
- Change the layout
- Use Safari profiles
- Open and close tabs
- Organize your tabs
- View your Safari tabs from another Apple device
- Share Tab Groups
- Use Siri to listen to a webpage
- Bookmark favorite webpages
- Save pages to a Reading List
- Find links shared with you
- Annotate and save a webpage as a PDF
- Automatically fill in forms
- Get extensions
- Hide ads and distractions
- Clear your cache
- Browse the web privately
- Use passkeys in Safari
- Check stocks
- Manage multiple watchlists
- Read business news
- Add earnings reports to your calendar
- Use a Stocks widget
- Translate text, voice, and conversations
- Translate text in apps
- Translate with the camera view
- Subscribe to Apple TV+, MLS Season Pass, or an Apple TV channel
- Add your TV provider
- Get shows, movies, and more
- Watch sports
- Watch Major League Soccer with MLS Season Pass
- Control playback
- Manage your library
- Change the settings
- Make a recording
- Play it back
- Edit or delete a recording
- Keep recordings up to date
- Organize recordings
- Search for or rename a recording
- Share a recording
- Duplicate a recording
- Keep cards and passes in Wallet
- Set up Apple Pay
- Use Apple Pay for contactless payments
- Use Apple Pay in apps and on the web
- Track your orders
- Use Apple Cash
- Use Apple Card
- Use Savings
- Pay for transit
- Access your home, hotel room, and vehicle
- Add identity cards
- Use COVID-19 vaccination cards
- Check your Apple Account balance
- Use Express Mode
- Organize your Wallet
- Remove cards or passes
- Check the weather
- Check the weather in other locations
- View weather maps
- Manage weather notifications
- Use Weather widgets
- Learn the weather icons
- Find out what Siri can do
- Tell Siri about yourself
- Have Siri announce calls and notifications
- Add Siri Shortcuts
- About Siri Suggestions
- Use Siri in your car
- Change Siri settings
- Contact emergency services
- Use Emergency SOS via satellite
- Request Roadside Assistance via satellite
- Set up and view your Medical ID
- Use Check In
- Manage Crash Detection
- Reset privacy and security settings in an emergency
- Set up Family Sharing
- Add Family Sharing members
- Remove Family Sharing members
- Share subscriptions
- Share purchases
- Share locations with family and locate lost devices
- Set up Apple Cash Family and Apple Card Family
- Set up parental controls
- Set up a child’s device
- Get started with Screen Time
- Protect your vision health with Screen Distance
- Set up Screen Time
- Set communication and safety limits and block inappropriate content
- Charging cable
- Power adapters
- MagSafe chargers and battery packs
- MagSafe cases and sleeves
- Qi-certified wireless chargers
- Use AirPods
- Use EarPods
- Apple Watch
- Wirelessly stream videos and photos to Apple TV or a smart TV
- Connect to a display with a cable
- HomePod and other wireless speakers
- Pair Magic Keyboard
- Enter characters with diacritical marks
- Switch between keyboards
- Use shortcuts
- Choose an alternative keyboard layout
- Change typing assistance options
- External storage devices
- Bluetooth accessories
- Share your internet connection
- Allow phone calls on your iPad and Mac
- Use iPhone as a webcam
- Hand off tasks between devices
- Cut, copy, and paste between iPhone and other devices
- Stream video or mirror the screen of your iPhone
- Start SharePlay instantly
- Use AirDrop to send items
- Connect iPhone and your computer with a cable
- Transfer files between devices
- Transfer files with email, messages, or AirDrop
- Transfer files or sync content with the Finder or iTunes
- Automatically keep files up to date with iCloud
- Use an external storage device, a file server, or a cloud storage service
- Intro to CarPlay
- Connect to CarPlay
- Use your vehicle’s built-in controls
- Get turn-by-turn directions
- Change the map view
- Make phone calls
- View your calendar
- Send and receive text messages
- Announce incoming text messages
- Play podcasts
- Play audiobooks
- Listen to news stories
- Control your home
- Use other apps with CarPlay
- Rearrange icons on CarPlay Home
- Change settings in CarPlay
- Get started with accessibility features
- Turn on accessibility features for setup
- Change Siri accessibility settings
- Open features with Accessibility Shortcut
- Change color and brightness
- Make text easier to read
- Reduce onscreen motion
- Customize per-app visual settings
- Hear what’s on the screen or typed
- Hear audio descriptions
- Turn on and practice VoiceOver
- Change your VoiceOver settings
- Use VoiceOver gestures
- Operate iPhone when VoiceOver is on
- Control VoiceOver using the rotor
- Use the onscreen keyboard
- Write with your finger
- Use VoiceOver with an Apple external keyboard
- Use a braille display
- Type braille on the screen
- Customize gestures and keyboard shortcuts
- Use VoiceOver with a pointer device
- Use VoiceOver for images and videos
- Use VoiceOver in apps
- Use AssistiveTouch
- Adjust how iPhone responds to your touch
- Use Reachability
- Auto-answer calls
- Turn off vibration
- Change Face ID and attention settings
- Use Voice Control
- Adjust the side or Home button
- Use Apple TV Remote buttons
- Adjust pointer settings
- Adjust keyboard settings
- Adjust AirPods settings
- Turn on Apple Watch Mirroring
- Control a nearby Apple device
- Intro to Switch Control
- Set up and turn on Switch Control
- Select items, perform actions, and more
- Control several devices with one switch
- Use hearing devices
- Use Live Listen
- Use sound recognition
- Set up and use RTT and TTY
- Flash the LED for alerts
- Adjust audio settings
- Play background sounds
- Display subtitles and captions
- Show transcriptions for Intercom messages
- Get Live Captions (beta)
- Type to speak
- Record a Personal Voice
- Use Guided Access
- Use built-in privacy and security protections
- Set a passcode
- Set up Face ID
- Set up Touch ID
- Control access to information on the Lock Screen
- Keep your Apple ID secure
- Use passkeys to sign in to apps and websites
- Sign in with Apple
- Share passwords
- Automatically fill in strong passwords
- Change weak or compromised passwords
- View your passwords and related information
- Share passkeys and passwords securely with AirDrop
- Make your passkeys and passwords available on all your devices
- Automatically fill in verification codes
- Automatically fill in SMS passcodes
- Sign in with fewer CAPTCHA challenges
- Use two-factor authentication
- Use security keys
- Manage information sharing with Safety Check
- Control app tracking permissions
- Control the location information you share
- Control access to information in apps
- Control how Apple delivers advertising to you
- Control access to hardware features
- Create and manage Hide My Email addresses
- Protect your web browsing with iCloud Private Relay
- Use a private network address
- Use Advanced Data Protection
- Use Lockdown Mode
- Use Stolen Device Protection
- Receive warnings about sensitive content
- Use Contact Key Verification
- Turn iPhone on or off
- Force restart iPhone
- Back up iPhone
- Return iPhone settings to their defaults
- Restore all content from a backup
- Restore purchased and deleted items
- Sell, give away, or trade in your iPhone
- Erase iPhone
- Install or remove configuration profiles
- Important safety information
- Important handling information
- Find more resources for software and service
- FCC compliance statement
- ISED Canada compliance statement
- Ultra Wideband information
- Class 1 Laser information
- Apple and the environment
- Disposal and recycling information
- Unauthorized modification of iOS
Change advanced camera settings on iPhone
Change the Main camera resolution
On iPhone 15 models, the Main camera resolution is set to 24 MP by default. You can switch between 12 MP, 24 MP, and 48 MP.
To learn about customizing the Main camera on iPhone 15 Pro and iPhone 15 Pro Max, see Customize the Main camera lens .
Turn View Outside the Frame off and on
On supported models , the camera preview displays content outside the frame to show you what can be captured by using another lens in the camera system with a wider field of view. View Outside the Frame is on by default.
Turn Prioritize Faster Shooting off and on
The Prioritize Faster Shooting setting modifies how images are processed—allowing you to capture more photos when you rapidly tap the Shutter button. Prioritize Faster Shooting is on by default.
Turn Lens Correction off and on
On supported models , the Lens Correction setting adjusts photos taken with the front camera or Ultra Wide camera for more natural-looking results. Lens Correction is on by default.
Turn Scene Detection off and on
On iPhone 12 models, the Scene Detection setting can identify what you’re taking a photo of and apply a tailored look to bring out the best qualities in the scene. Scene Detection is on by default.

The Best Camera Settings for a Tanzania Wildlife Safari
It’s always a bit lofty to call any camera setting “the best”, as people have different styles and preferences, and the environment is always changing. However, you have to start somewhere, so here is a listing of what I view as the best places to start with , in terms of camera settings, so you’re ready to capture the wide range of photo opportunities on a Tanzania Photo Safari .
The Best Landscape Settings for Tanzania
Fortunately, you’ll likely have pretty great light the entire time. The sky is big and the sun is shining. Although you’ll usually be setting out early in the morning, and also be enjoying many evening wildlife drives, there will be plenty of time in between with great light. This means that you can photograph at a wide depth of field without concern for slow shutter speeds.
If you shoot with a point-and-shoot , I recommend setting your camera on “landscape mode”, to force it to photograph at a wide depth of field. If you shoot with a camera capable of custom aperture settings ( DSLR or mirrorless ), I recommend f/8.0 and above. In a photo like the above, with good lighting, you can shoot at f/11 for maximum depth of field, which translates to a sharp foreground and background. By setting your camera on “aperture mode”, your camera will choose the corresponding shutter speed, which again, because of all the light ought to be plenty fast for nearly every shot.
The Best Settings for Wildlife Photos in Tanzania
The bountiful light on the African savanna means that you won’t have to shoot at low aperture numbers, but I recommend that you start there. There are two key advantages for photographing at what we call a “wide aperture”, or “low aperture number” (f/2.8, f/3.5, f/4, and f/5.6. The first being that it gives you a very fast shutter speed. This allows you to freeze motion in the photo, which in Tanzania, can be very helpful as wildlife can often be moving fairly fast.
For cameras that do not allow manipulation of your f-stop number, there is an easy shortcut. Simply set your camera to “portrait mode” and this puts your camera at the lowest f-stop number automatically.
The other thing a “low aperture number” does is that it helps blur the non essential parts of the photo. This is a bit more of an artistic thing, but it also serves to help isolate the subject and avoid any distractions from errant grasses or tree limbs that sometimes get into your shot. See how in the above photo the grasses are slightly blurred, helping you concentrate on the hyena? That’s what we’re after.
Take, for example, the above photo. If I used the same settings as I did for landscape photography I’d likely be distracted by whatever is in the background – grasses, trees, other wildlife. However, by deliberately choosing a shallow depth of field, my subject really stands out and pops in a very vibrant way.
The Exceptions
Rules are always meant to be broken, right? Here are a few examples with both landscape and wildlife photography where I’m not following my own advice.
When the light gets low, you really can’t afford to shoot with a wide depth of field any longer. You must shoot at low aperture numbers to give your camera as much light as possible. If you’re not sure what I’m talking about here, I recommend reading my Aperture section .
In the above shot, I’m not trying to get everything in focus like I would for a normal landscape photo. Because most of the foreground is silhouetted, I’m not all that worried about how perfectly sharp the leaves and branches are. Thus, by dialing in a lower f-stop number, my camera will give me the fastest shutter speed it can in these lower light conditions. (usually f/5.6, f/4, or even f/2.8 at this time of day).
I’m a big fan of photographing African landscapes with animals in them. Why not, right? Well, as a bit of explanation, I personally feel this provides excellent context to the scene. Landscapes always look better when there is a specific thing to look at first (like a stream, rock, mountain peak, or in this case, animal), and wildlife looks better when surrounded by gorgeous landscapes.
While I normally may use a shallow depth of field with wildlife, to get that background blur, I don’t want that here. In this photo, I’m treating it more like a landscape shot that just so happens to have wildlife in it. My settings? Wide depth of field so that everything’s in focus, aiming for f/7.1, f/8 or maybe even f/9. As you may be able to tell, this was early morning light, so I was a bit reserved with the aperture, as a very wide depth of field like f/11 would not let quite enough light for the shot.
There are no doubt many tried and true techniques for photographing in Tanzania . If you have a particular style or tip that is your go-to, please do share with us in the comments!
Go forward and give it a shot,
- #Shot Settings
- #Wildlife Photography
How to Turn any Sunset into a Spectacular Photo
Tips on photographing the grand canyon.

Court Whelan, Ph.D.
Court is an avid nature and wildlife photographer and naturalist Expedition Leader for Natural Habitat Adventures. His background in wildlife and conservation biology led him to pursue a joint Ph.D. in ecotourism and entomology. As Editor in Chief of The Natural Photographer, he is eager to share his photography knowledge and creative guidance with readers through comprehensive tutorials and blog posts. You may view more of his photography at www.courtwhelan.com
10 Comments

Wish I had known this when I went to Tanzania. Great trip but all my pictures are not tact sharp at 100%
Good info for next time
The great thing about Africa is that there is always a reason to go back! Hope you can join us, and sometimes it may be nice to consider a special photographic version of a safari, as your leader will really be able to help get you the perfect shot over and over again. But yes, there’s always a next time — especially in a place as magical as Africa!

What lens selection would you suggest for the animals. I have a 100- 400 which I can hand hold quite well. I also have a 600 which I mostly use for birds but obviously needs a tripod and is bulky. Many thanks
I think we spoke on the phone, but yes, the 100-400 is a great all around lens in Africa. 600 is good, too, but very limiting when wildlife is up close, which can be often on our expeditions! You’ll very likely get more shots with your 100-400 because of its versatility.

Extremely right information
Thanks, Kiran!

What a great post! Leaving for safari next week and just got my first DSLR for the trip and having these recommendations are fantastic and extremely helpful!
so great to hear, Liza! Enjoy the adventure!!

Hi Court, this all sounds good on A setting but my pictures still come out a little dark even at the recommended Aperture settings based on landscape and light. Do you leave ISO on auto as well as Shutter Speed in the A setting? I’ve found when I up my exposure to 0.7 or 1.0 that helps with the lighting but I’m not sure if that’s the best way to do it?
Hey Blake, great question here. First off, and this might seem silly, but it might be worth checking your LCD screen settings. There is an “auto dim” setting that often makes your camera’s screen lighter and darker based on ambient light. I only say this, as I was having a similar problem a few years ago with a new camera, finding everything was WAY too bright. Then I realized it was actually just the screen in the back of the camera, not the actual image and exposure :).
Now, assuming this is not the problem, and the shots are actually coming out too dark on their own, I do have a few comments. First off, AUTO ISO is a great setting, and now that it’s getting more accurate in newer cameras I use that a lot. And shutter speed will always be automatic when shooting on Aperture Priority (A) setting. In fact, the camera is designed to expose properly at whatever exposure setting you have regardless of auto ISO or not. So, I’m kinda thinking it could either be your own preference or tolerance for light and dark, or perhaps an LCD issue. At the end of the day, if that still doesn’t fix it, I would honestly just set your camera to +0.7 or +1.0 on the exposure meter and keep it there as long as you’re seeing the photos as too dark. It’s indeed a good fix and won’t impact the quality of the photos…it’s just a shortcut way to calibrate the light/dark balance :).
Hope this helps!
Leave a Reply Cancel Reply
Save my name, email, and website in this browser for the next time I comment.
This site uses Akismet to reduce spam. Learn how your comment data is processed .
Pin It on Pinterest

How to Stop Websites Accessing Your Camera, Microphone, Location, and More
C ookies aren’t the only thing a website might try to access when you pay them a visit. They can also request access your device’s webcam, microphone, and all kinds of other functions or data.
Luckily, most web browsers allow you to control what websites can access from your devices. This article shows you how you can control what these sites can access.
What Can Websites Try to Access From Your Device?
As the functionality of websites and web apps advances, they need access to an increasing number of device functions to work. Some of the most common functions websites and apps may try to access include:
- Location data
- Images and media files
- Device activity
Websites and apps may also request access to send you push notifications, automatically play media files, and a variety of other purposes. Most browsers require websites to request permission for access to your device functions, using a prompt system.
This means you can allow or block access on a case-by-case basis, every time a website or web app requests permission. However, you can also manage default permission settings in your browser and change the settings for individual websites.
Let’s look at how you can do this in Chrome, Safari, Firefox, and Edge.
How to Manage Site Settings in Chrome
To manage website permissions in Chrome, click Settings > Privacy and security > Site settings . Under the Permissions tab, you’ll see a short list of permissions websites and web apps can request.
To view the full list, click on the Additional permissions tab.
This reveals the full list of site permissions settings you can control in Chrome.
From here, you can manage how websites access your device functions and data by changing permission settings.
For example, click on Camera in the list of permissions, and you can set the default behavior to Sites can ask to use your camera or Don’t allow sites to use your camera .
Allowing sites to ask for permission means you’ll receive a prompt in the browser every time a site requests access. This way, you can accept or block access upon each request. Alternatively, you can set the default behavior to Don’t allow sites to use your camera , and this will block all websites from requesting access.
On the same page, you can also view lists of websites granted access and blocked from each permission.
This allows you to review permission settings and remove specific websites at any time. For a more in-depth breakdown of Chrome site settings, we've also got an article listing 23 website permissions to change in Chrome for better browsing.
How to Change Website Access Settings in Safari
To change website permissions in Safari, click on Settings > Websites to view the list of permission controls on the left.
On the right, you’ll see a list of sites currently open in Safari and their permission settings. You can set these permissions to Ask , Deny , or Allow and set these as default settings for all websites using the When visiting other websites setting on the bottom-right of the panel.
How to Set Website Permissions in Firefox
We’ve got an in-depth article showing how to set website permissions in Firefox , but here’s a quick run-through.
To change your settings, click Preferences > Privacy & Security and scroll down to the Permissions section.
From here, you can click on any permission to manage settings. Let’s say you want to control which websites can send you push notifications. Click on Settings next to the Notifications label and see the following box:
You can see a list of the websites granted permission to send you push notifications. To block any website from sending notifications, simply click the tab under Status and change it to Block . Alternatively, you can remove websites from the list, which means the site will send another request when it needs access in the future.
You can also prevent any websites not included on your permissions list from requesting access by selecting the checkbox labeled Block new requests asking to allow notifications . Once you’re done, make sure you click Save Changes to apply your settings.
How to Manage Website Permissions in Edge
Managing website permissions in Edge is almost identical to Chrome. First, click Settings > Cookies and Site Permissions to see the full list of permissions options available.
You can view and manage permissions for individual websites by clicking on the All sites tab and selecting either Ask (Default) , Allow , or Block .
Alternatively, you can manage settings for each permission from the Site permissions page. Simply click on the permission you want to manage, and you’ll see two lists–one for blocked sites and another for sites given access.
You can unblock websites by removing them from your block list, and also remove any unwanted sites from your allow list. You’ll also see a toggle switch for the Ask before accessing setting.
With this turned on, you’ll receive prompts every time a website requests permission to access your device. Turn this off and Edge will automatically block access to websites for this permission, meaning you’ll no longer receive any prompts.
Why It's Important to Keep Track of Site Settings
Many websites and apps have legitimate reasons to access certain device functions. For example, a video calling app needs to access your device's camera and microphone for obvious reasons.
Not all requests are essential, though. Let’s say you occasionally browse social media sites on your desktop, but you only ever post from your mobile. In this case, you may not want the web app to access your desktop’s images and media files or its camera.
More importantly, malicious websites can also try to access your device’s functions and data. So, it’s important to keep track of site settings in your browser(s) and regularly manage the list of websites gaining access to your devices. As cyber criminals develop increasingly sophisticated methods, it’s worth taking extra steps to make sure your browser is safe and secure.

The 7 Best iPhone Camera Settings to Record Better Videos
Your iPhone videos will look even better once you master these settings.
Quick Links
- Change Your Video Resolution and Frame Rate
- Use Action Mode
- Ensure Enhanced Stabilization Is Enabled
- Use Apple ProRes
- Enable the Grid and Level Tools
- Disable HDR Video
- Enable Macro Control
While your iPhone can shoot great-looking videos out of the box, you can get better results by tweaking some camera settings. Whether you're a beginner or professional, here are all the iPhone camera settings you should tweak right away.
1. Change Your Video Resolution and Frame Rate
Head to your iPhone's Settings app and go to Camera > Record Video . On the next screen, you'll see several combinations of video qualities and different frame rates. If you'd like to record in the highest resolution possible, make sure you choose 4K at 60FPS.
However, keep in mind that the higher resolution you choose, the more storage space each video will consume. You can also tweak the video resolution of slo-mo and cinematic videos. So, if you tend to use those video modes often, it's worth adjusting their resolution settings as well.
You can also adjust the video resolution and frame rate directly from the Camera app. Switch to Video mode and tap the HD or 4K option in the top-right corner to switch your resolution. And to adjust the frame rate, tap the FPS value right next to it.
Additionally, you'll find an Auto FPS setting in Camera > Record Video . When this is enabled, your iPhone will automatically reduce the frame rate to 24FPS to improve low-light videos. By default, it's only enabled for 30FPS videos, but you can turn it on for both 30 and 60FPS shots.
2. Use Action Mode
There's no worse feeling than taking a video of your favorite artist performing at a concert only to realize your hands were shaking throughout the video once you rewatch it. This is where the Action mode feature on the iPhone 14 and newer models comes in clutch. It's a dedicated mode that can help reduce the shakiness of your videos.
To help you see the difference, here's a video I recorded with Action mode enabled:
And here's a video I recorded with Action mode disabled. Notice how shakier the footage is when I'm barely even jogging?
To enable Action mode, head to the Camera app on your iPhone and switch to Video mode. You'll see an Action Mode icon, which looks like a person running. Once you tap the icon, it'll turn yellow, and you'll see an Action mode banner appear at the top of the screen.
You should be in a well-lit area to get the most out of Action mode. Otherwise, a "More light required" message may appear on the screen.
However, you can enable this feature for low light conditions by heading to Settings > Camera > Record Video and toggling on the switch next to Action Mode Lower Light .
So, if you tend to capture videos when you're on the move, turning on Action Mode is definitely a great idea!
3. Ensure Enhanced Stabilization Is Enabled
While you're at it, we also recommend enabling Enhanced Stabilization. Like Action Mode, Enhanced Stabilization is available on the iPhone 14, iPhone 14 Pro, and newer models. This feature zooms in slightly and crops the edge of your footage slightly. Unlike Action Mode, this feature also works in Cinematic mode.
To help you see the difference, here's a video I recorded with Enhanced Stabilization enabled:
Here's a video I recorded with Enhanced Stabilization disabled. Notice how the first video exhibits a smoother motion when the camera is in motion, whereas the second video appears to be more unstable.
While Enhanced Stabilization by default, you may have unknowingly disabled it while messing around with your settings. Head to Settings > Camera > Record Video and ensure Enhanced Stabilization is toggled on.
4. Use Apple ProRes
If you have an iPhone 13 Pro or newer Pro model and want to use your Apple device to record clips with incredible detail, we recommend turning on ProRes.
Apple ProRes is a "visually lossless" recording format that's relatively easier to edit. While you won't find this feature all that useful if you simply record videos for Instagram or TikTok, it'll definitely come in clutch if you're a cinematographer or a budding content creator on YouTube.
To turn on ProRes, head to Settings > Camera > Formats and toggle on the switch next to Apple ProRes under the Video Capture section.
Go to your iPhone's Camera app and switch to Video mode. Finally, tap the ProRes toggle at the top. While this recording format will undoubtedly allow you to record videos that capture much more detail, ProRes videos are around 30x larger than HEVC (High Efficiency Video Coding) files. So, make sure you have enough free space on your iPhone .
5. Enable the Grid and Level Tools
The rule of thirds in photography suggests dividing your image into a grid of nine equal parts using two vertical and two horizontal lines. The main subjects or points of interest are then placed along these lines or at their intersections to create a balanced composition.
Whether you're an experienced videographer or a complete beginner, camera grid lines can help you apply the rule of thirds with ease. To enable grid lines on your iPhone , go to Settings > Camera and toggle on the switch next to Grid under Composition .
Apple also introduced a leveling tool in iOS 17 that helps you line up your shots on your iPhone. To use the Level tool in your iPhone's Camera app , simply toggle on the switch next to Level in Settings > Camera .
6. Disable HDR Video
By default, the iPhone 12 and newer models use Dolby Vision HDR (High Dynamic Range) when the conditions are ideal. However, leaving HDR mode enabled sometimes causes videos to look choppy and unnaturally saturated if the conditions of the videos aren't ideal.
To help you see the difference, here's a video I recorded with HDR enabled:
Here's a video I recorded with HDR disabled:
So, if you're going for a more natural vibe with your videos and prefer having a consistent color theme, you're better off disabling it. All you need to do is head to Settings > Camera > Record Video and toggle off the switch next to HDR Video .
7. Enable Macro Control
One of the most impressive additions to modern iPhones is Macro Control, which allows users to capture stellar shots of subjects as little as two centimeters away. Here's a video I recorded with Macro Control enabled:
Here's a video I recorded with Macro Control disabled:
Unfortunately, Macro Control is exclusive to the iPhone 13 Pro and newer Pro models. So, if you'd like to take close shots, head to Settings > Camera and ensure Macro Control is toggled on.
Then, open the Camera app and position your iPhone's camera close to the subject. Once you do so, your iPhone's camera will automatically switch to the ultra-wide lens. You'll also notice a yellow flower icon when Macro Control is activated. If you want to disable automatic macro switching, simply tap the flower icon.
While your iPhone's camera can record videos with great detail without you having to do anything, taking some time to tweak these settings can help your footage stand out, especially while shooting in less-than-ideal conditions.
- a. Send us an email
- b. Anonymous form
- Buyer's Guide
- Upcoming Products
- Tips / Contact Us
- Podcast Instagram Facebook Twitter Mastodon YouTube Notifications RSS Newsletter
Apple Releases Safari Technology Preview 192 With Bug Fixes and Performance Improvements
Apple today released a new update for Safari Technology Preview , the experimental browser Apple first introduced in March 2016. Apple designed the Safari Technology Preview to test features that may be introduced into future release versions of Safari.

The current Safari Technology Preview release is compatible with machines running macOS Ventura and macOS Sonoma , the latest version of macOS that Apple released in September 2023.
The Safari Technology Preview update is available through the Software Update mechanism in System Preferences or System Settings to anyone who has downloaded the browser . Full release notes for the update are available on the Safari Technology Preview website .
Apple's aim with Safari Technology Preview is to gather feedback from developers and users on its browser development process. Safari Technology Preview can run side-by-side with the existing Safari browser and while designed for developers, it does not require a developer account to download.
Get weekly top MacRumors stories in your inbox.
Top Rated Comments
Safari 17.5 with MacOS 14.5 scored a 14.2, Safari Tech Preview 192 was 13.3, and the latest Google Chrome was 26.8. Uggg....

"and Performance Improvements" Sooooo...at long last, it's the most snappiest Safari we've ever created. You're going to love it
Popular Stories

iPhone 16 Plus Rumored to Come in These 7 Colors

When to Expect a New Apple TV to Launch

Macs to Get AI-Focused M4 Chips Starting in Late 2024

iOS 18 May Feature All-New 'Safari Browsing Assistant'

Review: Six Months With the iPhone 15 Pro

Alleged iPhone 16 Battery Details Show Smaller Capacity for One Model
Next article.

Our comprehensive guide highlighting every major new addition in iOS 17, plus how-tos that walk you through using the new features.

App Store changes for the EU, new emoji, Podcasts transcripts, and more.

Get the most out your iPhone 15 with our complete guide to all the new features.
A deep dive into new features in macOS Sonoma, big and small.

Revamped models with OLED displays, M3 chip, and redesigned Magic Keyboard accessory.

Updated 10.9-inch model and new 12.9-inch model, M2 chip expected.

Apple's annual Worldwide Developers Conference will kick off with a keynote on June 10.

Expected to see new AI-focused features and more. Preview coming at WWDC in June with public release in September.
Other Stories

7 hours ago by MacRumors Staff

10 hours ago by Joe Rossignol

11 hours ago by Tim Hardwick

1 day ago by MacRumors Staff

1 day ago by Tim Hardwick
Watch CBS News
Experts warn not to look at solar eclipse with your phone camera — but share tricks for safely taking pictures
Updated on: April 8, 2024 / 12:12 PM EDT / CBS News
Millions of Americans will be able to see the solar eclipse on April 8, 2024, and chances are many will want to grab their phone and take pictures to document the rare event.
Experts warn that it's essential not only to protect your eyes from the sun, but also to be cautious when using your phone to view or take photos of the solar eclipse.
A partial solar eclipse, when the moon blocks some of the sun, will occur from coast to coast, while a total solar eclipse —when the moon lines up with the sun, blocking all of its light — will be visible in the "path of totality," stretching across more than a dozen states , from Texas to Maine.
"There is no safe time to look at the sun without protection, period," Dr. Christopher Starr, director of the fellowship program in cornea, cataract and laser vision correction surgery at NewYork-Presbyterian and Weill Cornell Medicine, said in an interview with Health Matters, NewYork-Presbyterian's online journal. "Not a split second, not a half a second, not a quarter of a second. At no time should a kid, or an adult, be looking at the sun even as the sun is partially eclipsed. It's still unsafe."
The safest way to look at a partially eclipsed sun is with eclipse glasses that meet an international standard, ISO 12312-2, according to the American Optometric Association.
Can I take pictures of the solar eclipse with my cellphone?
Cellphone cameras should not be pointed directly at the sun, as it may damage the phone's sensor, experts say.
Smartphones were never designed for taking photos of the sun or the moon, according to NASA. Because standard lenses are very small, they aren't equipped with the resolution needed for the largest objects in the sky like the sun and moon.

"Cellphone cameras do not have the kind of protective filters needed for safe or successful solar photography," Dr. Geoff Bradford, professor of ophthalmology at West Virginia University, told CBS News.
Photographing the partial eclipse with a smartphone will likely not only damage the camera sensor but also result in an overexposed photo, Bradford said.
Douglas Goodwin, professor of media studies at Scripps College and an expert in computational photography, agreed.
"Smartphone cameras in 2024 have small sensors and lenses, making it challenging to capture detailed images of the eclipse itself," Goodwin said in an interview. "Taking photos of an eclipse is even harder than taking photos of the moon — it's small and dazzling!"
Can I look at the sun on my cellphone screen?
Pointing your cellphone at the sun is bad for the phone, but it also could be dangerous for your eyes if you look at the sun on your cellphone screen, experts say.
Except for the few moments of total eclipse , when the sun is completely obstructed, "viewing the sun with your unprotected eyes or through a cellphone screen is extremely dangerous," Bradford said, advising that all visual contact with the sun take place only through special solar eclipse glasses that meet international standards.
That international safety standard, which is set by the International Organization for Standardization , means the glasses reduce visible sunlight to a safe level and block ultraviolet and infrared radiation, according to the American Astronomical Society website.
Ultraviolet radiation can damage the eyes's cells, while heat from infrared radiation can cause thermal damage, according to the National Eye Institute .
What's the safest way of taking pictures of the eclipse?
The solar eclipse has various stages and effects, and some are safer to photograph than others.
"Smartphones will be great for capturing the experience of the eclipse," Goodwin said. This includes the effects of the altered lighting around us.
"Keep your head down and look under leafy trees for crescent-shaped projections of the eclipsed sun on the ground," Goodwin said. "Plus, you will observe how the strange light affects people and animals."

Goodwin also recommended that people in the eclipse's path look for shadow bands, which are mysterious gray ripples that snake over the ground just before and after the total eclipse.
If you really want to photograph the sun as it becomes partially covered, take an extra pair of solar eclipse glasses, cut them and tape one of the filters over your phone's camera lens, Bradford said. If your smartphone has several lenses, make sure all are covered.
If you're using an iPhone, you should turn off the camera's macro mode when putting a filter in front of the camera.
"Do not look at the sun, even briefly, while pointing your camera skyward," Bradford said. "To enlarge the eclipse further than your camera zoom will allow, you can purchase a clip-on zoom lens for your smartphone for more dramatic photos."
Can I take photos of the sun when it's fully obstructed?
If you're in the path of totality , during the few minutes of total eclipse, you can look up without eye protection and take unfiltered photographs with a smartphone, Bradford said.
But it's important to be mindful that the total eclipse is a fleeting occurrence. As soon as the moon begins to move away from the sun and sunlight reappears, make sure your eclipse glasses and camera filter are back on, Bradford advised.
Some experts warn against looking up at the sun even when it's fully obstructed because of how suddenly sunlight can reappear.
"Totality of the eclipse lasts only about 1 to 3 minutes based on geographic location, and bright sunlight suddenly can appear as the moon continues to move," an eclipse viewing guide published in JAMA noted, adding that "even a few seconds of viewing the sun during an eclipse" can temporarily or permanently damage your vision.
Looking at a partial eclipse without the protection of filters can cause permanent and irreversible eye damage, including blind spots, distorted vision and decreased color vision, Bradford said.
During the darkened few moments of the total eclipse, Goodwin recommends using your smartphone's HDR (High Dynamic Range) and Night modes to enhance photographs. HDR mixes exposures to capture a range of brightness levels, while Night mode uses image stacking to create well-lit photos in low-light conditions, Goodwin said.
You can use the iPhone's Wide and Ultra Wide cameras during near-total darkness.
S. Dev is a news editor for CBSNews.com.
More from CBS News

3 investments to consider with inflation rising

How to find the best tax relief company

Iowa governor signs bill that allows for arrest of some migrants

EPA issues first-ever regulations for "forever chemicals" in drinking water
IMAGES
VIDEO
COMMENTS
A green light beside the camera glows to indicate the camera is on. The camera (and the green light) turn off when you close or quit all apps that can use the camera. In Safari, to allow a website to use the camera, choose Safari > Settings, click Websites, then select Camera.
Camera Permissions: Under the "Websites" tab, you'll find a list of website permissions on the left-hand side. Look for the "Camera" option among the permissions. By clicking on "Camera," you can review and manage the websites that have requested access to your camera while browsing with Safari. Adjusting Camera Settings: Upon selecting the ...
By following these steps, you can effectively check the camera access settings in Safari on your Mac. This foundational knowledge sets the stage for confidently managing camera permissions and ensuring a secure browsing experience. With a clear understanding of the current camera access settings, you're now ready to proceed to the next crucial ...
Shutter Spee d. Capturing the essence of movement is crucial in safari photography, making shutter speed a vital setting. Opting for a faster shutter speed proves effective in freezing the motion of swift-moving animals. Typically, a recommended shutter speed of 1/1000th of a second or faster is advised for wildlife photography.
ISO 800, 1/10th second shutter, f/2.8 aperture. Shot with Canon EOS R5 + EF 100-400. 400mm, ISO 10,000, f/5.6, 1/60th shutter. Both images are obviously of a leopard. However, the compact camera struggles to get a close up shot due to the maximum 70mm focal length, and even at ISO 800 the image ends up being quite noisy.
Step 1: Open Safari Settings. To begin the process of allowing Safari to access your camera, you'll need to navigate to the settings within the Safari browser. Follow these steps to open Safari settings: Launch Safari: Open the Safari browser on your device by clicking on the Safari icon located on your home screen or in the applications folder ...
How to allow or deny camera, microphone, and location access. Safari includes the ability to determine whether or not websites ask can use your Mac's camera and microphone. Here's how to set it up. From the Safari menu, choose Preferences.... Click the Websites button.
3. Adjust the font size. The default zoom amount (100%) appears at the top of the menu. Tap the smaller A on the left to decrease the default font size, or the larger A on the right to increase it. Continue taping until you're satisfied with the new size, then tap anywhere on the page to close the window. [1] 4.
Safari lets you configure a few settings on a per-website basis. These include camera and microphone access, push notifications, and auto-play settings. To tweak these, visit Safari > Preferences > Websites. In the sidebar, you'll see the list of settings you can configure for individual websites. For each setting, notice the default behavior ...
Ensure you have the right camera equipment for safari photography. Camera. Bring a DSLR (Digital Single Lens Reflex) camera and zoom lenses with 200-600 mm range or a quality compact camera for versatile quality wildlife photos. Safari photography on a smartphone is not the best option to photograph wildlife, but it is, of course, a great ...
ISO 100 will give you the best image quality, but will be way too dark with the fast shutter speeds needed for safari photography. Most entry level cameras are pretty good up to ISO 1000, while newer full-frame cameras can be good until ISO 6400 or even higher. However, this is highly dependent based on your camera.
These options are in the same place as auto-play settings in Safari. Open Safari > Preferences and select the Websites tab. In the left pane, you can select Camera to check which sites are ...
This enables the camera to use only the required pixels from the sensor for your chosen video resolution, effectively cropping into your subject without losing resolution for HD or 4K video. This ...
5. Camera Settings. I wrote a whole post on the best camera settings for safari photography, but I'll give you some of the highlights below.. Continuous Shooting: Wildlife moves a lot, so I shot a lot in burst mode/ continuous shooting.On the positive side, I was able to capture so many cool shots. On the down side, I ended up with thousands of photos to sort through…despite the annoyance ...
Shutter Speed: 1/200. ISO: 2000. These settings are quite general and lend themselves to either landscape photos, like a beautiful sunrise, or quiet wildlife sightings right away. While a 1/200 shutter speed isn't fast enough for rapidly moving animals, you must also be cognizant of the relatively low light in the morning.
Tamron 150-600 Lens. From a value point of view, this is probably the best superzoom lens for safari. This is also a great lens for Canon camera option as well as other camera brands. ⇒ Read More Reviews on DPReview ⇒ Check the Price on the Tamron 150-600 Lens.
Open the Safari app. Navigate to a website you want to customize. Tap the Aa icon. Tap Website Settings to customize how the website should appear. Tap the Request Desktop Website toggle to always display the website in desktop mode. (This version will sometimes have more detail.) Tap the Use Reader Automatically toggle if you want to hide ads ...
Tip 1: Safari Photography Equipment Tips. Invest in a good SLR camera and a couple of lenses. The best camera set up for wildlife photography includes at least a 300mm lens, because anything less will just be frustrating. Ideally you should have 2 cameras as changing lenses is time-consuming when you might be missing the action.
Change the Main camera resolution. On iPhone 15 models, the Main camera resolution is set to 24 MP by default. You can switch between 12 MP, 24 MP, and 48 MP. Go to Settings > Camera > Formats > Photo Mode, then choose 12 MP or 24 MP. To capture resolution at 48 MP, go to Settings > Camera > Formats, then turn on Resolution Control or ProRAW ...
When prompted to grant your web browser permission to use your camera, go to the top left of your browser and select Safari. In the dropdown menu, select Preferences. This opens a "Websites" window. Select Camera. View the list of "Configured Websites" on the right side of the window. On the right of api.id.me, under Configured Websites ...
If you shoot with a point-and-shoot, I recommend setting your camera on "landscape mode", to force it to photograph at a wide depth of field. If you shoot with a camera capable of custom aperture settings ( DSLR or mirrorless ), I recommend f/8.0 and above. In a photo like the above, with good lighting, you can shoot at f/11 for maximum ...
To change website permissions in Safari, click on Settings > Websites to view the list of permission controls on the left. On the right, you'll see a list of sites currently open in Safari and ...
1. Change Your Video Resolution and Frame Rate. Head to your iPhone's Settings app and go to Camera > Record Video. On the next screen, you'll see several combinations of video qualities and different frame rates. If you'd like to record in the highest resolution possible, make sure you choose 4K at 60FPS.
Apple's iPhone 16 Plus may come in seven colors that either build upon the existing five colors in the standard iPhone 15 lineup or recast them in a new finish, based on a new rumor out of China.
Zambia is popular with safari travelers thanks to a number of national parks and the quality of its guides. Kafue is the country's largest national park and is home to more than 200 animal species.
Experts warn against pointing your phone's camera directly at the sun. Here are a few tricks for photographing the solar eclipse — or snapping a selfie. Experts warn against pointing your phone ...