- Travel Around The World
- Travel Stories
- Tutorials, Free Presets, Transitions, Luts, Effects Adobe Premiere Pro

Travel Guide
Travel photos, travel videos.
- Trek in India
- Trek Plan Blog
- Travel Questions
- Become a Contributor
- Photo Contest
- Stock Footage Licensing

My 22 KM Trek to Kedarnath Temple: Unveiling the Spiritual Journey

This is How I travelled 1536 KM in Kumbha Express from Kolkata to Haridwar

Kedarnath Yatra 2023 – Embarking on a Spiritual Journey | Kedarnath Cinematic Travel Video

Tungnath Trek: Exploring the Mini Switzerland of India through Chopta Tungnath Trek

Cinematic Haridwar: Explore the Spiritual Landmarks, Bustling Market, and Majestic Ganga Aarti

Finding the Perfect Suites in North Carolina: Cary, Chapel Hill, and Durham

Kochi Unveiled: A mesmerizing Travel Guide to Kerala’s Coastal Gem

Unveiling Kenya’s Hidden Gems – Journey into the Unknown

5 Charming Reasons to Visit Mauritius

Vasudhara Falls – I visited this HIMALAYAN WATERFALL after 10 YEARS

Ukhimath – Winter Abode of Kedarnath | Uttarakhand Drone View 4K | Ukhimath | Cinematic Travel Video

Plan Your Next Trip with ChatGPT: The Ultimate Guide to Using AI for Hassle-Free Travel Planning

Sundarban Documentary – The Natural Shield on Earth

Experience 10 Inspiring Instagram Travel Photos By This Awesome Travel Photographer

10 Selected Travel Photos Of The Week From Instagram

8 Breathtaking Stages of Sunset at Arunachal Pradesh

Giveaway Offer: 50 Landscape Wallpapers Free Download For Your Desktop

GATI | A Short Travel Film of Wyoming

India Cinematic Travel Video – Show Me India

7 Best Winter Destinations in India | Top 7 Snowfall Places in India

Atal Tunnel Rohtang – Why You Should Visit Atal Tunnel

Thailand Budget Tour in 4 Days with Bangkok & Pattaya Tour

- Travel Blog, Share Travel Stories From All Over The World - Top Five Buzz
30 Free Transitions for Travel Vlogs and Travel Videos
So here are 30 Free Transitions for Travel Vlogs and Travel Videos. Use it with in and out process easily to your videos using Premiere Pro software. Its are free Premiere Pro transitions.
Watch & Download 30 Free Transitions for Travel Videos
RELATED ARTICLES MORE FROM AUTHOR

How to Convert MOV to MP4 in Just 3 Steps | FREE Online Video Converter

10 Travel Vlogging Tips for Beginners | Become a Pro in Travel Vlog

12 Best Transition Effects in Filmora | How to Use Filmora Transitions

How to Cinematic Color Grade in FILMORA [Tutorial]

8 FREE Squid Game Shape Transitions – Free Premiere Pro Transitions

10 FREE Premiere Pro Transition Effects for Your VLOG

5 FREE Intro Opener Templates for YouTube & How to Create YouTube Intro Opener Using Premiere Pro

10 Cinematic Intro Titles in Premiere Pro – How to Create Modern & Clean Cinematic Titles

60 Free Lower Third Templates for Premiere Pro

100+ FREE After Effects Elements to Use in 2021

6 Cinematic bar Effects or Opening Tutorial in Premiere Pro | Crop Opening Transition

200+ FREE Premiere Pro Transitions, Opening Titles, Lower Third | Free Stock Videos, Free Music
Leave a reply cancel reply.
Save my name, email, and website in this browser for the next time I comment.
Trending Now

This is How I travelled 1536 KM in Kumbha Express from...

Kedarnath Yatra 2023 – Embarking on a Spiritual Journey | Kedarnath...

Tungnath Trek: Exploring the Mini Switzerland of India through Chopta Tungnath...

Cinematic Haridwar: Explore the Spiritual Landmarks, Bustling Market, and Majestic Ganga...

Guide To Bwindi Impenetrable National Park

Magical Panda Lights Show Nicco Park | Show Timing, Online Ticket,...

Learn How to go on a Date while Traveling and Stay...

Espace Voyages Launches Online Flight Booking Service

10 Most Budget Hotels in Ladakh

30 Stunning Photos of Kolkata You’ve Never Seen Before

6 Attractions During Our Leh to Kargil Road Trip

Into The Nature Cinematic Video – Featuring Monsoon in Sikkim

Brahmatal Trek: Watch My Inspirational Journey to The paradise of Himalaya

Hawaii – Nature in Motion

Drei Zinnen – Dolomites in Winter 4K

Most Viewed Articles

Annapurna Adventures: 6 Must-Try Short Treks

Finding the Perfect Suites in North Carolina: Cary, Chapel Hill, and...
Follow me on instagram.
- Calling All Mountain Lovers
- Submit Content
Privacy Policy
- Terms & Conditions
- DMCA Policy
Username or Email Address
Remember Me
Don't have an account? Register
Forgot password?
Enter your account data and we will send you a link to reset your password.
Your password reset link appears to be invalid or expired.
Add to collection.
Public collection title
Private collection title
No Collections
Here you'll find all collections you've created before.
3 Transition Hacks to Improve Your Travel Videos
Transitions play a huge role in making a video appealing. Here are three ways to create seamless and dynamic transitions for your video projects.
Travel videos can often contain so much visual information, and one crucial skill to develop is to arrange them in sequences that are not just visually stimulating but also not too overwhelming or distracting. Travel videos tell stories about a place, the people there, and ultimately the experience of visiting the place and interacting with the environment. Depending on how much you do on location, how much you explore, or how many different stories you would like to tell, there is a tendency to over-crowd your videos with too much information and movement. Separating and arranging them into effective sequences is where transitions best come in.
In this video from travel filmmaker Kyrke Jaleco, he talks about three essential ways to create effective transitions from even the simplest of footage. This video does not discuss the technical aspects of shooting or editing such videos but instead talks about the creative use of visual and sound elements in creating transitions and effective sequences. With the right collection of footage and visual information, the use of movement, and great composition, following these tips should help you be more effective in stimulating your viewers and keeping them hooked to your clips.

Nicco Valenzuela is a photographer from Quezon City, Philippines. Nicco shoots skyscrapers and cityscapes professionally as an architectural photographer and Landscape and travel photographs as a hobby.


- Travel Tips
Enhancing Travel Videos: Special Effects and Transitions
- 6 minute read
- September 4, 2023

Elevate your travel experiences from ordinary to extraordinary with the magic of special effects and seamless transitions. In this captivating guide, we delve into the world of travel video enhancement, where the marriage of creativity and technology takes viewers on an immersive journey.
Discover how to weave emotional narratives using carefully crafted transitions, all while infusing your videos with the awe-inspiring allure of special effects. Let’s embark on this visual adventure and learn how to transform your travel videos into cinematic masterpieces that truly captivate the senses.
Importance of Visual Appeal
Visual appeal plays a crucial role in keeping your audience hooked. Special effects like color grading can enhance the mood of your video, making vibrant destinations even more stunning. Slow-motion shots can emphasize the smallest details, while time-lapses showcase the passage of time, adding a dynamic element to your storytelling.
Types of Special Effects
Color Grading: Color grading involves adjusting the colors in your video to create a certain atmosphere or mood. For example, you can use warm tones to evoke feelings of nostalgia for a historic location, or cool tones to emphasize the tranquility of a beach scene.
Slow Motion: Slow-motion shots can be used to emphasize action or emotions. Whether it’s a thrilling adventure activity or a serene moment of reflection, slowing down the footage can make it more impactful.
Time-lapse: Time-lapse videos condense hours or even days into a few seconds, showing the transformation of a location over time. This technique is perfect for capturing stunning sunrises, bustling markets, or changing weather patterns.
Choosing the Right Transitions
Transitions help smoothly connect different scenes in your video. Here are some common transitions to consider:
Cut A simple and effective transition where one scene cuts directly to another. It’s great for creating a fast-paced and energetic vibe.
Fade A classic transition where one scene gradually fades out as the next scene fades in. Fades work well when you want to convey a change in time or location.
Slide : With a sliding transition, one scene moves horizontally or vertically to reveal the next scene. This technique adds a dynamic element to your video.
Zoom: Zooming in or out transitions can add emphasis to a specific detail or provide an overview of a location. It’s a versatile transition that can create different effects.
Creating a Storyboard
Before you start editing, create a storyboard to plan the sequence of your shots and transitions. This will help you visualize how the effects and transitions fit into your narrative.
Tools for Adding Effects and Transitions

To add special effects and transitions, you’ll need video editing software. Popular options include Adobe Premiere Pro, Final Cut Pro, and DaVinci Resolve. Additionally, you can use plugins and presets to streamline the editing process.
Dos and Don’ts
Do: Match Effects with Content
Ensure that the effects and transitions you choose match the mood and theme of your video. Consistency will help create a cohesive viewing experience.
Don’t: Overdo It
While effects and transitions can enhance your video, using too many can be overwhelming. Maintain a balance and let the content shine.
Showcasing Different Destinations
When it comes to enhancing your travel videos, the use of different effects and transitions can be a powerful tool for highlighting the unique characteristics of each destination you visit. By tailoring your visual and stylistic choices to the specific atmosphere and vibe of each place, you can create a more immersive experience for your viewers.
For instance, if you’re capturing the vibrant energy of a bustling city, consider using lively and dynamic effects. Bright and vivid color palettes, quick cuts, and energetic transitions can mirror the city’s liveliness and convey the excitement of its streets. On the other hand, when portraying serene and nature-focused locations, opt for softer effects and smoother transitions. Subtle color grading, gentle fades, and gradual camera movements can evoke a sense of tranquility and appreciation for the natural beauty of the surroundings.
Evoking Emotions Through Effects
Every travel experience is accompanied by a range of emotions, and your goal as a video creator is to convey those emotions to your audience. Special effects can serve as a conduit for these feelings, enhancing the emotional impact of your video.
For instance, a soft-focus effect can create a dreamy and nostalgic atmosphere, perfect for reminiscing about past travels or showcasing intimate moments. Warm color tones, such as golden hues, can evoke feelings of comfort and happiness. On the other hand, cooler tones can convey a sense of calm and contemplation. By deliberately choosing effects that resonate with the emotions you want to convey, you can create a deeper connection with your viewers.
Crafting a Seamless Narrative
A compelling travel video should tell a story that engages the audience from start to finish. This is where transitions come into play. Transitions are not just visual connectors; they’re the threads that weave your video’s narrative together.
Imagine you’re transitioning from exploring a bustling local market to watching a breathtaking sunset by the beach. Using a smooth slide or fade transition can create a seamless flow, guiding the viewer’s attention and maintaining their engagement. By carefully selecting changes that suit the mood and pace of your video, you can ensure a cohesive and captivating narrative.
Sound Effects and Music

While visuals are essential, audio plays an equally vital role in creating an immersive experience. When enhancing your travel video, don’t overlook the impact of sound effects and music.
Pairing your video with appropriate sound effects, such as the bustling sounds of a city or the gentle rustling of leaves in a forest, can transport your viewers to the heart of each destination. Moreover, the right soundtrack can enhance emotions, complement visuals, and create a lasting impact. Whether it’s an upbeat melody for an adventurous sequence or a soothing tune for a serene landscape, the right music can elevate your video’s emotional resonance.
Sharing and Receiving Feedback
Once you’ve crafted your enhanced travel video, it’s time to share it with the world. Post it on your social media platforms, share it with friends and family, and actively seek feedback.
Feedback is a valuable tool for improvement. Listen to what your viewers have to say, take note of their reactions, and consider their suggestions for future videos. Constructive criticism and positive reinforcement alike can help you refine your skills and produce even more captivating content in the future.
The Power of Social Media
In today’s digital age, social media platforms serve as an incredible stage for showcasing your travel videos. Take advantage of platforms like Instagram, YouTube, and TikTok to reach a wider audience.
When sharing your videos on social media, make use of relevant hashtags to increase your content’s visibility. Engage with your audience by responding to comments, asking questions, and inviting them to share their own travel experiences. The more you interact with your viewers, the more you’ll create a sense of community around your content.
Engaging Your Audience
Creating a connection with your audience goes beyond the content itself. Encourage engagement and interaction by posing questions and prompts throughout your video . Ask your viewers about their favorite travel memories, their dream destinations, or even their thoughts on specific shots or effects.
Enhancing travel videos with special effects and transitions allows you to create captivating stories that resonate with your audience. By carefully choosing the right effects and transitions, you can transport viewers to the destinations you’ve explored and share the magic of your travels. So, grab your camera, edit with creativity, and embark on a journey to create remarkable travel videos.
How much did you like Our detailed Enhancing Travel Videos: Special Effects and Transitions ? Review Also, please share these Blogs with your friends on social media.
Related Article –
- Road Trips Ideas | 12 Tips to Prepare Your Car for a Long Road Trip?
- 150 Best Places to Visit in the United States In 2023
- Road Trip With Kids
- How to Stay Awake While Driving Long Distances
- Audiobooks to Listen to On Your Road Trip
- How to Create an Epic Itinerary Road Trip
- Best Rental Cars For Travel Adventures
Travel Videos FAQs
Can i use special effects on any type of travel video.
Absolutely! Special effects can enhance various types of travel videos, from adventurous expeditions to peaceful retreats.
What software is best for beginners to add effects and transitions?
For beginners, software like iMovie or HitFilm Express offers user-friendly interfaces and basic editing capabilities.
Should transitions be the same throughout the video?
While consistency is good, you can experiment with different transitions to match the pace and emotion of each scene.
Is it necessary to use licensed music in my videos?
Using licensed music is recommended to avoid copyright issues on platforms like YouTube. Look for royalty-free music libraries.
How do I make my travel videos stand out on social media?
Use attention-grabbing thumbnails, write compelling captions, and engage with your audience through comments and stories.

Meet David Hoper, a passionate travel Blog writer with 7+ years of experience in travel content. Through his exemplary storytelling and engaging narratives, he shares his experiences and brings destinations to life. With a keen eye for detail and a love for exploration, he has cultivated a diverse portfolio of travel blogs that inspire and inform readers worldwide.
In this article:
Post written by: David Hoper
Leave a reply.
Your email address will not be published. Required fields are marked *
Save my name, email, and website in this browser for the next time I comment.

United states Falmouth Heights Beach: A Guide to Activities and Access in Falmouth, MA

- September 5, 2023
United states Ben T Davis Beach Tampa FL: Your Ultimate Guide to Beach Parking and Photos
You may also like.

A Comprehensive Paris Travel Guide: 20+ Must-Read Tips
- 18 minute read

Exit Row Airplane Seats: Everything about Pros, Cons and Restrictions
- 12 minute read

Square Sea Waves: What They Are & Why They Occur
- 15 minute read

Your Travel Essentials with Packing Cubes | Amazingworld
- 5 minute read

How do I Find and Book Local Tours and Activities?
- 9 minute read

Save Money and Avoid Tourist Traps: 50+ Expert Japan Travel Tips
- 37 minute read
Our Latest Instagram Posts
@amazingworld.travel8.

- Editing Techniques
- Post-Production
- Video Effects
Free Video Transitions — Premiere Pro, After Effects, and More
- What is Film Editing
- What Does a Film Editor Do
- How Does an Editor Control the Rhythm of a Film
- How to Become a Film Editor
- What is In Camera Editing
- What is Screen Direction in Film
- What is a Rough Cut in Film
- What is Continuity Editing in Film
- What is Intercutting in Film
- What is Stock Footage
- What is Video Bitrate
- What is Proxy Video
- What is Letterboxing in Film
- Types of Editing Transitions
- What is a Wipe Transition in Film
- What is a Dissolve in Film
- What is a Fade Transition
- What is a Lap Dissolve
- What is a Sound Bridge in Film
- What is Superimposition
- What is Cross Fade Transition
- What is a Film Cut
- Shot Reverse Shot
- What is a J-Cut in Film
- What is an L Cut in Film
- What is a Jump Cut
- What is a Match Cut
- What is a Smash Cut
- What is an Eyeline Match
- What is Cross Cutting and Parallel Editing in Film
- What is Parallel Editing in Film
- What is a Freeze Frame
- What is a Cutaway Shot
- Split Screen Film Examples
- Best Colleges for Film Editing
- Best Laptops for Video Editing
- Best Video Editing Apps
- Free Video Transitions
- Best Lower Third Templates
- Free Sound Effects for Video Editing
- Best Free Video LUTs
- Ding Sound Effect Download
- Best Final Cut Pro Plugins
- Davinci Resolve 16 Review
- Muzzle Flash Effect Download
- Best Websites with Free B-Roll Footage
- Free Fog Overlay Templates
- Final Cut Pro vs Premiere Pro
- Best Green Screen Background Videos
- Best Stock Video Sites
- Best After Effects Plugins
- Best Free After Effects Templates
- The Godfather Restaurant Scene Breakdown
- Wes Anderson Symmetry & Symmetrical Editing
- Thelma Schoonmaker Editing Style
- You Talking to Me? — Scene Breakdown
- American Psycho Business Card Scene Breakdown
- Editing Techniques in Star Wars
- Inception Special Effects Breakdown
S tock transitions have been used over and over again and has led to video editors avoiding transitions to avoid making a stale video. However, thanks to the power of the internet and generosity, some creators have put together some extremely unique, creative, and sometimes colorful transitions that can add some life to your edits. From edgy, digital glitch transitions to ink splash transitions to travel video transitions, this list has a transition for you.
Watch: The Shot List Ep. 9 — Scene Transitions
Subscribe for more filmmaking videos like this.
VIDEO CLIP TRANSITIONS
1. 24 free video transitions - film crux.
FILM CRUX free video transitions
Let’s start this list off with a pack of some fundamental transitions that can be used in a variety of videos. This pack of 24 free transitions from Film Crux contains transitions like blurs, spins, warps, glitches, whip pans and more.
These are great for travel videos, commercial videos, and even short films. Using the transitions is as easy as downloading the pack, dragging them into your Premiere Pro presets folder, and dragging the transition file onto a transition layer.
Best video transitions
2. travel film transition pack .
FREE video transitions for Travel Videos
If you’re looking for transitions specifically for a travel video, look no further than this pack of transitions created by travel filmmaker Austin Newman. In the pack, you’ll find the following transitions: Luma Fade (in & out), Quick Zoom w/ Motion Blur (in & out), Smooth Spin W/ Motion Blur, and Smooth Warp Transition. To see these transitions in action, check out the video above.
Related Posts
- Read More: Walter Murch’s Six Rules of Editing →
- Read More: Organize Post Production Workflow to Edit Like a Pro →
- Read More: Film Editing Techniques You Can Learn From Star Wars →
Best video transition effects
3. textured transitions for premiere pro.
15 FREE Premiere Pro Textured Transitions • Free for Adobe Premiere Pro
This pack of textured free video transitions by PremiumBeat is perfect for overcoming the often overused stock transitions of Premiere Pro. The colorful, textured transitions create a unique look that, when matched stylistically to a short film, can elevate an opening or closing credit sequence.
The pack comes with different styles to choose from standard wipes to torn paper to scribbled pencil. This textured pack of transitions stylistically falls somewhere between witty indie film and light-hearted comedy.
Transition effects in video editing
4. 16 free circle transitions.
Circular free video transitions
The circle transition is a more modern take on the classic radial transition. With 16 different circle transitions to choose from, this pack is a great addition to anyone editing a travel, commercial, or event video. The dynamic circle transitions help create an upbeat edit that is great for any video with quick cuts from shot to shot.
Simple video transitions
5. ink splash free video transitions.
Video transitions premiere pro + Free Ink Splashes
Are you confused one what an ink splash transition is? Don’t worry because you’ll know when you see it. The ink splash is a recognizable transition used for character introductions are title sequences. Traditionally, these were rather laborious to accomplish.
Today, using ink splash transitions is made quick and easy with this transition pack by PremiumBeat. Skip all of the tedious masking and layering in After Effects by using this pack of preshot ink splash transitions.
Cool video transitions
6. 10 free freeze frame transitions .
Free video transitions for freeze frames
Music videos are commonly created by piecing together various performances from different scenes. If you’re editing a music video and looking for a creative way to transition between these different shots, check out this pack of free video transitions.
These transitions allow you to carry over a freeze frame of a subject over to another clip with different color and hue changes. Using these frame transitions does require some masking, so check out the video tutorial above if you plan to use them in your project.
- Read More: Match Cuts & Creative Transitions →
- Read More: What is a Whip Pan or Swish Pan? →
- Read More: Types of Editing Transitions in Film →
Adobe premiere video transitions
7. glitch & distortion transitions.
ERROR • Premiere video transitions
This pack of glitch and distortion transitions titled “ERROR” is great for any video editor looking to add a bit of digital edge to their edit. The pack comes with 5 different transitions: Block Distortion, Horizontal Pull, The Shaker, Time Glitch, and Total Chaos. When used with high action videos, these transitions can create an edgy, high energy edit. This makes it perfect for things like sport highlight videos and workout videos.
Premiere video transitions
8. 20 free smooth transitions pack.
Free video transitions premiere pro
If edgy transitions isn’t what you are going for then check out this pack of smooth transitions. This pack comes with 20 basic, but smooth transitions like Luma Fades, Smooth Zooms, Lens Distortions, and Smooth Slides. The less stylistic transitions are great for travel videos in transitioning from drone shots to handheld shots . Once you download the pack, check out the video tutorial above on how to import and use them in your edit.
Video transition effects
9. 18 free animated gritty textures.
FREE Animated Gritty Textures • Free Elements for Premiere
Colorful, textured, dynamic. If these words got you excited, this pack of free video transitions is probably what you’ve been looking for. With 18 different styles to choose from, this pack of colorful, textured transitions will add some life to your edit.
The pack of transitions was literally made by scanning different textured materials in various positions to create the DIY animated look you can see in the video above. Each file lasts about 5 seconds and also comes with still versions. These transitions are an easy way to add quality animation to your video.
Video transitions premiere pro
10. action wipe transitions.
Action Wipe • Cool video transitions
Like the Circle Transitions Pack we listed above, this pack of Actin Wipe Transitions is a modern take on the traditional wipe transition. The action wipe transitions are great for transitioning to an establishing shot of a cityscape or landscape. They can also be used on text for an animation like reveal of a word, title, or phrase. Once downloaded, check out the video tutorial above by the creator of the transitions Chung Dha.
Video transition effects for AE
11. clean transitions for after effects .
Video clip transitions pack for After Effects
This pack of seamless transition is the first on our list of After Effects transitions. The pack includes 100 transitions with sound effects for each. The transitions can even be manipulated in After Effects to play longer or shorter in duration. Once downloaded, check out the video tutorial above on how to use the transitions pack.
Cool video transitions for download
12. 20 free after effects transitions .
20 Video transition effects
Next on our list is this pack of After Effects transitions by Moysher on Motion Array. The transitions pack requires no plug-ins and can be used at 4K resolution. The transitions are simple and great to used for anyone who is new to After Effects and editing.
4K Video transition effects
13. motion island transition pack for ae.
25 Free Simple video transitions
Once downloaded, you’ll receive a pack of 25 After Effects transitions for free. Take a look at the video above to check out the 25 different types of transitions you’ll be able to use. All transitions are also 4K resolution for your high-resolution video footage.
Video transition effects for download
14. plexus transitions for final cut pro.
Best video transition effects for FCPX
If you’re more of a Final Cut Pro X editor, you’ll love these next few transition packs. This Plexus transition pack includes 16 different PLexus transitions for a dynamic edit. These FCPX templates require no plug-in and are easy to use once downloaded.
FCPX video editor transitions
15. fcpx glitch transitions.
Glitch Transitions Final Cut Pro Templates
Looking for something a bit more futuristic or sci-fi-y? You’ll love these FCPX glitch video transition effects. Whether you’re editing a music video, ssi-fi short film, or commercial, these glitch transitions are a great way to spice up your edit. The pack contains 10 different types of glitch transitions that are easy to use in FCPX.
FCPX video clip transitions
16. fast zoom transitions.
Best video transitionsfor dynamic edits
If you’re looking for dynamic free video transitions and a whole lot of them, look no further than this fast zoom transition pack. With a whopping 94 zoom transitions to choose from, it will be difficult not to find the quick zoom transition that will add just what you’re looking for to your edit. They’re great for music videos, commercials and travel videos that are high energy and fast paced.
Types of Editing Transitions in Film
Transition templates are a great way to save time while adding quality to your edit. But different transitions have different functions. To learn more about the different types of editing transitions in film, check out our next article in which we look at everything from visual to audio transitions.
Up Next: Types of Editing Transitions in Film →
Showcase your vision with elegant shot lists and storyboards..
Create robust and customizable shot lists. Upload images to make storyboards and slideshows.
Learn More ➜
Leave a comment
Your email address will not be published. Required fields are marked *
- Pricing & Plans
- Product Updates
- Featured On
- StudioBinder Partners
- The Ultimate Guide to Call Sheets (with FREE Call Sheet Template)
- How to Break Down a Script (with FREE Script Breakdown Sheet)
- The Only Shot List Template You Need — with Free Download
- Managing Your Film Budget Cashflow & PO Log (Free Template)
- A Better Film Crew List Template Booking Sheet
- Best Storyboard Softwares (with free Storyboard Templates)
- Movie Magic Scheduling
- Gorilla Software
- Storyboard That
A visual medium requires visual methods. Master the art of visual storytelling with our FREE video series on directing and filmmaking techniques.
We’re in a golden age of TV writing and development. More and more people are flocking to the small screen to find daily entertainment. So how can you break put from the pack and get your idea onto the small screen? We’re here to help.
- Making It: From Pre-Production to Screen
- What is Film Distribution — The Ultimate Guide for Filmmakers
- What is a Fable — Definition, Examples & Characteristics
- Whiplash Script PDF Download — Plot, Characters and Theme
- What Is a Talking Head — Definition and Examples
- What is Blue Comedy — Definitions, Examples and Impact
- 25 Facebook
- 1 Pinterest
- Subscription
18 Best Video Transitions [+Free Templates]

When you make a video, chances are, it doesn’t consist of just one cut. There are exceptions, of course. For instance, due to their nature, webinars and live videos are often made in one take.
However, most videos are made of several building blocks or clips. There’s one thing that can help you “glue” them together and make your video feel like it’s one story and not just a collection of random pieces.
That is – video transitions .
What are video transitions ?
In video editing , a transition is what shows between two video clips . It’s a technique used in post-production to join the video clips together.
Video transitions are used in post-production to join the video clips together.
More sophisticated animated video transitions are a great way to make video ads, social media videos, promo videos , and explainer videos .
The ultimate goal of any video transition is to smoothly guide the viewer from one scene to the next.
18 best video transitions to use in your videos
When it comes to choosing the best transitions for your marketing videos, you are not without a choice. From subtle animations to more advanced techniques, there are hundreds of transitions to try. The only problem is that most of them require solid knowledge of tools like Adobe Premiere Pro or After Effects.
Luckily, with online video makers like Wave.video , you can master video production without any special design skills.
Just recently, we’ve doubled the number of video transitions inside the editor so that you can get even more creative while building your video story from multiple blocks.
Add Awesome Transitions to Your Videos
Pro tip: if your video is short (for instance, social media videos might be as short as 15 seconds), you can also make them in one take, i.e. just with one scene. To make sure they don’t seem monotonous, try using different animated text effects or adding stickers/GIFs to the video .
Customize this template
Here are 18 video transitions that you can try for your next video.
1. Video transition: Doorway
A “doorway” is a video transition when the new scene changes the preceding one as if through open doors. This technique is great for travel videos or vlogs. At some point, the preceding scene is visible together with the new one. So, this video transition is great for videos that have the same storyline, without abrupt cuts or sudden changes in the plot.
2. Circle video transition
The name of the transition is quite self-explanatory. One scene is “swallowed” by a circle shape and the next one appears. This transition looks great if the video features some round objects or shapes like on this video.
3. Fade to black video transition
You can also use this video transition when you want to create a suspenseful atmosphere in your videos.
4. Video transition: Move
This smooth and fast transition is a good fit for short dynamic videos, for instance, a video ad or an Instagram story video. The transition itself reminds the move you make when turning over a page of a book.
5. Cross dissolve transition
When you use the cross- dissolve transition, the scenes smoothly “ dissolve ” into each other. That is, the next scene follows the previous one as if subtly blending in with it.
This transition is great for history-related videos.
6. Spin transition
This twisting video transition is a bit hypnotic and works especially cool with round objects in the middle, like, let’s say pizza.
7. Blur video transition
Pro tip: to create the right tone, accompany your video with appropriate music. The visuals are important but it’s the music that will really help you to add a final touch.
8. Fade to white
The fade to white video transition is similar to “ fade to black”, except here one scene follows the next one with the slight whitening effect instead of black (hence the name).
Use this type of transition when you make a video out of images or staged clips. This will give the final video a crisp photo flash effect.
9-10. Zoom in/out
Zooming in/out of the next scene is a creative video transition. It allows you to connect the two scenes , where the next slide appears from zooming into the previous one.
This transition is perfect for longer videos where you need a bit more time to tell a story and tie it all together.
Pro tip: Combine the zoom in/out animation effect for your image with the zoom in/out video transition. This will give your video a dynamic look, like in the example below.
11. Entrance video transition
Your video doesn’t necessarily have to consist only of video clips or images. To freshen your video content, try using solid colors as a background. This works best for text-heavy videos or video quotes .

When you use solid colors as a background, it’s a good idea to use geometric transitions (Doorway, Swipe left, Entrance) to make the video look like it was animated by pros.
Here’s an example of a video with the entrance video transition:
12. No video transition
Sometimes the best video transition is no transition at all. When you omit the transition between the clips, it will help you to create a dynamic video effect or even give your videos a cinematic look.
Multi-directional video transitions
With the latest update it got possible to change the direction of some transitions , hence the number of options got even more impressive as multiplied by 4.
If you see small arrows on the preview (by the way, it’s possible to preview them from now on, yay!), that means this transition can be used in 4 various directions:
- left-to-right
- right-to-left
13. Swipe video transition
This type of video transition resembles a slide show. One scene follows another with a slide to the left/right-hand side, and also in the upward or top-down direction. Use this type of transition for listicles or any kind of videos where you need to mention several items, one by one.
Pro tip: to make the call to action at the end of your video stand out, use a different type of transition, like in the video above. Also, use the same background video or image for the first and last scenes to support your point.
14. Wipe , a close cousin to swipe
The wipe video transition is very similar to the previous one. The difference is that the slide happens in a bit smoother and faster manner. Also works great for listicle videos.
15. Video transition: Wallpaper
The wallpaper video transition divides the scenes into equal stripes that gradually switch one visual to the next one. The option looks really cool when the scenes feature contrasting colors like in the video below.
16. Scale video transition
Well, this is another version of a slide-like video transition. The move freezes in the middle of the canvas for a fraction of a second what creates a very eye-catching effect.
17. Mirror transition
Probably the most Intagramable video transition that reminds of mirror shimmers. Use this option to create a trendy captivating impression. Grab a template below to see how it fits your story.
18. Arc video transition
Here’s another variation of sliding transitions.In this case, the line that divides two scenes is curved and reminds an arc. See how it looks like on the template below.
How to add video transitions in Wave.video
You don’t have to have stellar design skills in order to use transitions in your video. Here’s how you can use them with just a click of a button in Wave.video.
Step 1. Open any video template or create a new video from scratch.
Choose one of the pre-designed templates or go with your own design.
Step 2. Add more than one video clip
In order to add transitions between the clips, you will first need to add more than just one clip to your video. After all, that’s what transitions are for – “gluing” the building blocks of your story.
To add another video clip to your video, simply click the “+” sign on the timeline. Read this article to learn more.

Step 3. Choose a transition
Now that you have several clips (or scenes , as you can also call them), you can add video transitions between them. To do that, simply click the little plus (“+”) sign between the scenes
You can choose between 18 different transitions (plus various directions) or go without any at all. As said, now you can see an animated preview for each transition that eases the choice-making.
Tips for using video transitions
Once you discover how easy it is to use video transitions , you might want to go crazy with them in your next video.
Don’t.
When it comes to transitions , “The fewer, the better” is your golden rule. Don’t try to impress your audience with all the fancy animations you now know how to add to your video. Instead, stick to these 3 simple rules.
Rule 1. Be consistent.
It is possible to combine several types of transitions in one video. However, we recommend that you take things slow and stay consistent with video transitions . It’s best not to overwhelm your audience with all the different visual effects .
Rule 2. Match the transition with the type of video you’re making
Some transitions are more dynamic and suit energetic videos more. This might be the case with video ads, for instance. Other transitions are slower and go well with more relaxed videos.
Whatever the case, try searching for balance and accompany your videos with video transitions of matching style and character.
Rule 3. You don’t have to use any transitions at all
Over to you.
A great video transition can go a long way, especially since adding transitions doesn’t have to be difficult or require any special design skills. Stick to just one type of transition or experiment to see what works for different videos – it’s your call.
- video production
Join our newsletter — it’s free!

The Ultimate Guide to Embedding Video on Your Website

7 Best Online Teleprompter Tools (Free & Paid)

How to Use AI To Generate More Traffic and Sales from YouTube

10 Best Webinar Platforms for 2023
We’ll keep you in the loop!
Join 5,000 marketers who read our articles first
How to Make a Travel Video: 15 Tips to Help PERFECTLY Capture Your Adventure
We’re teaching you how to make a travel video, including capturing quality footage, developing a comprehensive story, and creating an interesting edit.

Making a great travel video is so much more involved than turning on your camera or iPhone and pushing record. Whether you are starting a YouTube channel or you are just making a memorial of your family vacation, you want the absolute best quality video footage to remember your trip by. In this guide, we are going to dive into how to make a travel video or vlog for beginners. We’ll focus on basic tips to create quality video footage, a comprehensive story, and an interesting edit.
Stop for Scavenger Hunts During Your Travels
Let’s Roam creates app-guided adventures for explorers in hundreds of cities around the world . These scavenger hunts , art walks, pub crawls , or ghost hunts combine competitive spirit with interesting trivia and photo ops. Each one offers a fantastic and unique experience! Find one in a nearby city , or download an Explorer Pass and try them all.
How to Make a Travel Video
1. pick your destination.
If you are making a travel video for personal memories, you likely already have a destination in mind. If you are making a professional video for YouTube, you may need to do some keyword research first and find a location that ranks highly in the SEO world. Using something like Google’s Keyword Planner can be very helpful for ideas.
2. Decide What Kind Of Video You Want To Make
There are several different types of travel videos that might interest you. The best way to figure out what type of video you want to make is to watch a lot of travel videos. Hop on Youtube or Vimeo and get to watching. Don’t just watch for entertainment value though, pay attention to things you like and don’t like. Do you like the videos with live narration or do you like voiceovers? Do you like YouTube videos with music and beautiful b-roll footage, or do you really like videos focused on information? There is no right or wrong answer, just preference.
Types of Videos to Consider
· Travel Vlogs – Vlogs or video blogging is a form of videography that is very personal. Generally, they are informal, based on reality, and require limited editing. They are often filmed in selfie-mode and have a friendly vibe. They rely on the audience trusting the vlogger and experiencing the destination through their eyes.
· Travel Guides – Travel guide videos focus more on what to do in a destination, for instance, “Top 10 Things To Do In Chicago.” They are focused on delivering information on the place, instead of personal information. These videos generally take more planning, require you to shoot much more footage, and take longer to edit. They can be highly SEO-driven though and produce a high number of views.
· Niche Videos – If you are making a family memoir, then this doesn’t apply so much to you, but if you are getting into professional video making, you need to find your niche. Do you want to focus on food, culture, or adventure? Think about your target audience and your passion! If you make videos about what you love, it will translate to your audience. They will feel your excitement and connect to your channel.
3. Write A Story
It is important to have a story in mind. You may film your whole trip and have great footage, but it can be really hard to put it together into something that makes sense. It is actually much easier to take some time before filming and figure out what your storyline is. This will help you decide what to film, what order to film in, and how to organize your video clips. If you are planning on posting your video professionally, keeping viewers’ attention is huge! You may have beautiful footage, but if people are bored with you, and your story is all over the place, you will lose them. Pulling people into an organized and interesting plot, keeps them hooked and coming back to see where you will take them next!
4. Decide What You Want To Film
Once you have a story in mind, begin to line out what exactly you want to film. This will naturally go along with your travel planning. What do you want to see? What are your interests in your target destination? Start with a general list of sights. Organize them into an itinerary that makes sense travel-wise. Then, begin to think about how you want to film them.
Again, go back to what others have done. While you don’t want to copy anyone else’s work (it’s always best to be creative and original), you can get great ideas from those who have gone before you. Think about angles, specific shots, pans, and what information you would like to present. Do you want to just have great footage and do a voiceover later? Do you want to present the information in vlog style, taking the viewer along as you go? Perhaps, you want each family member to have a part? Do you just want it to be natural and let what happens happen? Again, there is no wrong answer, only preferences.
We recommend making a list of exactly what video clips you want to get. It doesn’t have to be technical or use formal, filmmaking language, as long as you know what you mean. It can be scratched on a napkin or kept in a formal Google Spreadsheet, whatever fits your style! For instance, if you are filming the Eiffel Tower, you may make a list something like this:
- Slow pan up from bottom to top.
- Slow pan down from top to bottom
- Still view floating by from river cruise
- Panoramic pan from the top
- Long view from Champ-de-Mars
- Distant view The Trocadéro
- Zoom in from a distance
- Close-up still footage of twinkling lights at night
- Time-lapse at sunset as lights come on.
- Zoom out focusing on lights
5. Gather Your Equipment
The best equipment to use is the equipment you have! If you are making a family memoir or just starting out on YouTube, don’t worry too much about getting professional equipment to make travel videos. Actually, the learning curve is quite steep on some professional camera equipment, and you will find that your video quality is not as good as it is on your iPhone, GoPro, or point-and-shoot camera. So, don’t feel like you need to go spend a fortune on equipment. If you would like to snag a starter camera, the Canon PowerShot G7X Mark III is a great one. It has an articulating screen so you can keep an eye on what’s in your frame, a lightweight structure, and it takes great footage.
6. Use Multiple Cameras And Angles
One of the most important aspects of making a good travel video is making it visually stimulating. The same pan from left to right, the same eye level shots over and over, the same focal length throughout, makes for a visually boring video. Spice it up. Cinematic videos use footage from all different angles, above, below, the side, from the bottom up, etc! Get creative, if you don’t like it, you don’t have to use it! If you are planning on using the film for social media, then you need to consider what apps you will be using and film the scene in the correct orientation. For instance, you need a horizontal orientation for YouTube, but you are going to need a vertical orientation for your marketing on Instagram.
If you are traveling with family members or a partner, each of you carry a camera. This allows for multiple views, of the same subject, that you can splice together in editing software to create an interesting clip. Also, two creative brains are better than one. Your partner may see something in a different way than you do, and catching as many viewpoints as you can will help you create a video that many different kinds of people will enjoy watching.
Some cameras are better for specific footage. For instance, a DSLR camera is great for still footage, they are difficult to stabilize when moving heavily. GoPros are better for stabilization in active situations. Obviously, for aerial views, you need a drone. It may be easier to catch an unexpected moment on your phone. Use it all!
7. Keep It Steady
Video stabilization and sound are nemeses of travel videographers. They are the hardest two things to control. While most cameras and expensive lenses have internal stabilization, you will find that large cameras are still very hard to stabilize. If you are considering making YouTube your career, consider a gimbal for your camera. This will allow you to move and walk and talk, without shaky footage. Use a tripod or set up your camera on a steady surface when you want to do a monologue. Use a GoPro with stabilization when doing something active. When doing a pan, something as simple as holding your breath can make a huge difference. Most of all, when you turn on the camera, think about what you are shooting. Don’t just turn it on and slap record. Think about the composition. Think about your body stance. Get set, and then shoot.
8. Over Film Everything
You can never have too much footage. Film it, then film it again. You may think you got good footage, and then you get to editing and realize that it is overexposed, the sun is blocking out everything, or you didn’t allow it to focus well. You may find that you thought you were recording and you weren’t. All these things happen. So, we recommend filming the scene, rewatching it on your screen or phone, adjusting for mistakes, and then refilming it. You may have to film a certain thing multiple times. This isn’t always possible, but when it is, take the time to film it a few times. There is no such thing as too much footage.
9. The Camera Is Not As Fast As The Eye
Remember your camera is a machine. Depending on the quality of your camera, it can take time to focus. When you begin a vlog or monologue, give it 5-6 seconds to focus before your begin talking. When you are panning a landscape, go incredibly slow, as the camera is having to refocus multiple times on the way through to keep sharp. You can speed up the footage in your video editor. Make sure you give it time to focus.
10. Follow The Light
Lighting is of utmost importance in filmmaking. Before you begin filming, do a test. If you are vlogging, make sure your face isn’t under a shadow. Shooting into the sun will often produce starbursts in your footage. Low light footage often looks noisy. Sometimes just turning around the other direction, or turning on a lamp, will completely change your video quality.
If shooting in the middle of the day, your camera will tend to overexpose the footage. Remember that it is much easier to brighten something in post than it is to correct overexposure. Err on the underexposed side. You may need to manually adjust this on your DSLR or mirrorless camera when filming in direct sunlight.
11. Offer Some Information
We find that the best videos give us a behind-the-scenes take on your travel experiences. People want to know what they are looking at. Why is it important? Don’t overdo it. You don’t want to bore people but bring in some historical, cultural, or experiential information to keep the audience interested. If you are making a video for your own memoirs, this is how you are going to remember your trip, so include funny things that happen, how you feel in the moment, and what is going on behind the scenes. These are your memories, make them personal, and include the information that will help you remember the best parts of your trip.
12. Organize Your Footage
When shooting on several cameras, organization is key. You need a single place to bring together all your footage. We recommend investing in a good hard drive. Solid-state drives are more expensive, however, they are more sturdy for being thrown in and out of your travel backpack. We also recommend backing up your footage in multiple places.
Once you get all your footage in one place, begin to watch and label it. If you have 5 pan-ups of Mount Rushmore, label which one you think is the best. If you want to use a number system to grade the quality, that’s great too. Label your videos with descriptive names, letting you know what they are for future use. For instance, do not label your footage, “hot air balloons in Cappadocia.” Label it, “best left to right slow pan of blue balloon,” and put it in the “Cappadocia Hot Air Balloon Ride” folder. The more descriptive the better.
If filming an entire vacation or work trip, you will have footage from several different locations and sights. Break down your footage into appropriate folders. You want to be able to find it quickly! If you know what videos you are going to make for YouTube, separate the footage by video title, keeping all the footage for each video together. This may mean you have footage from several places in one folder.
If you are making a montage for personal use or you aren’t sure exactly what travel videos you are going to make yet, then separate them by location. We find that setting up multiple layers of folders and being as precise as possible takes a lot of time at the front end, but saves you time in the long run. Whatever system you decide to use, use it consistently.
13. The Magic Is In The Post
While getting good footage is obviously important, so is putting it together in a way that makes sense, flows smoothly, and provides visual and audio interest. There is no way we can cover all the ins and outs of editing in the scope of this article, but here are a few general concepts to think about.
14. What Editor Should You Use?
What video editor you use depends on a lot of things, like what equipment did you film on? If you filmed on your phone, and you only have your phone, then you are going to use a video editing app like InShot . If you are filming primarily on an iPhone, then you may want to use iMovie.
Using multiple cameras to produce a full-length travel video or vlog for YouTube or Vimeo, requires true video editing software. Which one you choose, depends on your equipment and your editing style. Many PC users like Adobe Premiere Pro. Those who really want control over every detail of sound and color grading may like Davinci Resolve . Adobe is quite expensive, prone to crashing and freezing, and export issues. We wouldn’t recommend it or any expensive software for beginners.
Adobe does make a web-based video editor called Premiere Rush that is free and has a medium level of control, allowing you to splice video, color grade, and improve the sound. It has premade graphics and allows for adding text and video transitions. It’s a great editor for beginners! Davinci is not as user-friendly, but it does offer incredible control and is free. Mac users tend to use Final Cut , which again might be too expensive if you are just starting out or making videos for fun.
· Add Music
Music can make or break your video. Take some time to find music that fits the emotion of your footage. Find something upbeat for your intro. Make sure that music used when speaking is turned down and doesn’t have too many lyrics or crazy beats that make it hard to understand your words. You want your music to add emotion and interest to your video, not distract the viewer. It should be present, but not overpowering.
If you are posting your video anywhere on social media, you must make sure that you use only royalty-free music. There are paid platforms like Epidemic Sound , Bensounds , or Soundstripe that most YouTube professionals use. Good royalty-free music is generally not free to use. However, most of these subscriptions do have a free trial period.
· Go Easy On The Transitions
Creative video transitions can add to the visual interest of your video. However, you are not making a Powerpoint presentation, so use transitions, especially premade ones, sparingly. Instead, think about transitions when you are filming and use a camera drop, hand to the camera, or spin to transition from one clip to another. Be creative and think it out beforehand.
· Pay Attention To Consistency
When making a travel video, remember that the goal is to create a story. As much as possible, the viewer should not be able to tell when you switch cameras. Part of great editing is to adjust your color and sound to be consistent throughout the video. It takes some practice and a lot of time. So, be patient with it. It’s good advice to take it slow. When necessary, step away for a while and come back and look at it with fresh eyes. Your software will likely need to catch up anyway.
15. Be True To You
If we can offer one piece of advice, especially for those entering the YouTube world, it would be to stay true to yourself. Not only will it make you more successful, as you will attract true fans that want to engage and invest in your channel, but you will be happier with your content. There is nothing worse than watching a video you made 6 months ago and being embarrassed about how fake it feels. You should identify with your own creations. Make it beautiful. Tell a good story, but above all, make sure it is true to who you are!
Closing Thoughts
While this guide is nowhere near comprehensive, we hope it gives you a good foundation to start. Video making is an art, and it takes time to learn. Just like any art form, you need to practice. It will take trial and error. It will involve experimenting and failures, but that is half the fun!
What are your favorite videography tips? Let us know in the comments!
Want to get ahead of the game on filming new destinations? Check out our list of “ Emerging Travel Destinations”, and get there first!
Does your new adventure include traveling with a partner? Check out our guide on “ How to Travel As A Couple: Tips For An Amazing Adventure. “
Frequently Asked Questions
Making a great travel video starts with capturing fantastic footage. Composition, lighting, and stabilization are things to think about. Include info like travel tips and historical facts to add interest!
These 15 tips for producing travel videos will help you ensure that you capture your adventure in a fun and professional way
Picking what to shoot is an important part of making a travel video . Consider doing a tour or a city scavenger hunt of your destination. This will allow you to get a glimpse of the local attractions.
Featured Products & Activities

Video Transitions The Essentials and When to Use Them
What you’ll learn:
Video transitions fundamentals
- What are video transitions?
- Standard Transitions
- Wipes and flashes
- 3D Transitions
- Specialized transition
- Video transition tips to create seamless transitions
Transition effects for videos For a unique flavor & solid narrative
Video editors use transitions to tie their shots and clips together into a cohesive, polished program. Transitions can take many different forms, from straight cuts to fades and dissolves to full-blown 3D animations. VEGAS Pro offers a huge array of fully customizable, GPU-accelerated transitions for you to take advantage of. And all of these transitions can be further modified with the Transition Progress envelope (although we won't cover that in this article). Before you start using transitions in your projects, you should learn some video transition basics. Read on to demystify the world of transitions and learn how to use them for creative advantage in your videos !

What is a Transition, Anyway?
Video transition is a post-production technique used in video editing or film to connect one shot to another. Often when a filmmaker wants to join two shots together, they use a basic cut where the first image is immediately replaced by the next.
In other words, we can describe a transition as any move between different shots in your video. Many people tend to think of transitions as always being flashy or noticeable, but the most-used transition is almost always invisible when used correctly – a simple cut. Simple cuts make up the majority of transitions you see in videos, whether you notice them consciously or not.

Types of Transitions and When to Use Them
Non-linear editors (NLEs) like VEGAS Pro put a wide variety of transition types at your disposal. Let’s break down the most common examples and discuss some of the best ways to use them, when to use them, and perhaps as importantly, when it’s best not to.
Standard Transitions – Use These Most of the Time
The most commonly used transitions are so because they work. They’re effective and they don’t distract or annoy the audience. These are the tried-and-true workhorses for video editors everywhere. For the vast majority of your transitions, use these:

Straight Cuts
As we said, the most common transition of them all; one clip ends and the next begins with no overlap and no gap between them. While most of the time straight cuts go unnoticed, you can make hard cuts between scenes for a jarring, dramatic effect, or use them for comedic timing.

Fades/dissolves
Often used to open or close out a scene, fading out of one scene to black (or sometimes white) and then fading back up into the next gives a sense of closure for the first scene and moving on to something new gracefully. You can often use fades to add a sense of conscious perception for the audience, such as fading out as a character goes to sleep or fading in when he or she wakes. Fading to black and staying on it for a few seconds before fading into the next scene can add a sense of time passage.

Cross-fades/Cross-dissolves
Fading one shot out while simultaneously fading the next shot in, instead of to white or black before fading into the next shot. With this type of transition, you'll see both clips on screen at the same time during the transition period. Cross-fades/cross-dissolves often make for excellent depictions of time passing or getting inside a character’s thoughts.
VEGAS Pro makes creating cross-dissolves easy – just position the beginning of one timeline clip event so that it overlaps the end of another event. The overlap between the clips automatically becomes a crossfade. The amount of overlap between the two events dictates how long the transition lasts. If you want, you can then drag and drop any other kind of transition, some of which we'll discuss next, into the overlap area and the crossfade becomes that transition instantly. No other software makes creating a transition faster or more logical.
Wipes and Flashes – Add Some Interest
These transitions find their way into professional works, but not nearly as much as the ones above. Use them to add visual interest or artistic emphasis, but be careful not to overuse them.

Just like it sounds, these transitions appear to wipe one shot away with the next one. Often done as straight or angled wipes, other variations include shapes, like iris wipes (circles), star wipes, or heart wipes. Other variations include clock wipes, which appear to sweep around the face of a clock, or matrix wipes, which look like an array of growing shapes like stars or diamonds. Famously used in the Star Wars films and others, they can be very effective transitions between scenes, but you don’t see them often because they can start to tire an audience if used too much. And, if not used tactfully, or if not properly used for an intentional cheesy or comedic effect, they can make your production look amateurish. One very effective use of wipes, though, can be to connect two different shots in a quick pan to make them look like one continuous shot.

Somewhat similar to very quick cross-fades, these use a bright (sometimes colored) flash to move between shots. Use flash wipes to emphasize quick points, but too much flashing will exhaust viewers very quickly.
Variations – Only Occasionally, With Purpose
The following transitions are similar to wipes, but they’re almost never used in narrative works. They can be effective in short, punchy videos like commercials, but may come across as “amateur” in more serious presentations.

Much like it sounds, one shot slides out to reveal the next. You might use these in a “slide show” style presentation.

Looks like the first shot is “pushed” out of the frame by the next shot.

The first shot “opens up” like sliding doors to reveal the next shot.

The first shot “splits” open to reveal the next shot, similar to a barn door, but the shot may split into fours and slide out to the corners of the frame, or other variations.
3D Transitions – Use Sparingly and Only if it Makes Sense
Most of these transitions should be used sparingly, if at all. If you do use them, make sure you have a pretty darn good visual reason for it. They may have a place in quick-moving, high-intensity videos, certain types of commercials, or perhaps brief informational videos. You may even find an artistic reason to use them in longer-form or narrative work. But for the most part, look to other transitions before these.

Page Rolls/Peels
One shot appears to “roll up” or “peel off” and reveal the next shot.

Cascades/Blinds
The next shot appears to cover the first shot like a Venetian or vertical blind, with “slats” turning or rolling in.

Fly In/Fly Out
The next shot flies in to cover the first one, or the first shot flies out to reveal the next.

Specialized Transition in VEGAS Pro
VEGAS Pro now gets the brand new warp flow transition.
The Warp Flow transition
The Warp Flow transition creates intermediate frames between two shots for the appearance of a seamless transition between the two. You can use this as a cool, sci-fi style effect to “morph” one shot into the next, or you can use it smooth over a jump cut, so that objects between two shots don’t “jump” as they might if you remove some frames from a clip, or try to cut together separate takes of the same shot.

Video Transition Tips
While it can be appealing to go crazy with transitions, it’s best to avoid this. Here are a few quick tips for using video transitions well.
Keep it simple and consistent
There’s nothing more amateur than using different transitions for every scene. Before you get carried away remember that the content of your video is the most important thing, you’re trying to give your message the highest impact possible, and that means not distracting the viewer with extravagant effects.
Keeping it simple is the best approach with transitions.
Keep it smooth, use them for passing of time or change of direction/mood
Transitions are best used when we need to show the passing of time, change of mood, change of subject or change of direction.
Unless you’re going for a specific effect, it’s best to use transitions sparingly. Try to make everything seem smooth and natural, not forced; that way the viewer will be at ease and concentrating on the message you are trying to get across rather than who edited the video!
Keep in mind, most of the time, directors use basic cuts between scenes. Transitions are usually only used when they serve a storytelling purpose.
Keep the meaning of each transition type in mind
While you can have some fun with transitions, it’s best to bear in mind what different transitions symbolize and use them only where appropriate.
For example, as fade to black is a dramatic transition that signifies completion, it would be odd to use it between two scenes that take place in the same time and space. Where a fade to black symbolizes completion, a fade to white does the exact opposite. A fade to white tells the audience that the hero’s journey isn’t quite over. This is why you will often see a fade to white at the end of a dramatic film with an ambiguous ending.
Play Around and Experiment
You won’t get it right the first time. Take time to practice your transitions, you’ll be surprised how quickly your editing skills will improve and VEGAS Pro offers a huge array of fully customizable transitions for you to take advantage of.
If it looks natural, you’ve probably got it right; if it’s clumsy or jumpy have another play with it.
Create Seamless Transitions For a Unique Flavor & Solid Narrative
Transitions are a valuable tool for video creators, helping to move the story along, convey a mood or tone to viewers, and set the stage for the next scene. Different transitions have different meanings and symbolism, so they should be used thoughtfully and should always serve the story.
If you’re ready to get started, VEGAS Pro makes it easy to add creative transitions to your videos, with a wide variety of free and premium footage and effects. Try it out for free today and learn how to use them for creative advantage in your videos!

What's the difference between VEGAS Pro Edit, VEGAS Pro Suite and VEGAS Pro Post?
- VEGAS Pro software comparison
Video transitions: Everything you need to know to level up your video

It doesn’t matter if you’re a pro filmmaker or a beginner vlogger, the transitions in your video tell a story of their own.
The right transition effects—as simple as a cut or as fancy as a star wipe—have the ability to take your project from good to great.
Below, we dive deeper into the nuts and bolts of video transitions, including specific examples and how you can enrich your video content with better transitions.
What are video transitions?
A transition is a visual effect you can apply at the start, end, or in-between scenes of individual clips.These transitions are a critical tool for filmmakers and video editors because they enable a seamless flow from one scene to the next.
Video transitions can range from simple cuts to more complex effects like cross dissolve, wipe transitions, or zoom transitions. They’re not just about moving from one scene to the next—they also help convey changes in the story, like the passage of time, movement between locations, or a complete storyline shift.
Because of their ability to shape the feel and flow of the story, the role of video transitions in cinema and editing is monumental. For example, a well-executed “whip pan” instantly transports the audience to different locations, while a “glitch” effect might signify a disruption in the storyline.
Different transitions have the ability to create a powerful emotional response from your audience. So let’s explore some of the most common editing techniques.
Types of video transitions you need to master, with examples
Do you create video content and want to grow an audience? Mastering a variety of video transitions is essential. Here’s a detailed list of 12 common video transition effects, complete with examples.
The cut is the most straightforward and commonly used video transition. You’ll likely find it in most video editing projects. A cut is an immediate switch from one clip to another, without any special effect or time delays in between scenes.
Think of it like turning a page in a book and going directly from the end of one paragraph to the beginning of another—no interruption necessary. One of the best things about cut transitions is that they’re flexible. They’re usable in virtually every type of video context, anywhere from fast-paced action sequences to dialogue-driven scenes.
Cut transitions keep the flow of your video steady, which makes them perfect for maintaining the mood between one scene and the next.
How to do it : Depending on the video editing software you use, it can be as simple as placing two clips next to each other on the timeline or clip editor.
With Descript, you can edit cut scenes with ease . It’s like rearranging the structure of a paragraph: copy the section you want to cut to, then paste it where you want it— all from the transcript.
You can also break this section into its own scene for more editing options. Use the “/” key to break your script into scenes, and then arrange visuals the same way you’d work with slides.

Example : Almost every film uses cuts to depict ongoing scenes. Here’s an example of several cuts from The Devil Wears Prada :
2. Fade in/fade out
The fade in/fade out transition is a classic technique where the image gradually appears from a black screen (fade in) or gradually disappears into a black screen (fade out). This transition is often used to signify the beginning or end of scenes, which help create a clear demarcation between different parts of a video or film. It’s a more deliberate transition compared to the cut, because it adds a touch of drama and emotion to the scene.
These fades serve as breathers, giving the audience a moment to absorb what they’ve just witnessed before moving on to the next part of the narrative.
How to do it : Apply the fade In/out effect from your video editing software’s transition library.
Descript comes with a few built-in transitions including:
- Directional wipe
- Dip to color

You can apply a transition to either a scene or a clip. Here’s how to do it from the Descript dashboard:
- Click on the scene’s thumbnail.
- Tap the + icon in the Transitions section of the properties panel and choose a transition.
- Select the Adjust icon to view and adjust the transition properties from the properties panel.
Example : One iconic example of the fade in/fade out transition is in the movie The Godfather , by Francis Ford Coppola. The film uses the fade in transition to introduce new scenes and fade out to signify the end of significant sequences, often paired with the movie’s brilliant score.
3. Crossfade (dissolve)
The crossfade, also known as dissolve, is a transition where one clip gradually fades into the next, creating a seamless blend between two scenes. This transition is commonly used to indicate a passage of time or a change in location, adding a layer of emotional or thematic depth to the video.
Unlike abrupt cuts, a crossfade provides a smoother, more natural transition, making it ideal for moments that require subtlety or emotional nuance. Whether you’re working on a sentimental montage or transitioning between different parts of an interview, the crossfade is a versatile tool that adds polish and flow to your video editing.
How to do it : Choose the crossfade or dissolve effect from your transition library and place it between two clips.
With Descript , you’re able to apply fade-ins, fade-outs on any type of layer, and create crossfades between adjacent clips within a layer.
From the Descript dashboard, just drag a transition handle in the timeline.
Example : Check out this crossfade example from the movie Citizen Kane .
The wipe transition involves one scene being “pushed” off the screen by another, as if wiped away. This transition is often used to signify a change in location or the passage of time. The transition is a lot more noticeable, which is what makes it perfect for action or fantasy genres where quick and dramatic changes are part of the storytelling.
How to do it : Choose the wipe effect from your transition library and place it between two clips. Here’s how to do it with Descript:
- Click on the scene’s thumbnail you’d like to add the transition to.
- Tap the + icon in the Transitions section of the properties panel and choose the directional wipe transition.
Example : The wipe transition is used famously in Star Wars to transition between scenes.
5. Star wipe
There are many kinds of wipe transitions — the wipe can slide from the center to the outer edges, it can open in a circle, or it can wind around like the hands of a clock. But perhaps the most infamous wipe is the star wipe, which transitions between scenes with a star that expands from the center of the frame.
Because the star wipe is associated with the age of VHS tapes and cable infomercials, it gives a video a dated, campy feel, which can work well in comedy clips or in scenes set in the late 20th century.
How to do it : Use the star wipe effect between your clips. Here’s how to do it with Descript:
- Click on the clip you’re editing.
- Navigate over to the transitions drop-down menu.
- Choose Star Wipe from the menu.
Example : In the show Better Call Saul, Saul Goodman used star wipes liberally in his TV commercials — a symbol of both his low budget and the show’s early aughts timeline.
6. L-cut and J-cut
The L-cut and J-cut transitions involve audio leading the video or vice versa. In an L-cut, the audio from the first scene continues as the video cuts to the next scene. In a J-cut, the audio from the next scene starts before the video cuts .
These transitions are often used in dialogue scenes or interviews to maintain a natural flow of the narrative and keep the audience engaged in the conversation.
How to do it : It helps to edit the audio and video tracks separately to achieve this effect. With Descript, you can use the timeline editor to overlay clips, add music, and adjust the timing of your transitions by clicking and dragging each element across the timeline.
Example : Check out this great explainer video with the film The Wolf of Wall Street :
7. Match cut
A match cut is a creative transition where a visual element in the first scene seamlessly matches a visual element in the next. This transition is often used to draw parallels or contrasts between scenes, adding a layer of thematic depth.
It’s best for moments where you want to create a strong visual or thematic connection between different parts of your video.
How to do it : Plan your shots carefully and place the matching frames next to each other. In Descript, it’s as easy as dragging and dropping the exact clip you want to overlay and adding a fade out transition.

Example : The match cut used in 2001: A Space Odyssey of the bone and the spaceship might be the most famous example of this transition:
8. Iris in/iris out
Imagine a scene appearing or disappearing through a round opening, almost like an eye opening or closing. That’s the iris in/iris out transition. This is a more stylized transition you frequently see in older films, including cartoons.
It’s used as a way to add a touch of whimsy or nostalgia to a scene. The iris cut is best for moments that require a more theatrical or dramatic flair.
How to do it : Apply the iris in or iris out effect from your transition options in your video editor.
Example : Check out a few examples of how it’s used in popular cartoons below.
9. Zoom in/zoom out
The zoom in/zoom out transition gives the impression of the camera moving closer to or farther away from the subject. This transition is often used to focus on a specific detail or to reveal a broader context.
It’s best for documentaries or educational videos where you want to draw attention to a particular subject or object. For example, a zoom in could focus on a person’s face during an emotional interview, while a zoom out could reveal the crowd they are speaking to.
How to do it : With Descript, you can simply do the following:
- Choose Zoom from the menu.
Example : Check out this compilation of several different scenes using the zoom transition.
10. Split screen
The split screen transition displays two or more scenes simultaneously on the screen. This is often used to show different perspectives or parallel actions happening at the same time. It’s best for action-packed sequences or to show simultaneous events in storytelling.
How to do it : Here’s how to put two videos side by side with Descript :
- Drag both of your video clips into the timeline editor.
- Place one of your clips directly on top of the other in the timeline editor to create an overlay.
- Then, adjust the relative size of the videos by clicking and dragging the corner of each one in the video pane to make the frame larger or smaller. You can also click the “crop” tool to trim the sides of the video. Adjust each until you’re happy with the results.
Example : You can find this transition in films like Kill Bill during fight scenes to show both the protagonist and antagonist’s actions at the same time.
11. Flashback/flash forward
The flashback/flash forward transition depicts a jump in time—either to the past or the future. This transition is often used in storytelling to give background information or to foreshadow future events. It works best for narrative films or TV shows where the timeline is a key part of the plot.
How to do it : There’s no one right way to create a flashback effect—so don’t be afraid to play with different transitions. Use a distinct transition like a fade to white or a ripple dissolve; even an iris out effect can work. Play around with the options in Descript’s Transitions drop-down menu: for example, the cross-zoom transition can help create a flashback effect between two clips.
Example : Here’s how the makers of Ratatouille achieved the flashback effect.
12. Parallax effect
The parallax effect involves different layers of the video moving at different speeds, creating a sense of depth. This transition is often used in animated films or video games to create a 3D effect. It’s best for moments where you want to add a sense of depth or dynamism to a 2D scene.
How to Do It : Separate your video into different layers and move them at different speeds. Use Descript’s timeline editor to do this with ease by overlaying clips at different speeds.

Example : In the following YouTube video, the creator generated a parallax effect using only still images.
Tips to master video transitions
Mastering video transitions is more than just dragging and dropping effects onto your timeline. Consider some essential tips to elevate your video editing skills from meh to pro.
Understand the purpose and context
Before you even start adding transitions, understand why you’re using them. Are you trying to indicate the passage of time, switch locations, or maybe you want to add some dramatic tension?
For instance, a cross dissolve effect might be perfect for showing a character’s emotional change, while a whip pan could be used to switch quickly between different locations. Always align your video transitions with the storyline’s intended emotion or the message you’re trying to transmit.
Keep it subtle and seamless
Less is often more when it comes to video transitions. Overusing flashy transitions like glitches or special effects can distract from the video content.
Stick to common transitions like cuts or fades for most of your film, and save the more complex transitions for moments that truly need to be highlighted. Tools like Adobe Premiere Pro and Descript offer a range of subtle presets that can make your transitions seamless.
Practice timing and rhythm
The timing of your transitions is crucial. Make them too fast, and you risk jarring your audience; too slow, and you lose their attention. This is where sound effects help guide the rhythm of your transitions.
For example, a well-timed sound effect makes a simple cut more impactful. This is where video editing software makes your life a lot easier. It often comes with built-in tools to help you match cuts and maintain the flow of your videos.
Experiment and learn from others
Don’t be afraid to experiment with different types of transitions. Platforms like YouTube offer countless tutorials from seasoned video creators who freely share their best editing techniques.
It doesn’t matter if you’re into vlogs, music videos, or post-production, there’s a world of knowledge available online. It’s always a great idea to take inspiration from others and make it your own.
Descript has tons of step-by-step YouTube videos so you can start editing your content even if you’re a beginner. Check out this quick tutorial on how you can add transitions to your video content:
Master video editing with Descript
The transitions in your videos tell a story of their own. With Descript, you can ensure that your story is exactly what you want it to be.
Using Descript as your editing sidekick, you’re able to cut and trim videos with ease, add your favorite transitions between clips with its drag-and-drop dashboard, and overlay everything from images, text, and background music without having to reach for any extra tools.
It’s how thousands of video creators are already streamlining their editing workflow with Descript as their all-in-one tool.
Check out Descript and start video editing today.
Video transitions FAQ
What are the best transitions for videos.
The best transitions vary by project but some of the most common ones include cross dissolve for emotional scenes and whip pans for fast-paced videos.
What are the most common transitions in video?
Simple cuts, cross dissolves, and fade ins/outs are the most commonly used transitions in video editing.
How do you transition in a video?
To transition in a video, use video editing software like Descript to drag-and-drop your chosen transition effect between clips on the timeline.
Featured articles:
Articles you might find interesting

Other stuff
Making the Best Out of Your YouTube Banner
A YouTube channel banner is an essential part of your self-presentation on the platform. Your banner art also gives you an opportunity to provide a snapshot of your content.

The 10 Best Comedy Podcasts to Laugh It Out
When it comes to the best comedy podcasts, the field has never been better or more diverse. Discover the funniest and most popular podcasts on the charts.

Build a video editing PC: Everything you need to know
A custom PC build can give you all the functionality you want without the hefty price tag. Learn how to create the best video editing PC build for your needs and budget.

How to start a podcast: A step-by-step beginner’s guide
Starting a podcast is no small feat. This beginner’s guide walks you through the process of creating a podcast your audience loves.
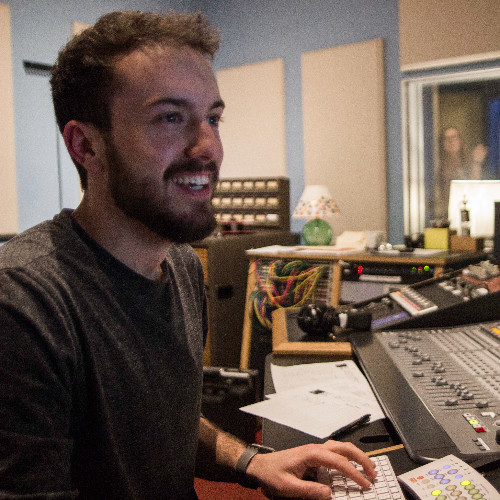
How to become a YouTuber and get paid in 2024
Learn step by step how to become a YouTuber in 2023, and tips for getting paid through the world’s largest video search engine.

Tips & Tricks
How to make videos for social media: 9 winning tips
Looking to learn how to make videos for social media? Find out in this complete guide.

Join millions of creators who already have a head start.
Get free recording and editing tips, and resources delivered to your inbox.
Related articles:
How to Make a Great Travel Video
Driving traffic is critical to the success of any affiliate marketing campaign. In the travel niche, one of the best solutions is to create travel videos. Videos are a highly engaging, easy-to-share form of content that will boost the engagement on your page and help you grow brand awareness. This post explains how to make a travel video step-by-step to capture your audience’s attention and encourage them to click your affiliate links.

The truth is that you don’t need years of experience or a filmmaking background to start making great travel videos. Over time, through trial and error, you will find a workflow that perfectly works for you and will be able to create engaging content in no time. If you are just starting out, you can follow the tips that we share to create your first travel video. While videos come in different forms (from “walk and talk” vlogs to more advanced films), the video-making process essentially includes four steps:
- Creating a story that will connect the shots
- Making enough footage
- Editing it into a single story
- Publishing your travel video
Below, you will find a detailed description of each step and tips on how to make an engaging travel video.
Step 1. Creating a Story
The process of making a travel video starts prior to actual filming. You need to have a story in mind before you hit record. This is because human brains love stories and are fascinated to see them until the end. Such videos trigger emotions and allow viewers to feel as if they have also seen those sceneries with their own eyes. For that reason, creating a story behind your video is the most important part of the whole process.
What kind of story can you narrate? It can be about your trip or about a place itself, like about local food, people, traditions, etc. Try to think of a common thread in your footage that can be weaved into a whole story. It can start with sunrise and end with sunset, or happen in reverse chronological order.
1. Hone Your Skills by Watching Travel Videos
You can find travel video ideas by watching content from other creators. Pay attention to their video format, style, transitions between clips, light, and experiment from there. Vimeo Travel is a great platform to start with, as it offers thousands of inspiring travel videos from the world’s best creators.

2. Find the Purpose of Your Video
The second step is to find the purpose behind your video. What do you want it to convey and through which format can that be achieved most efficiently? Who is your video for and what do you want your viewers to feel in the end? From the moment you start planning your shots to publishing the video, the key thing is to remember the end goal and make decisions accordingly. Also, think about why you’re making travel videos in general and how you want this channel to evolve.
For example, you might want to inspire people to go to a particular country by showing beautiful scenery and communicating the vibe of the place. Or create a highly informative video that will show people how they can plan their trip step-by-step. Understanding the purpose will help you stay focused and work efficiently.
3. Plan Your Shots
Now that you have a purpose in mind, it’s time to plan your shots. Create a list of all the things you want to film: what sights, sounds, and experiences will represent your idea best? Consider different angles to shoot from, types of shots, etc. You’ll also need a common thread connecting all shots and smooth transitions between them. For example, it can be the same location, angle, sound, object, etc.
A common mistake is to film random shots without proper planning. Then, travel video editing becomes quite challenging, as one has to create a story out of that pile of footage. To avoid it, try to find travel video ideas and plan beforehand. You can even create a Pinterest board to visualize ideas and map your story beforehand. Then, you’ll know what to film when on site.

Step 2. Filming Your Video
Now it’s time to put that plan of yours into action and take the necessary shots. Follow our best practices to shoot smartly.

1. Find Which Gear and Settings Work Best for You
You can still make a vacation video without expensive equipment, even a phone can be enough. For example, Mark from Migrationology started out with a point-and-shoot camera, which was about 4.3 megapixels. Kiersten from The Blonde Abroad used to make shots on her iPhone. Depending on your camera, having multiple lenses might come in handy. For example, photographer and videographer Tiffany Nguyen often carries prime and wider lenses in her kit to take different shots.
You also might need a tripod, headphones, a good microphone to record audio, and maybe an external lighting system. GoPros are also a good idea because they take up little space and can be used anywhere. To take breathtaking shots from a bird’s eye view, consider buying a drone. Such clips draw attention right away, but make sure to get a license to fly in select locations.

2. Use Support for Your Camera
To make steady shots, consider using a tripod, a gimbal stabilizer, or a shoulder mount rig. It might be hard to hold your camera and keep it from shaking with every breath. Special gear such as tripods can stabilize your camera so you can focus on the footage content.
3. Choose the Best Light
Light can define the look and the feel of your video, so it’s very important to consider the time of day when planning your shots. Dawn and dusk are the best time to film outside, as the light is soft and not as intense as during the day. It’s also the best moment to make a timelapse of the sun rising or setting. And you can shoot indoors in the daytime, as there will be a good amount of light inside buildings.
4. Diversify Your Shot Types
Just as an unvaried diet quickly becomes boring, having the same type of shots won’t excite your viewers in the long run. Using different types of shots will help keep your viewers engaged, and engagement is key to travel videography. Here are a few ideas for travel video shots :
- Close-up shots
- Action shots
- Point-of-view shots
- Still tripod shots
- Time lapses
- Panning left, right, up, down
- Shooting from bird’s eye view
- Slowly spinning shots, etc.
Last but not least is to show up on camera so that the audience can see your face and get to know your personality. It will help them connect much faster.
5. Create Movement
To make a travel video even more engaging, try to add motion. Apart from filming moving objects like birds flying or people dancing, you can create your own motion through simple camera movements such as panning, or liven up a static landscape with a timelapse, etc.
6. Get Consent From Everyone You Shoot
If you wish to get people on camera, make sure to get their consent. While some may be eager to get filmed, others might object. So, to avoid any legal trouble, discuss this with your models before releasing your footage.
7. Be Smart When Filming
One of the most important travel video tips is to shoot smart. On the one hand, when you start editing, you may wish there would be more material. On the other hand, watching hours of video to find the best clips and make a three-minute compilation can also be challenging. So, you need to shoot smartly. Here are a few tips:
- Shoot when the light is at its best, which is usually at dawn and dusk. Thus, you’ll have time to explore the place during the day.
- Make sure your camera is steady. It’s better to film shorter yet steady clips in contrast to longer but shaky footage.
- Videos are about movement, so if you need to film something still, try to add motion by moving the camera and so on.
- Take various shots, such as panning up and down, left and right, zooming in and out, etc.
- Film from different angles: for example, from eye level, from close to the ground, from a tree, etc.

Make sure to check your footage regularly. If something is wrong, it’s better to find out while you’re still on site so you can fix it.
8. Back It Up
After filming is over, it’s important to back up the footage into a hard drive, or onto two different places just in case. Better safe and sorry. Once the footage is backed up, you can move on to the next step and start picking the best shots.
Step 3. Editing Your Video
Travel video editing is no less important than filming. At this stage, you can choose your favorite clips and put them together into a captivating story. It might be a time-consuming process unless you handle it wisely. Here are a few tips on how to make a vacation video that inspires wanderlust:
1. Use Editing Apps
Travel video editing apps will save your time and help create smooth transitions. Start with easy tools to learn the ropes and then move on to more advanced solutions.
- iMovie . This program is great for those who have little grasp on editing, for example, you can use it to combine clips with meaningful transitions. iMovie is for Mac only.
- Movavi is an alternative tool, available for Windows. You can change the background, add special effects, and more.
- Quick . This is a special app by GoPro, which automatically edits clips to a beat point, for example, your favorite song. It also allows you to collect your best clips, provides unlimited backup, various light and color options, etc.
- Filmora . This tool guides you through the whole editing process and tells what type of footage you need and when. It offers a library of video styles and video LUTs (presets for videos), as well as music, transitions, and more. Here is a detailed guide on editing with Filmora .
More advanced users can take advantage of tools like:
- Adobe Premiere Pro is a professional editing tool that allows you to import and edit videos, add effects, and export footage. It features pro templates and allows for advanced customization.
- After Effects is another great tool by Adobe to make cinematic movie titles, intros and transitions. You can remove an object from your clip, add animation or 3D design, and more.
- Final Cut Pro is available for Mac and features incredible editing functions based on machine learning.
You can always start with a free trial and then decide which program will be most helpful, and worth its money, in your case.
2. Make Meaningful Connections
If you look for travel video ideas on the internet, you’ll notice smooth transitions between clips. When editing your video, try to find meaningful connections between clips. Naturally, it can be a chronological retelling of your journey if you look at a bigger picture. But you can also work with smaller details and connect your clips through:
- The motion of an object
- The camera moving in the same direction
- Dominant color
Using such methods will allow you to create a single flow throughout your travel video and make it cohesive and therefore engaging. It may be unclear to viewers at first, but as long as your footage has inherent structure and is edited with intention, it’s good enough. So, you can start watching all the clips until you find two that can be meaningfully connected and edit from there.
3. Add Stock Videos if Necessary
If you lack certain clips to create a cohesive video, look for relevant stock videos. There is a lot of high-quality free and paid footage that may be a perfect match and save you the necessity to go back to the location and shoot again. Here are some platforms:
- Storyblocks offers royalty-free stock images, audio and video. Unlimited access to video starts from €20 per month, to access to all content – from €30 per month.
- WeVideo provides a collection of over a million licensed stock media files. Access to the Essentials library is possible with paid subscription only, starting from $4.99 per month.
- Videvo shares over half a million video clips, motion graphics, video templates, music tracks, etc. Premium subscription starts from $4.99 monthly.
4. Find Good Music
Good music is essential in making a travel video, as sound helps create a comprehensive experience for viewers. If you find relevant tracks before sequencing your film, you can follow the beats and add connections accordingly. If not, you can look for music that will suit your edited clip. The goal is the same — to make what users hear and see go well together. Some websites offer royalty-free music that you can easily use in your videos:
- Artist provides royalty-free music, sound effects, and footage starting at $9.99 per month. You can search music by mood, genre, instrument, etc. The platform offers licenses covering social media such as Facebook, Instagram, TikTok, and more.
- Thematic offers copyright-free music matching your YouTube videos. You can filter songs by aesthetic, vibe, keywords, and other filters. Remember to credit the author when publishing your video!
- MusicVine features over 6,000 tracks from the world’s famous composers and songwriters. You can access the music starting from €17.99 per month depending on your project type.
5. Add Real-Life Sounds
Using real-life sounds for your video will help create a comprehensive experience for your viewers. Smells, tastes, and sounds heighten our senses when traveling, so you can increase the emotional response from your audience and help them feel connected to the place with this technique. For example, you can collect sound bites with a microphone on site when filming or recourse to stock platforms offering real-life sounds such as Freesound . You can also find sound effects in the YouTube Audio Library .
6. Find the Perfect Length
It’s important to make your video engaging yet not boring or tiring. The ideal length will depend on the platform. For Instagram, it should be about 45 seconds , while YouTube and IGTV are good for longer footage. Depending on what your video is about, a good length can be three to ten minutes and comprise the following parts:
- Introduction. This should take about ten seconds. Make it as engaging as possible to capture the viewers’ attention and entice them to watch it until the end.
- Promotion. Promote your brand for about five seconds. It can be just a logo with music, or more.
- Body. This should last three to eight minutes. Depending on what you want to share, the main part of the video can vary in length.
- Call to action. The final scene and call to action should last about 10 seconds. Many bloggers use this part to ask the audience to like the video and subscribe. Also, you can add an end card directing viewers to other videos on your channel or page.
Step 4. Publishing and Promoting Your Video
While it may seem that publishing a video is a piece of cake and your work is done, there are some best practices to drive more traffic.
1. Export in a High Quality
For your viewers to have a better experience, it’s important to ensure that it has the highest quality possible when exported. For example, the Bucketlistly Blog advises using the ProRes 422 format to have high quality without the huge file size. You can then upload this file to the Adobe Premiere Pro and compress the video while retaining its quality.
2. Drive Traffic in the First 24 Hours
If you publish your video on YouTube, driving as much traffic as possible within the first 24 hours after publishing is a decisive factor for your video’s success. You’ll show the algorithm that your video is particularly relevant and good, and deserves to be shown to more people. So, the objective is to get as many views, likes, and comments as possible during the first day. If you count on SEO in terms of traffic, your strategy will likely be different, because it takes time for Google to rank and start sending you traffic.
3. Optimize Video With Keywords
Adding keywords to the video title, description and meta tags will help drive more traffic. You can start with the Google Keyword Planner to find keywords with high search volume. Here is where to add keywords to optimize your video for YouTube:
- File name. Before uploading the video, name it using a keyword.
- Title. Add keywords at the beginning of the video title but ensure that it makes sense.
- Description. On YouTube, you can add a description below the video. It’s common to include keywords once every 100 words to not be spammy. Description length varies a lot among vloggers, some write about 300-500 words.
- Tags. Use keywords as tags. Remember about synonyms and related keywords.
- Thumbnail image. Enticing thumbnails can boost your clicks and what you can achieve through attractive images and relevant keywords.
- Subtitles. While creating subtitles takes time, they can greatly improve user experience and widen your audience through inclusivity.
4. Send Your Video to Your Email List
If you have a newsletter, you can share a new video with the subscribers. Thus, you’ll ensure more traffic and stay in touch with your followers.
5. Share Your Video on Social Networks
Another way to promote a video is to share it on social media. Some vloggers take advantage of Instagram and Facebook lives as they find it useful to drive more engagement. You can share the full video or make a teaser and encourage the audience to click the link and keep watching.
6. Create Memes or Infographics
An advanced promotion strategy is to create funny memes and infographics to drum up interest. Such content works great on its own, and together with a quality video, it can make a slash in your traffic! Make sure to add a CTA to see the full-length video. The goal here is to boost interest and get as many shares as possible.
If you like traveling, making travel videos is one of the best ways to share your adventures with your audience and encourage them to explore the world. Make sure to create videos that share your travel tips and tricks and help your audience plan for their own travels.
A travel vlog will not only help you grow a loyal community, it will also connect you to other travel enthusiasts and boost your affiliate marketing conversions.

IMAGES
VIDEO
COMMENTS
Learn FUN transitions for your travel videos! Create better travel vlogs with a few easy camera tricks. Get better at filming & editing with 3 months of Skil...
Here are 30 Free Transitions for Travel Vlogs, Free Transitions for Travel Videos using Premiere Pro. Download Free Premiere Pro Transitions from Debrup Trav...
BECOME A VIDEO CREATOR WITH MY COURSES:→ Video Camera Basics: https://geni.us/tFtzg→ Practical Videography: https://geni.us/2EN7I→ Storytelling for YouTube: ...
Connect with: Save my name, email, and website in this browser for the next time I comment. So here are 30 Free Transitions for Travel Vlogs and Travel Videos. Use it with in and out process easily to your videos using Premiere Pro software. Its are free Premiere Pro transitions.
Tilting: Rotate your camera vertically, moving it up or down. Tilting is useful for emphasizing tall structures or capturing dramatic skies. Tracking: Follow a subject's movement by moving your camera smoothly alongside it. Tracking shots add dynamism and immersion to your videos.
A collection of free travel transitions that have been preset for Adobe Premiere Pro, this includes effects such as smooth spin, smooth warp, luma fade, and quick zoom that can be used for travel and music videos. Free Travel Film Transition Pack Download. 12. Handy Seamless Transition
Transitions play a huge role in making a video appealing. Here are three ways to create seamless and dynamic transitions for your video projects. Travel videos can often contain so much visual ...
1. Preparation. 1. Travel Gear I Use. First and foremost, before every big trip, I will always list my camera gear and assess how it will fit in my backpack. I am a light traveler with one 60L backpack for clothes and one 25L Herschel daypack for all my camera gear, so space management is very important.
Elevate your travel videos Effects with special effects and emotions. Learn how to craft engaging narratives and share your journeys with the world." Top Places
This pack of 24 free transitions from Film Crux contains transitions like blurs, spins, warps, glitches, whip pans and more. These are great for travel videos, commercial videos, and even short films. Using the transitions is as easy as downloading the pack, dragging them into your Premiere Pro presets folder, and dragging the transition file ...
Here are 18 video transitions that you can try for your next video. 1. Video transition: Doorway. A "doorway" is a video transition when the new scene changes the preceding one as if through open doors. This technique is great for travel videos or vlogs. At some point, the preceding scene is visible together with the new one.
6. Use Multiple Cameras And Angles. One of the most important aspects of making a good travel video is making it visually stimulating. The same pan from left to right, the same eye level shots over and over, the same focal length throughout, makes for a visually boring video.
Here are a few hacks that serve as foundations for better travel videos as a whole and not just upgrading your transition game. These hacks are from years of...
10. Spin video transition. The spin transition is a popular video effect that rotates a video into the following clip with a fast 180-degree spin. The scene transition creates a fun, artistic effect suitable for travel vlogs, action and sport videos, fashion and lifestyle, event promos and music videos.
This video transition can create a cool effect if you want to demonstrate the passage of time, a pursuit scene, or a journey. Shooting a single, lengthy movie using a tripod and then cutting out specific segments to demonstrate a jump in time is a straightforward approach to making a jumpcut sequence like the one in the above example.
Open your movie in the timeline or create a project. Above the browser, select the "transitions" tab. Preview a transition by skimming over it. Add a transition between two clips by clicking to add. On the timeline, drag the transition to the two clips you want. Adjust the settings and lengths as you'd like.
Video transition is a post-production technique used in video editing or film to connect one shot to another. Often when a filmmaker wants to join two shots together, they use a basic cut where the first image is immediately replaced by the next. In other words, we can describe a transition as any move between different shots in your video.
Free Online Travel Animation Video Maker. Elevate your travel storytelling with travel animation videos made on FlexClip's free online travel animation video maker, a game-changer in video production that saves you time and money. Be it captivating travel map animation, dynamic travel logo animation, or engaging travel video intro animation ...
High quality Music - Musicbed - http://share.mscbd.fm/ankitbhatiafilmsLearning Time remapping Transition,https://youtu.be/Xhpgza6WP2oJoin my Free Video Editi...
Click on the clip you're editing. Navigate over to the transitions drop-down menu. Choose Star Wipe from the menu. Example: In the show Better Call Saul, Saul Goodman used star wipes liberally in his TV commercials — a symbol of both his low budget and the show's early aughts timeline. Better Call Saul Star Wipes. 6.
1. Hone Your Skills by Watching Travel Videos. You can find travel video ideas by watching content from other creators. Pay attention to their video format, style, transitions between clips, light, and experiment from there. Vimeo Travel is a great platform to start with, as it offers thousands of inspiring travel videos from the world's best ...
50+ Seamless Transitions Pack for Premiere Pro : https://sellfy.com/p/1bpbbx/ Everything Color Graded with my Custom LUTs : https://sellfy.com/henbu/Where...
Server Travel | Unreal Engine 5 Tutorial. In this video tutorial, I will demonstrate how to implement Server Travel in Unreal Engine. Server Travel allows you to seamlessly transition between different maps or levels within a multiplayer game, creating a smooth and uninterrupted gaming experience for players. Show more.
Instantly Unlock Our Free Filmmaking Workshop "10 Secrets To Cinematic Shots":https://www.fulltimefilmmaker.com/freetrainingyoutube?sl=top8seamlesstransition...