
- Types Of RVs
- Tow Vehicles
- Maintenance & Repairs
- RV Power & Electrical Supplies
- RV Appliances
- Living In An RV
- Travel & Destinations
- RV Gear Buyer’s Guides


Can You Hookup Your RV Into House Electrical System?
- Last Updated: March 3, 2024
- 11 minutes read
Whether you’re a full-time RVer or a weekend road warrior, you’ve no doubt asked yourself if you can plug your RV into a house outlet.
After all, you’ve probably witnessed friends who are moochdocking – the art of plugging a travel trailer into a friend’s house to mooch off their electricity.
Or maybe you’ve seen someone with a big garage or shed for their RV who seems to have their camper powered up all the time.
Which begs the question – can you plug your RV into your house electrical outlet?
The short answer is yes, you can plug your RV into a household electric system. But there are limitations including the sorts of RV appliances you can run and the amount of time you can run an RV on household electric. For example, RVs wired for 30 amp electricity are easier to plug into your house than RVs with a 50 amp hookup. And you need to be careful to understand how much your home circuit breaker can withstand.
And you also need to decide if you’ll use an adapter to plug your camper into your house or if you’ll hire an electrician to wire up a special plug for your RV.
So let’s break it all down for you here – what sorts of campers you can plug into your house, how you should plug them in, and the limitations that come with plugging your RV in at home.

Is it Possible to Plug an RV Into a House Electric System?
Yes, you can plug your camper into a household outlet.
But you’re probably asking yourself:
- How can I plug a 30 amp RV into my house?
- How can I plug a 50 amp RV into my house?
- And, should I simply plug my RV into my house outlet or do I need a special plug?
The answers to the above questions depend on what type of camper you have, how you plan to use your camper at your house, and the specifics of your home’s electrical system.

What Types of Campers Can I Plug Into My House?
Any modern RV, travel trailer, camper, or pop up can be plugged into your house. This is true for both 30 amp and 50 amp RVs.
But plugging your RV into a house outlet does not mean that it will run like normal.
Unless you plan to make some modifications to your home electrical system, you’ll be limited on how you can use power in your RV.
This is especially true if you have a larger motorhome with a 50 amp hookup.
Understanding the Basics of RV Electric Will Help You Know Your Limitations When Plugging Your Camper in at Home
Before deciding how to plug your camper into a house outlet, it’s important to understand the basics of RV power systems:
1. RVs generally have one of two types of power – 30 amp or 50 amp.
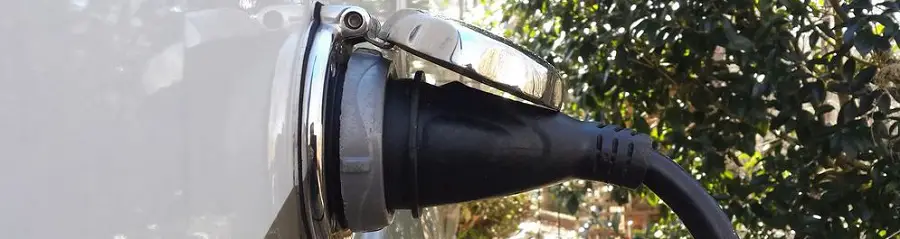
30amp RV plugs have 3 prongs and are larger than your standard home plug.
50amp RV plugs have 4 prongs and are also larger than a standard home plug.
50amp plugs and power systems are generally found on larger RVs – especially those with two or more air-conditioners on the roof.
2. Some smaller pop-up or teardrop campers will have a standard household 110volt plug coming out of them.
Because pop-up/teardrop campers have limited power needs, they can usually be plugged into household outlets without modification.
3. Campers also have an internal 12 volt power system that powers lights and other small electronics.
Your RVs 12 volt power system exists so you can use your camper’s onboard batteries to power small electronics (e.g. lights) when you are not plugged in.
When you plug your RV into your house, your 12 volt system will be powered because your RV has a converter that will take some of the 110 volt power from your house and convert it to 12 volt.
When you plug into a house outlet, your RV will also charge its internal batteries so you can use the 12 volt system when you unplug.
How Can I Run Electricity From My House To My RV?
When it comes to plugging your RV into your house, you have two main options:
Use an adapter to plug your RV cord into a standard household outlet.
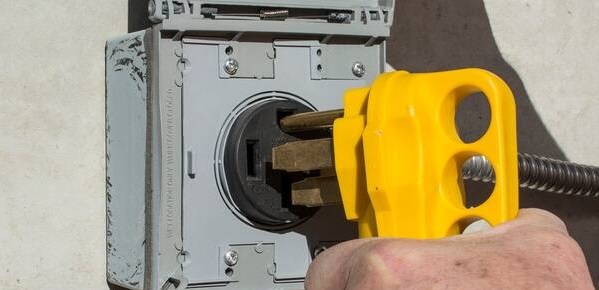
Hire an electrician to wire a 30 or 50 amp plug into your home (this is the same outlet you use at most RV parks).
If you go with option 1, the adapter will cost between $10-$30. Be sure to buy an adapter that is specific for a 30 or 50 amp plug, depending on which you have.
Option 1 will also limit you on what appliances you can run in your RV. More on that in a moment.
If you go with option 2, you could spend anywhere from $200-$1,000+ having an electrician wire up the appropriate plug.
With option 2, you won’t need an adapter because your electrician will wire up the exact outlet your RV requires.
Option 2 will usually allow you to run your RV just as you normally would at an RV campground – using your air-conditioner and other appliances without issue as you stay in your camper.
How To Plug In An RV Into House Electric
Let’s assume you don’t want to shell out for an electrician and you go with option 1. Here are the steps you’ll want to follow to plug in an RV to your home’s electrical system:
- Be sure that all power is off in your RV – If you accidentally left your RV’s air-conditioner, heater, or other energy hungry appliances on before plugging into your house, you’ll suck a big amount of power when you plug in. This usually results in a circuit breaker getting tripped and all power getting cut off to your RV. Avoid this problem by first shutting down all electrical appliances in your camper.
- Pick the house outlet you want to use – This step can be a bit tricky, but it is vital that you pick an outlet with a high amp rating to best handle your camper being plugged into it. To figure this out, you’ll need to go to your house’s circuit breaker and find the switch for the outlet you want to plug your RV into. On the switch, you should see a number. That number is the maximum number of amps that that outlet can handle before the breaker trips and you lose power. Be sure the number on that switch is 10amps or higher. Many household circuits are only 5amps which usually won’t provide enough power for your RV.
- Get a heavy duty extension cord long enough to stretch from your RV to the household outlet – The safest and most reliable extension cords are the thick ones designed for RVs. By using an RV extension cord all the way up to your household outlet, you’ll be getting the maximum amount of power from your home outlet.
- Plug your RV cord or extension cord into the adapter – Now that you’ve gotten your RV power cord extended to the outlet you want to use, you will need to use your adapter to actually plug in to your house outlet.30/50 amp RV plugs are much larger than a household outlet, so that’s why we need the adapter to make the connection.
- Plug the adapter into your household outlet – Simply plug your RV cord into the female end of the adapter and then plug the male end of the adapter into your house outlet.
Plugging Your Camper in at Home: What Appliances Can You Use?
When you plug your RV into a standard household outlet, you will be limited on the appliances you can use in your RV.
Plugging your camper into your house is great for running small appliances like most RV fridges, the converter that charges your RV batteries, interior lights, and small plug-in electronics (e.g. phone or computer chargers).
Generally speaking, when your camper is plugged into your house, you could run a space heater or a hair dryer or your microwave.
But never try to run two power hungry devices at the same time when your travel trailer is plugged in at home.
If you do, you’ll likely trip your home circuit breaker and cut power to your entire RV.

Plugging Your Camper in at Home: What Appliances Can You NOT Use?
Plugging your camper into your house generally won’t allow you to simultaneously run power hungry appliances like space heaters, hairdryers, and microwaves.You can get around this by only running one power-sucking appliance at a time.
That said, you will rarely – if ever – be able to run your air-conditioner while plugged into your house.
Air-conditioners usually hog so much power that they’ll trip most household breakers even if they’re the only thing running in your RV.
Can I Use the 220v Outlet for my Clothes Dryer/Oven to Plug in my RV?
Unfortunately, no.
Most electric stoves and clothes dryers in your home have a larger 220v outlet.
While this outlet might look like it’s made for your RV, trust us, it is not. In fact, even if you were to figure out a way to rig this up, you’d fry your RV’s electronics as soon as you plugged in.
So please do not try this.
All RVs large and small are wired up for 110v power and you will cause extreme damage if you try to run 220v power into your camper.
The good news is, your 220 volt outlet is not even compatible with any RV plug, so unless you perform some major modifications, it’s very hard to make this mistake!
Benefits of Plugging Your Camper into Your House
Even if you don’t plan on staying in your camper for awhile, there are many benefits to keeping it plugged in at home:
1. It will keep your batteries charged, allowing you to have 12volt power when not plugged in.
Just be sure to read your owner’s manual to make sure your battery charger is “smart” so it won’t overcharge your RV batteries.
2. It keeps your fridge running.
Let’s say you bring your camper out every weekend for football games… By leaving your camper plugged in, you can keep those game snacks and drinks cool in the fridge without having to move them.
3. Run ultrasonic pest controllers.
- These devices keep pests away with high-frequency sound, but they need power to keep running while you’re away.
4. You can power dehumidifiers.
- A great tool for keeping destructive moisture out of your camper.
I Keep Losing Power to My RV When Plugged Into My House. What Should I Do?
This usually happens when you pull too much power for your household outlet by running too many power-hungry appliances.
Remember that your air-conditioner will almost always not work when plugged into your house, so if you tried that and lost power to your RV, you know what the culprit is.
Or, perhaps you tried running the microwave and a hairdryer at the same time and power suddenly shut off?
Or, you may be plugged into an outlet that’s on a circuit with a low amp rating. Try plugging into an outlet in another part of the house to see if this resolves the problem.
In these cases, the most likely cause is that your household breaker has tripped, cutting off power to the outlet that you plugged your camper into.
This rarely causes damage, but is a message that you’re trying to pull too much power in your RV.
Simply shut off all electrical appliances in your RV, locate your home’s circuit breaker, and turn the tripped circuit back on.
Once you’ve done that, you should have power back to your camper. Just be sure not to repeat the mistake by running the devices (or combination of devices) that caused the power outage.
Always Use a Surge Protector When Your Travel Trailer is Plugged into Your House.
Surge protectors keep your RV electronics safe in the event that a power surge occurs.
If your RV is plugged into your house and the power grid surges, your camper’s electronics will get cooked – unless you have a surge protector.
RV surge protectors come in a variety of shapes, sizes, and prices, but they will generally attach to your RV power cord.
By attaching a surge protector as you plug your RV into your home, you’ll help protect against this costly situation.
Whether you plan to moochdock, live in your own driveway, or just want to keep your camper powered up when you’re not using it, you can plug your RV or travel trailer into your house.
Before you plug in, it’s important that you understand the limitations and benefits that come with plugging a 30 amp or 50 amp RV into a household outlet.

About Author / Aaron Richardson
Aaron Richardson is an expert RVer and the co-founder of RVing Know How. Aaron, along with his wife Evelyn, has been living and traveling in their Keystone Fuzion RV since 2017. Their adventures span across the country and beyond, including memorable RVing experiences in Mexico. Aaron's passion for the outdoors and RVing shines through in his writings, where he shares a blend of travel stories, practical tips, and insights to enhance the RV lifestyle.

where can I park my RV to live and travel full-time
5 convenient ways for mounting a generator to a trailer bumper.

Barbara Steele
I’m in my father’s driveway for the winter and for some reason I think I fried my electric blanket. Everything else that I e used on the same outlet is fine just not the blanket. Clues as to why????? Please and thank you.

Joseph Marinaro
You stated that houses have 5 Amp circuit breakers? Also please explain why you would fry something plugged into a stove or dryer, my guess is that it has no neutral. Regards, Joe
Leave a Comment Cancel reply
Your email address will not be published.
Save my name, email, and website in this browser for the next time I comment.
You Might Also Like

10 Reasons Your RV Hot Water Heater Isn’t Working & How to Fix

Where Is The Circuit Breaker In My RV?

How To Increase Water Pressure In An RV?
Start typing and press Enter to search

Don't leave without reading this article
16 Real Benefits Of Summer Camp For Kids And Adults
Here’s How You Plug Your Travel Trailer Into Your House.
Share this post:.
When you take a trip in your RV or camping trailer, you do not always have to take a long-distance trip. Some people prefer to camp out in their own driveway or take their travel trailer to a friend’s house.
Part of the fun of using an RV of any type is having the comforts of home while being away from home. This means that you need electricity to power appliances. This leaves many campers asking, “Can I plug my travel trailer into my house’s power?”
So, can you plug your travel trailer into your house?
You can plug your travel trailer into your house. There are several different methods for plugging your travel trailer in at home but for most methods there are draw-backs and precautions that you must consider. For instance, using a dog-bone adapter from a 110 volt 20 amp outlet will only be ok if you are using bare minimums like lights and a refrigerator. Using the A/C will throw the breaker and can be a fire hazard.
We will give you the complete low-down, so be sure to read all the great information below.
Clickable Table Of Contents
Plugging a Travel Trailer into Your Electrical System: What You Need to Know
Though it is possible to plug your travel trailer into your house’s electrical system, there are certain conditions that need to be met.
- Required Outlets
The first thing you need to know is that most RVs/travel trailers require at least a 30/50 amp and 15/20 amp electrical outlet. If you do not have these, you can’t properly use your home to power your RV.
- Recommended Time for Power Usage
When you do plug your travel trailer/RV into your home’s electrical system, you need to understand that it is not recommended for you to do so for an extended period of time. When you do not need electricity, remember to unplug. It’s best for you to plug your trailer in only for weekend trips. Though the time limit is not specified, you should use your best judgment.
- How Much Power You Can Use
As a general rule, you shouldn’t try to power up every appliance in your trailer when you’re using a house’s electrical system. If you try, you are likely to trip the breaker. Depending on the adapter that you are using, you may only be able to use one thing at a time.
This can be frustrating if you are using your RV during the summer or winter, as you need heat/AC. If you work from home and have taken your laptop with you, keep in mind that charging your computer can take up a lot of electricity. Unplug that before you use other appliances.
Plugging a Travel Trailer into a House’s Electrical System: How To
Plugging your trailer into your home’s electrical system isn’t as easy as finding an outlet and using it. There are certain steps that you have to take for this to work smoothly.
- Check Your RV Manual
In order to find out exactly what you will need to use (i.e. adapters), you have to check your RV manual and see which service yours will require. You will either need a 30amp or 50amp service.
- Check Your Circuit Box
Next, you need to know the amperage of your home’s receptacle. You can usually do this by checking your circuit box. The amperage that it provides to that certain circuit should be listed.
- Grab Your Supplies
Once you have taken note of both the RVs required amp service and your home’s amperage, you need supplies that will allow you to properly plug your trailer into your house. You will need cords, cables, and adapters that match these specifications.
If you don’t know which supplies you need for your specific trailer and home, you should always ask other experienced RV campers and even electricians if you have to. It’s always better to ask questions if you are confused. If you don’t and you plug it in on a guess, the result could be dangerous.
Adapter Tips
- If you are using 30amps for your RV, you will need a 30a male to 15a female adapter.
- If you use a 50amp RV, you need a 50a female to 30a male adapter which can be connected to a 30a male/15a female adapter.
Once you are sure of what you need and you have followed the advice of experts on the matter, only then should you plug your travel trailer into your house.
For more information on how, exactly, to safely do this, please click on this link (see “How To” section.)
Is it Possible to Power All Appliances When Using Your Home’s Electrical System?
The only way to be able to use more power safely is if your trailer uses 50amp service and your home can provide that 50amp service. A perfect 50-50 match will allow you to use more power for several appliances, but not all of them.
Also, there is no safe way for you alone to modify your house’s power system to provide 50amp service. You will either fry your RV’s electrical system or damage your home’s wiring system. You could even catch your house on fire! Always consult an electrician before trying this.
In some cases, a home will need to be required to be modified like this and an electrician will be able to determine whether or not such drastic measures are necessary as well as whether it is possible for you to do so at all.
Unfortunately, completely powering an RV/trailer with a house’s electrical system isn’t always possible. Homes simply aren’t equipped to handle both tasks at one time.
You’ll be experiencing some of the comforts of home but in moderation.
Tips for Plugging In
Any time that you are working with electricity, you need to be careful. This includes plugging your trailer/RV into your home’s electrical system.
- Be Confident in Your Supplies
As stated earlier, always be sure that you have the right equipment before plugging your travel trailer into your house. If you are unsure, ask the experts. Using proper gear will save you the frustration of extra rigging, save money, and stay unharmed. If you do use incompatible equipment, you could damage your RV’s electrical system permanently.
- Hire a Professional
If you still are not confident enough to do the job yourself, you may be able to hire an electrician to do it for you. They are experts in their field, and they will know exactly how to hook up an RV/travel trailer without damaging either system. You will be paying for their services, but this will save money in the long run because you won’t be wasting power or damaging your property, which costs considerably more to repair.
- Make Sure that Appliances are Off
Before you plug in your travel trailer, check and see that all appliances in the RV are turned off, especially the air conditioning unit. If anything is left on, you will almost certainly trip the breaker. While this isn’t necessarily dangerous, it’s a hassle to get everything up and running again.
- Don’t Go Overboard
Depending on the power that you have to work with, you only have enough to power certain appliances at one time. Be mindful of what you’re using, what is plugged in, etc. If you do go overboard and use too many appliances at once, you will again trip the breaker in the house and possibly fry your RV’s electrical system.
- Confirm Legality
Believe it or not, it’s not always legal for you to plug your RV or travel trailer into a home, especially one that is not your own.
If you are planning to use someone else’s home for your travel trailer’s power source, you need to know that you won’t be prohibited by zoning laws.
In urban areas, you may not even be able to park your trailer in someone else’s driveway whether you plan to use their electrical system or not. This is due again to zoning laws. There simply is not enough space for your trailer in some instances.
In rural areas, the laws are fairly relaxed on the legality of parking on someone else’s property and using their electricity. Just be sure that you have their consent first, of course. After all, the electricity you will be using isn’t free.
To sum it up, yes, you can plug your travel trailer into your house, but you need to do so with great caution and care. Consider the steps that need to be taken, be sure of what you are doing, and hire someone to do the job if you can’t. There’s no shame in getting help!
When you have plugged your travel trailer in and you have the power that you need, don’t overload the system by turning on everything at once. Realize that sometimes, it’s better not to plug it in at all (i.e. extreme weather.) Enjoy what your RV/trailer has to offer, but do it one or two things at a time. Take note of what requires more power, and adjust your expectations accordingly.
If you are considering taking your next RV trip to your own driveway or over to a friend’s house, you can do so without roughing it as long as you are safe and mindful of your limits. Now you can hit the road (or not) confidently. Happy trails!
More Articles You Will Love
Can I plug a 50 amp RV Plug into 30 amp RV Plug? (Consider This)
Do RV Heaters Run On Electricity? ( Answers and Explanations )
Should You Leave Your RV Fridge On All the Time? (When to turn it off)
Heat Strips In An RV ( What is it, How does it work, Is it worth it )
Rickie Arms
Hi, I'm Rickie Arms, owner of Glampingorcamping.com. I am so invested in writing the best and most informative articles for you that I went out and bought a travel trailer just so I could write about it for you. I spend just about all of my off time both camping and glamping so I can share everything I have learned and will learn with you. I have spent my whole life camping and over the last 10 years, I have spent a large amount of time checking out glamping experiences with my wife and kids as well. Thank you for coming by and we hope to see you back here getting great information in the future. Rick Arms-
One thought on “ Here’s How You Plug Your Travel Trailer Into Your House. ”
Like!! Thank you for publishing this awesome article.
Comments are closed.
Recent Posts
Taking Your Dog Camping – 14 common questions answered
People love their dogs and dogs love their people so it is only natural that you would want to take your dog on your next camping trip. With this in mind, we asked our readers to let us know what...
Camping While Pregnant - Your Essential Questions Answered
You’ve got a baby bump, but you’ve also got an itch for the great outdoors. Fear not, for you can do it all. After all, Sacagawea got her and her baby over the Rockies the day after he was born....
Can You Hook an RV Up to Your Home's Electrical System?
Have you ever noticed an RV sitting in someone's driveway and wondered if you could live in it that way? Well, the answer is yes - sort of! An RV can be hooked up to a home's electrical system, but there are some things you must know.
While it's not suggested to live in an RV outside a home for an extended time (although they can be insulated for longer-term efficiency), short trips will be fine for keeping the lights on during your travels. Let's look at how to hook an RV up to your home and what factors to consider when doing so.
Hooking an RV Up to Your Home's Electrical System
While you can hook your RV up to a home's electrical system, you won't be able to run every appliance or use the electricity 24/7. You will most likely need to set your RV up to be able to connect to the standard 3-prong household plug you use at home. Since your RV will need at least a 30/50 Amp hookup to power the rig, you'll be limited in what you can run connected to a home's 15/20 Amp electrical outlet.
You can hook up an RV up to your home's electrical system in one of two ways: You can ensure what you need is installed when you buy the RV, or you can install a 30/50 Amp hookup at home. If you are visiting a place often, it may be worth it to install a hookup for your RV at the destination.
If you are hooking up to a home's standard outlet, you can do this via an outdoor, all-weather extension cord and 15/20 Amp adapter for your RV's electrical hookups. You want this extension cord to be as short as possible going from your home to your RV to prevent it from overheating.
Follow these steps to hook an RV up to your home's electrical system:
- Before you plug in the extension cord from your home to your RV, ensure all electrical appliances are turned off in your rig.
- Turn off the breakers to your home, too.
- Plug the extension cord into your RV's electrical hookups via an adapter, if necessary.
- Then, reset your home's breakers.
If successful, you're setup properly and ready to use what you need. If not, your breaker will trip before you even head back to your RV.
If the breaker trips, unplug everything and venture inside your RV to ensure all appliances are in fact off, and nothing is plugged in using power anywhere in your rig. Try the above steps again.
If these steps still don't work, refer to your RV's manual, contact the manufacturer, or give the dealership a call to talk through the issue.
Limitations to Hooking an RV Up to Your Home's Electrical System
Unless you set up a fully operational RV pad at home, you will not be able to use 30/50 Amp setup and will not be able to use everything powered in your rig. To operate within safe parameters , you will only be able to use one appliance at a time in most cases. If you use more than one at a time, you'll trip your home's breakers.
The following RV appliances are electric hogs, so be cautious when running them for long periods of time or trying to run them with other appliances at the same time:
- Air conditioning
- Toaster oven
Appliances like TV, DVD players, laptops, and your refrigerator can be used at the same time without overloading even a 15/20 Amp connection in most cases. If you notice flickering lights or something turns off on its own, chances are you've overloaded the electrical connection between your RV and home.
Pro Tip: If you're parked in front of your house or someone you know, consider using their appliances rather than running yours whenever possible to conserve energy and prevent overloading the electrical system you're hooked up to for the stay.
When it comes to hooking an RV up to your home's electrical system, proceed with caution. You can damage both your RV and home's electrical system if you plug in and expect everything to work like normal. You need to take your time, understand how your RV works, how your home works, and then get everything hooked up properly.
If you're not sure if you should hook up even the smallest of RVs in your driveway, consult forums, dealerships, and others in the RVing community to make sure you're good to go. Otherwise, you may cause damage that'll cost you time and money to repair properly.
Everything You Should Know Before Renting Your First RV
RVing 101 Guide: Water Heaters
RVing 101 Guide: Electrical Systems 101
The 9 Best Power Adapters for European Travel of 2024
Planning a Camping Trip: The Complete Guide
The 10 Best Travel Adapters of 2024
How to Hook up a Trailer Hitch
The 10 Best RV Parks in Florida
The Best Beach Camping in Northern California
Electrical Outlets That Are Used in Norway
10 Cool Ways to Upgrade Your RV
Foval Power Step-Down Voltage Converter Review
How to Make Reservations at California State Parks
The 8 Best Air Mattresses for Camping of 2024, Tested and Reviewed
HAOZI Universal Travel Adapter Review
Travel Ready AC Power Adapter Review

The Ultimate Step-by-Step Guide to RV Electrical Hookups
Modern RVs are technological marvels, enabling travelers to have all of the trappings of home with them out in the wilderness. Yes, with propane gas and electric hookups, you don't have to sacrifice comfort to go on an adventure.
Ideally, whichever campground you end up booking will have full hookups, while others will have either 30 or 50 amp electricity and water. After you arrive, you will need to connect your RV yourself.
If you don't know how to connect your RV electrical system to a campground hookup, or need a reminder of what to do, then now's the time to pay attention!
The Difference Between 30 and 50 Amp Systems
First up, do you know the difference between 30 amp and 50 amp RV electrical hookup systems? You're more likely to encounter a 30 amp RV electrical hookup system in smaller RVs, while fifth wheels and larger motorhomes are generally equipped with a 50 amp system.
In terms of power, 30 amp RV hookups receive 3,600 watts of power, while 50 amp systems receive more than 12,000 watts. In practical terms, an RV with 30 amps of power can run fewer appliances than one with 50 amps.
With a 50 amp RV electrical hookup, you're on your way to bigger and better things. You can run multiple appliances in a 50 amp RV without worrying about tripping the breaker. Try to run multiple appliances in a 30 amp RV, and you'll trip the breaker in much less time than it takes to hook up.
However, if you hook up your 30 amp RV to a 50 amp hookup at a campsite, know that you're still only going to draw 30 amps; and, if there are only 30 amp hookups, but you've got a 50 amp RV? You're still not going to be able to draw more than 30 amps.
Cruise America RV are equipped with 30 amp and a 15 amp adapter. If you can, try to find campsites that have the appropriate RV electrical hookup for the system in your RV to make things easier for you.
Your Step-By-Step Guide To RV Electrical Hookups
Once you've arrived at a campground with electrical hookups, get to know the system and breaker there. After you've found it and worked out what the power supply is, make sure everything is turned off in your RV, and also shut off the campsite's power supply. That's step one.
Next, pull out your RV's plug, which you will connect to the campground power box you just shut off. But, hang on! Remember what was said about 30 amp and 50 amp systems? If your RV electrical system is being connected to a hookup with different amperage, you'll likely need an adapter. If everything looks correct, plug your RV into the power system. Step two –– done.
The final step? Step three is when you switch your campsite's breaker back on. You should now have power in your RV!
What About Unhooking the RV Electrical System?
To unhook your RV, simply follow the above steps, with the main difference being unplugging your rig instead of plugging it in!
RV Electrical Hookup at Home
There may also be times when hooking up your RV to your actual house will be desirable or necessary. For instance, if you want to check to make sure everything is working well before you head out on a road trip, it makes sense to perform a kind of diagnostic check. Or, it may simply be that you're loading it up with perishable food, and want to keep some things cold.
Even if you're not an RV owner, you can take an RV rental home and hook it up to your house as you prepare for your next big journey. You won't be able to run everything, or for very long, but think of this as a backup plan to handle things before camping.
You can proceed with an RV electrical hookup at home without too much fuss, provided you have a connector for a three-prong plug. You will also need a 30/50 amp adapter to hook up to a house's 15/20 amp system.
Make sure the breakers are off at your house, and that everything is off in your RV, too. Once you've connected your RV to your house with a three-prong connector and/or adapter, you can switch your house's breakers back on and everything should be hunky-dory.
Keep in mind that RV appliances and systems can use a lot of electricity and thus drive up your bill, so try not to rely on your home’s electric grid for too long.
Connect With Cruise Before You Connect With a Campground
If you're going RV camping , you need to know 1) what kind of RV electrical system your RV has, 2) what kind of hookups there are at your chosen RV campsite, and 3) how to proceed with an RV electrical hookup once you've arrived at your campground.
Surely, by now, you have the basics down to avoid electrical problems , which means it's time to get yourself an RV rental from Cruise America . Our RVs are equipped with 30 amp and 15 amp adapters.
Before you can connect an RV electrical hookup, you have to have an RV, and Cruise America has the one you're looking for. Connect with Cruise America today to power up your next RV adventure!
Related Articles

How to Celebrate National Park Week: National Park Week Events

Best Earth Day Activities for Families and Kids

Why You Should Go RV Camping for Earth Day 2024

Adventure with a Loved One for Valentine’s Day | Cruise America

The Best Beaches for Spring Break (Party & Relaxed Locations)

The 10 Best National Parks for Spring Break RV Trips
Share this RV trip idea with friends & family

Step-By-Step Guide: How To Connect An Rv To House Electrical
Have you ever wondered, “How To Connect An Rv To House Electrical?” If so, you’re not alone. Every year, thousands of RV owners look for ways to power their mobile homes using their house’s electrical system. This not only provides a convenient power source but can also save on energy costs. Whether you’re prepping for a long trip or just need a temporary power solution, understanding the connection process is crucial. In this guide, we’ll walk you through the steps, to ensuring a safe and efficient connection.
Understanding the Basics of RV Electrical Systems
Ah, the open road, the freedom of the RV lifestyle, and… electrical systems? Yep, it’s not all sunsets and campfires when you’re living the RV dream. Before you can enjoy all the comforts of home on wheels, you need to understand a bit about how RV electrical systems work.
First off, let’s talk amps. Most RVs come with either a 30-amp or a 50-amp electrical system . Think of amps as the amount of electricity you can use at one time. A 30-amp system is common in smaller RVs, while larger ones with more appliances and gadgets might require 50 amps. It’s like choosing between a small coffee and the “I-have-a-long-day-ahead” size.
Next up, are converters and inverters . No, they’re not the latest dance moves. A converter takes the 120-volt AC power from an electrical hookup and converts it to 12-volt DC power for your RV’s batteries. On the flip side, an inverter takes the 12-volt DC power from your batteries and turns it into 120-volt AC. It’s like a relay race but for electricity.
Lastly, before you even think about connecting your RV to your house, remember safety first ! Always ensure your RV’s electrical system is off before making any connections. And never, ever connect without the right equipment. It’s like trying to fit a square peg in a round hole – not going to end well.

The Essentials of Home Electrical Systems
Now, let’s switch gears and talk about your home’s electrical system. Most residential homes in the U.S. run on a standard voltage of 120 volts . Your typical outlets, where you plug in your phone charger or toaster, are part of this system.
But here’s the kicker: while your home might seem like it has endless power, it has its limits. That’s where safety breakers come in. These nifty devices prevent overloading by cutting off the power when too much electricity is being drawn. Think of them as the bouncers of your electrical system, ensuring things don’t get too rowdy.
Lastly, it’s essential to recognize the limitations of home electrical systems . While it might be tempting to run every appliance in your RV while connected to your home, doing so can overload your home’s system. It’s like inviting the entire neighborhood to your pool – fun in theory, but not so great in practice.
To dive deeper into the world of RV electrical systems and how they play nice with home setups, check out this comprehensive guide on RV electrical hookups . And remember, always prioritize safety and knowledge before embarking on your electrifying RV adventures!
Step-by-Step Guide: Connecting Your RV to Your Home
Choosing the Right Adapter for the Connection
When it comes to connecting your RV to your home’s electrical system, the first step is choosing the right adapter. Think of it as trying to fit a square peg into a round hole; it’s not going to work unless you have the right tool. There are various adapters available, each designed for specific types of RV plugs and home outlets. Do your research and ensure you pick the one that matches your RV’s requirements.
The Process of Safely Connecting the RV Plug to the Home Outlet
Now, let’s get to the meat and potatoes of the process. Here’s a step-by-step guide on how to connect an RV to a house electrical:
- Turn off all electrical appliances in your RV. This will prevent any sudden power surges.
- Switch off the main breaker in your home. Safety first, always!
- Connect the adapter to your RV’s plug.
- Plug the other end of the adapter into your home’s electrical outlet.
- Switch the main breaker back on . If you’ve done everything right, your RV should now be powered by your home’s electrical system.
Remember, this isn’t a race. Take your time and ensure each step is done correctly.
Monitoring Power Usage to Avoid Overloading
Just because you’ve successfully connected your RV to your home doesn’t mean you can go wild with power consumption. Monitor your power usage to ensure you don’t overload your home’s electrical system. Overloading can lead to blown fuses or, worse, electrical fires. Consider investing in a power usage monitor to keep track of your consumption. It’s better to be safe than sorry!
The Role of Extension Cords and Surge Protectors
Why a Heavy-Duty Extension Cord is Crucial
If you’re thinking of using that flimsy extension cord you found in your garage, think again. When connecting an RV to a house, a heavy-duty extension cord is crucial. These cords are designed to handle the power demands of an RV without overheating or becoming a fire hazard. Plus, they’re more durable and less likely to get damaged.
The Benefits of Using a Surge Protector
A surge protector is like an insurance policy for your RV’s electrical system. It protects your RV from unexpected power surges that can damage appliances and electronics. Think of it as a bouncer for your RV, keeping out unwanted electrical guests.
Potential Risks and How to Mitigate Them
Connecting an RV to a house’s electrical system isn’t without its risks. There’s the potential for power surges, overloading, and electrical fires. However, with the right precautions, these risks can be mitigated. Always use a heavy-duty extension cord and a surge protector. Regularly monitor your power usage and ensure all connections are secure.
And if you’re looking for a real-life example of how to plug in your RV at home, this guide by Getaway Couple is a fantastic resource.
Where Are Milwaukee Hand Tools Made: Benefits and Limitations
Wait a minute, we’re not talking about tools here! Let’s dive into the electrifying world of RVs and home connections.
The Convenience of Using Home Electricity for RVs
Imagine this: You’ve just returned from a long road trip in your RV, and you’re not quite ready to let go of that RV lifestyle. So, you decide to park it in your driveway and live in it for a few more days. But there’s a catch! How do you power it up? Enter the concept of How To Connect An Rv To a House Electrical . It’s like giving your RV a temporary visa to tap into your home’s power grid. No more relying on generators or external power sources. Just pure, uninterrupted electricity right from your home.

Limitations in Power Capacity and Potential Challenges
While connecting your RV to your home’s electrical system sounds like a dream, it’s not without its limitations. Your home’s electrical system is designed for, well, your home. Not a massive vehicle with its own set of power demands. This means you might not be able to run every appliance in your RV simultaneously. Think of it as a buffet; you can’t pile on everything at once. Overloading can lead to tripped breakers or even damage to your RV’s electrical system.
Cost Savings and Other Advantages
On the bright side, using your home’s electricity can lead to significant cost savings. No more spending money on fuel for generators or paying for RV park electrical hookups. Plus, it’s eco-friendly! You’re reducing your carbon footprint by using a more stable and efficient power source. And let’s not forget the convenience factor. Need to charge your RV’s battery? Just plug it in. Want to use the microwave and the air conditioner at the same time? Go for it (but remember the limitations)!
Troubleshooting Common Issues
Ah, the joys of RV life. It’s all fun and games until something goes wrong. But fear not! Here’s a quick guide to troubleshooting common electrical issues when connecting your RV to your home.

Addressing Tripped Breakers and Resets
Tripped breakers are the most common issue when connecting an RV to a home electrical system. If you find that your RV suddenly loses power, check your home’s breaker box. If a breaker has tripped, reset it. But remember, if it keeps tripping, it’s a sign you’re overloading the system.
What to Do When the RV Isn’t Getting Power
If your RV isn’t getting power even after checking the breakers, ensure all connections are secure. Check the adapter, the extension cord, and the outlet. If everything seems fine, it might be an issue with your RV’s internal electrical system .
Recognizing Signs of Potential Electrical Issues and Seeking Professional Help
Flickering lights, burning smells, or unusual sounds are all signs of potential electrical issues. If you notice any of these, disconnect your RV from your home immediately and seek professional help. It’s always better to be safe than sorry.
For more insights and tips on connecting your RV to your home, check out this comprehensive guide .
Frequently Asked Questions
How do i safely connect my rv to my house’s electrical system.
The first step is to ensure you have the right adapter for your RV and home outlet. Always turn off all breakers before connecting and follow the steps in our guide.
Can I connect a 50-amp RV to a standard home outlet?
Yes, but you’ll need a specific adapter. However, be cautious as your home’s electrical system might not support all RV appliances simultaneously.
How long can I keep my RV connected to my house?
While there’s no strict limit, it’s essential to monitor power usage to avoid overloading your home’s electrical system.
Do I need a surge protector when connecting my RV to my house?
It’s recommended. A surge protector can prevent potential electrical issues and protect your RV’s appliances.
What if my breaker trips while my RV is connected?
This usually indicates an overload. Disconnect the RV, reset the breaker, and ensure you’re not using too many high-power appliances at once.
Is it expensive to connect my RV to my house’s electricity?
The cost is minimal, especially when using the right adapters and extension cords. In the long run, it can be more cost-effective than relying on generators.
Understanding “How To Connect An Rv To House Electrical” can open up a world of convenience for RV owners. With the right tools and knowledge, you can enjoy the comforts of your RV without relying solely on campsite hookups or generators. As always, safety should be your top priority. So, follow our guide, take the necessary precautions, and enjoy the seamless power experience in your RV.
Thank you for reading!
RV Chronicle
Can You Hook Up Your Home Electrical To Your RV?

It is possible to plug an RV into a regular home outlet of 110/115 V AC power. It’s widespread practice for most Rver’s to plug their Rig into their house to cool their fridge and charge up their batteries before they leave on a camping trip. Even long-term having your RV plugged into your home power of 110/115 volt AC should not affect anything in your RV. The biggest concern is running too many appliances at one time or running appliances that require too many amps and your 15/20 amp home electrical is not able to supply can result in in popping your breaker on your house’s breaker panel.
What Can I Run When My RV Is Plugged Into My Home Electrical?
For all RV’s plugging into your home electrical outlet that provides 15 amps of power, the minimum of appliances should be run. Such as the fridge, some lights, charging the batteries and maybe a few fans should not be a problem. However, if you wanted to run your air conditioner along with those other items, I would have some concern that a breaker would be blown. It is possible to run you’re A/C if it is under 1500 watts if you are using a soft start or slowly increase the speed on you’re A/C’s control board you can read more about it here .

Can I plug My 30 amp / 50 amp RV / Camper Into A Regular House Outlet?
Plugging your RV into a regular house outlet 15/20 amp receptacle requires an adaptor or a dog bone to convert the plug from either 50 amp to 15/20 amp receptacle or a 30 amp to 15/20 amp receptacle. These adaptors are perfectly safe to use to step down the connections to connect to your homes AC power. The 15/20 amp from your home’s AC power should not cause any harm to your RV. To find out what amperage your outlet(s) have is to check the circuit breaker and if you see the number 15 = 15 amps, and if you see the number 20 = 20 amps. Since you’ll be plugging your 30 or 50 amp RV into a 15-20 amp outlet, it means you won’t be able to run all the appliances on your RV while you’re charging the batteries or cooling down your RV fridge .

Can You Run A 30 amp RV On 15 amp?
You can run your 30 amp RV on a 15 amp outlet, but you won’t have enough power to run all your appliances. Remember that since you can’t get more than 15 amps of power from
the outlet, make sure that the amount of power drawn by your RV does not exceed the maximum electrical load capacity. Since each country will have different electrical standards and configurations, you can compute the electrical load using the formula:
Amperage (A) x Volts (V) = Watts (W)
Example: 15 amp outlet x 120 volt circuit = 1,800 watts
With this example, you can just adjust to the available amperage (15 or 20 amps) or voltage circuit (either 110v or 220v) available in your home to see the maximum electrical load you can draw in your RV while plugged into a house outlet (so you don’t trip the breakers). Power hungry items should be avoided (AC, microwave, hair dryer, etc.), and I explain more on this in the article HERE .
What Do I Need To Plug My 30 Amp / 50 Amp RV Into My House?
You can directly plug in your 30 or 50 amp RV into your house via: (1) directly into the wall outlet (which can allow either 15 or 20 amps) using the appropriate adapters, or (2) if you install a dedicated 30 or 50 amp RV hookup similar to what you can find in RV parks. With the former in mind, the adapters you’ll need, depending on your RV is/are:
In case the most convenient house outlet isn’t as accessible to your RV plug and adapters, you’ll will need a proper extension cord, make sure that the extension cord you use is heavy-duty, weather resistant and is a gauge 10 (ultra-heavy duty) with an amp rating that fits your RV like the Camco (55191) 25’ 30A PowerGrip extension cord which can also come in longer lengths and would also have a 50A available.

Is It Bad To Leave Your RV Plugged In All The Time?
Plugging an RV into power all the time does not harm anything in the RV. The extended use of the appliances and converter may shorten the life of these items as they have been used more frequently. It is not bad to leave your RV plugged in all the time, but the increased use will mean more repairs and replacement of parts will occur sooner than for someone who only uses their RV occasionally through the year.
One of the things to be wary about keeping your RV plugged in all the time will be your electricity bill. Your RV is a portable home, so expect the electric bill to jump up, especially if it’s plugged in at home, and you have the RV’s AC or heater on – whether you’re using the RV as a spare space for guests or living in it full-time. When it comes to your RV batteries, unless you have a smart converter with a trickle charge, the constant overcharging can dry up your lead-acid batteries faster or if it gets undercharged, can lead to sulfation. Also having a BMS (Battery Monitoring System) is important so it can take out the guess work, and you’ll get to protect your battery bank. One of the main things to think about is that if you leave your RV plugged-in all the time, it’ll be subject to more wear and tear. There will be small electrical devices on your RV, like clocks or gas detectors that will drain power, so having a battery disconnect switch can protect your RV batteries.

Can I Plug My RV Into 220V?
This depends on if you have a 30-amp RV or 50-amp RV. 30-amp RV’s can only plug into 110 volts, while a 50 amp can plug into 220-volt. Large RV that needs 50-amp power is designed to handle 220 volts of power. The 50 amp is 110 v by 2 times, which equals 220 volts.

Can you Plug Your RV Into Your Dryer Outlet?
While the Plug for your RV and your home Dry plug might look like it fits, the
Hopefully this article can serve as a beneficial guide to make sure you properly hook up your RV to your house outlet. Always prioritize electrical safety, not just for your RV, your house, but your safety as well. So if you have any doubts, always make sure to consult a certified electrician who’s familiar with RVs to make sure no issues occur.
- ← Does A 50-amp RV Into A 30-amp Service: Answered!
- Surge Protectors: Necessary Before Plugging Your RV! →
Similar Posts

RV Batteries: Lead Acid, AGM, Lithium – What’s Best?

Do Electrical Outlets Work In A Motorhome While Driving?

Is It Worth Installing Solar Panels On Your RV? It Depends…
How to Install RV Hookups at Home

Sharing is caring!
Thanks for your support! If you make a purchase using our links in this article, we may make a commission. And, as an Amazon Associate, I earn from qualifying purchases. See the full disclosure here .
We’ve been considering installing RV hookups at home for water, sewer, and electrical. We would like to do this so we have a place to store the RV but also so we can live in or service our RV right at home. But, there are steps we must take to ensure we do things the right way.
So how do you smoothly connect water, electric, and sewer hookups to your RV at home?
1. Build a Gravel or Concrete Parking Pad 2. Run a Water Hookup to the RV 3. Run an Electrical Hookup to the RV 4. Install or Use Your Existing Permanent Sewer Hookup

In this article, we will run through some home RV parking hookup ideas so you can install your own RV hookups right at home. Please be aware that depending on where you live, you may need permits to install permanent RV hookups at home. So, check with your local officials before you begin any work.
Build a Gravel or Concrete Parking Pad
If you want your RV hookups to go as seamlessly as possible, you will want to build a gravel or concrete pad. This setup allows your RV to rest on a flat surface outside of your home. Ultimately, it will keep the weight of your RV from settling into the ground. If you were to park your RV on grass sooner or later, the ground will settle, and your RV will no longer be level.
To build a gravel or concrete parking pad, you should first measure the length and width of your RV. You want to make the pad about 4 feet wider and 4 feet longer than your RV, so you have room to walk around the RV. You should also consider the height of your RV to make sure you don’t hit any overhead power, phone, or cable TV lines.
To build a gravel pad, you will need to start by leveling the area where you want to install the pad. You should plan to make the gravel pad 4-6 inches deep. The heavier the RV, the deeper the gravel.
Once you dig out and level the area, install a layer of filter cloth over the dirt BEFORE filling in with gravel. Most people don’t know to install the filter cloth first. The filter cloth keeps the dirt under the gravel from eroding, so you don’t end up with spots that sink.

I recommend using #57, or #2 washed gravel for your gravel pad. Do not use pea gravel because your rig will sink right into it. I also do not recommend using crush and run, which is gravel mixed with gravel dust. Crush and run is very dirty and you will track the stone dust into your RV, and maybe your house too.
And lastly, I absolutely do not recommend using recycled concrete. Recycled concrete typically has wire mesh or rebar in it, which is metal used inside of concrete to add to its overall strength. Use recycled concrete, and I guarantee you will get a flat tire at some point.
To build a concrete pad, you will need to dig and deep enough to install 4 inches of gravel below the 4-6 inches of concrete you will then pour on top. You should still use filter cloth under the gravel, and I recommend using crush and run gravel and tamping it down under the concrete.
When pouring the concrete, you will want to use 2 x 6s to build a form, so your concrete pad has a clean edge all the way around. Also, you should install wire mesh in your concrete pad or buy concrete that has fiber mesh mixed into it for added strength.
Also, I do not recommend trenching under your parking pad for your water or electric lines. I realize that if you take a shorter path, the cost of materials will be less expensive.
But, if there is ever a problem with either of those lines, you may have to dig up your parking pad to make a repair. And, the trench lines are likely to settle at some point which will cause the pad to sink in those spots.
If time, tools, or know-how aren’t on your side, you can always hire a contractor to do the dirty work for you.
Install Sturdy Posts for Your Water and Electrical Hookups
When the pad is complete, it’s time to install 4 x 4 posts for the RV hookups. You can use the leftover concrete if you installed a concrete pad to do this. Or, you can just buy a few bags of concrete and dry pack the posts if you installed a gravel pad.
Dig a hole for each post about 8 inches in diameter and about 30 inches deep. Install the posts as level and plumb as possible and then pack with leftover concrete or just pour the dry concrete right from the bag around the post.
This is called dry packing and the moisture from the ground will seep into the dry concrete mix and it will harden up. If you live in very dry climates, this method will not work and you will have to mix it with water before packing it around the post.
Obviously, you will want the water and electrical posts to be on the correct side of the RV to make hooking up the electric line and water hose as easy as possible.
Install the Water Line Hookup First
First, dig a trench from the water source to the post for the water hookup. Why dig a trench? Well, you’ll need something that you can run the waterline through so it doesn’t get damaged or freeze. You’ll want to strategically position your post and trench. (Knowing this may affect where you choose to install your post in the first place)
Before you dig your trench, you should call Miss Utility. or whatever service is in your area, to come out and mark all of the existing utility lines on your property. In fact, in Maryland, where we live, it’s the law.
Calling a utility marking company can help prevent you from hitting an existing water, power, or gas line! And it is expensive to pay the repair bill if you hit one of these lines.
Digging the trench for the waterline is the hardest part of setting up the waterline. It’s labor intensive because you have to dig down below the frost line.
Or you can rent a trenching machine at Home Depot so you can get the waterline installed below the frost line for your area of the country. A frost line is how deep the ground freezes during winter. Once you know the frost line depth, be sure to dig below it or the water line could freeze.
CPVC pipe is easy to install and it is rated for installation both above and below ground. Just make sure you do not use purple primer on the CPVC pipe and that you use the proper glue rated for CPVC.
After running your water line through the trench, you’ll run the water line up the post. Before securing the water line to the post, wrap the water line with heat tape. This will keep the water line above the frost line from freezing.
Then secure the line with pipe clamps and fill in the trench. So long as your line is secure, you shouldn’t run into any problems hooking up your RV at home. Add the faucet, and you are almost done.
While you still have to set up the electricity and sewer lines, you’ve got the first part under your belt! It’s a rewarding feeling, especially when you’ve done it all yourself. So go ahead and celebrate, but not for too long—there’s more work to be done.
Installing the RV Electrical Hookup at Home
Hooking up electric service to your RV means figuring out some details about your rig. In this case, you’ll want to figure out what number of amps your RV pulls.
This will determine which breaker box and outlet you purchase for your electrical line. You should also decide if you want phone and cable TV service for the RV because the electrician can take care of those items too.
RVs typically pull two different amperage levels. So, figure out whether yours is 30 amp or 50 amp. Refer to the owner’s manual for this information. Another option is to look at your RV’s male electric plug since the two amp options look different. In our case, our RV can run on a 110-volt line so all we need to do is plug into an existing outside receptacle.
If you need 30 or 50 amps of electricity, it’s probably best left to an electrician to do the work. I highly recommend hiring an electrician because the electrical line will need to be run from your breaker box, or a sub-panel to the RV. A licensed electrician will be able to determine what size electric line you need run from your house to your RV.
By having a dedicated 30 or 50 amp circuit installed for your RV, you will be able to run all of the appliances in your RV. I also recommend having a 110 outlet mounted on the electrical post so you have somewhere to plug in your heat tape for the water line during the winter.
To save yourself some money, you can install the trench for the electric line from the house to the RV. And since you will possibly have rented a trenching machine, why not just get it done so, you aren’t paying an electrician top dollar to dig it for you.
You’ll want to dig a trench from your house to the post. But first, have the electrician show you where and how deep to dig the trench. You can ask him to show you when he visits to give you an estimate for the work. This way, the trench will be ready when he arrives to do the job.
Do note that you’ll want the electric line to be a separate trench. Don’t share the trench with the water line. Just like the water line, secure the electrical wire to the post with u-shaped clamps.
Turn off all appliances and breakers before plugging in and install a good 30 amp surge protector or 50 amp surge protector before plugging the RV into the new electrical receptacle. A surge protector can help to ensure that the appliances in the RV don’t short out in case of an electrical surge.
It’s incredibly expensive to replace the electrical appliances in your RV. So, whether at home or at a campground, you should always use a 30 amp or 50 amp surge protector.
How to Install an RV Sewer Hookup at Home
There are a few ways to accomplish setting up an RV sewer hookup at home. They are hooking up to the existing public sewer system, hooking up to your private septic system, or installing a sewer tank.
Hooking up to your existing public sewer system is the easiest way to drain your black and gray water tanks, but it also may be illegal where you live. So, you will need to check with your local jurisdiction before attempting to hook up this way.
But if it’s legal, it’s as simple as hooking up your sewer at a campground. Just look for the sewer cap in your yard, remove it, and hook up your sewer line.
The process is similar if you have a septic system on your property, but you may need to install a 4-inch pipe from the septic holding tank, so you have something to connect to.
Adding an RV in-ground septic tank to your yard is the last solution to the sewer hookup problem because it can be very expensive to bury a holding tank. And then, after it’s installed, you will have to pay to have it pumped out when needed. You will also probably need to have a contractor install the septic tank for you, and then you just hookup like at a campground.
Consider Using a Compost Toilet
There’s an alternative to a septic tank setup. Compost toilets are eco-friendly and help you avoid having to install a tank on your property. In a self-composting toilet, the liquid and solid wastes are kept separate, but how?
Liquid waste goes in the front compartment and is tossed outside in a safe location when full. Meanwhile, solid waste finds its way into the back section. Natural ingredients like mulch or moss help it break down, and compost and a fan help avoid any smells before they begin.
You can then deliver compost build-up to your outdoor composting pile. Composting toilets aren’t cheap but they are certainly less expensive than installing a septic holding tank.
RV Hookup Installation Costs
The costs for water, sewer and electrical hookups can vary quite a bit depending on how much work you can do yourself, what type of sewer system you need, and if you need to pay for permits in your area.
Below are some cost ranges for RV hookups at home:
- RV Water Hookups – From $20 if you do it yourself to $750 if you hire a plumber
- RV Electrical Hookups – From $100 if you do it yourself to $1200 if you hire an electrician
- RV Sewer Hookups – From $0 if you can hook up to your existing sewer or septic system to $3500 or more if you have a sewer tank installed.
It can be really easy or pretty complicated and expensive to install RV hookups at Home. But it can be done! Just be sure to do your homework up front to know if this option will work for you. For some very good related information about parking an RV at home, check out these other articles we wrote.
RELATED READING :
– can i park an rv in my driveway, – can i live in an rv on my own property, – 21 must have rv accessories for a new camper or travel trailer, – rv hookups explained (water, sewer, electric).
Do you have any thoughts or ideas to share about installing RV hookups at home? Please share in the comments section below!

31 thoughts on “How to Install RV Hookups at Home”
Hi, Ive searched all over the internet for the answer to this question and have not found it. I have 7 acres in the country, when purchased this land it already had a septic tank, electric pole and water well on it. I had electrician install a pole to put electric for my rv, a plumber to run septic to graveled area where I will park my travel trailer so those areas are taken care of. Now I have a water well thats about 40 ft. from where the trailer will be parked. I called the well service people and was told that if I just planned on using trailer as an occasional vacation spot that instead of running a water line to trailer, I could just run a water hose from the well spout to the trailer. The well house in enclosed in a 5×5 by 4 ft tall square enclosure made up of cinder blocks with a corrigated tin lid. When looking at the plumbing there is a metal spigot attached to the pvc piping next to the pressure switch, oh and my well does not have a pressure regulator guage on it that I can find. Then at the end of the pvc piping there is narrow piece of pvc pipe with a plastic valve on top, when you turn the valve water shoots out of it. Not sure what that is for, is it to put on another connection? So my question is, would i attach the water hose to the metal spigot or have to install a fixture onto that end pvc piece with the plastic valve to attach water hose to to run to trailer? Also, would I need to attach a pressure guage at that spigot to control the water pressure and would I install a water filter onto the well spigot or would the pressure guage and water filter go on the other end of the water hose that attaches directly to the trailer?
Regarding dumping a black RV tank into a residental septic tank I am wondering if the typical odor eliminating and break up chemicals that are used in a RV black tank would cause havoc with the bacterial world in the septic tank. Any opinion on this question?
Already have full hookups on our property but looking to make them better. Trying to find the sewer hookups like you find at Disney or higher end RV parks that put the connection below the surface and allow you to cover it when not in use. Any idea of where to find them?
Thanks for the article.
I believe I will hire professionals and appreciate all the insights.
Hi Laura, I wish you the best of luck! Keep us posted on the project. Mike
Hello, I am planning on living in my trailer on an isolated corner of my parents property. Their septic tank is about an acre away from where I am parking the trailer. What would be the best (cheapest) option for hook up?
Do you have any information on Maryland restrictions? My mother wants to park one on our property and live out of it. Thank you!
We are selling our house and buying an trailer to live in for a period of time (1-2 years). The property we are going to does not have a septic system so I will have to install one. What size would you recommend I install and about how frequent would that have to be pumped? Can the gray and black water go into the same tank. Family of 4 2 adults with 2 toddlers. Totally new to camper/RV world so sorry if this is a dumb question. Can’t seem to find much on the Google machine.
Thanks, Joe
No one has a 115 amp receptacle outside their house. I think you meant 115 volts. Most homes only have 100 amp service total.
Thanks Bob – sometimes I do misspeak for sure. Mike
Happy new year 2021 to all! Thank you so much for this site & wealth of info! My husband & I have an RV and enjoyed several years traveling locally, in a tri-state area bc of his medical issues. Hope to get back to it again this year. My question, however, is about my (step)daughter. College student who will graduate in 6 months but due to fast roommate loss, had to move in with her mom. Sorry, to make this long story shorter…she’s convinced, with her mom’s encouragement that she can just buy a camper, travel trailer, for couple thousand dollars and set it up on her grandmother’s home area, less than acre, in a subdivision. I’m trying to not scream how crazy this is but can you tell me (without all my emotions added) Why this is or isn’t even plausible much less a good idea?? She thinks she can buy a used one & remodel the interior like she sees online…however we don’t have a plumber, electrician or contractor in our family anywhere!?!? Sorry for length of this but I’m trying to get a response together, with facts not my emotions
Mike thank you for this informative and straightforward session!
looking at your picture, I would never put the water and electric on the same pole, actually i would separate them by at least 6 feet. when you have a backflow preventer on the end of the faucet, they tend to leak often, having it right next to a power outlet is asking for trouble. other than this I think you have shared some good info. thanks.
Thanks Gregg, Water and electric are on the same pole in just about every campground in the US… Is this dangerous? Thanks Mike
What would be approximate cost of gravel pad 20×14. As in someone else but me doing it myself?
Have you ever seen a stainless steel RV dump “sink” which has an RV sewer hose connection for dumping and also a smaller drain? Ft. Wilderness had these at Disney years ago and I’d like to install one in the barn we are building for our RV. The purpose is should there be some leakage at the dump hose connection it stays contained in the sink and then goes down the separate smaller drain in the corner of the sink. Great for rinsing everything out afterwards. Looked everywhere but can’t find a small sink like that with the larger and smaller drain holes in it.
As another alternative for sewer hookup is a macerator pump. Connect it to your sewer connection on the RV and its discharge is pumped through a 3/4″ to 1″ garden hose. These pumps typically run on 12 volt DC from the RV. The hose can be discharged directly into a toilet or piped into the sanitary piping inside a building.
Hi Doug, That is a great option too! Thanks for sharing that info with the group! We started a new Facebook group that we are launching today called RV Camping for Newbies! It’s a great place to ask questions and get great answers from your fellow RVers in the group! We hope you’ll check it out! Mike and Susan https://www.facebook.com/groups/RVCampingforNewbies/
We recently bought a cabin that has what we were told were hookups for gray water and black water. How do I know that they will work if we have a friend with an RV come and visit? I’m coming in the dark having never RV or even camped much.
thanks! Jean
That’s a tough one Jean. If you have zero experience I would ask a plumber come and take a look for you. They will be able to make sure everything works properly. Also – when you bought the cabin was there a home inspection? Maybe the home inspector tested the hookups and if he did it will be in the home inspection report. Thanks and best of luck! Mike
I have looked all over our yard for a sewer cap and can’t find one. I know where the septic tank lives. I am wondering how do you install a cap that goes into the septic tank?
hopefully by now you found it. you can “T” in off the clean out cap.
A Flowjet Portable Waste Water Macerator pump or Valtera SewerSolution is also a great way to pump waste water into a sewer clean-out or even household toilet. My Flojet can empty my 30 gallon tank in less than 5 minutes through a high quality hose over 50′ to my toilet. Would not be without it.
There are two sewer pipes coming out of the ground at my house one in front of the other and I don’t want to play any many mighty mo, so do you the one close to the house or the farther, thanks, Randall
Hi Randall,
That’s very unusual but I would remove one cap and flush the toilet in your house and see if you hear the water rushing through the pipe. Then I would put the cap back on and remove the second cap and flush the toilet or run a lot of water and see if you can hear it. Whichever pipe you hear the water running through is the sewer pipe you can connect to. Hope this helps! Let me know how you make out! Mike
Two sewer cleanouts in line can indicate either 1) a backflow/backcheck valve & cleanout combination or 2) two one-way cleanouts installed back to back (one guides the sewer snake upstream the other guides it downstream).
That is not unusual. They are sewer clean outs and they “sweep” in different directions. The one closest to the house actually sweeps toward the street so you can clean out clogs between the street and the house. The one farthest from the house (closest to the street) actually “sweeps” toward the house so you can clean out clogs under house. Imagine a system where the clean out closest to the street swept toward the street and the clean out closest to the house swept toward the house. There would be an 18 inch (24-36 inche?) space in the sewer line where no camera and no roto rooter would have access.
Why do you not use purple primer on the cpvc water line?
There is a primer for PVC, for CPVC and for both PVC and CPVC. The same is true for the glue. I’ve seen more people use the wrong primer and the wrong glue than you can shake a stick at. So, I recommend no purple primer on CPVC and use the correct glue. Just makes it simpler.
Hey Mike, thanks for the clarity! However, “why” or “what” is the end result if the “purple” primer is used, pls!?
Respectfully, Joe
Hi Joe, Great question. There are several types of purple primer on the market. One is for use on PVC, one is for use on CPVC and finally, there is a purple primer that can be used on both PVC and CPVC. However, if you use the wrong primer on your CPVC pipe the seal can leak over time. And I have seen countless times where people have used the wrong primer on the wrong pipe! So, I recommend not using it and just going with good CPVC glue. Or if you do choose to use the purple primer just make sure you are using the right one. PVC and CPVC are not the same. Hope this helps! Mike
Leave a Comment Cancel reply
Save my name, email, and website in this browser for the next time I comment.
Where You Make It
How to Connect Your RV Utilities to Full Hookups at a Campsite
Hey! This site is reader-supported and we earn commissions if you purchase products from retailers after clicking on a link from our site.
Connecting your rig into a power or plumbing system while you travel should never be an issue. Most private campgrounds and public facilities have electrical systems that will accommodate RVs that may need a 50-amp connection, a 30-amp supply or a standard 110/120-volt outlet that you would find in a standard home or apartment.
In addition to a power supply, many of these same places have hook-ups for sewer, water, and some will even supply you with cable television and internet services. Rates for these amenities will vary of course, but that is all dependent upon the services you require. For example, you have a satellite TV antenna and don’t need to access their services so your rate may be less than those that would like cable or internet access.
You should also know that many campgrounds offer various services based upon different areas of their facilities. Occasionally, you may pull into a facility that while they have full hook-ups, those sites may be reserved or already occupied. When this happens, you should be prepared to deal with those issues and in this article I’ll share with you some of the items I bring along when I travel to avoid these problems, and I’ll also share some tips for connecting your utilities properly as you travel.
Arriving at your campsite or campground
If you are arriving at a site with an office or check-in point, always stop there and check-in with them even if you are pre-registered, pre-assigned a site, or prepaid. Circumstances may have changed since you booked the site and in some cases those changes may benefit you.
For example, you booked a site online a few months ago that only had a 30-amp electric hook-up, full water, and no sewer available. You did this because it was all that was available at the time you booked the site and you were willing to deal with the inconveniences because being in that location at that time far outweighed the smaller challenges.
That said, when you arrive at your location, sometimes you may be pleasantly surprised when the folks at the check-in point tell you that they’ve had a cancellation or a no-show and they have a site for you with what you wanted in the first place. Sometimes they’ll offer a better site at a discounted price, and sometimes they’ll offer to book you into that site with no additional charge to you.
Connecting your electricity
Connecting the electricity to your RV can sometimes be confusing based upon your RV’s connectivity outlet and that of the hosts connectivity. While you may have a top of the line electrical system based upon 50 amps, perhaps the campground you are staying at may have an electrical power grid based upon 30 amps.
Your best option for this scenario is to purchase a set of adapters that will allow you connect to the services offered by your host. In other words, if your RVs electrical system is wired for 50-amps, and the services offered by your campground or host is only 30-amps or less, you’ll need an adapter that will either add or subtract the amperage based upon the hosts system and your electrical system.
Now that you have established your electrical connections, the next step is to level your RV and deploy its slide-outs. Some folks prefer to do this step first when they pull into a site, but I prefer to establish an electrical connection first and that prevents me from unnecessarily draining my onboard batteries. Once I have connected my electricity, leveled my rig and disconnected it from my tow vehicle, I move onto connecting it to the other utilities.
Connecting your water
After I connect my system into a power grid when I’m staying at a conventional campground, my next step is to hook up my water supply. You may remember that in my last article on RV gas mileage , I recommended that you limit your freshwater supply onboard your rig if you’re traveling a short distance between stays. If you have followed this advice, you’ll need to replenish your water supply by hooking your hoses into the hosts freshwater supply and filling your tank.
Connecting your sewage
Frankly, I hate dealing with black or gray water and I always wait until last to hook these components up when I pull into a new site. For the most part, I always try to empty these tanks between sites, and I do this to conserve fuel while I’m traveling between campsites. If I’m fortunate enough to have a continuous connection to a sewage drain, this will be my first step when disconnecting and moving on and we’ll look at that process in a future article.
In the meantime folks, thanks so much for following along on my journeys and I hope to see you on the road someday.
Be sure to check out our favorite campgrounds around the country too!
Related Articles:

Born and raised in Michigan, contributing writer Brian C. Noell is a retired hospitality industry professional that now works remotely as a visual artist, writer and photographer as he travels around the United States in an RV with his dog Lizzy, an eighty pound Appenzeller hound dog.
Can I Plug My RV into a regular 110 Household Outlet?

About the Author
Tom Davidock
One common question among RV owners is about the compatibility of their RV’s electrical system with standard household outlets. Specifically, many RVers want to know if they can plug their 30-amp or 50-amp RV into a regular household outlet. The good news is that you can safely plug your RV into a 110-volt outlet. However, you will need special adapters, and you should also be aware of the power limitations of this type of connection.

Understanding Your RV’s Electrical System
Modern RVs typically have a sophisticated electrical system designed to handle a range of appliances, from air conditioners to coffee makers. The system is usually built to work with either a 30-amp or a 50-amp service. These are quite different from the standard 110-volt home outlets. The key lies in understanding the amount of power your RV needs and what a standard household outlet can provide. If you think about the Amperage options as a bucket of power, the 50Amp will be the biggest, and the small 110-house outlets will be the smallest. When operating your RV, if you request more electricity than is available in that bucket, you’ll overload the system and trip a circuit breaker.
Tools you need to connect your RV to a household outlet:
To safely connect a 30 or 50-amp plug RV to a regular household outlet, which typically provides 110-120 volts at 15 or 20 amps, certain tools and adapters are essential. This process involves adapting the higher amp RV system to the lower amp household outlet without overloading the electrical system. Here are the key tools and equipment needed:
- RV Power Adapter (Dogbone Adapter) : This is the most critical tool. For a 30 amp RV, you’ll need a 30A male to 15/20A female adapter. For a 50 amp RV, a 50A male to 15/20A female adapter is required. These adapters, often referred to as “dogbone” adapters due to their shape, enable the connection between the RV plug and the household outlet.
- Heavy-Duty Extension Cord : If the RV is parked at a distance from the household outlet, a heavy-duty outdoor-rated extension cord that can handle the amp requirements of the RV is necessary. Ensure that the cord’s rating matches or exceeds the amperage of your RV and the adapter being used.
- Surge Protector : A surge protector designed for RV use is highly recommended to protect your RV’s electrical system from potential voltage spikes and irregularities that can occur with household outlets.
- Weatherproof Outlet Cover (If Applicable) : If the household outlet is outdoors and not already weatherproofed, consider using a weatherproof outlet cover to protect against moisture and debris

Outdoor Miles is reader-supported. When you buy through links on our site, we may earn an affiliate commission at no additional cost to you.

The Amps Matter: 30-Amp vs. 50-Amp Service
Most large RVs are equipped with a 50-amp service, allowing the use of multiple large appliances simultaneously. Smaller RVs might have a 30-amp service, which can still handle a fair amount of power but less than the 50-amp. The standard household outlet, on the other hand, is typically a 20-amp or sometimes a 15-amp circuit. This difference in amperage is crucial when considering plugging your RV into a home outlet. Below is a basic breakdown of plug-in options for your RV:
Can You Plug Into a Standard Household Outlet?
The ability to plug an RV into a standard 110-volt household outlet is a convenient option for many RV owners, especially when access to dedicated RV hookups is not available. However, this practice requires understanding and adapting to the limitations and differences between RV electrical systems and standard home outlets.

Understanding the Power Difference
- Ampere Capacity: Standard household outlets typically provide either 15 or 20 amps, which is significantly less than the 30 or 50 amps that many RVs are designed to use.
- Voltage Considerations: While RVs are equipped to handle 110-volt systems, the lower amperage at home outlets means less overall power is available.
Using an Amp Adapter
- Role of Adapter: An amp adapter, also known as a dogbone adapter, is essential for connecting the RV’s power cord to a standard outlet. This adapter ensures the compatibility of plug types and safely steps down the amperage.
- Choosing the Right Adapter: It’s important to select an adapter that matches your RV’s plug type and the outlet’s amperage capacity. For instance, if your RV is equipped with a 30-amp plug, you’ll need a 30-amp to 15/20-amp adapter.
Managing Power Usage
- Limitations on Appliance Use: When connected to a standard outlet, the RV’s power usage must be carefully managed. High-power appliances like air conditioners, microwaves, or electric heaters might not run effectively or could trip the home’s circuit breaker.
- Prioritizing Appliances: It’s advisable to use only one major appliance at a time and avoid simultaneous use of multiple power-intensive devices.
Safety Precautions
- Avoid Overloading Circuits: Ensure that the household circuit you are connected to can handle the added load without overloading. This might involve turning off certain home appliances while the RV is plugged in.
- Surge Protection: Using a surge protector is highly recommended to protect the RV’s electrical system from potential power surges or fluctuations in the home’s electricity supply.
- Regularly Check Connections: Regularly inspect the adapter and power cord for any signs of damage, overheating, or wear.
Longer Term Solutions
- For Extended Stays: If you plan to connect to a home outlet frequently or for extended periods. or need access to a lot of power, consider installing a dedicated RV outlet, such as a 30-amp or 50-amp outlet, at home. This involves professional installation but provides a more reliable and safer power source for your RV.
In conclusion, while plugging an RV into a standard household outlet is possible, it comes with important limitations and safety considerations. Careful management of power usage and adherence to safety protocols are key to ensuring a safe and enjoyable RV experience.

The Role of Amp Adapters and Surge Protectors
Amp adapters, such as a 30-amp or 50-amp to a 20-amp adapter, allow your RV to be plugged into regular outlets. However, this comes with a limitation on the amount of power you can use. Additionally, it’s wise to use a surge protector to safeguard your RV’s electrical system from any potential power surge or low voltage issues.
Limitations and Precautions
When plugging your RV into a 110-volt outlet, several limitations and precautions must be considered to ensure safe and efficient use of your RV’s systems. Unlike a dedicated RV park hookup, which usually offers higher amp receptacles, a 110-volt outlet typically provides less power, affecting the performance of various appliances and systems in your RV.
- Amp Limit and Breaker Concerns : Standard 110-volt outlets in homes and some campgrounds are generally equipped with a 15 or 20-amp breaker. This amp limit is significantly lower than the 30 to 50-amp hookups found at RV parks. Therefore, operating high-consumption appliances like an RV air conditioner or electric water heater could easily exceed this limit, risking a trip of the circuit breaker.
- Shore Power Considerations : When connected to a lower amp source, like a 110-volt outlet, the concept of shore power becomes crucial. Shore power allows your RV to draw electricity from an external source. However, with a lower amp supply, the number of appliances that can be safely used simultaneously is limited.
- Managing RV Appliances : It’s advisable for RV owners to prioritize which appliances are necessary. Essential systems like the water pump can be used, but it’s best to avoid running multiple high-consumption appliances at once. For instance, using the RV air conditioner alongside other heavy appliances might not be feasible.
- RV Batteries and Power Management : If your RV is equipped with batteries, they can be used to supplement the power supply, especially for smaller appliances and charging electronic devices. This approach can help in managing the overall power consumption and avoid overloading the 110-volt outlet.
- Safe Usage of RV Outlets : Inside the RV, the outlets will also be limited by the lower amp supply. This means being cautious about what you plug into the RV outlets. Small appliances like a coffee maker or a laptop charger are usually safe, but larger appliances should be used judiciously. This is especially true for high power appliances like coffee makers or space heaters.
- RV Power Cord and Adapter Use : When connecting to a 110-volt outlet, ensure that you have the appropriate adapter for your RV power cord. This will help in safely converting the plug to fit the 110-volt outlet without compromising the electrical system of the RV.
- Monitoring Power Consumption : RV owners should be vigilant about their power usage. Devices like an amp meter can be useful in monitoring consumption, helping to ensure that the amp limit of the 110-volt outlet is not exceeded.
The Risk of Voltage Drop and Power Issues
Plugging into a home outlet also risks a voltage drop, especially if the outlet is not on a dedicated circuit or is far from the breaker panel. This can lead to damage to your RV’s electrical system and appliances. Always ensure the power source is stable and sufficient.
Safest Way to Connect- Choosing the Correct Extension Cord
The safest way to connect your RV to a home electrical system is through a heavy-duty, gauge extension cord, and ensuring the outlet is on a dedicated circuit. This minimizes the risk of overheating and power issues. These thin orange ones found at stores like Home Depot or Lowes are typically undersized for this application. Here are some important considerations when selecting an extension cord:
- Length : Keep the extension cord as short as possible to minimize voltage drop and resistance. However, ensure it’s long enough to reach from the household outlet to your RV without being overstretched. A longer cord increases resistance and reduces the efficiency of power transfer, potentially leading to voltage drops.
- Wire Gauge : The wire gauge, or thickness, of the cord is critical. For a 30 amp RV, a 10-gauge wire is typically suitable. For a 50 amp RV, look for a 6-gauge wire. The thicker the wire (indicated by a lower gauge number), the more current it can safely carry.
- Quality and Durability : Opt for a heavy duty extension cord designed for outdoor use. It should be made of high-quality materials to withstand environmental factors like UV exposure, rain, and extreme temperatures. Look for cords with a sturdy, weather-resistant jacket.
- Certifications and Ratings : Look for cords that are UL (Underwriters Laboratories) listed or have similar certifications. This ensures that the cord meets specific safety and performance standards.
- Weatherproofing : If you will be using the cord outdoors, consider a cord that is specifically designed to be weatherproof. This adds an extra layer of safety against moisture and debris.
- Color and Visibility : A brightly colored cord can be beneficial for visibility, reducing the risk of tripping or accidental damage.
What About Larger Appliances?
For larger appliances, it’s better to use a dedicated 30-amp or 50-amp RV hookup. If you must use a home outlet, avoid running multiple high-power appliances at once. For instance, don’t use the AC unit and the hair dryer simultaneously.
Final Thoughts
While it is possible and sometimes necessary to plug an RV into a standard 110-volt outlet, it’s essential to understand the limitations and take the necessary precautions. Always use the right adapters, consider the power limitations, and prioritize the safety of your RV’s electrical system. For specific concerns or custom solutions, consulting with a professional RV dealer or electrician is the best course of action. Learn More about RV Electricity here:
Leave a Reply Cancel reply
Year End Bundle Deal: 95%+ off! *only 100 available
The tiny house blog, how does a trailer’s electrical system work - a guide for new rv owners.
.jpeg "connecting travel trailer to house power")
A trailer's electrical system is among the essential parts to understand as a new recreational vehicle (RV) or Tiny House on Wheels (THOW) owner. Power is one of the most vital things you must have while on a road trip. As much as possible, you want to feel at home while away and have everything you may need, and electricity can provide you with all that. With power, you can watch the TV, plug in your ventilation fan, refrigerator, interior and exterior lights, and many more.
But to ensure a constant power supply, you must first understand how the system works. Knowing this lets you know how much power you can draw, how to save energy, protect your appliances from electrical damage, and maintain your system. Additionally, it enables you to repair minor issues or know what to report to mechanics while looking for affordable electrical services . With that said, here's a simple guide to how a trailer's electrical system works!
Types Of Electrical Systems In A Trailer
Your camper or Tiny House has three electrical systems designed to keep the appliances in it running seamlessly. These systems use alternating (AC) and direct (DC) power supplies. The systems are:
- 12V DC Automotive System
This system emanates from chassis on class A or C units or tow vehicles for trailers. It regulates lighting outside your RV that engages it as you drive around the roads but can't supply power to the 12V DC electrical system. The battery in these vehicles is 12V, providing the energy required to start the car. When the engine runs, the alternator charges the battery and produces the vital energy to power signaling lights, headlights, marker lights, and brake lights.
A 12 volts DC automotive system is fed to the RV through cables linked at the hitch. Smaller vehicles have four connections for lighting only, while those with larger capacity have 6 or 7 cable wires, including those that control your trailer's brakes.
Both RVs, travel trailers and Tiny Homes on Wheels will all have this DC automotive system.
Pro tip: if your trailer lights aren't working, the first thing to check is the fuses in your tow vehicle. If they aren't blown, then the second thing to check is the wire grounding connected to your metal trailer chassis! A pour ground will prevent your lights from working properly.
- 12V DC RV System
This system is powered by a battery or numerous batteries installed on your trailer. You can charge these batteries using your RV's electrical system or maintain them with a charger connected to your trailer's AC electrical system. The 12-volt system is divided into circuits supplied from the trailer's fuse block. It powers appliances like a blender, refrigerator, coffee maker, and interior and exterior lighting.
Most RVs will have a DC system, but most tiny homes on wheels will not have a DC system.
Pro tip: if you're building a custom tiny home and you'll have DC system, we highly recommend getting a DC breaker panel instead of just a fuse box. This way you don't have to carry around extra fuses!
- 120V AC Electrical System
This is the last system in your RV. It powers all the outlets, including washers, dryers, microwaves, etc. This system only works when you connect it to shore power or a generator (or solar power!), and you can use 20, 30, or 50 amps cords to supply the power. The 30 amp has three prongs, and the 50 amp has four. With 50 amps, you can use more electricity compared to when using 30 amps. In addition, if your RV has a capacity of 50 amps, you can adapt it to 30 amps and everything will work properly, but the reverse won't always work properly.
.jpeg "connecting travel trailer to house power")
Power Sources For An RV Electrical system
As explained above, RV utilizes alternating and direct current to power your truck and other devices you may need to use for your daily activities. The RV is just like your tiny home ; you need electricity to do most of your everyday activities as you would in your actual home. However, for the trailer to operate, it requires a power system to charge it. Below are some of the power sources:
RV batteries are developed for deep cycles with thick plates that discharge and charge. They power the home appliances in your trailer when no external power is available. The length of time your batteries will last is determined by your power draw and size of your battery bank. Your battery charges whenever you connect an external power source to your RV.
- Shore Power
An RV shore power is when you connect your trailer to a main power grid supply. After plugging your RV into a power grid, the shore power provides electricity to any AC electrical gadget onboard. Also, the inverter converts this power to DC, which charges your camper's battery.
The power here is measured in amperes. The RV connectors are made up of 30 amps and 50 amps. You can use them to connect to a line that runs from a power source but always be keen on low amp-amp power. You may destroy your RV's electrical system if you draw more electricity than the show power line. You might blow the fuses or power sources.
- Solar Power
RV solar panels are available to mount on the top of your trailer. They draw their energy from the sun and convert it into electrical current, sending it to your RV's battery bank. The primary purpose of these sources is to charge your RV's battery. Unlike shore power, they produce DC power, meaning the amount of energy your battery generates is limited.
The good thing about solar power is that you don't need electric hookups. The solar continuously charges your battery so long as the sun is available. It ensures your battery is always charged, thus extending its life. However, solar panels are weather dependent. It's dependent on the sun's exposure for it to work effectively.
Learn more about Solar Power here.
RV generators provide power to several devices and appliances in your camper. Like shore power, they supply AC power. It also gives electricity through circuit breaker panels to the equipment. It also feeds power to your converter, which charges your RV house batteries.
The RV generators serve two primary purposes in your trailer. First, store energy within your camper's house battery. Second, you can use it as a direct plug-in for 120V AC power outlets.
Maintaining Your RV Electrical System
The best way to prevent significant issues in your trailer electric system is by frequently maintaining and inspecting it. Check your batteries and all their connections to ensure they're clean and safe. On the other hand, confirm that all the electrical panels are in place to provide you with sufficient power. Also, check for corrosion often to ensure everything is in excellent condition.
Electrical systems may look complex, especially if you're not an electrical engineer. Fortunately, when you understand how it works and its basic functions, you realize it's the easiest thing to learn. The guide above provides you with the crucial information you can employ to care for your RV and appliances and ensure you have a constant power supply while on an adventure.
Need more info? Get
Subscribe to get the latest news.
This is a new way to communicate faster than any communication platforms

Get free resources, updates, tips & tricks, and special offers by joining the Tiny House Plan Newsletter.
More Related Posts

7 Advantages of Off Grid Living

9 Challenges of Going Off Grid

Benefits of Composting Toilets
Frequently asked questions.
Find answers — straight from the author — for the most common questions about this article.
More Related Articles
The Dirty Truth: Overcoming Challenges When Using Composting Toilets
Join the tiny house community.
- PRO Courses Guides New Tech Help Pro Expert Videos About wikiHow Pro Upgrade Sign In
- EDIT Edit this Article
- EXPLORE Tech Help Pro About Us Random Article Quizzes Request a New Article Community Dashboard This Or That Game Popular Categories Arts and Entertainment Artwork Books Movies Computers and Electronics Computers Phone Skills Technology Hacks Health Men's Health Mental Health Women's Health Relationships Dating Love Relationship Issues Hobbies and Crafts Crafts Drawing Games Education & Communication Communication Skills Personal Development Studying Personal Care and Style Fashion Hair Care Personal Hygiene Youth Personal Care School Stuff Dating All Categories Arts and Entertainment Finance and Business Home and Garden Relationship Quizzes Cars & Other Vehicles Food and Entertaining Personal Care and Style Sports and Fitness Computers and Electronics Health Pets and Animals Travel Education & Communication Hobbies and Crafts Philosophy and Religion Work World Family Life Holidays and Traditions Relationships Youth
- Browse Articles
- Learn Something New
- Quizzes Hot
- This Or That Game New
- Train Your Brain
- Explore More
- Support wikiHow
- About wikiHow
- Log in / Sign up
- Cars & Other Vehicles
- Recreational Vehicles
How to Connect an RV to Power
Last Updated: December 4, 2023
This article was co-authored by wikiHow Staff . Our trained team of editors and researchers validate articles for accuracy and comprehensiveness. wikiHow's Content Management Team carefully monitors the work from our editorial staff to ensure that each article is backed by trusted research and meets our high quality standards. This article has been viewed 17,005 times. Learn more...
Whether you’re on the road or your RV is parked outside your home, you’ll want to connect it to power to use appliances and charge the RV’s battery. Many campgrounds and all RV parks have power supply boxes with various electrical outlets that you can plug into. You can also plug your RV into a home electrical outlet. Either way, the process is pretty straightforward. Keep a few adapters with you in your RV, so you can connect to power anywhere you go!
Choosing an Adapter

- Knowing how many amps your RV’s power cord is meant for will allow you to determine if you need any adapters to connect it to a power source.
- RV electrical cables are usually located in a compartment on the lower backside somewhere on the outside of the RV or they are loose inside the RV and you have to plug them into the electrical outlet located on the outside of your RV.

- Once you know what power outlets are available and what kind of power cable your RV has, you will know whether you can plug directly into the power supply or if you need an adapter.
- Most power supply boxes at campsites and RV parks have 2-3 different kinds of outlets available.

- The female end is the end that you plug the power cord into.
- You can purchase adapters made specifically for RVs that are called dogbone adapters. These consist of a short section of cable with different male and female ends. You can purchase dogbone adapters online or at an RV supply store.

- If you’re plugging into a standard home electrical outlet, use an adapter that has a male end with 1 round pin and 2 straight flat pins that is meant for 15- or 20-amp electrical outlets.
Plugging into a 30- or 50-Amp Power Supply

- For example, if you have a 30-amp RV cable and the power supply box only has a 50-amp outlet, use a dogbone adapter that has a 30-amp female end to plug your RV power cord into and a 50-amp male end to plug into the power supply.

- Many RVs also have a built-in surge protector to protect their electrical systems against damaging electrical surges. If your RV doesn’t have one, consider getting one installed.
Tip : You can also use this method to plug your RV into a generator, if a power supply box is not available. Use a generator that is at least 3500 watts. [7] X Research source

- This is a safety precaution to protect against dangerous and damaging electrical surges when you plug in. Always plug your RV into a power supply with the electricity turned off.

- If you are using an adapter, double-check the connection between the RV power cable and the female end of the adapter after you plug the male end of the adapter into the power supply box.

- Plugging an RV into a power supply box at a campground, RV park, or elsewhere is known as connecting it to shore power. This will allow you to run all the electrical components in your RV as well as charge the RV’s battery.
Using a Home Electrical Outlet

- You can purchase these adapters online or at an RV supply shop, if you don’t have one already. They cost about $15 USD.
Tip : If you’re shopping for an adapter online, you might have to select the type of male and female ends you want from an abbreviated list, where the one you want would appear like this: 15M/30F. The numbers mean the amps and the letters stand for male and female.

- This will keep you from tripping a breaker switch when you connect your RV to the home’s electrical outlet.

- It’s best to plug your RV into a home electrical outlet that isn’t being used for anything else. It’s even better if the outlet is on a breaker circuit all of its own, so you don’t end up causing the breaker to flip by using too much electricity at once.
- If the power cable and adapter don’t reach all the way to an electrical outlet, use a heavy-duty extension cord to connect them.

- Even if you don’t plan on using your RV while it’s parked outside your home or someone else's home, it’s a good idea to connect it to the power. That way the RV’s battery will charge while it’s in storage.

- For example, you definitely won’t be able to run the air conditioning system in your RV off a home electrical outlet.
Expert Q&A
- If your RV doesn’t have a built-in surge protector, consider getting one installed to protect your RV’s electrical systems against damaging power surges. Thanks Helpful 0 Not Helpful 0
- A 30- or 50-amp power supply will typically let you run everything in your RV with no problems. If you have to use a 15- or 20-amp home electrical outlet, try to minimize your use of electrical items and avoid running big systems like the air conditioning. Thanks Helpful 0 Not Helpful 0

- Always treat all electrical wires and outlets as if they are live, even if you know you just turned them off. It’s best to exercise the utmost caution whenever you’re making any kind of electrical connection to avoid accidents. Thanks Helpful 0 Not Helpful 0
Things You’ll Need
- Dogbone power cable adapter (optional)
You Might Also Like

- ↑ https://rvshare.com/blog/rv-electrical/
- ↑ https://www.outdoorsy.com/blog/rv-electricity-basics
- ↑ https://rvtailgatelife.com/plugging-rv-home-electric/
About This Article

- Send fan mail to authors
Did this article help you?

Featured Articles

Trending Articles

Watch Articles

- Terms of Use
- Privacy Policy
- Do Not Sell or Share My Info
- Not Selling Info
Don’t miss out! Sign up for
wikiHow’s newsletter
- You are here:
- Home »
- Blog »
- » RV Water Hookup at Home: Can You Hook an RV Up to a House?

RV Water Hookup at Home: Can You Hook an RV Up to a House?
- August 30, 2022 /
- RVing 101 /
- By James V.
You can as long as city officials do not know about it. But once they find out, you may be facing a lot of fines. A lot of owners have various reasons why they want to do this project and one is to make their travel trailer a mother-in-law suite
Hook an RV to a house is possible and how you hook your trailer up will depend on your purpose. Temporary hook-ups are different from permanent or long-term hook-ups so you need to know which option you will do before starting the work.
To learn more about this topic and the work involved, just continue to read our article. It has the information you need to know about before you make the decision to build or not. It is not a simple situation to be involved with.
Can You Hook an RV Up To a House?

This will depend on what type of electrical service you want to use. If it is the normal 15 to 20-amp power you need, all you have to do is plug in a strong extension cord and you should be good to go.
However, this level of service may not be powerful enough to run an air conditioner or a 30 or 50-amp RV. In that case, you would need to install a dedicated 30 or 50-amp outlet to handle the power demand.
Then you have to take into account the size of your trailer and how it is wired. Smaller teardrop type trailers usually are wired for 110 or 120 power. That makes it simple to use an extension cord.
A larger RV or trailer will require 30 to 50 amp service if you are running more than the lights inside the RV, etc. For the latter options, you will need an electrician to install and wire the 30 or 50-amp outlet.
It is not something you can or should do yourself. For the former, if you are only using 110 power, make sure to turn the breakers off in your home first. Then check to make sure all electrical appliances in your trailer are shut off as well.
You can use an adapter if you want but after all the power is turned off, plug in the extension cord. Then turn your breakers back on. That is the safe way to handle this project.
The following appliances may have to wait their turn to be used if you are not hooking up to 30 or 50-amp service:
Air conditioning
Toaster oven
And there may be more that needs to wait as 110 power cannot handle multiple appliances operating at the same time.
Can You Hook Up An RV To House Water?
Yes, this is a possibility. The key to doing this though depends on the color of the hose. If you always wondered why garden hoses came in different colors, the explanation is simple.
They are not all made for transporting drinking water. They all can transport freshwater but depending on the color of the hose, you cannot drink from all of them.
The only garden hose that is made that allows you to drink safely from them is white. This color of hose does not have the different chemical ingredients that green and other colored hoses have.
The reasons behind these different color systems are as follows:
1. Different colored hoses are made from plastic, rubber, or polyurethane and many of them contain the following harmful elements-- lead, tin, mercury, cadmium, arsenic, bromine, chlorine, and BPA
2. Safe Drinking Water Act (SDWA) doesn’t cover all hoses- while the water is the same that comes from your water pipes in your home, those pipes are governed by the regulations in this Act.
That Act protects you from over 90 contaminants so the water pipes are made in accordance with the act. Since the garden hose is not a pipe, it is not made from safe materials.
Except for the white-colored hose. It is supposed to be made safe and you can drink out of it without worry. You can also buy the white hose just about anywhere garden hoses are on sale.
RV Water Hookup At Home

There is a process to do this safely. The first step would be to dig a trench from your source at the house to the post where you will make the connection to your RV. Even with little foot or vehicle traffic, this is a good move to make.
The trench will protect the water line from any type of accident that could happen on your property. If you live in a part of the country that gets cold, the trench will protect the hose from freezing over and getting ruined.
Just make sure you dig the trench deep enough. While you may want to keep this activity a secret, to be safe and legal, you should contact your local water department. They will inspect as well as give you the regulations you need to meet.
That is if you are making a permanent spot for your RV or trailer. If it is a short-term hook-up a white hose should suffice. When you dig the trench, contacting your local water company is very important.
You will need to know the location of existing water, power, or gas lines. Repairs to those lines can be very expensive. When you are doing a permanent hook-up, use the proper water pipe material and forget the hose. It is just better and safer.
The other aspects of constructing a water line are easier than this. You just need to dig a hole deep enough to hold the post. Then you attach the hook-up to the pipe so it is ready for a hose from the hook-up to the RV.
Insulate the exposed pipes and hoses to protect them from the cold in the winter season.
RV Electrical Hookup At Home
This is a little more difficult and possibly more expensive. Unless you have extensive training and experience in running wires, hooking them up and so on, you can’t do this yourself.
Before you start, you need to decide what type of power you need running to the outlet. Once you do that, you will know which type of electrical equipment you need to buy.
Unless you own a small trailer wired for 110 or 120 power, the equipment you will need to buy must accommodate either 30-amp power or 50-amp power. You should also have a 110 or 120 outlet on your electrical post. This will run things like heat tape and other smaller devices where 30 or 50-amps are too powerful.
Make sure you have all the outlets you need. Some people also suggest having a 15 or 20-amp outlet on the panel so you can cover other devices as well. WHAT all this means is that you need a professional electrician to do the work.
A good handyman may not suffice here as you need someone trained in breaker box connections, the type of wire you need, and the tools to hook everything up safely.
Having a professional to do the work will protect you from the insurance company, any fees or fines the city may charge you if it is not done right and replacement costs if there is a fire.
While you may want to save money, you need to protect yourself from possible future situations that will impact your savings. To protect those wires, you can dig a trench as well instead of hanging them up high.
That last option will depend on your property’s design and distance from the house or power source.
How To Hook Up An RV At Home

You just read about how to install your electrical and water hook-ups and once those are in, all you have to do is make the connections like you would at an RV campground.
There are two more items that you need to install if you want to be legitimate and avoid any illegalities in your city. One, if you do not have any level space around your home, you will have to install a gravel or concrete pad.
The key to this pad is that it has to be level. You do not park your RV on grass as the ground will settle eventually and take your RV out of level. The gravel or concrete options are the best ones to use.
For gravel you will need to level off an area for your RV or trailer, then dig that 30 or 40-foot by 10-foot area down 6 to 8 inches. The heavier your RV is, the more gravel you will need.
Then you will need some filter cloth on the dirt BEFORE you add the gravel. This protects your pad from having spots sink a little more than others. When you go to build your concrete pad, you will still need 4 to 6 inches of gravel (for drainage purposes) under the concrete.
Then you will need at least 4 inches of solid concrete with the right thickness of rebar to hold your RV or trailer. That thickness needs to change if you are parking a very heavy RV on the pad.
In addition, you still need to place the filter cloth in the pit before you add the gravel. On top of that, do not trench the water, sewer, or electric lines under your pad.
If there is a problem, you have to destroy your pad to fix the problem if it is in that location. Plan carefully
Connecting The Sewer Hook-Up
This is the second item we mentioned in the last section that needs to be addressed. This is going to be the biggest problem you will have as it affects your neighbors if anything goes wrong.
This is also something you may not be able to do secretly. It has been done and when the person made expansions to the motorhomes sitting on his property, he blew out his sewer system and contaminated the water supply of his neighbors.
His neighbors got sick and the authorities found out and you can guess what happened after that. So you will need to connect and build a proper sewer system if this plan is permanent.
If it is going to be temporary, then you may only be allowed to drive out when the tanks are full and dump those tanks at the nearest dump station. For a permanent situation, you have 3 options:
1. connecting to the current sewer system correctly
2. hooking up to or building a septic field
3. build a septic tank
Each option is going to cost you some money and you will have to get permits and inspections. With the first option, there may be some local problems. Your city or county may have laws against doing this.
That means you can’t do it unless you want to pay a lot of fines, penalties, or even spend a little time in jail (a rare possibility). You will need to contact the local office that handles sewer connection and see what they say.
If there is no law against it, then you just hook up as you do at a campground. The other two options can be expensive and depending on the side of your property, may not be feasible.
If that is the case, you are left with dumping the tanks at a dump station. There are many details involved in doing options 2 and 3 so you should research them to see if they will work for you.
If you leave on a large piece of land, several acres in size or more, or way out in the hinterlands of your state, you may be tempted to ignore all of those and do what you want.
We do not recommend that method as there are wild animals that may be poisoned, and you will ruin your property over time. It is best to stay legal and do all 3 hook ups and the pad correctly.
That way makes sure you have nothing to worry about if your RV or trailer is spotted. If you do it the other way, you may save money initially, but if you are caught, you lose that savings. It is your choice though but makes a good one in this situation.
Adding RV Hookups To Your Property

The first step in this process is to figure out your costs. Each professional will charge a different amount per hour for their labor and also different prices for the materials. You can save on the latter if you buy them yourself.
All you have to do is find out which materials you will need and shop around for the best price. That is something you can do to save money. In most cases, it is best to hire professionals as that way you know it was done right. If it wasn’t then you have legal recourse.
The overall general prices for a plumber, electrician, or sewer technician are as follows:
- $20 if you do it yourself to $750 if you hire a plumber. Price will fluctuate depending on the length of the water line, etc.
- $100 if you do this yourself up to $1200 if you hire an electrician. Again length and complexity will influence the prices
- $0 if you make the connection to an existing sewer line and you do it yourself. Or up to $3500 if you hire someone to do the digging, etc. for a septic tank or septic field. Again size will matter.
But before you start all of this work, you will have to contact your city or county departments to see how much permits will cost and the regulations you have to meet.
There are different regulations you will have to meet if you want a safe permanent location for your RV or trailer and someone is going to use it. If you are just storing your RV, then you can get away with parking it on grass or building a pad.
How To Install RV Hookups At Home
We provided most of the details earlier. When it is a temporary set-up, then you will not have to do all the work we mentioned in that earlier section. All you would have to do is install a 30 or 50-amp outlet nearby if you intend to allow your guests to use your appliances or other features.
For water in a temporary situation, you can use a white garden hose for the fresh water tank and a different colored hose for other water options. These two items are a matter of plugging in the extension cord and turning the fittings until they are tight.
The problem will be your gray and black water tanks. Some people dump their gray water right on their grass. This is a possibility if it is not illegal in your area. However, the black water tank is another story.
Many cities and towns do not allow you to tie your RV’s black water tank directly into your sewer line. This means that you would have to go out every few weeks and dump that tank in a dump station.
Depending on the size of that tank you may be doing this frequently or once a month. With temporary set-ups, you have to be careful about hooking your RV up to your home’s facilities.
Finding RV Hookup Installation Near Me

This is not as complicated as it may seem. What may confuse people would be those 2 letters RV. Those letters may cause people to think that they need specialized personnel to handle all the hook ups.
That is not the case. The professional traditional house plumber, electrician, and sewer technician can handle the same duties for your RV. The question will be if they are willing to be hired for that work and if they have time to handle it for you.
Electricity and correct wires do not change just because they are being connected to an RV and the same goes for a water line and the sewage system. Any professional should be knowledgeable enough to make sure your hook-ups meet the code.
All you have to do is do a local search for these professionals and talk to them. Just make sure to vet the one you want to hire to make sure you are not going to end up with a mess on your hands.
Make sure to check references and so on before hiring them.
Can You Live In Or Rent Your RV
Everything we have said so far is very straight forward and not that hard to do. The biggest hurdle you will have is if you can live in your RV, use it as a guest house or rent it out to strangers through those different online websites connecting travelers to homeowners.
It is hard to provide a very good answer in this limited space but suffice it to say, you have to check with your local city, county, and state laws first. Zoning may not be your friend.
Also, if you live in an HOA neighborhood, the rules of that association may prohibit you from doing any of this. There may be other statutes that may interfere with your plans.
Make sure to research this topic carefully to make sure you do not waste any money if you are told to stop.
Some Final Words
It is possible to install different RV hook-ups at your home. It is just a matter of time and money to get it done. However, you will need to check with your local authorities first.
They do get upset when you violate the laws on the books. Before you start you will have to decide how much work you are going to do so you can lower the costs, In most cases, hiring a professional is the best way to go.
Related Posts
Does CarMax Buy RVs? (CarMax RV Trade-In Guide)
300 Lbs Over Payload: What Happens If I Exceed My Payload?
Thor Vegas Problems (Windshield, Battery, Fridge, Swivel Chair)
Leave a Comment:

RV Safety: How to Connect to Shore Power

Shore Power Components & Operation
This article will discuss some of the different components and how they operate inside your camper, as well as safe and potentially dangerous power connections. Your Oliver Travel Trailer is designed with a 30-amp shore power connection on the street side of the unit, and some campers may also have an optional convenience 30-amp power connection on the front LP housing. These connections can be used with campground pole connections and a generator.
Your camper has a built-in transfer switch to determine where the power is coming from. It will automatically switch between the two power inlets to supply power to your main power panel through the surge protector.

Connecting to a Power Supply
When you hook up a shore power connection, whether from a campground pole or a generator, it is important to make sure that the power is good. The power cord that Oliver supplies with every camper has a built-in LED at the power pole end that will light up when power is present but does not indicate whether the power you are connecting to is safe.
Rest assured, all new Oliver campers are equipped with a built-in surge protector. This protector acts as a gatekeeper, ensuring that only safe power is allowed into the main converter box. It’s like having a security guard for your camper’s components. However, it’s important to note that the power cord itself and the power inlet are still vulnerable to damage from a bad power supply or improper connection.
Remember, it’s your responsibility to connect to the side of the camper before plugging into the power source. Always ensure that you twist the connector to set it properly, and use the twist lock collar. Neglecting these steps could lead to heat build-up at the power inlet, potentially melting the power cord plug end and the power inlet itself.
Once you have correctly connected to the power inlet on the side of the camper, ensure that the breaker for the pole (shore power) is turned off before connecting the plug end of the power cord. Flip the breaker to the on position once the power cord is plugged into the power source.
Using Extension Cords & Adapters
In some instances, you may be unable to reach the power supply without connecting an extension cord and/or an adapter to a lower-amperage receptacle. You need to know a few things about using these options and what might occur if they are not used properly.
First, let’s take a look at extension cords. Not all extension cords are built for the same purpose. When using an extension cord, Oliver recommends you purchase an RV-rated 30-amp power cord extension. RV 30-amp power cords are 10/3 cords rated to carry the 30 amps your camper requires to fully operate. This does consider that you are still connecting to a 30-amp receptacle. Still, if your only option is to connect to a standard 15 or 20-amp receptacle like those at most residences, you might consider using a lower gauge extension cord with an adapter.
Please remember that we do not recommend using an extension cord rating lower than 10/3 that matches your main power cord. If you do choose to use a lower-gauge extension cord, you should first understand its rating. Extension cords come in many different sizes and lengths. The longer the cord, the more voltage drop will occur, and when this happens, some components may not operate properly or at all.
It would help to use an extension cord rated at least the same breaker size as the receptacle you are plugging into. If the receptacle you are plugging into has a 15-amp breaker, then you would want an extension cord that meets that rating. Failure of the cord to meet the rating can cause heat build-up, and the wires inside the cord may melt before the breaker trips the receptacle.
Heavy-Duty Extension Cords Chart
*When using an extension cord outside these specs on a 15-amp rated receptacle, a certain amount of power will be lost between the receptacle and the trailer.
Losing this power may cause components to malfunction or become inoperative.
*You should always use an extension cord with a ground. Some older cords and receptacles may need a ground. You should check or be aware of the power you are plugging into to ensure that it is properly wired, grounded, and installed with the proper breaker size prior to connecting your Oliver camper.
NOTE: Oliver recommends using the appropriate 30-amp 10/3 RV extension cord. The above chart is for reference if you use a different extension cord.
30-Amp to 15-Amp Adapter
Oliver does not support using an adapter from the 30-amp camper power to the 15-amp receptacle. These adapters are widely available and used in the RV industry; however, you should be aware of limitations and potential dangers when using an adapter. When connecting to a 15-amp receptacle, you should always know the size of the breaker in the circuit.
The size of the breaker lets you know how much power is available and how much power is safely protected. Breakers can provide up to 80% of their rating. A 15-amp breaker can provide up to 12 amps of continuous power for 3-4 hours. Not all breakers are equal. There are different types of Trip Curves, which simply mean when or how quickly a breaker will trip to protect the wire.
Most breakers have a 3x – 5x in-rush rating, meaning they can handle more than its rating for a second or two, but only if the load quickly drops back within working parameters. In layman’s terms, you cannot fully operate a 30-amp camper on a 15-amp power source. You should ensure that the breaker for the receptacle is sized correctly before plugging in your camper.
30-Amp to 50-Amp Adapter
Oliver does not recommend using an adapter to step down from a 50a connection to the 30a power cord provided with your camper. Your Oliver Travel Trailer has been designed to work with a 30-amp power supply. Connecting to a higher-rated power connection could damage wiring and/or components inside your camper trailer .
More Articles
Related articles, 2024: the year of luxury travel with high-quality trailers.
2024 is the year for high quality; say goodbye to ...
Get Ready for Your Greatest Adventure Yet with the Oliver Travel Trailer
Are you ready for the grandest adventure of your l...
Is an Oliver the Last Travel Trailer You’ll Ever Buy? Q&A
Are you tired of constantly upgrading your travel ...
Off-Grid Travel Trailers: An in Depth Look at Oliver
Why is Oliver considered the best RV for off-grid ...
Going Green in Style with Oliver
Discover how Oliver are revolutionizing the concep...
Luxury Travel: Discover the Top High-End Options for Ultimate Comfort
When traveling and exploring the great outdoors, c...
Unraveling the Magic within Oliver: A One-way Ticket to Paradise on Wheels
Isn't life extraordinary? It's like a movie, but w...
Oliver Off-Grid: The Ultimate Hunting, 4-Season Companion
Having a reliable and durable travel trailer is pa...
Is the Best-Built Travel Trailer an Oliver?
Discover the best-built RV on the market, the Oliv...
Start Your Adventure Today
- Privacy Overview
- Strictly Necessary Cookies
- 3rd Party Cookies
We use cookies to provide the best possible experience with our web sites. This includes cookies that are Strictly Necessary for the site to work, help us understand site usage, help manage your preferences, and deliver advertising relevant to your interests. Cookie Policy .
Strictly Necessary Cookie should be enabled at all times so that we can save your preferences for cookie settings.
If you disable this cookie, we will not be able to save your preferences. This means that every time you visit this website you will need to enable or disable cookies again.
This website uses Google Analytics to collect anonymous information such as the number of visitors to the site, and the most popular pages.
Keeping this cookie enabled helps us to improve our website.
Please enable Strictly Necessary Cookies first so that we can save your preferences!
Anker MagGo-Doubly Fast in a Snap
Earth Day Eco-Savings. Up to 40% Off and Exclusive Free Gifts

Connecting an Inverter to the House Network: A Comprehensive Guide
If you’re riding the wave of sustainable living by harnessing solar power to lower your energy bills and reduce your carbon footprint, understanding the core components of your solar power system is crucial. Central to these systems is the inverter, a device that plays an essential role in transforming the energy generated by your solar panels into usable electricity for your home. Knowing how to connect the inverter to the house network is a key step in any solar setup.
This guide delves into the specifics of what an inverter does, explores various inverter types in solar systems, and walks you through a detailed, step-by-step process to connect your balcony power plant inverter to your home network correctly and safely.
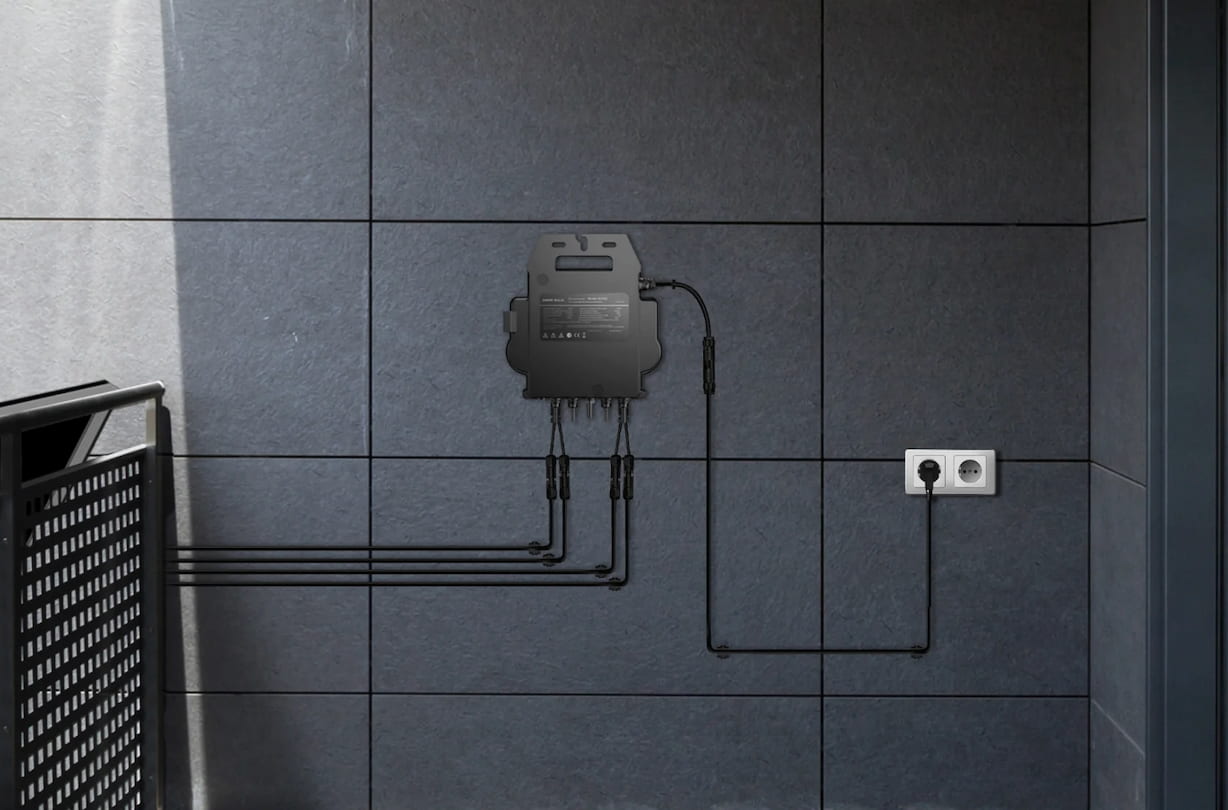
What does an Inverter do?
An inverter is an essential component in any solar power system. Solar panels generate electricity in the form of direct current (DC). This is the initial type of electrical output produced when sunlight interacts with the photovoltaic cells in the panels. However, most homes and electrical appliances operate on alternating current (AC), not DC. This is where the inverter comes into play. Once the DC electricity is produced by the solar panels, it flows to the inverter, which then converts it into AC.
Inverters also play a significant role in the safety and efficiency of solar power systems. They ensure that the electricity output matches the voltage and current requirements of the grid and your home’s electrical circuits. Additionally, modern inverters come with smart technology that can provide data monitoring and energy management, which helps in maximizing the efficiency of your solar system by tracking production and usage patterns.
What are the Different Types of Inverters?
Inverters come in various types, each designed to suit different setups and performance needs in solar power systems. Here are the three primary types of inverters used in residential and commercial solar installations:
- String Inverters: These are the go-to choice for many residential solar systems. A string inverter connects a series of solar panels (a string) to convert their combined DC output into AC power. They work best where all panels receive similar sunlight without much shading. String inverters are relatively affordable and straightforward to install. However, if one panel in the string gets less light and performs poorly, it can drag down the output of the whole string.
- Microinverters: Unlike string inverters that handle multiple panels, microinverters are installed on each panel. This setup allows each panel to convert power independently, which can significantly boost your system’s efficiency—especially in complex roof layouts or areas where shading varies throughout the day. Microinverters help ensure that issues with one panel don’t affect the rest, and they make it easier to monitor and manage the performance of individual panels.
- Hybrid Inverters: These are like the multitaskers of the inverter world, combining the functions of standard grid-tie inverters and battery inverters. They not only convert DC to AC for your immediate needs but also channel any excess energy into batteries for later use. This feature is perfect for systems designed for maximum energy independence, allowing you to store power for when the grid goes down or during peak energy cost times. Hybrid inverters are becoming more popular in places with less reliable grid power or for anyone wanting to get the most out of their solar investment.
Can Balcony Power Plant Inverters Be Connected to a Home Network?
Yes, the inverter of a balcony power plant , also known as a “plug-and-play” solar system, can be legally and safely connected to your home network. These systems typically include one or two small solar panels and a micro inverter that can directly plug into a standard household electrical outlet.
In Germany, to qualify for this simplified plug-in connection method, the Renewable Energy Act (EEG) stipulates that the inverter used must comply with the VDE standards, and that the total output of the inverter must not exceed 600 watts, or 800 watts since 2024. This regulation ensures that the systems are safe and do not pose a risk to the public grid or the household electrical circuits.
A Step-by-Step Guide to Connect the Balcony Power Plant to the Home Network
With the right guidance, connecting a balcony power plant to your home network can be a straightforward process. Here’s a step-by-step breakdown of the process, using the Anker SOLIX Balcony Solar Power System (2*RS40B Panel 410W, Micro Inverter 600W/800W, Balcony Brackets) to illustrate:
Install the Inverter
To successfully connect a balcony power plant inverter to your home network, start by choosing an optimal location for the inverter. It should be near both the solar panels and your intended socket to minimize cable length and reduce potential power loss. It’s also important to mount the inverter at a height that is easily accessible for regular maintenance and monitoring.
Ensure that the location is well-ventilated to avoid overheating, which can decrease the inverter’s efficiency and lifespan. Securely attach the inverter to the lower support beams of the mounting brackets or a wall in an area that is dry and shielded from direct sunlight or exposure to harsh weather.
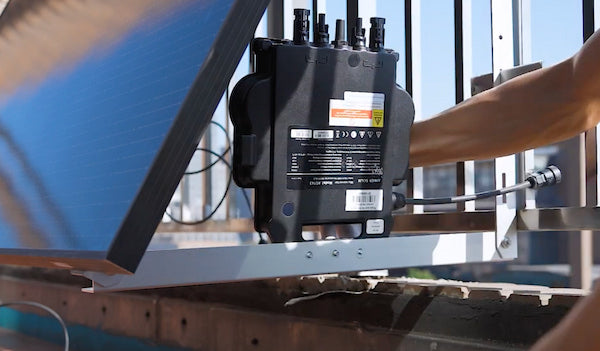
Connect Solar Panels to the Inverter
Prepare to connect the solar panels to the inverter. Before starting, ensure that the inverter is turned off to avoid any electrical hazards. Route the cables from the solar panels to the inverter using the safest and most direct path.
Attach the output wires from the solar panels to the inverter’s designated input terminals, ensuring that each connection is tight and secure to prevent power loss and avoid electrical hazards. Use proper cable glands and conduits to protect the wires from physical damage and adverse weather conditions.
Connect the Inverter to the Home Network
In the case of the Anker SOLIX Balcony Solar Power System, connecting the inverter to your home network is a straightforward process that involves the use of a Schuko connection cable.
Begin by connecting the microinverter to the Schuko connection cable. Ensure that the cable’s plug aligns properly with the microinverter’s port. Insert the Schuko connection cable plug into your dedicated household socket. Make sure the connection is firm and that the plug is fully inserted into the socket to ensure a stable and safe electrical connection.
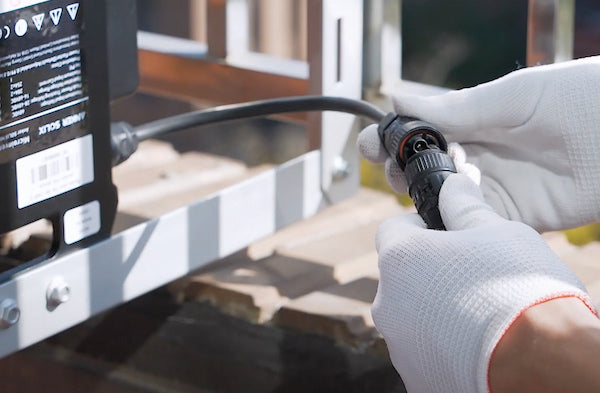
We hope this guide has illuminated the process and considerations involved in how to connect the inverter to the house network. By following the steps outlined in this guide, from installing the inverter to connecting solar panels and ultimately integrating the inverter into your home network, you can ensure a safe and smooth process. If you have any questions or need further assistance, don’t hesitate to reach out to a professional. Embrace the power of solar energy today and make a significant impact on both your energy bills and the environment.
Can the inverter be connected to an outlet?
Yes, the microinverters designed for balcony power plants can be connected directly to a standard household outlet. These are often referred to as plug-and-play inverters. For this connection, a standard socket for protective contact plugs, commonly known as Schuko plugs, is adequate.
Where should the inverter be connected?
Ideally, the inverter should be mounted near the solar panels to minimize energy loss through long cables and in a place protected from direct sunlight and extreme weather, such as under an overhang. Additionally, it should be easily accessible for maintenance and close enough to your home’s power system for easy connection to the household electrical network.
Can I connect the inverter myself?
You can connect the inverter yourself if you are using a plug-and-play inverter used in balcony power plants. These inverters can be connected to a standard electrical outlet using a Schuko connection cable. However, if your system requires more complex wiring or you are not confident in your ability to safely handle electrical installations, it is recommended to hire a certified electrician. This ensures that the installation adheres to local electrical codes and safety standards.
Balcony power plant with storage · 22/04/2024
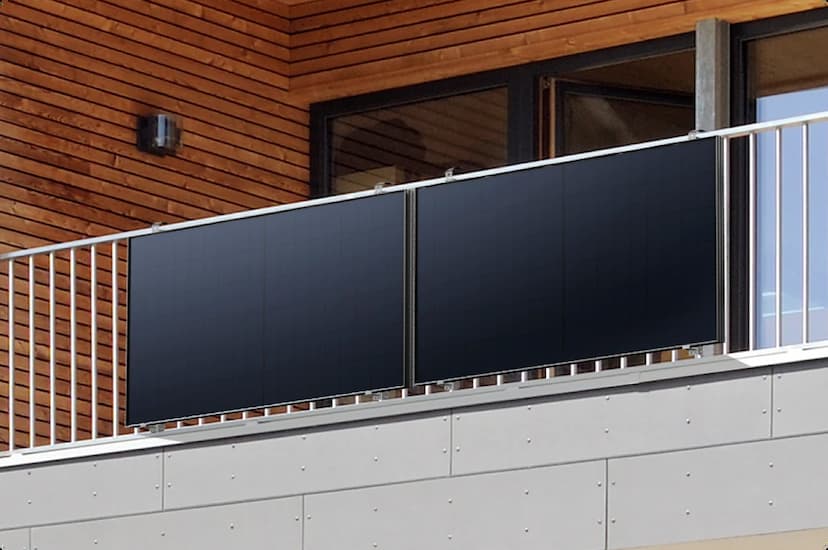
Buy on the Anker Store
Fast Shipping
30-Day Money-Back Guarantee
Hassle-Free Warranty
Lifetime Customer Support
Europe / English
- Asia-Pacific
United Kingdom
Deutschland
- North America
United States
New Releases
Power Banks
Hubs and Docks
Our Company
Terms of Use
AnkerCredits Program
Customer Reviews
Earn 10% Referral Cash
Become An Affiliate
Corporate Purchase
Education Discount
Verification
Returns & Refunds
Process a Warranty
Shipping Policy
Privacy Policy
Documents & Drivers
Accessibility
© Fantasia Trading LLC 2022 200923810277
Your cart is empty
Knowledge is power
Stay in the know about climate impacts and solutions. Subscribe to our weekly newsletter.
By clicking submit, you agree to share your email address with the site owner and Mailchimp to receive emails from the site owner. Use the unsubscribe link in those emails to opt out at any time.
Yale Climate Connections
What are virtual power plants?
Share this:
- Click to share on Facebook (Opens in new window)
- Click to share on X (Opens in new window)

For decades, electricity has been produced at large power plants and then sent to homes and businesses.
But as rooftop solar and other renewable sources expand, energy can be generated all over.
Nemtzow: “For the first time, we can take distributed energy resources, which have been around for many years, but we can organize them to act like power plants.”
David Nemtzow is with the U.S. Department of Energy.
A so-called virtual power plant can be operated by a traditional utility. It can include solar panels, car batteries, WiFi-enabled devices like thermostats, and more, all linked together in a network. This allows the utility to manage these resources together to balance the overall supply and demand of energy.
When more energy is produced than needed, cars can charge up and air conditioners can run full-blast.
But when demand is high, smart devices can limit energy use — for example, by slightly turning down the AC — and batteries can send power back to the grid.
These automatic adjustments are implemented carefully.
Nemtzow: “The secret is to make it so that the consumer doesn’t notice.”
So by pooling resources, virtual power plants could help ensure there’s always enough energy — without relying on fossil fuel power plants.
Reporting credit: Ethan Freedman / ChavoBart Digital Media
We help millions of people understand climate change and what to do about it. Help us reach even more people like you.
more like this

What is a passive house?

Schools in coal country are going solar

Want a climate-friendly home? You might need a new breaker box.
- Skip to main content
- Keyboard shortcuts for audio player
House approves sell-or-be-banned TikTok measure, attaching it to foreign aid bill

Bobby Allyn

The latest effort in Congress to force TikTok to be sold is the most serious threat yet to the app's future in the U.S. Michael Dwyer/AP hide caption
The latest effort in Congress to force TikTok to be sold is the most serious threat yet to the app's future in the U.S.
TikTok is now hurtling toward what is perhaps its biggest threat yet in the U.S.
The House on Saturday passed legislation that could trigger a nationwide ban of TikTok if its Chinese owner does not sell the video app. The Senate could vote on the bill as soon as Tuesday.
While lawmakers in the House advanced a similar bill last month, this effort is different for two reasons: It is attached to a sweeping foreign aid bill providing support for Ukraine and Israel. And it addresses concerns from some members of the Senate by extending the deadline for TikTok to find a buyer.
President Biden supports the effort. That means TikTok being forced to sell, or face a possible ban, is on the fast-track to becoming law.
It would mark the first time ever the U.S. government has passed a law that could shut down an entire social media platform, setting the stage for what is expected to be a protracted legal battle.
TikTok condemned the bill as an unconstitutional attack against the hugely popular service.
"It is unfortunate that the House of Representatives is using the cover of important foreign and humanitarian assistance to once again jam through a ban bill that would trample the free speech rights of 170 million Americans," said TikTok spokesman Alex Haurek.
Fears over propaganda, spying, fuel TikTok crackdown
National security officials in Washington have feared that the Chinese government could use TikTok to promote propaganda aimed at interfering in U.S. elections, or surveil some of the 170 million Americans who use the app every month.
Those concerns remain largely hypothetical.
TikTok is owned by Chinese tech giant ByteDance, yet there is no publicly available evidence that government officials have ever influenced what Americans see on the app, nor any proof that officials in China have spied on U.S. citizens through TikTok.
TikTok says it has built a firewall between its headquarters in Los Angeles and its parent company in Beijing, but some reports indicate U.S. user data does still move between the two.
While there has been no evidence made public that Chinese government officials have accessed Americans' information through TikTok, the idea that China has the theoretical ability to weaponize an app used by half of America has been enough to set off an all-out crackdown.
Questions about exactly what a buyer would be getting
Under the bill just passed by the House, TikTok would be given up to a year to find a company, or group of investors, to acquire it. That extends the timeline from the six-month window the app was given in the original bill the House passed last month, which some Senators said was too short.

Federal judge blocks Montana's TikTok ban before it takes effect
But that has raised a critical question among TikTok experts: What exactly would they be buying?
TikTok's algorithm, the secret sauce of the app, is owned by ByteDance. And during the Trump administration's campaign against TikTok, China added content-recommendation algorithms to its export-control list, meaning selling the technology would require the blessing of the Chinese government.
James Lewis, director of the technology and public-policy program at the Center for Strategic and International Studies, said that is a non-starter for Beijing.

New DOJ Filing: TikTok's Owner Is 'A Mouthpiece' Of Chinese Communist Party
"The Chinese said very firmly this month at senior levels that they won't let the algorithm be sold and without it, it's an empty deal," Lewis told NPR.
Then there is the hurdle of the pricetag itself.
Given that TikTok is one of the largest and most popular social media platforms in the world, its value would put it out of reach for all but the largest tech companies.
It's not known exactly how much TikTok is worth, but analysts peg its privately-owned parent company, ByteDance, at around $225 billion. TikTok is by far the company's most successful service.
If a Silicon Valley giant attempted to take over TikTok, that would almost certainly attract scrutiny from antitrust enforcers in Washington, who have grown increasingly skeptical of deals that increase the reach of already-massive tech firms.
Lewis, of the Center for Strategic and International Studies, is doubtful the latest push will result in ByteDance letting go of TikTok. But, he noted, it does forestall the issue until after the November presidential election:
"The bill buys time to figure out a real solution, while putting space between passage and the election."
IMAGES
VIDEO
COMMENTS
When it comes to plugging your RV into your house, you have two main options: Use an adapter to plug your RV cord into a standard household outlet. Hire an electrician to wire a 30 or 50 amp plug into your home (this is the same outlet you use at most RV parks). If you go with option 1, the adapter will cost between $10-$30.
You can plug your travel trailer into your house. There are several different methods for plugging your travel trailer in at home but for most methods there are draw-backs and precautions that you must consider. For instance, using a dog-bone adapter from a 110 volt 20 amp outlet will only be ok if you are using bare minimums like lights and a ...
Well, the answer is yes - sort of! An RV can be hooked up to a home's electrical system, but there are some things you must know. While it's not suggested to live in an RV outside a home for an extended time (although they can be insulated for longer-term efficiency), short trips will be fine for keeping the lights on during your travels.
If you do need to plug your RV into an electrical system, the process to do so is fairly simple. The first step is to make sure you have everything you need. If your RV is 30 amps, you'll require a 30a female to 15a male adapter (which tends to run around $10 to $20 ). A 50 amp RV, on the other hand, will need a 50a female to 30a male, which ...
How to Connect Travel Trailer RV to House Power - Forest River 18BHS Aurora-It's really simple to connect your RV or Travel Trailer to the house power so you...
Learn how to plug your RV into your house 110 outlet to get it ready to go camping.In this video: 0:00 Plug your RV into your house0:09 How 15M/30F adapter...
You're more likely to encounter a 30 amp RV electrical hookup system in smaller RVs, while fifth wheels and larger motorhomes are generally equipped with a 50 amp system. In terms of power, 30 amp RV hookups receive 3,600 watts of power, while 50 amp systems receive more than 12,000 watts. In practical terms, an RV with 30 amps of power can run ...
Shore power. RV shore power is when you can plug your RV into an AC electrical grid. The available power you can draw on is measured in amps. The most common RV connections are 30 amps and 50 amps. You can connect your RV to a line running from someone's house, but use caution.
Step-by-Step Guide: Connecting Your RV to Your Home. Choosing the Right Adapter for the Connection. When it comes to connecting your RV to your home's electrical system, the first step is choosing the right adapter. Think of it as trying to fit a square peg into a round hole; it's not going to work unless you have the right tool.
Plugging your RV into a regular house outlet 15/20 amp receptacle requires an adaptor or a dog bone to convert the plug from either 50 amp to 15/20 amp receptacle or a 30 amp to 15/20 amp receptacle. These adaptors are perfectly safe to use to step down the connections to connect to your homes AC power.
November 15, 2021. 12. Dave Solberg is a leading expert in the RV industry and author of the "RV Handbook" as well as the Managing Editor of the RV Repair Club. Today he discusses plugging a trailer into a house's electricity, and keeping tanks from freezing. Dear Dave,
Connect it to your sewer connection on the RV and its discharge is pumped through a 3/4″ to 1″ garden hose. These pumps typically run on 12 volt DC from the RV. The hose can be discharged directly into a toilet or piped into the sanitary piping inside a building. Reply
Connecting your electricity. Connecting the electricity to your RV can sometimes be confusing based upon your RV's connectivity outlet and that of the hosts connectivity. While you may have a top of the line electrical system based upon 50 amps, perhaps the campground you are staying at may have an electrical power grid based upon 30 amps.
This can supply power to many smaller tent trailers, some small trailers, and most pickup campers. A GFCI type will be required. Make sure it is rated at 20 amps, not the normal 15 amps most home outlets use. A 30 Amp Outlet Designed for RVs: Commonly used by larger tent trailers, most camp trailers, and smaller motorhomes. The NEMA designation ...
Tools you need to connect your RV to a household outlet: To safely connect a 30 or 50-amp plug RV to a regular household outlet, which typically provides 110-120 volts at 15 or 20 amps, certain tools and adapters are essential. This process involves adapting the higher amp RV system to the lower amp household outlet without overloading the ...
Almost all RVs come with a power cord to plug into the electrical pedestal at a campground with hookups. This is also known as a "shore power" connection. These power cords come in two amperages: 30-amp and 50-amp. A 30-amp cord has three prongs, and a 50-amp has four.
Failing to do so can be dangerous and may potentially damage your RV. Using a checklist can be very helpful when you're a newbie and worried about missing a step. 1. Turn Off Breaker. The first step in your RV electrical hookup to power is to turn off the breaker at the power pedestal. Inspect the power pedestal once you turn off the breaker ...
When I reviewed the Bluetti AC200P I talked about hooking it up directly to your RVs DC electrical system. In this video I show you how I did that in my own...
12V DC RV System. This system is powered by a battery or numerous batteries installed on your trailer. You can charge these batteries using your RV's electrical system or maintain them with a charger connected to your trailer's AC electrical system. The 12-volt system is divided into circuits supplied from the trailer's fuse block.
The process for plugging your RV in at home will vary depending on the type of electrical connection available. If you have a 50-amp RV and a 50-amp electrical connection, the process is similar to how you'd connect at a campground. You should connect the power cable to your RV, connect the surge protector to your power cable, and then plug ...
Download Article. 1. Connect the appropriate dogbone adapter to your RV's power cable. Pull your RV's power cord out of the compartment that holds it on the outside of your RV. Plug the power cord into an adapter with the matching female piece, if your power cable doesn't match the available outlets.
Smaller teardrop type trailers usually are wired for 110 or 120 power. That makes it simple to use an extension cord. ... The first step would be to dig a trench from your source at the house to the post where you will make the connection to your RV. Even with little foot or vehicle traffic, this is a good move to make. ... That last option ...
When connecting to a 15-amp receptacle, you should always know the size of the breaker in the circuit. The size of the breaker lets you know how much power is available and how much power is safely protected. Breakers can provide up to 80% of their rating. A 15-amp breaker can provide up to 12 amps of continuous power for 3-4 hours.
Insert the Schuko connection cable plug into your dedicated household socket. Make sure the connection is firm and that the plug is fully inserted into the socket to ensure a stable and safe electrical connection. Conclusion. We hope this guide has illuminated the process and considerations involved in how to connect the inverter to the house ...
A second Republican member is supporting an effort to oust House Speaker Mike Johnson. Rep. Thomas Massie, R-Ky., says he is co-sponsoring a resolution by Georgia Republican Rep. Marjorie Taylor ...
Nemtzow: "For the first time, we can take distributed energy resources, which have been around for many years, but we can organize them to act like power plants." David Nemtzow is with the U.S. Department of Energy. A so-called virtual power plant can be operated by a traditional utility. It can include solar panels, car batteries, WiFi ...
Connect; Press; Ethics; Bill to ban TikTok or require its sale passes House The bill, now advancing to the Senate, represents the most serious threat yet to the video app used by half of Americans.