
21 TRAVEL PHOTOGRAPHY TIPS (Easy Ways to Improve Today)

- Last Updated: February 8, 2024
Here are our best travel photography tips for beginners and intermediates, based on our experience of going from complete beginners to professional travel photographers, and now working in the industry for 8 years.
Picture this.
You finally book a trip to your ultimate bucket list destination.
Antarctica, Iceland, Namibia, Bali, seeing the Aurora Borealis – wherever it is, you’ve waited your whole life to finally visit.
Naturally you are going to want to capture the best travel photos possible of this once-in-a-lifetime adventure to share with your portrfriends and family members, on social media, and maybe even print on the wall at home.
Moments in time or a travel experience that you always want to cherish.
So you’ve splashed out on a new camera based on expert recommendations , and you’re keen to hit the road.
But here’s the problem – you don’t have the faintest idea how to get the same kinds of images you see in postcards or on the internet.
The kinds of travel photos that just pop, stand out from the rest, inspire you to book a flight immediately.
Luckily that’s where we come in.
We’ve been fortunate enough to work as professional travel photographers for almost a decade now, being paid to fly around the world, running photography workshops, take pictures for the tourism industry and tell stories.
And now we want to share our knowledge, secrets and insights from our travel photography journey with you so you can take better travel photos.
In this post you’ll find many of our favourite travel photography tips you need to know to come home with shots you will be proud to show off.
Today is the time to learn. Let’s begin.

Table of Contents
1) Know Your Camera
2) focus on the golden and blue hours, 3) plan your shots, 4) learn about composition, 5) framing, framing and more framing, 6) move your feet, make them feel comfortable, 8) use a tripod, 9) find the right travel photography gear, 10) be unique, 11) find your voice as a photographer, 13) aperture, 15) shutter speed, 17) bonus – general ideas for camera equipment settings, 18) use manual mode, 19) shoot in raw (if available), 20) learn about post processing, save this pin for later, general travel photography tips for beginners.
To start with let me talk about the general travel photography tips that I feel are not only the most important, but also the most difficult to master.
Developing an eye for photography takes time. Years in fact. It’s a never-ending learning process, but I promise you with practice you will get much better.
And once you start to get the skills for framing and composing a shot, the rest is easy.
Whether you shoot on a dSLR, mirrorless, smartphone or an old film unit, the first travel photography tip is to get to know your camera equipment.
Whatever you have in your camera bag , take the time to read the instructions, play around with all the buttons and camera settings, and spend hours with it in your hand so that it becomes a part of you.
Study the menu so that if you need to change camera settings in the field you’re not spending minutes scrolling through it when timing is critical.
Also don’t forget to learn your camera’s limitations.
Does it perform well in low-light or does the image fall apart? Is it sharp wide open, or do you need to stop down to get the best clarity? Does it have inbuilt image stabilisation?
Ultimately when you pick up your camera you want to feel comfortable and know exactly how it works. Then getting better pictures will come faster and easier.

Light is everything when it comes to travel photography images, and there’s a good chance you’ve already heard about the golden and blue hours.
The Golden Hour is that time when the sun is low in the sky and it throws a magical, warm glow across the scene.
Think the first hour after the sun peaks in the morning, and the last hour or two before the sun drops over the horizon in the afternoon.
The Blue Hour is when the sun is below the horizon and the sky gives off a beautiful blue hue.
If you really want better travel photos, one of the best travel photography tips we can give is to get used to waking up early and stay out late to make the most of these two times of day.
If you’re not a morning person, get used to setting an alarm. Many of the great travel photos of the Taj Mahal and other tourist sites with no one in them for example were taken by people who got there early.
Taking photos in the middle of the day can still result in great shots, but in general you’ll find the blue sky too blown out unless there are some interesting clouds, and on a sunny day you’ll find the lighting conditions can be a bit harsh.
Instead use the middle of the day to get street photography, or scout out photo locations and a vantage point for your sunrise and sunset photos to come back later.
Bonus Tip – Even if it looks like the sunrise or sunset might not be so beautiful, wait around. You never know when the clouds might break or the sky randomly lights up in brilliant colours.

Before you arrive in your tourist destinations, spend a few hours planning out your shot list of images you want to photograph.
You can get inspiration from Instagram, Google Maps, travel guides, magazines and more.
Make a note of these pictures, and then plan your day around the optimum time to shoot (sunrise or sunset for example).
Doing this will help you nail the shots you want to go, and give you more purpose and direction.
You need to know that all of the best photographers use tools like Google Maps or social media to form a shot list, and you should get used to it too.

You’ve probably heard about how important it is to compose a shot properly, and I bet if you’ve ever read a photography manual you would have come across the ‘ rule of thirds ‘.
Good composition can be the difference between an average shot and award-winning travel photos.
There’s all kinds of ‘rules’ that theoretically make a photo look nicer, such as not putting your subject in the middle of the shot, don’t cut elements out of the frame, etc.
But right now let’s go a bit into the Rule of Thirds.
This concept is where you divide your image into 9 even squares (many cameras actually have this grid line feature built into their display options).
Then what you do is you place the subjects and points of interest such as a human element along those lines and squares.
Here’s an example of how this looks:

The idea of the rule of thirds is that this is a mathematical idea of what our eyes naturally find pleasing. So it’s good practice to incorporate this method into your shots.
Another thing to look for is leading lines that naturally draw your eye around the photo, as well as different angles and shapes.
Have a river flowing from the side of the shot up to a waterfall on the top left for example, or the foreground bending around, leading the eye towards a church at the top of the photo.
This is a skill that you’ll learn with more practice.
An important thing to remember is that rules are meant to be broken .
Get used to analysing your shots with the rule of thirds, but please don’t use it as gospel if you think a different composition would work.
Adding a human element also brings a lot of interest to a good shot, so place people in your frame.

When you look through the viewfinder or LCD screen, don’t just focus on the subject.
Make sure you run your eyes around the entire frame to make sure you’re not accidentally cutting off something important.
Double-check that the top of a mountain is fully inside the frame, or that your friend’s whole body is in the shot as an example.
This isn’t gospel, because sometimes having something cut off from the frame can be good for composition, but you’ll have to be the judge of that.
Also check to see if you can use something natural in the scene to create a frame inside your picture.
Think of looking out a window at a building, or a bent-over tree surrounding a pretty lake.
These can all help make better travel photos.

This is one of the most important travel photography tips I can give – Move your feet.
Don’t just arrive to a scene and take a shot from the place you’re standing.
Instead take a few minutes to walk around and see if there is a better frame or composition.
Go closer, move back, step to the side, consider your lens’ focal length, etc.
Imagine trying to take that iconic Taj Mahal photo, only to find out later that you were 2m to the left of centre, throwing off that perfect symmetry.
Or maybe if you walk to the river’s edge you’ll be able to incorporate some interesting rocks into the scene instead of just water.
Better yet, take multiple travel photos and fill up those memory cards from the same photo locations so you have lots of options when you get home to see which is your favourite.

7) Ask People for Permission
Travel photography isn’t all about capturing the most beautiful sunsets and gorgeous architecture around the world.
Travel photography is also about the people you meet. But if you’re a bit shy like me, how do you get those amazing portrait photos without feeling rude?
Simple – just ask for permission.
Asking someone for permission to take their photo is polite and respectful.
If you have had a great encounter with someone, or you just see a great opportunity and want to capture a wonderful portrait, give them a big smile and ask if it’s ok to take their photo.
You’ll find many people are more than happy to pose for a photo if you just ask (just make sure you respect them if they say no).

But what if you want to get a candid shot, with the subject looking natural?
There’s always another way to get these without annoying the person.
Don’t make it obvious that you are taking their photo. Act natural and take lots of photos of the environment around them.
You can also keep your camera down by your side and point the lens in their direction.
If you have a zoom lens, use it. This was you can be on the other side of the street or market and still photograph the person.
Interested in learning more? Join one of our exclusive photography workshops in Antarctica, Kyrgyzstan, Tajikistan or Mongolia !
Another one of my favourite travel photography tips for portraits is to bring in another element to the shot.
Some people will feel uncomfortable posing for a stranger, but if you can make it about something else they will feel much more at ease.
As an example, maybe ask if they can pose with something in their store like a rug, or ask them to show you their wedding ring.
This way they’ll realise there is more to your photo than just them. This will also add a lot more interesting elements to the shot!

A tripod is one of the best camera accessories you can have in your camera bag, and really essential for travel photography.
This will allow you to get excellent shots in low light, as well as get creative with your images (like taking long exposures).
These days you don’t always need a massive tripod to travel around with, especially if you want to travel light and are a hobbyist photographer. Look at some of the Joby Gorillapods .
Another good thing about using a tripod is that it will force you to slow down with your photography and put more thought into each shot.
Rather than just pointing and shooting, you will think carefully about where you want to set up your tripod and how you want to compose your shot.
Honestly if you want to become a better travel photographer, you’ll need to invest in at least a small tripod.

You don’t need to go out and spend tens of thousands of dollars on new travel photography gear to get the best shots.
In fact chances are you already have a perfectly adequate camera right next to you (your phone).
Instead just get what you an afford, and as you grow with your photography style, post production, etc, you’ll learn what camera gear you need as well.
Things like filters, tripods, flashes, prime lenses, zoom lenses, etc will come in time.
For now, all you really need is a camera, memory card and enthusiasm!
Check out our recommendations for the best travel tripods .
There’s nothing wrong with getting those iconic shots of the Eiffel Tower or Machu Picchu to share on social media.
They’re beautiful and are often amazing camera angles of famous places that everyone wants to visit.
But don’t forget to be unique as well! Find a different perspective that hasn’t been photographed a million times.
In fact make it your goal to get a few unique shots that you can be proud of.
Over-expose, under-expose, incorporate motion blue – the only limitation is your imagination!

Just like a writer or musician finds a particular style they like, as a photographer you need to discover your ‘voice’.
Travel photography is such a broad term that can cover just about anything.
Really just taking any travel photos will fit the description, whether it is landscape photography, wildlife photography, architecture, portraits, food or whatever.
Just find a style you love most, and focus on getting better at it.
If you really like black and white photography, then start shooting in black and white! Love taking images of crazy street markets? Then get out there and find them!
Experiment, learn, discover and nurture!

Technical Travel Photography Tips
While the technical side of using a camera is usually the most overwhelming thing for a new photographer to think about, it’s actually one of the easiest things to master. All it takes is a bit of study and practice.
If you’ve never looked into getting out of ‘Auto mode’ on your camera, then terms like ISO, aperture, white balance and shutter speed will seem completely foreign.
READ MORE: Check out our great article and blog posts featuring our best landscape photography tips !
12) Exposure Triangle of Photography
The Exposure Triangle is a metaphor to explain the 3 elements that allow light onto a sensor.
A camera captures light, and the right amount is needed so that your image isn’t too bright or too dark.
The 3 parts of the Exposure Triangle are aperture, ISO and shutter.
Each one affects how light reaches the sensor in different ways, and getting this combination right is essential to capturing a beautiful image.

If you want more information, I’ve put together this comprehensive guide to understanding the exposure triangle which you should really check out.
For now though I’ll explain these three things briefly, and how they relate to taking better travel photographs.
Aperture is how wide, or small, the blades in your lens are and how much light goes through the lens.
The aperture size is measured in ‘F Stops’, and displayed as numbers. f5.6, f8, f11, f16, etc
A wide aperture (small number – f1.8) lets in more light than a low aperture (big number – f22).
A wide aperture also has a shallowed depth of field than a low aperture. I know it can be a little confusing, but you’ll pick it up the more you play around with it.
If you want the background blurry in your photo, you’ll want a wide aperture. If you want everything in focus, you’ll want a low aperture.

ISO is how sensitive your camera sensor is to light. A small number, such as 100, means it’s not very sensitive and therefore needs more light to leave an impression.
A high number, like 6400, means it’s very sensitive and needs only a little bit of light to show up on the sensor.
The higher the ISO, the more noise shows up in a photo. Noise lowers the quality of your image, so in a perfect world you’ll want to keep this as low as possible (unless you’re going to stay out late doing astro and night photography ).
It’s also necessary to raise your ISO if you’re shooting moving subjects (or handheld) indoors.

Shutter speed is pretty straight forward – how long it takes for your shutter to open and close. This allows you to freeze a frame, or introduce motion blur.
Want to capture a bird in flight? You’ll want to have a fast shutter (1/4000th of a second for example).
Want to make a waterfall look silky smooth, like you see in so much Iceland photography? Go for slow shutter speeds (3 seconds for example), and check out our guide to waterfall photography tips while you’re at it!
Keep in mind that if you are holding your camera equipment rather than using a tripod, you’ll need to have a fast enough shutter to eliminate your own hand movement.
As a general rule 1/60 of a second is the slowest you should go so your picture doesn’t pick up hand movement. Any slower than that and you’ll probably need a tripod.

16) Combining All Three for Perfect Exposure
There is no ‘perfect setting’ for aperture, ISO and shutter. It all depends on what you are trying to photograph and the style you’re going for.
Luckily most decent digital cameras have two little tools that will let you play around figure out how all three work together – manual mode and histograms.
Manual gives you complete control over your camera’s ISO, aperture and shutter.
If you change one, nothing else will change, unlike in ‘aperture priority’ mode or ‘shutter priority’ mode.
The histogram is a visual display of light. When the bars are all the way to the left, the image is darker. When they are all the way to the right, the image is lighter.
When most of the bars are in the centre, this is perfectly exposed.

The best way to figure out what combinations work best when you’re a complete amateur is to put your camera on “manual” mode, activate the histogram, and play around with the settings.
Pick an aperture (f/8 for example) and point it at the scene. Now look at the histogram.
If the image is too dark, then you’ll need to let more light in. Let’s make the speed slower. See a change?
Now put the shutter back to where it was and instead change the ISO. Make the ISO higher. Is the image getting lighter?
Spend an hour or two playing around with different apertures, ISO and shutter so you get an idea of how each one affects the light hitting the display.
Take note at how drastically things can change if a cloud goes in front of the sun, or you take the camera inside.
This just comes with practice of course, and knowing what settings you want for a particular scene will become second nature
Keep in mind that not all travel photos needs to be perfectly exposed. Sometimes having a darker image looks much better than having one that is nice and bright. You can use your judgement for this.

This is very, very basic and by no means should be read as gospel. There are a million different things that can affect why you would want a faster shutter, or wider aperture. But if you are confused about what to pick for what here’s a quick idea.
- Landscapes – You’ll want your aperture around f8-f11. You’ll also want your ISO as low as possible. Slow down the shutter accordingly.
- Portraits – You’ll probably want to photograph your subject to be sharp, but the background blurry to bring focus on the person. Have a wider aperture (say f2.8 for example), and a faster shutter (around 1/160 at the absolute slowest) to freeze the subject. Adjust ISO accordingly.
- Indoors – Because it is darker inside than outside, you’ll need to let a lot more light into the sensor. Unless you’re using a tripod, keep the speed at around 1/60 as the slowest, and the aperture around f5.6 to start with. Adjust ISO and aperture accordingly.
Of course there’s a bunch of other styles of travel photography that would use different settings, such as astrophotography, architecture, street scenes photography, wildlife photography, etc.
In time you’ll learn what settings work best for each scene.
The best way to get to know your camera and how light works is to have complete control over what settings you choose.
The only way to do this is to shoot in manual mode (shown by the letter M on most cameras).
It will take months of practice, but I promise you that in time you’ll be able to look at a scene and instantly know what aperture, ISO and shutter to use to get the exact style of image you’re looking for.
You can also use aperture priority mode (the letter A on your camera) if you don’t want to make the big leap to manual just yet.
This way you can lock in the aperture you want (f8 for landscape photography, f2.8 for portraits, etc) and the camera will automatically adjust the ISO (although you can control this part too) and shutter to get perfect exposure.
I highly recommend focusing on learning manual settings though until you have it perfected.

When you take a photo on your digital camera, the computer chip inside it takes what you captured on the sensor and converts it into a format that can be easily read. For most cameras, these two formats are RAW and JPEG.
JPEG is a compressed format that the camera creates to save on space. In doing so it ‘locks in’ all the data that it picked up such as the colour and white balance.
RAW files actually saves all the data of what you took and doesn’t compress it.
Most decent digital cameras will give you the menu option of shooting in RAW, and I recommend you use it if you ever plan on editing your photos.
Keep in mind that the file sizes will be a lot bigger (for example on one of our cameras a RAW is 42, while a JPEG is just 20), so you’ll need to have extra memory cards and external hard drive storage.
If you have no plans on editing your photos then shoot in JPEG.

Some people think that editing your photo is ‘cheating’. But the truth is photographers have been editing their photos ever since photography was invented.
Yes, even your favourite photos in National Geographic have been manipulated in some way.
99% of photos you see in your favourite travel magazines have been edited. Every professional photographer edits their photos to some degree.
The reason is that not all cameras are great at capturing exactly what the eye saw in terms of colour and light.
If you really want to get the most out of your professional travel photography business, you should start playing around with post processing.
Many people have heard of Adobe Photoshop , but it’s a pretty advanced tool that most people wouldn’t ever need to use (until you get more experience).
To start with look at the free apps that you can get on your phone, such as Snapseed, or free editing programs on your computer, like iPhoto or GIMP.
Once you get serious about travel photography and you want to start editing all of your photos that are filling up your memory cards and external hard drive, we recommend purchasing Adobe Lightroom.
If you’re ready to make the jump to using Lightroom and Photoshop, Adobe have a great ‘Creative Cloud’ package, which is what we use for only $10 a month. You can buy it here with a 7-day free trial

21) Practice, Practice, Practice
Just like anything, becoming a great travel photographer takes time, and a lot of practice. The only way you can get better is by getting out there taking travel photos!
You don’t even have to travel the world to tourist destinations or have the most travel camera available to be a great photographer.
Borrow some family members to take their portraits, get a friend who is also interested in photography and push each other, or grab your smartphone and go shoot sunset.
Buy whatever you can afford, go for a walk around your city and snap away.
We hope that this general guide on travel photography tips for beginners has been helpful.
Please feel free to reach out to us if you have any other questions. We have a lot of experience working with tourism boards, and would be happy to help you too.
Good luck on your photographic journey, and maybe we’ll see you in National Geographic one day!
DISCLAIMER: Some of the links in this article are affiliate links, which means if you book accommodation, tours or buy a product, we will receive a small commission at no extra cost to you. These commissions help us keep creating more free travel content to help people plan their holidays and adventures. We only recommend the best accommodations, tours and products that ourselves or our fantastic editorial team have personally experienced, and regularly review these. Thanks for your support, kind friend!

Alesha and Jarryd
Hi, We’re Alesha and Jarryd!

We’ve been traveling the world together since 2008, searching for the planet’s best destinations and adventures.
Love Travel?
Sign up for our free weekly newsletter for the best travel tips, ideas and deals!
We respect your privacy. Unsubscribe at any time.
READ MORE...
Peak Design Everyday Messenger Review – My Honest Experience
GoPro HERO 11 Review – Is it Worth Upgrading in 2024?
GoPro HERO 12 Review – Is it Worth Buying in 2024?
Related Posts
A photo journey along the silk road, 15 waterfall photography tips – how to shoot epic cascade shots, the nas backup workflow – how pros backup photos, a photo journey inside hang son doong – the world’s largest cave, 73 thoughts on “21 travel photography tips (easy ways to improve today)”.
I indeed agree in Know your camera and Plan your shots. These tips would make a good start in achieving your socmed worthy travel shots. And ofcourse, the other tips will surely be useful too. Great post!
Good article but I need to say something about using Manual – it’s not that great. Manual is just a different mode of settings for exposure, little different from either shutter or aperture priority, except these two give you a leg up, to where you’re going anyway. At the end of the day whatever exposure setting you choose will be just a combination of the 3 on the ‘exposure triangle’. Instead of using manual try these other two in conjunction with exposure compensation, which overrides the exposure meter reading. You still need the meter for any exposure anyway, just not necessarily using the value it recommends. It amounts to the same thing, only easier, quicker, and still constraining one of the triangle sides that you want. I use manual for specific unusual objects, such as sun, moon, stars, but during general daytime subjects it’ll be very unusual to hamper yourself by not using the aid provided when there is no advantage.
Your blog has become my go-to source for insightful content.
Thank you so much. So glad to hear. 🙂
Before you go, research your destination and its culture. This will help you better understand the people, customs, and landscapes you’ll be photographing.
I benefited a lot from your post. Thank you
So glad you did. Thank you for stopping by. 🙂
Thanks for sharing all this amazing tips & information. Fabulous post !
You are welcome. We are happy to help. Happy photographing
nice summary of basic photo tips that will improve my shots, thanx!
You are rocking..keep it up your work
Thank you so much. We really appreciate it.
Great article with great tips and i also like the pictures
Thank you so much Alesha and Jarryd for these amazing photography tips! I look forward to putting into practice some of your wonderful ideas and tips! I do so appreciate any tips that I can get to improve my photography. :)) Cheers, Marilyn
I absolutely loved this article! Like you I received my first ‘proper’ camera at 14 and since then have been hooked. I recently purchased a Nikon D750 and am absolutely loving it. Although at the moment I only have two lenses for it I am hoping to be able to afford more soon. What are your favourite lenses?
In my photography I love capturing candid portraits of people I encounter during my travels. I always struggle with the dilemma of getting the perfect candid shot and feeling compelled to ask permission before taking the shot. As a very shy person directing people in images is daunting, but it is something I am striving to work on. It’s nice to read that you are also shy yet manage to capture such incredible images of people.
As I am mostly self-taught, I always love to read technical tips to improve my images. I found the technical side of your post incredibly helpful and wanted to say thank you for taking the time to write such a detailed post. I believe it really helps and inspires amateur photographers like myself.
Glad you liked the article. Thank you for your comment. Keep photographying Caitlyn 🙂
Great tips and awesome photos! I always tell people if they aren’t comfortable with their settings, the #1 way to make sure their images aren’t blurry is to shoot in TV/S (shutter) priority. That way you can prioritize having no hand shake.
Thank you so much. Great advice. Thanks for your comment. 🙂
Awesome tips for everyone and specially to me who loves capturing photos everytime i travel.This one also help me and give me more knowledge on how to make awesome photos and its good because you don’t need to buy expensive camera to have a good quality photos, just your iPhone or smartphone you can make a great photos.
Hi, you are so right. You can take great photos with your phone. Glad the article could help you.
Great article! Do you even bother carrying your camera with you during the day in broad sunlight? I find it’s not worth the hassle for such poor shooting conditions.
Hi Scott, It all depends what we are doing. If we are on a job, we always carry our cameras with us. The midday sun is harsh but you get used to working with it. Especially indoors with the sun coming through the cracks, it can work out really lovely sometimes. When we are travelling on our own time, we don’t usually carry the camera. Happy travels
I really enjoyed reading this post, as I am a beginner in photography as well and it’s always interesting to see what gear other people are using!
I have the Canon Rebel as well, and also love the 50mm lens. It’s just great and is so versatile!
Thanks for sharing.
Glad we could help. Thank you for your comment. Happy photographing,
Great tips guys! Photography is an art so it must be learned properly. A good guide can teach art in a great way. This article is similar to a guide because it is an eye-opener for blooming photographers and travel lovers.
Thank you so much!
Thank you for your comment Glorias. Glad the article could help.
Hello Alesha and Jarryd, not sure to whom I adresse the message to, but I’m guessing Jarryd took the pictures and Alesha wrote about it :p
Anyway, do you guys use any customized Firmware on your DSLR? like the CHDK or Magic Lantern. That’s one question, the other one will be: can’t find any Mobile Phone photography on your blog? can you please refer me to any article that provide valuable info around Mobile phone photography?
Hi Ayoub, The photos and words in the article are a combination of both of us. Usually Alesha is the photographer and Jarryd is the writer.
We use use no customise firmware at all. We haven’t ventured this way as it voids our warranty.
As for phone photography, maybe this is an article we should write. With our phone photos, we do use Snapseed to edit them. But do not take any photos through any apps. All the best
Thank you for the tip regarding phone photography, I mostly use the customized firmware to do timelaps and edit directly on the camera, keep me posted after publishing the new article. (Already subscribed to the weekly newsletter)
Definitely will do. Thank you so much. Happy photographing. 🙂
you are doing a great job
Thank you so much. 🙂
This was really an amazing list of tips, I am a hobbyist photographer and this would really helps me a lot
Glad we could help. Keep up the photographing. 🙂
Great tips Alesha and Jarred. I really liked your golden and blue hours tip. Will try it soon and hope get amazing pics 🙂
Glad we could help. Practise will get you on the right track and before you know it you will be taking amazing shots. We are still learning about photography everyday. We love that you can never stop learning. Thanks Linda.
Some of the best tips I have read so far. Amazing post and captures so much detail. Worth the read for every travel photographer. 🙂 Keep it up.
Thank you so much,. We really appreciate it. 🙂
Priceless tips for amateurs like me. Thanks for sharing. For a long while, I’ve tried to follow the rule of thirds, but the best shots came out when I finally dared to break it. You’re absolutely right about the rules are meant to be broken. Regarding the camera, I agree it doesn’t have to be the most expensive. But sometimes I have a feeling my shots would have been better had I owned a proper camera. What device is the best balance between price and quality?
HI Robin, you’re welcome. We are so happy we could help. Sometimes breaking the rules works out to be better. 🙂 We definitely know what you mean. You do not need to buy the most experience camera. A camera that you can use manual settings, is great as you can start using and playing with aperture, shutter speed and ISO. We started off with a Sony RX100ii and it was great. Compact and a great camera to learn. Here is some articles that may help. https://www.nomadasaurus.com/best-camera-for-travel-ultimate-photography-series/ https://www.nomadasaurus.com/best-camera-accessories-ultimate-photography-series/
Thanks a lot for the great advise! I especially like your explanations about the exposure triangle. I was a bit aware of it before, but never played around with it unless I wanted to change the depth of field (and even then, I did this very rarely). But thanks to focusing more on it, I am starting to get the hang of it. I have taken some very good hummingbird pictures, for example, which never would have been possible if I hadn’t raised the ISO so I can keep the shutter speed fast. Those birds zip around like crazy!
Also, I think one of the most important pieces of advise, and the one I’m struggling with most, is to always look at the whole frame. I am guilty of looking at the main subject and later finding out that I cut off important things on the side or that something weird is in the photo that shouldn’t have been there.
Hi Ilona, so happy the article could help you. That’s amazing you experiment with your hummingbird shots. They are fast birds. By practising photography, you will get better and better. No matter how experienced you are, there are always things to learn. When you come to a scene you want to photograph, stop for a minute look around, walk around and think about what shots you want to take. Obviously this is hard when the subject is moving but great for landscape and street photography. All the best and keep up the awesome work. 🙂
Hi, I took around 500 shots on a trip to Kyrgyzstan recently, some I think are pretty good, but now after reading your tips, I think I will make another trip to that part of the world again soon!
what a great tips especially the lighting part – i also agree that getting up earlier and shooting in the natural sunlight is so great for your photos. talking to the locals and knowing your camera, You guys covered it all
Thank you so much for reading Shama. Glad you liked our article. Natural lighting is the best. Even though sometimes that early morning is hard it is worth it. 🙂
u are absolutely right u don’t need an expensive camera or go to Bali ( although it’s a good idea) to get great photos. it’s just simple common sense and a good eye and you can master photography
Well said. Thank you for your comment and reading Shama. Have a great week.
Thanks a lot for the helpful tips on holiday photos. My partner and I are in Easter Island, irresistible place for photo opportunity. My Nikon D7000 will keep on taking photos on auto mode for the time being until I have had enough practice following your guidelines and the who knows what photos I might produce! Thanks.
Glad we could help Balu. Definitely when you have time, go out and take some photos on manual. Play with the different settings. Before you know it, you’ll only be on manual. At the beginning when I was still learning, I would take a shot on the manual settings I thought and then a shot of the same view on auto in case I messed up. Better safe than sorry. Have a great time in Easter Island. There is so much to do there and learning about the history is amazing. Take care. Alesha
Guys your advice are completely helped me. I was stressed before, i want to travelling at the moment but i hope i can take a good picture cause you know how annoying it will be when we take a picture and then when we are home they are completely bad. So then you have to comeback at the same place again just to take a picture. But this one is helpfull
Hi Fabio, Don’t stress. You are going to bring back amazing photos from your travels. It is all overwhelming at the beginning but it gets easy. When you are shooting, put some time aside and concentrate on what you have learned. It doesn’t matter if it takes you 20 minutes to an hour to get your shot. If their are other photographers around, most of the time that are happy to give you some advice. Let them know you are new. Maybe they will let you know their settings for ISO, aperture and shutter. When it comes to editing, take your time as well. There are many You Tube videos that can help you for free. Have a great time on your trip. Happy travels
Hey Guys, very useful tips especially the Bonus tips.
Keep Sharing!!!
Glad we could help. Thanks for reading.
P(Program) you set either the aperture or shutter and the camera adjusts the other one accordingly to maintain the right exposure. Thanks
Thanks Rezan
I love traveling around the world. I wish to capture some of the beautiful places that I enjoyed. The above tips helped me to improve my travel photography skills. It also helped me to click some of the memorable moments of my travel with my friends and relatives.
Hi Vivek, Glad we could help. It is all about practise. We love having a day to ourselves and just getting out and shooting anything – landscape, cityscape, people or animals. We try to give ourselves a challenge sometimes. It makes it interesting and we are enjoying ourselves. 🙂
Great tips to help out beginners like me. I need to work on to ask people for permission as I get shy sometimes. I love the quote “rules are meant to be broken”!
Thank you Mao. Don’t worry, “asking” will come. Alesha was so shy and I used to take all the people shots. Now she is more confident and really enjoys shooting people. All the best.
THANK YOU . Your very easy to read starter guide to photography was AMAZEBALLS I learnt so much .cheers LIZY
Thank you. Glad we could help. Happy shooting and get creative. 🙂
Hey guys, this is an amazing guide, thanks for writing this up in such detail. As an amateur, I always look for good travel photography tips from other travellers. I left my tripod behind in Thailand and I think this was a huge mistake, I need to get a new one, urgently 🙂
By the way, really enjoy your photos on your blog and Instagram, they are amazing! 🙂
Glad we could help guys. We never used to use a tripod in our early years until we discovered how amazing the shots can be with one in low light and now we have 3. You can rest your camera on something to get a shot but you are limited to positions. Thanks for reading guys. 🙂
thanks for the tips. i’d make one edit: instead of ‘move your feet’ i’d say “don’t be lazy”…move left or right. move forward or back. climb up on something or get down on your knees.
Love it Aaron. You are so right. A little to the left might be the perfect shot or a little to the right and crouching might be the perfect shot. thanks for the input. Have a good one.
I love this post. It is incredibly helpful to all beginner travel photographers like myself! I have only been shooting in manual mode for the past 5 months and have already seen a huge increase in the quality of my photos! But I am always looking to improve. Will definitely be sharing your post
It is crazy how you improve when you start shooting manual. I know Alesha did also. You learn so much about the camera and what it can do, it is incredible. Thank you for reading and all the best with your photography Hayley. 🙂
this guide is amazing, thank you so much for explaining everything in a way an amateur can understand 🙂
Bookmarking the post for future reference!
Cheers, Naddya
Thank you guys. We are glad it is useful for you. 🙂
Wow! Amazing Tips. These tips will help a lot to click great pictures with your camera. Love the point of Shutter Speed. and about RAW.
Thanks for Sharing Helpful Post.
Thank you so much Nitin. Glad we can help. Thank you for reading.
Yeah I agree with you buddy.
Thank you 🙂
Leave a comment Cancel reply
Save my name, email, and website in this browser for the next time I comment.
- Student Successes
- My Learning
How to Take Travel Photos: A Complete Guide
You can also select your interests for free access to our premium training:
Who doesn’t love visiting gorgeous places? When we travel, it is natural to want to capture those special moments. So why not explore this niche?
With the right skills and some practice, you could make your travel photography hobby into a full-time job. In this article, we have organised our knowledge base on travel photography.
Read on to find out how to become a travel photographer.

What Is Travel Photography?
Travel photography is the act of photographing while travelling. The goal is to capture the locations you visit and the adventures you experience.
It is a combination of different genres. It includes landscape , street , portrait , environmental portrait and even architecture photography.
You can take landscape images of the places you visit, portraits of the people you meet or architecture photos of the buildings you see.
You can even master your self-photography skills by taking selfies everywhere you go.

How to Start Travel Photography
Getting started with travel photography: beginner’s guide.
Travel photography is a genre that requires a lot of pre-photoshoot preparation.
You need to be able to find suitable locations, handle different weather conditions, and choose the best equipment for each trip.
Practising and learning how you like travelling the basis of the whole process. You should also find out which type of travel photography suits you the most.
Read our beginner’s guide to learn more about how to get started with travel photography.

How to Plan for Road Trip Photography
Everyone’s idea of travel is different. Some go away for the weekend, and others plan a whirlwind trip covering dozens of countries in a concise period of time.
If you are the road trip kind, this article is for you.
Firstly, you’ll need to figure out how to get around. Will it be your car, a rental or even hitch-hiking? Next is the route.
You need to take care of how you can stay connected to the internet. Or how you’ll have access to electricity, and how you’ll back up your photos .

The Travel Photographer’s Packing Checklist
Travelling requires a few more items than your keys, wallet, and passport. It requires planning and making sure you have every necessary item with you.
The easiest way to remember everything is by writing a list.
Think about where you are going and if the location has the things you might need to buy? Don’t forget to update your list after each trip.
Prepare for bad weather, hot summer days and everything you can predict. Take a look at our list so you surely won’t miss anything!

Photographing With Minimal Gear: Why You Don’t Need as Much as You Think
As a travel photographer, you’ll constantly be moving around. A heavy backpack full of equipment gets tiring very fast.
Learning how to capture travel photography with minimal equipment is a blessing. That way, you’ll enjoy your journey much more.
Think about your lenses. Perhaps one or two zoom lenses are much better than five fixed (prime) alternatives. And don’t take anything you might not use. It is a waste of space.

The Best Packing Hacks for the Travel Photographer
As a travel photographer, you need to organise both your camera gear and your clothes. It can be a hard task. All you need to find is balance.
Start by creating a photography shot list in advance. Lay out your gear and then cut it all down.
Choosing the right bags is also essential. With our space-saving packing hacks, you are going to be able to organise everything cleverly.
An important thing to keep in mind is that you will need to reach your gear easily. If you don’t have comfortable access to them, you will get frustrated soon.

How to Make the Most of Your Travel Photography With a Shot List
The best travel photos are the results of hours of planning and research.
A shot list is a helpful reminder to ensure you get a wide range of images. No matter where you go, you will have the same or a similar list.
You won’t miss anything if you need what kind of shots you need. Also, a list can guide your attention and make you spot the scenes worth photographing.

How to Choose the Best Travel Tripod
A tripod helps you capture long exposures and stops movement in low light conditions. It also allows your arms a little rest while keeping your camera safe.
I know they can be heavy and a burden when you don’t need them. Yet, there are lightweight carry-on choices that can fit in your bag.
You have to use a tripod that matches your camera. Heavier gadgets will need sturdy and stable ones. Also, windy weather requires more robust tripods.
Read here for more information on tripod choices for all your travel photography needs.

The Most Useful Travel Photography Accessories
As a travel photographer, you will encounter a lot of different situations. Not only do you have to be ready for them, but your gear has to as well.
There are some basic accessories you should always carry with you. A lens pen is the perfect pocket-tool for cleaning your lenses on the go. But others, like a drone, are for more creative photography.
Start with the basics. Choose a comfortable neck strap or buy memory card holders . Extra batteries and power banks are also practical and necessary items, based on how long and where you are shooting.

Travel Photography Settings for Every Scenario: From Portraits to Landscapes
Travel photographers have to deal with changing lights and scenes. Also, it’s a mixture of genres, so even the type of photography determines the settings.
Pay attention to white balance, focus, and the pillars of the exposure triangle .
You can find basic settings for portraits, environmental portraits, landscapes, sunsets, or buildings in our article above. Food, wildlife, action or night photography are not missing from the list either.
Start with these settings and tweak them if needed.

Photography Style: What Is It and How Can You Find Your Own
Your photography style separates you from every other travel photographer. Believe me. There are thousands in this category.
Finding your style will take time and practice. It isn’t something you can develop overnight.
Keep experimenting. You can focus on a particular mood or atmosphere. Or concentrate on the same colour range. Or even take stunning portraits .
Famous photographers have recognizable styles. If someone recognizes your images without seeing your name on them, you’re on the right path.

Top 12 Rules For Amazing Travel Photography
Travel photography is not about your camera. It isn’t even about where you are.
It is about the stories you tell with your captured images. The way you take these stunning images is through research and observation.
Researching your location will let you know what is available to photograph. And the best time to capture it.
Preparing your gear and writing travel notes are also something you should do.
Read our article for all the 12 rules of travel photography.

How to Avoid These 15 Common Travel Photography Mistakes
You can first ruin your travel photography but not planning it enough. Not having a shot list is a part of this mistake.
Also, make sure to have enough time for what you would like to reach. This is important when you would like to have blue hour shots of a certain place, and you are still far from there at sunset.
Don’t pack too much gear, and try not to be too shy. Telling stories with your images is always a great idea.
Follow our tips to avoid the most common mistakes!

Best Ways to Backup Your Photos While Travelling
Utilizing an external hard drive is the most important way to safely store your images once they are out of your camera.
Backing up in the field means that you need to find a solution to keep your images safe without a computer.
Having a system that will copy your images from your memory cards means not buying more of them.
Check our article above to find the best solution.

Tips For Travelling Safely With Your Camera
Travelling safely with your camera leys you enjoy yourself and keep photographing.
Having an item or camera stolen can dent your experience and budget. Travel insurance is a smart investment to make.
By covering up your cameras’ brand and model, you can really deter thieves looking to take your gear. This is best done using black tape.
Use padded cases so that your camera and lenses are protected against all knocks they will encounter.
This is a great way to keep your lenses in and out of your bag for extra protection. You can also use them separately on a strap or belt.

Travel Safety Tips Every Photographer Should Know
Staying safe while travelling should be the most important priority of your photography.
This is how you ensure that you enjoy the place you’re in for the time that you are.
Start with taking your camera on board if you are flying. Also, respect local customs to avoid conflict. Knowing your surroundings and not leaving your gear unattended are the very basics of staying safe as a travel photographer.
Read our article here for the most important travel tips to keep you safe.

Tips for Better Vacation and Holiday Photography
You can, of course, be a travel photographer without fancy locations and a huge kit bag. It’s a well deserved holiday where you decide to capture a few shots.
Even then, your photography could use a few tips. Choosing the right spot to photograph first is the number one tip.
You might also find it a game-changer to wake up and shoot before the crowd gathers.
Try avoiding clichés and find a balance between portrait and landscapes. Include your family in your images, but also make sure to capture the local culture.

Tips for Breathtaking Cityscape Photography
If you’re headed toward the city, then this article is for you. You’ll find great tips for short trips or extended stays.
Find the right location and check the forecast to check the available light. Take images from a distance and also zoom in to capture details.
Preparing your gear and thinking about your settings in advance are also essential here. Blue and golden hours might be the best time for these images. Experiment a lot, and go back if you are not satisfied and you have time. To dig deep, check out our tips on cityscape photography.

Where To Find Travel Photography Inspiration
Best travel photography blogs to follow.
Travel photography blogs serve as great inspiration for us photographers out there.
You can get great tips and ideas by looking at other photographers’ images. Also, reading their stories and descriptions help you prepare for the shooting sessions.
You can find the best locations and events by reading quality blogs.
Take a look at the 16 best travel photography blogs to follow!

Top 10 Travel Photography Destinations
You can go anywhere in the world and take photographs. And if you use a few basic compositional rules , you are halfway there.
Our article offers different places you should visit, from all around the globe. From Thailand to the USA and even to New Zealand, you can find popular photography destinations!
It’s always a good idea to get information before you start planning your travel.

The Most Iconic Places in the World to Photograph
There are some places in the world that everyone recognises. These are usually historical sites or buildings, but some of them are the wonders of nature.
If you visit these places, you must take photos of them. But try to be unique! Get creative, and bring a new perspective.
Take a look at our list and plan to visit one of them on your next trip. It can be the Eiffel Tower or Central Park, and you have great opportunities.

The Best Architecture Photography Locations in the World
Some places are known for their architecture . You can find unique buildings everywhere, sometimes even stories that blow your mind.
While you are travelling, make sure to do a bit of research, and don’t miss any interesting spot!
For the ten best locations, read our article, then start packing!

The Most Beautiful Cities in Europe to Photograph
In Europe, there are so many diverse landscapes and architecture at such small distances.
The same can be said about nature. Without these venues, cities wouldn’t be the same. Natural landscapes also play a vital role in shaping the atmosphere.
Read our list, and if you have the chance, try visiting more of them during one trip!

How to take Unique Photos of Famous Places
People travel from all around the world to see and photograph these delights. Because they are so famous, it’s hard to capture them in a unique way.
If you follow our 9 tips, you can get closer to this goal.
Start with doing research and plan what you would like to see in your images. Arriving early is a great idea to avoid the crowd. If the place is already crowded, you can even use this to show the atmosphere.

Top 20 Places to Take Pictures in LA
There’s the old and classic Los Angeles. And, there are the newer, more happening spots that offer you brand new photo ideas.
Take a tour around LA with our list of the best 20 places!

The Best Places to Take Pictures in NYC
New York is an ever-changing city, with a rich history and cityscape.
Go through our 10 recommendations and imagine how you will photograph them in your own unique way.
You can include New Yorkers in your images as the crowd belongs to the atmosphere.

Beautiful Pictures of Japan to Inspire Your Travel Photography
Japan has a lot of historical, cultural and natural wonders you can capture.
For some travel photographers, Japan sits on a pedestal because of it’s natural and built heritage. It is also full of interesting food and neon-lit streets.
Our 20 images of Japan give enough inspiration to book a flight to Japan!
The Best Photography Locations in Tokyo
The capital of Japan is an incredible place to photograph. Whatever style of photography you enjoy, Tokyo will have you covered.
You should visit the most popular places and buildings. The architecture is amazing, and you can also find quirky settings like cosplay events.

Guide To Photography Etiquette in Japan
Like anywhere else on the planet, Japan has a photography etiquette that should be followed when capturing images.
Some of them are common sense, such as asking for permission if photographing people up-close. Others are specific to locations. In Japan, some areas have banned selfie sticks, for example.
Read through our list to make sure you are doing everything you can to stick to these guidelines.

The Best Spots For Photography in London
London is a crowded place, and not only because of people. By walking on the streets, you bump into landmark buildings or parks on every corner.
Take a look at our list and make sure to include everything when you are planning your route.

The 10 Best Photography Locations in Paris
When someone says Paris, the Eiffel Tower appears in everyone’s mind. In reality, the opportunities for photography in the many arrondissements are endless. And Parisians light up every frame.
We collected 10 of the most famous ones. Make sure to visit them if you have the chance.

Best Tips and Locations for Taking Great Pictures in Venice
Venice has a nostalgic and romantic atmosphere. Due to its unique location and breathtaking canals, everyone can immediately recognise photos taken here.
This article not only summarises the best locations, but it gives tips on when to visit them. A lot depends on the lighting. You can spice up the most basic images if you are there at the right time.

The Best Photography Spots in Rome
All roads lead to Rome; who can deny that? This city is full of history, culture, architecture, and food.
We collected our favourite photo spots and added some tips on how and when to photograph there. Plan your visit in advance to make sure you don’t miss anything!

The Best Photography Spots in Barcelona
Barcelona is full of tourists due to its stunning sights. You can find famous, one of a kind buildings from Gaudí, beautiful parks and streets.
Our lA Barcelona-based photographer wrote our list of 10 photography spots you will find under-the-radar nooks only the locals know!

The Best Amsterdam Photography Locations
Amsterdam is a compact, pedestrian-friendly, and cultural city. The streets themselves are worth photographing, but obviously, you can find famous venues.
Our list is going to guide you through Amsterdam and show you the places you must visit.

The Best Photography Spots in Budapest
Budapest is a photogenic city where you can bump into different subjects that worth capturing. From famous streets to buildings and thermal baths aplenty, there’s so much to photograph.
It has a beautiful river, the Danube, which allows you to take breathtaking images and offers many opportunities. Let us guide you, and see why you should visit this city.

Best Spots for New Zealand Landscape Photography
New Zealand has beautiful places to visit. It’s like you were standing in a painting or in a scene out of a famous trilogy.
Follow our ideas to find the best spots, and take surreally beautiful images. You should include cities, lakes, waterfalls and the countryside in your collection.

Best Iceland Photography Spots and Tips
Iceland is becoming more and more popular among tourists. It’s no wonder this place offers venues that are beyond comparison.
Get to know the locals, and travel to more isolated and secret places. Besides giving you useful advice, we collected the best spots you should visit!

Best Photography Spots in Yosemite National Park
Yosemite National Park is one of California’s most beautiful places. It’s full of ancient redwoods, so this is the perfect destination for wildlife photographers.
It’s hard to say which spot is the best, but we tried to collect 10 of them. Explore Yosemite and get beautiful memories printed and framed on your walls!
Casey Kiernan’s Iceland Photography Workshop Review
Casey Kiernan is an award-winning photographer and cinematographer. He is best known for his stunning time-lapse and images that can be seen all over the place.
In this review, we run through his Iceland Photography workshop. Unlike traditional photography workshops, this one took place with the use of campervans.
For all the ins and outs of why this workshop is highly recommended, read our review above.

Creative Travel Photography Ideas
Tips for carnival photography.
From Brazil and Mexico to Venice and Thailand, street carnivals are a fiasco of colour and costumes.
Each one is slightly different in size, magnitude or duration. They also have different concepts.
Read our tips to arrive prepared. Practise taking what you need, scout the location, and try isolating your subject. These and our other ideas will hopefully help you a lot.

How to Take Great Travel Photos of Yourself
There will be times where you want to record yourself while travelling. Either for memories or social media proof.
What to do if you were on your own? How do you manage to capture yourself in a scene?
Luckily there are a few ways you can do this. You can ask other tourists or locals to take your picture. Another way would be to use a tripod and a 10-second delay.
For other tips and techniques, read our article here!

Creative Photography Composition Techniques to Improve Your Travel Photos
Compositional rules exist to help create interest in your images.
These can be layered for maximum effect, turning a somewhat dull image into something awe-inspiring. Using reflections is a great place to start.
These repetitive images are great for the viewer as they add depth and dimension to your subject.

Black and White Travel Photography: How to Make the Most of It
Shooting in black and white eliminates the distractions caused by colours. By using black and white, you look at your subject and scene in a different way.
Here, your focus is on the contrast of a scene. The textures and shapes are more prominent.
Read our article on why you should look at the city or nature in black and white.

Street Photography: How to Take Pictures of Strangers
Photographing people on your travels adds story elements to a scene. It also adds a sense of scale to large or difficult to gauge subjects.
Having people in a scene can change the atmosphere of the scene easily. But for this, you need to prepare and learn how to stay invisible. Or how to communicate with your subjects.
Our article runs through how you can capture pictures of strangers.

Documenting Places and People: What You Need to Know
As a travel photographer, you are documenting the people and places you visit. Each new location brings forth new moods, feelings, light, people and visual elements.
With most areas of photography, research is key. This lets you know what you can expect in each new area.
Knowing what to expect means you can change your camera and personal gear accordingly. This gets you one step ahead of other photographers.
Try telling stories, photograph strangers and spot the unique scenes.

How to Crop Your Travel Photos for Better Results
Knowing a little about cropping can really help to boost your travel photography. What you leave in is just as important as what you leave out.
It’s better to concentrate on your subjects than missing great moments while you are trying to reach the best composition. You can crop the image later.
In our article above, we have summarised the basics of cropping and rotating your travel photos.

How to Use an ND Filter to Remove People from Long Exposure Shots
An ND filter is an essential piece of equipment. It allows you to capture long exposure shots in the harshest sun.
Not only is it easy to assemble, but they are quick and easy to use. They can incorporate well into time-lapse projects too.
The biggest benefit is their ability to make people disappear. This can be especially helpful in very tourist-heavy locations and sites.

Documentary Photography – Tips For Starting Out
If you are into travel photography, why not try a small documentary project? It could boost your creativity.
Documentary projects are typically long-term projects rather than one-time photo sessions. Photograph what you see. Visualise the atmosphere, the people and the locations around you.
You are going to learn about our world, and about your creativity too.

How to Photograph the Northern Lights
The Northern Lights attract a lot of tourists and travel photographers from all around the world.
However, they are not so easy to photograph. You have to be prepared, have a tripod and a proper camera for it.
Also, you have to be patient because they are not always visible and their intensity changes too.
Set your camera and take delight in this beautiful phenomena!

How to Take Stunning Panoramic Pictures
Panoramic images are a great way to show the landscapes you encounter. The advantage is that you are not restricted to one single perspective or view.
After capturing many images on a horizontal plane, they are then stitched together. Our article covers everything you need to know about stunning panoramic pictures.

Tips for Beautiful Beach Photography
On your travels, you are likely to come across beaches, strands, and banks. They are great areas to show sunsets, sunrises, and possibly, stories in your work.
Beach photography needs a little consideration to capture perfectly. Our list here will give you all the tips you’ll need.
After a little research, you will capture them with interesting compositions, perspectives, and exposures. Try avoiding crowds, but sometimes you can include people in your images. Details, golden hours, and silhouettes are also great ideas to capture.

Ethical Travel Photography
Travel photography ethics: when you shouldn’t take that picture.
A camera is a powerful tool. It’s a device you can use to record the world around you.
Sometimes you have to consider whether you should photograph someone or something or not. Poverty, self-promotion or stereotyping are controversial topics.
Ask permission first, to avoid questionable situations. Don’t invade anyone’s personal space.

Tipping for Photos: Should You Do It?
Tipping is the act of giving someone money in exchange for a photograph of them. Usually, it is a local person in the native environment who adds something to the image.
It makes the image possible. But you might find these locals will ask for something, usually money, to be in your image.
This is something that many travel photographs will face numerous times.

Find a Fixer: Using a Local to Improve Your Travel Photography
A fixer is basically a local person who can help with many tasks.
They speak the language, know the contacts and can show off the hidden highlights of a place.
They can be expensive, based on their experience and the lack of competition, but are incredibly useful.

How to Start a Travel Photography Business
How to get paid for travel photography.
There is a lot of money in the travel industry, which means the demand for anything tourism-related is strong.
Of course, you have to make sure if travel photography is right for you. Make a website, a blog, be active on social media and have the proper gear.

Get Paid to Travel – 10 Hot Tips From Paid Travel Photographers
A travel photographer provides imagery for the global tourism industry.
This might be for magazines, newspapers, and books aimed at marketing, information or documenting cultures and events.
Being a professional travel photographer means making money from your images. There are multiple avenues to do this.
One way is to sell your prints. Be present on social media, sell your images on stock sites and enter competitions. And these are only a few of our tips!

How To Sell Your Travel Photography
Of course, you have to start with having great photos. Then you have a lot of options, like selling them on stock sites or as prints.
You can even sell the images directly to clients, not as stock photos. You can even sell your stories, accompanying your photos.
How do you promote yourself efficiently? Read our article above for smart tips.

How to Post-Process Travel Images
How to optimise your travel photography editing workflow.
Travel photography can result in a lot of images. Sometimes it seems to be impossible to go through them.
You should back up everything and organise your images. One way to keep track of your photographs is to create a different Lightroom catalogue for each journey.
For other great workflow tips, read our article above.

Post-Processing Tips for Better Travel Images
Travel photography can require post-processing. You should start by choosing the best editing software.
Then go through the different stages of editing, from cropping to sharpening, noise reduction and adjusting contrast, highlights and shadows. You can even remove unwanted elements.
For the 10 best post-processing tips, take a look at our article here.

Simple Lightroom Tips for a Better Travel Photography Workflow
Lightroom is a popular software for post-processing. It hosts a great library system for effective image storing.
After importing your images, you can make use of the built-in map. It makes it easier to find the shots you are looking for.
Lightroom presets are also going to make your workflow faster. And you can even use Lightroom on your smartphone, to edit images on the go.

Photo Editing Tips for Travel Photography
Photographing in RAW will make editing your images more efficient and you’ll have better quality.
In the editing stage, adjust the colour temperature, the exposure, and add a bit of contrast. Adjust whites and blacks as well. Cropping and strengthening are also important.
The last step can be the removal of unwanted elements.

Best Free Lightroom Presets to Use
Adobe Lightroom presets are a great way to edit your photographs fast. You upload them to your Lightroom preset folder, and then use them as you wish.
They adjust your image at the click of a button. Exposure values, shadows, and highlights are a few modifications that could change due to the preset.
Others are more extensive, changing the tone and colours of an image to have a certain atmosphere.
Here are a few free presets for you to work with to get more from your images. If you need some help installing these presets, read our article above.

We are confident that this article provides you with all the education you need to become a professional travel photographer!
As you can see, travel photography is a versatile genre. It needs planning, research, organising skills, patience and knowing the ethics. Be aware of your surroundings and capture everything, but also make sure to enjoy your travels!
It may start as a hobby but you can make a lucrative career out of it. So, keep travelling and clicking!
Want to reach the world with your stunning travel photographs? Get organised. Check our ebook Organic Marketing for Photographers for time-tested smart tips on building a website, SEO, lead generation, pricing, sales, etc.
21 EASY Travel Photography Tips (Make Better Pictures with Little Effort)
By Author Jurga
Posted on Last updated: December 8, 2022

Are you looking for simple travel photography tips to help you take better pictures? You came to the right place! In this guide, we share some easy, actionable tips and tricks that will help to improve your travel photos with very little effort. No photography course or fancy equipment needed – find out!
Travel photography has become an essential part of any trip and any vacation. We all want to capture those special moments of our travels, keep them for later, and share them with our family and friends…
But how often do you find yourself in a situation where you feel that your travel pictures just don’t do justice to all the amazing things you saw and experienced?
With ever-improving technology, it’s now easier to take good travel photos without much effort than ever before. However, by preparing well and applying a few simple tricks, you can easily transform your travel photography from good to great! And no, you don’t need a professional camera or any special knowledge for that.
So if you looking for travel photography tips to improve your vacation pictures, this guide should help you do just that. In this article, we share some simple photography tips, but also some important travel tricks.
These tips will not only take your travel photography to the next level but will also help you have a more unique travel experience. Find out!

How this article is structured. First, you’ll find general tips for travel photography, followed by simple photography tips that will help you take better pictures without much effort. Further, you’ll find some useful practical tips and things to consider when preparing for your trip (with photography in mind).
Take a look!
These are our best travel photography tips:
1. Get to Know Your Camera
First, let me make one thing clear. You do not necessarily need expensive camera gear in order to take really nice pictures. Smartphones and entry-level point-and-shoot digital cameras like this one offer excellent quality. Quality that’s more than good enough for a family album, social media stories, or a print to hang on the wall.
However, no matter what kind of camera or smartphone you use for travel photography, it’s always useful to take some time and familiarize yourself with it. After all, you don’t want to miss some unique photo opportunities because of the time it takes you to set up your camera.
Each device has somewhat different settings and a big range of possibilities. Even if you use just a few of those settings once in a while, you’ll improve your photography skills and get better pictures.
Here you can find our hand-picked selection of some really good cameras for travel for all budgets sold on Amazon .

2. Do Some Research for Trip-Specific Photography Tips
Now that I told you that you don’t need any special gear, I also have to add that some types of travel photography might indeed require some special equipment or knowledge.
For example, if you are visiting Nordic countries in winter, you’ll probably want to learn the basics of the Northern Lights photography . You may want to research if there are any special aurora photography apps for your phone. However – if you want some decent pictures – you’ll definitely need a good tripod and a somewhat better camera with manual settings for this type of travel photography.
This is also the case for a trip where you are planning to take pictures of wildlife. Often, your smartphone and cheaper cameras will just not be sufficient for really good pictures. So if you are planning a safari in Africa, you may want to research what kind of cameras and lenses you need for wildlife photography .

3. Experiment with Camera Settings
Don’t be afraid to exit the ‘auto’ mode of your camera and experiment with the settings. Even something as simple as switching off or forcing the flash, can make a huge difference already.
If you are using a smartphone, you probably just use the standard photo and video settings. But if you look a bit deeper, you’ll see that there are other options as well.
Most smartphones also have panorama mode (great for wide panoramas in the mountains or cityscapes), selective focus mode (nice for portraits), or even one for food or night photography. Usually, there’s also a ‘pro’ mode where you can play with different white balance settings, etc.
If you have a DSLR camera , you may want to learn just a little bit about white balance, ISO, aperture, and shutter speed. Change the white balance and your pictures taken on a grey rainy day will become warmer. Change the shutter speed and you have a silky waterfall. Change the ISO sensitivity and you’ll be able to take pictures in low light without the flash…

4. Look for Different Angles
Standing in front of a landmark you visit, you suddenly realize everyone around you is holding cameras and smartphones, taking the exact same pictures… Sounds familiar?
Do you want your travel pictures to be different? It’s easier than you think! All you have to do is simply use your legs.
Sit down, kneel down, even lie down if necessary. Or try to climb somewhat higher. Get closer to your subject or move further away. Go left, go right, go behind… You get the picture. Literally – you get a better, more unique picture just by changing the angle.

5. Try Different Compositions
One of the easiest ways to improve your photography skills is by learning how to make a good composition. Sometimes by simply recomposing your shot just a bit differently, you get a picture that tells a more powerful story.
Most people take pictures with the subject right in the middle. And while sometimes it can result in a beautiful shot, more often you get an ordinary image. Often, you can really bring your pictures to life by simply moving your subject away from the center.
You may have heard of the famous rule of thirds . Divide your picture frame into 3 imaginary lines and 3 columns and place the subject at the intersection of those lines. Take a look at the sleeping koala picture to see what I mean.

Shooting landscapes? Put your horizon at either top or bottom third of the photo. Also, use natural lines, such as a forest path or a twist in the road to help guide the viewer through your photograph.
Taking pictures of people or animals? Try to also place your subject in such a way that they are looking towards your picture and not away from it.

6. Explore Deeper
Some of the best travel pictures are not those that are taken right in front of famous landmarks. For more authentic travel photography, try to get just a bit off the beaten path.
If you are walking around the city, don’t stick to a plan or try to follow the map exactly. If you see an interesting side street or an alley, turn in and check it out. If you are road-tripping and stumble upon some interesting roadside attractions or local events, stop and check it out…
Also, ask locals or other tourists for some cool spots and hidden gems. You’ll be surprised at how many incredible locations are not mentioned in any travel guides. Don’t be afraid to talk to people and ask for some tips.
We have had some amazing travel experiences just because we talked to people. And even if it doesn’t always lead to the best photo spots, you might find delicious local food, quirky shops, or some interesting street art.

7. Include People or Objects
Another easy way to improve your travel photography is by including people or objects in your pictures. Not only do you get better and more unique photos, but they also tell a story.
Look around for something or someone you can include in your picture to give it a different feeling or perspective .
Think of people (locals, kids, really old people – don’t forget to ask for permission!), animals, flowers, tree branches, road signs… For a more personal perspective, try including your own arms or legs, etc.
Even just including a few wildflowers in your composition can make your landscape pictures stand out. You can also frame your images using tree branches and leaves. You can show the size of a building or a tree by including people or cars in that same image.
There are so many ways to be creative; often you only have to look around with different eyes!

8. Look for Colors
When traveling, always keep an eye out for bold, vivid colors . Pictures with strong colors are often more powerful and bring the place back to life in your photos.
It can be anything from colorful buildings (focus on details like walls, doors), to cars, buses, bikes, or scooters. But also local markets and traditional clothing often give you a chance to take some unique colorful travel pictures.
TIP: If you are traveling to a place that isn’t really known for being colorful, wear some bright clothing yourself. A bright jacket can make all your gloomy vacation pictures so much more special.

9. Look for Details
For more interesting travel pictures, try to look for some interesting details everywhere you travel. It can be something local, something unique to that place, or maybe a special detail in the architecture of a building.
Also, get close, really close to your subject. Very often, details tell a stronger story than the whole!
Sometimes you get frustrated because you can’t fit the whole building into a picture. Or you are at a colorful lively market, but your pictures don’t portray any of that special atmosphere… Remember that often less is more and concentrate on a few details rather than trying to capture everything.

10. Have Your Camera Ready
Some of our best travel pictures are often taken unexpectedly, without any planning. It’s especially so with trips that involve wildlife . You just never know when you’ll get to see animals or what they’ll do, so you should always have your camera at hand and ready to take a picture.
Of course, pictures that you take unexpectedly will often not be perfect in composition, or maybe even a bit blurry. You can often solve it with some post-editing afterwards. But at least you got the shot!
Another example of the importance of having your camera ready is when you’re taking a picture of something that you only do once and it moves fast (like in our picture on the fun zip-line experience in Switzerland – see below). You have to be ready to take a picture and it helps if you put your camera in continuous shooting mode. That way, you can take lots of pictures in just a few seconds, and afterwards keep the best ones.

11. Do Something Fun
It’s impossible to get spontaneous pictures of the whole family if you don’t have a photographer following you around the whole day. So if you want to take some fun vacation pictures, the best way to go about it is to actually do something fun.
If you are taking pictures of your kids or your travel companions, simply ask them to do something and actually pose for a picture.
We all want candid shots, but they hardly ever happen, especially when you want to get several people in the same picture. But if you make an effort, you can easily take some really nice vacation pictures of you and your family.

12. Be Patient & Take Your Time
Travel photography is what you make of it. You can just take a picture and move on, but for the best pictures, you need to take your time and be patient.
Often, you don’t have much time when we travel, and you find yourself running from one place to the other. But even if you slow down just a little bit, even if you wait just a few moments, you might be able to take a much better picture.
It might mean waiting for the perfect light or for another person to move away from your composition, but it usually pays off.

13. Just Take That Picture!
Sometimes, you see a beautiful place, but you have no time to stop for a picture, or the light is not perfect, or the weather isn’t ideal, or there are too many clouds… So you swear to do it later or on your way back.
But then the weather changes for even worse, the mist comes up, or something else happens, and you never get a second chance.
This happened several times to us. So now we always take a picture when we see an interesting opportunity. Even if it’s not perfect, at least you got the shot. And if you do come back and the conditions are better indeed, you can always take another picture.
And sometimes, you get some really interesting pictures that way.

14. Travel Light
It’s always so tempting to pack the perfect camera or lens for all the possible situations you might encounter on your trip. But that also means that you’re always carrying so much unnecessary gear. Not only is it expensive to buy and heavy to carry around, but it also limits your flexibility. Not even to mention that expensive camera gear can put you at risk in certain places you visit.
Often, having more photography gear to deal with might actually lead to you missing the best photo opportunities. You may find that you are constantly switching lenses trying to get that perfect shot while your travel companions are simply enjoying the scenery.
So pack wisely, considering what kind of pictures you think you’ll be taking. My personal rule is to never pack more than two lenses for my DSLR camera. If we visit cities, I usually just go with one lens. For nature and wildlife, I pack a good telelens as well. Sometimes, it’s a tough choice which lenses to pack, but you also learn to be more creative that way.
TIP: If you are not a professional or a semi-professional photographer and don’t absolutely need a DSLR camera for your travel photography, simply get a really good point-and-shoot camera with a good optical zoom (something like this ). That way you always have the right ‘lens’ with you. There are so many versatile cameras nowadays that offer great quality. So don’t make your trip more stressful than necessary.

15. Pack a Tripod
Now that I told you to travel light, I also have to say that – for some trips – you really should consider packing a good tripod . It can be bulky and heavy to carry around, but it is also unmissable for certain types of photography.
If you are planning to take pictures early in the morning or late in the evening, if you are photographing waterfalls or Northern Lights, a tripod is a must. But even if you simply want to have the whole family in one picture, it’s often useful to have a tripod. And yes, you can also ask other people to take a picture, but we all know how those pictures usually turn out to be…
There are many different kinds of tripods and you should get one that can steadily hold your camera. For the smallest cameras or smartphones, you can use something like a GorillaPod . For heavier DSLR cameras, we recommend Manfrotto tripods – they are available in many different sizes and models.
My experience shows that for travel photography, the more compact and lighter the tripod is, the more you’ll use it. Just make sure that it can hold the camera and the lens that you have.

16. Pack Enough Memory Cards & Extra Batteries
Always, always pack more memory cards than you think you’d need. They are really not that expensive anymore and as the camera quality gets better and the picture size larger, you may run out of space on your memory card. So always have a few extra cards.
Also, get memory cards that are fast so that you don’t need to wait for the camera to save a picture before you can take a new one. If you are traveling to places with extremely hot or cold weather, make sure that you have quality memory cards that can work in any conditions.
We use and recommend Sandisk SD Extreme and Sandisk SD Extreme Pro cards. They offer an excellent price-quality ratio.
Always pack at least one backup battery set (and make sure that it’s charged) and carry it with you. There’s no use in having a set of extra batteries in your hotel room or in the car; they should always be at hand.
If you are using your smartphone for photography, take a power bank and a cable so that you can easily recharge your phone during the day. In any case, a good light and compact power bank is a must for any trip these days!

17. Be Respectful & Be Careful
One of the most important things any traveler should remember is to be respectful. Respect other people, nature, and local rules and regulations. Also, just use common sense and don’t do things that you wouldn’t want others to do to you.
Don’t go trampling wildflowers even if there are no signs asking not to do that. And definitely don’t go past the signs asking you not to – there’s always a reason for that, even if it might not look obvious to you. Don’t go on private property and try to always ask people before taking a picture of them. When in doubt, don’t take the shot.
Also, don’t go jumping at the edge of a cliff just because it looks cool or you saw someone else post crazy pictures like that on Instagram. Too many accidents happen every year because people are trying to get some perfect angle for their picture and misstep too far… No picture is worth it!
Having said that, we also have quite some pictures taken at places that look quite dangerous. But in our case, it’s more about finding the right angle to make it look more special. We are always extremely careful and we do our best to always stay on paths and never cross the line or a sign asking not to do it.

18. Get up Early & Stay Late
Photography is all about the light, and it’s not a secret that the best times for pictures are at dawn and at dusk. Photographers call this the Golden Hour . So one of the best travel photography tips I can give you is to make an extra effort and get out of bed early in the morning and stay up late.
Not only will you get better pictures this way, but you will also experience some incredible sunsets and sunrises that will make your trip more special!
Another advantage of getting up early is that you can explore even the most popular travel destinations without the crowds. Most tourists never get to their destination before 9-10 AM, so those few hours in the morning will not only help you get better travel pictures but will also make your travel experience so much more unique.
Unfortunately, this is not really the case at sunset at most destinations, because many people love to stay up for sunset. However, you’ll still have more beautiful light and more special colors for your pictures. Also, some destinations that are popular with day-trippers, are very quiet in the evening. So if you can, book accommodation very close-by and stay longer! This brings me to the next two points.

19. Book Your Accommodation Wisely
This might look like a strange tip for travel photography, but the location of your accommodation can have a huge influence on your trip and on the pictures you’ll be able to take.
Spending a night at a popular day trip destination will allow you to explore the place without the crowds of day-trippers. Staying close to a specific landmark might give you unique opportunities to photograph it in a different light and at different times during the day.
Staying inside a national park might mean that you’ll be able to explore it from dawn to dark and even at night. You might be able to photograph incredible skies at night or get to see wildlife just at your doorstep at dawn. Even just booking a room with a nice view can give you chances to take pictures you’d never be able to get otherwise.
So keep this in mind when choosing your accommodation. Some of the most special travel experiences we had during our trips wouldn’t have been possible if we had chosen another accommodation.
Some of those include watching whales from our hotel in Ilulissat, Greenland , or exploring the fairytale castles of San Marino at sunset with hardly anyone else around, or watching wildlife at dusk and in the dark in Etosha National Park in Namibia … And these are just a few examples.

20. Research the Best Photography Spots and Locations
If you want to take some really nice pictures while traveling, it’s helpful to do some research in advance. Once you are on a trip, you hardly ever have the time to scout the best photography locations. It’s very easy to overlook some nice places or special angles when you’re visiting somewhere for the first time.
One of the best ways to research the best locations is by checking images of your destination online. Just type in your destination name on Google Image search, and you’ll see what kind of images come up. You can then try to find their exact location and potentially even mark it in your Google Maps account.
Another good way to find some of the nicest photo spots is by looking on Instagram. However, this also often leads to ‘Instagram tourism’ and everyone taking the exact same pictures of the same ‘instagrammable’ places…
For some places, it might be important to research when the light is best for photography. This usually highly depends on the direction of the sun. Which brings us to the last tip…

21. Don’t Forget Why You Travel & Enjoy Your Trip
If you are on vacation, it will be impossible to always be in the right place at the best possible time. Also, the weather will play a role and some unforeseen circumstances. So no matter how much research you do or which camera gear you have, often, you simply won’t be able to get the best pictures.
Remember that those perfect images that you see in the travel brochures were usually taken by professional photographers. Usually, they stay at the same location for at least a few days, scout out the best times and angles, and go back to the same place a few times in order to capture that perfect light and composition.
So unless photography is the main goal of your trip, don’t stress about it. Remember why you travel in the first place and enjoy your vacation instead of trying to get that one perfect shot!

So, these are some of the basic travel photography tips that I wanted to share with you. As you can see, most of them have nothing to do with the camera you have or the settings you use. It’s more about being creative, looking for different angles, doing something fun, or catching the perfect light. It’s also a matter of practice. The more you do it, the better you’ll get at it.
I truly hope that our tips will help you get better travel pictures. But I also hope that these tips will help you have more special trips and create better memories.
Explore, take your time to look for little details, get off the beaten path, and once in a while splurge for some well-located accommodation. Trust me, it will be worth it!
READ ALSO: Our Favorite Destinations Worldwide
If you found this post helpful, don’t forget to bookmark it and share it with your friends. Are you on Pinterest? Pin these images!

This site uses Akismet to reduce spam. Learn how your comment data is processed .
Wednesday 13th of April 2022
Do you have any tips on how to present the photos and videos that you take on your travels? For instance do you create photobooks or videos that include video clips and photos?
Tuesday 19th of April 2022
@Jurga, Awesome, thank you very much. :)
Thursday 14th of April 2022
Hi Vanessa, yes, we sometimes make a photo book with our pictures and my husband also makes a nice video of each bigger trip too. It's all more meant as a nice memory for the kids and they loved watching older photos/videos of themselves :). We don't usually mix the two though - so pictures and videos are separate.
Michael Anthony Cicchi
Tuesday 6th of July 2021
You make gorgeous photos 🙂
Wednesday 21st of July 2021
Thank you, Michael!
Saturday 26th of December 2020
Great general tipps & some beautiful shots there! keep it up :)
Monday 28th of December 2020
Thank you, Lisa!
Michael Cicchi
Sunday 13th of December 2020
A very nice article, Jurga! Great tips.
Thank you, Michael! Always such a loyal reader!
The leading authority in photography and camera gear.
Become a better photographer.
12.9 Million
Annual Readers
Newsletter Subscribers
Featured Photographers
Photography Guides & Gear Reviews

Travel Photography Tips, Ideas, Examples & Jobs
Have a passion for travel photography but not sure how to take it further? This post covers careers, what gear is best, and tips for improving!
Learn | Photography Guides | By Ashley Darrow
Travel photography is one of the most exciting styles of photography, but it can also be one of the most intimidating to get started with.
I’m at my most inspired as a photographer when I’m on the road.
Even when I’m not headed to an exciting new location, I’ve started to think about all of my photography from the standpoint of travel.
This guide is going to give you everything you need to know to get started with travel photography.
I’ll be covering everything from the basics, to the equipment you need, to 20 travel photography tips that will improve how you approach taking photos.
When you’re ready to hit the road, we’ll start our adventure with some travel photography 101.
Table of Contents
What Is Travel Photography?
Defining travel photography can be a little bit challenging as this is one of the most open and free categories of photography.
In general, travel photography involves documenting people, landscapes, and cultures anywhere in the world.
Your travel photography counts whether you have to hike for thousands of miles or you took a 10-minute bus ride from your home.
Travel photography can be done by career professionals working for major magazines like National Geographic or it can be done as part-time freelance work.
Many travel photographers make their money by taking contract work from tourism departments or brands looking for product photography shot on location.
Travel photographers often find themselves working in challenging conditions. There’s a good chance that you’re going to be snapping pics in low light conditions , rough weather, or even half a world away from the comfort of your own bed.
- Related: 77 useful travel tips for photographers
What Does Travel Photography Include?

Image Credit: Sam Forson
Travel photography incorporates countless different styles.
Travel photographers often take landscape photographs, architectural photographs , as well as street photography. It’s also common to see food photography and documentary work being done by travel photographers.
As a travel photographer, your goal is to capture and express the story of a particular time and place. You’ll be giving people a taste of what’s happening in the moment while you’re in a particular location.
How Much Do Travel Photographers Make?
Travel photography is made up of a wide range of styles, but it’s also made up of a wide range of pay rates.
If you’re lucky enough to land a staff photography job with a major magazine, you could wind up with a six-figure salary. However, freelance travel photographers can make as little as around $18,000 a year.
Beginner travel photographers often make even less than that as they start to piece together their career.
Part of your pay as a travel photographer will come in the form of comped travel expenses. It’s pretty common for travel photographers to take a job with a tourism department that includes free transportation and lodging as part of their payment.
Is travel photography in demand?
Travel photography is in high demand.
How Much Do You REALLY Know About Photography?! 🤔
Test your photography knowledge with this quick quiz!
See how much you really know about photography...

Your answer:
Correct answer:
SHARE YOUR RESULTS
Your Answers
This demand is being driven by tourism departments, brands looking for more engaged lifestyle photography , and the rise of social media making travel photography a viable path for a content creator.
There are more people taking travel photos than ever before which means that you’re also going to have a lot more competition despite there being more job openings.
How Do I Become a Travel Photographer?

Image Credit: Kamaji Ogino
Becoming a travel photographer is pretty similar to how you would start up almost any photography career.
If you’re a total beginner, you want to start by mastering the craft of working behind the camera. This means learning how to stay in control of your exposure, frame captivating shots, and just get comfortable taking pictures wherever you go.
Here’s a basic outline of the steps you’ll take to start your travel photography career.
- Learn your photography basics
- Identify your travel photography niches
- Build your portfolio
- Grow a social media presence
- Begin reaching out to clients
- Publish your photography
- Grow your business by reaching out to bigger clients
- Continue to promote your work
- Have fun traveling!
I should note that plenty of travel photographers also crowdfund parts of their career.
Building a presence on social media sites like YouTube and connecting that to your crowdfunding platform of choice is a great way to bring in some additional money.
What Equipment is Needed for Travel Photography?

Image Credit: Hiren Lad
In all my years of photography, the one thing I’ve learned is that if there’s anything photographers love nearly as much as taking pictures, it’s talking about their gear.
Whether you see this equipment as the tools of your trade or the raw materials of your art, you’re going to need some equipment to get started with travel photography.
I’m going to cover the standard gear that most travel photographers will gravitate towards, but I’ll also be talking about different setups for film photographers and mobile photography.
I’m going to kick things off with the absolute must: a camera.
You’re not going to get very far in your career as a Travel Photographer without a camera. I’m being a little silly here, but it’s not just as simple as picking up any random mirrorless camera for travel blogging .
So, what camera is best for travel photography?
The absolute best cameras for travel photography are going to be, no surprises here, the latest mirrorless releases from the big-name brands like Sony, Camera, and Nikon.
Those cameras are packed full of the latest features and offer some of the best image quality.
You can also get amazing results, and save money, by picking up older cameras. My Sony a7s II is still my main camera body and my Canon 5D Classic, which was released way back in 2005, still takes pictures that get people asking me “How did you do that?”
You don’t need to spend a lot of money on your travel photography camera. A skilled photographer will be able to take amazing pictures using a point and shoot digital camera from the 90s. It’s craft that makes the photographer, not gear.
Travel photography can also be done with your smartphone. There are plenty of professional photographers out there primarily shooting on smartphones.
I also want to highlight film cameras. Film is the historic origin of our art form. Any film camera from a toy lomography camera to a professional large format camera can help us see our travels in a new way.
With all of that said, there are a few important features that you should look for in a travel photography camera.
- Weather sealed designs are much more important when you’re trekking through unknown territory than when you’re at home in the studio
- Your camera should also be ready for the road. Just like your car, you should take your camera in for a tune-up before a long trip
- Double-check for the specs that matter most to you. For me, that’s low-light performance and color science
Your camera is only half the equation which means we need to take a look at the lenses that will be going on this journey with you.
- Related: How to choose a camera and what is the best camera for travel photography?
I bet you’re wondering which lens is best for travel photography? You don’t need to worry, I’ll walk you through my top pics for a travel lens whether you’re shooting on a brand-new Sony mirrorless camera or you plan on taking a Canon 5D Classic on the road.
The first place you need to start is by asking yourself the most essential question in photography: What types of pictures do I plan on taking?
Here’s a quick breakdown of my recommendations for travel photography lenses based on my experience for a variety of photographic styles and budgets.
- Standard Zoom Lens —A standard zoom lens like the classic 24 to 70mm is the go-to travel lens for so many photographers I know. This lens easily handles street photographs, landscapes, and portraits. Pick this to make a flexible one-lens kit
- Wide Angle Zoom Lens —Wide angle zooms are better suited for photographers who know they’ll be shooting landscapes and architecture. If your wide angle zoom goes up to 35mm, then you can even get away with using that as your every-day lens
- Wide to Telephoto—These lenses have focal length ranges like 24 to 105mm. They are usually affordable alternatives to pro-level lenses that can still capture stunning images. You’ll want this lens if your main concerns are budget and stylistic flexibility
- Telephoto Zoom Lenses —These massive lenses typically top out at 200mm or 400mm focal lengths and are ideal for wildlife, bird, and sports photography. Their size, weight, and cost make them less flexible than other options, but these lenses are a must-have for photographers interested in the styles I just mentioned
- Pancakes and Nifty Fifties —Pancakes lenses have such a small profile they double as a body cap while the iconic Nifty Fifty is a budget 50mm with a huge fanbase. These lenses are perfect for photogs who want to stay ultralight or for anyone who wants an emergency backup lens.
- THAT lens —We all have a lens that, despite never getting much use, we just can’t seem to leave at home. Mine is the Helios 44-2. I take that lens on pretty much every trip even if it doesn’t get much use. Allow yourself a little room for that “fun” lens and you might be surprised by how much use it gets over time
I always have at least two lenses on me when I’m traveling—just in case.
I once dropped an expensive prime lens and watched it roll off the edge of a mountain in the desert. Luckily, I had a pancake lens in my bag so the photography trip wasn’t a total loss.
Ever since then, not only do I treat each of my lenses with the utmost care, but I also make sure but I’ve got backup options on hand.
- Related: How to choose a camera lens
Travel Photography Bag
Just like with lenses and camera bodies, you have a few options to consider when it comes to picking the right travel bag for your next adventure.
Before I get too far into talking about camera bags, here’s the five things I always consider when I’m packing a bag for my next trip.
- Camera Bag Size —Size is one of the most important things to look at when shopping for a new travel photography bag. You want to find a bag that’s going to comfortably fit all of your equipment without causing too much strain on your back. Sling bags are great for days out in the city with light gear, but you should look for a comfortable backpack if you plan on covering some serious distance with your gear
- Pack Weight —Here’s a quick piece of advice I picked up from hiking. Your maximum pack weight should only ever be 20% of your total body weight. This means that if you weigh 200 lb, the heaviest your camera bag should ever be is 40 lb. The lighter, the better
- Features —There are some features that I consider an absolute must have in any of my travel camera bags including rugged build quality, plenty of padding and protection for my gear, and easy access to at least my main camera body and lens so I can shoot on the fly
- Style —You could buy the most technically perfect travel camera bag, but if you don’t actually like the way it looks you’re never going to take it on a trip. I definitely believe that form should be second to function when it comes to camera bags, but I’d also be lying if I said it wasn’t a huge factor in my camera bag purchasing decisions
- Your Gear —Your gear is actually going to dictate the type of bag that you’ll be looking for. A travel photographer shooting on a Leica Q2 can get away with a much smaller bag than a photographer shooting with a Canon 1DX
I also typically bring a packable backpack with me as part of my kit. This could be a really lightweight sling bag or something like the Lowepro Runabout.
This lets me leave the bulk of my gear at my hotel when I just want to have a quick trip around a new city taking pictures.
- Related: How to choose a camera bag
Tripods for Travel Photography
Tripods are an interesting—and somewhat contested—piece of the travel photography puzzle. I never used to take a tripod with me while traveling and that’s because most of my photography was shot street style which means lightweight and handheld.
However, the more I get into film photography and more interesting exposures, the more I find myself relying on my travel tripod.
My absolute number one pick for an adventure tripod would have to be the Peak Design Travel Tripod . It’s fairly lightweight, intelligently designed, and packs down small enough to fit in most of my bags.
Depending on the type of photography you’re looking to capture, you can also use tripods like a gorilla pod or even just take the tripod you have—even though it might be a little larger and heavier than would be ideal for travel.
This roundup of the 7 best travel tripods is a great place to get started if you’re shopping for something designed for the road.
Do I Need a Tripod for Travel Photography?
I’m going to dig into this mild controversy for just a moment. The question of whether or not you need a travel tripod to begin with is the source of some debate for photographers.
Honestly, the answer is maybe. It really depends on the type of pictures that you’re hoping to capture and your personal style as a photographer.
If you like to run and gun while capturing slices of life on busy city streets, you probably don’t need to bring a tripod with you.
Styles of photography that are highly mobile and rely on fast composition changes typically ditch the added stabilization that a tripod brings because it just slows them down too much.
Tripods might also not work for certain events and organizations. Trying to set up a tripod during a rock concert is a recipe for disaster and some museums won’t even let you bring in a tripod unless you pay their professional photography fees.
Then again, there are a few types of photography that absolutely need a tripod in order to work. Long exposures, shooting in dimly lit situations, and using some telephoto zoom lenses pretty much mandate shooting on a tripod.
The long and short of this is that owning a tripod and learning how to use it will make you a better photographer, but it’s not quite a mandatory piece of your travel photography kit.
The Camera Accessories I Always Forget for Travel Photography!
There are so many small accessories that are vital for digital photography that I find myself constantly forgetting. Far from being little odds and ends, these are essential parts of my kit that I’ve started to just leave in my travel bag so I never have to worry about packing them.
I’m talking about SD cards , microfiber cloths, sensor cleaning kits, and all those other little things that you might not miss until you’re in the field and you’ve got a speck of sand on your sensor ruining your shots.
I’ve started making a checklist that contains all these little items before I pack out. There’s nothing more defeating than being in some beautiful destination and realizing you only have enough space on your memory card for a few dozen more shots.
This is the checklist that I use for your average trip. Feel free to adjust things based on the gear that you use.
- Sensor cleaning swab x 2
- Lens cleaning Spray
- Microfiber cloth
- Spare camera batteries for each camera
- Memory cards—one in each camera, extra in the bag
- External SSD if I’ll need to backup files while traveling
- iPad for editing, emailing, and posting pics on socials
- Camera strap
- Camera body cap and rear lens cap
- Remote shutter release
- Chargers and cables
Lighting for Travel Photography
Lighting is a bit of an interesting topic when it comes to travel photography. We don’t often associate this incredibly mobile genre of photography with the piece of equipment that defines studio work, but there’s some great reasons to take some lights with you on your next trip.
Photographers like Briscoe Park are doing incredible work mixing bold, almost giallo, lighting styles with travel photography. There’s also a wealth of photographers using the dark nights of remote locations as canvases for their light paintings.
I started taking a few small lights with me when I hit the road and it’s definitely pushing my abilities behind the camera.
Lights like the Aputure MC and MC Pro are great for adding lights to portraits, throwing splashes of color into images, or creating other-worldly scenes. The Infinibar or MT Pro, also from Aputure, are solid choices for light painting .
Even something small like the Lume Cube can help gain control over lighting while away from the studio. Just don’t try to haul around your old tungsten lights on your next trip!
Mobile Travel Photography Gear
Before you start thinking travel photography requires a mountain of expensive equipment, you might be reading this article on the only device you need to get started with travel photography.
That’s right, smartphone cameras have come a long way and they are perfectly capable of being your main camera body for traveling adventure photography .
Even though your smartphone is essentially a pocket camera that can surf the internet and make phone calls, you still might want to add some extra gear to make the most out of being a mobile travel photographer.
My biggest recommendation would be to pick up a Moment smartphone case and a few Moment lenses.
These lenses will dramatically change your composition and help make your images look a bit more professional and a bit less like a quick shot on a smartphone.
A lightweight Gorillapod, a photo editing app like Lightroom mobile, and a power bank to keep you charged are a few must-haves.
This might sound a little unconventional, but my smartphone is one of the cameras I use the most. It’s lightweight, can take high quality pictures, and it can be a great budget alternative to expensive cameras because you probably already own one.
I almost never leave the house without throwing one or two Moment lenses in my bag. This is true whether I’m going on a 10-minute walk to the store or I’m about to hop on a 10-hour flight.
Travel Film Photography Gear
Is there any sound more relaxing than the shutter of a film camera when you’re deep in the woods or on top of a mountain ridgeline?
I don’t think so and that’s one of the reasons why I tend to travel with film photography equipment.
Film photography is almost a completely different animal than digital photography. You have to be much more engaged with your subject, composition, and exposure since you only have a few frames before your roll is spent.
Here’s a quick list of the film photography gear that I travel with. Just as a quick note, I’m leaving out things like tripods and camera bags that overlap with digital photography.
- Gallon zip-top bag to store film
- Permanent marker to jot notes on the side of a film canister
- Light meter
- Film (I always try to bring one more roll than I think I’ll need—just in case)
Read our guide to film photography for more tips.
20 Tips to Help You Improve Your Travel Photography
Want to improve your travel photography? I’ve put together 20 travel photography tips to help you up your game the next time you take your camera on vacation.
These tips are going to cover everything from advice for total beginners to some really interesting things that caught me by surprise while I’ve been on tour with my camera.
Tip 1—Get Comfortable With Your Gear Before You Travel

Image Credit: Amar Preciado
This is my number one tip for travel photography because it applies to experienced photographers as well as beginners. Before you head out on your big trip, take some time to get comfortable with your equipment.
This means packing your camera bag just like you’re going to for your travel photography trip and wearing it around your home city or just walking around your neighborhood.
There’s nothing worse than being hundreds, or thousands, of miles from home only to find out that you actually don’t like that brand new camera bag you bought.
Giving all of your gear a comfortable trial run ahead of time ensures that you don’t run into any sudden surprises while you’re traveling.
I’ve started doing this with all of my travel photography gear and it’s hard to express just how much it’s helped me. Most of the time I’m just adjusting my backpack to make sure it’s got a comfortable fit for a long day of hiking, but there have also been times where I realized that piece of my equipment just wasn’t right for me.
This will also help make things easier when you’re out there taking pictures.
It can be a little stressful to try and line up the right composition in a busy downtown neighborhood of a foreign city. Knowing your gear inside and out will give you a huge confidence boost when you need it the most.
Tip 2—Set Your Travel Photography Intentions
This might seem like a silly question to ask, but why do you want to do travel photography?
Setting some intentions and being aware of your goals ahead of time is going to help improve your career as a photographer.
If you need some inspiration for your goals, here’s a few that I’ve used in the past.
- Have at least 5 new pictures that I can turn into prints once I’m home
- Spend two days on location, day one focuses on lifestyle photography while day two is all about landscapes
- Get out of my comfort zone and network with other travel photographers shooting the same location
Remember that goals are a lot like onions. They have layers.
Your ultimate goal might be to become a world famous travel photographer with National Geographic calling you every day, but you’ve got to start somewhere.
Let’s say that your goal is to start getting freelance travel photography contracts with tourism departments. You can start from scratch by pretending that you’re on contract to take photos of a particular location.
This will help you with your future goals as well as allow you to build your portfolio in the now.
Tip 3—Always Bring (Your) Camera

Image Credit: Ketut Subiyanto
Everything starts with the ABCs and for travel photographers this means to Always Bring (your) Camera and always be taking pictures.
You really never know when the right moment is going to strike for your photography. There have been countless moments where I wish I would have had a camera on me to capture a moment that was either beautiful or could have even been historic.
Whether you’re carrying your main camera body, a pocket camera, or even your smartphone, you should always have a camera on you when you’re traveling. Be ready to start snapping pics at a moment’s notice if you spot something that catches your eye.
Worst case scenario, you’ve got another few hundred pictures to sort through when you get home. Best case scenario, you’ve caught the once-in-a-lifetime shot that you might have otherwise missed.
Tip 4—Be Patient with Your Shots
Here’s something that’s happened to me nearly every single time I’ve gone on a travel photography trip.
I’ll be at a historic ruin or in a national park with the perfect shot framed only for there to be dozens of other tourists cluttering up my shot.
When I first started with photography, I didn’t have enough patience just to wait it out. I thought that I would have to spend hours standing at a particular spot waiting for people to disperse.
As it turns out, the longest I’ve really ever had to wait for a shot to clear up has been about a half hour. If you’ve got someone to talk to or a book to read, that’s no time at all.
Don’t pass up on the shots that you want to capture just because there’s something cluttering your frame. Patients will reward photographers every single time.
Pro travel photography tip: Using an ND filter on your camera can let you lower your shutter speed which will cause fast-moving cars and people to “vanish” from your shots!
Tip 5—Learn How to Photograph People
This travel photography tip can be one of the most challenging to incorporate. Getting comfortable cold approaching strangers takes a lot of social energy.
I know extroverted photographers that have a dozen model release forms printed and ready to go in their backpack. They have no problem chatting up strangers, but it took me some time to build up that confidence.
Here’s a quick template that you can use for approaching strangers for portraits.
Be cheerful and open about being a photographer. You can say something like “I’m a photographer taking portraits today in [Location] and I’d love to take your picture.”
If you’re on a freelance contract or working for a client, feel free to name drop them to give yourself some added credibility.
After snapping their pic, I like to give people my business card, email, or Instagram handle so they can contact me later if they’d like a copy of their photo.
If they say no photos, that’s just business.
It also really helps if you can speak just a little bit of the local language. You’ll be shocked how much more accommodating people can be if you can handle a few lines of the local tongue.
Tip 6—Study Local Laws and Customs
Photography laws and customs are different the world over. As a travel photographer, you’re going to need to familiarize yourself with local laws and customs—especially when you’re traveling abroad.
Remember that the letter of the law and the local customs might not necessarily be a one-to-one match.
I’m based in the United States and here it’s perfectly legal to take pictures of strangers as long as you’re in a public location. However, social customs dictate that it’s considered rude to take someone’s picture without asking their permission first.
When in doubt, always default to asking permission first. This means asking someone’s permission before taking their portrait or asking permission before taking pictures at a historic site or museum.
Tip 7—Get in Frame

Image Credit: Dominika Roseclay
This is something I’m still working on becoming more comfortable with.
When I’m in the studio, I’ve got no problem hopping in front of the lens and doing some self-portraiture. However, once I’m out in the field I’m a little bit reluctant to stand in as my own model.
Travel photography is about telling your story. This means that you’re going to need to get in frame for some of your photographs.
Even if it’s just a few shots of you setting up, traveling to your destination, or getting dinner after a long day of shooting, people want to see the photographer behind the camera.
If you’re traveling with other photographers, why not consider making this a game? Challenge each other to see who can take the most interesting photos of your fellow photographers.
You can even take some quick selfies on location to contrast your professional photography. This will make your self-portraiture a little more intimate and warm while your travel photos show off your full talent.
Tip 8—Scout Travel Photography Locations with Your Smartphone
A great way to dramatically improve your travel photography is to scout your locations ahead of time. Before you haul all of your gear on a quest for the perfect photo, go out there with just a day pack and walk around soaking up the scenery.
Location scouting gives you a strong understanding of what speaks to you as a photographer about this location before you even start pressing the shutter button.
I recommend carrying your smartphone or a point-and-shoot camera when you’re out scouting locations.
This lets you take some test shots of a travel location before bringing all your gear out.
Tip 9—How to Always Pack the Right Lenses
I used to be so worried about not bringing the right lenses on a trip, but it’s been years since I’ve felt like I picked the wrong lens for the job.
Part of this is knowing your lenses inside and out. You should learn the basics of your lenses like aperture, how their focal length compresses an image, and which focal lengths are ideal for different styles of photography.
Lenses like the Sony FE 24-70mm f/2.8 make a great choice for travel. The focal length options on that lens easily handle majestic landscape panoramas and street photography portraiture.
I also recommend taking at least two lenses with you for most travel photography trips. I’ll take one primary lens with me that I plan on doing most of my shooting with and a secondary lens for those “just in case” moments.
Tip 10—Staying Safe While Traveling with Camera Gear
Being a tourist always carries some risk when it comes to crime. Being a tourist that happens to be carrying $3,000 in photography equipment carries a little bit more risk.
Here’s a few tips that I stick with when it comes to staying safe while shooting with expensive camera equipment.
If you can, try to do your travel photography with a group. Even if you have one other person traveling with you, that company is usually more than enough to deter most would-be thieves.
This might seem a little obvious, but you always want to keep your gear in sight. Unless I know I’m alone in the wilderness, my camera bag is never further than an arm’s reach away.
I’ve got a tip for you that I don’t see a lot of people talking about when it comes to traveling safely with your camera equipment. I like to stay discreet when I’m traveling with my camera gear.
This means I leave the branded Sony strap at home and opt for a much more neutral Peak Design strap . I also throw a velcro patch over things like the LowePro logo on my backpack that might otherwise announce that there’s some expensive camera equipment in there.
If you stay smart and aware of your surroundings, your odds of having an unfortunate encounter while carrying camera equipment will be greatly reduced.
Tip 11—Shoot Some Short Format Video
We’re all photographers here. This means I can be a little honest with you about shooting short form video.
It might not be your main stay, but social media platforms are putting a lot of emphasis on TikTok style videos. If you can incorporate a little short form videography into your travel photography routine, you’ll have that much better performance online.
There are countless ways that you can build short form video production into your photography routine. You could record a 60 second video demonstrating your setup for the shot or even just an interesting voice over on top of a still image.
Shooting short videos can also be fun. Building this into your photography routine is a great way to improve your skill set while you’re also increasing your social media following.
Tip 12—Find Your Voice by Getting Lost
Some of the best travel photography stories happen because you get lost. Getting turned around is a great way to change your perspective on things and improve you or travel photography.
This is easily one of the most underrated travel photography tips. Best of all, you can do this from the comfort of your hometown.
Try getting lost on purpose by walking through a neighborhood you don’t usually go to or checking out a city that you might have otherwise overlooked.
While all the other travel photographers are gathered at the tourist traps we’ve all seen a thousand times on Instagram, you’ll be exploring something new while catching refreshing pictures of your travels.
Tip 13—How to Fly With Film
If you plan on doing some film photography while you’re traveling, you’re going to need to know how to transport your film while traversing through airports safely.
The x-rays used in airport security scanners can damage undeveloped photographic film. The more x-rays undeveloped film is exposed to, the more haze and distortion starts to pop up on the final image.
Film with an ISO 800 and above can be damaged by any airport X-ray machine. Expired and experimental films can also be damaged by x-ray equipment.
Some airports now use more powerful CT scanners. These are often used for checked baggage, but they can also be used for carry-on as well.
CT scanners put out enough x-ray radiation to damage film of any ISO. You should always bring your film with your carry-on luggage in its own zip-top bag.
When you’re traveling through security at an airport, you can ask the security personnel for a hand examination of your photographic film. In my experience, they almost always say yes no matter how busy the airport is.
However, it is at the discretion of airport security and I have had them turn down a hand examination of my film. One trip through an X-ray scanner won’t damage your film, but multiple trips will.
This is why I recommend buying film on location if possible. You can also have film mailed to your hotel or to a friend’s address who lives near where you’re traveling.
Tip 14—Become a Traveler at Home
Traveling is expensive and it’s not always available for us. However, this doesn’t mean that you have to stop your travel photography plans.
If you’re looking for the true zero-budget way of starting a travel photography career, you have to start in your home city.
While this might not seem exciting at first, keep in mind that the city that you live in is an exotic travel destination for someone else.
Try using all of the travel photography tips and tricks I’ve talked about in this article while taking pictures of your home city. Even if you live in a sleepy little town, there are compelling stories that you can tell by documenting the life and history of the place you live.
Tip 15—How to Find Travel Photography Inspiration
No matter what style of photography you’re in, it’s easy to get stuck in a rut. What should you do if you’re running out of inspiration before your next big travel photography trip?
Here are five quick ways I stay inspired and motivated as a photographer.
- Start following more photographers on social media to see what other people are doing
- Research historic photographers and get inspired by how they were shooting when our medium was still new
- Check out international photographers to see how people are shooting across the world
- Get experimental by looking into the weirder side of photography with things like film soup or databending
- When I’m heading to a new location, I like to look at the history, upcoming events, and what photographers are shooting for that local
Tip 16—Turn Regular Trips into Travel Photography Trips
If you’ve always got your camera with you, and you’re always shooting, every trip you go on is a travel photography trip.
A great way to stay active as a travel photographer who has yet to break into the full-time business is to transform every trip you go on into an opportunity for travel photography.
Whether you’re heading across town for a family dinner or going on a work trip, you’ve got an opportunity to do some trouble photography.
Not everything has to be a grand adventure. You could use that trip across town as an excuse to work on catching shots of yourself in transit, for example.
Tip 17—Becoming a Better Photographer
Every photographer has an area that they can improve on. Whether you’ve always wanted to be one of those photographers who only ever shoots on full manual mode or you’ve been hoping to add sports photography to your travel routine, now’s the time to start working on those skills.
Skills building exercises can be a great activity during your travel photography downtime. You’re not always going to be on the road to an exotic destination and that time in between trips is vital to your success.
Even if you’ve been a professional photographer for decades, there’s still countless things about this art form that you can learn.
Tip 18—Get Your Photos Seen
Now that you’ve got a portfolio of travel photography images, how do you get people to see them?
As with most freelancing gigs, the name of the game is networking. Here’s a few tips for getting your pics in front of more eyes.
- Be more consistent with social media by posting regularly and using hashtags strategically
- Enter into photography competitions
- Ask local shops if you can display your work
- Get your photos published
- Reach out to travel agencies, tourism boards, and parks departments for freelance work or partnerships
- Network with other photographers
As the old saying goes: It’s not what you know, it’s who you know.
Tip 19— Travel Photographer Tips for The Business Side of Things
Making it as a working travel photographer has gotten harder in recent years, but it’s not out of reach. Here’s a few business tips to help you stay on top of your budding photography career.
Always try reaching out to new clients. Keep in mind that bigger clients are harder to land, but there are plenty of smaller travel destinations that are ideal for a beginner photographer.
You should create a budget for your travel photography work. If you’re just starting out, you don’t need a fancy app. A simple spreadsheet is more than enough for you to stay on top of your money.
You can also try becoming a content creator while you’re working on landing clients. Building up a social media following and generating some income through a site like Patreon can help you stay on the road longer.
Tip 20—How to Tell Your Travel Photography Story

Image Credit: Ena Marinkovic
You’ve reached the end of my travel photography tips. The last tip, and the most important one, that I’m going to give you is some advice on how you can tell your story.
Travel photography is all about storytelling. This means documenting your journey, engaging your audience, and finding your voice.
Taking captivating pictures without context isn’t enough. Your travel photography needs to speak to people on a deeper level and communicate something yet untold about the experiences behind your journeys.
It’s going to take time to figure out how you want to represent your adventures. The best thing you can do is get started today.
Even if you’re just taking travel photos a few blocks from your home, you’ll be breaking the ice and taking those important steps in finding your voice as a storyteller.
What is the purpose of travel photography?
The purpose of travel photography is to share your journey with the world. Travel photographers help to tell the story of not only their adventures, but also the people and places they encounter whether they are traveling around the world or within a few miles of where they grew up.
Is travel photography a good career?
Travel photography can be an amazing career that is rewarding and potentially very lucrative. It can be challenging to get started, but there are countless photographers who do travel photography as both their main job as well as a side gig.
What is the single best lens for travel photography?
The single best lens for travel photography is the wide angle to telephoto zoom like the Sony FE 24-105mm f/4 G OSS Lens. This lens allows you to capture everything from sweeping landscape panoramas to sports and wildlife photography .
Is travel photography a job?
Travel photography can absolutely be a job. You can make money as a travel photographer by freelancing for clients, photographing destination weddings , or working as a photojournalist.
Is GoPro good for travel photography?
A GoPro can be great for travel photography especially if you’re interested in capturing video and using stills from that footage for your photography.
Even though a GoPro is a good choice for travel photography, you’re probably going to be better served by a dedicated camera if your main goal is photo rather than video.
Final Words
I hope this guide gives you everything you need to hit the ground running with travel photography. If you’re an experienced travel photographer, I hope you’ve picked up a few new tricks that can help improve your next adventure.
I’ve tried to cover travel photography from nose to tail in this blog, but I’m sure I left a few things out.
I want to hear your travel photography tips, tricks, and experiences in the comments. If you like this article, make sure to check out my other photography blogs .

Check out these 8 essential tools to help you succeed as a professional photographer.
Includes limited-time discounts.
You'll Also Like These:

Ashley is a photographer, writer, and film critic. When Ashley’s not writing essays on photography, cinema, and theory, he’s out taking pictures with retro film cameras.
Keep Sharing more impressive blogs.
Leave a Comment Cancel Reply
👋 WELCOME TO SHOTKIT!

🔥 Popular NOW:

Unlock the EXACT blueprint to capture breathtaking iPhone photos!
Shotkit may earn a commission on affiliate links. Learn more.
Nomadic Matt's Travel Site
Travel Better, Cheaper, Longer
How to Take Professional Travel Photos

Travel photography is not something I’ve very good at. I take all my pictures on an iPhone, and if they aren’t used on the blog, they mostly just sit on my hard drive. I’ve never taken the time to really improve my skills. Like learning a language, improving your photography takes time.
Luckily, just like learning a language, anyone can do it!
Travel photographs are memories. You look at a picture, and it conjures up thoughts, feelings, and smells that take you back to a long-forgotten place. I think it’s important we all spend a little time improving our photography.
Today, professional photographer Laurence Norah of Finding the Universe begins a five-part series on how to take better travel photos and become a better photographer in general. He’s going to share his top tips to help you improve your skills and take awesome photos.
Enter Laurence…
In 2009, I gave up my job in IT and set off to travel the world. My first destination was Australia , a stunning country where I desperately wanted to capture my adventures. I’d been taking photos since I was 13, but it was only on this trip that I started to focus on learning the art of photography and realized that this was something I could be truly passionate about.
I quickly learned the reality that photography is a skill that takes time, effort, and practice to master.
It’s also not a question of gear — great travel photography is very much about the photographer.
In this post, I’ll give you the eight simple travel photography tips you need to take better pictures right away. If you follow these rules, you won’t go wrong!
Table of Contents
- Composition
- The Rule of Thirds
- Leading Lines
- Foreground, Midground, and Background
- Focal Points
- Use of Color
- Storytelling
1. Composition: Taking Pictures People REALLY Want
Patterns — the human brain is a sucker for them. We’re always looking for patterns, be they shapes in the clouds, symmetry in buildings, or colors that compliment each other. There’s just something about a pattern that our brains love.
Understanding these patterns and what pleases the human brain is a nifty shortcut to taking better photos. And that’s what composition in photography is all about. Learn and apply the rules below, and you’ll start taking more photos that people will enjoy.
Before launching into them, though, some important basics. First, ensure that your camera is level. You don’t want wonky horizons. Your brain generally doesn’t like them; they’re the visual equivalent of nails on a chalkboard.
Next — stop moving. You want to be as still as possible when shooting to avoid blurry images. Hold your camera with both hands and be steady, or use a tripod.
2. The Rule of Thirds
One of the most important rules of composition is known as the rule of thirds.
I learned recently that this is based on how babies learn to identify their mothers’ faces, which can be split up into three parts: the eyes, nose, and mouth.
The rule of thirds requires you to break an image into three equal parts either vertically, horizontally, or both. The goal is to place key compositional elements into those thirds.
On your device, find the setting to enable a grid over the preview screen. Four lines will appear, two vertical and two horizontal.

Take a look at my shot above of a surreal sculpture park deep in the Australian outback , over which I have overlaid a grid to demonstrate the horizontal and vertical thirds.
With the grid, you can see how I have composed the image: one-third land and two-thirds sky, while the plane on the left is on the left-hand grid line, close to the intersection of two lines.
Placing subjects on the intersecting points will naturally draw the viewer’s eye to them, as these points are usually where we focus first in an image, and doing so is a great starting point for a good composition.
Another of my favorite subjects to shoot is a sunset. I love how they are always different and how wonderful the light is at that time of day.
To get a great sunset shot, you can easily apply the rule of thirds — composing the shot with two-thirds sky, and one-third land or sea. You want to avoid splitting the image half and half, as it won’t look as good. The shot below of a sunset in Santa Cruz illustrates this and also has an interesting subject in the left third of the image.

3. Leading Lines
When composing a photograph, you want to make it as easy as possible for the person looking at it to figure out the subject and focus of the image.
One way to do this is with leading lines — the use of natural geography or other features that the viewer will naturally look at first and that will lead their eyes to the main subject.
Roads are excellent as leading lines, particularly in big landscape shots. When I was traveling in New Zealand , I wanted to create a photographic story of the hike up Mount Taranaki, one of my favorite New Zealand hikes . Near the start, the walking trail itself gave me a perfect leading line to illustrate the journey ahead, drawing the viewer’s eye into the frame and up to the mountain.

Another good illustration of a leading line is this shot of me walking on railway tracks in Italy. (Obviously, it’s only advisable on either disused or somewhat infrequently used tracks!)

The goal for this image was a self-portrait that evoked my life of travel. The parallel tracks, which appear to converge, were perfect for leading the viewer’s eye to the subject — me. I felt I captured the image of wanderlust that I was looking for by using them.
4. Foreground, Midground, and Background
Have you ever taken a picture of a mountain or city skyline and then looked at it later and wondered why it doesn’t manage to convey the majesty of what you were looking at?
This is likely because your photograph is a two-dimensional image, and you have lost the sense of scale that is apparent when you are present and in the moment.
When composing a shot — and this is particularly true for landscape photography — think about the different elements in the foreground, midground, and background of the shot.
For example, here’s an example of a sunset in Glencoe, Scotland , easily the most stunning place I’ve photographed in 2015.

I used the rock in this frozen lake to provide something interesting in the foreground, helping to provide scale and balance to the overall image. The viewer’s eye is drawn to the rock, and then likely to the mountain and sunset, before heading into the distance of the valley.
When you are out and about in the world, think about everything around you. If you see a far-off mountain you want to shoot, look around and see if you can find something interesting in the foreground or midground to incorporate into the shot. If you’re near a river, maybe that could be a canoe. Elsewhere it could be a house. Or a group of sheep. Or a car starting to scale a winding road.
If you’re shooting a city scene, look at what is happening all around you. Street vendors, different modes of transport, and signs and storefronts can all be incorporated as foreground to provide context and scale for your city skyline or that interestingly shaped building.
If you can’t find something, be creative. Find someone to stand in your shot to provide that scale. If you’re traveling with a tripod, do what I did in that railway shot and use yourself as the subject.
Thinking beyond the big background parts of the image and focusing on the smaller elements will help you create more balanced, pleasing images.
Just remember not to confuse your viewer too much with too many compositional elements, and keep it clear what the photo is of.

Here’s another shot from Glencoe. Here the house provides that midground scale, while the river works both as an interesting foreground subject and as a leading line to draw you into the photograph.
This compositional technique isn’t about hanging a picture in a frame; it’s about using what’s around you to “frame” the subject you are trying to capture, illustrating to the viewer what the shot is of and drawing their eyes into the scene.

In this shot of the bridge into the medieval town of Besalú in Spain , I used the old bridge and its reflection as a natural frame for the newer bridge.
When you have found your subject, look around to see if there’s a way you can frame it creatively. Some good options for framing include vegetation, like tree branches and trees, as well as doors and windows.
Take a look at this shot of a temple in Ayutthaya, Thailand , to see what I mean. I wanted to capture the beauty of this temple scene while drawing the viewer into the wat in the center.

The frame in this case is much larger than the subject, but it is never unclear what the shot is of. This is a really easy photography technique, but it might require you to scout around, or step back from your subject, to find a good way to frame it. Don’t be afraid to stand further away and use the zoom on your lens to get the frame you want.
As another example, using trees to frame a waterfall, here’s a shot of Lower Yosemite Falls in Yosemite National Park.

I felt that the trees added much more to the shot with the waterfall between them. There was a pleasing symmetry to the shot, given the two parallel trees.
There are many more options for framing. Experiment and see what works!
6. Focal Points
One way to be sure that people look at the part of the image you want them to look at is to have only that part sharp and in focus and the rest blurry.
This is particularly effective for isolating people or animals in shots — take a look at wedding or sports photos of people, and you’ll see how often the subject of the shot is the only thing in focus.
I love shooting events with friends and family, and I find that this technique works really well at isolating the subject from a crowd and making it obvious who the photo is of.

To start with, you can achieve this effect with the “portrait” or “people” mode on your camera.
7. Use of Color
Color is really important in photography, particularly how different colors work well together. For example, blue works well with yellow (sunflowers in a field), and red works well with green (Christmas!).
To figure out which colors work well together, take a look at this color wheel .
Generally, colors opposite each other on the wheel will complement each other. These colors don’t need to be evenly balanced in a shot — often images work best with a small percentage of one and a greater percentage of another.

Take a look at the shot above, from the gorgeous Nyhavn Harbor in Copenhagen . You can see all sorts of colors, but in particular, the blue of the sky and water is the predominant color, with the houses’ reds and yellows (yellow is opposite blue on the color wheel) offering a counterpoint.
When you are on your travels, keep an eye out for contrasting and complementary colors that you can incorporate into your shots. Spice markets, old European cities , rural meadows, and old colorful barns in green fields are a great place to start.
8. Storytelling
Remember that when you are taking a picture, you have all the background and surrounding knowledge of your trip in your mind. When you look at the image later, all of that will come back to you.
No one else has that advantage. To them, that shot of a waterfall is just that — a shot of a waterfall. The story of the five-hour hike there through a leech-infested jungle? Lost. The feeling of how refreshing it was on your skin when you took the plunge to cool off? Also gone. It’s just a two-dimensional image on a screen, likely quickly flicked by to be replaced by the next image in the stream.
It’s your job to bring all that lost context to life.
We’re often told that a photograph is worth a thousand words. As a photographer, it’s your job to convey those words. Figure out how to tell that story with your image. Get the shots that pull your viewers into your stories. Use emotion, find and freeze moments, and incorporate the human element so your shots resonate with your viewers.
Take this monkey in Rio de Janeiro . These guys were being really cheeky with tourists, trying to get food from them and generally playing around as much as possible. I wanted to try and capture some of that, and I managed to get this monkey sticking its tongue out at me.

I’d advise spending time thinking about the shot you are trying to create, the moment you are trying to capture, and the story you are trying to tell your viewer. Put yourself into their shoes, imagine you are going to be looking at the shot with no other context, and try to build the shot from there.
This is probably one of the harder parts of photography, and — like the shot of the monkeys above — will likely require some time, patience, and luck. You will make errors. But with research and practice, you will be able to master it!
Practice makes perfect – and travel photography is no different in this regard! The more photos you take, the more you will learn how to compose and capture great shots. While reading some travel photography tips will definitely help, the key is to actually go out in the world and practice them. The more you practice, the faster this will all become second nature. It won’t happen overnight, but over time your skills will improve — I promise!
So what are you waiting for? Get out there and start taking some photos!
Laurence started his journey in June 2009 after quitting the corporate life and looking for a change of scenery. His blog, Finding the Universe , catalogs his experiences and is a wonderful resource for photography advice! You can also find him on Facebook , Instagram , and Twitter .
Travel Photography: Continue the Series
For more helpful travel photography tips, be sure to check out the rest of Laurence’s series:
- Part 1 – How to Take Professional Travel Photos
- Part 2 – How to Shoot the Perfect Travel Photograph
- Part 3 – The Best Camera Gear to Get
- Part 4 – How to Take the Perfect Photo: Advanced Techniques
- Part 5 – 7 Editing Tips to Improve Your Travel Photographs
Book Your Trip: Logistical Tips and Tricks
Book Your Flight Find a cheap flight by using Skyscanner . It’s my favorite search engine because it searches websites and airlines around the globe so you always know no stone is being left unturned.
Book Your Accommodation You can book your hostel with Hostelworld . If you want to stay somewhere other than a hostel, use Booking.com as it consistently returns the cheapest rates for guesthouses and hotels.
Don’t Forget Travel Insurance Travel insurance will protect you against illness, injury, theft, and cancellations. It’s comprehensive protection in case anything goes wrong. I never go on a trip without it as I’ve had to use it many times in the past. My favorite companies that offer the best service and value are:
- SafetyWing (best for everyone)
- Insure My Trip (for those 70 and over)
- Medjet (for additional evacuation coverage)
Want to Travel for Free? Travel credit cards allow you to earn points that can be redeemed for free flights and accommodation — all without any extra spending. Check out my guide to picking the right card and my current favorites to get started and see the latest best deals.
Need Help Finding Activities for Your Trip? Get Your Guide is a huge online marketplace where you can find cool walking tours, fun excursions, skip-the-line tickets, private guides, and more.
Ready to Book Your Trip? Check out my resource page for the best companies to use when you travel. I list all the ones I use when I travel. They are the best in class and you can’t go wrong using them on your trip.
Got a comment on this article? Join the conversation on Facebook , Instagram , or Twitter and share your thoughts!
Disclosure: Please note that some of the links above may be affiliate links, and at no additional cost to you, I earn a commission if you make a purchase. I recommend only products and companies I use and the income goes to keeping the site community supported and ad free.
Related Posts

Get my best stuff sent straight to you!
Pin it on pinterest.

- Czech Republic
- Falkland Islands
- Latin America
- New Zealand
- North America
- South Georgia
- Kilimanjaro
- Adventure Travel
- Archaeology
- City Guides
- Itineraries
- Portrait Photography
- Tips and Advice
- Travel Photography
- Travel Stories
- Unhelpful Guides
- Wildlife Photography
- Work With Me
25 Brilliant Tips For Travel Photography
Let me guess: you love travel, but while you want to enjoy your holidays and make the most of the beautiful destination , you’re also a keen photographer and want to capture stunning images that you can look back on and share with your family and friends.
Contents (click to view)
That’s why you’re looking for tips for travel photography. But travel photography is hard! What gear should you take? How do you know where to go and when to go there? What about the weather? Photographing strangers is scary! Places are often crowded! There are so many questions and challenges that it can be quite intimidating to even start.
But as they say, a journey of 1000 miles starts with a single step. And you’ve taken that first step by coming here to read my easy travel photography tips for beginners. Hopefully all this advice will help inspire you to get your camera out and start improving your travel photography so you can create beautiful images of your holidays to enjoy for years to come.

Tips for Travel Photography: Planning
1/ do your research.
The best travel photography starts before you even leave home. To make the most of every destination , you first need to do your research. Look up the places you’re going to on Pinterest, Instagram, or your favourite travel blogs, find out where are the best places to go and the best time of day to go there, and get helpful advice on what gear to take. You can also search for images that inspire you and make a list of the sorts of themes and angles you’d like to get. That way, when you’re at the location, you won’t be wasting your precious holiday time searching for the right spot.

2/ Know your camera
Another thing you need to make sure you do before leaving home is getting to know your camera. I rarely read instruction manuals, but when I buy a new camera, reading the manual is the first thing I do. Modern cameras are packed with amazing functions to help you take stunning images, so if you just stick yours on auto and hope for the best, you’re missing a great opportunity to get the most out of it.
If you’re a beginner travel photographer you don’t necessarily need to start learning all the manual settings, but even taking advantage of some of the different modes your camera offers – such as sports, nighttime or portrait – will really help take your travel photography to the next level.

Read more: The Rewards Of Visiting Uganda’s Batwa Tribe
3/ Travel as light as you possibly can
Don’t weigh yourself down with endless lenses, bodies, tripods and other paraphernalia. Yes it’s great to have lots of gear to choose from, but especially when you’re a beginner the key to great travel photography is freedom and flexibility. If you’re lugging a heavy backpack full of stuff, chances are most of it will end up staying in the bag, or by the time you’ve rummaged through it to find the thing you want the moment will have been lost.
This image was taken on Day 5 of climbing Kilimanjaro with a little Fuji X100T compact I bought specifically so I wouldn’t have to lug a DSLR up the mountain. I’m sure I got more and better shots with this because I could have it in my hand so it was ready to go every time I saw something interesting.

Read more: Climbing The 8 Days Lemosho Route On Kilimanjaro
4/ Bring the camera you have, and always have it with you
The old tip, ‘the best camera is the one you have with you’ is absolutely true. There’s no point splurging on a fancy camera if it’s so heavy you end up leaving it in the hotel. I love my Canon 5D Mark IV , but I have to admit it’s very bulky and heavy and there are lots of occasions when it’s not sensible or appropriate to bring it.
I can’t count the number of times I’ve ended up just using my phone because it’s quick and convenient – and you can take great travel photos with a smartphone! As a beginner, the number one best way you can improve your travel photography is by always having your camera close to hand so that when you spot that perfect moment, you’re ready to grab it.

Read more: An Unhelpful Guide To… Aztec Ruins In Mexico
Travel Photography Tips for Beginners: On Location
5/ prioritise your photography.
You may get lucky and spot a golden opportunity for the perfect photo, but if you’re really keen on taking the best travel images you can, you’re going to need to carve out time in your trip for photography. That’s what’s going to make the difference between a nice holiday snap and a professional-quality travel photograph.
When I’m travelling, I often plan mornings or afternoons just to explore a place with my camera; for me it’s a great way to really get to the heart of an area and spot things I’d never normally notice if I was just walking round as a tourist.

Read more: Stunning Photography on the Streets of Cuba
6/ Get up early and stay out late
The best times to prioritise for travel photography are around sunrise and sunset. Not only will you get the nicest light – the hours just before and just after dawn and dusk (known as blue hour and golden hour) will give you the prettiest light and the most interesting skies, but you’ll also avoid the crowds and be more likely to get those gloriously empty images of your destination that you see on all the travel websites. Yes, it can be tough to drag yourself out of bed that early, but I promise you it’s worth it!
I took this image of our campsite in the Sahara Desert, Morocco , at blue hour, just after sunset, while the rest of my tour group were drinking wine round the campfire. I don’t regret it for a second, and of course I joined them as soon as I was done!

7/ React to the moment
While it’s great to have a plan, sometimes it’s even better to just chuck that plan out of the window and go with the flow. So you’ve arrived somewhere and it’s really crowded? The weather is bad? That famous landmark you came to see is covered with scaffolding? Then you’ll need to adapt.
Travel photography is all about seeing what’s in front of you and capturing the spirit of the place, and if that spirit isn’t what you were expecting, just roll with it. When I was in India I found everywhere was really crowded, so instead of trying to take photos of landmarks (arguably quite boring anyway), I decided to capture the other people taking selfies and came back with some much more characterful travel images as a result.

Read more: India: a Nation of Selfie-Lovers
8/ Set yourself a challenge
It can be all too easy to wander aimlessly with your camera, taking pot shots at random things and not really getting anything good. At times like these I find it’s really helpful to set myself a project. It might be to get ten really great photos of traders in a market, or to focus on doors, street dogs, or graffiti.
You could force yourself to shoot everything without using your zoom or set yourself a travel photography scavenger hunt with a list of 10 or 20 different things you want to capture that sum up the destination for you. Doing this will really force you to think about your photography and help you bring back much better images than if you just fire off your shutter at whatever happens to be in front of you.
In Trinidad, Cuba I spent about three hours wandering around just taking photos of people in doorways; this is one of my favourites.

9/ Abandon your tour group…
If you’re taking a tour or travelling with a group, travel photography can be extra challenging. Getting stunning images takes time and patience, and if you’re always being told to keep up, or you’re worried about getting lost, that can really limit what you can achieve.
So wherever possible, I find the best solution to this is to ditch the group and do my own thing. If you plan to do this, make sure you tell the guide so they’re not looking for you, get their number in case you do get lost, agree a time and place to meet later, and if you can, grab a friend for company and safety. I also always try to be one of the last back on the bus – not late, of course, so I’m delaying everyone, but not early either, so I’m not sitting in a half empty bus when I could still be out exploring.
In Chefchaouen, Morocco , I left the group and wandered off by myself to find interesting corners like this one.

10/ … but mine your guide for information
Taking a tour – even if it’s just a day trip or a guided visit to a site – does offer up one huge advantage for travel photography: local knowledge! Your guide should know all the best places to go, the key things to photograph, and the best times to go there. I always let the guide know that travel photography is my passion, and they will often give great advice and sometimes even adjust the itinerary to make sure I get extra opportunities to take amazing photos of the destination.
In Inle Lake, Myanmar we had a free day, and by chatting with the guide I learned it was possible to hire a private boat and go out on the lake before sunrise, which is how I got images like this one.

Read more: The Beautiful Leg-Rowing Inle Lake Fishermen, Myanmar
11/ Get lost on purpose
Sometimes the best images I’ve taken have been the unexpected ones, when you wander down a side street and discover a slice of local life that the guidebooks would never know about. If you stick to the beaten paths and follow the usual tourist trails, mostly what you will see is other tourists and the country’s polished public face.
It’s only when you dip a little behind the scenes that you find the really interesting stuff, the bits that haven’t already been photographed a million times. So be bold. Wander curiously and see where it takes you – and when you’ve had enough just ask for directions or let Google maps guide you back.

Tips for Travel Photography: Composition
12 / use the rule of thirds.
If you’re a beginner travel photographer you may already be familiar with this concept. The rule of thirds states that if you imagine your image divided up into thirds horizontally and vertically, the most visually-pleasing composition is one where the subject of the image sits on one of the third lines. This draws the eye in and makes for a much more satisfying image than if you put the subject dead centre or too far off to one edge. It really works and it’s one of the easiest ways to make a huge difference to your photography in a single step.
In the image below, you can see the horizon sits nicely on the bottom third line, and the church tower and window are on the left third line.
Of course the rule of thirds is really a guideline more than a rule. Feel free to break it if you want to! If you scroll through the images in this post you’ll notice that the majority of them do follow the rule – but not all of them!

13/ Include people
While you probably want to avoid massive crowds of tourists, it’s a really great idea to try to capture individuals in your travel photos. Including a person can add a sense of scale to a beautiful landscape or give a focal point to wide shot of a landmark.
A street with a few traditionally-dressed locals walking through will always capture the essence of a destination more completely than an empty road, while a charming portrait of a local character always makes for an engaging image. So rather than waiting for people to walk OUT of your shots, why not think about waiting for them to walk IN?
Read more: 25 Spectacular Places To Visit For Travel Photography

14/ Be patient
The best travel photographs rarely happen in an instant. Yes, it only takes a fraction of a second to click the shutter, but to get to that point you need not only planning, but also patience. Quite often I find I can see the potential shot, but the reality is not quite right. The sun needs to come out from behind a cloud, or I need the right sort of person to walk through the shot, or I want the market trader to hand over the money or the tourist to get out of the way.
Often I can be waiting for ages for the thing to happen; sometimes I lose patience and give up, but other times the farmer I’ve got my camera trained on looks up and laughs and it’s totally worth the wait.

Read more: Taking Portraits in Myanmar (Burma)
15/ Think about what’s in the background
A common mistake that many beginner travel photographers make is that they’re so focussed on the subject of their image that they fail to notice what’s going on in the background. Is there a tree growing out of your subject’s head? Did a tourist just wander into the back of the shot? Is there a parked car or pile of rubbish spoiling the view?
When composing your image, ask yourself, ‘what is this photo actually OF?’ and then try to exclude anything that distracts from that, either by reframing, moving your position, moving the subject (if you can!) or waiting until the annoying person in the back of shot has moved away.
In this image of the Falkland Islands I chose to include the people as I wanted to show the juxtaposition of the group and the albatross colony, but if I’d wanted this to just be a photo of the colony I’d have needed to move or zoom in.

16/ Move your feet
Most modern cameras have huge zooms which allow you to get a variety of different shot sizes from a single standing point. But if you stay stuck in one place, you may be missing out on a better view of your subject just to one side. So don’t get too attached to one spot: get closer, get further away, find a vantage point… you might just stumble across something unexpected. And as an added bonus: photography is great for your daily step count!
While the rest of my group were all standing together over to the left, I explored a bit further round to the side and was able to get a much better angle on this chimpanzee.

Read more: Chimpanzee Trekking In Uganda: A Breathtaking Wildlife Adventure
17/ Don’t copy Instagram
While it’s great to use Instagram for background research, once you’ve seen what’s out there try to think outside the box and do your own thing. No travel photographer ever won an award by taking the exact same picture as everyone else, and no one wants to look at hundreds of identical photos of the same place.
How many photos have you seen of a girl in a big hat with her back to the camera looking at a view? It’s so unoriginal! See what everyone else is doing, sure, but then use it as inspiration and move forward.

18/ Take the obvious shot, then take a better one
Each time you take a picture, instead of just taking one, take two. First, the standard one from the conventional viewpoint, and then do something different. Zoom in, crouch down, move closer, walk round the side, wait for someone to walk into the frame, look for a different vantage point, find some way to make your image a little bit less ordinary. This will set you apart from the masses and give you unique, more eye-catching images.
This first photo of the Duomo in Orvieto, Italy , is perfectly nice, but don’t you think the second one is far more interesting?

Read more: 30 Beautiful Pictures Of Guatemala And The Stories Behind Them
Traveller Photography: Best Practice
19/ be culturally aware.
There are many places in the world where photography is frowned upon. Some sites ban it, in other places local people just don’t like being constantly papped by passing tourists. Sadly with the rise of social media this is becoming more and more common, and it’s certainly something I’ve found frustrating in the past, but as a responsible traveller it’s your job to respect the locals and their customs.
So if you find yourself in a place where it’s not permitted or appropriate to take photos, don’t do it. Simply enjoy being in the moment and focus on making memories instead.
Read more: Ethical Travel Photography: How To Capture With A Conscience

20/ Ask permission
It’s not necessary (and it would be impossible) to ask permission from every man or woman in the street before you take a photo, but if you want to take a close up of an individual it’s a good idea to get their consent first. Doing this shows respect and gives that person the chance to decide whether they want to be photographed or not. Don’t worry if you don’t speak the language, a simple smile and a gesture towards your camera is universally understood.
Sometimes, however, you may not want to interrupt the moment as this can often cause the person to stop what they were doing and ruin the shot. In this case you’ll need to make a decision. If you’re far enough away and can quickly take the photo without offending them, do that. If you want to get closer, the best strategy is to ask permission, take one or two photos, walk away a little and wait for them to forget about you and go back to what they were doing, then come back and get the shot you originally wanted.

21/ Be safe
Of course it should go without saying that while following all of these tips, it’s important to be sensible. Don’t go off alone if you’re not sure you’ll be able to find your way back. Don’t wander into a dodgy part of town with a big expensive camera hanging round your neck.
Make sure your money is secure and your backpack pockets are properly zipped and your passport is in the safe in your hotel so that someone can’t pickpocket you while you’re busy focussing on other things.
Watch where you’re putting your feet so you don’t fall off a cliff or step in front of a car. If possible, have someone with you so you can keep an eye on each other. Photography is enormous fun, but that fun will come to a swift end if you get robbed or worse, and no image is worth putting yourself in danger for.

Travel Photography Tips for Beginners: Technicalities
22/ bring enough memory and batteries.
You’ve spent all that money to go all that way, so the last thing you want is to miss out on bringing home some fantastic images just because you didn’t bring enough memory! Make sure you’ve got your charger, at least one spare battery and a big enough memory card or two. Imagine how annoyed you’d be if you spotted something astonishing and then couldn’t capture it because your card was full or your battery died!

23/ Backup backup
Whether you can do this depends on where you’re going and how light you plan to travel, but I never go away for more than a few days without taking a laptop and hard drives with me. At the end of every day I download the photos and back them up on two drives which I store separately, so that if ever my camera or a drive gets lost or broken, I won’t lose all my images.
This image of a penguin colony in Antarctica was just one of several thousand that I took. Losing them all would have been a disaster so I backed up my photos every day.

24/ Learn some basic photo editing
If you really want to take your travel photography to the next level, you need to learn a little photo editing . No professional travel photograph you will ever see has come straight out of the camera; they have all been tweaked at least a bit.
I’m not talking about hours of colour correcting and photoshopping here, and if you’re a beginner I’m not suggesting you pay for pro editing software (at least for now, though you may want to later on), but there are plenty of free tools out there (including the one that probably came with your camera) that will allow you to make a few simple improvements. Things like cropping, levelling a wonky horizon, or adjusting white balance or exposure, are just small corrections that can really help to make each image just that little bit better.

25/ Practise at home
And finally – yes, it’s all about practice. No one ever got good at anything overnight, but if you’re passionate and you want to learn, you WILL get better! Why not try taking your camera out round your local area, for example? Practice street photography in your own town or shoot landscapes in your nearest bit of countryside. That way when you’ve splurged your savings on that trip of a lifetime, you won’t mess it up!

Further travel photography reading
Looking for more tips for travel photography? Why not try some of these:
- 19 Wildlife Photography Tips for Beginners
- 13 Top Tips For Photographing Markets
- How To Take Great Photos Of The Northern Lights
70+ Stunning South Georgia Photography Tips
- Photography on the streets of Cuba
Liked this travel photography tips post?
Why not Pin It for later? Thank you for supporting my blog!

Bella is a multi-award-winning travel writer, wildlife photographer and science and history documentary director from London. Among many awards and nominations she won Blogger of the Year at the British Guild of Travel Writers’ Awards 2023 and Best Photography at the Travel Media Awards 2020. Her work has been published by National Geographic, Wanderlust, and BBC Travel among others. Her films have been shown around the world including on the BBC, Discovery and PBS.
Further Reading...

25 Spectacular Travel Photography Destinations (With Photos)

The Best Camera Gear For Antarctic Photography

Alfombras In Guatemala: A Guide To The Colourful Sawdust Carpets
An antarctica clothing list: what to pack.
Some of the links on this site are affiliate links. This means that if you click through and make a purchase, I will earn a small commission at no additional cost to you. Passport & Pixels is a participant in the Amazon Services LLC Associates Program. As an Amazon Associate I earn from qualifying purchases.
- Anniversaries
- Baby Showers
- Cards and Stationery
- Father's Day
Photo Books
- Wedding Invitations
21 Travel Photography Tips and Checklist For Your Next Trip
Written by Shutterfly Community Last Updated: Aug 12, 2019
Planning your next vacation? Document your trip (big or small) with photos that will allow you to remember and share your experiences long after you return home. Whether you want to capture picture-perfect spots in NYC or head west to embrace scenic spots in San Francisco , you don’t need to be an expert to get genuinely beautiful shots.
Shop Trending Categories

Wedding Invitation
Graduation Announcements

Canvas Prints
Whether you decide to use a nice camera or a smartphone, there are plenty of photography tips and tricks that will help you know how to take the perfect photo . Make sure the equipment you use is familiar to you. You don’t want to spend the whole trip reading your camera manual.
Once you decide on what camera you’re bringing, the photos will come naturally. In case you hit a photo block and aren’t sure what to photograph, we’ve created a travel photography checklist that includes what to bring on your trip and photo ideas. Simply read through the travel photography tips, print the checklist and you’ll be ready to go!
Quickly jump to a section:
- Travel Photography Tips
Travel Photography Checklist
22 travel photography tips and tricks.

1. Do your research
While planning your trip, make a note of destinations that are beautiful. Find out if they are easy to get to and what sort of transportation you’ll need. Will you need a permit for the area? Figure out the logistics ahead of time so you don’t run into problems after you’re already there.
2. Get inspiration from others
The best way to learn is through others. Look at other photographer’s blogs and social media to see if they’ve been to the location you’re visiting. As you look at photos, create a bucket list of places you’d like to photograph while exploring. And make note of the composition and angles to capture.
3. Practice at home
You don’t need to travel far to practice your travel photography skills. Look up local attractions and go visit them with your camera. Learn how the light works in natural settings compared to more industrial ones.

4. Travel light
You don’t need to (and shouldn’t) bring every camera accessory you have with you on your journey. Not only will they be heavy to lug around, but there’s a danger of losing or forgetting pieces behind. Bring only the key items such as the camera, a charger and memory cards.
5. Charge Your Equipment The Night Before
Make sure everything is charged and ready to go before you set out for the day. Bring along 2-3 extra charged batteries for your camera and external flash.

6. Learn a few words in the native language
If you’re going to a foreign country where the language is not your own, try learning a few phrases. Things like “hello”, “thank you” and “Can I take your photo?” will go a long way and might lead to a better photograph.
7. Listen to the Locals
Ask the locals where the best places to shoot are. Ask about their favorite photo spot and they’ll likely be excited to share the wonders of their home. Be sure to be respectful of their space and leave them alone if they’re not interested in talking with you.
8. Follow Basic Photo Rules
If you’re a beginner photographer, take some time to learn the basics. When taking photos, keep in mind guidelines like the rule of thirds and your depth of field. Learning photography terms will help you take better quality photos.

9. Get Candid Shots
Not all your shots should be posed and planned out. Try a variety of angles, capturing candids. Take photos of everything, the one you least expect may be the one that ends up the best.
10. Give Yourself Time
When shooting, make sure you give yourself plenty of time at the location. A time crunch will lead to blurry and rushed photos. Leave yourself enough time to set up, learn what setting your camera should be on and find the right light. This may mean starting your days earlier than normal.
11. Embrace Golden Hour
Lighting is everything. Make sure you know the different sunrise and sunset times of the location you’re at. Even places only a few hours away can differ. It may also be helpful to know what direction the landmark is facing that you’re trying to photograph so you can plan to be there when it’s in full light.

12. Get a New Angle
If you’re visiting a place that’s been photographed thousands of times, try a new angle. Find hidden details that aren’t always noticed like paintings on the ceiling. Shoot through an alleyway that frames the photo or move around and try to find a new vision.
13. Stay in the Moment
Don’t overthink the shot. Stay in the moment and go with the flow. Don’t be afraid to switch around your schedule to get a good photo.
14. Take Notes
Bring a small notebook with you as you travel and when you take photos to make sure you’re noting the place and your camera settings. This will help you later on as you go back to see what worked and what didn’t.

15. Be Wary of the Weather
Look at the weather forecast if you’re shooting outdoors. Remember, just because it’s raining or snowing doesn’t mean you shouldn’t go. Sometimes a foggy backdrop can reflect the light and make for an even better photo.
16. Bring Secure Bags with Locks
You’ve probably invested a lot in your camera and accessories, so make sure they are kept safe. Bring a camera bag with you that has a lot of padding and can be locked.
17. Backup Your Photos
Every time you return to home base, whether that be a hotel or friend’s home, make sure you backup your photos . This will free up space on your camera and will keep your images safe.

18. Always Bring a Camera When You Can
Bring your camera with you wherever you go. The perfect shot could be where you least expect it. This will also let you document your whole trip, not just parts.
19. Be Respectful of Your Environment
You may be visiting this place but to others, it’s home. Be respectful of the people and animals you meet along your journey.
20. Get Lost
Get out of your comfort zone and a venture off the beaten path. Try finding something unique to photograph. Get a little lost.

21. Share Your Work
Once you’ve returned from your trip, make sure your photos don’t just sit on the memory card or computer. Share them by creating a photo board on your wall or styling a travel photo book .
22. Print Everything Ahead of Time.
Before you start your travels, don’t forget to print your boarding passes, itinerary and other documents just in case your phone isn’t working properly. By printing everything ahead of time, you do not have to wait in any lines, worry about the digital kiosks in the airport or lack of wifi connection

Click To Download Travel Photography Checklist PDF
Travel photography is a fun way to document your trips. It allows you to take your stories home and share them with friends and family. Try creating a collage with a photo collage app and sharing your experiences on social media.
Explore Categories

Graduation Invitations

Custom Photo Blankets

Save the Dates

Wall Calendars

Written by Shutterfly Community | View all posts
★ Lifestyle Expert
Shutterfly Community is here to help capture and share life's most important moments. Discover thoughtful gifts, creative ideas and endless inspiration to create meaningful memories with family and friends.
Visit their Website . You can follow on Instagram and Pinterest .
9 Travel Photography Tips and Tricks for Beginners
By Alice Ross | TRAVEL TIPS
- TRAVEL TIPS » 9 Travel Photography Tips and Tricks for Beginners

Traveling gives you a chance to practice and enjoy photography. So, if photography is something you're interested in, you can make the most of finding yourself in a new place and use this opportunity to improve your skills. If you’re new to it, there are some travel photography tips and tricks that you may want to learn to produce a good result.
An essential part of travel photography is that you have to be ready. And to be prepared, you need to have the right equipment to make sure that you can capture incredible shots. So, before I talk about some of the tips and tricks I personally use to get some incredible travel pictures, let's take a look at what kind of gear you should consider traveling with.
Must-Have Equipment for Incredible Travel Photo Ops
As you probably know, photography can quickly become expensive if you want to invest in some of the best equipment to level up your photography game. However, before making a big investment, you must know exactly what you need. After all, who wants to waste money?
Of course, choosing the right travel camera is the first and foremost thing you need to do. There are some characteristics you need to consider to find the best camera for your needs. Here are the some of the key features you should look at.

- Available lighting modes – indoor, outdoor, bright light, low light, etc.
- Zoom capacity
- Portability
In most cases, it's a good idea to get yourself a DSLR with a changeable lens. Having different lenses will allow you to adapt the settings to different types of subjects, shooting conditions, and desired results. This range and flexibility might allow you to apply more of our top travel photography tips and tricks.
Other things to consider are the types of features the camera has to offer. Make sure to know what you need – are you looking for one that you can use in low light, for landscape photography, or to take both pictures and videos ? Make sure to ascertain your purposes for buying a camera and to define what you will mostly use it for. From there, it will be easier for you to find the perfect model.
Other Equipment to Consider Buying for Travel Photography

- Lighting gears: This is important for low light or indoor shoots and to create different looks for your photos.
- Tripods: Using a camera tripod will help you to stabilize the camera and place it anywhere and at any height you want. A tripod coupled with a camera timer will also allow you to take great photographs of yourself while traveling without relying on strangers to snap you (often badly!).
- Different lenses: As mentioned earlier, you may need your camera for different purposes. Different lenses are better for landscapes or portraits, so make sure to think about which ones you want to have.
- Photography props: These could be any accessories that help to create an exceptional or striking picture.
- Travel bags: Your main priority is to protect your camera when you’re traveling. Buy a camera bag that is specifically designed for the camera you have.
Useful Travel Photography Tips and Tricks
Even if you’re inexperienced, it’s possible for you to capture incredible photos that you can take home with you along with priceless memories. You see, I’m not a professional photographer, but I pride myself on taking some decent pictures that get a handsome number of likes on Instagram. Here are some of my favorite hacks and techniques.

1. Add Drama
When you add drama to your photoshoot, your photos are going to come out more visually interesting and arresting. Showing scale is one of the best ways to add drama to your photographs. You may want to add people, landscapes, or natural features to make your composition more striking.
2. Clean Up the Clutter
Whenever you're in a new place and seeing exciting new things, it's easy to overlook the background. But before hitting the shutter button, look around first. Watch out for clutter that may ruin the picture. Always keep in mind that the smallest detail can affect the overall look of your photo.
3. Add Authenticity
Regardless of where you are in the world, always add touches of authenticity – whether it is by featuring local people or local attractions that make the place unique and interesting. If you decide to take pictures of the locals, make sure to ask for permission first! It’s rude to take photos of people without their approval. Or at the very least, tell them after taking the picture and ask if you can keep it.
4. Make It Candid
Taking candid photos often makes for more interesting and authentic shots. This means that you don’t even have to make a big effort to stage your picture. Sometimes, you don’t need to look for something special or unique – when you know, you know.

5. Add a Story
If you've had enough of the candid style, well, adding a bit of storytelling can also work wonders. Going to the beach? Then bring your tripod and take a picture of you from the back, as if you’re watching the sunset. You can also for instance attend a cooking class and take a picture of you and the teacher while cooking. When you get home from your trip, you can gather the shots that you think highlight and tell the story of your entire trip and upload them all at once.
6. Shoot at the Right Time of the Day

If you’re in a foreign place, two of the best times of the day are during dusk and dawn. This is when the light is warmer and softer. At those times, the sky is usually bluer and moderately darker. This will definitely add high definition tone to the scenery: the lights will pop up more vividly and the colors will come out brighter. If you’re planning to take a picture of an open green space, this will add great contrast to the overall look of the photography.
7. Shoot in the Right Mode
This is one of my favorite travel photography tips and tricks. Shooting in JPEG and RAW modes will give you better flexibility when it comes to editing your travel photos . However, this also means that you have to make sure you have enough memory for all the photos you’re taking. If you’re planning to take a lot of pictures, it’s a good idea to always bring your laptop, and if possible, your hard drive for extra storage. It will also make organizing your photos a lot easier.
8. Look for Inspiration

If you have no idea what to expect at your destination and you’re wondering where in the area to take pictures, then search online for the places most commonly visited by tourists. Instagram is one of the best places to do this. Simply type the name of the location in the search bar, and a series of photos taken there will appear. After Instagram, Pinterest can also the best place to find inspiration from.
9. Take Notes
Every night, after taking a lot of beautiful pictures, you may want to write down some of the things that you feel you learned. By doing this, you can always look back and redo something you did before that worked. Read more: 10 Tips for Editing Your Travel Photos Like a Pro
Culture is an amazing thing and pictures that reflect culture are among the most beautiful and captivating things you will see. This is why traditions and lifestyles that are new to you can influence you and widen your horizons. Some of the most important things that travel photos can capture are religion, cuisine , housing, tradition, art, music, and a lot more.

Keep in mind that not all pictures are going to turn out as good as professional shots, and that’s okay. Just like other skills, photography can be improved with practice. As a beginner, taking travel photos shouldn’t always be taken too seriously. Have some fun with it! Don’t get stressed if you think you’re not getting good pictures at first, that's a normal part of the learning process.
Taking travel pictures is always fun, and usually exciting. I hope these travel photography tips and tricks help you with your next trip ! If you have any questions regarding this topic, or other tips you'd like to share to make this article more useful, let us know in a comment below! And don’t forget to share this article on your social media pages to help your friends who are looking to improve their travel photography as well!
Rating: 4.5 (2 votes)
Thank for your voting!
About the Author
Hi, I’m Alice Ross, a long-term traveler who left the corporate world to travel the world. I chose to live life on my own phase and live day by day while immersing myself in new experiences, new knowledge, and new people in a different walk of life I met along the way.
RELATED POSTS
A Practical Guide to Finding the Ideal Airport Hotel for Your Budget and Preference
How to Secure Cheap Car Parking Lots in One of the Most Expensive U.S. States – N.Y.
Mastering Street Photography: Capturing Life in the Urban Jungle
Leave a Comment:
Save my name, email, and website in this browser for the next time I comment.
(0) comments
- Start Free Trial
Please select the country/region in which you do business.
- European Union
- United Kingdom
- United States
Home » Blog » Tips for Making a Living as a Travel Photographer with Pro Laura Grier
- Photography Business Tips
- Photography Tips
Tips for Making a Living as a Travel Photographer with Pro Laura Grier

Laura Grier has spent the past 22 years working as a photojournalist on all seven continents and made a life out of exploring the world, capturing and writing about her experiences. We recently had the pleasure of sitting down with this inspiring photographer and long-time Zenfolio Ambassador to discuss her tips for how to get started in travel photography. From researching the most interesting destinations to gear to how to find paid work, Laura held nothing back.
Laura: Thank you. I’m an adventure travel photojournalist. I shoot for the National Geographic Artisan Catalog. I also started a hat company working with the same artisans I’ve been photographing for the last 20 years. Now we’re in business and partnership with each other, exporting artisan goods.
I’ve had lots of different experiences through working with National Geographic . And also I do a lot of travel tourism. I’ll shoot for hotels or cruise lines tourism boards, which are essentially the PR companies of every state and country.
Another part of my business is providing supplementary photography for different writers that I work with a lot. I also still shoot weddings and events.
How can someone who doesn’t have any experience get into travel photography?
There are a couple things I would suggest. I did an internship with National Geographic in DC when I was in college, and I think internships are a great way to begin. There’s a lot of different travel publications and blogs, such as Thrillist or Matador Network . They’re constantly looking for contributors, and a lot of their contributors are writers so they’re not really good at photography. You can always partner up with existing writers that you find and say, “Hey, I’d love to supplement your articles with my imagery.”
Another way is to build up an online portfolio and have your own blog. It is really helpful because a lot of travel photography involves writing as well. A lot of publications want you to be able to do both and be an actual photojournalist. So I think showing and self-publishing your work with a story attached is really helpful. If you already have a library of imagery on your website or blog , you can market that to tourism boards and say “Hey, I shot amazing images from Mexico (or here or there.) Would you like to use them?”
There’s a website I recommend called TravMedia , where you can create a profile as a journalist or a photographer. They also have a show every year. The biggest one is called International Media Marketplace , and it’s in January, usually in New York. That’s a great marketplace to go to because it’s all editors; all the tourism boards go there, and journalists and writers. It’s a great way to network. Basically it’s speed dating between travel media people and editors, because everyone gets their budget in January for the year.
Based on the people you meet and network with, you can either be invited on a trip with their budget, or you can just go out and shoot the locations you want to visit and submit it to them. For me, that event was a really helpful place to meet other travel media people.
I still feel like I’m learning as I go and I’ve been doing it for years. If you’re not a writer, remember that writers get invited on trips, and the tourism board doesn’t always think about photographers. My boyfriend is a travel writer and I’ve provided photography for a lot of his articles. I’ve pitched to the PR people or the tourism boards being like, “Hey, could I come as the photographer on your trip, and I could stay in my boyfriend’s room. It wouldn’t cost you an extra hotel room.” And a lot of times they reply “Oh yeah, we didn’t even think about that.”
Then they’ll bring you on a trip or hire you. A lot of times, even just partnering with a writer and supplementing them can turn into a lot of jobs, too. Even though I’ve been doing it for a long time, I’m still pitching ideas. Nat Geo hires me five or six times a year, but they’re not my main form of income. There is still a bit of a hustle involved.
Basically, the best advice is to either partner up with a writer or reach out to tourism boards and seriously, everyone should join TRAVMedia. It’s a great travel media resource.

At this point in your career, are you choosing destinations yourself or are you being sent by publications to go places?
I’m mostly choosing them. So for instance, at the show I was just talking about, I went and said “I really want to go to Japan. I really want to go to this region of the world, over to Uzbekistan.” I chose regions I either hadn’t been to or that I’m very interested in going to. And then a few regions that I’m very familiar with, like California. I spend a lot of time in California and sometimes I forget about my own backyard.
I was very specific about who I talked to and who I reached out to. It doesn’t have to be a giant net that you throw out there hoping to get something. I think everyone can be a little bit more intentional about where they want to shoot and what they want to do. It doesn’t make sense to go somewhere that you don’t really feel connected to or you’re not familiar with, unless you really want to go there.
I also feel that way about wedding photography and really any type of photography. I go to hotels that I really want to work with for a wedding, and I make meetings with their marketing director or specifically do a styled shoot there. This way I would have images from the location to blog with and promote so I could attract weddings from there.
I think we can all cast a smaller net and be very specific about where we want to be.
How do you plan and research so you know where the best places are and opportunities for photography are, especially if you’ve never been there before?
This is another reason why reaching out to the tourism board is really important. You can find a lot of the tourism boards through Instagram, or Google it; tourism board of Australia , or whatever location. There’s probably 15 different ones for different regions, but they will work for you for free, almost like a fixer, because their job is to get beautiful stories and imagery and people to come to their locations.
So if you reach out to the tourism board and say “Hey, I’m a photographer. I’d really like to do a styled shoot here. I’ve been dying to go here, and I’d like to write a story about what adventures there are to do in South Australia.” They will be more than happy to help; These are the restaurants you should go to, these are the hotels, this is where you should stay, this is our person that can help you organize this and that.
I use them as a fixer because their job is to show their location in the best light. So they go out of their way to help any journalist or photographer with any type of questions like that, at least in my experience. So even if you’re not getting hired by them to go somewhere, they are still a really good resource to help you or to answer questions. You can also research online for the best weather times to visit, and whether there are any festivals.
You can do a lot of your own research, but I like asking the tourism board because they always know what most people don’t know and can’t find online yet. They’ll know the new things that are about to open, the best spots to visit.
What about your stylized shoots in places that most people have never been before? How do you find those places?
My stylized shoots, for instance Sri Lanka; I did a workshop in Sri Lanka, I had 12 women and we wanted to go to iconic places all across Sri Lanka.
I had a Sri Lankan coordinator that helped me a little bit, but I also did a lot of the research finding insta-famous places and famous images that people have shot for National Geographic and Sri Lanka for inspiration. Then I found out how to get to those places.
Once we were there, I would talk to local people to find out what was the best time of day, and how should we do this? It was crazy because a lot of these places that were insta-famous, the Instagrammer went to the parking lot or the entrance way of a place, but never actually hiked it or explored it.
Our whole vibe was to debunk the Insta-famous places and show you what it really takes to get there and what it’s really like. I found that these places were even more beautiful and cool than Instagram let on. Usually the place that becomes famous in the image is not the coolest part about that location.
I found this one image from National Geographic of the stilt fishermen in Sri Lanka . The men stand on these stilts in the ocean and they fish. I asked locals for help with that; sometimes you’re showing a picture and asking “How do I find this place?” A lot of times an entire trip I’ve done, or a workshop has been planned around and inspired by one image I saw somewhere.

Is communicating with the locals and getting to know the culture a big part of your photography?
In the beginning when I first was traveling in my twenties and shooting pictures, I would just kind of walk around and think “Oh, that’s cool, the woman with really wrinkled skin, I want to photograph her.” I would shoot everything with a long lens and I felt almost like I was stealing images here and there of whatever I was attracted to.
I also found that style of shooting didn’t really help me later on when I was trying to write an article or to do any type of travel writing because the images didn’t really go together. They didn’t tell a story, they were just sort of disjointed images of random people that I didn’t really get permission to photograph.
In order to get images sold or published, you have to have a release and get their permission. Some of the best pictures come from when you actually spent the day with somebody and they know you’re there. They’ve invited you into their house and you’ve had a meal with their family and you’re shooting with a 50 millimeter lens, right near their face.
There’s a really easy app, it’s literally called easy release app , on your cell phone that you can download and have anybody sign a photography release; model release, location release, things like that. Whenever I’m traveling, I don’t need to have a piece of paper or pen, you can just have someone do it on your cell phone. That’s super handy.
How do you get the confidence to go up to someone that you don’t know, especially in another culture or a language that you don’t speak, to make that connection?
My work with National Geographic helped me a lot with that, because we would already have the relationships with a lot of these artisans and have the permission to go into their villages and photograph them and meet them. I’ve been able to call upon them a lot of times saying “Hey, I’m going to Thailand, I’d love to meet these kind of artisans. Could you help me find a person?” I find that you can’t just walk into a random village and start photographing; a lot of villages don’t even accept tourists.
Beside Nat Geo, there’s always local tour guides or companies that work with villages and artisans. Let’s say that you want to meet artisans that work in Guatemala; you could reach out to a clothing company or someone that’s maybe working with those artisans and ask them if they will help get you permission to visit for the day.
One example is Intrepid Travel . They have trips to go meet up with artisans and stuff all over, so you can get that experience, and have a translator with you and permission.

Who do you bring with you to assist on a trip, and what is your essential gear?
A lot of times I’m doing things by myself, which is crazy. Then I’m finding people that help me on the ground, on location. I think the most I’ve ever traveled with was three other photographers or assistants.
I have to keep it pretty minimal. Not only is it kind of just a lot to bring a lot of people in gear and I think, you know, even just my own gear, I keep very minimal. So everything I have has to be portable and carried.
I carry all my own stuff. All my photo gear is always my carry-on when I’m traveling. If it doesn’t fit in the carry-on, I’m not bringing it. I have a tiny drone, my Mavic Pro Air . I have a tiny portable Lowel softbox . I use my Canon external flashes with a little slave on top of the Canon, so I can just put the little flash in the portable softbox and create a studio, all battery powered.
I always have extra batteries and a charger for my phone. I use my cell phone and a little DJI Osmo gimbal for video. I only really use the main video in my camera if I have a tripod and I’m already sitting there doing something on the tripod. I also bring maybe three lenses, a couple camera backs, and my laptop; it all fits in my backpack.
I use a Peak Design backpack , which I think is the greatest photo backpack ever. This thing has gone through hell and back and it’s still in perfect condition and it just holds so much. It’s a smaller backpack, but it holds everything; my laptop, my lenses, this and that. Then I’ll have a side side second bag, either a roller bag or backpack, depending on where I’m going, with all my other gear in it.
So I just have a backpack and a smaller bag. And that’s all my photo gear that I bring, because there’s things like, hiking Kilimanjaro or hiking to some of the villages I’ve had to go to, where there are no power outlets. There’s no way to roll anything. You just have to carry everything.
You just have to figure it out and be portable; that’s my best advice on that.
Do you have a recommendation for a good travel tripod?
There was one that I bought years ago and I now don’t have it, but for years it would go everywhere with me. I think I got it at WPPI and it was one of the best little portable travel tripods; it was only a couple pounds.
I have a little one that folds up really small from Manfrotto , but it’s a full tripod. If I was shooting with a 7,200 lens on it, I wouldn’t want to just leave it by itself. I feel like that would be a little topheavy. But other than that it’s been pretty stable.
Cheryl: I have done quite a bit of photography while hiking, and settled on one from 3 Legged Thing . They’re out of the UK and they have some really great tripods and heads; good for video and still photography. So that’s another one to check out.
What three lenses are your go-to for travel photography?
My favorite three to go on assignment are my 50 prime, f 1.2, my 16 to 35 wide angle, and my 70 to 200. I love my 24 -70 as well; that would be my next choice. Honestly, you have to have a telephoto, you have to have a wide lens, and then you have to have a very, very fast portrait lens.
A lot of times you’re in super low light situations and you just want to have that super low depth of field. Or out in a landscape, you want a high depth of field. So I would say those are my go-to lenses, but I can’t tell you how much I use my 16 to 35. There’s something about, for all my landscape stuff, to get those epic clouds and that sort of distortion and everything. It’s just a magical lens.
What other useful gear would we find in your camera bag on a trip?
Portable chargers for everything that you can actually plug into your regular outlet, as well as USB’s for using with the computer. I think my biggest thing is having power, especially since my drone has to be flown using my cell phone? I use my cell phone as my video. I use it for social media. I also use it as my navigation and everything. So it’s constantly draining. Having a portable charging device is really, really important.
Also having the little mini LED panels that are portable that you don’t need to plug in have been really helpful, whether you’re interviewing somebody on camera or you just need an extra pop of light in a dark place. That’s been really great when you don’t want to use on camera flash for portraits and things like that.
Honestly, having a little mini steady cam/gimbal for my cell phone has been a game changer. You can shoot so much cinematic stuff with that; I use it all the time, and it’s tiny. They range from around $200 down; you can find cheaper ones. The Osmo is the one that I love.
Lastly, having my GoPro and being able to shoot underwater; it has been really easy to use. I just went canyoning the other day in Dominica Island and I wanted to bring my big camera, but you’re jumping off cliffs into the water. I don’t want to do all that with my big waterproof casing, so having a waterproof underwater camera is really helpful.
What is the most invaluable but inexpensive piece of gear you bring on a trip?
My universal adapter; I get so geeked out over having power.
The cheapest, tiny little thing that’s in my bag; zip ties, bare bands, the little carabiners. Having the little plastic sleeve for your cell phone, the waterproof thing that you can put around your neck. Those things have come in handy so many times.
Free Download: Laura’s Gear Checklist
Download Laura’s travel photography equipment checklist to make sure you’re prepared for your next photography adventure.
How do you take care of your gear while you’re traveling? You go places where there’s water, sand, and humidity.
I have to get my stuff overhauled and cleaned a lot. When I come back, I go to Canon, I’m a Canon Pro Service (CPS) member. You can ship your camera off and within two days they have it back to you. In general, I calibrate and clean my stuff once in a while cause it gets banged up.
I photographed a wedding this past year at Burning Man : Let me talk to you about destroying your photo equipment. You do everything, tape it, do all the things; it doesn’t matter. That dust gets everywhere. That experience was crazy.
I’m really good about keeping my lens caps on; and the other thing that just sounds like a no-brainer, but I always turn my camera off before switching my lenses. While it is turned on, your camera is an electromagnetic vacuum and if you take your lens off, it just sucks in everything. So you get a lot of dust spots and stuff in your camera if you don’t turn your camera off when you switch lenses.
I’m also really good about having clear filters on all my lenses to protect the glass while shooting.
Do you ever use other lens filters?
I do it all in post. I used to have filters. I think it’s such a pain to be switching filters all the time, and then you’re getting stuff trapped in them. I’d rather keep one filter on that protects the lens and then do everything in post production for polarizing and stuff like that.
Have you ever thought about creating your own line of camera straps?
That’s really funny that you should say that. We just asked our artisans if they could make guitar straps and things like that. And I guess it would be intention straps, because you can choose which one. So the answer is yes. It’s going to happen soon.
What’s your current favorite camera strap or harness?
I’m not a multi-camera carrier; I’m not a harness person. I don’t like things being strapped to me all the time, so I’m definitely a one camera, maybe I’ll have a side bag with some lenses kind of person. I like the freedom of being able to move around and through places quickly, and I don’t like having a lot of stuff on me.
I did get a new camera strap from Custom SLR , it has the two straps where it splits so it’s better on your shoulder. It’s not just all the weight on one, it separates it into two, because I get really tight neck and shoulders all the time. So there is a camera strap that can be easier on your neck and shoulders.

Do you still enjoy your trips or do they feel like work?
I always enjoy everything. There is no separation for me between work and play, and even when I’m sitting here spending time with my family in Virginia, I’m ironing hats for a hat show, and then I’m doing a photo shoot tomorrow. Everything blends all together all the time.
I use my photography all the time in my hat business and met the artisans through my photography and these artisans also are helping me with a nonprofit I’m forming. You never know what your connections are going to be, but I love what I do. I really, really love shooting photos. I think the only time where I’m not having a good time is when I’m not sleeping enough.
In general, if I plan my life well enough and I can get rest, I’m enjoying all the things I’m doing and all the travel I’m doing. I think it is important to make sure that there is rest built in. Even now with certain clients I’ve had, I make sure they fly me in a day early and I make sure that I have time to edit and downtime because it’s really important to build that in. It’s going to make you a happier, better photographer.
I finally realized that you have to have a level of self care, whether it’s yoga or some sort of massage, that needs to happen. I build that in, it’s included in the pricing of my packages because it’s part of the deal, and it’s not that much.
I do enjoy all of it. I wish I could clone myself and have more hours in a day.
Do you also travel just for fun, without your camera?
Sometimes I’m going to new, beautiful places I haven’t been, and then those images I can license to my stock agency. If I didn’t have my camera, I would want my camera. So even as a tourist, I would have my camera. I don’t consider that work, but I could never just travel without my camera, you know?
Especially if I’m going somewhere new, because I would want to document it and it could be something that could make money later on. It’s still fun, but I’m always thinking of ways I can repurpose things and multitask .
It’s also my gift that I give to a lot of my friends and family, this photography. Or I’ll [be traveling and] will want to do a styled shoot somewhere. I’m always blending it. Even with the hats, I’ll wear a hat and I’m going on a trip and of course I’m going to want to shoot pictures of me in a cool place wearing the hat for the hat company.
There’s always things that I’m thinking about when I’m on a trip, even if it’s just a vacation that ends up being kind of a blend of work. And same thing with work; when I’m on a work trip, I’ll extend it a few days and make it a vacation, too. It’s all blended together.

How can photographers learn from you in person?
We had a couple trips that were planned earlier and we had to push them just for various reasons. But in the fall there are going to be a few trips. One is to Iceland. It’s going to be a goddess session trip; a women’s trip where we’re going to be shooting Fashion Goddess portraits along the way in epic locations, similar to the Kilimanjaro series . It’s going to be an amazing journey. We’re going to be going to places in Iceland I’ve never even been to, either.
As for teaching, a lot of my trips I’m there to help you out with your own thing. In some ways, a lot of it is adventure and I’m just a tour leader. Then we set up photo shoots along the way. For the Iceland trip, I’ll facilitate setting up the photo shoots and help people with their settings. Each person’s going to be modeling and having their own pictures taken during that time. It’s a fun, empowering trip that involves photography; I won’t be teaching every day about the basics of photography, but I’ll be there to help with any type of need.
Another trip that we’ll be doing is a visit to our artisans for the hat company ; the next one is in November 2023 centered around Cusco and the Sacred Valley. This is one of our origin trips, where everybody on the trip gets a hat and you get to meet all the indigenous artisans and learn about their cultural practices. We will have permission to go into the villages; we’ll do portraits with them.
All of my trips create amazing opportunities to come back with an incredible portfolio from [the location]. It’s not hardcore where every day there’s photo instruction. We’ll usually do photo shoots during the day, then at night we can have a discussion over dinner, cover questions people have or exchange thoughts.
I’ll usually do one evening where I’m talking about editing tips and things like that. It’s very relaxed: It’s like going on an epic trip during the day where you’re taking incredible images and having an adventure, then at night having a fireside chat about photography.
Do you require participants in your trips to have a certain level of photography experience or type of equipment?
I always tell people, bring your professional camera or bring your iPhone.
We can teach on anything; I don’t want people to feel like they’re not good enough, or don’t have good enough equipment to come. I think you can do amazing imagery on any camera that you have, and I want people to be able to enjoy it no matter what level they are.
How many people do you allow each trip?
The most I ever bring on these trips are 12. It’s usually eight to 12, they’re pretty small.
I will be doing more trips to Africa next year. Our Madagascar trip will probably be in the spring of 2024.
Then there is a potential North Pole adventure; Greenland and Northern Arctic Adventure. That will be later in the year, probably wintertime. It seems counterintuitive to go in the winter, but that’s actually the best time to go. We don’t have the dates on it yet, they are TBD, but we have the actual trip planned. That will be on a cruise ship that makes different stops, and we will Zodiac boat to different places.
The upcoming ones will be fall; Guatemala, Peru, and then Iceland will be also probably October, November. Madagascar would most likely be February or March of 2024.
When we post the dates, everything will be found on lauragrier.com . You can follow me on Instagram or join the newsletter on the site. We’ll be announcing them and posting them on the trip section as soon as we have all the dates.
Are there any places still on your bucket list?
My bucket list: I swear it keeps getting longer and longer as I’ve gone places, because you hear about new places you’ve never been. Papua New Guinea is high on my list. Believe it or not, I have not been to Turkey. I’ve flown through the airport, but I haven’t spent a lot of time in Turkey, so I really, really want to head over there.
My main thing is to do an Eastern European road trip. There’s 15 countries I could visit in one road trip, and a lot of them I just don’t know that much about: Albania, Estonia, and Moldova. There’s so many different places out there.
I’m at 88 countries right now, so I’m like, “Hmm, I could probably hit a hundred if I did an Eastern European road trip,” but that isn’t the main reason why I want to do it. I think it would be so cool to just explore on a road trip, learn a lot on the ground and understand the geography because I’m driving. That’s something I’ve always wanted to do.
My jam is going to places where there’s vanishing cultures and indigenous people. I would love to see the Eagle Festival in Mongolia or Siberia and visit the tribes in Papua New Guinea.
I’m also an advanced diver, so I’m trying to hit as many reefs as I can before some of those disappear. I just went and swam with the sperm whales in Dominica Island, it was amazing. I want to go to Tonga, there’s Raja Ampat in the Indonesian islands that’s supposed to be the most spectacular reef on the planet, and it’s really hard to get to.
Find Laura’s top tips for composition and editing in part two of this blog series, and visit her Facebook , Instagram feed , and website to see what exciting things she’ll do next.
Watch our full interview with Laura Grier for more of her professional tips on travel photography.

Related Posts

Contributors

Laura Grier of Beautiful Day Photography has spent the past 22 years working as a photojournalist on all 7 continents and has made a life out of exploring the world, capturing, and writing about her experiences. She has been a platform speaker for WPPI, WIPA, Canon, Zenfolio, Step Up Women’s Network, and the Wedding MBA Conference. Presently, she is a Los Angeles and Miami based Photojournalist, Travel Writer, and owner of both Beautiful Day Photography (specializing in Destination Weddings) and Laura Grier Travel, featuring her Fine Art Prints, travel workshops, and behind-the-scenes of her jet setting around the world. Laura’s ability to combine her love of travel, adventure, weddings, and art into a chic, colorful perspective, has made her a renowned International photographer. (Author Profile)
View all posts

Cheryl is the Director of Content Strategy at Zenfolio and the Owner/Photographer at Portraits by Cheryl and Seniors by Cheryl in Raleigh, NC. Cheryl has mentored countless new photographers looking to build successful photography businesses.

Amanda is the Content Marketing Specialist at Zenfolio and the Owner/Photographer of Wild Orchard Studios photography. A BFA graduate from Maine College of Art and Design and professional Portrait, Family, and Branding photographer for nearly 20 years, she thoroughly enjoys drawing from her experiences to guide new photographers as they are starting out. Amanda lives in the wilds of Maine with her husband and two imaginative daughters. If there’s such a thing as too much dark chocolate, she hasn’t heard about it.
Create your photography website in minutes.
- Privacy Overview
- Strictly Necessary Cookies
This website uses cookies so that we can provide you with the best user experience possible. Cookie information is stored in your browser and performs functions such as recognising you when you return to our website and helping our team to understand which sections of the website you find most interesting and useful.
Strictly Necessary Cookie should be enabled at all times so that we can save your preferences for cookie settings.
If you disable this cookie, we will not be able to save your preferences. This means that every time you visit this website you will need to enable or disable cookies again.
- Cameras Equipment Photography
The Art of Travel Photography: Tips and Tricks
- December 10, 2023
- Cameras , Equipment , Photography
Table of Contents
Why travel photography is popular
Travel photography is a popular genre that allows photographers to capture the beauty and essence of different cultures, landscapes, and people around the world. It offers a unique opportunity to explore new places, experience different cultures, and document moments that may otherwise be forgotten.
Travel photography allows us to tell stories through images, showcasing the diversity and richness of our world. With the rise of social media and the increasing accessibility of travel, more and more people are taking up travel photography as a way to share their adventures and inspire others to explore the world.
The popularity of this genre can be attributed to its ability to evoke emotions, ignite wanderlust, and provide a visual escape for both the photographer and the viewer.

Essential equipment for travel photography
When it comes to travel photography, having the right equipment is essential for capturing stunning images. While smartphones have made it easier than ever to take photos on the go, investing in a good quality camera and lens can make a world of difference.
A DSLR or mirrorless camera allows for greater control over settings such as aperture and shutter speed, giving you more creative freedom. Additionally, a versatile lens, such as a wide-angle or telephoto lens, can help you capture a variety of scenes and subjects. Don’t forget to pack extra batteries, memory cards, and a sturdy tripod to ensure you’re always ready to capture that perfect shot.
Choosing the right camera settings for different situations
Choosing the right camera settings for different situations is vital in capturing stunning travel photographs. The settings you use can greatly impact the outcome of your images, whether you’re shooting landscapes, portraits, or street scenes.
Understanding how to adjust your aperture, shutter speed, and ISO will allow you to control the depth of field, freeze or blur motion, and manage the light sensitivity of your camera. By utilizing the appropriate settings, you can create visually compelling and technically proficient travel photographs that truly transport viewers to the places you’ve explored.
Composition techniques to enhance your travel photos
Composition techniques play a vital role in capturing stunning travel photos. By applying these techniques, you can take your images from ordinary to extraordinary. One such technique is the rule of thirds, where you divide your frame into a grid of nine equal parts and place your subject along the intersecting lines.
This creates a visually appealing balance and draws the viewer’s attention to the focal point. Another technique is leading lines, which involves using natural or man-made lines in the scene to guide the viewer’s eye towards the main subject. Additionally, incorporating foreground elements can add depth and create a sense of scale in your photos.
These composition techniques, when mastered, will enable you to create captivating travel photographs that tell a story and evoke emotions in the viewer.
Finding unique and interesting subjects while traveling
Finding unique and interesting subjects while traveling is a key aspect of capturing stunning travel photographs. As a travel photographer, it is important to go beyond the typical tourist spots and delve deeper into the local culture and surroundings. Exploring off the beaten path can lead to hidden gems and extraordinary moments that will make your photographs stand out.
Engaging with locals and immersing yourself in the destination’s customs and traditions will provide you with a deeper understanding and appreciation of the place, allowing you to capture its essence in your photographs. By seeking out unique subjects, you can create a visual narrative that tells a captivating story and transports viewers to the heart of your travel experiences.
Capturing the essence of a destination through photography
Capturing the essence of a destination through photography is a skill that requires both technical expertise and a creative eye. It is not just about taking pictures of famous landmarks, but about capturing the unique atmosphere and spirit of a place.
By paying attention to details such as lighting, composition, and perspective, you can create images that transport viewers to the heart of the destination. Whether it’s the vibrant colors of a bustling market or the serene beauty of a secluded beach, travel photography allows you to share your experiences and evoke emotions in others.
So, next time you’re exploring a new destination, don’t forget to bring your camera and let your creativity shine through your lens.
Tips for shooting in different lighting conditions
Shooting in different lighting conditions is a fundamental skill for any travel photographer. Whether you’re capturing a sunrise over a mountaintop or a bustling city street at night, understanding how to adapt to different lighting situations can make or break your photos.
One important tip is to always be aware of the direction and quality of light. For example, shooting during the golden hour, when the sun is low in the sky, can create a warm and magical atmosphere. On the other hand, shooting in harsh midday sunlight can result in harsh shadows and blown-out highlights.
By learning to work with the available light and making use of techniques such as exposure compensation and using reflectors or diffusers, you can capture stunning images that truly showcase the beauty of your travel destinations.
Editing and post-processing techniques for travel photos
Editing and post-processing techniques are essential for enhancing the beauty and impact of your travel photos. While capturing the perfect shot is important, it is during the editing phase that you can truly bring out the colors, details, and mood of your images. From adjusting exposure and contrast to fine-tuning white balance and saturation, the possibilities are endless.
Additionally, post-processing allows you to remove unwanted distractions, enhance sharpness, and even create stunning panoramic shots. By mastering these techniques, you can transform your travel photos into captivating visual stories that transport viewers to the destinations you have explored.
Sharing and showcasing your travel photos
Sharing and showcasing your travel photos is an important aspect of travel photography. Not only does it allow you to share your experiences with others, but it also provides an opportunity to inspire and connect with fellow travelers. When sharing your photos, it is crucial to curate them effectively, selecting the best shots that tell a story and evoke emotions.
Additionally, utilizing social media platforms and photography websites can help you reach a wider audience and gain recognition for your work. Remember, the key is to capture the essence of your travels and transport viewers to the destinations you have explored.
Conclusion: The joy of capturing memories through travel photography
Travel photography is not just about taking pictures, it’s about capturing memories and telling stories through your lens. The joy of travel photography lies in the ability to freeze a moment in time and evoke emotions through visual storytelling.
Whether it’s the vibrant colors of a bustling market or the serene beauty of a remote landscape, travel photography allows us to relive our adventures and share them with others. So, grab your camera, explore the world, and let your creativity flow as you capture the essence of each destination, creating a visual diary of your journey.
- Villas & Lodges
- Apartments & houses
- Camping and Glamping
- New South Wales
- South Australia
- Western Australia
- Northern Territory
- Norfolk Island
- New Zealand
- Switzerland
- Middle East
- Southeast Asia
- Antarctica & Arctic
- Coach, Group & Escorted
- Special Interest
- City Tours & Sightseeing
- Scenic Flights & Heli Tours
- All-Inclusive Packages
- Restaurants
- Wine & Dine
- Street Food
- Art & Culture
- Shopping & Markets
- Rail Journeys
- Ski & snowboard
- Walks & Treks
- Dive & Water Sports
- Expeditions
- Parks & Reserves
- Theme & Amusement Parks
- Spa & Wellness
- Global Village
- Money & Rewards
- What’s On
- Tried & Tested
- Interviews & Profiles
- Deals & Itineraries
Subscribe to the magazine

- Vacations & Travel on Facebook
- Vacations & Travel on LinkedIn
- Vacations & Travel on Instagram
- Vacations & Travel on YouTube
V&T Newsletter
Love inspiring travel stories and exciting competitions? Get the latest news delivered to your inbox.

Eight travel photography tips and tricks for beginners
- facebook-f-brands (1)
- twitter-brands (1)
- linkedin-in-brands
- envelope-solid
Whether you’re shooting on a phone or camera, Liam Fawell has some travel photography tips for you.
Whether you’re backpacking around Europe, on a family holiday in Fiji, or embarking on a bucket-list once-in-a-lifetime trip, one thing is sure: you’ll be taking plenty of photos along the way. Travel photography is a genre of content creation that involves documenting the landscape, people, culture, customs and environment of a particular place. From architecture, food and events, to urban and natural environments, animals, people and portraits, travel photography is a creative way to capture memories and moments while exploring new places. Liam Fawell is a well-travelled creative director, photographer, videographer and Nikon Z Creator, and he has some expert travel photography advice for budding snappers and experienced clickers alike.

The best ways to capture the ‘essence’ of a location
Liam says the best way to capture images that really communicate the essence or spirit of a location is to seek out subjects that resonate with you. “For me, it’s people. I also love capturing landscapes. Figure out what you’re most inspired by and naturally gravitate towards when picking up your camera. That should be your subject because if it interests and intrigues you, you’ll continue to shoot it,” says Liam. “Finding your style of photography while on the road and travelling is important. There’s no rulebook as to what the best things to capture are, so whatever feels the most authentic to you, that’s what you should photograph.”
How to take travel portraits of yourself and your travelling companions
Being ‘in’ the moment – and photographing that moment – is when authentic and real images are captured, says Liam. “When an image is authentic, real and raw, you can tell. It’s a moment being lived, and someone just happened to point a camera. Use your camera as an extension of yourself to capture fleeting moments with the people around you,” says Liam.

Travel photography rules
Seeking out alternative perspectives, using photographic equipment you’re familiar and comfortable with, and knowing when to put the camera down, are Liam’s top three key rules.
- “Travel light. On the road, there are so many moments that constantly happen before you. If your gear isn’t easily accessible and you don’t know it well enough, you’ll miss it. Your gear should be able to enhance your vision, not detract from it.”
- “Try and look at things differently. Change up your process to alter the way you look at things, therefore capturing different perspectives.”
- “Learn to put the camera down. Some moments are worth taking in with no thoughts about framing and composition. Take in the whole moment with every sense you have, not just visually. You’ll become more grateful for the opportunity you have in front of you to travel and document.”

Safety tips for travel photography
The key to travelling safely yet functionally is finding equipment that strikes a balance between security and accessibility. “Camera straps and lens caps are a must while on the road, they’re simple, easy and will make a world of difference if something ever went wrong,” says Liam. “Always have equipment insurance, especially overseas, it’s an absolute non-negotiable.”
The best lenses for travel photography
“I’ve always been a fan of zoom lenses for travelling. My trusty NIKKOR 24-70mm f/2.8 is always with me on every trip I go on. That range is adaptive enough to capture 90% of the frames I want,” says Liam. “I’ve also scored some incredible captures on my NIKKOR 70-200mm f/2.8 on a couple of trips. If I have the capacity to bring that sort of weight with me, I’ll always do it. With film cameras, I love having a fixed lens for some shots, a 28mm or 35mm is perfect for little moments in day-to-day life.”

Liam’s top three iPhone travel photography tips
- “Just get out there and shoot. Learn what you like to take photos of then start to figure out how you can develop that further.”
- “Learn the basic rules of photography, such as composition, framing, lighting, and learn camera settings back to front so that if you were to use an actual camera, you could create the images you want to.”
- “Explore, shoot, edit. Find inspiration and constantly keep trying to create imagery that feels authentic to you. “
Travel photography tips for beginners
“What makes a good travel image is completely up to individual interpretation, which is the beautiful thing about it. What someone loves in a photo, another person won’t at all,” says Liam.
- Keep your subject towards the centre of the frame, it’s where the eye is drawn so you want the viewer to see the whole image from first glance.
- If you’re shooting people, focus on the eyes, it’s the first thing we all naturally look at.
- Think heavily about composition and framing. Although there are no rules, these things are what will make or break a travel image.
- Colour and angles are both very individual stylistic choices. Depending on the scene just think about how you want to tell the story and what feels authentic to you.

What’s the best time of the day to take travel photos?
Whether Liam is shooting people or places, sunset is his favourite time to get out and about with the camera. ”I will forever be obsessed with the dreamy light and colours that fall into my frame as the sun goes down and disappears below the horizon,” says Liam. “However, I’ve been loving shooting coastal beachy scenes around midday on 35mm because of how beautifully the light is captured on film. I’m obsessed with how that time of day can produce nostalgic summer feelings on film.”
Read more:
Three dream destinations for photographers Five underwater travel photography tips The most photographed places in the world
Read more inspiring stories by Vacations & Travel…

Tags: advice , Photography
Travel Video We Love
Subscribe to our newsletter
Email address:
Latest Posts

Latest Features

Top 6 Instagram locations in Australia’s North West

The hilly streets of San Francisco
Travel Portrait Photography – Tips For Taking People’s Photos While Traveling

Travel Portrait Photography Tips For Taking People’s Photos While Traveling
Our travel portrait photography guide outlines the best tips and tricks for taking people’s photos while traveling. From tips for nailing your composition, choosing your location, cultural sensitivity, and approaching people to the more technical stuff that will help you improve your portrait photography and take better travel and cultural portraits.
Ask us what we love more, traveling or photography, and we’ll have a hard time giving you an answer. Travel photography combines both of our passions, taking photos and videos and experiencing other cultures . Travel photography includes many aspects and elements of highlighting the local culture, from the architecture and landscape to the customs and food. Though we try to incorporate all of these elements and more while creating our photo essays to convey the story of the place we’re traveling in, our true passion lies in cultural portraits. We love to learn about the local culture mainly by highlighting the human element. We love taking people’s photos while traveling, and in our opinion, it’s the best way to deepen your knowledge about the local culture and truly get to know the place you are traveling in.
So how do you do that? Showcasing the local culture while focusing on the human element? We like to visit local markets and artists. We love strolling around local streets and alleys, trying to capture a fleeting moment or the vignettes of daily life through our lens. We always try to tell a story with our images, and it is something we’ve learned over the years. If you want to improve your travel portraits, if you want to know how to approach people and learn how to tell a story with your lens, this article has all the tips you need and then some. We start by giving some general tips for taking awesome travel portraits and then dig in deeper into the more technical stuff.
This post may contain affiliate links, which means we earn a small commission if you purchase from them (no extra costs to you!). For details check our disclaimer .
Table of Content
Why is travel portrait photography so powerful.
Capturing the essence of a place can come in many forms. You can take pictures of the food, architecture, or landscapes but taking pictures of the people not only helps you showcase the local culture, it also provides endless opportunities for interactions with the local residents and deepens your knowledge about the local culture. No matter if you snap a picture of a local lady in the market or if you take pictures of the local cheesemaker or artisan, you will have an opportunity to make a connection with them. It might be just a smile or a nod of the head; it’s up to you to make it a bit more than that and learn about that person’s life. Ask the lady in the market about the local fruits and vegetables, inquire the cheesemaker about the process of making cheese or how he got into the cheese-making business, ask the artist about the tradition behind his craft. These interactions with local people provide a glance into the local customs and personal lives of the local residents. Besides, as a photographer, you want your pictures to evoke an emotion and tell a story, and in our opinion, travel portraits are the best way to achieve this goal.
Get our FREE Maps-2-Go
Get monthly updatesincluding exclusive access to our google maps which feature all of our favorite attractions in numerous cities all over the world.
I want to subscribe to your NEWSLETTER!
Types of Travel Portraits
Let’s start from the beginning and talk about the different types of travel portraits. Most people think that portrait photography is taking a close-up or medium shot of a person, but that’s not entirely true since there are other kinds of portrait photography.
Classic Portrait
When you take a picture of your subject that fills up the whole frame, that’s a classic portrait. It can be just the face, part of the face, or even the entire body.
Environmental Portrait
The environmental portrait is different from your classic portrait since you’ll fill the frame with your subject and the environment. The environmental portrait is all about showcasing the place of work of your subject, where he lives, his personality, hobbies etc.
Details Portrait
Sometimes you don’t need to capture the face of your subject. Highlighting just a part of the body can tell a story as well. You can focus on a unique outfit, special shoes, hands, and so on.

Challenges of Taking People’s Photos While Traveling
If you are a travel portrait photographer, you have to face many challenges before getting the perfect shot. Most times, you won’t be able to control the light or carry a lot of equipment with you. If it’s a candid shot, you need to be quick about it, and even if it’s not, you can’t keep your subjects from their daily routines for a long time. You’ll need to learn how to approach people if you’d like to take their photo from up close; there will be cultural differences, language barriers, and many more issues you’ll have to deal with. There is also the ethical issue of taking people’s photos without their permission or using your travel portraits across social media.
Travel Portraits – Ethical Issues of People Photography
In recent years more and more voices have started speaking about the ethics of people photography. Should you ask for permission before taking a photo? Should you take pictures of children? Should you post your photos across social media? Should you sell your photos? Some are even claiming that in the era of social media, Westerns seem to treat people in third world countries as if they were animals in a zoo, snapping pictures of the “exotic creature” without permission. There are also questions regarding the photographs’ authenticity and the different approach in people photography. Some photographers would not dream of staging a moment, while others claim it’s the only way to get breathtaking travel portraits of their subject matter.
So what’s the right answer? You’ll have to decide for yourself. We have our own rules of conduct that we try to follow. Regarding permission, if it’s a candid shot, there’s no point in asking for permission because the moment will be lost forever. If our subject is aware of our presence, we’ll ask for consent—either verbally or by gesturing to our camera. If we notice that someone isn’t happy about us snapping a picture of him, we’ll apologize and delete the image. When we do ask for permission, we do it with a smile and accept the fact the photograph is going to be a bit staged, which can even be a good thing at times. In fact, after our encounter with a group of photographers in Myanmar’s Inle Lake, we realized some of the most stunning shots on Instagram must have been staged. Regarding social media and posting photos on our site, we make a point of choosing images that we feel flatter our subject. We’ll never post a picture that showcases someone in a negative light. We love to highlight a place by taking photos of the daily life and local customs and traditions, so for us people photography and travel portraits are a big part of our cultural photo essays.
We encourage you to think about these ethical questions and decide for yourself how to behave but always be respectful, accept “no” as an answer and treat your subjects like you would like to be treated. Think about your intention and only post pictures that you believe flatter your subjects.
Travel Portrait Photography Tips and Tricks - General
Research your destination - history, customs and more.
Before going anywhere, we do our research. We’ll start reading a little bit about the history and culture of the place we plan on visiting. You have to know at least the basics about the local culture in terms of Do’s and Don’ts and make sure to search for these social cues while traveling. If people leave their shoes at the entrance to a temple, follow their lead and if you’re not sure, ask one of the local residents. You should especially be culturally sensitive when taking pictures of children, and if you see a child with his parents, always ask for permission before photographing them.
Regarding locations, research online for the sights you’d like to see, but also, always look beyond the obvious sights and attractions if you’d like to be a bit more original and capture more authentic shots.

Learn a Few Phrases in the Local Language
Learning a few phrases and words in the local language goes a long way. It’s much easier to make someone smile or have a positive attitude when you speak a few words of his language. Moreover, it’s much more respectful when you visit another country, and you make the effort of learning how to say ‘thank you’ ‘you welcome’ and so on in the native language.
In terms of travel portraits, it’s a good idea to learn how to ask ‘what is your name’ ‘May I take a picture’ ‘thank you’ ‘how to say’ and perhaps a few adjectives like ‘beautiful smile’ ‘nice’ etc. People tend to be more open and listen to you or give you the time of day when you make an effort to learn their language. They will gladly help you learn a few more words if you ask them ‘how to say’ and point to an object. It’s also a great way to break the ice and even get a candid moment from a somewhat staged situation.
Search for Things You’d like to Photograph
Besides learning about the local culture and etiquettes, list your interests and favorite places you’d like to visit. We love local markets and art, so we always look for the best markets, and we intentionally search online for local artists we could see or local festivals or events that take place during our visit.
First of all, always have your camera ready. Stumbling upon a magical moment and having your camera in the bag will result in heartbreak (and we’re talking from experience). You always need to be ready to shoot, and that means choosing your camera’s setting and looking around for interesting situations.
Travel Portrait Photography Tip: Most DSLR/Mirrorless cameras have custom buttons. You can choose your custom settings and assign them to these buttons. For example, you can assign the perfect setting for an outdoor photoshoot to one of them, and the second can be used for a low-light setting.
Are You Going for a Staged Photo or a Candid Photo
There’s something magical about a candid travel portrait. You were able to capture a fleeting moment, one perfect shot that no one will be able to reproduce. We love taking candid photos. It’s all about street photography and catching that decisive moment. However, staged shots have their own merits and charm.
What is a staged shot? Many times, once you ask for permission from your subject, it’s going to be a staged shot (including a big cheesy smile). Your subject’s posture and facial expression are going to change, and many times it won’t be as unique or authentic as it was before. Nevertheless, there are ways to make your subjects act or pose more naturally, and we’ll discuss it later.
Now there are those staged shots when you tell your subject how to act, where to look, what to do or even where to stand. It can be awkward at first, but that’s the best way to get a perfect portrait (provided your subject is following along with your guidelines).

Approaching People/Asking Permission
Most times, we ask people for permission before or after we take the picture. Many times, while we’re taking the shot, the person might notice us, and we ask for permission with a gesture. If he seems comfortable with it, we’ll continue shooting; if not, we’ll apologize and delete the images.
There are times when we ask for permission in advance, especially when we get really close to our subject. We smile, point to the camera and to him/her, sometimes we introduce ourselves and try to say a few words and see if it’s ok. Sometimes after a short conversation, people will change their minds and let you take their picture.
It is not easy, and for us, it has always been and still is one of the most challenging aspects of people’s photography, but we’ve learned to overcome our shyness. Even if you’re not sure, there’s no harm in trying, and remember to always be polite and thank them with a smile even if they say no.
Keep Smiling, Show Your Interest and Engage with Your Subjects
No matter what happens, always keep smiling and have a positive attitude. It’s not just about approaching people but also about taking candid photos, talking to people on the street, addressing your waiter, and so on. Not just while traveling, keeping a big smile, having a positive attitude, and showing a genuine interest in the daily lives and local traditions of anyone you meet can open the door to many opportunities. If you’re taking pictures of a local, ask for recommendations for the area. If you’re photographing a local artist, ask about the process, and by doing so, you might learn about another craft you’d like to photograph.
Get close to your subjects! Yes, using a zoom lens might give you beautiful classic portraits with nice bokeh in the background, and it’s definitely less obtrusive, but you’ll get the best travel portraits by getting close to your subjects.
When you take a candid shot of a street or a market scene, it’s always best if you have someone close in the foreground since it adds perspective, depth, and interest to your photo. It also allows you to make a real connection with your subject.
Reciprocation
After you’ve learned how to approach people and engage with them, what about reciprocation? Should you offer to pay them for their portraits? Should you buy something from them? There’s no right answer to these questions, and we judge each situation as it comes.
We don’t encourage paying someone for taking his portrait, especially in third world countries, since many times it creates a habit. People are expecting a payment, they might be rude about it, and in some countries, children are taken out of schools and go “work” in the streets by posing for tourists. If someone asks us for money, we simply smile, shake our heads and go away. A few times in the past, especially in Vietnam , I refused, and then the women called me back to take their portraits after all ; fter taking a few snaps, I bought some items from them.
Nevertheless, there’s an exception to that rule. Many times, especially in third-world countries and especially in pagodas or nunneries, it’s customary to donate a small amount of money for the living expenses of the nuns/monks. Other times, if you’d like to ask someone to pose for you and you are going to give them instructions and spend a while there, you should definitely consider paying him/her.
Other times, in local markets, for example, we usually buy something from the vendor. We’re always happy to have fresh fruit or nuts as a snack. When photographing local artists, we buy an item, and if we spend a long time there but know that the items are too heavy to carry, we do offer a small payment for their time.
When we visit local villages in third-world countries, we try to carry with us some simple toys, crayons, or stickers to give to the local children. Some say it’s a bad habit since they start to expect it (which might be true), but it’s a simple exchange, and it’s nice to see the pure joy of these children who often don’t have access to these kind of items.
No matter what, you should always offer to show your subject the picture you’ve taken. Sometimes they don’t want to see it, but many times they will be grateful for the offer and, if possible, ask to send it to them by email. Some people even carry a polaroid camera and give them the picture on the spot.

Travel Portrait Photography Tips and Tricks - Advanced
Think about the light.
As a photographer, light is your best friend or your worst enemy. The more you learn how to use the light to your advantage, the more you’ll be able to capture breathtaking travel portraits. If you have no clue about how light affects your camera, we suggest either taking the portrait in the shadow or in the light but in most cases, taking a picture when half of the frame is in shadow and half of the frame in the sun will result in a bad travel portrait unless you know what you are doing.
Generally speaking, without getting too technical, the worst time for taking travel portraits is around noon when the sun creates harsh shadows under the nose and eyes. A backlight travel portrait can be quite flattering when you know how to work with the light, and the best light for travel portraits is definitely in the late afternoon and early morning hours.
Over exposure is usually more flattering to your subjects, while underexposure is going to enhance the appearance of wrinkles and signs of time. Analyze the quality of light (is it a harsh or soft light ) and use it to your advantage.
Travel Portrait Photography Tip – Try and plan your daily schedule according to the light. In the morning and late afternoon, you’ll have the best light, so plan for outdoor activities. During the harsh hours of midday, you can visit indoor markets or other indoor venues.
Know Your ISO Limit
ISO can be your best friend when you don’t have enough light, but you need to be familiar with your camera’s ability. Some cameras can handle ISO 8000, while others produce very grainy images in ISO 400. You should always try and be at ISO 100 or 200 but if you don’t have enough light take advantage of the ISO capabilities of your camera.
Travel Portrait Photography Tip – If you don’t have a lot of light, choose a lens with a wide aperture and use it to your advantage. If you have a camera with internal image stabilization, you’ll be able to work with slower shutter speeds under 1/60 (provided your subject stands still), but you can always lean against a wall or something steady which will provide extra stabilization.
Composition
Composition is everything, and after learning how to work with light, you should spend some time learning about the different composition rules. From the rule of thirds to leading lines and the golden ratio, knowing how to compose a portrait will improve your portrait photography skills. Also, think about headroom or breathing/negative space when you compose your travel portraits.
Composition also includes choosing to take a horizontal or vertical picture. Generally speaking, most old-school photographers will probably say that a classic portrait should be vertical, and an environmental portrait should be horizontal, but nowadays, it’s all up to you. Depending on what you would like to express and how you choose to compose the picture, there are no clear rules regarding the horizontal/vertical choice.
Check out this quick overview of Steve McCurry’s , one of the most well-known travel photographers, composition tips!
Travel Portrait Photography Tip – Apply the grid option in your camera (Mirrorless, DSLR or mobile phones). It will help you compose the shot according to the Rule of Thirds.

Break the Rules
Once you know the classic composition rules of photography, it’s time to break them. There are many stunning travel portraits that don’t adhere to any of the traditional composition rules. Think about what you are trying to express and the story you’d like to convey, and compose your frame accordingly. For example, though it’s customary to leave some breathing space in front of your subject in the direction he’s walking to, by placing your subject close to the edge of the frame, without leaving breathing space in front of him, you might express anxiety, stress, the end of a journey etc.
Think about DOF
Depth of Field (DOF) is the distance between the closest and farthest objects in a photo that appear acceptably sharp. In simpler terms, the area in front/behind your subject that remains in focus. A large depth of field means that much more area in your photo will be in focus, while a narrow DOF means that just a small area in your photo will be in focus.
You can control the depth of field mainly with your aperture and the distance of your subject from the camera. Large apertures (smaller f-numbers such as 1.8 or 4) means shallower DOF. Small apertures (such as f 10) mean larger depth of field. Shallower DOF provides some dreamy quality to your travel portrait and it works great with classic portraits when there’s a ‘hero’ in your shot. A larger DOF is great for environmental portraits when you want to showcase the background as well. If there are many people in your photo that stand at various distances from the camera, you have to go for a larger DOF if you want them all to be in focus.
Other than the aperture, other factors such as distance from the camera/background, the focal length of your lens, and the size of your camera’s sensor can affect the DOF. Check out this helpful DOF guide!
Travel Portrait Photography Tip – If you’re using your mobile and you’d like to have a blurry background (shallow DOF) choose the food/live focus option for Samsung or Portrait for iPhone.
Change Your Angles
When you attempt to take a portrait of someone, do you choose to take a picture at eye level, or do you go for a higher/lower angle? Choose your camera angle, depending on what you want to convey
The classic portrait is usually taken at eye level. This way, the subject looks directly into the lens, which enhances the feeling of connection between the subject and the spectator.
However, a lower angle, when the camera is slightly lower than eye level and tilted up, can provide some kind of authority to your subject and contribute to making him the hero of your shot. If you choose a lower angle, do so with caution since it can be unflattering if the camera is too low.
A high angle puts the focus mainly on the face and can help create beautiful light in the eyes of your subject (catch light) since they are looking up towards the light source. It’s also great to show artists with all of their arts and crafts or while working, but you should pay attention to the depth of field and think about what you’d like to be in focus, and choose your aperture accordingly.
Travel Portrait Photography Tip – Always try to take a few pictures at different angles and various compositions. Sometimes a few steps to the right or lowering your angle makes all the difference in the world. In addition, you can play with your angle/composition/DOF to eliminate distracting elements in your shot.

Think About Focus
First of all, you need to learn everything you can about the focus system in your camera. If you don’t nail the focus in your travel portrait, there’s really not much you can do about it; the portrait will be unusable.
Now think about where the focus should be. Most times, It should be on the eyes but sometimes it can be elsewhere, depending on what you’d like to emphasize and your composition. The shallower DOF, the harder it is to nail the focus. So when in doubt, opt for a smaller aperture (larger f no.). With extremely wide aperture numbers like f1.8, it’s much harder to nail the focus.
Travel Portrait Photography Tip – Some cameras have face/eye detection systems, so it’s easier to nail the focus, but with other cameras, your best bet is to work with a single focus point.
Know How to Use Your Manual Focus
When in doubt or when your camera struggles to focus, switch to manual focus. Many cameras let you enlarge the area you’re focusing on, so it’s easier to nail the focus.
Know Your Camera – Custom buttons & Functions
It’s always a good idea to get to know all the functions of your camera. If you’re a beginner, you can use the Auto function. However, most times, you’ll get better results while using one of the semi-automatic (shutter/aperture priority) or manual mode.
Travel Portrait Photography Tip – Other than the shooting modes and ISO capabilities learn about the most important functions of your camera that can help you improve your travel portrait photography. Try to shoot in burst mode, so you don’t miss a moment. Learn about the focus system, light-metering and so on.
Tell a Story & Evoke Emotions
The most mesmerizing portraits tell stories and evoke emotions. Think about your favorite portraits, often times you can see the emotions of the subject, spontaneous laughter, a gesture of heartbreak, an expression of delight or any other kind of emotional spark. Even when you stage someone, you can create candid moments that will highlight the situation and your hero.
Furthermore, try to tell a story with your portrait. You can shoot your hero in his/her environment and include everyday objects/tasks, or you can capture the interactions of several people like a group of children, market vendors, a father and son, and so on.

Look for a Nice Location & Wait for the Shot
That’s one of the most important rules that can genuinely make a difference. The problem is it can take a long time to take the shot. When you see beautiful scenery and the light conditions are great for your travel portrait or street photography, you want to wait for the right moment for someone interesting to pass by.
Travel Portrait Photography Tip – For these kinds of situations, it is always better to shoot in burst mode
Use Colors, Textures, Patterns & Light
Colors add so much life and vitality to an image, so look for these colorful spots/ walls/ objects and incorporate them in your photo. Use patterns and textures to your advantage to add depth and interest to your travel portrait, and always think about the light and backdrop. Ray of lights can add so much drama to a scene. If you’re trying to capture someone who is smoking or a steamy dish, a light source and a dark backdrop will enhance the drama in your shot.
Go Off the Beaten Path
We always try to find off-beaten-path locations. Sure, we want to capture the most famous places in each destination we visit, but for a less touristy experience, we recommend finding these places that not many tourists know about. There’s something much more authentic when you visit a local market than the touristy one and we’ve visited many of those in Sidemen area in Bali. We are always looking for neighborhoods and towns we don’t know much about, and usually, we discover hidden gems like the Istrian peninsula in Croatia. The residents are usually surprised to see tourists there and are much more patient and willing to have their portraits taken.
Look for Inspiration
If you want to be a better photographer, you need to learn from the best and seek inspiration. There are so many great travel and portrait photographers. Look for inspiration on Instagram, Pinterest, Google, or wherever you can find it. Think about which portraits you will remember or which ones evoke emotion and determine how the photographer has achieved it.

Tips for Taking Environmental Portrait While Traveling
Environmental portraits must showcase the surrounding of your subject. We’d often opt for a horizontal shot, but depending on the environment, we might go for a vertical shot. It doesn’t really matter as long as your viewer can recognize the environment and your image tells your subject’s story.
Don’t go for an ultra-wide aperture like 1.8; otherwise, the background is going to be blurry. We usually go for f/5.6-11 depending on the setting and what we’d like to emphasize.
Since you’re photographing a relatively large area, think about the composition. What would you like to include in your frame, how are the light conditions, do you prefer a staged/posy portrait, or do you want to capture your subject in action? After you have your answers, give directions to your subject, ask him to move according to the light conditions, tell him what to do (go about his business or pose for you), and change your angles so you’ll have a variety of shots.
Tips for Taking Classic Portraits
Classic portraits focus on your subject, so you don’t really have to pay much attention to the environment, even though sometimes it can improve your shots. For example, if there’s a beautiful colorful wall, use it as your backdrop, include some leafy greens in your photographs etc.
In the past, many photographers believed classic portraits must be vertical, but nowadays, the rules are more flexible. It really depends on your subject, what you would like to emphasize, and the intended use of your image. We usually take some vertical and some horizontal shots.
Choose your aperture according to your framing and be aware of the depth of field. Always make sure the eyes are in focus, and usually you’d want your subject to be lightened evenly across his body/face unless you work in manual or aperture priority and you know how to expose for the shadows or highlights.
Sometimes people feel awkward while they pose. You can give them something to think about or fuss about to evoke emotion and make the portrait more natural. Ask an artist to hold his tools, ask a child to play with his/her favorite toy.
Tips for Taking Portraits of Details
Details portrait can be powerful, but you have to make sure they can still depict a story, evoke an emotion, or shed light on the culture/person you photograph. You can play around with the depth of field depending on what you’d like to convey. Sometimes you’d like to highlight just one item (choose a wide aperture), or you’d like the majority of things to be in focus (choose a narrow aperture like f8).
If there’s movement in your shot (like the hand of the artist), you need to think about your shutter speed. If you want to freeze the motion, choose a higher shutter speed like 1/250 to be on the safe side (the faster the movement, the higher the shutter speed should be in order to freeze it).
Tips for Taking Candid Portraits
Candid moments are usually best to capture emotions and tell stories simply because once you ask someone to take his picture, his demeanor changes, from the facial expression to the body language. However, don’t be afraid of posing your subject because sometimes it’s the best way to capture great travel portraits. The secret is you need to create these real moments that occur naturally and evoke emotional sparks. Ask your subject about himself until he relaxes a bit, tell a joke to catch his genuine laughter, ask an artist to continue working or ask a vendor to grab some fruits.

Editing Your Travel Portraits
Nowadays, post-processing is a must, especially when shooting RAW. Try to use Photoshop, Lightroom, or any other photo editing up to your advantage. Eliminate distracting colors, enhance the important elements in your image, get rid of noise etc.
Travel Portrait Photography Tip – Shooting RAW will give you more options while you edit your travel portraits. You could salvage some of your under-exposed/over-exposed images. If you have a good camera, you probably have the option to shoot in RAW files. Many mobiles also give you such an option, and so are some photography editing apps like the mobile version of Lightroom (DNG is RAW).
As a travel photographer, you usually don’t carry a lot of equipment with you. Some prefer a zoom lens, while others like to work with prime lenses (with a fixed focal point). Generally speaking, for classic portraits, you’d better use a focal point of 50 mm or above since it’s more flattering to your subject (wider lenses have a distortion effect). However, for environmental portraits, use semi-wide and wide lenses (35mm and below). The wider the lens, it can have a slight distortion, depending on the quality of your lens but you could fix in post-processing.
Most times, you will shoot in natural light, but you can have a foldable reflector with you if you need a boost of light. However, nowadays, especially if you shoot in RAW, you’d be able to open up the shadows in post-processing.
A flash can be an excellent addition to your portrait photography kit if you know how to use it. Bouncing the light from a white wall or using an off-camera flash allows you to adjust the lighting conditions to your liking, but it means carrying more stuff with you.
A Word About Model Releases
Portrait photographers need to be aware of model releases, especially if they plan to sell their travel portraits to stock photography sites or make commercial use of them. In general, if someone is in a public place, technically, you do have a legal right to photograph him, so why do you even need a model release?
The bottom line is that in order to use a travel portrait on your social media/website/private use, you do not need a model release, but you should think about your subject’s privacy and show your respect. If someone clearly doesn’t want his photo taken, don’t use it. As long as you do not portray your subject in a negative light, you should be ok.
When talking about selling photos, you can sell travel portraits to individual people or for editorial use without a signed model release. However, you can not use these photos commercially or sell them to stock photo sites since they require such a release. You can read more about model releases or if you’d like to have an app for model release on your mobile just in case, here are some great choices.
That’s it for our travel portrait photography guide. We hope we’ve given you some useful tips to improve your travel portraits and feel free to ask us anything or add tips of your own in the comments below.
Don't forget to pin our guide for later!

Check out some of our other guides!

Jerusalem in Photos
Check out our Jerusalem photo diary and learn about the best sites for photographers in the holy city!

Food Photography
Check out our ultimate guide to take stunning food photos while traveling, including tips, tricks and examples!

Madrid Neighborhoods
Our Madrid neighborhood guide lists the top things to do in our favorite Madrid neighborhoods!
4 thoughts on “Travel Portrait Photography – Tips For Taking People’s Photos While Traveling”
This is a nice tutorial. I will surely try it later. I think this tutorial will help me a lot. I would like to read more of your article in future. I wish you best of luck for your next article.
Many thanks for your kind words, glad it was helpful!
This is a nice blogwith having good content & best Visuals
Thank you so much for your kind words, we’re glad you like it 🙂
Leave a Comment Cancel Reply
Your email address will not be published. Required fields are marked *
By using this form you agree with the storage and handling of your data by this website. *
This site uses Akismet to reduce spam. Learn how your comment data is processed .
Privacy Overview
- #Luxury travel
- #Unusual Moscow
- #Jewish Heritage
- #Russian traditions

Best spots in Moscow for photo maniacs
- #Special Interest
- #Photospots
- Capturing the Kremlin and central Moscow: the higher, the better

Of course, pictures of the Kremlin shot from the Red Square are no doubt iconic and must-have, but they are taken by thousands of tourists every day and can hardly make a wow-effect on your friends on Instagram and other social networks.
Another problem with shooting from Red Square is that the photos do not fully represent the scale of the medieval fortress of Kremlin. So, you need to make some steps further and higher to catch the right shot. You’ll be surprised by the fact that the panoramic views of the Kremlin are pretty easy to get. We have four hints for you: Zaryadie, Ritz Carlton, Patriarch bridge, and Radisson riverboat.
If you want to not only make beautiful photos but also to learn something interesting about the history of Russia, we recommend an individual tour of the Kremlin. You can order it online here .

First, go to Zaryadye, which is located right next to the Red Square, behind the St Basil’s Cathedral, on the closest Moscow river bank. The most impressive views over the Kremlin are unfolded from the so-called Flying bridge of Zaryadye and Glass Dome building in the back part of the park.
Zaryadye is the new place of attraction in Moscow. It’s a landscape park, opened in September 2017 by the Moscow government on the hill where the giant soviet hotel ‘Rossiya’ located before its demolition in the early 2000-s. As a bonus, you’ll get an incredible view over one of Stalin’s skyscrapers, located on the opposite bank of Moscow river — the so-called Vysotka at Kotelnicheskaya, used as a residence of many Russian famous people and officials.
- The roof of the Ritz Carlton Hotel
This option is ok only in case if you’re ready to pay the average bar bill of over 2500 rubles (about $40). Visit the O2 Lounge Bar on the roof of the Ritz Carlton Hotel, where all the global celebrities take their Moscow pictures, from Angelina Jolie to Robert Downey Jr.
But such photo investments seem to pay off immediately. The deck of the bar makes an excellent panorama point for the Kremlin walls and towers, the Historical Museum, the Great Kremlin Palace, and the Kremlin cathedrals. All these landmarks are not too far away, which makes them perfectly recognizable, even in the background.
- The Radisson riverboat

This hint will be useful in case you’re traveling to Moscow in the cold season. River transportation in Moscow doesn't stop in winter. Many enclosed and heated tourist yachts with panoramic windows and ice-breaking equipment can be found in the Moscow River. For instance, one of the most recognizable is the flotilla Radisson.
Their route goes past all the main sights of pre-revolutionary and Soviet Moscow – from Stalin's skyscrapers (Ukraina hotel and Vysotka at Kotelnicheskaya) to the Kremlin and the Novodevichy Convent. It is possible to go out to the open deck and take photos of you and your family or friends against a backdrop of the city’s lights and their reflection in the river. The cruise lasts 2.5 hours. You can book a tour with a car roundtrip transfer from your hotel to the pier and back: book online here
- Patriarch bridge

The bridge is located further from the Kremlin, than Zaryadye or Ritz Carlton, so the Kremlin walls on your photos will look smaller. The brighter side of walking through the bridge is that you can do more fabulous pics of the Moscow river and city center landscapes. The Moscow river and the pretty recognizable giant statue of Peter the Great are ideally viewed from the bridge. Be prepared that it’s a famous and popular pedestrian area for tourists all over the world so the bridge may be crowded.
Also, the bridge is a part of a long promenade which leads from the Christ the Saviour Cathedral through the Balchug island to the opposite bank of the Moscow River, where another pedestrian area — Museon embankment — is ready to joy you with its cafes, cozy lawns and impressive views over the river flow, ducks and boats.
- Moscow City

The best spot to shoot the famous Moscow business downtown is located on the Taras Shevchenko embankment. To get there you need to come to the metro stations Vystavochnaya or Delovoi Tsentr, then go to the Bagration bridge (use the metro navigation, the path is tricky), cross the bridge — and voilà! You’ve reached the best spot for shooting, posing, sending selfies, and Instagramming.
- Ponds and orangeries

There are two ponds in Moscow, that deserve your attention in summer: the Chistye ponds (actually there is only one pond, but it’s worth it) and the pond in Gorky Park, which is full of small boats and catamarans. Both lakes are lost between the green alleys and are drowning in all the shades of green. Those are the perfect spots to catch the moment of peace amid the madness of big city life.
- Banya: Russian steam bath read
- Luxurious travel to Moscow: best places to visit read
- 7 Top Things to Do in Karelia Region read
- Russian Souvenir: what to bring home from a trip to Russia read
- The Top 10 Unusual Things to Do in Moscow read
- Christmas Festival in Moscow read

We use cookies to improve your experience on our Website, tailor content, and measure advertising. By continuing to use our Website, you accept our Privacy Policy .
Your request has been sent successfully! Our travel expert will contact you shortly.
This site is protected by reCAPTCHA and the Google Privacy Policy and Terms of Service apply.
- Destinations
- How it Works
Hire Your Moscow Vacation Photographer
Book a photoshoot to celebrate and beautifully capture your marriage proposal engagement anniversary beach vacation solo trip babymoon love for travel romantic getaway marriage proposal honeymoon family trip bachelorette
01 Easy to book
Choose your dates and book your favorite available photographer.
02 Quick Turnaround
Edited high-resolution digital photos in 5 business days
03 Quality Photography
Vibrant photos of moments you will cherish forever
04 Local Tips
Best local secrets for what to see, eat, & do in town
Vacation Photographers in Moscow
Handpicked and vetted by our team for quality, style, and skill. Make sure to check availability early so your dates don’t get booked up! Can’t pick your favorite Moscow photographer? Check who is available for your travel dates.
Best Photography Spots for a Moscow Photoshoot
Moscow, the capital of Russia, is a photographer's dream, where the grandeur of historical landmarks meets the vibrancy of contemporary urban life. The city's iconic Red Square, flanked by the colorful domes of St. Basil's Cathedral, offers an irresistible backdrop for architectural and cultural photography. The Kremlin's majestic walls and the monumental GUM department store provide a rich tapestry of visual subjects. Explore the Arbat Street's bohemian charm, the sleek modernity of Moscow City's skyscrapers, or the timeless allure of the Moscow Metro stations adorned with intricate mosaics and chandeliers. Moscow's energetic street life, cultural celebrations, and the juxtaposition of tradition and modernity create endless opportunities for visual storytelling. Whether you're capturing the city's elegance, its dynamic pace, or the rich tapestry of Russian life, Moscow promises an enchanting visual journey for photographers seeking to capture the essence of this iconic metropolis.
Red Square, Moscow's iconic and historic centerpiece, is a photographer's dream come true.... read more
The Kremlin
The Kremlin, Moscow's historic fortress and political heart, is a captivating photo spot w... read more
Moscow Metro
The Moscow Metro, often referred to as an underground art gallery, is a captivating and un... read more
Gorky Park, a lush and vibrant urban oasis in Moscow, is a picturesque photo spot that off... read more
Moscow Photoshoot Packages
Invest in forever capturing postcard-perfect vacation moments. After you check out of the hotel and your return flight lands, these photos will be a cherished souvenir for years to come!
Short & Sweet
For Those On-The-Go
30 Minute Mini Session
with a Professional Photographer
Private Online Gallery
with All the Best Shots
15 Digital Photos Included
Beautifully Edited & High-Res
- Inquire Now
Timeless Souvenir
Couples & Small Families
1 Hour Photoshoot
30 Digital Photos Included
Storyteller
Most Popular!
90 Minute Photoshoot
45 Digital Photos Included
Groups & Photo Lovers
2 Hour Photoshoot
60 Digital Photos Included
What's included in my photoshoot package?
Peace of Mind
Choose from vetted and highly rated personal photographers. Hassle-free booking and a travel-friendly refund policy.
Quick Turnaround
Receive your gallery within 5 business days of your photoshoot, but usually sooner! Download your choice of 15, 30, 45 or 60 digital photos depending on your shoot package.
Expert Photo Editing
All photography is edited for light, color, & sharpness to make your vacation photos gorgeous. Advanced beauty edits are available for purchase.
Your personal photographer also acts as an informal tour guide with all the best photography spots and local secrets for what to see, eat, & do in town.
Print Release
Turn your digital photos into cherished travel prints & wall art! Use our printing partners and get FREE SHIPPING - as low as $1 USD for 4×6 luster prints.
Frequently Asked Questions
Prices vary by city, ensuring you the best rates according to the local market. Choose between photography packages that range from 30 minutes up to 2 hours. The high-resolution photos are professionally edited and delivered by email in a private online gallery within 5 business days. See pricing for your destination here.
Check your dates, and then you'll be notified by email which photographers are available. Book your date and then your local professional photographer will work with you to go over all the best photography spots, when the best light will be, and how to beat the crowds to capture magical moments without tons of other tourists in the background. Local Lens vacation photographers are handpicked artists for quality, style, & skill. Not only will they take amazing photos, but they will edit them to be beautiful photo souvenirs you’ll treasure for years to come.
All photos are professionally edited for vibrance and composition and delivered in a private online gallery where you can download your favorite photos in high-resolution jpg format. Additional files and high-quality prints from our professional partner labs are also available for purchase. You should receive an email with your photography gallery link within five business days.
Hello from Moscow!
Find ideas & inspiration for your romantic getaway, family portraits, engagement photos, bachelorette party, honeymoon, save the date, or anniversary gift!
Ready to finally return home with beautiful vacation photography?
Miami is where the magic of sun, sea, and style mix so seemingly and where photos come out incredible! With its iconic Art Deco architecture along Ocean Drive, pristine sandy beaches, and a rich cultural mosaic, Miami offers a diverse range of photographic opportunities. So, are you ready to pose and snap some photos in this interesting destination? Check out the top photo spots in Miami: 📍South Pointe Beach — With its powdery white sand, azure waters, and a backdrop of towering luxury condominiums, it offers a quintessential Miami beach experience. 📍Lummus Park & Beach — The wide promenade, lined with palm trees and iconic lifeguard towers, offers a lively backdrop for capturing the essence of Miami’s sun-soaked lifestyle. 📍Vizcaya — A magnificent Italian Renaissance-style villa turned museum in Miami, is a photographer’s dream, offering a glimpse into the opulence of the Gilded Age. 📍Pier Park at Sunny Isles — The pier, extending gracefully into the Atlantic Ocean, offers a stunning vantage point for capturing breathtaking ocean views and vibrant sunsets. 📸 Captured by Natasha in Miami, USA 🌐 www.locallens.com ▶️ #locallensphotographers . . . #coupletravel #coupleshoot #proposalideas #proposalphotography #miamiphotographer #miamifl #miamiphotographt #visitmiami #travelmiami #miamiflorida #floridaphotographer #floridaphotographers #floridaphotography #proposalinspiration #surpriseproposal #proposalphotography #weddingproposal

Imagine popping the question in Machu Picchu? 🤯 Sounds like a unique and beautiful way to start the next chapter of your lives as fiances. And while it sounds incredible, there are some things you need to keep in mind to make your Machu Picchu proposal a reality. 1️⃣ Buy your entrance ticket at least a month in advance. 2️⃣ When buying your ticket, pick a morning timeslot. 3️⃣ Expect to stay longer if you’ve purchased a morning entrance. 4️⃣ Bring your passport to get a special Machu Picchu stamp. 5️⃣ Don’t forget sunblock, bug spray, and layers of clothing. 6️⃣ And remember, small backpacks only! 📸 Captured by Marco in Machu Picchu, Peru 🌐 www.locallens.com ▶️ #locallensphotographers . . . #proposalideas #proposalphotography #cuzcoperu #cuscocity #cuscoperu #visitcusco #7thwonderoftheworld #couplephotoshoot #machupicchu #machupicchutravel #machupicchuperu #travelsouthamerica #cuzco #visitperu #travelperu #ig_southamerica #surpriseproposal #proposalinspiration #weddingproposal
Seville is ‘bonita’ and a photographer’s paradise. The city is the perfect mix of history, culture, and architectural gems, making it an excellent destination for a photoshoot. Here are some of our favorite photo spots for a Seville photoshoot: 📍Plaza de España — The most popular spot! This architectural masterpiece wraps around an enormous square with fountains, moats, and tiled walls and offers plenty of photo opportunities. 📍Barrio Santa Cruz — This captivating and historically rich district was formerly the Jewish quarter of Seville, characterized by its ancient alleyways and meandering streets. 📍Royal Alcazar — Looking for a royal vibe in your photos? Renowned for its diverse gardens and historical influences, the Moorish Royal Palace is one of Spain’s most exquisite structures. 📍Parque Maria Luisa — Maria Luisa Park, situated just behind Plaza de España, is an ideal location for photography with its flourishing flower gardens and scenic tree-shaded pathways. 📸 Captured by Tatsiana in Seville, Spain 🌐 www.locallens.com ▶️ #locallensphotographers . . . #sevillespain #sevillephotographer #sevillecity #sevilletravel #visitseville #visitspain #familyphotoshoot #familyphotoideas #familyphotography
If you’re a soon-to-be momma, you deserve a babymoon in Europe to spoil yourself before the sleepless nights begin! A babymoon, more than a trip is the perfect time to spend time with your partner, relax and mentally prepare for all that lies ahead. And there is no better place than Europe and its many destinations perfect for future parents. Here are some of our favorite babymoon destinations in Europe: 📍Prague 📍Lake Como 📍Santorini 📍Lucerne 📍Sintra 📍Amsterdam 📍Madrid 📍Valencia Any other destination we should add to the list of babymoons? Let us know in the comments! 📸 Captured by Victor in Prague 🌐 www.locallens.com ▶️ #locallensphotographers . . . #charlesbridge #charlesbridgeprague #pragueoldtown #praguetrip #praguephoto #coupletravel #praguephotography #pragueworld #visitprague #praguestagram #instaprague #praguetoday #czechrepublic #praguecity #praha #praguephotographer #babymoon #momtobe #mumtobe #pregnancyannouncement #pregnancyphotography
Da Nang, a vibrant coastal city in Vietnam, is a fascinating destination that offers an interesting mix of natural beauty and modern urban life. And for those visiting, the city is also the perfect place to get photos in some of its most beautiful spots, like its stunning sandy beaches and lush landscapes. Check out some of the best photo spots in Da Nang: 📍My Khe Beach — This stunning stretch of sandy shores and serene blue waters provides a picturesque backdrop for capturing the essence of a coastal paradise. 📍Marble Mountains (Ngu Hanh Son) — These ancient limestone outcrops are dotted with caves, pagodas, and sacred shrines, providing an array of visual inspiration. 📍Dragon Bridge — This iconic bridge comes to life in the evenings with a thrilling fire-breathing dragon show, creating a dynamic and visually spectacular scene. 📍Linh Ung Pagoda — The pagoda is renowned for its giant Lady Buddha statue, and it’s the perfect spot to capture Vietnam’s cultural richness and natural beauty. 📸 Captured by Trung in Da Nang, Vietnam 🌐 www.locallens.com ▶️ #locallensphotographers . . . #coupletravel #visitvietnam #travelvietnam #couplephotoshoot #danangbeach #danangtravel #danangphotographer #danangphotography #danangtrip #danangvietnam #danangcity #proposalphotography #proposalideas #proposalinspiration #surpriseproposal #weddingproposal
Bangkok is a cultural treasure with many beautiful temples that are a must-visit if you are looking for an enriching experience. But the choice is hard, as Bangkok has more than 400 temples. So, which one to pick? Luckily, we have made a top 5 pick of the best temples or ‘wats’ to visit in Bangkok. 1️⃣ Wat Arun Ratchawararam (Temple Of Dawn) — An ancient temple dating back to the Ayutthaya period and considered a Royal Temple of King Rama II with a stupa considered one of the most beautiful and gigantic stupas in that era. 2️⃣ Wat Phra Chetuphon Wimon Mangkhalaram Ratchaworamahawihan (Wat Pho) — Home of the Reclining Buddha, with various interesting ancient Thai cultural murals around the temple. 3️⃣ Wat Saket Ratchaworamahawihan (Phu Khao Thong) — One of the famous highlights of this temple is its spiral staircase, which has 344 steps. 4️⃣ Wat Trai Mit Witthayaram Worawihan — This temple is home to the solid gold Sukhothai-style Buddha called the seated Phra Phuttha Maha Suwana Patimakon, known as the world’s largest golden Buddha statue. 5️⃣ Wat Benchamabophit (The Marble Temple) — As its name states, the temple’s ordination hall was constructed of marble imported from Italy. 📸 Captured by Suriyathepjuti in Bangkok, Thailand 🌐 www.locallens.com ▶️ #locallensphotographers . . . #bangkokthailand #bangkokcity #bangkoktrip #bangkoktravel #travelphotography #travelandleisure #bangkokspirit #beautiful_bangkok #thailand_allshots #thailandtrip #thailandtravel #adayinthailand #thailandinstagram #amazingthailand #bangkokphotographer
Being a new parent can be both beautiful and unnerving — it is a big responsibility! And if you feel you need some guidance and to set up some goals to help you get your groove back, start by setting some resolutions for this new year. 2024 it’s all about taking care of yourself, and being a new parent doesn’t need to limit that. Here are a few ways you can be the best version of yourself while handling this incredible new role: ❤️ Take a moment to evaluate how you are feeling ❤️ Take time to reconnect with yourself ❤️ Take time to reconnect with your partner ❤️ Enjoy the time you manage to be alone ❤️ Rekindle friendships ❤️ Have dates, just you and your baby. ❤️ Reassess how you are feeling at the end of every month and change your goals accordingly Any other advice you have for new parents? Let us know in the comments! 📸 Captured by Rojeena in Maui, Hawaii 🌐 www.locallens.com ▶️ #locallensphotographers . . . #hawaiiphotographer #hawaiiphotographers #hawaiistagram #hawaiiphotography #hawaiibestphotos #hawaiilove #beachphotography #mauiphotography #mauihawaii #mauistyle #travelhawaii #visithawaii #hawaiitrip #hawaiivacation #hawaiibeaches #mauiphotographer #babymoon #mumtobe #momtobe #pregnancyphotography #pregnantstyle
Okay, a new year has begun, and now it’s time to commit to those resolutions. Yes, it can be challenging, but with the right tips, you can make your wishes a reality and make 2024 the year you stick to your resolutions! Here’s what you have to do to achieve your new year’s goals: ☑️ Start small ☑️ Create goals for different areas of your life ☑️ Write them down ☑️ Prioritize your goals ☑️ Break down bigger goals ☑️ Include friends and other peeps ☑️ Keep it interesting ☑️ Celebrate progress ☑️ Adjust as necessary ☑️ Have patience Now tell us, what are your 2024 resolutions? 📸 Captured by Julia in New York City 🌐 www.locallens.com ▶️ #locallensphotographers . . . #nycphotographer #nycphotographers #nycphotoshoot #nycphotography #newyorkcitylife #newyorklife #newyorkgram #newyork_ig #newyorkcityphotography #newyorktravel #newyorkstyle #newyorktrip #weddingproposal #proposalinspiration #proposalphotography #proposalideas #newyorkstreets #newyorkphotographer #newyorkphotography #newyorkphotos #surpriseproposal
New adventures are around the corner. And this 2024 will be filled with new memories, destinations, health, and happiness. Happy New Year from Local Lens! ✨🍾 📸 Captured by Christopher in Singapore 🌐 www.locallens.com ▶️ #locallensphotographers . . . #singaporeinsiders #singaporetravel #singaporecity #exploresingapore #singaporeig #singaporephotography #singaporediaries #singaporetourism #singaporephotographer #travelasia #surpriseproposal #proposalideas #proposalphotoshoot #proposalinspiration
What a year! 2023 has been a year full of blessings, and many captured memories. Just this year, our local photographers have captured over 4,000 shoots around the world!! From families to engagements, anniversaries, and solo traveling, we love being there and creating memories with you. Thank you for a fantastic year, and we hope to be with you next year, capturing your next chapter. And like they say, cheers to many more! 🥳✨💫 🌐 www.locallens.com ▶️ #locallensphotographers . . . #destinationaphotographer #surpriseproposal #proposalideas #proposalphotography #proposalinspiration #weddingproposal #familyphotography #familyphotoshoot #familyphotoideas
- United Arab Emirates
- Switzerland
- The Netherlands
- Puerto Rico
- United States
- New Zealand
- ➨ Choose from World Map
- Budget Travel
- Family Travel
- Getting Around
- Visas & Passports
- Work with Us
Browsing Category
- Czech Republic
- Saint Martin
- Uncategorized
Moscow Travel Guide: Best Things to Do + More [2023]
· everything to know about visiting moscow, including the best things to do and how to get around. ·.

Moscow is Russia’s vibrant capital city, and it also happens to be the largest city in all of Europe. The city’s long and infamous history makes it one of the most unique places we have ever visited.
The architecture ranges from centuries-old palaces to uniform, gray concrete buildings. The people range from cold and private to warm and welcoming. Moscow is a city is strong juxtapositions, and we learned a lot during our time there.
This post will break down all you need to know about visiting Moscow, including the best things to do, how to get there, how to get around, and more.

The Best Things to Do in Moscow
1. explore the red square.
The Red Square is the heart of Moscow. Most of the city’s top attractions can be found here, including just about everything on this list. The Kremlin, St. Basil’s Cathedral, and Lenin’s Mausoleum are all located here, and the State Historical Museum and GUM are not far from here, either.
The Red Square is a common home for parades, protests, and seasonal celebrations. There are massive Christmas celebrations here, with food vendors and carnival rides set up in numbers.

2. Check Out the Ziferblat
The Ziferblat is a café in Moscow that is unlike any café we have ever been to. While most cafes charge you for your drinks and food, the Ziferblat charges you for your time.
Upon arrival, you are given a clock. When you leave, the barista calculates how much time you spent in the café and charges you accordingly. This concept was created to help visitors to be more intentional with their time, and the cafe itself is incredibly charming.
For a detailed look at everything you need to know before you visit, make sure you read my post about visiting the Ziferblat Cafe in Moscow .

3. Marvel at St. Basil’s Cathedral
St. Basil’s Cathedral is one of the most iconic churches in the world, and it was the single thing we were most excited to see while in Moscow. Built almost 500 years ago, St. Basil’s Cathedral is recognized by its colorful domes and whimsical style. The church is of the Russian Orthodox faith, and the inside is just as wondrous as the outside.
St. Basil’s Cathedral is located on the edge of the Red Square, making it incredibly convenient to visit. Entrance for non-worshippers costs 800 rubles, and tickets can be bought at the church

4. Explore the Kremlin
The Kremlin is the largest active fortress in Europe, and it is the site of most of Russia’s government affairs. In addition to government buildings, the Kremlin Complex is filled with courtyards, towers, and museums that are open to the public. If you have the time, you could spend a couple of days fully exploring all that there is to see in the Kremlin.

5. Walk Through Lenin’s Mausoleum
Vladimir Lenin is one of the most important figures in Russian history, and his body is located perfectly embalmed in a mausoleum in the Red Square. The Mausoleum is open to the public to visit, and as long as you are willing to go through a few security checks, it is easily one of the best things to do in Moscow. Its convenient location in the Red Square makes it a can’t miss attraction.
There is absolutely no photography allowed inside the Mausoleum. Do not test this rule.

6. Wander Along Arbat Street
The Arbat is a very popular street in Moscow that is lined with stores, cafes, and other touristy attractions. It is one of the oldest streets in the city, dating back to the 1400s. This street is both quaint and trendy, and there are many walking tours that introduce tourists to the neighborhood’s wonders and highlights.

7. Catch a Show at the Bolshoi Theatre
As a lover of the arts, it is hard to think of Moscow and not think of ballet. Russia has always been a top dog in the world of fine arts, and Bolshoi Theater is one of the best places to catch a performance. We were lucky enough to attend an Opera here, and it is a venue that you don’t want to miss out on if you enjoy opera, ballet, or orchestral performances.
8. Visit the State Historical Museum
The State Historical Museum is one of the most respected museums in Moscow. Despite its name, it is not really focused on the history of Russia as a nation. Rather, it contains a collection of artifacts from all throughout Russia’s history.
The museum’s collection is very broad in nature. It houses some items from indigenous tribes that used to occupy the region, pieces collected by the Romanov family, and more.
9. Wander Around GUM
GUM is an absolutely massive mall within walking distance of the Red Square. It isn’t just the size that draws visitors here; it’s the sense of luxury. The mall is so beautiful inside, much like the metro stations.
While visiting a mall might not sound like it belongs on a bucket list, this mall does. You will not want to miss out on visiting GUM while in Moscow.

10. Admire the Cathedral of Christ the Saviour
While St. Basil’s Cathedral is the most iconic church in Moscow, it isn’t the only one. The Cathedral of Christ the Saviour is absolutely stunning, with massive golden domes. It is the tallest Orthodox church in the world, and it is the seat of the Orthodox Patriarch of Moscow.
It is located just about a mile from the Red Square, just south of the Kremlin Complex. You can walk to it from the Red Square in about 20 minutes.
How to Get to Moscow
Flying to moscow.
Moscow has three major international airports: Sheremetyevo (SVO) , Domodedovo (DMO) , and Vnukovo (VKO) . All three of them are directly connected to downtown Moscow by the Aeroexpress trains, which leave every 30 minutes throughout the day. By Aeroexpress train, you can expect to get to the city center in 25-45 minutes depending on the airport that you fly into.
Sheremetyevo is the biggest and busiest of the three airports, and it is the one you are most likely to fly into – especially if you are coming from outside of Europe or the Caucus region. We flew into Sheremetyevo on a direct flight from New York City.
I usually provide backup airport options, because flying right into the city isn’t always the cheapest way to get where you’re going. Unfortunately, when it comes to Moscow, don’t really have a choice other than to fly right into Moscow. It is a very remote city, and it is usually the cheapest place to fly into in Russia as a whole.
Since Sheremetyevo is so busy, you will probably find a great flight option anyway. I wrote in my post about finding cheap flights that using hub airports will lead to more affordable airfare, and the same logic applies here. Even though Russia’s national airline, Aeroflot, is no longer a member of the SkyTeam Alliance, Moscow is still a major hub connecting passengers from all over the world.
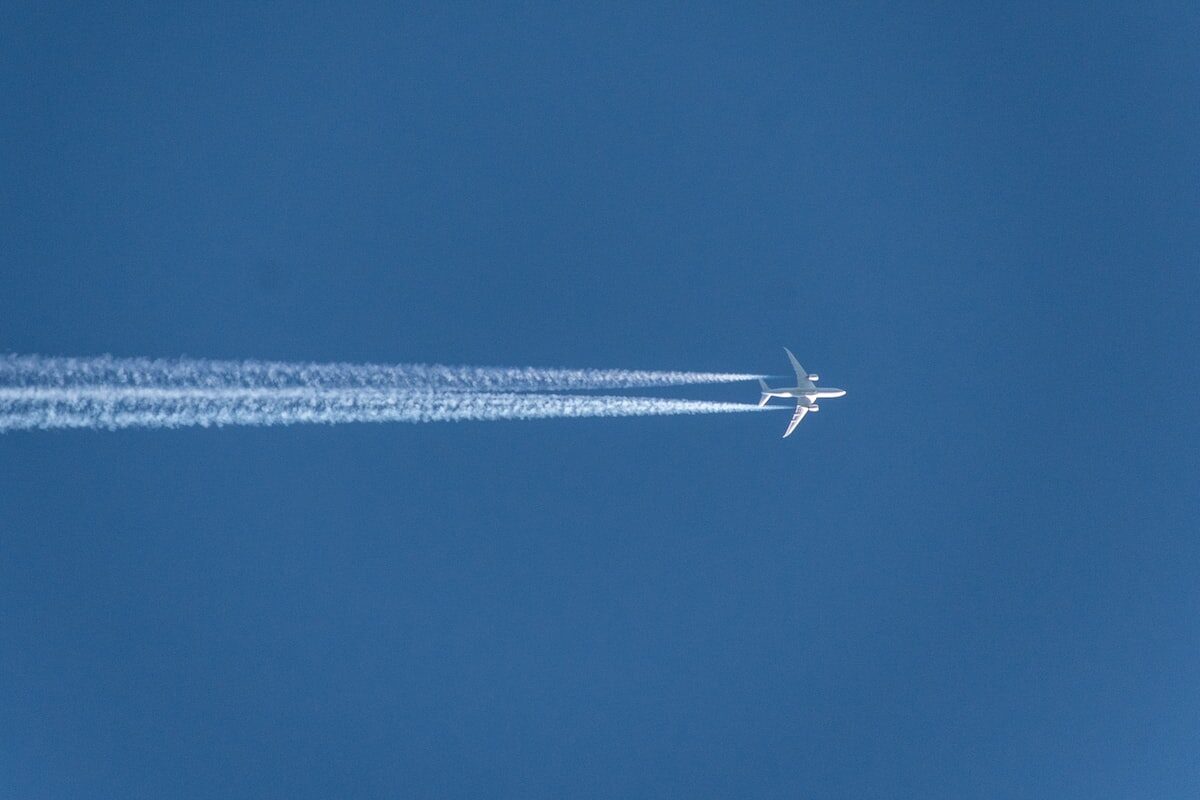
READ OUR CHEAT SHEET
Train or Bus to Moscow
Trains and buses are one of the most popular ways to get around Europe. However, they’re of very little use when you’re trying to get to Moscow.
Moscow is hundreds of miles from the nearest major cities. The only major European city that can even be reached within 8 hours on the ground is St. Petersburg, and even the Baltic capitals of Riga, Vilnius, and Tallinn are over 12 hours away.
If you want to get to Moscow, the best option is almost always to fly. While the train routes to Moscow are scenic, they simply take forever.
How to Get Around Moscow
METRO | TROLLEYS | TRAMS | BUSES
Moscow has one of the most memorable metro systems in the world. Its metro lines are very deep underground, and the stations are absolutely stunning. Each station has its own unique style, but all of them contain escalators that seem to go on forever.

The system was built in an effort to showcase the power of the Soviet Union and its bright future. The plans were a form of propaganda, but they resulted in what is still one of the most visually appealing subway systems on earth.
Moscow’s metro system isn’t just pretty. It is also very useful and accessible. The system has 17 lines that connect the city and its surrounding area.
But wait; there’s more!
The Moscow metro system is also incredibly affordable, with each ride costing less than a dollar. The metro is by far the best way to get around Moscow, as it is almost impossible to beat the connection times and the low cost to ride.
Tickets can be bought at electronic, English-speaking kiosks in stations, or directly from ticket counters at certain larger stations. There are also day passes available, which are a very solid option if you plan on riding the metro several times per day.

The metro is by far the best way to get around Moscow.
In addition to the metro system, Moscow also has a network of buses, trams, and trolleys. This system is nowhere near as convenient or well-connected as the metro, though, and is likely of little use to you during your trip. There is no Uber in Moscow, but a similar app named Yandex is available if you need a ride in a pinch.
How Many Days Do You Need in Moscow?
Moscow is the biggest city in all of Europe, and it is absolutely loaded with things to do. You could spend weeks in Moscow and still find new things to do. Of course, most travelers don’t have that kind of time to spend in one place!
I recommend spending no less than three full days in Moscow, and ideally closer to five or seven.
Moscow is very spread out, and it can take some time to get from one major point to another. There are also so many places that are nice to just sit back and relax, which is hard to do when you’re in a hurry trying to cram activities into just a few days.
If you only have a week to visit Russia, I’d advise spending all of the time in one city. If you decide to split your time between Moscow and St. Petersburg, I recommend not trying to squeeze in any day trips beyond those two cities.

When Is the Best Time of the Year to Visit Moscow?
There are two different ways to approach this question. Personally, I think the best time to visit Moscow is around Christmas and New Year’s Day. While the weather will be absolutely freezing, Moscow is a surreal winter wonderland in December and January.
We were in Moscow right before Christmas. While it was very cold, you can always bundle up. Exploring the Christmas markets and pop-up ice skating rinks throughout Moscow is one of my favorite memories from anywhere I’ve traveled, and I dream of going back to do it again.
If you aren’t fond of the cold, Moscow is beautiful in the summer. It tends to get pretty cold in the shoulder seasons, so if you want warm weather, you should plan to visit in the summer. Moscow actually gets pretty warm in July and August, and there are a bunch of fantastic places to soak up the sun within the city.
The best time to visit Moscow is either around Christmas or from late May to August.

Is Moscow Safe to Visit?
While Moscow is a truly wonderful city, there’s no denying that visiting Russia comes with risks. As the country is run by an infamous communist dictator, concerns about visiting are valid. While we didn’t experience any sort of threat or negative treatment during our time in Moscow, we visited in a peaceful time.
In our experience, Russia doesn’t seem to detain normal Americans or Westerners to use as pawns. As a regular person, as long as you don’t commit any crimes, there is a slim chance you will run into any issues. However, Russia will not hesitate to enforce its laws against foreigners, and illegal behaviors will likely land you in a very compromising position.
Russia will not hesitate to enforce its laws against foreigners, and illegal behaviors will likely land you in a very compromising position.
To make matters worse, Russia has a bad reputation for gang violence. While the Russian mafia has very little interest in normal Western tourists, they won’t hesitate to pick a fight with anyone who ventures into their sphere of influence. If you seek out illegal substances or activities, you could be a target of the mafia.
If you seek out illegal substances or activities, you could be a target of the mafia.
Finally, since Russia’s invasion of Ukraine, things are all very different. Russia is currently at war, and there are battles raging within 8 hours of Moscow. While it is still relatively safe to visit, that could change at any time as the war with Ukraine continues.
Is Moscow Worth Visiting?
Without a doubt, Moscow is worth visiting. It is one of the most unique major cities we have ever visited, and we hope to make it back one day. The Russian Orthodox churches are stunning, the city’s history is unlike any other, and the food is to die for.
While many visitors prefer St. Petersburg to Moscow, I think Moscow deserves a lot of hype of its own. Moscow is the beating heart of Russian culture and history, and it’s a place I highly recommend checking out if you have the chance.

That’s all we have for you about Moscow! I hope this post was helpful as you plan your trip to Russia’s capital.
Have you been to Moscow? Or is this your first time visiting? Comment below if you have anything to add to our travel guide!
Hi, I'm Greg. I'm an avid traveler who has traveled to over 50 countries all around the world with my wife and kids. I've lived in Italy, Mexico, China, and the United States, and I dream of moving abroad again in the future. With this blog, I provide my audience with detailed destination guides to my favorite places and pro-tips to make travel as stress-free as possible.
Leave a comment
Save my name, email, and website in this browser for the next time I comment.
Meet The Author - Greg

Recent Post

How Much Does a Trip to Egypt Cost: Budget Breakdown
March 10, 2024
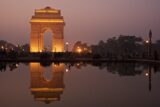
Best Time to Visit the India Gate in Delhi [2024]
March 1, 2024

Flying with a Sinus Infection: Tips to Avoid Pain
February 20, 2024

11 Best Things to Do in Breckenridge Besides Skiing
February 12, 2024

10 Best Beaches in Mexico for Families (We Lived Here)
February 3, 2024

The Golden Rules of Retirement Travel
By Stacey Lastoe

This is part of a collection of stories celebrating the many shapes retirement travel can take. Read more here.
Bonni and Bob Gumport travel regularly in their retirement. Not beholden to one short vacation a year (they average seven big ones), their compounding experience has allowed them to develop a code of rules by which they abide— tips and tricks to use wherever they go. After one too many of the small rooms common in boutique hotels, for example, they’ve cut them out entirely. Also out of the question are walking tours within two days of arrival in a new destination, as they prefer to settle in. Their daughter Lauren describes them as “pros on retiree travel,” but they are not the only ones with advice to give.
There are former museum curators who have learned not to overbook themselves; solo travelers who always learn a little of the local language. Adherence to anyone’s rules will never ensure a vacation free of hiccups, where no flight is ever delayed , every tour is worth the hours put in, and every meal sublime . But learning from others may improve your chances of a good time—even when things inevitably go sideways. We’ve spoken to over 20 retired travelers to hear how their Golden Years have informed the way that they travel. Below, find some of their savviest secrets for better trips.
1. Take a ride on the hop-on, hop-off bus tour
If she’s traveling in a city that offers one of those double-decker hop-on, hop-off sightseeing tours, Denver -based Heidi Burtoni, 65, who goes on multiple trips per year, is definitely stepping aboard. Burtoni says it’s a great way to figure out the rest of her itinerary, get tips from other travelers and the tour guide, and get a feel for the new city. “It’s the first thing I do to get the lay of the land,” says Burtoni. Her previous career in sales means the frequent solo traveler will “talk to anybody,” so these tours also open the door for socializing and making connections.

Know what to skip—“whether that means avoiding tourist traps, the most sweltering hours at fairs, or not putting yourself in danger by flagging a taxi when it's unsafe," says Lynn Zelevansky.
2. Figure out what to avoid
For Paul and Lynn Zelevansky (77 and 76, respectively), travel is less about hitting all the top spots and more about learning where not to go, “whether that means avoiding tourist traps, the most sweltering hours at fairs, or not putting yourself in danger by flagging a taxi when it’s unsafe.” They visit the Venice Biennale in fall, now, rather than at the opening, to avoid the worst of the crushes—it also helps them more effectively skirt the city's infamous pickpockets (Lynn's wallet was stolen on a crowded vaporetto ferry in 2022).
3. BYOTP (Bring Your Own Toilet Paper)
“Toilet paper in Europe is very scratchy … not good for sensitive parts,” says Florida native Karen Butera, an avid pickleball player who often travels with the sport in mind. Whenever overseas, she always travels with her own toilet paper. Butera, 66, is taking her granddaughter to see Taylor Swift in Paris this summer, and, yes, she will be packing TP—creature comforts are even more crucial on the road than they are at home.
4. Don’t overschedule
Packed-to-the-brim itineraries used to be J. Patrice Marandel’s MO, but these days, the former chief curator at Los Angeles County Museum of Art (LACMA) is more keen on scheduling “plenty of time for the unexpected.” Gone are the nonstop days with planned breakfasts, lunches, and dinners; instead, Marandel, 79, leaves room for the possibility of something unexpected and “exciting.” It often pays off.

5. Pack light
Buffalo, New York-based Lisa LaLonde, 74, and her travel companion Antoinette Judelsohn, 70, whom she’s been traveling with for over a decade, are pros at packing light . The pals can manage for a month on very little, relying on the versatility of black leggings and black tops, says LaLonde. The trick? Develop a travel uniform, bring just a few versions, and wash undergarments as necessary, says Judelsohn. Big suitcases stuffed to the brim with a ton of different outfits are more of a hassle than a luxury. “They’re a pain in the neck if you’re getting on a train or off a train … or moving from one city to another,” says LaLonde.

“Anybody and their brother with an RV travels on Sunday,” warns Jenelle Jones.
6. Don't get (too) excited
Judelsohn, a former teacher who met LaLonde when they worked together at the same school in Buffalo, has another travel rule that’s served her well: Letting go of expectations. “I never get excited about a trip,” says Judelsohn. Instead, the savvy traveler lets the excitement emerge based on what's in front of her in the moment.
7. Avoid traveling on Sundays
RVer Jenelle Jones, 64, is against traveling on Sundays. As she puts it, “anybody and their brother with an RV travels on Sunday.” Long weekend RVers who have to get back for work on Monday use Sundays to head home, so retired Jones, 64, simply avoids the day altogether. It's also, according to her, the “biggest day to get in an RV wreck”— yet another reason to sit back and relax. You have nowhere you need to be, after all. Take advantage.
8. Learn a few words of the local language
Charlotte Simpson , whose blog Traveling Black Widow documents her travels (100 countries and counting so far), says her number one travel rule is to learn a few key phrases—hello, goodbye, please, thank you—in the dominant language of the places she visits. Simpson says her efforts are always well received. “I just find, inevitably, it sort of stuns people when I even just say good morning.” Simpson, who prefers not to reveal her age, says she gets a lot out of bridging the language gap with just a few words: “It just makes people so friendly and so happy that you took this moment to learn [their language].”

9. Travel slower
When you cram too much into a single trip, “the whole experience just kind of becomes a blur,” say Gillian Batt, 43, and Stephanie Myers, 51, whose blog Our Freedom Years documents their early retirement and subsequent travels. The couple, who hail from Ontario, Canada, say staying in one place for an extended period of time helps them avoid travel burnout, keep costs low, and enjoy the whole experience more. All that rushing around on limited PTO? Well behind them.

For RVers like Norm, keeping things flexible is key.
10. Go your own way
The pandemic crystallized things for Kim Kelly Stamp , 65, and her wife Liz Schick, 62, who left it all behind and decided to travel around the country in a red 21-foot teardrop trailer. They’ve since gotten really good at going with the flow. “We know where we’re going to stay along the way, but we hold that really loosely and give ourselves the opportunity to make something else happen,” explains Stamp. This approach led them to Laurel, Mississippi, where the HGTV show Hometown —of which Stamp and Schick are big fans of, is based. Instead of following a regimented schedule, they followed their passion when the road forked, literally.
11. Keep an open heart and mind
In spite of being seasoned travelers, John and Bev Martin, 60, who started the RetirementTravelers site to share their journey with others, admit they still need to remind themselves that they can’t control everything. “We have to be patient and receptive to the lessons the world is trying to teach,” says the couple. One that keeps coming up? “Retirement is not the time to stop dreaming about new and different routes in life.”

12. Do your research
The Gumports appreciate getting a taste of the local culture wherever they are traveling, and they’re not opposed to tours or experiences that deliver on this front. But Bonni has a few words of advice: “If you’re looking at purchasing something that uses words such as ‘bespoke, artisanal, farm-to-table’ and more fluffy adjectives, make sure these experiences are as authentic as they sound.” Read reviews thoroughly and take the time to research before you buy, advises Bonni. It's fun to be spontaneous, but it's easy to be misled by clever marketing and buzzwords.
13. It’s a marathon—not a sprint
It wasn’t long before Brenda Huyhn adopted—and adapted— a popular van-lifer rule: Don’t travel more than 3 hours, get in by 3 p.m., and stay at least 3 nights. Huyhn, who at 47 retired earlier than many, is adamant about not trying to do too much in one day to avoid burnout. She and her husband take their time, prioritizing “quality over quantity” with their stops and stays. It makes the entire experience all the richer.

14. You can always head home
Diana Petterson is on track to hit the 100-country mark just in time for her 70th birthday in 2026. But as much as the Black solo traveler loves seeing the world, she’s not afraid to ditch a trip if something isn’t working out. “Wherever I am in the world, if for whatever reason I am uncomfortable, or I don't feel well … I’m going to plop down that credit card , and get home.”
15. Start the day early to avoid the crowds
Artist Simma Liebman, 76, enjoys going to museums while visiting new cities and places. But since the retiree is immunocompromised, she plans these outings a little differently. Now Liebman hits the museums “as early in the day as possible” and masks up while taking in the art "unless there are very few people inside.” Whatever your motivation, rising early is something you can be sure the hordes of 20-something backpackers won't be doing. Beat them to all the best spots.

“I like a very good hotel, but not necessarily the best,” says Betty. Focus on getting the right location.
16. Base yourself strategically
Betty, 80, an art collector who declined to share her last name, has found that mid-sized hotels (meaning about 200 rooms) in central locations, with just enough of the services she wants and needs, do the job. “I like a very good hotel, but not necessarily the best,” says Betty. As long as you have the basics covered, it's really about location, location, location.
17. Don’t wait for tomorrow
Instead of putting off travel for a later date, Chicago -based Ruthie Maldonado-Delwiche advises those interested in exploring the world to get out there and “do it now.” Because “tomorrow isn’t promised,” Maldonado-Delwiche, who’s been traveling since she retired in 2017, says. Don't wait if there’s something you want to do or a place you want to visit.
Former psychiatrist Ann Heaslett, 60, who aims to run the six major world marathons in her retirement, feels exactly the same way. “There’s no time like the present.”
By signing up you agree to our User Agreement (including the class action waiver and arbitration provisions ), our Privacy Policy & Cookie Statement and to receive marketing and account-related emails from Traveller. You can unsubscribe at any time. This site is protected by reCAPTCHA and the Google Privacy Policy and Terms of Service apply.
- Travel Advice
- Tips & Tricks
‘Game-changing’ $10 Kmart travel item
A $10 Kmart item is all the rage on social media with travellers boasting about how it will “change your life” when it comes to packing for a trip.

Why Gen Z still use travel company

One word you should never say on a cruise

Bali about to get more expensive
A $10 Kmart item is all the rage on social media with travellers boasting about how it will “change your life” when it comes to packing for a trip.
There’s nothing more annoying than having to rearrange your suitcase or leave clothes behind, because it simply won’t fit.
Kmart shoppers have discovered the Aussie chain’s travel compression storage bag and they’re obsessed.

One TikToker claimed the bags freed up to 30 per cent more luggage space, allowing her to pack even more items.
“This $10 Kmart product will change your life, especially if you’re an overpacker like me,” lifestyle and travel blogger Jess Ricci said in a clip.

“These are the compression storage bags – they come in a set of six (four small and two large).”
Jess, who has accumulated more than one million likes on her TikToks, said she really loves to pack her suitcase to the brim and fears her bag will one day “break”.
“These are pretty much the old school vacuum storage bags that are made manual,” she said about her new-found obsession.
“You pack them up and then compress them down. I personally like the rolling technique.”
Just said it helps remove the air and flattens the garments down in a way that “packing cubes could never”.

“You see the difference,” she said. “I estimated I got about 30 per cent more space with the bags which of course I then filled up with more stuff.”
Other customers have taken to Kmart’s site to give the item a 4.3-star rating out of 23 reviews.

“Takes a bit of practice but once you get the hang of rolling them they work really well,” one traveller wrote.
“I was able to fit two weeks worth of clothing plus shopping in half a suitcase. Also protects your clothes from any spills or leaks. Will definitely use these for any trips in the future.”
Another traveller said she took to the $10 bags to Japan and was able to squeeze more in her suitcase “as I knew I’d be buying up a storm”.
One woman said she was able to “significantly reduce bulky winter clothing” that she had put into storage.
More Coverage

“Good size for full length puffer jackets and jersey’s, hoodies, etc.” she added.
However, others warned it can be difficult to “get the air out” when rolling the bags, while some argued they couldn’t get the bags to stay compressed.
“Resorted to using our larger size sandwich bags which worked better than this compression item,” one woman wrote in her review.
After more than 60 years in business, Contiki is still going strong, however, it had to make some changes for the new generation.
Similar to how saying “fire” in a movie theatre is frowned upon, there’s a word that’s “not allowed” on cruise ships.
Travellers heading to the island paradise next month will be in for a big shock as the tourist hotspot brings in its new tax.
- Search Please fill out this field.
- Manage Your Subscription
- Give a Gift Subscription
- Newsletters
- Sweepstakes
The Best Tips and Tricks for Peeling Hard-Boiled Eggs
Easter weekend often means hard-cooked eggs. Here are the simplest methods for peeling off the shells
The secret to peeling hard-boiled eggs is simpler than you think.
If you are busy making deviled eggs this weekend, these are some simple methods to remove the shells. It all starts with purchasing the eggs. The biggest rule of thumb when it comes to peeling: The older the egg, the easier it is to peel.
Generally, you should buy and refrigerate eggs 7 to 10 days before hard boiling. Eggs absorb air as they age, which helps separate the membranes from the shells.
You can test how fresh an egg is by placing a raw one in a glass of water. If the egg lies flat, it is fresh and best used for poaching or scrambling. But if the wide end of the egg floats up slightly, or it balances on its pointy end, the egg is older — but still safe to eat — and perfect for hard-boiling. (If it floats to the top of your glass, it's too old and should be discarded.)
The cooking process is just as easy. Place the eggs in a large saucepan, and cover them with cold water by about 1 inch. Slowly bring the water to a boil over medium heat.
As the water begins to simmer, gently stir the eggs to center the yolks. When it reaches a rolling boil, cover the pot and remove from heat. Let sit for 10-12 minutes for firm yolks or 6-8 minutes for a softer yolk.
Remove the eggs from the hot water and plunge them into an ice bath to stop the cooking. Leave them in the cold water for 2-4 minutes before peeling.
Some suggest adding ingredients like baking soda, vinegar or salt to the water before boiling, but this does not guarantee an easier peeling process .
When it comes to actually removing the shells, the internet is ablaze with strategies.
Peeling while holding the egg under running water is one technique. The water helps to separate the egg from the membrane and also washes off any of the pesky eggshell remnants left behind while peeling.
The spoon method is another popular choice. You crack the eggshell and peel off a small piece that still manages to fit a spoon inside. The shape of the spoon allows it to glide between the membrane and the egg, taking off larger shell pieces in the process.
Or, you can try shaking your hard-boiled eggs in a glass container. Fill a glass Tupperware container or Mason jar with about an inch of water before adding your cooked egg inside. Place the lid on, and shake the container. When you take out the egg, the shell should be almost entirely removed. Plus, with this method, you can peel several eggs at once if you put a few in the same container.
Related Articles

Wealth of Geeks
Traveling With Kids? 24 Tips and Tricks To Make Family Travel a Little Easier
Posted: January 31, 2024 | Last updated: January 31, 2024

Being on vacation with kids is fun, but traveling to and from your destination is sometimes another story. With the right gear, a little advanced planning, and the ability to stay flexible, family travel can be enjoyable from the moment you leave your front door.

Make Family Travel Better With These Tips
Don’t let the fear of traveling with kids keep you from booking that trip! Use our list of tips and tricks to make family travel easier.

1. Square Crayons Don’t Roll
Whether kids are coloring on an airplane’s tray table or at a booth in a restaurant, crayons always seem to roll away from little fingers onto the floor. Invest in square crayons. The purchase will likely save you from recurrently searching for round crayons on the ground.

2. Reusable Stickers Never Get Old
Stickers are worth their weight in gold. Reusable ones are even better. Some websites carry reusable stickers that arrive in a book. Kids can create their favorite scenes, then rip them all off and do it again. Placing stickers on cars, planes, or train windows is also a favorite family travel pastime.

3. Bring Duct Tape
This trip from travel host Samantha Brown is invaluable. Duct tape can fix everything from broken toys to suitcases. In a hotel, you can use duct tape to soften sharp edges on furniture. If your little ones love cars, you can even craft a duct tape road on the hotel floor for them to whiz their vehicles around.

4. Mess-Free Markers
Most kids love to color, and these markers are magic. The markers must be paired with Color Wonder Paper, but it’s worth the small extra expense. Little ones will love seeing the clear stick produce vibrant colors before their very eyes. Plus, the markers are nontoxic.

5. The Element of Surprise
Family travel days can be long, frustrating, and tedious. Surprises are exciting. If you have a bag of toys, books, and activities to entertain your kids, reveal one toy at a time. The delay gives them ample opportunity to play with each one. When children get bored, parents can surprise them with something new.

6. Rent Baby Gear
Lugging baby gear through airports and in and out of cars weighs you down. Big and bulky items, like cribs, highchairs, portable baths, toys, and more, are often necessary but awkward to carry. Consider renting baby gear online at places like BabyQuip .

7. Invest in a Doona
No need to carry a car seat and a stroller. The Doona quickly transforms from a car seat to a stroller and back again. It’s expensive ($550 as of this article’s publishing) but makes family travel with an infant much easier.

8. Board the Airplane Last
Most airlines let families board first. However, this means more time that kids must sit on the plane or be strapped into a car seat. If you already have assigned seats, let them burn off excess energy in the airport a little longer before boarding.

9. Snacks, Snacks, and More Snacks
This tip is for parents as well as their children. Eating gives travelers something to do, keeps moods and energy levels up, and provides necessary nutrition. Pack healthy snacks you know that you and your kids already like.

10. Pack Extra Wipes, Diapers, and Clothes in Your Carry-on
Kids are unpredictable. Whatever the mess, a freshly wiped face and new clothing will make everyone feel better. Parents, throw an extra shirt or pair of pants in there for you, too.

11. Bring a Sealable Bag
Following up on the high probability of accidents mentioned above, a sealable bag can save the day. When on the go, it’s nice to throw wet or tarnished items in something sealable so they can’t touch anything else in your bag.

12. Plan Downtime
Family vacations can be busy. There’s always plenty to do and so much to see in a limited timeframe. Even if your kids don’t nap, quiet time can go a long way. Downtime lets bodies and minds recharge so everyone is ready for the next adventure.

13. Get Global Entry for Each Family Travel Member
Global Entry can significantly reduce the time spent on lines when flying internationally. The U.S. Customs and Border Protection Trusted Traveler program lets travelers get through customs quicker. The saved time can be a lifesaver for those traveling with temperamental kids.

14. Download Entertainment at Home
While some argue that iPads or other electronic devices aren’t the best option to entertain young ones, they are useful when needed. When all else fails, or you just need a bit of peace and quiet, a new movie or favorite TV show might be just the trick. Your fellow passenger may thank you for it!

15. Kid-Friendly Cameras
Kids can capture beautiful family memories to last a lifetime from their very own kid-friendly cameras. Cameras help document a family trip, and kids will also feel proud of the photos they take. Plus, the activity is sure to occupy their time.

16. Air Tags
Air Tags are not just a tip for family travel; they benefit all travelers. Throw one in your suitcase or even your kids’ backpacks—really anything or anyone that might get lost.

17. Look For Special Kids’ Programs
Look for the National Park Service’s Junior Ranger program. It’s activity-based and fun, and kids learn about the importance of national parks. Ideal for ages 5-13, these programs are located across the country. Additionally, consider staying at a hotel with a kids’ club. They offer fun activities for little ones and give parents a much-needed break.

18. Consider Matching Clothes
Matching clothes makes it easier to find family members in a crowd. If matching isn’t for you, try easy-to-spot bright clothing.

19. Book Bulkhead Seats
Bulkhead seats help your child enjoy their flight . They’re often the best option for families with babies, as many airlines offer in-flight bassinets. For older kids, it gives them a little extra legroom.

20. Gate Check Strollers
Don’t check your stroller. You might need it at the airport. Instead, check it at the gate for free right before boarding the plane. It’ll be ready to pick up upon departing.

21. Reusable Water Bottles
Reusable water bottles, including kid-friendly sippy cups, are a general family travel tip that benefits everyone. They’re better for the environment; you can refill bottles at water fountains, and the sippy cups are familiar to little mouths.

22. Let Kids Carry a Backpack or Suitcase
When kids carry their own backpacks or suitcases, it encourages independence. They’ll likely be excited to be in control of all their stuff. As an added bonus, parents won’t have to carry extra gear, at least for a while.

23. Choose Hotel Rooms Wisely
If possible, upgrade to a suite. There’s more room for your belongings; everyone can spread out a bit. If a suite isn’t feasible, choose a room with a large square footage so kids have plenty of space to move around.

24. Be Flexible With Routine
Sure, kids thrive with routine, but this is vacation. Rules are meant to be broken. Nap times may not be perfect, meals might consist of more pizza and less broccoli. Family travel is for everyone; the entire family should enjoy it!
More from Wealth of Geeks
- A First Timer's Guide to the Wisconsin Dells
- The Best Activities for Couples in Key West

Read More From Wealth of Geeks
- Best Countries To Live In Across the World
12 Record-Breaking Roller Coasters Across the Globe
More for You
12 Ordering Mistakes You're Making At Subway, According To Employees
I'm a Swede who used to work with Americans. These are the main differences I saw in our working cultures.
The first interracial kiss aired on TV more than 50 years ago—and more shows that broke racial barriers
How to get rid of stink bugs, according to an entomologist
The bloody dynasty that built the English state
Magic's Jonathan Isaac criticizes White House over Transgender Visibility Day
What's The Difference Between A Chicken And A Cornish Hen?
This couple's DIY 'Skoolie' bus conversion took 4 years and cost $20,000. See inside their 'mid-century' dream home.
Carnival Cruise Line forced to make beverage package change
The Most Expensive Dog Breeds Money Can Buy in 2024
Dairy Queen is giving out free Blizzards in April
How to write a cheque without letting a fraudster take your money
That Guy From That Thing: Great Character Actors Everyone Recognizes
For Better Or For Worse by Lynn Johnston
Russian role in attack on American officials?
You Shouldn’t Be Able to Pay With Cash OR a Card at a National Park. They Should Be Free.
How to easily peel a hard-boiled egg
6 Cars That Seem Expensive but Rarely Need Repairs
Sydney Sweeney bought her great-grandmother's house back after the family had to give it up. Here's how you can protect your family's most important assets
KFC rolls out new menu item to challenge McDonald’s, Burger King
IMAGES
VIDEO
COMMENTS
Travel Photography Tips 1. Know How to Use Your Camera. This one might seem obvious, but really, you should know the functions of your camera. Get to know your camera before you travel. Read the manual cover to cover, read a few photography guides (see our suggestions here), or take a photography class.
Table of Contents. General Travel Photography Tips for Beginners. 1) Know Your Camera. 2) Focus on the Golden and Blue Hours. 3) Plan Your Shots. 4) Learn About Composition. 5) Framing, Framing and More Framing. 6) Move Your Feet. 7) Ask People for Permission.
Find the right location and check the forecast to check the available light. Take images from a distance and also zoom in to capture details. Preparing your gear and thinking about your settings in advance are also essential here. Blue and golden hours might be the best time for these images.
Travel photography is becoming a popular niche, and you're in the right place if you're thinking of giving it a try (or looking to take your current technique ... Travel Photography: Tips and Tricks for Stunning Images. By Author Nicole Kinkade. Posted on Published: May 10, 2023 - Last updated: November 7, 2023.
These are our best travel photography tips: 1. Get to Know Your Camera. First, let me make one thing clear. You do not necessarily need expensive camera gear in order to take really nice pictures. Smartphones and entry-level point-and-shoot digital cameras like this one offer excellent quality.
But for tack sharp landscapes, low-light photography, self-portraits, flowing water shots, and sunsets/sunrises, a travel tripod makes a huge difference. 7. Experiment With Composition. Get Low for a Different Perspective. You can almost always come up with a better photo composition after some experimentation.
Tip 1—Get Comfortable With Your Gear Before You Travel. Image Credit: Amar Preciado. This is my number one tip for travel photography because it applies to experienced photographers as well as beginners. Before you head out on your big trip, take some time to get comfortable with your equipment.
7. Use of Color. Color is really important in photography, particularly how different colors work well together. For example, blue works well with yellow (sunflowers in a field), and red works well with green (Christmas!). To figure out which colors work well together, take a look at this color wheel.
Tips for Travel Photography: Planning 1/ Do your research. The best travel photography starts before you even leave home. To make the most of every destination, you first need to do your research.Look up the places you're going to on Pinterest, Instagram, or your favourite travel blogs, find out where are the best places to go and the best time of day to go there, and get helpful advice on ...
Here are several tips to help you take stunning travel photography with every camera click. 1. Find the right light. Finding the right light is essential for taking amazing photos for a few reasons. It's simply the best travel photography tip that anyone will tell you. Lighting is everything to capture the perfect shot.
13. Stay in the Moment. Don't overthink the shot. Stay in the moment and go with the flow. Don't be afraid to switch around your schedule to get a good photo. 14. Take Notes. Bring a small notebook with you as you travel and when you take photos to make sure you're noting the place and your camera settings.
In this week's tutorial I discuss my top tips for taking better travel photography, whether you're a pro or a beginner. From the ideas I keep in mind when lo...
It ignited in her a love of adventure, which quickly blossomed into a full-time career as a professional travel photographer and blogger with more than 140K followers on Instagram. Here, Diana, whose latest ventures include trips to Cuba and Spain, shares her top 10 travel photography tips for shooting stunning images when exploring new locations.
Must-Have Equipment for Incredible Travel Photo Ops. Other Equipment to Consider Buying for Travel Photography. Useful Travel Photography Tips and Tricks. 1. Add Drama. 2. Clean Up the Clutter. 3. Add Authenticity.
Travel Photography Logistics. 78. From travel photographer Karthika Gupta - When traveling to a place for the first time or even traveling alone, pick a location or a hotel close to what activities you are going to be doing. The last thing you want to do is spend hours commuting from one location to another.
Member Spotlight: Wild and Free Photography - Family Documentary Photography Travel Photography Tips and Tricks: Capturing Stunning Images like a Pro with Laura Grier. Contributors Laura Grier Laura Grier of Beautiful Day Photography has spent the past 22 years working as a photojournalist on all 7 continents and has made a life out of ...
Travel photography is a popular genre that allows photographers to capture the beauty and essence of different cultures, landscapes, and people around the world. It offers a unique opportunity to explore new places, experience different cultures, and document moments that may otherwise be forgotten.
Eight travel photography tips and tricks for beginners. July 10, 2023 · Laura Barry. Whether you're shooting on a phone or camera, Liam Fawell has some travel photography tips for you. Whether you're backpacking around Europe, on a family holiday in Fiji, or embarking on a bucket-list once-in-a-lifetime trip, one thing is sure: you'll be ...
Our travel portrait photography guide outlines the best tips and tricks for taking people's photos while traveling. From tips for nailing your composition, choosing your location, cultural sensitivity, and approaching people to the more technical stuff that will help you improve your portrait photography and take better travel and cultural portraits.
Story by Katie Hollamby. • 1mo. 1 / 14. Capture the World in 2024 - 12 Expert Tips for Travel Photography Essentials and Techniques! ©Provided by Passing Thru Travel. Travel photography is ...
The roof of the Ritz Carlton Hotel. This option is ok only in case if you're ready to pay the average bar bill of over 2500 rubles (about $40). Visit the O2 Lounge Bar on the roof of the Ritz Carlton Hotel, where all the global celebrities take their Moscow pictures, from Angelina Jolie to Robert Downey Jr. But such photo investments seem to ...
Photo Tips: After work hours are the best time to see people interacting with street performers, perfect for street photography. 8. Church of Nikolaya Chudotvortsa Tverskoy Old Believers' Community. This is a small, relatively unknown cathedral, but what makes this place special for me is its location.
Local Tips. Your personal photographer also acts as an informal tour guide with all the best photography spots and local secrets for what to see, eat, & do in town. ... & do in town. Print Release. Turn your digital photos into cherished travel prints & wall art! Use our printing partners and get FREE SHIPPING - as low as $1 USD for 4×6 luster ...
3. Marvel at St. Basil's Cathedral. St. Basil's Cathedral is one of the most iconic churches in the world, and it was the single thing we were most excited to see while in Moscow. Built almost 500 years ago, St. Basil's Cathedral is recognized by its colorful domes and whimsical style.
13. It's a marathon—not a sprint. It wasn't long before Brenda Huyhn adopted—and adapted— a popular van-lifer rule: Don't travel more than 3 hours, get in by 3 p.m., and stay at least ...
1. Ears. Gross as it feels, earwax actually cleans your ears by collecting dirt and debris, then carrying them out. Scraping that protective goop from the ear canal will leave your ear unprotected ...
Tips & Tricks 'Game-changing' $10 Kmart travel item A $10 Kmart item is all the rage on social media with travellers boasting about how it will "change your life" when it comes to packing ...
This can be especially troubling while traveling. Fortunately, specialists have provided advice to handle traveling. Bringing disposable heating pads, wearing the right shoes, and even sitting in ...
When it reaches a rolling boil, cover the pot and remove from heat. Let sit for 10-12 minutes for firm yolks or 6-8 minutes for a softer yolk. Remove the eggs from the hot water and plunge them ...
Story by Nicole Findlay. • 1mo. 1 / 27. Traveling With Kids? 24 Tips and Tricks To Make Family Travel a Little Easier ©Provided by Wealth of Geeks. Being on vacation with kids is fun, but ...