- PRO Courses Guides New Tech Help Pro Expert Videos About wikiHow Pro Upgrade Sign In
- EDIT Edit this Article
- EXPLORE Tech Help Pro About Us Random Article Quizzes Request a New Article Community Dashboard This Or That Game Popular Categories Arts and Entertainment Artwork Books Movies Computers and Electronics Computers Phone Skills Technology Hacks Health Men's Health Mental Health Women's Health Relationships Dating Love Relationship Issues Hobbies and Crafts Crafts Drawing Games Education & Communication Communication Skills Personal Development Studying Personal Care and Style Fashion Hair Care Personal Hygiene Youth Personal Care School Stuff Dating All Categories Arts and Entertainment Finance and Business Home and Garden Relationship Quizzes Cars & Other Vehicles Food and Entertaining Personal Care and Style Sports and Fitness Computers and Electronics Health Pets and Animals Travel Education & Communication Hobbies and Crafts Philosophy and Religion Work World Family Life Holidays and Traditions Relationships Youth
- Browse Articles
- Learn Something New
- Quizzes Hot
- This Or That Game New
- Train Your Brain
- Explore More
- Support wikiHow
- About wikiHow
- Log in / Sign up
- Home and Garden
- Disaster Preparedness
- Home Security

How to Make a Tripwire
Last Updated: March 16, 2023 References
This article was reviewed by Barry Zakar . Barry Zakar is a professional handyman and the founder of Little Red Truck Home Services based in the San Francisco Bay Area. With over ten years of experience, Barry specializes in a variety of carpentry projects. He is skilled at constructing decks, railings, fences, gates, and various pieces of furniture. Barry also holds his MBA from John F. Kennedy University. There are 28 references cited in this article, which can be found at the bottom of the page. This article has been viewed 143,504 times.
A tripwire is a mechanical or electrical device. Generally, it's used in weaponry. Soldiers use them in war to cause an enemy to fall, and sometimes, to trip a mine. However, they can also be used for less nefarious purposes. For instance, you can use a tripwire as a perimeter alarm for a campground or as a simple prank.
Creating a Tripwire Bang Alarm

- Instead of pop caps, you can use a glow stick. [6] X Research source

- If you're using a glow stick, drill four holes. Tie the glow stick on so that the bow hits it when the trap releases. [9] X Research source

- You can also paint the tent pegs before you attach the mousetrap.

- If you used a glow stick, the glow stick will light up when hit. [16] X Research source
Making a Tripwire Out of a Water Bottle

- To truly prank your friends , you need to disguise the trap somehow. However, you can't hide the top of the bottle, as that will release your trap.

Making a Doorway Buzz Alarm with a Tripwire

- Pull out the cardboard to test the clothespin. See if it buzzes. Place the cardboard back inside the mouth.

Community Q&A
- Be careful when working with hammers, drills, and nails. Always wear protective eye wear. Thanks Helpful 0 Not Helpful 0
You Might Also Like

- ↑ https://www.youtube.com/watch?v=8VsRqxoEhwY&feature=player_detailpage#t=13
- ↑ https://www.youtube.com/watch?v=8VsRqxoEhwY&feature=player_detailpage#t=56
- ↑ https://www.youtube.com/watch?v=8VsRqxoEhwY&feature=player_detailpage#t=65
- ↑ https://www.youtube.com/watch?v=8VsRqxoEhwY&feature=player_detailpage#t=86
- ↑ https://www.youtube.com/watch?v=8VsRqxoEhwY&feature=player_detailpage#t=93
- ↑ http://www.rside.org/glow-stick-perimeter-alarm/
- ↑ https://www.youtube.com/watch?v=8VsRqxoEhwY&feature=player_detailpage#t=92
- ↑ https://www.youtube.com/watch?v=8VsRqxoEhwY&feature=player_detailpage#t=100
- ↑ https://www.youtube.com/watch?v=8VsRqxoEhwY&feature=player_detailpage#t=113
- ↑ https://www.youtube.com/watch?v=8VsRqxoEhwY&feature=player_detailpage#t=124
- ↑ https://www.youtube.com/watch?v=8VsRqxoEhwY&feature=player_detailpage#t=131
- ↑ https://www.youtube.com/watch?v=8VsRqxoEhwY&feature=player_detailpage#t=139
- ↑ https://www.youtube.com/watch?v=8VsRqxoEhwY&feature=player_detailpage#t=145
- ↑ https://www.youtube.com/watch?v=8VsRqxoEhwY&feature=player_detailpage#t=152
- ↑ https://www.youtube.com/watch?v=hW6dH_Y25RA&feature=player_detailpage#t=6
- ↑ https://www.youtube.com/watch?v=hW6dH_Y25RA&feature=player_detailpage#t=23
- ↑ https://www.youtube.com/watch?v=hW6dH_Y25RA&feature=player_detailpage#t=31
- ↑ https://www.youtube.com/watch?v=hW6dH_Y25RA&feature=player_detailpage#t=51
- ↑ https://www.youtube.com/watch?v=hW6dH_Y25RA&feature=player_detailpage#t=59
- ↑ https://www.youtube.com/watch?v=hW6dH_Y25RA&feature=player_detailpage#t=73
- ↑ https://www.youtube.com/watch?v=hW6dH_Y25RA&feature=player_detailpage#t=99
- ↑ https://www.youtube.com/watch?v=hW6dH_Y25RA&feature=player_detailpage#t=121
- ↑ https://www.youtube.com/watch?v=hW6dH_Y25RA&feature=player_detailpage#t=118
- ↑ https://www.youtube.com/watch?v=hW6dH_Y25RA&feature=player_detailpage#t=131
- ↑ https://www.youtube.com/watch?v=hW6dH_Y25RA&feature=player_detailpage#t=168
- ↑ https://www.youtube.com/watch?v=hW6dH_Y25RA&feature=player_detailpage#t=175
- ↑ https://www.youtube.com/watch?v=hW6dH_Y25RA&feature=player_detailpage#t=179
- ↑ https://www.youtube.com/watch?v=hW6dH_Y25RA&feature=player_detailpage#t=187
About This Article

To make a tripwire bang alarm, you’ll need fishing line, a mouse trap, ring caps, tent pegs, nails, screws, and rubber bands. First, screw the mousetrap to the top half of a tent peg so you can put it in the ground later. Then, drill a hole through the middle of the mouse trap’s bait pedal for the fishing line to go. When you’ve done that, hammer two nails into the corners where the trap’s pedal hits the wood. Once you’re ready to set up the trap, tie the fishing line to a second tent peg and run it across your path into the back of the hole you made in the mousetrap. Wrap a rubber band around the trap to secure the wire. Then, cut individual pop caps from the ring and attach them to the nail heads on your mousetrap. Finally, pull the pedal down to arm the trap and wait for it to go off. For more tips, including how to make a tripwire with a water bottle, read on! Did this summary help you? Yes No
- Send fan mail to authors
Reader Success Stories
Apr 10, 2023
Did this article help you?
Mar 4, 2017

Featured Articles

Trending Articles

Watch Articles

- Terms of Use
- Privacy Policy
- Do Not Sell or Share My Info
- Not Selling Info
Don’t miss out! Sign up for
wikiHow’s newsletter
Perimeter Alarm, Trip Wire, Booby Trap

Introduction: Perimeter Alarm, Trip Wire, Booby Trap

I have a building about 300 feet from my residence. This building is a shed that houses lawn equipment, snow removal equipment, a pickup truck and misc. tools and fuel. The shed was built for storage and is not easy to secure (there is a 1 foot gap between the side and the ground). It has no electrical power and is not visible from the residence. I needed a low cost alarm that would alert when the equipment is being disturbed. I have two dogs that alter when they hear loud noises such as a gun shot.
After doing some research I found that a 12 gauge shotgun shell fits in a 3/4 inch black pipe to make a make shift barrel. (the pipe is welded and the inter seam may have to be filed for the shell to completely enter he pipe) I also learned that the pipe is not strong enough for repeated shotgun blasts, so I decided to use just the primer as a noise maker and not use a complete shell with powder. I wanted to make an alarm not a pipe bomb.
I wanted a simple device to make, so I went to the home center and picked up the following items.
4 inch long 3/4 inch black pipe nipple
PVC 3/4 inch threaded female coupler to 3/4 inch glue fitting
PVC 3/4 inch to 1/2 bushing glue fitting
3 inch long 1/2 PVC pipe
PVC 1/2 inch glue fitting to 1/2 female threaded fitting
PVC 1/2 threaded plug
4 inch 1/4-20 bolt and nut
Spring .035 wire 6 turns per inch 3/8 diameter 3.25 inches long (this was just cut off a 12 inch length of spring)
8 penny nail (end blunted to reduce piercing the primer)
1/2 inch dowel 1 inch long wrapped with masking tape to make a slip fit in 1/2 pipe.
Pop rivet pin to secure firing pin.
All these items were purchased for less than $10, (researching the internet I have got the price to just under $5 each)
Step 1: Machining (hole Drilling)

There are 3 holes to be drilled
Drill an 1/4 inch hole through the center of the plug
Drill an 9/64 hole through the 1/4-20 bolt to secure the striker, the location is found by assembling the spring on the bolt and inserting it into the plug and then while holding in a vise with the spring fully compressed mark the bolt on the bottom of the plug. Grind a flat on the bolt where the hole will be drill. Using a vise on the drill press, align the bolt to the drill bit, a small ruler between the drill bit and the bolt will locate the center of the bolt by acting like a seesaw and when it is centered the ruler will be horizontal. Remove the ruler and drill the hole.
The last hole is a clearance hole in the dowel for the 8 penny nail.
Drill and 1/8 hole in the center of the dowel for the firing pin (nail)
Step 2: Glue Plastic Pipe

Now glue the female coupling, bushing, 1/2 pipe, and female coupling together.
Step 3: Preparing the Empty Shotgun Shell

Get a spent 12 gauge shotgun shell and remove the used primer.
Purchase a box of new primers, (available at sporting goods, gun shops, Bass Pro, Cabela, Midway USA, even some Walmart carry them with the black powder firearms ammunition)
Insert the new primer in the shell and press in place (an assist from a dowel and a mallet or a reloading press may be needed)
DO NOT USE A COMPLETE SHELL ! ! ! !
Primer only.
Step 4: Assemble Firing Pin, Striker, and Release Pin

Insert firing pin into 1/2 pipe.
Insert spring onto bolt and insert through hole in pipe plug attach nut to keep assembly together
Screw pipe plug into pipe assembly
Secure in vise and cock striker, insert pop rivet Release Pin
Attach cord or string to release pin
Insert primed shell into black pipe and screw onto plastic pipe
Mount to a fixed object near to the monitoring point with conduit straps
Run trip wire (string) using eye hook to change direction
Then wait for the alarm to be activated
DO NOT FORGET TO DEACTIVE ALARM BEFORE YOU MOVE THE TRIP WIRE
Recommendations

Big and Small Contest

Making Time Contest

Remake It - Autodesk Design & Make - Student Contest

Urban Survival Site
Want To Prep But Not Sure Where To Begin?
Sign Up for Our Newsletter and Get Your FREE One Year Urban Survival Plan!
We won't send you spam. Unsubscribe at any time.
6 DIY Trip Wire Alarms for Off-Grid Security
By Steve Nubie 2 Comments
Estimated reading time: 28 minutes

A lot of folks have never put together a trip wire alarm, and there’s a good reason. There are just not a lot of occasions where a trip wire is necessary. However, when those occasions do emerge, it’s at least worth understanding the concept of what works and what doesn’t.
What Exactly is a Trip Wire?
But who needs them now, do it yourself versus buy it yourself, trip wire 101, electrical wire, monofilament fishing line, bungee cord, lasers, infrared, and motion detectors, rocks in cans, firecracker poppers, .22-caliber blanks, air horns, sirens, and other noise makers, what about light, this is not about the use of lethal force, location, location, location, 1. bungee marbles, 2. monofilament on the rocks, 3. paracord pull-string fireworks, 4. thin wire .22-caliber blank, 5. winter white trip wire, 6. back gate avalanche, is this a good idea.
A trip wire is a long length of thin wire, monofilament fishing line, or any other type of cordage that is usually connected to something that makes noise. The idea is that when an intruder either human or animal steps into the wire, the alarm is sprung, alerting you to an intrusion.
The trip wire concept was developed in wartime as a way to alert troops of an enemy incursion. This was particularly needed at night and was often used in the dense island jungles during the war in the Pacific in World War II.
The usual configuration was a thin length of rope suspended low to the ground between trees with empty C-ration cans filled with stones to rattle the alarm whenever the wire was “tripped.” And while booby traps were sometimes used to maim or kill, there was always the concern that an innocent civilian or friendly soldier wandering off to go relieve himself would trip the wire.
Want to save this post for later? Click Here to Pin It On Pinterest!

The usual reason someone considers a trip wire is when they are in an area with the potential for any number of unknown threats. The idea is usually to make noise to signal an intruder .
- The threat could be from wild animals like bears or wolves approaching a camp in a remote area.
- In countries ravaged by civil wars and civil unrest, no night is safe and trip wires are sometimes used to at least alert the local population if a covert threat is approaching.
- Following a disaster , many people find themselves isolated and alone with the potential for looters or worse. That’s when a trip wire may at least scare them off, if not serve as a warning of an unwelcome approach.
- In times requiring a bug-out to a distant but safer location, there are occasions where a night must be spent on the road in unknown territory where the threat is equally mysterious. Trip wires would serve as a perimeter defense to at least alert anyone spending an unplanned night on the road of any approach.
- And yes, they’re still used in war zones, although the technology of trip wires in those areas is usually defined by lasers, electronic signals, or infrared beams connected to electronic alerts through cameras or video or in extreme cases: explosives.
- In fact, the concept of contemporary home security systems connected to motion-detector technology to turn on lights; sound an alarm, record video, or alert the local police are the 21 st century versions of the trip wire concept.
It may seem unnecessary to build your own trip wires when so many options appear on the Internet , but if a situation makes the Internet undependable or unavailable, or deliveries or the purchase of many things is difficult or impossible, that might be a good time to know how to improvise a trip wire.
There’s also the fact that in some instances, the electricity is out or unavailable, and most modern security solutions require at least some level of power. In a worst case scenario with a total grid failure, technology will quickly diminish and old-school, analog solutions will offer the most dependable options. Those are the types of trip wire concepts we’ll cover.
We might as well start with the wire. There are a variety of options . Usually, the wire or cord is low-profile and hard to see. It also needs to be relatively strong. If someone or something walks through the wire or cord and it easily breaks, little is accomplished except alerting the intruder to the fact that you’ve setup some trip wires.
Here are options to consider:

Electrical wire comes in a variety of gauges, but the smallest (and most inexpensive) gauges are referred to as 14 and 16 gauge. They’re more than strong enough to serve as a trip wire.
They’re all coated with a flexible plastic coating that comes in a range of colors. White, black, red, and green are the most common, and those colors present camouflaged, stealth characteristics, depending on the time of year, time of day, and natural surroundings. Floral wire is another option and also comes in a variety of colors.

Fishing line is thin, strong, and also hard to see. Buy one of the heavier weight tests of at least 50 pounds or more. Avoid any of the brightly colored lines. Go with a neutral, plain monofilament.

Paracord is another surprisingly strong option, but you have to think about the color of the cord. During winter, a white Paracord might makes sense if the ground is snow covered. A green or camo cord could work well in a forest or field. Black is an obvious choice for night.

You don’t see bungee cord mentioned in a lot of the write-ups about trip wires, but it has a characteristic that could make sense if you think about it. If the idea of your trip wire is to rattle a bell, cans, or other noise maker, a bungee cord will certainly make that happen.
In fact, a bungee cord may cause more noise to occur than any of the other options we’ve mentioned due to its flexibility and springiness. A black bungee makes sense. Green if you’re in the woods.
If your trip wire is designed to trigger a mechanism, bungee is not the best choice, but if you’re rattling cans the old-fashioned way, it’s a good option.

You can buy these things and improvise a trip wire yourself, but make sure they’re battery or solar powered or have a way to recharge the batteries . These are complicated solutions, so we’ll mention them but we’re not going to spend a lot of time covering ways to make technology work in a primitive environment.
Some websites offer tips and solutions to improvising trip wires with technology, but it’s a lot of work and you have to consider how and when you’ll need any trip wire, and for how long.
The idea of most trip wires is to make a lot of noise when someone trips over the wire. Noise makers vary depending on what you have available or may have bought in advance. We’re going to assume your situation caught you a bit by surprise and that you have to improvise from available materials.
It’s believable that a lot of us would have wire, cords, and fishing line lying, around but things that make noise require a bit of creativity or at least some pre-planning , especially if you require a very loud alarm.
How loud your alarm needs to be depends on your distance from the trip wire and whether you are inside or outside. Someone camping in a tent will be more likely to hear a rattle of rocks in a can than someone sleeping in their home or cabin.
If you are at a distance from your trip wire or indoors, you may need to plan and buy ahead to acquire louder alarms like blank cartridge firing mechanisms, firecracker poppers, air horns, or anything else that will be heard under most circumstances.
Want to prep but not sure where to begin? Click Here to Get Your FREE One Year Urban Survival Plan!
And if you can, paint your alarms to match the environment. If you don’t have paint, you can rub some mud or clay on the bell/can/noisemaker so it is somewhat camouflaged. Black is good at night, camo combos for any natural forest or field, and snow white for winter.
If you’re trying to keep animals at bay, the colors are less of an issue. Animals only see in black and white, but keep an eye on the contrast. They can still notice highly contrasting shades.

A lot of us have bells around for various reasons including cowbells, Christmas bells, antique bells, and collectible bells. And then some of us don’t. If you have any assortment of bells, you’re off to a good start with a trip wire.

Even if you’re not a bell collector, there’s a good chance you have access to tin cans and rocks. No rocks? Anything that makes noise in a can will do from bolts to nuts or better yet, marbles— although marbles may jostle around in your can in the wind, so maybe stick with the pebbles.

You only want a few in the can but enough to make noise when the can is jostled. Smooth, rounded stones and marbles are best. Look for rounded stones in river and creek beds.
Drop a few in and give the can a shake. Adjust until you think you have the most and best noise for a shake. And if you don’t think a rattling can is going to work, then you’ll need to think about stocking some very loud alarms like the next few items.

There’s a type of firework that has two stings emerging from either end of a firecracker. When you pull the stings, the firecracker pops. They’re loud, and you can tie them onto a number of trip wires around your area.
Some of them are made out of paper and will get wet due to rain, snow, or morning dew, so wrap them in plastic cut from a black or neutral garbage bag. They’ll most likely scare off a wild animal and might scare off an intruder. Either way you’ll certainly hear it.

This isn’t about setting up a full loaded .22 caliber round on a trip wire. That’s a really bad idea. Trip wires are indiscriminate and when tripped, the wire fires. Most .22-caliber blanks are used for nail hammers to drive nails and pins into concrete.
The firing mechanism for trip wires and .22 blanks can be bought online , although the blanks are available at most hardware stores next to the nail guns . There are also 12-gauge blank variations on this concept.
As a trip wire, they’re mostly designed to deter wild animals, but the people who sell them offer all sorts of reasons to use them . You’ll certainly hear it, and it will scare most anyone and anything away.
However, it may cause a response you don’t necessarily want. If someone is approaching and they are armed, they may perceive the detonation of a .22-caliber blank round as actual gunfire and return fire. Up to you.

If it makes noise, it’ll work on a trip wire. The only challenge is figuring out how to trigger the noise. Things like sirens need power, but if you’re handy with a little wiring, you can make a trip-switch to set off the siren.
There are also solar powered options available . There’s some advice out there about setting up a rock over an a ir horn that will fall on the air horn button when tripped. That requires some precise setup and once that rock is on the air horn, it’s going to make a lot of noise until you lift the rock.
You’ll also probably use up all the air in the horn by the time you get out of bed or your sleeping bag to lift the rock.

There are solar powered motion detectors that will illuminate an area. These are best hung high in a tree out of sight and out of reach. It’s a variation on the trip wire concept, and it’s usually used to dissuade animals. It could also deter an intruder, but if you’re using something to trip an alarm that will notify you of an intrusion, a light in the night will do little good if you don’t see it while you’re sleeping or otherwise occupied.
Most trip wire concepts are designed to make noise to let you know that someone or something is approaching, and improvising a light to a trip wire can get a little complicated unless you have some good skills with wiring and trip switches. We’re going to skip the lights and stick with noise.
Booby traps have often been used in times of war and they are designed to kill. That’s a really bad idea. The whole idea is to either scare something or someone away with sound or to at least be alerted to the presence of something approaching.
Even a blank .22-caliber cartridge should be pointed towards the ground. Otherwise, the blast could send shrapnel from a tree trunk or branch in someone’s direction, and you don’t want it to be one of your children or an innocent wanderer lost in the night. This is about making noise, not war .
Where you place any trip wire is as important as the design of the trip wire itself. You want it far enough away to give yourself some time to observe the direction of the alarm and see what’s coming plus prepare to respond. But you also want it close enough so you can hear it.
Another location factor is the height of the trip wire from the ground. If you’re concerned about human intruders or large animals like a bear , you’ll want your trip wire about a foot above the ground. 6-inches above the ground is about the minimum or someone or something could step on the wire without tripping it.

Also, if it’s any lower than 6 inches, every random squirrel, raccoon, possum or most any other rodent could trip your wire repeatedly. If that happens enough, you may take to ignoring the trip wire noise while assuming it’s just another passing rabbit when it’s the intruder you were so worried about in the first place.
Support for attaching a trip wire is something else to think about. A lot depends on what’s available at the location and what kind of trip wire you’re using. Two tree trunks could work, but they will create a very taut trip wire that may not ring any bells for long. They could also cause an intruder to literally trip which may be an effective deterrent–or not.
The branches of two trees or two saplings give some flexibility to any trip wire and could result in a sway in the wire, causing the noise to persist a little longer.
Two stakes in the ground are another solution, but if you’re trying to raise your trip wire to a foot of height, you’ll need long and large stakes deeply imbedded in the ground.
The number of trip wires you set up is another location consideration. Think in terms of avenues of approach. Around a home or dwelling, any open area like a gap in a fence, a gate, an open back or front yard, approaches to doors or windows, or approaches to outbuildings are worth thinking about.
A lot depends on what you’re worried about, the location, and the immediate threat level.

A remote survival camp or any campsite for that matter might require a number of trip wire setups, but even then –animals prefer open paths and clear terrain. A human intruder may do otherwise and stick to the cover of scrub, brush, and trees, so you just have to do your best to estimate what could be coming and from where.
Check your trip wires if you have them in place for any length of time. Improvising an alarm with some rocks in a can is a good idea, at least until it rains or freezes and the water or frozen rocks in the can fail to rattle.
It’s also possible one of your trips has worked loose; been tripped without you knowing it, and loose on the ground, or something as simple as a knot that has worked loose. It’s actually somewhat of a “set it and forget it” approach, but it’s worth checking them from time to time if you need them for any duration.
Remove your trip wires when you don’t need them anymore or when you move on. They will cause you or anyone else to trip, including family members, as long as they’re in place. You also may need them again.
The DIY Trip wires

The advantage of a bungee cord as a trip wire is its springiness. Think of it as a rubber band on steroids. In fact, the interior of a bungee cord is just that. Long strands of rubber encased in a flexible fabric braid.
You can attach anything that makes noise to a bungee cord. The advantage is that a bungee will rattle and shake longer while making more noise.
- Bungee cord of sufficient length for your trip wire area. You can buy coiled bungee cord in various colors and cut them to length. If you only have packaged bungee cords of varying lengths with hooks, you can connect them together, although the hooks will be somewhat visible during the day.
- Various soup cans painted to match the terrain or time of day. They should also have holes punched towards the top of the can on either side.

- (You can substitute bells for the cans.)
- Choose a bungee cord color that you think will blend in the best with the surrounding areas.
- Wrap the one end of the bungee around a tree trunk, branch, sapling or stake. Tie it off with two half-hitches and pull tight.
- Thread your can or cans onto the bungee.
- Stretch it tight to another tree trunk, branch, sapling or stake and wrap and knot with two half hitches until tightened.

- Add marbles to the can and test it with a few pulls on the bungee. Add or remove marbles depending on the sound.
- Test your bungee trip wire again with someone in camp or in the house and ask them if they can hear the cans? If not, move the trip wire closer or add some more cans.

Monofilament is an excellent trip wire source. It’s hard to see during the day and totally invisible at night. The key is to have a strong enough weight test to activate the noise without breaking. It can be used in most any trip wire setup in any location.
- Monofilament fishing line. 50 pound test or higher is best, but any weight test will do if it’s all you have on hand. You could even double or triple up the monofilament if you’re worried it will break or snap.
- Empty tin cans. Soup cans are a good size. Peel off any colorful labels and either paint them or coat them in a thin film of mud so they are less reflective. Paint the cans black or do a camo pattern depending on the surrounding area.
- Smooth, round rocks, nuts, bolts, marbles —anything hard that can easily move around and rattle in the can.
- Cordage or wire to attach the cans to the monofilament.
- Wrap the one end of the monofilament around a tree trunk, branch, sapling or stake. Tie it off with an improved clinch knot (a fishing knot perfectly suited to monofilament) and pull tight.
- Punch 4 holes in each can.

The holes should be punched in pairs towards the top of the can about a ½ inch apart and opposite each other at the rim of the can. This is so the can is bound tight to the monofilament as it is threaded through the holes to ensure a good shake.

- Thread the monofilament through the holes.

- Add the can or cans along the monofilament, but try to place them in spots that are obscured by brush, tall grass, or other natural camouflage. It makes no difference at night, but take a look when it’s dark to be sure.
- Stretch it tight to another tree trunk, branch, sapling, or stake and wrap and knot with another improved clinch knot and pull light.
- Try to locate the cans in a location that is hard to see during the day.
- Drop a few rocks in the can and shake the fishing line wire to see if the cans rattle. Add more or less rocks until the cans make a racket. Continue to add cans where you can. Tighten the cans to the monofilament if you need to.
- Test your monofilament trip wire and have someone in camp listen and ask them if they can hear the cans. If not, move the trip wire closer or add more cans.
- Thin paracord . A type I or type II is thin enough to be obscure but strong enough to function as a trip wire. Choose the color that best matches the terrain and time of day.
- Pull-string fireworks. They’re legal to buy in most states and can also be purchased online. You’ll need to have them on hand because they’re very difficult to improvise.
- Choose a paracord color that will blend in with the surrounding area.
- Wrap the one end of the paracord around a tree trunk, branch, sapling, or stake.
- Find a location that is hard to see along the paracord and tie one end of the pull-string firecracker to the cord.
- Tie the other end of the paracord to another tree trunk, branch, sapling, or stake and wrap and knot with two half hitches until tightened.
- Carefully tie the paracord to the other end of the pull-string using a square knot or any knot you can improvise. You have to do this delicately. You want the paracord tight, but you don’t want to accidentally detonate the firecracker. If you want to get the best tight line, you could tie the final end of the paracord to the tree or stake with a trucker’s hitch . This will give you a little more control over the slack, but be gentle.
- You don’t want to test your popper trip wire or you’ll have to retie another one. If you want to test the distance and whether or not you’ll hear it, have someone in camp or in the house listen while you pull a spare popper. If they don’t hear it, move the trip wire closer. Don’t be tempted to add multiple poppers to the same trip wire. What will most likely happen is that one popper will trip, leaving any others unexploded.
- Unlike bells and tin cans, you have to rearm your firecracker trip wire whenever it goes off. That’s not a bad idea to at least see if there are any footprints or paw prints to tell you if your intruder was human or a stray dog.

- Floral wire . Black is the default color, but if you have a green or white color that can match the terrain or time of year (snow), that’s a good idea.
- A .22-gauge firing capsule. You can buy these online. They’re hard to find in stores.
- Blank .22-gauge loads. Buy these online where you bought your firing capsule or at a hardware store in the nail bun aisle.
- Wrap the one end of the wire around a tree trunk, branch, sapling or stake. Choose a color that matches best with the surroundings.
- Attach an unloaded .22-gauge capsule in an obscure spot.
- Attach the other end of the wire to the .22-gauge firing capsule.
- Stretch it to another tree trunk, branch, sapling or stake and pull until you have tension on the .22-gauge firing mechanism.
- Test the unloaded .22-gauge capsule by pushing on the trip wire to see if the pin fires. If not, adjust the tension. If the pin fires, rearm the firing mechanism and carefully add a blank .22-gauge cartridge.
- If appropriate to the situation, do a test. It will be loud and attract a lot of attention. If the firing pin is firing when unloaded, you should be good to go if a test causes local problems or concerns. Anything that sounds like a gun shot in the neighborhood may attract some unwanted attention.

This setup uses a white length of electrical wire attached with overlapping loops through two holes in the top of a can painted white. Obviously, it’s a winter trip wire and it uses marbles or pebbles to create the alarm. The overlap of the wires causes the can to shake and rattle more than a conventional wire or line passing through the holes.
- White electrical wire
- A can or cans painted white
- Marbles or pebbles
Directions:
- Attach one end of the wire to a tree branch.
- Run the wire through the can in a discreet location, but overlap the wires so the can shakes when the wire is tripped.

- Attach the other end of the wire to a branch and test.
If trouble is close to home and you need to come up with a trip wire fast, this is one option. This is a trip wire connected to a gate, causing an avalanche of large rocks to fall onto a large piece of sheet metal or even a metal garbage can. It makes a lot of noise and can also be staged so the rocks fall onto the metal when the gate is pushed rather than pulled open.
You can improvise this kind of setup anywhere someone may enter uninvited, from a barn door to a back door to a door on a wood shed. This is not a stealthy trip wire. It assumes that a gate or other barrier is obstructing any view of the setup.
- Bucket to hold the ro cks.
- About two dozen large rocks from 1 to 2-inches in diameter.
- A large metal surface or object that will make a lot of noise when rocks land on it. Sheet metal, metal garbage cans, metal ductwork, any type of metal that’s relatively thin and will create noise.
- A wood platform 12” square to support the bucket
- Three wooden dowels about 3 feet long. (You can use old broom handles or even 1×2’s can work).
- Cordage . Any type and any color. The trip wire will also be obscured by the gate or barrier.
- Fill your bucket with your rocks and dump them on your metal sheet, can or whatever else your using to assess the noise. Ask someone inside your home or camp to determine if they can hear it.
- If you’re satisfied with the noise level, fill the bucket with your rocks.
- Pound the 3 support sticks into the ground in a triangle that will support the 12” square platform.
- Set the 12” platform on top of the support sticks. You don’t want to drive the support sticks too deep into the ground. You want this to be a precarious balancing act.
- You have two options. If your gate pulls open towards you, attach your trip wire to the gate and to the front support stick or your three sticks setup far enough away to allow the rocks to fall on the metal. Place the metal in the best location for the rocks to fall. You might want to put some rocks under the metal to lift it off the ground to increase the noise and hold it in place to some degree. When the gate is opened, the trip wire will pull out the support and the bucket will fall forward onto the metal.
- If your gate opens away from you, set up the support sticks and the platform right next to the gate. When someone pushes the gate open, it will topple the bucket with the rocks onto your metal plate or can.
- Test either option to see where the rocks fall and place your metal sheet or container in that location.
- Test again and ask someone inside the house to assess the noise level.
- If satisfied, set the trip or add more rocks or adjust the metal location or type of metal. It’s an easy set up and will create enough noise to cause most intruders to jump out of their boots.
Are There Other Approaches?
No doubt . Trip wires have been around a long time, and what you choose to improvise is only limited by your imagination and materials on hand . What we tried to do here was explore the concept so anyone could take the basic idea and adapt it to their needs, available supplies , and their location. It’s all a question of finding stuff that will make a lot of noise when someone trips over your wire.
In an emergency, it’s good to know how to do this stuff. In an ideal scenario, you would have sophisticated electronic devices that are solar powered and connected to motion detectors and all manner of alerts and alarms. Complicating things further is that any device with any level of electronics will also need to be weatherproof.
But this isn’t about an ideal scenario with a house surrounded by lasers . It’s about a sudden and surprising time when things rapidly become dangerous or threatening. Anyone in that situation would have plenty to think about and the ability to quickly improvise something as basic as perimeter alarms with trip wires not only makes sense but simply seems like a good idea. Just don’t throw way any old bells.
Like this post? Don't Forget to Pin It On Pinterest!
You May Also Like:
- 11 Home Security Tips for Life After SHTF
- How to Build a Bicycle Generator
- 20 Survival Uses for Wire Coat Hangers
- 5 Ways to Minimize Generator Noise
- 3 Things To Know BEFORE You Go Camping

© Copyright 2010-2022 Urban Survival Site · All Rights Reserved
Contact Us · Disclosure · Privacy · Terms of Use · Direct Ad Sales · Site Map
Facebook · Pinterest · Twitter
* Urban Survival Site is a participant in the Amazon Services LLC Associates Program, an affiliate advertising program designed to provide a means for us to earn fees by linking to Amazon.com and affiliated sites.
Enter your email address below to get your One Year Urban Survival Plan... it's 100% FREE!
Plus daily survival tips (unsubscribe anytime)
Advertisement
The Best Mousetrap

By Doug Mahoney and Sarah Witman
We’re not sure what’s worse: seeing an actual mouse in your home, or just finding their poop in your cupboards. Either way, if there’s a mouse in your walls, you want to get rid of it asap. After more than 25 hours of research and interviews with industry experts, and a combined 15 hours of baiting, setting, and detonating mousetraps, we are confident that the Tomcat Press ’N Set Mouse Trap is the proverbial “better” mousetrap. It’s easier to set than the competition without hurting your fingers and easier to empty without touching a dead mouse—and it traps mice just as well as anything else we tested.
Everything we recommend
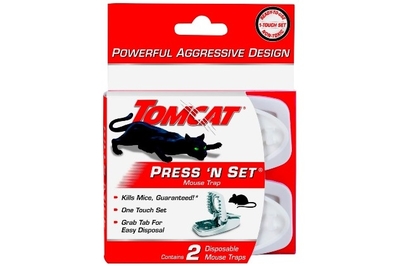
Tomcat Press ’N Set Mouse Trap
A better mousetrap.
Effective, inexpensive, and easier to bait, set, and discharge than most competitors, the Tomcat stands out as the proverbial “better” mousetrap.
Buying Options
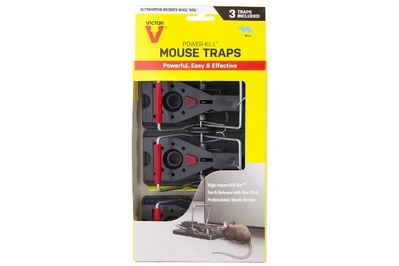
Victor M393 Power-Kill Mouse Traps
A great alternative.
The Power-Kill has a strong snap and sets easily. It’s very similar to the Tomcat except that the dead mouse (and the accompanying gore) is a little more visible.
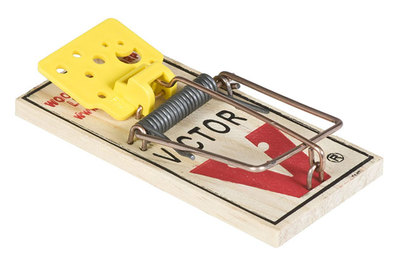
Victor Easy Set Mouse Trap
An affordable classic.
This iconic trap isn’t as easy to set up or clean out as our pick, but it’s effective and inexpensive enough to buy in bulk and toss after a catch.
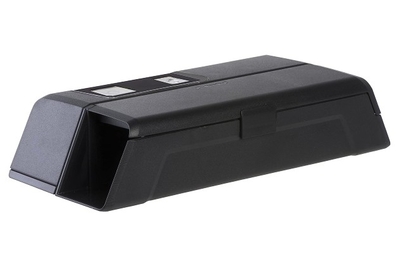
Victor M1 Smart-Kill Wi-Fi Electronic Mouse Trap
Remote monitoring.
The Victor M1 kills with an electrical shock, then sends your phone an alert, so you know to empty and reset the trap. It’s expensive, but it’s a nice option for those who might not be mobile enough to constantly check their traps.
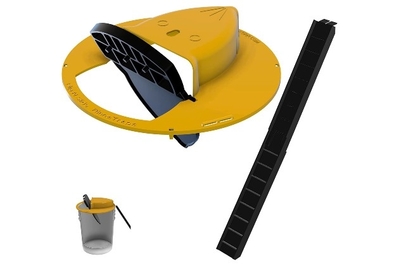
RinneTraps Flip N Slide Bucket Lid Mouse Trap
Only for the biggest infestations.
The Rinne self-resets after each capture, so it can trap mice alive all night long. But it’s bulky, and we only recommend it for large infestations or outbuildings.
With a powerful snap, a sensitive trigger, and mouse-grabbing teeth that remind us of the Monster Book of Monsters in Harry Potter , this simple, inexpensive trap did its mouse-killing job just as well as more traditionally designed traps. It’s small, discreet, and inexpensive, yet it’s just as effective as bulkier gadgets that cost far more money.
If the Tomcat Press ’N Set is not available, we also like the Victor M393 Power-Kill Mouse Trap . In many ways, the two traps are alike. They both have a sensitive trigger, a very simple setting mechanism, and an easy cleanup. We like that the Victor has a very strong snap, but it’s not as discreet as the Tomcat, meaning that after a kill, the brutal results are on full display. With the Tomcat, the snapping portion of the trap is large enough to block some of that nastiness from view. But there is no question that this is an effective trap and for effectiveness we put it on the same footing as the Tomcat.
The Victor Easy Set does a fine job killing mice but is trickier to set up than our top pick and doesn’t make it as easy to discharge a dead mouse without touching the body. That means it isn’t as easily reusable, but it’s also cheap enough to throw away along with a dead rodent—and that adds up to some savings when you need to buy a lot of them.
If you’re someone who has trouble getting to the areas where you set your traps, you should consider the Victor M1 Smart-Kill Wi-Fi Electronic Mouse Trap . This trap kills mice with an electrical shock and then sends a notification to your phone, letting you know it’s time to clean out and reset the trap. This means you’re not wasting your time constantly checking the traps, which often requires multiple trips up and down either basement or attic stairs. Because of the way the mouse is killed, cleanup is easy and has little to no gore. Multiple traps can be connected to the app, and it keeps a running tally of kills for each trap. We had success with the Victor M1 and its app, but we strongly recommend making sure you have Wi-Fi in the area where you’re planning to use it. Attics and basements may be beyond the range of your Wi-Fi and will render the notification system useless. Usually priced between $35 and $45, this is an expensive item, and we only recommend it for those who really have trouble monitoring their traps.
If you want a low-maintenance way to catch a lot of mice at once (and we mean a lot of mice ), it’s hard to beat the RinneTraps Flip N Slide Bucket Lid Mouse Trap . The Rinne trap attaches to a 5-gallon bucket and lures mice onto a trap door that is weighted to reset itself. Once a mouse falls through and into the bucket, the trap is immediately ready again and will continually catch mice with no human intervention. With an empty bucket, the mice are trapped alive, so they can be released. The other option is to fill the bucket with a few inches of water, which drowns them. In our testing, the Rinne was so successful and trapped so many mice that we needed to remove it from the test area (an old barn) in order to catch mice with the other traps we were looking at. With four different styles of traps set up, the RinneTrap caught 10 mice over a two-night period, while the other traps caught zero. The Rinne is a bulky trap, and if you don’t want to deal with either a bucket of live mice or a bucket of drowned mice, it’s not a fit for you. Some people will call a pro before getting to the point of needing the RinneTrap, but for those willing to take on a large mouse infestation themselves, this trap will assist quite a bit.
The research
Why you should trust us, who this is for, how we picked and tested, our pick: tomcat press ’n set mouse trap, runner-up: victor m393 power-kill mouse trap, also great: victor easy set mouse trap, also great: victor m1 smart-kill wi-fi electronic mouse trap, also great: rinnetraps flip n slide bucket lid mouse trap, what about a cat, what about sticky glue traps, what about poisons, how to prevent mice from entering your home, how to bait and set a mouse trap, the competition, care and maintenance.
Senior staff writer Sarah Witman has dealt with mild-to-moderate mouse problems in two houses and a studio apartment in Madison, Wisconsin, and a one-bedroom apartment in Brooklyn, New York. In those instances, she relied on the classic wood-and-wire snap traps, as well as a catch-and-release trap. Also, she’s descended from three generations of butchers, who taught the value of a quick and clean kill.
This guide was also worked on by senior staff writer Doug Mahoney, who lives in a 249-year-old house with a fieldstone foundation. This, along with the fact that he raises sheep, chickens, pigs, and cows, means he is no stranger to rodent infestations. In fact, he’s all too familiar with them.
To write this piece, we consulted Shawn Woods , a mousetrap enthusiast whose weekly video series, Mousetrap Monday, shows him testing all kinds of mousetraps. He covers how to set them up and their successes and failures, as documented by an infrared motion camera in his Oregon barn. Woods has nearly 2 million subscribers and, like Wirecutter, makes money from traps purchased through affiliate links on his videos . He rarely gets freebies from trap companies and spent, he told us, “well over $10,000 a year on mousetraps.”
We also spoke with Matt Frye, PhD , who studied entomology before becoming an extension educator for Cornell University and New York State Integrated Pest Management; Maxwell Ryan, the CEO and founder of Apartment Therapy, who has tested mousetraps aplenty for the site’s Best Mouse Trap article ; and Ashley Brown, then senior marketing and product-development manager at Woodstream, the owners of Victor, Terro, and Havahart, among other animal control brands (she is now senior director of Commercial Business). We also had a conversation with Nick Olynyk , the founder of Grandpa Gus’s Pest Control. We also spoke with Boris Bajlovic, then vice president of Rodent Control at Woodstream. He has been working with the Victor company since 2007 and now oversees their product development, sourcing, and sales.
We read dozens of peer-reviewed journal articles to dive into the science of pest management, as well as a few chapters of Rodent Control: A Practical Guide For Pest Management Professionals . This book—written by Robert Corrigan, PhD , who has studied rodents enough to earn himself the title of Rat Czar —is the gold standard in the industry, and it supplied many wonderful details that helped frame this piece.
There are a lot of reasons you don’t want mice living in your walls, ranging from the emotional to the practical. But no matter which angle you’re looking at it from, mice are a problem you want to take care of quickly. This guide is for anyone who wants to try to deal with it themselves, before calling in the professionals.
“If you have never had a mouse and now you’ve got one, you think the greatest calamity on Earth has befallen you. There’s a visceral reaction,” Woodstream’s Bajlovic told us. Apartment Therapy’s Ryan said he thinks mice bother people so much because it feels like an invasion of your most intimate, safe place. “Mousetraps were very personal for me,” he said. “I lived in the West Village [the NYC neighborhood] for many years, and I had a lot of mouse issues. It was a small apartment, and my bed was on the floor, so they were physically very close to me. I had a lot of sleepless nights listening to them come and go.”
But it’s not only about your own comfort level, there are also plenty of practical reasons to want your mice gone. In addition to feasting their way through your pantry, they can spread pathogens like hantavirus and salmonella that are harmful to humans. Carrying parasites is another one of their tricks, such as mites , ticks , and fleas. They also don't mind nibbling on electrical wires, which can result in some really big problems. According to the Ohio State University Extension Office , “One quarter of house fires with undetermined causes are assumed to be caused by rodents chewing on electrical wires.” And as if all this wasn’t bad enough, the mice in your home are also peeing and pooping all over everything in their path.
If all this doesn’t get you motivated to act fast with a mouse problem, consider that mice are fantastic multipliers. “Nobody ever has one mouse. You might only see one, but you’ve got like five or six,” Bajlovic told us. And that’s only if you’re lucky enough to be seeing the first wave, because mice reproduce very quickly—one female mouse can give birth to as many as 10 litters , or 60 mice, per year. If left unattended, a little mouse problem can quickly become a big mouse problem.
The traps we discuss here are meant for mice, not rats, which are much larger and would likely only be injured by a mousetrap, potentially creating even more problems. If you have a rat problem, you’ll need larger traps designed for bigger rodents , and it may be worth your time to contact an exterminator too.

We started by learning everything we could about mice and mousetraps. We looked at the top results on Amazon, Google Shopping, and retailers like Home Depot and Lowe’s. We read countless owner reviews and forum posts online to find common problems among the different types of traps—from the ubiquitous snap trap to the more obscure varieties like the rolling log .
We asked the experts about their favorite traps, and their criteria for a good trap. In our conversations, the experts delved into details like how to bait and set a mousetrap , how to prevent mice from entering your home in the first place , and, of course, why not just get a cat ? We also talked to about a dozen Wirecutter staffers—spanning many age, geographic, and socioeconomic demographics—about their past experiences with mice.
To deal with the ethical question first, we think that a trap should kill a mouse. That might feel a little savage to some, but it's what our reporting bore out. Mice are innocent creatures—they’re just going about their daily lives when they unwittingly trespass on your property, eat your food, and besmirch your belongings with tiny droppings. What’s wrong with just trying to capture them and setting them free somewhere nearby (but not too nearby)?
Well…a lot, as it turns out. Live-capture traps pose a couple issues. “The biggest problem I have with live-catch traps,” said Woods, “is that if you don't check them often they just turn into kill traps because the mice get stressed and die in there. And to me that’s worse, to suffer a slow death.” He added that sometimes when multiple mice are confined in a no-kill trap, even just overnight, they “turn into cannibals.”
But even if you manage to capture mice alive and get to them in time to ensure their safety, chances are they won’t stay happy and healthy for long. Mice can return to their home from over a quarter-mile away, so to truly stop an infestation you’d need to transport your captured mice a pretty good distance. And it’s likely the creature won’t survive its release into the wild. “Chances are against them,” Bajlovic told us. Mice are not good in unfamiliar territory and are likely to die of starvation, dehydration, or become a meal for a predator. “I don’t know how humane that is either,” said Woods, “just putting them out in nature with a lot of new predators, with no food and no home.” Plus, relocation is illegal in many states.
So a good mouse trap should be one that makes a quick, clean kill that minimizes the animal’s trauma and suffering. It should be able to kill many mice in a night—so, either a multi-catch trap or a single-catch trap that’s inexpensive enough to buy in bulk—to nip the infestation in the bud. In general, we wanted a trap that was either affordable, or else able to be used over and over to offset the cost. It should not be overly gory or unsanitary to clean up. It should be small and compact, self-contained, and nontoxic to kids and pets.
Though rodent behavior is somewhat predictable, we didn’t conduct a true scientific comparison test of mouse catching efficacy. Without a controlled population of mice at home to work with, even if one of the traps managed to catch more mice than the others, it wouldn’t mean that those traps were necessarily better, just that they were in the right place at the right time. Rather, we baited, set, triggered, and cleaned up each of the traps twice—once with Nutella and once with peanut butter (both recommended by our experts)—over the course of a week, making detailed observations of how each one felt to use. We watched videos of other people setting off the same traps, just in case we were missing anything in our own tests. We also heavily relied on what my sources—most of whom catch mice on a regular basis, or work closely with people who do—shared with us.

In our testing, the Tomcat Press ’N Set Mouse Trap stood out above the rest. Like many traps, it’s powerful and sensitive enough to catch and kill mice effectively—but what sets the Tomcat apart is a design that makes it easier than competitors to set without snapping your fingers. It’s also easier to empty without touching a dead mouse, and (as one of the least expensive traps we tested) it’s one of the most affordable to buy and use in a high enough quantity to head off your mouse problem.
This trap had one of the most powerful snaps of any we tested. You can see in Woods’s video how the trap actually lifts off the ground when killing a mouse. This is important because it means a quick, clean kill—which is not true for some traps that we tested, like the Intruder The Better Mouse Trap . The Tomcat has a similar baiting system to pretty much every snap trap: You put a little bait in a designated divot and wait for the mouse to try to lick it off, triggering the trap. But the Tomcat seemed more sensitive to touch compared with other snap traps we tried, lessening the likelihood that a mouse will lick all the bait off the trap without triggering it.
The build quality of the Press ’N Set traps also impressed us—with a sturdy, thick plastic that seems difficult for a mouse to chew its way out of—and, as Woods points out in his video , the twin sets of “teeth” help grab onto and kill the mouse in one fell swoop “as it comes smashing down.” This wasn’t the only trap that experts noted was effective in quickly and humanely killing a mouse (although that dual-tooth detail is distinct), but in doing so, it met one of this guide’s most important criteria.
Despite its vicious appearance and snap, we felt safer using the Press ’N Set than many of the competitors. The one-click setup makes it nearly impossible to snap your fingers on accident. If you do, it’s pretty harmless—Woods actually closes a Tomcat intentionally on his fingers in his video.
Although most traps we tested had a no-touch discharge system, this feature made the Press ‘N Set a clear standout above any trap that makes you handle a dead mouse. With the Press ‘N Set, you just grip the same lever used to set the trap and drop the deceased animal into the trash. And because the trap is made of plastic, you can easily wash and reuse it, making it more cost-effective and environmentally friendly—or, at least, a better option than something thrown away after a single use.
With all of the improvements this trap offers over other, more traditional models, we would have expected to pay a premium. But these traps usually go for about $7 for two, which is only a few dollars more than the cheapest traps we tested (our also-great pick ) and cheaper than nearly every option in the Competition section . With hundreds of positive reviews, the Tomcat is regularly available online.
To get the best results with the Tomcat (and, really, all snap traps) you should get a bunch of traps and set them up strategically around your home. Frye said you should place a few side by side—if the mouse sees one trap and tries to jump over it, you might still get it on the jump. This guide’s research turned up a lot more info about how to bait and set a trap , but the conclusion, as far as the Tomcat goes, is that not only is it effective as a single trap, its low price means it’s also effective at affordably solving the problem that got you reading this guide in the first place.
How the Tomcat has held up
After using the Tomcat to keep multiple homes mice free for years since this guide was originally published, it remains a consistent and effective trap. We’ve also heard from readers who agree that the trap gets the job done.
Wirecutter senior editor Harry Sawyers recently deployed a pair of Tomcats in a Los Angeles garage where mice had gotten into a surplus stash of dehydrated dog food . Sawyers baited the traps with a few bits of food and reports with a mix of shame and pride that he netted three mice in two nights. "I hope it's over," he said. He noted that the traps' easy one-handed operation made it possible to pick up the loaded trap, drop the catch into a plastic bag, all the while shielding his face with his free hand to avoid looking into the creature's still-open black eyes.
Flaws but not dealbreakers
The primary complaint that we and some Amazon reviewers have is that the Tomcat is a little tricky to clean because of all its nooks and crannies. You really need to get in there with a cotton swab, or a strong blast of water, to get it completely free of peanut butter. But this isn’t a major problem because, as you can see at the end of Woods’s video , it’s such a clean kill that you might not have to extensively clean out the trap even between uses.
You can easily find other snap traps that will do the job for less, but the Tomcat’s powerful snap paired with the fact that it’s so easy to set up and discharge make it well worth spending the extra money.
This trap is not indestructible. After detonating several Tomcat traps dozens of times with a chopstick, we noticed that one of the traps started to have trouble functioning (you could still set it with no problem, but about half of the time the bait area wouldn’t trigger the snap and we would have to reset it). Considering this happened to only one of the traps, and how inexpensive this trap is, we didn’t think it was a dealbreaker.

If the Tomcat traps aren’t available, we also like the Victor M393 Power-Kill Mouse Trap . This trap has many of the same positives of the Tomcat; it can be easily set with one hand, cleanup isn’t too difficult, and the overall build quality is nice. The only downside compared with the Tomcat is that it has the more traditional bar as the striking piece (instead of the plastic jaws), so the gore of a kill is on full display. On the Tomcat, the bulkier jaws often hid the more gory parts of the kill. Cost fluctuates, but we’ve consistently seen the Power-Kill traps sold for the same price as the Tomcat traps, except that you get three instead of two, so the per unit cost is usually lower.

The Victor Easy Set Mouse Trap is one of the few traps that’s even cheaper than the Tomcat and the Power-Kill, and it’s even easier to find. It’s also less durable than the others, and it can’t be washed and reused as easily. But it works well, it’s pretty reliable, and it’s usually a few dollars less than the Tomcat, so it’s a good option if you’re looking to load up on a lot of traps or if you want to think of them as disposable.
Both the Tomcat and the Easy Set can effectively and quickly kill a mouse, but the main reason we’d suggest the Tomcat or Power-Kill first is the ease of setup. Whereas the Tomcat and Power-Kill offer one of the most stress-free bait and setup procedures, the Easy Set leaves open the possibility that you can snap your finger under the wire. It made our hearts race a little just thinking about all the times we’ve accidentally done that (which isn’t terribly painful, but is worth avoiding). Watching some videos online revealed Frye’s nifty trick for setting the Easy Set— with a pencil !—and after that, we felt much more confident and sustained fewer injuries.
The Victor Easy Set costs about twice as much as the Victor Original , which is the best-selling wood-and-wire trap you see everywhere. Since the Victor Original was patented in 1903 , there have been many variations on the design, and in choosing between them, the Easy Set offers some small advantages—for a similar rock-bottom price. The main difference between the Easy Set and its predecessor is what’s called an expanded trigger—it looks like a bright yellow slice of Swiss cheese—which some feel is more effective at catching mice. It also has two settings (sensitive and firm) to give you a little more control over the trigger, although we didn’t think this feature noticeably improved the trap’s function. And despite its name, we did not find the Easy Set any easier to set than the Original.
Among the negative reviews of the Easy Set, most people complain that the trigger is too sensitive to set easily, or that the traps spontaneously misfire when no mouse is present, or that they don’t go off at all . Although we do think that practicing and trying Frye’s aforementioned tips will help, it’s also very possible that—especially with something this cheap—you might get some defective units.

We think that our recommended snap traps are going to get the job done for the vast majority of people, but if you’re someone who has difficulty getting to the areas where you set your traps, we also like the Victor M1 Smart-Kill Wi-Fi Electronic Mouse Trap . This trap kills mice with a powerful electric shock and then it sends a notification to your phone, letting you know it’s time to clean out and reset the trap. This remote monitoring comes at a price and we only recommend it for those who feel they truly need it. We also recommend first checking to make sure you can get a Wi-Fi connection in the places that you may be using the trap. Basements and attics might not be in the range of your Wi-Fi signal.
The Victor M1 consists of two parts that click together. One half houses the electronics, and the other half is the kill chamber. For a mouse to activate the trap, it needs to crawl in the kill chamber and step on two metal plates, which creates the shock. The kill chamber has a series of baffles, so it’s impossible for a person, or even a child, to reach in and touch both metal plates. This makes it a safe trap for kids and pets.
Because the mouse is electrocuted, the cleanup is much less gory than with a snap trap. The kill chamber detaches from the rest of the trap, and the entire top opens as a lid. So for cleanup, just shake the mouse out of the chamber. It’s very easy.

To use the Wi-Fi element of the trap, the Victor app first needs to be downloaded to your device. The app does not have a lot of positive reviews with reports of having trouble connecting to the trap or a lack of notifications. Despite the negative reviews, we tested it and found that it works as advertised. We had no problems with it, but we will keep using it and will report back on any issues. However, we can only recommend this trap for people who have a strong network connection in the place they want to monitor. Basements, attics, and crawl spaces may have a tough time getting good Wi-Fi reception. You can test the signal by taking your phone to that location and connecting to the Wi-Fi. You can also use a laptop, a security camera, or anything else that connects to Wi-Fi.
The Victor M1 currently costs about $45, which is very high compared with the snap traps that we recommend. In nearly all cases, our recommendation is to stick with those basic traps. They’re simple, effective, and inexpensive. At the same time, we understand what it might mean for someone to not have to constantly be going up and down the basement stairs in order to check their mouse traps. The Victor M1 allows for a much more passive mouse trapping experience and one that doesn’t require a great deal of mobility. For those who could really benefit from that aspect of the trap, we recommend The M1, but for the rest, we think you should use snap traps like the Tomcat or Victors we recommend above.
We emailed Victor to confirm that the company only collects basic information with its app, like the email address you sign up with, trap names, and the number of kills on each trap. The app may also collect location information, but the traps work fine without that permission, so we suggest not enabling it unless you run into issues. The company also confirmed it does not share any customer data with third parties, and the minimal data it does collect is encrypted in transit. Since the traps are connected to your Wi-Fi network, we suggest making sure your Wi-Fi settings are secure .

If you have an extremely large infestation (and aren’t yet ready to call a pro), consider the RinneTraps Flip N Slide Bucket Lid Mouse Trap . This trap sits on the top of a 5-gallon bucket (not included) and lures mice to a trapdoor that dumps them in the bucket. The trap then automatically resets itself. If you leave the bucket empty, the mice are caught alive and can be relocated, but if you put a few inches of water in the bucket, the mice will drown. Given our research, we don’t like either of these options, but at the same time, we understand that there may be instances when an infestation is out of control and needs an extreme solution. Woods is a big fan of the RinneTrap, calling it the “ greatest mouse trap ever invented ” and our testing bore the same results: The RinneTrap is capable of catching a lot of mice, all with zero oversight.
But there is no question that this trap will raise an ethical problem for some—you’re either drowning the mouse or you’re releasing it in the wild. Neither of which are very pleasant for the mouse. As we discussed above , releasing a mouse away from its home typically results in death anyway, either by the elements or a predator. And drowning goes against our requisite for a quick, clean kill. But in this instance, the RinneTrap offers something the other traps don’t: The ability to catch mouse after mouse after mouse without any oversight, resetting, or rebaiting of the trap. In just two nights we caught 10 mice in a farm outbuilding. We had snap traps set up in the same room (about two feet away from the RinneTrap), and they remained untouched over the same two nights. In fact, we ultimately had to remove the RinneTrap from the area in order to test the other traps.
The success of the RinneTrap has to do with how it is baited. The bait of choice, in our case peanut butter, is smeared on the underside of a hood piece that is positioned over the trap door. The key is that the trap door opens up with the mouse still about four or five inches away from the bait. So in order to be trapped, the mouse only needs to be interested in the bait, and not engaged with it, like they have to be with a snap trap. Add this to the fact that the RinneTrap resets itself and the next thing you know, you’ve got a bucket full of mice.
The RinneTrap is clearly not for everyone, and some will be repulsed by the idea of either drowning mice or leaving them in unfamiliar territory to be eaten by a fisher cat or a coyote. We think the RinneTrap is going to be most effective at controlling excessive mouse activity. It’s not for a little mouse maintenance here and there. To do something similar with snap traps would require setting up 10 or 20 snap traps, but baiting and positioning those gets tedious and might not even be possible due to space constraints. It also might not be enough. The capabilities of the RinneTrap will grow or reduce with the infestation. It’ll just catch the mice that are present. You don’t need to worry about not setting out enough traps, or wondering if you’re wasting your time by setting out too many.
Woods really likes the RinneTrap and has a video showing it catching 54 mice (and one rat). He said the RinneTrap was “one of the best mouse traps I’ve ever tested out.” There are other designs that incorporate a 5-gallon bucket, but Woods tested three leading competitors against the RinneTrap, and the RinneTrap caught the most mice, by far.
There are a number of imitators of the RinneTrap and Woods warns against them. He tested one of them against the RinneTrap and it did not catch as many mice. He said that it was “full of failures.” So even if a trap looks nearly identical to the RinneTrap, we think you should resist the urge to save a few dollars.
No guide to catching mice would be complete without discussing the most timeless mousetrap of all: a cat. There’s plenty of material online about what cat breeds and dispositions make the best hunters, and exactly how cats sniff out their prey. And there’s no denying the satisfaction of a proud cat bringing you its trophy. But because of the variabilities among cat personalities and their behavior with mice, and the unpredictable reaction from the mice to the presence of a cat, we really can’t recommend a cat as a primary course of action against an infestation. For example: This research was not conducted on mice specifically, but a 2016 study focused on rats found that they hoard more food when they know a predator is near. If mice responded similarly, it could complicate the infestation, with mice leaving their nest infrequently and stockpiling food, leading to odors and bugs. We didn’t strike gold looking for scientific research on domestic cat and mouse behavioral dynamics either, but we found it notable that a 2010 Scripps Research Institute study observed mice that had been bred in a lab for a hundred generations—and have never seen a cat—“reacted fearfully” when they smelled a cat. Scared mice hiding in your walls does not resolve the problem. And if you do have a cat that hunts mice, be aware that they could catch a disease or parasite from their prey.
A lot of the people we talked to told me that they hate using sticky glue traps—flat trays or three-dimensional objects with a glue coating that the mice touch and get stuck to—but that they continue to use them because they’ve been successful when all other types have failed. Glue traps are relatively easy to set, don’t require bait, and are readily available.
But we still chose not to test them. We’ve heard too many stories about mice screaming from inside a trash can, starving to death, and chewing or ripping themselves free. In the latter instances, it’s not even doing the job it’s designed to do, which is to trap the mouse.
To this point, Cornell’s Frye told us that although glue traps do work well for cockroaches and other insects, “according to the research and literature, they’re actually not all that effective against mice.” He said this is because adult mice have “guard hairs” on their paws that can detect differences in texture. So when they feel the stickiness of a glue trap, they’ll avoid it. Because of this, he said, you might catch juvenile mice that haven’t yet developed these hairs, but you’ll rarely catch an adult mouse. Woods is no fan either and has a video titled “ An Honest Look at Sticky Glue Tray Mouse Traps .”
No matter which way you slice it, these traps can’t be considered among the best options available. Our hope is that the techniques described in the rest of this guide will help people get better results with other types of traps—and not feel like they have to resort to glue.
Some household rodent poisons —anticoagulants in particular—work better than others for mice, but none are completely safe to use around young kids and pets and some of the more effective ones aren’t easily available to nonprofessionals. Poison also introduces issues with the disposal of dead mice, which we talk about in the Care and maintenance section, because animals that scavenge their carcasses will get sick. As Frye explains in this video , mice that consume poison often feel sick and can retreat to their nests before dying, creating a smelly problem inside your walls or near your home. Given the wide number of variables involved, and with so many good, affordable trap options available, we didn’t consider poisons for this review.
Frye and Corrigan are both members of a group called the Scientific Coalition of Pest Exclusion , which is dedicated to spreading awareness about how to exclude pests from homes and other buildings, as opposed to straight-up extermination. They have numerous resources to help architects , engineers (PDF) , builders , landlords (PDF) , and homeowners be more proactive about pest exclusion .
If you live in a house or apartment with mice, or that has had mice in the past, the biggest thing you can do to keep them from returning is to seal up gaps , cracks, and holes (the CDC has a good list of places to look for these). There are many ways of doing this, and the right method will depend on the size of the hole. In most cases, for pests, you’ll want to use a sealant (which is different from a sealer) containing siliconized acrylic latex or ethylene copolymers. While caulks pull away from the sides of a hole when they dry, sealants stick to every surface. They last up to three decades, can be painted and cleaned, and will maintain a seal in a wide range of temperatures and other environmental pressures. Caulk will not do this, nor will foam fillers. It’s also harder for mice to chew through a good sealant than a caulk or foam.
If you don’t feel comfortable using a sealant, or if your lease won’t allow it, you can also use steel wool to temporarily plug up holes through which you know mice are traveling. Because it’s made of metal, the mice can’t chew through it.
According to the CDC , it’s also a good idea to store food and pet food in sealed plastic or metal containers, clean up promptly after meals and spills, and keep compost, bird feeders, and animal feed as far away from your home as possible and make sure your trash barrels have secure lids.
Peppermint and essential oils have long been used as a natural mouse repellent . But Frye told us that no rigorous scientific studies have shown that they work. We have friends who swear by Grandpa Gus’s Potent Rodent Repellent —an elixir of peppermint essential oil, cinnamon essential oil, and water—and the Grandpa Gus’s Mouse Repellent pouches , which We were told by the company’s founder are designed to gradually release peppermint and cinnamon essential oils. The oils are supposed to cause a burning sensation in the mice’s nose, eyes, and mouth that won’t harm them but makes them stay away. We appreciate Grandpa Gus’s all-natural approach to exclusion, but after trying out these products myself We’re still not convinced they do anything more than make your home smell like Fireball Whisky and peppermint schnapps. Plus, John Hopkins Children’s Hospital does not recommend using peppermint oil on children less than 30 months old, so there are risks involved if you have young ones around.
Victor has a line of indoor and outdoor scent repellents . Brown said a lot of Victor’s customers don’t buy repellents until they already have an infestation, which she said is too late. “You’re not going to be able to put out a repellent and make them flee their homes,” she said. “We recommend killing, then repelling.” Again, though, there’s no conclusive evidence that these repellents work.
Woods said that no ultrasonic mouse repellent he’s tried has worked at all: “The mice walked right up to it.” Seeing as they cost between $20 to $150, I’m comfortable taking his word for it that the technology is just not there yet on these types of devices.
As Ryan put it to me, “You’re not luring them to the bait, you’re just putting it in their way.” Mice like to go straight from their nest to a known source of food, taking the same path each time without deviating from it. “They travel along walls, they’re not going to run across the kitchen. That’s very unusual for the mouse,” Woodstream’s Bajlovic told us. Knowing this, it’s best to place your traps right along your baseboards, in corners, and near holes and cracks where you’ve seen a mouse coming or going—or near evidence of mouse activity like bite marks and droppings. Baljovic summed up the idea, “mice are on the bottom of the food chain, everything eats them, so the less they can travel the better for them. So if they can find some of that food they have to travel 20 feet to get, but it’s only 10 feet in, they’re likely to engage.”
Placing some traps side by side can sometimes catch mice jumping past a trap, as Frye mentioned in our pick section , and he also suggests buying about six snap traps per mouse to increase your odds of getting a catch.
In terms of the best types of bait, everyone we talked to agreed that peanut butter and Nutella are the best—they’re both aromatic, high in fat and protein, easy to apply to traps, inexpensive, and they don’t dry up and harden as fast as cheese. Bajlovic also mentioned peanut butter and Nutella, but told us that the pros often bait with whatever food the mice have been getting into, “If your mouse is eating your peanuts, you should use those peanuts as bait on your mouse trap. They like it, they're familiar with it, they're going to go after it.”
Although we didn’t try it ourselves, Woods also swears by Tootsie Rolls because you can ball up little pieces of them and stick them to a trap, making the mouse work harder to get it off and (ideally) increasing your likelihood of catching the mouse. He said he also knows people who glue down their bait and traps to make them stay put. Corrigan’s book says you can also bait traps with bits of twine or other materials that you know the mouse has been using to build its nest.
Whatever you use, it’s crucial not to overbait your traps. A pea-size amount will do. Otherwise the mouse will just lick a bunch off the edges, get full, and move on without setting off the trap.
Timing is important too. According to Bajlovic “Your first night is your most important trapping night. You're most likely to catch the most amount of mice on that first night that you set out traps.” Make sure you’re putting out a bunch of traps on this first night.
Woods’s ethos is: “There's a balance between a trap that works really well and how much you want to pay. Obviously there are a lot of traps that work really well, but cost more.” (He said one of the best he’s tested is a $200 trap made by a company in New Zealand that uses a CO 2 canister to kill its prey , à la No Country For Old Men .) In our testing, we were looking for a sweet spot of high efficacy at the lowest price possible—especially keeping in mind that you’re going to need to buy so many of these. Here are the ones that didn’t make the cut.
The Victor Safe-Set Mouse Trap is similar to our main pick and Victor runner-up, but the trigger isn’t as sensitive as the Tomcat’s. We thought the Victor Power-Kill was just as easy to set and is typically a little less expensive. Victor also has a non–Wi-Fi version of its electronic trap, the Victor M250S . It costs around $20, and while it’s cheaper than the Wi-Fi version, it’s still a decent amount to pay, especially considering the snap traps are only a couple dollars each. Still, it’s a good option if you’re concerned about pets and kids.
The Country Porch’s Sliding Tube Mouse Trap (now discontinued) has a simple design —pull the two ends apart, line up the holes, and wedge a piece of solid bait in the hole to prop it open—although it’s a little finicky to set it up. We also found that it was cumbersome to take it apart to wash, and we don’t relish the idea of doing so when there’s a dead mouse attached—the trap is small enough that you’d almost certainly have to touch the mouse. Plus, you can only buy it on The Country Porch’s website and we currently can’t get the website to load.
The Snap-E Mouse Trap has a sturdy plastic body and a strong metal-and-plastic kill bar that produces a fierce snap. It’s easy to set up: You add bait to the circular bait cup, pull back on a metal bar (different from the kill bar, so it’s harder to snap your fingers than with Victor’s Easy Set or Original) and click it into place. We also liked that it’s possible to disarm the trap by nudging the plastic mechanism aside and gently lowering the kill bar, rather than having to set it off with a chopstick. However, this trap was tougher to set than the Tomcat Press 'N Set and has a slightly less sensitive trigger system. We also noticed that after a few uses, the plastic mechanism had slid out of place, which makes me think it would have a short lifespan.
The Intruder The Better Mouse Trap is easy to bait and set, but compared with the Tomcat it has a weak-sauce snap—something that Woods also noted in his video review . We also thought its trigger was less sensitive than other, comparably priced snap traps. We wouldn’t buy it.
Woods told us that in his own home—and the homes of friends and family members who frequently request his services—he usually uses the Made2Catch Easy Use Mouse Trap – Super Sensitive, as well as a newer variation called the Made2Catch Easy Use Mouse Trap – New Generation. Both appear to have been discontinued, but when we originally tested them, we thought they seemed a little flimsier than the Tomcat Press ’N Set, their snap was a little weaker, and we noticed that several of the “teeth” had broken off after just a few detonations.
Before our reporting discouraged us from using no-kill traps, we selected three to test. Of those, the Victor Tin Cat Mouse Trap with Window was the best option, with a sturdy metal box design that mice won’t be able to chew their way out of. And the window lets you see when you’ve caught a mouse, which is imperative for minimizing the animal’s time inside the trap. The Tin Cat costs between $10 to $20 per trap, putting it at a huge disadvantage relative to our pick, but at least it’s sturdier than others of its type. A word of caution: Many no-kill traps can get very hot if left in direct sunlight, and this may be especially true for the Tin Cat.
The Smart Mouse Trap Humane Mouse Trap wasn’t as sturdy as the Tin Cat even though it costs about the same. It’s made entirely of a thin plastic that we wouldn’t expect to survive more than a year of use. It was also kind of a pain to clean peanut butter out of the bait tray. But the trap’s mechanism seems effective enough to trap a single mouse, and the setup and discharge are a breeze. We also liked that it has plenty of breathing holes, which are a must for any no-kill trap.
There are tons of traps online that are identical to the Catcha 2-Piece Humane Smart Mouse Trap . We found that it was decently simple to bait and set, but Ryan told me he didn’t have much luck with it. And although Woods tested a copycat version, you can see in his video that mice can easily enter the trap completely and not set it off. We don’t recommend it.
Variations of the 5-gallon bucket trap are everywhere, but none have the success of the RinneTrap. Many of them have a collapsing gangplank. These don’t cover the top of the bucket, like the RinneTrap does, so they’re not as discreet. As mentioned earlier, Woods tested four popular bucket traps (video) against one another, and the RinneTrap was clearly the most successful.
When disposing of dead mice, or handling live mice, you should absolutely wear gloves—either the disposable kind like we used, or a pair of kitchen or gardening gloves that can be washed. You can also just put a plastic bag over your hand in a pinch. We recommend putting the mouse (and anything else you’re getting rid of, such as a disposable trap or droppings) in a plastic grocery bag (double-bagging is ideal), tying it up, and throwing it in the trash—preferably an outdoor trash can with a lid to fend off predators.
Or if you live in an appropriate spot, return the dead mice to nature. Woods dumps his mouse carcasses outside, far away from his house, and sets up an infrared motion camera to watch the circle of life unfold—skunks, opossums, cats, owls, and more like to feed on mice. He said this is another reason he doesn’t use poisons.
You should always clean up areas where you know mice have been hanging out with diluted bleach or another disinfectant. Ventilate the area first. Between kills, you can rinse traps in warm water (try not to use a perfumey soap, because it might overpower the scent of the bait); we like to get in all the nooks and crannies with a cotton swab. It’s time to throw a mousetrap away when it no longer functions, or when the mechanisms start to rust or degrade. The CDC has more detailed info on cleaning up here .
This article was edited by Harry Sawyers.
Meet your guides

Doug Mahoney
Doug Mahoney is a senior staff writer at Wirecutter covering home improvement. He spent 10 years in high-end construction as a carpenter, foreman, and supervisor. He lives in a very demanding 250-year-old farmhouse and spent four years gutting and rebuilding his previous home. He also raises sheep and has a dairy cow that he milks every morning.

Sarah Witman
Sarah Witman is a senior staff writer who reports on powering and charging technology for Wirecutter. She previously worked as a writer, editor, and fact checker for several science magazines. Though she researches and tests chargers for a living, her phone battery is usually low.
Further reading

The Best Bug-Killing Gear
by Doug Mahoney
Here’s the best gear for killing flies and other common household pests.

The Best Mosquito Control Gear for Your Patio or Yard
Create a bug-free bubble outdoors with these spatial insect repellents.

Bug Control Gear That Actually Works
by Harry Sawyers
Here are the pest repellents and traps that experts agree can effectively keep bugs away.

How to Get Rid of Bedbugs
by Courtney Schley
Bedbugs can get the best of us, but there are steps you can take to beat them.
- Industrial & Scientific
- Occupational Health & Safety Products
- Facility Safety Products
- Emergency Light Sticks
Enjoy fast, free delivery, exclusive deals, and award-winning movies & TV shows with Prime Try Prime and start saving today with fast, free delivery
Amazon Prime includes:
Fast, FREE Delivery is available to Prime members. To join, select "Try Amazon Prime and start saving today with Fast, FREE Delivery" below the Add to Cart button.
- Cardmembers earn 5% Back at Amazon.com with a Prime Credit Card.
- Unlimited Free Two-Day Delivery
- Streaming of thousands of movies and TV shows with limited ads on Prime Video.
- A Kindle book to borrow for free each month - with no due dates
- Listen to over 2 million songs and hundreds of playlists
- Unlimited photo storage with anywhere access
Important: Your credit card will NOT be charged when you start your free trial or if you cancel during the trial period. If you're happy with Amazon Prime, do nothing. At the end of the free trial, your membership will automatically upgrade to a monthly membership.
Return this item for free
Free returns are available for the shipping address you chose. You can return the item for any reason in new and unused condition: no shipping charges
- Go to your orders and start the return
- Select the return method
This item has been tested to certify it can ship safely in its original box or bag to avoid unnecessary packaging. Since 2015, we have reduced the weight of outbound packaging per shipment by 41% on average, that’s over 2 million tons of packaging material.
Image Unavailable

- To view this video download Flash Player

Cyalume Surface Tip Flare, Miltary Grade, 5 Minutes Duration, High Intensity Orange
Purchase options and add-ons.
- REUSABLE PLATE - The re-usable plate, when triggered by a trip wire, activates a 6” ultra high-intensity lightstick.
- SAFE TO USE - It will not start a fire and can be used safely during bans and pyrotechnics.
- COMPATIBLE WITH CYALUME PRODUCTS - Use with Cyalume's patented formulated survival glow sticks
- DURABLE AND RELIABLE - Designed to meet the needs of law enforcement officers, army and military members, hunters, campers, official doomsday preppers, or anyone looking for a reliable emergency glow stick solution.
- RELIABLE AND MAINTENANCE FREE - No batteries needed. Engineered, tested, and manufactured in the United States
Frequently bought together

Similar items that may deliver to you quickly

From the manufacturer

Looking for specific info?
Product information, technical details, additional information, warranty & support, product description.
Cyalume surface trip flare. Proven by the U.S. military, the surface trip flare is safe for use in any environment, under any conditions. When triggered by a trip wire, it activates a 6-inches chemlight lightstick. Recommended by swat teams for maximum flexibility during nighttime operations. Non-flammable and non-toxic; it will not start a fire like a pyrotechnic trip flare. Ideal for nighttime intrusion spotting for any security observation post. The surface trip flare is reusable; just insert a new chemlight and it's ready to use again. An ultra-high-intensity lightstick is recommended for use with this unit. Each surface trip flare includes one ultra high-intensity chemlight, trip cord, and mounting hardware for any surface.
Compare with similar items
Customer reviews.
Customer Reviews, including Product Star Ratings help customers to learn more about the product and decide whether it is the right product for them.
To calculate the overall star rating and percentage breakdown by star, we don’t use a simple average. Instead, our system considers things like how recent a review is and if the reviewer bought the item on Amazon. It also analyzed reviews to verify trustworthiness.
Customers say
Customers like the appearance and performance of the device. They mention it's an interesting design and works great. Some say it works fantastic for camp security, marking hunting trails, and home security.
AI-generated from the text of customer reviews
Customers are satisfied with the appearance of the product. They mention it has an interesting design and is cool.
"...if you have to go there, then you better have these... This item is so cool . it even comes with a black 100 foot trip wire...." Read more
"This device is an interesting design and it works perfectly...." Read more
" Very cool looking product , it can be used as a Security device when you're camping or maybe while your playing war games - air soft" Read more
Customers are satisfied with the performance of the product. They mention that it works great, and is fantastic for camp security, marking hunting trails, and home security.
"This thing is great! Works fantastic for camp security , marking hunting trail, home security, and can be used with other things besides glow sticks..." Read more
"This device is an interesting design and it works perfectly ...." Read more
" Worked great and you can see it from miles away. I would recommend this to anyone needing a trip flare." Read more
- Sort reviews by Top reviews Most recent Top reviews
Top reviews from the United States
There was a problem filtering reviews right now. please try again later..

Top reviews from other countries
- Amazon Newsletter
- About Amazon
- Accessibility
- Sustainability
- Press Center
- Investor Relations
- Amazon Devices
- Amazon Science
- Sell on Amazon
- Sell apps on Amazon
- Supply to Amazon
- Protect & Build Your Brand
- Become an Affiliate
- Become a Delivery Driver
- Start a Package Delivery Business
- Advertise Your Products
- Self-Publish with Us
- Become an Amazon Hub Partner
- › See More Ways to Make Money
- Amazon Visa
- Amazon Store Card
- Amazon Secured Card
- Amazon Business Card
- Shop with Points
- Credit Card Marketplace
- Reload Your Balance
- Amazon Currency Converter
- Your Account
- Your Orders
- Shipping Rates & Policies
- Amazon Prime
- Returns & Replacements
- Manage Your Content and Devices
- Recalls and Product Safety Alerts
- Conditions of Use
- Privacy Notice
- Consumer Health Data Privacy Disclosure
- Your Ads Privacy Choices
Free Shipping Over $99
- Primers & Blanks Trip Alarms
- Intruder Buster Trip Alarm
- Tripwire & Accessories
- Infrared Trip Alarm
- Flash Bangs & Blanks
- Tweaker Pepper Spray
- Foam Fire Suppressor
- Questions? (888) 878-6637
Your Cart is Empty
- $0.00 Subtotal
Taxes and shipping calculated at checkout
Fith Ops™ Perimeter Camp Safe™ Trip Alarm - 12 Gauge OD Green 6061 Aluminum USA-Made
- Money Back Guarantee
- Ships Within 1 Business Day
🚚 Ships to all 50 states
Great reasons to buy from us:

FithOps™ Camp Safe™ 12 Gauge Perimeter Trip Alarm*
Our newest, updated version of our 12 gauge perimeter trip alarm. Made of 6061 Aluminum, this unit utilizes a spring-loaded firing mechanism and a trip trigger. When the trigger pin is disturbed while loaded with a 12 gauge Flash Bang/Training Blank, the unit will discharge. This device is compatible with blanks, adapters, flares and pepper gas depending on situation and requirement.
UPC : 861209002659
WARNING: For outdoor use only. Keep away from flammable materials. NEVER USE LIVE AMMO.
- PLEASE NOTE: We are not able to ship Internationally. Your order will be automatically deleted and refunded.
* Flash Bang Not Included
Customer reviews.
The product is good to go. Works as supposed to. What did suck, is on the day of delivery of the perimeter trip alarm. I received a promotional email about buying 2 perimeter trip alarms, and they’ll give 1 for free. I bought four, and tried to contact the company to no response. Now I am being asked to do a review.
I recently purchased a few of these for use around camp. I have set up and practiced using them with shotshell 209 primers only. They fire each and every time the trip cord is pulled. These are very nice to have. I chose not to purchase the shotshell primer adapters due to being 19.99 each. I would have to buy 4 of them for use in the 4 I purchased. I made my own adapters with spent shotshells that work very well. These campsafe perimeter alarms are a great product.
The trip alarm is well made and easy to use. I like the way the attachment options are designed into the housing. I'm very impressed with the product.
Keeps the deer away. That’s its main purpose on the farm.
This website uses cookies to ensure you get the best experience on our website. Privacy Policy
IMAGES
VIDEO
COMMENTS
2. Mousetrap and Pistol Primers Method. This one is incredibly simple: Just prime your mousetrap and set your pistol primers on the trap, positioned so that they will go off when they come into contact with the spring. Wrap a tripwire around the spring and, when it's pulled, the spring will launch forward and strike the primers.
The mousetrap trip wire is armed and ready. The best type of string to use is fishing line because it is so hard to see and easy to attach. Tie one side to loop on the holding bar and the other side to something sturdy. As someone's foot contacts the fishing line, the bar is pulled and the mouse trap will sound off.
1. Gather your materials. You'll need fishing line, a mouse trap, ring caps, tent pegs, nails, screws, and rubber bands. [1] 2. Screw the mousetrap to the tent peg. Use a drill to screw through the mousetrap onto the top half of the tent peg. Use a screwdriver and wood screws to screw them together. [2]
Google+ https://plus.google.com/+MrGearOfficial-----Hi, there, my dear friends! In this video I will show you an interestin...
So, for this low-tech and highly effective DIY project, you'll require the following materials: a mouse trap. fishing line. tent pegs. ring caps. screws. nails. rubber bands. This type of tripwire alarm is the ideal solution for securing outdoors objectives, such as the perimeter of your home or a camp site.
Remove the holding bar from the u-shaped nail on the mousetrap, then cut away the curved portion. After that, remove the bait holder catch. Place some small nails in line with where the hammer ...
Make sure each one is slightly raised above the base of the trap so that caps can rest on them once the trap is set. Setting the Trap. Place the trap into the ground and tie one end of the fishing line to the bracket through the hole you made in the previous step. Pull the line across the width of the perimeter that you are trying to protect ...
How To Make Simple AirSoft TRIP - WIRE ALARM with MOUSE TRAP#howtomake #diy #airsoft #tripwire #alarm #mousetrapFollow: https://plus.google.com/u//b/1154159...
Step 1: Mousetrap. This design is based around a normal mousetrap. I had a few lying around the house, but they had all been cannibalized at one point or another for various projects, so the best I had was this one without most of its triggering mechanism. This is not terribly important; a simple method for setting it off will be shown later.
4 Different Awesome Alarm Using Mouse Trap - Airsoft TRIP-WIRE#HowToMake #Tripwire #Airsoft #Alarm #mousetrap #homemade.Follow: https://plus.google.com/u//b...
Step 1: Machining (hole Drilling) There are 3 holes to be drilled. Drill an 1/4 inch hole through the center of the plug. Drill an 9/64 hole through the 1/4-20 bolt to secure the striker, the location is found by assembling the spring on the bolt and inserting it into the plug and then while holding in a vise with the spring fully compressed ...
The DIY Trip wires. 1. Bungee Marbles. The advantage of a bungee cord as a trip wire is its springiness. Think of it as a rubber band on steroids. In fact, the interior of a bungee cord is just that. Long strands of rubber encased in a flexible fabric braid. You can attach anything that makes noise to a bungee cord.
As a former 18-B, I learned just about everything there is to know at one time or another about 'booby traps' and perimeter security, and it did save our drunk and tired-ass lives on at least a couple occasions. They used to make something similar a long time ago that fired an off sized 12 Ga. round on a pull pin trip wire.
Got this idea from watching Kipkay's "Trip Wire Bang Alarm" video. Works great, nice and loud and easy to hide!As a side note, the trap is normally enclosed ...
To ensure the desired results, consider lining the bucket with a layer of oil or grease. An inch or so below the rim of the bucket, drill two holes, one directly across from the other. STEP 3 ...
The Best Mousetrap. After further research and testing, we're now recommending the Victor M393 Power-Kill Mouse Trap, the Victor M1 Smart-Kill Wi-Fi Electronic Mouse Trap, and the RinneTraps ...
Hi, there, my dear friends! In this video I will show you an interesting idea how to turn an ordinary mouse trap and gunpowder caps into an alarm device.plea...
REUSABLE PLATE - The re-usable plate, when triggered by a trip wire, activates a 6" ultra high-intensity lightstick. SAFE TO USE - It will not start a fire and can be used safely during bans and pyrotechnics. ... This item is so cool. it even comes with a black 100 foot trip wire. better than thread and mouse traps~!!!
DEFEND YOUR PERIMETER! Make cheap, functional trip wire intruder alerts. see the alert in action: https://www.youtube.com/watch?v=uDT7Kk3sSAs
Our newest, updated version of our 12 gauge perimeter trip alarm. Made of 6061 Aluminum, this unit utilizes a spring-loaded firing mechanism and a trip trigger. When the trigger pin is disturbed while loaded with a 12 gauge Flash Bang/Training Blank, the unit will discharge. This device is compatible with blanks, adapters, flares and pepper gas ...
This is a new and improved version of the trap shown in my previous video, "How to Build a Trip Wire Snare". Enjoy. #NightHawkInLight-~-~~-~~~-~~-~-Check out...
Sensible Prepper Presents: Mouse Trap Projects for SHTF. Using household items in various ways can save money and get's you to improvise. Here are some uses ...
I give a review to a trip wire boobytrap I bought on Gunbroker. It can fire flares, blanks and pepper gas shells. perfect for protecting the perimeter!