Quick Search
Advanced Search
- Magazine Home
- Video Game News
- Strategy Guides
- Walkthroughs
- Conventions & Events

Featured Articles
- The Monsters of the Wailing Prison
- Strider Review
- BioShock Dev Irrational Fires All But 15 Employees
- New Titanfall Maps Confirmed
- There Are Aliens In Titanfall
- Guide: How to Dominate The Elder Scrolls Online PvP
- The Elder Scrolls Online PvP Experience
- Get Glow-in-the-Dark Condoms For Pre-Ordering InFamous: Second Son
- Batman: Arkham Origins Devs Have No Intention To Fix Bugs - Working On DLC Instead
- 8 Exclusive ESO Screenshots
Subscribe via RSS
Skyrim Dawnguard Walkthrough: Fort Dawnguard Location
- Written By: GameShampoo Staff
- Categorized in: Strategy Guides , Walkthroughs
After you have started Dawnguard , your objective in this first quest is to speak to the leader of the Dawnguards. Fast travel to Riften, which is the closest city to Fort Dawnguard. Open your map and locate the points of interest. Fort Dawnguard is directly to the east of Riften, however a big mountain range stands between your location and the fort.
There should be a quest marker to the southeast of Riften, which is where you will head to. If you do not see the marker on the map, open your journal and make sure the quest "Dawnguard" is active.
If you have a horse (or don't mind buying/stealing one), the trip will be faster. Either way, you will be going around the mountains from the southwest side (see map below). Most of the way will be on the paved road. You will cross Snow-Shod Farm, and once you have cleared the mountains to the south, you will turn east. Again, the map below will show you the exact route to take.
The way to Fort Dawnguard passes through Dayspring Canyon. The entrance to the canyon is through a cave due north of the marker. When you approach the quest marker, go north. Don't climb up the mountain, but go down into the valley. You should soon see the entrance to Dayspring Canyon.
Go through the cave and meet Agmaer, who is also on his way to join the Dawnguards. He will ask to accompany you. Follow him on the road, which will take you all the way to Fort Dawnguard. Once you reach the fort, enter and speak to Isran, the guild leader.
In the next part of the walkthrough, we will travel to Dimhollow Crypt .
Comments (0)
- Change your comment display settings
New comments are currently disabled.
All trademarks and copyrights are the property of their respective owners. Contact Us
For all advertising inquiries Email: [email protected]
Fort Dawnguard
- Edit source
- View history
Fort Dawnguard is a location in The Elder Scrolls V: Dawnguard . It serves as the headquarters of the Dawnguard , an order of vampire hunters. The fort can only be accessed via Dayspring Canyon north of Stendarr's Beacon . It is located in the Rift , hidden deep within the Velothi Mountains near the Morrowind border.
- 1.1 Disbandment and disrepair
- 1.2 Restoration
- 2 Architecture
- 3.1 Main lobby
- 3.2 Dining area
- 3.3 Crafting area
- 3.4 Sleeping quarters
- 3.5 Training area
- 3.6 Dead Drop Falls
- 3.7 Master bedroom
- 3.8 Torture room
- 3.9 Rooftop
- 5.1 Outdoors
- 7 Appearances
- 8 References
History [ ]
The fort dates back to at least the Second Era , when it was built by the Jarl of Riften . The Jarl's son, through his overly confident and adventurous pursuits, contracted vampirism . The Jarl refused to kill his own son, so instead commissioned the construction of the fort and contracted a large mercenary force, named the "Dawnguard," in order to keep his son quarantined.
Disbandment and disrepair [ ]
Historical accounts vary on the years that followed. Some believe the Dawnguard were forced to put down the Jarl's son, in doing so they were banished from the hold and officially disbanded. They later continued their work as vampire hunters, until they broke up, as people increasingly disregarded the threat of vampires, weakening the power of the Dawnguard. [1] Other accounts claim that the Dawnguard, seeing the immense power that being a vampire gave, decided to become vampires themselves. They were said to have preyed on the people of the Rift until they were hunted down. [2]
Either way, the fort fell into a state of disrepair and was eventually abandoned.
Restoration [ ]
In the Fourth Era , Isran came to the fort and repaired it with hopes of reforming the Dawnguard. Soon after in 4E 201 , the Volkihar Clan destroyed the Hall of the Vigilant and killed numerous Vigilants of Stendarr , including Keeper Carcette . In opposition to these vampires, the new Dawnguard would continue to grow, occupying the fort as their permanent base.
Architecture [ ]

Internally, Fort Dawnguard features castle-like architecture in a state of disrepair.
Fort Dawnguard has the appearance of a large castle with several towers. The masonry work inside the fort is not only very precise but the stone surfaces have the appearance of a slight shine to them. The tall arched hallways are supported by huge, decorative rectangular pillars. The inside of the fort itself has an arched theme to it, from the ceiling to the blind arches on the walls.
Interior [ ]
Main lobby [ ].

The main lobby is a large circular area littered with barrels and crates. Eight banners adorn the walls displaying the symbol of the Dawnguard. The floor consists of weathered cobblestone and decorative slabs that line the edges of two curved iron grates. Straight ahead is a hallway that leads to all the major ground floor rooms in the fort. When standing in the middle of the circle facing away from the main entrance, the second floor is to the right, the small balcony is another right. The large balcony is to the left, and left again.
Dining area [ ]

The dining area.
To the west is the main dining area. The rectangular room is littered with general clutter and barrels of food. A grand fireplace decorated with banners and animal skulls sits to the side of the large dining table. Two cooking spits are available for use. Adjacent to the fireplace are two shelving units containing general silverware. Behind the shelving is a storage area of sorts. Barrels, bags and crates line the walls, along with several bales of hay and two disused kegs covered in cobwebs. A map of Skyrim is on a desk by a small table in a side room.
Crafting area [ ]
The crafting facilities are further west. To the left is a small room with an arcane enchanter and alchemy lab . The shelves contain some basic ingredients and potions, along with several animal skulls . Adjacent is a fully fitted smithy, including a forge , grindstone and workbench . A smelter and tanning rack are on the lower level. The forge, arcane enchanter and alchemy lab will only be available if the Dawnguard are joined and the quests " A New Order " and " Bolstering the Ranks " have been completed.
Heading past the smithy, the fort opens up into a large cave. Opposite the smelter is a small wooden pen built against the cave wall where Gunmar keeps his armored trolls . To the south are two archery targets. Heading back west along the main hallway leads to the sleeping quarters.
Sleeping quarters [ ]
The large square room features a dining table and another grand fireplace. Animal hide rugs line the floors and the walls are adorned with several mounted deer and bear heads. There are four cots on the western side of the room, and five cots on the opposite side. Shelving units on the western wall hold pieces of Dawnguard armor and weapons. Most members of the Dawnguard sleep here, aside from Isran, who sleeps upstairs, and Mogrul, who patrols the interior and rooftops of the fort.
Training area [ ]

A view of one of the inner halls.
Heading further west, the fort walls again end and open up into a large cave. This section is used as a training area and three training dummies are on a wooden platform against the north wall. In addition, a small dog pen is in the far corner, holding Sceolang and Bran . This cavern also leads to Dead Drop Falls. Beleval and Ingjard can be found here during the day training on the dummies.
Dead Drop Falls [ ]
Dead Drop Falls is a series of caves that run deep into the mountains.
Master bedroom [ ]
This room is on the second floor and is cluttered with boxes, barrels, and sacks. The room has a pillar in the middle, and contains a cot, a table, and a shelf. As the Dragonborn progresses through the Dawnguard storyline this room is upgraded into a master bedroom. The cot is replaced with a bed, then four wardrobes and a mannequin are added complete with Dawnguard armor. Dawnguard banners, candles, rugs, and mounts with wolf and moose heads decorate the room. A weapon rack is added, and there are two troughs which hold weapons and ingredients. Five steel ingots and two bolt quivers are also in the room for the taking.
Torture room [ ]

The torture room.
A blood-splattered room up on the second floor. There are various torture devices in the room, along with blood and bones everywhere. Human skulls sit on two shelves while eight deer skulls are mounted on the wall. There is plenty of Nord mead on the wall and some iron ingots as well. On the table, there are several torture tools, as well as a single septim. Large cobwebs hang from the ceiling as with much of the rest of the fort.
Rooftop [ ]
There are three sets of stairs that lead to different parts of the roof. Two sets of stairs each open to a small circular battlement with two bedrolls and a chest. There are two weapon racks parallel to each other on each rooftop. On the rooftop nearest to Dead Drop Falls, there is a copy of The Lusty Argonian Maid , a Dawnguard helmet , and a pair of Dawnguard gauntlets . On the rooftop nearest to the entrance and the stairs to the second floor, there is a copy of The Talos Mistake and an Amulet of Talos sitting on two barrels. Beside one of the bedrolls, the skill book 2920, vol 01 - Morning Star is located. The third set of stairs goes to a part of the roof that is significantly larger. On this rooftop there are five weapon racks, two chests, a tanning rack and a grindstone. There is also a table with two chairs, a bedroll, a Dawnguard shield , and a pair of Dawnguard boots .
Exterior [ ]
Initially, fast traveling to the fort places the Dragonborn some distance from the building itself, around where they met up with Agmaer . Following the Dragonborn's decision at the end of " Bloodline ," where they chose to side with Isran and the Dawnguard , returning to the fort over the course of the following quests " A New Order " and " Prophet " sees the path leading up to the fort's main doors fortified with several sturdy wooden walls, each one guarded by a Dawnguard member, and the fast travel point bumped up to just outside the main doors. After the fortifications are done, a group of refugees set up camp at the base of the path leading to the main doors.
Characters [ ]

- Agmaer – A Nord male recruit. Potential follower .
- Beleval – A Bosmeri female vampire hunter. Potential follower.
- Bran – A war-dog and potential follower. Can be recruited after completing " Bloodline " and siding with the Dawnguard.
- Celann – An old associate of Isran and seasoned veteran. Potential follower.
- Durak – An Orcish male vampire hunter. Potential follower.
- Florentius Baenius – Resident alchemist and master Restoration trainer . Appears after the quest " Bolstering the Ranks ."
- Gunmar – Dawnguard's blacksmith and master Smithing trainer. Appears after the quest " A New Order ."
- Ingjard – A Nord female vampire hunter. Potential follower.
- Isran – Leader of the Dawnguard and Heavy Armor master trainer.
- Mogrul – An Orcish male vampire hunter.
- Sceolang – A war dog and potential follower. Can be recruited after completing " Bloodline " and siding with the Dawnguard.
- Sorine Jurard – general goods merchant and master Archery trainer. Appears after the quest " A New Order ."
Outdoors [ ]
The following members can be found scouting the outer walls in Dayspring Canyon:
- Ollrod – A Nord male vampire hunter.
- Tilde – A Nord female vampire hunter.
- Vori – A Nord female vampire hunter.
- PC The alchemy lab will fail to install into Fort Dawnguard, with only barrels appearing where the lab should be, severely reducing Fort Dawnguard's capabilities.
- 360 (Fix) Solution: Reloading the game fixes this issue.
- 360 A large, vital section of the Dead Drop Falls area of the fort may not load, thus turning the path into a large, unloaded physical and visual drop off.
- 360 The game may freeze when new quests are accepted in the foyer.
- 360 (Fix) Solution: Loading an earlier save should fix the problem.
- PC (Fix) Partial solution: if returning there as a quest directive, bringing up the journal and using "Show On Map" works.
- PC (Fix) Holding the right mouse button and dragging the map to change the map's angle of vision may make Fort Dawnguard's location visible on the map.
Appearances [ ]
- The Elder Scrolls V: Dawnguard
References [ ]
- ↑ Dialogue with Isran
- ↑ Dialogue with Sorine Jurard
- Elder Scrolls
- 1 Marriage (Skyrim)
- 2 Console Commands (Skyrim)
- 3 Trainers (Skyrim)
- The Elder Scrolls V: Skyrim Special Edition Achievements
- The Elder Scrolls V: Skyrim Special Edition News
- Walkthrough *
12. The Elder Scrolls V: Skyrim Special Edition Dawnguard
The Dawnguard are a group of vampire hunters living in a very large fortress near Riften known simply as 'Fort Dawnguard'. This faction is at war with another large group, a faction of vampires from the north of Haafingar known as the 'Volkihar Vampire Clan'. Much like the Civil War you can become a part of this conflict and be instrumental in resolving it. Alike to the Civil War you must choose which side to join and remain loyal to them. All related achievements can be unlocked in one playthrough regardless of which side you choose.
There are '5' achievements involved with the main Dawnguard questline; three for completing all of the major quests for either faction, one for learning all three words of the 'Soul Tear' Shout and one just for using a powerful new weapon called 'Auriel's Bow' once.
Note: Random vampire attacks do not occur in the Special Edition version of Skyrim so there is no need to prioritise this questline, in fact because of the subsequent enemy faction attacks that do occur after choosing your side in this conflict I would recommend leaving it for later.
Finding the Dawnguard
Once you reach character level 10 you will be sought out by the Orc ranger 'Durak', he is a representative of the Dawnguard, and he asks you to join their cause and visit the leader of the Dawnguard.
> Your quest marker will point you to a small unmarked cave near Riften that leads you to 'Fort Dawnguard'.
The quest marker may be glitched, to help it point to the right place deactivate the Dawnguard quest in your journal, fast-travel to Riften Stables or the Black-Briar Lodge then reactivate the quest.
> Find the main road leading east from Riften and look for the entrance to the 'Dayspring Canyon'.
Warning: If you still have Lycanthropy there is a small chance that members of the Dawnguard will attack you on site. Either cure your Lycanthropy (after unlocking the werewolf mastered achievement of course) or just reload a previous save.
> Once inside SAVE, make your way towards the fort, after you discover Fort Dawnguard look to the left to see Durak practicing his crossbow skills. If you ask him about the weapon he's using, he will give you a crossbow and some bolts for free. Move on towards the entrance to the keep and a Breton Vampire Hunter named 'Celann' will think you're a fresh recruit and welcome you inside.
> Go inside and you'll find the Dawnguard leader 'Isran' talking with a Vigilant of Stendarr named 'Tolan', they refer to the Vigilants being attacked and the death of 'Keeper Carcette'. After some dialogue Isran will task you with finding out about an important vampire artifact in 'Dimhollow Crypt. Tolan will offer to help and say that he'll meet you there, SAVE.
There is a potential bug here that causes Isran not to talk to you, or the next quest failing to start. The only known fix is to reload a previous save.
This concludes the Dawnguard quest and immediately initiates the next quest 'Awakening'.
> Head outside and look for Dimhollow Crypt on your map, it's located northeast of Morthal, a little west of the Lord Stone, fast-travel out to your nearest location, most likely your Windstad Manor house, or Fort Fellhammer.
> Once inside Dimhollow Crypt SAVE, sneak forward to find two vampires talking and a death hound guarding the gate. Kill them and you may notice poor Tolan's dead body on the ground next to a couple of dead vampires, it seems that he took them out before he fell. Find the small tower in southwest corner and go up to pull the chain at the window to open the gate to the northeast.
> Move through and take care of the single leveled vampire and some skeletons. Use the lever to the right of the western gateway to open it and move through. Take a right and head north, you'll find a vampire and death hound battling with some draugr. Either let them weaken each other first or just wade in and attack, or sneak past them. SAVE.
> Use the chain on the side of the door to the west, open it, move through and SAVE. Proceed on to a waterlogged room. Kill the skeletons, the vampire and any death hounds and frostbite spiders before moving up and through into the crypts.
> You'll be attacked by another vampire and some death hounds before reaching a closed gate with a high level vampire fighting a wounded frostbite spider behind it. Use the lever to the left to open the gate and finish off the survivor. Then proceed through the door into 'Dimhollow Cavern'.
> Once inside SAVE, you'll find a vampire named 'Lokil' interrogating 'Vigilant Adalvald', he'll kill Adalvald before you can intervene and the vampires below will continue talking. Meanwhile sneak down the right side and towards the centre structure.
> Kill Lokil and the other two vampires here then SAVE, activate the button in the centre and your hand will be skewered.

The light will shine through to the next groove to the east, this time push the brazier inwards. The line will shine again to the groove to the north, push the brazier in towards it to connect it up. Then again, to the northwest, push this brazier outwards, and the final one needs to be push inwards.
> Observe as the ground lowers and reveals a stone monolith, activate the monolith to release a 'Mysterious Woman' inside. Talking to her reveals that, although she is a vampire, she may be able to help you with something greater than a mere vampire threat. Talking with her further reveals that her name is 'Serana' and she was imprisoned here a very, very long time ago, and she will reveal more if you take her to her home.
As a possible glitch; Serana will not talk, reloading a previous save is the only known fix.
Complete "Awakening"
> Serana becomes a follower at this point, SAVE and find the small stone bridge to the northeast. You'll be introduced to a new enemy called 'Gargoyles' here.
Gargoyles don't have any particular weaknesses and they are immune to paralysis and poisons. Destroy them, then proceed up the ledge to the southeast.
> Go through the wooden door and through some tunnels. You'll come to an open room, climb the steps ahead and then look to your right to find a lever in the middle of a circle, activating it will unleash some draugr and open a gate to the north.
> Take out the draugr and move through the gate, you'll come to a large arena-type room, SAVE. Go down and you'll face multiple skeletons, draugr and a high leveled draugr, possibly even a Dragon Priest. Kill them all and approach the Word Wall to the northeast to learn a word from the 'Drain Vitality' Shout.
> Now find the iron door atop the main stairs to the north and go through, pull the chain to the right of the closed gate to open it and move through out into the open world.
> Once outside SAVE, your next destination is 'Castle Volkihar', found to the west of Solitude, but in order to get there the first time you have to reach the 'Ice Water Jetty'. Your map marker will show you where this is, fast-travel to the nearest location and make your way there on foot.
> Activate the small boat there in order to reach the castle, once at the castle SAVE. Cross the bridge, Serana will thank you for taking her this far, but she urges you to stay your hand in the castle and be calm. The 'Watchman' will recognise Serana and open the gate for you. Move inside and enter the castle.
It's possible that the Watchman may not see Serana and just keep repeating that ' you're not welcome here ' this can be fixed either by reloading a previous save, or fast-travelling away then returning via the jetty again and making sure Serana engages you in conversation halfway across the bridge.
> Once inside, and before moving forward make a very important SAVE. A vampire named 'Vingalmo' will greet you and he'll soon turn and announce Serana's return to her father and everyone else in the hall below.
> Now, proceeding down will result in a conversation with 'Lord Harkon', a very powerful vampire lord. Once you have started this conversation you cannot withdraw without losing the opportunity to join the vampires. You must make your choice now; either remain loyal to the Dawnguard and refuse Harkon, or accept his 'gift' and you will be made into a vampire lord.
Do not worry about the 'vampire mastered' achievement or any other achievement, if you decide to remain with the Dawnguard Serana will give you the gift of the vampire lord ability in a few quests time, and you can still complete the Dawnguard quests and all achievements regardless of which side you join. Once you make your choice however, you are bound to that side of the conflict for good.
Note: If you are still a werewolf; siding with Lord Harkon will cure you, and the only way to become a werewolf a second time is to talk to 'Aela the Huntress' in the Jorrvaskr in Whiterun. Make sure you either have the 'werewolf mastered' achievement unlocked, the option for a second chance from Aela, or that you are siding with the Dawnguard before continuing.
Each side is about the same in terms of quest length and difficulty (Dawnguard has a slightly shorter first quest), you can be a vampire lord on both sides and you will also have full access to 'Auriel's Bow' and the 'Summon Durnehviir' and 'Soul Tear' Shouts on both sides. Both Fort Dawnguard and Castle Volkihar have almost equal facilities such as safe storage, alchemy lab, arcane enchanter, and smithing utilities. You will gain Serana as a follow on both sides and have access to all the same loot at the end.
However, each side has the following differences:
Remaining with the Dawnguard
Advantages:
- The ability to smith crossbows and bolts.
- Access to five Dawnguard followers.
- The ability to buy 'Armoured Trolls' to accompany you.
- Side-quests offering the unique 'Dawnguard Rune Hammer, Shield and Axe'.
- You can sell the Elder Scrolls to Dexion for 6,000 gold.
Disadvantages:
- You will be randomly attacked by leveled vampires, but only during eclipses.
- You will be randomly hunted down by a 'Vampire Assassin' with a writ for your death.
- You will be limited to how much you can increase your vampire lord potential.
Siding with Lord Harkon
- Side-quests offering exclusive and incredible enhancements to the vampire lord ability.
- You will be attacked by Dawnguard Scouts whenever you visit Castle Volkihar.
- Random Dawnguard Vampire Hunter attacks will become a common event wherever you go.
To be honest, the best way to decide is simply to ask yourself; do you want to be a more powerful human, or a more powerful vampire?
Make your choice and then please follow the relevant questline below.
Staying loyal to the Dawnguard
> If you actively refuse Lord Harkon by saying ' I don't want to become a vampire ', or if you take too long to answer, he will cast you out of the castle and you'll find yourself back out on the jetty.
This concludes the quest 'Bloodline' and initiates the Dawnguard-specific quest; 'A New Order', make sure it's activated it in your journal.
A New Order
> Fast-travel back to Fort Dawnguard and SAVE, make your way to the fort where you'll be attacked by some vampires, kill them then find Isran and speak to him. Tell him about Serana and the Elder Scroll, he'll be worried and now he feels the need to recruit some new help. It becomes your task to find this new help: a Breton Master Thief named 'Sorine Jurard' and a Nord Master Blacksmith named 'Gunmar'.
> Firstly find Gunmar, he can be found at any one of nine randomly selected locations in Skyrim or Solstheim.
> Fast-travel out to the nearest location you can to his marker and you'll usually find him in sneak mode hunting a bear. Talk to him, he needs help with the bears in a nearby cave before he'll agree to help you.
> Head towards the cave and kill any hostile creatures outside before entering the cave itself. Once inside SAVE, help Gunmar kill all the bears inside the cave then talk to him and tell him to go to Fort Dawnguard.
> Next track down Sorine, she can be found looking for Dwemer artifacts at a set location north-northwest of Karthwasten, just south of Mor Khazgur. Fast-travel to her nearest location, find her and talk to her.
> After some explanation Sorine agrees to help, but she requires at least one 'Dwarven Gyro' before she leaves. Either use your speech skill to convince her or give her a gyro. If you happen to have one on your person you will hand it to her automatically, otherwise locate her lost satchel just down by the river to your southeast, take at least one gyro from it and give it to Sorine.
> Now return to Fort Dawnguard, once there SAVE and find Isran, he will be inside the fort on a balcony above Sorine and Gunmar. Isran will make sure none of you are vampires then give some orders.
This concludes the quest A New Order and automatically begins the next quest 'Prophet'.
Dismiss any followers you might have now.
> Be sure to activate this quest in your journal. After Isran's speech, he drops the gate in front of you but use the spiral staircase to the east to reach him and speak to him.
Due to a possible glitch, Sorine, Gunmar and Isran can become stuck in a 'busy' state after his speech. To fix it go outside, wait 24 hours then return and go up the staircase.
> Ask Isran what you can do to help, he'll give you a couple of side tasks then follow him as he walks around the corner.
You'll find Serana has come to the fort and wishes to speak with you. Listen to her as she reveals her father's sinister plot to use an Elder Scroll to destroy the Sun itself. This is too far, even by vampire standards, and she wants your help to stop him. Now speak again with Isran, he is not pleased about working with a vampire but he'll tolerate her, for now.
Talk back with Serana, she explains that although she has the Elder Scroll with her, neither she, nor anyone else she knows of, can actually read it. This moves you on to the task of finding a 'Moth Priest', to read the scroll.
Serana will become a follower at this point, now leave the fort via the spiral staircase again. Your next objective is to ask around Skyrim about Moth Priests. The easiest thing to do is fast-travel to the College of Winterhold. If you have never been to the college before, either speak to carriage drivers outside of main cities or see the beginning of the College of Winterhold page to find out how to gain entry.
> Enter the college and SAVE, don't follow the quest marker, use the door to your right instead, enter the 'Arcanaeum' and speak to the Orc librarian 'Urag gro-Shub'. Urag will inform you that there is indeed a Moth Priest in Skyrim, he recently visited the college then left for 'Dragon Bridge'. Dragon Bridge is found to the southwest of Solitude, just south of the Statue to Meridia, head out there now.
> Once at Dragon Bridge SAVE immediately, you could be attacked by multiple vampires here and some of the townspeople may be killed, if you care about their survival, kill the vampires then check for any bodies or ash piles, if any named characters have died, reload the save.
> Find the only child in town, he's called 'Clinton Lylvieve', he will reveal that an old man has just left town heading south across the bridge. If Clinton will not reveal the information due to a glitch , or if you have already adopted him, just proceed on over the bridge anyway.
> Run across the bridge to the south and down the road to find a broken down carriage. Search the dead body of the vampire to find a note, read it to reveal that the priest has been taken to a nearby ruin called 'Forebears' Holdout', head there now on foot.
> Forebear's Holdout is just to the east, SAVE and keep this save until you leave the cave. Enter, move in and turn left, kill a couple of death hounds then go around to find a short tunnel into an enclosed area with a fire. Kill the vampire thralls here then sneak up either staircase to approach the blue light.
> If you're not noticed, you'll overhear a vampire called 'Malkus' talking to another vampire. Kill them and search the corpse of 'Malkus' to find the 'Weystone Focus' from his body.
You should see the Moth Priest 'Dexion Evicus' inside the magical barrier, due to a possible glitch he may be outside of the barrier. If you manage to speak to him before dropping the barrier, he will be permanently hostile to everyone; you can use Bend Will Shout if you have it to calm him down and then proceed as normal. Or you can try reloading the previous save outside of the cave then repeat the sequence to see if he is now inside. Alternatively you can try killing the vampires around the barrier then talking to Dexion and sending him to Fort Dawnguard without ever dropping the barrier.
> If Dexion is in the barrier as normal ascend the nearby stairs and place the Weystone in the altar. This will drop the barrier around the Dexion. He will still be enthralled by the vampires and turn hostile, so beat him down until he submits. Now talk to him about the Elder Scroll, and ask him to help. He'll accept so tell him to go to Fort Dawnguard, where you are also to go to now.
> The only way out is the way you came in, so go back outside then fast-travel back to the fort, be prepared however for a potential vampire attack when you arrive.
> Go into the fort and SAVE, find Dexion and Isran in the main hall, talk to Isran, he will give Dexion the Elder Scroll to read.
> Dexion will read the scroll out loud, he speaks of a powerful weapon called 'Auriel's Bow', and of the rise of a ' Dread lord ', he also speaks of the day and the night becoming one at a time when the dragons have returned. After these cryptic messages he reveals that to know more we must find more Elder Scrolls, one speaking of dragons, and one speaking of ancient blood.
This ends the quest Prophet, and begins two new quests, SAVE.
Seeking Disclosure
This quest involves the finding of the two missing Elder Scrolls, the Dragon scroll and the Blood scroll. The Dragon scroll is found as part of the Main Story of the base game, and also during the Daedric quest 'Discerning the Transmundane'. If you have not completed these quests yet please navigate to the 'Elder Knowledge' section of the Main Story page and the 'Oghma Infinium' section of the Daedric artifacts page for all information.
If you've previously retrieved the Dragon Elder Scroll, but you now no longer have it in your possession (under books not scrolls), then it is highly likely that you sold it to 'Urag gro-Shub' at the College of Winterhold. Go back there now and buy it back from him for 4,000 gold, or, if you are Arch-Mage, you can persuade him down to 2,000.
> Once you have the Dragon Elder Scroll, the quest will update and acknowledge that you have found it.
> Your only task now is to find the Blood Scroll, the concurrent quest below 'Chasing Echoes', will lead you to the scroll.
Chasing Echoes
> Turn to Serana and speak to her about the Blood Scroll, she believes that her mother 'Valerica' may have it. After some dialogue, suggest to her that her mother may be hidden in Castle Volkihar itself. Serana deduces that this is the most likely place and she knows of a secret entrance that will lead to an old garden in a courtyard that her mother once tended.
> Exit the fort via the main entrance and fast-travel back to the castle. Head left (north) around the shore. You'll come to an old dock, kill the augmented skeletons here and go up the stairs to enter 'Volkihar Undercroft'.
> Once inside SAVE, kill the critters and death hounds as you make your way through the tunnels and sewers, find some stairs to the northwest and kill the feral vampire there. Activate the lever to open the way below you.
> Proceed through and try not to fall off the narrow walkway as you fight more skeletons and death hounds, turn left and go through the next gruesome area. Break through the spiders web above then kill the giant frost spider before pulling the lever to drop a drawbridge down to the narrow walkway from before.
> Head back down to the walkway move left across the drawbridge and go all the way to find the door to 'Volkihar Courtyard'.
> Once outside SAVE, follow Serana as she reminisces about the old garden her mother used to tend. Notice the shiny object in the nightshade garden when she talks about it. She then goes to the 'Moon Dial' in the centre and says that there is something odd about it.
> Pick up the 'Full Moon Crest' from the garden to the east, then grab the 'Half Moon Crest' from the pool in the northwest corner, and finally pick up the 'Crescent Moon Crest' up the stairs to the northeast by the table.
> Return to the moon dial and select the missing slots around the dial, the correct crests will automatically be inserted. The dial will rotate unlocking some stairs that descend into the ruins beneath Castle Volkihar. Go down and enter the ruins.
> Use the chain to the left to open the way then SAVE and proceed forward to find a macabre scene of skeletons having a banquet, destroy them all and move up the stairs. Kill a Gargoyle and move up more stairs to find more skeletons. Kill these skeletons and go up more stairs.
> Destroy another Gargoyle before SAVING and ascending yet more stairs. Destroy the skeletons and move on to find more stairs and skeletons ahead. You'll soon come to a room with a mezzanine that contains a Gargoyle in front of a chain on the wall. Activate the chain and destroy the Gargoyle that consequently attacks.
> The chain opens a gate just to your northeast, move through and kill the skeleton and Gargoyle up the stairs, open the next gate with the chain and kill the skeletons in the next room. Move around, cross a bridge, kill the skeleton, go through the door, through the next room, through another door finally reaching some double-doors, SAVE
> Enter the room, three Gargoyles will attack, destroy them then find the unlit candlestick on the southeast wall. Turn it to open a secret passage through the fireplace. Go up a series of stairs to reach a room with a strange circle in the centre.
> Serana will talk to you asking you to find her mother's notes, find 'Valerica's Journal' on the top shelf of the middle bookcase in the southwest of the room. Talk back with Serana, she'll deduce that her mother most likely went into a mystical place called the 'Soul Cairn', a place where all souls reside after disappearing from soul gems.
> To access the Soul Cairn Serana lists some special ingredients she needs, then she mentions that she needs her mother's blood, remind her that she shares her mother's blood and then go look for the ingredients:
Pick up the 'Finely Ground Bone Meal' from the table to the left of where the journal was, just to the left of the alchemy set, below the mammoth skull; it's in the grey bowl, different from normal bone meals. Now grab the 'Soul Gem Shards' from the top of the small wardrobe, just up the stairs where all the other soul gems are, in the same type of bowl. And finally find the 'Purified Void Salts' on a shelf on the northwest balcony, along from the arcane enchanter.
> SAVE, then return to Serana who'll be standing next to the 'Portal Vessel', activate the vessel to place the ingredients inside. Talk to Serana and she will offer up her blood and the portal will open.
Please read ahead before making any decisions:
> You cannot simply walk into the Soul Cairn, talk back with Serana after attempting to go in. She will reveal that in order to enter the Soul Cairn you'd either have to be a vampire lord, or partially trap your soul into a soul gem and offer it to the cairn.
You do not need to become a vampire at this point, in fact, to avoid an extra quest to cure yourself afterwards, I recommend you wait until after the final quest when you can request Serana to make into a vampire lord.
> Ask Serana to soul trap you, then head into the Soul Cairn. Once inside SAVE, this completes the quest Chasing Echoes and activates the next quest 'Beyond Death'.
Beyond Death
> Make sure to activate the Beyond Death quest, it may be advantageous to complete a few small tasks as you go, in order to gain the use of an undead horse named 'Arvak'. Move forward towards the quest marker, notice some 'Soul Husks' on your left as you descend, pick them, they can be eaten to reduce the negative effects of the Soul Cairn (see your 'Active effects' in your magic menu).
> Move down the misty path passing a few souls on the way, destroy the 'Bonemen' that attack you. Then find a soul of a man standing in a misty dell, he'll talk to you about losing his horse Arvak, then disappear.
> Continue on towards the quest marker, go through the gap in the giant wall, and along the path, you'll be attacked by more bonemen, destroy them then you'll eventually reach a magical barrier where Serana's mother is trapped.
> After a lot of dialogue, SAVE, you'll be tasked with freeing Valerica; the only way to free her however, is to kill all three of the 'Boneyard Keepers'. These Keepers are to be found in three separate towers quite far apart in the Soul Cairn.
To make travelling a little quicker, head over to the east and locate the 'Skull of Arvak' inside a small archway and guarded by 'Mistmen':

> Kill the mistmen and bonemen around it then take the skull. With the skull in hand activate the miscellaneous objective to return the skull, it will mark the soul of Arvak's rider to your northeast. Talk to him and he'll give you the power to 'Summon Arvak', equip it from the Conjuration list of your magic menu then use it to summon Arvak.
> SAVE, then use Arvak to reach the first tower to your north. Find the glowing pool marked by your map, jump into it to teleport yourself to the top of the nearby tower. Work your way further up and kill the powerful archer Keeper.
> With the Keeper dead, SAVE, then use the portal there to get back down. Summon Arvak again and make your way to the southern tower. This next Keeper will be tougher, he'll be sat on the ground floor on the north side of the tower. Dispatch him in your preferred style, then SAVE.
> Summon Arvak again and head northwest to the final tower. This will be the toughest Keeper, and he'll have some bonemen friends to help him. Use a power or two and your best Shouts etc to defeat them all.
> With the final Keeper destroyed, SAVE, summon Arvak once more and return to Valerica. Talk to her then move through the door into the 'Boneyard'. Here the undead Dragon 'Durnehviir' will attack you.
> Durnehviir is similar in power to that of a Frost Dragon, however he has a potent 'Drain Vitality' Shout which eats away your health quite rapidly and a unique Shout called 'Soul Cairn Summon' which allows him to summon various bonemen enemies to aid him. Counter him with fire spells, if you can, and let Serana and Valerica take care of his minions.
> Durnehviir is cursed with 'undeath' and you cannot truly kill him, when you do 'seemingly' kill him however he will disappear and you won't absorb a dragon soul, nor be able to loot his corpse. Follow Valerica now over to where the Blood Elder Scroll is kept. Talk with her about Durnehviir and then she will open a box for you to retrieve it.
> Talk again with Valerica until the quest prompt changes to say 'Return to Tamriel', then make sure to also talk about retrieving your soul. Valerica will tell you where it is; activate this objective from the miscellaneous section of your journal.
> Now head back outside the way you came in. Be careful not to attack Durnehviir on your way back , he will be waiting for you on a broken wall and he'll engage you in conversation. If you have accidentally turned him hostile, reload the previous save. He explains his plight and asks you to summon him once you return to Tamriel. You will be given all three words of the 'Summon Durnehviir' Shout now, SAVE.
> You can Summon Arvak again if you like and make your way over to find your soul gem to the west. Find a small black fort and head inside, kill a few Bonemen and find a small portal in the ground in a room to the northeast. Jump in and retrieve your 'Soul Essence' from the chest on the roof.
Complete "Beyond Death"
Seeking Disclosure - Continued
> You can reactivate the quest Seeking Disclosure in your journal if you like. Use the door to the southwest that leads to the 'Volkihar Balcony', this allows you to fast-travel back to Fort Dawnguard.
> Go into the fort, once inside SAVE, find Dexion. Unfortunately it seems he has now gone blind from reading the first Elder Scroll, and consequently he is unable to read the other one. He does offer a solution however; you are to go to the 'Ancestor Glade' and find a special knife called a 'Draw Knife', then with this tool, you can harvest bark from a 'Canticle Tree', then use this bark to attract the 'Ancestor Moths' to your person and perform a ritual that will enable you to read the Elder Scroll.
This ends the quest Seeking Disclosure and automatically begins the next quest 'Unseen Visions', be sure to activate it in your journal.
Unseen Visions
> Leave Fort Dawnguard, once outside SAVE. This is your first opportunity to begin learning the 'Soul Tear' Shout for the related achievement. Firstly you need at least '3' dragon souls to unlock the Summon Durnehviir Shout. For information about finding some easy souls check the Dragon Souls, Lairs and Shouts section of the Miscellaneous Achievements page.
Absorb a dragon soul
> Continuing with the quest at hand; fast-travel to the closest location to the 'Ancestor Glade', it's located just to the east of Falkreath. The easiest way to reach it is to find 'Peak's Shade Tower' east of Falkreath then follow the main road northeast. After a bandit ambush with the wooden bridge that spans the road look further along for a fallen tree and a stone marker, there's a faded dirt track here leading south, follow this as it winds up the mountain encountering a few bandits along the way to 'Ancestor Glade'.
Before entering make an important SAVE and keep this save until you leave the glade.
> Once inside SAVE, there's no enemies in here yet, so no need to sneak, use the ledge on your left to get up and across the log bridge, move through the tunnel. As a possible glitch Serana may not have entered with you, since you need her for the quest, reload the previous save or try waiting a few hours. Follow the marked path down into the water and retrieve the Draw Knife from the sculpture.
> Use the knife on the nearby 'Canticle tree' to harvest some bark, this will attract the first batch of moths to you. As a possible glitch you may not be able to harvest bark from the tree, try either leaving the glade and re-entering, or reloading your previous save. You must now look around for swarms of moths and walk into them to gather more around you, do this seven times to gain enough moths. The second swarm is in the pool just to the northwest, the third up the stream to the west, then go up the stairs to find the fourth. Further up then back down to the east to find the fifth under the waterfall. Continue on this ledge to find the sixth near a tree, then go up the stairs to your southwest to find the final swarm.
> Return down to the pool and stand in the beam of light in the centre. SAVE before reading the first scroll; the Blood scroll from your 'book' menu. You will then automatically read all three scrolls, this will reveal a map of the western part of Skyrim, it highlights Markarth to the southwest, Solitude to the northeast and a strange white symbol to the north that must mark the location of Auriel's Bow. Talk with Serana.
> You know the location of the bow to be 'Darkfall Cave', Serana recommends that you leave with her immediately to find it. This concludes this quest and automatically begins the next quest 'Touching the Sky'.
Touching the Sky
> Before you may even break dialogue with Serana, you will be attacked by several vampires and their thralls. Take care of them and exit the glade the way you came in, you may encounter additional vampires on your way out too.
> Activate Touching the Sky in your journal then fast-travel to the nearest location to Darkfall Cave that you have, it's located to the southwest of Dragon Bridge, northwest of Karthwasten, and just south of Mor Khazgur.
> Once inside SAVE, you may want to invest in some light. Move forward sticking to the right, continue along the path, kill the frostbite spider and cross the bridge, it's a dead end, so return over the bridge and jump down to go on a little ride.
> Allow yourself to be swept down the stream until you end up with all the spiders at the end, kill them then SAVE. Push forward, you'll reach a little camp, find a chain behind the wooden shelter straight ahead (north), pull it to open the secret passage to your right. Go through.
NOTE: Many glitches can occur throughout your journey to Auriel's Bow, almost all of these occur because certain characters that you will meet and Serana will have incomplete scripts running. To avoid these glitches always allow everyone to finish their dialogue properly and SAVE every time I prompt to or more. If you become stuck, if you are unable to complete any of the tasks I mention, fall back on a previous save and try again.
> You'll enter an open area with a stone dome in the centre, SAVE and talk to 'Knight-Paladin Gelebor'. Gelebor is one of only two remaining 'Snow Elves' left in the world. He will give you Auriel's Bow as long as you kill his brother 'Vyrthur' who resides deep in the 'Inner Sanctum'. To get to the Inner Sanctum you must first fill a 'Ceremonial Ewer' with the water from '5' different 'Wayshrines'; those of Illumination, Learning, Radiance, Resolution, and Sight. Gelebor will make the Wayshrine rise out of the ground and give you the 'Initiate's Ewer'. After all dialogue has ended you can ask some more questions if you like or enter the Wayshrine and activate the portal to 'Darkfall Passage'. (The portal may not have spawned visually, so just activate the back wall).
> Use the portal and enter Darkfall Passage, begin the long trek through many Falmer and Chaurus, to reach the first Wayshrine; the Wayshrine of Illumination. The way through has only one way, so just make sure to SAVE periodically and destroy any 'Chaurus Hunter Cocoons' before they hatch.
Also be wary of many traps, there is a particular chest out in the open in a peculiarly well-lit dell, it is a lethal trap, so leave it.
> You'll eventually come to two strange chains on the wall, activate the one on the left, and kill the new 'Vale Sabre Cat'. Once in the next open area SAVE, you're ultimately looking for the bridge high up that leads to the northwest corner.
> Cross the bridge to find the first Wayshrine, talk to 'Prelate Sidanyis' there, then activate the font inside the Wayshrine to fill your ewer. If you are a vampire you will be subject to the weaknesses of the Sun on the other side, so wait for night time then use the portal to enter the 'Forgotton Vale'.
Forgotten Vale Map
Courtesy of Gamebanshee.com
> Once inside SAVE, move through the passages and be careful not to fall off as you emerge on a narrow ledge. Ascend the ledges to enter a large open valley, you'll appear at point (A) on the above map. Move down and kill the Vale Sabre Cats here and head towards the quest marker on the furthest right, number (2) on the map, to the north.
> Find 'Prelate Athling' and he will open the Wayshrine of Sight for you, fill your ewer, but do not use the portal this time. Instead turn southwest to find a pass; number (3) on the map, go through and you'll be ambushed by frostbite spiders. SAVE then exit the pass and take a left to find the Wayshrine of Learning (number 5 on the map).
> Talk to 'Prelate Celegriath' and then fill your ewer. Again do not use the portal, turn southwest and cross the river to find a narrow snowy pass leading up, go up and through an archway. You'll emerge on a frozen lake, make an important SAVE here, you're about to be attacked by two unique dragons called 'Naaslaarum' and 'Voslaarum'. (It may be a good idea to summon Durnehviir here to help you).
> Stick the right as you make your way north-northwest towards number (7) on the map. As you approach the Word Wall the dragons will attack, kill them and learn a word of the 'Drain Vitality' Shout from the unusual wall, SAVE.
> Continue north to find your fourth Wayshrine; the 'Wayshrine of Resonance', talk to 'Prelate Nirilor' to access it. Fill your ewer, avoid the portal, and then look southwest for a hard-to-find snowy pass; If you stand right next to Nirilor and look southwest you will see a snowy tree right ahead, go forward and behind this tree to the southwest is the pass, hug the rocks on your right and continue towards the quest marker.
> You'll soon pass a few Moonstone ore veins. Go down and take a left before the stone bridge, kill the Falmer outside the entrance to 'Glacial Crevice'.
> Once inside SAVE, stick to left and kill the Frost Troll and Falmer as you ascend the southwest side of the cavern. The Unrelenting Force Shout is particularly useful during the next few sections of the cave. Be careful not to fall off as you kill more Falmer before passing through an icy tunnel to the left. Open a gate and avoid the tripwire, continue up the ledges on the left and kill more Falmer and a Chaurus.
> Cross over to the right side and killing the Falmer from the hut to the left, move through the next gate and SAVE. Avoid the tripwire before moving through and killing another Falmer, ignore the spiraling descent and head through the gate, pass some tents and head up the ledges.
> Kill a Falmer outside and proceed south, fight more leveled Falmer as you carefully navigate along the narrow ledge and across a bridge. Go through another tunnel to the northeast to find a way back out to the Forgotten Vale.
> Once outside SAVE, you'll find an elaborate Falmer village crawling with high level Falmer. Avoid the tripwires and navigate your way up the various make-shift bridges and find the way forward behind the south-eastern most tent. A little further you should find a tent with the special Falmer book called the 'Unknown Book, Vol. IV' inside, go through the tent to the left of this one dropping down to the ground to find the gate forward.
> Go through the gate and SAVE, then proceed through the tunnels avoiding a dangerous tripwire as you go. You'll eventually reach the final Wayshrine; the 'Wayshrine of Radiance', talk to 'Prelate Edhelbor' to open it for you. Fill your ewer then turn northeast to find a stone bridge.
> Cross the bridge, then climb the stairs past the statue, fill the water basin using your full ewer. Observe as the water filters towards the door unlocking the mechanism. Open the door to the 'Inner Sanctum'.
> Once inside SAVE, you'll find lots of Falmer and Chaurus completely frozen stiff by some magical force. Open the door to the north and proceed through to find more frozen enemies and a tunnel leading to 'Auriel's Chapel', go through.
> Once inside SAVE, drop down and move towards the marker, after you approach 'Arch-Curator Vyrthur' he will speak to you then the frozen enemies will begin thawing and attack you. Defeat a wave of 'Frozen Chaurus', then some weaker Falmer, stay away from the centre of the room as Vyrthur will drop pieces of the ceiling down to harm you, as another wave of Falmer attack.
> Defeat them, then Vyrthur will summon an 'Ancient Frost Atronach', more pieces of the ceiling will fall, this time targeted at you, and a wave of higher level Falmer will also attack. After they are all dead Vyrthur will stand, you'll be temporarily unable to open your journal or use anything offensive, while Vyrthur destroys the temple with a mighty explosion and you'll be knocked back.
> Vyrthur will run away, after you come to your feet SAVE, pursue Vyrthur, you still can't attack yet, but you'll find Vyrthur just up ahead injured. After some dialogue with Serana and Vyrthur you'll be returned control of your weapons and journal and Vyrthur will attack.
> Although Vyrthur is a vampire, he is still vulnerable to poisons, and particularly vulnerable to fire. Use this knowledge and your other preferred means to destroy him and you may wish to loot his body for the only set of 'Ancient Falmer Armor' in the game.
> Turn now to the Wayshrine where Gelebor has appeared. Speak to him and he will be assured of your worthiness to carry Auriel's Bow, it will then appear behind him inside the Wayshrine, take it.
This concludes the quest Touching the Sky and automatically activates the final quest 'Kindred Judgment'.
Kindred Judgment
> You can use Auriel's Bow immediately (if it is daytime) but you only have 'Sunhallowed Elven Arrows'; these arrows cause bursts of Sunlight that damage everyone around you, this will hurt, but not kill Serana. Simply equip the bow and some arrows, then aim directly at the Sun. You can ask Gelebor to change any Elven arrows you have into Sunhallowed Elven Arrows for free. Similarly Serana will change Elven arrows into 'Bloodcursed Elven Arrows', these can be used to blot out the Sun until the next dawn, this is useful to negate all the negative effects of sunlight on vampires.
Use the special power of Auriel's Bow
> SAVE, then speak to Serana, she concludes that the only course of action is to kill her father; Lord Harkon. Now be sure that the Kindred Judgment quest is active in your journal and use the portal back to Darkfall Cave.
> Use the tunnel to the south, take a right at the fire, go up the ledges and pull the chain to open the way. Burn through the cobwebs then take a right towards the waterfall. Take a right again then head up and out into the open.
> Fast-travel back to Fort Dawnguard, SAVE when you arrive and be wary of vampire assassins. Proceed into the fort, and find Isran, talk to him and then he'll give a speech to everyone in the main hall, talk to him again and he will launch an assault on Castle Volkihar.

> Once inside SAVE, battle your way through the vampire host in the main hall and make your way towards the quest marker. Use the chain to open the portcullis in the northwest. Finally head into the Cathedral to confront Lord Harkon, do not go into sneak mode before talking to Lord Harkon.
> You'll find Lord Harkon awaiting you in vampire lord form, he will engage you in conversation, do not give Harkon Auriel's Bow , he will just betray you leaving you at a major disadvantage. He will conclude that both you and his daughter Serana are both threats and attack. Do not try to summon Durnehviir inside the cathedral, it can cause a major glitch.
> Harkon will use 'Vampiric Drain' on you, he'll summon skeletons and gargoyles and he'll occasionally turn invisible or into a swarm of bats. Stay on him and let Serana take care of his minions or summon some of your own. Harkon is immune to poisons, undead turning, fear spells and the Wabbajack, he is also highly resistant to frost but highly vulnerable to fire.
When he is low on health he will flee to his blood altar and regenerate behind a magical shield, this shield can only be broken by Auriel's Bow, normal arrows will break it so don't waste your Sunhallowed ones. When Harkon is finally defeated he will curse his daughter and turn into a pile of red ash, SAVE.
If Lord Harkon fails to die after depleting all of his health; try saving then reloading that save, or alternatively reload an earlier save and fight him again.
Complete "Kindred Judgment"
You can loot Harkon's ash pile for his 'Vampire Royal Armor', his special katana, and some other high end treasures. Isran will appear now and talk to Serana, he thanks her for her part in the Volkihar Vampire Clan's downfall.
After this many new quests become available with various members of the Dawnguard. The blacksmith at Fort Dawnguard; 'Sorine Jurard' will now stock 200 Elven arrows to be made into either Sunhallowed or Bloodcursed Elven arrows. You can buy an 'Armoured Troll' from 'Gunmar' for 500 gold, and recruit 'Ingjard', 'Celann', 'Durak', 'Beleval', and 'Agmaer' as Dawnguard followers.
You can also sell the Elder Scrolls back to Dexion for 6,000 gold.
Bear in mind that you can only do the things above if you have not become a vampire.
Additionally; random vampire attacks will only ever occur during eclipses now.
After this point you can ask Serana to make you into a 'Vampire Lord' , when you accept you will be purged of Lycanthropy and all other diseases, and you will receive the 'Vampire Lord' ability. Please refer to the 'Vampire Mastered' section of the Miscellaneous Achievements page for all information regarding vampire lords.

When you are levitating, you have a magic ability in your right hand called 'Vampiric Drain' which sucks the life from any living creature. To gain experience points for the vampire skill tree use this ability on anything except: rabbits, foxes, undead, Dwarven constructs and summoned entities.

This is the first opportunity to go for the 'vampire mastered' achievement. There are two ways to go about this; much like mastering the werewolf skill tree, mastering the vampire lord skill tree can be done in the same two ways: either change into vampire lord form every so often and work gradually towards unlocking the perks, or make a save now, then go on a rampage in all the major towns and cities, killing innocents and guards to gain as much XP as possible then reloading your save.
Acquire 11 vampire perks
Joining the Volkihar Vampire Clan
If you accept Lord Harkon's reward of blood, you will be purged of Lycanthropy and all other diseases, and you will receive the 'Vampire Lord' ability.
> You will black-out, when you awake you will be inside the 'keep' in front of a font of blood. Lord Harkon will bid you to turn into a Vampire Lord in order to teach you the ways of the vampire.
See just above for the controls while using vampire lord power. Also please refer to the 'Vampire Mastered' section of the Miscellaneous Achievements page for all information regarding vampire lords.
You can ask a few more questions, otherwise tell Harkon you're ready and he'll direct you to 'Garan Marethi'.
This concludes the quest 'Bloodline' and initiates the vampire-specific quest; 'Bloodstone Chalice', activate it in your journal.
The Bloodstone Chalice
> Talk to Garan, he will give you the 'Bloodstone Chalice' in order for you to take it to a place called 'Redwater Den' and fill it up from the 'Redwater Spring'.
> Continuing with the Bloodstone Chalice quest, you'll have to find Redwater Den, it's located to the northwest of Riften, to the east of Treva's Watch.
> Redwater Den is an illegal Skoomer dealership, when you approach you'll notice some lookouts, do not attack them if you want to do this quest the easy way, they will think you're just after some Skooma and ignore you. Locate the trap door around the back and enter.
> Once inside SAVE, walk in and the 'Doorman' will stop you, he'll warn you to keep your weapons to yourself then open the door for you. Move forward to find the 'Dealer' behind the desk, you can persuade her for a free sample if you like, otherwise move past all the booths to your right and find a locked gate.
> You have a choice here; you can either just start killing everyone now loudly as you make your way to the 'Bloodspring' or, if you are more stealth orientated, you can sneak all the way through to the spring.
> Whether you choose to sneak or not you can follow these directions: Make a SAVE before picking the expert lock then sneak through the shadows. Sneak your way up the sides and onto the wooden planks around up to the top. Sneak past or kill the guards as they patrol and find the lever to drop the drawbridge.
> SAVE then sneak across the bridge and go down avoiding or killing the guards, make your way around and descend further past more guards and a skeleton. Pull the chain at the bottom to open the secret passage, move through and SAVE.
> You'll come to a kind of crypt area being patrolled by Death hounds who are more likely to detect you if you are still sneaking. Make your way northeast to find the door to 'Redwater Spring'.
> Once inside SAVE, in here you'll find more Death Hounds and vampires patrolling around, sneak through to the right and you'll hear some vampires talking, sneak down the left side and be very careful to avoid a shadowy grate in the floor when you enter the room with two pillars in the middle, it's a trap!
> Go up the spiral ramp to the east, turn left and make your way around the room to find a chain in an alcove, pulling this chain opens the gate straight ahead and the gate just to your left, go through the gate to your left then forward and through the other newly opened gate.
> Once through SAVE, sneak or fight your way through the next series of corridors, you'll find vampires (some asleep in the coffins) and Death Hounds all along the way. Pull the chain to open the next gate then go through the iron door.
> SAVE and avoid the pressure plates as you move forward, you'll come to an open room with a patrolling thrall and skeleton. Find the left-hand coffin on the northwest wall and open it. SAVE before pick pocketing the 'Redwater Wellspring Key' from 'Venarus Vulpin'.
> Sneak over to the master locked door in the south and open it. Move in to find the Bloodspring itself.
> Approach the spring and activate it to fill the Bloodstone Chalice. The imperial vampire 'Salonia' and the vampire bandit wizard 'Stalf' will enter the room and begin talking. Do not attack them until they finish talking. If they fail to begin dialogue you have to strike first to fix it. Salonia says that she was sent here by Vingalmo and Orthjolf to kill you and return the chalice, Stalf notices that she said 'I' instead of 'we' and so they fight each other.
> Whatever the outcome; you must make sure both of them are dead, then use either one of them to fill the chalice with their blood. This will update your objective to 'return to Garan Marethi' and unlock the door at the back of the room.
> Move through and SAVE, you'll come out behind the counter in Redwater Den, pick the lock to the side and exit the den. Return now to Castle Volkihar.
> SAVE before you enter the castle. As a possible bug everyone may attack you for no reason, try exiting the castle, waiting 24 hours then returning or reloading the save before you entered. Find Garan and tell him what happened, he will explain about you being attacked and the quest will be complete.
> This next quest will begin automatically after the previous, be sure to activate it in your journal. Find Lord Harkon in the castle and speak to him. He thanks you and wants you to accompany him as he addresses his court. Do not leave the castle.
After the speech he gives you, and everyone else, the task to find a 'Moth Priest'.
> At this point everything in the Castle is free for you to take if you wish, you may want to grab a few 'Potions of Blood':
After a certain amount of time, your vampire powers will increase and it will become harder to talk to normal people. These potions are good to sate your appetite for human blood without having to actually feed making you appear more friendly to people.
Serana will also offer herself as a follower at this point. Your next objective is to ask around Skyrim about Moth Priests. The easiest thing to do; is to fast-travel to the College of Winterhold. If you have never been to the college before, either speak to carriage drivers outside of main cities or see the beginning of the College of Winterhold page to learn how to gain access.
> Once at Dragon Bridge SAVE, find the only child in town, he's called 'Clinton Lylvieve', he will reveal that an old man has just left town heading south across the bridge. If Clinton will not reveal the information due to a glitch , or if you have already adopted him, just proceed on over the bridge anyway.
> Forebear's Holdout is just to the east, enter and SAVE, move in and turn left, kill a couple of dogs then go around to find a short tunnel into an enclosed area with a fire. Kill the Dawnguard soldiers here and their 'Armoured Troll' then sneak up either staircase to approach the blue light.
> If you're not noticed, you'll overhear a Dawnguard called 'Vanik' talking to his lieutenant. Kill them and find the corpse of a vampire called 'Malkus', take the 'Weystone Focus' from his body and make an important SAVE.
> Ascend the nearby stairs and place the Weystone in the altar. This will drop the barrier around the Moth Priest 'Dexion Evicus'. He will turn hostile so beat him down until he submits. Now go into your magic menu and equip your 'Vampire's Seduction' power.
> The only way out is the way you came in, so go back outside then fast-travel back to the castle, be prepared however for a potential attack by Dawnguard Scouts when you arrive.
> Go into the castle and SAVE, find your thrall Dexion and Lord Harkon in the main hall, talk to Harkon, he has given your thrall an Elder Scroll to read. Command Dexion to read the scroll.
> Dexion will read the scroll out loud, he speaks of a powerful weapon called 'Auriel's Bow', and of the rise of a 'dread lord', he also speaks of the day and the night becoming one at a time when the dragons have returned. After these cryptic messages he reveals that in order to know more we must find more Elder Scrolls; one speaking of dragons and one speaking of ancient blood.
> Turn now and talk with Lord Harkon, ask him where the scrolls are to be found. He reveals that one was hidden by his wife and the other is in the bowels of an ancient Dwemer ruin. This completes the quest Prophet, and begins two new quests, SAVE.
This quest involves the finding of the two missing Elder Scrolls, the Dragon scroll and the Blood scroll. The Dragon scroll is found as part of the Main Story, and also during the Daedric quest 'Discerning the Transmundane'. If you have not completed these quests yet please navigate to the 'Elder Knowledge' section of the Main Story page and the Discerning the Transmundane section of the Daedric Artifacts page for all information.
> Find Serana in the Castle of Volkihar and speak to her about the Blood scroll. She believes that her mother 'Valerica' may know the whereabouts of the Blood scroll. After some dialogue, suggest to her that her mother may be here in the castle itself. Serana deduces that the most likely place would be the courtyard.
> It may be a good idea again to wait until night and then exit the castle via the main entrance. Jump over the wall to the right and head around the shore. You'll come to an old dock, kill the skeletons here and go up the stairs to enter 'Volkihar Undercroft'.
> Once inside SAVE, kill the critters and Death Hounds as you make your way through the tunnels and sewers, find some stairs to the northwest and kill the feral vampire there. Activate the lever to open the way below you.
> Proceed through and try not to fall off the narrow walkway as you fight more skeletons and Death Hounds, turn left and go through the next gruesome area. Break through the spiders web above then kill the giant frost spider before pulling the lever to drop a drawbridge down to the narrow walkway from before.
> Pick up the 'Full Moon Crest' from the garden, to the east, then grab the 'Half Moon Crest' from the pool in the northwest corner, and finally pick up the 'Crescent Moon Crest' up the stairs to the northeast and by the table.
> Return to the moon dial and place the crests in the correct slots on the ground, it selects them for you. The dial will rotate unlocking some stairs that descend into the ruins beneath Castle Volkihar. Go down and enter the ruins.
> Use the chain to the left to open the way then SAVE and proceed forward to find a macabre scene of skeletons having a banquet, destroy them all and move up the stairs. Kill a leveled Gargoyle and move up more stairs to find more skeletons. Kill these skeletons and go up more stairs.
> The chain opens a gate just to your northeast, move through and kill the skeleton and Gargoyle up the stairs, open the next gate with the chain and kill the skeletons in the next room. Move around, cross a bridge, kill the skeleton, go through the door, through the next room, through another door finally reaching some double-doors.
> SAVE then enter the room, three Gargoyles will attack, destroy them then find the unlit candlestick on the southeast wall. Turn it to open a secret passage through the fireplace. Go up a series of stairs to reach a room with a strange circle in the centre.
> Serana will talk to you asking you to find her mother's notes, find 'Valerica's Journal' on the top shelf of the middle bookcase in the southwest of the room. Talk back with Serana, she'll deduce that her mother most likely went into a mystical place called the 'Soul Cairn', a place where all the souls from soul gems reside.
> SAVE, then return to Serana who'll be standing next to the 'Portal Vessel', activate the vessel to place the ingredients inside. Talk to Serana and she will offer up her blood and the portal will open. Simply walk into the portal to enter the Soul Cairn.
> Once inside SAVE, this completes the quest Chasing Echoes and activates the next quest 'Beyond Death'.
> Make sure to activate the Beyond death quest, it may be advantageous to complete a few small tasks as you go, in order to gain the use of an undead horse named 'Arvak'. Move forward towards the quest marker passing a few souls on the way, destroy the 'Bonemen' that attack you. Then find a soul of a man standing in a misty dell, he'll talk to you about losing his horse Arvak, then disappear.
> Continue on towards the quest marker, go through the gap in the giant wall, and along the path, you'll be attacked by more Bonemen, destroy them then you'll eventually reach a magical barrier where Serana's mother is trapped.
> After a lot of dialogue, SAVE, you'll be tasked with freeing Valerica; the only way to free her however, is to kill all three of the 'Boneyard Keepers'. These Keepers are to be found on three separate towers quite far apart in the Soul Cairn. To make travelling a little quicker head over to the east and locate the 'Skull of Arvak' inside an archway that looks like this:
> Summon Arvak and head northwest to the final tower. This will be the toughest Keeper, and he'll have some bonemen friends to help him. Use a power or two and your best Shouts etc to defeat them all.
> Durnehviir is cursed with 'undeath' and you cannot truly kill him, when you do 'seemingly' kill him however he will disappear and you won't absorb a dragon soul, nor be able to loot his corpse. Follow Valerica now over to where the Elder Scroll is kept. Talk with her about Durnehviir and then she will open a box for you to retrieve it.
> Talk again with Valerica, SAVE, then head back outside the way you came in. Be careful not to attack Durnehviir on your way out , he will be waiting for you on a broken wall and he'll engage you in conversation. If you have accidentally turned him hostile, reload the previous save. He explains his plight and asks you to summon him once you return to Tamriel. You will be given all three words of the 'Summon Durnehviir' Shout now, SAVE.
> You can reactivate the quest Seeking Disclosure in your journal if you like. Use the door to the southwest that leads to the 'Volkihar Balcony', this allows you to fast-travel back to the castle main entrance.
> Go into the castle, once inside SAVE, find your thrall Dexion. Unfortunately it seems he has now gone blind from reading the first Elder Scroll, and consequently he is unable to read the others. He does offer a solution however; you are to go to the 'Ancestor Glade' and find a special knife called a 'Draw Knife', then with this tool, you can harvest bark from a 'Canticle Tree', then, use this bark to attract the 'Ancestor Moths' to your person and perform a ritual that will enable you to read the Elder Scrolls.
> Leave Castle Volkihar, once outside SAVE. This is your first opportunity to begin learning the 'Soul Tear' Shout for the related achievement. Firstly you need at least '3' dragon souls to unlock the Summon Durnehviir Shout. For information about finding some easy souls check the Dragon Souls, Lairs and Shouts section of the Miscellaneous Achievements page.
Learn all three words of Soul Tear
> Continuing with the quest at hand; fast-travel to the closest location to the 'Ancestor Glade', it's located just to the east of Falkreath. Make your way up the winding path and make an important SAVE before you enter, keep this save until you leave the glade.
> Once inside SAVE, don't worry about any enemies for now, so sneaking is pointless, use the ledge on your left to get up and across the log bridge, move through the tunnel. As a possible glitch Serana may not have entered with you, since you need her for the quest, reload the previous save or try waiting a few hours. Follow the marked path down into the water and retrieve the Draw Knife from the sculpture.
> Use the knife on the nearby 'Canticle tree' to harvest some bark, this will attract the first batch of moths to you. As a possible glitch you may not be able to harvest bark from the tree, try either leaving the glade and re-entering, or reloading your previous save. You must now look around for swarms of moths and walk into them to gather more, do this seven times to gain enough moths. The second swarm is in the pool just to the northwest, the third up the stream to the west, then go up the stairs to find the fourth. Further up then back down to the east to find the fifth under the waterfall. Continue on this ledge to find the sixth near a tree, then go up the stairs to your southwest to find the final swarm.
> Before you may even break dialogue with Serana, you will be attacked by several Dawnguard members and an armoured troll. Take care of them and exit the glade the way you came in, you may encounter more Dawnguard on your way out too.
> Fast-travel to the nearest location to Darkfall Cave that you have, it's located to the southwest of Dragon Bridge, northwest of Karthwasten, and just south of Mor Khazgur.
NOTE: Many bugs can occur throughout your journey to Auriel's Bow, almost all of these bugs occur because certain characters that you will meet and Serana will have incomplete scripts running. To avoid these glitches always allow everyone to finish their dialogue properly and SAVE every time you're prompted to. If you become stuck or you are unable to complete any of the tasks mentioned fall back on a previous save and try again.
> You'll enter an open area with a strange dome in the centre, SAVE and talk to 'Knight-Paladin Gelebor'. Gelebor is one of only two remaining 'Snow Elves' left in the world. He will give you Auriel's Bow as long as you kill his brother 'Vyrthur' who resides deep in the 'Inner Sanctum'. To get to the Inner Sanctum you must first fill a 'Ceremonial Ewer' with the water from '5' different 'Wayshrines'; the Wayshrines of Illumination, Learning, Radiance, Resolution, and Sight. Gelebor will make the Wayshrine rise out of the ground and then he'll give you the 'Initiate's Ewer'. After all dialogue has ended you can ask some more questions if you like or enter the Wayshrine and activate the portal to 'Darkfall Passage'. (The portal may not have spawned visually, so just activate the back wall) .
> You'll eventually come to two strange 'chains' on the wall, activate the one on the left, and kill the new 'Vale Sabre Cat'. Once in the next open area SAVE, you're ultimately looking for the bridge high up that leads to the northwest corner.
> Cross the bridge to find the first Wayshrine, talk to 'Prelate Sidanyis' there, then activate the font inside the Wayshrine to fill your ewer, SAVE. If you are still a vampire you will be subject to the weaknesses of the Sun on the other side, so wait for night time then use the portal to enter the 'Forgotten Vale'.
> Once inside SAVE, stick to left and kill the Frost Troll and Falmer as you ascend the southwest side of the cavern. The Unrelenting Force Shout is particularly useful during the next few areas. Be careful not to fall off as you kill more Falmer before passing through an icy tunnel to the left. Open a gate and avoid the tripwire, continue up the ledges on the left and kill more Falmer and a Chaurus.
> Cross over to the right side and kill the Falmer from the hut to the left, move through the next gate and SAVE. Avoid the tripwire before moving through and killing another Falmer ignore the spiraling descent and head through the gate, pass some tents and head up the ledges.
> Go through the gate then SAVE, proceed through the tunnels avoiding a dangerous tripwire as you go. You'll eventually reach the final Wayshrine; the 'Wayshrine of Radiance', talk to 'Prelate Edhelbor' to open it for you. Fill your ewer then turn northeast to find a stone bridge.
> Defeat them, then Vyrthur will summon an 'Ancient Frost Atronach', more pieces of the ceiling will fall, this time targeted at you, and a wave of higher leveled Falmer will also attack. After they are all dead Vyrthur will stand, you'll be temporarily unable to open your journal or use anything offensive, while Vyrthur destroys the temple with a mighty explosion and you'll be knocked back.
> Although Vyrthur is a vampire, he is still vulnerable to poisons, and particularly vulnerable to fire. Use this knowledge and your other preferred means to destroy him and you may wish to loot his body for the unique set of 'Ancient Falmer Armor'.
> Turn now to the Wayshrine where Gelebor has appeared. Speak to him, he is now assured of your worthiness to carry Auriel's Bow, it will then appear behind him inside the Wayshrine, take it.
> You can use Auriel's Bow immediately (if it is daytime) but you only have 'Sunhallowed Elven Arrows'; these arrows cause bursts of Sunlight that damage everyone around you, this will hurt, but not kill Serana. Simply equip the bow and some arrows, then aim directly at the Sun. You can ask Gelebor to change any Elven arrows you have into Sunhallowed Elven Arrows for free. Similarly Serana will change Elven arrows into 'Bloodcursed Elven Arrows', these can be used to blot out the Sun until the next dawn, this is useful to negate all the negative effects of Sunlight on vampires.
> Use the tunnel to the south, take a right at the fire, go up the ledges and pull the chain to open the way. Burn or cut through the cobwebs then take a right towards the waterfall. Take a right again then head up and out into the open.
> Fast-travel back to Castle Volkihar, SAVE when you arrive and be wary of Dawnguard Scouts. Proceed into the castle.
> Once inside SAVE, make your way straight towards the quest marker and confront Lord Harkon in the cathedral, do not go into sneak mode before talking to Lord Harkon. Do not give Harkon Auriel's Bow , he will just betray you and it leaves you at a great disadvantage. Do not summon Durnehviir inside the cathedral.
Harkon will fight you in vampire lord form, he will use 'Vampiric Drain' on you, he'll summon skeletons and gargoyles and he'll occasionally turn invisible or into a swarm of bats. Stay on him and let Serana take care of his minions or summon some of your own. Harkon is immune to poisons, undead turning, fear spells and the Wabbajack, he is also highly resistant to frost but highly vulnerable to fire.
When he is low on health he will flee to his altar and regenerate behind a magical shield, this shield can only be broken by Auriel's Bow, normal arrows will break it so don't waste your Sunhallowed ones. When Harkon is finally defeated he will curse his daughter and turn into a pile of red ash, SAVE.
You can loot Harkon's ash pile for his 'Vampire Royal Armor', his special sword, and some other high end treasures. Garan Marethi will appear now and recognise you as the new leader of the Volkihar Vampire Clan, the castle and its vampires are now yours.
The castle blacksmith 'Hestla' (found in the southeast of the keep) will now stock 200 additional Elven arrows for you to use to convert into either Sunhallowed of Bloodcursed Elven Arrows. You can later ask Garan to repair the passage to the courtyard of the castle. You can also return to the Soul Cairn and talk to Valerica, this will make her leave the Soul Cairn and return to the castle once more. Additionally; various side-quests become available from various members of the castle.
Big thank you to The Unofficial Elder Scrolls Pages with permission for the use of this content granted under the Attribution-ShareAlike 2.5 License with due acknowledgement and thanks.
Thank you also to the guys from Bethesda Softworks LLC for providing additional information and writing the Official Elder Scrolls V: Skyrim Game Guide.
- PlayStation 3
- PlayStation 4
- PlayStation 5
- Xbox Series
- More Systems
- Fast travel.
The Elder Scrolls V: Skyrim - Dawnguard
Xbox 360 pc playstation 3.
- Post New Message
- Page 1 of 2
- The Elder Scrolls V: Skyrim (PC)
GameFAQs Q&A
- How do I change from Vampire Lord back to original form? Tech Support 4 Answers
- Moth priest/ Dragon bridge? Side Quest 2 Answers
- How do i solve the Jarl's Justice? Side Quest 1 Answer
- When does Fort Dawnguard get fully restored? Main Quest 2 Answers
- Can't get Durnehviir's shout? General 3 Answers
Skyrim:Bloodline
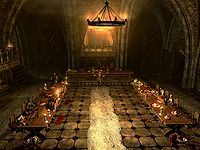
Quick Walkthrough [ edit ]
- Escort Serana to Castle Volkihar .
- Speak to Lord Harkon .
- Either join Volkihar or remain loyal to the Dawnguard .
Detailed Walkthrough [ edit ]

Once you've found Serana and opened her sarcophagus at the end of Awakening , she will stumble out; disorientated after being asleep for a very long time. She asks you to take her to her father at Castle Volkihar , but before this you can ask her some questions after she initiates a conversation. This exchange will be different depending on whether or not you're a vampire:
If You're Not a Vampire [ edit ]
Serana initiates the conversation.
You have three lines of conversation, all of which lead to Serana commenting on you not being "like her."
It continues with:
You can either deliver a notice of hostility or ignore her vampirism.
At this point, your only option is to agree to escort her home. The only question is how you'd word it.
If You're a Vampire [ edit ]
You'll be faced with another round of options after the initial introduction.
The conversation continues regardless of what you pick.
Other Topics [ edit ]
You can also speak to her about general topics before escaping Dimhollow Crypt:
You can also ask her about her home.
You can also ask about the Elder Scroll on her back.
You can touch on how long she's been out.
Regardless of how you answer, the conversation continues.
You can also ask her why she was locked away.
Escape the Crypt [ edit ]
Once the conversation is complete, you can escape the crypt. Exit the cavern by crossing the small stone bridge on the opposite side of the room you came in from. You will be ambushed by two gargoyles ; to which Serana yells "Look out! Gargoyles!" . Once you've dealt with them, find the door to the right and enter a small chamber. If you get lost during the escape, Serana will comment on this with a few remarks:
- "So I'm thinking that wasn't the right way."
- "All right, so obviously not this way, either."
- "Well, we're definitely not going to find our way out from here. Do you... know what you're doing?"
- "This feels like the right way. I was starting to worry."
The gate to the next room is opened by a lever which also releases a number of skeletons and draugr . Through the gate is a large amphitheater room with several leveled undead (including a boss-level draugr), a boss chest and the Drain Vitality Word Wall . Behind the Word Wall is an altar with a few coin purses and two random enchanted weapons. Head out through the gated door at the opposite end of the room from where you came in and exit Dimhollow Crypt . When you finally escape Dimhollow Crypt, Serana will say:
As you travel with Serana to her castle, she will comment on the weather occasionally:
- "Even in this weather, it's better than the cave." (cloudy, fog, overcast or storm)
- "This weather is incredible." (anything else)
If you try to bring her to Fort Dawnguard, she will comment: "I don't like the feel of this place. I'll wait for you back by the entrance." .
Castle Volkihar [ edit ]
The castle is in the northwest corner of the map. The fastest way to reach the castle is to take the boat at Icewater Jetty , which is reachable on foot or fast traveling to Northwatch Keep and walking the remaining distance to the boat. It's also possible to hire a ferryman , but when asking to be taken to the island, they all reply with: "The one with the ruined castle? Don't you know that place is cursed? Even seasoned sailors steer far around that place. I'll take you as far as I can, but I'm not hanging around and it's gonna cost you extra. " and drop you off at the jetty. They part with a few cautionary words: "They say anyone who steps foot on that island will meet an early death... hope you know what you're doing." Once you are near the castle, Serana will say:
Once you arrive at Icewater Jetty she will say:
Activate the boat and you will arrive at a small dock with Castle Volkihar looming in the background. Bone hawks circle overhead and a stone bridge lined with gargoyles leads to the main gate. About halfway across the bridge, Serana will initiate conversation:
The next part can vary depending upon if you are a vampire or not. You are given three options to reply:
As you approach the gate, the Watchman will initially berate you, saying: "Begone! You're not welcome here!" Then, upon seeing Serana with, he'll be shocked and say, "Lady Serana's back! Open the gate!" and lead you both into the castle. Once you open the door and step into Volkihar Keep you are confronted by a vampire named Vingalmo . He yells: "How dare you trespass here!" but upon seeing Serana will joyfully exclaim: "Wait... Serana? Is that truly you? I cannot believe my eyes! My lord! Everyone! Serana has returned! "
Serana will walk over to the balcony overlooking the main hall as Harkon welcomes his daughter home:
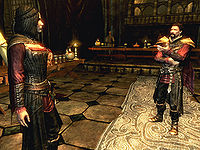
At this point you can either give him your name or ask him to reveal his first. Either choice leads to the same follow up: "I am Harkon, lord of this court. By now, my daughter will have told you what we are."
Three choices are presented:
- You're vampires: "Not just vampires. We are among the oldest and most powerful vampires in Skyrim."
- You're a reclusive cannibal cult: "Not quite, though I can see how an outsider might arrive at that conclusion. No, we are vampires, among the oldest and most powerful in Skyrim."
- I don't really care what you are: "Perhaps you should. I count some of the oldest and most powerful vampires in Skyrim among the members of my court."

He will expand on either of the above by mentioning: "For centuries we lived here, far from the cares of the world. All that ended when my wife betrayed me and stole away that which I valued most." Should you ignore him and walk away mid conversation, he becomes irritated and remarks: "You dare walk away from me? In my own hall, before my own court, you dare insult me?" or "We have not finished speaking yet. Come back at once."
The next set of questions relate to a potential reward, which results in Lord Harkon offering to bestow the power of a Vampire Lord unto you:
- What happens now?: "You have done me a great service, and now you must be rewarded. There is but one gift I can give that is equal in value to the Elder Scroll and my daughter. I offer you my blood. Take it, and you will walk as a lion among sheep. Men will tremble at your approach, and you will never fear death again."
- Do I get a reward for finding your daughter?: "I was about to suggest that very thing. Yes, you most certainly deserve a reward. There is but one gift I can give that is equal in value to the Elder Scroll and my daughter. I offer you my blood. Take it, and you will walk as a lion among sheep. Men will tremble at your approach, and you will never fear death again."
The last set of questions are dependent upon if you are already a Vampire , Werewolf or neither. Upon choosing the last option, Harkon demonstrates his immense power by transforming into a Vampire Lord himself:

As Harkon stands in front of you in his Vampire Lord form, you are forced to either refuse or accept his offer:

Choosing Vampire Lord [ edit ]
If you choose to become a Vampire Lord, Harkon will bite you as everything fades out. When you wake up, you and Harkon will be in the Volkihar Cathedral. Harkon will begin teaching you how to use your Vampire Lord powers, which include raising dead and draining life, as well as a claw attack. He also explains a few things, such as his history and that of his family, if you ask him about them. Once you are done getting acquainted with your new powers, you will be given a quest to fill The Bloodstone Chalice .
Power of the Blood [ edit ]
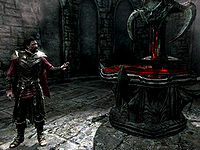
If you accept Harkon's offer, you awaken in the castle's catherdral where Harkon stands before an altar and remarks: "Awake at last, good. The power is growing within you, and now you must learn to wield it." .
At this point, three replies are presented. The first is option leads into a short training session with Harkon, who teaches you how to you the power of the Vampire Lord:
Once you transform into Vampire Lord, Harkon follows with:
As you land on the ground, he goes on:
Next you are prompted to view the perk tree . After exiting, Harkon continues:
Finally, once you select the list of powers from the favorites menu, Harkon ends with:
At this stage, three more dialogue options are presented that allow you to gain additional information about your newly found powers. Choosing first option end the conversation.
- I'm ready to carry out this task: "Good. Go and speak to Garan Marethi. Tell him it is time. He will understand."
- Tell me again about being a Vampire Lord: "When you first transform into a Vampire Lord, you will hover in the air. While you do, you will command the powers of Blood and Night. Descend to the ground, and you can attack with your claws and feed upon your prey to regain your strength. With experience, your powers will grow and you will discover new ways to use them."
- What must I know about being a vampire?: "With each passing day that you do not feed, that weakness will become more deadly, but your powers will also become stronger. Feed upon those who are sleeping, and your vulnerability to sunlight will diminish along with your powers."
The second and third of the original three choices offer additional insight into Harkon's background and the power he has granted you:

Choosing Dawnguard [ edit ]
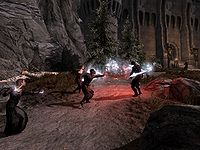
If you decide to stick with the Dawnguard and refuse his offer, Lord Harkon will cast a spell that will teleport you outside the Castle gate. He also "advises" you to never return. With the castle locked behind you, your only remaining option is to return to Fort Dawnguard and report this new discovery to the Dawnguard. Once you arrive, you will find the fortress under attack by a band of vampires. After defeating the vampire attackers, you should speak to Isran and tell him what you discovered. Following this report, he will give you the duty of seeking out some of his old allies to create A New Order . Following the Dawnguard side of the questline will cause Fort Dawnguard to be rebuilt and refurnished. You will also have access to Crossbow upgrades and Armored Trolls .
Notes [ edit ]
- While in the castle during this quest, you can't draw your weapon, cast spells, shout or do anything aggressive. However, you are free to take anything in the keep without it being identified as thievery, although many of the doors are locked (and can't be picked), and there is very little time to do so – just two gaps in the forced dialogue.
- You can still become a Vampire Lord if you choose to side with the Dawnguard, though it will not be possible until later in Dawnguard's main questline . If you do, your allegiance to the Dawnguard remains unchanged, though many of the Dawnguard will treat you with hostility and not offer services until you're cured.
- Siding with the Dawnguard allows access to some unique rewards. Specifically, the Ancient Technology quests allow you to smith crossbows and crossbow bolts, both steel and dwarven, and Lost Relic quests allow you to recover three unique magic items. Similarly, if you join the Volkihar side, the Ancient Power , Amulets of Night Power and Rings of Blood Magic quests help you enhance your Vampire Lord abilities.
- If you exit the conversation when Lord Harkon tells you to make your choice, and take too long to give an answer, he will banish you from the castle as if you chose to refuse his gift.
- If you are a werewolf, siding with Lord Harkon will cure your lycanthropy. However, you can become a werewolf again by asking Aela (which will cure your vampirism), and any lycanthropy perks which you had will be restored. You can restore your lycanthropy this way only once. You cannot advance in the Volkihar questline or use any of the vampire clan's services except when you are a vampire.
- If you try to bring Serana to Fort Dawnguard, she will refuse to go inside it, having "a bad feeling about this place". Isran will tell you to do as she asked in order to discover what it is all about, even if you tell him she's a vampire.
Bugs [ edit ]
- You can circumvent this issue by clipping through the wall on the right while standing on the railing. This gets you past the gate and able to access the door.
- You can glitch through the gate by holding up a large plate/platter against the gate, then using Whirlwind Sprint to sprint into the gate and pass through it. See YouTube for demonstrations of the plate glitch technique.
- After accepting Harkon's gift and transforming into a Vampire Lord, you may be permanently frozen, unable to move at all.
- If you are unable to start the quest after you have turned into a vampire and you try talking to Garan Marethi, all he tells you is to go back to Lord Harkon and get changed back to a vampire, and you are unable to start the conversation with him. To fix this on PC, do the following: open the console, and type player.setrace <race>racevampire , replacing <race> with the name of your race (e.g., player.setrace darkelfracevampire if you are a Dark Elf).
- Harkon may equip the Banish spell, but just stand and stare at you if you refuse to become a vampire.
- After speaking with Harkon about accepting his gift, he may not transform. If you approach him and talk to him again, he will continue to repeat the same introduction dialogue.
- Reload to a save after entering Dimhollow Crypt, wait 30 days, then proceed with the quest. this resets all dungeons, characters, etc... this also fixes the bug where you die after being bitten by Harkon.
- You can also try standing behind one of the tables in the room before Lord Harkon addresses you. From there, he won't be able to lunge at you so you won't die, but you'll receive his gift anyway.
- You can also change to your human form, go into sneak mode, and type tcl in the console to reach the door to Skyrim undetected. After you exit the castle you may enter again as normal.
- In the latter case, it may be that the follower is actually inside the castle, rather than simply gone.
- Serana normally leaves your service as a follower for a while upon completion of this quest, throughout the following quest A New Order , until after the start of Prophet , but sometimes can remain a follower (and willing to enter Fort Dawnguard after Bloodline). When this happens, it causes a dialogue oddity in Prophet (plus Sorrine and Harkon in A New Order are not coded to have any reaction to you asking them to join Dawnguard while you're also traveling with an obvious vampire), but the glitch is otherwise harmless. ?
- Sometimes the Watchman will not let you into the castle, blocking quest advancement.
Quest Stages [ edit ]
- The following empty quest stages were omitted from the table: 0, 6, 7, 8, 9, 15.
- Any text displayed in angle brackets (e.g., <Alias=LocationHold> ) is dynamically set by the Radiant Quest system, and will be filled in with the appropriate word(s) when seen in game.
- Not all Journal Entries may appear in your journal; which entries appear and which entries do not depends on the manner in which the quest is done.
- Stages are not always in order of progress. This is usually the case with quests that have multiple possible outcomes or quests where certain tasks may be done in any order. Some stages may therefore repeat objectives seen in other stages.
- If an entry is marked as "Finishes Quest" it means the quest disappears from the Active Quest list, but you may still receive new entries for that quest.
- On the PC, it is possible to use the console to advance through the quest by entering setstage DLC1VQ02 stage , where stage is the number of the stage you wish to complete. It is not possible to un-complete (i.e. go back) quest stages, but it is possible to clear all stages of the quest using resetquest DLC1VQ02 .
- Skyrim-Dawnguard
- Skyrim-Dawnguard-Quests
- Skyrim-Dawnguard-Quests-Main Quest
- Skyrim-Dawnguard-Bugs Fixed by the Unofficial Dawnguard Patch
- Skyrim-Dawnguard-Confirmed Bugs
- Skyrim-Bugs Fixed by the Unofficial Dawnguard Patch
- Skyrim-Unconfirmed Bugs
- Skyrim-Confirmed Bugs
- MetaTemplate-Load
- Skyrim-SRQRP-Requires Final Review
Navigation menu
Personal tools.
- Not logged in
- Contributions
- Create account
- How to Contribute
- Recent Changes
- Random Page
- View Mobile Site
- Android App
- All Content
- Elder Scrolls Online
- Battlespire
- Call to Arms
- Merchandise
- Featured Content
- Community Portal
- Admin Noticeboard
- Join Server
- X (Twitter)
- Hosted Wikis
- Starfield Wiki
- Oblivion CS Wiki
- Skyrim CK Wiki
- Fallout 3 GECK Wiki
- Fallout 4 CK Wiki
- What Links Here
- Related changes
- Special Pages
- Printable Version
- Permanent Link
- Page information
- Cite this page
- This page was last edited on 5 September 2023, at 12:46.
- All content is available under the terms of the Attribution-ShareAlike 2.5 License .
- Privacy Policy
- About UESPWiki
- Disclaimers
- Mobile view
IMAGES
VIDEO
COMMENTS
I'm just a little sick of fast traveling to Dawnguard, then having to run all the way up to the doors. I'm wondering if there's a way to fast travel directly to the fort? Thanks guys! -Boyko. Go a bit further into the Dawnguard quest chain. I thought the same thing too, but eventually you can fast travel to a couple of meters from the door.
Go back the way you came and when you see the flames on the right enter that cave and you will be in Day Spring Canyon then just follow the path to the Dawnguard. If you get to the wall that the road passes through, but says you cannot go this way, you've gone too far. Turn back and watch for a broken Aspen tree on the side of the road.
1. Fort Dawnguard. Fort Dawnguard is a large fort southeast of Riften which serves as the Dawnguard 's base of operations. † The alchemy lab, arcane enchanter, and forge are not initially present in the fort, but added during restorations to the fort just before the Prophet quest ends. The fort is home to the ancient order of vampire hunters ...
The Elder Scrolls V: Skyrim; Updated Fast Travel Guide; LordTrinen 11 years ago #1. This is an updated version of my previous Fast Travel Guide. It now includes travel between all the minor settlements like Riverwood and DLC locations like Fort Dawnguard. ... Markarth to Fort Dawnguard = 28:45 (28.75 hours) Markarth to Castle Volkihar = 9:30 (9 ...
Fast-travel to the closest location to Fort Dawnguard and enter the 'Dayspring Canyon'. Warning: If you still have Lycanthropy there is a small chance that members of the Dawnguard will attack you ...
Fast Travel is a method of travel in The Elder Scrolls V: Skyrim. It is a way of quickly "teleporting" to any previously discovered location. The travel takes place almost instantaneously in real-world time through a loading screen, but in game time will still pass by as if the Dragonborn had walked there. When using fast travel, the time elapsed may be longer than the time it would have taken ...
After you have started Dawnguard, your objective in this first quest is to speak to the leader of the Dawnguards.Fast travel to Riften, which is the closest city to Fort Dawnguard. Open your map and locate the points of interest. Fort Dawnguard is directly to the east of Riften, however a big mountain range stands between your location and the fort.
Fort Dawnguard is located slightly southeast of Riften, far off in the mountains, and is accessible via a small cave. Fort Dawnguard is the home base of the vampire hunting sect, The Dawnguard .
Fast travelling. Fast travelling a long distance (Fort Dawnguard to Castle Volkihar 1, including map navigation time) took 9.6 seconds and advanced the time by 32 and a half hours. That would make "waiting" 720 hours take a little under 4 minutes in total. This makes travelling much faster option. Waiting with tfc (PC only)
Skyrim (2011) Dawnguard (2012) Hearthfire (2012) Dragonborn (2012) Other games. Battlespire (1997) ... Rannveig's Fast: RannveigsFastExterior01 RannveigsFastExterior02 RannveigsFastExterior03 RannveigsFast01 ... Fort Dawnguard DG: DLC1DawnguardHQ01 Fort Greenwall: FortGreenwallExterior01 FortGreenwallExterior02
Fort Dawnguard is a location in The Elder Scrolls V: Dawnguard. It serves as the headquarters of the Dawnguard, an order of vampire hunters. The fort can only be accessed via Dayspring Canyon north of Stendarr's Beacon. It is located in the Rift, hidden deep within the Velothi Mountains near the Morrowind border. This is Fort Dawnguard. Originally owned by the Jarl of Riften back in the Second ...
> Exit the fort via the main entrance and fast-travel back to the castle. Head left (north) around the shore. You'll come to an old dock, kill the augmented skeletons here and go up the stairs to ...
Version 1.0.2. Description. This mod adds map markers and changes the Dayspring Canyon entrance to be more immersive and believable (NO MORE TINY CAVE ENTRANCE!!). In addition, once the location of Fort Dawnguard is discovered, you will be able to fast travel there immediately like most other map markers instead of further through the quest.
About this mod. Lets you fast travel to the entrance of Fort Dawnguard. Share. Requirements. Permissions and credits. This is just a little change to the fast travel location of Fort Dawnguard. Either Bethesda messed up with placing this correctly or, even worse, they intended us to walk all the way uphill from the vally to the entrance of the ...
Dawnguard DLC is especially torturous since it's clearly designed with fast travel in mind, otherwise you wouldn't be forced to go to remote locations far off the existing diagetic fast travel services on a frequent basis just to say "hi" now and then to then be sent off to the other side of the country for some errand or another.
By Default, the Skyrim map can be a little touchy when it comes to fast-traveling to the new Dawnguard locations. The only reliable solution I've found is to rotate the map (by right-click dragging), which changes the angle and pushes the locations "up", making them much easier to select. Share. Improve this answer. edited Sep 1, 2013 at 22:34.
Use the command player.moveto 03003ba8 to meet Harkon inside the castle and that would have you start quest next quest. however, you have to fast travel to complete the quest "bloodline". Use the command prid 02017d59 to select the gate, then disable to remove it. Serana may not enter the castle with you.
Description: Near the Riften south gate you can find teleport stone to Dayspring Canyon (Fort Dawnguard). During the Second Era this stone was used by Jarl of Riften to visit his vampire son. And now you can use this ancient way to have a quick access to Fort Dawnguard. This mod will be useful for those who avoid to use fast travel but hate run ...
The trip from Riften to Fort Dawnguard is quest aware. In order to travel to Fort Dawnguard from Riften, you must have started and/or completed Awakening. If you arrive at Fort Dawnguard on foot, you can use the carriage stop to travel back to Riften regardless of quest status. It is feasible that this quest requirement might conflict with mods ...
Overview. Fort Dawnguard is a bit of a blank slate in vanilla. Immersive Fort Dawnguard is an aesthetic overhaul - adding lots of interesting new stuff while staying true to the original feel. The fort exterior now includes extra fortifications, a main gate, alchemy tower, farming area and greenhouses. The interior features a new chapel ...