Winter is here! Check out the winter wonderlands at these 5 amazing winter destinations in Montana
- Travel Destinations
- United States

How To Obtain A Travel Document In The USA To India
Published: November 1, 2023
Modified: December 28, 2023
by Regine Meagher
- Plan Your Trip
Introduction
Planning a trip to India from the United States? One of the essential steps in ensuring a smooth and hassle-free journey is obtaining the necessary travel document. Whether you’re an American citizen, a permanent resident, or a non-U.S. citizen residing in the United States, there are specific requirements and processes to follow to acquire the appropriate travel document.
Travel documents serve as proof of identity and permission to enter a foreign country. In the context of traveling to India, there are a few options to consider depending on the purpose and duration of your visit. These include visas, passports, Electronic Travel Authorization (ETA), or Overseas Citizen of India (OCI) cards.
Understanding the requirements and procedures involved in obtaining the right travel document is crucial to avoid any unnecessary delays or complications during your trip. This comprehensive guide will walk you through the steps you need to follow to obtain a travel document for your journey from the United States to India.
Step 1: Determine the type of travel document you need
The first step in obtaining a travel document for your journey to India is determining the specific type of document you require. The type of document will depend on factors such as your citizenship, the purpose of your visit, and the duration of your stay. Here are the most common travel documents for traveling to India:
- Visa: A visa is an endorsement or stamp in your passport that grants you permission to enter and stay in India. There are various types of visas available depending on the purpose of your visit, such as tourist visas, business visas, student visas, employment visas, and more. Determine the type of visa that aligns with the purpose of your trip.
- Passport: If you are a U.S. citizen, you will need a valid passport to travel to India. Make sure your passport has a sufficient validity period beyond your intended stay in India.
- Electronic Travel Authorization (ETA): An ETA allows eligible foreign nationals to visit India for tourism, short business visits, and medical purposes for a duration of 60 days. This is a convenient option for those planning a short-term visit to India.
- Overseas Citizen of India (OCI) card: The OCI card is available for individuals of Indian origin who hold foreign citizenship. This card grants multiple entry and lifelong visa-free travel to India. It is suitable for individuals who wish to visit India frequently or for long durations.
Consider your travel plans, purpose of visit, and duration of stay in India to determine which type of travel document is most appropriate for you. Once you have identified the type of document needed, you can proceed with gathering the required documents and completing the application process.
Step 2: Gather the required documents
Once you have determined the type of travel document you need for your trip to India, the next step is to gather the necessary documents. The specific documents required may vary depending on the type of travel document you are applying for. Here are some common documents you may need:
- Visa: If you are applying for a visa, you will typically need the following:
- Completed visa application form
- Valid passport with at least six months of validity
- Passport-sized photos
- Proof of travel itinerary
- Proof of accommodation arrangements
- Evidence of sufficient funds to support your stay in India
- Supporting documents depending on the type of visa (e.g., letter of invitation, employment letter, student enrollment letter)
- Passport: If you are a U.S. citizen, you will need the following documents to obtain or renew your passport:
- Completed passport application form
- Proof of U.S. citizenship (such as birth certificate or naturalization certificate)
- Proof of identity (such as driver’s license or government-issued ID)
- Passport photos
- Payment for passport fees
- Electronic Travel Authorization (ETA): To apply for an ETA, you will typically need the following documents:
- Completed ETA application form
- Passport with at least six months of validity
- Passport-sized photo
- Overseas Citizen of India (OCI) card: If you are applying for an OCI card, you will generally need the following documents:
- Completed OCI application form
- Proof of Indian origin (such as birth certificate, previous Indian passport, or parent’s/grandparent’s Indian passport)
- Valid passport
- Evidence of current citizenship
- Proof of residency status (such as Green Card or visa)
It is important to check the specific requirements and documents needed for your particular travel document type. Make sure to gather all the necessary documents and keep them organized for the next steps in the application process.
Step 3: Complete the application form
Once you have gathered all the required documents, the next step in obtaining a travel document for your journey to India is completing the application form. The application form varies depending on the type of travel document you are applying for, such as a visa, passport, ETA, or OCI card.
Here are some important tips to keep in mind when filling out the application form:
- Read the instructions: Before starting the application form, carefully read the instructions provided. Understand the requirements, guidelines, and any specific details related to the form.
- Provide accurate information: Ensure that all the information you provide is accurate and matches the details on your supporting documents. This includes personal details, travel information, and any additional information required.
- Be consistent: Maintain consistency in your responses throughout the application form. Use the same format for dates, names, and other details as requested in the form.
- Double-check your entries: After completing the application form, review all the entries to ensure there are no errors or omissions. Mistakes or missing information can cause delays or even rejection of your application.
- Seek assistance if necessary: If you have any doubts or concerns while filling out the application form, don’t hesitate to seek guidance from the relevant authorities or consult professional visa services.
Remember to sign and date the application form where required. Keep a copy of the completed form for your records. Once the application form is complete, you can move on to the next step in the process, which is paying the application fees.
Step 4: Pay the application fees
After completing the application form, the next step in obtaining a travel document for your journey to India is paying the required application fees. The fees vary depending on the type of travel document and the specific requirements of your application. Here are some important points to keep in mind when paying the fees:
- Find out the payment methods: Check the official website or reference materials to determine the accepted payment methods for the application fees. Typically, online payment through credit/debit cards or electronic bank transfers are common options. Some application centers may also accept cash or money orders.
- Calculate the exact amount: Make sure to calculate and pay the exact amount mentioned for the application fees. Any overpayment or underpayment may result in delays or rejections.
- Keep proof of payment: After making the payment, be sure to keep a copy of the payment receipt or any confirmation document as proof of payment. This will be important for tracking the progress of your application and for future reference.
- Check for additional fees: Apart from the main application fees, there may be additional charges for optional services or expedited processing. Be aware of any additional fees and decide accordingly based on your needs and preferences.
- Be cautious of fraudulent websites: When making the payment, ensure that you are on an official and secure website. Beware of fraudulent websites that may attempt to steal your personal and financial information. Always double-check the URL and look for the secure padlock symbol.
It is essential to complete the payment of the application fees promptly to initiate the processing of your travel document. Once the payment is made, you can move forward with submitting your application for further processing.
Step 5: Submit your application
After completing the necessary forms and paying the application fees, it’s time to submit your application for processing. The submission process may vary depending on the type of travel document you are applying for. Here are some general guidelines to follow:
- Check the submission method: Determine the appropriate method for submitting your application. This could be online through a designated portal, in-person at an application center, or by mail. Refer to the official website or instructions provided to ensure you follow the correct submission procedure.
- Prepare the application package: Assemble all the required documents along with the completed application form. Organize them neatly and in the order specified to make the processing smoother. Include any additional forms or supporting documents as required.
- Make copies: Before submitting your application, make photocopies of all the documents in the application package. This will serve as a backup in case any documents get misplaced during the processing period.
- Check for completeness: Double-check your application package to ensure that all the necessary documents are included. Verify that the information provided is accurate and matches the supporting documents. Any missing or incorrect information may result in delays or rejection of your application.
- Submit the application: Follow the instructions provided to submit your application. If submitting in-person, be prepared for any required biometric data collection (such as fingerprints or photographs) or an interview, if applicable. If submitting by mail, use secure and trackable methods to send your package.
- Keep the submission receipt: After submitting your application, make sure to obtain a submission receipt or proof of submission. This will serve as evidence that your application has been received and can be used for tracking purposes or inquiries regarding your application status.
Remember to maintain patience and follow the provided guidelines throughout the application submission process. Once your application is submitted, the next steps in the process will depend on the type of travel document and the respective processing timelines. Stay informed about the progress of your application and prepare for any additional steps that may be required, such as attending an interview or providing further documentation.
Step 6: Schedule an appointment (if applicable)
Depending on the type of travel document you are applying for, you may be required to schedule an appointment as part of the application process. This step typically applies to visa applications or certain types of passport services. Here’s what you need to know about scheduling an appointment:
- Check appointment requirements: Review the official guidelines or instructions to determine if an appointment is necessary for your specific application. Different consulates or application centers may have varying requirements.
- Online appointment system: If an appointment is required, the application process often includes an online appointment scheduling system. Visit the designated website and follow the instructions to book your appointment. Make sure to select a convenient date and time that aligns with your schedule.
- Prepare the necessary documents: Before attending the appointment, gather all the required documents as specified by the official guidelines. This may include the completed application form, supporting documents, and any additional forms or photographs.
- Arrive on time: On the day of the appointment, make sure to arrive at the designated location on time. Plan ahead for any travel time, parking, or security procedures that may be in place. Arriving early will help ensure a smooth and stress-free appointment experience.
- Follow appointment instructions: During the appointment, follow the instructions provided by the officials. This may involve submitting your application package, providing biometric data (such as fingerprints or photographs), or attending an interview. Be prepared to answer any questions related to your application.
- Take note of any additional requirements: After the appointment, take note of any further requirements or steps provided by the officials. This may include additional documentation, follow-up interviews, or updates on the processing timeline.
It is important to carefully review the appointment requirements and follow the instructions provided to ensure a successful appointment. Missing or rescheduling appointments may cause delays in the processing of your travel document application. Stay organized and prepared for your appointment to maximize the chances of a smooth and efficient process.
Step 7: Attend the visa interview (if required)
For certain types of visas or travel documents, attending a visa interview may be a mandatory step in the application process. The visa interview provides an opportunity for consular officers to assess your eligibility and intentions for traveling to the destination country. If a visa interview is required for your application, here’s what you need to know:
- Receive interview notification: Once your application has been processed and reviewed, you will receive a notification regarding the interview appointment. The notification will include details such as the date, time, and location of the interview.
- Prepare for the interview: Take the time to prepare for the visa interview by gathering all the necessary documents and reviewing your application materials. Familiarize yourself with the documentation requirements and potential questions that may be asked during the interview.
- Pay attention to appearance: Dress appropriately and present yourself in a professional manner for the interview. The way you present yourself can make a positive impression on the consular officer.
- Be honest and confident: During the interview, answer all questions honestly and confidently. Provide clear and concise responses while maintaining a respectful demeanor. If you are unsure about a question, it is better to ask for clarification than to provide incorrect information.
- Provide supporting documents: Bring all relevant supporting documents to the interview, such as your application form, passport, travel itinerary, financial documents, and any other documents specified in the interview notification.
- Address language barriers: If you are not fluent in the local language, make arrangements for an interpreter if necessary. It is important that you fully understand the questions being asked and can provide accurate responses.
- Follow any post-interview instructions: After the interview, the consular officer may provide further instructions or request additional documentation. It is crucial to carefully follow these instructions and promptly provide any requested information.
The visa interview is an essential step in the application process, as it allows the consular officer to assess the purpose of your visit and determine your eligibility for the travel document. Be well-prepared, confident, and truthful in your responses to maximize your chances of a successful visa interview.
Step 8: Wait for the processing of your travel document
After submitting your application and completing any required interviews or appointments, the next step is to wait for the processing of your travel document. The processing time can vary depending on the type of document and various factors such as the volume of applications, time of year, and the complexity of your case. Here’s what you need to know about waiting for the processing of your travel document:
- Review processing times: Check the official website or reference materials to get an estimate of the processing times for your specific travel document. This will give you an idea of how long you may need to wait.
- Avoid making unnecessary inquiries: It is common to be eager to receive your travel document, but it is generally advised to wait until the processing time has elapsed before making any inquiries. An overwhelming number of inquiries can cause delays in the processing.
- Track your application: If there is an online tracking system available, use it to monitor the status of your application. This will help you stay informed about any updates or changes in the processing of your travel document.
- Prepare for additional requests: In some cases, the processing authority may request additional documents or information to complete the evaluation of your application. Be prepared to respond promptly to these requests to avoid any further delays.
- Be patient: Waiting for your travel document can be a test of patience. Keep in mind that the processing times are meant to ensure thorough assessment and review of applications. Try to focus on other aspects of trip planning and avoid unnecessary stress.
- Contact the appropriate authorities if necessary: If the processing time surpasses the estimated timeframe and you have urgent travel plans, contact the appropriate authorities or consult with professional visa services to inquire about the status of your application.
Remember that processing times can vary, and it is important to plan ahead and submit your application well in advance of your intended travel dates. Stay informed, exercise patience, and be prepared to receive your travel document once the processing is complete.
Step 9: Receive your travel document
Congratulations! The final step in obtaining your travel document for your journey to India is receiving the document itself. After the processing period, you will be notified once your travel document is ready for collection or delivery. Here’s what you need to know:
- Notification and collection method: You will receive notification regarding the availability of your travel document. The notification will specify whether you need to collect it in person or if it will be mailed to you. Follow the instructions provided to retrieve your travel document.
- Collection process: If you are required to collect the travel document in person, visit the designated location during the specified hours of operation. Bring the necessary identification and any supporting documents that may be required for the collection process.
- Verification and signature: During the collection process, your identity may be verified, and you may be required to sign for the receipt of your travel document. Make sure to carefully inspect the document for any errors or discrepancies. If there are any issues, notify the appropriate authorities immediately.
- Delivery process: If your travel document is being delivered to you, ensure that you provide an accurate and secure delivery address. Keep track of the delivery status using any provided tracking information.
- Safeguard your travel document: Once you receive your travel document, take measures to safeguard it. Keep it in a secure place, preferably in a protective cover or sleeve, and make copies of the document for backup purposes. It is essential to protect your travel document as it is your key to entry and exit from the country.
- Review the details: Thoroughly review the details in your travel document, including personal information, validity period, and any visa or entry requirements. Ensure that all the information is accurate and matches your intentions and travel plans.
Receiving your travel document marks the final step in the process, and you are now ready for your journey to India. Make sure to adhere to the terms and conditions of your travel document and any visa requirements during your stay in the country. Enjoy your trip!
Obtaining a travel document for your journey from the United States to India is an essential step to ensure a smooth and hassle-free travel experience. By following the steps outlined in this guide, you can navigate the process with ease and confidence. Here’s a recap of the important steps to obtain your travel document:
- Determine the type of travel document you need based on your citizenship, purpose of visit, and duration of stay.
- Gather the necessary documents, such as a visa application, passport, photos, and supporting documentation.
- Complete the application form accurately, following the instructions provided.
- Submit the application and pay the required fees using the approved methods.
- Schedule an appointment if necessary, and attend any required interviews.
- Wait patiently for the processing of your travel document, keeping track of its progress if possible.
- Collect or receive your travel document following the instructions provided, ensuring the accuracy of the details.
Throughout the process, it is crucial to stay organized, follow the guidelines provided, and be patient as the processing times may vary. Seek assistance or consult with professional visa services if you require any clarifications or if your travel plans are time-sensitive.
Remember, obtaining a travel document is a significant step towards your journey to India. Ensure that you adhere to the regulations and requirements of your travel document during your stay in the country, and enjoy your time exploring all that India has to offer.
- Privacy Overview
- Strictly Necessary Cookies
This website uses cookies so that we can provide you with the best user experience possible. Cookie information is stored in your browser and performs functions such as recognising you when you return to our website and helping our team to understand which sections of the website you find most interesting and useful.
Strictly Necessary Cookie should be enabled at all times so that we can save your preferences for cookie settings.
If you disable this cookie, we will not be able to save your preferences. This means that every time you visit this website you will need to enable or disable cookies again.

Authorized Portal for Visa Application to India Indianvisaonline.gov.in
All foreign nationals entering India are required to possess a valid international travel document in the form of a national passport with a valid visa from an Indian Mission/Post or eVisa (Limited Categories) from Bureau of Immigration, Ministry of Home Affairs.
Visa on Arrival for the nationals of Japan, South Korea and UAE (only for such UAE nationals who had earlier obtained e-Visa or regular/paper visa for India) Available at selected Airports

Advisory: Government of India has not authorized any agent or intermediary to charge any fee for facilitation of emergency / express Visa/eVisa. For travel to India a regular/eVisa along with passport is mandatory. Only categories exempted under bilateral arrangments may not need a visa. For persons of Indian origin (all categories), OCI card is mandatory.

e-Visa - Only Ordinary Passport holders may apply for eVisa application online. Select Visa Service as G20 eConference Visa and purpose as "To Attend G20 Conference/Meeting" .
Regular Visa - Diplomatic/Official/Ordinary Passport holders may fill online application and submit at concerned Indian Embassy/Mission in their country. Select Visa Service as Conference Visa and purpose as "To Attend G20 Conference/Meeting" .
- Main Menu ×
- Search Flights
- Corporate Travel Programme
- Group Booking
- Special Offers
- Travel Insurance
- Flight Schedule
- Check In Online
- Manage Booking
- Seat Selection & Upgrades
- Self-Service Re-accommodation
- Request Refund
- Flight Status
- Nonstop International Flights
- Popular Flights
- Partner Airlines

- Baggage Guidelines
- Airport Information
- Visas, Documents and Travel Tips
- First-time Travellers, Children and Pets
- Health and Medical Assistance

- At the Airport
- The Air India Fleet

- About Flying Returns
- Sign In/Sign Up
- Our Partners
- Family Pool
- Earn Points
- Spend Points
- Upgrade Cabin Class
- Points Calculator
- Customer Support

What are you looking for?
Documents to Carry
Your checklist for a worry-free travel.
Have I got everything I need? A constant question that troubles every traveller. Leave it to us to make it easy for you. Having a checklist of documents before your journey can ease your travel woes. Whether it's understanding the documentation you need or the unique entry requirements for the country you're visiting, we've got you covered.
Documents for domestic flights
For domestic travel in India, please carry your ticket and a valid proof-of-identity document. Acceptable proof of identification documents are
- Voter ID card
- Aadhaar card
- Driver's licence
- ID card with photo issued by the central or state government, public sector undertakings, local bodies, or public limited companies.
- Student identity card issued by a government institution or government-recognized educational institution.
- Nationalized bank passbook with an attested photograph.
- Pension card/pension documents with a photograph.
- Disability ID card/handicapped medical certificate issued by the respective State/UT governments or administrations.
Proof of identity and travel documents stored in DigiLocker are accepted at airports in India if you wish to avoid carrying physical documents.
Infants and minors
Infants and minors do not require proof of identity when travelling with parents or guardians who carry valid IDs. Unaccompanied minors must have one of the proof-of-identity documents listed above.
Unable to present any of the acceptable identity proofs?
If a traveller cannot present any of the listed documents, then a group 'A' gazetted central or state government officer can issue an identity certificate. The officer must submit the duly attested certificate on the official letterhead with a photograph of the passenger.
Documents for international flights
If you are flying internationally, please carry a valid passport, visa, entry permit, and necessary health certificates. Also, ensure that embarkation forms, if required, are completed and submitted to customs and immigration authorities before boarding the aircraft.
When you're travelling, it's important to download and carry your e-visa status with you, either in digital or printed form. This documentation is necessary for the boarding process, ensuring that you have the required paperwork as per the regulations set by immigration authorities and Air India.
Note: If you are a seaman, download the IATA individual ship's crew fare resolution.
Name matching on identification document and flight ticket
Please provide your full name exactly as it appears on the valid identification proof that you will present at the time of entry into the airport, check-in, immigration, or boarding.
The name on your e-ticket should match your passport, Aadhaar card, or other proof of identity you will present at the airport for entry, check-in, and boarding.
If your name on the identification proof does not match the name provided in the booking, you will not be permitted to enter the airport or board the flight.
If you don't have a first name or last name or would like to understand the name format policy for different countries, please follow these instructions to complete your booking successfully.
It seems like you're in landscape mode. For the best view, switch to portrait mode where the magic happens!
Official websites use .gov A .gov website belongs to an official government organization in the United States.
Secure .gov websites use HTTPS A lock ( A locked padlock ) or https:// means you've safely connected to the .gov website. Share sensitive information only on official, secure websites.
- Create Account
Travel Documents
If you wish to return to the United States lawfully after traveling outside the United States, you generally must have a:
- Valid entry document, such as a Permanent Resident Card (Green Card) or nonimmigrant visa; or
- Valid and unexpired travel document.
The type of document you need varies depending on your immigration status (including lawful permanent resident status) or if you have a pending immigration benefit request.
You generally need to apply for and obtain a travel document before you leave the United States. Before planning travel, please consider USCIS processing times . If you have an urgent need to travel outside the United States, see our Expedite Request and Emergency Travel pages for additional information.
File Form I-131, Application for Travel Document , to request travel documents, including:
- Advance parole document for noncitizens in the United States seeking to return after temporary travel abroad (including advance permission to travel for Commonwealth of the Northern Mariana Islands (CNMI) long-term residents);
- Refugee travel document;
- Reentry permit; or
- Temporary Protected Status travel authorization.
If you are already outside the United States and need to return, but do not have your reentry permit, Green Card, advance parole document, or Temporary Protected Status travel authorization document because it was lost, stolen, or destroyed, see Form I-131A, Application for Carrier Documentation.
NOTE: If you file Form I-131, Application for Travel Document, to request an advance parole document to authorize your return to the United States after temporary travel abroad and you depart the United States before we issue your advance parole document, we will consider your Form I-131 application abandoned unless you were previously issued an advance parole document that remains valid for the entire time you are outside the United States.
Travel outside of the United States may have severe immigration-related consequences.
Admission or parole into the United States is not guaranteed even if you have the appropriate documents. You are still subject to immigration inspection or examination at a port of entry to determine whether you may be admitted or paroled into the country and whether you are eligible for the immigration status you seek.
Additional cautions for people in certain circumstances are summarized below.
If you are a nonimmigrant
If you have been admitted as a nonimmigrant and have filed Form I-539, Application to Extend/Change Nonimmigrant Status , to change to a different nonimmigrant status, we generally will consider your Form I-539 abandoned if you leave the United States before we make a decision on your application, though there are some exceptions. Having an advance parole document does not prevent abandonment of the change of status application. When you return to the United States, you are likely to be denied admission if your current status has expired.
If you have a pending Green Card application
In general, if you are applying for adjustment of status (a Green Card) and leave the United States without the appropriate travel documentation (for example, an advance parole document), you may not be allowed to reenter the United States when you return. Even if you are allowed to reenter, you may be found to have abandoned your pending application for adjustment of status.
If you have unlawful presence or a removal order
If you have accrued unlawful presence while in the United States or have a removal order, then you may be found inadmissible if you seek admission after a departure from the United States, even if you have a travel document. We follow the Board of Immigration Appeals decision in Matter of Arrabally and Yerrabelly , which held that travel on advance parole does not constitute a “departure” for purposes of triggering the 10-year unlawful presence bar under Immigration and Nationality Act (INA) § 212(a)(9)(B)(i)(II) for applicants for adjustment of status. We also apply this analysis to INA § 212(a)(9)(B)(i)(I) and to individuals with TPS who travel on TPS travel authorization. For more information, please see Section 212(a)(9) of the Immigration and Nationality Act (INA) and the Unlawful Presence and Inadmissibility page.
Advance parole allows you to travel back to the United States without applying for a visa. A transportation company (airlines) can accept an advance parole document instead of a visa as proof that you are authorized to travel to the United States. An advance parole document does not replace your passport.
Please note that having an advance parole document does not guarantee that you will be allowed to reenter the United States. At the airport or border, a U.S. Customs and Border Protection (CBP) officer will make the final decision about whether to allow you to reenter the United States.
Advance parole is most commonly used when someone has a pending:
- Form I-485, Application to Register Permanent Residence or to Adjust Status : If you depart the U.S. while your Form I-485 is pending without first obtaining advance parole, USCIS will deny your case unless you fit into a narrow exception for people with certain nonimmigrant statuses.
- Form I-589, Application for Asylum and for Withholding of Removal : If you are an asylum applicant and you intend to travel outside the United States and return, you must apply for and receive advance parole. If you leave the United States without first obtaining advance parole, we will assume that you have abandoned your asylum application.
For information on how to apply for advance parole, go to our Form I-131, Application for Travel Document page.
USCIS issues refugee travel documents to people with refugee or asylum status and to lawful permanent residents who obtained their Green Cards based on their refugee or asylee status.
You must have a refugee travel document to return to the United States if you:
- Have refugee or asylee status but are not a lawful permanent resident (Green Card holder); or
- Are a derivative asylee or refugee.
If you do not obtain a refugee travel document before you leave the U.S., you may be unable to re-enter the United States or you may be placed in removal proceedings before an immigration judge.
For information on how to apply for a refugee travel document, go to our Form I-131, Application for Travel Document page.
Permanent or conditional residents should apply for a re-entry permit if they will be outside the United States for one year or more. While it is valid, a re-entry permit allows you to apply for admission to the U.S. without having to obtain a returning resident visa from a U.S. Embassy or Consulate. Go to our Form I-131, Application for Travel Document page for information on how to apply.
Travel authorization for Temporary Protected Status (TPS) beneficiaries allows you to travel back to the United States and, if you are eligible, be inspected and admitted into TPS. A transportation company (such as an airline) can accept a TPS travel authorization document instead of a visa as proof that you are authorized to travel to the United States. A TPS travel authorization document does not replace your passport.
Please note that having a TPS travel authorization document does not guarantee that you will be allowed to reenter the United States. At the airport or border, a U.S. Customs and Border Protection (CBP) officer will make the final decision about whether to allow you to reenter the United States.
If we are still adjudicating your application for TPS and you wish to travel outside the United States, you may request advance parole.
For information on how to apply for TPS travel authorization, go to our Form I-131, Application for Travel Document , page.
Carrier documentation allows an airline or other transportation carrier to board permanent residents who have temporarily been outside the United States and whose Green Card or re-entry permit has been lost, stolen or destroyed. If you are a permanent resident in this situation, you may need to file a Form I-131A. Go to the Form I-131A, Application for Travel Document (Carrier Documentation) for more information.
Cookies on GOV.UK
We use some essential cookies to make this website work.
We’d like to set additional cookies to understand how you use GOV.UK, remember your settings and improve government services.
We also use cookies set by other sites to help us deliver content from their services.
You have accepted additional cookies. You can change your cookie settings at any time.
You have rejected additional cookies. You can change your cookie settings at any time.
- Passports, travel and living abroad
- Travel abroad
- Foreign travel advice
Entry requirements
This advice reflects the UK Government’s understanding of current rules for people travelling on a full ‘British citizen’ passport from the UK, for the most common types of travel.
The authorities in India set and enforce entry rules. If you’re not sure how these requirements apply to you, contact the High Commission of India in London or another Indian consulate in the UK .
COVID-19 rules
There are no COVID-19 testing or vaccination requirements for travellers entering India.
Passport validity requirements
Make sure your passport is valid for at least 6 months from your date of entry into India.
Your passport must also: - have 2 blank pages for your visa
Check with your travel provider that your passport and other travel documents meet requirements. Renew your passport if you need to
You will be denied entry if you do not have a valid travel document or try to use a passport that has been reported lost or stolen.
Visa requirements
Apply for the right type of visa for the purpose of your travel.
You need a visa to travel to India unless you are an Overseas Citizen of India (OCI) cardholder.
India has a number of visa categories. Make sure you get the right visa for the purpose and duration of your travel.
Penalties for having the wrong visa can include refusal of entry or deportation. This may also include not being allowed to enter India in the future.
For latest information on Indian visas and immigration requirements, see the e-FRRO online portal (part of the Indian Foreigners Registration Office), the Bureau of Indian Immigration website and Indian Ministry of External Affairs website .
Applying for a visa or e-visa
Find out how to apply for a visa from the Indian Bureau of Immigration Depending on your requirements you may be able to apply for:
- regular (paper) visa
- e-visa (make sure to check the website’s ‘FAQs’ for restrictions on airports and seaports of entry)
Check your eligibility and any restrictions before you apply and allow plenty of time for your application to be processed.
More information is available from the website of High Commission of India in London .
Applicants of Pakistani origin
If you are of Pakistani origin, a British-Pakistan dual national, or holding a National Identity Card for overseas Pakistanis (NICOP), the visa processing time will be substantially longer than other visa applications. More information is available from the High Commission of India in London .
If you are a British-Pakistan dual national, you must apply for an Indian visa on your Pakistani passport. If you have renounced your Pakistani nationality or cancelled your Pakistani passport, you will need to submit documentary proof of this.
Overseas Citizens of India (OCI) cardholders
If you hold a valid Overseas Citizens of India (OCI) card, you can use this, along with your valid British passport to visit India. You do not need a visa. If you have a Persons of Indian Origin (PIO) card, you will need to convert it to an OCI card. More information is available from the High Commission of India in London and the Indian Bureau of Immigration .
Arrival, registration, and extensions
If you plan to stay in India for more than 180 days and do not hold an OCI card, register within 14 days of arrival with the Foreigner Regional Registration Office (FRRO) . You could be denied permission to leave if you do not do this. Check if you are required to register your arrival .
Overstaying in India on a visa is an offence. Make sure you leave the country before your visa expires or get an official extension if needed. More information is available on the Indian Bureau of Immigration website.
If you’re hospitalised
If you or someone you’re travelling with has a short-term Tourist Visa and is hospitalised, you may be able to extend or ‘convert’ to a Medical Visa .
Exit requirements
You will pass through immigration as you depart India. Officials will check when you entered the country. If you do not have an entry stamp, for example if you have a newly issued passport, you will need to apply for special exit visa before you travel. This must be done online and can take between five and fifteen working days for straightforward applications. Factor this into your timeframe to leave India when you are booking flights. For further information see the e-FRRO online portal (part of the Indian Foreigners Registration Office).
Vaccination requirements (other than COVID-19)
At least 8 weeks before your trip, check the vaccinations and vaccination certificates you may need on TravelHealthPro (from the UK’s National Travel Health Network and Centre).
Depending on your circumstances, these may include:
- yellow fever
The Indian Ministry of Health and Family Welfare also provides vaccination guidance and data .
Accommodation
By law, hotels, hostels and other accommodation providers must register the stay of foreign guests with the Foreigners’ Regional Registration Office (FRRO) using a “C Form”. Please ask your accommodation provider to ensure they have done so.
Customs rules
There are strict rules about goods that can be brought into and taken out of India . You must declare anything that may be prohibited or subject to tax or duty.
Satellite phones and listening devices
It is illegal to possess and operate satellite phones in India without a licence. British nationals have been arrested for bringing them into the country without prior permission. You can contact the Indian Department of Telecommunication to request a licence .
You may also need prior permission from the Indian authorities to bring equipment like listening or recording devices, radio transmitters, powerful cameras, or binoculars into India. You can ask the High Commission of India in London for advice.
Taking money into India
There are restrictions on bringing Indian rupees into India.
Visitors, including tourists, must not bring any amount of Indian currency into the country. If you’re resident in India, you can bring up to 25,000 rupees into the country.
If you’re visiting India, you can bring cash, travellers’ cheques (in pounds sterling or another foreign currency) or a bank card with you and exchange or withdraw rupees once in India.
You must declare any amount above 5,000 US dollars in notes, or 10,000 US dollars in notes and travellers’ cheques combined.
Related content
Is this page useful.
- Yes this page is useful
- No this page is not useful
Help us improve GOV.UK
Don’t include personal or financial information like your National Insurance number or credit card details.
To help us improve GOV.UK, we’d like to know more about your visit today. We’ll send you a link to a feedback form. It will take only 2 minutes to fill in. Don’t worry we won’t send you spam or share your email address with anyone.

For visitors, travel, student and other international travel medical insurance.
Home » Visas » DS-160 Form » DS-160 Form Guide: Passport Information
DS-160 Form Guide: Passport Information

Form DS-160 is a multi-part form, which must be filled by all US non-immigrant visa applicants. This web page describes the passport information section.
- Passport/Travel Document Number: Your current passport/travel document number. If you previously had a passport that expired or was lost, do not write numbers from those passports. This must be the same passport you will be using when traveling to the U.S. It should be a valid, unexpired passport or other valid, unexpired documentation that is sufficient to establish your identity and nationality.
- Passport Book Number: The Passport Book Number is commonly called the inventory control number. You may or may not have a Passport Book Number on your passport. The location of the Passport Book Number on your passport may vary depending on the country that issued your passport. Please contact your passport issuing authority if you are unable to determine whether or not your passport contains a Passport Book Number. If it is not applicable to you, click ‘Does Not Apply’. India: For citizens of India, click ‘Does Not Apply’. Mexico: If you have a later version of the Mexican passport, click ‘Does Not Apply’. However, if you have the old-style Mexican passport, enter the passport book number found on the first passport page (not on the photo page) that is different from your passport number.
- Country/Authority that Issued Passport/Travel Document: Country that issued the passport: it is the country you are a citizen of. Sometimes, it gets confusing to some people. If you were staying in a different country (say Japan) when passport was expiring and if the Indian embassy in Japan issued you the passport, the issuing country is still “India” and NOT “Japan”.
- Where was the Passport/Travel Document Issued? City: City where passport was issued. Write current official name of the city. E.g., write “Mumbai” instead of “Bombay”. If your passport was issued outside your country of citizenship, such as in USA or even some third country, write that city, state/province and country here. State/Province *If shown on passport: Enter it if it is shown on your passport. Otherwise, leave it blank. Country/Region: Select the Country from where the passport was issued.
- Issuance Date: Date when passport was issued in DD-MM-YYYY format.
- Expiration Date: Date when passport is expiring. In most cases, your passport must have at least six months of validity beyond the date of your visa application and/or your arrival in the U.S. Exceptions
- Passport/Travel Document Number: Either enter the passport/travel document number, or if suitable, click on “Do Not Know”.
- Country/Authority that Issued Passport/Travel Document If you had more than one passport lost or stolen, you can click on “Add Another” for each of them, and enter the above information for each of them.
How useful was this post?
Click on a star to rate it!
We are sorry that this post was not useful for you!
Let us improve this post!
Tell us how we can improve this post?
- Visitor Medical Insurance Directory Fillable Forms Read/Post Experiences Sample Documents
- DS-160 Form General Tips Photograph Requirements
Form Sections Guide
- Personal Information Address and Phone Information Passport Information Travel Information Travel Companions Information Previous U.S. Travel Information U.S. Point of Contact Information Family Information: Relatives Family Information: Spouse Present Work/Education/Training Additional Work/Education/Training Previous Work/Education/Training Security and Background Signature/Confirmation/Thank You
Category specific
- Sponsoring Parents Visitors Visa Student/Exchange Visa Temporary Worker Visa E-Visa V-Visa Crew Visa Upload Photo and Sign
- Confirmation Page DS-160 Application Form
Related Links
- Application Procedure Scheduling Appointment
Share this article:
- Visitor Visa
- Visitors Insurance
- Read Experiences
- Discussions Forums
- Insurance Resources
- Privacy Policy
- Terms of Use
immihelp ® .com is private non-lawyer web site. Not affiliated with any government agency.
Copyright © 1999-2024 immihelp ® .com. All rights reserved.
https://www.immihelp.com/us-visa-ds-160-form-passport-information/
This website uses cookies, some of which are essential for the functionality of the website while others are for improving user experience and personalization. By continuing to browse this website, you agree to our use of cookies. For information about your privacy, please read our Privacy Policy and Terms of Use .
Want to save time & money on your next India trip?
Check out the list of travel hacks learned after +4 years in India
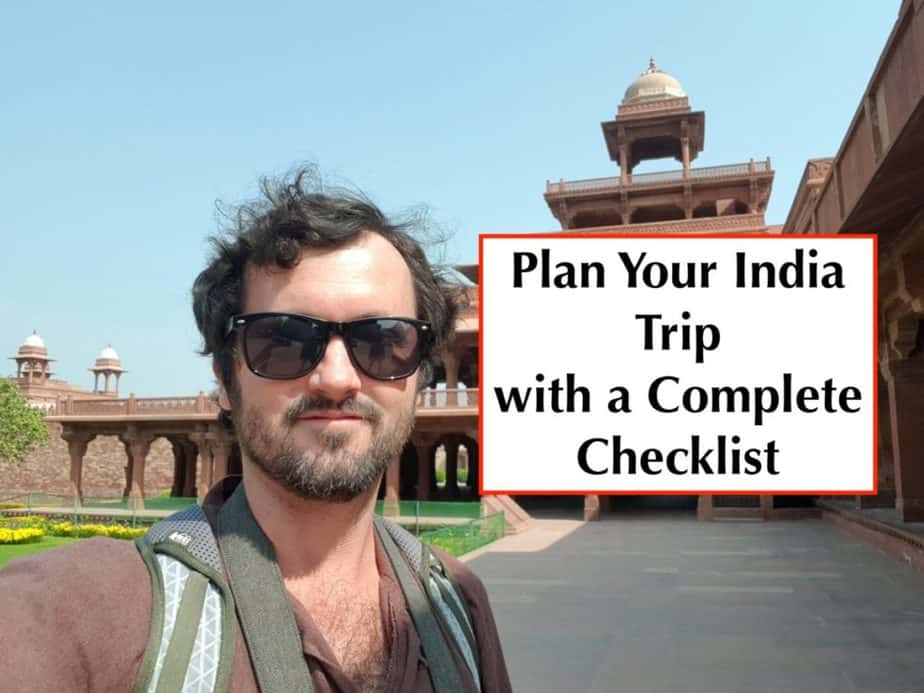
The Ultimate Travel Checklist For Your India Trip + Free PDF
It can be overwhelming to plan an international trip to a far-off place like India.
When I was planning my trip to India and helping my family plan theirs, it was helpful to have a complete timeline of when we should start doing important things like: Booking our flights, getting our visa, and more.
Below you’ll see the checklist I use for myself and friends to plan our India trips…
Want a free travel checklist PDF for India ? Click the link to check it out and see if it will help you pack and plan.
Things You Need:
- Visa: You can apply for most visas online if you’re staying up to 5 years in India.
- Travel insurance: Need to cancel your trip due to sickness? You’re covered. Need to fly home due to a death in the family? You’d get reimbursed. Need to be evacuated back to the US because something terrible happened? It would be handled.
- Flight tickets to India, as well as any domestic flights.
- Train tickets
- Accommodation
- Vaccinations: You need to decide if you want them or not?
- Valid Passport: Make sure your passport has validity for more than 6 months after your trip.
- International Driver’s License: If you want to rent a scooter, you would want one of these to do so legally.
4-6 Months Before Departure

If you want to be prepared, you can start taking care of things at this stage so preparing for India can be as smooth as possible. If you’d prefer to procrastinate, it’s not necessary to start now.
How Long Are You Traveling For?
Can you get away from work for only two weeks? Or can you travel around India for 6 months?
It’s time to start figure out how long you can get away to explore beautiful India.
Where Are You Going?
India is huge and there’s a lot to see. Are you going to do the most popular tour like the Golden Triangle?
Or do you want to explore the little-known destinations like Khajuraho’s Erotic Temples? Pondicherry’s chill beach culture?
What do you like to do?
- Are you looking for beach parties and raves? Then Goa is for you.
- Are you looking for historical monuments you can only find in India? Then the Golden Triangle of Delhi, Agra and Jaipur is for you. Maybe add in a trip to Varanasi.
- Do you want to take a yoga training? Rishikesh is the yoga capital of the world.
- What about doing adventure sports in the Himalayas? Manali should be on your list.
- Do you want a romantic vacation with your partner? Then head to Kerala and do a houseboat tour on the Backwaters.
- Are you seeking enlightenment? Check out the shiva temples in South India like Madurai.
Once you know where you are going then you can start researching how you’ll get there and around:
- Book hotel rooms with free cancellation: Booking.com lets you cancel some hotel bookings and I’ve booked hotels 6 months ahead of time then been able to switch them last-minute without a penalty.
- Sign up for price alerts on flights from Skyscanner : You have time to buy your flight but you may see a great deal on a service like Skyscanner. Just plug in your flight details and once you get some estimates click Get Price Alerts . Then when the price changes you will get an email.
- Research train tickets on Indian Railways: You can book tickets as much as 120 days in advance, so you want to start looking at prices and availability. You still have time though, but this will give you an idea about a reasonable travel budget .
Start Your Paperwork
Visa : You can apply as much as 120 days before your trip for your visa. You don’t need to apply at this stage yet and I recommend you apply 1 month before you depart. If you don’t want the headaches, having to do this yourself, then get help from iVisa .
Make sure your passport is valid. Getting an Indian visa means your passport should NOT expire within 6 months of your trip. If it does, then you need to get a new passport and that can take 4-6 weeks for a US passport.
Research Your Insurance Needs
What type of coverage do you need?
At this stage, you want to have an idea of what travel insurance is and what you might need. You do NOT need to apply until you know where you are going, BUT the earlier you buy, then you can be covered for more things because you eliminate some pre-existing conditions. For instance, if you waited to buy, then broke your leg… you wouldn’t be covered for any treatment for that condition since it happened before you bought it.
World Nomads has been my travel insurance provider of choice for years. They’re great for travelers who want plenty of coverage for the important stuff like emergency medical and evacuation insurance. They also have good trip cancellation and interruption coverage which means if you have to cancel your trip you can get refunded for pre-paid expenses.
BUT they’re great because they cover a lot of adventurous activities like hiking, scuba diving and driving a scooter… which are NOT covered by most travel insurance policies.
You can also sign up in a few minutes on their site and they’re recommended by the Lonely Planet.

SafetyWing is my recent favorite travel insurance provider. I like that they also provide good coverage for important items like emergency medical and evacuation coverage. They will also cover you if you visit your home country, which most providers will NOT do. For instance, if I flew back to the US from India to visit family, I could get covered if the trip was less than 3 weeks.
The cost is also twice as inexpensive as World Nomads, AND I can pay each month instead of having to buy a 6-month policy in advance.
Their site is also very easy to navigate and understand, and you can check your price in a few minutes if you like their offer. [By clicking and purchasing through that link you also take a step towards supporting this website at no cost to yourself.]
To Vaccinate or Not?
India does NOT require any vaccinations for entry unless you have been to an area with Yellow Fever (like some countries in Africa).
You should be up to date on your routine vaccinations before going to India, such as measles, mumps, rubella, diphtheria, tetanus, pertussis, polio, chickenpox, and your annual flu shot. But you need to decide if you want to get extra vaccinations before your trip.
The CDC recommends that MOST travelers get vaccinated for:
- Hepatitis A: You can contract this through contaminated food or water.
- Typhoid: You can contract this through contaminated food or water too. It’s especially found in rural areas and street food.
The CDC recommends that SOME travelers get vaccinated for:
- Hepatitis B
- Japanese Encephalitis
- Yellow Fever
IMPORTANT: Once you know where you are traveling to in India, then see your doctor and ask for recommendations on what would be best for your situation. You have time and could schedule this closer to 4 weeks before departure.
Research India: Read and Watch Movies
I couldn’t get enough books and novels about India. The novel Shantaram actually inspired my trip for the first time, as the main character lived in the Mumbai slums and worked as a doctor, then a gangster.
Here’s the ultimate list of books to read before traveling to India .
I’m also a film buff and have tracked over 2,000 films that I’ve watched. There are some great movies to inspire and educate you on Indian culture.
You can check out my 50 recommendations for India trip movies.
7-10 Weeks Before Departure
You should have progressed with your research, have a working draft of your itinerary and are ready to make some purchases.
Buy International Flights
CheapAir.com did an Airline Study looking at 917,000,00 airfares in +8,000 markets for the best time to buy airline tickets before an international flight and found that…
- In 2017, 70 days before your departure was the cheapest time to buy your tickets.
- In 2018, 54 days was the cheapest time to buy your tickets.
- For an average trip, the lowest price changed 62 times with an average drop or raise of $36.
- If you book 319 to 169 days in advance, you’ll pay $50 more than the lowest average prices. But you have more airfare options, and can choose seats and sit with your travel partners.
- If you book 121 to 21 days in advance, you can find the cheapest fares.
The best time to buy your flights is Tuesday around 3 pm EST. You’ll also want to fly on Tuesday, Wednesday or Thursday if you can.
4-6 Weeks Before Departure

At this point, you should have a concrete itinerary and know where you’re going. It’s time to buy!
- Finalize itinerary
- Book hotel rooms
- Book train tickets
- Book domestic flights in India
- Apply for your visa
- Buy travel insurance
- Get an International Driver’s License
Buy Items For Your India Trip
Some items you want to bring with you on your India trip:
- Travel t-shirt
- Travel underwear
- Packable daypack
- Travel adaptor
- Charcoal tablets
- Grapefruit seed extract
- Anti-diarrhea pills
- Electrolyte tablets
- Melatonin tablets
- Great footwear
- Sleeping bag liner
- Mosquito net
- Women’s peeing kit
- Neck wallet
- Travel backpack

If you’ve prepared well, then you can be chilling at this time. But there are a few things to do:
- Bring extra cash: Bring a couple of hundred dollars in your local currency as a backup
- Research ATMs at the airport you are arriving in , so you can easily find them and withdraw cash for a good rate. The currency exchange kiosks in the airport have higher rates and often hidden fees.
- Put travel notices in your banks and credit cards
- Pack your bag.
Make 5 paper copies of your important documents:
- Hotel reservations
- Plane Tickets
- Drivers license
I use these to give to hotels. This is not necessary but some will ask and smaller places may not have a copier.
Make 2 digital copies of your documents. Put them on your phone and also online in Google Driver or Evernote. Then if you lose your phone, you can still access them.
You can use this free travel checklist PDF for India to plan. The important thing is to get started early and have fun as you plan. India has so many beautiful destinations and things to do, this could be an adventure you’ll never forget!
Benjamin Jenks
Traveler, Filmmaker, and Lover of India. I've been living, writing and sharing what I've learned about traveling in India since 2018. Learn more about me here or Youtube .
Recent Posts
3-Day Havelock Island Trip Itinerary
If you plan to visit the Andaman and Nicobar Islands for a vacation, Havelock Island is a must-see. However, you won’t want to waste time since you could waste money. It’s definitely not...
4 Ways To Get A Local SIM Card in India for Tourists
Using a local SIM card in India can cost $3 to $7 a month and save you hundreds of dollars. However, it’s more difficult to get one in 2024, and they don’t work for every type of foreign...

Update April 12, 2024
Information for u.s. citizens in the middle east.
- Travel Advisories |
- Contact Us |
- MyTravelGov |
Find U.S. Embassies & Consulates
Travel.state.gov, congressional liaison, special issuance agency, u.s. passports, international travel, intercountry adoption, international parental child abduction, records and authentications, popular links, travel advisories, mytravelgov, stay connected, legal resources, legal information, info for u.s. law enforcement, replace or certify documents.
Tourism & Visit
Study & Exchange
Other Visa Categories
U.S. Visa: Reciprocity and Civil Documents by Country
Share this page:
Reciprocity Schedule
Select a visa category below to find the visa issuance fee, number of entries, and validity period for visas issued to applicants from this country*/area of authority.
Explanation of Terms
Visa Classification: The type of nonimmigrant visa you are applying for.
Fee: The reciprocity fee, also known as the visa issuance fee, you must pay. This fee is in addition to the nonimmigrant visa application fee (MRV fee).
Number of Entries: The number of times you may seek entry into the United States with that visa. "M" means multiple times. If there is a number, such as "One", you may apply for entry one time with that visa.
Validity Period: This generally means the visa is valid, or can be used, from the date it is issued until the date it expires, for travel with that visa. If your Validity Period is 60 months, your visa will be valid for 60 months from the date it is issued.
Visa Classifications
Country specific footnotes.
▲. Maximum validity for A-1 and A-2 TDY visas is 12 months.
◼. Please check with the Visa Chief at Embassy New Delhi for Indian citizens applying for A3 visas, or A2 visas where the position is designated as "service staff member" in the diplomatic note.
Although care has been taken to ensure the accuracy, completeness and reliability of the information provided, please contact the U.S. Embassy or Consulate where you plan to apply if you believe this information is in error or if you have further questions.
Visa Category Footnotes
The validity of A-3, G-5, and NATO 7 visas may not exceed the validity of the visa issued to the person who is employing the applicant. The "employer" would have one of the following visa classifications:
- G-1 through G-4
- NATO 1 through NATO 6
An E-1 and E-2 visa may be issued only to a principal alien who is a national of a country having a treaty, or its equivalent, with the United States. E-1 and E-2 visas may not be issued to a principal alien if he/she is a stateless resident or national of a country without a treaty. *When the spouse and children of an E-1 or E-2 principal alien are accorded derivative E-1 or E-2 status and are themselves a national of a country that does not have a treaty with the United States – the reciprocity schedule, including any reciprocity fees, of the principal alien’s country of nationality should be used. **Spouse and children of an E-1 or E-2 visa principal applicant, where the spouse and children are also nationals of a country that has a treaty with the United States – the reciprocity schedule, including any reciprocity fees, of the spouse and children’s country of nationality should be used.
*Example 1: John Doe is a national of Country A that has an E-1/E-2 treaty with the U.S. however his wife and child are nationals of Country B which has no treaty with the U.S. The wife and child would, therefore, be entitled to derivative status and receive the same reciprocity as John Doe, the principal visa holder. **Example 2: Mike Doe is a national of Country Y that has an E-1/E-2 treaty with the U.S. however his wife and child are nationals of Country Z that also has a treaty with the U.S. The wife and child would, therefore, be entitled to derivative status and receive the reciprocity issued to nationals of Country Z.
The validity of H-1 through H-3, O-1 and O-2, P-1 through P-3, and Q visas may not exceed the period of validity of the approved petition or the number of months shown, whichever is less.
Under 8 CFR §214.2, H-2A and H-2B petitions may generally only be approved for nationals of countries that the Secretary of Homeland Security has designated as participating countries. The current list of eligible countries is available on USCIS's website for both H-2A and H-2B visas. Nationals of countries not on this list may be the beneficiary of an approved H-2A or H2-B petition in limited circumstances at the discretion of the Department of Homeland Security if specifically named on the petition.
Derivative H-4, L-2, O-3, and P-4 visas, issued to accompanying or following-to-join spouses and children, may not exceed the validity of the visa issued to the principal alien.
There is no reciprocity fee for the issuance of a J visa if the alien is a United States Government grantee or a participant in an exchange program sponsored by the United States Government.
Also, there is no reciprocity fee for visa issuance to an accompanying or following-to-join spouse or child (J-2) of an exchange visitor grantee or participant.
In addition, an applicant is eligible for an exemption from the MRV fee if he or she is participating in a State Department, USAID, or other federally funded educational and cultural exchange program (program serial numbers G-1, G-2, G-3 and G-7).
However, all other applicants with U.S. Government sponsorships, including other J-visa applicants, are subject to the MRV processing fee.
Under the North American Free Trade Agreement (NAFTA), Canadian and Mexican nationals coming to engage in certain types of professional employment in the United States may be admitted in a special nonimmigrant category known as the "trade NAFTA" or "TN" category. Their dependents (spouse and children) accompanying or following to join them may be admitted in the "trade dependent" or "TD" category whether or not they possess Canadian or Mexican nationality. Except as noted below, the number of entries, fees and validity for non-Canadian or non-Mexican family members of a TN status holder seeking TD visas should be based on the reciprocity schedule of the TN principal alien.
Canadian Nationals
Since Canadian nationals generally are exempt from visa requirement, a Canadian "TN' or "TD" alien does not require a visa to enter the United States. However, the non-Canadian national dependent of a Canadian "TN", unless otherwise exempt from the visa requirement, must obtain a "TD" visa before attempting to enter the United States. The standard reciprocity fee and validity period for all non-Canadian "TD"s is no fee, issued for multiple entries for a period of 36 months, or for the duration of the principal alien's visa and/or authorized period of stay, whichever is less. See 'NOTE' under Canadian reciprocity schedule regarding applicants of Iranian, Iraqi or Libyan nationality.
Mexican Nationals
Mexican nationals are not visa-exempt. Therefore, all Mexican "TN"s and both Mexican and non-Mexican national "TD"s accompanying or following to join them who are not otherwise exempt from the visa requirement (e.g., the Canadian spouse of a Mexican national "TN") must obtain nonimmigrant visas.
Applicants of Iranian, Iraqi, Libyan, Somalian, Sudanese, Syrian or Yemeni nationality, who have a permanent resident or refugee status in Canada/Mexico, may not be accorded Canadian/Mexican reciprocity, even when applying in Canada/Mexico. The reciprocity fee and period for "TD" applicants from Libya is $10.00 for one entry over a period of 3 months. The Iranian and Iraqi "TD" is no fee with one entry over a period of 3 months.
Q-2 (principal) and Q-3 (dependent) visa categories are in existence as a result of the 'Irish Peace Process Cultural and Training Program Act of 1998'. However, because the Department anticipates that virtually all applicants for this special program will be either Irish or U.K. nationals, the Q-2 and Q-3 categories have been placed only in the reciprocity schedules for those two countries. Q-2 and Q-3 visas are available only at the Embassy in Dublin and the Consulate General in Belfast.
No S visa may be issued without first obtaining the Department's authorization.
V-2 and V-3 status is limited to persons who have not yet attained their 21st birthday. Accordingly, the period of validity of a V-2 or V-3 visa must be limited to expire on or before the applicant's twenty-first birthday.
Posts may not issue a T-1 visa. A T-1 applicant must be physically present in the United States, American Samoa, the Commonwealth of the Northern Mariana Islands or a U.S. port of entry, where he/she will apply for an adjustment of status to that of a T-1. The following dependents of a T-1 visa holder, however, may be issued a T visa at a U.S. consular office abroad:
- T-2 (spouse)
- T-3 (child)
- T-4 (parent)
The validity of NATO-5 visas may not exceed the period of validity of the employment contract or 12 months, whichever is less.
The validity of CW-1 and CW-2 visas shall not exceed the maximum initial period of admission allowed by DHS (12 months) or the duration of the transition period ending December 31, 2014, whichever is shortest.
The validity of E-2C visas shall not exceed the maximum initial period of admission allowed by DHS (24 months) or the duration of the transition period ending December 31, 2014, whichever is shortest.
General Documents
Individuals residing outside of India may obtain documents from the state or local government entity with jurisdiction over the district of their previous residence. Indian relatives or friends may request issuance of documents on behalf of someone now living abroad. Relatives and friends should have specific written authorization from the interested party before they request official documents. Alternatively, persons in need of official documents can contact the Indian Embassy or Consulate nearest to their residence abroad to ask for assistance.
Birth, Death, Burial Certificates
Birth certificates.
Available : For persons born after April 1, 1970, birth certificates are available. For persons born prior to April 1, 1970, birth certificates are considered unavailable.
Fees: Fees vary from each Municipal authority, or any office authorized to issue birth and death certificates by the Registrar of Births & Deaths.
Document Name: Birth Certificate
Issuing Authority: Municipal Authority, or any office authorized to issue birth and death certificates by the Registrar of Births & Deaths.
Special Seal(s) / Color / Format: Varies substantially from state to state.
Issuing Authority Personnel Title: There is no issuing authority personnel title.
Registration Criteria: The registration criteria varies
Procedure for Obtaining: Procedures vary from each authority.
Certified Copies Available: There are no certified copies available.
Alternate Documents: If an individual is born after April 1, 1970 and is unable to obtain a birth certificate, the individual must obtain a certificate of non-availability from the local authorities with jurisdiction over their place of birth. In addition to a non-availability certificate, the following documents can be accepted as secondary evidence:
- School-leaving Certificate (document provided to students when they cease attending a particular school, be it public or private),
- Matriculation Certificate,
- Certificate of Recognized Boards from the school last attended by the applicant (Boards are exams)
- A notarized affidavit executed by either a parent, if living, or another close relative older than the applicant. This affidavit should clearly state the relationship between the deponent and the applicant, how well the deponent knows the applicant, the date and place of the applicant's birth, the names of both parents, and any other related facts. If the applicant has no living relatives that witnessed their birth, a self-attested affidavit detailing their knowledge of the facts of their birth may be accepted.
Exceptions: None
Comments: For all births after April 1, 1970. It is mandatory under the law (as per the Registration of Births & Deaths Act, 1969) to register every birth with the concerned state or union territory.
Death Certificates
Available
Fees: Varies by authority
Document Name: Death Certificate
Issuing Authority: Appropriate state or municipal authorities.
Issuing Authority Personnel Title: There is no issuing authority personnel title
Registration Criteria: Varies for each authority.
Procedure for Obtaining: Varies for each authority.
Alternate Documents: There are no alternate documents.
Comments: It is mandatory under the law (as per the Registration of Births & Deaths Act, 1969) to register every death with the concerned state or union territory. Prior to April 1, 1970, reporting of deaths was voluntary.
Marriage, Divorce Certificates
Marriage certificates.
Fees: Varies by authority.
Document Name: Marriage Certificate.
Issuing Authority: Religious authorities and the offices of the Government Registrar of Marriages, which are located in the headquarters of each district.
Special Seal(s) / Color / Format: Varies substantially.
Issuing Authority Personnel Title: Different for each state and religious authority that conducts the marriage.
Registration Criteria: Prior to 2006, marriages by Hindus, Buddhists, Jains, or Sikhs were not required to be registered, but may have been voluntarily registered under the Hindu Marriage Act of 1955. As of 2006, it is mandatory to register all marriages. In India, a marriage can either be registered under the Hindu Marriage Act of 1955 or under the Special Marriage Act of 1954. For marriages registered at government offices under the Special Marriage Act, the certificate will be issued by the Registrar only if the bride and groom personally appear before the official and pay the required fee. For other marriages that are required to be registered with government authorities under the Hindu Marriage Act of 1955, registration criteria vary by authority.
Procedure for Obtaining: Varies for each authority .
Alternate Documents: See comments section.
Comments: Hindu Marriage Act is applicable to Hindus, whereas the Special Marriage Act is applicable to all citizens of India irrespective of their religion. Please note that marriages by Hindus, Buddhists, Jains, or Sikhs may be voluntarily registered under the Hindu Marriage Act of 1955.
A marriage certificate issued by a Christian church needs to be registered in the office of The Registrar of Marriages. The registration authority varies from state to state.
If the parties are married in an Islamic religious ceremony, the certificate issued by the religious authority (such as a Nikah Nama contract issued by the mosque, or a marriage certificate issued by the Waqf Board) is sufficient proof of the marriage, and an additional registration with government authorities is not necessary/mandatory. A document known as a “Marriage Agreement” or “Deed of Marriage” to live as man and wife (under the Registration Act of 1908) is not sufficient confirmation of a marriage. Such a document does not confer legal marital status under the law. The minimum age for a marriage to be legal is 18 for females and 21 for males.
Same-sex marriages are illegal in India.
Divorce Certificates
Fees: Varies by court and authority.
Document Name: Divorce Decree. For Islamic religious authorities, it is called the Talaqnama.
Issuing Authority: Courts of jurisdiction, Muslim religious bodies.
Special Seal(s) / Color / Format: Varies. Divorce decrees should include official stamps from the court of jurisdiction.
Procedure for Obtaining: Varies for each authority.
Alternate Documents: There are alternate documents
Comments: Parties filing for divorce can obtain divorce decrees from their court of jurisdiction. For marriages that took place under Islamic religious authorities, in the absence of a court divorce decree, a divorce certificate from the religious officiant, called a “Qazi,” or the head of the mosque is acceptable. Muslims can also apply for a court divorce decree.
Some Hindu communities practice divorce by mutual consent outside of the judicial system, resulting in a “divorce deed.” However, only a final “divorce decree,” obtained through a court, is proof of the final dissolution of a Hindu marriage.
Adoption Certificates
Fees: Yes ($5000 for inter-country adoptions)
Document Name: Adoption Order issued by an Indian court confirming adoption. Adoption gets concluded legally after obtaining an adoption order from the court concerned. NOC under Article 17 and Conformity Certificate under Article 23 are issued by the Central Authority of India.
Issuing Authority: Competent Indian Court. Court means civil court, which has jurisdiction in matters of adoption and guardianship and may include the District Court, Family Court or City Civil court. The Central Adoption Resource Authority (CARA) is the designated Central Authority of India.
Special Seal(s) / Color / Format: No specific format/color; but the court order should be signed by a Judge and issued by a competent Indian court. Court order should state that adoption of the child is granted to the adoptive parents and the new name as given by the adoptive parents must be recorded along with the date of birth of the child.
Issuing Authority Personnel Title: Judge (The court may be City Civil Court or, District Court or Family court or High court).
Registration Criteria: Inter-country adoption means adoption of a child from India by nonresident Indian or by a person of Indian origin or by a foreigner. All inter-country adoption to be done as per the provisions of THE JUVENILE JUSTICE (CARE AND PROTECTION OF CHILDREN) ACT, 2015 (JJ Act) and the Adoption Regulations framed by The Central Adoption Resource Authority (CARA). It extends to the whole of India. Procedure for Obtaining: Contact the attorney.
Certified Copies Available: Yes.
Alternate Documents: None.
Exceptions: None.
Comments: It should be noted that India is a member to the Hague convention. The Central Adoption Resource Authority (CARA) is a statutory body of Ministry of Women & Child Development, Government of India. It functions as the nodal body for adoption of Indian children and is mandated to monitor and regulate inter-country adoptions. CARA is designated as the Central Authority to deal with inter-country adoptions in accordance with the provisions of the Hague Convention on Inter-country Adoption, 1993, ratified by Government of India in 2003.
Identity Card
Fees: Varies by authority.
Document Name: Aadhar Card
Issuing Authority: Unique Identification Authority of India, Government of India
Special Seal(s) / Color / Format: There are no special seal/color/formats.
Registration Criteria: Must be a resident of India.
Procedure for Obtaining: Available from Aadhaar Enrollment Centers, Aadhar Camps, and other enrollment facilities. Please see for more information: uidai.gov
Alternate Documents: For proof of address that the Indian Passport Offices will accept, please see this link: portal2.passportindia.gov.in
Comments: Residents of all states and union territories of India can obtain a National ID card, which bears a 12-digit unique identity number. Aadhar is a proof of residence, and not a proof of citizenship. Aadhaar does not itself grant any rights to domicile in India. The Aadhar number is linked to a resident’s basic demographic and biometric information such as a photograph, ten fingerprints and two iris scans, which are stored in a centralized database. The Aadhar project is also linked to some public subsidies and benefits. Aadhar enrollment is not compulsory.
Police, Court, Prison Records
Police certificates.
Document Name:
All Indian nationals aged 16 and above, residing in India - Indian Police Clearance Certificate.
Indian passport holders residing outside India – statement of no criminal record
Non-Indian applicants residing in India who are registered with the Foreigner Regional Registration Office (FRRO) – Police Clearance Certificate
Non-Indian applicants who reside in India and are not FRRO registered (such as Tibetan Identity certificate holders) - Police Clearance Certificate
Issuing Authority:
All Indian nationals aged 16 and above, residing in India - Regional Passport Office.
Indian passport holders residing outside India – The local Indian Embassy, Consulate, High Commission, or Deputy High Commission.
Non-Indian applicants residing in India who are registered with the Foreigner Regional Registration Office (FRRO) - The FRRO serving their area of residence.
Non-Indian applicants who reside in India and are not FRRO registered (such as Tibetan Identity certificate holders) - District Police Station serving their area of residence.
Special Seal(s) / Color / Format: All police clearance certificates from regional passport offices have a similar format. The header bears the symbol of India’s Central government (three lions), and contains the contact information of the regional office, issuance date, file number, and applicant photograph. It is signed and stamped by the Ministry of External Affairs. Police clearance certificates issued by other authorities vary in format.
Registration Criteria: Varies by authority
Procedure for Obtaining: Varies by authority
Certified Copies Available: Applicants obtain original police clearance certificates from police authorities.
Alternate Documents: There are no alternate documents
Comments: Police certificates are only available for Indian nationals and non-Indian nationals currently living in India. Indian police certificates are not available for foreign (non-Indian) nationals applying outside India.
Court Records
Fees: Varies by authority
Document Name: Varies by authority
Issuing Authority: Varies by authority
Special Seal(s) / Color / Format: Varies substantially, however, all court documents should bear some kind of official stamp.
Issuing Authority Personnel Title: Varies by authority
Registration Criteria: There are no registration criteria.
Procedure for Obtaining: Varies by authority
Comments: In all states and union territories there are 24 high courts at the state and union territory level of India, along with the Supreme Court of India at the national level. Each high court has jurisdiction over a state, a union territory or a group of states and union territories.
Prison Records
Document Name: Varies by authority
Special Seal(s) / Color / Format: Varies by authority
Registration Criteria: There are no registration criteria
Comments: A person who has been incarcerated can obtain a prison record from the State Inspector General of Police, from the Police authorities of Mumbai, Kolkata, or Chennai, or from the Superintendent of the jail in which the sentence was served.
Military Records
Unavailable
Passports & Other Travel Documents
Types Available:
- Regular Passport: (Type P). Dark blue. Most passports are valid for 10 years. Issued by the Ministry of External Affairs through the Central Passport Organization and its network of 37 Passport Offices and Passport Seva Kendras (local offices). Applicants must apply through a Passport Seva Kendra or online through Passport Seva . Indians living abroad can obtain passports at one of the 185 Indian consulates located overseas.
- Diplomatic Passports: (Type D). Maroon. Issued to Indian diplomats, top ranking government officials and diplomatic couriers. Has a validity period of 5 years or fewer, depending on the position of the passport holder and the nature of the assignment/visit. The Consular, Passport & Visa Division of the Ministry of External Affairs issues Diplomatic Passports.
- Official Passports: (Type S). White/Gray. Issued to individuals representing the Indian government on official business. Has a validity period of 5 years or fewer, depending on the position of the passport holder and the nature of the assignment/visit. The Consular, Passport & Visa Division of the Ministry of External Affairs issues Official Passports.
Identity Certificate: Yellow. Known as the IC, it is available to Tibetan Refugees and Stateless Persons. The IC is a valid travel document, which enables the bearer to travel internationally, and is the document in which to place a U.S. visa. It is valid for 10 years. Older ICs were paper booklets with a pasted photograph; the latest version (produced since 2007) is yellow and bears a digital photo. Only the Regional Passport Office in New Delhi can authorize Identity Certificates for Tibetan Refugees. Stateless persons can apply at the passport office within the jurisdiction they reside.
Fees: Fees range according to document and service. Those applying for a passport or identity certificate can use the fee calculator to determine costs.
Other Records
Not applicable.
- Visa Issuing Posts
Post Title: Mumbai, India (Consulate General)
Address: C-49, G-Block, Bandra Kurla Complex, Bandra East, Mumbai 400051
Phone Number: (022) 2672-4000, Fax: (022) 2672-4755
Visa Services: Immigrant visas, Nonimmigrant visas
Comments / Additional Information: None
Post Title: New Delhi, India (Embassy)
Address: Shantipath, Chanakyapuri 110021
Phone Number: (91) (11) 2419-8000, Fax: (91) (11) 2419-0017
Visa Services: Nonimmigrant Visas, Adoptions, and Specialized Immigrant Visas
Post Title: Chennai, India (Consulate General)
Address: 220 Anna Salai Gemini Circle, 600006
Phone Number: (91) (44) 2811-2000, Fax: (91) (44) 2811-2027
Visa Services: Nonimmigrant Visas ONLY
Post Title: Hyderabad, India (Consulate General)
Address: 1-8-323 Chiran Fort Lane Begumpet, Secunderabad 500 003
Phone Number: (91) (040) 4033-8300, Fax: (91) (040) 4033-8301
Post Title: Kolkata, India (Consulate General)
Address: 5/1 Ho Chi Minh Sarani, 700071
Phone Number: (91) (33) 2282-3611 through 2282-3615, Fax: (91) (33) 2282-2335
Visa Services: Nonimmigrant Visas ONLY
Visa Services
All U.S. immigrant visas for India are processed in Mumbai, except for adoption cases and follow-to-join asylees and refugees, which are processed in New Delhi. Although the embassy and consulates divide the country into separate consular districts, non-immigrant visa applicants are free to apply at any post. The one exception to this is Blanket L visa applicants, who can only apply in Chennai.
Additional Information for Reciprocity
- Reciprocity: What's New
- Temporary Reciprocity Schedule
- Country Acronyms
- Terrorist Designation Lists
- State Sponsors of Terrorism
- Treaty Countries
Afghanistan
Antigua and Barbuda
Bosnia and Herzegovina
Brunei Darussalam
Burkina Faso
Cayman Islands
Central African Republic
Congo the Democratic Republic of the
Curaçao
Czech Republic
Côte d'Ivoire
Dominican Republic
El Salvador
Equatorial Guinea
Guinea-Bissau
Iran, Islamic Republic of
Israel, Jerusalem, the West Bank and Gaza
Korea, Democratic People's Republic of
Lao People's Democratic Republic
Liechtenstein
Marshall Islands
Micronesia, Federated States of
Moldova, Republic of
Netherlands
New Caledonia
New Zealand
North Korea
North Macedonia
Palestinian Authority
Papua New Guinea
Philippines
Russian Federation
Saint Kitts and Nevis
Saint Lucia
Saint Vincent and the Grenadines
Sao Tome and Principe
Saudi Arabia
Sierra Leone
Sint Maarten (Dutch part)
Solomon Islands
South Africa
South Korea
South Sudan
Switzerland
Timor-Leste
Trinidad and Tobago
Turkmenistan
Turks and Caicos Islands
United Arab Emirates
United Kingdom
Virgin Islands, British
Wallis and Futuna
External Link
You are about to leave travel.state.gov for an external website that is not maintained by the U.S. Department of State.
Links to external websites are provided as a convenience and should not be construed as an endorsement by the U.S. Department of State of the views or products contained therein. If you wish to remain on travel.state.gov, click the "cancel" message.
You are about to visit:
IMAGES
VIDEO
COMMENTS
Step 3: Complete the application form. Once you have gathered all the required documents, the next step in obtaining a travel document for your journey to India is completing the application form. The application form varies depending on the type of travel document you are applying for, such as a visa, passport, ETA, or OCI card.
Travelers without valid documents or the correct type of visa may be denied entry into India. Indian visa regulations and instructions change frequently, often with little advance notice. Travelers are urged to check the website of the Indian Embassy in Washington, D.C. before any travel to India to review the most current information. The U.S ...
Authorized Portal for Visa Application to India Indianvisaonline.gov.in. All foreign nationals entering India are required to possess a valid international travel document in the form of a national passport with a valid visa from an Indian Mission/Post or eVisa (Limited Categories) from Bureau of Immigration, Ministry of Home Affairs.
For domestic travel in India, please carry your ticket and a valid proof-of-identity document. Acceptable proof of identification documents are. Passport. Voter ID card. Aadhaar card. PAN card. Driver's licence. ID card with photo issued by the central or state government, public sector undertakings, local bodies, or public limited companies.
An India entry visa, often known as an 'X Visa,' is a travel document that permits foreign nationals to enter India for various purposes. Whether joining family members, embarking on a spiritual journey, or visiting India for specific events, an India entry visa opens the doors to a wide range of experiences in this culturally […]
Age Group (18 and above ): Only valid Voter ID or Passport is valid to travel to Nepal; The Emergency Certificate & Identity Certificate issued by the Embassy of India, Kathmandu will be valid for single journey for travelling back to India. Also note:-Aadhaar (UID) card is not an acceptable travel document for travel to Nepal/Bhutan.
The required documents when applying for an India visa include the following: A valid passport. The completed application form. A passport photo. Copy of previous India visa. Proof of income. Proof of residence. Copy of onward air ticket. Proof of visa fee payment.
Nonetheless, you can be certain that these documents will be useful for any trip: Passport, Travel Visa and National ID Card. Proper identification is the foundation of international travel. As a result, you should ensure to always have an official identification document with you. You can even consider having multiple documents such as your ...
To secure an Indian visa, a series of documents are needed for travel to India. These documents vary depending on the type of visa you wish to apply for, but they are an important part of the application process. ... This document is the standard for all types of visas and is the only document that can be used. The application form has sections ...
The second essential document for an Indian visit is a visa. Only in case of Nepal, you don't need any prior visa. The only requirement is of identification papers, and visa is issued at the airport itself. There are different types of visas for different travel purpose. Make sure to apply for the correct visa type, as per the purpose of your ...
Travel Documents. If you wish to return to the United States lawfully after traveling outside the United States, you generally must have a: Valid entry document, such as a Permanent Resident Card (Green Card) or nonimmigrant visa; or. Valid and unexpired travel document. The type of document you need varies depending on your immigration status ...
Passport. Your passport is the most important document for your travel across the continent. Your passport has to be a valid one. If expired, renew it as soon as possible. If you don't have a passport, get one made, as otherwise traveling from one country to another is not possible. Visa (Indian Visa) A person visiting India has to have a visa.
A travel document is an identity document issued by a government or international ... Foreign nationals need to present their passports or other required types of travel documents when ... is an example of internal border controls in minority regions of China and India. Other similar documents include Restricted Area Permits and Protected Area ...
Passport validity requirements. Make sure your passport is valid for at least 6 months from your date of entry into India. Your passport must also: - have 2 blank pages for your visa. Check with ...
Form DS-160 is a multi-part form, which must be filled by all US non-immigrant visa applicants. This web page describes the passport information section. Your current passport/travel document number. If you previously had a passport that expired or was lost, do not write numbers from those passports. This must be the same passport you will be ...
But there are a few things to do: Bring extra cash: Bring a couple of hundred dollars in your local currency as a backup. Research ATMs at the airport you are arriving in, so you can easily find them and withdraw cash for a good rate. The currency exchange kiosks in the airport have higher rates and often hidden fees.
Here is a step-by-step guide on how to fill out the Schengen visa application form: 1. Surname (Family Name) Write your surname or family name as it appears on your passport or travel document. 2. Surname at Birth (Former Family Name) Write the name you had at birth, if different from the first section. 3.
Know in detail about different types of passport in India with colour. Learn what documents are required to get different types of Indian passports. wifi_calling_3 1800-102-4499 . ... In case of loss of passport or other travel documents, you can contact the Care Assistance Provider in India, who will provide you consular access to the ...
Visa Classification: The type of nonimmigrant visa you are applying for. Fee: The reciprocity fee, also known as the visa issuance fee, you must pay. This fee is in addition to the nonimmigrant visa application fee (MRV fee). Number of Entries: The number of times you may seek entry into the United States with that visa. "M" means multiple times.
Apply for a U.S. Visa. At this website, you can learn about obtaining a visa, as well as applying for your visa. How to apply for your nonimmigrant visa for travel to the United States. What documents, photos and information you need to apply for your visa. How to access visa application forms and instructions.