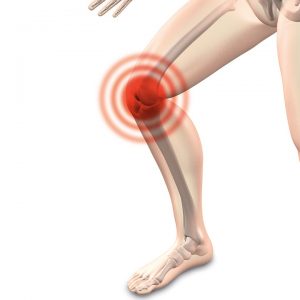
5 Ways to Fix Knee Pain When Squatting

No matter what anyone tells you, squatting doesn't actually cause knee pain. Instead, most knee pain when squatting is actually due to muscle imbalances or limited mobility . That's because your joints are affected by the movement in your joints directly above and below them.
Advertisement
After all, your knee joint is located between your hip and ankle joints, so any issues in your feet, ankles, hips and glutes can end up affecting you knees.
Video of the Day
That said, learning how to fix knee pain from squatting doesn't have to be that tricky. Here are five form adjustments and mobility drills you can do the next time you get low.
Related Reading
Knee Pain During Squats? Here's What Your Body Is Trying to Tell You

1. Grip With Your Feet
Strong, active feet provide a solid base of support and help properly distribute forces throughout your joints. If you don't know how to actively engage with the ground using your feet, other joints — including your knees — take on excessive load when you squat.
Think of how you would grab a heavy dumbbell with your hands: You wrap your fingers around the handle and grip hard. Ideally, your feet should be doing something similar when you squat.
Focus on grabbing the ground with your toes and think about pushing the floor away from you with your feet. If you're struggling to activate your feet, try squatting in your socks so you can better feel your connection with the ground.
Imagine you are straddling a huge crack in the earth. Your job as you squat is to try to spread that crack apart with your feet.
Another thing to watch out for is your heel(s) popping off the floor. The ball of your foot, its outside edge and your heel should all stay in constant contact with the ground while squatting or lunging.
"Keeping the heel 'glued' to the ground can prevent knee pain from squatting," says Michelle Kania, CSCS , a certified strength and conditioning specialist and owner of One Day Better Training.
2. Work on Your Ankle Mobility
If your ankles don't move well, your knees pick up the slack. Poor ankle mobility is one of the most overlooked obstacles to squatting with great form
According to a March 2015 study in the Journal of Human Kinetics , ankle dorsiflexion (raising your toes toward your shins) plays a major role in the depth of your squat , aka how low you can go. This means if your ankles don't bend very well, you'll have a hard time getting into the bottom of a squat.
You can improve your ankle mobility by including some ankle drills in your warm-up . The half-kneeling kettlebell ankle drill below uses the weight of the kettlebell to gently drive your knee forward over your toe. Be sure to keep your heel down on the floor throughout the rep.
"Tight calves can also make it harder for your knee to move past your toes without your heel popping up off the ground," Kania says.
Spend a couple of minutes at the start of each workout foam rolling your calves to help relax these overly tight muscles.
Half-Kneeling Kettlebell Ankle Drill
- Start in a half-kneeling position and place one knee down on a pad so that it's directly beneath your hip. Your back toes should be flexed and pointing to the floor. Bend your front knee so it forms a 90-degree angle. This foot should remain flat on the floor throughout the exercise.
- Place a mid-weight kettlebell on top of your front side. The weight should be heavy enough to push you into the stretch, but not so heavy that it causes pain or excessive leg fatigue.
- Use the weight of the kettlebell to gently guide your knee out over your toe. Keep the knee in alignment with your toes and do not allow it to travel in toward the middle of your body.
- Go as far as you can while still keeping your front heel glued to the floor. When you reach end range ankle dorsiflexion, return to the starting position.
3. Lead With Your Hips and Knees
One of the biggest mistakes that contributes to knee pain when squatting is starting the exercise from your ankles. When you bend at your ankles first, your knees automatically shoot out over your toes without your hips sh0oting behind as a counterbalance. This causes your knees to absorb nearly the entire load as you squat.
To avoid this problem, begin each rep by moving your hips and knees. Think about squatting both back and down so your hips take on their fair share of the load. This way you'll also be able to use your glutes and core to support yourself throughout the movement.
It might also be helpful to do box squats (see below) to help you understand how far back your hips should go.
- If possible, select a box that allows you to squat down so your thighs are parallel with the floor. People who are tall, those with limited hip or ankle mobility or those with active knee pain may need to use a higher box.
- Start standing in a tall and tight upright position.
- Initiate the movement by reaching your hips back and bending your knees. Think about sitting both back and down. Grab the floor and try to spread it apart with your feet.
- Continue descending into your squat until your hips reach the box.
- Finish the movement by driving your feet into the floor to stand up. Keep your chest tall throughout the rep. Don't allow yourself to excessively fold over or lean forward.
Relates Reading
How Bad Is It Really if Your Knees Go Over Your Toes During Squats and Lunges?
4. Strengthen Your Glutes
Sometimes, to fix knee pain from squatting, you kneed to focus on your hips and glutes. Your glutes, and primarily your side glutes, play a big role in stabilizing your knee joint. So any weaknesses there can make things go off-track.
But, of course, most lower-body workouts ignore the side glutes (gluteus medius and minimus). Fix that by doing side-to-side exercises like lateral band walks , clamshells and side squats .
The 32 Best Glute Exercises for Every Piece of Equipment
5. Choose a Different Squat Variation
If you struggle with knee pain during squats, try a different squat variation (think: goblet squats , double kettlebell squats , barbell front and back squats, air squats , sumo squats ).
While front-loaded squats put more stress on your quads and knees, they also use a pretty upright posture that some people prefer. Meanwhile, backloaded squats take some pressure off of the knees, but require you to hinge more at the hips and move your knees farther over your toes.
In the end, everyone is a bit different in what works for them. So test out the variations and stick with the ones that feel most comfortable on your knees. Over time, as you build strength and mobility in your legs, you may be able to expand your squat repertoire.

The 30 Best Squat Variations for Every Exerciser and Piece of Equipment

5 Exercises to Help You Improve Your Squat

The 5 Best Mobility Moves to Deepen Your Squat — Glute Gains Guaranteed

How Deep Do You Really Need to Squat?
- Journal of Human Kinetics: "Lower Extremity Strength and the Range of Motion in Relation to Squat Depth"
Was this article helpful?
150 Characters Max
Thank you for sharing!
Thank you for your feedback!
Report an Issue
Screenshot loading...
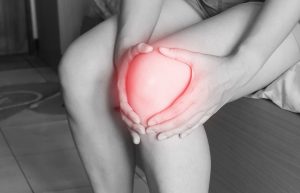
What to Do if Squats Hurt Your Knees
What to do if you love squats, but your knees are giving you too much pain to go on.

SQUATS SHOULD MAKE you feel something, since they're among the most important—and potentially the most heavily-loaded—compound lifts in your strength training arsenal. One thing you shouldn't feel from squats is knee pain.
Knee pain isn't a death sentence for your leg day gains, however, or even your ability to perform squats. You don't need to take a break from squatting to heal your aches. You just need to address the issue causing the knee pain in the first place. Here, Samuel looks at 4 common issues that typically lead to knee aching after squatting, and offers solutions to work through them.
Why You Have Knee Pain With Squats
Problem 1: you load your hips wrong.
Yes, squats are a knee dominant exercise, but the hips are also heavily involved. To load some pressure into the glutes, you need to hinge backwards. If you don't, extra stress can translate to the knees, which may cause pain. Poor hip loading can happen for several reasons, and you simply need to restore the feeling of proper loading and timing, Samuel says.
Touch Down Squat

The touch down squat allows you to keep a perpendicular shin at the knee throughout the movement, which is going force you to load at the hips. This exercise is going to help you "rebalance your entire squat motion," Samuel says.
How to Do It:
- Grab one plate to start—if you get through a full set without knee pain, then you can go higher and grab another.
- Stand on your platform.
- Push your butt back to slowly lower your other leg to where your heel meets the floor. Go as slow as you can on the way down.
Set and Reps: Do 3 to 4 sets of 6 to 8 reps per side as a warmup to your standard squats
Problem 2: Your Glutes Are Weak
If you're lacking glute strength, your hips won't be able to externally rotate under great load they way they need to in a heavy squat. In a squat, your knees need to be able to track outward to properly align with your shins to create an efficient movement pattern. Opening up the knee requires strength through the glutes.

These may look silly, but the clamshell is one of the best exercises to work on hip external rotation.
- Lay down on your side, and place a resistance band just above your knee if you have one (you can still do the move against gravity if you don't have one).
- Slightly bend your knee forward. Keep your heels together as you drive your top knee up.
Set and Reps: Do 2 to 3 sets of 20 reps per side as a warm up to your squats.
Monster Walks

This exercise also helps build outer glute strength, which will ultimately help your knee maintain proper position when squatting.
- Place a resistance band just above your knees. You can also place one around your ankles for a little extra challenge.
- Bend your knees slightly to get into an athletic stance—think quarter squat—like a defender on a basketball court.
- Take 5 to 10 steps laterally each way. Think about stacking your knee over your ankle every step.
Set and Reps: Do 2 to 3 sets of 5 to 10 steps each direction as a warm up to your squats.
Problem 3: You Don't Bend Your Knees Enough
Everyday movement doesn't typically call for a ton of deep knee flexion, the bent position you'll find yourself in when you perform a full-depth squat. Even if you're only working on squatting to a 90 degree or parallel position, you still get a few benefits from working on deep knee bending. This action can help build tendon strength in the knee, and "spending time in deep knee flexion is going to train our quads in a lengthened position," Samuel says.
ATG Split Squat

The ass-to-grass split squat really emphasizes bringing your calf as close as you can to your hamstring, finding that intense strength into knee flexion.
- Grab one or two plates to create a platform. Place one foot on the platform and extend out the back foot, finding a good split squat stance .
- Shift your weight down and forward onto the front leg. Drive your knee as far over and in front of your toes as possible—don't be afraid to lift up off the heel a bit.
- Time your time, and feel that stretch. Hold for 2 to 3 seconds before pushing back up.
Set and Reps: Do 3 sets of 6 to 8 reps per side as an accessory motion on your leg days, or at least 2 to 3 times a week.
Assisted Squat with Heels Up

This move provides a similar idea to the split squat with a bilateral (two-foot) movement, while loading the knee just a little differently. You're still trying to get the hamstrings to touch the calves.
- Find something sturdy to hold on to like a post or side of a squat rack.
- Spread your feet out hip width apart, and load your weight into your toes. Lift the heels up off the ground.
- While holding your base, squat down to where you bring your calves as close to your hamstrings as possible, keeping your heels lifted the whole time.
- Hold that position for 2 to 3 seconds before pressing up.
Set and Reps: Do 2 to 3 sets of 5 reps, every day.
Problem 4: You Lack Ankle Mobility
A good squat depends more on ankle mobility than you would think. You have to shift the knees forward, and that can't be done that without proper flexibility through the ankles—specifically in the Achilles tendon.
Kneeling Ankle Stretch

This is a very simple stretch that you can incorporate into your squat warm up routine to prep the ankles for motion.
- Get down onto one knee. Place one thumb around your Achilles tendon on your front foot.
- Push down with that hand to ensure your heel doesn't pop up off the ground while you shift your weight forward into that foot.
- Track your knee as far forward over your toes as possible.
- To get a deeper strength, place a little bit of pressure over top of your front knee.
Set and Reps: Do 1 to 2 sets of 3 to 5 reps during your squat warm up, or in between your squat sets.
.css-1fpt53b{height:1.25rem;}@media(max-width: 48rem){.css-1fpt53b{overflow:unset;line-height:1.25rem;}}@media(min-width: 48rem){.css-1fpt53b{line-height:1.25rem;}}.css-1fpt53b:before{background-color:#D2232E;color:#fff;margin-right:0.625rem;width:1.25rem;height:1.25rem;content:'';display:block;} Workouts

The Best Chest Exercises to Build Stronger Pecs

This Is How to Bench Press Correctly

Jake Gyllenhaal's 'Road House' Workout

15 Moves to Smoke Your Back With Just Dumbbells

How to Get a (Stronger) Grip

Build Massive Calves With These Workouts

How to Do a Perfect Dumbbell Chest Fly

The Moves You Need for Hamstring Muscle

Build Lower Body Power With Box Squats

How Many Situps You Should Do in a Day

The Beginner's Guide to Weight Training
HOW TO ELIMINATE KNEE PAIN DURING SQUATS (8 TIPS)

Nothing ruins the joy of working out more than nagging joint pain.
Not only is it physically uncomfortable, but it often stalls progression by preventing you from training at peak performance.
The knee joint is an area that very commonly acts up in many trainees, especially during the squat.
However, squats are not inherently dangerous. In fact, when performed with proper technique, they can actually strengthen the knees and reduce the risk of future injuries .
But what should you do if you experience knee pain during squats?
In this post I’ll be going over 8 tips you can implement to treat the underlying causes, eliminate the discomfort and get back on the road to squatting pain-free.
Squats & Knee Pain: 8 Tips To Follow
#1 – do a proper warm up.

This is the first and most basic place to start if you’re experiencing knee pain while squatting.
Doing nothing more than one or two quick warm up sets and then jumping straight into the heavy weights is not enough if you truly want to minimize the strain on your knees and optimize training performance.
A properly executed warm up will lubricate the joints with synovial fluid, improve mobility and activate your central nervous system for greater strength, power, and faster reaction time.
#2 – Spread Your Knees Outward

A big problem many lifters run into during the squat is having their knees buckle inward.
We call this a “knee valgus,” and it’s a very common cause of knee pain from squats.
Knee valgus increases the tension on the knee joint and places a lot of stress on the anterior cruciate ligament (ACL), potentially leading to patellofemoral pain syndrome or even ligament tears.
The first step in preventing this is to simply be aware of what your knees are doing during the squat and to ensure that they remain in line with your feet rather than collapsing inward.
A useful cue for this is to focus on “spreading the floor apart” with your feet.
Adopting a squatting stance with your toes pointed slightly outward helps as well.
If simply adjusting your form doesn’t take care of it completely, there could be other underlying issues at play.
One of the most common reasons behind inward collapsing knees are weak and inactive glutes.
When the glutes don’t fire properly during a squat, they’re unable to resist the inward force your upper legs undergo during the lift, causing your knees to buckle.
Performing some very light “pre-activation” work for the glutes prior to your squatting sessions can be helpful here, as can directly training the glutes using movements such as hip thrusts and banded sidewalks.
Another helpful tip is to squat with a mini-band wrapped your knees, as this will increase the strength and activation of the glutes and force you to keep your knees spread outward throughout the exercise.

Another common cause of knee valgus is tight ankles.
Insufficient ankle mobility will pull your feet inward when you reach the lower part of a squat. Once this happens, your knees will follow automatically.
Lifters who are limited by their ankle flexibility can self-myofascial release the tissues in the calves, ankles and feet in order to loosen things up and improve ankle mobility. A lacrosse ball or other SMR tool can be used for this. ( This video covers some techniques you might find helpful.)
Lastly, knee valgus can often be fixed by simply re-learning the squat using lighter loads.
Focus on keeping your knees in the proper position and getting those glutes to fire consistently, and then gradually begin adding weight again while maintaining the correct form.
#3 – Stop Pushing Through Your Toes

When you push through your toes during the squat (or on any compound quad exercise such as leg presses, lunges, or deadlifts ), you shift the tension forward and direct more stress onto the knees.
Instead, make sure to evenly distribute the weight over your entire foot.
One form cue that will help out with this is to think about “sitting back” as you descend on each rep.
Box squats are a very helpful exercise to learn how to do this correctly.
Since you can maintain a more upright shin angle with this variation, lifters with beaten up knees will often feel less pain on the box squat in comparison to regular squats.
Don’t push your hips too far back though, since this will create greater flexion at the hip joint.
When overdone, this can turn your squat into a good morning exercise and lead to more stress on your lower back .
Find a middle ground here between sitting back during the squat but without allowing your torso to collapse forward.
This will help to prevent knee pain during squats and keep your lower back protected as well.
#4 – Self-Myofascial Release Your IT Band

The Iliotibial Tract (IT) band is a thick strip of connective tissue that is attached to your knee joint. It helps abduct and laterally rotate the hip and is essential for the stabilization of your knees.
However, squatting (and running) regularly can cause the IT band to become excessively tight, which pulls and creates tension on the knee joint.
While a deep tissue massage from a skilled practitioner would be ideal, self-myofascial release techniques (SMR) are a good alternative to relax those overly contracted muscles and release built-up trigger points.
The most well-known SMR technique is foam rolling.
Simply place a foam roller between your body and the ground and apply pressure to the area you’re trying to treat by slowly rolling back and forth.
Here’s how you can SMR your IT band:

Once you’ve gotten into position, perform long, slow rolls running from your hip all the way down to just above your knee. If you find an area that is particularly tender, stay on that spot for a bit longer until the pain subsides.
You’ll likely find this very painful if it’s your first time, but the discomfort will gradually decrease with repeated sessions.
#5 – Self-Myofascial Release Your Adductors

The adductors are a group of muscles located at your inner thigh.
Their primary function is to bring your legs toward the midline of your body. Aside from that, they also assist with hip flexion, hip extension and hip rotation.
The problem?
The adductors muscles – just like your IT band – have a tendency to become overly tight.
Tight adductors can increase your risk of knee pain on squats by contributing to knee valgus as discussed above, as well as by preventing proper stabilization of the femur.
You can use a foam roller for this as well along the inner portion of your thigh.

#6 – Use A Pair Of Knee Sleeves

Knee sleeves are made up of a thin layer of rubber or neoprene and are wrapped around your knees during the squat.
They help to lubricate the joints by trapping in heat, as well as providing additional support to the knees throughout the lift.
Knee sleeves should not be used as a “crutch” for bad form, and they certainly aren’t a solution to knee pain during squats in and of themselves.
However, if you’re squatting with proper form and are working on fixing some of the potential underlying issues addressed above, knee sleeves can be used (at least temporarily) to provide a bit of extra support.
#7 – Squat Deeper

Although it may seem counter-intuitive, squatting with a deeper range of motion may actually be superior for knee health.
One analysis found that full squats produce less stress on the knee joint and have a lower risk of injury than partial squats. ( 1 )
The researchers also found that the highest force on your knees during a squat is when your upper legs are parallel to the floor.
In addition, full squats force you to use a lighter weight which not only reduces the stress on the knee joints but also on the lower back as well.
#8 – Do Front Squats

If you’ve tried all of the tips above and that stubborn knee while squatting still won’t subside, another option is to take a break from regular back squats and try performing front squats instead.
Despite the fact that front squats cause more forward knee travel, they produce less stress on your knee joint overall and may be better for long-term knee health. ( 2 )
They’re much easier on the lower back as well.
Here is what the researchers concluded in the study linked above:
“The front squat was as effective as the back squat in terms of overall muscle recruitment, with significantly fewer compressive forces and extensor moments. The results suggest that front squats may be advantageous compared with back squats for individuals with knee problems such as meniscus tears, and for long-term joint health.”
If front squats aren’t doing the trick either, then you’ll probably just be best to take a break from squatting movements altogether to give your knees a chance to heal.
Try replacing them with another compound leg exercise such as a leg press if you find it more comfortable. Going with a lighter weight/higher rep approach would probably be helpful as well.
Squats & Knee Pain: The Bottom Line

There are many benefits to squats , but you can’t do them if you’re injured.
Conversely, it’s been a long-held belief that squats are bad for your knees. However, when performed properly, squats are the single most productive lower body exercise available and are safe on the knees as well.
In fact, they can even improve the health of your knees joints and prevent future knee injuries as long as your technique is on point.
If you’ve been experiencing nagging knee pain on squats (or just want to minimize knee strain during the exercise to prevent future injuries), implementing the 8 tips above should take care of the issue for you.
Read more about leg extension knee pain to protect your joints in that exercise, too.
If you found this article helpful, make sure to sign up for your FREE custom fitness plan below...

Suggested Articles
Featured comment.

Thanks for checking out my article! I hope you found the information useful. Feel free to leave a comment below if you have any questions and I\'ll get back to you as soon as I can.
If you did enjoy this post, don\'t forget to sign up for my newsletter that delivers science-based, no B.S muscle building and fat loss tips, macro-friendly recipes, motivational strategies and more straight to your inbox every week:
==> http://www.SeanNal.com/newslet...
And if you\'re into social media, make sure to connect with me on YouTube, Facebook, Instagram and more for additional fitness tips and updates:
==> http://www.SeanNal.com/connect...
Thanks for checking out my article! If you found it helpful, make sure to subscribe to my YouTube channel and follow on Instagram for more daily training and nutrition tips.
If you need further help getting onto the right track with your fitness goals, you can also sign up for a free customized program from me here:
https://www.SeanNal.com/free-custom-fitness-plan.php
ABOUT SEAN NALEWANYJ

RECOMMENDED POSTS
- How Much Muscle Can You Gain Naturally, And How Fast?
- Not Losing Fat? 20 Cutting Diet Mistakes To Avoid
- 7 Ways Supplement Companies Are Ripping You Off
- How To Build Round "3D Delts" That Pop (4 Exercises)
- The Best Cardio Exercises To Burn Fat And Get Lean
- Not Gaining Strength In The Gym? (12 Simple Fixes)
- The #1 Cutting Diet To Achieve A Lean Physique
- 10 Ways To Increase Testosterone Levels Naturally

Most Recent Posts
- 7 “RED PILL TRUTHS” ABOUT BUILDING MUSCLE YOU NEED TO KNOW
- 20 COMMON GYM MISTAKES YOU NEED TO AVOID
- THE TOP 5 WORST PRE-WORKOUTS ON THE MARKET
Looking For Something Specific?
- For Individuals
- Benefit Leaders and Health Plans
- Our Approach
- Learning Center
- Knee Pain While Squatting: Tips and Exercises to Prevent It
Learn the possible causes and best remedies for knee pain while squatting, including at-home exercises to keep your knees strong and resilient.

- Hinge Health Learning Center
Table of Contents
All hail the knee: It's our biggest joint, and responsible for our ability to walk, run, jump, climb stairs, sit, and stand back up. So it’s natural to worry when your knee starts to hurt — and hurt during specific activities like squatting. Just about anyone can experience this type of pain because we squat so much as part of our day. “Every time you sit or stand from a chair or a couch, you’re squatting,” says Cody Anderson, PT, DPT, a physical therapist at Hinge Health.
If squatting irritates your knee, you may start to unintentionally — or intentionally — avoid that movement. “If you’re retrieving something from a low cabinet, for example, you may bend more from the back and the hips instead of the knees,” says Dr. Anderson. While this is an understandable adaptation, this change in mechanics can lead to other problems down the road, and can actually prevent your knee from getting stronger and more resilient.
Here, learn about some common causes of knee pain while squatting, myths about the “perfect” way to squat, and exercises to help your knee stay strong.
Our Hinge Health Experts
Cody anderson, pt, dpt, jonathan lee, md, mba, dylan peterson, pt, dpt, tap into pain relief. anytime, anywhere with our app., why does my knee hurt when i squat and how bad is it.
Knee pain during squatting can happen for a lot of reasons, including a sudden uptick in physical activity, repetitive workouts, or an underlying issue in the joint. Lack of activity or a sedentary lifestyle can also cause the knee joint to lose mobility and range of motion, making it more sensitive to pain when you squat. Many people experienced this during the COVID-19 pandemic, for example. “During the early days of the pandemic, many people were not as active. And an increase in home deliveries meant we were less likely to be in the store, squatting to get things off the shelf. As people started to go back to their usual routines, they may have found that squatting caused pain when it didn’t before,” says Dr. Anderson.
Knee pain when squatting may feel like a dull ache, a pulling sensation, or a sharp pain. One common misconception is that a sharper pain must mean a bad injury and worse outcome, but this is not necessarily true, says Dr. Anderson. “A sharp pain in the knee usually indicates a more notable irritation or flare-up compared to a dull ache that builds. A sharp pain is the brain saying, ‘I’m not ready for that movement right now,’” says Dr. Anderson. But it doesn’t necessarily indicate that an injury is worse or will take longer to heal.
Common Causes of Knee Pain When Squatting
Here are some common contributing factors to knee pain when squatting. No matter what the primary cause of your knee pain when squatting is, movement and targeted exercises are usually a first-line treatment for each of these issues. They help strengthen the knee to reduce pain and prevent pain flares from occurring in the future.
Patellar tendinitis. The patellar tendon is located just below the kneecap. Repetitive force through the patellar tendon from activities like repeated jumping (often called jumper’s knee ) can contribute to inflammation or swelling just below the knee. This can contribute to knee pain when squatting for some people.
Quadriceps tendinitis. The quadriceps tendon is located just above the kneecap and connects the quadriceps muscles (front thigh) to the top of the kneecap, helping you straighten your knee during activities like climbing stairs, walking, running, and jumping. If the quadriceps tendon becomes strained or irritated, you’ll feel pain just above the kneecap.
Patellofemoral syndrome. This condition can cause a dull ache behind or around the kneecap and is caused by irritation in those areas. It may get worse during activities such as squatting and climbing stairs. It can also be referred to as runner’s knee because it’s common among athletes, but anyone can develop patellofemoral syndrome, regardless of activity level.
Meniscus tear. Just as it’s normal to develop gray hair on your head or wrinkles on your skin, it’s normal for the cartilage that cushions the knee joint to change with age. While these changes are often unnoticeable, they can contribute to knee pain, stiffness, swelling, or reduced range of motion for some people. You may also feel a catching or locking sensation.
Osteoarthritis. Similar to the meniscus, it’s normal for the articular cartilage that cushions the knee joint to change with age. If these changes contribute to friction in the knee joint, you may experience aches or stiffness that can make everyday movements, including squats, more difficult.
Weak glute muscles. Research shows that working the glutes, inner hip, and inner thigh muscles can help reduce knee pain. If you have pain with squatting and your knees cave inward during a squat, try strengthening your glute muscles to see if it helps, suggests Dr. Anderson. Start with the standing side leg raise (instructions below). Know that knees caving inward during a squat isn’t necessarily a bad thing, or something that contributes to pain, but it may indicate a lack of glute strength which can be a factor in the bigger picture of your knee pain.
Limited ankle mobility. Everything in the body is connected. So if your ankle has a limited ability to flex forward or adjust side to side, it ultimately affects the angle at which your knee bends and it may force your knee to assume a position that’s more stressful for you. Simple at-home exercises can improve your ankle’s range of motion (see prevention tips and exercises below).
Too little movement throughout the day. Staying in the same position for too long can be irritating to your joints and make them stiffer. There’s no right or wrong way to sit or stand throughout the day. The most important thing you can do to prevent and manage stiff joints is to change positions and move throughout the day. If you have to sit a lot during the day, make sure to change positions and take movement breaks. Same with standing. That’s why our Hinge Health physical therapists always say your next position is your best position .
Treatment Options for Knee Pain During Squatting
If you overdid it and your knee is inflamed, these remedies can help you through the worst of the pain, until you're ready to resume your normal activities again.
For an overuse injury , try modifying your activities. You may need to scale back on certain activities that cause a noticeable uptick in your pain to give your knee time to recoup, but it’s important to keep moving in some capacity. Movement delivers healing nutrients to the joint and ensures that it stays strong and resilient.
For inflammation, try:
Icing your knee for 10 minutes after activity.
Over-the-counter (OTC) medication such as ibuprofen (Advil, Motrin), naproxen (Aleve), and acetaminophen (Tylenol) to help reduce pain and swelling. It’s important to make sure that you are safely able to take these medications, based on your medical history.
Compression (like a knee sleeve), to potentially help to keep the swelling under control.
For stiffness try using heat before activity, such as a heating pad for 10 minutes. Warming up the tissues can help make them more pliable and resilient when moving.
When to See a Doctor
Most cases of knee pain during squatting are nothing to worry about and resolve with activity modifications and other conservative measures. If you have excessive swelling that lasts for several days and happens in conjunction with squatting, see your medical provider. There may be an underlying medical issue that requires evaluation, says Dr. Anderson.
The Truth About the ‘Best’ Way to Squat
Spoiler alert: There is no such thing as a “perfect” squat. “People’s bodies are so variable that it’s really hard to come up with one form for everyone,” says Dr. Anderson. The squat technique below is commonly recommended as it works for most people. However, there may be good reasons your body has trouble following these instructions to a tee. The important thing is to listen to what your body is telling you during a squat so you can adapt your squat to meet your own unique needs.
General Squat Form Recommendations:
Keep your feet flat on the ground. Think about the inside and outside balls of your foot and your heel — these three points should all be on the ground, says Dr. Anderson.
Stand with your feet hip-width apart.
Keep your knees in line with your feet. In other words, you want your knees to rest over your feet, not forward or behind them.
Hold your chest up and keep your core engaged.
When squatting, move your hips back, as if you are about to sit on a chair behind you.
Try to keep the middle of your knees in line with the space between your second and fourth toes throughout the entire movement.
What It Means If:
You are very upright. An upright position when squatting tends to mean you’re heavily engaging the quadriceps muscles (top of the thigh). This could happen because of your body mechanics — if you have a long torso and shorter thigh bones (common in powerlifters, for example). Or, you may not be fully engaging your glute muscles.
You are very bent forward. This means you are engaging your hips and back more than your quads and knees. This could mean you have an opportunity to increase your knee range of motion, or that you’d benefit from strengthening your quads. (Start with the knee extension, below).
Squat Myths to Bust
Myth: It’s really bad if your knees go over your toes. If you’re like most people, you’ve been told at some point to not let your knees go past your toes when you squat. It’s true that you might not be ready for your knee to go over your toes just yet, because there can be increases in knee pressure as your knees go farther over your toes. However, it’s not a bad thing to have your knees extend past your toes when squatting and this advice can make it seem really dangerous. The knee naturally goes over your toes all the time in daily life — like every time you go down the stairs, says Dr. Anderson. So just know that if your knee does go over your toes, you are not damaging the joint. You are just challenging your knee more.
Myth: You shouldn’t let your knee cave inward (known as knee valgus) during a squat. In excess, knee valgus could signal weak muscles or poor form. But variations in movement are normal. If you are naturally a bit knock-kneed, for example, your body may be used to your knee moving inward. “If you’ve been moving this way for 25 years with no problem, chances are this isn’t the main cause of your pain and you may not need to correct this,” says Dr. Anderson.
Myth: It’s bad to turn out your toes. If your toes turn out when you squat, it may be because of how your hip bones are aligned. In that case, it’s okay to do what feels most natural for your body. In fact, turned-out toes can actually allow you to squat deeper with less stiffness.
How to Prevent Knee Pain When Squatting
Put simply: Motion is lotion . To keep your knees healthy and strong for life, the key is to stay active in whatever way works for you. The CDC recommends a minimum of 150 minutes of cardiovascular exercise a week, and strength training twice a week can keep your muscles strong and protect your joints from stress. Here are specific ways to make sure your physical activity nurtures strong, resilient knees.
Indulge in ‘movement snacks.’ Since prolonged sitting can irritate the knees, it’s crucial to stand up and move around frequently, even if it’s just for a minute or two. “Giving your knees movement throughout the day is actually better than if you sit all day and then hit the gym at night,” says Dr. Anderson. Set an alarm on your phone to remind yourself to take hourly mini-breaks for movement, whether it’s walking around the block or just to the bathroom, or stretching near your seat.
Improve knee mobility — gently. “When we’re talking about improving knee pain, a lot of times we’re really talking about improving your range of motion,” says Dr. Anderson. Here are two ways to help your knee bend to its full range of motion while using little or no weight. This can help you bend your knees more deeply during activities like squatting and build up your confidence about moving the joint.
Knees to chest stretch : Lay on your back and pull your knees to your chest, grasping the back of your thighs or the top of your shin bones. Breathe deeply and hold for 30 to 60 seconds. For an even gentler stretch, do this one leg at a time.
Child’s pose . This popular yoga pose mimics a squat — but without supporting the weight of your body. Kneel with your knees shoulder width apart, feet together, and buttocks down toward your heels. Lean forward and place your hands on the ground for support, and breathe deeply. Hold for one to two minutes Improve ankle mobility. Because the knee and the ankle work together to move the leg, improving ankle mobility helps your knee stay in optimal alignment as well. Improve your ankle’s range of motion with a knee-to-wall stretch . Here’s how to do it:
Place your bare foot flat on the floor about three inches from the wall, then bend your knee forward until it hits the wall. Move your foot back a half inch or so until you can no longer touch the wall with your heel on the ground.
Slowly rock your knee toward the wall and hold for three to five seconds. Relax back to the starting position and repeat six to eight times before repeating on the other side.
If your knee begins to touch the wall during the repetitions, this is a sign your ankle mobility is improving.
Engage your hip muscles. “Some people naturally do a very knee-dominant squat, meaning they are very upright and they are just not used to using the hip muscles,” says Dr. Anderson. ”Sometimes, if we give people hip exercises, they become better able to engage their hip muscles and adjust so they can get some pain relief,” says Dr. Anderson. And sometimes, simply becoming more aware of how you’re moving and using your muscles can make a big difference. Get started with the standing side leg raise below.
Exercises for Knee Pain Relief
Relieve your pain today with our app.
Curated exercise playlists just for you by physical therapists
These exercises recommended by Hinge Health physical therapists take you through a low, medium, and high load to build up to doing full squats. Start by doing these three days a week, and slowly increase to every other day or daily.
The information contained in these videos is intended to be used for educational purposes only and does not constitute medical advice or treatment for any specific condition. Hinge Health is not your healthcare provider and is not responsible for any injury sustained or exacerbated by your use of or participation in these exercises. Please consult with your healthcare provider with any questions you may have about your medical condition or treatment.
PT Tip: Try This High-Heel Squat Trick
It’s true that general squat form recommendations include keeping your feet flat on the ground. But if you have knee pain during squatting, there’s a modification you can try that may help: Raise your heels off the ground. You can do this by resting your heels on a very small step (about two inches), a piece of plywood, a book, or anything else you have lying around the house. You can also do your squats barefoot and place your exercise shoes behind you so you can place your heels on the toes of your shoes.
Elevating your heels can help knee pain in a lot of ways, such as allowing you to increase squat depth, increasing the range of motion at the knees, and increasing activation of the quadriceps. High-heel squats can also be especially helpful for people who struggle with ankle mobility because it can improve their alignment during a squat, says Dr. Anderson.
How Hinge Health Can Help You
If you have joint or muscle pain that makes it hard to move, you can get the relief you’ve been looking for with Hinge Health’s online exercise therapy program.
The best part: You don’t have to leave your home because our program is digital. That means you can easily get the care you need through our app, when and where it works for you.
Through our program, you’ll have access to therapeutic exercises and stretches for your condition. Additionally, you’ll have a personal care team to guide, support, and tailor our program to you.
See if you qualify for Hinge Health and confirm free coverage through your employer or benefit plan here .
This article and its contents are provided for educational and informational purposes only and do not constitute medical advice or professional services specific to you or your medical condition.
Looking for pain relief? Check if your employer or health plan covers our program
Almeida, G. P. L., Rodrigues, H. L. das N., Coelho, B. A. L., Rodrigues, C. A. S., & Lima, P. O. de P. (2021). Anteromedial versus posterolateral hip musculature strengthening with dose-controlled in women with patellofemoral pain: A randomized controlled trial. Physical Therapy in Sport, 49 , 149–156. doi:10.1016/j.ptsp.2021.02.016
Bump, J. M., & Lewis, L. (2022). Patellofemoral Syndrome. In StatPearls . StatPearls Publishing. http://www.ncbi.nlm.nih.gov/books/NBK557657/
Cannell, L. J., Taunton, J. E., Clement, D. B., Smith, C., & Khan, K. M. (2001). A randomised clinical trial of the efficacy of drop squats or leg extension/leg curl exercises to treat clinically diagnosed jumper’s knee in athletes: Pilot study. British Journal of Sports Medicine , 35 (1), 60–64. doi:10.1136/bjsm.35.1.60
Caterisano, A., Moss, R. F., Pellinger, T. K., Woodruff, K., Lewis, V. C., Booth, W., & Khadra, T. (2002). The effect of back squat depth on the EMG activity of 4 superficial hip and thigh muscles. Journal of Strength and Conditioning Research , 16 (3), 428–432.
Move More; Sit Less . (2022, June 2). Centers for Disease Control and Prevention. https://www.cdc.gov/physicalactivity/basics/adults/index.htm
Mulcahey, M. K. (2022, February). Common Knee Injuries. OrthoInfo — American Academy of Orthopaedic Surgeons. https://www.orthoinfo.org/en/diseases--conditions/common-knee-injuries/
Deshpande, B. R., Katz, J. N., Solomon, D. H., Yelin, E. H., Hunter, D. J., Messier, S. P., Suter, L. G., & Losina, E. (2016). The number of persons with symptomatic knee osteoarthritis in the United States: Impact of race/ethnicity, age, sex, and obesity. Arthritis Care & Research , 68 (12), 1743–1750. doi:10.1002/acr.22897
Sheth, N. P. (2022, April). Osteoarthritis. OrthoInfo — American Academy of Orthopaedic Surgeons. https://www.orthoinfo.org/en/diseases--conditions/osteoarthritis/
Wittstein, J. R. & Wilkerson, R. (2021, September). Patellar Tendon Tear. OrthoInfo — American Academy of Orthopaedic Surgeons. https://www.orthoinfo.org/en/diseases--conditions/patellar-tendon-tear/
Mulcahey, M. K., Hettrich, C. M., & Liechti, D. (2020, October). Patellofemoral Pain Syndrome. OrthoInfo — American Academy of Orthopaedic Surgeons. https://www.orthoinfo.org/en/diseases--conditions/patellofemoral-pain-syndrome/
Pereira, P. M., Baptista, J. S., Conceição, F., Duarte, J., Ferraz, J., & Costa, J. T. (2022). Patellofemoral Pain Syndrome Risk Associated with Squats: A Systematic Review. International Journal of Environmental Research and Public Health , 19 (15), 9241. doi:10.3390/ijerph19159241
Raj, M. A., & Bubnis, M. A. (2022). Knee Meniscal Tears. In StatPearls . StatPearls Publishing. http://www.ncbi.nlm.nih.gov/books/NBK431067/
Foran, J. R. H. (2020, June). Total Knee Replacement. OrthoInfo — American Academy of Orthopaedic Surgeons. https://www.orthoinfo.org/en/treatment/total-knee-replacement/
Related Articles
OPT OUT OF SALES, SHARING, AND TARGETED ADVERTISING
Manage consent preferences, strictly necessary cookies.
These cookies are necessary for the website to function and cannot be switched off in our systems. They are usually only set in response to actions made by you which amount to a request for services, such as setting your privacy preferences, logging in or filling in forms. You can set your browser to block or alert you about these cookies, but some parts of the site will not then work. These cookies do not store any personally identifiable information.
Performance Cookies
These cookies allow us to count visits and traffic sources so we can measure and improve the performance of our site. They help us to know which pages are the most and least popular and see how visitors move around the site. All information these cookies collect is aggregated and therefore anonymous. If you do not allow these cookies we will not know when you have visited our site, and will not be able to monitor its performance.
Functional Cookies
These cookies enable the website to provide enhanced functionality and personalisation. They may be set by us or by third party providers whose services we have added to our pages. If you do not allow these cookies then some or all of these services may not function properly.
Targeting Cookies
These cookies may be set through our site by our advertising partners. They may be used by those companies to build a profile of your interests and show you relevant adverts on other sites. They do not store directly personal information, but are based on uniquely identifying your browser and internet device. If you do not allow these cookies, you will experience less targeted advertising.
Cookie List
Knee Pain After Squats: How to Get Rid Of It
You hear it everywhere you turn – if you wanna get big, especially in the lower body, you gotta squat. That’s ok for those with healthy joints, but what about those of us who have to put up with knee pain? Do we have to eliminate this fundamental mass builder from our routine, or is there a way to squat without suffering debilitating knee pain as a consequence?
Let’s find out.

Knee Anatomy
Your knee is a hinge joint, but one that does not have a fixed axis. Instead, it is able to glide and rotate. As a result, the axis of the joint constantly changes. This is one of the prime reasons for knee problems.
In order for your knees to work without giving you too much trouble, you need your hamstring and your quadriceps to be of roughly equal strength. Ideally, you should have a hamstring-to-quadricep ratio of one to one.

The knee is comprised of seven types of tissue:
- Bone – the femur, tibia and patella
- Ligaments – this is the connective tissue that connects bone to bone; there are eight interior ligaments and six external ligaments
- Muscle -while there are no muscles in the actual knee joint, those that act on the knee are the quadriceps and the hamstrings
- Tendon – tendons connect the quadriceps and hamstrings to bones of the knee.
- Bursa – this is a pad-like sac that prevents friction from occurring at the point of connection, such as between bone and muscle. The knee contains twelve of these bursa.
- Adipose tissue – this provides padding around the knee joint
- Articular cartilage – this is the connective tissue that allows for fluid movement between the bones of the knee joint. There are two cartilages on the knee joint; the two menisci which cradle the rounded knobs of the lower femur.
Why the Pain?
The knee joint is stuck between the ankle and the hip. Often the reason that squatters end up with pain in that middle joint has nothing to do with the fact that they have ‘bad knees’. Rather, incorrect movement at the hips and ankles lead to collateral damage to the knee. 90% of the time the issue is with the hips. If you do not have the right mechanics of the hip joint while you squat , your lower body will not be able to stabilize itself when you are squatting. As a result of that, your knees will not be able to track up and down in the ideal plane of movement.
In order to ensure that you are squatting with the correct hip alignment there are two key steps that you need to take:
(1) When you get under the bar be sure that your elbows are pointing downward and into your sides, with your head up. This may seem inconsequential, when in fact it is critical. When your elbows are pointing down, your upper and mid back will automatically come into proper alignment and stabilization.
(2) As you start to go down, consciously pull your body down. To do this, activate the hip flexors and contract and squeezing the psoas muscle. This will allow you to stabilize the lumbar spine.
When you practice those two steps, your knees will track directly up and down when you squat. You will not have to artificially recruit the muscles on the outside of the thigh to push back up. As a result, you will not experience the knee pain that you are used to.
What If You’ve Got Patellar Tendonitis?
Patellar tendonitis will result in stabbing knee pain that goes right through your knee caps into your inner knee joint after doing even light squats. But even that doesn’t mean that you have to forego the squat exercise. The solution to patellar tendonitis pain is to do the box squat.
Patellar tendonitis results from the fact that the tendons attached to the knee are being relied on too much to carry the load of the weight you are squatting. Your goal is for the quads, hamstrings and glutes to take that load. Your job is going to have to be to train those tendons to hold back and allow the muscles to do the job. Squatting to a box will allow you to do just that.
The most common reason that squatters over rely on the patellar tendon is that they have a psychological fear of not being able to get back up during the squat descent. As a result, they rely on the patellar tendon rather than the quads as they are going down. They will bend the knees first because they do not want the quads to take the load. They do not have the confidence that their quads will be strong enough to get them out of the hole. When you use a box, however, that problem is eliminated.
You should squat to a box height of about seventeen inches. You will probably use a bench as your squat box and the height of most benches should be set at about that level. Place the bench between your legs. This will ensure that you are squatting with a wide stance, which will turn out your toes and bring more hip activation into play. Your hips will lead on the descent rather than your knees. Lean back with the hips and then start descending. The bench will provide you with the security that you won’t fall to the ground.
Rather than resting on the box, just touch it with your butt and then power back up, again driving through the hips. Using the box will also recruit more involvement from the hamstrings and glutes.
Knee Tracking
The line of travel of your knee is critical to squatting pain free. You want your knee to be pushed out as you go up and down so that it is in line with your toes. This will minimize any interior or external rotation of the tibia.
Pushing Through the Heels
Inexperienced squatters have a tendency to push through the front of the foot as they push up out of the hole. This is never a good idea and especially not when you are experiencing knee pain. Pushing through the toes will concentrate the tension of the exercise forward and place more stress on the knees.
You should ideally displace your weight over your entire foot. As you drive out of the squat, visualize pushing into the ground through your heels. This will go a long way to helping to achieve the ideal body tracking that you are after.
What About Squatting Shoes?
The shoes that you wear while squatting can have a great impact on your knees while squatting. Most general running or casual shoes do not have the stability or the arch support to lower you to squat efficiently. For many people, their feet have a natural tendency to pronate when they squat. This will also force the knees to come inward. This leads to a chain of problem reactions including strain on the ligaments, excessive sheer force and misaligned tracking of the patellar.
Wearing the right type of squatting shoes can help to prevent these effects.
Squatting shoes also allow you to have a raised heel and a solid heel cup. A solid heel support will stop the heel from moving laterally, which will cause a lot of strain on your knee joint. The raised heel will also place your body in the proper alignment to move up and down with proper patellar tracking.
What About Bar Positioning?
Does the position of the bar on your back affect your knees? Yes, it does. The back squat gives you the choice of either a high bar or a low bar position. The high bar position puts the bar across the upper trapezius muscles, whereas the low bar will have it positioned across the rear delts. With the bar higher, you will end up with a more upright squat position, less hip flexion, and more forward migration of the knee. This is not what you want if your goal is to reduce knee pain .
The low bar squat will naturally result in more forward lean, more hip flexion and less migration of the knee. This is the preferred form to reduce pain in the knee area.
How About Knee Wraps?
Should people with knee pain use knee wraps?
The answer is no – unless you are squatting at more than 85% of your one rep maximum. The problem is that a wrap absorbs the stress and not the tissues of the knee. This means that your tissues never get stronger. If you are going to wear knee wraps be sure to purchase wraps that are heavy as they will provide the greatest level of knee protection. You also want the wrap to have a length of about 18 feet. Allowing you to wrap it around your knee multiple times. You do not, however, want wraps that provide a lot of elastic stretch.
What About Foot Position?
The health of your knees has a direct correlation to your foot stance. At the end of the day, you will have to work out your ideal foot stance in accordance with your own anatomical peculiarities. However, there are some basic foot stance guidelines that you should take into account:
- Point your feet slightly outwards. This is the strongest stance for quad recruitment.
- Do not have an overly wide stance. This will put too much pressure on the patellar tendon.
- Do not allow your knees to cave in during the drive out of the hole. This will place too much pressure on the medial ligament.
- Do not use a close stance. This will place too much compression on the knee.
- Keep your feet locked in position during the set. Do not allow them to fidget around.
Try Front Squats
The front squat is a great exercise that places more emphasis on the quads and less on the hamstrings and glutes. It has also been shown to be less troublesome to the knees. According to a 2009 study . . .
“The front squat was as effective as the back squat in terms of overall muscle recruitment, with significantly fewer compressive forces and extensor moments. The results suggest that front squats may be advantageous compared with back squats for individuals with knee problems such as meniscus tears, and for long-term joint health.”
Warming Up to Prevent Knee Pain
As we’ve already identified one of the main causes for knee pain when squatting has to do with the patellar tendon. Warming the patellar before you get under the rack is vital in order to alleviate the problem. Be sure to do lots of dynamic stretches before you tackle squats.
The Exercises
Here is a non-weight circuit that you can perform in order to loosen up the entire knee area prior to adding weight to your squat.
Partial Pulse Squats x 10
With this move you are only moving through the first 6-8 inches of the squat. You will be pulsing up and down in a ballistic movement.
Side Step Pulse Squats x 10 (each direction)
This is the same movement as the previous exercise, but with every squat, lunge to the side a few inches. Maintain, short, quack and ballistic movements.
Drop Set Pulse Squats x 10 (each direction)
This time as you pulse down you will step back into a quarter turn. Rotate from side to side, allowing your hips to open up.
Jack Pulse Squats x 10
This pulse squat variation involves perform mini jumping jacks as you pulse up and down.
Perform this circuit three times with about 30 seconds of rest between each circuit before you go into your first set of weighted squats and you will take a lot of the pressure off the knees.
Check out this article for ideas on which squat workout is right for you.
Knee pain doesn’t have to mean that you are resigned to missing leg day. It doesn’t even mean that you have to give the squat rack a wide berth. By implementing the guidelines provided in this article, you will be able to squat without the pain. In so doing, you’ll once again be benefiting from the single best exercise for building strength, size and power.
- Research Reviews
- Masterclass
Is it Safe for Knees to Pass Toes During a Squat
One of the biggest training myths out there is that the knees shouldn’t travel forward past the toes during a squat, otherwise your knees will explode… or something like that. This myth, like a lot of other myths, likely started with an old study that was misinterpreted and this incorrect knowledge being passed down over years and years to end up with the false but widely held beliefs we have today – myths.
One such study that may have contributed to this belief was conducted in 2003 by Fry et al. (1) , who looked at how joint torques at the knees and hips changed when restricting forward knee travel during a squat. As you can see in the picture below, in ‘A’ the knees were allowed to travel forward freely, whereas in ‘B’ they were restricted to not travel forward past the toes at all.
What they found was that by limiting forward knee travel it simply shifted the stress from the knees to the hips/low back. So while squatting with restricted forward knee movement showed a 22% decrease in knee torque, there was a 1070% increase in hip torque! This is a LOT more work for the hip and low back musculature to perform, and is a potentially more dangerous squatting method for the low back.
Therefore, while it is true that anterior knee stress increases as the knees come forward during a squat, it is important to know that the amount of stress from the knees going slightly in front of the toes is still WELL within the limits of what the knee can handle (2). Reference: Schoenfeld 2010 .
Furthermore, in order to reach FULL depth in the squat the knees almost always have to move forward past the toes. Olympic weightlifters are a great example of this, as they need to train at full depth for their sport, and so often squat with their knees past their toes, and with very high loads too!
Caution – knees about to blow!
This myth is also likely perpetuated by the popular ‘knees over toes’ cue, which actually means don’t let the knees collapse inwards or outwards and keep them in line with the feet. This is far more important to follow as it not only ensures efficient force transmission through the knee joint, but also, an inward collapse of the knee (or dynamic knee valgus) has been linked with ACL injuries, so it is likely not a good idea to encourage this movement pattern.
What people also tend to forget is that each type of squat is MEANT to have differing amounts of forward knee travel, due to the varying demands placed on the joints of the lower limb due to the different bar positions. In order of most to least expected forward knee travel in different versions of the squat:
Front squat > High bar back squat > Low bar back squat > Box squat
So don’t go expecting someone to have the same amount of forward knee movement in a front squat compared to a low bar back squat.
Hopefully now it’s pretty clear that there is no need to restrict forward knee movement altogether when squatting. However, it’s probably not a bad idea to limit ‘excessive’ forward knee travel to prevent undue strain on the patellar tendon and patellofemoral joint. And by excessive I’m talking knees being more than 15-20cm in front of the toes every rep in people that squat heavy and often.
Note that there hasn’t been any research to quantify what is ‘excessive’, it is just a figure I have estimated from my own clinical experience.
Having said all of this, there are people who may benefit from limiting forward knee travel during a squat – those with anterior knee pain, i.e. pain at the front of the knees (3) Reference: Rudavsky 2014 .
In this population reducing anterior knee stress may allow for more pain-free squatting. If this is you, I would recommend doing squatting movements that encourage less forward knee travel (or more vertical shins) such as box squats and the powerlifting squat or low bar back squat (4) Reference: Swinton 2012 .
Hope this has shed light on this huge training myth. Happy squatting!
Want to master youth low back pain?
Angela Jackson has done a Masterclass lecture series for us!
“Assessment and Rehabilitation of Low Back Pain in Youth Athletes”
You can try Masterclass for FREE now with our 7-day trial!
- Fry AC., Smith JC, Schilling, BK. Effect of knee position on hip and knee torques during the barbell squat. J Strength Cond Res. 2003 Nov;17(4):629-33. https://www.ncbi.nlm.nih.gov/pubmed/14636100
- Schoenfeld BJ. Squatting kinematics and kinetics and their application to exercise performance. J Strength Cond Res. 2010 Dec;24(12):3497-506. https://www.ncbi.nlm.nih.gov/pubmed/20182386
- Rudavsky A, Cook, J. (2014) Physiotherapy management of patellar tendinopathy (jumper’s knee). Journal of Physiotherapy 60: 122–129] http://www.journalofphysiotherapy.com/article/S1836-9553 (14)00091-5/fulltext
- Swinton PA., Lloyd R., Keogh JW., Agouris I., Stewart AD. A biomechanical comparison of the traditional squat, powerlifting squat, and box squat. J Strength Cond Res. 2012 Jul;26(7):1805-16. https://www.ncbi.nlm.nih.gov/pubmed/22505136
Don’t forget to share this blog!
Leave a comment.
If you have a question, suggestion or a link to some related research, share below!
You must be logged in to post or like a comment.
Related blogs
Elevate your physio knowledge every month.
Get free blogs, infographics, research reviews, podcasts & more.
How to Squat Correctly
WSBB Education Sun Aug 20, 2023

One of the most basic and essential barbell exercises is the squat. The squat is an exercise that allows an individual to strengthen their legs, back, and trunk and can provide a myriad of strength and athletic benefits depending on how the exercise is performed and programmed. Whether you are a football player looking to improve sports performance or a powerlifter seeking to add pounds to your total, the barbell squat can be programmed to deliver the desired training results.
The Conjugate Method provides a template allowing the barbell squat to be utilized in many ways. At Westside, we perform squats in one of three ways: during max, dynamic, and repeated effort training. The selected squat exercises can range from a basic barbell or SSB squat to giant cambered bar box squats with forward-pulling bands. A squat variation is a tool, and how we choose to utilize that tool dictates the training outcomes we can expect.
However, to attain expected training results, the athlete must be able to perform a barbell squat proficiently. Failure to execute squat exercises with optimal form leads to reduced training effectiveness, an increased risk of overuse injuries, and an increased risk of catastrophic injury.
As you can see, the squat is a rewarding exercise when performed correctly, but it can set an athlete back if performed without proper form and intent. At Westside, we have taught and corrected squat techniques for many athletes seeking to improve their lower body strength, explosive power, muscle mass, and endurance.
The Anatomy of a Squat
The barbell squat is an exercise that involves and challenges many different muscle groups. This is what makes the squat such an effective exercise: the ability to target multiple muscle groups simultaneously while performing a basic barbell movement. Here are the major muscle groups involved in a barbell squat:
Anterior Chain:
Abdominals / Trunk
Hip Flexors
Posterior Chain:
Erector Spinae
As you can see, the squat trains all the essential lower-body muscle groups efficiently and effectively. This simple barbell exercise is an incredibly valuable training tool for all athletes. No matter the sport you’re preparing for, there is no doubt all of these above-listed muscle groups play a significant role in the execution of basic sports movements.
At Westside, we utilize a variety of specialty barbells and special exercises to target each of the above-listed muscle groups most effectively. These exercises are included to improve the overall technical mastery of the squat while placing specific emphasis on anterior or posterior muscle groups. These exercises enhance squat strength and coordination and help to build a complete athlete.
Basic Squat Execution
When thinking about squat execution, it is essential to remember that no two athletes will squat or perform any lift the same way. For this reason, effective squat coaching is achieved by providing movement guidelines and parameters instead of strict rules that all athletes must follow without considering biomechanical advantages and disadvantages.
Barbell lifts are best coached by providing an athlete with basic instructions that can be easily followed while leaving room for the athlete to find their groove and move most efficiently. Remember that no matter how well-educated or capable a coach is, nobody knows how an athlete should move more than the athlete. Proprioception plays a tremendous role in technical mastery; only the athlete knows how they feel under the barbell.
Here are the basic guidelines we use to coach the barbell squat at Westside Barbell:
First, ensure the rack elevates the barbell to the proper height for a comfortable unrack. For most athletes, this will be the height that places the barbell in the middle of the chest as you walk up to the bar.
Next, set the hands up properly. We recommend that athletes set their hands wide enough for the torso to remain as vertical as possible throughout the movement. The width of the grip will ultimately be determined by the width of the athlete’s back and the shoulder mobility they possess.
Now that the hands have been properly set, we can bring the torso underneath the barbell and set the barbell on the back. This can be done one of two ways - high bar or low bar . Where you place the barbell will largely depend on your trunk and torso size. Typically, leaner athletes benefit from using the high bar position, considering stability and lack of torso lean associated with high bar squatting.
Larger athletes can choose to squat high bar or low bar. Large athletes typically benefit from increased trunk and torso size when using a low bar position, allowing for the spinal flexion and torso lean created by the low bar position to be more tolerable. Low bar also gives a large athlete a biomechanical advantage over the barbell, considering the differing hip and knee flexion levels associated with high bar and low bar squatting.
Once you have determined how to carry the barbell, it is time to unrack it. Unracking the barbell to squat will differ depending on whether you use a typical squat rack or a monolift.
You must unrack and walk the weight out to complete your set when using a basic squat rack. This means an athlete must stabilize, unrack the barbell, walk the barbell out, restabilize, and complete the movement. To do this most efficiently, we want to unrack the barbell with our torso braced as much as possible. Then, we want to take as few steps as necessary to walk the bar out. Two steps are preferable, but if it takes a few extra steps to get your feet set, so be it. Once the feet are set, the athlete will restabilize as much as possible.
When using a monolift all we have to worry about is bracing properly and unracking the barbell. With the monolift, there is no need to be concerned about walking out the weight and finding our foot placement, considering we can place our feet properly before standing up with the barbell.
Now that we have unracked the barbell, it is time to initiate the eccentric portion of the squat. The first move should be a slight sit back of the hips to reduce the amount of forward knee travel as we descend. This is not a significant sitting back of the hips, just a slight movement rearward to give the knee joint and quads a break and maximize the use of the hips, glutes, and hamstrings.
As we sit the hips back, we will simultaneously break at the knees to lower the barbell. During the descent, maintaining a torso as vertical as possible with the trunk adequately braced is critical. The torso position will ensure we maintain control of the barbell, while the trunk brace will act as the brake pad once we transition to the concentric portion of the squat.
While lowering the barbell, we want to maintain a vertical shin position by opening the knees up as much as necessary, depending on the width of our stance. This will help ensure efficient lateral and vertical force transfer to the barbell, creating a stronger and more explosive squat movement.
Once we have completed the eccentric phase of the squat, it is time to reverse the weight and complete the concentric phase of the lift. Provided you have followed the above advice, all that should be left to do is apply adequate force and move the barbell back to the starting position. As the exercise is completed, we will maintain our trunk brace and control the barbell as we return it to the rack.
The Benefits of Squatting
The squat may be the most beneficial movement for all athletes out of the big three barbell lifts. Aside from the deadlift, which can cause issues with fatigue if performed too often, no other barbell lift challenges as many major muscle groups as the squat. Not only does the squat make an athlete bigger and stronger, but it does so rapidly and efficiently.
When you program a squat or squat variation into your training program, you can guarantee you won’t waste your time. At Westside, we use the squat and its many variations to make athletes bigger, stronger, faster, and better conditioned. When considering the number of squat variations and the ability to adjust volume and intensity to manipulate the training effect further, you can see how the squat is a Swiss Army knife-type exercise.
The greatest benefit is that squatting will improve lower body absolute strength. As an athlete, it is vital to increase the absolute strength you possess constantly. Absolute strength is the king of all strengths and determines your maximum strength, power, speed, and endurance. This is achieved by regularly including squat variations during max effort lower training.
The next benefit of squatting is developing lower body explosive power. At Westside, we use the squat and its many variations to perform dynamic effort lower body training. This is done using a three-week wave format, training at specific intensity levels to achieve optimal barbell velocity.
The final benefit of squatting is developing lower body muscle mass and endurance. At Westside, we use the repeated effort method when performing our accessory work. Often, if an athlete lacks lower body muscle mass or work capacity, we program accessory squat work at moderate to high volume and moderate to low intensity.
The squat is an excellent tool to build muscle and improve conditioning, considering the number of muscle groups involved and the energy required to perform multiple multi-rep sets.
Common Squat Mistakes
Depending on your level of experience, you can make various mistakes when performing a barbell squat. However, almost every athlete makes a few common mistakes regardless of their level of strength or experience. The effectiveness of your squat training depends on your ability to avoid errors and perform technically proficient repetitions, so it is essential to know what habits to avoid when squatting.
Here are a few of the most common squat mistakes we have seen athletes make over the years:
Weak Unrack: This occurs when an athlete sets their rack height incorrectly or fails to brace properly before lifting the barbell out of the squat rack. Either way, a weak unrack will cause immediate instability in the squat setup and typically result in poor execution. With the squat, you finish as well as you start, so a poorly managed unrack can lead to disaster.
Weak Brace: This can occur before or after lifting the barbell from the rack. A weak brace means what it says: your brace is weak or nonexistent. This happens due to improper breathing, with the athlete failing to create adequate intra-abdominal pressure. A weak brace will also lead to our next common squat mistake.
Excessive Torso Lean: This mistake occurs when an athlete fails to brace correctly or does not have the strength to control the barbell properly. This results in the torso leaning forward, placing significant strain on the lower back. When this happens, the athlete will look like they are performing a good morning instead of a proper barbell squat.
Collapsing Chest: This can occur due to poor bar placement or a weak upper back. A collapsing chest in the squat means the shoulders are rolled forward, placing great strain on the neck and upper back. This results in a loss of control over the eccentric portion of the lift and can lead to thoracic or cervical spine injury.
Collapsing Knees: This occurs when the knees excessively collapse inward as an athlete applies force out of the hole to complete the concentric phase of the lift. This can occur due to weak hips, a poor trunk brace, or improper squat stance width. When left unchecked, collapsing knees can lead to catastrophic injury.
Frequently Asked Questions
Q: What is the proper way to use air to brace during a squat?
A: We want to breathe in deeply, using the air to expand the diaphragm and create adequate intra-abdominal pressure. When done correctly, your trunk will feel rigid and stable without feeling like you’re holding your breath. When done incorrectly, you will feel the air pressure in the chest and face, with the trunk and torso remaining noticeably unstable.
Q: Should I wear a belt when squatting?
A: We recommend wearing a belt when performing a standard squat workout. However, if you are completely new to squatting, we do recommend training with lighter weights and no belt to develop fundamental movement skills without the assistance of a belt
Q: Should I wear knee sleeves or wraps when squatting?
A: Knee sleeves can be worn during any squat or lower body exercise. However, we typically save knee wraps for max effort training or if we plan on performing high or ultra-high rep squat sets and need additional assistance and support.
Q: Box squats or free squats?
A: At Westside, we perform all our dynamic effort squats to a box. With max effort squatting, we will perform a mix of free and box squats. The key is to perform as many free squats during max effort training as necessary to remain proficient in competition-relevant movements.
Q: What squat exercise variations are most commonly used at Westside Barbell?
A: We most often use the back squat, front squat, box squat, and squat vs. bands using a typical squat bar, safety squat bar, buffalo bar, or giant cambered bar.
Find Your Form
Finding optimal form is one of the most critical aspects of successful barbell training. An athlete must take the time to practice the different barbell movements and see what setups and techniques work best for them as an individual. The idea that there are one-size-fits-all rules to barbell lifts is nonsense and disregards what we know about human biodiversity and biomechanics.
No two athletes are the same. It is vital to develop techniques that make the most of all the biomechanical advantages an athlete may have while avoiding techniques that complicate the lift for the athlete. The goal is an efficient and effective movement pattern that provides optimal training while protecting the athlete from injury as much as possible.
Finding the form and technique that works best for you is integral to your success in the gym. You do not want to waste time using techniques that are either ineffective, place you at a disadvantage, or increase the risk of injury. Don’t fall victim to one-size-fits-all approaches to barbell training form and technique. Do the work, develop your style, and reap the benefits of optimal squat training.
Simmons, L. (2007). Westside Barbell Book of Methods . Westside Barbell.
Verkhoshansky, Y., & Siff, M. C. (2009). Supertraining . Verkhoshansky.
Zatsiorsky, V. M., & Kraemer, W. J. (2006). Science and Practice of Strength Training . Human Kinetics

Search The Blog
Popular posts.

The Westside Barbell Template For Athletic Development
Wed jul 05, 2023.

The Conjugate Method™
Tue oct 18, 2016.

How to Execute A Box Squat Correctly!
Wed apr 24, 2024, like what you're reading.
Sign up for our newsletter and get new articles sent straight to your inbox weekly.
The Conjugate Club
Unlimited Access Starting at $20
Related Products
Related articles, conjugate for athletes: programming optimization.
It is a trap to think you can fix nonlinear problems with linear solutions. This...
Basic Conjugate Training Advice II
The Conjugate Method allows an athlete to rapidly enhance strength, speed, muscle mass, and athletic...
Conjugate Football: Off-Season Max Effort Lower
It’s now the off-season for most football programs, and it is the time of year...

How-To Squat Correctly: Technique, Benefits & Muscles Worked
Many people think that the squat is an exercise for athletes or serious lifters only, but this couldn’t be further from the truth, as the squat can be done by a wide variety of people with a range of goals.
All squats share a similar movement pattern in that they move a weight from a standing position via simultaneously flexing the hips, knees, and ankles during the descent, which is followed by a return to the standing position using simultaneous hip and knee extension.
The squat can be performed in a number of different ways, e.g with or without weight, using dumbbells, a barbell or machine, and with the weight being held in different positions, among many others. Common variations of the squat that use a barbell are the high bar back squat (HBBS), the low bar back squat (LBBS), and the front squat.
We will focus on the high bar and low bar back squats in this article.
What are the Muscles Worked in a Squat?
The squat loads a large amount of muscle mass including the quadriceps , hamstrings , glutes , adductors in the legs, the erector spinae in the trunk, and a number of muscles in the upper body to securely hold the bar.
The primary movers of the squat are the quadriceps muscles that act to straighten or extend the knee, whereas the glutes, hamstrings, and portions of the adductors act to straighten or extend the hip. [1] As discussed above, the muscles of the trunk, torso, and upper body are also active to transfer force from the lower body to the bar, maintain balance during the movement, and secure the bar in place on the lifter’s back.

To further explain how each of the primary movers are working during the squat, we will break up the squat into two parts, e.g. the eccentric and concentric phases.
The eccentric portion refers to the downwards phase of the squat, e.g. when the lifter is lowering themselves down towards the floor. Eccentric muscle contractions are when the muscle is getting longer lengthening while producing force against a resistance. In the squat, the hip and knee extensors are lengthening as they exert force against the bar to slow its acceleration due to gravity.
The concentric portion of the squat refers to the upwards phase, e.g. when the lifter rises to the top position of the movement. Concentric contractions are when the muscle is actively shortening while exerting force against an external object or force. On the way up the knee extensors and hip extensors are contracting concentrically to move the weight against the force of gravity.
Generally speaking, the squat and variations of the movement train the quadriceps, glutes, portions of the adductor muscle group, and hamstrings through a relatively long range of motion. This makes the squat a great exercise for training lots of muscle mass at the same time.
Accessories for Squats
Weightlifting shoes: Weightlifting shoes or “squat shoes” are the footwear of choice for many lifters. They typically feature a non-compressible sole made of a number of different materials, a strap across the top of the foot, and an elevated heel. Manufacturer’s vary as to what materials are used and how much heel elevation they build into the shoe, but most shoes are somewhere between 0.6” and 1” of heel elevation.
Together, these features make for a very stable shoe to train in. The heel elevation also changes the plane that the ankle moves through, thereby making it easier to get the knees further forward during the squat. While it doesn’t change the range of motion in the ankle, the change in angle can help some folks achieve either a more upright squat position or squat deeper.
Overall, any type of shoe is fine for squatting, but competitors and serious lifters will often squat in weightlifting shoes or flat shoes like a converse.
Wrist wraps: Wrist wraps create a support around the wrist to provide additional support. Many lifters find the compression of wrist wraps more comfortable for training and competition. If you struggle with wrist pain during the squat these can help support your wrists as you hold the barbell.
Belt: A lifting belt acts to increase intraabdominal pressure and intramuscular pressure to increase stiffness of the trunk and allow for better force transfer from the lower body to the barbell and increase the ability of the lifter to move weight.
It is possible to lift weights and get stronger without using a lifting belt, though most would be able to lift heavier weights with a belt than without. Still, most serious lifters will have a belt in their gym bag to use to get the most out of their training.
Chalk: Chalk absorbs moisture from the hands and can result in a better grip on the barbell. Lifters report that using chalk helps maintain their grip. Additionally, you may see people put chalk on the back of their shirts to help keep the bar in the same place on their back.
Knees sleeves: Knee sleeves are common also for individuals who train the squat. These are typically made of neoprene and act to warm the knee and provide minimal support. Some individuals find squatting in knee sleeves more comfortable but they are by no means required for the movement.
Spotters: While not a true gym accessory, spotters on the squat can be useful when performing challenging weights. We recommend squatting in a rack with the safeties set to just below the depth you’re squatting to, so that if you happen to have an issue standing back up you can set the bar down on the safety pins.
Using spotters can be a helpful addition at heavier weights and/or when it’s not possible to use safeties. We recommend using three spotters, with one person on each side of the barbell and one behind the lifter. Ideally, the spotters will not touch you or the barbell unless the bar is moving back down while you’re trying to stand up with it.
None of the equipment listed above is essential but it can be helpful for performance and comfort, which can help with being more consistent in the gym.
How-To Do Squats Properly
- Stand with your feet about shoulder-width apart, with your toes turned out about 15 to 30 degrees.
- Start the descent by pushing the hips back and knees both forward and out. Your torso will bend forward a little bit and become a bit more horizontal.
- Keep your feet flat on the ground and weight balanced across the entire foot during the movement.
- Keep descending lower into the squat until the crease of your hip is below the top of your knee.
- Once below parallel, you should reverse the motion by pushing up with your legs and hips, while keeping your torso tight.
- Stand up straight at the top to complete the rep. Repeat the process for each repetition.
To start, there will be significant variation to how an individual will set up for and perform the squat. The tutorial below is a great starting point for the squat. From here, we recommend making small changes over time as needed to improve performance, comfort, and/or repeatability.
For the high- and low-bar squat variations, you’ll need a squat rack and a barbell.

Setting Up the Rack
Place a barbell in the J-hooks at a height that’s just below shoulder height, approximately at the level of the mid-sternum. Ideally the bar being used is a standard power bar, e.g. a 7’ long, 20kg barbell with center knurling and a single score mark on each side. If you are between two different heights, we recommend starting at the lower height to make sure you don’t have any issues re-racking the weight and so you don’t unrack the bar on your tippy-toes.
Pro-Tip: When you unrack the bar for the first time, take a peek over at one of the j-hooks and see how much room you have between the bar and the hook. Ideally, there should be about an inch of clearance between the bottom of the bar and the top of the hook. If you have way more or less than this, we recommend adjusting the height of the hooks if possible.
Approach the barbell in the rack and take an overhand grip with your hands wider than shoulder width. Specifically, we recommend placing your index or middle finger on the score mark of the standard power bar, which are spaced at ~31” apart.
While maintaining this grip on the barbell in the rack, lower your body under the bar and place the bar on your back. Here we will distinguish between the high- and low-bar back squat’s different positions:
Bar Position
- For the high bar squat , place the bar on your trapezius on the thick part of the muscle just below your neck. To locate this position by hand, feel on your neck for the bony anatomical landmark called the vertebra prominens , which is the spinous process of the 7th cervical vertebrae. The bar should sit just under that.
- For the low bar squat , place the bar about an inch lower so that it’s sitting on your rear delts . To locate this position by hand, reach towards the rear, outside aspect of your shoulder and feel for the spine of the scapula. The bar should sit just under that. If you’re having difficulty finding the spine of the scapula, follow your collar bone (clavicle) outwards towards the shoulder. At its far end, it meets the acromion process, which is at the end of the spine of the scapula.
Place the bar in either the high- or low-bar positions. Both squats train the same muscles, though the torso angle in the high bar squat is typically a bit more upright and the low bar squat is a bit more horizontal. The training effects of both squat variations are similar, so this is mostly up to personal preference.
If you find that the bar position is uncomfortable to hold, you may want to adjust your grip. We are starting with a “thumb-around” grip, but you can also squat with a thumbless grip if that’s more comfortable. Alternatively, moving the grip wider or narrower may be helpful depending on your individual situation. In any case, find a position that is most comfortable for you.
Pro-Tip : While the hands are firmly gripping the barbell, they should not be bearing any of the bar’s weight. Rather, the hands are just there to trap the bar in place. We recommend feeling like you’re picking the weight up and supporting it with your body, not your arms.
Unracking the Weight
Now that the bar is in the correct position, you are ready to unrack it. You will move your feet so they are directly under your hips and shoulders. You will know the rack is at the right height if your knees and ankles are slightly flexed in this position. To take the bar out of the rack, straighten your knees and lift the bar straight up to create space between the bar and the j-hooks.
Pro-Tip: We recommend taking a deep breath and holding it before unracking the bar to help increase the stability of your trunk while it’s bearing weight. This technique is called the Valsalva maneuver increases activity of the core muscles and helps transfer force throughout the body. [2]
Walking the Weight Out
After unracking the bar and clearing the j-hooks, take two to three small steps away from the rack.You want to be far enough from the rack that you don’t hit the j-hooks on the way up but close enough that you are not expending extra energy walking around with a heavy barbell on your shoulders.
Pro-Tip: Go slow with the walk out, taking one small step on each side at a time. Similar to a basketball player’s free throw routine, the preferred walk out for an individual becomes more and more repeatable and efficient through deliberate training.
Stance Width For the Squat
The correct squat stance varies significantly between individuals and over time. To start, place your feet about shoulder-width apart, with your toes turned out about 15 to 30 degrees. With time you might find that you prefer a slightly wider or narrower stance. With this stance your toes will be turned out just a bit, this will dictate how your knees move during the rep. A narrow stance with toes pointed forward will result with knees pointing forward too. The more outward your toes are turned the more knees will point out too.
A quick note on the knees’ relationship to the toes during the squat. Most people will find that their knees will travel forward directly over or past their toes when viewed from the side. The high bar position, closer stance widths, less toe-out angle, longer femurs, and other aspects of anthropometry will all tend to produce a more “knees forward” position in the bottom of the squat.
While many claim this increases risk of injury by “loading the knee joint”, there is no evidence that performing squats this way increases the risk of knee injury or knee pain compared to other squat styles. On the contrary, humans are highly adaptable to training provided the dose of training is appropriate for the individual’s current fitness level. This video and article on injury risk are a good starting place to learn about injury risk reduction and injury in training.
Bracing During the Squat
After unracking the weight and moving into the correct stance, perform a Valsalva maneuver by taking a deep breath and holding it. By doing so, we increase intra-abdominal pressure because the diaphragm contracts and descends while breathing in, thereby reducing the space within the abdominal cavity.
We also recommend contracting your abs and your back muscles to reinforce the posture, which even further increases intra-abdominal pressure due to the additional muscular tension from abdominal wall muscles. You can do this with or without a belt .
Pro-Tip : The technical aspects of the Valsalva maneuver are sometimes confusing. Put simply, we recommend taking a big breath and holding it as if you were bracing your midsection for impact. You will hold this breath for the duration of each rep.
Initiating the Squat
You are now ready to begin the squat. Simultaneously unlock your hips and knees to initiate the descent. It may be helpful to feel like you’re pushing your hips backwards while pushing your knees forward and out.
The torso will become more horizontal relative to the floor during the descent. Put simply, you cannot squat with a perfectly vertical torso. A low bar position, shorter torso, longer femurs, and other individual differences tend to result in a more horizontal torso angle. Nevertheless, the torso should become slightly more horizontal until about halfway down, then remain more or less the same until getting about halfway up, where the torso becomes more vertical and the lifter returns to the start position with straight knees and extended hips.
Squatting to Depth
As you start out you may not know how low to go in the squat. Most people will be able to squat below parallel, though some may prefer a bit lower or higher based on their current abilities. This is also fine outside the sport of powerlifting, which requires a below-parallel squat in competition. In this context, “below-parallel” refers to lifter being viewed from the side and the crease of the hip joint being lower than the top of the knee. When the crease of the hip joint is at the same level of the top of the knee, that is called a “parallel” squat.
It should be noted that moving through larger ranges of motion in the lower body (and elsewhere) generally correlates to more muscle growth. [3]. As you are learning a new movement, it may take a few tries to achieve a below-parallel squat. For most folks, we think that aiming for a below-parallel squat should be the goal, though we admit there’s likely little difference from a health or hypertrophy perspective to squatting at parallel or just above. Similarly, we don’t think there are unique health or hypertrophy benefits from squatting well below parallel. Rather, there is a range of squat depths between just above- and well below-parallel that work generally well for improving health, function, and driving muscle growth.
From a strength perspective, we predict that the greatest improvements in strength are specific to the training performed by the individual. In other words, we’d predict that training a below-parallel squat improves below-parallel squat performance more than training to a depth of 1” above parallel or a depth of 4” below parallel. This is because strength is specific to the range of motion, joint angles, movement velocity, and contraction type. The more two movements have in common, the more likely they are to carry over to one another. This is the Specificity of Adaptation to Imposed Demand (SAID) Principle in a nutshell.
It is important to know that there is not one “correct depth” per se’, but we want to maintain a consistent range of motion over time to ensure progress. If someone adds weight to the squat, but reduces the range of motion, it’s unclear whether or not they actually got stronger or if they just changed the movement. Some people may find it beneficial to learn the squat by temporarily using a physical marker (box or bench) that you make contact with your glutes at the bottom of the rep.
Pro-Tip : If you are recording your lifts and watching the bar path, it is most efficient if the bar path is vertical when viewed from the side. If you have a barbell that is lopsided when viewed from the front, this is not a concern.
Re-racking the Weight
Once you have completed the desired number of reps and you have returned to a full standing position, l walk the bar straight back into the rack and make contact between the barbell and the uprights. Once you can feel both uprights against the barbell you can lower it down into the j-hooks. This prevents you from missing a j-hook as you lower the bar.
How To Troubleshoot Your Squat
There are a number of mistakes that frequently occur in the squat. We recommend using a phone or small recording device in your gym to assess your technique. While a specific squat form is not correlated with injury or pain, the goal is to generate a repeatable and efficient movement pattern to maximize the results from training.
Each of the following items is an opportunity to improve performance in the squat:
Bar Rolling
Movement of the barbell forward or backwards relative to the balance point- the middle of the foot- can happen if the thoracic spine (upper back) is moving a lot during the rep. This is sometimes accompanied with the bar rolling up or down your back during the rep.
Pro-Tip: First, make sure the bar is in the right position and not too high or too low relative to the type of squat you’re trying to do. Oftentimes, a bar that is too high will roll up and a bar that is too low will roll down. People can also affect the bar’s position by inappropriately elevating their elbows up during the squat. We recommend keeping the elbows down and tucked into the sides of the torso during each repetition. Barring a bar position or elbow problem, check out the following video for how-to keep your thoracic spine tight during the squat.
Chest Falling in the Squat
Whether it’s a high bar, low bar, front, or even overhead squat, the hips are going to rise at a slightly faster rate than the chest and shoulders during a heavy squat. Practically speaking, this means that the torso tends to become slightly more horizontal during the ascent, though we should aim to fight against this.
If the hips rise too quickly relative to the shoulders – sometimes called a “good morning” squat- lifters tend to be in a mechanically disadvantageous position and there’s a tendency for the barbell to get forward of the balance point. This squat style is less efficient than it could be and we would advise trying to correct it to improve performance.
Pro-Tip : When you come up out of the hole in the squat, be sure that you’re not inadvertently driving the hips backwards. Instead, think about using “leg drive” to drive the hips, torso, and chest straight up. Another cue that may be useful is to “lead with the chest” out of the bottom, e.g. aim to move upwards first with the chest and shoulders as if you have a string attached to your sternum and that string is pulling you up out of the hole. If neither of these work for you, consider initiating the squat with a “knees forward first” cue to change how you get to the bottom of the squat. When lifters don’t have enough forward knee travel during the descent, there’s often some forward momentum of the bar and lifter at the bottom, which the body reacts to by shifting everything backwards on the way up, thereby creating a more horizontal torso angle.
Heels or Toes Coming Up During the Squat
When watching a squat, a good coach will take a peek at the feet to see if the toes or heels are coming up at any point during the rep. If the toes come up during the rep, the weight is too far back. Similarly, the heels coming up during the rep signifies that the weight is too far forward relative to the balance point. Both represent an opportunity to improve efficiency, as we want the weight to remain relatively centered over the midfoot.
Pro-Tip : For weight shifting onto the heels (e.g. toes up), we recommend cueing yourself to keep your knees forward during the squat. For weight shifting onto the toes (e.g. heels up), we recommend cueing yourself to keep your hips back more during the lift. Overcorrecting can sometimes be useful, e.g. lifting the big toe prior to the descent if your heels are coming up, or deliberately pushing your big toe down to start the movement if your toes are coming up.
Improving Depth
There are a number of reasons why an individual may have issues with achieving a below parallel squat:
- Awareness – Sometimes people are not aware that they’re squatting above parallel and simply asking them to go lower works just fine. If trying this, we recommend reducing the weight being used to ensure the load isn’t too heavy at the new, lower depth.
- Too vertical of a torso – Some people will attempt to squat with a perfectly vertical torso, which is incompatible with a below-parallel squat. Outside of the cue “lean forward more” during the descent, doing a few goblet squats where a dumbbell is held in the arms against the sternum can help people feel the correct amount of forward inclination.
- Incorrect stance – Too wide and too narrow of a stance make it hard to squat below parallel. To verify your stance width, we recommend doing a bodyweight squat first with your feet approximately shoulder width apart and toes slightly turned out. Try playing around with slightly wider or narrower stances to find what feels the most comfortable and repeatable for you. Holding onto the side of a rack or other sturdy object can help you squat lower to check stance width without requiring as much muscular strength.
- Knees caving in- If the knees aren’t pushed out to the side, many people will feel their upper thigh contact their abdomen, signifying they’re as low as they can go. By pushing the knees out to the side more, we can create room to squat “in between” the legs.
- Lack of strength – If someone can squat below parallel with their feet flat on the floor and maintain balance, but cannot do so with a barbell on their back, the weight may be too challenging. In this instance, doing a goblet squat, a barbell squat to above parallel, a leg press, or other exercise may be necessary to develop the strength to squat with a barbell. Alternatively, a lighter training bar can be used if available.
Overall, we think most people should be able to squat to parallel or slightly below. We acknowledge that barbell sports like powerlifting, Olympic weightlifting, CrossFit , and so on each have their own sports-specific demands for squat depth. Outside of that, we’re really looking for a repeatable and efficient technique that gets the lifter close to parallel or just below, if possible. Squatting above parallel is certainly better than not squatting at all though!
What are the Benefits of Squatting?
Increase in physical strength.
Like other resistance training exercises, the squat improves muscular strength in many muscles, as it is a compound or multi-joint exercise that can be loaded heavily. However, when we think of muscle strength, we shouldn’t only consider what a muscle can do in the gym. For example, strength training has been shown to improve power, endurance, and speed as well. [4.5]
Improved Health
From a health perspective resistance training can help promote a healthy lifestyle , maintain independence and quality of life throughout your lifetime. Specifically, resistance training can be correlated with decreased risk of injury, improved bone and muscle strength, and improved blood pressure. [6-8]
Strength training can also reduce joint pain from osteoarthritis , one of the most common disabling conditions related to joint pain. By producing clinically significant improvements in muscle strength, functional ability, and pain scores in patients, strength training should be a part of nearly everyone’s exercise routine.[9]
Improved Mental Health
Regular strength training has been proven to reduce the risks or symptoms of disorders like depression and anxiety. These effects seem to occur with regular participation, though the size of the effect is not really tied to how strong individuals get. [10,11]
Should You Squat?
The squat is a great way to build muscle in your lower body, particularly the glutes, thighs (quadriceps), and hamstrings. As you are getting started, don’t worry about being perfect. The squat has some technical details and personal preferences to work out. Don’t be afraid to try different stance widths, grip widths, or equipment as you find what works best for you. There isn’t one perfect squat or style. Find what works for you and is repeatable week after week.
References:
- Yavuz HU, Erdag D. Kinematic and Electromyographic Activity Changes during Back Squat with Submaximal and Maximal Loading. Appl Bionics Biomech. 2017;2017:9084725. doi: 10.1155/2017/9084725. Epub 2017 May 4. PMID: 28546738; PMCID: PMC5435978.
- Hemborg B, Moritz U, Löwing H. Intra-abdominal pressure and trunk muscle activity during lifting. IV. The causal factors of the intra-abdominal pressure rise. Scand J Rehabil Med. 1985;17(1):25-38. PMID: 3159082.
- Schoenfeld BJ, Grgic J. Effects of range of motion on muscle development during resistance training interventions: A systematic review. SAGE Open Med. 2020 Jan 21;8:2050312120901559. doi: 10.1177/2050312120901559. PMID: 32030125; PMCID: PMC6977096.
- Andersen V, Prieske O, Stien N, Cumming K, Solstad TEJ, Paulsen G, van den Tillaar R, Pedersen H, Saeterbakken AH. Comparing the effects of variable and traditional resistance training on maximal strength and muscle power in healthy adults: A systematic review and meta-analysis. J Sci Med Sport. 2022 Dec;25(12):1023-1032. doi: 10.1016/j.jsams.2022.08.009. Epub 2022 Aug 28. PMID: 36130847.
- Balabinis CP, Psarakis CH, Moukas M, Vassiliou MP, Behrakis PK. Early phase changes by concurrent endurance and strength training. J Strength Cond Res. 2003 May;17(2):393-401. doi: 10.1519/1533-4287(2003)017<0393:epcbce>2.0.co;2. PMID: 12741884.
- O’Bryan, Steven J et al. “Progressive Resistance Training for Concomitant Increases in Muscle Strength and Bone Mineral Density in Older Adults: A Systematic Review and Meta-Analysis.” Sports medicine (Auckland, N.Z.) vol. 52,8 (2022): 1939-1960. doi:10.1007/s40279-022-01675-2
- Cornelissen, Véronique A et al. “Impact of resistance training on blood pressure and other cardiovascular risk factors: a meta-analysis of randomized, controlled trials.” Hypertension (Dallas, Tex. : 1979) vol. 58,5 (2011): 950-8. doi:10.1161/HYPERTENSIONAHA.111.177071
- Lauersen, Jeppe Bo et al. “The effectiveness of exercise interventions to prevent sports injuries: a systematic review and meta-analysis of randomised controlled trials.” British journal of sports medicine vol. 48,11 (2014): 871-7. doi:10.1136/bjsports-2013-092538
- Turner MN, Hernandez DO, Cade W, Emerson CP, Reynolds JM, Best TM. The Role of Resistance Training Dosing on Pain and Physical Function in Individuals With Knee Osteoarthritis: A Systematic Review. Sports Health. 2020 Mar/Apr;12(2):200-206. doi: 10.1177/1941738119887183. Epub 2019 Dec 18. PMID: 31850826; PMCID: PMC7040944..
- Gordon BR, McDowell CP, Lyons M, Herring MP. The Effects of Resistance Exercise Training on Anxiety: A Meta-Analysis and Meta-Regression Analysis of Randomized Controlled Trials. Sports Med. 2017 Dec;47(12):2521-2532. doi: 10.1007/s40279-017-0769-0. PMID: 28819746.
- Gordon BR, McDowell CP, Hallgren M, Meyer JD, Lyons M, Herring MP. Association of Efficacy of Resistance Exercise Training With Depressive Symptoms: Meta-analysis and Meta-regression Analysis of Randomized Clinical Trials. JAMA Psychiatry. 2018 Jun 1;75(6):566-576. doi: 10.1001/jamapsychiatry.2018.0572. PMID: 29800984; PMCID:

No products in the cart.
25% Off Apparel, Templates & Supplements w/ MDW25
- Skip to primary navigation
- Skip to main content
- Skip to primary sidebar
The Online Home for Strength Sports
What It Really Means to Be a Hip or Knee-Dominant Lifter
Does knee or hip dominance mean anything more importantly, does it even matter .

The strength training community is obsessed with categorization. From sumo pullers to “ snatch specialists ,” athletes that work with the barbell seem to adore applying labels and fitting themselves into neat, tidy boxes.
As such, you’ve probably heard in passing — or worse yet, been told to your face in the gym from an unwelcome do-gooder — that you’re “a knee-dominant squatter” or something of the like.

Before you can partake in the knee-versus-hip debate, you need to understand it. Is there such a thing as being a hip-dominant squatter , or a deadlifter who relies on their knees too much? Are these labels even useful, or just more meaningless gym jargon ?
These are the ABC’s of the hip and knee, and what they mean for you.
What Is Hip Dominance?
What is knee dominance.
- What Determines Hip or Knee Dominance?
Best Exercises for Hip-Dominant Lifters
Best exercises for knee-dominant lifters.
Editor’s Note: The content on BarBend is meant to be informative in nature, but it shouldn’t take the place of advice and/or supervision from a medical professional. While many of our contributors and experts have respected certifications and degrees, and while some are certified medical professionals, the opinions and articles on this site are not intended for use as diagnosis and/or treatment of health problems.
(Very) Basic Biomechanics
The human body is unbelievably intricate. Just when you think you have a grasp on something pertaining to anatomy or physiology, there’s another layer to peel back and deepen (or muddle) your understanding of how you work .
On the flipside, biomechanics can be quite easy to get your head around. Although your musculoskeletal system is biologically complex, from a practical perspective, you can think of your muscles and joints as a lever-and-pulley system .
Your muscles, ligaments, and joints all obey simple physics. You don’t need a biology textbook to understand your performance in the gym — you’re simply a well-designed organic machine.
It’s also worth pointing out that the hip vs. knee conversation largely if not entirely revolves around how you perform squats and deadlifts (as well as their variations).
A hip-dominant lifter is someone who relies predominantly on the muscles in their hips or lower back to successfully make their lifts. That’s all there is to it.

Hip Dominance in the Squat
The hallmark of a hip-dominant squat is torso angle. If you naturally — or, despite your best efforts — fold over while descending or ascending during a squat, you may be a hip-dominant athlete.
Any type of squat you perform in the gym requires that you perform two biomechanical actions: extension of the knee and hip joints. From a standing position, you can flex your knee or tip over at the waist and the barbell will descend in space.
View this post on Instagram A post shared by Jess Buettner (@djessicabuettner)
Therefore, there’s plenty of leeway and variability to how you physically lower the bar. Hip-dominant squatters tend to rely less on forward knee travel , instead opting to push their butt back, lean forward, and compress into a more folded-over position when they squat.
Hip Dominance in the Deadlift
The deadlift is somewhat less susceptible to variability. Since the bar begins on the floor and your task is to stand up with it as efficiently as possible, all deadlifts are completed via hip extension. There’s no getting around it.
To call yourself a “hip-dominant deadlifter” is like saying you’re an “elbow-dominant curler ,” which isn’t saying much at all. You’re supposed to feel the deadlift in your hamstrings , glutes, and lower back (to a degree).
However, pulling style does come into play. The technique of the sumo deadlift naturally creates a more upright torso and more bent knees , so it is important to recognize that conventional pulling is usually more hip-dominant by design.
That said, segment length (how long or short your bones are) does affect just how much of that load is placed on your posterior chain . Athletes with shorter femurs may not need to pull with their hips as high or their torsos as inclined as a long-legged lifter.
Knee-dominant athletes, whether they intend to or not, lean heavily on their quads to do a lion’s share of the work in the squat and bear as much load as possible in the deadlift.

Knee Dominance in the Squat
When you squat, your knees flex and travel forward (to massively varying degrees depending on the athlete) while your hips fold and move both backward and down. An athlete who displays a lot of knee compression and forward travel with a more upright torso would be considered a knee-dominant squatter .
Interestingly, “knee-dominant squatting” is an effective moniker for a visual posture but says little about what actually happens with your lower body musculature.
View this post on Instagram A post shared by Giulia Imperio (@giuliaimperioo)
Plenty of scientific research has studied muscle activation during various types of squats, and much of it has arrived at the conclusion that your torso angle hardly affects how hard your quads, hamstrings, or glutes work . ( 1 )( 2 )
Some literature does show higher quadriceps engagement in the front squat when compared against a “hip-dominant” movement like the low bar squat. But, broadly speaking, the major factor determining what parts of your legs work the hardest is total range of motion .
Knee Dominance in the Deadlift
Deadlifts of all shapes and sizes are much more about hip work than knee travel. When you use a barbell , it’s quite hard to turn a deadlift into a quadriceps exercise, no matter how you tweak or fiddle with your technique.
There are a couple of situations where knee dominance may play into how you pull. If you find that you’re strong and fast off the floor but your bar speed slows down as you approach a standing position, you may have very strong quadriceps that allow you to forcefully initiate the lift.
Further, the sumo deadlift typically involves more leg work than its conventional cousin, simply due to the nature of the setup. Your hips and spine are in a poor mechanical position to move the barbell, making the first half of the sumo pull almost entirely about your quads .
What Determines Hip or Knee Dominance
If you’re wondering why all your squats look more like good mornings , or how some career powerlifters seem to pull heavy weights with nearly-vertical torsos, rest assured that, for most people, hip or knee dominance probably doesn’t matter very much.
That said, there’s no harm in diving into the “why” behind your movement habits.
Anatomical Structure
As a lifter, you’re essentially a fleshy construct: Levers and pulleys. Your individual anatomy reigns over how you move in the gym, whether with a barbell, kettlebell , or just your body weight .
This is why, try as you might, your squat and deadlift will never look exactly like that of your favorite powerlifter . They may serve as a useful visual guide, but you were each dealt very different hands long before you ever picked up your first barbell .
Femur Length
Segment length is far and away the most important factor in how you move through lower body exercises . Specifically, the length of your femur (the large bone in your thigh).
Athletes with shorter femurs will usually be more upright when they squat and deadlift . Longer-limbed lifters simply have more leg that can get in the way of their positions in the bottom of the squat or while setting up for a deadlift .
Ankle Flexibility
Ankle range of motion also plays into what joint “dominates” your lifting. When you squat, your knees and hips flex concurrently. For the knee joint, this means forward movement. But if you’ve got limited ankle mobility, your knees can only travel so far.
For the barbell to continue moving downward, something has to give. As a result, your hips will flex more and you’ll tip over further, making your squat more reliant on hip extension when you go to stand back up.
The length of your spine (and thus how long your torso is relative to your legs) also affects how you lift, especially in the deadlift. Your shoulders must be directly over the barbell when you pull, and your shoulders are attached to your trunk.
As such, lifters with longer torsos will naturally “sit down” more in their pulling stance to bring their shoulders back on top of the bar, while shorter-trunked athletes need to raise their hips more to get their shoulders directly on top of the bar. This inadvertently also places more load on the hips and lower back .

Training Habits
Which joint you rely most heavily on isn’t just determined by how your skeleton is put together. Your training behaviors and, more specifically, the sport or outcome you’re working towards , also guide your hand.
For example, an upright torso is critical to Olympic lifters who need to perform the snatch or clean & jerk . Not only is an upright, knees-forward posture encouraged in the competition lifts themselves, but weightlifters make the high bar and front squats a centerpiece of their accessory training .
The weightlifting deadlift also necessitates the athlete place their hips lower and more forward than most powerlifters would.
These choices aren’t in service of knee dominance unto itself, but it tends to come with the territory. On the other hand, powerlifters need to squat to a very specific depth for their sport.
For some, the path of least resistance to depth involves folding at the torso and using a lot of leverage from their hips to lift the most weight possible. More commonly, an athlete may simply have a stronger back relative to their legs — potentially creating the dreaded “ squat-morning .”
As such, they won’t push their knees as far forward to involve their quads, instead opting to place a majority of the load on their hips since it gives them the best opportunity to make the lift .
You shouldn’t have gaps in your training . Shoring up weaknesses and ensuring that your body is equally developed (as much as possible, anyway) will help you lift better, get bigger, or run faster. Conversely, even if ultra-upright high bar squats look pretty to you, you probably shouldn’t go out of your way to become a knee-dominant athlete for its own sake.
But if your hips are noticeably stronger than your knees, you should probably dedicate some time to bringing up your quadriceps strength . However, you can’t head to the weight room and fix a problem with your lifting by lifting the same way you usually do.
Deficit Deadlift
The deadlift leans heavily on hip extension, true enough. That said, whether you pull sumo or conventional (or work with the trap bar ), the first half of the movement comes largely from quad strength.
By standing on an elevated surface such as a wooden riser or weight plate , you have to sit lower into your setup to reach the bar. This means more knee flexion than you would normally have, which naturally encourages you to use your quads more off the floor and should translate well to your standard pull.
The axial, or on-the-spine, loading of a free-weight squat is what gives you so much freedom of choice in how you move. By changing the orientation of the resistance, the belt squat takes away your ability to turn the squat into a hip hinge .
View this post on Instagram A post shared by Maddy Maddawg | BSN | Coach (@maddyforberg)
Even if you don’t have a belt squat machine in your gym, a makeshift replacement with a dip belt and some plates (or even attaching yourself to a low cable tree ) will do fine.
The physics of the belt squat pulls your pelvis straight down, which takes away your ability to shift your hips back or forward. This effectively forces you to balance out how you use your lower body while squatting.
Floating Snatch Deadlift
Even though Olympic lifters rely heavily on their quads, it’s totally possible to have a bit of an imbalance between your anterior and posterior extensors. You can build up your knee extension strength and practice your snatch technique at the same time by using a “floating” pull where you don’t let the barbell touch the ground between reps.
Floating pulls test your work ethic and pain tolerance more than you’d think. The bottom position, where the bar is suspended off the ground, places enormous load onto your quads. You’ll want to compress your knees so the bar touches the floor, and your task is to resist that urge by utilizing every ounce of your leg strength .
There isn’t much wrong with using your knees heavily in your lower body training. If you pull sumo and squat high bar, you probably have beastly quads already. That said, there’s no good excuse to neglect your posterior chain .
Once you know the rules of squatting , you have some ground to gain by breaking them — properly. The Kang squat can be a highly effective exercise for posterior chain engagement if you know how to perform it.
More of a technical primer than a mainstay movement, Kang squats intentionally have you shoot your hips backward as you ascend. For knee-dominant squatters, this provides some extra stimulation to your hamstrings and lower back in a low-load scenario, while also priming your body to tolerate any errant movement that may occur during heavier sets.
Block (or Rack) Pull
Knee-dominant pullers are often strong off the floor in the deadlift but lose steam the higher the bar rises. To remedy this kind of weakness, you need to remove your strengths from the equation.
Pulling from an elevated surface places the bar around knee height to begin with — the same height at which your quadriceps stop most of their contribution to the deadlift. What’s left is a posture in which your hamstrings, glutes, and lower back are your only tools to move the weight .
Nordic Curl
Balancing your lower body isn’t all about shoring up weaknesses. It can also be about protecting your strengths. Lifters who rely heavily on their knees to squat or pull may need to balance out all that compression and loading with oppositional movement.
The Nordic curl is a fantastic movement for knee prehab and hamstring strength, and you don’t need any weight to do it. When you squat, your quadriceps control the rate at which your knee joint flexes.
Maintaining healthy joints is about balancing forces (and using the right amount of volume ), so you need an exercise in which your hamstrings resist the rate at which your knee opens. The Nordic curl accomplishes just that.
Practical Takeaways
The physical nature of lifting weights is far more unique and intricate than it appears at a glance. There’s little sense, then, in trying to pack yourself into a tight box or assign yourself a category that defines your movement.
Is hip (or knee) dominance a real thing in the squat or deadlift? Visually speaking, sure. Physiologically? Not quite as much. Moreover, how you move with the barbell depends on why you’re lifting in the first place.
If you need to squat to a certain depth, it doesn’t really matter whether you rely more on forward knee travel or hip flexion as long as you’re able to lift the most amount of weight comfortably and sustainably.

On the other hand, if your sport or training goal necessitates a certain posture — like an extremely upright torso to clinch a 1-rep-max snatch — you should exercise in a way that facilitates that. Even at the risk of being labeled “too knee-dominant,” whatever that means.
Understanding your body can help you train better , but don’t get too lost in the weeds of movement and forget that you’re in the gym to train hard, lift safely , and have fun.
1. Yavuz, H. U., Erdağ, D., Amca, A. M., & Aritan, S. (2015). Kinematic and EMG activities during front and back squat variations in maximum loads. Journal of sports sciences, 33(10), 1058–1066. 2. Gullett, J. C., Tillman, M. D., Gutierrez, G. M., & Chow, J. W. (2009). A biomechanical comparison of back and front squats in healthy trained individuals. Journal of strength and conditioning research, 23(1), 284–292.
Featured Image: sportpoint / Shutterstock

About Jake Dickson, NASM-CPT, USAW-L2
Jake is a graduate of the University of North Carolina at Wilmington with a B.S. in Exercise Science. He began his career as a weightlifting coach before transitioning into sports media to pursue his interest in journalism.
View All Articles
BarBend is an independent website. The views expressed on this site may come from individual contributors and do not necessarily reflect the view of BarBend or any other organization. BarBend is the Official Media Partner of USA Weightlifting.
How to Squat Correctly
Learn how to avoid adding pain to sore knees caused by arthritis by following simple steps for proper squatting and building strength.
Squatting is a functional move. It helps you do activities in your daily life, such as getting pots out of a bottom cabinet or picking up shoes off the floor. Squatting also helps build strength in the legs and hips, and stronger muscles mean more stable joints.
But if you don’t squat correctly, it can be painful to sore knees. Too many people compensate for sore knees by bending over at the waist, which can lead to a sore back, says Cynthia Harrell, physical therapist and clinical coordinator of the arthritis and osteoporosis programs at the Duke Center for Living at Duke University in Durham, North Carolina.
The Right Way to Squat
For example, when you go to reach into a low cabinet hold on to the countertop and “sit” down, using the muscles in your arms and buttocks for lowering and pulling yourself up. If squatting this way is still painful, place a chair in front of the cabinet or area where you need to pick something up. “Reaching to the floor from a seated position is much less stressful on the knees,” says Harrell. Build Strength with Wall Squats
The ability to squat correctly without pain can be improved by building quadriceps, buttocks and core muscles. To do so, Harrell recommends the wall squat exercise. Start with 10 wall squats three times per week, says Harrell. Stop at the point where you feel muscle pain, but continue to perform the exercise regularly, so that the non-painful range will increase as thigh, buttocks and core muscles become stronger. “If done correctly, squatting is well tolerated by people with osteoarthritis of the knees,” says Harrell. Here’s how to properly do a wall squat in three steps:
1. Stand with your back flat against a wall. Feet should be shoulder-width apart and heels 18 inches away from wall. Keep knees in line with heels, not out in front of toes.
2. Breathe in and exhale as you squat by “sitting down” as far as you can comfortably go. Don’t drop buttocks lower than knees and keep knees in line with heels.
3. Tighten abdominal muscles and flatten back against wall. Or, place a ball behind your back to keep you from moving too far forward. Inhale as you return to standing position, pushing up through heels (not off the balls of the feet) to work the muscles in the back of your legs and buttocks.
Managing Pain

How to Safely Climb Stairs

How to Avoid Back Injury
Quiz to help manage pain, give & get your best, stay in the know. live in the yes..
Get involved with the arthritis community. Tell us a little about yourself and, based on your interests, you’ll receive emails packed with the latest information and resources to live your best life and connect with others.
- Research article
- Open access
- Published: 17 July 2018
How to squat? Effects of various stance widths, foot placement angles and level of experience on knee, hip and trunk motion and loading
- Silvio Lorenzetti ORCID: orcid.org/0000-0002-8339-8960 1 , 2 ,
- Mira Ostermann 1 , 3 ,
- Fabian Zeidler 1 , 4 ,
- Pia Zimmer 1 , 4 ,
- Lina Jentsch 1 ,
- Renate List 1 ,
- William R. Taylor 1 &
- Florian Schellenberg 1
BMC Sports Science, Medicine and Rehabilitation volume 10 , Article number: 14 ( 2018 ) Cite this article
82k Accesses
44 Citations
232 Altmetric
Metrics details
A Correction to this article was published on 29 January 2020
This article has been updated
Squatting is a core exercise for many purposes. The tissue loading during squatting is crucial for positive adaptation and to avoid injury. This study aimed to evaluate the effect of narrow, hip and wide stance widths, foot position angles (0°, 21°, and 42°), strength exercise experience, and barbell load (0 and 50% body weight, experts only) during squatting.
Novice ( N = 21) and experienced ( N = 21) squatters performed 9 different variations of squats (3 stance widths, 3 foot placement angles). A 3D motion capture system (100 Hz) and two force plates (2000 Hz) were used to record mediolateral knee displacement ( ΔD* ), range of motion (RoM) at the hip and knee joints, and joint moments at the hip, knee, and lower back.
Both stance width and foot placement angles affected the moments at the hip and knee joints in the frontal and sagittal planes. ΔD* varied with stance width, foot placement angles and between the subjects’ level of experience with the squat exercise as follows: increasing foot angle led to an increased foot angle led to an increased ΔD* , while an increased stance width resulted in a decreased ΔD* ; novice squatters showed a higher ΔD* , while additional weight triggered a decreased ΔD* .
Conclusions
Suitable stance width and foot placement angles should be chosen according to the targeted joint moments. In order to avoid injury, special care should be taken in extreme positions (narrow stand-42° and wide stance-0°) where large knee and hips joint moments were observed.
Peer Review reports
Exercises related to movements from daily activities are of major interest within physical exercise development and research. Squatting features components of everyday functional movements such as walking, ascending and descending stairs, sitting down, and standing up [ 1 , 2 ]. The squat strengthens the muscles in the lower limb and improves the ability to counteract a medial or lateral displacement of the knee [ 3 ]. Common techniques to vary the squat exercise include changes in stance width, foot placement angle, hip depth, and extra load. Similar to split squats [ 4 ], these different techniques lead to different loading conditions and movements and thus to different opinions among therapists, coaches, and experts regarding the most effective squatting execution. Besides the health benefits, and a general low injury risk of strength training compared to other sports, squatting has been identified as a strength exercise with a raised risk of injury for the lower limbs and the trunk compared to other strength exercises [ 5 ]. Evidence based guidelines exist for the execution of a squat, and these include foot stance of shoulder width or wider, maintaining the feet flat on the ground, and toes pointing forward or slightly outward by no more than 10° [ 6 , 7 , 8 ]. In addition, the knees should track over the toes throughout the squat motion without knee displacement either medially or laterally [ 7 ]. To create and evaluate these guidelines, a number of studies have investigated the kinematics, muscle activity, and loading conditions that occur in the lower extremities during different execution forms of the squat exercise. A comparison between the restricted knee (where the knee should not pass anteriorly of the toe) and the unrestricted knee (where the knee is free to pass beyond the toe) techniques during squatting shows that the range of motion (RoM) of the knee [ 9 , 10 ] and of the lumbar and thoracic spine differs significantly and furthermore when adding a greater load [ 11 ]. With increasing load, the RoM of the lumbar curvature decreases significantly, and the thoracic curvature RoM decreases with increased additional load on the barbell from 25 to 50% of participant’s body weight [ 11 ].
The effect of foot placement angles has primarily been investigated by examining the change in electromyography muscle activity [ 12 , 13 , 14 , 15 , 16 ] but also by kinematic and kinetic analyses. While stance width affects muscle activity in the lower extremities, varying foot placement angles during squats does not seem to play a major role on either muscle activity or knee joint contact forces [ 17 , 18 ]. In contrast, different stance widths have been found to influence the motion and joint loading of hip and knee but not the trunk motion [ 19 , 20 ]. Here, it needs to be mentioned, that these authors included powerlifters that probably have acquired a different squatting strategy than observed in other athletes. Therefore, different types of executions clearly influence both musculoskeletal movement and loading conditions; thus, specific variations in squat techniques (depth, speed, stance width, and bar load) can be optimally tailored to achieve an athlete’s or patient’s training goals [ 8 , 18 ].
While many published studies refer to advanced squatters such as Olympic or national weightlifters [ 15 , 19 ] or powerlifters [ 20 ], the present study focusses on understanding the major influences of squat technique from a perspective of both more and less experienced participants working out in a gym. No studies have investigated a stance width below 10 cm, since most attention has been paid to shoulder or hip stance width [ 10 , 12 , 17 , 19 , 21 ].
While it is well known that a greater knee valgus angle in the knee during squatting is a risk factor for lower extremity injuries, knee displacement in the frontal plane has only been examined using cohorts with excessive medial knee displacement. Here, especially gastrocnemius muscle tightness and increased adductor activity may cause excessive mediolateral knee displacements, and squatting variations such as heel lifts or improved strength in the ankle lead to lower mediolateral movements [ 22 , 23 , 24 , 25 ].
While anterior-posterior translation of the knee during squats or deep knee bends has been studied [ 9 , 10 , 26 , 27 ], the mediolateral displacement (leading to varus or valgus postures) has only been examined using cohorts with excessive medial knee displacement, showing that increasing knee valgus angles result in an increasing risk factor for injury. To lower mediolateral movements, changes in the squatting variations such as heel lifts or improving strength in the ankle is recommended [ 7 , 22 , 23 , 24 , 25 ]. However, particularly the mediolateral movement of the knee within healthy novice and experienced strength exercise participants is missing in literature. Therefore, the aim of this study was to assess knee and hip range of motion and moments, including knee frontal plane displacement, and in addition spinal curvature, and moment at L4/L5 level, of experienced and novice squatters during different execution forms of parallel back squats.
Participants
Forty-two participants were recruited by email and public announcement at ETH Zurich and in surrounding fitness centres. Novice and experienced participants with good health, without a lower-limb surgery, and who regularly exercised in a fitness centre or gym were included. Participants who performed squatting exercises once a week or more, for at least 1 year, and with a one repetition maximum of at least 80% of their body weight were considered experienced squatters. All participants provided written informed consent to participate in this study, which was approved by the local ethics committee (EK 2015-N-27). The novice group included 11 women and 10 men (age 25 ± 6 years; weight 66.3 ± 11.2 kg; height 172.2 ± 8.8 cm) and the experienced group included 10 women and 11 men (age 25 ± 5 years; weight 68.9 ± 11.2 kg; height 174.0 ± 9.1 cm).
Squat position
Three stance widths were examined: narrow stance (NS) described a stance width of 10% of the distance from the greater trochanter to the floor; hip stance (HS) was a distance between the two anterior superior iliac spines; and a wide stance (WS) was twice the distance between the anterior superior iliac spines. The HS and WS equalled the two stance widths analysed by McKean and co-workers [ 21 ]. Based on previous study results [ 17 ], three different foot angle placements were examined (0°, 21°, and 42°). The angle of each foot was defined as that between the line pointing straight ahead and the foot axis (line through the middle of the heel and the second toe). Performing each of the three stance widths with the three foot placement angles resulted in total nine different squatting positions, each completed by all the participants.
Squat executions
After a warm up phase of 5 min, both groups performed a set of five squats in each of the nine different positions (Table 1 ), in a randomized order. The experienced group additionally performed squats under loaded conditions, using additional weight of 50% of their body weight on the barbell (e+). To ensure an equal arm position during the non-loaded squat performances (n and e), a very light wooden bar (less than 0.5 kg) was handed to the participants and placed on the trapezius muscle to simulate the presence of the barbell. Between each set, the participants received a two-minute rest in order to minimize possible effects of fatigue [ 28 , 29 ]. For all conditions, standardized instructions were provided (Table 2 ).
Procedure for data collection
The data collection took place in the Laboratory for Movement Biomechanics of the Institute for Biomechanics (IfB) at ETH Zurich between January and April 2016. For the measurement of the kinetic data, two Kistler force plates using a sampling frequency of 2000 Hz (Kistler Instrumente AG, Winterthur, Switzerland) were used, one for each foot [ 10 ]. To ensure the correct position of the feet, a laminate paper marked with the foot placement angles was attached to each force plate. Thus, the nine positions to be carried out by the participants were marked on the floor.
The kinematic data were gathered synchronized to the force data using the 3-dimensional motion capture system Vicon (Vicon Motion System, Oxford Metrics Ltd., UK), with 22 fixed and 7 mobile cameras (MX40 and MX160) and a sampling frequency of 100 Hz. The IfB Marker Set [ 11 ], consisting of 55 markers on the legs, pelvis, shoulder and arms, 22 on the back and 2 attached to the wooden bar or the barbell, was used (Fig. 1 ). Through standardized basic motion tasks, the centre and axis of the ankle, knee, and hip joints were functionally determined [ 11 ], while the joint centre of L4/L5 was defined anatomically based on anthropometric data [ 30 ]. The conventions of the joint coordinate system developed by Grood and Suntay [ 31 ] were used to describe the kinematics of these joints. For the back, both a segmental and a curvature approach was used [ 32 , 33 ].

Measurement set up including the participant (1) fitted with the IfB Marker Set (2), the wooden bar (3), force plates under each foot (4) and Vicon cameras (5) for the condition wide stance (6) with a 42° (7) foot angle placement (WS-42°)
The external joint moments were calculated using an inverse approach with a quasi-static solution [ 34 ], taking the ground reaction force and kinematic data into account [ 35 ], normalized to BW and averaged over both limbs at the hip and knee joints [ 10 , 36 ]. The inverse approach included the position of the joints, the forces acting on each foot, and the gravitational force of the segments [ 10 , 36 ]. Due to slow accelerations of the segments during these exercises, the inertia forces were neglected. Positive values represent external flexion, adduction and internal rotation moments. All calculations were completed using MATLAB (version R2014a, The MathWorks Inc., Natick, MA, USA).
Data analysis
A single squat cycle was defined with participants starting in an upright position, moving downwards to the lowest point possible, and returning to the upright position. The vertical velocities (v barb >0.04 m/s) of the wooden bar and the barbell were tracked using the mean vertical velocity of the two markers attached to each end [ 11 , 36 ]. From each squat position, the averages of five repetitions were calculated separately for each participant. Further calculations and the statistical analysis were performed using the average data from each participant.
Leg alignment was defined as the deviation of the knee joint centre (KJC) from the sagittal plane ( ΔD* in % of participant’s leg length) of each leg, which was formed by the ankle joint centre (AJC), the hip joint centre (HJC), and the marker on the head of the second metatarsal (TO):
where \( \overrightarrow{N} \) is the normal vector of the sagittal plane of each leg pointing towards lateral:
And LL is the participant’s respective leg length, calculated as follows:
Each limb was analysed separately ( ΔD* right/left ) and normalized to each participant’s leg length. By definition, knee valgus is represented by ΔD* < 0, a straight alignment by ΔD* = 0, and knee varus by ΔD* > 0, which takes the different stand widths and foot placement angles into account [ 3 ]. Contrary to the anatomical convention and definition of knee varus and knee valgus as convex or concave movement from the medial plane, this calculation signifies that the coordinate system by Grood and Suntay [ 31 ] was also adjusted for, therefore accounting for each standing position. The lumbar curvature was calculated by fitting a circle around the skin markers in the lumbar part of the spine [ 37 ] a method that allows the quantification of the spinal dynamics during movements [ 11 , 38 , 39 , 40 ]. An inverse dynamic approach was used to calculate the moments in the joints [ 11 , 36 , 41 ].
A two factor linear mixed method model was used to explore the two groups, foot placement angles, and stance width as fixed effects and participants as random effects were used to test the influence of the different execution types on the average mean knee deviation ( ΔD* ) between novice and experienced squatters, as well as with and without extra load within the experienced squatters. A Bonferroni post-hoc test was conducted to adjust the significance level for multiple comparisons. Descriptive analyses were conducted for all other parameters, including the average RoMs of the KJC and HJC, the RoMs of the lumbar curvature, as well as the sagittal and frontal moments of the HJC, KJC and lumbar spine. Statistical tests were performed using IBM SPSS (version 22, SPSS AG, Zürich, Switzerland).
The averaged stance widths of the investigated squat performances were for NS, 0.091 ± 0.007 m; for HS, 0.24 ±0.02 m; and for WS, 0.48 ± 0.03 m. There was no significant ( p = 0.614) interaction between group and foot position.
Average mean knee deviation ( ΔD *)
Values of ΔD* were between − 17 and 27% of participants’ leg lengths (Fig. 2 ) indicating valgus and varus positions. Only position WS-0° displayed a knee valgus for all three groups, while in the experienced group, the position WS-21° additionally showed a knee valgus. For WS-0°, ΔD* was − 1, − 4% and − 7% of the participant’s leg length for novice, experienced and experienced with additional load respectively, and for WS-21° -0.5% and − 2.4% of participant’s leg length for experienced without and with additional load (Fig. 2 ). Significant differences in ΔD* were found between the novice and the experienced squatters, between the non-load-carrying and load-carrying execution of the experienced squatters, as well as among the factors stance width and the foot placement angle. While a wider stance led to smaller ΔD* , a wider foot placement angle caused a larger ΔD* . The novice group showed a significantly higher ΔD* than the experienced squatters, while within the experienced squatters, performing squats with extra weight loading led to a smaller ΔD* , but was dependent upon the execution form. Within each single cycle, ΔD* diverged between the different positions as a function of the knee flexion angle (Fig. 3 ). Within a cycle, smaller stance widths and larger the foot angles resulted in a greater ΔD*, which also increased with knee flexion angle.

Averaged values including standard deviation of ΔD* [% of leg length] displayed for the novice squatter (n), the experienced squatter non-loaded (e) and loaded (e+), for all three stance widths and all three foot placement angles. ΔD* is significant different between the different stance widths, foot placement angles and between the groups. While an increasing angle in the foot placement angle led to an increasing ΔD* , an increased stance width resulted in a decreased ΔD* . Novice squatters showed a higher ΔD* , while additional weight provoked a smaller ΔD*

Averaged values of ΔD* [% of leg length] as a function of the knee flexion angle [°] of the experienced cohort with the wooden bar (e: thin line) and with extra load on the barbell (e+: thick line) for all nine positions
Range of motion
While the RoM of knee adduction seemed to be constant over the different foot placement angles and step widths (factor 0.9 from NS to WS and 1.4 from 0° to 42°), both, the foot placement angles and the step widths influenced the hip adduction RoM (by a factor of 1.6 from NS to WS and 3.2 from 0° to 42°) (Table 3 ). Similarities could be observed in the transversal RoMs of the knee and hip, where the hip RoM seemed to be more sensitive to the different foot positions. In addition, wider stance widths and larger foot angles led to higher hip RoMs in the transversal plane.
Regarding the sagittal plane, the outcomes were comparable to the other planes: A wider step width and a larger foot angle seemed to lead to higher RoM in the sagittal plane in both the hip (Additional file 1 : Figure S1) and the knee (Additional file 2 : Figure S2). Contrary to that, RoM in the lumbar spine appeared to be constant over the different positions, while the largest difference could be observed between the unloaded and the loaded conditions of the experienced squatter. Here, the additional load led to smaller RoMs (3.0 m − 1 ) compared to the unloaded condition (4.1 m − 1 ).
All moments increased with additional load on the barbell in the experienced squatters group with a factor between 1.38 to 1.86, except the minimal external moment of the knee in the frontal plane (Additional file 3 : Figure S3), which remained relatively constant and the lumbar spine moment, which increased with a factor of 1.1 only. Here, the lumbar spine moment between the different step widths and foot placement angles in the e + group varied between 1.2 and 2 Nm/kg and led to a standard deviation of 1.3 Nm/kg, which is more than 2.5 as high as the non-weighted groups (Table 4 ).
Coupling the kinematic and kinetic values, an increased stance width and an increased foot angle led to lower maximal adduction moments in the hip with an increased hip adduction RoM (Fig. 4 ).

Averaged values of the external hip adduction moment [Nm/Kg] (negative: external abduction moment) as a function of the hip adduction angle [°] of the experienced cohort with the wooden bar (e: thin line) and with extra load on the barbell (e+: thick line) for all nine positions
In this study, two cohorts (novice and experienced) were compared performing different types of squats, in order to assess the influence of stance width and foot placement on the knee and hip movement and loading. The study aimed to find a difference between novice and experienced squatters regarding the knee displacement from the sagittal plane ΔD*, as well as kinematic parameters and external joint moments in hip, knee and lower back joints in the sagittal, frontal and transversal planes. In order to assess the movement of the lumbar spine the curvature [ 11 ] was analysed. The extra load of 0% for novice and 50% for experienced squatters chosen here represents the lower end of weight used in a strength training [ 10 ] but it allows to analyse the unloaded squat movement and the effect of a moderate extra load.
Average mean knee deviation ( ΔD* )
General guidelines regarding the knee position during squat exercises recommend that the knees should be maintained vertically between the malleoli in the frontal plane, avoiding either medial or lateral knee displacement in order to reduce the risk of injury [ 6 , 7 ]. Excessive mediolateral movement of the knees is thought to signal a functional deficit. These deficits can include an enhanced hip adductor activity, malfunction / weakness of the musculature of the posterior chain complex or a reduced RoM of the ankle joint, which tends to valgus positions in the knee or [ 7 , 22 , 23 , 24 , 25 ]. However, the mediolateral displacement of the knee is not only dependent on the movement of the patella with respect to the toes in the global frontal plane, but should be analysed in the local frontal plane also, i.e. with respect to the femoral and tibial longitudinal rotation and the stance width of a squat. The parameter ΔD*, used in this study to exactly address this topic, should remain as low as possible throughout the movement to avoid displacement and additional passive forces, and thereby reduce the risk of injury.
In general, knee varus (negative ΔD* ) is a much more common deficit than valgus, and a more negative ΔD* value in the novice squatters compared to the experienced ones was therefore expected. Our results demonstrate that the novice squatters tend towards a varus position, since a higher value of ΔD* was observed compared to the experienced squatters. Compared to the novice participants, the experienced cohort performed squats in all positions with a ΔD* closer to 0 except in the position WS-0°. Without any special prior instructions, all participants avoided a knee valgus or varus position in most of the squat positions, except for WS-0° and WS-21°, second for the experienced group only. However, these findings are in line with other studies, which reported a greater stretching of the lateral collateral ligament (LCL) than the medial collateral ligament (MCL), especially in an experienced group [ 42 , 43 ] – thus indicating a tendency towards varus limb alignment during the task.
Special attention to the knee position should be taken when performing squats in extreme positions, since position NS-42° and WS-0° led to the highest and lowest ΔD* , respectively (Figs. 2 and 3 ). As a result, regarding the mediolateral displacement of the knee, we would recommend that positions HS-0° and WS-21° are employed when performing squat exercises. This is in line with literature, where it is recommended to avoid exaggerated foot placement angles in closed chain movements such as the squat [ 18 ].
Although “avoiding significant forward knee translation” and “no varus or valgus motion” is recommended by [ 18 ], the squat does not seem to compromise knee stability, and can enhance stability if performed correctly [ 42 ]. Here, our results indicate that even novice squatters are able to perform squats with a low risk of injury due to knee displacement, if extreme positions are avoided.
While the minimal curvature was measured at the widest stance and at 42° foot placement angle, spinal curvature did not seem to play a large role in joint RoMs, either in the experience of the squatters, the foot placement angle, or the stance width. On the contrary, squats should be performed with some extra load in order to maintain lumbar lordosis throughout the whole squat cycle, since the additional weight seems to enhance stabilization of the lower back. While these results are in line with previous findings [ 11 ], it is important to note that extra weight normally leads to higher moments and can cause failure due to fatigue and thus cause undesired stress on other musculoskeletal structures.
In general, other studies have recommended that an increased foot angle is used in combination with an increased stance width [ 17 , 44 ]. The results of our study are somewhat contrary to these previous findings and rather indicate that a larger foot placement angle can lead to larger rotational RoMs in hip and knee, larger ab−/adduction RoMs in hip and larger flexion RoMs in knee. As a result, we would recommend that a moderate foot placement angle (approximately 20°) in combination with a moderate stance width (with feet approximately shoulder width apart) should be used.
Many studies have examined the loading conditions in the lower extremities during squats. Comparisons to our study seem rather difficult, since different extra load, only 2D assessment, only one ground reaction force plate, or different calculation approaches were used [ 15 , 45 , 46 , 47 ]. It can be assumed that a narrow stance width with a small foot angle causes a higher hip moment, while a wide stance width with a larger foot placement angle causes a higher knee moment in the sagittal plane. In the frontal plane, a narrow stance width with a small foot angle results in higher hip and knee moments. Interestingly, the knee joint moments in the frontal plane change from external abduction to external adduction within one cycle. This phenomenon is even higher with larger stance widths. By changing the joint moments, it is possible to allow a certain level of load in order to allow positive adaptation of the tissue due to the mechanical stimulus or to prevent from overload.
To our knowledge, no other study has examined the lower back moments with respect to different stance widths and foot angles during squats. Here, it is worth noting that extra weight on the barbell seems not to affect the moments in the lower back, maybe caused by the more stabilized posture, also seen in this study.
Limitations
Several limitations existed in this study and should be mentioned. Aside the technical limitation due to the accuracy of the used measurement set up and the assumptions for the inverse dynamics, three points needs to be addressed. Firstly, the examined cohort included only healthy participants without any lower limb injuries. Thus, a transfer of the results to patients in a rehabilitation process is uncertain and should be treated with caution. Second, novice squatters examined in this study squatted under unloaded conditions only. For the experienced squatters, the 50% BW extra load was rather low, but allowed the participants to perform the squats at a low fatigue level in order to allow the acquisition with a low intra-participant variation. A comparison between different loaded conditions is required, since often additional weights are used, even throughout rehabilitation. Third, the influence of knee moments in the frontal plane on considering corresponding knee displacements is still not fully understood.
General summary
To our knowledge, this is the first study examining the combined effects of kinematics and kinetics of the lower limb and lumbar spine during squats, and examining mediolateral knee displacement in healthy participants, while also considering the experience of the squatters. To investigate mediolateral knee movement, a new and practical approach to calculate knee displacement ( ΔD* : varus and valgus postures) is presented and the results indicate that changes in foot placement angle or step width influences knee movements in the frontal plane.
The knee displacement ΔD* differs significantly between the different stance widths, foot placement angles and between the groups. Novice squatters without additional weight tend towards a more varus alignment, while experienced squatters showed a lower mediolateral movement. To minimize the lumbar curvature RoM, maximize sagittal RoMs in the hip and knee with a high sagittal knee moments, WS-42° with extra weight is preferable, but leads to large RoMs in the transverse and frontal planes in the hip and knee, as well as a lower hip sagittal moment. Here, it is noteworthy that extra weight on the barbell seems not to affect the moment in the lower back.
Since limb alignment, as well as RoM of the lower extremities and the lumbar curvature are dependent on foot placement angles, the exact squat protocol should be chosen wisely, where caution should be taken when performing squats in extreme positions (NS-42° and WS-0°). Additionally, a narrow stance width with small foot angle results in increased hip and knee moments in the frontal plane.
Change history
29 january 2020.
Following publication of the original article [1], the authors reported an error in the following sentence on page 8: “In general, knee varus (negative ΔD*) is a much more common deficit than valgus, and a more negative ΔD* value in the novice squatters compared to the experienced ones was therefore expected.”
Abbreviations
Frontal knee displacement
Ankle joint centre
Expert group with additional extra weight
Expert group
Hip joint centre
Knee joint center
Level between the vertebra 4 and 5 in the lumbar spine
Lateral collateral ligament
Than the medial collateral ligament
Novice group
Number of participants
Narrow stance
Vertical velocity of the barbell
Wide stance
Lynn SK, Noffal GJ. Lower extremity biomechanics during a regular and counterbalanced squat. J Strength Cond Res. 2012;26:2417–25.
Article PubMed Google Scholar
Richards J. Biomechanics in Clinic and Research: An Interactive Teaching and Learning Course. 1st ed. London: Churchill Livingstone, Elsevier; 2008.
Google Scholar
Pauli C, Keller M, Ammann F, Hubner K, Julia L, Taylor WR, Lorenzetti S. Kinematics and kinetics of squats, drop jumps and imitation jumps of ski jumpers. J Strength Cond Res. 2016;30(3):643–52. doi: https://doi.org/10.1519/JSC.0000000000001166
Article PubMed PubMed Central Google Scholar
Schutz P, List R, Zemp R, Schellenberg F, Taylor WR, Lorenzetti S. Joint angles of the ankle, knee, and hip and loading conditions during split squats. J Appl Biomech. 2014;30:373–80.
Müller R. Fitness Center: Verletungen und Beschwerden beim Training bfu-Report 39. Bern: Beratungsstelle für Unfallverhütung; 1999.
NSCA. N.S.C.A. POSITION PAPER: the squat exercise in athletic conditioning: a position statement and review of the literature. Strength Cond J. 1991;13:51–8.
Myer GD, Kushner AM, Brent JL, Schoenfeld BJ, Hugentobler J, Lloyd RS, Vermeil A, Chu DA, Harbin J, McGill SM. The back squat: a proposed assessment of functional deficits and technical factors that limit performance. Strength Cond J. 2014;36:4.
Comfort P, Kasim P. Optimizing Squat Technique. Strength Cond J. 2007;29:10–3.
Article Google Scholar
Fry AC, Smith JC, Schilling BK. Effect of knee position on hip and knee torques during the barbell squat. J Strength Cond Res. 2003;17:629–33.
PubMed Google Scholar
Lorenzetti S, Gulay T, Stoop M, List R, Gerber H, Schellenberg F, Stussi E. Comparison of the angles and corresponding moments in the knee and hip during restricted and unrestricted squats. J Strength Cond Res. 2012;26:2829–36.
List R, Gulay T, Stoop M, Lorenzetti S. Kinematics of the trunk and the lower extremities during restricted and unrestricted squats. J Strength Cond Res. 2013;27:1529–38.
McCaw ST, Melrose DR. Stance width and bar load effects on leg muscle activity during the parallel squat. Med Sci Sports Exerc. 1999;31:428–36.
Article CAS PubMed Google Scholar
Ninos JC, Irrgang JJ, Burdett R, Weiss JR. Electromyographic analysis of the squat performed in self-selected lower extremity neutral rotation and 30 degrees of lower extremity turn-out from the self-selected neutral position. J Orthop Sports Phys Ther. 1997;25:307–15.
Signorile JF, Weber B, Roll B, Caruso JF, Lowensteyn I, Perry AC. An Electromyographical comparison of the squat and knee extension exercises. J Strength Cond Res. 1994;8:178–83.
Wretenberg P, Feng Y, Arborelius UP. High- and low-bar squatting techniques during weight-training. Med Sci Sports Exerc. 1996;28:218–24.
Signorile JF, Kacsik D, Perry A, Robertson B, Williams R, Lowensteyn I, Digel S, Caruso J, LeBlanc WG. The effect of knee and foot position on the electromyographical activity of the superficial quadriceps. J Orthop Sports Phys Ther. 1995;22:2–9.
Escamilla RF, Fleisig GS, Zheng N, Lander JE, Barrentine SW, Andrews JR, Bergemann BW, Moorman CT 3rd. Effects of technique variations on knee biomechanics during the squat and leg press. Med Sci Sports Exerc. 2001;33:1552–66.
Schoenfeld BJ. Squatting kinematics and kinetics and their application to exercise performance. J Strength Cond Res. 2010;24:3497–506.
Escamilla RF, Fleisig GS, Lowry TM, Barrentine SW, Andrews JR. A three-dimensional biomechanical analysis of the squat during varying stance widths. Med Sci Sports Exerc. 2001;33:984–98.
Swinton PA, Lloyd R, Keogh JW, Agouris I, Stewart AD. A biomechanical comparison of the traditional squat, powerlifting squat, and box squat. J Strength Cond Res. 2012;26:1805–16.
McKean MR, Dunn PK, Burkett BJ. The lumbar and sacrum movement pattern during the back squat exercise. J Strength Cond Res. 2010;24:2731–41.
Bell DR, Padua DA, Clark MA. Muscle strength and flexibility characteristics of people displaying excessive medial knee displacement. Arch Phys Med Rehabil. 2008;89:1323–8.
Bell DR, Vesci BJ, DiStefano LJ, Guskiewicz KM, Hirth CJ, Padua DA. Muscle activity and flexibility in individuals with medial knee displacement during the overhead squat. Athl Train Sports Health Care. 2012;4:117–25.
Mauntel TC, Frank BS, Begalle RL, Blackburn JT, Padua DA. Kinematic differences between those with and without medial knee displacement during a single-leg squat. J Appl Biomech. 2014;30:707–12.
Bell DR, Oates DC, Clark MA, Padua DA. Two- and 3-dimensional knee valgus are reduced after an exercise intervention in young adults with demonstrable valgus during squatting. J Athl Train. 2013;48:442–9.
Hill PF, Vedi V, Williams A, Iwaki H, Pinskerova V, Freeman MA. Tibiofemoral movement 2: the loaded and unloaded living knee studied by MRI. J Bone Joint Surg Br. 2000;82:1196–8.
Johal P, Williams A, Wragg P, Hunt D, Gedroyc W. Tibio-femoral movement in the living knee. A study of weight bearing and non-weight bearing knee kinematics using ‘interventional’ MRI. J Biomech. 2005;38:269–76.
Kraemer WJ, Adams K, Cafarelli E, Dudley GA, Dooly C, Feigenbaum MS, Fleck SJ, Franklin B, Fry AC, Hoffman JR, et al. American College of Sports Medicine position stand. Progression models in resistance training for healthy adults. Med Sci Sports Exerc. 2002;34:364–80.
Martorelli A, Bottaro M, Vieira A, Rocha-Junior V, Cadore E, Prestes J, Wagner D, Martorelli S. Neuromuscular and blood lactate responses to squat power training with different rest intervals between sets. J Sports Sci Med. 2015;14:269–75.
PubMed PubMed Central Google Scholar
Nissan M, Gilad I. Dimensions of human lumbar vertebrae in the sagittal plane. J Biomech. 1986;19:753–8.
Grood ES, Suntay WJ. A joint coordinate system for the clinical description of three-dimensional motions: application to the knee. J Biomech Eng. 1983;105:136–44.
Zemp R, List R, Gulay T, Elsig JP, Naxera J, Taylor WR, Lorenzetti S. Soft tissue artefacts of the human back: comparison of the sagittal curvature of the spine measured using skin markers and an open upright MRI. PLoS One. 2014;9.e95426. https://doi.org/10.1371/journal.pone.0095426
Article PubMed PubMed Central CAS Google Scholar
Schmid S, Studer D, Hasler CC, Romkes J, Taylor WR, Brunner R, Lorenzetti S. Using skin markers for spinal curvature quantification in main thoracic adolescent idiopathic scoliosis: an explorative radiographic study. PLoS One. 2015;10
Zatsiorsky VM: Kinetics of human motion . Human Kinetics; 2002.
Hof AL. An explicit expression for the moment in multibody systems. J Biomech. 1992;25:1209–11.
Schellenberg F, Lindorfer J, List R, Taylor WR, Lorenzetti S. Kinetic and kinematic differences between deadlifts and goodmornings. BMC Sports Sci Med Rehabil. 2013;5:27.
Zemp R, List R, Gulay T, Elsig JP, Naxera J, Taylor WR, Lorenzetti S. Soft tissue artefacts of the human back: comparison of the sagittal curvature of the spine measured using skin markers and an open upright MRI. PLoS One. 2014;9:e95426.
Schmid S, Bruhin B, Ignasiak D, Romkes J, Taylor WR, Ferguson SJ, Brunner R, Lorenzetti S. Spinal kinematics during gait in healthy individuals across different age groups. Hum Mov Sci. 2017;54:73–81.
Schmid S, Studer D, Hasler CC, Romkes J, Taylor WR, Brunner R, Lorenzetti S. Using skin markers for spinal curvature quantification in main thoracic adolescent idiopathic scoliosis: an explorative radiographic study. PLoS One. 2015;10:e0135689.
Schmid S, Studer D, Hasler CC, Romkes J, Taylor WR, Lorenzetti S, Brunner R. Quantifying spinal gait kinematics using an enhanced optical motion capture approach in adolescent idiopathic scoliosis. Gait Posture. 2016;44:231–7.
Schellenberg F, Schmid N, Haberle R, Horterer N, Taylor WR, Lorenzetti S. Loading conditions in the spine, hip and knee during different executions of back extension exercises. BMC Sports Sci Med Rehabil. 2017;9:10.
Escamilla RF. Knee biomechanics of the dynamic squat exercise. Med Sci Sports Exerc. 2001;33:127–41.
Klein KK. The deep squat exercise as utilized in weight training for athletes and its effects on the ligaments of the knee. JAPMR. 1961;15:6–11.
Rippetoe M. Starting Strength - Einführung ins Langhanteltraining. Munich: riva Verlag; 2015.
Ariel B. Biomechanical analysis of the knee joint during deep knee bends with heavy load. In: Biomechanics IV. London: The MacMillan Press LTD; 1974. p. 44–52. https://link.springer.com/content/pdf/bfm%3A978-1-349-02612-8%2F1.pdf
Lander JE, Bates BT, Devita P. Biomechanics of the squat exercise using a modified center of mass bar. Med Sci Sports Exerc. 1986;18:469–78.
Escamilla RF, Fleisig GS, Zheng N, Barrentine SW, Wilk KE, Andrews JR. Biomechanics of the knee during closed kinetic chain and open kinetic chain exercises. Med Sci Sports Exerc. 1998;30:556–9.
Download references
Acknowledgements
We thank INDIGO FITNESS CLUB ZURICH and ACTIV FITNESS ZURICH for allowing us to recruit participants from their centres.
Availability of data and materials
The data is available upon reasonable request. Please write to [email protected]
Author information
Authors and affiliations.
Institute for Biomechanics, ETH Zurich, Leopold-Ruzicka-Weg 4, 8093, Zürich, Switzerland
Silvio Lorenzetti, Mira Ostermann, Fabian Zeidler, Pia Zimmer, Lina Jentsch, Renate List, William R. Taylor & Florian Schellenberg
Swiss Federal Institute of Sport Magglingen, SFISM, Hauptstrasse 247, 2532, Magglingen, Switzerland
Silvio Lorenzetti
Department of Business, Health & Social Work, Bern University of Applied Science, Schwarztorstrasse 48, 3007, Bern, Switzerland
Mira Ostermann
Department of Medicine, Sports & Healthcare, University of Applied Science Technikum Vienna, Höchstädtplatz 6, 1200, Wien, Austria
Fabian Zeidler & Pia Zimmer
You can also search for this author in PubMed Google Scholar
Contributions
SL: designed the study, supervised the data evaluation and wrote part of the manuscript. MO: performed the measurements, evaluated the part of the data wrote part of the manuscript. FZ: performed the measurements, evaluated the part of the data wrote part of the manuscript. PZ: performed the measurements, evaluated the part of the data wrote part of the manuscript. LJ: supported the data evaluation and coding. RL: supervision and coding during the data evaluation, helped to design the study, wrote part of the manuscript. WRT: helped with analysis, supported the texting and wrote part of the manuscript. FS: designed the study, evaluated the data, performed statistical evaluation and wrote part of the manuscript. All authors read and approved the final manuscript.
Corresponding author
Correspondence to Silvio Lorenzetti .
Ethics declarations
Ethics approval and consent to participate.
The survey of data in this study followed the cohort study design. The Ethical Committee of the Eidgenössische Technische Hochschule Zurich endorsed the study design protocol (EK 2015-N-27) prior to participant acquisition. All participants received written information on the course of study and provided written, informed consent prior to starting measurements. This study was performed according to the Declarations of Helsinki.
Consent for publication
The participant in the picture provided written informed consent that the picture can be published.
Competing interests
The authors declare that they have no competing interests.
Publisher’s Note
Springer Nature remains neutral with regard to jurisdictional claims in published maps and institutional affiliations.
Additional files
Additional file 1:.
Figure S1. Averaged values of the hip moment in the sagittal plane [Nm/Kg] as a function of the hip flexion angle [°] in the experienced cohort with the wooden bar (e) and with extra load on the barbell (e+) for all nine positions. (PDF 181 kb)
Additional file 2:
Figure S2. Averaged values of the knee moment in the sagittal plane [Nm/Kg] as a function of the knee flexion angle [°] in the experienced cohort with the wooden bar (e) and with extra load on the barbell (e+) for all nine positions. (PDF 176 kb)
Additional file 3:
Figure S3. Averaged values of the knee moment in the frontal plane [Nm/Kg] as a function of the knee adduction angle [°] in the experienced cohort with the wooden bar (e) and with extra load on the barbell (e+) for all nine positions. (PDF 189 kb)
Rights and permissions
Open Access This article is distributed under the terms of the Creative Commons Attribution 4.0 International License ( http://creativecommons.org/licenses/by/4.0/ ), which permits unrestricted use, distribution, and reproduction in any medium, provided you give appropriate credit to the original author(s) and the source, provide a link to the Creative Commons license, and indicate if changes were made. The Creative Commons Public Domain Dedication waiver ( http://creativecommons.org/publicdomain/zero/1.0/ ) applies to the data made available in this article, unless otherwise stated.
Reprints and permissions
About this article
Cite this article.
Lorenzetti, S., Ostermann, M., Zeidler, F. et al. How to squat? Effects of various stance widths, foot placement angles and level of experience on knee, hip and trunk motion and loading. BMC Sports Sci Med Rehabil 10 , 14 (2018). https://doi.org/10.1186/s13102-018-0103-7
Download citation
Received : 29 September 2017
Accepted : 25 June 2018
Published : 17 July 2018
DOI : https://doi.org/10.1186/s13102-018-0103-7
Share this article
Anyone you share the following link with will be able to read this content:
Sorry, a shareable link is not currently available for this article.
Provided by the Springer Nature SharedIt content-sharing initiative
- Squat exercise
- Knee alignment
- Varus / valugus
BMC Sports Science, Medicine and Rehabilitation
ISSN: 2052-1847
- General enquiries: [email protected]
IMAGES
VIDEO
COMMENTS
There are several ligaments of the knee that keep it stable, including the anterior cruciate ligament (ACL) and the posterior cruciate ligament (PCL). Trauma, like a fall, can cause a tear in any of the ligaments, which can then lead to pain while squatting. Tears in the ACL or PCL often also come with a medial meniscus tear, Jeffcoat says.
People can use the R.I.C.E method for relieving pain in the knee. The R.I.C.E method involves:. Rest: Rest the knee and avoid bearing too much weight on it.; Ice: Apply a towel-wrapped ice pack to ...
Driving the knee that is planted on the box forward, hinge your hip and bring the other foot to the floor, tapping the floor and coming back up. Dr. Horschig does this on a 12-inch box, but if it ...
Osteoarthritis of the knee causes pain, swelling, and stiffness in and around the knee joint. It occurs when the hyaline cartilage that separates the bones wears away, leading to bone-on-bone grinding. The severity of osteoarthritis can vary, and it is often considered a normal part of aging. However, there are ways to improve symptoms.
Start in a half-kneeling position and place one knee down on a pad so that it's directly beneath your hip. Your back toes should be flexed and pointing to the floor. Bend your front knee so it forms a 90-degree angle. This foot should remain flat on the floor throughout the exercise. Place a mid-weight kettlebell on top of your front side.
Spread your feet out hip width apart, and load your weight into your toes. Lift the heels up off the ground. While holding your base, squat down to where you bring your calves as close to your ...
When overdone, this can turn your squat into a good morning exercise and lead to more stress on your lower back. Find a middle ground here between sitting back during the squat but without allowing your torso to collapse forward. This will help to prevent knee pain during squats and keep your lower back protected as well.
Here are some of the most common causes of knee pain when squatting or kneeling: Knee arthritis. Arthritis is caused by inflammation in the joints. Inflammation from arthritis can lead to pain, swelling, and stiffness. Any joint in the body can experience arthritis, but knee arthritis is one of the most common forms.
Research shows that working the glutes, inner hip, and inner thigh muscles can help reduce knee pain. If you have pain with squatting and your knees cave inward during a squat, try strengthening your glute muscles to see if it helps, suggests Dr. Anderson. Start with the standing side leg raise (instructions below).
With the bar higher, you will end up with a more upright squat position, less hip flexion, and more forward migration of the knee. This is not what you want if your goal is to reduce knee pain. The low bar squat will naturally result in more forward lean, more hip flexion and less migration of the knee. This is the preferred form to reduce pain ...
Step to the side and reach the glutes back. Keep your knee stacked over the heel so you feel the stretch of the glute and your hip flexion. Maintain a long line of energy from the crown of the ...
Having said all of this, there are people who may benefit from limiting forward knee travel during a squat - those with anterior knee pain, i.e. pain at the front of the knees (3) Reference: Rudavsky 2014. In this population reducing anterior knee stress may allow for more pain-free squatting.
Even intuitively this does not make sense. Think about every time you stand up off the toilet or couch: depending on the seat height there is a very good chance you are already performing a squat while your knees travel (at least slightly) over top your toes. Research showing what forces are acting on the knee at different degrees of squat ...
The feet and the knees should stay aligned during the entire range of motion. Adding 2-3 sets of 15-20 reps into your leg workouts is a great way to help teach your body to properly activate the lateral glutes. This will in turn prevent knee valgus and alleviate any pain you feel in your knees during the squat.
Deloading your squat. If you have knee pain during a squat, the first thing I would encourage you to try is deloading the movement. Deloading uses something, usually a band or pulleys, to assist the motion. Basically, it makes the squat easier. Why does this matter? Deloading helps to both assess the motion and works to retrain the movement.
Here are the basic guidelines we use to coach the barbell squat at Westside Barbell: First, ensure the rack elevates the barbell to the proper height for a comfortable unrack. For most athletes, this will be the height that places the barbell in the middle of the chest as you walk up to the bar. Next, set the hands up properly.
Technique. In essence, a squat could not be easier to perform. Stand with your feet shoulder width apart, bend your knees and then straighten them again. Easy! As always, the devil is in the ...
In the squat, the hip and knee extensors are lengthening as they exert force against the bar to slow its acceleration due to gravity. ... Most people will find that their knees will travel forward directly over or past their toes when viewed from the side. The high bar position, closer stance widths, less toe-out angle, longer femurs, and other ...
I've had a couple PTs bring up knee travel in the squat, specifically that the 'knees shouldn't pass the toes in the squat'. This leads to (what i see as) a lot of half-squatting, and god forbid the client has a longer femoral segment with a shorter shank. Hard to imagine any front squat that abides by this rule.
Hip-dominant squatters tend to rely less on forward knee travel, instead opting to push their butt back, lean forward, and compress into a more folded-over position when they squat. Hip Dominance ...
1. Stand with your back flat against a wall. Feet should be shoulder-width apart and heels 18 inches away from wall. Keep knees in line with heels, not out in front of toes. 2. Breathe in and exhale as you squat by "sitting down" as far as you can comfortably go. Don't drop buttocks lower than knees and keep knees in line with heels.
Background Squatting is a core exercise for many purposes. The tissue loading during squatting is crucial for positive adaptation and to avoid injury. This study aimed to evaluate the effect of narrow, hip and wide stance widths, foot position angles (0°, 21°, and 42°), strength exercise experience, and barbell load (0 and 50% body weight, experts only) during squatting. Methods Novice (N ...
MSN