Want to highlight a helpful answer? Upvote!
Did someone help you, or did an answer or User Tip resolve your issue? Upvote by selecting the upvote arrow. Your feedback helps others! Learn more about when to upvote >
Looks like no one’s replied in a while. To start the conversation again, simply ask a new question.
Change language in safari
[Edited by Moderator]
Mass-Storage Management Software
Posted on May 26, 2022 1:00 PM
Posted on May 27, 2022 9:01 AM
Here's how to change the language in Safari on your MacBook:
1. Open Safari and click on the Safari menu item in the top bar.
2. From the drop-down menu, select Preferences.
3. In the window that opens, click on the General tab.
4. Click on the
the drop-down menu next to Language and select the desired language.
5. Close the Preferences window and you're all set! The new language will be used for menus, alerts, and websites in Safari.

Similar questions
- Language problem in Safari For some reason the language on Safari (on my iPhone) changed from English to German. What happened? And how do I change it back to English? 970 1
- How add Farsi (persian) language to safari? Add Farsi language 300 1
- Change language My safari comes up in Hebrew. How do I change it to English 217 1
Loading page content
Page content loaded
May 27, 2022 9:01 AM in response to Estherjulius

May 27, 2022 5:31 AM in response to Estherjulius
Please follow instructions given in this article.
Change the language your Mac uses - Apple Support
Atlas Support Center
How do i change the language on safari for mac print.
Modified on: Tue, 24 May, 2022 at 1:05 PM
In the Personal section, click the Language & Text icon.
In the menu that appears, drag your preferred language to the top.
Click the Apple icon in the upper-left hand corner of the screen and select Log out (username)...
Your preferred language is displayed upon signing back into your computer.
Did you find it helpful? Yes No
Related Articles
How To Change Language In Safari

- Software & Applications
- Browsers & Extensions

Introduction
Safari is a versatile and user-friendly web browser developed by Apple, known for its sleek interface and seamless integration with Apple devices. One of its many convenient features is the ability to customize the language settings, allowing users to browse the web in their preferred language. Whether you're learning a new language, conducting research in a multilingual environment, or simply more comfortable in a different language, Safari makes it easy to make this adjustment.
In this guide, we will walk you through the simple yet powerful process of changing the language in Safari. By following these steps, you can personalize your browsing experience and ensure that the content you encounter is presented in a language that suits your preferences. Whether you're a polyglot or simply looking to explore the web in a different linguistic context, Safari's language customization feature empowers you to tailor your browsing experience to your unique needs.
Let's dive into the step-by-step instructions to seamlessly change the language settings in Safari , allowing you to explore the web in the language of your choice. Whether you're a language enthusiast, a global traveler, or simply seeking a more comfortable browsing experience, Safari's language customization feature offers a world of possibilities.
Step 1: Open Safari
To begin the process of changing the language in Safari, you first need to open the browser . Safari is easily accessible from the dock on your Mac or from the Applications folder. Simply click on the Safari icon, and the browser will launch, presenting you with a clean and intuitive interface.
Upon opening Safari, you will be greeted by the familiar address bar, bookmarks, and a range of features designed to streamline your browsing experience. The sleek and minimalist design of Safari makes it a popular choice among Mac users, offering a seamless platform for accessing the web.
Once Safari is open, you are ready to proceed to the next step in customizing the language settings. Whether you're a seasoned Safari user or exploring the browser for the first time, the straightforward interface ensures that changing the language settings is a hassle-free process.
With Safari launched and ready for customization, you are one step closer to personalizing your browsing experience. The next steps will guide you through the process of accessing the language settings within Safari, allowing you to select your preferred language for a more tailored and enjoyable web exploration.
Now that Safari is open, let's move on to the next step and delve into the process of adjusting the language settings to suit your linguistic preferences.
Step 2: Go to Safari Preferences
Navigating to Safari Preferences is the pivotal step in customizing the language settings to align with your linguistic preferences. This process allows you to access a range of configuration options, including the ability to modify the language settings seamlessly. Here's how to access Safari Preferences and embark on the journey of personalizing your browsing experience.
Locate the Safari Menu : At the top-left corner of your screen, you will find the Safari menu. It is represented by the Safari icon, which is easily identifiable and serves as the gateway to a multitude of customization options.
Access the Drop-Down Menu : Click on the Safari menu to reveal a drop-down list of options. Among these options, you will find "Preferences" listed towards the bottom of the menu. Click on "Preferences" to proceed to the next stage of the customization process.
Explore the Preferences Window : Upon selecting "Preferences," a new window will appear, presenting you with a range of customization categories. The Preferences window is designed to offer users a comprehensive set of options to tailor their browsing experience, and it is within this window that you will find the language settings.
Navigate to the Language Tab : Within the Preferences window, you will notice a series of tabs at the top of the window, each representing a different category of settings. Locate and click on the "Language" tab to access the language customization options.
Prepare for Language Customization : As you enter the Language tab, you will be presented with a list of languages, each accompanied by a checkbox. This interface allows you to select your preferred language from the available options, enabling Safari to display web content in the language of your choice.
By following these steps, you will successfully navigate to Safari Preferences and access the language customization options. This pivotal stage sets the foundation for tailoring your browsing experience to align with your linguistic preferences, ensuring that the content you encounter is presented in a language that resonates with you. With the Preferences window open and the Language tab at your disposal, you are now prepared to select your preferred language and embark on a more personalized and enriching web exploration journey.
Now that you have successfully accessed Safari Preferences and located the language customization options, it's time to proceed to the next step and delve into the process of selecting your preferred language within Safari.
Step 3: Select Language
Upon reaching the Language tab within Safari Preferences, you are presented with a diverse array of languages, each accompanied by a checkbox. This intuitive interface empowers you to select your preferred language from the available options, thereby customizing your browsing experience to align with your linguistic preferences.
As you peruse the list of languages, you will notice a wide selection, encompassing a multitude of global languages, dialects, and regional variations. This comprehensive range of options reflects Safari's commitment to catering to the diverse linguistic needs of its users, ensuring that individuals from various cultural backgrounds can seamlessly engage with web content in their preferred language.
To select your preferred language, simply locate it within the list and click on the accompanying checkbox. This action signifies your choice to have web content displayed in the selected language, enriching your browsing experience and facilitating a deeper connection with the online material you encounter.
The flexibility of Safari's language customization feature extends beyond a single language selection, allowing you to choose multiple languages if desired. This versatility is particularly beneficial for multilingual individuals or those navigating websites that offer content in different languages. By selecting multiple languages, you can enhance your browsing experience by ensuring that web content is presented in the most accessible and meaningful manner.
Furthermore, Safari's language customization feature is designed to prioritize your language selections, ensuring that web content is displayed in the preferred language whenever available. This intelligent functionality enhances the seamlessness of your browsing experience, minimizing the need to manually switch languages as you navigate diverse online environments.
Once you have selected your preferred language or languages, Safari seamlessly integrates this customization into your browsing settings, readying the browser to present web content in the chosen language. This effortless process reflects Safari's commitment to user-centric design, prioritizing ease of use and personalization to enhance the overall browsing experience.
With your language selections made, you are now equipped to proceed to the next stage of the language customization process, solidifying your preferences and preparing Safari to showcase web content in the language or languages that resonate with you. This pivotal step marks a significant milestone in tailoring your browsing experience to align with your unique linguistic needs, setting the stage for a more enriching and personalized web exploration journey.
Now that you have successfully selected your preferred language within Safari, it's time to move on to the next step and delve into the process of finalizing your language preferences before relaunching Safari to experience the customized language settings in action.
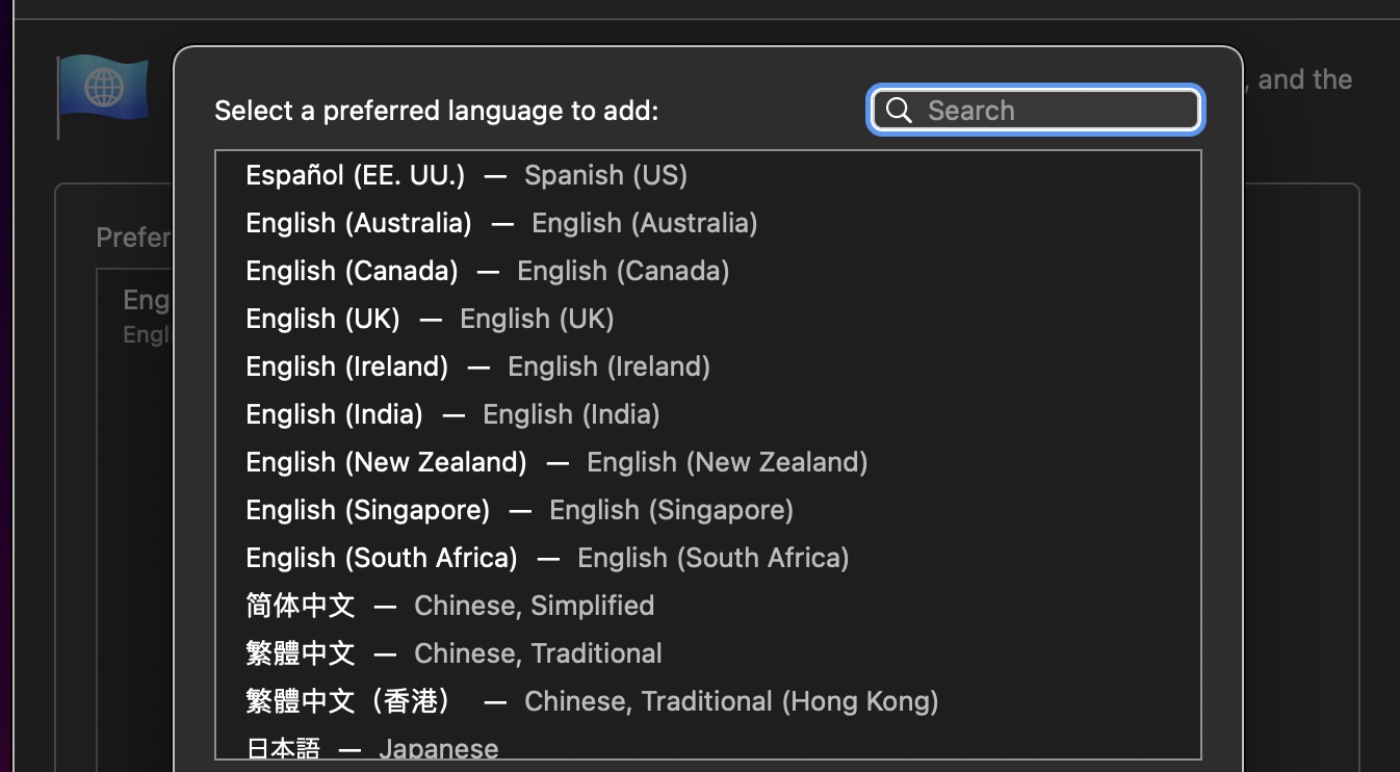
Step 4: Choose Preferred Language
Step 5: close preferences and restart safari.
After customizing the language settings in Safari to align with your linguistic preferences, the final step involves closing the Preferences window and restarting the browser to apply the newly configured language settings. This crucial stage ensures that Safari seamlessly integrates your language preferences, readying the browser to present web content in the selected language or languages.
To close the Preferences window, simply navigate to the top-left corner of the window and click on the red "Close" button. This action finalizes your language selections and returns you to the main Safari interface, where the updated settings are poised to enhance your browsing experience. With the Preferences window closed, you have successfully solidified your language preferences within Safari, setting the stage for a more personalized and enriching web exploration journey.
Following the closure of the Preferences window, the next step is to restart Safari, allowing the browser to implement the customized language settings. To restart Safari, navigate to the Safari menu at the top-left corner of your screen and select "Quit Safari" from the drop-down list. Alternatively, you can use the keyboard shortcut Command + Q to swiftly exit the browser.
Once Safari has been closed, relaunch the browser by clicking on the Safari icon in your dock or accessing it from the Applications folder. As Safari reopens, the customized language settings will come into effect, ensuring that web content is presented in the selected language or languages, thereby enhancing your browsing experience and facilitating a deeper connection with online material.
The process of closing Preferences and restarting Safari serves as the final touch in the language customization journey, culminating in a seamless transition to the newly configured settings. By following these steps, you have successfully tailored your browsing experience to align with your unique linguistic preferences, empowering you to explore the web in a language that resonates with you.
With Safari relaunched and the customized language settings in place, you are now poised to embark on a more personalized and enriching web exploration journey. Whether you are delving into global news, conducting research, or simply enjoying online content, Safari's language customization feature ensures that the web is presented to you in a language that enhances your browsing experience, fostering a deeper connection with the digital world.
Leave a Reply Cancel reply
Your email address will not be published. Required fields are marked *
Save my name, email, and website in this browser for the next time I comment.
- Crowdfunding
- Cryptocurrency
- Digital Banking
- Digital Payments
- Investments
- Console Gaming
- Mobile Gaming
- VR/AR Gaming
- Gadget Usage
- Gaming Tips
- Online Safety
- Software Tutorials
- Tech Setup & Troubleshooting
- Buyer’s Guides
- Comparative Analysis
- Gadget Reviews
- Service Reviews
- Software Reviews
- Mobile Devices
- PCs & Laptops
- Smart Home Gadgets
- Content Creation Tools
- Digital Photography
- Video & Music Streaming
- Online Security
- Online Services
- Web Hosting
- WiFi & Ethernet
- Browsers & Extensions
- Communication Platforms
- Operating Systems
- Productivity Tools
- AI & Machine Learning
- Cybersecurity
- Emerging Tech
- IoT & Smart Devices
- Virtual & Augmented Reality
- Latest News
- AI Developments
- Fintech Updates
- Gaming News
- New Product Launches
- AI Writing How Its Changing the Way We Create Content
- How to Find the Best Midjourney Alternative in 2024 A Guide to AI Anime Generators
Related Post
Ai writing: how it’s changing the way we create content, unleashing young geniuses: how lingokids makes learning a blast, 10 best ai math solvers for instant homework solutions, 10 best ai homework helper tools to get instant homework help, 10 best ai humanizers to humanize ai text with ease, sla network: benefits, advantages, satisfaction of both parties to the contract, related posts.

How Do I Change My Browser Settings

What Happened To Safari Reader In IOS 7

How To Change Browser Timezone

How Do You Enable Cookies On Safari

How To Translate Safari Page On IPhone

How To Enable Javascript For Safari

How To Translate Page In Safari

How Can You Detect The Clients Browser Name
Recent stories.

How to Find the Best Midjourney Alternative in 2024: A Guide to AI Anime Generators

How to Know When it’s the Right Time to Buy Bitcoin

How to Sell Counter-Strike 2 Skins Instantly? A Comprehensive Guide

10 Proven Ways For Online Gamers To Avoid Cyber Attacks And Scams

- Privacy Overview
- Strictly Necessary Cookies
This website uses cookies so that we can provide you with the best user experience possible. Cookie information is stored in your browser and performs functions such as recognising you when you return to our website and helping our team to understand which sections of the website you find most interesting and useful.
Strictly Necessary Cookie should be enabled at all times so that we can save your preferences for cookie settings.
If you disable this cookie, we will not be able to save your preferences. This means that every time you visit this website you will need to enable or disable cookies again.
How-To Geek
How to translate web pages in safari on mac.
Have you landed on a French or Spanish website? Translate it to English with the press of a button!
Often find yourself on websites with text in a foreign language? If you use Safari, there's no need to go to Google Translate. You can translate web pages between seven languages right in Safari on a Mac.
Starting with Safari 14.0, Apple included a translation feature directly in the browser. As of this writing, the feature is in beta, but fully functional. If your Mac is running the latest version of macOS Mojave, Catalina, Big Sur , or newer, you can access the translation feature.
The translation functionality works between the following languages: English, Spanish, Italian, Chinese, French, German, Russian, and Brazilian Portuguese.
By default, you can translate any of the above languages to English. You can also add more languages to the mix (we'll talk more about that below).
To get started, open a web page in one of the supported languages. Safari will automatically recognize that language, and you'll see "Translation Available" in the URL bar, along with a Translation button; click it.
If this is the first time you've used the feature, a pop-up will appear. Click "Enable Translation" to turn on the feature.
In the translation menu, select "Translate to English."
The text on the page will instantly convert to English, as shown in the image below. The Translation button will also turn blue.
To disable the Translation feature and return to the original language, click the Translation button again, and then select "View Original."
As we mentioned above, you can also translate to languages other than English. To do so, click the Translation button, and then select "Preferred Languages."
This opens the "Language & Region" menu in System Preferences. Here, click the plus sign (+) to add a new preferred language. You can add multiple languages here while continuing to use English as the default language across your Mac.
In the pop-up, select the languages you want to add, and then click "Add."
System Preferences will ask if you want to make this your default language. Choose the previous default language if you want it to remain the status quo.
Now that you've added a new preferred language, you'll see the translation button even when you visit web pages that are in English.
The translation process for a preferred language is the same: click the Translation button in the URL bar, and then select "Translate to [the language you selected]."
Again, you can view the original at any time by simply clicking "View Original" in the Translation menu.
If you're traveling to a new country, you can also use the built-in Translate app on your iPhone or iPad to quickly translate speech between multiple languages.
Related: How to Use the Apple Translate App on iPhone
- PRO Courses Guides New Tech Help Pro Expert Videos About wikiHow Pro Upgrade Sign In
- EDIT Edit this Article
- EXPLORE Tech Help Pro About Us Random Article Quizzes Request a New Article Community Dashboard This Or That Game Popular Categories Arts and Entertainment Artwork Books Movies Computers and Electronics Computers Phone Skills Technology Hacks Health Men's Health Mental Health Women's Health Relationships Dating Love Relationship Issues Hobbies and Crafts Crafts Drawing Games Education & Communication Communication Skills Personal Development Studying Personal Care and Style Fashion Hair Care Personal Hygiene Youth Personal Care School Stuff Dating All Categories Arts and Entertainment Finance and Business Home and Garden Relationship Quizzes Cars & Other Vehicles Food and Entertaining Personal Care and Style Sports and Fitness Computers and Electronics Health Pets and Animals Travel Education & Communication Hobbies and Crafts Philosophy and Religion Work World Family Life Holidays and Traditions Relationships Youth
- Browse Articles
- Learn Something New
- Quizzes Hot
- This Or That Game New
- Train Your Brain
- Explore More
- Support wikiHow
- About wikiHow
- Log in / Sign up
- Computers and Electronics
- Internet Browsers
How to Change Your Browser's Language
Last Updated: April 2, 2020 Tested
This article was co-authored by wikiHow staff writer, Jack Lloyd . Jack Lloyd is a Technology Writer and Editor for wikiHow. He has over two years of experience writing and editing technology-related articles. He is technology enthusiast and an English teacher. The wikiHow Tech Team also followed the article's instructions and verified that they work. This article has been viewed 531,003 times. Learn more...
This wikiHow teaches you how to change the language used in your computer's web browser. You can change the language used in Google Chrome, Firefox, Microsoft Edge, Internet Explorer, and Safari. You cannot change a mobile browser's language without changing the language for the entire smartphone or tablet.
Google Chrome

- If you're using a Mac, you can't change your Chrome language settings from within Chrome. Skip ahead to the Safari method to see how to change your Mac's default language, which will change the language used by Chrome. [1] X Research source

- Keep in mind that not all webpages will support your selected language.

- On a Mac, you'll click Preferences here.

- Your language settings won't apply to Firefox's menus, but any webpage you visit will be translated automatically into the language you selected if the website supports your language.
Microsoft Edge and Internet Explorer

- Unfortunately, you can't change the language used in Microsoft Edge or Internet Explorer without changing the language used on your whole PC.

- This can take several minutes.

- You may have to restart your computer for the language to fully implement.

- You can't change your Safari language settings without changing your Mac's language.

Community Q&A
You Might Also Like

- ↑ https://support.google.com/chrome/answer/173424?co=GENIE.Platform%3DDesktop&hl=en
- ↑ https://support.apple.com/kb/PH25082?locale=en_US&viewlocale=en_US
About This Article
- Send fan mail to authors
Is this article up to date?

Featured Articles

Trending Articles

Watch Articles

- Terms of Use
- Privacy Policy
- Do Not Sell or Share My Info
- Not Selling Info
wikiHow Tech Help:
Tech troubles got you down? We've got the tips you need
Tips & Tricks
Troubleshooting, how to change language for specific apps on mac.

When you set up your Mac for the first time, you’re asked to select a preferred language and set the region you’re residing in. In addition to this general language setting, you can have different languages for different apps installed on your Mac. This is obviously useful for multilingual Mac users, but having app-specific language settings could also be super helpful if you’re looking to learn a foreign language.
Many of you may already know how to change the language or add a new language on macOS . However, the ability to set a language that’s not the system language for a specific app is a relatively new feature that Apple introduced, so whether you want to localize a favorite app, use it for language learning, or just prefer an app in a particular language, this feature is for you.
If you’re interested in setting languages for specific apps on a Mac, then read on to learn how!
Before you go ahead with the following procedure, you’ll need to make sure that your Mac is running macOS Catalina, Big Sur, or later, since you won’t find the app-specific language setting on older versions.
There you have it, you’re now using a different language for a specific app on your Mac. You can repeat this for other apps if desired too. Pretty great, and easy, right?
Thanks to this new setting, you don’t have to force yourself to use your Mac’s default language for all the apps from now on. For example, you can set Safari’s language to French or Spanish while still keeping your system language English.
It’s worth noting that not all apps installed on your Mac may have support for so many languages. However, as long as you can switch to your desired language, this feature works seamlessly.
Are you trying to change the default language of your Mac instead? In that case, you might want to check out how you can switch to a different system language and add multiple preferred languages on your Mac . Keep in mind that changing your Mac’s region will also automatically change the system language to match the country you selected.
What do you think of customizing language settings on a per-app basis on your Mac? Share your relevant opinions, thoughts, tips, and experiences in the comments.
Enjoy this tip? Subscribe to our newsletter!
Get more of our great Apple tips, tricks, and important news delivered to your inbox with the OSXDaily newsletter.
You have successfully joined our subscriber list.
Related articles:
- How to Set Preferred Language and Change Region on iPhone & iPad
- How to Add & Switch Languages in Mac OS X
- How to Change the Keyboard Language Being Typed with a Keystroke in Mac OS X
- How to Disable Bad Language in Siri on iPhone and iPad
Leave a Reply
Name (required)
Mail (will not be published) (required)
Subscribe to OSXDaily
- - The Best Way to Clean a MacBook Air Keyboard: Microfiber Cloth & KeyboardCleanTool
- - How to Opt Out of ChatGPT Using Your Training Data While Keeping Chat History
- - How to Check Disk Health on Mac with smartctl
- - How to Enable Do Not Disturb on Apple Watch
- - 3 Mac Tips for Working with International Teams
- - Opinion: Shiny Keys on MacBook Air & Pro Are Ugly and Shouldn’t Happen
- - MacOS Ventura 13.6.6 & Safari 17.4.1 Update Available
- - Using M3 MacBook Air in Clamshell Mode May Reduce Performance
- - First Beta of iOS 17.5, macOS Sonoma 14.5, iPadOS 17.5 Released for Testing
- - iOS 16.7.7 & iPadOS 16.7.7 Released for Older iPhone & iPad Models
iPhone / iPad
- - What Does the Bell with Line Through It Mean in Messages? Bell Icon on iPhone, iPad, & Mac Explained
- - Fix a Repeating “Trust This Computer” Alert on iPhone & iPad
- - Create a Resume with Pages on Mac, iPhone, iPad
- - How Secure are Personal Hotspot Connections from iPhone?
- - You Can Play Flappy Bird in the Mac Finder
- - Fix “warning: unable to access /Users/Name/.config/git/attributes Permission Denied” Errors
- - How to Fix the Apple Watch Squiggly Charging Cable Screen
- - NewsToday2: What it is & How to Disable NewsToday2 on Mac
- - Why Did My iPhone Alarm Stop Automatically & Turn Itself Off?

About OSXDaily | Contact Us | Privacy Policy | Sitemap
This website is unrelated to Apple Inc
All trademarks and copyrights on this website are property of their respective owners.
© 2024 OS X Daily. All Rights Reserved. Reproduction without explicit permission is prohibited.
- Press Releases
- Industry News
- Product Spotlight
- Fresh from Apple
- Video Production
- Installation Videos
- Explainer Videos
- Testing Lab
- Networking & Security
- Special OWC Deals
- The Other World
- Powered by OWC
- Space & Beyond
- Random Thoughts & Topics
- OWC Unplugged
- Article Archives
- Make a Suggestion
Send us a Topic or Tip
Have a suggestion for the blog? Perhaps a topic you'd like us to write about? If so, we'd love to hear from you! Fancy yourself a writer and have a tech tip, handy computer trick, or "how to" to share? Let us know what you'd like to contribute!
How to Change Language & Region Settings in macOS Monterey

Recently some websites in Safari on macOS Monterey have started displaying in languages other than English. If this happens to you, there are steps you can take.
Adjusting System Preferences for Language & Region
First, change the Language & Region settings for the entire Mac. Here’s how:
1. Open System Preferences > Language & Region.

2. Make sure that English is set as the primary language on the left side of the pane.

3. Now go back to Systems Preferences and click Keyboard.

4. Click Input Sources.
5. Make sure the U.S. is selected in the tab at the left of the pane.
This assumes you want U.S. English as your input source. If you wish to use another language, click the “+” sign at the bottom of the pane and choose another language.
These steps should solve any problems in resolving any language issues in Safari or on your Mac in general. If not, you may have to contact Apple support .
Related articles:
- How to Use the Translation Text Feature in macOS Monterey
- iOS 15 Feature Roundup: Translate
Leave a Reply Cancel reply
Save my name, email, and website in this browser for the next time I comment.
Notify me of follow-up comments by email.
Notify me of new posts by email.
You Might Also Like

How to Use Your iPad as a Desktop Computer With Stage Manager Extended Display

How to Choose the Best Drives for Offloading Footage While Traveling

How to Choose a Memory Card for Best Performance and Compatibility

How to Edit B-Roll and Stock Faster with DaVinci Resolve’s Cut Page
Email Address
- Brand Assets
8 Galaxy Way Woodstock, IL 60098 1-800-275-4576 +1-815-338-8685 (Int)
All Rights Reserved, Copyright 2020, OWC – Since 1988 | Terms of Use | Privacy Policy
We use cookies to provide you with a full shopping experience, including personalized content, and to help us improve your experience. To learn more, click here .
By continuing to use our site, you accept our use of Cookies, Privacy Policy and Terms of Use .
- Web Browser
- Google Chrome Browser
- Mozilla Firefox Browser
- Microsoft Edge Browser
- Apple Safari Browser
- Tor Browser
- Opera Browser
- DuckDuckGo Browser
- Brave Browser
- Best Browser for Downloading large Files
- Does Firefox support Chrome extensions?
- Which browser has built-in password manager?
- Is there a way to stop automatic updates in Chrome?
- What are the main advantages of using Microsoft Edge?
- Can we use Google Chrome extensions on mobile?
- Does Chrome browser has built-in ad blocker?
- Is it important to clear browser cache?
- Which browser has built-in VPN?
- What security measures does Microsoft Edge have?
- Unique features Opera GX offer for gaming?
- What are the security features in Opera GX?
- What is hardware acceleration in browser?
- Which browser is most optimized?
- Which browser is compatible with Chromebook?
- What is reading mode in Microsoft Edge?
- What are the accessibility features in chrome?
- What are the main features of Microsoft Edge?
- Which browser support syncing open tabs between devices?
Can you change the default language in Safari?
Yes , you can change the default language in Safari
If you are using Mac or iOS devices then Safari gives you the option to change the default language in Safari Browser.
- On Mac, you need to go to System Preferences > Language & Region and drag English to the top of the list.
- On iOS, you need to go to Settings > General > Language & Region and select English as the iPhone/iPad language.
Please Login to comment...
Similar reads.
- Web Browsers-QnA
- Web Browsers
- What are Tiktok AI Avatars?
- Poe Introduces A Price-per-message Revenue Model For AI Bot Creators
- Truecaller For Web Now Available For Android Users In India
- Google Introduces New AI-powered Vids App
- 30 OOPs Interview Questions and Answers (2024)
Improve your Coding Skills with Practice
What kind of Experience do you want to share?
How to change macOS Safari default language
If you want to change the default language of the macOS Safari web browser , you can follow the below steps,
- Close Safari ,
- Now go to Apple Menu: System Preferences... ,
- Click on Language & Region ,
- Click on + sign to add new Region ,
- Select a prefered language,
- Click on Add ,
- You will see a prompt based on what you select: Would you like to use English (US) as your primary language? : When changing your primary language, some applications may not use the new language until your computer is restarted.
- You may have to restart the system to apply the changes.

- How to show line numbers in Nano on Mac
- How to install Jupyter Notebook on macOS Sonoma
- How to Disable Remote Management using Mac Terminal
- Test internet speed using macOS Terminal command
- Docker Desktop needs privileged access macOS
- Google Search Hot Trends Screensaver for Mac OS X
- How to do calculations in Mac Terminal
- How to make TextEdit the default text Editor on Mac
- How to Show Full Website Address on Safari for Mac (Ventura/Sonoma)
- The Zsh Shell - Mac Tutorial
- Opening mac Terminal
- How to change the name of your Mac running on macOS Ventura 13
- How to find the Battery Cycle Count on macOS Ventura
- How to set an emoji as Zsh terminal prompt in macOS
- How to access Trash Folder using Mac Terminal Command
- macOS Ventura XCode Command Line Tools Installation
- Hide Bluetooth icon on Mac Menu Bar macOS Ventura 13
- How to run .sh file in Mac Terminal
- Terminal Command to get the list of available shells in macOS
- How to see Storage Information on macOS Ventura
- How to Go To /usr/local/bin on Mac Terminal?
- How to do screen recording on Mac
- How to Find File and Directory Size in Mac Terminal
- Open .bash_profile File in TextEdit using Terminal
- Remove Now Playing icon from macOS Big Sur Menu Bar
- How to Clear Mac Terminal History - MacOS
- Audio Video Network protocols supported by Android OS Devices - Android
- The Zsh Shell - Mac Tutorial - MacOS
- Channel 50 SMSes received every few minutes Android Phones - Android
- Fix - Error:Invalid Gradle JDK configuration found (Android Studio) - Gradle
- ChatGPT Outage: Hmm...something seems to have gone wrong. Maybe try me again in a little bit. - HowTos
- Setup synonyms or alias or thesaurus in SharePoint - SharePoint
- How To Remove Only Conditional Formatting in Excel - Microsoft
Safari Browser: to change the language
- Apr 14, 2024
The language in Apple's own Browser Safari, only in a roundabout way change. You need to adjust the language settings for the entire System. We will show how this works.
Safari on Mac: to change the language
Within Safari, there is no Option, fit the language. Instead, the Browser takes over the language settings of the operating system. If necessary, you can adjust the language on your Mac but.
- First, open the system preferences on your Mac. The works, for example, by clicking on the Apple Logo in the top left > "system settings...".
- Select "Language & Region".
- In the field "Preferred languages", you go on the Plus icon and add the language in which you want Safari to use.
- You will see a query of whether you want the selected language as the primary language of use. You go here on the blue Button "use".
- In order to apply the primary language on the entire System, you must now restart your Mac new.
- You open Safari after the restart, you need to change the language.

Language in Safari on the iPhone customize
On iOS devices such as the iPhone or iPad, you also need to set the system language to use Safari in another language.
- Go to the system settings.
- Go to "General" > "language and Region".
- At the top, touch "iPhone/iPad-languages" and select from the list the desired language.
- You go to the top right on "Done" and confirm the query.
- After a short wait, an iOS conversion of the device to the new language, and you can also use Safari in this language.
- Photography
- Household & Living
YOU MAY ALSO LIKE

Offline iOS games: The 5 best Games
- Tue 02, 2024

Apple Earpods or AirPods clean - so it goes
- Sat 06, 2024
LEAVE A COMMENT
Recent posts.

Swine Fortune: Exploring Piggy Bank Bonuses in Slot Games
Mon 15, 2024.

Crafting Immersive Worlds: The Art of Theme Development in Online Slot Games

Navigating the Wilderness: Strategic Approaches to Online Slots Amidst Emergencies

Understanding Licensing Requirements for Online Casino Gamblers
Subscribe to our newsletter to get notification about new updates, information, etc..
Safari User Guide
- Change your homepage
- Import bookmarks, history, and passwords
- Make Safari your default web browser
- Go to websites
- Find what you’re looking for
- Bookmark webpages that you want to revisit
- See your favorite websites
- Use tabs for webpages
- Pin frequently visited websites
- Play web videos
- Mute audio in tabs
- Pay with Apple Pay
- Autofill credit card info
- Autofill contact info
- Keep a Reading List
- Hide ads when reading articles
- Translate a webpage
- Download items from the web
- Share or post webpages
- Add passes to Wallet
- Save part or all of a webpage
- Print or create a PDF of a webpage
- Customize a start page
- Customize the Safari window
- Customize settings per website
- Zoom in on webpages
- Get extensions
- Manage cookies and website data
- Block pop-ups
- Clear your browsing history
- Browse privately
- Autofill user name and password info
- Prevent cross-site tracking
- View a Privacy Report
- Change Safari preferences
- Keyboard and other shortcuts
- Troubleshooting
Change preferences in Safari on Mac
Use Safari preferences to make browsing the internet work best for you.
Open Safari for me
General : Change your homepage, and choose what to see when you open a window or tab, how long to keep your browsing history, which bookmarks to show in Favorites view, and choose where to save downloads and how long to keep them.
Tabs : Choose when to open pages in tabs, choose to move tabs into the toolbar, select to use keyboard shortcuts, and select to show website icons in tabs.
AutoFill : Select to automatically fill previously saved contact information on forms, automatically enter previously saved user names and passwords when revisiting websites, and automatically enter previously saved credit card information on webpages.
Passwords : View, add, change, remove, and share the user names and passwords you’ve saved for websites.
Search : Choose the search engine you want to use when searching the web in Safari, and select how to use the Smart Search field to help with searches.
Security : Turn on warnings when you visit a suspected phishing website, and allow websites to use JavaScript.
Privacy : Prevent third-party content providers from tracking you across websites, block cookies from being stored on your Mac, remove some or all cookies that are stored on your Mac, allow websites to check if you have Apple Pay enabled, and allow Apple websites and apps to check if you have Apple Card on your Mac.
Websites : For individual websites, choose to block ads, prevent videos from playing, block pop-ups, and more.
Extensions : Add custom controls, change the appearance of web content, and more by installing Safari extensions from the Mac App Store.
Advanced : Show full website addresses in the Smart Search field, set a minimum font size for webpages, automatically save articles for offline reading, access tools for developing websites through the Develop menu, and more.
How to Make English the Default Language Using Safari
- Small Business
- Business Communications & Etiquette
- Presentations
- ')" data-event="social share" data-info="Pinterest" aria-label="Share on Pinterest">
- ')" data-event="social share" data-info="Reddit" aria-label="Share on Reddit">
- ')" data-event="social share" data-info="Flipboard" aria-label="Share on Flipboard">
Can I Input Chinese on an iPad?
How to make letters in different languages on a keyboard, how to connect an iphone to a pc if it doesn't pop up.
- How to Switch a Keyboard Back to English
- How to Change the Language on a PayPal Account
Some Web pages are available in a variety of languages and are displayed in the language you have set as your browser default. Configuring your Safari preferences so English is the default language ensures that content is consistently displayed in English, even if the page is written in another language. Language settings -- which determine languages for all apps, not just for Safari -- are in the System Preferences menu on your Mac and the Settings app on your iOS device.
Changing Language Settings on Mac OS X
Launch System Preferences from your Dock or Apple menu and then click "Language & Region." Ensure that "English" is present and listed as the "Primary" language at the top of the list on the left. If it is not, click "+" and add it, then drag it to the top of the list. Close your System Preferences window once your language is set. If Safari was open while you made the changes, quit it and then open it again to reset the browser to your new preferences.
Changing Language Settings on iOS
Launch the Settings app, tap "General" and then "International." On the next screen, verify that "English" is displayed in gray next to the "Languages" header. If not, tap "Languages" and select "English" from the list of available language options. Your iOS device will return to the Home screen after a few moments and display the language you selected. You can launch Safari from here to verify Web pages are displaying in English.
- Apple: Safari 6 (OS X Mountain Lion) -- Specify Your Preferred Language for Web Pages
- Apple: iOS -- How to Change the Language When It's Set to One You Don't Understand
- MacWorld: Get to Know OS X Mavericks -- System Preferences
Based in Tampa, Fla., Danielle Fernandez been writing, editing and illustrating all things technology, lifestyle and education since 1999. Her work has appeared in the Tampa Tribune, Working Mother magazine, and a variety of technical publications, including BICSI's "Telecommunications Distribution Methods Manual." Fernandez holds a bachelor's degree in English from the University of South Florida.
Related Articles
How to use a hiragana keyboard, how to change ipad language, how to change language in startup on windows 7, how to get siri for ipad, how to turn on international keyboard on a sony laptop, how to switch the keyboard back to english & arabic, how to switch language on a dell laptop, how to install a language for openoffice, how to write kanji on a keyboard, most popular.
- 1 How to Use a Hiragana Keyboard
- 2 How to Change iPad Language
- 3 How to Change Language in Startup on Windows 7
- 4 How to Get Siri for iPad
- a. Send us an email
- b. Anonymous form
- Buyer's Guide
- Upcoming Products
- Tips / Contact Us
- Podcast Instagram Facebook Twitter Mastodon YouTube Notifications RSS Newsletter
Translate Webpages in Safari on iPhone and iPad
On iPhone and iPad , Apple includes a Translate app that can translate several different languages in real-time, and Safari has integrated translation capabilities, too.
At the time of writing, supported languages include English, Spanish, French, Italian, German, Russian, Portuguese, Japanese, Chinese, Korean, Ukrainian, Polish, Arabic, Dutch, Indonesian, Thai, Turkish, and Vietnamese.
How Translate a Webpage in Safari

Add More Language Options to Safari Webpage Translation
You can translate web content into additional languages if you add them to your preferred languages list. The following steps show you how it's done.
- Launch the Settings app on your iPhone and iPad.
- Tap General -> Language & Region .

- Select a language from the list.
- Tap your preferred language to keep the current language that the system is using, thereby confirming this selection as an additional Webpage Translation language option.
After following the above steps, the next time you visit a compatible webpage in another language you'll see your selected languages available as additional translation options.
Get weekly top MacRumors stories in your inbox.
Popular Stories

iOS 18 Will Add These New Features to Your iPhone

Game Boy Emulator for iPhone Now Available in App Store Following Rule Change [Removed]

Top Stories: M4 Mac Roadmap Leaked, New iPads in Second Week of May, and More

Best Buy Opens Up Sitewide Sale With Record Low Prices on M3 MacBook Air, iPad, and Much More

iPhone 16 Plus Rumored to Come in These 7 Colors

Macs to Get AI-Focused M4 Chips Starting in Late 2024
Next article.

Our comprehensive guide highlighting every major new addition in iOS 17, plus how-tos that walk you through using the new features.

App Store changes for the EU, new emoji, Podcasts transcripts, and more.

Get the most out your iPhone 15 with our complete guide to all the new features.
A deep dive into new features in macOS Sonoma, big and small.

Revamped models with OLED displays, M3 chip, and redesigned Magic Keyboard accessory.

Updated 10.9-inch model and new 12.9-inch model, M2 chip expected.

Apple's annual Worldwide Developers Conference will kick off with a keynote on June 10.

Expected to see new AI-focused features and more. Preview coming at WWDC in June with public release in September.
Other Stories

6 hours ago by MacRumors Staff

3 days ago by MacRumors Staff

3 days ago by Tim Hardwick

4 days ago by MacRumors Staff
How To Update Safari On Your Mac: A Step-By-Step Guide

It's no secret that Safari is the go-to browser for many Mac users . Sure, other browsers like Google Chrome have their advantages , especially if you're deep into Google's ecosystem, but using third-party browsers other than Safari on your Mac has downsides. Safari is optimized for macOS and integrates seamlessly with your other Apple devices like your iPhone and iPad by using Handoff.
If you've been a part of the Apple ecosystem for a while now, you're probably aware of Handoff, a very convenient Apple feature that allows you to begin a task on one of your devices, and pick up where you left off on another device.
Safari is no exception — Handoff allows you to start reading or watching something on your iPhone or iPad, and pick up where you left off on your Mac. This not only saves you the time of looking for a webpage but also makes jumping from one task to another extremely simple. Like any application, keeping Safari up to date is extremely important. Not only do new Safari updates come with newer features, but Apple also frequently rolls out updates to address security threats.
Now that you know it is a good idea to install Safari updates whenever they're rolled out, the real question is: How do you update Safari? Strangely enough, if your Apple device is updated to macOS Ventura or later , the only way to update Safari is to update your Mac itself.
How to update macOS
While you can't update Safari without updating macOS, you can check which version of Safari you're currently using. To do so, open the Safari app on your Mac and click on Safari from the menu bar. Now, select About Safari from the dropdown menu. Once you do so, a dialogue box will appear. The version of Safari you're currently using should be mentioned below the "Safari" text.
If you'd like to update Safari, follow the steps below to update macOS:
Click the Apple menu in the menu bar and select System Settings from the dropdown menu.
Select General from the sidebar on the left.
Click Software Update and wait for a few seconds.
Now, if a new update is available, click Update Now next to Updates Available.
If a Safari-specific update is available, you can click More Info and select Safari from the "Updates are available for your Mac" section.
To avoid having to update macOS manually to update Safari, we recommend enabling automatic updates. This way, you won't miss out on new features and can rest easy, knowing that Apple has fixed any known security threats . To do so, click the info icon next to Automatic updates and toggle on the switch next to Download new updates when available, Install macOS updates, and Install Security Responses and system files.
Google Chrome vs. Apple Safari: Which browser is better on Mac
Picking an ideal web browser is an essential part of your workflow
Key Takeaways
- Cross-platform availability can make the switch from Chrome to Safari seamless, with data and preferences intact across devices.
- Safari's user interface impresses with a clean layout, while Google Chrome offers more customization options in its Material You makeover.
- Safari's memory usage advantage over Chrome on Mac with 8GB of RAM is a key factor to consider if performance is a concern.
As the default web browser on Mac, Safari has received a steady stream of updates over the last few years. Apple releases new builds for all its apps and services with yearly OS updates. While we applaud Safari improvements on Mac, the burning question remains the same: is it good enough to prevent users from switching to Chrome? How does it compare to everyone’s favorite web browser out there? Read our comparison post before you change the default browser on your Mac , iPhone, or iPad.
Google Chrome vs Microsoft Edge: Which browser is better?
Cross-platform availability.
Before we pit Safari against Chrome, let’s check their cross-platform availability first. After all, you won’t want to leave your web bookmarks, history, quick links, and other preferences behind when you switch to another platform.
As expected, alternating is a breeze with Chrome, since the browser is available on most smart platforms you can think of. Whether you use Mac, Windows, iPhone, Android, or ChromeOS, you are ready to surf the web with all of your personal data and a familiar interface. In contrast, Apple’s walled garden approach has limited Safari’s availability to the company’s devices only.
User interface and theme
Being the first-party app on macOS, Apple has nailed the esthetics of Safari. Let’s start with the homepage. It carries all the essential elements you need when you fire up the browser. You can check your favorites, recently closed tabs, reading list, privacy report, Siri suggestions, and even apply minimal wallpaper to the background. If it’s too busy for you, customize the entire homepage from the bottom menu. Overall, it’s not as busy as Microsoft Edge and doesn’t look as bland as Chrome’s homepage. Safari also offers a cool translucent effect at the top when you scroll through webpages. Unlike Chrome, there is no theme store to change the look and feel with a single click.
Google Chrome recently received a neat Material You makeover on the web. While Material You on Chrome matches the rest of Google services, it does look slightly out of place with other Mac apps.
Tab management
Do you often have dozens of tabs open during long research sessions? Managing and switching between them can be cumbersome after a while. Here’s where Chrome and Safari’s tab groups come into play, where you can organize relevant tabs under different groups. Safari does have a couple of additional tricks up its sleeve though.
When you create several tab groups on Safari, you can check the entire list from the vertical sidebar. Safari also lets you create different profiles to keep your browsing data separate, such as tabs, history, cookies and website data.
You can assign a different symbol, color, and separate extension list for Work, School, or Personal profiles. There is also an option to share a tab group with your iMessage contacts.
Chrome vs. Safari: Features
Let’s compare Safari and Chrome based on extension support, reading mode, and other novelty features.
Reading mode
Apple offers a seamless reading mode on Safari that you can customize with different backgrounds, fonts, and sizes. In comparison, Chrome’s reader mode leaves a lot to be desired. It opens the article in a sidebar and doesn’t necessarily hide all the distracting elements. Safari wins hands down here.
While Safari covers the essential extensions from top VPNs, password managers, and other third-party developers like Grammarly, Pocket, Raindrop, and Notion, the overall collection is still slim compared to Google Chrome.
If your workflow depends on dozens of extensions, think twice before switching from Chrome to Safari.
Seamless sharing
Shared with You is a niche Safari feature that is tightly backed in iMessage. Links shared with you in the Messages app automatically appear in the Share with You section in Safari. It is only useful for those who frequently exchange weblinks in iMessage conversations.
Instant conversion and translation
Both Safari and Chrome support instant currency conversion and basic math equations. For example, you can quickly get a final number when you type $1000 to INR or 45*3 in the address bar. Chrome goes a step further with Google Translate integration - you can simply type Hello in French and get results instantly.
Chrome vs. Safari: Password management
Both browsers offer basic password management to save your login credentials. Safari uses iCloud Passwords that can sync with all your devices. It supports autofill, Passkeys, verification codes, notes, and more.
Google Password Manager also supports notes and checkup. Like security recommendations on Safari, Chrome Password Manager’s checkup tool shows your leaked, reused, and weak passwords.
Privacy and security
The built-in standard protection on Chrome warns you of harmful files, extensions, and corrupt sites. Safari is a step ahead with iCloud Private Relay. It’s a privacy add-on for Apple One and iCloud+ subscribers to hide your IP address from websites you visit. The option is enabled by default and works silently in the background. When you visit a website in Safari, no one, including Apple, can see who you are or which sites you are visiting. It’s not as extreme as a VPN connection and doesn’t break your browsing setup. You can check out our dedicated guide if you'd like to learn more about iCloud Private Relay .
Safari also offers a privacy report that shows the number of trackers it has blocked from profiling you in the last 30 days.
Performance
When it comes to performance, you won’t find any major differences between Chrome and Safari on a high-speed internet connection. However, if your Mac has a slow network connection, you may notice that Safari can load webpages faster than Chrome, something that Avast confirmed in their dedicated speed comparison for major browsers .
While we are on the topic of performance, we should also factor in compatibility. Since Google Chrome (built on Chromium) is the most popular web browser out there, developers test and optimize their offerings for it. You may run into performance issues with specific websites (like Photopea, a web-based Photoshop alternative) on Safari.
Memory usage
Safari is a relatively lightweight web browser compared to Chrome. This is expected, since Chrome has been infamous for high RAM usage. We opened a couple of identical tabs on Chrome and Safari and checked their memory usage from the Activity Monitor. We will let the screenshot below do the talking.
Mac users with 8GB of RAM will surely appreciate Safari’s approach to memory usage.
Chrome vs. Safari: Mobile experience
Both Apple and Google have done a solid job with their iOS apps. They use a bottom bar with all the essential options. You can also use Chrome password manager as the default method to autofill login info. Chrome’s default Discover menu with news articles may irritate some users. Interestingly, Google has done a better job than Apple when it comes to widgets, as Chrome offers more widget options than Safari. Most notably, Chrome offers lock screen widgets which are missing from Safari.
Browse the web in style
Are you still unsure about the pros and cons of Chrome and Safari? Allow us to simplify the situation. Safari shines with better UI, low memory usage, and integration with other Apple apps. Chrome strikes back with cross-platform availability, rich extension support, and Google Translate integration. If you notice performance glitches while browsing the web, check CPU usage on Mac .

Change the language Office uses in its menus and proofing tools
There are three areas in Microsoft Office where you may want to change the language.
Editing or Authoring is the language in which you write and edit your content. You may need to install an associated keyboard for this language via Windows settings.
Proofing tools are spelling and grammar check. Typically, you'll set this language to be the same as the editing or authoring language.
Display language is for all the buttons, menus, and controls in Office.
You can set the display and editing or authoring languages independently from each other. For example, you may want the display language to be English, but the document you're writing or editing is in French.
Note: If you want to completely change Office, permanently, to a different language you'll get the best results if you first set that to be your default display language in Windows as well. For more information on doing that see this article for Windows 10 or this article for Windows 7 or 8 .
Configure Office language for newer Office versions
Tip: To prevent having to manually configure the proofing language with each new document in Word, switch on the option to detect the language you're writing. On the Review tab, go to Language . Choose Language > Set Proofing Language , and then select Detect language automatically .
Note: If you're using Office 365 and the commands available are different from what's shown here, expand the Configure Office language for Office 2016 or earlier section and follow the instructions there.
In Office, the language options are in the Office Language Preferences dialog box. The display and authoring languages can be set independently. For example, you could have everything match the language of your operating system, or you could use a combination of languages for your operating system, authoring, and display.
To configure the display language:
Within any Office application, select File > Options > Language .

Select the language you want, and then select Set as Preferred . If you want your Office display language to match the display language you have for Windows, select Match Microsoft Windows [Language] .
If the language you want is not listed, select Install additional display languages from Office.com and follow the instructions there.
To configure the authoring and proofing language:

If the language you want appears in the list, select it, and then select Set as Preferred . If the language you want is not listed, select Add a language , and then follow the instructions in the Add an authoring language dialog box.
If the language accessory pack includes proofing tools for that language, its status appears as Proofing installed . If the status is Proofing available , click the link to install the proofing tools.
Configure Office language for Office 2016 or earlier
In Office, the language options are in the Set the Office Language Preferences dialog box. The display and help languages can be set independently. For example, you could have everything match the language of your operating system, or you could use a combination of languages for your operating system, editing, display, and Help.
To configure the editing and proofing language:

If your language already appears among the editing languages press Set as Default . Otherwise select the language from the Add additional editing languages list then press the Add button. The new language will appear in the list of editing languages.
If the Keyboard Layout shows as Enabled , you're all set for editing. If it says Not enabled in the Keyboard Layout column follow these steps to enable it:
Click the Not enabled link.
In the Add Languages dialog box, press Add a language , select your language in the list, and then press Add .
Close the Add Languages dialog box. Your language should display as Enabled under Keyboard Layout in the Choose Editing Languages section.
Under Proofing , if your language shows as Installed , you're ready to go. Otherwise press Not installed and Office will take you to a page where you can download the necessary Language Accessory Pack for that language. Follow the instructions on that page to download and install the pack, then come back to the Office Language Preferences dialog box to confirm that it's now installed.
To configure the display and help languages:

If you've already set your Microsoft Windows display language to be the language you want Office to display in you can leave this set to Match Microsoft Windows . Otherwise select your language and press Set as Default to move that language to the top of the list. The language that is listed first is the one Office will use for its menus and buttons. Please note, if your Windows display language is not also installed in Office, your Office display language will appear in the next language in the display list.
Repeat to configure your help language if you want to.
If the language you want isn't available...
Download the proper Language Accessory Pack for the language you want to use from this page: Language Accessory Pack for Office . The Language Accessory Pack contains the display and proofing tools for most languages, but you can still choose to have your display in one language and editing or authoring in another.
Microsoft Office for Mac already contains all of the available languages, so there's nothing to download. To configure Office to use those languages follow these steps:

User Interface - The display language for Office for Mac uses the primary language set for operating system. To change the display language for Office for Mac, you need to set a different primary language for your operating system:
On the Apple menu, choose System Preferences > Language & Region
In the Preferred Languages list, set the desired language to be your primary language by dragging it to the top of the list.
If the language you want doesn't appear just press the + sign and add it.
You'll have to restart your Office application for this change to take effect.
Editing - Setting the editing language depends on the program you're working in.
Word and PowerPoint
To change your editing language in Word for Mac or PowerPoint for Mac, go to Tools > Language , select your language, and select OK .
To make it the default for all new documents select Default .
Tip: To prevent having to manually configure the proofing language with each new document in Word, switch on the option to detect the language you're writing. On the Review tab, go to Language , and then select Detect language automatically .
To change your editing language in Excel for Mac, go to Tools > Language , select your language, and select OK .
To change your editing language in OneNote for Mac, go to Tools > Set Proofing Language , select your language, and select OK .
User Interface & Editing - The display and keyboard languages for Office for Android is the same as the language that the device is set to. You can configure those by going to Settings > Language and Input .
Proofing - On Android you can change the proofing language in Word.

In Word on your Android tablet go to the Review tab and you can select your proofing language from the ribbon.
User Interface & Editing - The display and keyboard languages for Office for iOS are the same as the language that the device is set to. See Change the language on your iPhone or iPad for instructions.
Proofing - On iOS you can change the proofing language in Word.

User Interface & Editing - The display and keyboard languages for Office for Windows Mobile are the same as the language that Windows is set to.
Change Language Preferences in Windows 10
Add or Change Languages in Windows 7 or 8
Proofing - On Windows Mobile you can change the proofing language in Word.
In your document, on the Review tab, you can select the proofing language from the ribbon.
User Interface - The best way to set the display language in Office for the web is to set the language in the host where your documents live. That's usually OneDrive, SharePoint, Dropbox, etc. When you open a document from one of those sites, Office Online will use the display language you have that service set to.
Tip: If you're using a personal Microsoft account, you can choose your preferred display language in your profile settings at https://account.microsoft.com/profile .
Change views on OneDrive (Scroll to the bottom for language settings)
Set your language in SharePoint . If you're using SharePoint, and want a language other than your system language, you'll want to be sure to select a SharePoint language.
Change your language settings in Dropbox
To set the proofing tools language in your app go to the Review tab > Spelling & Grammar > Set Proofing Language . In OneNote for the web this is found on the Home tab.

Things to know
This change will only take effect from this point in the document forward.
To apply this change to any existing text in the document, press Ctrl+A to select all of the existing text, then set the proofing language with the steps above.
This change only affects the current document. For subsequent documents you'll need to repeat these steps.
Set up or change the languages used to check spelling and grammar
What languages are supported in Office?
Translate text into a different language
Remove languages and fonts you don't use
Right-to-left language features

Need more help?
Want more options.
Explore subscription benefits, browse training courses, learn how to secure your device, and more.

Microsoft 365 subscription benefits

Microsoft 365 training

Microsoft security

Accessibility center
Communities help you ask and answer questions, give feedback, and hear from experts with rich knowledge.

Ask the Microsoft Community

Microsoft Tech Community

Windows Insiders
Microsoft 365 Insiders
Find solutions to common problems or get help from a support agent.

Online support
Was this information helpful?
Thank you for your feedback.

iPhone Users Can Use Chrome Or Firefox As Default Browser On iOS: Here's How
Published By : S Aadeetya
Trending Desk
Last Updated: April 15, 2024, 09:50 IST
Delhi, India
iOS now lets you change the default web browser from Safari to others
Apple has been forced to make a lot of changes in iOS after pressure from the EU and one of them includes the ability to change their default browsers
Most smartphones today come equipped with their pre-installed web browser, typically provided by the device manufacturer. On Android devices, Google Chrome often serves as the default browser, whereas iPhones, developed by Apple, feature their proprietary browser known as Safari. Safari enables users to browse the internet and offers a distinct set of features compared to alternatives like Google Chrome.
For iPhone users, links opened from Gmail or received via social media apps such as WhatsApp, Twitter, Facebook or Instagram will automatically launch in Safari. However, users have the option to change their default browser if they prefer an alternative to Safari.
How to Change the Default Browser on iOS
– Users will first have to open the settings option on their iPhone or iPad.
– The next step is to scroll through the applications of web browsers like Google Chrome, Opera, Microsoft Edge, etc.
– Click on the preferred browser, and the setting options of the application will appear.
– Once the setting option of the browser application opens, users can switch over to their preferred browser from their default browser, Safari.
– Tap and choose the browser of your preference. It's done. Users can now enjoy using their preferred web browser other than Safari.
Now that an iOS user has changed their default web browser from Safari to their preferred one, whenever they open a link from any other application, it will directly open in the newly selected browser.
In the new iOS 17, Apple will show a list of the most popular browsers in the user's region. Users can also select their default browser at that time. The user can select their preferred web browser from that list and download that application from the app store. Once it is downloaded, it will be set as the default browser and users will not have to open settings anymore.
- Safari web browser
Select Product
2204 LTSR (initial release)
Known issues
New UI (Technical Preview)
Install, set up, upgrade, and uninstall
Plan your StoreFront deployment
User access options
System requirements
Install StoreFront
Citrix Customer Experience Improvement Program
Citrix Analytics
Secure StoreFront with HTTPS
Secure your StoreFront deployment
Configure email based account discovery
Create a new deployment
Join an existing server group
Upgrade StoreFront
Reset a server to factory defaults
Uninstall StoreFront
Configure authentication and delegation
Configure authentication
Smart card authentication
Domain pass-through authentication
Gateway pass-through authentication
SAML authentication
User name and password authentication
Federated Authentication Service configuration
Configure and manage stores
Create a store
Configure a store
Remove a store
Export store provisioning files for users
Advertise and hide stores to users
Configure Kerberos Delegation
Manage the resources made available in stores
Manage remote access to stores through Citrix Gateway
Certificate Revocation List (CRL) checking
Configure two StoreFront stores to share a common subscription datastore
Manage subscription data for a store
Store subscription data using Microsoft SQL Server
Enable or disable favorites
Citrix Virtual Apps and Desktops configuration
Advanced store settings
Optimal HDX Routing
Subscription synchronization
Configure session settings
Ica file signing
Citrix Workspace app configuration
Manage a website
Create a website
Configure website
Category settings
Customize appearance
Featured app groups
Authentication methods
Website shortcuts
Deploy Citrix Workspace app
Session settings
Workspace control
Client interface settings
App Protection
Remove website
Configure Citrix Workspace app website
Configure server groups
Integrate with Citrix Gateway and NetScaler ADC
Configure Citrix Gateways
Import a Citrix Gateway
Load balancing with NetScaler ADC
Configure Citrix Gateway and StoreFront for Delegated Forms Authentication (DFA)
Authenticate using different domains
Configure beacon points
Create a single FQDN used internally and externally
Export and import the StoreFront configuration
End user guide
StoreFront SDK
Troubleshoot StoreFront
Third party notices
Document History
This content has been machine translated dynamically.
Dieser Inhalt ist eine maschinelle Übersetzung, die dynamisch erstellt wurde. (Haftungsausschluss)
Cet article a été traduit automatiquement de manière dynamique. (Clause de non responsabilité)
Este artículo lo ha traducido una máquina de forma dinámica. (Aviso legal)
此内容已经过机器动态翻译。 放弃
このコンテンツは動的に機械翻訳されています。 免責事項
이 콘텐츠는 동적으로 기계 번역되었습니다. 책임 부인
Este texto foi traduzido automaticamente. (Aviso legal)
Questo contenuto è stato tradotto dinamicamente con traduzione automatica. (Esclusione di responsabilità))
This article has been machine translated.
Dieser Artikel wurde maschinell übersetzt. (Haftungsausschluss)
Ce article a été traduit automatiquement. (Clause de non responsabilité)
Este artículo ha sido traducido automáticamente. (Aviso legal)
この記事は機械翻訳されています. 免責事項
이 기사는 기계 번역되었습니다. 책임 부인
Este artigo foi traduzido automaticamente. (Aviso legal)
这篇文章已经过机器翻译. 放弃
Questo articolo è stato tradotto automaticamente. (Esclusione di responsabilità))
Translation failed!
Three different methods are available for users to access StoreFront stores.
- Citrix Workspace app installed locally - Users with compatible versions of Citrix Workspace app can access StoreFront stores within the Citrix Workspace app user interface. This provides the best user experience and the greatest functionality.
- Citrix Workspace app for HTML5 - Users with compatible web browsers can access StoreFront stores by browsing to the store’s website. By default, users also require a compatible version of Citrix Workspace app to access their desktops and applications, known as hybrid launch . However, you can configure your website to enable users to access their resources through their browser without installing Citrix Workspace app.
- XenApp Services URLs - Users who have legacy Citrix clients that cannot be upgraded, can access stores using the XenApp Services URL for the store. When you create a new store, the XenApp Services URL is enabled by default.
- Citrix Workspace app installed locally
Accessing stores from the locally installed Citrix Workspace app provides the best user experience. For the Citrix Workspace app versions that can be used to access stores in this way, see System Requirements .
Citrix Workspace app uses internal and external URLs as beacon points. By attempting to contact these beacon points, Citrix Workspace app can determine whether users are connected to local or public networks. When a user accesses a desktop or application, the location information is passed to the server providing the resource so that appropriate connection details can be returned to Citrix Workspace app. This enables Citrix Workspace app to ensure that users are not prompted to log on again when they access a desktop or application. For more information, see Configure beacon points .
Add Store to Workspace App
After installation, Citrix Workspace app must be configured with connection details for the stores providing users’ desktops and applications. You can make the configuration process easier for your users by providing them with the required information in one of the following ways.
Important: By default, Citrix Workspace app requires HTTPS connections to stores. If StoreFront is not configured for HTTPS, users must carry out additional configuration steps to use HTTP connections. Citrix strongly recommends that you do not enable unsecured user connections to StoreFront in a production environment. For more information, see Store configuration parameters in the Citrix Workspace app for Windows documentation.
Manual configuration
Users can connect Citrix Workspace app to their store by entering the store URLs into Citrix Workspace app. For more information, see the Citrix Workspace app documentation.
Provisioning files
You can provide users with provisioning files containing connection details for their stores. After installing Citrix Workspace app, users open the .cr file to automatically configure accounts for the stores. By default, the website offers users a provisioning file for the single store for which the site is configured. You could instruct your users to visit the websites for the stores they want to access and download provisioning files from those sites. Alternatively, for a greater level of control, you can use the Citrix StoreFront management console to generate provisioning files containing connection details for one or more stores. You can then distribute these files to the appropriate users. For more information, see Export store provisioning files for users .
Auto-generated setup URLs
For users running macOS, you can use the Citrix Workspace app for Mac Setup URL Generator to create a URL containing connection details for a store. After installing Citrix Workspace app, users click on the URL to configure an account for the store automatically. Enter details of your deployment into the tool and generate a URL that you can distribute to your users.
Email-based account discovery
With email-based account discovery, instead of needing to know the access details for their stores, users enter their email addresses during the Citrix Workspace app initial configuration process. For details of how to set this up see Email based account discovery .
Global App Config Service
Use the Global App Config Service to configure Citrix Workspace app for your StoreFront stores. See Configure settings for on-premises stores .
- Citrix Workspace app for HTML5
As an alternative to using a locally installed Workspace app, users can access their store through a web browser with Workspace app for HTML5. When users come to launch their resources there are two possibilities.
Resources launch within locally installed Citrix Workspace app. This is known as a hybrid launch. This gives users the best experience as it can take advantage of full operating system integration. For more details see Hybrid launch
Resources launch within the browser. This makes it possible for users to access resources without needing to install any software locally.
The default configuration is to require that Citrix Workspace app is installed locally for a hybrid launch. You can change the configuration to either always launch resources in the browser or to give the user the choice. See Deploy Workspace app .
If the admin selected Use Receiver for HTML5 if local Receiver is unavailable then when the user first opens the store website in their browser, the user has the option to click Use Light Version to launch resources within their web browser.
Requirements for opening resources in your browser
For users on the internal network, access through Citrix Workspace app for HTML5 to resources provided by Citrix Virtual Apps and Desktops is disabled by default. To enable local access to desktops and applications using Citrix Workspace app for HTML5, enable the ICA WebSockets connections policy on your Citrix Virtual Apps and Desktops servers. Citrix Virtual Apps and Desktops uses port 8008 for Citrix Workspace app for HTML5 connections. Ensure your firewalls and other network devices permit access to this port. For more information, see WebSockets policy settings .
For Citrix Virtual Apps and Desktops resource launches to succeed, configure the TLS connections to the VDAs that host apps and desktops. Remote connections through a Citrix Gateway can launch resources using Citrix Workspace app for HTML5 without configuring TLS connections to the VDA.
- Hybrid Launch
When users first open Citrix Workspace for HTML5 through their browser but launch apps within the locally installed Citrix Workspace app this is known as hybrid launch. There are a number of ways in which the web site can communicate with the locally installed Workspace app to launch resources.
Citrix Workspace launcher
When the user first goes to a StoreFront web site with a supported operating system and browser, Citrix Workspace app for HTML5 attempts to invoke the Citrix Workspace Launcher. If a supported version of Citrix Workspace app is installed then the app notifies StoreFront. Citrix Workspace app for HTML5 remembers this and when it launches an app it uses Citrix Workspace Launcher.
The store web site invokes Citrix Workspace Launcher on Windows, Mac and Linux with when using the following browsers:
- Firefox 52 or higher
- Chrome 42 or higher
- Safari 12 or higher
- Edge 25 or higher
Citrix Workspace Launcher requires the following minimum versions of Citrix Receiver or Citrix Workspace app.
- Receiver for Windows 4.3 or higher
- Receiver for Mac 12.0 or higher
- Workspace app for Linux 2003 or higher
If the Workspace app launcher is not available, or the user does not allow it to open, then it will not be able to detect the locally installed Citrix workspace app. The user has the option to try again, or to click Already Installed , in which case it falls back to launching apps using .ica files. The user can later try again by going to the Settings screen and clicking Change Citrix Workspace app .
If you are using multiple active StoreFront server groups behind a global server load balancer then Citrix Workspace launcher may fail intermittently. To avoid this you must configure your global server load balancer to force the user web session to be persistent to one StoreFront server group for the lifetime of the client detection process, see CTX460312 . Alternatively deploy Citrix Workspace web extensions.
Citrix Workspace web extensions
The Citrix Workspace web extensions are extensions for commonly used web browsers that improve the user experience for detecting the locally installed Citrix Workspace app and launching virtual apps and desktops. Compared to Citrix Workspace launcher, this provides a better user experience and avoids issues with global server load balancers.
To enable the browser extension-based client detection:
- Enable the feature on the StoreFront server.
- Deploy the browser extension on the client devices.
- Deploy Citrix Workspace app for Windows 2303, Mac 2304 or Linux 2302 or higher.
The first time a user goes to a store website on a supported platform, it prompts the user to detect the locally installed Workspace app. It first tries to use the web extension and if this fails then it tries Citrix Workspace Launcher. Existing users who have already completed Workspace app detection can go to Account Settings , click Change Citrix Workspace app to re-detect workspace app.
Important This feature is enabled by default for new installations. However, if you are upgrading from a previous version, you need to enable this feature manually.
This feature is off by default. Administrators can enable this feature using the following PowerShell script on a StoreFront server: Add-STFFeatureState -Name "Citrix.StoreFront.EnableBrowserExtension" -IsEnabled $True .
Internet Explorer
The first time the user opens the store web site in Internet Explorer, it prompts the user to install Citrix Workspace app which includes the Citrix ICA Client Add-on for Internet Explorer. Once the plugin is installed, this is used to launch apps and desktops through the locally installed Citrix Workspace app.
ICA file downloads
If Citrix Workspace app for HTML5 is unable to detect a locally installed Citrix Workspace app by any other means then when a user launches an app or desktop then it downloads a .ica file. The user can open this file with the locally installed Citrix Workspace app.
- Resource shortcuts
You can generate URLs that provide access to desktops and applications available in your store. Embed these links on websites hosted on the internal network to provide users with rapid access to resources. Users click on a link and are redirected to the store website, where they log on if they have not already done so. The store website automatically starts the resource. For more information about generating resource shortcuts, see Website shortcuts .
When you create an application shortcut, ensure that no other applications available from the store have the same name. Shortcuts cannot distinguish between multiple instances of an application with the same name. Similarly, if you make multiple instances of a desktop from a single desktop group available from the store, you cannot create separate shortcuts for each instance. Shortcuts cannot pass command-line parameters to applications.
To create application shortcuts, you configure StoreFront with the URLs of the internal websites that will host the shortcuts. When a user clicks on an application shortcut on a website, StoreFront checks that website against the list of URLs you entered to ensure that the request originates from a trusted website. However, for users connecting through Citrix Gateway, websites hosting shortcuts are not validated because the URLs are not passed to StoreFront. To ensure that remote users can only access application shortcuts on trusted internal websites, configure Citrix Gateway to restrict user access to only those specific sites.
- Customize the user interface
Citrix StoreFront provides a mechanism for customizing the user interface. These apply whether accessing a store through Citrix Workspace app or a web browser. You can customize strings, the cascading style sheet, and the JavaScript files. You can also add a custom pre-logon or post-logon screen, and add language packs. For more information see Customize Appearance .
- XenApp Services URLs
Note: XenApp Services (also known as PNAgent) is deprecated. It is recommended that you use Citrix Workspace app to connect to StoreFront using a Store URL.
Users with older Citrix clients that cannot be upgraded can access stores by configuring their clients with the XenApp Services URL for a store. You can also enable access to your stores through XenApp Services URLs from domain-joined desktop appliances and repurposed PCs running the Citrix Desktop Lock. Domain-joined in this context means devices that are joined to a domain within the Microsoft Active Directory forest containing the StoreFront servers.
StoreFront supports pass-through authentication with proximity cards through Citrix Workspace app to XenApp Services URLs. Citrix Ready partner products use the Citrix Fast Connect API to streamline user logons through Citrix Receiver for Windows or Citrix Workspace app for Windows to connect to stores using the XenApp Services URL. Users authenticate to workstations using proximity cards and are rapidly connected to desktops and applications provided by Citrix Virtual Apps and Desktops. For more information, see the most recent Citrix Workspace for Windows documentation.
When you create a new store, the XenApp Services URL for the store is enabled by default. The XenApp Services URL for a store has the form http[s]://serveraddress/Citrix/storename/PNAgent/config.xml, where serveraddress is the fully qualified domain name of the server or load balancing environment for your StoreFront deployment and storename is the name specified for the store when it was created. This allows Citrix Workspace apps that can only use the PNAgent protocol to connect to Storefront. For the clients that can be used to access stores through XenApp Services URLs, see User device requirements .
Important considerations
XenApp Services URLs are intended to support users who cannot upgrade to Citrix Workspace app and for scenarios where alternative access methods are not available. When you decide whether to use XenApp Services URLs to provide users with access to your stores, consider the following restrictions.
- You cannot modify the XenApp Services URL for a store.
- You cannot modify XenApp Services URL settings by editing the configuration file, config.xml.
- XenApp Services URLs support explicit, domain pass-through, smart card authentication, and pass-through with smart card authentication. Explicit authentication is enabled by default. Only one authentication method can be configured for each XenApp Services URL and only one URL is available per store. If you need to enable multiple authentication methods, you must create separate stores, each with a XenApp Services URL, for each authentication method. Your users must then connect to the appropriate store for their method of authentication. For more information, see XML-based authentication .
- Workspace control is enabled by default for XenApp Services URLs and cannot be configured or disabled.
- User requests to change their passwords are routed to the domain controller directly through the Citrix Virtual Apps and Desktops servers providing desktops and applications for the store, bypassing the StoreFront authentication service.
In this article
This Preview product documentation is Citrix Confidential.
You agree to hold this documentation confidential pursuant to the terms of your Citrix Beta/Tech Preview Agreement.
The development, release and timing of any features or functionality described in the Preview documentation remains at our sole discretion and are subject to change without notice or consultation.
The documentation is for informational purposes only and is not a commitment, promise or legal obligation to deliver any material, code or functionality and should not be relied upon in making Citrix product purchase decisions.
If you do not agree, select I DO NOT AGREE to exit.
Do you want to switch to the website in your browser preferred language?
Edit Article
IMAGES
VIDEO
COMMENTS
Here's how to change the language in Safari on your MacBook: 1. Open Safari and click on the Safari menu item in the top bar. 2. From the drop-down menu, select Preferences. 3. In the window that opens, click on the General tab. 4. Click on the. the drop-down menu next to Language and select the desired language. 5.
On your Mac, use Language & Region settings to set the language you want shown in macOS and apps, and select the formats used to show dates, times, numbers, and more. To change these settings, choose Apple menu > System Settings, click General in the sidebar, then click Language & Region on the right. (You may need to scroll down.) Option.
In the Safari app on your Mac, go to the webpage you want to translate. If the webpage can be translated, the Smart Search field displays the Translate button . Click the Translate button , then choose a language. If you think the translation might need improvement, click the Translate button , then choose Report Translation Issue.
Open System Preferences from the dock at the bottom of the desktop. In the Personal section, click the Language & Text icon. In the menu that appears, drag your preferred language to the top. Click the Apple icon in the upper-left hand corner of the screen and select Log out (username)... Your preferred language is displayed upon signing back ...
Whether you're a language enthusiast, a global traveler, or simply seeking a more comfortable browsing experience, Safari's language customization feature offers a world of possibilities. Step 1: Open Safari. To begin the process of changing the language in Safari, you first need to open the browser. Safari is easily accessible from the dock on ...
In this pop-up, click the "Application" drop-down menu and select the app for which you want to change the language. Next, click the "Language" drop-down menu and select the language that you want the app to use. Finally, click "Add" at the bottom of the pop-up to save your changes. Note: The "Language" drop-down menu only shows the languages ...
Safari will automatically recognize that language, and you'll see "Translation Available" in the URL bar, along with a Translation button; click it. If this is the first time you've used the feature, a pop-up will appear. Click "Enable Translation" to turn on the feature. In the translation menu, select "Translate to English."
Scroll down and click Language. It's in the "Languages" section of options near the bottom of the page. 6. Click Add languages. This link is at the bottom of the "Language" menu. 7. Select a language. Scroll down (if necessary) until you find the language you want to use, then click the language to select it.
Easily change the language of your Safari browser with our step-by-step guide. Watch our tutorial to learn how to switch languages in just a few clicks!Pleas...
Click on the "Apps" category to change the language for individual apps. Now, click on the "+" icon as shown below to add a new app to the list. Select the application you want to localize using the dropdown menu. Next, select your desired language for the chosen app and click on "Add" to save your language setting.
First, change the Language & Region settings for the entire Mac. Here's how: 1. Open System Preferences > Language & Region. Click Language & Region. 2. Make sure that English is set as the primary language on the left side of the pane. English as Primary Language. 3.
Here's how to do that. Click on the Safari menu and choose General. Select the General tab. From the top menu, choose whether Safari opens with a new window, a new private window, open tabs from last session, or all non-private windows from last session. Use the next two menus to choose what is displayed when you open a new window and a new tab.
Yes, you can change the default language in Safari. If you are using Mac or iOS devices then Safari gives you the option to change the default language in Safari Browser. On Mac, you need to go to System Preferences > Language & Region and drag English to the top of the list.; On iOS, you need to go to Settings > General > Language & Region and select English as the iPhone/iPad language.
If you want to change the default language of the macOS Safari web browser, you can follow the below steps, ⚠️ Note: This will change the default language of all the applications to the one you set as primary. Close Safari, Now go to Apple Menu: System Preferences..., Click on Language & Region, Click on + sign to add new Region,
Go to the system settings. Go to "General" > "language and Region". At the top, touch "iPhone/iPad-languages" and select from the list the desired language. You go to the top right on "Done" and confirm the query. After a short wait, an iOS conversion of the device to the new language, and you can also use Safari in this language.
In the Safari app on your Mac, choose Safari > Preferences, then click a preference pane: General: Change your homepage, and choose what to see when you open a window or tab, how long to keep your browsing history, which bookmarks to show in Favorites view, and choose where to save downloads and how long to keep them. Tabs: Choose when to open ...
Launch System Preferences from your Dock or Apple menu and then click "Language & Region." Ensure that "English" is present and listed as the "Primary" language at the top of the list on the left ...
Click the '+' button near the bottom of the "Preferred languages" box. 5. Find and select your language. 6. Click 'Add'. 7. Drag and drop the language you want to use to the top of the ...
Tap the aA button in the far-left of the address bar, then select Translate to [Language] in the dropdown menu. If you don't see the option, the webpage either isn't compatible with Safari's ...
To do so, open the Safari app on your Mac and click on Safari from the menu bar. Now, select About Safari from the dropdown menu. Once you do so, a dialogue box will appear.
Safari's memory usage advantage over Chrome on Mac with 8GB of RAM is a key factor to consider if performance is a concern. As the default web browser on Mac, Safari has received a steady stream ...
To change your editing language in Word for Mac or PowerPoint for Mac, go to Tools > Language, select your language, and select OK. To make it the default for all new documents select Default . Tip: To prevent having to manually configure the proofing language with each new document in Word, switch on the option to detect the language you're ...
Now that an iOS user has changed their default web browser from Safari to their preferred one, whenever they open a link from any other application, it will directly open in the newly selected browser. In the new iOS 17, Apple will show a list of the most popular browsers in the user's region. Users can also select their default browser at that ...
This Preview product documentation is Citrix Confidential. You agree to hold this documentation confidential pursuant to the terms of your Citrix Beta/Tech Preview Agreement. The development, release and timing of any features or functionality described in the Preview documentation remains at our sole discretion and are subject to change without notice or consultation.