Best lenses for safari photography
Our experts pick out the best lenses for safari in all major mounts, with a range of zooms for all budgets.

The quick list
Multi-mount, micro four thirds, how to choose the best lenses for safari, how we test lenses.

Multi-mount Sigma 150-600mm Sports Tamron 18-300mm Sigma 60-600mm
Canon RF 200-500mm EF 70-300mm
Nikon Z 24-200mm AF-S 200-500mm
Sony FE 100-400mm
Fujifilm XF100-400mm XF150-600mm
L-mount Lumix S 70-200mm
Micro Four Thirds Olympus 12-100mm Lumix G 35-100mm
How to choose How we test FAQs
The best lens for safari photography is not, despite what you may think, simply the longest telephoto you can find. Safari photography is about capturing both wildlife and scenery, and this means your best bet is finding a lens that can cover as much range as possible (as you don't want to be swapping every two minutes). As such, in this guide we've focused on telephoto zooms.
Historically, the best superzoom bridge cameras have been very popular with safari-goers ( Sony’s RX10 cameras are pretty clearly constructed with this audience in mind). However, for superior quality and performance, you're much better off with a mirrorless camera or DSLR, which will have a larger sensor.
in this guide to the best safari lenses, we’ve picked out a great variety of options for all the major mounts. We’ve included fantastic superzooms and telephoto zooms in an attempt to provide you with a broad, flexible range of options. These lenses all have different strengths and weaknesses, as we’ve discovered in our testing, but the one thing they all have in common is that we reckon they're the best safari lenses for each system right now.

Jon is one of our go-to specialists when it comes to all aspects of photography, from cameras and action cameras to lenses and memory cards. Here he looks at the best lenses for safari shoots.

Best multi-mount
Available for both Sony E-mount and L-mount, this exceptional lens delivers a dream range for safari shooting, with speed, flexibility and weather sealing.
Read more below

Best Canon mirrorless
If you're using a Canon RF mirrorless camera, the RF 100-500mm f/4.5-7.1L IS USM is our recommendation for safari shooting – well built, with great stabilization.

Best Canon DSLR lens
Adding a little more reach than a standard workhorse telephoto, the Canon EF 70-300mm f/4-5.6 IS II USM is great for safari shooting on DSLRs.

Best Nikon mirrorless
For Z-mount, the Nikkor Z 24-400mm lens will deliver excellent results for wildlife. It's stabilized and weatherproof, and delivers even more reach on DX-format cameras.

Best Nikon DSLR lens
For F-mount DSLRs, the Nikon AF-S 200-500mm lens delivers monster zoom reach and fast focusing. The constant f/5.6 aperture is also a welcome feature.

Best Sony FE
While Sony users have plenty of choice, we particularly rate this capable 100-400mm lens, which excels at producing bokeh-licious wildlife portraits.
Load the next products ↴

Best Fujifilm X
The longest telephoto for Fujifilm X-mount, this lens can even be extended further with teleconverters! Its image quality is brilliant too, and it's stabilized.

Best L-mount
If you're looking for a dedicated L-mount lens for safari, this workhorse Panasonic is – for our money – better value than its more expensive f/2.8 stablemate.

Best Micro Four Thirds
With a focal range equivalent of 24-200mm, this lens for Micro Four Thirds is built to high quality standards, inside and out. We especially like the gorgeous metallic construction.
The best lenses for safari photography in 2024
Why you can trust Digital Camera World Our expert reviewers spend hours testing and comparing products and services so you can choose the best for you. Find out how we test.
First up, we've grouped together some spectacular lenses that are available for multiple mounts, including Sony E, L-mount and Fujifilm X. If you're using any of these mirrorless systems, this is an excellent place to start.
Sigma 150-600mm Sports

1. Sigma 150-600mm f/5-6.3 DG DN OS Sports
Our expert review:
Specifications
Reasons to buy, reasons to avoid.
Covering a focal expanse from telephoto 150mm to super-telephoto 600mm, the Sigma 150-600mm f/5-6.3 DG DN OS Sports is a very popular format of lens. We could have filled this list with 150-600mm lenses if we wanted, but we picked this update to a very popular DSLR lens, the old Sigma 150-600mm f/5-6.3 DG OS HSM | Sport for Canon EF and Nikon F mounts. This time it fits Sony E-mount mirrorless, with a version also available for L-mount full-frame cameras made by Panasonic, Sigma and Leica.
Tack-sharp throughout its zoom range, the Sigma 150-600mm f/5-6.3 DG DN OS Sports is designed for speed and flexibility. It focuses fast, delivers great-looking bokeh in its defocused areas, and it’s also comprehensively weather-sealed, which is good news if the heavens decide to open mid-safari. If you’re using an L-mount camera, we’d say it’s essential. If you’re on Sony E-mount, you have a few more competitive options (see our full Sony section further down the page).
See our full Sigma 150-600mm f/5-6.3 DG DN OS Sports review .
Tamron 18-300mm

2. Tamron 18-300mm f/3.5-6.3 Di III-A VC VXD
Want to whip from expansive scenic shots to super-close-up images of wildlife within a moment? A good superzoom lens like the Tamron 18-300mm f/3.5-6.3 Di III-A VC VXD is just the thing. It’s available for two APS-C systems – Fujfilm X and Sony E-mount (the A6000 cameras) – meaning it delivers an effective focal range of 27-450mm. It’s got quality where it counts too, particularly in the centre of images. There’s some drop-off at the edges, as you’d expect with a lens of this type, but nothing that’s going to ruin your images. Autofocus speeds impress, meaning you shouldn’t have to worry about wildlife making a run for it while your camera hunts for focus. It weighs just 620g, too. See our full Tamron 18-300mm f/3.5-6.3 Di III-A VC VXD review
Sigma 60-600mm

3. Sigma 60-600mm F4.5-6.3 DG DN OS Sports
A lens that weighs this much won’t be for everyone, that’s for sure. However, if you’re using full-frame Sony or L-mount cameras and want to cover your bases, the Sigma 60-600mm F4.5-6.3 DG DN OS Sports will do just that, running from standard focal length to super-telephoto. It impresses all across that zoom range too, with excellent sharpness and well-engineered handling despite the weight. It does feel a little weird using such a bulky lens at 60mm, but you get used to it. The stabilization is class-leading, providing up to 7 stops of effective compensation. Though bear in mind that the 105mm filter thread means you’ll have to fork out a sizable sum if you want even a simple protective UV filter. Check out our full Sigma 60-600mm F4.5-6.3 DG DN OS Sports review .
Here we've picked out the best Canon safari lens for both RF-mount mirrorless and good old EF-mount DSLRs – the latter of which can also be adapted to fit mirrorless cameras.
RF 200-500mm

4. Canon RF 100-500mm f/4.5-7.1L IS USM
Canon lenses with the ‘L’ designation in the name are designed with the utmost attention to quality. This means a lens like the Canon RF 100-500mm f/4.5-7.1L IS USM is built to last in all sorts of conditions, with a heat shield coating that means it can withstand ultra-hot weather (or ultra-cold, for that matter). The generous zoom range gives you a lot of shooting flexibility, with a smooth zooming action with speed that can be adjusted to taste. Its stabilization is very effective too (even more so with higher-end EOS R cameras like the EOS R5), meaning you can use slower shutter speeds and still get sharp shots. This is especially helpful when dealing with the somewhat pedestrian maximum aperture, which drops to a weak f/7.1 at the telephoto end. See our full Canon RF 100-500mm f/4.5-7.1L IS USM review .
EF 70-300mm

5. Canon EF 70-300mm f/4-5.6 IS II USM
The Canon EF 70-300mm f/4-5.6 IS II USM is an update to a popular lens, providing a little more reach than your average workhorse telezoom, at the cost of a slower maximum aperture. Image quality is gorgeous, and stays so even at the outer limits of the 300mm focal length, which is good news for safari shooters. The handling is great too – smooth and intuitive, with a useful digital information display for checking settings. Plus again there’s that L-series build, meaning the lens is capable of surviving a sudden downpour. If you’re using Canon DSLRs, whether APS-C or full-frame this is definitely a lens to consider adding to a safari kitbag – it’ll deliver great quality and flexibility without adding too much weight. See our full Canon EF 70-300mm f/4-5.6 IS II USM review .
Nikon shooters may be using Z-mount mirrorless cameras or F-mount DSLRs – so once again we've included here our favourite lenses for both systems. Remember that F-mount lenses can be adapted to fit Z-mount mirrorless cameras with an FTZ adapter (though not the reverse).

6. Nikkor Z 24-200mm f/4-6.3 VR
This lens is compatible with both full-frame and APS-C Nikon Z cameras – and you get different advantages with each one. Use it with the full-frame models like the Z5 or the Z7 II and its built-in Vibration Reduction stabilizer can work in tandem with the in-body VR on those cameras to deliver highly effective stabilization. Or, use it with DX-format cameras like the Nikon Z50 to bump the effective focal range up to 26-300mm. Either way, you’re getting a travel-friendly zoom that’s equally capable at capturing scenic vistas and close-up wildlife images. S ee our full Nikon Z 24- 200mm f/4-6.3 VR review .
AF-S 200-500mm

7. Nikon AF-S 200-500mm f/5.6E ED VR
Reasonably priced for a telephoto zoom of its kind, the Nikon AF-S 80-400mm f/4.5-5.6G ED VR offers tremendous value for users of Nikon DSLRs – which are still some of the most popular wildlife cameras out there. Its image quality is top-notch, delivering clean and sharp images right the way through the zoom range, and both the autofocus and stabilization are consistently effective. We would have liked a full suite of weather seals – there’s a rubber mount around the gasket, but it’s not overall comprehensive. You’ll probably be okay in light drizzle, but it might be worth investing in a rain cover if you’re anticipating any torrential downpours. See our full Nikon AF-S 200-500mm f/5.6E ED VR review .
Thanks to Sony's historic openness to third-party lens manufacturers, Sony E-mount users are particularly spoilt for choice. All of the lenses in our top Multi-mount section are compatible with Sony E cameras to some degree (two for full-frame and APS-C, one for just APS-C). However, if you'd prefer a Sony-made lens, here is our top pick.
FE 100-400mm

8. Sony FE 100-400mm f/4.5-5.6 G Master OSS
Sony’s ‘G Master’ designation is conferred only on its top-end lenses, ones that deliver an exceptionally high standard of optical quality. As such, while the Sony FE 100-400mm f/4.5-5.6 G Master OSS is undoubtedly an expensive lens, it’s also a beautiful piece of kit. One thing it particularly excels at is creating images with attractive bokeh – meaning the quality of the defocused areas of images. This means if you want to create portrait-style images of wildlife with a shallow depth of field, it’s a good choice of lens. Also, if you need more reach, it can be used with Sony’s 1.4x and 2.0x teleconverters (just remember that the extra focal length comes at the cost of reduced maximum aperture). See our full Sony FE 100-400mm f/4.5-5.6 G Master OSS review .
Fujifilm's APS-C X cameras are a brilliant choice for safari photographer, and the telephoto lens range for the system has expanded in recent years. Here are our top picks for Fujifilm X safari shooting. Remember also that the Tamron 18-300mm f/3.5-6.3 Di III-A VC VXD in our Multi-mount section is available for Fujifilm X-mount.
XF100-400mm

9. Fujifilm XF100-400mm f/4.5-5.6 R LM OIS WR
With the release of highly capable cameras like the X-H2S and the X-T5 , Fujifilm has signified it is playing in the big leagues. This weighty lens is a perfect partner for those who want to use Fujifilm’s flagship cameras for challenging pursuits like safari photography. It may be heavy for an APS-C lens, tipping the scales at just under 1.4kg and stretching out to 270mm in length when fully zoomed, but it delivers a focal range equivalent to 152-609mm in full-frame terms. It’s thoroughly weather-sealed as well.
See our full Fujifilm XF100-400mm f/4.5-5.6 R LM OIS WR review
For a while it was the longest lens you could get for the X-mount – however, it has been eclipsed by a more recent release…
XF150-600mm

10. Fujifilm XF150-600mm F5.6-8 R LM OIS WR
The APS-C crop factor of Fujifilm X plays into this lens’s strengths, transforming it into an amazing 229-914mm equivalent in full-frame terms. To get the same thing on a full-frame Sony system you’d need a 600mm lens and a 1.4x teleconverter, which makes both the price and the modest maximum aperture of this lens look a bit more reasonable. The XF150-600mm also features a ‘sensing and control system’ to help control for movement when using it at full zoom, and it really does make a difference to hand-held shot sharpness. This is definitely helpful as you’ll already have a bit of softness to contend with at the maximum focal length. Not enough to ruin shots, but it’s worth being aware of.
See our full Fujifilm XF150-600mm F5.6-8 R LM OIS WR review
L-mount shooters should note that, like Sony E users, they can also take advantage of the Sigma 150-600mm f/5-6.3 DG DN OS Sports and Sigma 60-600mm F4.5-6.3 DG DN OS Sports lenses featured in our Multi-mount section. For more options, read on as we pick our favourite dedicated L-mount lens for safari.
Lumix S 70-200mm

11. Panasonic Lumix S Pro 70-200mm f/4 O.I.S.
We love this lightweight telephoto zoom for L-mount cameras – in many ways, we prefer it to the flashier, professional Lumix S Pro 70-200mm f/2.8 . The f/4 version is much, much lighter and still delivers spectacular sharpness with impressive consistency throughout its zoom range. In good news for safari shooters, the lens is comprehensively weather-sealed, and the focus ring features a clutch mechanism that allows you to switch between auto and manual focus with a simple push-pull action. The stabilization is also highly effective – when paired with a compatible system in a Panasonic Lumix S camera, it can deliver up to six stops of effective compensation, helping keep images sharp while shooting handheld.
Read our full Panasonic Lumix S Pro 70-200mm f/4 O.I.S. review .
Micro Four Thirds lenses are compatible with Panasonic Lumix G, Olympus and OM System cameras. The 2x crop factor of the smaller sensor means the stated focal length of the lens is effectively doubled, giving you some serious telephoto reach in a compact lens body.
Olympus 12-100mm

12. Olympus M.Zuiko Digital ED 12-100mm f/4 IS Pro
This lens is something of a wonder, and though the 200mm maximum equivalent reach may not be enough for all safari goers, its sheer image quality and supremely effective stabilization make it well worth considering for your kit bag. The ‘PRO’ designation means it’s built to high quality standards inside and out – so as well as the excellent optical quality, you also get a weather-sealed barrel, with a metallic construction and textured rings. This is one of the more ambitious lenses for Micro Four Thirds, and that is reflected in the price, which is higher than average for a lens in this class.
Lumix G 35-100mm

13. Panasonic Lumix G X Vario 35-100mm f2.8 II Power OIS
With the Micro Four Thirds crop factor, this lens delivers the workhorse focal length of 70-200mm, which is pretty good coverage for safari work. Plus, the compact size and affordable asking price mean it doesn’t have to be the only lens you take – this really is one of the key advantages of MFT. The Lumix G X Vario 35-100mm impresses in most categories, delivering very good sharpness at all focal lengths. It drops off a little at f/2.8, and the bokeh quality isn’t the smoothest, but when stopped down the lens delivers the goods, with color fringing and distortion basically nullified when combined with in-camera corrections. See our full Panasonic Lumix G X Vario 35-100mm review .
Naturally, safari photography shares a lot of DNA with wildlife photography – however, there are a few factors specific to shooting safari that will impact your lens choice. For one, the guided nature of a safari means you're likely going to be able to get closer to your subjects than you would if you were out on your own relying on bushcraft. For this reason, you don't necessarily need the kinds of ultra-long telephoto lenses that are the hallmarks of professional wildlife photographers – 600mm and 800mm lenses are probably going to overkill (which is good news for your bank balance).
You do need a bit of telephoto reach, and having a zoom is a good idea, since you're unlikely to be able to move much from your initial position. For this reason, many safari photographers favour standard workhorse telephoto zooms like 70-200mm, 100-400mm or even 150-600mm. This gives you plenty of range and flexibility.
Naturally, the wild animals you encounter are not going to pose obligingly for you, so a lens that focuses quickly is certainly an asset. Having stabilization is also going to help, as you won't necessarily be able to set up a tripod – and this also means you'll want to keep an eye on weight, as you may be hand-holding the lens for extended periods. Weatherproofing is also a good idea.
We test lenses using both real world sample images and lab tests. Our lab tests are carried out using the Imatest testing suite, which consists of custom charts and analysis software that measures resolution in line widths / picture height – a measurement widely used in lens and camera testing. We also take lenses out into the real world to get a feeling for how they perform, and whether they do everything their manufacturers claim.
What equipment do you need for safari photography?
As well as your camera and lens, there are a number of valuable photographic accessories worth taking along for safari photography. A good camera support is always going to be an asset – a tripod is great, or a monopod is also handy, and even a beanbag could potentially be a lifesaver as a place to rest your lens for steadier shots.
Otherwise, you shouldn't need to carry too much – flashguns are a no-no. Do remember some spare batteries and memory cards however, as you won't be able to stock up once you're out there.
Are bridge cameras good for safari photography?
If you're looking for a more affordable alternative to an interchangeable camera/lens system, then a bridge camera could be the way to go. These are essential SLR-styled compact cameras with big zoom lenses, and they are quite popular among safari enthusiasts. However, while they are cheaper and more portable than mirrorless or DSLR cameras, their smaller sensors do have an impact on image quality, particularly in terms of dynamic range. Check out our guide to the best bridge cameras to learn more.
Best lenses for bird and wildlife photography Best cameras for wildlife How to prepare for a safari or wildlife photography trip
Get the Digital Camera World Newsletter
The best camera deals, reviews, product advice, and unmissable photography news, direct to your inbox!
Jon spent years at IPC Media writing features, news, reviews and other photography content for publications such as Amateur Photographer and What Digital Camera in both print and digital form. With his additional experience for outlets like Photomonitor , this makes Jon one of our go-to specialists when it comes to all aspects of photography, from cameras and action cameras to lenses and memory cards, flash diffusers and triggers, batteries and memory cards, selfie sticks and gimbals, and much more besides.
An NCTJ-qualified journalist, he has also contributed to Shortlist, The Skinny, ThreeWeeks Edinburgh, The Guardian, Trusted Reviews, CreativeBLOQ, and probably quite a few others I’ve forgotten.
Related articles


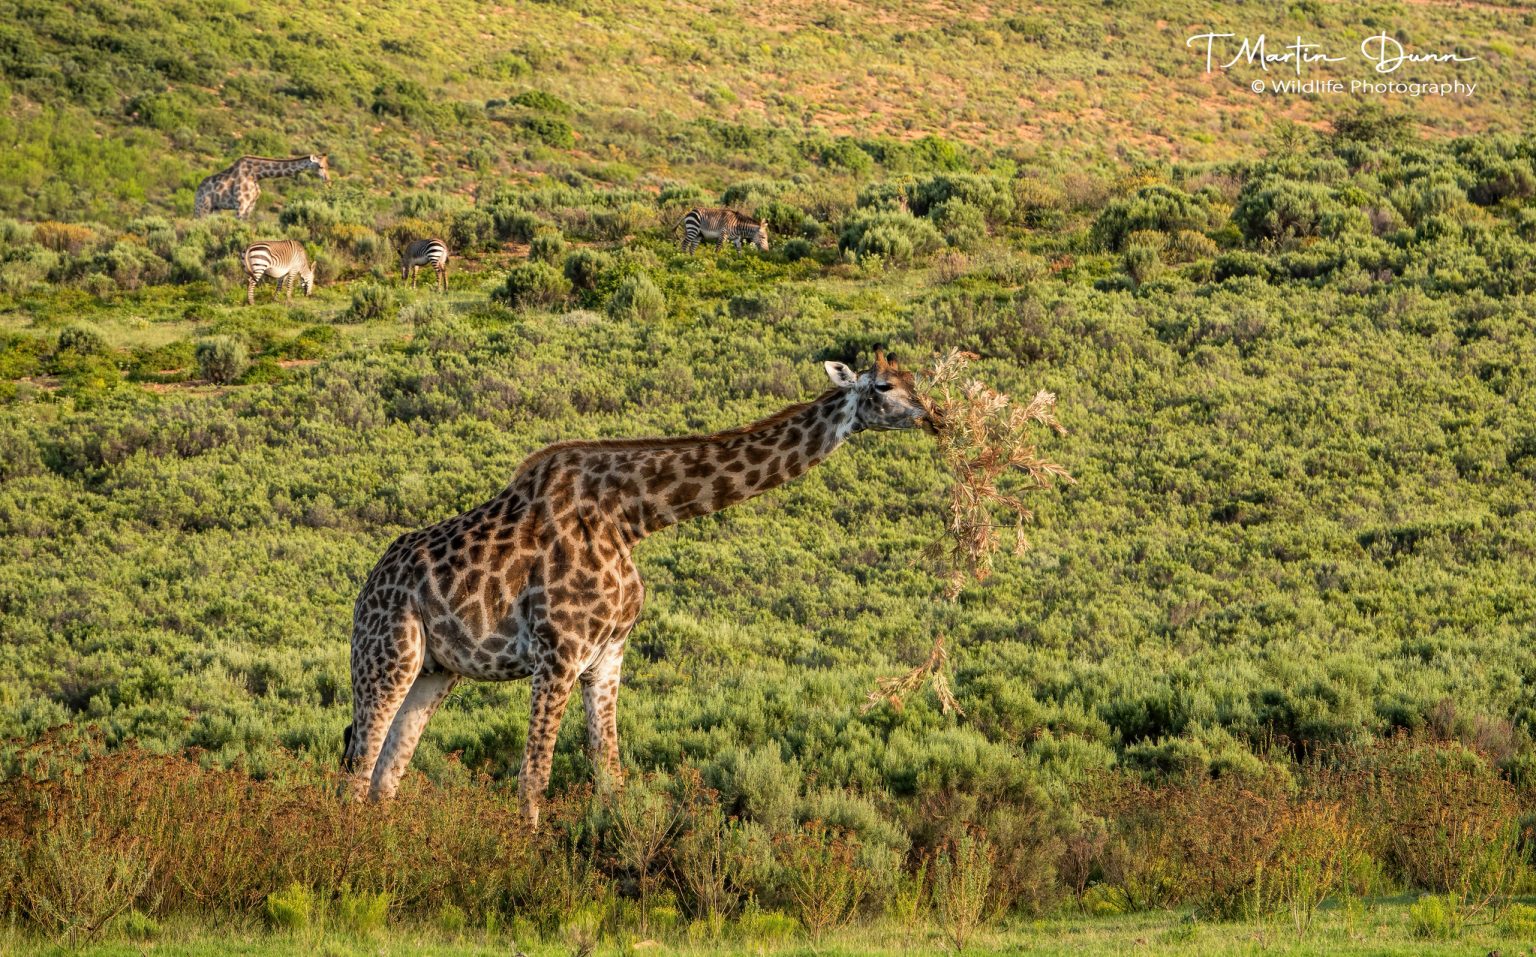
Wildlife Photography Africa

Choosing the right lenses for your safari. Updated
Way back in 2018 we put up a post entitled “Choosing the right lenses for your safari”
Even now, after 5 years and some amazing advances in camera technology, it is still the post that draws the most comments so we thought that it would be a good idea to revisit this subject.
Probably one of the most frequent questions we get asked by clients is “What lenses should I take on safari?”
This question is not limited to first timers either; because the equipment you need to take depends very much on where you are going and what the conditions will be like. Photographing lions on the plains of Masai Mara requires a different approach to photographing gorillas in the rainforests of Congo or Uganda, and photographing birds is very different to photographing elephants. So how do you make the right selection?
Of course there is an assumption being made here; that you have a variety of equipment to choose from. The dilemma of having more equipment that you need or want to carry on any one safari is perhaps one that applies only to those DSLR users with a selection of lenses and accessories. If you’re an enthusiast who prefers the convenience of a bridge camera then life is much simpler
Bridge Cameras
Let me say right away that there is no intention here to heap scorn on bridge cameras. The convenience of having a zoom lens that covers the range from 24mm to 1400mm cannot be overstated. How many times have those of us lugging a 15kg backpack full of gear looked enviously at compact cameras that have it all covered.
The 2 standout bridge cameras at the moment are the Sony RX10iv and the Nikon Coolpix P950 or P1000 . Both can shoot RAW.
The Sony has a range from 28-600mm, the Nikon P950 covers 24-2000mm and the P1000 24-3000mm . If you want the ultimate on longe range shooting then one of the Nikon Coolpix is hard to beat. If you are happy with a more modest zoom range but want the best image quality a bridge camera can offer, then it has to be the Sony.
Of course bridge cameras do have some limitations:
a smaller sensor size means that the performance in poor light conditions is, for the most part, not outstanding
because every function is battery operated, battery life can be short so you’ll need to carry several spares.
But in good sunny conditions almost all modern bridge cameras are capable of producing fine images and if the images are going to be used mainly for posting online, the quality is absolutely fine.
DSLR & Mirrorless
But, for all the convenience of a bridge camera, most serious photographers prefer the versatility of a DSLR. (Digital Single Lens Reflex). In recent years many photographers are choosing to use Mirrorless cameras rather than DSLRs.
Both DSLR and Mirrorless cameras use interchangeable lenses, in many cases they can use the same lenses, but there are significant differences. This article will help you understand them.
For the purposes of this post, as it is mainly lenses we’re talking about, we’ll not spend time arguing the merits of one versus the other; they do the same job.

Why DSLR or mirrorless? Versatility and image quality. Simple as that. The ability to pick the lens that is right for the task in hand is a big plus. Although the lens on a bridge camera covers a huge focal range, there are inevitably some trade-offs to achieve that.
Their compact size usually means a smaller sensor which impacts on the camera’s ability to perform in poor light conditions and on your ability to maximise your image size.
Using a DSLR you are looking through the actual lens at your subject; bridge and compact cameras use an electronic viewfinder (EVF). They used to be pretty awful, but now they are very good indeed, however it does mean that you are not seeing the true image. Mirrorless cameras also use an EVF, but they are exceptionally good and have one advantage over the Through The Lens view of a DSLR that many people love.
Although with a DSLR you can see exactly what you are shooting, you do not know, without checking the display, whether or not you have the right exposure. You can see the settings you have applied, but not how they affect your shot. With the EVF on a Mirrorless camera the image you see takes all your settings into account and shows you how the final image will look. With a Mirrorless it is almost impossible to over or underexpose your shot.

So, on the assumption that you’re using a DSLR or Mirrorless and want to cover all eventualities, what should you take?
In practical terms, you should be able to manage with 3 lenses, maybe just 2. Any more than that and not only does weight become an issue but you’ll waste too much time faffing about changing lenses or deciding which one to use.
If you can cover focal lengths from about 20mm to 400mm you won’t miss out on much. If you like photographing birds then you may want to stretch out that longer length to 500mm or 600mm.

70-200mm zoom
One of the most popular lenses, for both professionals and enthusiasts is a 70-200mm zoom. The 70-200mm lens is a flagship lens for companies like Nikon and Canon; consequently they are very well built and capable of terrific results. No disrespect intended to users of Sony, Fujifilm or OM System; I am sure they are able to offer lenses of comparable focal lengths to those I am suggesting.
So, this is the lens we’d put at the heart of our selection and one that will probably be on your camera for a large part of your safari.
A lot of people think that shooting wildlife requires really long lenses; usually it doesn’t. What is does require is flexible lenses, and the 70-200mm is one of the most flexible.
A lot of people are surprised by just how close you can get to large animals like lions, leopards and elephants.
Far better to use a slightly shorter focal length than you need and then crop, than have too long a focal length and not be able to get your whole subject in the frame. Think ahead, don’t find yourself needing to change lenses when you should be taking photographs.
The other big advantage of the 70-200mm lens is that it is relatively fast; either f 2.8 or f 4. That is a big help in situations where the light is poor. A lot of animals only become active in the late afternoon and with the sun going down fast, the light deteriorates quickly. If you want to keep shooting, you’ll need to be able to open up the aperture and increase the ISO just to allow you a reasonably fast shutter speed. In areas where there are a lot of trees or dense bush, your subject may not be out in the open. A good example of this is mountain gorillas. In the rainforest there is likely to be a lot of shade and it could be raining; even with a wide aperture you will probably still need an ISO setting of 1600 or more. In fact, if you are trekking to photograph gorillas we’d recommend a shorter zoom, perhaps 28-120mm; most people are able to get much closer than they expected.
OK, so we’ve got one lens sorted, but 70mm is not wide enough for a lot of situations and 200mm is not long enough for subjects like birds.

One of the things that makes Africa such a special place for photography is its size. For many, one of the iconic images of Africa is the plains of the Masai Mara teeming with animals. To capture this kind of scene you need to be able to shoot wide. It’s not a close up of one animal you’re after, but the sheer spectacle of animals as far as the eye can see.
Having a good wide angle lens is also invaluable when the action is really close, or if you can’t get enough distance from your subject.
Once again a zoom lens works well. Something like a 24-70mm fits neatly with the 70-200mm.
For a bit more versatility you could opt for an 28-120mm lens. This gives you a bit of overlap and means that you won’t need to change lenses quite so often.
Either one of these will serve you well when you are close to the big mammals; whether it is gorillas in the forest or elephants at a waterhole.

One of the favourite lenses for professional wildlife photographers is the 400mm. But buying one of these beauties is expensive and out of the reach of many amateurs and enthusiasts. Fear not though, there are other ways of getting this focal length.
One of the simplest is to use an 100-400mm zoom lens. These lenses are also highly rated and cover a very useful range. In fact, if you have one of these, you could leave the 70-200mm at home. The big drawback of this lens though, is its weight. It weighs over 1.5kg. Not a problem if you’re able to support it somehow, but it becomes heavy quite quickly if you’re hand holding.
Nikon offer a 18-300mm lens for around £650. It is not the most robust construction but it is light, easy to use and delivers excellent images.
An alternative, but less flexible, option is to take a 300mm lens and a tele-converter or multiplier. The advantage of a 300mm prime lens is that it is very light and easy to hand hold. The addition of a 1.4x or 2x tele-converter will turn it into a 420mm or 600mm lens, for very little extra weight. It does mean a bit of faffing around though, usually at a time when you really don’t want to be faffing around.
If weight is not an issue, then there are some very good ‘super zoom’ lenses available, with a focal length of 150-600mm. Third party lens makers Tamron and Sigma both have highly rated 150-600mm lenses. They are light enough (around 2kg) to hand hold for short periods, have built in vibration reduction and come in just under £1,000.
Sigma even have a 60-600mm zoom that would cover just about every situation you might come across for around £1,700 and Tamron have a 18-400mm for around £700.
Nikon users may prefer to stick with the brand and choose their 200-500mm zoom, which is just over £1,000 and delivers incredible images for the price. If bird photography is your thing, then these are well worth considering, but make sure you get plenty of practice before you go the longer the lens the more vulnerable it is to camera shake, resulting in unsharp images.

Please note, that these are just suggestions for a selection of lenses that will cover most situations; take these lenses and you won’t miss out on many shots. They are not by any means the only options and specific situations may benefit from different choices.
If you take just 2 lenses and are also able to take 2 bodies, then you can go through your whole safari without needing to change lens.
With 3 lenses you should put the lens you will use the most on the body you like best with the second most used lens on the other body. You will only need to change to the 3 rd lens in exceptional situations
Think carefully before you buy new lenses
Don’t feel that you must rush out to buy a new lens just for your safari. Think about your ongoing photography needs; how much will you use it when your safari is over? Far better to buy lenses that you’ll use on an everyday basis; even with a relatively short zoom lens, like an 28-120mm, you’ll still get plenty of great shots on safari.
It is also worth mentioning that you can get some excellent lenses at terrific prices by buying second hand. You should always buy the best lens you can afford; if you buy a cheap lens it is quite probably you won’t like the results and will want to upgrade it before too long.
Buying a lens online at the cheapest price sounds appealing but you won’t know what you’re getting until it arrives. Wherever possible we recommend that you visit your nearest photographic dealer and try the lens on your camera body to see how it feels. Take a few sample shots as well.
Well, 2 bodies are better than 1. Just the ability to have 2 lenses of different focal lengths mounted and ready to go is a big help. It also means that in the unlikely event of camera failure, you have backup.
Peripherals
Some kind of support is useful to have. Whether it is a tripod, monopod or something as simple as a bean bag, anything that helps keep your camera steady will make it easier to get sharper images.
Don’t forget spare batteries and memory cards.
Leave a Reply Cancel reply
Your email address will not be published. Required fields are marked *
- Bespoke Itineraries
- Planned Itineraries
- Wilderness Dreaming

- Bespoke Best of Kenya
- Bespoke Best of Tanzania
- Bespoke Best of Zambia
- Bespoke Best of Zimbabwe
- Bespoke Best of Botswana
- Bespoke Best of Namibia
- Bespoke Best of South Africa
- Specialised safaris
- Okavango Delta Photo Safari
- Ngorongoro Crater and Serengeti Safari
- Wild Ruaha Photo Safari
- Zambia Forest Secrets
- Botswana & South Africa Predator Workshop
- Leopards of Londolozi
- Masai Mara Predator Safari
- Why book your safari with Greg
- What to pack for safari
- Guest Testimonials
- Guest Speaking
- Selected press
- Conservation and Charity
- Documentary
African Wildlife Photography Safari FAQ - What To Pack
See all Africa photo safaris and workshops complete with photo galleries, detailed itineraries and guest testimonials .
What about food on an African wildlife photography safari?
Both East and Southern Africa were once under British rule and as such you can expect English cuisine on your African wildlife photography safari. The breakfasts usually consist of cereals and a hot English breakfast. Lunches are usually a variety of salads and there is always a meat option. Dinners are traditional English dinner affairs usually with a soup starter and freshly baked bread. The main course will usually be a roast of sorts, with accompanying vegetables. Dessert is usually a simple affair consisting of a baked pudding. You will not go hungry on an African wildlife photography safari and the biggest complaint about food is usually that there is too much!

(A side note to mention is that between meals there are often not snacks readily available and breakfast is often only later in the morning. You might want to bring a few snacks or energy bars if you have a problem keeping your sugar levels up, especially for the early morning).
Can I drink water and eat fresh produce on an African wildlife photography safari?
I advise that you only drink bottled or filtered water which is always available in camps. Avoid ice as this is often made from local water which although is generally safe to drink, foreign tummies might disagree with. It is safe to eat fresh produce. Although it is washed by tap water, this water usually comes from an underground well and is safe. If you are suspect, then simply ask the camp where they get their water from and if it is underground then it is generally fine to eat the fresh produce on your African wildlife photography safari.

What about my allergies on an African wildlife photography safari?
Most safari camps are able to handle common food allergies. The best way to handle an ‘intolerance’ is to simply avoid eating that particular food as there is almost always too much food in camp. If you have an allergy that is uncommon, like being allergic to eggs, and you know of a substitute, like a powder, then bring it along on safari. If you have a deadly allergy, then be sure to travel with your own medication and request in camp that that ingredient be removed from the kitchen altogether. Vegetarians, dairy and wheat intolerances are common and can be managed easily, provided the camps are told ahead of time about these. If you suffer from a combination of these allergies then you especially need to let the camps know in advance so that they can prepare as there is no supermarket down the road for them. When booking any of my photo safaris and workshops , simply mention your food allergies and they will be sent to the camps.

(Side note: It is helpful to remember that many safari camps have to fly produce in or truck it in, over hundreds of miles. If you assist the camp in managing your allergy by forewarning them or bringing your own substitute, it will be greatly appreciated).
What about medicine, diseases and vaccinations?
Please check in with your local travel clinic or doctor for advice. Personally I am vaccinated against yellow fever, hepatitis A and B, tetanus, meningitis and rabies, while the plethora of others are optional. If traveling between African countries you WILL be asked for your yellow fever certificate by customs officials. My safaris are mostly conducted in low risk malarial areas or at low risk times, but for your own peace of mind, I recommend that you take a prophylactic. Malerone (although expensive) is excellent, and I have had no clients display any serious side effects while on this medication.
In areas where you get tsetse flies in East Africa, humans are not the primary disease carries. There is nothing you can do about these flies except to dress appropriately (keep reading) and to apply Mosie-Guard. None of my current safari itineraries carry tsetse fly warnings.

The camps do have medicine kits and they do have evacuation plans but please take out your own comprehensive travel insurance, and travel with a copy of it. I find it practical to travel through Africa with the following medical items:
– Immodium (keep this handy when in transit) – Buscopan (for tummy cramps) – Pain killers (that contain both paracetamol and a muscle relaxant) – Antihistamine cream and tablets for any insect bites or allergic reactions – Melatonin to help speedy recovery from jet lag – Any medicine or ointments that you would normally take at home – Mosquito repellant – A product called Mosie-Guard for areas where Tsetse Flies occur (manufactured in the Uk and all natural as deet does not work) – Tweezers for any thorns or splinters – Re-hydrant sachets (very important) – Disinfectant or antibiotic cream (just for nicks, cuts or grazes) – Plasters (to cover nicks, cuts or grazes) – Lots of high (30+) factor sunblock – A broad spectrum antibiotic is seldom needed but does offer peace of mind for any major tummy issues or cold/flu infections and can also be used for toothache. Speak to your doctor about this. – On this Africa photo safari in the form of a predator workshop, there is an option to sleep out and earplugs can come in handy to block out snoring.
What about clothing and weather on an African wildlife photography safari?
This will vary slightly from safari to safari, but a safe bet is to expect cool conditions in the mornings (trousers and a jumper). By mid-morning it is already hot and the heat keeps building until the late afternoon. There might be a thunder shower in the afternoon and the nights are pleasant. The best advice I can give is to layer on your African wildlife photography safari! Expect temperatures range between 32 F – 97 F (that is 0 – 36 degrees Celsius) on any given day. Always pack a beanie! The above applies to my signature Kenya photo safari and my Okavango Delta safari . My big cat photography workshop takes place in the middle of winter so the mornings can be freezing cold so pack gloves, beanies, good socks and thermals. But again you must layer as the days are warm and pleasant and the nights only moderately cold.
Try to avoid light coloured clothes on any safari and especially avoid white clothing if you will be conducting a walking safari. If in an area with tsetse flies, avoid wearing solid colours and especially blacks and blues. Stripy clothing works well for tsetse flies.
Always bring lots of sunblock (factor 30+) on your African wildlife photography safari and after-sun as well as hats (although these often blow off). Shades are advised and if you are particular about your eyes, bring clear night shades for the evening time, to avoid any flying insects or midges when returning to camp after dark (more applicable if traveling between Oct-March in Southern Africa).

In the hotter part of the day it is fine to wear short pants and even sandals in camp (although watch out for acacia thorns). Dress comfortably and layer (repeated just for added effect). I find that a jumper, a light wind-breaker and beanie are ideal for the colder part of the day and then shorts and t-shirts for the rest of the day. The camps will have rain coats or as we like to call them ‘five second ponchos’.
There is not much of a dress code in camp so rather focus on being comfortable. I find that most foreigners tend to wrap themselves up in long clothing, even in the heat of the day, but this need not be the case.
Bring a swimsuit on your safari as they are light, wash easily and you never know when or where you might be able to take a dip. In Southern Africa between May and August it is a bit too cold to swim.
A special warning applies for the Botswana and South Africa Predator Workshop where during the months of June and July temperatures can, due to windchill on the safari truck, drop below freezing for the first hour of the day. A jacket, gloves and a beanie are a must. If you have signed up for the Meerkat photo safari extension then temperatures can drop as far as -16 degrees C or 3.2 degrees F during May-August so bring those thermals, down jackets and gortex shells.
I am afraid of flying on an African wildlife photography safari?
For most of your trip there will only be short legs of flying (under 1 hour each). If you are totally not up for it, we can arrange that we drive between safari legs. For some safaris it works fine to drive but generally driving can involve long detours on bumpy dusty roads. Something to remember is that small airplanes can land anywhere and the most risky flight you take is probably the one to get to Africa. A short internal flight is worth the African wildlife photography safari experience of a lifetime and it is statistically safer to fly than drive.

I get airsick?
So do I. From my experience, the best thing to do on an African wildlife photography safari is to nibble on something salty during the flight and to keep your eyes closed. Let your ears do all the balancing. You can get patches to stick on your neck but please do not touch the patch and then touch your eyes as this causes your pupils to dilate for days afterwards, resulting in blurred vision. Try sit in the middle or towards the front of the plane as this helps a lot. One Valoid tablet the night before traveling and one when you wake up on the actual day of traveling, is a trusted recipe but makes you drowsy. Drink Ginger tea or chew candy ginger. Flights are short (less than 1 hour) and worst case scenario is you have to use the sick bag. An African wildlife photography safari is worth being uncomfortable for a short flight.
What about Visas for an African wildlife photography safari?
This depends on your country of origin and please check with the embassy in your home country. Your visas, vaccinations and travel insurance need to be taken care of by yourself and prior to your departure. Please note that some countries will require to see your yellow fever certificate upon applying for a visa so check what you need to bring along to the application and avoid being turned around .
What about Travel Insurance for an African wildlife photography safari?
You are required to take out your own comprehensive travel insurance and to send the agent the relevant details once you have filled in the booking form.
What currency should I travel with on an African wildlife photography safari?
It is best to travel with US Dollars (other major currencies can work but are not as popular). Make sure that your US$ notes are post 2006. You can tip in dollars and buy curios in dollars too. Once you land, you can exchange for local currency if you prefer and you can also draw money on your Visa/Master card at ATM machines which are now readily available in African cities. Visa and Master cards seem to work best in Africa.

What about tips and gratuities on an African wildlife photography safari?
When on safari you do not need to tip everyone you come into contact with. Usually you tip someone for helping carry or deliver luggage at the international airport and hotel. However, once you leave your hotel and head out on safari, you do not tip for any services until the end of your stay at a camp. If you are traveling with me, I will take care of the airport porters as this just adds stress to your travel and at a time when you are tired.
Once in a safari camp, you only tip at the end of your stay and upon departure. It is safari tradition to tip your driver guide $20 per person per day on safari. This can be given to your driver guide in person at the airstrip prior to final departure. Most camps then also have a general tip box, for all the back of house staff. It is customary to also leave a $20 tip per person per day on safari for the general tip box. As such, traditionally you factor in $40 per full day you spend in a safari camp.

Please note that tipping is always optional and that the above is only a guide. You are free to tip more or less, and of course not at all, unless you are satisfied with your stay .
What is included and excluded in the cost of an African wildlife photography safari?
I try to make my safaris as all inclusive as possible so that once you land in Africa you can relax. Your accommodation, all transfer costs and local flights are included. Safari drives, exclusive vehicle fee and park fees are also included. Drinks are usually included except premium brands (e.g. champagne and cognacs). Please check each individual itinerary for a list of included and excluded items. Bottled water is always included.
Excluded are your visas, purchases of a personal nature (e.g. curios), gratuities, personal travel and medical insurance, international flights and special activities not listed in the itinerary (e.g. balloon flights).

In terms of African culture is there any behaviour that can offend when on an African wildlife photography safari?
Africans are friendly people and the best way to deal with anyone is by being polite and friendly. This will almost always be reciprocated. Being rude and demanding is not the way to go in Africa and it will generally just get you even more frustrated. In Africa people are almost never in a rush and two perfect strangers will almost always stop to speak to each other. This is very far removed from the rushed 1st World, so try to slow down a bit.
A general word of advice, to ensure that you enjoy your safari as much as possible, is to remember that Africa is largely 3rd World and things do not work like clockwork, nor do they always make logical sense. This can either frustrate you or you can go with the flow and let it add to the charm. My advice is generally to relax and to pack your sense of humour. Slow down as Africa is not in a rush and remember that the safari camp staff have a very rural background, one that is miles away and removed from your world. Sometimes you might want to jump in and fix a simple service issue, but remember that the staff take pride in their work and they do not have the privileged and educated background that many of us have. Africa is a colourful quirky place, let it be this to you on your African wildlife photography safari.

You say be friendly right, but what about being scammed when on an African wildlife photography safari?
My advice is, when you are in transit (e.g. in cities, airports, hotels or park/reserve entrances), remain polite but firm. In these environments there is no need whatsoever to have conversations with strangers as they invariably are wanting something from you. When vendors approach you, you just need to say, “Sorry, not for me today” and shake your head and raise a hand in protest (as they often will not understand your accent). You might need to repeat this over and over as they are often (or rather always) persistent. Try to avoid loosing your patience and also avoid being lulled into conversation. These guys are experts at starting conversation so they will often pick up on your accent and guess where you are from and get you talking. I know this answer might contradict the previous one, but while Africa is a friendly place, a little bit of ‘street smarts’ also goes a long way.
I offer exclusive Africa travel so I try to avoid the above situations as much as possible and I am always around to assist you!
What about buying curios from local vendors when on an African wildlife photography safari?
My suggestion is to work out the price of the item in your own currency and decide what you are prepared to pay for it. You might need to pay slightly more but be prepared to make a final offer, and walk away. If you do not barter you will get ripped off.

What are the general African wildlife photography safari do’s and don’ts?
– Never stand up on a safari truck as this breaks the outline and the animals suddenly see a human form, which could upset them and even evoke a charge.
– Never run from a wild animal (even if in camp). They are so much quicker anyway and when you run you act as prey!
– Do not photograph people without asking your driver guide’s consent. Always remember how you would feel if you were at home and a foreigner drove past and snapped your picture without asking.
– Do not walk outside your tent at night and always zip your tent closed. If you do, you are perfectly safe from any wild animal.
– Do not use your cellular phone on a safari drive or in a public area of the camp. Most people are trying to get away from the rat race on an African wildlife photography safari.
– Resist the urge to say “Psssst” to the wild animals or to say something like, “Here Kitty” and snap your fingers, or to do anything else to draw their attention. These are wild animals and we need to respect them as such. Invariably your attempt to manipulate their behaviour will fail and you will be left looking sheepish.
– ALWAYS ask to stop if you see something of interest or that you want to photograph. This African wildlife photography safari is about you, so don’t be shy. We are super flexible here in Africa and sometimes it is hard to hear in the front, over the engine noise, so if we do not hear you the first time, shout “STOP” even louder. We love to reverse or back-up in Africa so that you can see and photograph what you want to.
– There is no such thing as a stupid question in Africa. Trust me, we have heard them all, so please ask away.
– Never be shy to ask a photography question. Even if you temporarily forget where to turn the camera on, please ask and I promise to help you and not to laugh (ok, I might laugh a little).

Will I have internet connectivity or cell phone coverage when on an African wildlife photography safari?
The cellular industry in Africa is pretty good and if your phone is on roaming you will get signal (even if patchy) in most locations. On my Mashatu photo safari there is patchy cellular signal but there is very slow WiFi in camp. The Mala Mala photo safari portion has no cellular network but does also offer slow complimentary WiFi. My Masai Mara photo safari has good cellular coverage. The Okavango Delta photo safari is very remote with hardly any cell signal. Remote locations will have no communications and in Africa we go by the saying “no news is good news” so advise loved ones of this before you depart, and enjoy the break. If being out of communication is absolutely not an option then a satellite phone is the only true solution or you can book a private African photography safari and stay at only high end properties.
Any reading to do before the trip?
I get asked this a lot and my answer is “No”, unfortunately there is not, EXCEPT for your camera manual! It is important that you know your camera and practice with your pets before coming out to Africa. Please also bring your manuals with.
You can read or watch the following movies to get you in the mood though:
Out of Africa ( Kenya photo safari ) I dreamed of Africa ( Northern Kenya photo safari ) Ghosts in the Darkness ( Best Amboseli photo safari ) Jock of the Bushveld ( South Africa photo safari ) Gorillas in the Mist ( Mountain Gorilla photo safari ) Hotel Rwanda ( Rwanda gorilla photography tours ) Disney’s African Cats ( Masai Mara photo safari )

Let’s take a photographic break… FAQs continue below…

Let’s talk camera..
What camera gear to pack for a photo safari.
This is one of the most commonly asked questions when preparing to go on an African wildlife photography safari. In an ideal world we would take everything we own but the realities of traveling in Africa are that there are weight restrictions. These restrictions vary somewhat between the various countries and locations, but an average of 15kg (33lbs) TOTAL allowance, usually applies. This is an alarming figure for wildlife photographers; usually our camera kit weighs more than this on its own. If you opt to not photograph in the nude, then the reality is that you will need to reduce the weight of your camera luggage on your African wildlife photography safari. If you refuse to compromise on weight, then a very real solution is to book yourself an extra plane ticket for your internal African flights. This then doubles your allowance to 30kg or 66lbs, which is what most international carriers allow anyway. Considering the total cost of your safari, an extra internal seat does not equate to an exorbitant amount. If you absolutely do not want to be bothered with weight, you can also charter a plane. We can handle all of these arrangements for you. For my photo safaris and workshops I book a freight seat (included in the cost of each tour) to increase our luggage allowance to 32,5kg (72lbs). Your camera bag for any African wildlife photography safari should weigh about 17kg (37,5lbs).
Being a seasoned African traveler and not always having the luxury of booking an extra seat, I have learned to pack as sensibly as possible. I feel that having too much equipment can stifle creativity because instead of working on creative techniques, you are constantly fumbling with equipment.

Safari photography tip : Remember that most safari camps wash clothes daily so you only need two changes of clothes and because the climate is moderate, you can pack very lightly. As an extra side note remember that in East Africa, for cultural reasons, females underwear is not washed by camp staff. Washing powder is provided for this, but ladies – you might want to bring an extra pair or two of underwear. In Southern Africa all items of clothes are washed so there is not a problem with underwear.
Below is a general list of equipment that I recommend for an African wildlife photography safari. Please note that the list is intended to simplify matters and to communicate general principles. I am therefore not going into detail about which lens is better than another or which camera body out performs another. The Internet is full of such information ( click here ). The list below is intended to give you a quick guide in terms of what equipment is needed to capture award-winning imagery on your safari of a lifetime. It is intended to be a guideline and not everything on the list is mandatory, nor is the list an exhaustive guide to equipment that is needed for wildlife photography. Rather, it is a practical guide and one that I have compiled after guiding and hosting hundreds of African wildlife photography safaris. It is a general guide purposed to find solutions for all kinds of photographers traveling on all kinds of safaris and in any African country. Use the below principles when packing and not as a camera gear shopping list.
Best lens for safari
1. One long focal length lens of at least 400mm or longer is highly recommended:
Both Nikon’s 180-400mm and Canon’s 200–400mm F4 are great safari lenses as they are versatile, sharp and with a convertor built in, they really are a ‘one lens’ solution to your African wildlife photography safari needs. If your budget does not allow for the above, then don’t despair as the Nikon 80-400mm and Canon or Sony’s 100-400mm lenses (or their other similar long range zoom lenses) are incredible safari lenses. Their light weight and general versatility more than make up for any other short falls when comparing their performance to other more expensive lenses.
A 500mm F4 is a great option for a safari lens, it is fast and great in low-light. A 600mm F4 is a bit too long for my liking when on an African wildlife photography safari. Forget the older versions of this lens as they just too heavy for safari photography. A 400mm F2.8 is an increasingly popular lens as the new ones are lighter and can be coupled with converters giving excellent results. If you don’t own one, you can rent one for your safari. An 800mm F5.6 is a bit of an overkill for a safari and especially in Africa where the heat shimmer begins as early as 8am, making sharp results difficult to achieve.
For those of you not wanting to break the bank account completely, 100-400mm, 80-400mm, 200-500mm and 200-600mm lenses (or similar) offer good all-round compromises. These lenses are slower focusing and perform less well in extreme low light than some fixed focal length lenses (although they are coming dangerously close to competing). They are smaller and incredibly versatile, allowing you to shoot wider and then zoom in. They are very practical lenses for African travel and still produce very publishable results. If you shooting Nikon I would recommend rather hiring an 80-400mm lens as this lens is not sufficiently sealed against dust, so if you bring your own – you will need to get it serviced when you get home. Nikon’s 80-400mm lens paired with a cropped sensor camera body means that you will seldom need another lens when on safari. Nikon’s D500 pairs well with the 80-400mm and especially for ladies who, with smaller hands, want a versatile system. This lens when attached to a cropped sensor body offers an effective 120-600mm. Very handy to say the least!
If the above is still out of your budget then a 70-300mm F5.6 lens is your next best option for large mammals and predators. Birds will be mostly out of your reach though.

2. A mid-range zoom for close-up action or portraits is also highly recommended:
A 70-200mm F2.8 is a legendary lens and indeed the benchmark for mid-range and close proximity work in general. If you have the money available, just buy one as this lens is used across multiple genres. It is pin sharp, fast and manoeuvrable. This is the lens you will use when we are on top of the action, which happens often on my Botswana and South Africa predator workshop and on this Masai Mara predator safari .
Canon and Sony shooters can check out the 70-200mm F4 lens as we seldom shoot at F2.8 on an African wildlife photography safari. This lens is small and perfect for a mid-range reach on any safari.
Nikon’s 300mm F4 PF is superbly small and light and a great choice for safari especially if you are also bringing a longer prime lens.
3. A wide-angle lens of sorts for landscapes and to show your subjects in their environment:
These lenses are small and light! I advocate a wide-angle lens with zoom functionality as these lenses are sharp enough and you cannot value their zoom functionality enough. One problem we have with wildlife is not getting close enough for a wide angle lens and therefore a 24-70mm (or similar) is an ideal lens to have in your bag as realistically, when shooting a wild animal, you will seldom need a wider lens.
Due to the nature of my African wildlife photography safaris, we are usually miles away from light pollution so if you would like to shoot star trails, or galaxy shots, then a true wide angle lens is needed. At least 16mm wide for full frame cameras and 12mm wide for cropped sensor cameras. Lenses with an aperture of 2.8 are also best. These lenses are seldom used for wildlife as they are simply too wide. Don’t forget a tripod and ball-head if you wanting to shoot stars and also check in with me regarding the moon phase to see whether astro-photograophy will be possible.
(Side note: A 1,4 teleconverter is also recommended. I am not a fan of teleconverters but sometimes the action is just that little bit out of reach. A 2x converter is too much of a compromise in quality for my liking (unless coupled with very expensive glass like the 400mm F2.8). Make sure your lens is of course compatible with a converter and that both focusing and image stabilization works with it attached. The newer Canon prime lenses work very well with converters. Nikon shooters can consider a 1.7x convertor but I gave mine back.)
Best lens for safari summary:
All you need is 3 lenses on your African wildlife photography safari:
1. A long lens with a reach of 400mm or longer.
2. A mid-range zoom lens ranging from 70-200mm (or similar)
3. A wider angle lens of 24-70mm (or similar).

Best Camera for safari
Camera technology is changing so fast that if I give the specs of the current ‘best camera for safari’, by the time you read this that camera will be obsolete. I kid you not! So what we really need to look at here is the basic principles of what camera you need on a safari and this will depend on how much you wanting to spend:
A sensible and reasonable budget: What you are looking for is a camera with a decent size sensor ( 24 megs or thereabouts ) and decent frame rate ( 10-20 frames per second ) and good ISO performanc e (up to ISO 6400 with clean results) and good focusing. The good news is that almost any entry-level professional camera body these days can give you this. The cost of these cameras is in the region of US$3000. Any Nikon, Sony, Olympus, or Canon camera with these specs will be good enough for your African wildlife photography safari. I always recommend traveling with two cameras as swapping lenses wastes time and there are dust issues in Africa. Also, if one breaks, you have another. If your budget does not allow for two camera bodies then just bring one, I have done many safaris with just one camera!
A no-compromise budget: If you this kind if shooter then you know that you are and you want the very best camera. You want the most megs, the best frame rate and ISO performance. You want stacked sensors, fast electronic and mechanical shutters, high res viewfinders and decent flash sync speeds. Canon, Sony, Olympus and Nikon all have these flagship cameras and they easy to spot because they cost double what the above mentioned entry-level cameras cost, upwards of $6000.
If I had to go into all the specs of each brand and model, I would need an entire new website to house all the content. My simple and practical advice is therefore to buy the best camera you can afford . Stick to the big brands like Nikon, Canon, Olympus and Sony and buy lenses of the same brand as your camera. Then join me on an Africa photo safari or workshop and I promise you that the ‘best camera for safari’ will be the one in your hand, and it will be good enough. On all my photo safaris I teach principles that include camera settings but I also talk about other photographic principles and elements that have been around long before digital cameras, and which will outlive all the current newest spec cameras. See my other FAQ page about African photographic safaris to learn more about my philosophy and recipe for my photo safaris.

Safari photography tip : Before the current technology reached its new heights, I used to advocate shooting with two different camera bodies – one for action and one for insane quality. But these days all cameras offer insane quality while others offer insane r quality. I therefore recommend shooting with two identical bodies based on your budget and fanaticism. Having two cameras avoids changing lenses and ensures you don’t miss a shot and that you have a back up camera if necessary when out on an African wildlife photography safari. As mentioned, if you only have one camera then it is not a deal breaker as I have done many safaris with only one camera.
– Camera support is a constant challenge when on safari as each safari camp’s trucks will be configured slightly differently. The good news however is that optical stabilisation is getting better and better, so if you able to manage the weight of your camera and longest lens, then additional support is not needed. For this reason I am a real fan of the longer zoom lenses (100-400mm or equivalent). But if you cannot handhold your longest lens then your biggest ally in this regard is the humble monopod. Purchase a monopod that can collapse short enough to be propped on the seat between your legs and then regardless of the vehicle configuration, you will always be ok. I suggest you practice this at home, sitting on a chair. Monopods are small, light and easy to pack.
If you are a landscaper then a tripod is a must. Due to weight restrictions the carbon fiber tripods are the way to go. Gitzo’s are good tripods and Benro’s offer a similar product but are more affordable. Really Right Stuff make incredible gear.
– You will need a decent head to screw onto your monopod or tripod. There are dozens of heads out there and here again, weight becomes a critical factor (I really like the Kirk ball heads). Due to this, large fluid heads are generally not recommended. A medium-size ball head can do the trick for both your landscape and wildlife work. When shopping for a ball head make sure that it can take the weight of your heaviest lens. It is very important that you test your longest lens on the head of your choice and please test your rigging before the safari. Depending on your brand of head, you will need matching lens plates attached to your lenses’ feet and camera bodies. When ordering or purchasing a head, ask them to send the relevant plates for as many lenses as you will want to attach to the head, and attach these before the safari, to avoid having missing screws and needing Allen-wrenches out in the field (although I always travel with a set).
If you have a large prime lens (500mm or longer), then gimbal heads are excellent but a bit heavy – so you will need to compromise somewhere else. These screw onto your monopod or tripod and allow you to pan effortlessly. Perhaps the best solution for wildlife photography is the Mongoose tripod head. This product is difficult to find outside of the USA but it is similar to a Wimberly gimbal, but HALF the weight. The Jobu gimbal heads (made in Canada) are also an excellent and lightweight choice.
A Manfrotto super clamp is a very handy device if you are shooting from a vehicle that has a bar to clamp on to. If you bring a super clamp, make sure you have the studs and again check the rigging at home. See here to order your super clamp.
– The humble beanbag can often save the day. ALWAYS bring an empty beanbag and if needed, you can fill it when on safari. With a beanbag and a monopod with a ball or gimbal head you can always make a plan in any vehicle or on any surface .
Safari photography tip : A ball head and tripod is needed for landscape work so please bring one along if you want to shoot Milky Way galaxy shots.
– One of the best African wildlife photography safari tips is to pack a flash. A flash is small and light so I always recommend it when packing camera gear for safari, especially since it comes in very handy when light conditions are less than favourable. When buying a flash, just buy the latest professional flash from the same brand as your camera. They are not expensive when compared to cameras or lenses and as wildlife photographers we need all the functionality of the latest and best models. Flashes are durable and last a long time so don’t skimp by buying cheaper or 3rd party flashes . If you want to photograph wildlife in very low light then an off camera flash bracket is essential, to avoid getting green eyes (you can correct this in post production but I prefer a bracket for a natural look).
See here for the correct bracket option and if shooting with a gimbal head you can purchase an extra arm. Also purchase your off camera cord, needed for the bracket to be of any use. The type of cord will depend on the type of camera body that you are shooting with and avoid 3rd party cords. Remember to check the rigging before you go on safari. Canon users, please bring two cords in case one rattles loose from vibrations on the truck. Nikon shooters, I prefer the SC28 cord to the SC29 as it is more robust.
– Good batteries are essential for a flash so buy the best rechargeable batteries you can find. Click here

Safari photography tip : If you take your lowlight action photography seriously – a flash battery back is essential to help your flash match your camera’s high frame rate.
Purchase an awesome one here.
Miscellaneous
The following items are recommended when packing camera gear for safari .
– Extra camera batteries are a must as are good rechargeable batteries for your flash.
– Card reader to download your memory cards.
– Storage device (laptop) and back up device (portable hard drive or other). I like to back up onto my laptop and then again onto a small portable hard drive.
Safari Photography Tip : When traveling keep your hard drive and laptop separate.

– Raincoat for camera or at least plastic bags. I like Storm Jacket Camera Covers .
– Sufficient memory cards. I shoot with Lexar cards and I favour large cards, 64 gigs and up. Download every day though. If you run out of memory on your laptop or storage, which is very possible on my photo safaris and workshops, memory cards can save the day.
– If you into landscapes then don’t forget Lee or Singh Ray Split ND filters, Polarizer and cable release.
– A Headlamp in your camera bag is a must for when we return or leave in the dark (which is always on an African wildlife photography safari).
– Cleaning cloth and dust blower. A chamois cloth is best to wipe raindrops.
– A shower cap, zip-lock bag and dustbin liner can go a long way in Africa to help keep the dust at bay.
Safari photography tip : Bring a couple of bungee cords along. These come in very handy to strap your bag down in the safari truck so that your camera bags do not bounce off the seat when we following wild dogs on an Okavango delta photo safari or following a leopard off road on this Africa photo safari in the form of a predator workshop.
Oh my word, I do not have all that equipment and I only have one camera?
Sorry, I did not mean to give you a heart attack. If you do not have all the equipment on the above list, please don’t stress. As a professional photographer, I live by the rule ‘do what you can with what you got’. Before I became a sponsored photographer I also only had one camera body and one lens fro years. The real secret behind African wildlife photography is getting to the right location at the right time and in the right light. When you do this, all you need is one camera and lens!
What about power supply?
There will always be a way to charge camera batteries and laptops. Most of the time this will be done in your tent but for mobile camps there is often a central charging station in the camp dining area. It is sometimes restricted by generator times or solar energy. Flexibility and ‘to be prepared’ is key when photographing in Africa so I suggest you definitely bring additional spare camera batteries and make sure you have a long-lasting laptop battery. A simple solution (although expensive) is also to bring lots of big memory cards.
Remember to bring your international adapter as the camps don’t always have these. In East Africa and many other parts, like on my Masai Mara photo safari and best Amboseli photo safari extension, the plugs are UK style and for my Botswana and South Africa predator workshop they are mostly a large round three-pin configuration .
Safari Photography Tip : Bring a plug strip so that you can charge all our devices at once.
How does seating on the safari work?
For all my African wildlife photography safaris I only have 3 photographers per vehicle and what we do is each photographer sits on the left-hand side of the vehicle. This way I can line you all up easily and quickly for that award winning shot. Having your own row means you can also shoot out the right as there will be times when it is impossible to position the left-hand side of the truck to face the action. To keep it fair we change seats for every safari drive and by moving one seat forward each time, you will get to shoot in each seat. When you get to the front row, you then start at the back again. This way no one feels like they are always in the worst seat.
I sit in front with the driver guide to direct him. For detailed reasons as to why I sit in front, please see my pre-booking FAQs .

Please note that on a Mashatu photo safari there is a tracker who sits on the back of the safari truck. This tracker helps us find photographic subjects and also directs the driver. When sitting in the back row, you will share that row with the tracker but this need not be a disadvantage as the tracker will always duck out of your way if you are shooting out the right-side. You can also get him to hold your spare camera and lens, or even your flash. If you do not want the tracker to join us then please specify this to me beforehand. The Mala Mala photo safari leg has no trackers. On my leopard photo safari the tracker sits on the front of the bonnet and in big cat sightings will climb on the back but he will not be a hindrance. s do not have trackers but if its a concern then please check in with me when booking your Africa photo safari .
If you bring a non photographing spouse along then you two will need to share a row so as not to hinder the other photographers. If you a photographer concerned about non-photographing partners joining, then please specify this so that we can make sure you on a tour with no non-photographing partners. Most of my safari clients travel alone so this is rarely an issue.
Safari Photography Tip : If you for medical reasons have to sit in a certain seat then please book a private African photography safari .
Jane Leland (USA)
Chris fischer (usa), rae-anne jammer (canada), start imagining the pictures you possibly will be taking through my galleries….

Follow Greg
.
Best Camera & Lens for Safari in Africa (All Budgets)
By Author Jurga
Posted on Last updated: May 11, 2023

Are you planning a trip to Africa and wondering what’s the best camera for safari or what lens to get for safari photography? In this post, you can read some suggestions for camera equipment to take on safari in Africa .
We cover some of the best cameras and lenses for safari photography. In addition, you can find some general tips for safari photography. Find out!
There are so many cameras and lenses that you can use for safari photography; it’s impossible to cover them all. In this post, I am sharing some general tips that you should know when choosing a camera and lenses for your safari trip.
At the bottom of the post, you can also find my personal recommendations for the best cameras, lenses, and also tripods for wildlife photography. Find out!
TIP: If you are looking for more general practical information about taking pictures, please check our guide with the best travel photography tips .

Best camera and lens for safari
We visited Africa several times and have been on numerous safaris. Watching other tourists taking pictures of the animals is often more entertaining than the safari ride itself.
People use every imaginable type of camera on safari. You see smartphones, tablets, but also 10kg half a meter long lenses which are impossible to hold still and are therefore pretty much useless on safari rides…
If you are a professional photographer going to Africa in order to photograph animals, then this post is not for you. If you don’t care about the pictures and only go on safari for the experience – then this article is not for you either.
This post is for hobby photographers who are going on safari and hoping to take at least a couple of decent quality pictures to bring home as a memory of this amazing experience.
Before I continue with what kind of camera equipment you best take on safari in Africa, there are a couple of things you should know. Read on!
What to know about taking pictures of animals on safari
- You cannot take good safari pictures with a smartphone, a tablet or a pocket camera. You can take ok pictures with the newest smartphones, but it’s incomparable with the quality you get with a DSLR camera.
- The chances of you getting a National Geographic – like close-up high-quality image of a hunting leopard in action are close to zero.
- You can take good quality pictures of safari animals even if you are not a pro. But you’ll need good equipment and it helps if you can learn a few basic photography techniques. As a minimum, you need one of the two, so if you don’t know much about photography, you definitely need a good camera and a decent lens.
If you don’t own a good camera yet, a trip to Africa is the perfect excuse to get one. Come on, you are going to spend thousands of dollars to go on a once-in-a-lifetime safari trip to Africa and take a pocket camera with you? Really? You’ll regret it the first day, take my word for it.
And no, your latest iPhone won’t do the job either. You may use it to photograph landscapes or a herd of zebras in a distance, but it will be completely useless for photographing moving animals (and they do move, they always do).
TIP: If you don’t feel like getting a DSLR camera for safari and having to change lenses, take a look at some of the best point-and-shoot cameras available at the moment. Technology doesn’t stand still and there are some really good cameras with amazing zoom possibilities that might be perfect for your needs. We ourselves just bought Nikon Coolpix P1000 and I’m quite impressed with this camera, the zoom, and image stabilization. For the price and the ease of use, I’m not sure I’ll ever want to take my DSLR & lenses on many trips anymore. For more budget-friendly alternatives with decent zoom, take a look at Panasonic Lumix FZ300 or the previous model of the camera we bought – Nikon Coolpix P900 .

Tips for choosing the best camera and lens for safari
I’m not going to go into too much detail about all kinds of different camera brands and models as there are so many of them available with new ones coming out all the time. You can find a few suggestions based on your budget below, but this is what you definitely should know about the best camera for a safari in Africa.
- You need a digital SRL camera or a very good, newest point-and-shoot to take on safari in Africa. What you need, basically, is a camera that focuses fast and takes a picture the moment you press the shutter and not a second later.
- You need a good telephoto zoom lens with a reach of at least 200mm to photograph safari animals. There will be moments you wish you had a 500mm with you, but in my view, it’s just not worth the price and the weight to carry a lens like that if you are not a professional photographer. Unless you get one of the point-and-shoot cameras that sometimes have a zoom that goes to 2000-3000mm – more about it below.
- You need a wider lens for photographing landscapes , which are often just as interesting as the animals. I use 24-70mm f2.8 as my main lens when we travel, also in Africa. If you like really wide landscape pictures, you may want an even wider lens, like 16-35mm (my new favorite). If you have a regular DSRL camera without the full-frame sensor, you’ll probably need a lens of at least 18-55mm for regular landscape shots and one of 10-18mm for wide-angle photography.
- You may want to take a second (cheaper) camera for photographing landscapes so that you don’t have to change lenses all the time when you are on safari. Or simply use your smartphone for that.
- Consider taking a tripod to photograph animals in low-light conditions (morning or evening) at the waterholes. More about it further below.
- Take enough batteries and memory cards when traveling to Africa – at least twice as much as for a regular trip. Charging batteries might not always be possible (certainly if you are camping) and you won’t find many places selling batteries or memory cards in the middle of the Kruger National Park or the Kalahari desert.

What camera to pack for safari
As I said before, this post is not for professional photographers, but rather for regular tourists. Also for photography enthusiasts traveling to Africa and hoping to get a few decent shots of safari animals.
Below you’ll find a few suggestions on what camera and lenses to take on safari .
I’m going to focus on Canon cameras and lenses as this is what I use and know best.
Best-buy cameras for safari in Africa
If you are looking for a decent camera for your trips, but don’t want to spend a fortune on it, you should consider the cheapest DSLR cameras available.
At Canon, it would be the Canon EOS Rebel series . Often you can get a kit (camera + lenses + accessories) for around 500-600 USD. If you don’t know much about photography and just want good pictures without too much effort this camera is just right for you.
Why not just buy a point-and-shoot camera? As already said, you do need fast autofocus and a good lens in order to get decent pictures of safari animals. This DSLR camera will take care of that. But as I’m updating this article, I have to say that there are now also very good point-and-shoot cameras that could do the job just as well. In this price range, we recommend something like Nikon Coolpix P900 .
Mid-price range safari camera
If you are looking for more possibilities and even better pictures and don’t mind spending a bit more money, Canon EOS REBEL SL3 and similar series might be a good option for you. This kind of camera is great for photography enthusiasts looking for a good price-quality camera to improve their photography skills.
Higher-price/ semi-pro quality camera
Probably the best price/quality DSLR cameras for those who are serious about travel photography are Canon EOS 6DII and similar series. If you want great quality pictures and use your camera on a very regular basis, then these cameras won’t disappoint you. However, we now have an even better recommendation at a lower price – see below.
The perfect camera for safari and general travel photography
TIP – our newest recommendation: In the mid-price range, but with an amazing lens included, so actually cheaper than most other cameras, you can also get a point-and-shoot camera Nikon Coolpix P1000 . This is the camera we recently bought and I really don’t think anything else compares to it in terms of possibilities/ flexibility/ price/ quality.
This all-in-one camera has an insane optical zoom of up to 3000mm, but you can also shoot wide landscapes with it. If you don’t want to change lenses but still want good picture quality and the best zoom range on the market, you really can’t go wrong with it.
In all honesty, I think it can compete with one of the latest models of the semi-pro Canon EOS 5D that I own (and that costs about 3-4 times more, not even to mention the lenses). It may not have all the possibilities of a professional camera, but for 99% of people looking for the best camera for safari (and travel in general), it will give you all you could ever wish for. At the moment of the latest update to this article, this is my personal favorite camera and I can highly recommend it to anyone!

Best lenses for safari
Consider investing in one or two really good lenses if you are somewhat serious about photography.
Standard EFS lenses from Canon are ok with the cheapest DSLR cameras and will do the job for occasional travel photography, but if you can afford it, get the best lens you can and rather save on the camera.
I started out with the cheapest DSLR some 10 years ago, but immediately bought two very good lenses ( Canon L 24-70 f2.8 and Canon L 70-200 f4 IS USM ). I’ve switched 4 cameras by now, but these two lenses still do the perfect job and are my most used lenses. I couldn’t have used the cheaper EFS lenses on the cameras I owned later…
It’s a big investment in the beginning, but the quality is worth it. On top of that, the good lenses keep their value and you can usually resell them at a good price later if you decide that photography is not for you.
As already mentioned, you need a good telephoto lens with a reach of at least 200mm in order to photograph safari animals. Preferably 300mm or even more if you can justify the cost and the weight. I use the Canon L series lenses, but there are plenty of cheaper alternatives from Canon, but also from Sigma or Tamron .
Just make sure they fit the camera you have as these brands have the same range of lenses for many different brands, including Canon and Nikon.

Best budget lens for safari
You can buy a good beginner’s lens for wildlife photography for $100-200. Canon has a 75-300mm f/4-5.6 or you can get a similar lens from Tamron – AF 75-300mm f/4-5.6 .
Mid-range safari lens
There is a lot of choice of good telephoto lenses for safari in the mid-range budget. Some good examples are Canon EF 70-300mm f/4-5.6 IS II USM or Canon EF 70-200mm f/4L USM .
You can even choose a 2-in-1 solution – a lens that is wide enough for landscapes, but also has a telephoto zoom for animals. Here are a couple of good examples: Canon EF-S 18-200mm f/3.5-5.6 IS or Tamron 28-300mm F/3.5-6.3 .
Best quality lenses for safari photography
The best lenses for wildlife photography will quickly cost you over $1000. As I said, it’s an investment and these lenses will do a great job for many years. However, if you only need a camera and tele lenses for this one safari trip to Africa, then it’s a really expensive choice.
Probably one of the best safari lenses from Canon is the Canon EF 70-200mm f/2.8L IS II USM . I personally find it a bit too heavy and too expensive to justify this purchase, but I still have to meet a photographer who doesn’t love this lens. I use a bit cheaper and lighter version – Canon EF 70-200mm f/4 L IS USM .
A good alternative with a bit more reach is Canon EF 70-300mm f/4-5.6L IS USM . I have to admit that I had one of these, but didn’t love it. Maybe it was just one bad lens, because the reviews are really great.
Best tripods for safari trip
If you only have the smallest DSLR and don’t want to spend too much money, remember that any tripod is better than none . As long as it can hold the camera without falling over, of course. Otherwise, you better don’t use any. You can get a tripod for under $50 and it will probably do the job.
If you have a heavier camera and/or lens, the cheapest tripod is not going to be good enough. I use and recommend Manfrotto tripods , depending on the camera/ lens weight and your needs.
For travelers, I recommend Manfrotto carbon tripods since they weigh much less and are therefore more suitable when traveling. They are not cheap, but worth every cent. I had two different tripods before I got this one 6 years ago, and none of the previous ones lasted even two years. Manfrotto is in constant use and it’s still as good as new.
For traveling, I bought Manfrotto 494RC2 ball head since it’s so small and takes less space in my luggage. I now actually use this ball head at home too.
So, this is our guide to the best safari cameras and lenses. I hope that it helps you decide what camera and lens to pack for your trip to Africa and get some really good pictures on safari.
For the best safari experience, make sure to also check our top tips for your first safari experience in Africa. Click the link below to read more!
READ ALSO: Africa Safari Tips
If you found this post helpful, don’t forget to bookmark it and share it with your friends. Are you on Pinterest? Pin this image!

This site uses Akismet to reduce spam. Learn how your comment data is processed .
Sunday 17th of March 2024
Hello Jurga, great article. I have several adventurous trips planned including going on a safari in South Africa in June. I want to upgrade my camera equipment, including with lenses that would be good for shooting wildlife and amazing vistas across the globe the next several years. I am willing to spend time learning more about photography to produce wonderful photographs. I have a Canon EOS 60 D, which I am willing to replace if there is a better option given my plans and interests. My aim is to be a serious amateur photographer rather than at the professional level. What cameras and lenses would you recommend in the mid low and high price categories?
Kind regards
Monday 18th of March 2024
Hi Lauren, if you want to stay with Canon and don't mind upgrading your entire set, then you may want to look into their new mirrorless cameras. So much depends on your budget. EOS R8 is quite affordable and would be a great improvement from 60D. If you have any old EF lenses that you want to use with this camera, then you'll need to get a lens adapter. If you are planning on getting completely new lenses, then you'll need Canon RF lenses. I recently upgraded to a similar camera from Canon, got the adapter, and it works fine with my old lenses. However, one of my most used lenses was so old and glitchy that I also bought a new one that I consider a rather good choice for most situations. I went with this 24-105/f4 lens and I'm quite happy with it. I had 24-70 f2.8 in the past, but I just couldn't justify the price and the extra weight anymore. I also have a wide angle lens (17-35) that I use in some situations and also a 70-200 lens which I consider a must for any wildlife photography. I also have a Nikon Coolpix with an even bigger zoom - the quality may not be the same, but it's easy since there is just one lens that covers a very wide range. But there is no way I'm taking all of these at the same time on any trip, so it's always a struggle which lenses/cameras to take with me depending on the trip. Anyway, it really depends on what type of camera you are looking for (all-in-one or with interchangeable lenses) and your budget. But if you want to stay with Canon and are looking for very good quality at a decent price, then you really can't go wrong with the EOS R8 and one or two mid-price not too heavy lenses (e.g. 24-105 f4 and 70-200 f4). If you don't mind the extra weight, you can find some very good lenses that go up to 400mm or even 500mm. But I would only consider these if you are very serious about wildlife photography. Hope this helps.
Wednesday 28th of February 2024
Hi! I currently have the Nikon Coolpix L840 which has 38x zoom. I'm SO tempted to upgrade to the coolpix p950 or p1000. However, it does seem like they're much bigger than my L840. Do you think 38x zoom is enough for safari? I'll be doing a 2 month overland trip and getting great photos is a priority for me - but also will be carrying everything around for 2 months so weight is a consideration. I have photographed wildlife in Yellowstone before, they were super far away and I remember being impressed by the zoom capability (this was almost 10 years ago when I first got it), but it doesnt feel as impressive compared to what I can do with just my phone (currently have Galaxy s24 Ultra). FYI, I'm definitely a hobby photographer, and very much rely on a good camera to get good photos!
Hi Dakota, if you are happy with your camera, I'm sure it will be fine. It sounds like it should be plenty for most situations - 38x optical zoom is a lot. The problem is always to keep the camera steady if you zoom in further, so more zoom doesn't automatically mean better pictures. That being said, obviously, there will be some difference in image quality between an old camera and newer models. Whether that's a reason enough to upgrade your camera, only you can decide. Also, having a good smartphone, you will probably be taking many pictures with it as well. It will be ok for general landscape shots and maybe even animals if they are not too far away. Just keep in mind that most of the time, pictures look very different on a big screen vs on your phone, even more so for zoomed-in images taken in less than optimal light conditions. Good luck with the decision and have a great trip!
Mary Morris
Friday 16th of February 2024
Hi Jurga, Thank you for all your great information and recommendations. I'm going on my first Safari July 2024. I have absolutely no knowledge of cameras, nor use one in my current life but with a trip like this coming up, I would like to have a dedicated camera instead of using my cell phone. I'm thinking of the Nikon CoolPix P1000 as a basic point and shoot camera. I don't want to deal with changing lenses or anything like that. Does this sound like a good choice?
Sunday 18th of February 2024
Hi Mary, yes, this Nikon camera is quite good offering you a wide range of reach for all kinds of situations. However, it's also quite big and not very cheap - maybe not really something you need if you won't use it much in the future. There are many other cheaper and smaller cameras with somewhat less zoom reach, which can be just as good for someone who only uses a camera for an occasional trip. For example, this Panasonic Lumix camera has a range of 25-600mm, very good fixed aperture (f2.8), and is quite affordable and lighter to pack. So if you only need a camera for this one trip, I think I wouldn't necessarily spend more than $400-500. Whatever camera you get, be sure to get at least 2 extra battery packs as well! Hope this helps. Have a great trip!
John Winter
Monday 15th of January 2024
After 10 years I retired my 10 Canon 650D (18MP APS-C) with Tamron 18-270mm zoom. Served me very well in my travels worldwide.
Now have Canon RP (FF 24MP) + RF 24-240 zoom. Love it. A cropped image from this @240mm this is better than the above @ 270mm (equiv 400).
Simplistically 11MP of the FF wins over 18MP APS-C. I'll ignore lens quality, changes in technology, etc. IQ great at 24MP FF but at 11MP FF it's fair to average.
So now . . what to do for the bucket list safari?
I've considered another EF(-S) lens for the old 650D. Second hand possible too. But then I'll have TWO sets of camera gear. Add 3-5 kg?
The RF 100-400 seems ideal for me. Can't justify superior L series. Forget heavy EF and adapters. Also, I only have the Tamron above. But I'd have to swap back to the 24-240 for under 100mm and for superior quality in 100-200 range.
I can't justify another FF body or a high end APS-C body (dearer than some FF!) either. A RF cropped image (when editing) could be OK for a little extra reach beyond 400mm.
How about a cheapish APS-C R100 or R50? Extra reach. No swapping lenses. At max reach, effectively 11MP FF versus 24MP APS-C. They use the same battery, etc as the RP, so no need for two sets of accessories. Will be close in feel / familiarity to the RP. Guessing R100 or R50 limitations won't matter for outdoor safaris, though R50 is better / faster AF.
Overall add1(one) Kg for extra camera + extra lens instead of 3-5kg using my old camera!
(Besides how to I 'sell' this to my wife?)
Tuesday 16th of January 2024
@Jurga, Thanks. The Canon RP 100-400 comes in at 635g. Decent IQ. A little 'different' to the 1370g EF lens you tried!
So I'd be at about 1 kg total for either camera with either lens.
FYI Canon have made the RF mount exclusive to them. No third party allowed. Best is an EF mount (any brand) with adapter. That add expense, inconvenience, weight and less than 100% compatibility. I don't have any EF lenses to 'rescue'. Only the one EF-S Tamron which is no longer competitive. But at least it looks like the Canon R series of cameras and lenses are developing into a decent range of quality, price and value for money.
Hi John, from what I read, you have done so much research already that I really don't think I can add much to it. To me, it sounds like the set you have and love (24-240) is actually more than sufficient for most situations (not the answer you hoped for? :)). But we all travel with different expectations and if safari photography is the main purpose of your trip, you'll likely choose different gear than someone who just wants a few photos to remember the experience or post a few pictures on social media... In the end, it's all about your personal preferences. Usually, you already know what you want and are just looking for ways to justify that ;). Nowadays, I personally, would go for the most versatile lightweight solution, so one lens if possible. Or a maximum of two not-too-heavy/long lenses knowing that the telezoom lens will probably end up on the camera 95% of the time. I once bought a 100-400 Canon L lens and ended up sending it back - it was just way too heavy and too long for me. So if you decide to go that way, read some reviews and considerations by people who actually used it. Tamron or others might, of course, be different/lighter, depending on the glass quality. Anyway, whatever you decide, good luck with convincing your wife ;). And if you decide to save some money not buying new gear, treat yourselves to a nice excursion/experience during the trip! Enjoy it!
Friday 24th of November 2023
Hi Jurga… we are going on our first safari in June. I am a newbie in photography (have a Canon t6i) and wondering what will be the best for bringing home amazing memories. I don’t want to worry about changing lenses while on drives. I am looking at either Tamron 18-400 mm, Lumix FZ1000 ll or Coolpix P1000. I’ve read the P1000 isn’t very good in low light situations. Any advise would be appreciated. Thanks in advance Nikki
Sunday 26th of November 2023
Hi Nikki, it's hard to say but indeed in low light, most 'allround' lenses will have difficulty, especially if you zoom in to the maximum (3000mm without digital zoom) and have to hold the camera in your hands vs using a tripod. I think that Tamron will be comparable at 400mm with Nikon at that same length. But you can't compare 400mm vs 2000-3000mm in any way. If you already have a Canon camera and can get a Tamron lens for quite a lot less than Nikon P1000, then I'd just get the lens and use the camera that you have. I would only get the Nikon if you absolutely want more reach (but indeed, keep in mind that it's very difficult to take sharp pictures when you hold the camera in your hands and zoom in to the maximum). Hope this helps. Enjoy your trip!
Safari Photography Guide
Embarking on an African safari promises an exhilarating and memorable adventure, and ensuring you have the appropriate camera gear is crucial for immortalizing those rare and exceptional moments. Canon stands out as a top choice among camera brands for safari photography, renowned for its superior image quality and robust build. This article delves into the optimal Canon cameras and lenses to seize breathtaking photos during an African safari. This safari photography guide focuses on Canon as it is the brand that I use for all my photography and I have found the bodies and lenses robust and able to withstand whatever nature chooses to throw at you while on safari.
Behind the Lens: A Peek into My Camera Bag Essentials
In the dynamic world of photography, having the right gear can make all the difference in capturing those picture-perfect moments. Here’s an in-depth look into what’s in my camera bag, a carefully curated selection of equipment that empowers me to unleash my creativity.
- Lowepro ProTactic BP 350 AW II (Camera Backpack)
The backbone of my photography setup is the Lowepro ProTactic BP 350 AW II. Crafted with precision, this camera backpack is a perfect blend of durability and functionality. Its customizable interior ensures a snug fit for my gear, while the all-weather cover provides protection against the elements. With its versatile design, this backpack is a reliable companion for photographers on the move.
- Canon R7 Camera
At the heart of my kit is the Canon R7 Camera. Boasting advanced features and a mirrorless design, it delivers outstanding performance and portability and with its crop sensor is perfect for safari photography. With a high-resolution sensor and rapid autofocus, the Canon R7 empowers me to capture crisp and vibrant images, making it an indispensable tool for both amateurs and professionals.
- Canon Mount Adapter EF-EOS R
Enhancing the versatility of my setup, the Canon Mount Adapter EF-EOS R allows seamless integration of my EF lenses with the Canon R7. This adapter ensures compatibility across the Canon lens ecosystem, giving me the flexibility to explore various shooting styles and perspectives.
- CANON EF 100-400MM F/4.5-5.6L IS II USM (Telephoto Lens)
When it comes to capturing distant subjects with precision, the CANON EF 100-400MM F/4.5-5.6L IS II USM is my go-to telephoto lens. Its impressive focal range and image stabilization technology enable me to achieve sharp, detailed shots, making it an essential tool for wildlife photography.
- SanDisk Extreme Portable SSD 2TB (Storage Solution)
Storage is never a concern with the SanDisk Extreme Portable SSD 2TB. This high-speed, compact storage solution ensures that I have ample space for my extensive collection of photos and videos. Its rugged design adds an extra layer of security, making it the perfect companion for on-the-go photographers.
- Lexar SILVER Series Professional 1667x 128GB UHS-II SDXC Memory Card
The Lexar SILVER Series Professional 1667x 128GB UHS-II SDXC Memory Card complements my camera’s capabilities with its high-speed performance. With rapid read and write speeds, this memory card ensures smooth data transfer, a crucial factor in capturing high-resolution images and recording 4K videos.
- CANON EF 24-105MM F/4L IS II USM (Versatile Zoom Lens)
The CANON EF 24-105MM F/4L IS II USM is a versatile workhorse in my kit. Its wide focal range and constant aperture make it suitable for a variety of shooting scenarios, from landscapes to portraits. The built-in image stabilization ensures sharp results even in challenging lighting conditions.
- MacBook Air 13-inch Apple M2 (Editing Powerhouse)
For on-the-go editing and organization, the MacBook Air 13-inch with the Apple M2 chip is my trusty companion. Its lightweight design and powerful processing capabilities allow me to review and edit photos with efficiency, ensuring a seamless workflow during and after photo sessions.
- Bose QuietComfort Ultra Headphones (Immersive Audio Experience)
These headphones provide an unparalleled audio experience with exceptional noise cancellation, perfect for long flights and allowing me to focus entirely on my work, whether I’m editing photos or reviewing footage, or listening to music.
- Manfrotto Element Travel Tripod (Stability on the Go)
Stability is paramount in photography, and the Manfrotto Element Travel Tripod delivers just that. With its lightweight design and quick setup, this tripod provides a steady platform for capturing long-exposure shots, group portraits, or any scenario where stability is key.
- Spare Canon LP-E6NH Lithium-Ion Battery
To ensure uninterrupted shooting, I always carry a spare Canon LP-E6NH Lithium-Ion Battery. With extended battery life, I have the peace of mind that I won’t miss a crucial moment, especially during extended photo sessions or while exploring remote locations.
- iPhone 15 Pro Max (Smartphone Camera)
Lastly, the iPhone 15 Pro Max serves as a versatile tool for quick captures and behind-the-scenes moments. With its advanced camera capabilities, it complements my professional gear and allows me to document scenes spontaneously, ensuring no moment goes uncaptured.
Photography Tips
Engaging in safari photography offers a rare chance to capture breathtaking wildlife images in their native surroundings. Yet, achieving these moments can be daunting without a grasp of the optimal camera settings. Armed with the right configuration, you can produce sharp, well-exposed photographs with vibrant colors. This section will explore the most effective camera settings and offer tips for successful safari photography.
Shutter Spee d
Capturing the essence of movement is crucial in safari photography, making shutter speed a vital setting. Opting for a faster shutter speed proves effective in freezing the motion of swift-moving animals. Typically, a recommended shutter speed of 1/1000th of a second or faster is advised for wildlife photography. Adjustments to the shutter speed may be necessary depending on the animal’s movement and the prevailing lighting conditions.
Slow shutter speed can also play a crucial role in enhancing the artistic and dynamic elements of safari photography. While a faster shutter speed freezes fast-paced movement, a slower shutter speed introduces intentional blur, imparting a sense of motion to the image. This effect can be particularly useful when capturing the graceful movements of animals, such as a herd of wildebeests or a bird in flight.
By deliberately slowing down the shutter speed, you allow more light to enter the camera, contributing to a longer exposure time. This can result in visually striking photographs, showcasing the ambient light and creating a sense of drama in the scene. It’s important to note that using a slow shutter speed requires a steady hand or, preferably, a tripod to avoid unwanted camera shake.
Experimenting with slow shutter speeds in safari photography opens up creative possibilities, offering a unique perspective that goes beyond simply freezing action. Consider incorporating this technique when the opportunity arises, and adapt your settings based on the specific conditions and subjects encountered during your safari adventure.
In safari photography, mastering the relationship between aperture and depth of field is key to creating compelling and visually striking images. The aperture, the opening in the camera lens that controls the amount of light entering, plays a dual role by significantly influencing the depth of field in your photographs.
A wide aperture, represented by a smaller f-number (e.g., f/2.8 or f/4), is advantageous for safari shots. This setting allows more light to reach the camera sensor and creates a shallow depth of field. This shallow depth of field results in the main subject, such as a magnificent lion or an elegant giraffe, being sharply focused, while the background is beautifully blurred. This technique not only isolates the subject but also adds a pleasing aesthetic element to the image.
On the other hand, a narrow aperture, represented by a larger f-number (e.g., f/11 or f/16), increases the depth of field. This is useful when you want to keep both the foreground and background in focus, capturing the broader context of the scene. It’s essential to strike a balance between aperture and depth of field based on your creative vision and the specific composition you aim to achieve.
Understanding how to manipulate the aperture for optimal depth of field empowers you to adapt to different safari scenarios and improve your safari photography. Whether you’re highlighting a single animal against a dreamy backdrop or capturing the expansive landscape with various subjects in sharp focus, mastering aperture settings enhances the storytelling potential of your safari photography.
ISO is a measure of your camera’s sensitivity to light. A higher ISO can help you achieve a faster shutter speed in low-light conditions. However, a high ISO can also introduce noise or grain in your images. You should try to use the lowest ISO possible to achieve the desired shutter speed and aperture. A good starting point for ISO is 400, but you may need to adjust it based on the lighting conditions.
When capturing animal photographs on a safari, selecting the right focus mode is crucial to ensure that you achieve sharp and well-focused shots, especially considering the unpredictability of wildlife behavior. Here are some focus modes and considerations for taking animal photographs on safari:
- Continuous Autofocus (AI Servo or equivalent): This focus mode is essential for photographing moving subjects, such as animals in action. Continuous autofocus allows the camera to track the subject and adjust focus continuously, ensuring that your shots remain sharp even as the animal moves within the frame. It’s particularly useful for dynamic scenes like animals in motion or engaged in activities. This is the mode in which I normally have my camera set.
- Single Autofocus (One-Shot AF): When photographing stationary animals or capturing portraits, using the Single Autofocus mode can be effective. This mode locks focus on a specific point, and it’s suitable when your subject is relatively still. It allows you to achieve precise focus on the animal, especially when capturing detailed shots or portraits.
- Face and Eye Detection: Many modern cameras, including those used for safari photography, come equipped with advanced face and eye detection technology. When photographing animals, especially those with distinct facial features, enabling face and eye detection can help the camera automatically focus on the eyes or faces of the animals, resulting in compelling and engaging images. This needs to be set in your camera menu.
- Zone or Expanded Area Autofocus: For situations where your subject may move unpredictably within a certain area of the frame, using a zone or expanded area autofocus mode can be beneficial. This allows the camera to focus on a broader region, making it more forgiving if the animal moves slightly within the selected zone.
- Manual Focus: In certain scenarios, such as when dealing with challenging lighting conditions or when the camera’s autofocus might struggle, switching to manual focus gives you full control over focusing. This can be particularly useful for capturing shots where the autofocus system might have difficulty, such as in dense vegetation or low-light environments.
When on a safari, it’s essential to be ready for various shooting conditions and animal behaviors. Experimenting with different focus modes and being familiar with your camera’s autofocus capabilities will help you adapt to different situations, ensuring that you can capture stunning and well-focused animal photographs on your safari adventure.
Exposure mode
When on safari, selecting the appropriate exposure mode on your Canon camera is crucial for capturing well-exposed and visually appealing photographs in a variety of lighting conditions. Canon cameras typically offer several exposure modes, and the choice depends on the specific shooting scenario. Here are some exposure modes to consider:
- Aperture Priority (Av): This mode allows you to set the desired aperture while the camera automatically adjusts the shutter speed to achieve a proper exposure. Aperture Priority is useful when you want to control the depth of field, especially in wildlife photography where isolating the subject with a blurred background might be desirable.
- Shutter Priority (TV): Shutter Priority lets you choose the shutter speed while the camera adjusts the aperture accordingly. This mode is beneficial for capturing fast-moving animals or freezing motion in dynamic scenes. For example, when photographing wildlife in action, a faster shutter speed can help avoid motion blur.
- Program (P) Mode: In Program mode, the camera automatically sets both the aperture and shutter speed based on the scene’s lighting conditions. This mode is convenient when you want a balance between control and automation, suitable for situations where lighting is relatively consistent.
- Manual (M) Mode: Manual mode provides full control over both aperture and shutter speed. This mode is beneficial when dealing with challenging lighting situations or when you want precise control over exposure settings. It’s particularly useful for capturing diverse safari scenes where lighting conditions may vary.
- Auto (Green Square or Scene Modes): The Auto mode is suitable for beginners or situations where you want the camera to handle most of the exposure settings. Many Canon cameras also offer scene modes, allowing you to select a specific scenario (e.g., landscape, portrait, sports) for optimized settings.
- Exposure Compensation: Regardless of the exposure mode you choose, exposure compensation is a valuable tool. It allows you to adjust the exposure up or down in increments to compensate for challenging lighting conditions. This can be crucial when dealing with backlit subjects or scenes with high contrast.
When on safari, be prepared to encounter a variety of lighting situations, from bright sunlight to low-light conditions during sunrise or sunset. Familiarizing yourself with the different exposure modes on your Canon camera and understanding how they affect aperture, shutter speed, and ISO will help you adapt to the diverse and dynamic environments of a safari, ensuring you capture stunning images with optimal exposure.
RAW VS JPEG
When embarking on a safari adventure with your Canon camera, the choice between shooting in RAW or JPEG format becomes a crucial decision, each with its own set of advantages and considerations. My safari photography is done solely in RAW.
RAW Format:
- Maximum Image Quality: RAW files contain uncompressed and unprocessed data captured by the camera’s sensor. This results in the highest image quality and provides more flexibility in post-processing.
- Greater Dynamic Range: RAW files retain more information in highlights and shadows, allowing for better recovery of details in post-production. This is particularly useful in challenging lighting conditions often encountered on safaris.
- Extensive Editing Options: RAW files offer a broader range of editing possibilities, enabling adjustments to exposure, color balance, and sharpness without significant loss of quality.
- White Balance Flexibility: RAW allows you to fine-tune white balance settings during post-processing, providing greater control over the final appearance of your images.
- Optimal for Print and Large Prints: RAW files are well-suited for large prints due to their higher resolution and superior image quality.
JPEG Format:
- Smaller File Sizes: JPEG files are compressed, resulting in smaller file sizes. This can be advantageous for conserving storage space on memory cards and hard drives.
- In-Camera Processing: JPEG files undergo in-camera processing, applying settings like white balance, sharpness, and color saturation at the time of capture. This can be convenient if you prefer minimal post-processing.
- Quick Sharing: JPEGs are easily shareable as they are ready to be uploaded or sent without the need for extensive post-production. This can be beneficial when sharing images promptly, such as on social media.
- Faster Burst Rates: Shooting in JPEG allows for faster burst rates and longer continuous shooting, beneficial when capturing rapid sequences of wildlife action.
Considerations:
Storage Capacity: RAW files consume more storage space than JPEGs. Ensure you have sufficient memory cards and storage devices, especially if you plan to shoot extensively.
Post-Processing Skill: If you are comfortable with post-processing and desire maximum control over your images, shooting in RAW is recommended. However, if you prefer minimal editing and quicker workflows, JPEG may be suitable.
Backup: Given the larger file sizes of RAW, having a robust backup strategy is essential to avoid the loss of valuable images.
Ultimately, the choice between RAW and JPEG depends on your preferences, post-processing workflow, and the level of control you seek over your safari photographs. Many photographers opt for shooting in RAW for the superior image quality and flexibility it provides during post-production, especially when capturing the diverse and challenging conditions of a safari environment.
Familiarize Yourself with Your Camera Settings
Before embarking on your safari, take the time to acquaint yourself with the settings of your Canon camera. Knowing how to manipulate factors like aperture, shutter speed, and ISO is crucial for capturing captivating photos of wildlife and landscapes. Opting for manual mode grants you complete control over your camera settings, enabling adjustments tailored to the specific shooting conditions. For beginners, Aperture Priority mode serves as a viable option, providing control over depth of field while the camera automatically adjusts other settings.
Use a Telephoto Lens
When embarking on a safari adventure in Africa, having the right telephoto lens can significantly enhance your wildlife photography. Canon, a renowned camera and lens manufacturer, offers a variety of telephoto lenses designed to capture the beauty and essence of African wildlife.
To explore these lenses further and make an informed decision, you can check out real reviews from experienced photographers by clicking on the respective links. These firsthand experiences will give you valuable insights into the capabilities of each lens and help you choose the perfect companion for your safari photography journey.
Canon RF 100-400mm f/5.6-8 IS USM Lens
- Compact, lightweight, and high-image quality RF Tele zoom lens
- Optical Image Stabilizer with up to 5.5 Stops of shake correction
- High speed, smooth, and quiet autofocus with Canon’s Nano USM
- 9-blade circular aperture for beautiful bokeh
- Control Ring for direct setting changes
Canon EF 100-400mm f/4.5-5.6L IS II USM :
- Versatile zoom range for flexibility in framing distant subjects.
- Advanced Image Stabilization (IS) for sharp handheld shots.
- Excellent image quality with fluorite and super UD glass elements.
- Fast and accurate autofocus for capturing fast-moving wildlife.
Canon EF 70-200mm f/2.8L IS III USM :
- A professional-grade telephoto zoom lens with a wide aperture.
- Ideal for capturing wildlife portraits and details.
- Superior image stabilization for handheld shooting.
- Durable build suitable for rugged safari conditions.
Canon EF 400mm f/2.8L IS III USM :
- Exceptional image quality with a wide aperture for low-light conditions.
- Super telephoto reach for capturing distant subjects.
- Advanced IS technology for stable handheld shooting.
- Lightweight design for easier portability during safari excursions.
Canon RF 100-500mm f/4.5-7.1L IS USM :
- Designed for Canon’s RF mount, offering compatibility with mirrorless cameras.
- Impressive zoom range for versatile composition.
- Image Stabilization for sharp images at longer focal lengths.
- Compact and lightweight design for travel and safari use.
Canon EF 600mm f/4L IS III USM :
- Super telephoto lens with an ultra-wide aperture for exceptional light gathering.
- Ideal for capturing distant or elusive wildlife with incredible detail.
- Advanced IS system for handheld stability.
- Robust build with magnesium alloy construction.
Canon EF 200-400mm f/4L IS USM Extender 1.4x :
- Unique built-in extender for increased focal length flexibility.
- Versatile zoom range suitable for a variety of safari scenarios.
- Advanced optical design for high-quality images.
- Durable construction for challenging environmental conditions.
When selecting a telephoto lens for safari photography, consider factors such as focal length, aperture, and image stabilization. The choice depends on your specific preferences, the type of wildlife you plan to capture, and the shooting conditions you expect to encounter during your African safari.
Consider using a Wide-Angle Lens
When embarking on a safari adventure in Africa, a wide-angle lens can be a valuable addition to your camera gear. While telephoto lenses are often associated with wildlife photography, wide-angle lenses offer unique opportunities to capture the vast landscapes, stunning scenery, and the broader context of the safari experience. Here are some Canon wide-angle lenses to consider and why you might use them on a safari:
Canon EF 16-35mm f/2.8L III USM :
- Versatile Wide-Angle Zoom: This lens covers a broad range of focal lengths, making it versatile for capturing both expansive landscapes and closer subjects.
- Large Aperture: The wide f/2.8 aperture allows for excellent low-light performance and creative control over depth of field.
- Durable Construction: With weather-sealing and robust build quality, it’s suitable for varied safari conditions.
Canon RF 15-35mm f/2.8L IS USM :
- Designed for Mirrorless Cameras: This lens is part of Canon’s RF series, providing compatibility with their mirrorless cameras.
- Image Stabilization: The inclusion of image stabilization is beneficial for handheld shooting, especially in low-light situations.
- High Optical Performance: Offers sharpness and clarity across the frame, capturing the vibrant details of African landscapes.
Canon EF 24mm f/1.4L II USM :
- Wide Aperture: With a wide f/1.4 aperture, this lens excels in low-light conditions, allowing you to capture the magical moments of sunrise or sunset on the safari.
- Prime Lens Quality: As a prime lens, it delivers exceptional optical performance and is well-suited for capturing wide-angle scenes with stunning clarity.
Canon RF 14-35mm f/4L IS USM :
- Ultra-Wide Angle: This lens offers an ultra-wide focal length, ideal for capturing dramatic landscapes and immersive safari scenes.
- Image Stabilization: Equipped with image stabilization for handheld stability, even at wider angles.
- Compact and Lightweight: Designed for portability, making it a practical choice for travel and safari expeditions.
Why Use a Wide-Angle Lens on Safari:
Landscape Photography: Wide-angle lenses are perfect for capturing the vastness of African landscapes, showcasing the sweeping plains, majestic mountains, and expansive skies.
Environmental Context: Wide-angle lenses help tell a more comprehensive story by including the surroundings, and providing context to the wildlife and their habitat.
Creative Perspectives: Wide-angle lenses allow for creative compositions, emphasizing foreground elements and creating a sense of depth in your images.
Group Shots: When photographing groups of animals or scenes with multiple subjects, a wide-angle lens ensures you can fit more into the frame.
In summary, incorporating a wide-angle lens into your camera kit for an African safari enables you to capture breathtaking landscapes and diverse environments, providing a well-rounded photographic narrative of your safari experience.
Best Canon Cameras For Safari
Choosing the right Canon camera for an African safari involves considering factors such as budget, features, and the level of photographic expertise. Here are recommendations for affordable, mid-range, and professional-level Canon cameras that are well-suited for capturing the diverse and dynamic scenes encountered during an African safari:
Affordable Cameras:
Canon EOS Rebel T7i (EOS 800D):
- Budget-Friendly: The Rebel T7i offers an affordable entry point for those on a budget.
- 24.2MP APS-C Sensor: Provides decent image quality for capturing wildlife and landscapes.
- Dual Pixel CMOS AF: Ensures quick and accurate autofocus, handy for spontaneous wildlife moments.
Affordable RF Canon Cameras
Canon EOS R100
- Entry-Level Mirrorless: A budget-friendly mirrorless option24.1 Megapixel (APS-C) CMOS Sensor with ISO 10025600 (H: 51200
- Built-in Wi-Fi and NFC Technology.
- 9-point AF System and AI Servo AF
- Optical Viewfinder with Approx. 95% Viewing Coverage
- 3.0-inch LCD with 920,000 Dots
- Scene Intelligent Auto Mode – Full HD 30p
- Canon EOS Rebel SL3 DSLR Camera
- Lightest, Smallest EOS DSLR camera.
- High Image Quality with 24.1 Megapixel CMOS (APS-C) Sensor
- Fast and Accurate Dual Pixel CMOS AF with Eye Detection AF
- 4K Video, 4K Time-lapse Movie
- Vari-angle Touchscreen, 3.0-inch LCD.
- Built-in Wi-Fi and Bluetooth Technology with Auto Image Transfer.
Mid-Range Canon Cameras :
- Canon EOS 90D
- Fast continuous shooting, Capture the action at up to 10fps
- 32.5 megapixel APS-C CMOS sensor, For exquisite detail
- Intelligent optical viewfinder, Comfortable to use even over long periods
- 45 cross type AF points with multi-controller, Focus quickly and accurately even in low light
- iTR focus tracking, Keep even fast-moving subjects in focus
- 4K filmmaking and Dual Pixel CMOS AF, Superb quality video and audio
- Canon EOS 6D Mark II
- Full-Frame Power: A mid-range full-frame option.26.2 Megapixel Full-frame CMOS Sensor
- Optical Viewfinder with a 45-point All Cross-type AF System
- Dual Pixel CMOS AF with Phase-detection & Full HD 60p
- DIGIC 7 Image Processor, ISO 100-40000
- Vari-angle Touch Screen, 3.0-inch LCD
- Built-in Wi-Fi, NFC, Bluetooth and GPS
- Canon EOS R7
- High Image Quality with a 32.5 Megapixel (APS-C) CMOS Sensor
- High-Speed Shooting
- Blazing Fast Autofocus
- 5-axis In-body Image Stabilization with auto-level technology
- Record each clip over 30 minutes
- Get professional quality video with Smart Shoe integration for audio and HQ 4K
.
Pro Canon Cameras
- Canon EOS R3 Mirrorless Camera
- High Image Quality with a Back-illuminated Stacked 24.1 Megapixel Full-frame CMOS Sensor
- DIGIC X Image Processor with an ISO range of 100-102400; Expandable to 204800
- The First EOS Digital camera to feature Eye Control AF
- 5.76-million-dot & 120fps blackout-free EVF with quick response, as well as a Vari-Angle Touchscreen
- Capable of recording 6K 60P RAW or 4K 120p 10-bit (uncropped) with Canon Log 3
- Dual Card Slots for CFexpress and UHS-II SD Memory Cards
- Canon EOS 1DX Mark III
- A new era in autofocus speed and accuracy
- Outstanding stills and video
- High speed camera communications
- Always ready to perform, whatever the situation
- Enhanced DIGIC Processor
- New CMOS Sensor
Considerations When Buying a Canon Camera for Your African Safari:
Focal Length and Lens Compatibility: Ensure the camera is compatible with the lenses you need for wildlife and landscape photography, considering both EF and RF lenses.
Autofocus Performance: Wildlife photography demands reliable autofocus, so look for advanced autofocus systems like Dual Pixel CMOS AF for quick and accurate focusing.
Weather Sealing: Given the varied conditions on safari, having a camera with weather-sealed construction is crucial for durability and protection against the elements.
Portability and Weight: Consider the size and weight of the camera, especially if you plan to carry it for extended periods during safari excursions.
Battery Life: Longer battery life is beneficial for extended periods in the field. Consider having spare batteries for backup.
Video Capabilities: If you plan to document your safari in video format, consider cameras with advanced video features, such as 4K recording and high frame rates.
Low-Light Performance: Given the early morning and late evening safari excursions, good low-light performance is essential for capturing wildlife in natural lighting conditions.
Budget: Determine your budget range and choose a camera that offers the best features within that range. Consider investing in good lenses as well.
- It Is Important To Pay Attention To The Lighting.
Lighting is a crucial aspect of photography, and when on safari, capturing the vibrant colors, textures, and details of wildlife and landscapes depends significantly on understanding and utilizing available light conditions. Here are considerations and tips for handling lighting while on a safari photography expedition:
- Golden Hours:
- Early Morning and Late Afternoon: The golden hours around sunrise and sunset provide soft, warm, and directional light. This lighting not only enhances the natural colors of the environment but also creates long shadows, adding depth and dimension to your photographs.
- Harsh Daylight:
- Use Shadows Creatively: Embrace the challenges of harsh midday sunlight by incorporating shadows creatively. These shadows can add contrast and drama to your images, especially when capturing textured landscapes or wildlife features.
- Cloudy Days:
- Even and Soft Lighting: Overcast or cloudy days can provide even and soft lighting. This diffuse light reduces harsh shadows and can be advantageous for capturing details and colors without the distraction of strong contrasts.
- Backlighting:
- Silhouettes and Rim Lighting: Experiment with backlighting, especially during sunrise or sunset. This technique can create silhouettes and add a beautiful rim light to your subjects, highlighting their contours against the backdrop.
- Adapt to Changing Conditions:
- Be Flexible: Safari conditions can change rapidly, from bright sunlight to overcast skies. Be prepared to adapt your settings and compositions accordingly. Stay alert to the changing atmosphere and adjust your approach as needed.
- Use Natural Frames:
- Utilize Trees and Vegetation: Take advantage of natural elements like trees or bushes to create frames within your composition. These frames can add interest to your photos and also help control the intensity of sunlight.
- Consider the Animal’s Perspective:
- Capture Catchlights: When photographing animals, pay attention to the catchlights in their eyes. Position yourself so that the light enhances the catchlights, bringing life and sparkle to the subject’s eyes.
- White Balance:
- Adjust for Conditions: Set your camera’s white balance according to the prevailing conditions. Different lighting situations may require adjustments to maintain accurate and natural color tones.
- Avoid Direct Flash:
- Opt for Natural Light: While flash can be useful in certain situations, especially for fill-in light, try to rely on natural light as much as possible. It provides a more authentic and visually appealing look to your safari photographs.
- Patience and Observation:
- Wait for the Right Moments: Patience is key in wildlife photography. Observe the behavior of animals and be ready to capture those magical moments when the lighting is just perfect.
- Silent and Respectful Approach:
- Minimize Disturbance: Approach animals silently and respectfully to avoid disturbing their natural behavior. This not only ensures ethical photography but also allows you to capture them in their most relaxed and authentic state.
- Lens Hoods and Filters:
- Minimize Lens Flare: Use lens hoods to minimize lens flare caused by direct sunlight. Consider using polarizing filters to manage reflections and enhance colors.
Conclusion:
Lighting is a dynamic element in safari photography, and understanding how to adapt to different conditions will significantly impact the quality of your images. Whether you’re capturing the warmth of a sunrise, the drama of a storm, or the soft glow of an overcast day, being attuned to the nuances of lighting will help you create stunning and evocative safari photographs.
Best Software To Edit Safari Photos
Editing safari photographs requires software that can handle various aspects such as color correction, exposure adjustments, and fine-tuning details to bring out the beauty of wildlife and landscapes. Here, I’ll discuss three popular software options for editing safari photographs: Adobe Lightroom, Adobe Photoshop, and Luminar Neo.
- Adobe Lightroom:
- User-friendly interface: Lightroom’s intuitive interface makes it accessible for both beginners and experienced photographers.
- Non-destructive editing: Lightroom preserves the original image, allowing you to experiment with edits without altering the original file.
- Efficient organization: The software offers robust cataloging and organizational tools, helping users manage large collections of safari photographs.
- Synchronization: Edits made in Lightroom can be synchronized across multiple devices, facilitating a seamless editing workflow.
- Key Features: Global and local adjustments: Lightroom enables users to make overall adjustments to the entire image or target specific areas using the Graduated Filter, Radial Filter, and Adjustment Brush tools.
- Presets and profiles: The software includes a variety of presets and profiles, allowing users to apply predefined settings or create their own for consistent editing.
Advanced editing capabilities: Photoshop is a powerful software for intricate and detailed edits, making it suitable for tasks like retouching and compositing.
Layers and masks: The ability to work with layers and masks provides a high level of control over specific elements in the image, enhancing flexibility in editing.
- Key Features:
- Retouching tools: Photoshop offers advanced retouching tools, such as the Healing Brush and Clone Stamp, which are useful for removing distractions or imperfections in safari photographs.Advanced color correction: Photoshop provides extensive color correction tools, allowing photographers to fine-tune the color balance and enhance the vibrancy of safari images.
Luminar Neo:
- AI-powered editing: Luminar Neo leverages artificial intelligence to streamline the editing process, making it easier for photographers to achieve impressive results quickly.
One-click enhancements: The software includes AI-driven features like Accent AI, which automatically enhances images with a single click, saving time in the editing workflow.
- Sky replacement and AI filters: Luminar Neo offers creative tools like AI Sky Replacement, allowing photographers to change the sky in their safari photographs easily. Additionally, AI filters enhance specific aspects of the image, such as details and colors.
In conclusion, Adobe Lightroom, Adobe Photoshop, and Luminar Neo are all excellent choices for editing safari photographs, each offering unique features and strengths. Lightroom is ideal for efficient organization and global adjustments, Photoshop excels in detailed editing and retouching, while Luminar Neo stands out with its AI-powered enhancements and creative tools. Choosing the best software depends on the specific needs and preferences of the photographer.
Patient, Observant Wildlife Photography
Wildlife photography is a fascinating and challenging genre of photography. It requires a lot of patience and observation, as well as technical skill and knowledge of animal behavior. In this article, we will discuss some tips for being patient and observant in wildlife photography.
Research and Plan
Before heading out to photograph wildlife, it’s important to research and plan your trip. Research the animal behavior and habitat, as well as the best time of day and season to photograph them. Knowing where and when to find your subject will save you time and increase your chances of getting the shot you want. Planning also involves choosing the right gear, clothing, and accessories for your trip.
Be Quiet and Still
Wild animals are sensitive to noise and movement, so it’s important to be quiet and still while photographing them. Avoid making sudden movements, rustling leaves, or loud noises that could startle or scare the animal away. Move slowly and deliberately, and keep a low profile. Wildlife is more likely to approach you if you look and act non-threatening.
Observe the Animal Behavior
Observing animal behavior is essential to capturing great wildlife photos. Pay attention to their movements, body language, and interactions with other animals. This will give you insight into their behavior and help you anticipate their next move. Knowing when and where to point your camera will increase your chances of getting the shot you want.
Wait for the Right Moment
Wildlife photography requires patience, and waiting for the right moment is key to getting a great shot. Observe the animal and wait for it to do something interesting or unique. Be prepared to wait for hours or even days to get the shot you want. The key is to be patient and ready for when the animal does something interesting.
Be Respectful of the Animals
Respect for the animals and their habitat is crucial in wildlife photography. Avoid disturbing the animal or its environment by keeping a safe distance and avoiding feeding or touching them. Respect their space and be mindful of their safety and well-being. Remember, the animal’s welfare comes first, and photography comes second.
Patience and observation are essential to capturing great wildlife photos. Research and planning, being quiet and still, using a telephoto lens, observing animal behavior, waiting for the right moment, being respectful of the animals, using natural light, and shooting in continuous mode are all important techniques to master. With practice, skill, and a lot of patience, you can capture stunning wildlife photos that will inspire and delight others. Remember, the key to great wildlife photography is to be patient, observant, and have fun with creativity.
Related Posts

CemAir: My Last Flight – Here’s Why
- Feb 26, 2024

Slow Lounge Cape Town: A Haven of Comfort and Luxury
- Feb 15, 2024

Safari Snapshots: Mastering iPhone Photography in the Wild
- Jan 30, 2024
WhatsApp John Finch Travel
The Phoblographer may receive affiliate compensation for products purchased using links in this article. For more information, please visit our Disclaimers page .
Sony Photographers: Consider This Great Lens for Safari Photography

Paired with a Sony a7, Sony a9, or Sony a1 camera body, this is probably the only lens you’ll need for safari shooting. The Tamron 150-500mm is experiencing instant savings right now. Want a lens with weather-sealing and good autofocus? If there is anything we’re sure of it’s that this lens is one of the best birding lenses for the Sony FE camera system. In our review , we found it to be a great lens for wildlife. “Want a nice photo of a butterfly?” says Reviews Editor Hillary Grigonis. “This is the combo you’ll want.” She’s referring to the Sony a7 series cameras with the Tamron 150-500mm f5-6.7 Di III VC VXD. Besides good image quality, it’s fairly lightweight and boasts some incredible weather sealing. It’s available with savings over at Adorama and Amazon . These $100 savings on the Tamron 150-500mm f5-6.7 Di III VC VXD end on February 27th 2022.
You can view this article and much more with minimal banner ads in our brand new app for iOS, iPadOS , and Android . And for $24.99/year, you can have a banner ad-free experience.
The Phoblographer’s Cheap Photo deals posts are designed to focus on giving you some of the best deals on photography gear we find. We spend a literal business day researching the most attractive camera deals, lens price drops, and all other sales we can find. Some of the gear is brand new. But other times we’ll serve used or refurbished products at good prices. Our Cheap Photo Deals are different from the Phoblographer’s thoroughly researched Feature Roundups . If we’ve tested a unit, we may link to our reviews and coverage in our Cheap Photo Deals. With our Feature Roundups, we’re guaranteed to have used the product — often exhaustively. The site may receive affiliate commission payments if you make a purchase. These help us keep the staff fairly compensated, the server bill paid, and us continually delivering content.
The Best Safari Camera Recommendations
This post may contain affiliate links which means we may get a commission if you make a purchase at no additional cost to you. As an Amazon Associate we earn from qualifying purchases. Please read our disclosure for details.
"Each product we feature has been independently selected and reviewed by our editorial team. If you make a purchase using the links included, we may earn a commission."
An African safari is one of those experiences that you will want to replay in your mind. Whether you want to capture a leopard devouring its prey on a high tree branch, or a baby elephant happily roaming amongst the giant parents, you need the best camera for safari and wildlife. While it is quite straightforward to capture landscape views even on the phone, your camera has to have more advanced features for the optimum safari experience.

You might not know where to begin your research before purchasing an advanced safari camera. Don’t worry, that’s what we are here for.
The Types of Camera Suitable for Wildlife Photography
Depending on the type of safari you will embark, and – obviously – your budget, there are different options to choose from. Here, your main goal should be to capture photos that will retain the quality on a large screen without any pixelations. So, here are five different types of safari cameras to consider.
DSLR Camera
General description.
A digital SLR camera is perhaps the heaviest option among the five, yet it comes with rewarding photos. SLR stands for Single Lens Reflex , which is a mirror integrated inside the camera lens. Unlike some other types of digital cameras, you can look through the viewfinder and see your target view with your own eyes.
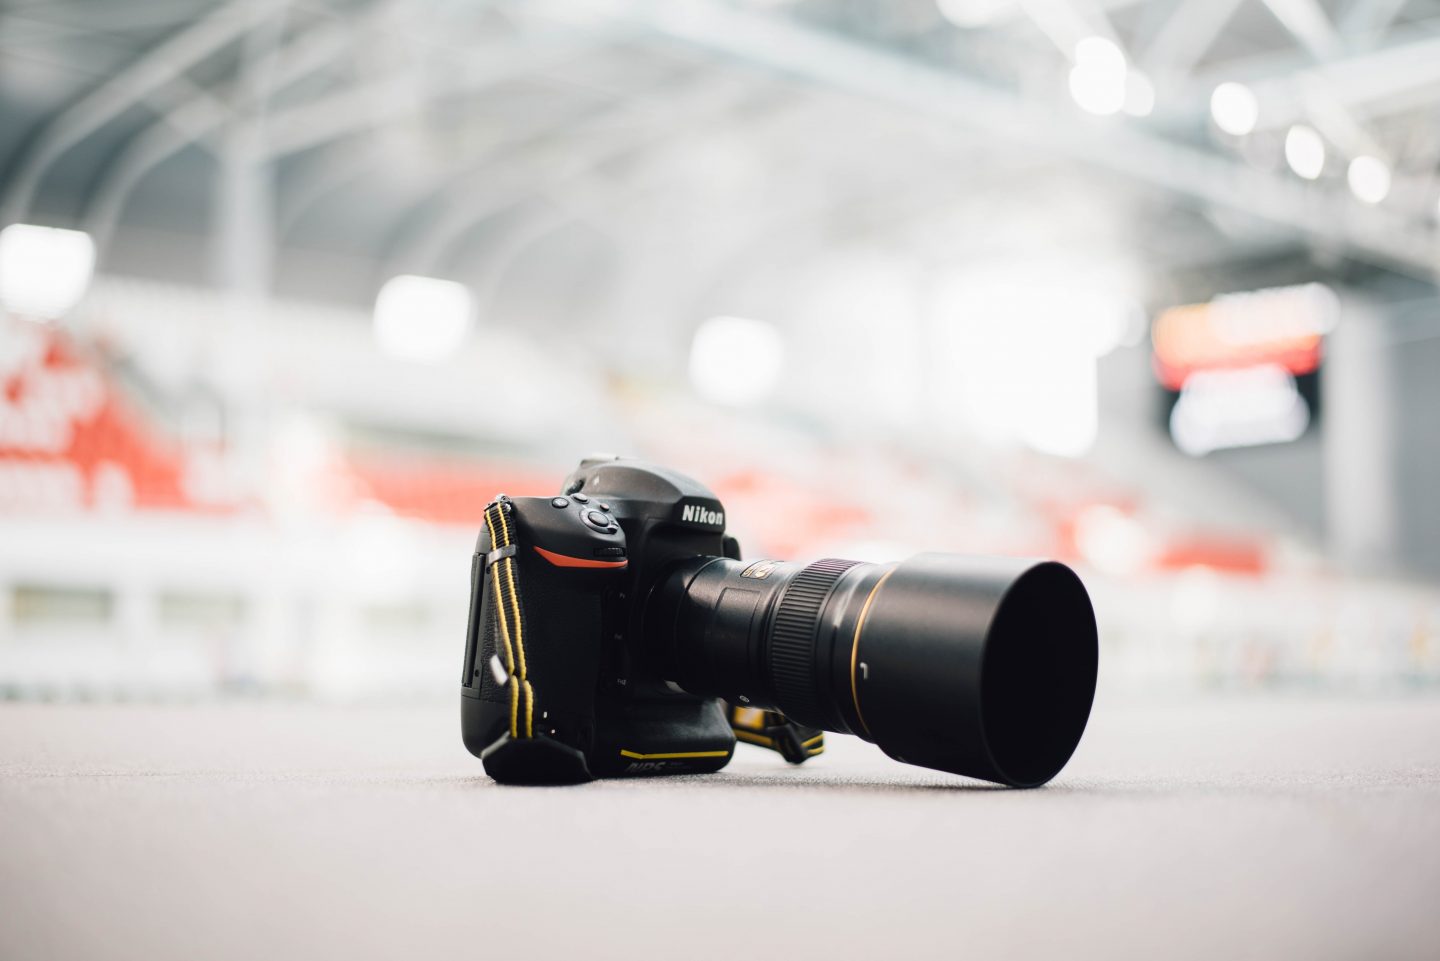
A digital SLR has two main parts – the main camera body, and a set of interchangeable lenses. While some brands require you to purchase the two parts separately, other brands sell a camera kit that includes both.
The biggest charm of a digital SLR comes from the high shutter speeds of up to 10 frames per second. It becomes a huge advantage when you want to capture things that are moving fast, such as birds, or predators chasing their prey.
Digital SLR cameras exhibit excellent performance in low light, which makes them ideal for early morning and evening safaris.
The set of interchangeable lenses provide flexibility for different landscapes, providing a range of focus.
As we mentioned earlier, DSLR cameras are quite heavy, so it can get uncomfortable if you need to move around regularly.
Not only is the camera body expensive, but buying separate lenses can also be costly.
Having so many lens options can be overwhelming.
Price Range
The camera body prices range from 500 to 900 USD. The lenses have the same price range, but the price increases with the zoom factor. A 300 mm lens starts from 500 USD, while a 400 mm lens can cost up to 800 USD. Overall, you need to make peace with spending between 1000-1800 USD for an entire kit of DSLR.
Canon, Sony, Nikon

- This Camera Bundle Kit comes complete with all manufacturer supplied accessories and includes:
- The EOS Rebel T7 DSLR Camera from Canon has a 24.1MP APS-C CMOS Sensor and DIGIC 4+ Image Processor. It has a 3.0" 920k-Dot LCD...
- Canon 18-55mm II Lens - a standard zoom compatible with Canon APS-C format cameras. It features a focal length range of 18-55mm...
- 2 x SanDisk 32GB SDHC Memory Cards + Deluxe Padded Camera Case + Flash Light + 3pc Filter Kit + Extra Battery Pack + AC/DC Car &...
- 0.43x Auxiliary Wideangle Lens - it conveniently mounts to the front of your fixed or zoom lens, and allows you to capture a wider...
Last update on 2024-03-16 at 04:23 / Affiliate links / Images from Amazon Product Advertising API
Point And Shoot Cameras
Unlike a DSLR, these cameras are so small that they can fit into your pocket. They are also much more affordable. The question is, do they have a compromised quality?
The zoom power of a point and shoot camera is one of the most important criteria that you should evaluate. Your goal is to have as much optical zoom as possible to maintain the photo quality. The cheapest cameras will have 6X optical zoom, while most mid-range cameras will offer between 10-12 X. There are a few models with 20 X optical zoom. One common mistake many people make is to judge the performance by the digital zoom, which causes pixelation when you enlarge the photos. So, a high digital zoom power does not mean good photo quality.
This article will give you a better idea about the difference between digital zoom and optical zoom.
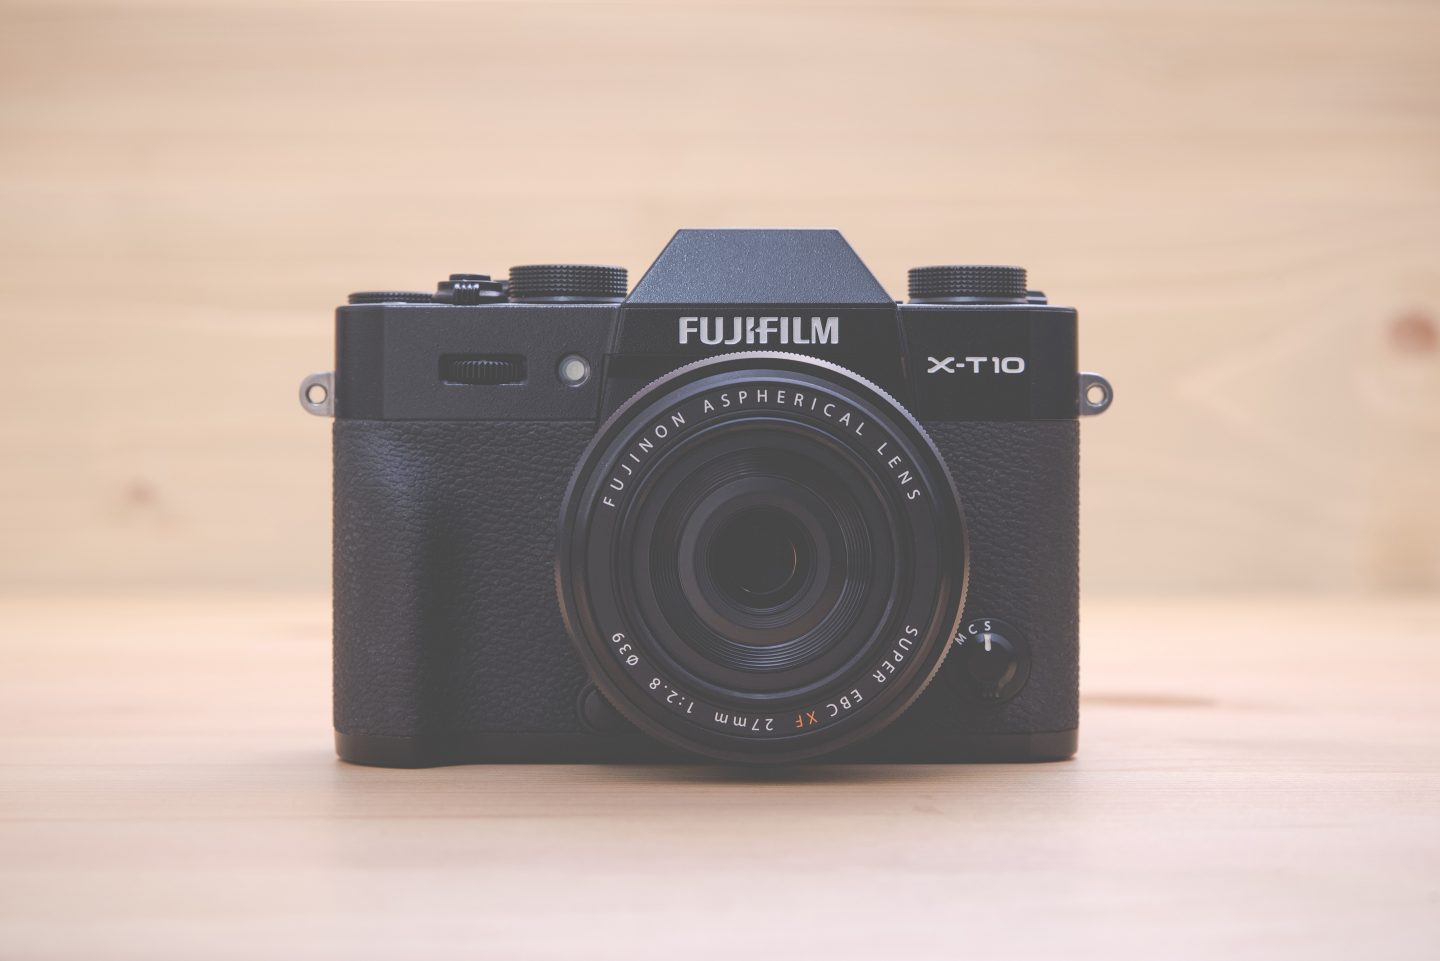
A point-and-shoot camera is ideal for landscape photography. If you are at a hide or deck that overlooks a big field, you can take decent photos of the overall field while possibly capturing great details of the big animals.
They are small, portable, and very easy to use.
They are affordable
The lack of telephoto zoom feature and the low optical zoom can make it difficult for you to capture animals in the distance.
These cameras usually come with a delayed shutter, so you have to hold still for a few seconds after you take the photo. Otherwise, the end result will be blurry.
They perform poorly in low light because of the delayed shutter.
A pocket-size digital camera can cost anything from 100 to 500 USD depending on the zoom power.
- 30x Optical/60x Clear Image Zoom ZEISS Vario-Sonnar T* Lens, 18.2MP Exmor R CMOS Sensor for superb low light images, Built-in...
- Versatile video w/ high-quality XAVC S, AVCHD & MP4 formats, Simple connectivity to smartphones via Wi-Fi w/NFC, 5-axis image...
- Selfie-ready 3" Extra Fine LCD multi-angle display, P/A/S/M modes, customizable settings and Memory Recall mode, Enhance features...
- Focus Range Wide: 1.97" (5 cm) - Infinity Telephoto: 8.20' (2.5 m) - Infinity.Adjustable Angle Up by approx. 180 degrees. F-number...
- In-The-Box: Rechargeable Battery Pack NP-BX1; AC AdaptorAC-UUD12; Micro USB cable; Wrist Strap; Instruction Manual
Mirrorless Cameras
We can describe mirrorless cameras as the love child of DSLR and pocket cameras. Just like DSLRs, they consist of a camera body and an interchangeable lens. The difference from DSLR is the pocket-size camera body, which makes it less heavy. Yet, the body has enough space for the attachment of a large lens. They are often called mirrorless digital 4/3 cameras to refer to the size ratio between the lens and the body.

Compared to the point and shoot cameras, mirrorless cameras provide much higher quality thanks to their improved sensors and higher resolution.
The rapid shutter makes it super-easy to capture fast-moving animals.
They are smaller than DSLRs
The lens is fragile and more vulnerable to damage.
They are just as expensive as DSLRs. Although many mirrorless camera kits contain lenses, they will have low zoom power, meaning that you would pay extra to buy a better lens.
If you are not worried about getting a decent lens, you might purchase a general kit for as cheap as 500 USD. However, you might end up spending up to 1200 USD if the default lens in the kit does not satisfy you.
Sony, Canon eos, Nikon, Olympus. I personally have the Canon EOS R.

- Compact, Lightweight and High-Quality RF Lens with a Versatile Zoom Range of 24-105 millimeter
- Optical Image Stabilization at up to 5 stops of shake correction
- Maximum Magnification of 0.4x and Minimum Focusing Distance of 0.66 feet in Auto Focus.
- Maximum Magnification of 0.5x and Minimum Focusing Distance of 0.43 ft. when using Center Focus Macro.
- Use the EOS Utility Webcam Beta Software (Mac and Windows) to turn your Canon camera into a high-quality webcam, or do the same...
Super-Zoom Digital Cameras
The biggest challenge in wildlife photography is to take sharp close-up photos of animals without getting close to them. A lot of digital cameras have a drawback of limited optical zoom. However; a recent type of camera called a superzoom digital camera overcomes this issue perfectly. Their strength comes from their exceptional optical zoom power from 30X to even 50X. With such an enhanced zoom-in technology, your camera can capture every detail of animals in far distances.
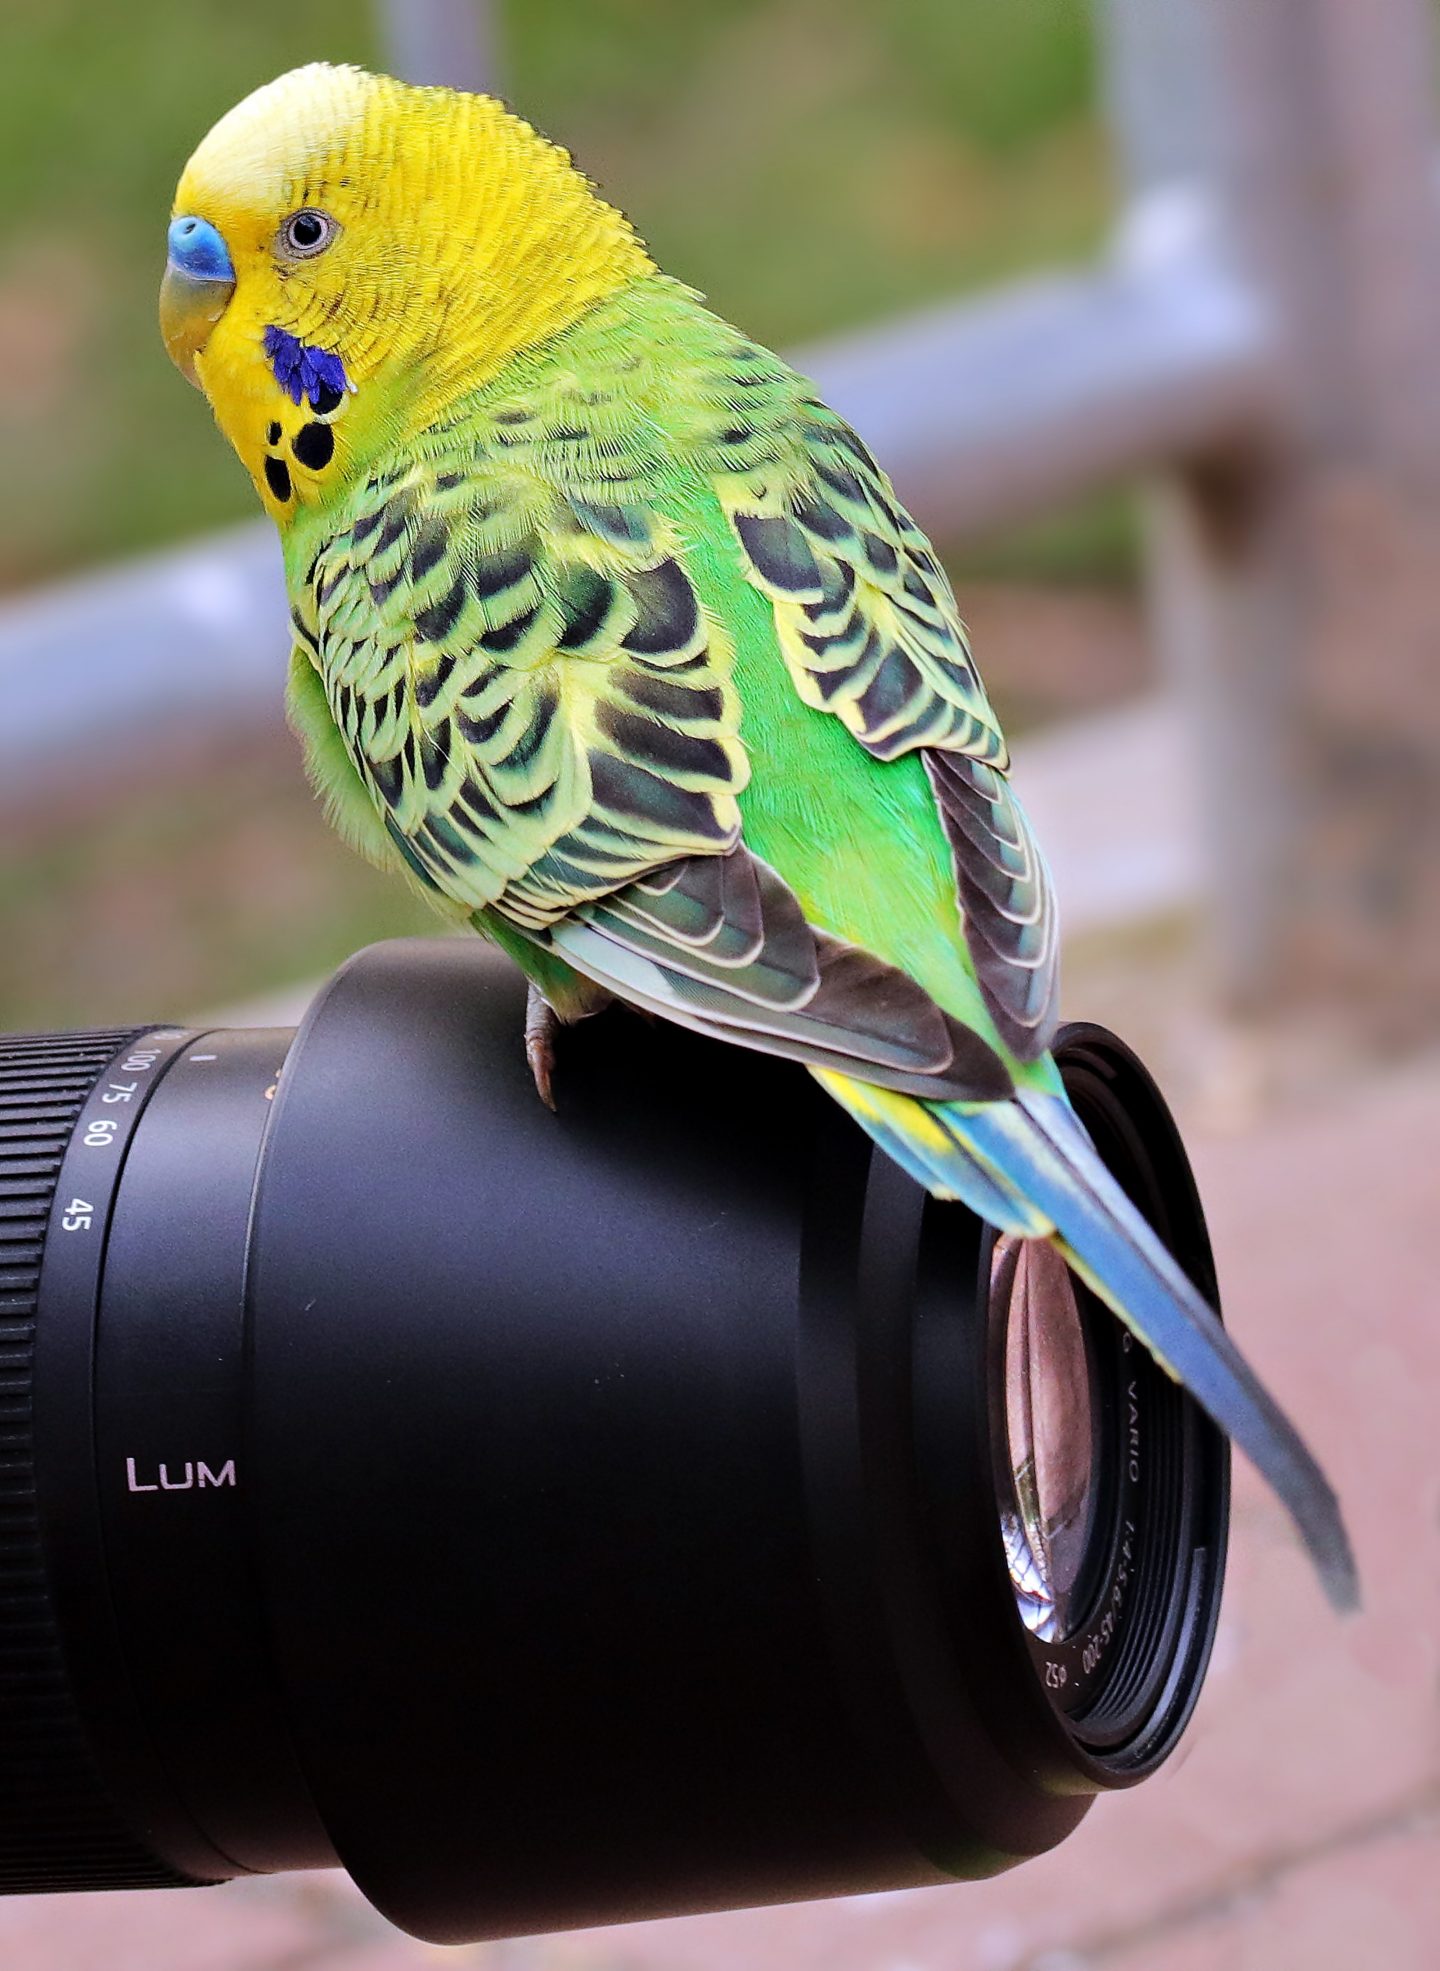
They have outstanding zoom power.
The simple design, settings, and interface make them user-friendly.
Their built-in flash brings a better quality to night shots.
They are not as small as pocket cameras, but they are still portable. You can easily carry them in your handbag.
They are surprisingly affordable. We would even say they have the best value/cost ratio of the types of safari cameras.
They have a delayed shutter lag, which might make it challenging to take photos of fast-moving objects.
You can find a super-zoom camera for as cheap as 300-400 USD. It comes with a lens that is not interchangeable, so you don’t have to pay extra for a lens.

- 3000 millimeter optical zoom-the most powerful zoom lens; Ever put on a Nikon Coolpix camera
- 4k ultra hd video with HDMI out, stereo sound and an accessory hot shoe
- Rock steady dual detect image stabilization and great low light capability. Vibration reduction: Lens shift VR (still pictures) /...
- Raw (NRW), time lapse and super lapse shooting plus great creative modes
- Full manual controls along with easy auto shooting
Essential Camera Accessories
So you have the perfect camera for safari, but that’s not the end of the story. You still need the correct gear that will make your use of the camera a pleasant experience. Here are some essential items:
An external hard drive for storing photos
A special towel to clean the dirt and the dust off your camera
A filter is necessary to optimize the color contrast. They also protect the lens.
If you are struggling to take sharp photos because of shaky hands, stable support like a tripod could help you a lot.

Night shots are always challenging, even with the best camera. Bringing a spotlight with you will increase the lighting of your frame.
For power, you should bring spare batteries and adapters. Also, you should make sure that your adapter has an inverter cable for charging in the car. It is especially necessary if your campsite does not have electricity.
A waterproof ziplock or camera bag can come in handy during boat safaris, where you might get splashed.

- Camera Accessories Kit includes: Altura Photo 2oz All Natural Camera Lens & Sensor Cleaner + Lens Cleaning Pen + Lens Brush + Air...
- Altura Photo All Natural Camera Lens & Sensor Cleaner is Alcohol FREE, Non-toxic and naturally biodegrades.
- Made in USA: Specially formulated for Multi-Coated lenses and safe for use on all sensitive optical surfaces including LCD...
- Extremely fine MagicFiber Microfiber leaves zero scratches, streaks or marks. Safe for all lenses.
- SATISFACTION GUARANTEED: Backed by Our 90-Day Satisfaction Guarantee.
Tips For Buying A Safari Camera
Regardless of the type of camera that you decide to buy, there are some simple tricks that you need to consider.
If you are buying a professional digital camera for the first time, you need a substantial amount of practice to become an expert in it. That’s why you should buy your camera well in-advance so that you have enough time to practice.
It may be difficult to afford, but it would be amazing if you were able to bring multiple cameras with you on a trip. Then, you can take out a different camera for a different occasion, whether you are in a moving vehicle or trying to photograph something on the horizon.
Conclusion: Safari Camera
They say the human mind is the best camera in the world, but that may not be the case in a safari. If you want to immortalize your encounters with animals, you need a camera with high resolution, optic zoom power, and minimum shutter delay. We hope that our recommendations will help you make the right choice.
FAQ about the Best Safari Camera
You can take decent photos with your smartphone during the day, which you can instantly send to your friends or upload elsewhere. However, they may not perform as good in low light. The shutter speed is usually slow, so image stabilization will be a challenge.
It offers excellent image quality even under low light, but it is a bit heavy to carry around.
It works well with close to moderate animal encounters and landscape photos.
You can not only take superb images but also video footage with a GoPro. It gives you more flexibility if you are constantly on the move, as you don’t have to look through the lens all the time.
Follow Us Around the World
Our next destination.
Fez, Morocco
- Explore photo contests
- Discover photo challenges
- Submit my vote
- Explore photos
- Meet photographers
- Creators Studio
- Photography logos
- Photography Websites
- Get the app
- Partnerships
- Explore photo contests Participate in the official contests
- Discover photo challenges Membership Launch and browse member challenges
- Submit my vote Pick my favorite photos
- My submissions View my top shots and ranks
- Explore photos Curated galleries to inspire you
- The blog Tips, tutorials, interviews and more
- Meet photographers Connect with your favorite creators
- Videos NEW Share your artistic shorts
- Photo gigs NEW Turn your photos into income
- Feedback Membership Get instant feedback on your photos
- Portfolio websites Membership Templates and domain
- Darkroom Presets & tools to edit photos

A Guide to Choosing the Perfect Lens for Your Safari Adventure
Get a gift today! 🎁
Enter your email to get a FREE course on how to win photo contests, and receive the best photography tips directly to your inbox 👇
Got it, you'll receive your gift soon!
Ready to jump start your creativity? 🤔
Embarking on a safari adventure is a thrilling experience, offering a chance to witness the majestic beauty of wildlife in their natural habitats. A vital component to capturing these moments and immortalizing them in photographs is choosing the right lens for your camera. The perfect lens combines a balance of focal length, aperture, and image stabilization capabilities. In this blog post, we delve into some top choices that would serve you well on a safari photography journey.
For any photography enthusiast, taking a safari is a golden opportunity to capture wildlife in all its grandeur. The essence of a perfect wildlife photograph lies not just in the moment, but also in the lens you choose to capture it with. Here, we highlight a few stellar lens options that should be on your radar:
For DSLR Cameras Canon EF 100-400mm f/4.5-5.6L IS II USM: A versatile zoom range and a relatively compact design make this a popular choice for wildlife photography. Nikon AF-S NIKKOR 200-500mm f/5.6E ED VR: Offers a great zoom range with a relatively fast aperture and effective vibration reduction. Sigma 150-600mm f/5-6.3 DG OS HSM | S: A lens with a substantial zoom range, available for both Canon and Nikon mounts. Tamron SP 150-600mm f/5-6.3 Di VC USD G2: Another lens with a great zoom range, available for Canon, Nikon, and Sony mounts (for Sony A-mount, not E-mount).
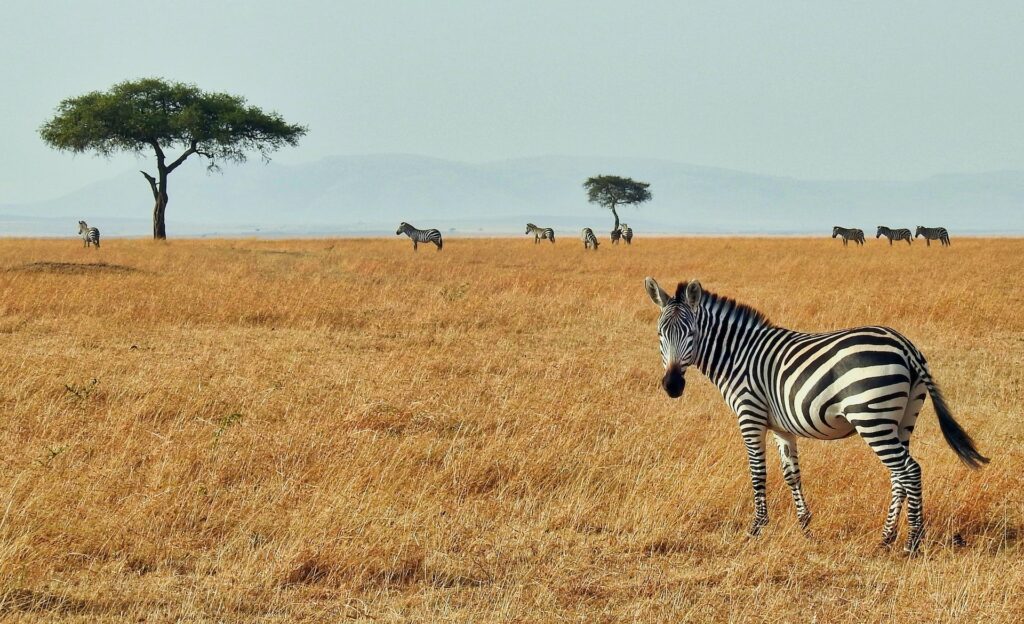
For Mirrorless Cameras Sony FE 100-400mm f/4.5-5.6 GM OSS: A high-quality lens with a versatile zoom range, designed for Sony's full-frame mirrorless cameras. Canon RF 100-500mm f/4.5-7.1L IS US: Designed for Canon's RF mount, this lens has a great zoom range and image stabilization. Nikon Z 100-400mm f/4.5-5.6 VR S: A (then upcoming) lens for Nikon Z-mount system, offering a versatile zoom range with vibration reduction. Panasonic Leica DG Vario-Elmar 100-400mm f/4.0-6.3 ASPH: A great option for micro four-thirds users, offering a substantial zoom range. Fujifilm XF 100-400mm f/4.5-5.6 R LM OIS WR: A lens with a substantial zoom range for Fujifilm X-mount cameras.
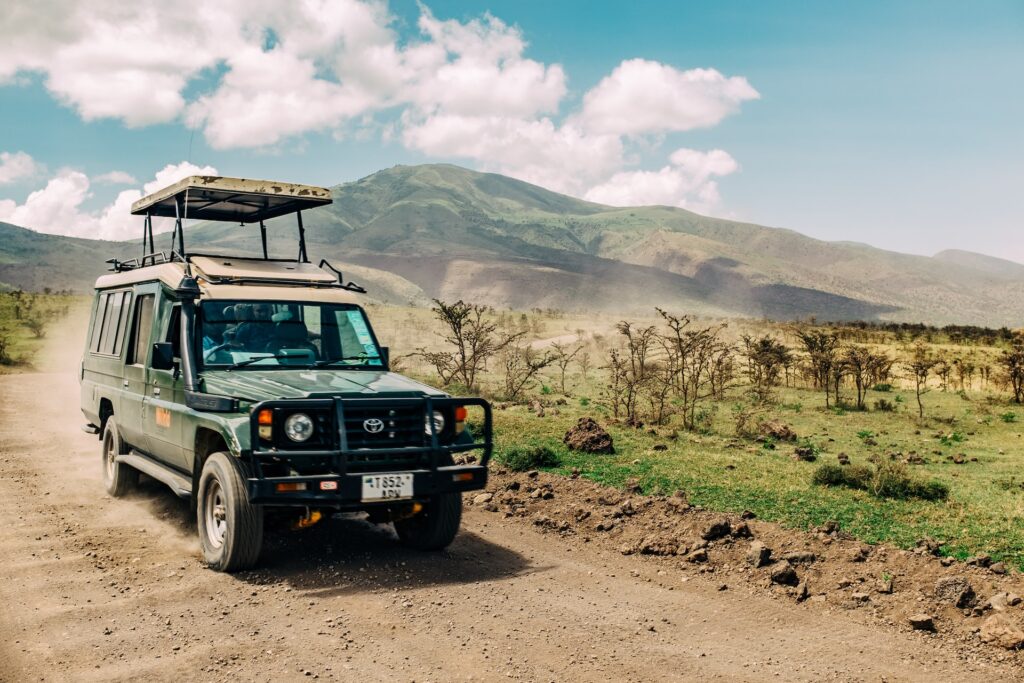
Basic Knowledge and Lens Tips: Aperture: Try to get a lens with a fast aperture (f/4, f/5.6) to enable low-light shooting. Focal Length: A longer focal length (400mm and above) is generally preferable for wildlife photography to allow for distant subject capture. Image Stabilization: Lenses with good image stabilization systems will be beneficial when shooting at long focal lengths. Teleconverters: Consider getting a teleconverter to increase the focal length of your lens if necessary. Camera Compatibility: Make sure to choose a lens that is compatible with your camera body (Canon EF, RF, Nikon F, Z, Sony E, etc.).
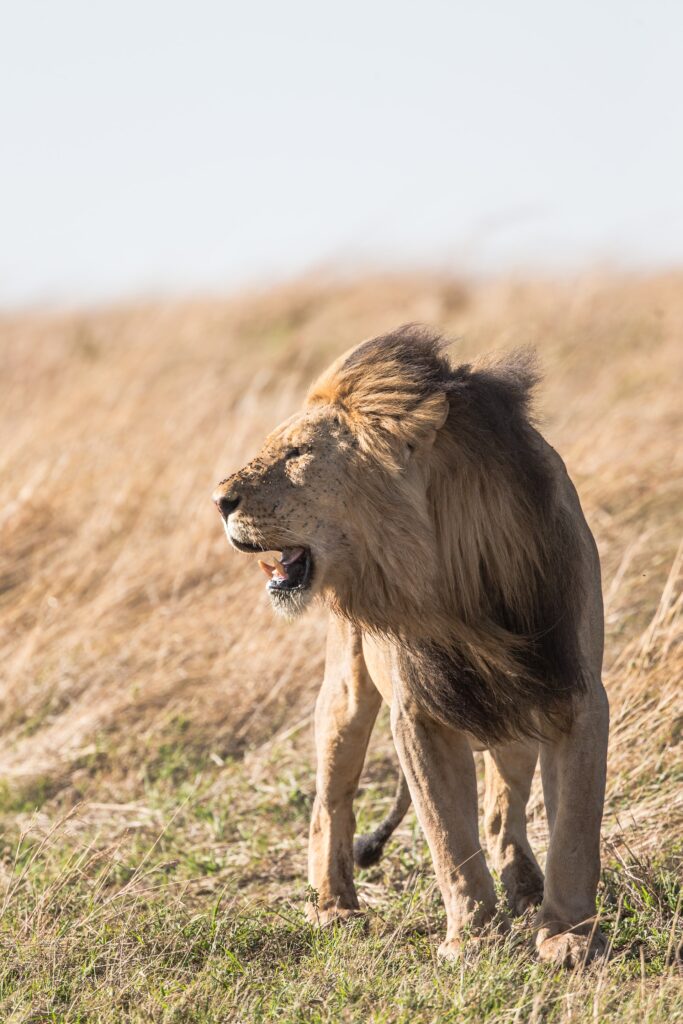
In conclusion, a successful safari photography expedition is largely dependent on the lens you choose to accompany your camera body. The right lens can make a significant difference, bringing the vibrant and sometimes elusive wildlife within your photographic grasp. Remember, the key attributes to look for in a safari lens are a long focal length, fast aperture, and robust image stabilization capabilities. With one of these lenses mounted on your camera, you'll be well-equipped to capture the breathtaking moments that unfold during your safari adventure. Happy shooting!
Note : Before making a purchase, make sure to check the compatibility of the lens with your camera body for the best results.
Summer Runway Photo Contest Finalists
FREE 2 DAY DELIVERY ON ORDERS $399+
The Mix 'n Match Method For Smart Photo Safari Shooting

© Mark Alberhasky
In the Masai Mara reserve. "When elephants pass in herds there's often one supervisor-type who wants to take a closer look at what's going on." D500, AF-S DX NIKKOR 16-80mm f/2.8-4E ED VR, 1/1000 second, f/9.5, ISO 800, manual exposure, Matrix metering.

"Cheetahs are one of the few predatory cats for which proximity is generally not dangerous for humans," Mark says. "We're just not on their menu." Still, he used his 80-400mm lens at 400mm for the image, taken in the Nanyuki region of Kenya. D500, AF-S NIKKOR 80-400mm f/4.5-5.6G ED VR, 1/1000 second, f/5.6, ISO 4500, shutter priority, Matrix metering.

"How could five random acacia trees in Masai Mara National Reserve line up in such perfect symmetry? A photo safari is such a visually rich experience, the challenge is not stopping to photograph every 50 feet." D500, AF-S DX NIKKOR 16-80mm f/2.8-4E ED VR, 1/500 second, f/5.6, ISO 1600, shutter priority, Matrix metering.

"The young are always protected by their elders," Mark says, "but man needs to protect the elders." This image, taken in Masai Mara, reminds us that if we want to catch a bird in flight, 1/2000 second is a good minimum starting point. D810, AF-S NIKKOR 800mm f/5.6E FL ED VR, 1/2000 second, f/5.6, ISO 1600, shutter priority, center-weighted metering.

How close you get to animals in Africa is a matter of common-sense caution and a guide's advice. Mark was arm's length from a mountain bongo (a species of antelope) for this closeup in Kenya's Nanyuki region. D500, AF-S DX NIKKOR 16-80mm f/2.8-4E ED VR, 1/500 second, f/6.7, ISO 1600, shutter priority, Matrix metering.

Sunrise on the slopes of Mount Kilimanjaro, looking south across the Kenyan border into Tanzania. D500, AF-S DX NIKKOR 16-80mm f/2.8-4E ED VR, 1/350 second, f/8, ISO 100, manual exposure, Matrix metering.

In Amboseli National Park, Kenya. "Elephant trunks contain over 400,000 muscles, can lift over 700 pounds and yet end in the delicate equivalent of fingers with amazing dexterity." D500, AF-S NIKKOR 800mm f/5.6E FL ED VR, 1/2000 second, f/8, ISO 560, manual exposure, Matrix metering.

"Gold in the Masai Mara sky drew my eye. and the 800mm lens let me savor the clouds and color on the horizon with incredible detail." D5, AF-S NIKKOR 800mm f/5.6E FL ED VR, 1/2000 second, f/8, ISO 400, shutter priority, center-weighted metering.

A wild boar in the Masai Mara reserve. "At the crop factor view of 1200mm, the beast becomes a beautiful example of razor-sharp detail against a natural palette of background colors." D500, AF-S NIKKOR 800mm f/5.6E FL ED VR, 1/750 second, f/8, ISO 1100, shutter priority, Matrix metering.

"Think an 800mm super-telephoto is too big to take on safari? Looking into this Masai Mara leopard's eyes, I can think of 800 reasons why you'll want one with you. And remember, on safari you'll be carrying it only from tent to vehicle. It wasn't a big deal to work with that lens each day." D810, AF-S NIKKOR 800mm f/5.6E FL ED VR, 1/750 second, f/11, ISO 800, manual exposure, center-weighted metering, SB-900 Speedlight.

"With wildebeests across the ridgeline, the sky spilling rays on Masai Mara and a natural spotlight highlighting an acacia, you just have to shoot and take it all in." D810, AF-S NIKKOR 80-400mm f/4.5-5.6G ED VR, 1/500 second, f/13, ISO 200, shutter priority, center-weighted metering.
T here's a lot to be said about the benefits of a backup camera.
First, well...it's self-defining, isn't it? If your camera slips from your grip and goes into the river, your first thought—Thank goodness I have insurance—is going to be followed by, Thank goodness I've got a backup.
There's another big advantage, though—one brought up in a conversation we had with photographer, workshop instructor and photo safari leader Mark Alberhasky not long after he returned from Kenya. Mark's idea: definitely carry two Nikon camera bodies, but make one an FX, the other a DX.
"I was able to travel light, but cover all the bases with a combination of a full-frame FX and a crop-factor DX camera," he said of his trip. His D810 was the former, his D500 the latter, and with those two bodies, a minimum of lenses provided maximum potential, as he carried less weight without sacrificing focal length.
Mark passes the mix-and-match advantages on to his safari first-timers. What he tells them—and he does it when they sign up, not when they show up—is that the professional edge is one FX and one DX camera. "That's what opens doors for them," he says.
The choice of DX and FX camera bodies ties directly into lens selection. Here's how it works.
"I know from experience that for the first-timer, a 70-200mm lens is most likely the big telephoto, so the first thing I have to do is get them to realize that to do wildlife justice, they're going to need a longer focal length."
Like an 80-400mm? "That's a pretty decent lens for a safari," he says, but lately he's been thinking longer than that: the 200-500mm, which, on a 1.5X crop factor DX body, provides the equivalent view of a 300-750mm zoom. Now you're really talking extra reach and close-up detail. "Ninety percent of wildlife photos, no matter where you are—Africa or Yellowstone—will be taken between 300mm and 600mm," Mark says.
The Right Stuff
As soon as Mark's clients decide to go on safari, he starts sending them information on what clothes to wear, what luggage to bring and how to pack. Perhaps most important, he sends a whole lot of ideas about equipment.
"I address the smart way to travel," he says. "I don't want them to bring every lens they own, so I do my best to get them thinking that they need to get two camera bodies and expand the repertoire of lenses to cover the need for long and varied focal lengths. The key is, don't duplicate—complement."
For example, Mark likes to have his 16-80mm on the DX D500 body and an 18-200mm or 28-300mm on the FX D810. "When I'm working a long lens and the animal decides to walk up within five feet of the vehicle, that long lens on an FX body won't get the picture for me because the minimum focus won't get detail on the animal's face. In that case I need to be able to instantly pick up the D500 with the 16-80mm on it and keep shooting, as the 16-80mm [is] like a 24-120mm on an FX body."
On the Kenya trip, Mark carried a D5 in addition to his workhorse D810 and D500. His lenses were a 16-80mm, an 80-400mm and an 800mm. At one point he took some images with a borrowed 200-500mm. "It's an incredible lens," he says. "It's sharp, compact and a great value. Everybody I know who's shot it, raves about it."

An iconic silhouette in late afternoon light in Amboseli National Park. "The image seems to say, "The sun is about to set on this majestic species. Save it!'" D810, AF-S NIKKOR 80-400mm f/4.5-5.6G ED VR, 1/4000 second, f/8, ISO 800, manual exposure, Matrix metering.
We asked Mark to complement his mix-and-match camera body advice with some of his top tips for successful safari photography. He was happy to oblige.
"Shoot wide, shoot medium, shoot tight."
"Learn to look for small details in the landscape as well as on the animals, then use your DX reach to capitalize on those details."
"Don't become tele obsessed. When first using a tele lens, it's likely you'll take every shot tight on the animal's head—but you should also show the whole body and the animal's environment. Tell the whole story."
"Resist the urge to bring every lens you own. As Jay Maisel says, 'The more equipment you bring, the fewer pictures you'll take.' When the action happens on safari, it happens fast, and you don't want to be switching lenses or thinking about what to use while what you want to shoot is over and done."
"This is important: bungee cord your gear in the vehicle for a secure ride. On my very first safari, I set a lens down on the seat, and when the driver suddenly took off, it went flying."
"Bring a minimum of two beanbags for camera and lens support to cover both sides of the vehicle."
"The most common mistake people make is shooting at too slow a shutter speed and too low an ISO. The animals are almost always moving, and certainly always looking around for what they want to eat or what wants to eat them. Shutter speed should be at least 1/750 to 1/1000 second, the ISO 800 to 1600, and I like apertures of f/8 and f/11. Want to get a bird in flight? That's a minimum 1/2000 second. These are ranges most people don't think about, but should when photographing wildlife anywhere."

This Article Goes Great With These Products
More from nikon.

Learn photo & video terms

Nikon School
Check out Nikon School.

Check out the Nikon apps.

NEW Mentors online course
Fashion photography with Dixie Dixon, Visual Storytelling with Joe McNally, Wedding photography with Jerry Ghionis and Sports photography with Rod Mar

Nikon Ambassadors
Check out the Nikon Ambassadors.
Stay connected to Nikon.
By clicking Sign Up, you are opting to receive promotional, educational, e-commerce and product registration emails from Nikon Inc. You can update your preferences or unsubscribe any time.
Thanks for signing up!
Renting Camera Gear For Safari – 15 Things To First Consider

You’re going on an African Safari and you want great photos but don’t want to spend thousands on a new camera or lens. Renting camera gear may be the best option for you. Renting a camera when going on your safari will allow you to take amazing safari pictures and save the money you would have used to get a new camera on something else like extending your safari by a few days. Let’s talk about a few things you should consider before renting a camera for Safari .
I’d first like to give a disclaimer that I’ve never had to rent safari gear before so I had to do a lot of research to find the most accurate information around this subject. I would use this article as a starting point in helping you make your decision but you should also do a bit more research on your own as well.
1. Is renting for you?
The first thing you may need to ask yourself is whether renting that camera is something you should actually do.
To figure this out need to think about what you plan on photographing and whether what you already have is suitable for it.
Renting camera gear is a great way of keeping your toes into the photography industry without having to spend a large amount of money required to get started.
By renting that camera, you will have the opportunity to take awesome photos as a beginner and there’s no better place to find awesome subjects to photograph than an African safari.
Renting camera gear is NOT for you if
- You already have a DSLR camera and a decent lens that is above 100mm. These are essentially the two things that you need to be able to take decent safari photos and if you already have them, there’s no need for you to rent.
- Photos are not your priority but you just like to take a few for memory sake. For this you can just use your cell phone camera. it won’t be that awesome but you will have photos that will capture the memories of your time in Africa.
- You are clumsy and may break any of the equipment. The fact that you are renting is a Ferrari gear means that if anything goes wrong you will need to pay for any damage. With the cost of average camera gear going into the thousands of dollars, you cannot afford to damage it because it’s as good as bought if you do.
2. When is buying a safari camera a better option?
you may want to take the plunge and just buy your camera before starting your African safari.
Buying instead of renting your camera safari gear is a great option for you if:
- You already know what kind of photography you want to do and have a long-term plan for how you will use your camera equipment after you return from your Safari.
- If you would like to get started in photography and want to use your own camera from the get-go instead of someone else’s.
- If you plan to use your camera in risky situations like climbing Kilimanjaro and don’t want to have the stress of thinking about what will happen if you drop one of the lenses
3. The kind of camera you should rent
There are a number of considerations you need to think about when choosing the kind of camera you take on a safari.
- Weight: The camera needs to be lightweight since having equipment that is too heavy may mean that you cannot fly on local safari airlines that use small planes that have strict luggage weight restrictions. There are times where flying using these planes is the only way of getting to the National Park.
- Ease-of-use. unless you are already a professional photographer that knows how to use a complex DSLR camera, you need to pick a camera that will be easy to use and whose point-and-shoot settings are good enough for you to take decent safari photos.
The camera you should use
Based on these factors I found the following Cameras to be best suited for renting when going on an African Safari.
I would advise that you get the Wildlife Kit for Canon offered by Lensrentals.com
This kit contains the following gear:
- Professional general use Lens : Canon 24-70mm f/2.8L II
- Professional Telephoto Zoom Lens : Canon 100-400mm f/4.5-5.6L IS II
- Professional Mid-Range DSLR Camera : Canon 5D Mark IV
- Bean Bag to Stabilize your Camera on Bumpy Safari Roads : LensCoat LensSack Jr.
- A Spare Battery for the camera : Spare Canon LP-E6N Battery
- 2 high-capacity Memory Card s: (2) SanDisk SDXC 128GB Extreme Pro 170MB/s UHS-1 U3
4. The kind of lenses you should rent
The kind of lens you carry to an African safari will significantly impact the kind of photos you will be able to take.
here are a few factors you should consider when choosing a lens to rent for your African Safari.
- Zoom Capabilities : When going on safari you will be in vehicles most of the time and will need to take photographs of animals that are not always very near. Having a zoom lens, not above 100 mm will allow you to take photos of animals that are a few hundred feet away.
- Versatility : on some occasions, you will get the opportunity to go into the city or have a landscape that is an incredible photo opportunity. You will need to rent a lens that will allow you to easily switch modes and take good photos of all of these scenarios but still take great wildlife photography. You need to get a lens or lenses that will allow you to take photos in these two scenarios easily and without struggling.
- Weight : as I mentioned earlier how heavy your gear is will impact the kind of transport that you can use when on your safari so you want to keep your lenses as light as possible.
How many lenses do you need?
Since weight is one of the big factors you need to put into consideration, carrying a lot of lenses is not an option.
However, you should have at least have two lenses:
- One Telephoto lens that will allow you to take photos of animals that are a bit of a distance away.
- One wide-angle lens that can be used for all other scenarios like landscapes, portraits, etc.
The lenses you should choose
Based on these factors, I found the following lenses to be most suited to rent when going on an African safari
5. How long should you rent your Camera Gear for?
If you are going on a 10 Day Safari, you might want to rent your camera equipment for about 21 days. This is because the 10-day safari does not include your travel time from home and back.
Having additional days will allow you to have enough time to try out the camera and lenses before you go and a few spare days after you return to ship your equipment back to the renting company
6. Cost of renting camera gear for an African safari
So how much does it actually cost to rent camera equipment if you’re going on safari?
The cost will be determined by two things:
- The kind of equipment you will be using (use the recommendations described on number 4&5)
- How long you’ll be renting the equipment for: Give yourself a few days before you travel to use the rented gear and figure out its basic settings.
For a 10 day safari, you expect to spend about $880 USD. This price will give you access to the following equipment.
7. When should you rent
As I have advised earlier, you want to ensure that you get the camera you will use for your safari a few days before you travel for Africa. The reason for this is the fact that you don’t want to be completely unfamiliar with your equipment when you arrive.
Best case, you will lose valuable shots at the beginning of your safari as you try to learn how to take the photos on your safari.
Worst case, you may end up with unusable photos for the whole of your safari since the settings you used were wrong.
8. Rent it from Africa or home?
I would advise that you rent from your home country and travel with your gear instead of trying to rent it when you come to Africa. First, you may have delays in getting your gear if you are lucky enough to find a company that will rent the equipment to you as a foreigner.
Rental companies avoid shipping internationally because of the taxes and duties such items attract.
You also don’t get the chance to test out your equipment ahead of the trip and this will work to your disadvantage.
9. Is there insurance for the equipment rented?
Lensrentals offers a type of insurance for their camera equipment called Lenscap
It protects you as the person renting the gear from full liability if something happens to the lens when you are on safari.
10. Should you rent the memory cards as well?
Even though the camera pack described above comes with high capacity memory cards, I don’t think renting the memory cards will be a great idea.
The cost of a memory card is really low and I think keeping it after your safari is worth it. You will have a backup location to store your safari photos and the memory card may become useful in the future.
11. How to Rent Safari Camera Gear
The process for renting camera gear for your safari can be ordered in the steps below:
- Figure out what type of camera and lenses you need: Doing a lot of research online on the type of lenses professionals typically on a safari
- Find a lens rental company near you & check whether they are legit and that they have a stock of the latest high-quality equipment.
- Make your order : some camera renting companies will start counting your rental period when they ship the gear to you.
- Confirm that the gear you had requested is what has been delivered
12. How to return a rented safari camera
Once you have come back from your safari, you will need to ensure that you have safely stored away all your pictures and cleared the memory cards you were using before returning the gear.
You will also need to ensure that the gear is in good working condition just as you received it before shipping it back.
Lensrentals will give you a prepaid return shipping sticker with your camera gear when you receive it. All you will need to ship back the camera will be to put the items back to the box they came in, seal the box and put the return shipping sticker with the
13. Traveling with a rented camera
It will be important to remember that the camera you are traveling with is not your own and you will need to pay greater consideration for the safety of the gear you are carrying.
Here are a few tips I found to travel with your rented camera gear.
- Put everything together. This will help you not to forget anything at home. It will help you also to keep your equipment within a single point and prevent you from losing anything along the way.
- Carry the camera as carry-on luggag e: Since cameras are fragile, you need to pack your gear as carry-on luggage that you will bring you to the plane. You also minimize the chances of the gear being lost with your luggage if you carry it with you instead of checking it in.
- Use a padded bag : when traveling to Africa, you will inadvertently bump into things. Either on the plane or on your safari drives. You want to prevent any damage to your equipment by using a bag that is padded and if you can, use a camera-bag.
14. Cleaning. Should you do it?
My general feeling about this is that you avoid cleaning your rented camera equipment if you do not have experience in these things. You risk damaging the camera or lenses if you clean them inappropriately and you would rather leave this to a professional.
With this, I am assuming that you are taking good care of your camera and that the only things that need cleaning after you come back from your safari are dust and a few smudges on the screen from you touching it when viewing photos.
The companies offering camera gear rentals will deliver your camera gear clean and will professionally clean the gear when you return it.
15. What happens if you damage it
Damaging rented camera gear on your African safari is something you may want to be worried about and you may be wondering what happens when your rented gear is damaged.
You would be liable to replace the item if it is damaged or stolen and you will need to take precautions when handling your gear.
The companies may offer a cover that limits your liability when damage occurs but you will still need to pay a portion of the repair cost.
You need to report immediately to the rental company that there has been damage or loss for them to advise you on the next steps .
Keep in mind that we may receive commissions when you click our links and make purchases. However, this does not impact our reviews and comparisons. We try our best to keep things fair and balanced, in order to help you make the best choice for you. As an Amazon Associate, I earn from qualifying purchases.
Antony Njoroge
Hi, I'm Antony & I'm from Kenya. I love traveling around Kenya when I get off from work and this website is a great way for me to share my local knowledge and tips that will help you travel well in East Africa. Having lived in East Africa my whole life, I share my personal experiences and knowledge with the goal of helping you optimize your East African Safari and make it an unforgettable expereince.
Recent Posts
Internet & WiFi in Kenya (A Complete Tourists' Guide)
If you are planning to visit Kenya any time soon, you might have wondered if Kenya has Internet and whether WIFI is easy to find. I have lived in Kenya all my life and I would love to answer this...
Is Mt Kilimanjaro Active? (And Should You Be Worried?)
If you are planning to visit Mt. Kilimanjaro like I am, you must have been doing a lot of research about your climb. During your research, you might have stumbled upon the fact that Kilimanjaro is a...
- Why Classic Africa
- Conservation Through Education
- Client Feedback
- Introducing "Safari Africa"
- Safari Options
- Custom Safaris
- Scheduled Safaris
- Property Portfolio
- Destination Map
- Property List
- Travel Planning
- Sample Itineraries
- Safari Cost Comparison
- When to Start Planning
- Frequently Asked Questions
- Request Information
- Client Photo Gallery
- Photography Forum
Best Big Lens for a Wildlife Safari
January 29th, 2021 by Piper & filed under Blog .
As we all know, photography on every level is generally a series of compromises. Buying gear is usually a compromise between budget and weight. Some of you will make these decisions quickly and easily, while most people may agonize over these decisions as I did when I switched to Nikon. I wrote about this in my last post about the struggle of choosing the right lens .

TECHNICALLY SPEAKING
When speaking of “big fast glass,” we are generally talking about a long lens 400 mm or greater and one that has a fixed aperture of 2.8 or 4.0 even on a zoom lens. That means when you zoom from 200 – 400 your aperture remains fixed, it does change from 4.0 at the shortest range (200) and change to F6.3 when zoomed out.
“Fast glass” refers to how fast the lens can focus.
If you have a lens that is fixed at 2.8 it always focuses with the speed of light at 2.8 even if you have the aperture dialed down to F/8. This means if you have a 400 mm 2.8 lens set at F/8 the lens will still “focus” at the speed of 2.8 light, before it closes the light down to F/8. If you have a 500 4.0 lens set at F/8 the lens will still focus at the speed of 4.0 light before closing down to F/8. If you have a sliding aperture 4.5 to 6.3 on a 150 – 600 lens, it will focus only at the widest aperture of your range. Therefore, when you zoom your lens out to 600 your lens is at 6.3 fixed and at F/8 your lens is only focusing at the speed of 6.3 light; too slow for a safari in the Maasai Mara in Kenya, on the Chobe River in Botswana, or the great plans of the Serengeti during the birthing season.

MATCH YOUR EXPECTATIONS
When you are considering purchasing or renting any gear the biggest consideration to think about is, will it meet the expectations of YOUR desired outcome? If your goal is to enjoy the experience and share your journey with friends and family through screen viewing—emails, social media, websites, then you may not wish to make the investment to own or rent big, heavy, expensive glass. If your goal is to make large fine art prints, submit for editorial or contest, or make income from your photographs then you should consider the investment to rent or own a high quality tool that will produce those high quality results.
For the first 14 years of my career I owned a 500 F/4 lens and I loved it until the day I gave it to one of my guides. A fixed lens is almost always going to be your sharpest lens, but working with no range is a challenge. When the 200-400 F/4 with a built in 1/4 tele-converter came onto the market and I had the opportunity to purchase one at a 40% discount, I did not pass it up. There are situations when having the range, such as being on the Chobe river in Botswana, is a huge advantage. These new 200-400 or 180-400 f.4 fixed with the built in converter are a game changer and is the lens that I would highly recommend for a safari.

BIGGEST COMPLAINT ON SAFARI
The biggest complaint I hear on safari every season is my lens is too slow and I wish I had rented better faster glass. From anyone who has rented big fast glass on one of my safaris, over the last decade, not once have they ever stated they regretted spending the money to rent the best big lens for their safari.
A stop of light, when out on safari, is a much bigger deal than I think most people understand. I would highly suggest getting behind one of these lenses I have spoken about that has the built in 1.4 tele-converter. Find a friend who owns one or visit your local camera store and let them know you want to see the impact of the built in 1.4 tele-converter to understand why you should invest in such an expensive lens. When looking through the viewfinder switch on the tele-converter. You will be able to see what a full stop of light looks like. It is very powerful. At a minimum you will be fully educated on how much a stop of light really is and be better able to determine, which lens will be best for your goals.
A safari is a large investment for many, which also seems to come with very high expectations. If you are booked on a safari or are considering a safari and do not own any big fast glass, I would highly suggest renting one for the weekend and testing it. This is the perfect time to do this. Soon the floodgates are going to open, the last openings on safaris are going to be grabbed up, and everyone is going to be scrambling to travel as soon as they are able. Your mind will no longer be focused on researching gear.

WHAT IS YOUR EXPERIENCE?
Many of you reading this blog have been on a safari. You were faced with the decision of which big glass to bring our rent. I am certain that sharing your experience or advice in the comments would be greatly appreciated by those who are considering going on their first African wildlife safari.
11 Responses to “Best Big Lens for a Wildlife Safari”
I have never heard anyone define “fast glass” as a lens that focusses quickly. I believe the generally accepted definition is a lens that has a wide aperture. Yes, a lens with a wide aperture will generally focus faster, but it’s not always the case. Particularly as some mirrorless cameras do not open up the aperture to perform their autofocus calculations in the way you described. That was/is the case with DSLRs, but it’s not a given with newer mirrorless cameras.
I think most people would call an 85mm f/1.2 lens “fast glass”, but there are certainly examples of that design where the lens doesn’t focus all that quickly. Nothing to do with the aperture, simply focus mechanism design.
I think it would be helpful to people if you reconsidered your definition and aligned it closer with the commonly accepted one to avoid confusion.
Dan I appreciate your comment, however this post was particular to the best lens for a wildlife safari. Therefore, my comment and definition stand. As wildlife photographers we refer to fast glass as a fixed wide aperture on a long lens. I am sure every genera has it’s own slang. As you mentioned the 85mm, I am assuming you are a portrait photographer? The biggest point of this post was how important it is to have a 2.8 or 4.0 fixed aperture long lens for safari. Regardless if you are shooting with a mirrorless or DSLR a 4.5 or sliding aperture lens is too slow when on safari.
Thank you for this valuable information! I have two cameras and will have different lens on each one so I will not have to switch lens while out. What would you recommend for a second lens, and what is your recommendation for carrying the gear? Thank you again, Jill
Hello Jill I am so glad you have found it useful. The second most popular lens is the 700-200 2.8. This is my most used lens. I have it on one of my cameras for wildlife and for tribes almost always and the other lenses get changed out. Many of us also have a 1.4 tele converter.
Thank you for this information. I was wondering if my 200-500 f5.6 would work on a safari. Your comments lead me to believe it would not. I will definitely research the 200-400 w/1.4 extender. Thanks again. jrmage.com
You are most welcome. Yes John, the 200-500 f5.6 can work beautifuly for a safari and is a great compromise for weight and price, but you may struggle with it a bit in the low light hours. I would suggest the 70-200 2.8 with a 1.4 teleconverter as you other main lens. If you have a megapixel camera you could always switch to using that with the 70-200 2.8 in low light and later crop in post production. Please remember the best lens also has to be the best lens for you, your expectations, and limitations. If you are flying on small bush planes, you will probably have some weight restrictions. Although I more than double those weight restrictions for my guest it can still be tight when you are carrying a lot of big heavy glass and gear. Have confidence in your choice and then have fun making the best images using what you have!! A safari is one of the most magical experiences no matter how many times you go on one and the experience should always trumpet the images……….Both being the best is usually the goal!!
Piper hello, Here are my comments on long lens and fast glass while on Safari. I have two thoughts to consider. On my first safari to Masai Mara I obsessed that I did not have a long enough lens as a Nikon shooter( d500, D850) I had the 70-200 mm 2.8 , plus the 300mm pf with two tele converters 1.4 and 1.7 . However I worried I needed a 500 mm or 600 mm as well. I could not have been more wrong. Now having gone back to Masai for a second Safari and hopefully another one after Covid makes it safe to travel I am more than satisfied with this set up. The reason is quite simple, if on those rare occasions I am not close enough you simply ask the guide to move closer to the animals. The guides we had were amazing in working with photographers and always put you in ideal conditions for shooting. Why would I need to spend $12,000 or more for a highly specialized lens when the jeep can do that for free? I have more than enough close ups of lions faces, leopards eyes, elephants ears, etc . They can all be achieved with this set up. The one exception to this is birds. If you love to shoot all the amazing birds in Africa I would agree the longer the lens the better as the noise of the jeeps and getting close to small birds is very difficult.
However, when I am not in a jeep being driven to the animals but when I am on my own back in North America in a forest trying to find and photograph, bears, snowy owls, etc I totally agree the longer the lens you have the better for your own safety and that of the animal. But sitting in a jeep in Africa I don’t believe it is necessary. I even shot a lot of my favourite images on last safari with my 24-70 mm 2.8 lens. The additional consideration is before you go and buy or rent a long lens you also have all the worries and hassles with dealing with airlines as well. Secondly and most importantly you need to consider what kind of shots are you planning to bring back with you , what type of images moves you the most ?
I personally find really close up shots of lions, and other cats to be less interesting, I do not want my wildlife shots to look like I could have taken them at a local zoo. If you have traveled half way around the world you might also want to put them in context of their environment, which is much easier to do with a 70-200 mm lens versus a 600 mm prime. Lastly I would add I went through a recent copy of BBC World Wildlife Awards book that they publish every year and out of interest I added up which lens won more awards? Again the most award winning images leaned towards those in the 70-200 and 300mm range than images at 600 mm and beyond. I love your work and have always enjoyed your point of view on photography it has helped me immensely while shooting in Africa. All the best Lance Saunders Instagram: lancesaundersphoto
Hello Lance
Thank you so much for your time and detailed comments!!
I agree on the length to some extent. When I switched from the 500 down to a 400 I was concerned I would feel short. However, I also up-graded to megapixel body so theoretically I could crop in post, although I prefer to experience the moment and create the frame in camera. For the most part I do not miss my 500 and since I have the 400 2.8 when I add the 1.4 converter is becomes a 500 4.0, but I find I don’t use it as much lately.
Yes, in the Mara there is leeway in getting closer, but not always. Kenya also has 42 reserves; many of them are incredible and a longer lens maybe desirable especially in the more wild places such as Tsavo. I also travel across the African continent and there are many incredible places where you will want that long lens, Mana Pools Zimbabwe (you are on foot), desert wildlife in Northern Namibia and in Etoshia, Savuti Botswana, and many more. However, I believe we agree you want a lens with either a 2.8 or 4.0 fixed. It is the wide fixed aperture that can be key with moving subjects in low light and where I find guest struggle the most.
As I wrote about in my last blog post, which was more about the 2.8, another value of a long lens is the compression (bokah) that I feel is what can really make a close up more interesting and creative.
Thank you for also bring up the point that it is most important to consider the kind of shots you wish to return home with!! The best gear for you is one that fits your vision and expectations!!
I have always been a tight shooter and always have to push myself to pull back. Using IR is helping with that, but next time I am out I need to force myself to leave the big glass in the tent and only bring my 24-70 and 70-200!! Environmental shots are often more powerful, yet again it also depends on the environment. Mara is known for its big cats and bit glass, Amboseli is know for it’s wide open spaces and dramatic skies, Serengeti is renowned for it’s stunning landscape, etc.
For those who have not been on a safari before or this maybe their one safari of a lifetime, although heavy and a bit of change out of pocket to rent, I still find the 200-400 with the 1.4 or 180-400 with the 1.4, is a great tool. As you know a first safari comes with many challenges and this lens creates less frustration with great results.
Again, thank you for the time you have given to share your experiences and advise. I know it is greatly appreciated!
Piper hello, Thank you for your reply. I agree totally with you and realize that my comments are indeed limited to one small reserve within the Mara and with each region and neighboring country offering its unique opportunities one’s needs would change. I took everyone I owned on my first safari and then paired down for my second one. I would absolutely agree fast glass is key and you really need a 2.8 or 4.0 lens if you want to be shooting just as sun rises and also at the blue hour. It was very frustrating for those people in our jeeps who did not have fast glass to have to sit and watch others took many more images while they could not given the faint light that was available at times . All the very best and hopefully one day we can have this conversation live in Africa. Be safe
If you decide to bring a big lens while on safari then you best rent it several times before you go on your first trip. Using a larger lens is a whole new ball game. Many people don’t shoot large lenses fast enough and then wonder why some of the images have motion blur. My suggestion is to never bring “something new” on any travel until you are very familiar with how to use it.
Thank you David!!! GREAT ADVICE!!! YES, always rent gear and test it out! I discuss this often and frequently and it is in all my information. A great way to do this also through a local camera store. Many of them have great one day workshops and even bring gear for you to try. In Southern California I would highly recommend Pauls Photo – https://paulsphoto.com , In Northern California and Colorado try Mikes Camera -https://mikescamera.com ,on the east coast look for Hunts Photo – https://www.huntsphotoandvideo.com/promotions.cfm Please feel free to list more.

A guide to maximize your photographic opportunities when planning a photographic journey
- Publications
- Featured Photographer
- inspiration
- tech and gear
- Tips and information
- Uncategorized
- February 2024
- January 2024
- December 2023
- November 2023
- August 2023
- February 2023
- January 2023
- November 2022
- October 2022
- September 2022
- February 2022
- January 2022
- November 2021
- October 2021
- February 2021
- January 2021
- December 2020
- October 2020
- August 2020
- December 2019
- October 2019
- September 2019
- August 2019
- February 2019
- January 2019
- December 2018
- November 2018
- September 2018
- December 2017
- November 2017
- October 2017
- September 2017
- August 2017
- February 2017
- January 2017
- November 2016
- October 2016
- September 2016
- August 2016
- February 2016
- January 2016
- December 2015
- November 2015
- August 2015
- February 2015
- January 2015
- December 2014
- November 2014
- August 2014
- February 2014
- January 2014
- November 2013
- October 2013
- September 2013
- August 2013
- February 2013
- January 2013
- December 2012
- November 2012
- October 2012
- September 2012
- August 2012
- February 2012
- January 2012
- December 2011
- November 2011
- October 2011
- September 2011
- August 2011
- February 2011
- December 2010
- November 2010
- October 2010
- September 2010
- August 2010
Sponsors & Affiliates

Associations
- 1 Description
- 2 Dual Format
- 3 Operation
Description
The Moskva-5 (MOCKBA-5 in cyrillic writing) was produced by KMZ ( Krasnogorskii Mechanicheskii Zavod or Krasnogorsk Mechanical factory) in the 1950s. Earlier models of the Moskva were copies of the Zeiss Ikon Super Ikonta C , but it makes more sense to call the Moskva-5 an adaptation. Unlike the Super Ikonta, its solid top plate has a built-in rangefinder and a dual-format viewfinder . The best thing about the Moskva-5 is the coupled rangefinder. A lever with rotating wedge-shaped prisms is fixed to the lens plate. Turning the lens to focus rotates the glass, thus adjusting the rangefinder: a very sophisticated device inherited from the Super Ikonta, with no mechanical linkage between the lens and the body. The two windows are 6.5 cm apart for accurate focusing. The separate viewfinder has a larger field of view, which helps composing the picture. As stated above, a sliding frame in the viewfinder selected on top of the camera can be set to 6×9 or 6×6.
The back of the camera showing the year of production (1958), two red windows for 6×6 and 6×9 numbering, the rangefinder window (left) and the separate viewfinder window (right). The symbol to the left of the serial number is the Krasnogorsk company logo.
Dual Format
Super Ikontas were made either for the 6×9 or 6×4.5 format. The Moskva-5 is a 6×6 and 6×9 camera. Since it has a fixed 105mm Industar lens, at 6×6 you have a mild tele at your disposal. To use the 6×6 size, you need to set the viewfinder to the square format. there is a lever to select the right window so you can see the numbering on the film back. The pressure plate does not need to be removed. The 6×9 red window is now blocked, so there's no room for confusion.
As a last step, the 6×6 mask has to be inserted. The camera locks right into its holes. Close the camera and you're ready to shoot.
The Moment 24c is a leaf shutter with speeds of B, 1 to 1/250s. To fire it, the film needs to be transported or the release button will be blocked, indicated by a red window on the top plate. The shutter isn't set by advancing the film; it has to be cocked at the lens by a lever. To take a picture, press the button on the left of the camera top. The button on the right is for unlocking the front plate when the camera is collapsed. Before folding the camera, you shouldn't forget to push down the lever with the polarised glass window.
- Moskva-2, -4 and -5 user manual at Butkus.org
- Tips for using the Moskva at Photosensitive
- Moskva 5 archived bulletin-board discussions, formerly at Robert Monaghan's Medium Format Photography Megasite (archived copy dated 8 May 2006, at Internet Archive )
- Locating light leaks in a Moskva 5 at Nelsonfoto forums (archived)
- Fixing light leaks (in french) at Dirapons'site
- Flickr image
- 6x9 rangefinder folding
- 6x6 rangefinder folding
- Soviet cameras
- Image by Dries van den Elzen
- Image by Siim Vahur
Navigation menu
Personal tools.
- View source
- View history
- List of Companies
- Community portal
- Recent changes
- Random page
- What links here
- Related changes
- Special pages
- Printable version
- Permanent link
- Page information
- This page was last edited on 31 December 2021, at 07:13.
- Text is available under GNU Free Documentation License 1.3 ; other licenses apply to photos.
- Privacy policy
- About Camera-wiki.org
- Disclaimers

- Search forums
- Native Lenses
Lens advice for Moscow on a budget?
- Thread starter sjducks
- Start date May 10, 2012
Mu-43 Rookie
- May 10, 2012
Sorry for another "what lens" post, but I figured that there are many people who have been in similar situations that can help. I'm leaving for Moscow in the middle of June and am interested in adding a lens to my m43 kit. My gear is still a work in progress, but I have an E-P2 and E-PM1, with the II R kit lens and the Sigma 19mm 2.8. I would like to add another lens to take along with my as I'll be taking photos all over indoors/outdoors, daytime/low light. I am however on a budget and really do not want to spend an excessive amount on this lens. I am interested in the Oly 45, but am not really going to be taking any portraits while there (or elsewhere for that matter). Maybe squeeze in a P14 for the wide angle? Any advice would be fantastic. Thanks much!
forgot to mention that I am looking more for native glass if possible. I also have an OM Zuiko 50/1.8, although I am not sure if it will make the trip with me. Thanks again.
Mu-43 Veteran
p20/1.7 - best choice

Mu-43 Hall of Famer
Both of those focal lengths are covered by your kit zoom, so you should be able to figure out which one you use more - wide-angle or short tele? Or are you generally 'stuck in the middle'? My personal preference would be something wide (particularly indoors and urban shooting), so the obvious budget option would be the 14/2.5. The 12, while expensive (and thus probably out of the question) would actually give you something very different in terms of field of view (extra mm on the wide-angle side mean more than on the tele end). Or even the 9-18 ultra wide zoom, although not everyone likes ultrawides equally. I enjoy them from time to time (I have a 17-40 on my full frame), but 24 is usually wide enough for me.
Mu-43 Regular
I visited Moscow just the other week and would definitely recommend a tele zoom as well. When walking around you will want to zoom in on the wonderful buildings and architectural details, and the 45 (good as it is) will not bring you close enough in my opinion. I shot most of my pictures last week with either a wide angle (I used the 9-18 Oly lens) or tele (the Oly 40-150). Since you mention you do not want to spend too much and maybe only want to add one lens I would suggest the 40-150 in your case, not too expensive and very versatile. Combined with your kit lens you will have a light and small but very usable combo that will give you a lot of picture opportunities. If you can stretch the budget think about the 9-18 as well though, great for interiors! https://www.mu-43.com/f56/moscow-color-b-w-25585/ To give you some idea, most outdoor pictures in my Moscow thread (above) were shot with 40-150, most indoor shots with 9-18 Regardless of your choice, you will have a great time there, wonderful city for a photo trip!
My wife and I went to London, UK, last summer. She was there for two weeks before I got there, and she took along her E-PL1, m.14-42 (mk. I) kit, and the m.40-150. She never complained about any restrictions, with the exception that 14mm wasn't wide enough for a very few architecture shots. I brought my old E-620, 11-22mm and 50mm f/2. It would get to be too much weight for a 10-12 hour day of walking around. I envied the little E-PL1. I would say that if your goal is to enjoy Moscow, and not to earn a profit off your shots, then get the m.40-150mm, a few extra batteries, and a few extra SD cards. It's a very sharp lens for the price, and extra batteries and SD cards are more important than another stop of light.

Just this guy...
Since you don't have a strong idea of what you want I'd go along with the others suggesting the 40-150. It gives you a good general purpose kit. The two zooms and faster normal on two bodies will be very versatile on a tight budget. Fred
Moscow lens Since you already have Oly cameras, I can recommend the 14-150 zoom. Compact, wide range, good quality (no equal to the primes, but plenty good enough). Just traveled to New Zealand and used this lens most of the time. It's $499 at Amazon, perhaps out of your budget but worth a look.
Mu-43 All-Pro
Save your money for your trip. Since you have no idea what you want, it would suggest you don't need a lens at all.

Wide. Wide. Wide. There are many very interesting interiors in Russia. The chapels inside St. Basil's for example. IMHO it takes 24mm equivalent or better to shoot an interior and give an adequate sense of space. My "travel wide" is the 9-18. (Church of the Savior on Spilled Blood in St. Petersburg is another photogenic interior. Don't miss it if you get that far.) Those photogenic interiors are usually pretty dim. I suggest a 5 or 6 section carbon monopod that collapses to around 16" Put a Velbon QHD-41Q or one of the Manfrotto ball heads with the QR2 system on your monopod and you will be a happy low-light shooter. IMHO you have enough longer lenses unless you are a birder.
either kit zoom or 9-18mm
lenshoarder
I would pickup a M39 adapter and buy old Soviet glass while there.
Thanks for all the suggestions fellas, much appreciated! Keep em coming.
Keep em coming. Click to expand...
oldracer said: One more re budget: You could buy a 9-18mm for the trip and sell it when you get home. Click to expand...

I actually have the same dilemma for Italy next year. The Oly 12,f2.0 is way out of my budget. I was probably going to buy the Pany 14,2.5. At < $300. I looked at the Sigma 19,f 2.8, but I didn't think the reviews were overwhelming. I have the EPL1. Type I. Kit lens, and the 40-150 tele-zoom ( love that lens ). I also have the Holga lens ( I actually like this one alot ). So, judging by the responses here, the Pany is the way to go. Thanks.
I am leaning a little more towards wide angle than zoom although the prices for the 40-150mm olympus are pretty cheap now (same goes for the 14mm panasonic). BAKatz, I'm with you...I'd love to get the Oly 12, but it's out of my range as well.
You can always take multiple images and stitch them together rather than buying a wide. I often do handheld panos. The gridded display is very helpful in taking the series.
Similar threads
- Jan 30, 2024
- Feb 1, 2024
- AjaxManifesto
- Jan 4, 2024
- Dec 26, 2023
- Feb 3, 2024
- Panasonic Cameras
Latest threads
- Started by Jmac8866
- Yesterday at 5:47 PM
- Started by rrobinson
- Friday at 9:36 PM
- Started by MichaelSewell
- Friday at 4:04 AM
- Started by Holoholo55
- Friday at 12:38 AM
- Replies: 42
- Started by cookedart
- Thursday at 3:10 PM
- Started by Mack
- Wednesday at 9:19 PM
- Wednesday at 2:51 PM
- Started by sasquatchphotog
- Wednesday at 1:05 PM
- Started by Underwater
- Tuesday at 10:55 PM
- Started by dicky109
- Tuesday at 10:29 PM
- Replies: 10
Watch CBS News
Experts warn not to look at solar eclipse with your phone camera — but share tricks for safely taking pictures
Updated on: April 8, 2024 / 12:12 PM EDT / CBS News
Millions of Americans will be able to see the solar eclipse on April 8, 2024, and chances are many will want to grab their phone and take pictures to document the rare event.
Experts warn that it's essential not only to protect your eyes from the sun, but also to be cautious when using your phone to view or take photos of the solar eclipse.
A partial solar eclipse, when the moon blocks some of the sun, will occur from coast to coast, while a total solar eclipse —when the moon lines up with the sun, blocking all of its light — will be visible in the "path of totality," stretching across more than a dozen states , from Texas to Maine.
"There is no safe time to look at the sun without protection, period," Dr. Christopher Starr, director of the fellowship program in cornea, cataract and laser vision correction surgery at NewYork-Presbyterian and Weill Cornell Medicine, said in an interview with Health Matters, NewYork-Presbyterian's online journal. "Not a split second, not a half a second, not a quarter of a second. At no time should a kid, or an adult, be looking at the sun even as the sun is partially eclipsed. It's still unsafe."
The safest way to look at a partially eclipsed sun is with eclipse glasses that meet an international standard, ISO 12312-2, according to the American Optometric Association.
Can I take pictures of the solar eclipse with my cellphone?
Cellphone cameras should not be pointed directly at the sun, as it may damage the phone's sensor, experts say.
Smartphones were never designed for taking photos of the sun or the moon, according to NASA. Because standard lenses are very small, they aren't equipped with the resolution needed for the largest objects in the sky like the sun and moon.

"Cellphone cameras do not have the kind of protective filters needed for safe or successful solar photography," Dr. Geoff Bradford, professor of ophthalmology at West Virginia University, told CBS News.
Photographing the partial eclipse with a smartphone will likely not only damage the camera sensor but also result in an overexposed photo, Bradford said.
Douglas Goodwin, professor of media studies at Scripps College and an expert in computational photography, agreed.
"Smartphone cameras in 2024 have small sensors and lenses, making it challenging to capture detailed images of the eclipse itself," Goodwin said in an interview. "Taking photos of an eclipse is even harder than taking photos of the moon — it's small and dazzling!"
Can I look at the sun on my cellphone screen?
Pointing your cellphone at the sun is bad for the phone, but it also could be dangerous for your eyes if you look at the sun on your cellphone screen, experts say.
Except for the few moments of total eclipse , when the sun is completely obstructed, "viewing the sun with your unprotected eyes or through a cellphone screen is extremely dangerous," Bradford said, advising that all visual contact with the sun take place only through special solar eclipse glasses that meet international standards.
That international safety standard, which is set by the International Organization for Standardization , means the glasses reduce visible sunlight to a safe level and block ultraviolet and infrared radiation, according to the American Astronomical Society website.
Ultraviolet radiation can damage the eyes's cells, while heat from infrared radiation can cause thermal damage, according to the National Eye Institute .
What's the safest way of taking pictures of the eclipse?
The solar eclipse has various stages and effects, and some are safer to photograph than others.
"Smartphones will be great for capturing the experience of the eclipse," Goodwin said. This includes the effects of the altered lighting around us.
"Keep your head down and look under leafy trees for crescent-shaped projections of the eclipsed sun on the ground," Goodwin said. "Plus, you will observe how the strange light affects people and animals."

Goodwin also recommended that people in the eclipse's path look for shadow bands, which are mysterious gray ripples that snake over the ground just before and after the total eclipse.
If you really want to photograph the sun as it becomes partially covered, take an extra pair of solar eclipse glasses, cut them and tape one of the filters over your phone's camera lens, Bradford said. If your smartphone has several lenses, make sure all are covered.
If you're using an iPhone, you should turn off the camera's macro mode when putting a filter in front of the camera.
"Do not look at the sun, even briefly, while pointing your camera skyward," Bradford said. "To enlarge the eclipse further than your camera zoom will allow, you can purchase a clip-on zoom lens for your smartphone for more dramatic photos."
Can I take photos of the sun when it's fully obstructed?
If you're in the path of totality , during the few minutes of total eclipse, you can look up without eye protection and take unfiltered photographs with a smartphone, Bradford said.
But it's important to be mindful that the total eclipse is a fleeting occurrence. As soon as the moon begins to move away from the sun and sunlight reappears, make sure your eclipse glasses and camera filter are back on, Bradford advised.
Some experts warn against looking up at the sun even when it's fully obstructed because of how suddenly sunlight can reappear.
"Totality of the eclipse lasts only about 1 to 3 minutes based on geographic location, and bright sunlight suddenly can appear as the moon continues to move," an eclipse viewing guide published in JAMA noted, adding that "even a few seconds of viewing the sun during an eclipse" can temporarily or permanently damage your vision.
Looking at a partial eclipse without the protection of filters can cause permanent and irreversible eye damage, including blind spots, distorted vision and decreased color vision, Bradford said.
During the darkened few moments of the total eclipse, Goodwin recommends using your smartphone's HDR (High Dynamic Range) and Night modes to enhance photographs. HDR mixes exposures to capture a range of brightness levels, while Night mode uses image stacking to create well-lit photos in low-light conditions, Goodwin said.
You can use the iPhone's Wide and Ultra Wide cameras during near-total darkness.
S. Dev is a news editor for CBSNews.com.
More from CBS News

3 investments to consider with inflation rising

China-Taiwan tension brings missiles and anxiety to a Japanese paradise

Here's how to get a tax extension from the IRS in 2024

3 smart gold investing moves to make with inflation rising
IMAGES
VIDEO
COMMENTS
One of the favourite lenses for professional wildlife photographers is the 400mm. But buying one of these beauties is expensive and out of the reach of many amateurs and enthusiasts. Fear not though, there are other ways of getting this focal length. One of the simplest is to use an 80-400mm or 100-400mm zoom lens.
Some popular lenses for safari photography include the Sigma 150-600mm f5-6.3 DG DN OS Sports and the Tamron 18-300mm f/3.5-6.3 Di III-A VC VXD. Bridge cameras can also be a good option for their convenience and versatility.
View at Walmart. View at Crutchfield. Best Canon DSLR lens. Adding a little more reach than a standard workhorse telephoto, the Canon EF 70-300mm f/4-5.6 IS II USM is great for safari shooting on DSLRs. Read more below. Best Nikon Z. 4. Nikkor Z 24-200mm f/4-6.3 VR. View at Walmart.
The African Safari, Part 3: Photo Gear and Shooting Tips. To quote the pioneering aviator Beryl Markham, "Africa is mystic; it is wild; it is a sweltering inferno; it is a photographer's paradise, a hunter's Valhalla, an escapist's Utopia. It is what you will, and it withstands all interpretations.".
Safaris are absolutely amazing, in this guide I take you through my top tips on lens selection to keep your bag light and your wildlife photos EPIC!!Find me ...
Longer. One of the favourite lenses for professional wildlife photographers is the 400mm. But buying one of these beauties is expensive and out of the reach of many amateurs and enthusiasts. Fear not though, there are other ways of getting this focal length. One of the simplest is to use an 100-400mm zoom lens.
Canon EF 24-105mm f/4L IS II USM: Great for landscapes and general wildlife photography. Nikon D850:The Nikon D850, a favorite among professional safari-goers, boasts a 45.7 MP full-frame sensor, 4K UHD video recording, and exceptional low-light performance. Nikon AF-S NIKKOR 80-400mm f/4.5-5.6G ED VR: Versatile zoom and vibration reduction.
A 500mm F4 is a great option for a safari lens, it is fast and great in low-light. A 600mm F4 is a bit too long for my liking when on an African wildlife photography safari. Forget the older versions of this lens as they just too heavy for safari photography. A 400mm F2.8 is an increasingly popular lens as the new ones are lighter and can be ...
8. Camera and Lens-Cleaning Kit. Have a kit for blowing dust off and keeping your gear clean in the rugged environments. Make sure you have a screwdriver or multi-tool (do not try to carry that on a plane). The constant vibration of the vehicle and bumpiness can and does loosen screws on your gear.
Best budget lens for safari. You can buy a good beginner's lens for wildlife photography for $100-200. Canon has a 75-300mm f/4-5.6 or you can get a similar lens from Tamron - AF 75-300mm f/4-5.6. Mid-range safari lens. There is a lot of choice of good telephoto lenses for safari in the mid-range budget.
Wide Aperture: With a wide f/1.4 aperture, this lens excels in low-light conditions, allowing you to capture the magical moments of sunrise or sunset on the safari. Prime Lens Quality: As a prime lens, it delivers exceptional optical performance and is well-suited for capturing wide-angle scenes with stunning clarity.
Spread the love. 1. Paired with a Sony a7, Sony a9, or Sony a1 camera body, this is probably the only lens you'll need for safari shooting. The Tamron 150-500mm is experiencing instant savings ...
It comes with a lens that is not interchangeable, so you don't have to pay extra for a lens. Nikon COOLPIX P1000 16MP 125x Super-Zoom Digital Camera. 3000 millimeter optical zoom-the most powerful zoom lens; Ever put on a Nikon Coolpix camera. 4k ultra hd video with HDMI out, stereo sound and an accessory hot shoe.
A vital component to capturing these moments and immortalizing them in photographs is choosing the right lens for your camera. The perfect lens combines a balance of focal length, aperture, and image stabilization capabilities. In this blog post, we delve into some top choices that would serve you well on a safari photography journey.
Embarking on an African safari is the dream of many a photographer. One that brings to mind immediate justification for the purchase of big, expensive lenses. After all, explaining to your significant other, 'But I need that 400mm 2.8 lens,' carries more weight if you're talking about capturing dramatic shots in the Serengeti of the 'Big 5 ...
On my very first safari, I set a lens down on the seat, and when the driver suddenly took off, it went flying." "Bring a minimum of two beanbags for camera and lens support to cover both sides of the vehicle." "The most common mistake people make is shooting at too slow a shutter speed and too low an ISO. The animals are almost always moving ...
This kit contains the following gear: Professional general use Lens: Canon 24-70mm f/2.8L II. Professional Telephoto Zoom Lens: Canon 100-400mm f/4.5-5.6L IS II. Professional Mid-Range DSLR Camera: Canon 5D Mark IV. Bean Bag to Stabilize your Camera on Bumpy Safari Roads: LensCoat LensSack Jr.
AF-S Nikkor 28-300mm f/3.5-5.6G ED VR. Tamron 28-300mm f3.5-6.3 XR Di VC LD. Some of these lenses (particularly the Canon) are quite expensive, and all three manufacturers also offer 18-200mm lenses that could be considered as more budget-friendly alternatives for a one-lens safari. As with any "Jack of all trades" these lenses have pros and cons:
TECHNICALLY SPEAKING. When speaking of "big fast glass," we are generally talking about a long lens 400 mm or greater and one that has a fixed aperture of 2.8 or 4.0 even on a zoom lens. That means when you zoom from 200 - 400 your aperture remains fixed, it does change from 4.0 at the shortest range (200) and change to F6.3 when zoomed out.
The Moskva-5 is a 6×6 and 6×9 camera. Since it has a fixed 105mm Industar lens, at 6×6 you have a mild tele at your disposal. To use the 6×6 size, you need to set the viewfinder to the square format. there is a lever to select the right window so you can see the numbering on the film back. The pressure plate does not need to be removed.
Sorry for another "what lens" post, but I figured that there are many people who have been in similar situations that can help. I'm leaving for Moscow in the middle of June and am interested in adding a lens to my m43 kit. My gear is still a work in progress, but I have an E-P2 and E-PM1...
The tank is armed with a 125-mm smoothbore gun (firing range up to 5 km), the ammunition includes 40 shells (in later versions 38 and 45 shells), both sub-caliber and cumulative and high-explosive. Later modifications of the machine were able to shoot missiles "Cobra" and " Reflex".
Experts warn against pointing your phone's camera directly at the sun. Here are a few tricks for photographing the solar eclipse — or snapping a selfie.
#Sancharam #Siberia #SafariTV #Santhosh_George_Kulangara #Lal_JoseStay Tuned : https://www.safaritvchannel.com Enjoy & Stay Connected With Us !!---...