- Privacy Policy
- Corrections Policy
- Ethics Policy
- Fact-checking Policy
- Ownership Policy
- Looking for Eguides?
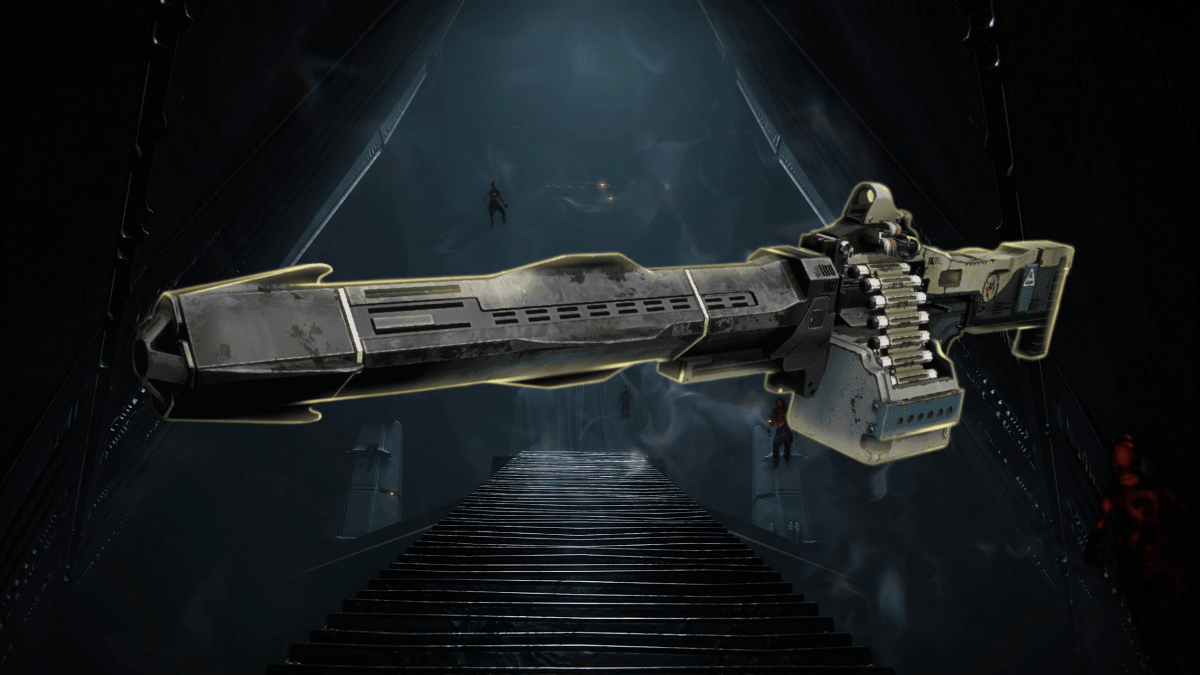

How to Complete The Journey Quest in Destiny 2
If you have the Shadowkeep Expansion, you might find yourself in possession of the coveted quest, The Journey . If you find yourself in possession of this quest and you don’t have Shadowkeep, be aware that you’ll need that expansion to finish this quest!! So, let’s get into it. Here’s how to complete The Journey quest in Destiny 2.
How to Complete the Journey Quest in Destiny 2
If you don’t have the quest yet, head first to the Moon, then to Sorrow’s Harbor. From here, you’ll want to head towards the Scarlet Keep. Once you enter it, take the first left door, and descend and keep left until you reach the Enduring Abyss . Once you hit the lantern, stop and look up to the right. There will be a lighted corridor you can jump up to.
Do so, then follow this path until you see a Pyramid. You’ll be in a small balcony area with four statues, two on the left, two on the right. By interacting with them, one or more will light up. Our goal is to light all four. This puzzle is random, so experiment by interacting with the statues until all four are lit. I found that working from the bottom left in a counter-clockwise fashion worked perfectly.
Related: How to Complete the Memory Alembic Quest in Destiny 2
Once the statues are lit, you’ll get a notification, and a chest will spawn. Open it, and you’ll get the quest, The Journey. Now, to the entrée:
Step 1: Emerged from the dark.
“Around you… darkness. If you are to discover your path, you much anchor yourself to light.”
It’d be easy to be stumped by this quest description. But it’s actually given us precisely where we need to go: the Anchor of Light . Head there from Sanctuary, then keep left until you see the bright yellow radio tower.
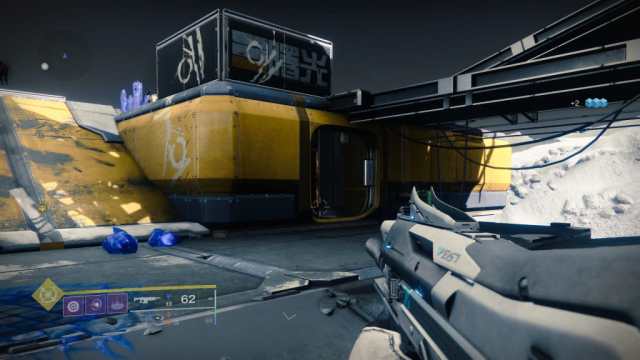
But we don’t want this large tower – we want the small room attached to it. Head inside, and you’ll find behind an ancient server a strange, Hive-like structure with a glowing orb within. Approach it, and it will prompt you to “Pick Up Light”. Do so, and you’ll find there’s a counter on the left side of your screen called “Torch Bearer”. You’ll have one minute to deposit the ball of light into six different locations.
This light has to be deposited in a precise order, so I really recommend finding each of the six locations and their scarlet plates beforehand. Once you have an idea of where to go, you’ll be able to complete this easily.
I’ve provided a short video of my run below (and as you can see, you can make a hiccup here or there and be perfectly fine on time). But here’s how to find each one:
Location 1 : Same Room
In the corner of the same room, you found the ball of light will be a scarlet plate. Interact with it, and your path will burn brighter.
Location 2: Within the chasm
Leave the room and keep heading straight until you see an orange wall in the distance with some Fallen graffiti. Head towards that wall and you’ll reach a stone bridge that goes over a green chasm. Turn left while on this bridge and you’ll see some broken scaffolding. Within this scaffolding is the second plate.
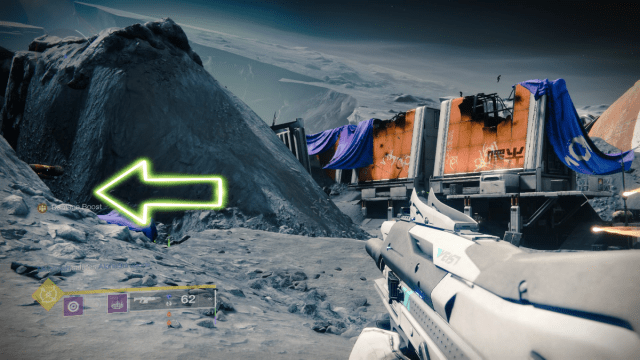
Location 3: Another small room
From your perch on the scaffolding, turn around until you see the saucer building. Head a little to the right of this saucer building and you’ll see a small yellow building with only one room. Behind the console in the center of this room will be another plate.
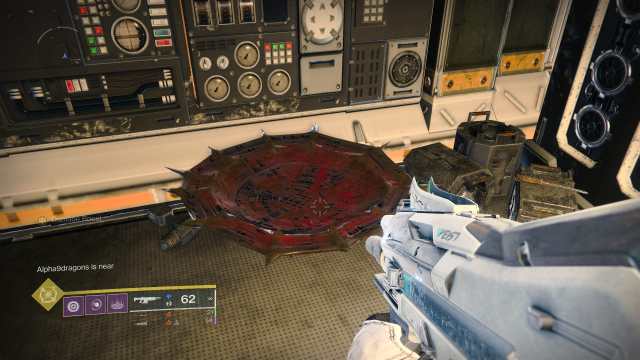
Location 4: Second floor of the radio tower
Return to the radio tower, but this time we’ll be ascending to the second floor. Once you’re on the second floor, you’ll see some crates covered with purple tarp. Jump on top of them, then look up. If you peer carefully, you’ll be able to see the dark, round shape of another plate on a girder above you. Jump up to it.
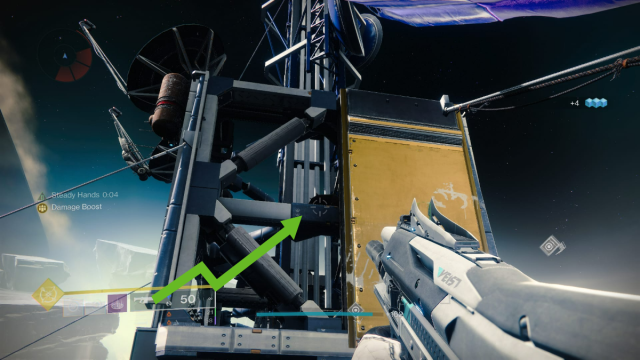
Location 5 : Cement ramp
Heading directly north of where the plate on the girder is, we’ll see another set of buildings, connected with a variety of cement ramps. Climb the highest ramp on the right side, and there will be a bowl on top.
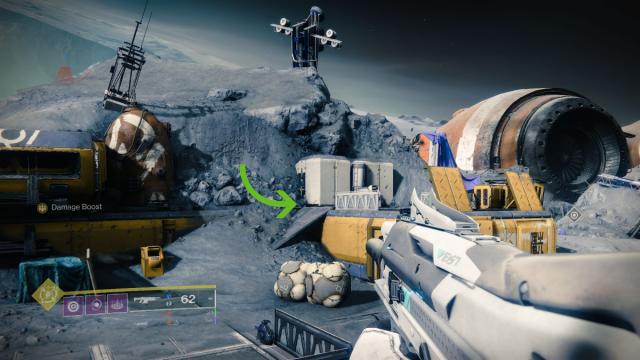
Location 6: Saucer/Round Building
From the top of the cement ramp, head forward until you see the UFO/Saucer shaped building that was our landmark for Location 2. We want to climb on top of that. Do so, and you’ll find the plate on top.
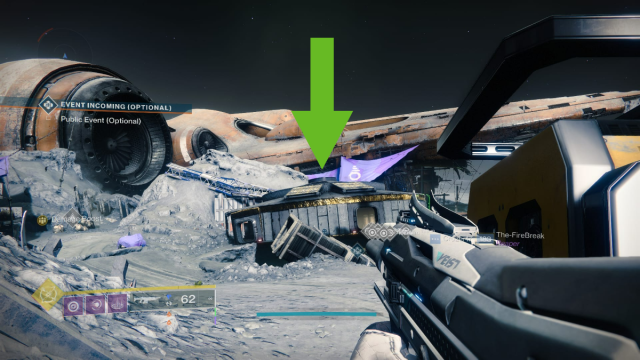
Once you find all 6, you’ll be directed towards a steel tower. There’s no time limit for this one, and you’ll get a clear map marker for it to boot.
Step 2: Pathfinder
Okay! We have quite a few more steps to go. We’ll need to find the following fragments:
- Archer’s Line Path Fragment
- Sorrow’s Harbor Path Fragment
- Hellmouth Path Fragment
- Anchor of Light Path Fragment
For this step, we’ll need to visit all the K1 Lost Sectors. Naturally, the easiest one to go to is Anchor of Light’s Lost Sector, K1 Communion, which is North East of the UFO building.
Fragment 1: Anchor of Light, K1 Communion
Complete the Lost Sector like usual, then claim the Lost Sector chest. Jump up towards the Lost Sector exit, and you’ll find a Hive puzzle on the wall. Your goal is to make all the symbols match the symbol at the very top (which I call the ice cream cone). You do this, of course, by shooting a tile which then flips over a series of others. Here’s the easy way to do it:
- Shoot bottom left
- Shoot bottom right
- Shoot top middle
Do that, and you’ll get a grid full of ice cream cones and a hive treasure chest will spawn. Open it, and you’ll get a Path Fragment. Now, to the next lost sector.
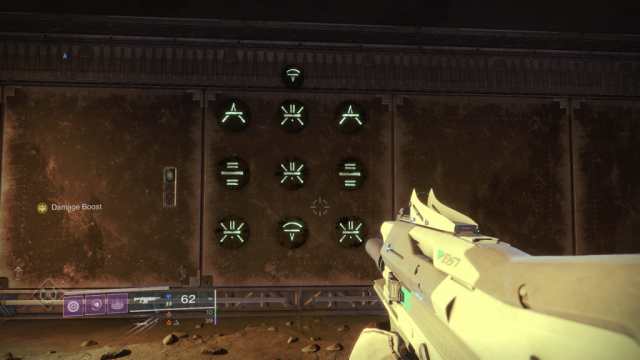
Fragment 2: Archer’s Line, K1 Logistics
This Lost Sector is always a pain to find. Head into Archer’s Line from Sanctuary, then keeping heading straight until you reach the large building at the end of the path. Enter the building but try to keep left until you find a room full of spooky scarlet ghosts. Follow the ghosties until you descend into the Lost Sector.
Related: Destiny’s Latest Teaser Reveals New Details about the Strand Subclass
Once you’re in K1 Logistics, continue as normal and grab the Lost Sector chest. Enter the corridor after the chest to find the next puzzle. Like K1 Communion, we’re going to want to shoot some tiles and get it to match the triangle on top.
The easy solution:
- Shoot top left
- Shoot middle right
- Shoot middle center
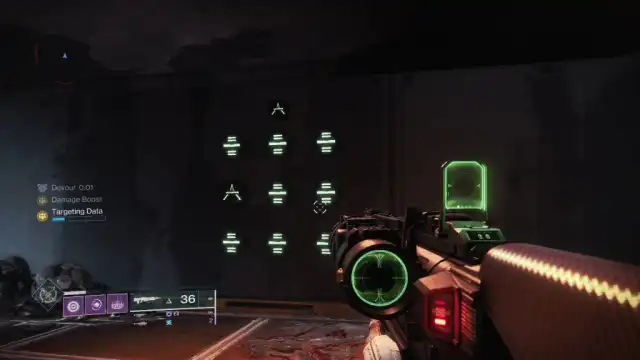
Claim your path fragment!
Next up: Sorrow’s Harbor.
Fragment 3: Sorrow’s Harbor, K1 Revelation
Another annoying Lost Sector to track down! Use your map to get practically on top of it. Once you are, look around. The Lost Sector is inside a cave that winds beneath your feet. And if you find that the final door won’t open once you complete the Lost Sector, it’s probably because you 1) Missed an acolyte somewhere or 2) You finished the final boss too quickly and you need to leave the area slightly then come back to trigger the next few waves of grunts.
Go through the final doors and you’ll see a new puzzle. To complete it, hit the following tiles:
- Shoot middle left
- Shoot bottom middle
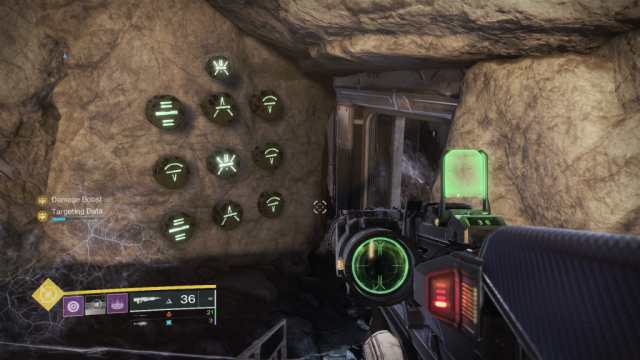
Yeah… that’s a lot of middle. Now, let’s head into the Hellmouth.
Fragment 4: Sorrow’s Harbor, K1 Revelation
Get into the Hellmouth whichever way you prefer, heading towards the crew community at the bottom of this section of the map. There’s nothing tricky about this Lost Sector, except you might miss the puzzle. It’s just past the Lost Sector cache on a rock balcony. Jump over to it then hit the following tiles:
- Shoot top right
- Shoot bottom middle
That’s a lot of bottoms.
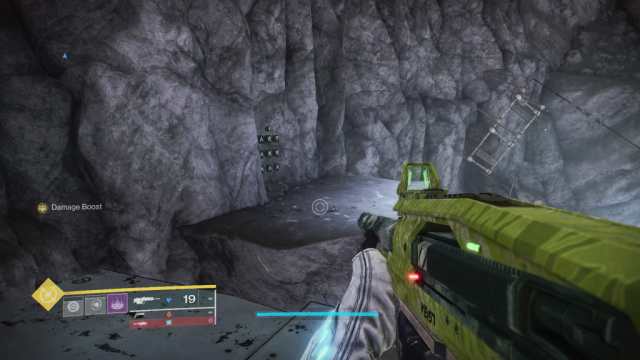
… Moving right along. We finally have our last fragment, and we’re onto our next step.
Step 3: Path Uncovered
Again, we get a bit of a location-based hint. We’ll need to head to Sorrow’s Harbor and begin the Pit of Heresy , a Dungeon you can see on your map. To access this dungeon, you’ll need the Shadowkeep Expansion. If you can’t access the Pit of Heresy and you do have the Shadowkeep Expansion, check to see if you’ve completed Eris’ “The Deepening Wake Quest”.
Now that you’re in the Pit, complete the first encounter. Head forward until you hit the wall puzzle with dozens of doors.
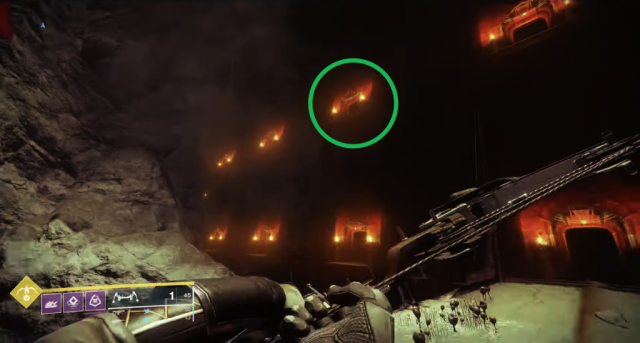
There are two rows of lit doors. Look left. Your goal is to get to the second door from the end on the top row. Climb up there and enter the room, and you’ll find a ruin on the ground. It will have the interaction prompt “Reveal Path’s End”. Interact with it, and you’ll get a new step.
Step 4: Discovery
Welp! We’ll need to find the Pariahs, and they’re luckily right in the Pits of Heresy with us. Continue through the Dungeon as normal, heading into the terrible awful maze portion where you’ll need to avoid the Ogres. It’s important to note that you MUST NOT get to the Chamber of Suffering checkpoint, as it will lock you out of backtracking!!
Is that enough exclamation points? !!!! Here are a few extra. I’m giving these to you because I know how tedious it was to get to this point, and it’d be awful to have to complete the Dungeon or wait for reset just to finish this step.
This area is meant to trip you up, but the next set of hidden runes are hidden on a path on a ledge. Search every edge you come across, and if you see a massive set of ribs and a few scarlet ghosts, you’ll know you’re in the right place. There will be a path that will lead downward, terminating at a set of runes on the ground. And, yes, it’s beside an ogre patrol point.
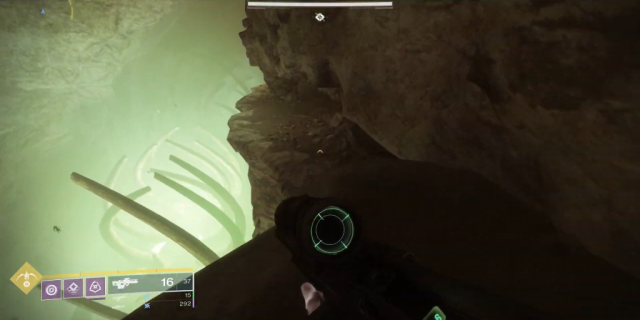
Once you interact with the runes on the ground, a set of platforms will spawn. Jump across them, and you’ll see something familiar: a hive bone structure with a ball of light in the middle. But don’t worry: this time the torch buff won’t run out.
Take this ball of light all the way back where you first entered this section. There, you’ll find two scarlet plates next to a door. Light both, and the door will open. Oh, and be careful of the Ogres. They still want to kill you.
Step 5: Slay Volmar, the Tempted
The door you deposited the light into will now open. Enter and breathe a sigh of relief because the Ogres can’t follow you here. Work your way through the spiderweb-choked corridors. There, at the very end will be a Hive Wizard gold bar – Volmar the Tempted.
I’m very sorry to say that killing Volmar isn’t as easy as chucking a Nova Bomb at his head. This boss can be difficult to solo and there’s a puzzle attached. Around Volmar’s arena are a variety of Hive Ruins, each of which are connected to an element: Void, Netural, Arc, and Solar.
Related: How to Get Riptide in Destiny 2
It’s best to try and memorize where each of these Runes are. In Volmar’s room, there is a ball at the center that he guards. You’ll be given a debuff with an element associated with it. Fiery Dread for Solar, Abyssal Dread for Void, Neutral Dread for kinetic, Thunderous Dread for Arc.
You’ll need to steal the ball he’s guarding then dunk it next to the Rune that represents the element you’re being affected by. Once you’ve dunked the ball, return to Volmar to try to get in as much damage as possible.
If you’re struggling and need to recover, try to hide near the kinetic altar. If you can’t get the ball, exit the room, and get the entrance ball. And once the wizard goes down? You’ll get the next step.
Step 6: Finality
What a journey. I guess that’s why they named this quest what they did. They could have also named it “suffering” and that would have worked, too.
Now, all you need to do is return to Eris Morn in Sanctuary, and she’ll hand you the Exotic Machine Gun, Xenophage! Congratulations, Guardian.

The Journey
From Destinypedia, the Destiny wiki
The Journey is an exotic quest in Destiny 2 that was introduced in the Shadowkeep expansion, which rewards players with the Xenophage Machine Gun . [1] To obtain this quest, players must complete a puzzle in the Enduring Abyss on the Moon . Right before Eris Morn 's station overlooking the Lunar Pyramid there are four Hive statues, which players have to interact with them to make all of them light up. Solving it spawns a chest with the first quest step.
- 1.1.1 Notes
- 1.2.1 Notes
- 1.3.1 Notes
- 1.4.1 Notes
- 1.5.1 Notes
- 1.6.1 Notes
- 1.6.2 Transcript
- 2 List of appearances
- 3 References
Steps [ edit ]
Step 1: Emergence [ edit ]
Around you... darkness. If you are to discover your path, you must anchor yourself to light.
- Emerged from the dark
Notes [ edit ]
To complete this step, the player has to travel to the Anchor of Light and locate an orb of captive Solar Light in one of the buildings. They have a limited amount of time to light seven saucers scattered around the area with this orb.
Step 2: Pathfinder [ edit ]
A light shines on your path. But you have yet to bring it into focus. Until then, your path remains among the lost.
- Archer's Line Path Fragment found
- Sorrow's Harbor Path Fragment found
- Hellmouth Path Fragment found
- Anchor of Light Path Fragment found
This quest step is completed by solving a puzzle at the end of each Lost Sector on the Moon. There is a grid with Hive symbols on a wall, and a symbol above it. The player has to change all of the symbols on the grid into the symbol above by shooting them. Shooting a symbol changes all symbols on the vertical and horizontal lines where it is located. Once a wall is solved, it spawns a chest with the path fragment.
Step 3: Descent [ edit ]
Your path brightens, shining through the barrier of emerald, beneath a harbor built from sorrow.
- Path uncovered
This quest step is completed in the Pit of Heresy dungeon . The player has to proceed past the Necropolis encounter to the walls with many doors and interact with a hidden switch in one of them. The correct doorway is the only one without a chained symbol on it.
Step 4: Discovery [ edit ]
The Pariahs stand guard over far more than just despair, for within these tunnels lie many secrets.
- Path's end located
This quest step is completed by opening the doorway to the hidden boss in the Pit of Heresy during the Tunnels of Despair encounter. At the leftmost area upon interacting with a prompt on the cliff underside, the player has to cross several floating platforms above the pit to obtain a shiny orb of Solar Light, and light the two saucers by the doorway in the opposite section of the encounter.
Step 5: Slay Volmâr, the Tempted [ edit ]
The end of your path is in sight. Defeat those who would keep you from it.
- Volmâr, the Tempted slain
- This quest step is completed by defeating the hidden boss in the Pit of Heresy. When in Volmâr's room, the player receives a " Dread " buff, which determines what element of damage they will be able to deal to the boss. Each corner of the entrance room contains an orb with a Hive rune above it, the color of the orb corresponds with a certain damage type. There are four saucers with Hive runes above them, and a shiny orb in the middle of the room. The player has to memorize the rune for the orb which matches their Dread in the entrance room, then carry the shiny orb and light the saucer with this rune in the main room. Doing so changes their buff to its " Vengeance " version, which lasts 30 seconds and allows them to damage Volmâr with the buff's element.
- The Dread and Vengeance buffs refer to the elements as Neutral ( Kinetic ), Thunderous ( Arc ), Fiery ( Solar ), and Abyssal ( Void ).
Step 6: Finality [ edit ]
Return to Eris Morn with the Hive bug.
- Talk to Eris Morn
Visit Eris Morn with the now-transformed Omar Agah . She will insert Omar’s Hive bug form into his prized machine gun Xenophage , which is then given as your reward.
Transcript [ edit ]
"This… communes with me. And I know it… I know him. This is what remains of dear Omar. Tortured by the Hive. I knew not that he would be transformed by Crota's twisted experiments…"
"I am sorry I couldn't save you, friend. In life, you may have been unable to escape their grasp. But you will have your vengeance yet."
Eris has kept in her possession one of Omar's greatest assets: his beloved Machine Gun. Eris empowers it with the spirit of Omar, and grants it to you.
List of appearances [ edit ]
- Destiny 2 : Shadowkeep
References [ edit ]
- ^ Bungie (2019/10/1) , Destiny 2 : Shadowkeep , Playstation 4
- Articles with verbatim transcripts of official documents
New to Shacknews? Signup for a Free Account
Already have an account? Login Now
- Subscribe
- Latest Pets
- Forum: Posts today 121
Xenophage Exotic Machine Gun - Destiny 2
Unlock Xenophage in Destiny 2 by completing The Journey steps on the Moon for Eris Morn.
Xenophage is one of Destiny 2’s most powerful Exotic Machine Guns. What it lacks in ammo capacity and speed it makes up for in raw, overwhelming power. To unlock Xenophage, players will need to complete a quest called The Journey for Eris Morn, which starts on the Moon.
Xenophage, Exotic Machine Gun
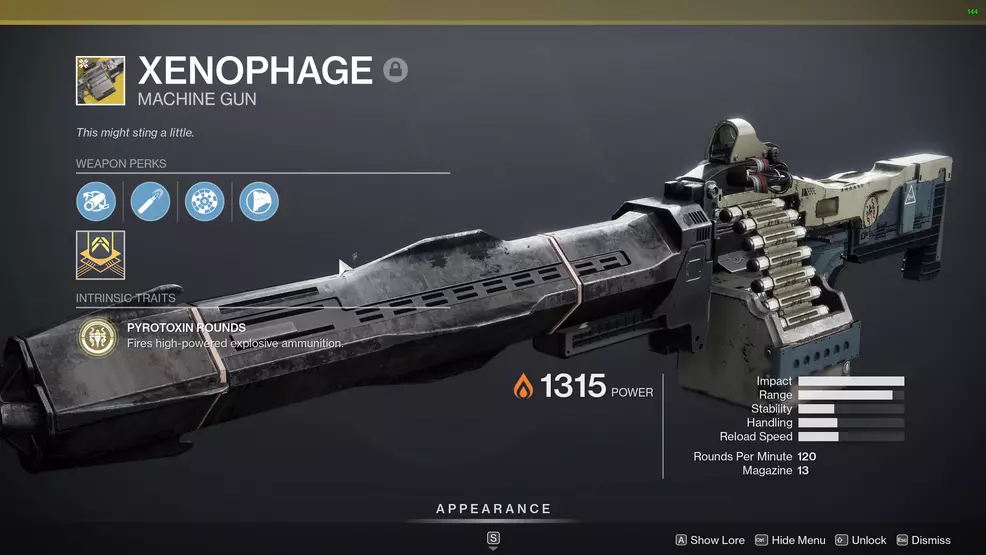
The Xenophage Exotic Machine Gun is a Solar Power weapon that uses Heavy ammo – which surprises no one. The gun was originally introduced during Season 8 , Shadowkeep and Season of the Undying, and has seen continual use since then.
Players that unlock Xenophage will be treated to one of the slowest firing Machine Guns in Destiny 2, featuring a 120 PRM. But, more on its perks and stats below.
The Journey Exotic quest
Unlocking Xenophage will require a bit of footwork, some puzzle solving, and venturing into the Pit of Heresy dungeon . Here are the steps to unlock Xenophage:
- Go to the Enduring Abyss below the Moon
- Use a ball of light in the Anchor of Light to light up six locations
- Solve puzzles in the Moon Lost Sectors
- Enter the Pit of Heresy and find the hidden item after the first encounter
- Collect a charge during the Pariah Ogre section and use it to light two brazier to open a door
- Slay Volmar, the Tempted
Step 1: Go to the Enduring Abyss
To get The Journey quest for Xenophage, you will need to reach the Enduring Abyss area beneath the Moon. Begin by loading in at the Sanctuary fast-travel point on the Moon. Head through the portal near Eris (if it's there) and follow to the point where you can see the pyramid. If the portal is not there, you'll have to take the long way. Use the embedded video below to help you find the Enduring Abyss location.
When you reach Enduring Abyss you'll find four statues, two on either side from where you look out towards the pyramid. Do not touch any statues until you're ready to begin. They should not be lit at all.
You will need to light them in the correct order. To do this, approach the statues in a clockwise direction and press the interact button when the message “Emerge from the Dark” appears. When all four are lit, a chest will spawn which contains The Journey, the Exotic quest for the Xenophage Exotic Machine Gun in Destiny 2.
Step 2: Emergence
The actual first step of The Journey will take Guardians to the Anchor of Light region on the Moon. Once there, an orb (ball of light, if you will) can be picked up. This light can then be taken to six nearby locations. At each one, Guardians will have to hold the interact button to Light Your Path. The six locations must be hit in the correct order, which is why we have a video of this step embedded below.
Step 3: Pathfinder - Lost Sector puzzles
The Pathfinder section of The Journey tasks players with solving puzzles in Lost Sectors. These are flip puzzles, where shooting a symbol flips all the symbols on its cardinal plane to the next icon. The puzzles are all found at the very end of the Lost Sector, after defeating the boss and going through a locked door.
You will need to complete all four puzzles in each of the Moon’s Lost Sectors to find the path fragments. Credit to the Raid Secrets community for the solution to some of these puzzles.
K1 Revelation
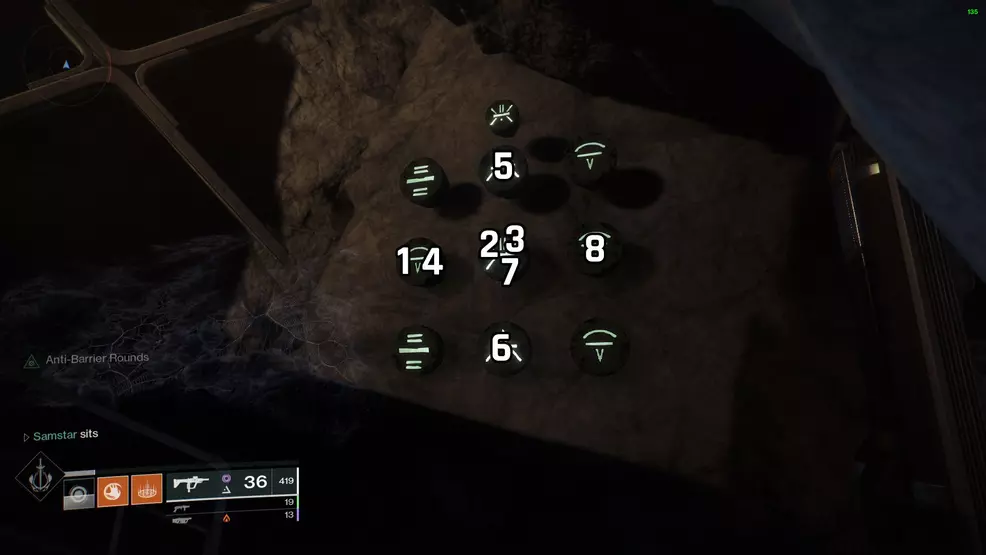
- Left middle
- Bottom middle
- Right middle
K1 Logisitcs
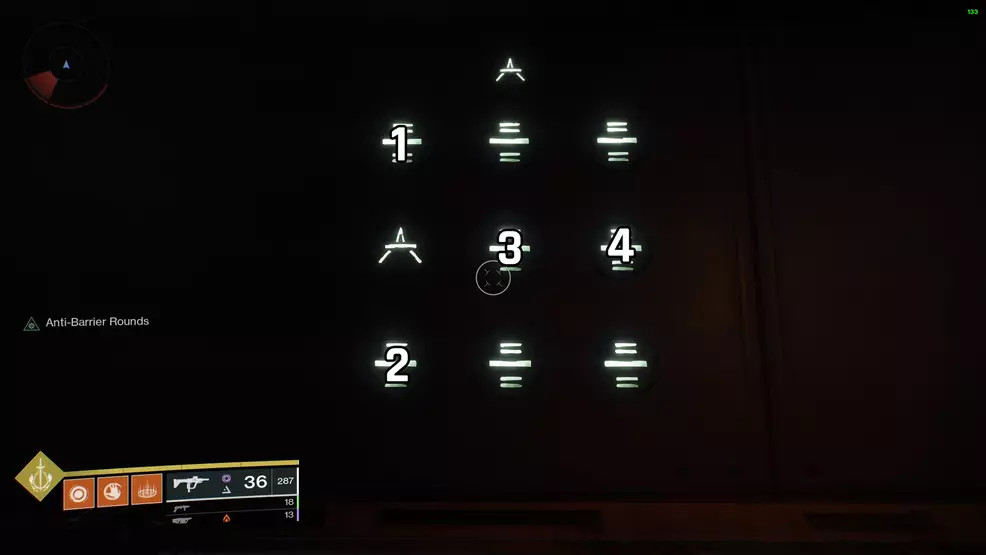
- Bottom left
K1 Communion
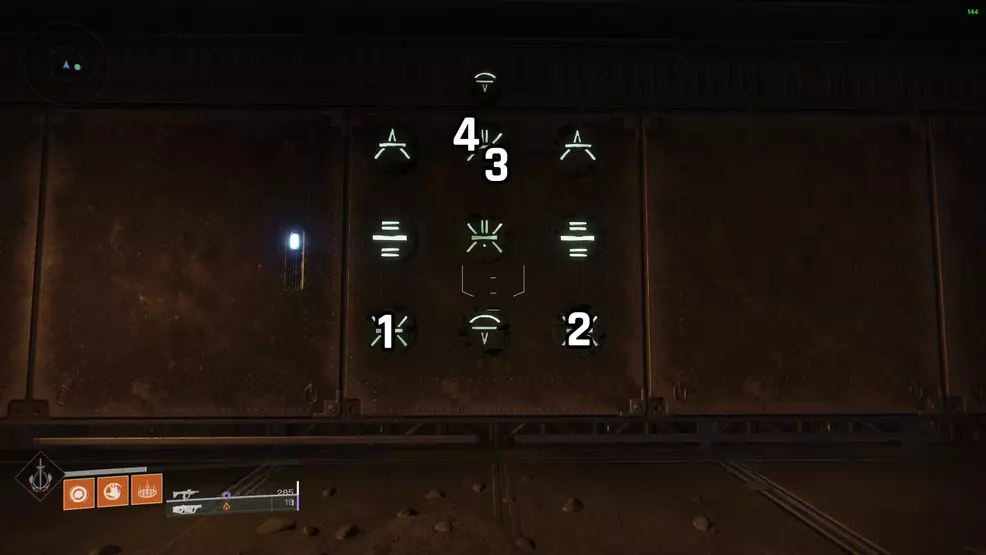
- Left bottom
- Right bottom
K1 Crew Quarters
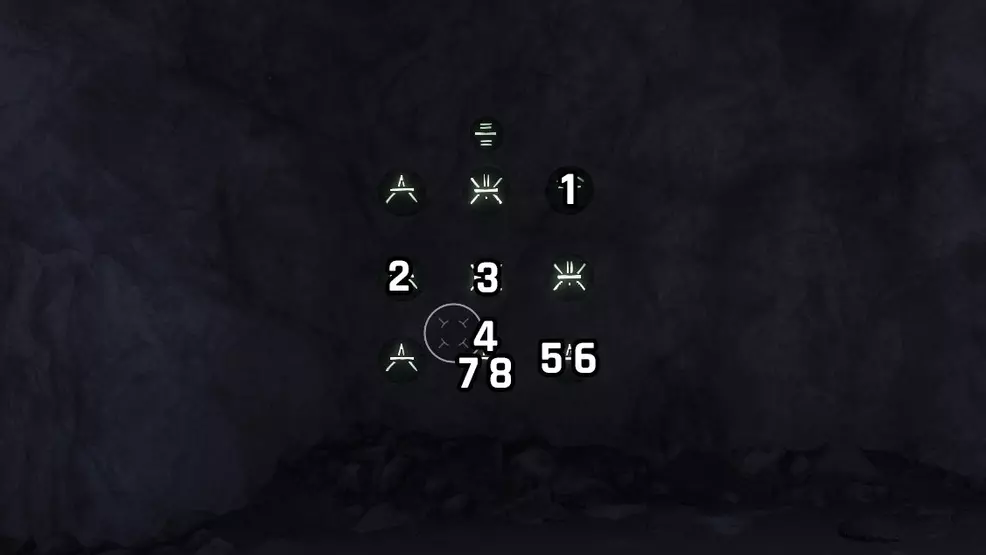
- Middle bottom
Step 4: Descent
The next step to unlock Xenophage is to dive into the Pit of Heresy dungeon. Depending on your experience level, you can either do this solo or as a fireteam of three.
Clear the first encounter, collect your reward from the chest, and then press onwards. When you reach the wall covered in doors, look up to the left to spot one without a chain hanging over it. Use the wall to climb up to this door. Inside you will find a stone you can interact with that reads "Reveal Path's End". Interact with the stone and move on to the next step.
Step 5: Discovery
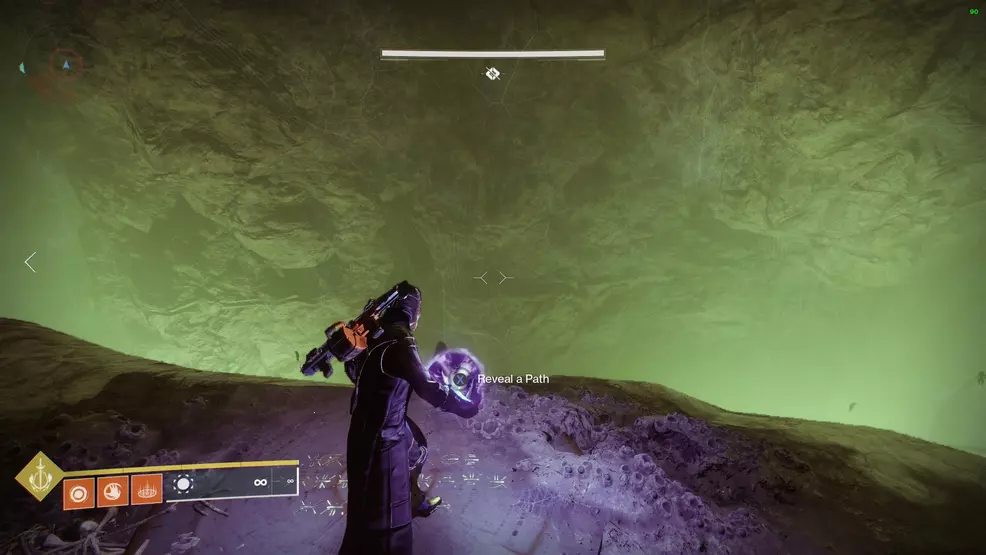
The next step also takes place in the Pit of Heresy dungeon, in the second encounter with the invincible Pariah Ogres. Along the left-hand side of the area is an abyss, but there's a ledge just over the edge. Drop down to it and stand on the plate while holding the appropriate button to "reveal a path". Jump across the floating platforms and collect the charge.
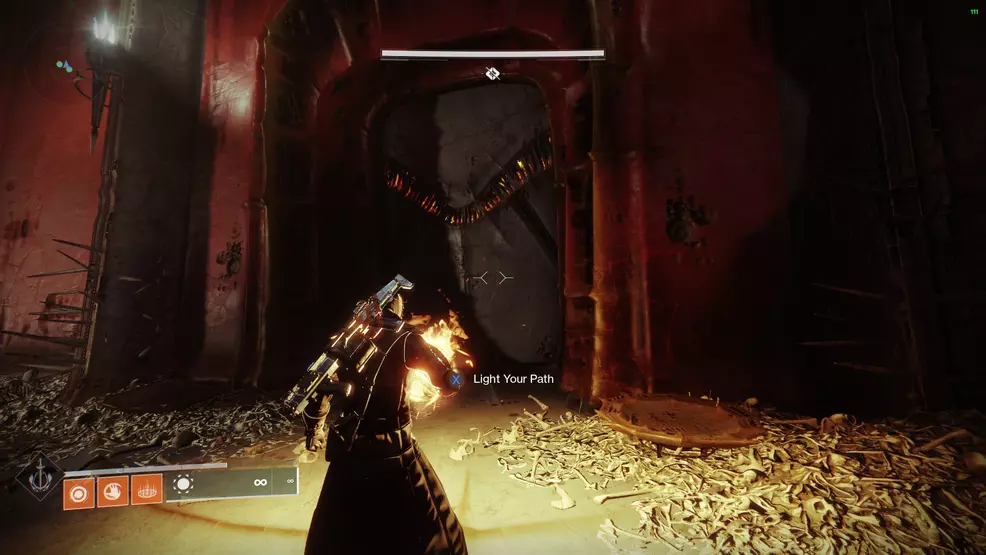
Take it back the way you came, sticking to the right-hand wall. You will need to use the charge to light two plates near a small door. This causes the door to open, granting you access to a hidden boss and the last step. This whole step is best attempted when the ogres disappear after clearing the encounter.
Step 6: Slay Volmar, the Tempted
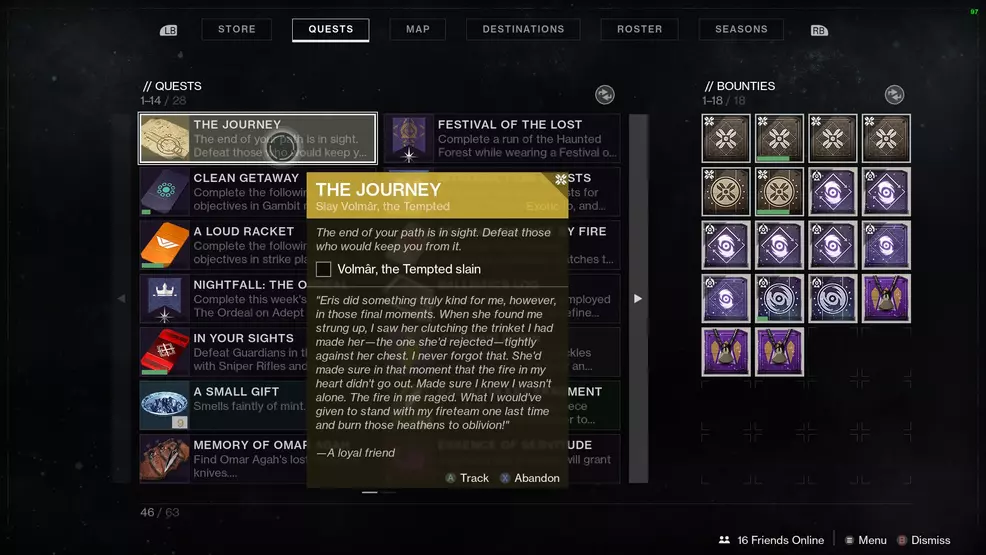
The final step in unlocking Xenophage is to defeat a hidden boss in the Pit of Heresy dungeon, Volmar, the Tempted. This boss fight requires you to use specific elemental damage against Volmar.
When you enter the first room, look at the bottom left of your screen to see what elemental charge you have. Find this element type in the corners of the first room. You will need to memorize the symbol as you must now find that symbol in the boss room. Go into the boss room and search for the symbol. When you find it, activate it. This will give you a short timer allowing you to deal damage of that specific element type. When the time is up, you will need to repeat the process of finding the matching symbol.
Repeat this until Volmar, the Tempted dies. At this point, you can return to Eris Morn to unlock the Xenophage Exotic Machine Gun.
Xenophage perks

The majority of Xenophage’s perks are rather average and even unassuming. However, they work together to make this thing hit like a truck.
- Full Bore – Barrel optimized for distance. Greatly increases range, decreases stability, and slightly decreases handling speed.
- High-Caliber Rounds – Shots from this weapon knock the target back farther. Slightly increases range.
- Rangefinder – Aiming this weapon increases its effective range and zoom magnification. Increased projectile velocity while aiming Rocket Launchers and Grenade Launchers.
- Composite Stock – This weapon has a versatile dual-purpose stock. Slightly increases stability and handling speed.
Xenophage’s Exotic perk is Pyrotoxin Rounds. This is what makes it so powerful.
- Pyrotoxin Rounds – Fires high-powered explosive ammunition.
This unassuming perk ensures that Xenophage deals ludicrous damage. In fact, if you’re not using Anarchy, you’re likely going to want to use Xenophage as your boss damage tool. It’s even great at knocking down Champions and Wyverns.
Xenophage lore
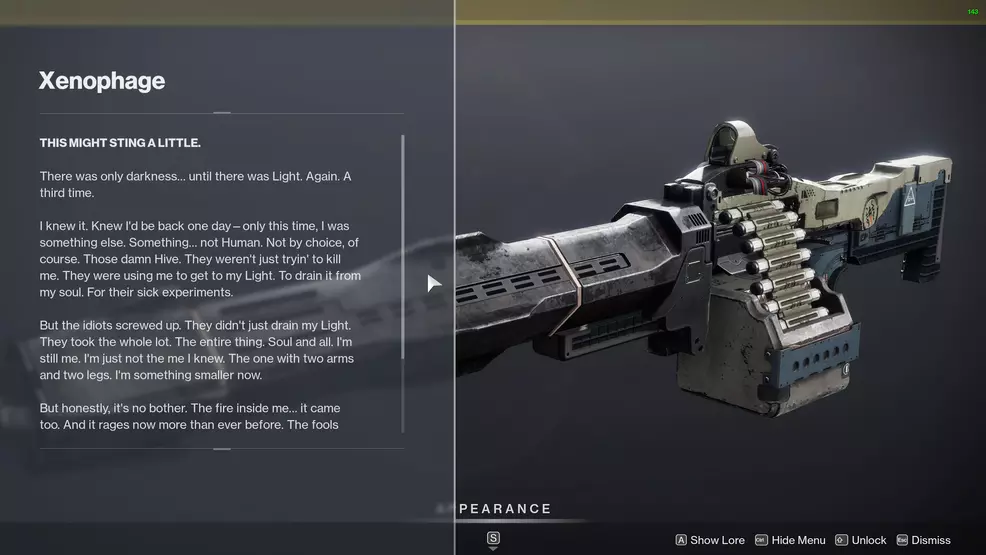
This might sting a little.
There was only darkness… until there was Light. Again. A third time. I knew it. Knew I'd be back one day—only this time, I was something else. Something… not Human. Not by choice, of course. Those damn Hive. They weren't just tryin' to kill me. They were using me to get to my Light. To drain it from my soul. For their sick experiments. But the idiots screwed up. They didn't just drain my Light. They took the whole lot. The entire thing. Soul and all. I'm still me. I'm just not the me I knew. The one with two arms and two legs. I'm something smaller now. But honestly, it's no bother. The fire inside me… it came too. And it rages now more than ever before. The fools have no clue what they've done. No idea the price they'll pay. I'll have my vengeance. In this life, not the next. —Omar Agah
Unlocking Xenophage in Destiny 2 is a lengthy process that requires fighting through the Pit of Heresy dungeon as part of the quest, The Journey. As with all dungeon runs, it's best to take a fireteam with you. Check out our Shacknews Destiny 2 complete strategy guide for more Exotic weapon walkthroughs.

Bill and Sam are the two Shacknews writers who handle the bulk of the Destiny 2 content. As a Hunter and Warlock main respectively, they can cover a great deal of ground with whatever is happening in Destiny 2 today. What they don't know they can find out thanks to their all-star lineup of Destiny 2 friends.
- Destiny 2: Shadowkeep
- Destiny 2: Season of the Undying
Bill Lavoy and Sam Chandler posted a new article, Get the Xenophage Exotic Machine Gun in Destiny 2
The fragments are in each of the four lost sectors on the Moon, the will have hive puzzles at the end of the lost sectors you are to solve.

- Call of Duty
- Apex Legends
- Dead By Daylight
- Attachments
- Field Upgrades
- Killstreaks
- Action and Adventure Games
- Battle Royale
- Gangs of Sherwood
- Indie Games
- Like a Dragon Gaiden: The Man Who Erased His Name
- Only Mobile Gaming
- Role Playing Games
- Shooter Games
- Sports Games
- Strategy and Simulation Games
- The Day Before
- shooter games
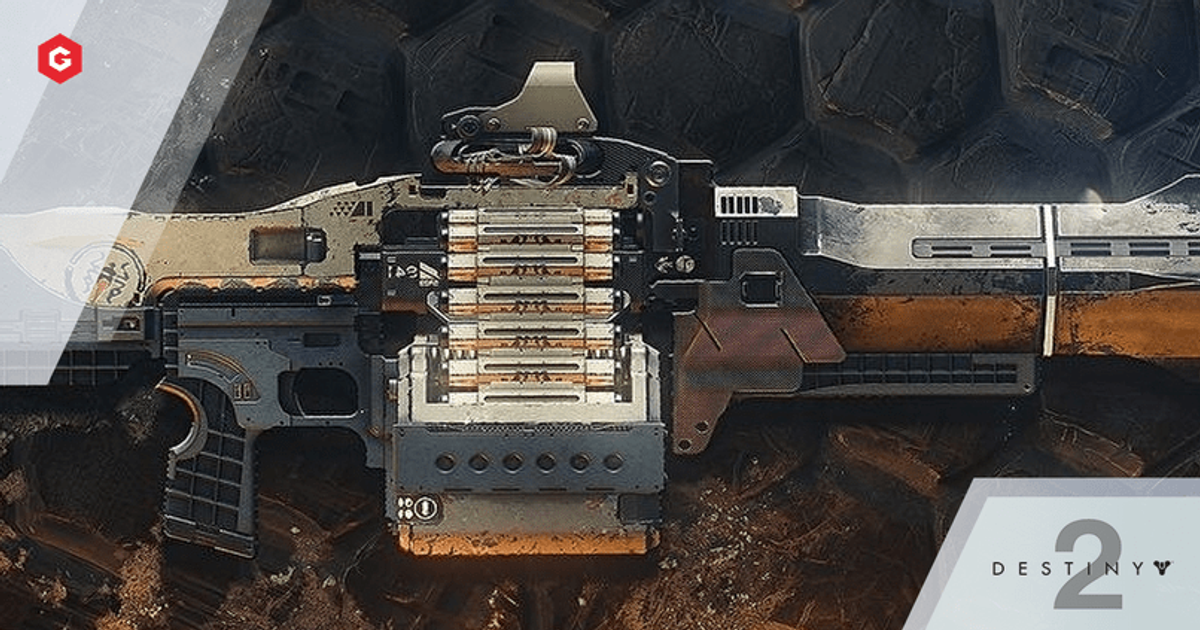
Destiny 2 Xenophage Exotic Guide: The Journey Quest and Volar The Tempted Guide
Going through a 'phage.
Published: 08 Jan 2021 10:41 AM +00:00 Updated: 22 Mar 2021 9:32 AM +00:00
Shadowkeep may have landed over a year ago, but collectors will want to get their hands on Xenophage.
Obtaining it will require heading into the Pit of Heresy dungeon, as well as defeating a hidden boss.
Here's what it does, and how to get it.
- Xenophage Guide
Start The Quest
Deposit orbs in anchor of light, k1 revelation, k1 crew quarters, k1 logistics, k1 communion, pit of heresy path uncovered, pit of heresy path's end and secret boss.
Read More: Destiny 2 Penguin Souvenir Locations: ALL Europa Penguin Toys Found In D2 Beyond Light
Destiny 2 Xenophage Guide
Xenophage is an exotic machine gun that uses heavy ammo.
It deals Solar Damage, and its intrinsic perk is "Pyrotoxin Rounds" – allowing it to fire high-powered explosive ammunition.
That makes it ideal for ripping through mobs or bosses.
Destiny 2 Xenophage Quest
Up first – obtaining the quest.
For this, you'll want to head to the Moon, specifically Sorrow's Harbor.
Head through the path to the North of the area, through the Enduring Abyss. Push through to the Pyramid, and look for four very creepy statues on the left and right.
Interact with all four to cause a chest to spawn containing The Journey – the Xenophage quest.
Head to Anchor of Light and look for a building with an Orb inside that you can interact with and pick up.
There are six locations where the orb needs to be deposited nearby:
- in the same room
- Next to a radio tower against a slope
- Small yellow building
- Atop the radio tower in Anchor of Light
- On top of a ramp to the North
- Atop the raised circular building
Head back to where this step started to receive a waypoint that'll kick off the next phase.
Pathfinder Puzzle Solutions
You'll now need to solve a puzzle in each of the Moon's four lost sectors.
You'll need a bunch of symbols on the wall to match the ones above, which is done by shooting specific icons.
Here are the solutions:
- Centre right
- Centre left
- Centre bottom
- Bottom right
- Bottom left
Head to the Pit of Heresy dungeon and complete the first encounter.
Afterwards, you'll find a series of doors on either side of the pathway ahead, with one looking different.
Get through that one, and you'll find a switch to start the next phase.
When you reach the dungeon's second encounter, head to your left into a glowing cavern.
Push on until you find a plate. Activate it by standing on it, grab the orb that appears and head back the way you came – keeping an eye to your right.
Go through the path on the right, dunk the orb, and you'll be tasked with fighting Volmar, The Tempted Slain.
You'll need to grab orbs and dunk them based on the corresponding buff:
- Arc Orb - Thunderous
- Kinetic - Neutral
- Solar Orb - Fiery
- Void Orb - Abyss
After each dunk, damage the boss as much as you can. Once he's dead, you can return to Eris to claim Xenophage!
Explore new topics and discover content that's right for you!
- Ethics Policy
- Ownership Policy
- Corrections Policy

Destiny 2 – The Journey – How To Emerge From The Dark – Lectern Lighting Order
The Journey quest in Destiny 2 can be a bit confusing, so in this guide, we will show you how to emerge from the dark for the Emergence step.
As part of the Xenophage quest, you will need to figure out how to emerge from the dark as part of The Journey exotic quest. The first step, Emergence, talks a lot about Crota, but this is a bit of a red herring. You need to head to the Anchor of Light, to light some Lecterns.
Head for the Anchor of Light, then go the point shown on the map above. This is where you will begin this part of the quest. You need to grab the Light from the strange relic in the small building shown in the header image above. The exact location can be found on the map. Once you have it, you need to light six lecterns, in the correct order.
There was a lot of trial and error done by the community for this one, but eventually, the good folks over at Raid Secrets on Reddit got it all worked out. My hat is off to them, and their amazing ability to expose Destiny 2’s secrets. The easiest way to show you the correct order to light them in is via a video. As such, I have recorded where to go, where the Light is, and what order you need to light the lecterns in. Just check the embedded video above.
Once you have them all, you need to go to an area that will be marked on the map, and interact with an item there. This will move you on to the next part of the quest, called Pathfinder! We are also working on a full guide for The Journey quest here if you need help with other steps.
- Genshin Impact
- Call of Duty
- Final Fantasy
- Blox Fruits Codes
- Blade Ball Codes
- Fruit Battlegrounds Codes
- Haze Piece Codes
- King Legacy Codes
- Shinobi Life Codes
- Anime Champions Simulator Codes
- Peroxide Codes
- Fortnite Skins List
- Fortnite Item Shop Today
- Tomorrow's Fortnite Item Shop
- Fortnite Rarest Skins
- Fortnite Rarest Emotes
- Privacy Policy

Destiny 2 Xenophage Quest Steps Guide – Puzzle Solutions & How-to Start The Journey!
Our Destiny 2 Shadowkeep Xenophage Quest Steps Guide will walk you through everything we currently know about this Exotic Machine Gun and how-to start the quest. We've got a full look at all of the quest steps, and feature a list of the perks and weapon features.
Xenophage Perks & Stats
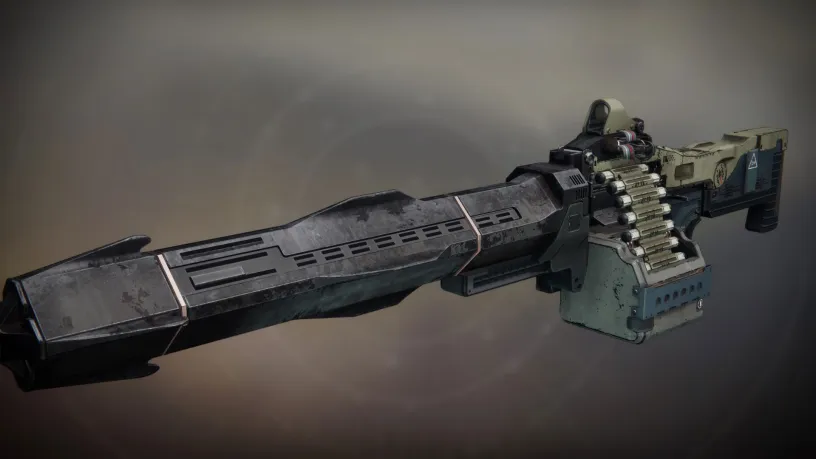
This might sting a little.
Weapon Perks
- Pyrotoxin Rounds: Fires high-powered explosive ammunition.
- Rangefinder: Aiming this weapon increases its effective range and zoom magnification. Increased projectile velocity while aiming Rocket Launchers and Grenade Launchers.
Weapon Stats
- Impact: 100
- Stability: 39
- Handling: 37
- Reload Speed: 38
- Rounds Per Minute: 120
- Magazine: 20
Xenophage Quest Steps
Starting the quest.
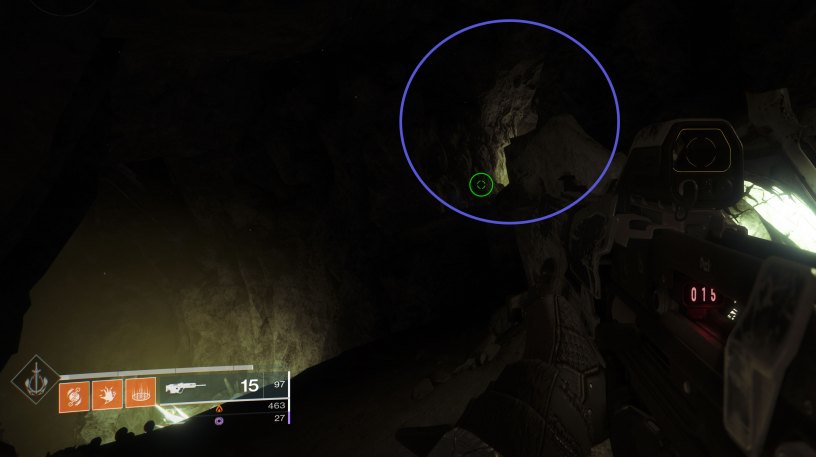
To start this quest, you'll need to go through the portal that is usually at the Sanctuary Landing Zone on the Moon. If it is not there, then you're going to need to do a bit of legwork. Go to Sorrow's Harbor and enter the Keep. Go down the hall and go through the door on the left. Keep following this hallway down until you get to a cave like area. You'll see a bright green light and right behind this will be a large opening to go down into the cave, and a smaller opening leading up and to the right. Jump up to the right entrance and follow this to the area you'd end up in if you took the portal. The two cave area should look like this:
There are four statues in this room that you will need to light in a certain order (if you're facing the direction from the cave): Bottom Right, Top Right, Top Left, Bottom Left. That will unveil a chest you can open which will start you on the quest.
Around you… darkness. If you are to discover your path, you must anchor yourself to light.
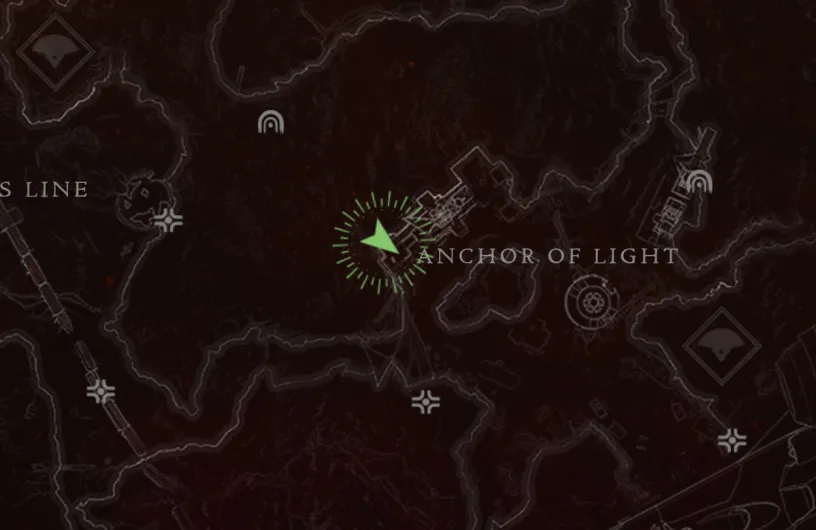
The quest merely tells you to "Emerged from the Dark." To complete this step, you'll need to go to the Anchor of Light area on the moon and to this exact spot:
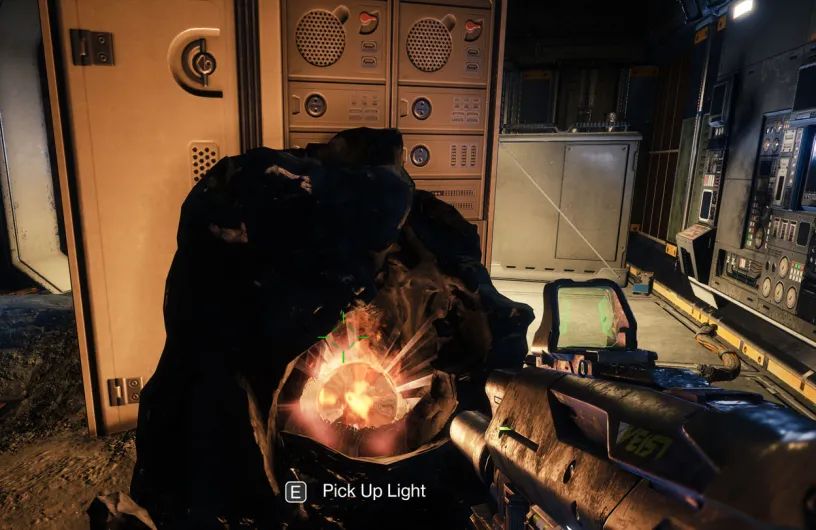
It's inside a little building, you will find an orb of light hidden behind some of the machinery:
You will then need to light a bunch of torches in under a minute to complete the quest. It's best just to follow along with this video:
A light shines on your path. But you have yet to bring it into focus. Until then, your path remains among the lost.
You now need to collect four Path Fragments, one from each of the Lost Sectors on the moon. Once you complete the boss in one of those Lost Sectors, a puzzle will show up on a wall. You need to solve the puzzle by matching the six runes to the top rune.
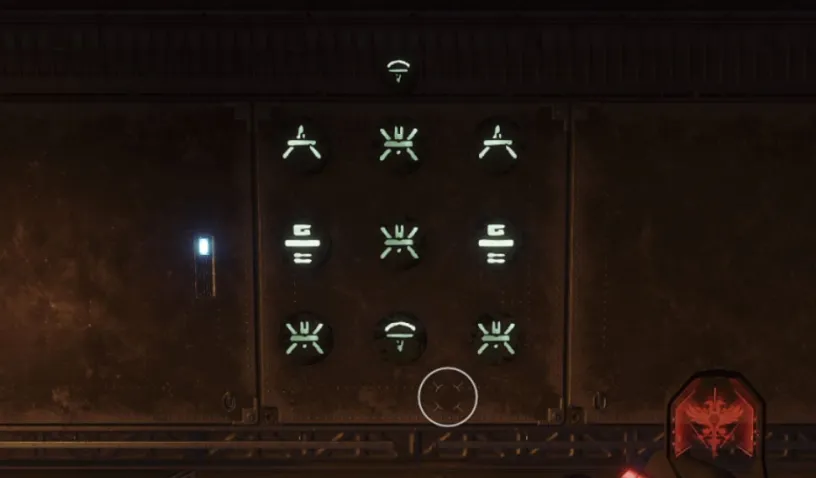
If you don't want to figure these out for yourself, here's the solutions we have right now. These solutions are from where the puzzle starts initially, if you shot it at all previously then the solution likely won't work. You can fully reset the puzzle by exiting the Lost Sector and redoing it.
- K1 Communion (Anchor of Light, Confirmed ): Bottom Left, Bottom Right, Top Middle, Top Middle
- K1 Crew Quarters (Hellmouth, Confirmed ): Top Right, Middle Left, Middle, Bottom Middle, Bottom Right, Bottom Right, Bottom Middle, Bottom Middle
- K1 Logistics (Archer's Line, Confirmed ): Top Left, Bottom Left, Middle, Middle Right
- K1 Revelation (Sorrow's Harbor, Confirmed ): Middle Right, Middle Left, Middle, Middle, Middle Left, Top Middle, Bottom Middle, Middle
If you mess up a single rune, you can shoot the rune four times to rotate it back to what it was previously.
Your path brightens, shining through the barrier of emerald, beneath a harbor built from sorrow.
Now you will head to the Sorrow's Harbor Pit of Heresy Dungeon. You don't need to complete the entire dungeon to finish this part of the quest. After the first mini-boss encounter, you'll come to a jumping section with a bunch of doors. You need to jump to the top left door, anyone on your fireteam can do it an you will receive credit for it.
Here's a video if you get confused:
The Pariahs stand guard over far more than just despair, for within these tunnels lie many secrets.
This part is really confusing, so I'm going to recommend you watch the following video on how-to complete it. You basically need to now light a path within the dungeon. There's some glowing platforms you'll need to engage, and then you'll need to bring the orb of light to braziers like you did in the Emergence step.
Slay Volmâr, the Tempted
The end of your path is in sight. Defeat those who would keep you from it.
It's time to face the boss, there are four elemental orbs in the boss room. Each of these corresponds to a particular elemental damage type: arc, solar, kinetic, void. Each player on the team will get a "dread" buff of a specific name. You will need to grab the orb in the middle of the room and place it into the correct slot.
- Solar (Fiery Dread) = X Symbol
- Kinetic (Neutral Dread) = Division Symbol (two dots and a line in the middle)
- Void (Abyssal Dread) = A Symbol
- Arc (Thunderous Dread) = Downward Triangle
Once you dunk the orb, you will then have 15 - 20 seconds to damage the boss with that particular elemental damage type. Keep doing this until the boss has been defeated!
Return to Eris Morn with the Hive bug.
That's everything! Head back to Eris Morn and collect your prize.
13 Comments
Cancel reply.
Comments are on moderation and will be approved in a timely manner. Please read the following rules before commenting:
- All comments must be on topic and add something of substance to the post
- No swearing or inappropriate words
- No asking or begging for anything free
- Do not attempt to start a poll in the comments
- Comments in all CAPS will be removed
- We reserve the right to remove a comment for any reason
- Do not impersonate a staff member or influencer
Save my nickname and email in this browser for the next time I comment.
This site is protected by reCAPTCHA and the Google Privacy Policy and Terms of Service apply.
- Privacy Policy
Destiny 2: How to Get the Xenophage Exotic Machine Gun
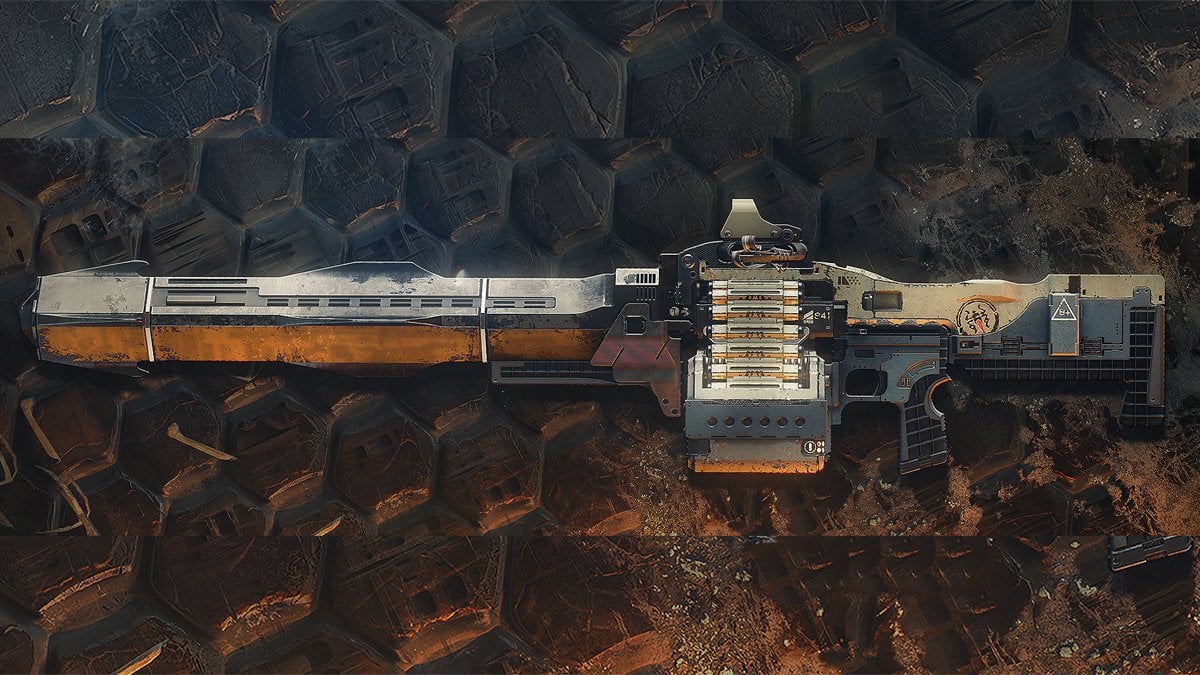
Xenophage is a top-tier Exotic Heavy Machine Gun and has been since its introduction in the Shadowkeep expansion. Though there are more optimal DPS choices in Destiny 2 , you’ll want to know how to get this weapon. That’s because Xenophage has high burst potential and relatively good ammo economy. Here’s how to complete The Journey Exotic quest.
How to Get the Xenophage Exotic Machine Gun in Destiny 2
To get Xenophage, you’ll need to complete an Exotic quest called The Journey . Even starting the quest is a bit complicated. We’ll go over all the steps below.
How to Start The Journey Quest in Destiny 2
To start The Journey Exotic quest, be sure that you own the Shadowkeep expansion, then head to Sorrow’s Harbor on the Moon .
Travel to the northern edge of the area and enter the Scarlet Keep, taking the leftmost doorway. Travel until you reach a light greenlit hallway, and keep an eye out for another passageway in the upper-right wall.
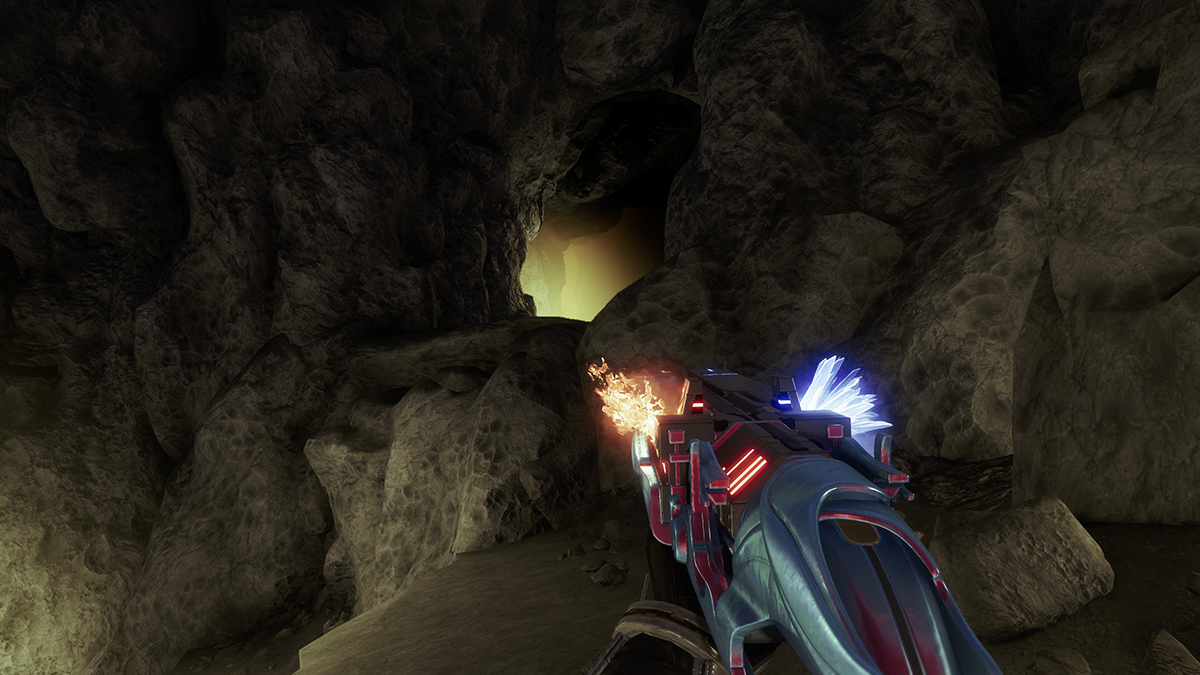
Jump into the passage, and follow it until you reach the chamber, where you can see the Lunar Pyramid and two Hive statues on either side.
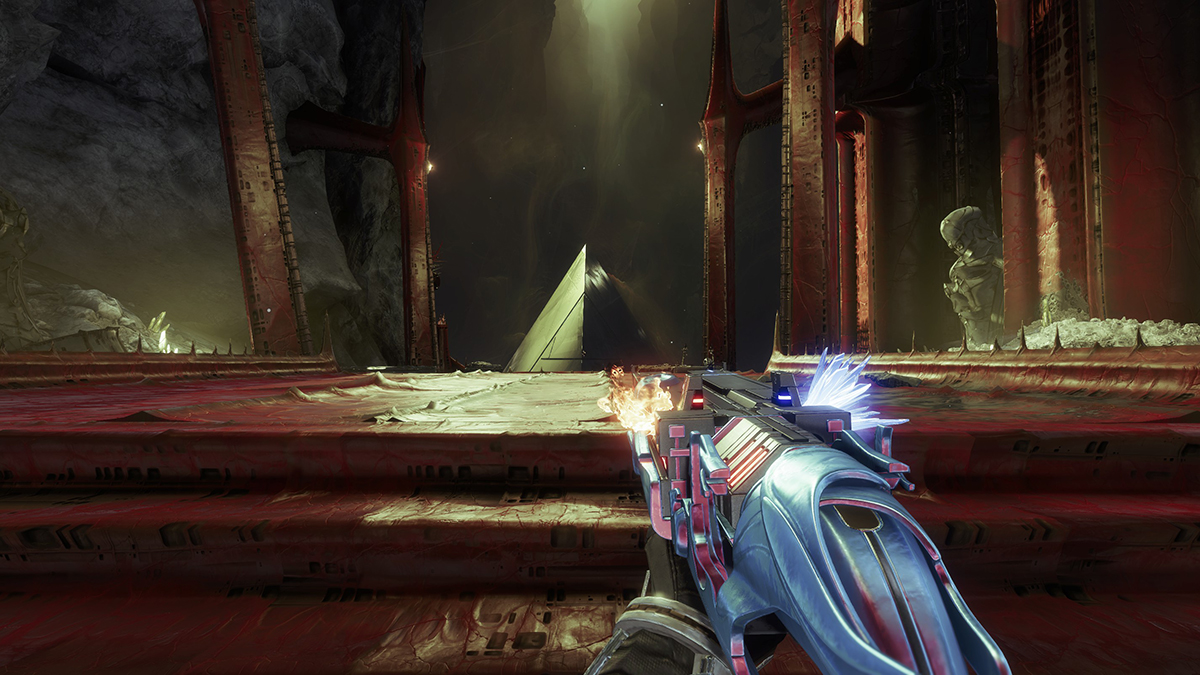
To complete the first step of The Journey quest, activate the statues in the proper order . Approaching them will show the message, “Emerge from the Dark.”
The correct order is below. These positions assume “back” is the side closest to the Pyramid . Once correctly activated, a hidden chest will appear. Open it to start the Journey quest in earnest.
- Front right
How to Complete Emergence: The Journey Step 1
The first step of The Journey Xenophage Exotic quest is called Emergence. Head to the Anchor of Light area on the right side of the Moon . Go to the northwest portion beneath the large, multi-story Fallen structure. There’s a small room there with a fiery altar.
You’ll be lighting a total of 6 Braziers in this step. Pick up the light to activate a 60-second timer. Each Brazier you light resets the timer to 60 seconds.
Brazier Location #1
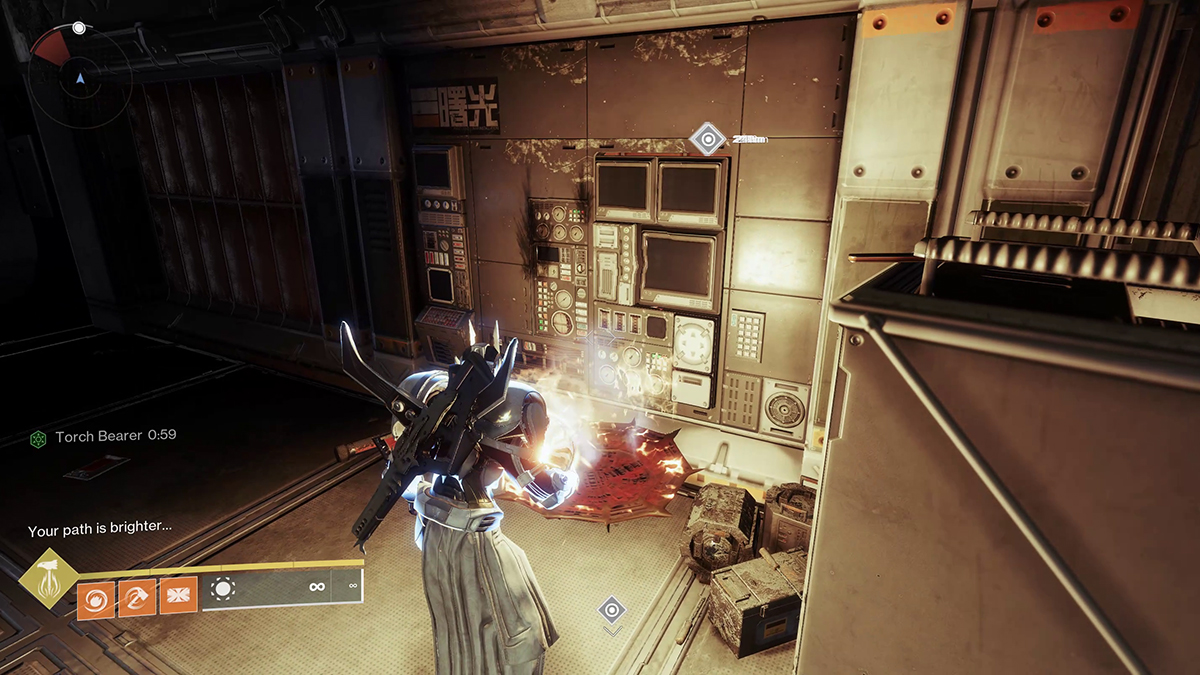
Go to the small unlit brazier on the floor nearby, and light it to refresh your timer.
Brazier Location #2
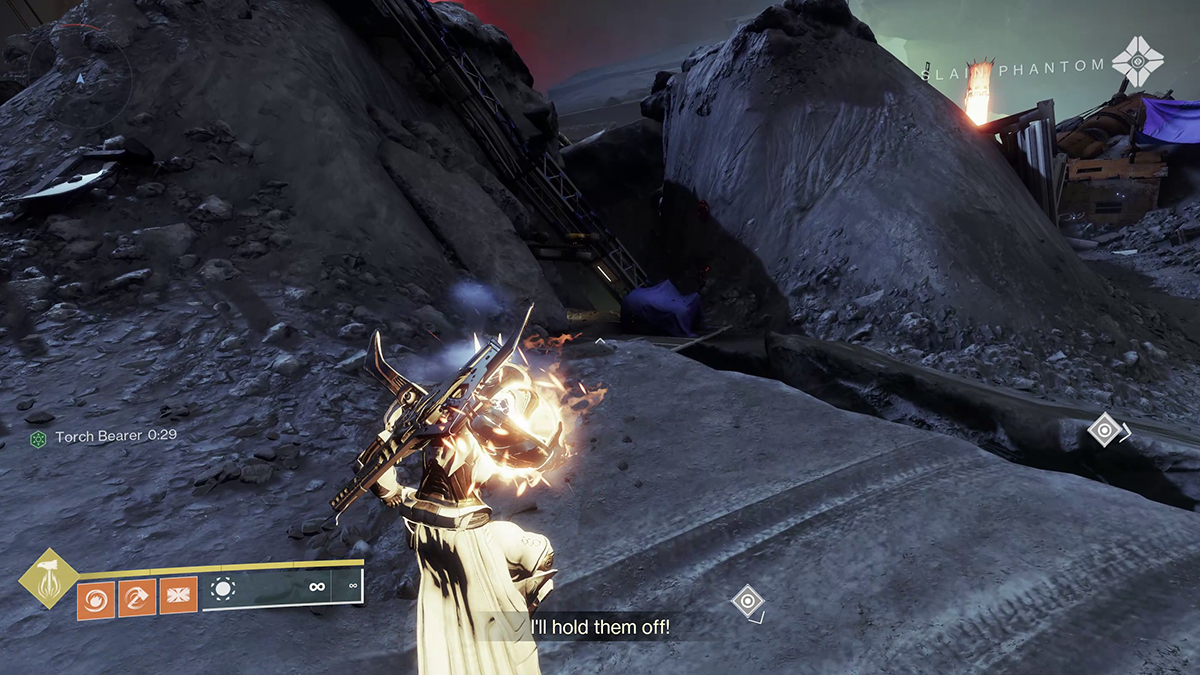
From the small room, head out and hang a left. When you see the other orange Fallen building, keep to the left. On a platform above a blue tarp-covered box is the second brazier.
Brazier Location #3
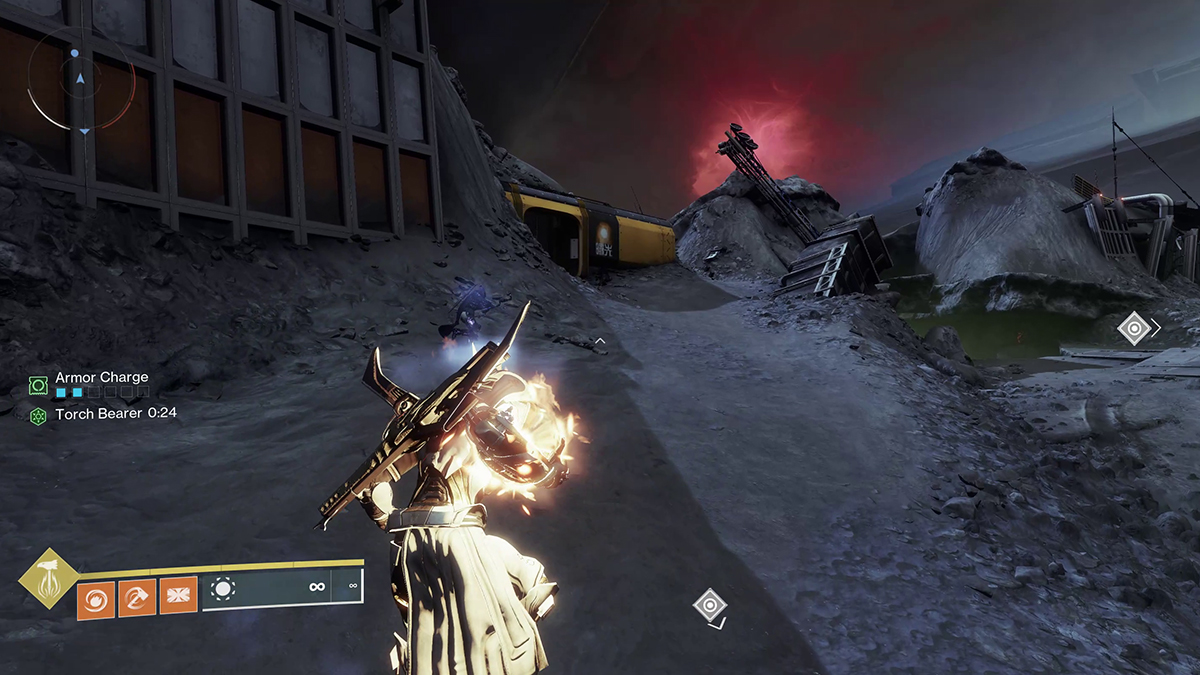
From the second brazier, turn around to the small room across from the large circular structure. The brazier is tucked into a dark corner.
Brazier Location #4
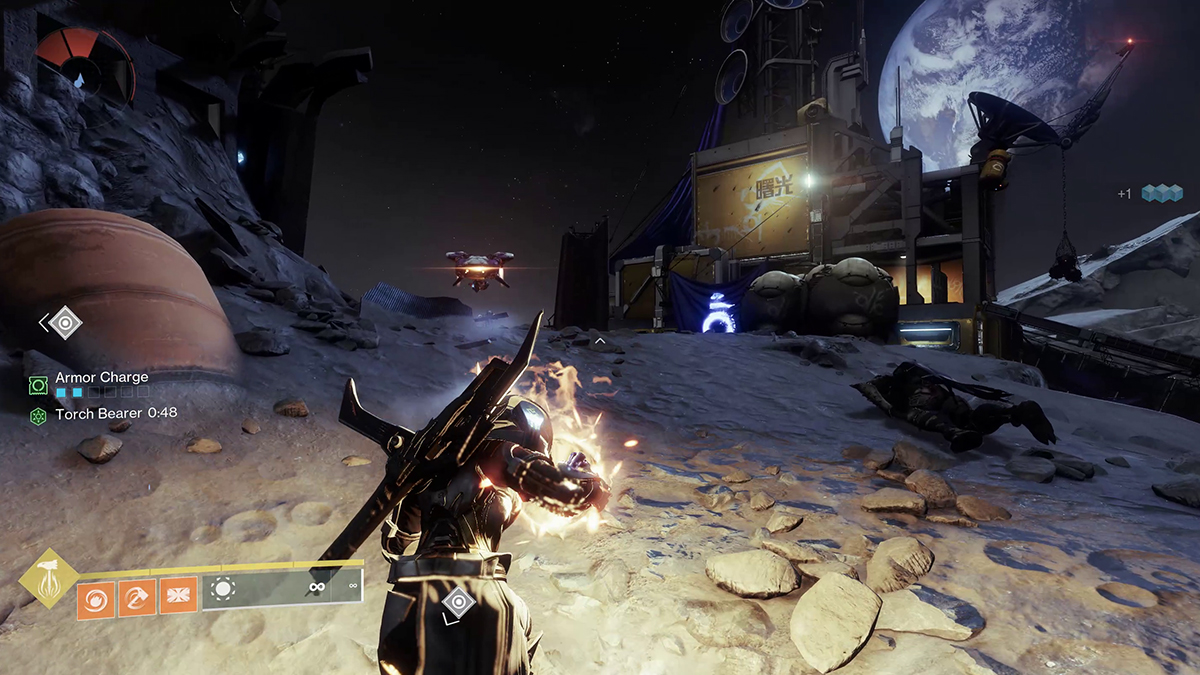
Head out the opposite opening from where you entered and go toward the multi-story Fallen building. Clamber into the support beams to find the next brazier at a vertex on the edge of the structure. You can also light this brazier from below if you’re having trouble reaching the beams themselves.
Brazier Location #5
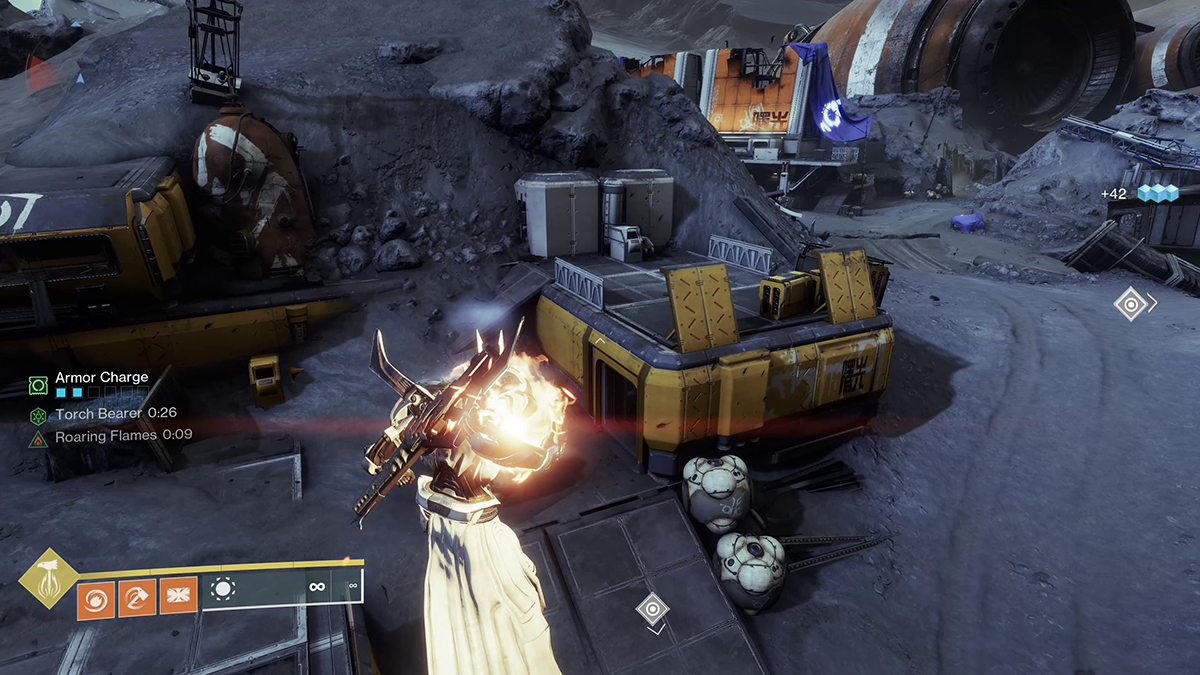
From the Fallen building, head directly across the area to a small structure with two large generators. The next brazier is to their left.
Brazier Location #6
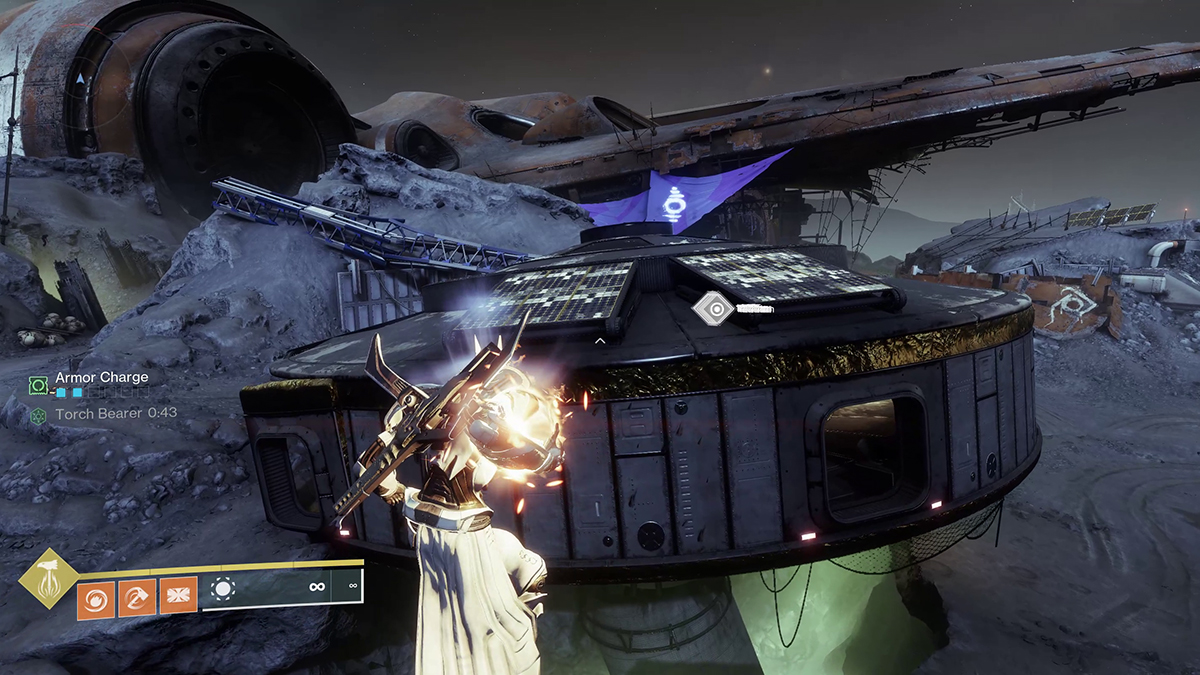
For the final brazier, jump on top of the large circular building. It’s at the center of the roof.
Once you’ve lit all the braziers, you have one more place to go but an infinite amount of time to get there.
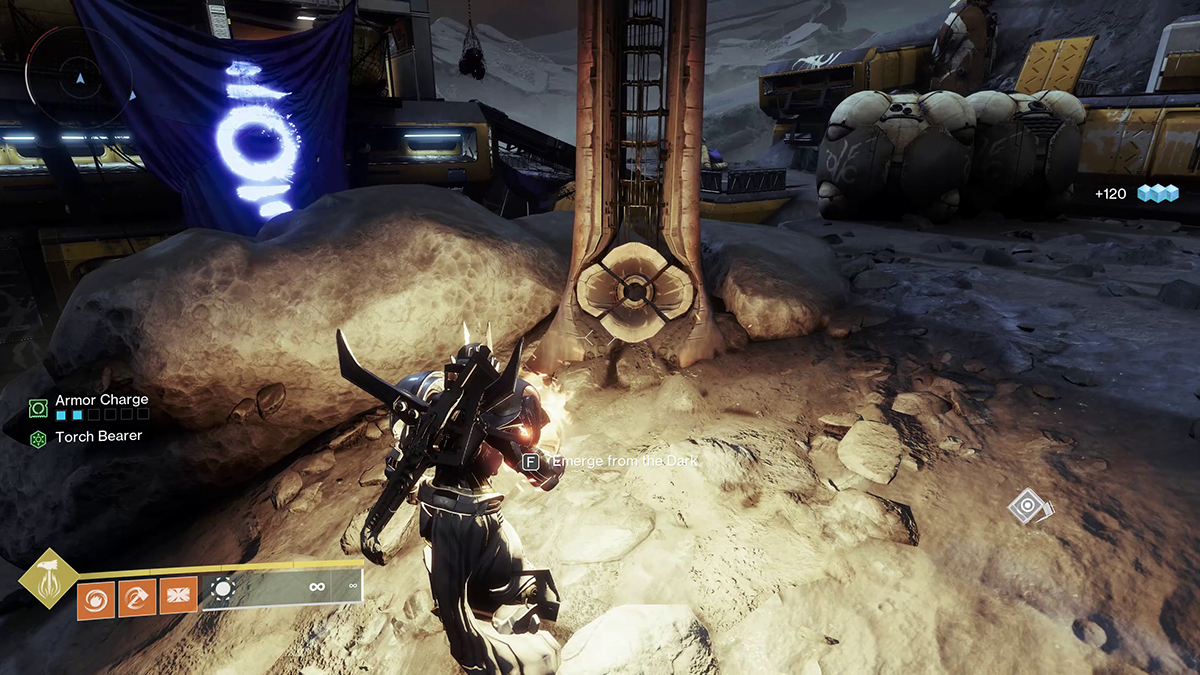
From the circular building, head back toward the first and fourth brazier locations at the multi-story Fallen building. Instead of going all the way there, stop near the cliffside next to a Hive altar jutting out of the ground. Deposit the light.
How to Complete Pathfinder: The Journey Step 2
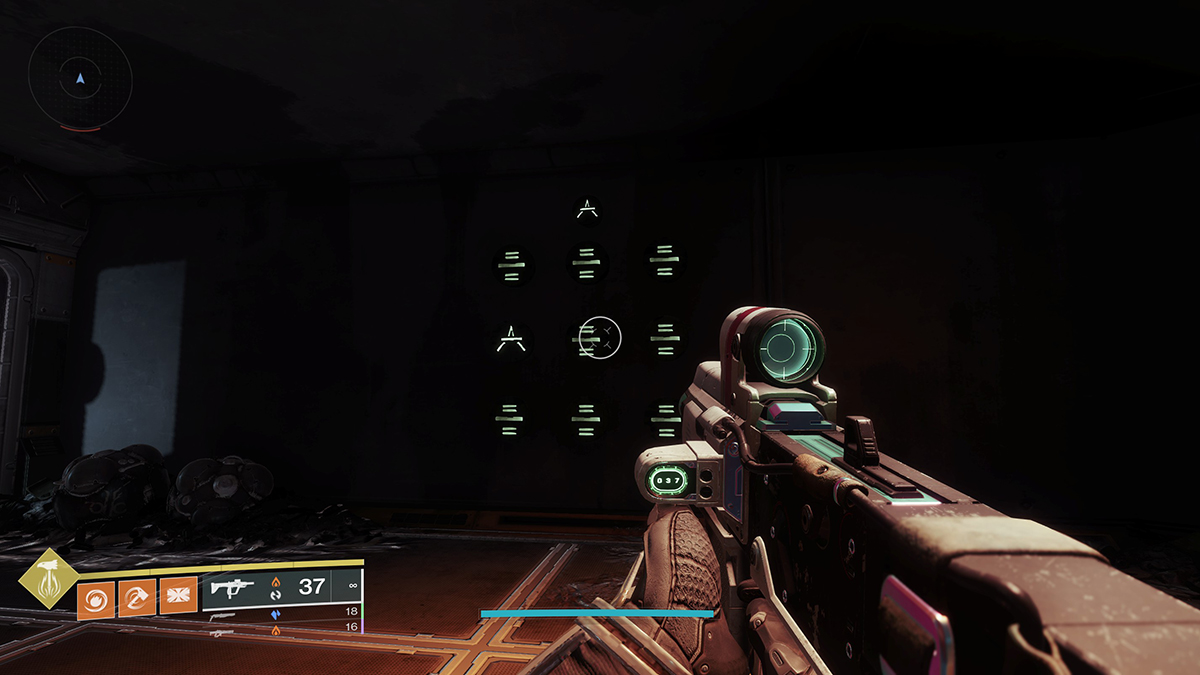
The second step of The Journey quest for the Xenophage is a bit more straightforward than the first. Your task during Pathfinder is twofold:
- Complete all four Lost Sectors on the Moon
- Solve a brief rune puzzle after the final loot chest
Complete each Lost Sector and loot the last chest to unlock the ability to complete the puzzle safely . The puzzle solutions are below, presented as positions and as numbers as you’d see on a phone. You simply shoot the runes in the following orders:
K1 Communion in Anchor of Light Rune Puzzle Solution
- 7 or Bottom left
- 9 or Bottom right
- 2 or Top middle
K1 Logistics in Archer’s Line Rune Puzzle Solution
- 1 or Top left
- 5 or Middle
- 6 or Middle right
K1 Revelation in Sorrow’s Harbor Rune Puzzle Solution
- 4 or Middle left
- 6 or Middle left
- 2 or Middle top
- 8 or Middle bottom
K1 Crew Quarters in the Hellmouth Rune Puzzle Solution
- 3 or Top right
- 8 or Bottom middle
How to Complete Descent: The Journey Step 3
Steps three, four, and five — Descent, Discovery, and Volmar, the Tempted — all take place inside the Pit of Heresy Dungeon . You’ll only need to complete one of the four main encounters in the Dungeon. We’ve covered everything you need to know about Pit of Heresy in our full walkthrough .
For step three of the Journey, Descent, complete the first encounter and proceed until you reach the wall of doors. Instead of heading down and to your right to the Ogre maze, look up and to your left.
Look for the one door without a rune above it . If you’re using the door directly in front of you as the starting point, the door you want is one level up and two columns to the left.
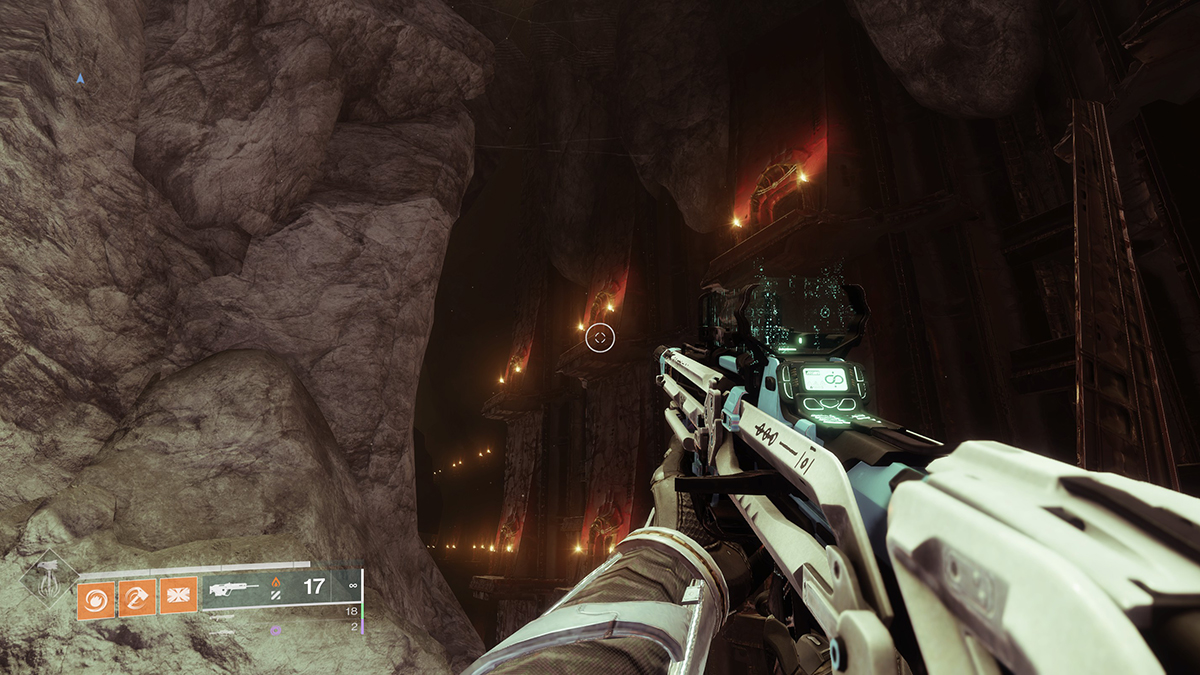
Platform your way to the door and head inside. There will be a Hive runestone within that you can interact with, giving you the next step in the quest, Discovery.
How to Complete Discovery: The Journey Step 4
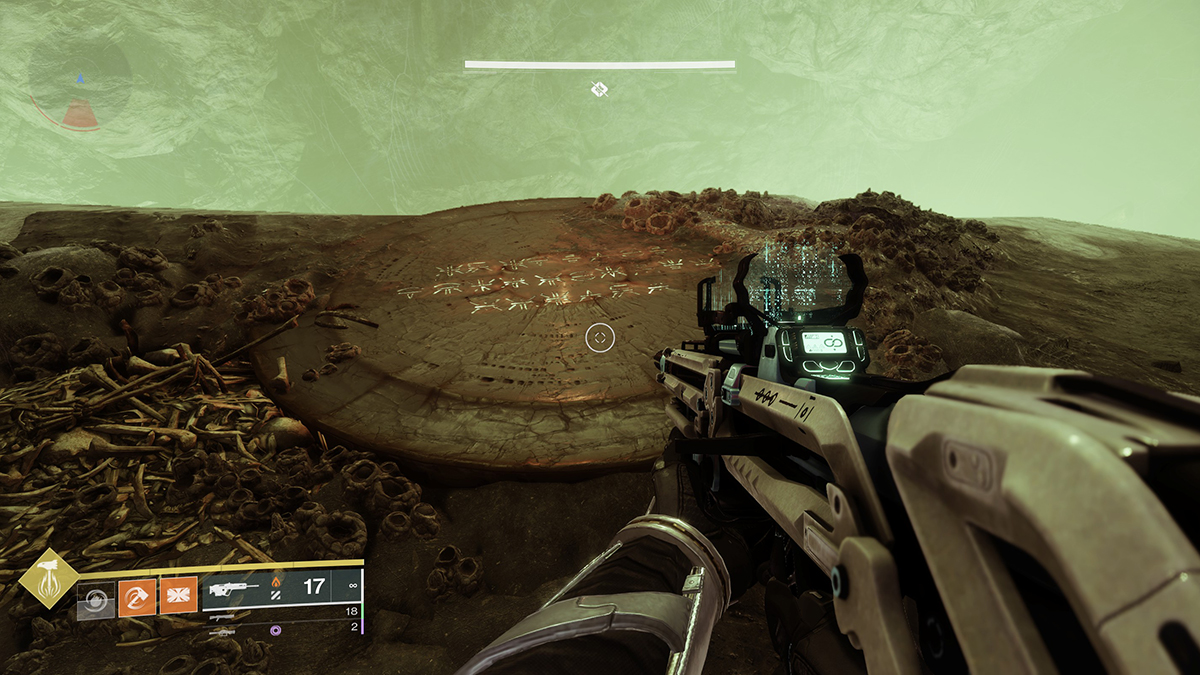
For Discovery, head into the Ogre maze. Rather than ducking into the middle caves, keep left until you reach the cliff. Jump down onto the lower platform until you reach a plate in the ground covered in Hive runes.
Activate the plate to raise three floating platforms from the chasm, with another light ball on the final platform. Grab the light ball, head back to the main area, and go right.
Take the tunnels to the right until you begin seeing red-lit doorways flanked by braziers like the ones you lit at the beginning of The Journey quest. You’ll be able to interact with the second door; don’t worry if the prompt doesn’t populate properly. Interact with both braziers to proceed to the next step.
How to Beat Volmar, the Tempted: The Journey Step 5
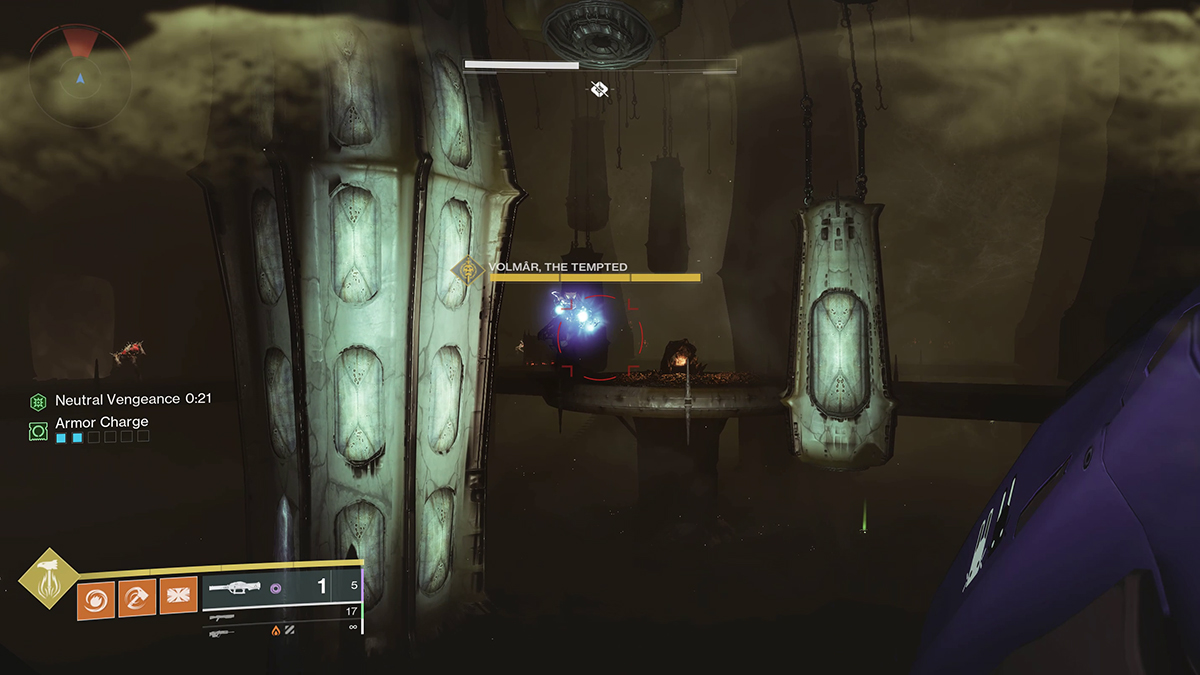
Make your way through the small maze until you reach a starting area with four Hive runes in each corner . These are the four elemental Dread buffs you’ll be using in the boss fight coming up shortly.
As soon as you enter the next room, Volmar, the Tempted, will appear, a boss-level Hive Wizard that’s completely invincible at first.
You and each member of your fireteam will receive a Dread buff based on one of the four damage elements available during Shadowkeep:
- Kinetic (Neutral Dread)
- Void (Abyssal Dread)
- Arc (Thunderous Dread)
- Solar (Fiery Dread)
To damage the boss, you’ll need to collect the light ball in the center of the arena and then interact with the proper rune to activate it and be able to do damage.
- Abyssal Dread : Top left on the upper platform
- Thunderous Dread : Bottom left on the lower floor
- Fiery Dread : Top right on the lower floor
- Neutral Dread : Bottom right on the upper platform
Once you dunk the light, you can damage the boss, but only with the element noted in your Dread buff. All other elements will register as immune. Repeat this process as often as it takes to kill Volmar — and don’t die. A full team wipe (or a single death if solo) will send you back to the start of the fight .
Once Volmar dies and you progress the quest, you can leave the Pit of Heresy Dungeon. Nothing else here matters to get Xenophage.
How to Complete Finality: The Journey Step 6
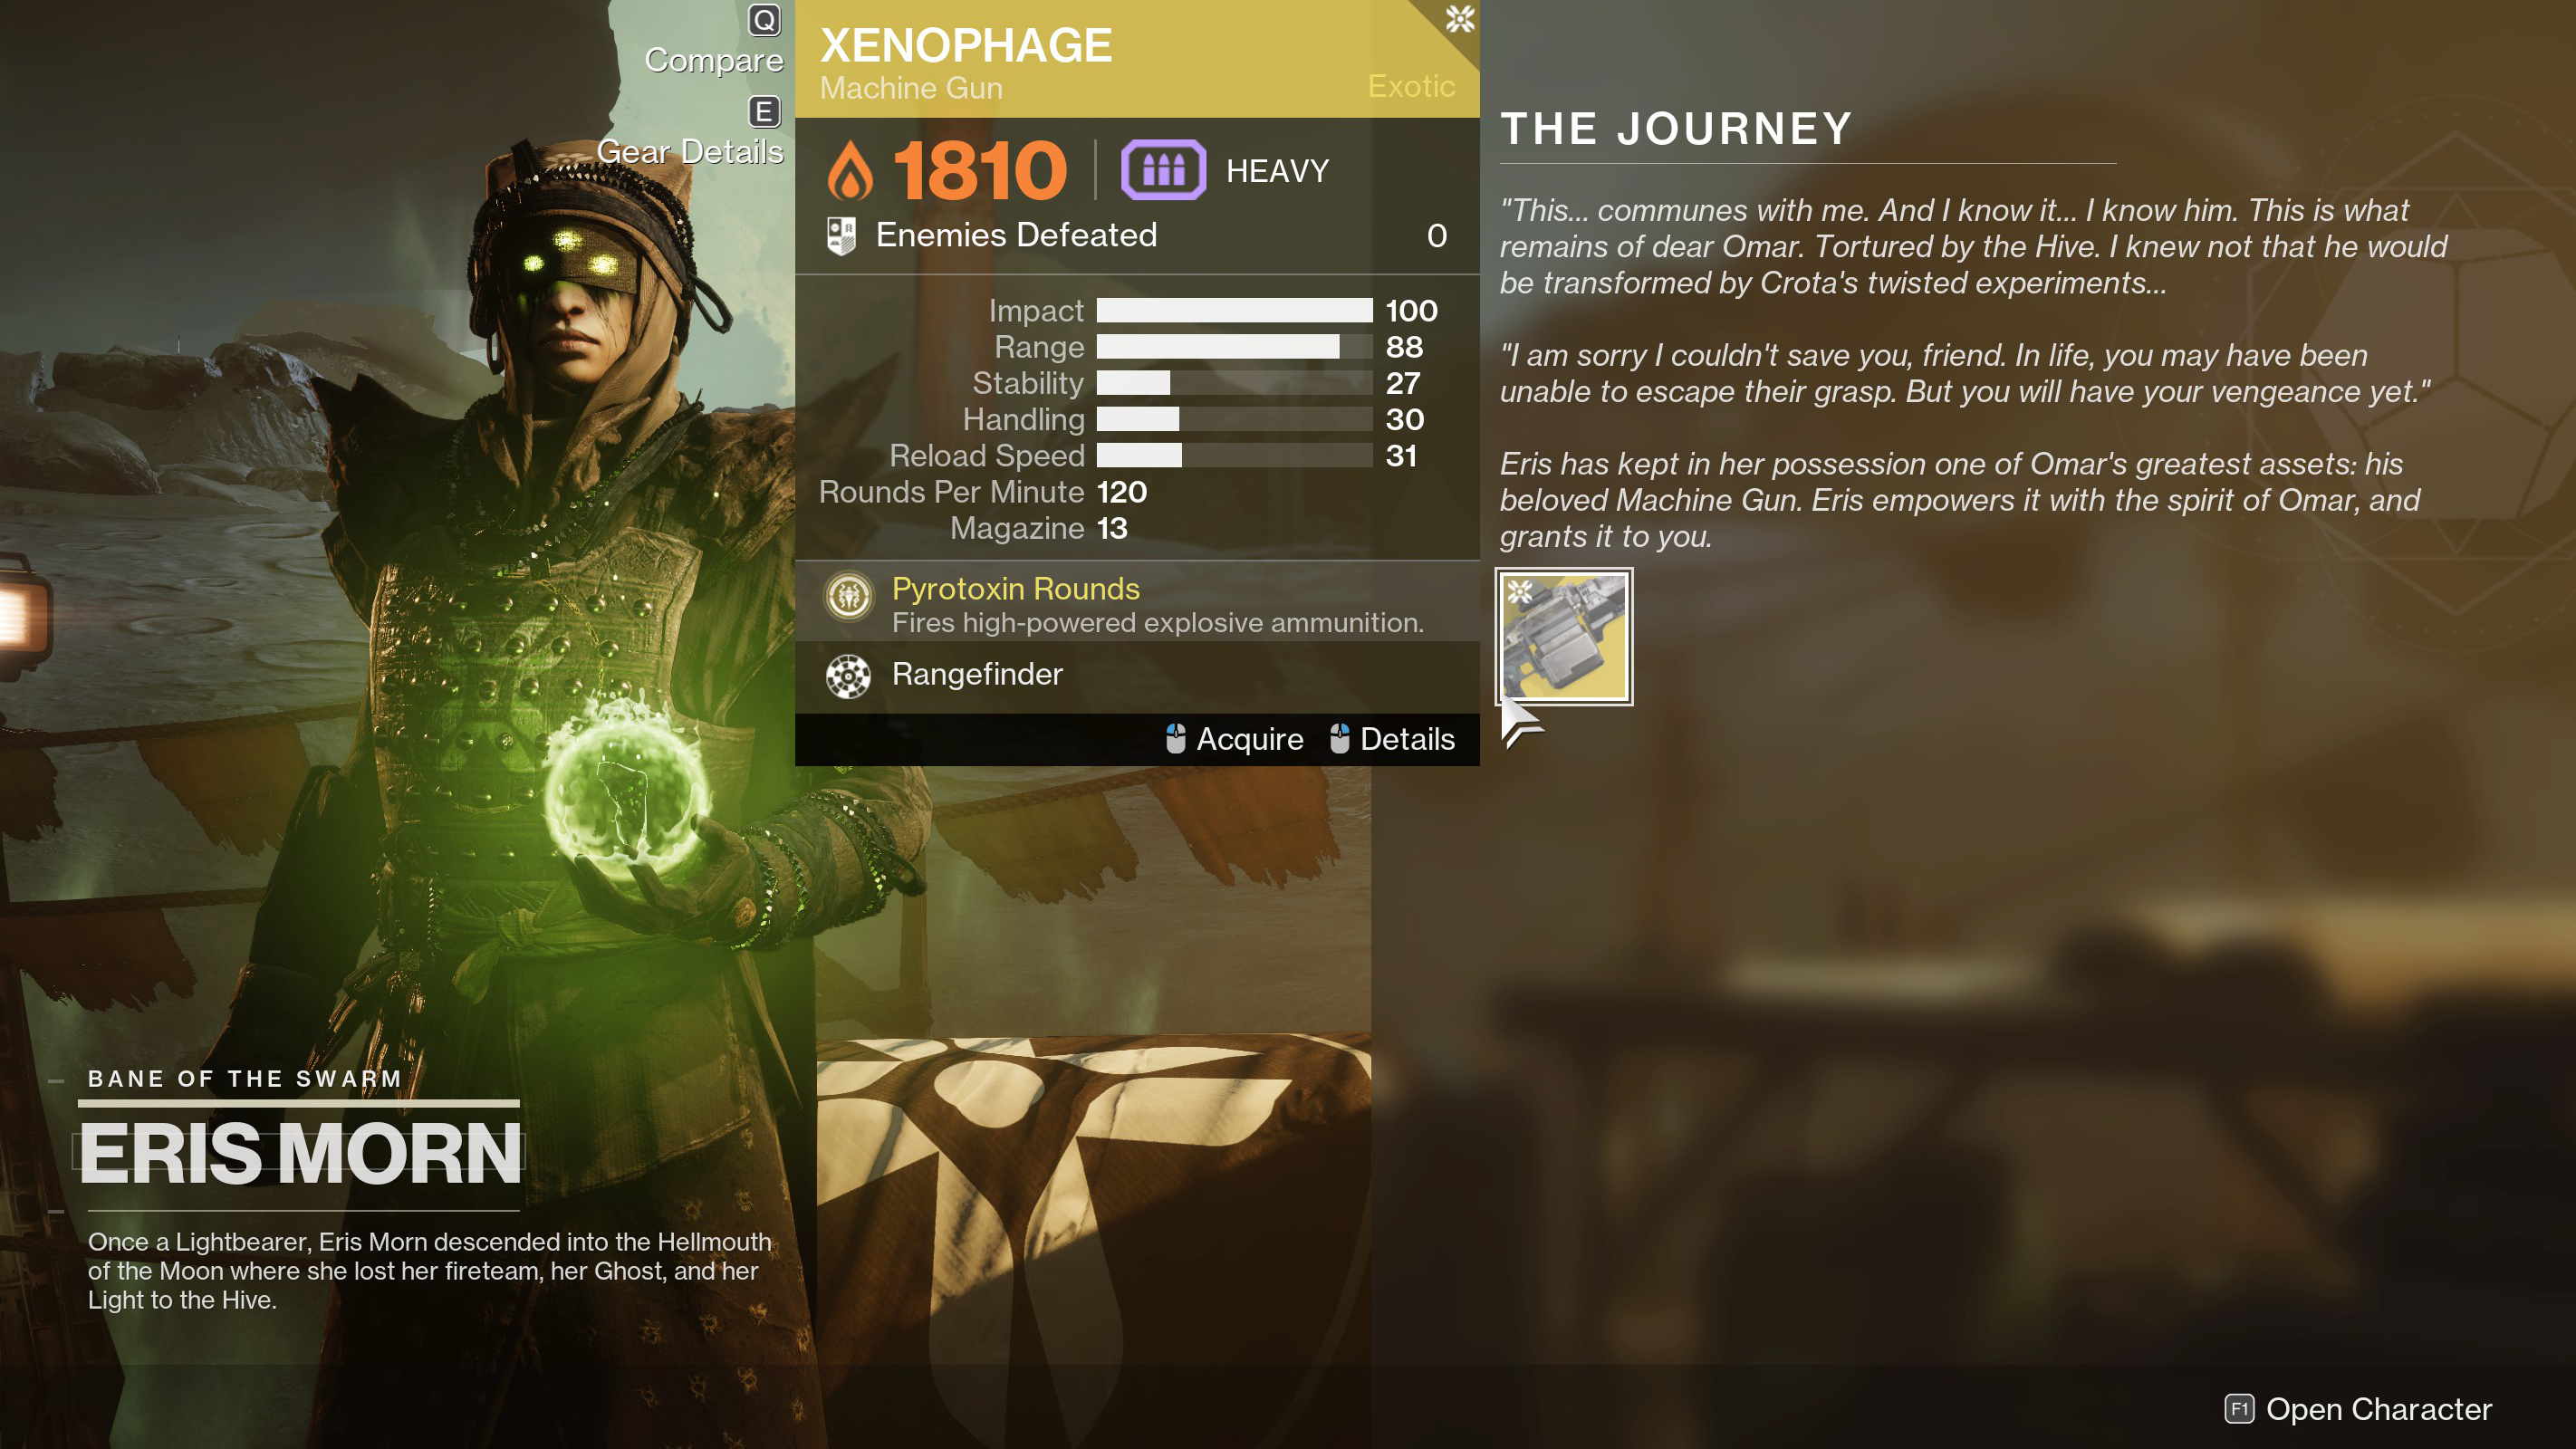
All step six entails is visiting Eris Morn and picking up your reward: the Xenophage Exotic Heavy Machine Gun.
The Xenophage Machine Gun you receive won’t be a Pinnacle or Powerful drop. It will be awarded at your current Power level . You don’t have to claim it immediately unless you want to, saving it to fill in a Power gap if you’re optimizing your leveling. However, you can also always infuse it later and get the most out of the weapon as you play.
And that’s how to complete The Journey quest and get the Xenophage Exotic Machine Gun. If you’re looking for additional help with Destiny 2 ’s collection of Exotics, check out our Gjallarhorn , Unfinished Business , and Winterbite Exotic weapons guides. Our D2 guides hub has much more.
Featured image via the Destiny wiki

Follow Polygon online:
- Follow Polygon on Facebook
- Follow Polygon on Youtube
- Follow Polygon on Instagram
Site search
- Dragon’s Dogma 2
- FF7 Rebirth
- Zelda: Tears of the Kingdom
- Baldur’s Gate 3
- PlayStation
- Dungeons & Dragons
- Magic: The Gathering
- Board Games
- All Tabletop
- All Entertainment
- What to Watch
- What to Play
- Buyer’s Guides
- Really Bad Chess
- All Puzzles
Filed under:
- Destiny 2 guide
Where to find Taken Blights in Destiny 2’s ‘Whispers of the Taken’ quest
Here’s how to upgrade your Whisper of the Worm with more perks
Share this story
- Share this on Facebook
- Share this on Reddit
- Share All sharing options
Share All sharing options for: Where to find Taken Blights in Destiny 2’s ‘Whispers of the Taken’ quest
/cdn.vox-cdn.com/uploads/chorus_image/image/73287606/Destiny_2_Screenshot_2024.04.17___11.41.34.15.0.png)
The “ Whispers of the Taken ” quests are weekly Destiny 2 missions that allow you to further upgrade your Whisper of the Worm Exotic . In order to complete them, you’ll need to visit Eris Morn each week on the Moon, defeat some Taken, and then destroy some Taken Blight sets inside the Legend version of “ The Whisper ” mission.
In this Destiny 2 guide, I’ll walk you through how to complete “Whispers of the Taken” and where to find the special Blights.
Note : As of this writing, “Whispers of the Taken 3” is still unavailable, and will launch on April 23. I’ll update this guide once it and its Taken Blight set enter the game.

‘Whispers of the Taken 1’ Blight set locations
:no_upscale()/cdn.vox-cdn.com/uploads/chorus_asset/file/25406301/Destiny_2_Screenshot_2024.04.18___02.10.20.15.png)
Immediately after getting Whisper of the Worm from “The Whisper” mission, the game will direct you to speak to Eris, who will then give you the “Whispers of the Taken 1” quest. Completing this quest will net you the Field Prep perk for Whisper of the Worm, which you can use to replace the Mulligan perk while crafting.
The first step of the quest is to find 30 Taken Essence , which you can earn by killing any Taken enemies (look to the Dreaming City for this) while you have Whisper of the Worm equipped. Note that you don’t need to use the Exotic sniper to get the kills, but you do need to have it in your heavy slot.
Once you get all the Taken Essence, you’ll need to destroy a set of three Taken Blights hidden in the Legend difficulty version of “The Whisper.” On this advanced difficulty, you’ll only have 20 minutes to find the Taken Blights and complete the mission, so look ahead and know where you’re going before you start.
Once you’re ready, launch “The Whisper” on Legend and make sure you have Whisper of the Worm with you.
Blight 1 and 2
:no_upscale()/cdn.vox-cdn.com/uploads/chorus_asset/file/25405373/vlcsnap_2024_04_17_14h02m37s282.png)
The set of Taken Blights you need to destroy for “Whispers of the Taken 1” are available very early on in the mission. All three of them are before you destroy the big Taken Blight and jump in the hole, so do not progress the mission that far or you’ll need to restart.
When you first start out in the cave on Io, walk forward and kill the Taken Thrall that appear. Walk up to the ledge and immediately look down . As long as you completed the Taken Essence part of the quest before launching “The Whisper,” you’ll see a little ball of Taken energy floating in the air (labeled #1 on the image above). Zoom in with Whisper of the Worm and shoot it.
From where you shot Taken Blight #1, look up and to the right , just under some tree branches. You’ll find the second Taken Blight for this set hovering in the air (labeled #2 in the above image). Shoot it.
:no_upscale()/cdn.vox-cdn.com/uploads/chorus_asset/file/25405358/vlcsnap_2024_04_17_14h04m08s275.png)
Once you’ve shot the first two Taken Blights, hop over to the cavern on your left, where you’ll find a Taken Phalanx. Do not go down the hole, but walk toward it. When you can see the large Taken Blight, turn around and put your back to it . Look out ahead of you and you’ll see the small Taken Blight ball among the trees (labeled #3 in the image above). Zoom in and shoot it.
Once you destroy that Taken Blight, you’ll see the next step for “Whispers of the Taken 1” appear, which asks you to complete “The Whisper” on Legend. Do that, return to Eris, and you’ll unlock Field Prep for Whisper of the Worm.
‘Whispers of the Taken 2’ Blight locations
:no_upscale()/cdn.vox-cdn.com/uploads/chorus_asset/file/25406302/Destiny_2_Screenshot_2024.04.18___02.10.28.81.png)
After you finish “Whispers of the Taken 1” with Eris, she’ll give you “Whispers of the Taken 2,” which rewards the No Distractions perk for Whisper of the Worm. The quest objectives here are the exact same as the first one, so get some Taken kills with Whisper of the Worm equipped and get your loadout setup for “The Whisper” on Legend.
This time, however, you’ll need to find a new set of Taken Blight balls, which are much further into the mission. Look ahead so you know where you’re going.
:no_upscale()/cdn.vox-cdn.com/uploads/chorus_asset/file/25405374/Destiny_2_Screenshot_2024.04.17___11.41.38.58.png)
Make your way through the bulk of the jumping puzzle in “The Whisper” and into the infamous “green room,” which comes directly after jumping into the portal holes. Instead of quickly exiting the green room via the shortcut I pointed out in my guide for the mission, look straight ahead.
You’ll find the first Taken Blight floating in the middle of the room once you walk in. (It’s labeled as #1 on the image above). Once you clock it, zoom in and shoot it.
You can shoot the second Taken Blight from the same vantage point. Look up at the middle of the room and you’ll see a large crack that leads to a big, round hole. The next Taken Blight (labeled as #2 in the image above) is floating in the middle of this hole. Zoom in and shoot it.
:no_upscale()/cdn.vox-cdn.com/uploads/chorus_asset/file/25405375/Destiny_2_Screenshot_2024.04.17___11.42.09.63.png)
For the third Taken Blight, walk forward to the big ball in the middle of the room and then turn around. Near the ceiling , in the direction you came from, you’ll see a Taken Blight floating in the sky (labeled #3 on the image above). Zoom in and shoot it.
Now, just like with the last quest, you’ll need to finish “The Whisper” on Legend and then talk to Eris. Once you do, she’ll award you the No Distractions perk.
Stay tuned for “Whispers of the Taken 3” next week!
The next level of puzzles.
Take a break from your day by playing a puzzle or two! We’ve got SpellTower, Typeshift, crosswords, and more.
Sign up for the newsletter Patch Notes
A weekly roundup of the best things from Polygon
Just one more thing!
Please check your email to find a confirmation email, and follow the steps to confirm your humanity.
Oops. Something went wrong. Please enter a valid email and try again.
Loading comments...

- Your guide to Fallout’s vaults and wastelands
Fallout is coming back for season 2 — here’s what we know
How to get a Stormblood (Eureka) relic weapon in FFXIV

Children of the Sun offers one of the most challenging, satisfying levels of 2024 so far
How to finish ‘The Whisper’ and get Whisper of the Worm in Destiny 2
Where to find the Oracles in ‘The Whisper’ mission in Destiny 2

The Witcher season 5 on Netflix will be the series’ last
Long read: The beauty and drama of video games and their clouds
"It's a little bit hard to work out without knowing the altitude of that dragon..."
Destiny 2 The Whisper exotic mission walkthrough
The return of one of Destiny 2's best missions.
The Whisper is an Exotic mission that has returned to Destiny 2 as part of the New Light update.
Guardians will need to brave the depths of Taken infested caves and defeat a series of bosses to overcome this challenge. If they are successful then the mighty Whisper of the Worm Exotic sniper rifle awaits.
This page will detail every step to this challenging task in Destiny 2 , including the best loadouts, and how to pass through each section.
On this page:
How to access The Whisper mission in Destiny 2
- Best weapons and loadouts for The Whisper
- How to traverse the anamoly in The Whisper
- How to Eridicate the Taken in The Whisper
How to defeat the bosses, including Tulgorh, Aspect of Agony, in The Whisper
The current iteration of The Whisper is much easier to access than its original incarnation. Previously you needed to track down a specific public event at a particular spot on Io, relying on luck more than anything. Now you simply start by visiting your old friend Eris Morn on The Moon .
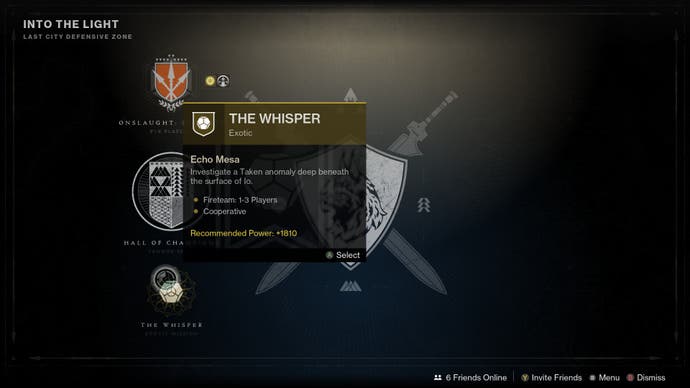
Speak to her and she will assign you the Whispers of the Past quest. This unlocks The Whisper exotic mission in the Into the Light section of your director. Choose between normal and legend difficulty, and launch when you are ready.
Best weapons and loadouts for The Whisper in Destiny 2
Before you begin the Whisper, there are a few things you should plan for. First, this is a timed mission. You have 40 minutes on normal, and just 20 minutes on Legend difficulty to clear the mission. That means you should build your character and weapons around offensive, rather than defensive play . Riskrunner is a great option, as many of the enemies do arc damage. Osteo Striga is great for clearing adds. Swords like Falling Guillotine are good for tougher enemies, while linear fusion rifles like Taipan 4FR and hard hitting rockets like Gjallarhorn are good for boss damage.
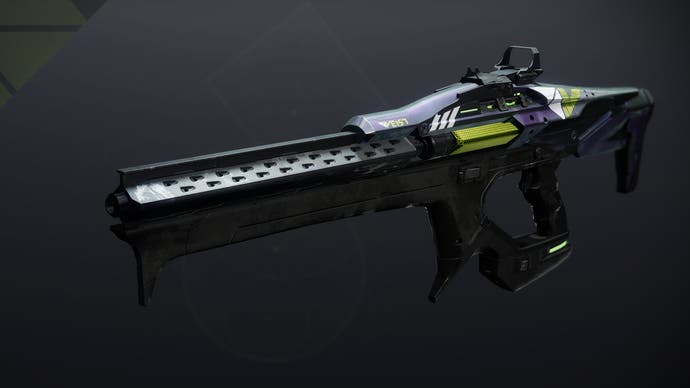
Second, there will be extended periods of platforming. Whatever setup and character you are most comfortable with making long and precise jumps is a good place to start. Remember that your loadout is not locked; you can change weapons and subclass anytime, so it is ok to use one kit for the jumping sections, another for combat areas, and yet another for taking out the bosses.
How to traverse the anamoly in The Whisper in Destiny 2
The mission begins with you in a cave on Io. Proceed forward (mind the few Taken enemies) until you come to a ledge. Jump to this rocky opening up ahead. There will be a Phalanx to deal with, and a blight to destroy to open a hole in the ground. Jump in, try to cushion your landing, and proceed forward through the cramped openings.
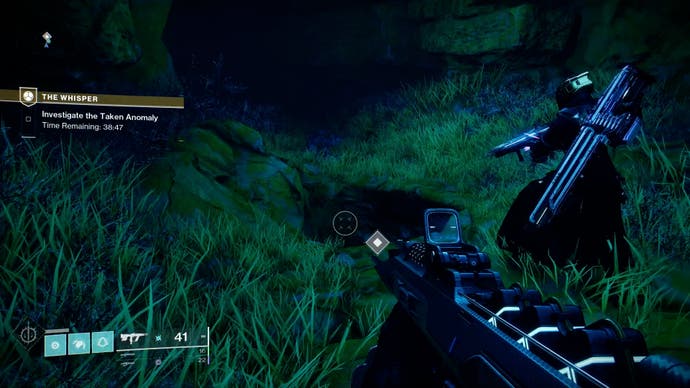
After a few small jumps you will arrive at a massive open space. Hug the wall to the right and work your way down to this platform.
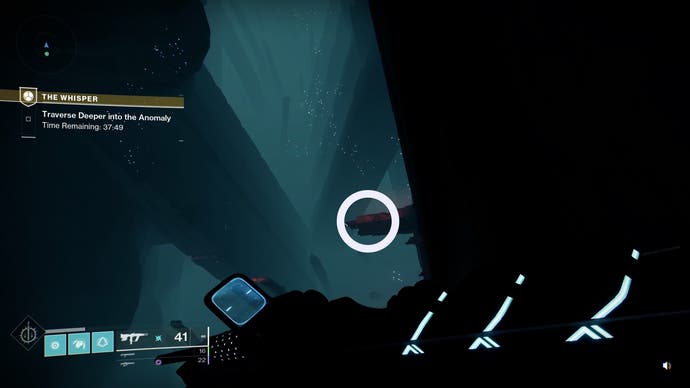
From there jump across these small steps until you reach the ledge around the big square structure. Follow it left, and be prepared to make a blind jump around the corner to reach a cramped shelf.
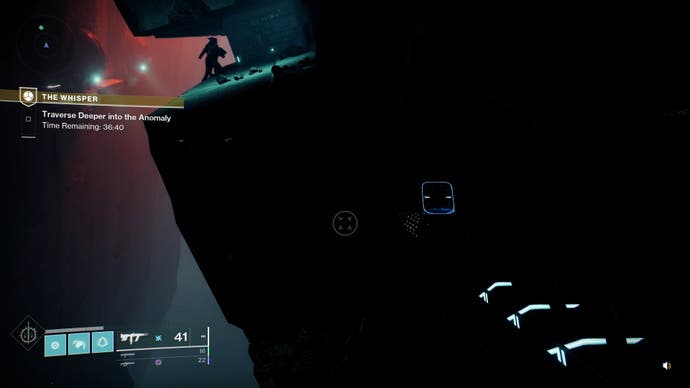
There is a narrow passageway you will cross while crouched. Three sections on this path will periodically push out over your path. Stop at each and wait for them to slide back in so as not to be dropped to your death.
Once you reach the end and can stand back up, look to the left and jump onto the narrow ledge near the wall mounted orbs. Work your way past those until you see this platform moving up and down. Ride it up, and jump onto the raised path. Immediately look left and enter the lit hallway, then turn right and proceed down the strange moving geometry until you come to another open room.
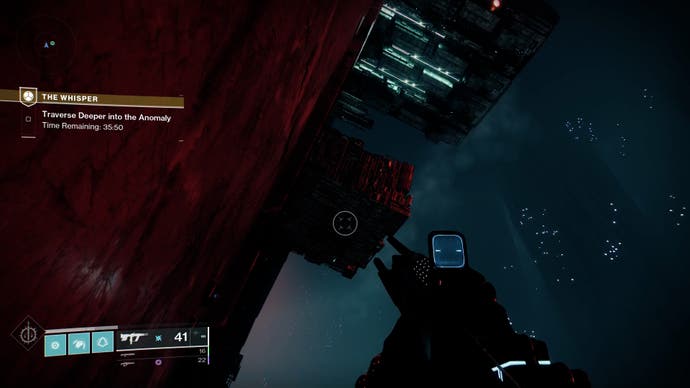
Look forward and you will see a series of narrow paths connected to walls. You will need to jump from one to the other to reach the other side of the room. A periodic blast of energy at each will launch you off, so time your jumps to land right after each shot.
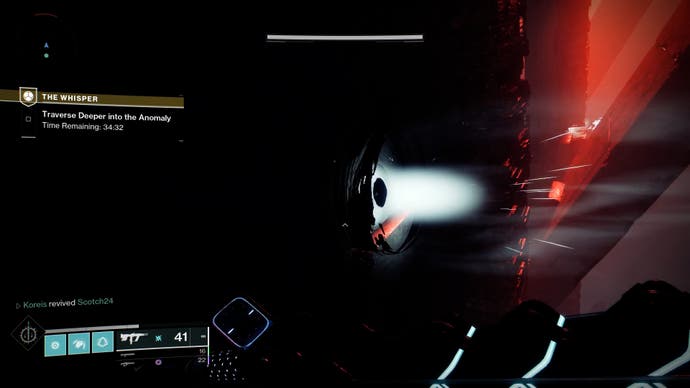
Once you reach the last platform look for this opening, and leap to it.
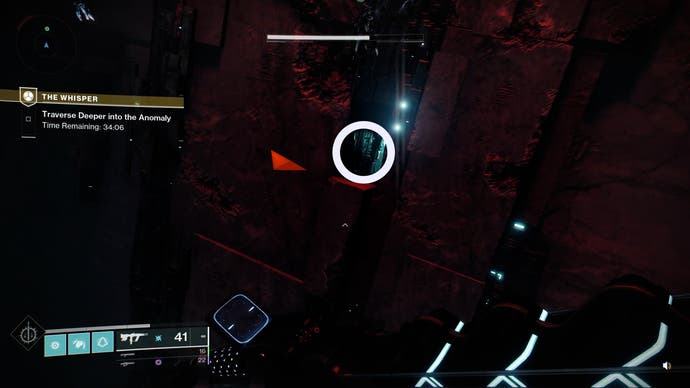
You will arrive at another open room with holes along both walls. Your destination is the one on the far top right. Jump in to drop down to another path leading to yet another open room.
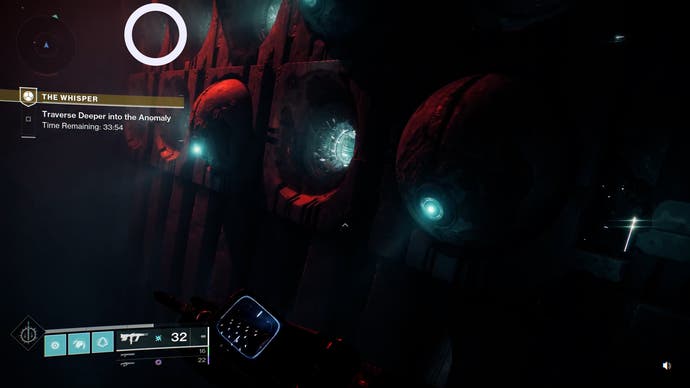
Take a few steps forward, stop, and turn around . There is a narrow gap behind their rock you can crouch and squeeze into. Drop down, turn right, and move forward until the space opens up again.
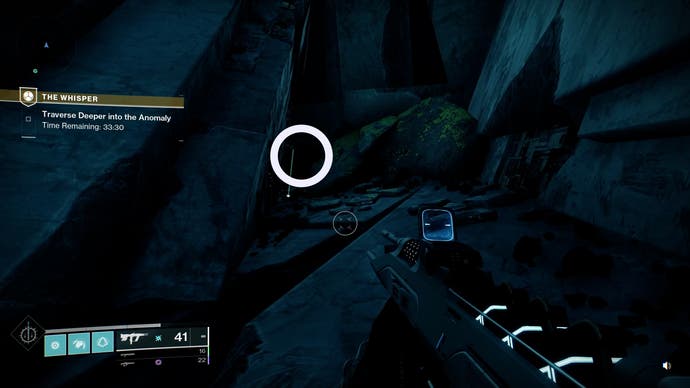
Keep to the left around the rounded wall until you reach another extended platform. Look down to see a lit opening far below. Take a running leap, and do your best to cushion your landing.
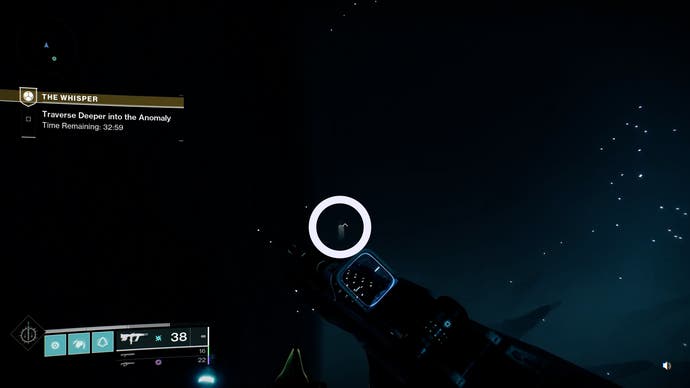
Follow the patch as it winds to your left, jump to an open up and to the left in the last room, and you will be clear of the platforming section.
How to Eridicate the Taken in The Whisper in Destiny 2
The second half of The Whisper is all about combat. You will need to clear all the enemies out of a series of rooms in order to spawn a blight which, when destroyed, opens the path forward.
The first room is filled with Taken Thralls in the front, and snipers in the back. A roaming super like Hammer of Sol or Arc Staff is great here, especially if you focus on reaching the tougher enemies at the rear of the room first. Clear them and open the door to proceed.
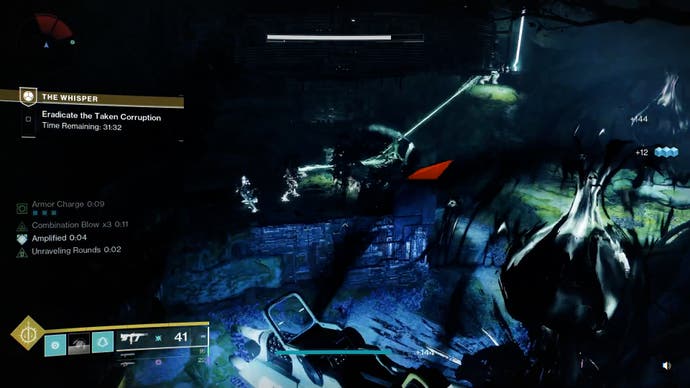
The next two rooms are similar. The first one is confined, and the main challenge is a group of Taken Captains. Clear everyone out and open the door to reach a large room with an upper and lower level. A good tactic is to follow the right wall forward, clearing all the enemies as you go, and wrapping around in a large U shape when you reach the front. Be careful of the Taken Knights, the pools of fire their attacks leave can quickly take down your health, costing valuable time while you respawn.
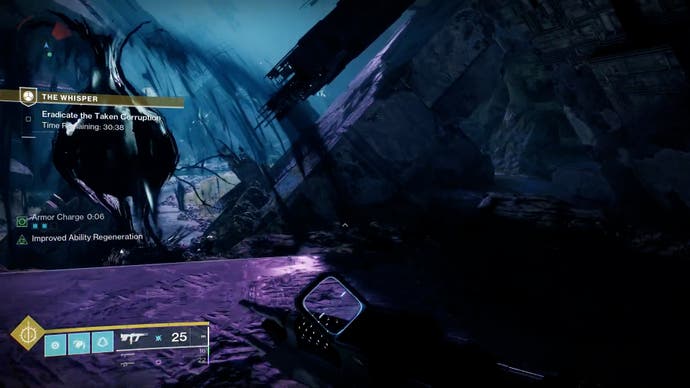
Once that room is cleared you can open the door forward. Target the snipers ahead and up first, but be cautious of a pair of Taken Phalanx that will spawn behind you. Once they are dealt with, turn your attention to clearing the Take Psions around the perimeter of this space. Once the last once is gone a blight will spawn at the center of the room. Jump down to reach the boss room.
The final challenge of The Whisper is a multi phase boss fight. As you drop down the entry way you will need to leap over a gap (be prepared do that anytime you die and respawn). Clear all of the adds to see a rally banner location and three vex cubes appear. Each cube corresponds to one of the three bosses. Break them one at a time to each boss. Once one boss goes down, summon the next. Repeat this until all three have been dealt with.

Now the big boss appear, Tulgorh, Aspect of Agony. This massive ogre is being shielded bay a pair of wizards near the rear of the arena. Kills them to drop Tulgorh’s shield and unload as much damage as you can into him. Eventually he will start summoning Taken Thralls. These annoying enemies are weak, but will never stop appearing during this fight. You can take some out, but concentrate on the boss as much as you can.
After Tulgorh reaches half health the wizards will appear again. Eliminate them as before, and continue focusing fire on the big guy. Use your heavy weapons and super abilites as they come available, and you will eventually wear him out, and claim victory.
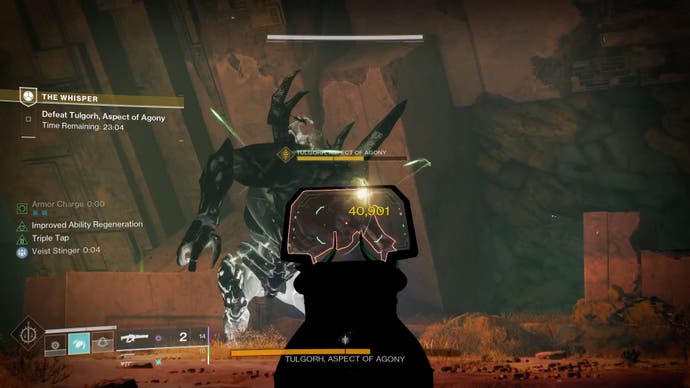
Once he falls a chest will appear at the end of the room. Open it to claim your prize, the Whisper of the Worm sniper rifle. Congratulations on a job well done!
Read this next
- Destiny 3 discussion swirls, following accurate expansion leak
- Destiny 2: The Final Shape's Prismatic subclass and Dread faction detailed
- PlayStation releases digital Jim Ryan bobblehead as nod to his career
Honkai Star Rail codes for April 2024 and how to redeem codes
Fallout 4 Companions, Affinity and Romance
Elden Ring: All Deathroot locations
Past Wordle answers and all previously used Wordle words
Today's Connections hint and answer on Friday 19th April for 313
Today's Wordle hint and answer on Friday 19th April for 1035
Today's Strands hints and answers for Friday 19th April
Elden Ring: All Somber Ancient Dragon Smithing Stone locations
Home » Walkthroughs » Destiny 2: Shadowkeep The Journey Guide
- Walkthroughs
Destiny 2: Shadowkeep The Journey Guide
by enricofairme · Published October 29, 2019 · Updated October 29, 2019
In Destiny 2 there is an Exotic Quest called The Journey. This Exotic Quest takes you around the Moon as you attempt to find the Exotic weapon. To help you complete this quest, use our The Journey Guide.
Note : Guide is still updating.
Reaching Enduring Abyss
To start you want to make your way to the area you meet Eris Morn overlooking the Pyramid. This area is in Enduring Abyss which can be accessed through a Memory portal, or by travelling through Sorrow’s Harbor to the Scarlet Keep. The portal way is rather straightforward, but requires having a Memory quest to turn in.

If you don’t have a Memory quest to turn in, fast travel to Sorrow’s Harbor and make your way inside the Scarlet Keep (located in the north). Inside the keep head forward until you see some glowing green rocks. Take a left here and head forward through the hallway.

As you walk through the hallway you will reach a new area called Enduring Abyss. After the text for this area walk forward until you need to drop down. Don’t drop down. Instead look along the right wall for a hole. Jump to the hole then walk through the corridor to reach the area overlooking the Pyramid.
Interact With the Four Statues to Get Quest

In the area overlooking the Pyramid you will find four statues. Go up to each statue and interact with it (“emerge from the dark”). Once you’ve done this with all four statues a chest will appear. Interact with the chest to receive the quest step Emergence, which is part of The Journey Exotic Quest.
Emergence: Anchor of Light
Once you have the Quest make your way to the Anchor of Light area. I found the the video from YouTuber Spider above to be useful in guiding you where you need to go. To complete this portion of the Exotic Quest you need to pick up a light source then light torches in a specific sequence. Once you’ve lit all the torches you will earn the Pathfinder mission step.
Pathfinder: Find the Path Fragments
The Pathfinder mission step is split into four objectives. You need to find Path Fragments in Anchor of Light, Sorrow’s Harbor, Hellmouth, and Archer’s Line. All of the Path Fragments can be found in the exits of each areas Lost Sector so you will need to complete each one. To help you find the exact locations, consult the the more indepth locations below.
Anchor of Light Path Fragment

Go to the Lost Sector in Anchor of Light. Make your way through the Lost Sector and exit via the door next to the Chest (elevated above the chest ledge). Go up the stairs and you will see some symbols on the wall in front of you. To solve this puzzle complete match all nine symbols to the one show on top of the puzzle. You can change the symbol by shooting. Once you match the symbols a chest appears with the Path Fragment inside it.
Solution (Puzzle Spawn) : Bottom Left, Bottom Right, 2x Top Middle.
Sorrow’s Harbor Path Fragment

Go to the Lost Sector in Sorrow’s Harbor. Make your way through the Lost Sector and exit via the door next to the Chest (on the catwalk by the Chest). Go up the stairs and you will see some symbols on the wall to the right of you. To solve this puzzle complete match all nine symbols to the one show on top of the puzzle. You can change the symbol by shooting. Once you match the symbols a chest appears with the Path Fragment inside it.
Solution (Puzzle Spawn) : Right Middle, Left Middle, 2x Middle, Left Middle, Top Middle, Bottom Middle, Middle.
Hellmouth Path Fragment

Go to the Lost Sector in Hellmouth. Make your way through the Lost Sector and exit using the stone platform near the Chest. On this stone platform is the puzzle. To solve this puzzle complete match all nine symbols to the one show on top of the puzzle. You can change the symbol by shooting. Once you match the symbols a chest appears with the Path Fragment inside it.
Solution (Puzzle Spawn) : Top Right, Left Middle, Middle, Bottom Middle, 2x Right Bottom, 2x Bottom Middle.
Archer’s Landing Path Fragment

Go to the Lost Sector in Archer’s Landing. Make your way through the Lost Sector and exit using the building behind the chest that opens when you defeat the boss. On your way out of this building you will see the puzzle on the wall to your right. To solve this puzzle complete match all nine symbols to the one show on top of the puzzle. You can change the symbol by shooting. Once you match the symbols a chest appears with the Path Fragment inside it.
Solution (Puzzle Spawn) : Top Left, Bottom Left, Middle, Middle Right.
Once you’ve collected all the Path Fragments from the puzzles above you will unlock the Descent objective. This objective takes you to into the Dungeon on the Moon.
Path Uncovered: Pit of Heresy
For this next portion of the quest make your way into the Pit of Heresy Dungeon. In this Dungeon you want to complete the first encounter. You then need to find a hidden pathway. Use the video by WoW Quests above to find the exact location. You will probably need a second or even third to get this far in the Dungeon. Once you reveal Path’s End you unlock the Discovery quest step.
Thoughts on our The Journey Guide? Drop a comment in The Pit below.
Tags: Destiny 2 Destiny 2: Shadowkeep
enricofairme
Starting the site back in 2016, Eli has poured blood, sweat and tears into making HtR a premiere spot for neckbeards and nerds alike.
2 responses
- Pingbacks 0
How do you reset the puzzle? I started the puzzle before I saw the walkthrough.
easy just reset the hidden sector and you’ll reset the puzzle
Leave a Reply Cancel reply
Your email address will not be published. Required fields are marked *
Recent Posts
- On the Hunt III Guide – Genshin Impact
- How to Showcase Characters in Genshin Impact
- On the Hunt II Guide – Genshin Impact
- Genshin Impact Update 1.4 Release Date and Details Revealed
- On the Hunt I Guide – Genshin Impact
Destiny 2: The Whisper Quest Walkthrough
Here's a complete guide showing the right path through Destiny 2's The Whisper quest, as well as some tips on how to fight the final boss.
Quick Links
Destiny 2: the whisper — traversal section, destiny 2: the whisper — combat section.
Whisper of the Worm was one of the first heavy Sniper Rifles in Destiny 2 , and while it hasn't been part of the meta in a long time, that might change with the addition of the craftable version of the gun. With a slew of new perks to choose from and a number of buffs given to it from the previous seasons, this ominous rifle might just make it to the top of the DPS charts.
Destiny 2: Best Titan Builds for Onslaught Mode
While the weapon can be bought from the Tower's exotic kiosk, players now have the chance to get the crafted version of Whisper of the Worm from its original quest called The Whisper, which has been reintroduced as part of Destiny 2's Into The Light update . If you're a new player experiencing this quest for the first time or a veteran who needs to brush up on the mechanics, here's a walkthrough covering the entire quest.
The first half of the quest will have players traversing through an enormous chasm. This is the most confusing part of the quest, as the labyrinthine pathways can easily throw players out for a loop. The path starts out simple at first, but there are many twists along the way. Note that this guide doesn't cover how to get Whisper of the Worm's catalyst in Destiny 2 .
We highly recommend using a Strand subclass here. The Grappling Hook will save you from plenty of unfortunate accidents and make traversal much easier.
Entrance and the First Chasm
In the beginning, make your way through the cave until you reach the ledge, taking care of the Thralls that spawn. On the opposite side, you'll spot a Vex cube — shoot it, and platforms will materialize before you. Get rid of the Knight on the ledge to the left, and pop the Blight. Jump down to enter the chasm.
In this first area, hug the wall to the right, then jump across. Slide through the small gap in front, then drop down the ledge and onto another ledge below. Make your way across while avoiding the moving walls, then jump across the chasm, using the platforms to secure your footing. Once you reach the ledge on the large pillar, go to the corner, jump off, then land on the other ledge to the right. From here, move through the crawlspace, but be careful of the walls that will push you down to the abyss. You can fly by this section much quicker if you know how to do Destiny 2's Sword Skating technique .
Jump onto the ledge to the left, and make your way up using the elevator. Hop onto the next ledge and move forward — once you reach the corner, turn left, then proceed through the tunnel.
Second and Third Chasms
You'll eventually enter another chasm with Taken snipers and even more ledges. Make your way to the end to enter yet another chasm. Make your way to the row of stone globes and holes to the right, then enter the entryway at the very end. Pay attention to the Knight that spawns in the middle of the chasm so you don't get killed. Grab any good sniper rifle or just ignore it.
Once you pass through the glowing entryway, you'll eventually reach a large hall with moss-covered stone floors. Hop down from the entrance, then immediately turn around. There's a hidden hole in the left corner of the ramp leading back to the entryway — enter it to reach a series of tunnels. From here, it's smooth sailing to the second half of the quest. Follow the tunnels, avoid the pitfalls, and you'll eventually reach the end of the parkour section
This part of the quest is much less confusing. Simply shoot your way through the large arenas while taking out the Taken Blights dotted around each area. There will be Taken all over the place, and some will take potshots at you from afar. We highly recommend bringing one of Destiny 2's best PVE scout rifles here just so you can plink safely from a distance.
Move through each arena, and you'll eventually reach the boss room. Here, you'll first need to fight three minibosses before you can fight the actual boss. It can get quite hectic in this arena, especially if you summon all three minibosses at once — shoot only one Vex cube at a time if you want the breathing space.
The actual boss of the Whisper quest is a giant Taken Ogre. There aren't any fancy gimmicks here; just shoot the Wizards to get rid of the boss' shields, then nuke the Ogre with everything you got. If you get overwhelmed, use the side tunnels to get a breather from the boss' attacks. Thralls will constantly swarm you, though, so stay on your toes.
Once the boss is dead, you'll be able to claim the schematic for the craftable Whisper of the Worm. Return to Eris on the Moon to get the actual gun. So far, visiting The Enclave is the only way to craft weapons in Destiny 2 , so if you want to customize your rifle, head straight there after completing the quest.

The Whisper Mission Walkthrough And All Oracle Locations - Destiny 2: Into The Light
Quick links, how to start the whisper mission, whisper mission walkthrough, whispers of the taken i, whispers of the taken ii, all oracle locations.
Destiny 2 has brought back its first Exotic mission with its Into the Light content update. Guardians can venture into the depths of Io once again to reacquire Whisper of the Worm, an Exotic Sniper Rifle that is heavily inspired by Black Spindle from the first game.
Destiny 2: Into The Light - Onslaught Activity Guide And Rewards
Whisper is one of the hardest-hitting Exotic Heavy weapons in the game, and it is fully craftable. If you want to unlock the full potential of this weapon, you'll need to complete "The Whisper" multiple times. This guide will explain how to access this mission, give an in-depth walkthrough of each encounter, and cover how to complete all of Whisper's Exotic quests. We also cover all of this mission's hidden Oracle locations for players chasing Karve the Worm, this mission's Exotic ship.
Updated April 16, 2024, by Charles Burgar: The Whisper mission has unveiled two new Oracle locations this week, and Eris Morn has a new Whisper of the Worm trait you can unlock through a short Exotic quest. We've updated this guide to include a walkthrough of "Whispers of the Taken II" and the location of the next two Oracles. The remaining Oracles and Whisper upgrades should be unlocked next week.
The Whisper mission is unlocked upon speaking with Eris Morn on the Moon. She will give you a quest called "Whispers of the Past" that will ask you to complete the Exotic mission on either Normal or Legend difficulty. The Whisper mission can be found within the "Into the Light" section on your Director. Matchmaking is disabled for this activity, but it can be cleared solo if you're using a decent build.
Both the Normal and Legend variants come with difficulty modifiers that make The Whisper mission slightly harder. Both difficulty modifiers are shown below.
It's important to emphasize that this mission is timed. You have 40 minutes (reduced to 20 on Legend) to complete the entire mission. If you fail to complete the mission before the timer expires, everyone will be sent back to orbit, requiring you to restart the mission from the beginning. No checkpoints are present , although a Rally Banner is available before the final encounter.
The Whisper Mission Changes
If you played this Exotic mission back when it was originally available, not much has changed. The core mechanics and jumping puzzles are exactly the same as before , although the combat difficulty has been cranked up to reflect the current sandbox. All changes are listed below.
- Vex Cubes can be found at the end of each platforming section. Destroying them will create a shortcut for any fireteam members left behind, allowing them to catch up to you.
- Hidden chests have been removed. They have been replaced with Oracles that can be destroyed.
- The Catalyst now drops from Legend difficulty. It no longer has a Catalyst objective .
- An extra final boss was added. After you defeat the Taken trio at the end of the mission, a fourth enemy will spawn. You must kill a pair of Taken Wizards to make the boss vulnerable.
- You can now craft Whisper of the Worm at the Enclave. It now has intrinsic upgrades you can unlock by destroying Oracles in the mission. Mulligan can now be replaced with other perks.
- Oracles are currently time-gated. The last Intrinsic upgrade is currently unobtainable.
Return to Quick Links
Destiny 2: How To Reach 1810 Power Level Quickly
Upon starting the mission, you will spawn near the end of the Grove of Ulan-Tan Lost Sector on Io. Run into the adjacent room and clear out the Taken Thrall. You should now have a clear overview of the entire Lost Sector. Don't jump down.
You'll want to look for a Vex Cube floating on the opposite side of the room, beside a tree. Destroying it will create a couple of Vex platforms that lead to the exit. Break the Taken Blight and jump down the newly revealed hole.
Vex Cube Mechanic
Small Vex cubes can be found towards the end of each platforming section. You can break these cubes to create static platforms for your allies to use. This is useful if you're carrying Guardians through the mission or need to backtrack.
Traverse Deeper Into The Anomaly
The grand Pyramidion structure on the surface of Io has taken root within the very core of this moon. You will need to navigate a series of jumping puzzles to reach the Taken Anomaly that plagues the region. Generally, follow any bright lights you see. An Eager Edge Sword, Strand's Grapple Grenade , or even Stasis can make this part much easier.
After sliding under a narrow gap in a Vex wall, you'll reach a massive chasm with violent pistons protruding from the wall beside you. Jump down towards the isolated platform bathed in red light, then hop to the large pillar structure. Hug the wall as you shimmy your way towards the left. When you hit a dead end, jump off the platform and around the corner.
There is an incredibly small ledge you can crawl through to reach the other side of this massive structure, but you'll want to wait first. This wall has slow-moving pistons that will push you into the chasm. You need to take it slow.
- Once the closest piston recedes, walk until you reach the second piston. Stop.
- Wait for the wall to push outward and retract. Walk until you reach the third piston. Do not continue.
- Wait a few seconds. The third piston will do its thing. Once it retracts back into the wall, you're home-free.
Now that you're on the other side of the structure, jump across the chasm to the nearby wall. Head to the cube platform at the end of the path and jump on top of it. It'll act as an elevator that will take you up a floor. Get off the elevator, walk along the wall, then turn left as soon as possible.
Yet another imposing hallway will greet you, but this section isn't nearly as bad. Wait for the Vex contraptions to recede, then book it to the other side. The following room is a large chasm filled with multiple diagonal pillars. Simply jump on the platforms jutting out of them to reach the opposite end of the chasm. Beware of the Taken physics traps and snipers as you progress.
The next room is lined with massive spherical Vex structures. Run to the opening at the very back of the right wall. There should be an opening on the top floor that will lead you to the next jumping section.
Most players refer to this as the "green room," a rather spacious area that has small patches of vegetation. While the room looks imposing, you can actually skip this entire jumping section. Once you enter the room, turn around and crouch under the small ramp. This will skip the entire green room puzzle.
You're almost done. The final platforming section requires you to run along the circular structure to your left. Jump down towards the bright light below, navigate the final stretch of platforms, and you'll reach the combat portion of this Exotic mission.
Eradicate The Taken Corruption
This next section will test your add-slaying skills. You must clear each room of all Taken enemies ; not one foe can be left standing. Each room is also infected with half a dozen Taken Blights. You don't need to destroy them to progress, but you might want to break a few to give yourself some safe areas to fight in.
There aren't any bosses or special mechanics during this section, so your main goal is to survive . Don't take unnecessary risks, focus on killing the Vandals and Knights first , and use cover whenever possible. Once all the Taken enemies are dead, you can destroy the Taken energy that's blocking the exit. Repeat this process until you reach the heart of this Vex structure.
Defeat The Taken Bosses
You will immediately be attacked by multiple Taken Centurions, all of which will attempt to spawn Axion Darts whenever possible. Kill these enemies as soon as possible. When the arena is clear, a Rally Point will appear near the center of the room. Swap to a DPS build before you start the encounter.
There are three Taken bosses trapped in the back of the room. Destroying the Vex Cubes in the center of the room will spawn a boss. You can choose to spawn one boss at a time or all three simultaneously. We recommend the former if you're playing this solo, but feel free to spawn all of them if your fireteam is armed to the teeth.
The bosses themselves don't have any mechanics; they're tanky variants of standard Taken foes:
- Urzok, Aspect of Hate: Taken Knight
- Drevis: Aspect of Darkness: Taken Captain
- Ta'aurc, Aspect of War: Taken Centurion
Use the short pillar structures as cover, duck into the tunnels on either side of the arena when you get surrounded, and chip away at each boss when it's safe. Unlike the original version, killing all three bosses doesn't end the mission. There's a fourth boss you must kill immediately after. Make sure your team is ready for this when the third boss is slain.
Defeat Tulgorh, Aspect Of Agony
Immediately after killing the third boss, a Taken Ogre named Tulgorh, Aspect of Agony, will spawn. Unlike the previous three bosses, this Ogre comes with an immunity shield that can only be stripped by killing the Taken Wizard couple near the back of the room.
No other mechanics are present here. Kill the Wizards, nuke the boss, and repeat until Tulgorh is dead. Open the final reward chest when it's dead to complete the activity. This will reward you with Whisper of the Worm and its respective crafting pattern. To unlock additional crafting options , you'll need to replay this mission and hunt down secret Oracles. The Exotic Catalyst drops from Legend difficulty.
Destiny 2: Exotic Mission Playlist Explained
Eris Morn has devised a method that will allow you to reforge Whisper of the Worm into a much stronger weapon. Speak to Eris Morn upon completing "The Whisper" to start the quest. The quest objectives are rather straightforward:
- Collect 10 Taken Essence from slain Taken combatants.
- Taken can be slain anywhere in the system.
- Boot up "The Whisper" on Legend. Destroy three Blights in the starting area.
- Complete the mission on Legend difficulty.
The Blights are located within the Io Lost Sector before you jump down the Taken Blight hole. Turn around and face the Lost Sector itself. You should see all three Taken orbs. Equip Whisper of the Worm and shoot the floating objects. Once you break all three, complete the mission on Legend difficulty. Speak to Eris Morn when you're done. You will unlock Field Prep as a craftable trait for Whisper of the Worm.
Like before, you'll need to speak with Eris Morn on the Moon. She will ask you to eliminate Taken while you have Whisper of the Worm equipped. Taken can be eliminated anywhere, not just in The Whisper mission. Once that's done, you'll need to destroy three more blights in the Exotic mission.
The second set of Blights can be found in the Green Room. When you first enter the room, you should see all three blights floating in the air. Equip Whisper of the Worm and destroy all three of them. Once complete, report back to Eris Morn to unlock No Distractions as a craftable trait on Whisper.
Hidden chests have been replaced with Oracle devices that can be destroyed. This mission has seven Oracles in total. You must break these Oracles to unlock Whisper of the Worm intrinsic upgrades and the Karve the Worm Exotic ship.
Time Gating
Only four Oracles are currently spawning in "The Whisper." They seem to be time-gated and will be released over the next few weeks. We will update this section with additional Oracle locations as they become available.
Oracle #1: First Platforming Section
- Location: After you descend the Taken Blight hole.
- Reward: Whisper Intrinsic II
After you descend the Taken Blight hole and jump across the first gap, look to your left. Hug the wall and walk as far as you can , then jump around the corner towards the light. Break the Oracle floating above a broken Goblin chassis to receive the second intrinsic upgrade for Whisper of the Worm.
Oracle #2: Cube Elevator
- Location: On the path after you use the cube elevator.
- Reward: Ship Progress
The second Oracle is located in the first platforming section. After you use the elevator, continue to follow the path; do not enter the Vex hallway. Jump up the narrow platform, then look to the wall on your left. There should be a gap in the wall directly above your character. Hop up into the wall to find the Oracle.
Oracle #3: Pillar Section
- Location: Around the last pillar before you jump across to the next room.
- Reward: Whisper Intrinsic III
During the pillar platforming section, you'll want to jump to the exit and turn around. Shoot the Vex Cube to create a new platform on the other side of the final pillar, then jump across. The Oracle will be floating in a corner. Destroy it to unlock the third intrinsic upgrade for Whisper of the Worm.
Oracle #4: Green Room
- Location: Found in the room after you complete the jumping puzzle; you cannot skip the puzzle.
The fourth Oracle is the most straightforward one to find, yet it's the most difficult to reach. You must complete the Green Room jumping puzzle to reach this Oracle; skipping it by walking under the entry ramp will not work.
If you've never done this before, start the puzzle by walking to the spherical structure near the center of the room. Turn left and walk into the gap in the wall. Look to the ceiling and jump up. This will lead you back outside.
Your goal is to jump on any platform with grass. Look for narrow ledges above or beside you to find the path forward. The puzzle will take you across the entire room. When you are standing on a ledge directly above the entrance to the room, look for a grassy patch to drop to. It'll lead to a room filled with dead Vex and the Oracle you seek.
Destiny 2: Every New Weapon In Into The Light
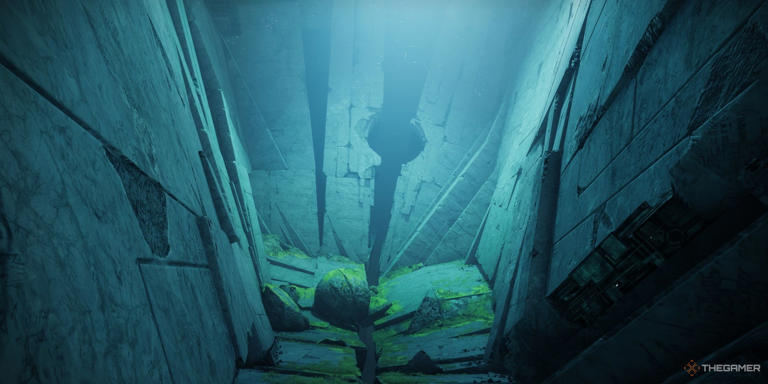
How to get Whisper of the Worm and its catalyst in Destiny 2
Complete Destiny 2’s The Whisper mission to return this one-of-a-kind sniper rifle to your inventory.

- Unlock Whisper of the Worm
- The Whisper walkthrough
- Whisper of the Worm catalyst
Six years ago, you may have grabbed yourself Destiny 2 ’s Whisper of the Worm when the secret exotic mission The Whisper was first released. After being vaulted at the end of the Season of the Arrivals, Bungie has brought the mission and the famous sniper rifle back with the Into The Light content update ahead of The Final Shape’s release.
Thankfully, if you were around when the mission was first released (or if you are a new Guardian who joined the fight against The Witness more recently), you will be pleased to know this new version of The Whisper isn’t as much of a pain to complete as it was back in 2018. However, there are some slight changes to shake things up.
With Into The Light finally out, you can now revisit the winding pathways and cavernous halls and get Whisper Of The Worm for yourself - if you didn’t already have it. But, even if you did get the gun before it was vaulted, it is worth playing through the quest again to get the crafting recipe, allowing you to customize the exotic weapon at The Enclave on Mars.
For a full walkthrough of the quest and how to unlock its catalyst check out our guide below.
How to unlock Whisper of the Worm in Destiny 2
Whisper of the Worm in Destiny 2 can now be unlocked by completing the Whispers of the Past quest from Eris Morn. This will ask you to enter the reprised exotic mission, The Whisper and finish it to get the exotic Sniper Rifle at the end.
The weapon is now in the power weapon slot and uses heavy ammo. Whisper of the Worm is a famous Destiny 2 sniper rifle as it used to be incredibly strong in raids and against bosses before it was vaulted thanks to its unique intrinsic trait: White Nail.
This trait gives you higher base precision damage, and rapidly landing three precision hits will cause the magazine to refill. This allows you to do as much damage as possible during a damage phase of a raid or dungeon boss without needing to reload.
Destiny 2 The Whisper walkthrough
The Whisper is a 1810 Power Level mission. Ideally, you and your fireteam want to be at least 1800 Power Level to be able to take on the intense boss battles at the end of the mission.
If you have played The Whisper before, then not a lot has changed, but for new Guardians here is a quick debrief. You have 40 minutes to complete the mission and it is a huge jumping puzzle, similar to what you would find in a raid but much longer. Towards the end, it will turn into a gauntlet asking you to kill tons of Taken enemies, as well as four bosses - three smaller ones and one large boss.
Before you jump in, you will want to use the Fireteam Finder to find two other players for this mission if you don’t have any friends to play it with, as completing it solo is extremely tricky.
When you are ready, the mission kicks off near the surface of IO and instead of jumping down after the first room, you want to look over to your left for a small opening in the rockface. Jump in there, kill the Centurion, and destroy the Taken Blight. You can then drop down deeper into the planet.
For the next section of the mission, you will be jumping through the large Vex structures and across huge gaps to make your way to the boss fights, so take each step carefully. Thankfully, the checkpoints and where you respawn are quite forgiving.
After the initial gap ahead of you, you will see a red light, which has the next platform to jump to beneath it.
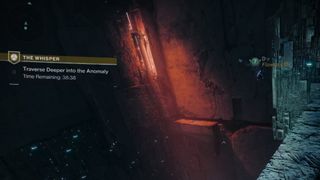
Once down here, crouch and make your way through to the first large hall. Here, you will have to contend with small blocks pushing you away from the wall, so before jumping, learn the rhythm and cadence at which they jerk in and out from the wall.
You want to stick entirely to the right side of the wall here initially. After the first block that tries to push you away from the wall, jump all the way down beneath you to another ledge with a red hue. Dodge the blocks once again and make your way to the long platform pointing to your left.
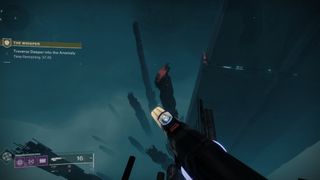
Down from this platform, you will find a small pillar to jump to and then a gap in the wall on the large column ahead. Shuffle your way along this column to your left, and jump around to the left to find another platform.
From this platform, you can crouch and walk along it, progressing deeper. Along this small ledge, blocks in the wall will actually try and knock you off. But, these can easily be avoided by taking one section at a time and waiting for the blocks to have fully receded back into the wall, before you try and get to the next safe section.
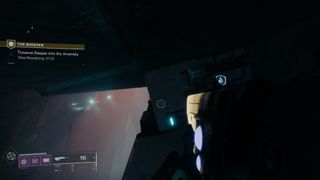
Once through, jump over to the opposite wall on your left and make your way along the ledge. You can crouch under the spherical structure on the wall and then jump onto the moving platform that goes up and down.
Once at the top, jump to the small ledge ahead and then take a left. Do not continue forward as this is a dead end.
After the corridor, make your way through the next jumping puzzle by avoiding the moving blocks in the same way as you have avoided the rest and enter the next large hall. This hall is a little trickier as you will have enemies positioned on ledges, trying to kill you. However, time your jump so as soon as the Taken blast in the wall by the first ledge finishes, you jump towards the ledge. This will ensure you miss the next blast. Hop from ledge to ledge, crouching once you reach the third ledge, continuing straight forward, and then jump through the hole in the wall ahead.
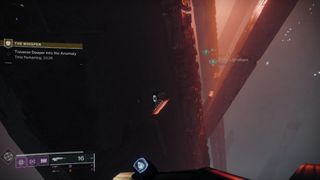
In the next room, you will see a lot of Vex-looking holes in the wall you can go through. However, most will lead to your death. The correct one to jump through is the final hole on your right. The easiest way to get there is to jump up to the ledge under the top set of spherical structures in the wall and walk along it until you reach the hole.
Watch out for the enemy, but once you are through you will enter another large hall.
This room is like a maze and you can easily find yourself looking around in circles for an exit. However, the easiest way forward is right where you enter the room. After dropping down to the base floor you can turn to your right and see a small gap in the rocks, which is the way forward.
If you do drop to the lower floor with the Taken Thrall, you can find several ramps, leading you back up.
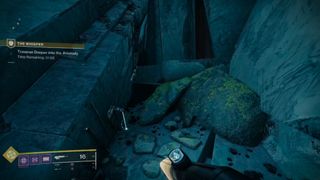
From there, you have a few more jumps to make along the wall to the left as you enter the next hall. Finally, there is one large drop to make to the lit-up hole in the wall beneath you.
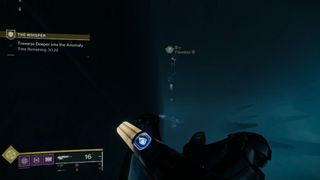
Continue forward and then look under the wall on your right in the next room to find a small hole, lit up by white light. This will finish the jumping puzzle section and put you right in the midst of combat.
There is nothing special to this initial fight, simply clear out the Taken and push forward before jumping down into the hole in the final room with the Psions.
Once in the final room, you will need to clear the first set of enemies and then summon three bosses. These can be done one at a time by shooting the Vex cubes in the arena or all at once. Fighting them one at a time makes for an easier battle, but summoning them all together and killing them will get you a Triumph.
These are regular boss versions of a Taken Captain, Centurion, and Knight. There is nothing special to them and machine guns and supers will make quick work of them. Additionally, there will be a whole bunch of extra enemies, but these can be slowly taken down one by one, and you can retreat to either of the caves on the left and right to recover your health.
Once all the enemies are down Tulgorh, will spawn - the true boss. However, this fight is actually significantly easier than the previous one. The only mechanic you need to remember is that at the start of the fight and at 50% health Tulgorh will gain a shield, which can only be destroyed by killing the two Taken Witches at the back of the arena.
Once those witches are dead you can unload on Tulgorh and defeat him. The only other enemies in the arena during this fight are some Taken Thrall, which are pretty easy to clear out.
Once Tulgorh is dead, you can open the chest at the end to complete the mission and get your Whisper of the Worm.
How to get the Whisper of the Worm catalyst in Destiny 2
The Catalyst for Whisper of the Worm is unlocked after obtaining the sniper rifle during your first run through The Whisper exotic mission. Upon returning to Eris Morn on the moon, she will give you the first Whispers of the Taken quest. This is a four-step quest, which upon completion will give you the perk Whispered Breathing for the Whisper of the Worm.
The perk from the catalyst gives the sniper bonus range and precision damage when zoomed in after it has been aimed without firing for a brief moment.
This quest is extremely simple, with the first step requiring you to kill 10 Taken and obtain Taken Essence. These kills don’t have to be with Whisper of the Worm either.
This can be done anywhere, but the best spot is in the Divalian Mists in The Dreaming City, as you can kill 10 Taken in less than two minutes.
The second step requires you to replay The Whisper mission on Legend and destroy the first set of Taken Blights. This is a little trickier as you only have 20 minutes to complete the mission. You want to be at Power Level 1810 or higher and if the rest of your fireteam is above the 1830 Power Level of the mission, even better, as they can help carry you through.
Fireteam Finder is a great way to do this as you will often find groups of higher Power level players or be joined by high Power Level Guardians if you are creating a session.
Once loaded in, these blights are located in the air within the second room at the beginning of the mission, just before you drop down. Before you jump to the cliff on your left, look over to your right and you will see two blights in the air by the trees and one right in front of you. Shoot them with Whisper of the Worm to destroy them.

The quest will then update and then tell you to finish The Whisper on Legend difficulty. As you are already here, bolt it back through the entire mission using our walkthrough above and try to get to the combat sections with as much time left as you can.
If your team are of a decently high Power Level, at least 1810-1820, you should be able to make it through these fights without too many issues. The enemies will be tankier and stronger, however, well-timed supers and strong machine guns used in unison with each other can melt the three initial bosses quickly and whittle away at Tulgorh’s health.
Do summon all three of the bosses in the first fight at the same time if you think your team can survive. Doing so means there is less time waiting for the bosses to spawn. Ideally, you want at least 10-14 minutes on the clock by the time you reach the first fight and begin clearing the Taken Corruption to give you enough leeway during the two boss battles.
After defeating Tulgorh you will unlock the catalyst and can return to Eris to complete the quest.
Even if you got the catalyst back when the weapon was first released, you will need to complete Whispers of the Taken to be able to put Whispered Breathing onto your crafted Whisper of the Worm. Finishing the quest will also unlock Field Prep within the Trait slot.
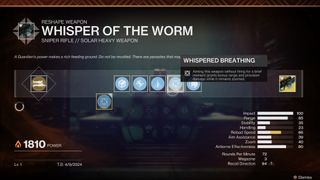
That is how to get yourself a fully kitted-out Whisper of the Worm and complete the exotic quests for its extra perks. This is easily the rarest weapon included with the Into The Light content update. However, there are also a whole bunch of classic legendary weapons to unlock from Onslaught. So, don’t skip out on the new wave-based horde mode for some extra returning weapons from Destiny’s past.
PC Gamer Newsletter
Sign up to get the best content of the week, and great gaming deals, as picked by the editors.
Descent 3 programmer releases the classic space shooter's source code, including a surprise patch developed 15 years ago but never released
Ready or Not studio Void Interactive confirms it was hacked in March but says 'no user-related data' was stolen
Teamgroup Z540 2TB NVMe SSD review
Most Popular
- 2 Best ultrawide monitor for gaming in 2024: the expansive panels I recommend for PC gamers
- 3 Best wireless gaming keyboard in 2024
- 4 Best gaming laptops in 2024: I've had my pick of portable powerhouses and these are the best
- 5 Best gaming chairs in 2024: the seats I'd suggest for any gamer
- 2 Children of the Sun review: A killer puzzle game that tests your skill and your patience
- 3 Moza R5 Bundle + Performance Kit review
- 4 Harold Halibut review: An undersea adventure that plays things too safe for its own good
- 5 Inkbound review: A clever yet frustratingly muddled follow-up to Monster Train
Dragon's Dogma 2 guide to help you live the Arisen life
Pawn off the work to us so we can help you on your quest with our Dragon's Dogma 2 guide

- Tips and basics
- Exploration
- Secrets and mysteries
Using our Dragon's Dogma 2 guide, you'll find help for many different aspects of the massive action RPG, helping you complete your Arisen's journey. Dragon's Dogma 2's complexity and freedom make it an interesting game to play but can also make it really overwhelming to get into – some quests require thorough exploration with easy-to-miss steps, and knowing how best to fight enemies or manage your Pawns can be tricky. Below you'll find all our Dragon's Dogma 2 guides, so you can easily get the tips you need.
Dragon's Dogma 2 tips and basics

As I've said, Dragon's Dogma 2 is hardly a simple game and feels like it throws you in at the RPG deep end at times, so knowing the basics is key. Start off with our Dragon's Dogma 2 tips for some things we wish we knew when starting the Arisen's quest. When you're creating your character, you'll be pleased to know that you can change your appearance in Dragon's Dogma 2 , though it's not an especially simple process and you need a particular book item to do it.
Early in the game, you'll also be shown the perils of water and the Brine that lurks within, so be sure you know how to cross water in Dragon's Dogma 2 to save you and your Pawns any trouble. If things do go awry in water or combat, you should know about reloading and how to save in Dragon's Dogma 2 , as it's very important to understand so that you don't lose or overwrite your progress.
Dragon's Dogma 2 quests

There are loads of quests in Dragon's Dogma 2, with a significant number being seemingly important side quests that you are forced to start or just wander into. Here's a list of all the quest walkthroughs we've got, helping you with parts of the main quest and many of the side activities you can get involved with:
- Dragon's Dogma 2 Vocation Frustration
- Lie or tell the truth for the Dragon's Dogma 2 Urchin
- Dragon's Dogma 2 Ornate Box
- Dragon's Dogma 2 Caged magistrate
- Dragon's Dogma 2 Nameless village
- Dragon's Dogma 2 Stolen Throne
- Dragon's Dogma 2 Saint of the Slums
- Dragon's Dogma 2 A Beggar's Tale
- Dragon's Dogma 2 Lennart
- Dragon's Dogma 2 Jadeite Orb
- Dragon's Dogma 2 Prey for the Pack
- Dragon's Dogma 2 Shadowed Prayers
- Dragon's Dogma 2 Tensions on the Highroad
- Dragon's Dogma 2 A Veil of Gossamer Clouds
- Dragon's Dogma 2 Phantom Oxcart
- Dragon's Dogma 2 Arisen's Shadow
- Dragon's Dogma 2 A Candle in the Storm
- Dragon's Dogma 2 Short-Sighted Ambition and On the Transference of Souls
- Dragon's Dogma 2 Trial of Archery
- Dragon's Dogma 2 Off the Pilfered Path
Dragon's Dogma 2 Vocations

Vocations are Dragon's Dogma 2's version of classes, with each one offering a unique fighting style and access to certain weapons, armor, skills, and augments for you to create a build with. For a general overview, you can read our Dragon's Dogma 2 Vocations guide to learn how to get all 10 of them, what they do, and which ones are best. The Dragon's Dogma 2 Mystic Spearhand is one of the best ones and you can get it pretty early in the game, so we've written a separate guide for that.
Dragon's Dogma 2 exploration

Dragon's Dogma 2 takes place in a huge world, mainly focusing on the kingdoms of Vermund and Battahl. With no mounts, you'll spend a lot of time on foot, which can make travel quite a slog, and your options for Dragon's Dogma 2 fast travel are limited too. However, as you're wandering around, your Pawns will no doubt start pointing things out to you, marking them with a Dragon's Dogma 2 exclamation mark that might be worth your attention.
Once you've got through a significant chunk of the main quest in Vermund and specifically the capital city of Vernworth, you'll be tasked with getting into the region of Battahl in Dragon's Dogma 2 , which isn't as straightforward as just walking there, requiring a permit or knowledge of a treacherous path.
Dragon's Dogma 2 secrets and mysteries

With such a massive world packed with quests, there are plenty of secrets, mysteries, puzzles, and obscure quests and items that you'll stumble across and might be left stumped by. Here's a list of some of the headscratchers we've found in the game:
- Dragon's Dogma 2 Sphinx riddles are part of a long quest with the Sphinx at the Mountain Shrine, but lots of great rewards are up for grabs.
- The infamous Dragon's Dogma 2 Dragonsplague disease can affect Pawns and could have dire consequences if left untreated. While it is quite rare, make sure you know how to deal with the deadly disease.
- The Dragon's Dogma 2 Flamebearer Palace Spellseal Door blocks off a path to the Volcanic Island area of the map, but it also leads to the Dragon's Dogma 2 Guardian Gigantus boss fight.
- Dragon's Dogma 2 Dwarven Smithing is one of the few types of weapon smithing, but unlocking this type requires you to complete a long and complicated series of quests.
- Dragon's Dogma 2 Newt liqueur is an item necessary to unlocking the Warfarer Vocation that can either be crafted or bought.
- The Dragon's Dogma 2 Jasper, Onyx, and Tiger Eye gemstones aren't much of a mystery but they can be sold in different areas for higher prices, so don't sell them to the first merchant you see.
© GamesRadar+. Not to be reproduced without permission.
Sign up to the GamesRadar+ Newsletter
Weekly digests, tales from the communities you love, and more

Will Sawyer is a guides writer at GamesRadar+ who works with the rest of the guides team to give readers great information and advice on the best items, how to complete a particular challenge, or where to go in some of the biggest video games. Will joined the GameRadar+ team in August 2021 and has written about service titles, including Fortnite, Destiny 2, and Warzone, as well as some of the biggest releases like Halo Infinite, Elden Ring, and God of War Ragnarok.
The first Nintendo emulator to land on the App Store and stick following an Apple rule change plays DS, GBA, N64 games for free
Hades 2 fans think the roguelike sequel confirms a 6-year-old fan theory about the mysterious narrator's identity, in an easter egg 2,000 years in the making
Zack Snyder says he hopes to make "four or six" Rebel Moon movies: "I guess it's whether or not we make one or two each time"
Most Popular

IMAGES
VIDEO
COMMENTS
Destiny 2 will add yet another Exotic quest to the mix next week, allowing players the chance to nab the Xenophage Exotic Machine Gun.. Step 1: Begin The Journey. You'll need to head to Eris' little hideout inside Sorrow's Harbour to start this quest. To get there, spawn at Sorrow's Harbour and head up towards the large set of stairs, taking the door on the left.
Pick up The Journey quest. First up, head to the part of the Moon where Eris Morn dwells and walk over to the portal that sits to her right. You will have been through this portal a few times so ...
Here's a quick rundown of the steps needed to obtain Xenophage : Interact with the statues near the Pyramid to start the quest. Light the six plates in Anchor of Light. Complete the four puzzles ...
Destiny 2 The Journey Exotic Quest Full Guide - Xenophage Exotic Machine Gun - Step by Step GuideThis guide shows you the Journey exotic quest in Destiny 2. ...
Related: How to Complete the Memory Alembic Quest in Destiny 2. Once the statues are lit, you'll get a notification, and a chest will spawn. Open it, and you'll get the quest, The Journey. Now, to the entrée: Step 1: Emerged from the dark. "Around you… darkness. If you are to discover your path, you much anchor yourself to light."
The Journey is an exotic quest in Destiny 2 that was introduced in the Shadowkeep expansion, which rewards players with the Xenophage Machine Gun. To obtain this quest, players must complete a puzzle in the Enduring Abyss on the Moon.Right before Eris Morn's station overlooking the Lunar Pyramid there are four Hive statues, which players have to interact with them to make all of them light up.
#destiny2 #TimeSausages #thewitchqueen #seasonoftherhaunted #xenophage #xenophagequestThe Xenophage Exotic is one of the best Weapons in Destiny 2. As it has...
Hey guys here's a guide for the 3rd quest step for Xenophage. How to complete all puzzlesHeres the number sequences I used:Anchor of Light - 79255525 Archers...
Players that unlock Xenophage will be treated to one of the slowest firing Machine Guns in Destiny 2, featuring a 120 PRM. But, more on its perks and stats below. The Journey Exotic quest
Destiny 2 Xenophage Guide. Xenophage is an exotic machine gun that uses heavy ammo. It deals Solar Damage, and its intrinsic perk is "Pyrotoxin Rounds" - allowing it to fire high-powered explosive ammunition. That makes it ideal for ripping through mobs or bosses. Destiny 2 Xenophage Quest Start The Quest. Up first - obtaining the quest.
Need help? |. The Journey quest in Destiny 2 can be a bit confusing, so in this guide, we will show you how to emerge from the dark for the Emergence step. As part of.
Destiny 2 Xenophage Quest Steps Guide - Puzzle Solutions & How-to Start The Journey! Jean-Pierre van Wyk | Published: Oct 29, 2019 01:54 pm . 0. Our Destiny 2 Shadowkeep Xenophage Quest Steps Guide will walk you through everything we currently know about this Exotic Machine Gun and how-to start the quest. We've got a full look at all of the ...
In Destiny 2 there is an Exotic Quest called The Journey. This Exotic Quest takes you around the Moon as you attempt to find the Exotic weapon. To help you complete this quest, use our The Journey Guide. Note: Guide is still updating. Reaching Enduring Abyss. To start you want to make your way to the area you meet Eris Morn overlooking the Pyramid.
Xenophage is a top-tier Exotic Heavy Machine Gun Shadowkeep Destiny 2. Recommended Videos. complete an Exotic quest called The Journey. Shadowkeep head to Sorrow's Harbor on the Moon. Screenshot by GameSkinny. Screenshot by GameSkinny. activate the statues in the proper order. "back" is the side closest to the Pyramid. Front right.
On top of a collapsed structure in the north of the area. In the small, yellow building next to the cliff east of where you picked up the orb. Within the central tower in the Moon base site where ...
Step 1: The Journey. This first step is all about finding the quest to get you started. The quest is hidden on the moon, inside Sorrow's Harbor. Once you land at the harbor, enter the tower and ...
Curse of Osiris. The Curse of Osiris is Destiny 2's first DLC that has players trying to aid the legendary Warlock Osiris and his Ghost, Sagira. It contains 8 story missions that take place on ...
Destroy the Blight to drop down into the hole. Proceed through the cave until you see some red lights in the distance. That's your cue to jump over the gap and into the narrow corridor. Leap ...
Now you just need to talk to Eris to kick things off. Jet over to the Moon and chat with her. She'll give you the " Whispers of the Past " quest. From there, all you need to do is open up ...
Look out ahead of you and you'll see the small Taken Blight ball among the trees (labeled #3 in the image above). Zoom in and shoot it. Once you destroy that Taken Blight, you'll see the next ...
Published on 12 Apr 2024. Follow Destiny 2. The Whisper is an Exotic mission that has returned to Destiny 2 as part of the New Light update. Guardians will need to brave the depths of Taken ...
updated Apr 17, 2024. As part of the Into the Light update for Destiny 2, Bungie has unleashed the BRAVE Arsenal - a collection of fan-favorite weapons with a new Origin Trait and new perk pools ...
Here's is the location of "The Journey - Descent" quest step "Path Uncovered". To get to it, you must complete the first encounter of the "Pit of Heresy" as ...
In Destiny 2 there is an Exotic Quest called The Journey. This Exotic Quest takes you around the Moon as you attempt to find the Exotic weapon. To help you complete this quest, use our The Journey Guide. Note: Guide is still updating. Reaching Enduring Abyss. To start you want to make your way to the area you meet Eris Morn overlooking the Pyramid.
Jump down to enter the chasm. In this first area, hug the wall to the right, then jump across. Slide through the small gap in front, then drop down the ledge and onto another ledge below. Make ...
The Whisper mission can be found within the "Into the Light" section on your Director. You have 40 minutes to complete the mission. Your maximum effective Power Level is 1,815 (-15 delta). You ...
Destiny 2 The Whisper walkthrough. The Whisper is a 1810 Power Level mission. Ideally, you and your fireteam want to be at least 1800 Power Level to be able to take on the intense boss battles at ...
updated Apr 10, 2024. Destiny 2: Into the Light has arrived, serving as a two-month content update bringing new activities, Crucible maps, and plenty more before the launch of the game's next ...
This video shows Path uncovered The Journey Destiny 2 quest objective. How to do Path uncovered The Journey Destiny 2 quest. You can complete Destiny 2 Path ...
Secrets and mysteries. Using our Dragon's Dogma 2 guide, you'll find help for many different aspects of the massive action RPG, helping you complete your Arisen's journey. Dragon's Dogma 2's ...