- Jayco Manuals
- Conventional Travel Trailer
- Owner's manual

Jayco Conventional Travel Trailer Owner's Manual
- page of 95 Go / 95
Table of Contents
- Troubleshooting
Chapter 1 - Introduction to RV Ownership
- Reporting Safety Defects
- Safety in Using LP Gas
- Electrical System Safety
- Safety When Emergency Stopping
- Additional Safety Considerations
- Extended Use
- Cold Weather Use
- Condensation
Chapter 2 - Obtaining Service
- Warranty Registration
- Basic Service Procedures
- Owner's Responsibility
Chapter 3 - Using Your Travel Trailer
- Tow Vehicle
- Hitches - Conventional Travel Trailer
- The Safety Chain - Conventional Travel Trailers
- Hitches - Fifth-Wheel Travel Trailer
- Weights and Cargo Capacity
- Loading Cargo
- Vinyl Tire Covers (Optional)
- Fire Extinguisher
- Brakes - Electrical
- Breakaway Switch
- Operations (Electric Slideout)
- Operations (Manual Slideout - Resort Travel Trailers)
- Operation (Manual Slideout - Qwest Travel Trailer)
- Maintenance
- Troubleshooting Electric Slideout
- Overriding the Electric Main Room/Bedroom Slideout System
- Setting up Your Travel Trailer
- Fifth-Wheel Travel Trailers Only
- Procedures to Take During an Alarm
- Maintenance/Testing
- Raising Antenna to Operating Position
- To Test System
- Lowering Antenna to Travel Position
Chapter 4 - the Systems
- City Water Connection
- Gravity Fill Tank
- 12 Volt DC Demand Pump
- Sanitizing and Filling the Potable Water System
- Bath and Shower
- Outside Shower (Optional)
- Winterizing Travel Trailer
- Residential Stools (Resort Model Only)
- Using Toilet and Tank System
- Holding Tanks
- LP Container
- Servicing and Filling LP Containers
- Main Supply Hose - Low Pressure
- If You Smell Gas
- LP Gas Consumption
- Automatic Changeover Regulator (Option)
- LP Detector
- Low Power Operation
- Changes, Modifications and Additions
- 30-Amp Service
- 50-Amp Service (Optional)
- Consumption of 120-Volt AC Power
- Auxiliary Battery (Option)
- Battery Isolator (for Tow Vehicle)
- Exterior Lights
- Porch Light
- Television Cable
- Fluorescent Lighting (Option)
- Fuse and Bulb Chart
- DC Fuse Panel Layout
Chapter 5 - Appliances
- For Your Safety Read before Operating
- Operating Instructions
- To Turn off Gas to Appliance
- Range and Oven Operation
- Oven Operation
- Pilot Operation
- Electric Ignition Operation
- Pilot Re-Ignite Operation
- Electric Operation
- Flushing Instructions
- Battery Drain
- Door Handles
- Interior Light
- Backup Operating System
- Operating the Refrigerator Controls - N621
- Operating the Refrigerator Controls - N841
- Refrigerator - Residential Units
- Monitor Panel (Eagle)
Chapter 6 - Care of Body Components
- Exterior Aluminum
- Fiberglass Sidewalls
- Exterior Roof
- Stone Guard
- ABS Plastics
- Doors, Extrusions, Windows & Vents
- Window Shades
- Pleated Blinds (Designer Only)
- Tire Covers - Vinyl (Optional)
- Vinyl Floor
- Bathroom Tubs, Lavatory Sinks
- Countertops
- Hardware and Sink or Shower Fixtures
Chapter 7 - Maintenance/Storage
- Carbon Monoxide Detector
- Furnace Maintenance
- Mechanical Maintenance Chart
- Maintenance Checklist
Chapter 8 - Options
- Air Conditioner
- Microwave Oven / Convection Oven
- Rubber Roof
- RV Digital Satellite System
- Spare Tire Carrier
- Ceiling Fan
- Security Lights
- Towable Transferable Limited Warranty
- Limited Warranty Transfer Application
Advertisement
Quick Links
Related manuals for jayco conventional travel trailer.

Summary of Contents for Jayco Conventional Travel Trailer
- Page 1 Where Tradition and Innovation Meet ® Conventional Travel Trailer & Fifth-Wheel Travel Trailer Owner’s Manual...
- Page 2 Just call us with your VIN # and we will find what you need and ship it directly from Jayco to your front door. Like Jayco, we are family owned and operated. Our courteous professionals are here to help make your shopping experience as pleasant as humanly possible.
- Page 3 Nothing in this manual creates any warranty, either expressed or implied. The only warranty offered by Jayco, Inc. is as set forth in the limited warranty applicable to this vehicle. The owner’s failure to provide required service and/or maintenance could result in the loss of warranty.
- Page 4 YOUR NEW JAYCO IS YOUR PASSPORT TO A WHOLE WORLD OF NEW FRIENDS, CAMPING FUN AND TRAVEL ADVENTURE WHEN YOU JOIN THE THOUSANDS OF JAYCO FAMILIES WHO MAKE UP THE . . . JAYCO JAFARI INTERNATIONAL TRAVEL CLUB You will find us enjoying the friendship and fellowship of JAFARI CAMPING as we join our local area FLIGHTS at hundreds of weekend camp-outs all over North America each month .
- Page 5 TO: Membership Coordinator for the Jayco Jafari International Travel Club Please enroll us as members in the Jayco Travel Club. We are ready to roll to where the “friends we just haven’t met yet” have the coffee on the fire and are waiting for us to arrive: We are ...
Page 6: Table Of Contents
- Page 7 Slideout Room Option Operations (Electric Slideout) Operations (Manual Slideout – Resort Travel Trailers) Operation (Manual Slideout – Qwest Travel Trailer) Maintenance Troubleshooting Electric Slideout Overriding the Electric Main Room/Bedroom Slideout System Setting Up Your Travel Trailer Carbon Monoxide Detector (Option) Fifth-Wheel Travel Trailers Only Procedures to Take During an Alarm Maintenance/Testing...
- Page 8 LP Detector Electrical System General Changes, Modifications and Additions 120-Volt AC System Power Cord GFCI 30-amp Service 50-amp Service (Optional) Consumption of 120-volt AC Power 12-volt DC System Converter Auxiliary Battery (Option) Battery Isolator (For Tow Vehicle) Exterior Lights Porch Light Television Cable Fluorescent Lighting (Option) Fuse and Bulb Chart...
- Page 9 Chapter 6 – Care of Body Components Exterior Aluminum Fiberglass Sidewalls Exterior Roof Stone Guard ABS Plastics Frame Doors, Extrusions, Windows & Vents Furniture Bedspreads Drapes Window Shades Pleated Blinds (Designer only) Tire Covers - Vinyl (Optional) Paneling Vinyl Floor Wood Floor Bathroom Tubs, Lavatory Sinks Carpeting...
Page 10: Chapter 1 - Introduction To Rv Ownership
Page 11: safety considerations, page 12: electrical system safety, page 13: insurance, page 14: chapter 2 - obtaining service, page 16: service procedures, page 17: factory, page 18: chapter 3 - using your travel trailer.
- Page 19 2-5/16" The Hitching Procedure – Conventional Travel Trailer Hooking up a conventional travel trailer is not difficult and will become easier with practice. The following procedure will help you until you become more experienced. 1. Turn crank on jack to raise tongue of travel trailer above hitch ball on hitch.
Page 20: The Safety Chain - Conventional Travel Trailers
Page 21: hitches - fifth-wheel travel trailer, page 22: traveling, page 23: loading cargo, page 24: vinyl tire covers (optional), page 25: wheel lugs, page 26: breakaway switch, page 27: operations (electric slideout), page 28: operations (manual slideout - resort travel trailers), page 29: operation (manual slideout - qwest travel trailer), page 30: overriding the electric main room/bedroom slideout system.
- Page 31 This will ensure that the slideout is locked into a sealed position. Re-connect the motor wire. (Fig. 3-5 and Fig. 3-6) Install the travel bars and take the unit to a Jayco dealer for service.
- Page 32 Fig. 3-5 Fig. 3-6...
Page 33: Setting Up Your Travel Trailer
Page 34: carbon monoxide detector (option), page 35: tv antenna, page 36: chapter 4 - the systems, page 37: 12 volt dc demand pump, page 38: faucets, page 39: winterizing travel trailer.
- Page 40 Method 2 This method utilizes a water heater bypass kit, available in most units, to avoid filling the entire water heater with antifreeze. 1. Turn off the pump. 2. Close valves A, B and D. Open valves E and C. (Fig. 4-8) 3.
Page 41: Sanitation System (Marine Toilets Only)
Page 42: residential stools (resort model only).
- Page 43 the tank (see directions for draining below) and close the valve when the tank is empty. Repeat this process as needed, but NEVER leave the termination valve open when hooked up to the park’s sewer system. To empty tank: 1. Place travel trailer as level as possible to make drainage easier. 2.
Page 44: Lp Fuel System
- Page 45 to 80%, the maximum level for safety, a liquid will appear replacing the vapor. Stop filling immediately and close both valves; HAND TIGHTEN ONLY. WARNING: A propane container should never be filled beyond 80% of its capacity. If your tank becomes overfilled and is not allowed to “bleed off” before installation to the RV system, it may gain pressure from exposure to direct sunlight and will begin “blowing off”...
Page 46: Main Supply Hose - Low Pressure
Page 47: regulator, page 48: checking for leaks, page 49: automatic changeover regulator (option), page 50: low power operation, page 51: electrical system, page 52: gfci, page 53: 50-amp service (optional), page 54: consumption of 120-volt ac power, page 55: battery isolator (for tow vehicle), page 56: fluorescent lighting (option), page 57: brakes, page 58: chapter 5 - appliances, page 59: for your safety read before operating, page 60: to turn off gas to appliance, page 61: range and oven operation, page 62: oven operation, page 63: pilot operation, page 64: electric ignition operation, page 65: electric operation, page 66: refrigerator - rv type, page 67: battery drain, page 68: door alarm, page 69: operating the refrigerator controls - n621, page 70: operating the refrigerator controls - n841, page 71: ice maker, page 72: refrigerator - residential units.
- Page 73 The switch in the lower left corner is for D.S.I. water heater operation if the D.S.I. option is built into your travel trailer. Fuses for the monitor panel operation are in 12-volt distribution center fuse block. Hood Mount (Designer Model Option) 1.
Page 74: Chapter 6 - Care Of Body Components
Page 75: abs plastics, page 76: bedspreads, page 77: vinyl floor, page 78: chapter 7 - maintenance/storage, page 79: tv antenna, page 80: furnace maintenance, page 81: mechanical maintenance chart.
- Page 82 COMPONENT MAINTENANCE AVOID DO NOT ignore checking Lug bolts must be checked at 10, Lug Bolts wheel lug bolts. 25 and 50 miles when your travel trailer is new or a tire is removed and every 3,000 miles there- after. In addition, the lug bolts should be checked periodically for safety, especially before long trips, extensive braking, or tire...
- Page 83 COMPONENT MAINTENANCE AVOID Tongue Jack Lubricate the jack by extending to full down position and insert SAE 30 oil through oil hole in top of jack. Do this several times per season. Excessive quantity of grease. Fifth Wheel Inspect pad tube and inner ram Landing Gear periodically.
- Page 84 COMPONENT MAINTENANCE AVOID Beginning of each camping trip: DO NOT smoke while chang- LP Gas System 1. Inspect all gas lines for ing bottles or any lines. crimps and road damage. 2. Check all lines and connec- DO NOT allow connections to tions for leakage with soapy be loose.
Page 85: Maintenance Checklist
- Page 86 Monthly Clean and lubricate the coupler. Check fire extinguisher pressure. Do not test the extinguisher. Test the ground fault circuit interrupter (GFCI) Every Three Months or 3,000 Miles Vacuum around L.P. Burner and pilot light areas. Compare water heater pilot flame with ideal flame. Refer to the water heater owner’s manual for ideal flame.
- Page 87 Every Year or 12,000 Miles Repack wheel bearings. Lubricate moving parts on the awning hardware. (Awning option only.) Oil drive shaft bearings. Manually operate the pressure-temperature control lever or dial to the lowest possible position on the water heater. Clean city water entry strainer. Check demand tank vent for obstructions.
Page 88: Chapter 8 - Options
Page 89: microwave oven / convection oven, page 90: ceiling fan, page 91: towable transferable limited warranty, page 93: limited warranty transfer application.
- Page 94 Jayco, Inc. to transfer its Limited Warranty, you represent the following: That you have received and read a copy of the Jayco Limited Warranty and Owner’s Manual. You understand that the unit is to be used only for recreational camping and travel.
- Page 95 WELCOME TO THE JAYCO FAMILY! As the owner of a new Jayco recreation vehicle we are proud to welcome you to our growing family. All Jayco RV homes are built with care, under the watchful eye of our Quality Assurance program. And it is our sincere wish that you will have a lifetime of fun times with your new Jayco.
This manual is also suitable for:
Rename the bookmark, delete bookmark, delete from my manuals, upload manual.

- Travel Gear and Gadgets
- Jayco Camper Tips & Mods
- Hints & Tips
- Must See Destinations
- The Family Travel Podcast
Select Page
Jayco Camper Trailer Checklists [Set-Up and Pack-Up]
Nov 5, 2022 | Jayco Camper Tips & Mods | 0
![Jayco Camper Trailer Checklists [Set-Up and Pack-Up]](https://abigpeacheyadventure.com.au/wp-content/uploads/2022/11/Jayco-Camper-Trailer-Checklists-Set-Up-and-Pack-Up.png "jayco travel trailer checklist")
Disclosure: When you click on links to various merchants on this site and make a purchase, this can result in this site earning a commission. Affiliate programs and affiliations include, but are not limited to, the eBay Partner Network
In this article I’ll share with you our Jayco camper trailer set-up checklist
(and our pack-up checklist too)
Even though I put these together when we‘d just bought our Jayco Swan a few years ago, I still refer back to this if we haven’t had our camper out for a while:
Setting up and packing down a Jayco camper trailer is mostly a sequential process…
…and doing things out of order can make things a lot harder (or make you need to backtrack which takes even more time) So we briefly re-read this just before setting-up to remind us the best order for OUR set-up
[yours might be slightly different based on whether you’re using your bed end flys, are setting up a bag awning, etc]
Here it is:
Our Jayco Swan Camper Trailer Set-Up Checklist
This is our standard set-up procedure for when we’re camping on an unpowered site:
- Insert levelling ramp on low side
- Drive onto ramp until level E-W
- Apply handbrake and chock wheels
- Attach jockey wheel, unhitch, move car
- Wind jockey wheel until level N-S
- Lower stabiliser legs
- Unzip, attach, and half-raise bed flys
- Undo clips and wind up roof*
- Insert roof support poles and close velcro
- Raise bed end flys
- Pull out beds and insert support poles
- Pull steps out
- Assemble door
- Raise wardrobe
- Insert hockey sticks
- Attach velcro
- Plug in roof power cable
- Switch fridge from DC to gas
* When winding up the roof we stop twice to double-check that the lifter arms are raising evenly
Now, depending on where we’re camping and what the weather is like, some optional things that aren’t standard practice for our set-up include:
- Roll out the awning
- Attach power cable
- Attach water hoses
- Set-up table and/or chairs
The main benefit (and reason) we switched from a bag awning to a Fiamma roll out awning is because you don’t need to commit to having it out during the set up process… you can decide later
(plus you can pack it away easily the night before leaving to make for a quick getaway in the morning)
To be honest, this is our number one timesaving tip for both set-up and pack-up
Read : 9 Tips To Save Time Setting Up Your Jayco Camper Trailer
The other big time-saver?
Swapping to collapsible chairs (instead of folding ones) and to a roll-up table
[we bought ours from BCF but you can find the same ones cheaper here on eBay ]
(this means we don’t have to get them out unless when we actually need them)
Read : 11 Best Jayco Camper Trailer Accessories (Our Must Have Purchases For Our Swan)
Our Jayco Swan Camper Trailer Pack-Up Checklist
Packing up to go home from camping is bad enough at the best of times… but it’s worse if:
- Things come loose during travel
- You have to wind up if forgot something
- Lights burn a hole in the canvas
- Food in the fridge gets warm, or just…
- It drags out for over an hour!
This is the process we’ve found most helpful for us:
- Wash, dry and put away dishes
- Unplug power and water
- Get everything out that’s staying out
- Internal confirmatory checks:
- Diesel heater isolation switch off
- Cupboard doors latched
- TV antenna down
- Windows zipped up
- Remove bed hockey sticks
- Fold down wardrobe
- Attach door to ceiling*
- Switch fridge to DC
- Unplug roof power cable
- Fold canvas and push in beds
- Lower bed flys halfway
- Remove bed support poles
- Wind down roof
- Fold up bed flys
- Fold away steps
- Turn off gas
- Wind up stabiliser legs
- Clip roof latches
HINT : When it comes to attaching the door to the ceiling something we didn’t know was that it needs to be folded flat
It’s the answer to a surprisingly frequent question that pops up when people have difficulty closing their roof…
…which is why it’s number 2 in this list of tips and tricks for Jayco camper trailer owners
Read : 23 Tips For New Jayco Camper Trailer Owners
And why is clipping the roof latches the very last thing?
By leaving it a few minutes, it allows the air to escape from the canvas which makes the roof easier to close
(which makes the difference in being able to leave our mattress topper on the bed when we close down)
Read : Ever Rest Memory Foam Mattress Topper Review [For Jayco Camper Trailer]
Summary: Our Jayco camper trailer set-up and pack-up checklists
We refer to our Jayco camper trailer set-up checklist (and pack-up checklist) especially if we haven’t had our camper out for a while:
Yours might be different based on how you camp and whether you’re using your bed end flys, are setting up a bag awning, etc
Read : 35 Most Popular Jayco Camper Trailer Modifications
Related Posts

5 Options for Installing Wardrobe Shelves In Jayco Camper Trailers
June 22, 2020
![Buying a Jayco Camper Trailer: 23 Things To Look For [Checklist]](https://abigpeacheyadventure.com.au/wp-content/uploads/2021/07/23-Things-To-Look-For-When-Buying-a-Jayco-Camper-Trailer-440x264.png "jayco travel trailer checklist")
Buying a Jayco Camper Trailer: 23 Things To Look For [Checklist]
July 24, 2021

Jayco Camper Trailer Step Covers: DIY vs Store-Bought?
October 12, 2020

9 Tips To Save Time Setting Up Your Jayco Camper Trailer
November 5, 2022
Leave a reply Cancel reply
Your email address will not be published. Required fields are marked *
Recent Posts
![Jayco Camper Trailer Bed Weight Limits [And How To Increase Support]](https://abigpeacheyadventure.com.au/wp-content/uploads/2020/04/Jayco-camper-trailer-bed-clothesline-modification-hang-between-the-support-poles-1-150x150.jpg "jayco travel trailer checklist")

Complete travel trailer maintenance checklist

- BEGINNERS GUIDE
G. Yoganand
Maintenance is key as far as RV’s are concerned no matter what RV you have. Whether you own a pop up camper, fifth wheel, class c RV or class A RV, its necessary to do good maintenance.
Travel trailers don’t have their own engine but are towed by a car or truck. Even then they do need good maintenance specially with the towing components.
Travel Trailer Maintenance
A travel trailer body need to be cleaned and taken care of regularly else it may start to leak, specially the roof.
Apart from exterior cleaning and washing make sure interior appliances and equipment’s are also well maintained.
Following a proper schedule for maintaining the RV of any kind is necessary, its shouldn’t only be a annual practice.
Lets go through a major points that need to be on your travel trailer maintenance checklist.
1. Inspect and maintain Awning
RV awning is an important part of your RV or travel trailer. There are few things that you need to do to keep it in good shape. Make use of locks to prevent it from rolling down while traveling. Awning should be washed with gentle brush using a spray of water.
Don’t pack it wet : Make sure the awning is completely dried before you roll it up. Lubricating moving parts of awning is also critical but don’t overdo it as this will allow dust and dirt to catch on it. Do not store the awning if its wet, this can result in growing mold on it.
Cleaning and stabilizing : Using stabilizing kit for the awning can also help a lot to keep it stable. Make sure you use bleach to clean any molds and mildews. During normal cleaning you can either make use of water plus detergent mixture or also opt for special products available online. Fabric used in awning can be vinyl or acrylic, vinyl fabric need to be cleaned gently else you can end up doing damage to it.
2. Maintain Hitches and other towing components
Travel trailer doesn’t have its own engine and the connection that connects it to car or truck is far more critical when you talk about travel trailer maintenance.
Hitches need to be inspected every time you head for Rving . Also when you return back from a long Rving tour make sure the towing component are intact. Since the towing connection is exposed to outside world it attracts lot of dirt and dust, thus make sure it is cleaned and inspected after every Rvig journey.
3. Check roof for leaks
Travel trailer roof can be made up of rubber, fiberglass or aluminium. Each of these have their own properties which make them either stronger or more susceptible for leaking.
First and foremost thing to do is to identify the kind of roof your trailer has. A lot of people RV in their travel trailer but when you ask them what kind roof they have, they wouldn’t have any idea on that.
Inspect regularly : Roof leakage is a very common problem and it can happen due to negligence. Inspecting the roof regularly and sealing the holes or gaps on time can prevent further damage.
The roofs of the RV goes through tough conditions like UV rays, snow, high speed winds and obviously there is chance of damage. Since travel trailer or RV’s in general are higher in height they also have to face tree banging or brushing them. Thus, over a period of time roofs loose their strength and start leaking.Make use of sealant to repair such leaks.
Use right sealant : Getting the right compatible sealant is also important. If you have any doubts talk to the dealer about it. You need to seal the seams so that the issue doesn’t become a permanent one. Repairing the roof right on time can save you a lot. Rubber roofs are better when you compare their average life. However you still need to take good care.
Wash the RV roof to makes sure the dirt and dust is cleaned. You can make use of full RV roof maintenance kit, that will include washing material, and sealing and caulking care maintenance items.
Attention to Minor damages : Smalls cracks developing on roof can become major issue if not attended. To prevent such minor damages inspecting RV properly is also important. If you don’t have proper storage then make use of RV cover. A lot of people use RV covers and they can be really handy to protect the RV roof.
4. Draining Fresh water tank
RV has total three different tanks. One for fresh water and other 2 for holding output from bathroom and toilet.
Fresh water tanks need to be sanitized properly and you cant keep water inside it for too long. Draining the water once after every trip can be really good and you also need to clean the tanks once in while. However if you use the Rv very often then draining may not be needed as you will refiling it again.
But if you are one for those who would take the RV only once in a month or once in two to three months then drain it and refill as needed. Algae can grow in unattended not used water.
Draining of the fresh water tank can be done using the valve that will probably be provided at lower left. Use the valve to drain all water after every trip depending on how big your trip was. It may take hours to drain the water depending on how much is left.
Fill at home : Also, its always better to fill the tank full at home only rather than at some other point. By doing this you know the quality of the water. Draining is one part and the other thing is to clean the tank at least after few months. Before you put the RV for storage make sure the tank is fully emptied and sanitized properly. Make use of chlorine when sanitizing.
5. Make sure trailer brake and lights are working fine
The trailer need to have its own license plate and the brake, lights need to function for signaling. Make sure the wiring used for this is in proper condition and is properly insulated.
Use electric insulation tape to cover any opened wiring so that there are no incidents. RVs in general are very lengthy and you need to be careful while making turns by giving signals.
6. Keeping the Vents open
Vents are a great option to have as they can help maintain good air inside the travel trailer. Roof vents should be kept open or closed is a question that everybody asks. Actually it depends on the weather that is there.
By keeping vents open you are basically allowing fresh air to circulate inside the RV and there by preventing moisture build up inside the RV. A closed and fully insulated RV can result in moisture build-up and thereby causing molds and mildews.
Vents open may not good always : Even when storing the RV making way for air through vents can be great. However there is one point to note, as we said it depends on the weather you are in.
A already moist environment may allow outside moisture to get inside, in which case keeping vents closed is an ideal option. Also if its raining during the winter then keeping vents closed makes sense.
7. Tire maintenance
Travel trailer tires need to be inflated properly. Having right tire pressure on travel trailer tires will make sure the travel is safe.
A tire that is not inflated properly may bust and cause accident. Keeping high pressure in tires results in tires busting, similarly maintaining low pressure can cause the travel trailer to overturn.
Check before you start : Checking tire pressure every time before starting the travel will ensure there wont be any mishap. A lot of people have this confusion as to what should be the correct tire pressure, ideally you should get it written inside the travel trailer or you can also check on tire side walls.
If you have happened to change the tires then check the previous readings and compare it with what was recommended by trailer manufacturer. Having a pressure gauge to check your tire pressure is a great gadget to have. Remember when you are on long journey you need to check it often.
Check pressure during morning time : With high temperatures, the pressure increases and getting to know the exact pressure constantly can be helpful. Also, its better to check pressure during morning time as that’s the time when the temperature isn’t high.
Another thing with tires to check is lug nuts. Loose nuts can be dangerous and can result in tires losing while driving. Make sure that the nuts haven’t got loosened in your previous journey.
Check tire sidewalls for any cracks and splits. A travel trailer tire can be used for 3-5 years or even more but an aging tire will show in its thread. It also depends on how much the tire has run and in what conditions it runs.
Keep check on weight : If you are heavy user and mostly travel through mountainous regions then you need to be more preventive. Do inspect the tire visual every time you are about to hit the road.
You not only have to check pressure of tires but also make sure your travel trailer isn’t overweight. Putting extra weight on trailer you are putting pressure on tires. Its also important to make sure you are not putting uneven weight. Need to keep proper weight distribution.
8. Check and maintain trailer battery
Most people do annual maintenance before putting the RV in storage. With RV battery though the maintenance need to be more regular, it will mostly include checking on battery charging.
A RV battery can last for around 5 years provided it is properly maintained. A lot of Rvers complain that their batteries die a lot faster. And the main reason why this happens is because of not charging them properly. Not keeping them charged fully can result in batteries loosing their capability and ultimately they die.
Check the battery charge : A battery should not be allowed to drop on charge less than 50%. And similarly it should not be overcharged. Most new modern battery connection come with systems that do not charge them after the certain point.
While in storage : Also storing the batteries separately during winter time can make sure they remain in good condition. Checking them while in storage and making sure the charge isn’t lost can help in keeping them fully charged. An idle kept battery even though not in use will loose around 5-8% charge every month. And thus do charge them while in storage once in while.
9. Check and do regular maintenance of air conditioner
Most travel trailers have air conditioners. Small pop up camper or tent trailer normally wont have AC in them. Air conditioner needs proper maintenance specially when you use it so much. Dirt and dust may accumulate in their filters and can result in issues like water leaking from roof.
Clean regularly : Cleaning the drain pane, drain pipes and filter regularly will keep them clean and enhance their overall life. Accessing the roof top ac can be a little challenge but you need to make sure its checked periodically for any such issues.
RV’s that don’t come with roof top ac’s can also go for portable AC’s that can be placed anywhere in the trailer. Roof top AC’s however are best and they cool the camper trailer uniformly.
Clogged pipes and filters : A lot of time we also see the drain pane or pipes are clogged due to dirt and that result in noise. An air conditioner that has most of its part outside the Rv has to go through high winds, dust and other dirt and therefore covering the AC is important.
Repairing : Once an Rv Ac gets old it can start to become less efficient, it wouldn’t cool much or wouldn’t start at all. With AC’s you may not have many options to repair apart from replacing capacitor of the compressor.
Amps : Most of the times when the AC’s are run on lower amps, they start to heat up and cause internal component damage. Therefor make sure you know the electrical amperage required by AC properly.
10. Cleaning and washing the travel trailer
This is an obvious one and you need to do this after every bigger trip. A travel trailer specially on aluminium types can attract a lot of dirt special when you camp near a beach. Fiberglass too need good cleaning and applying wax after cleaning can really put on some shine and protect against weather.
Don’t be harsh : Although the dirt could be tough but still you need to go with a soft brush and mild detergent that wont be too harsh on the trailer body. Using high pressure for washing is also not recommended as it can damage the trailer walls and roof. Its waterproofing may get lost with high pressure wash.
Top to bottom : Also, its only logical to start from top to down. Start washing the roof first and then proceed downwards. Using good hose sprays can help a lot. A big travel trailer cleaning will need good efforts and starting with good hose down will make it easy.
11. Drain and clean both the holding tanks on time
Holding tank sizes of travel trailer may not great and thus you need to keep an eye on its level. Ideally, clear the holding tanks after every trip but if you go through those long tours then you should be doing it while in travel.
Cleaning tank sensors : Many times the holding tank sensors don’t work and for that you need to make sure you get the sensors cleaned using cleaners.
Both grey and black tanks should be cleaned once in while using good strong cleaners that are recommended. To keep the whole water system sanity make sure you take of all the cleaning activity seriously.
12. Clean the interior before storage
The kitchen in any RV need to be cleaned thoroughly before putting the camper for storage. This is not only while the travel trailer is to be put in storage during winter time but any time it will not be used for long time. Any food particles residing inside can attract rodents, insects and can result in smell or odor.
Kitchen cleaning : Cleaning the sink, refrigerator and dining area thoroughly will only keep the travel trailer well maintained. If you are not going to take the travel trailer out for many days then there is no point in keeping the food inside the refrigerator. Make sure you take out all things that are perishable as that can result in algae growth.
You should probably prepare a spreadsheet of all these maintenance item checklist or get a maintenance schedule template for your convenience. Most of the items we have included here will also apply even if you own a fifth wheel, class c rv or class A rv. 5th wheels are almost similar to travel trailer and vary a little bit in terms of the hitch used.

You Might Also Like

Why do rvs have roof vents and how do they work ?

What type of RV is the easiest to drive?

How To Stop Condensation In RV (12 Tips)

Unwinterizing a RV or travel trailer -a complete guide

Camper Outdoor
All about RVs & Campers
Buying a Used Travel Trailer Checklist
Are you looking to purchase a pre-owned travel trailer? Even if you are not a beginner when it comes to RVs and campers, you want to be 100% sure of the investment you are making. Whether it’s a new or used travel trailer, you must check every step of the process of selecting, inspecting, and purchasing the travel trailer to ensure complete satisfaction with the transaction you’re about to undertake. If you want to make sure you have a solid checklist for buying a used travel trailer and guide you through the process , you’re in the right place. In this article, we share our expert input for buying a used travel trailer checklist ( Free Printable PDF ) .
The Checklist for Buying a Used Travel Trailer should include items like budget, floor plan, towing capacity, and must-have features. For a used travel trailer , you’ll also want to factor in things like condition, age, and miles . No matter which route you go, be sure to do your research and inspect the travel trailer thoroughly before making your purchase. This way you can hit the open road with peace of mind, knowing you made the best decision for your needs.
There are so many factors to consider when purchasing a used travel trailer.
This self-inspection checklist before buying a used travel trailer has more than 150 inspection points, and it is based on the manufacturers’ RV PDI but modified to look for particular details since you will inspect a used RV. You can download the “buying a used travel trailer checklist” Free Printable PDF , print it out, and bring it to the self-inspection (8 pages) . It is perfect to guide you through the process and don’t miss any details when inspecting a used travel trailer before buying .

Also, I would recommend this checklist for a private seller trying to sell a used travel trailer (to the right trailer value) . It’s the last chance for the seller to improve the trailer before selling and get the most out of your trailer.
Now let’s take a closer look at each of these items in more detail.
Table of Contents
How to Buy a Used Travel Trailer Checklist
When buying a pre-owned travel trailer , your checklist should include:
- Budget: How much can you afford to spend on your new travel trailer? Keep in mind that there will be additional costs beyond the initial purchase price, such as insurance, maintenance, and repairs.
- Floorplan: What type of floorplan do you need to comfortably accommodate your family or group? Do you want a spacious living area or kitchen, or are you looking for more storage space?
- Towing capacity: What is the towing capacity of your vehicle? This is an important consideration, as you’ll need to make sure your vehicle can safely tow the travel trailer.
- Must-have features: What features are must-haves for your new travel trailer? Some examples might include awnings, slide-outs, or solar panels.
- When buying a used travel trailer , you’ll also want to factor in things like condition, age, and miles. For a used travel trailer , your checklist should also include:
- Condition: Is the travel trailer in good condition? Be sure to inspect it inside and out, looking for any signs of damage or wear and tear.
- Age: How old is the travel trailer? Older models may not have some of the same features and amenities as newer models.
- Miles: How many miles has the travel trailer been used? This can give you an idea of how much life it has left and how often it’s been used.
In this article, we prepared a Checklist for Buying a Used Travel Trailer covering in detail all the self-inspection step-by-step you need.
No matter which route you go, be sure to do your research and inspect the travel trailer thoroughly before making your purchase. This way you can hit the open road with peace of mind, knowing you made the best decision for your needs.
As you will see in the following paragraphs, the most important part of the process of purchasing a used travel trailer is the inspection checklist to prevent scams.
What to Look for When Buying a Used Travel Trailer
If you’re in the market for a used travel trailer, there’s a lot to consider. You’re about to embark on a whole new world of adventure. That’s why we create this “ buying a used travel trailer checklist” and as you can see it is just for used travel trailers.
However, before you make your purchase, it’s important to do your homework and make sure you’re getting the best possible deal. Let’s see What to Look for When Buying a Used Travel Trailer .
We spoke with industry experts to find out the greatest red flags and signs to look out for, plus summarize our years of experience as RVers and engineers designing and manufacturing RVs and RV parts, as well as everything else you should keep in mind when buying an RV to create the perfect checklist for a used travel trailer. This checklist is different from the inspection points you should have for a motorhome, a fifth wheel, or a new RV. Use this “Buying A Used Travel Trailer Checklist” to help guide you through the process of buying a used travel trailer.
Here’s a checklist of things to keep in mind as you shop to help ensure you find the perfect travel trailer for your needs.
Determine Your Budget Before Buying a Travel Trailer
The first step in buying a travel trailer is to determine your budget. It’s important to have a firm idea of how much you’re willing to spend on a travel trailer before you start shopping. This will help narrow your search and prevent you from overspending.
How much can you afford to spend on a travel trailer? Determine your budget and stick to it.
Once you have a number in mind, you should not start shopping around until cover the rest of this checklist.
Research Different Types of Travel Trailers
There are many different types of RVs on the market, and travel trailers are very popular, so the variety of models on offer is huge. Whether you are looking for a new or used travel trailer, researching which travel trailer is the most attractive for your budget will take a lot of time.
Beginner buyers sometimes purchase campers practically on impulse, relying only on the look or floor design. Take the time to study the components, such as a water pump, plumbing, cabinet kinds, and so on. You will have to live with these intricacies, and you will not want to work with low-cost components.
Don’t be overwhelmed by the abundance of accessories and components, and consider carefully and critically if you require the extra capabilities supplied. Take some time to consider what type of life you want to live in your travel trailer .
Do your research to find the used travel trailer that best suits your needs. Figure out what size of travel trailer you need, regarding a length easy to maneuver, the weight according to the towing capacity, and the sleeping capacity you will need . Travel trailers come in a variety of sizes, from small “teardrop” trailers to large fifth wheels. Consider how many people you’ll be traveling with and what kinds of amenities you’ll want to have in your trailer.
Choose the right floor plan suitable for your purpose. Are you looking to live in a travel trailer or vacation and go on weekend trips? How many people will be sleeping and what kind of beds do you need?
Just like with houses, there are a variety of floorplans available in travel trailers. Again, think about how you’ll be using the space and choose a layout that will work well for you.
Pick the right extras you will need for your purpose when choosing a travel trailer. From slide-outs to solar panels, there are a lot of optional features available on travel trailers. Decide which ones are must-haves for you and which you can live without. For example: Interested in using the travel trailer during the winter ? Boondocking or Moochdocking ?
Read reviews and compare different models to find the travel trailer that’s right for you.
- Size, sleeping capacity, and types of beds : What kind of floorplan for your travel trailer do you need?
- Think about how many people will be using it and what type of activities you’ll be doing.
- Towing capacity: Can your vehicle tow a travel trailer? Make sure to check your vehicle’s towing capacity before making a purchase.
- Features : What features are you looking for in a travel trailer? Make a list of must-haves.
Let’s review a few more things before diving into the buying a used travel trailer checklist. Let’s see the towing capacity you need to tow the used travel trailer and the right used value to prevent scams.
Towing Capacity to Tow the Used Travel Trailer You Want to Buy
Regarding the towing capacity to tow the used travel trailer, you want to buy be sure to check your number about your towing capability before starting to look for (highly recommended to not waste your time) or at least before buying a used travel trailer!
Always check the maximum towing capacity of your tow vehicle. Remember that you’ll be adding people, a lot of stuff, and water if you don’t reach 80% of your maximum! Check your vehicle identification number and the owner’s handbook. Do not purchase a used travel trailer if it puts you within 80% of your maximum!!!
If you’re not towing with a truck, be sure your car or SUV has an integrated brake controller . You must have a brake controller to tow a travel trailer. If you don’t have one, calculate you’ll have to spend an extra $400 to towing safely.
As you can see before any buying inspection, there are a lot of things to consider when looking for a used travel trailer.
There is so much to choose from in the market that it will probably take you weeks to choose the model and floor plan that best suits your expectations. There is a complete article about this that we recommend you read to help you in your choice and it is called What to Look at When Buying A Travel Trailer. You can access the article by clicking on the link. Believe me when I say this is the most important part of your final satisfaction. Following these tips, you’ll be sure to find the perfect travel trailer for your needs.
Determine the Value of the Used Travel Trailer You Are Looking For
Before moving on to the checklist for buying a used travel trailer , you should consider one more thing. Besides your budget, be sure the value of the used travel trailer you want to buy is aligned with the current market.
Whether you are going to a dealer or buying from a private owner, you want to have a fair market price for the used travel trailer , which in other words is the Private Party RV Value .
The best way is to appraise the used travel trailer by using the NADA RV Guide . If you have the value in advance, when you go to the inspection, you can easily discuss the appropriate value with the seller and adjust it according to the condition of the used trailer you just it during the inspection. That’s the great advantage of basing your trailer value expectation on the NADA Guide for RV instead of websites that don’t apply rational fundamentals. If you want to learn more about why the NADA RV guide offers you the best way to quote and take care of your investment follow the links in this paragraph and it will take you to our articles where we explain how to get free quotes, how to use the guide and how to determine the NADA RV value by VIN . Remember there is no Kelley Blue Book for RVs .
Regarding the best time of the year for the transaction, for a buyer , I would strongly recommend doing your research in advance but waiting until the prices fall down by the end of the year . If you want to understand why this is the best time of the year, here is the link to my article What to Know Before Buying an RV
Get a Thorough Inspection
Inspect the trailer thoroughly before you finalize your purchase. It’s important to inspect the trailer thoroughly. You can do your self-inspection or get a pre-purchase inspection before you finalize your purchase from a qualified technician.
Take your time. Don’t rush into a purchase. This is a big decision and you want to make sure you’re choosing the right travel trailer for you and your family.
Check for any damage or wear and tear. If you have any questions, don’t hesitate to ask the dealer. Before you finalize any purchase, be sure to have a professional inspect the trailer for any potential problems. This is especially important if you’re buying a used travel trailer.
This is the most important part of the purchasing process. The core of this buying process and to prevent scams is to understand the level of details you should check and look for during the inspection before buying a travel trailer and this is the checklist that will help you to be successful in your purchase. Now it is time to start with buying a used travel trailer checklist.

Travel Trailer Self-Inspection Before Buying A Pre-Owned Travel Trailer
It is important to do a thorough inspection of any travel trailer before making a purchase, especially if you are considering a pre-owned model.
Bring the Checklist for Buying a Used Travel Trailer, Pencil, Flashlight, Gloves, and Ladder. Dress comfortably
When you go to inspect the travel trailer be sure to take a notepad or write down on this printed checklist, a pencil to take your notes, a flashlight, gloves, and although it may seem like overkill, include a ladder.
I know that bringing a ladder to the inspection to buy a used travel trailer may sound a little over the top. But believe me, 15 or 20 years ago I wish someone had given me that advice on how to properly inspect a trailer roof. If you don’t feel like carrying the ladder, you may be able to check from above with a drone. I prefer the ladder, but it’s true that when I was in my 20s or 30’s I wouldn’t have shown up with a ladder to the inspection.
Dress comfortably because you will be looking for the information above and below the trailer. And lastly, if you wear glasses, please don’t forget them! You will inspect the details of this used travel trailer, save money and ensure our investment. Keep that in mind while you read this text.
Extra Tip! Over the years I have also learned to ask my wife to go with me. Because if the seller wants to talk to me and distract me from my self-inspection job, she’s the one who takes care of it, and I can inspect without distractions. So, try to bring someone else on the inspection day to follow the seller’s conversation, and you will see how useful it is for you not to be distracted and save you from the seller who is insistent and nagging you all the time.
Print out this “ Buying a Used Travel Trailer Checklist Free Printable PDF ” and bring it to the self-inspection day, to help ensure that you are buying a quality travel trailer that will serve you well for many trips to come.
In the following sections, we will go through how to evaluate a travel trailer before buying it, using the checklist, step-by-step.
How to Inspect A Travel Trailer Before Buying It?
If you’re in the market for a travel trailer, it’s important to know how to inspect one before making a purchase. Here’s a checklist to help you out.
Before buying a used travel trailer, from a dealer or private owner, follow these important inspection tips.
You should include the entire exterior and interior. First, observe and then touch, and finally test if it works.
I advise you not to do this check with the trailer owner or dealer constantly talking to you. You will want to do this alone, objectively, and not be distracted so as not to skip any points of interest . The most important points of this buying a used travel trailer checklist is the following bullet point:
- Look for any signs of damage, both inside and outside the trailer.
- Check all of the windows and doors to make sure they’re in good condition and fully functional.
- Inspect the plumbing and electrical systems to ensure everything is in working order.
- Make sure the tires are in good condition and have plenty of treads.
- Finally, test all the features of the trailer to make sure they’re working properly.
Some of the signs of deterioration we look for are not to haggle over price or because they are costly to repair. Rather, we look for them because they may be an indicator of other damage or give us an idea of how well the travel trailer has been cared for by its owners. Let’s see the buying a used travel trailer checklist (deep dive level!)
Inspection Looking for Water Damage
In the exterior of the travel trailer as well as in the interior we are going to look for any signs of water damage. During the inspection we are going to focus in:
- Roof inspection (exterior and interior)
- Floor inspection (exterior and interior)
- Walls inspection (exterior and interior)
- Doors, Windows, and Roof Vents from the inside of the trailer
Let’s see What to Look for When Buying a Used Travel Trailer .
Exterior Condition Inspection
Travel Trailer Exterior Condition Inspection. Take a good look at the outside of the travel trailer.
When inspecting the exterior the most important inspection covers the walls, floor, and roof. We are going to start with the less important exterior condition inspection to have the details related to walls, floor, and roof fresh in our minds when we go inside.
Exterior lights and reflectors
- Also, check to make sure that all of the lights and reflectors are in good exterior condition (cracks? or broken?).
You may want to inspect the condition of:
- Exterior Security cameras,
- Entertainment center,
- Outdoor kitchen,
- Exterior shower,
- Pass-thru storage or exterior storage compartments.
- Check for corrosion and rust by opening all of the external panels. Give the walls a nudge as well.
Stabilizers
- Inspect the stabilizers. Are they electric or manual? Are they in good condition and fully functional?
Only For 4 Season Used Travel Trailers
On 3 Season and 4 Season Travel Trailers, you should inspect the drain pipes, insulation on storage compartments, and heated and/or insulated underbelly of the travel trailer that must protect the water lines from bursting and provide a suitable winterization .
- Are the drain pipes completely encased?
- Is there insulation in the basement storage?
- Is the storage in the basement heated?
- Are the tanks heated with electricity or propane?
Roof: Look for any cracks, dents, bow spots, or other damage.
The roof inspection is one of the most critical parts on our checklist for buying a used travel trailer.
- Use the ladder for the roof check so you can observe it from every aspect.
- What I’m going to check for first is bending in the trailer’s skin, so if you’re in a place like this with a lot of snow or rain, if that snow stays up on the trailer and isn’t properly removed, you’ll have bowing between the framing and that skin will go down.
- Is this trailer covered with a tarp?
- If there isn’t a tarp on the trailer, does it look like the tarp has been there for some time?
- Is a trailer covered with pine needles and sap? or Does it appear to be reasonably clean?
- Is the roof in need of repair?
- I’d go around the roof, inspecting each section. Has there been any roof sealant applied?
- Are there any additional indications of roof repair?
- I’d then go to the trailer roof vents.
- Is there a lot of work going on near the vents?
- Are there any flaws or cracks?
- All of the objects you are inspecting on the trailer roof, even just the external examination with the ladder, will provide you with information about what to search for within the trailer.
- Keep anything up there that remotely rings a bell, any type of red flag in your thoughts mind because when we enter into the travel trailer, here’s where you’ll take a closer look.
Solar Panels over the Used Travel Trailer Roof
- Are solar panels installed? Are they in good condition and fully functional?
- Are the solar panels adjustable so that you may turn them toward the sun while boondocking for a few days?
Exterior Walls: Look for any cracks, dents, bow spots, or other damage.
- A similar process as it was described for the roof, should be replicated for the travel trailer walls during the inspection. Especially next to joints, and openings such as windows, doors, roofs, lights, reflectors, etc.
Floor Inspection from the Exterior
- I strongly advise you to look underneath the travel trailer , that’s why I suggest bringing comfortable cloth to the trailer inspection.
Now, you go inside and check every single thing that remotely may seem a red flag in the exterior inspections of this used travel trailer. You will search for evidence in the interior that correlates with the possible damage you find in the exterior.
Let’s move to the next phase of this buying a used travel trailer checklist: the interior inspection.
Interior Condition Inspection
Let’s start with the part of the checklist for buying a used travel trailer that covers the Interior Inspection. Take a look inside the travel trailer, smell it, jump and touch it!
Smell Inside
- Cigarette: What does the inside smell like?
- Storage smell/Mold smell: What does the inside smell like? Might it just be a musty odor that goes away shortly? Allow it to air out for 20 minutes while you look about, then smell it again.
Used Travel Trailer Walls and Ceiling
- Check for any signs of water damage, molds, or mildew. Also, check inside cabinets and drawers looking for signs of water damage.
- Examine the corners of the ceilings and floors, look up and down the walls, and especially inspect the corners and caulk around the fixtures in the bathroom. Also, uncover cupboards and closets and use a flashlight to check for mold growth.
- Inspect ceiling joints and wall joints.
- You will check around to see whether it has recently been painted. I’d look at least twice.
- Is the fresh paint covering up water damage?
- If the water damage in the walls has been covered up, it may be more difficult to discover.
- Water damage would be visible. You may look for water damage in mattresses, inside cabinets, damaged furniture, etc.
- Water damage appears brown or produces waves on surfaces like wood paneling on trailer walls.
- If you find molds in walls or ceilings, pay extra attention in the next step when checking the used travel trailer floor.
Used Travel Trailer Floor
- If the trailer has a spanking new floor, don’t get too thrilled. Think something like “What are they covering?”
- Even if the floor is brand new, I will thoroughly check it before purchasing the travel trailer.
- I mentioned how a travel trailer floor might conceal possible water damage; I would argue the same thing regarding paint. If the trailer was recently painted, there is a chance of water damage inside.
- How do you evaluate the travel trailer floor before purchasing one? I’m just going to push about on the floor, stepping in every single spot. Look for a bouncy floor. Search for humps and elevated spots.
- Examine the flooring’s joints. Was that flooring used to cover up water damage?
- If the water caused damage to the inside of the trailer, you should be able to detect it using the techniques in this article.
- Were the cabinets harmed by water? Check between the cabinets and the floor.
- Were the walls harmed by water? Return to the “Trailer Walls Inspection” bullet points if needed.
- Another suggestion for examining the trailer floor is to remove and elevate carpets and rugs. Use your gloves.
- What’s hidden beneath the trailer rugs? I would recommend taking some gloves with you to work comfortably throughout the trailer inspection checklist. Removing the rugs and carpets may not always be the most pleasant chore. Simply be prepared to get messy and shift things about to view what you need to see.
- You could overlook minor water damage on the floor. If you find molds of walls or ceiling, jump up and down in a few places, notably around the kitchen and bathroom, where water is used the most. All of the floors should feel strong and robust; any give might suggest deterioration.
- After evaluating the whole travel trailer inside, go back outside and check to see if there is any damage to the flooring. Check below the trailer.
The bathroom will be included when inspecting the plumbing system.
Openings (Windows, Doors, Roof Vents, etc.)
- Check all of the windows and doors. Are they in good condition and fully functional?
- Open and close each window to ensure that it is straight and that the latches are snug when closed. Make sure it’s not too sticky.
- Is there a day/night shade or simply curtains on the windows?
- Examine the windows and roof vents for water damage.
- Go up to the roof vents and inspect each window. Look for discolorations, mushy areas, and any other indications that water has been there.
- Check to see whether they’ve made any repairs.
- Look for cracks in there since water damage may not have arrived yet, but it will.
- Examine the gaskets on the windows and doors.
- Look for signs of deterioration, such as fractures and weak structures.
Lights, Reflectors, Electrical Outlets
- Make sure that all of the lights and reflectors are in good working condition.
Are awnings in good condition and fully functional?
- When the awning is fully opened, examine the fabric.
- Is it fading?
- Starting to drift apart?
Are slide-outs in good condition and fully functional?
- Open the slides and observe the course they take along the floor. Look for scratches on the floor, twisted floor vents, or other signs that the slide isn’t working properly.
- Inquire with the prior owner if the slide has ever become stuck.
- Examine the seals surrounding the slide.
- Check that they are not damaged.
- Close the slide and have someone shine a flashlight around its perimeter. Check that you can’t see the light from outside.
- Check all the cabinets, drawers, storage compartments, etc.
- Remove the cushions and inspect both sides. Are there any stains being concealed?
Let’s move to the next phase of this buying a used travel trailer checklist: electrical system, including appliances, plumbing, and gas system.
Electrical Inspection
- Let’s talk about electricity. Now take out the solar portable generator and connect it to the shore power; you’ll be able to power anything in the trailer.
- If possible, hook the travel trailer up to a power source and test everything out.
- Are the lights turned on?
- Is the refrigerator turned on?
- Is the shower pump operational?
- Consider everything that requires power and put it to the test right now.
- Examine the electrical appliances and the control panel.
Appliances Inspection
In this part of the checklist for buying a used travel trailer, the main idea is to test all the appliances, try them, inspect working conditions and write down notes to discuss with the owner. This will give you a good approach to whether you need to invest in new appliances (or not).
- Some points were included in the electrical inspection.
- When inspecting the kitchen, have the sink countertop coverings gone missing? Not all the models include a sink counter-top
- Turn on all of the appliances to make sure that they are in good working condition.
- This includes all the kitchen appliances such as the stove, oven, refrigerator, and microwave oven, and the cooling system such as the air conditioner, a heating system, etc.
Air conditioner or Cooling System inspection
- For 3 minutes, turn on the air conditioning. The air flowing out of your used travel trailer should be ice-cold throughout your examination.
- Is there just one air conditioner? If the used travel trailer you are inspecting is larger than 30 feet, you should be aware that one air conditioning unit will most likely not enough on 100-degree days unless you have plenty of shade surrounding you.
- Are the air conditioners noisy?
- Examine the ceiling vent fans.
Kitchen Appliances
- Place a cup of water in the travel trailer’s microwave and heat it. A microwave can turn on and appear to function while not producing heat.
- Will the fridge be large enough to meet the demands of your family? Is it in good working condition? Is the fridge just powered by electricity or by a combination of electricity and propane?
Plumbing Inspection
- Check all of the faucets and toilets to make sure during the plumbing inspection they are in good working condition.
- Also, test all of the drains to make sure that they are clear.
- Include the bathroom and shower tray in the inspection.
Check the toilet to ensure that the closing hatch completely seals.
- Pour a tiny amount of water into the toilet and ensure that it pools rather than drains.
- Return in 5 minutes to ensure the water is still present.
Although you have selected the floor plan and that is why you are inspecting the used travel trailer for buying, now you have the chance to understand if besides the floor plan you like the interior, spaces, and for example the space in the shower.
- Is the shower big enough for you? Taller people may need skylights.
- Is the toilet made of porcelain or plastic?
- Is the bowl long enough to accommodate men?
- Is there a nice head on the shower? This is one of the first improvements the RV owners make.
- Is there space for a bench in the shower so that women may conveniently shave their legs?
- Is there a nice size lip on the bottom of the shower so that water doesn’t run out?
- Is there any mold or mildew in the shower?
- If it is a wet bath, Am I comfortable with that? Is there a hand basin included or do I just realize there is not?
Water Supply System
- Fill up the fresh water tank before testing the gray and black tanks. Hookups must be included in your used travel trailer inspection checklist. This allows you to fill the gray tank by simply taking a shower.
- It’s a good opportunity to check to see whether the shower head is leaking.
- As you take a shower, check the status indicators to determine if it appropriately gauges the quantity of water in the gray tank.
- Check the water heater to ensure it is heating the water appropriately.
Gas Inspection
- Check that the heating on/off system works properly. At least five times, turn it on and off. Examine the plug distribution.
Gas Box and Gas Connection
- Examine the floor’s condition. The floor must be firm. The gas box must be spotless.
- If the floor is unstable and the gas box is dirty, this might suggest a problem. All gas lines should be in good condition.
- Now we’ll go to the gas. Check the propane connection, stove, oven, and heater/furnace.
- Is everything up and running?
- Is everything functional?
- If the gas system works, you will have saved a lot of time when you arrive home.
Refrigerator/Cooker
- In gas mode, the flame must ignite.
Connectivity Inspection
- Is the travel trailer equipped with a radio, antenna, Wi-Fi, cell phone booster, and satellite internet for RV antenna?
Finally, the last part of this buying a used travel trailer checklist: the test drive.
Used Travel Trailer Test Drive Inspection Before Buying
The test drive is essential for me. I strongly disagree with a seller who says I can’t test it out for a few kilometers and with the seller. A test drive, if possible, is one of the greatest methods to acquire a general sense of the trailer.
Request a test drive with the seller onboard to answer any queries, and allow the seller to perform some of the driving as well.
Tires Inspection
Tires Inspection. Inspect the condition of the tires.
- Check for any excessive wear or damage.
- Also, be sure to check the air pressure in all of the tires.
- Determine the age and depth of the track. If the tread wear is asymmetrical in different areas of the tire, this indicates a misalignment inside the wheels or poor inflation.
- The standard rule of thumb is to replace your camper tires when they reach the age of 5 years. Tires must be no more than six years old, regardless of the aesthetic examination.
- Look for the DOT label on the sidewall of the tire to determine its age. The four-digit code that follows will reveal the week and year that the tire was manufactured. The number 2022 indicates that the tires were made in the 20th week (May) of the year 2022.
Additional Inspection
- Check the Trailer Hitch
- Taillights within the Trailer
- Tongue Weight
Final Thoughts about Buying a Used Travel Trailer Checklist and The Purchase
Final thoughts after you complete the self-inspection and the “buying a used travel trailer checklist”.
Just because you encounter certain damage, doesn’t mean you shouldn’t buy the travel trailer . It is only an indicator that you should invest a certain amount of money if you want to leave the travel trailer in good condition . It will also allow you to haggle over the price based on the find.
On the other hand, if the investment is considerable, you may want to give up and look for another travel trailer in better condition .
After completing the used travel trailer inspection checklist before buying you should have a good idea of additional investments needed.
Some repairs can cost several thousand. Especially those that have their origin in the water systems, plumbing, leaks, etc. Not only will you have to repair leaks and water leaks, pipes, and connections, but you will also have to repair all the water damage such as the floors, insulation, carpeting, mattresses, etc.
Finally, take some time to talk to the previous owner . They’ll be able to tell you everything you need to know about the travel trailer. Pay close attention to how they’ve maintained it over the years. With this checklist in hand, you’ll be able to find the perfect travel trailer for your needs.
Once you have thoroughly inspected the travel trailer, you can then make an informed decision about whether or not it is the right one for you. By taking the time to do a self-inspection, you can be sure that you are getting a quality travel trailer that will serve you well for many trips to come.
RV insurance, like vehicle insurance, is generally required in your state. Before hitting the road with your new purchase, think about the insurance. The responsibility for a towable RV, such as a travel trailer, extends from the tow vehicle. It’s critical to get enough coverage to safeguard your assets in the event of a major accident or litigation. You risk going into debt or losing the things you’ve worked hard for, such as your house, car, RV, personal belongings, and life savings, if you don’t have enough liability coverage.
Self-Inspection Checklist Before Buying a Used Travel Trailer Free Printable PDF
You should download the Self-Inspection Checklist Before Buying a Used Travel Trailer Free Printable PDF . Print and bring it to the inspection day.
By following these simple tips, you can be sure you’re getting the best possible deal on your used travel trailer. As you can see, there are a lot of points to pay attention to. Take your time and use this buying a used travel trailer checklist (including a pdf free ). It should be very useful to you.

About John Smith
For more than 30 years I worked in the exciting world of RV manufacturing. I liked knowing that I could improve the campers with customer feedback and see the improvements and upgrades on floor plans, delivering the best designs and the best quality RVs, year after year. After traveling with my family in RVs and small rented campers across the USA, Europe, Australia, New Zealand, and even North Africa, I feel that I must share personal experiences, guidance, concerns, tips, and news. At Camper Outdoor, we share our biggest passion, weekend getaways in a camper, RV vacations, extended stays in RV parks, the quiet life of senior couples who choose to spend more time enjoying their RV, and boondocking experiences (which as in the beginning was unsuccessful, we have good tips to avoid the same thing happening to you!). Enjoy this website created just for you!
Leave a Comment Cancel reply
Save my name, email, and website in this browser for the next time I comment.
Three Checklists To Help You Find Your Perfect RV

CHRISTINA AND BEN MCMILLAN
Christina and Ben live a minimal and purposeful life that prioritizes adventures. Christina enjoys scenic drives, sunsets and art. Ben is more of a “watch the big game, campfire, bourbon, people person” type of guy. More than anything, they enjoy being together in their Jayco Jay Feather travel trailer and not being tied to one particular location.
- Follow Thor Industries on Facebook
- Share this story on Pinterest
Five years ago, we purchased our very first RV: a Jayco Jay Feather travel trailer. And guess what? We still have that exact same RV today. We put a lot of thought into finding our perfect RV, and while everyone’s needs and requirements are different, putting in the time and effort upfront will definitely pay off in the long run. We found checklists to be extremely helpful during our initial RV research phase, so we’ve put together a few of the most helpful lists, all of which are designed to help you narrow down your search and ultimately find your perfect RV.
Pro Tip: Set a budget before you even start shopping for an RV. Then check out a few different dealers and reputable sources to get an idea for what your budget can get you. You can also join RV groups and forums online to hear from other RVers about their buying experiences.
Checklist #1: Motorized vs. Towable
To tow or not to tow? That is the question. Our very first checklist was to determine if we wanted a motorized RV (Class A, B and C) or a towable RV (travel trailer, toy hauler and fifth wheel). Here are a few questions to check yourself:

Checklist #2: RV Usage
How you plan to use your RV is another big thing to consider. Will you be traveling long-term or taking weekend trips? Do you prefer campsites with full hook-ups or something more remote? Knowing the answers to these questions will help you determine the various features and amenities you might need. We’ve provided a few recommendations based on the different RV uses:

Checklist #3: RV Layouts and Features
Once you’ve figured out the type of RV and how you plan to use it, then you can move on to some of the layouts, features and amenities offered. Try to take inventory of everything that you might put in your RV, as this will help you determine the amount of space you’ll need. Here we’ve included some considerations for various layouts and rooms inside your RV:

If you’re just starting to look for a new RV, the most important thing to remember is that you find an RV that suits your exact needs and comfort level. You know yourself, your family and your travel style better than anyone. Feel free to use these checklists as a guide to help you craft your own lists—tailor them and tweak them to fit your individual preferences. Armed with the right information, we promise you’ll be successful in finding your perfect RV.
Travel Trailers
Travel trailers are the most popular type of non-motorized RV. No doubt you’ve seen one pulled down the highway hitched to a car or pickup. Travel trailers come in all sizes including tiny jellybean-shaped models with a chuckwagon kitchen in the rear to the massive house-on-wheels with picture windows and a sliding glass patio door.
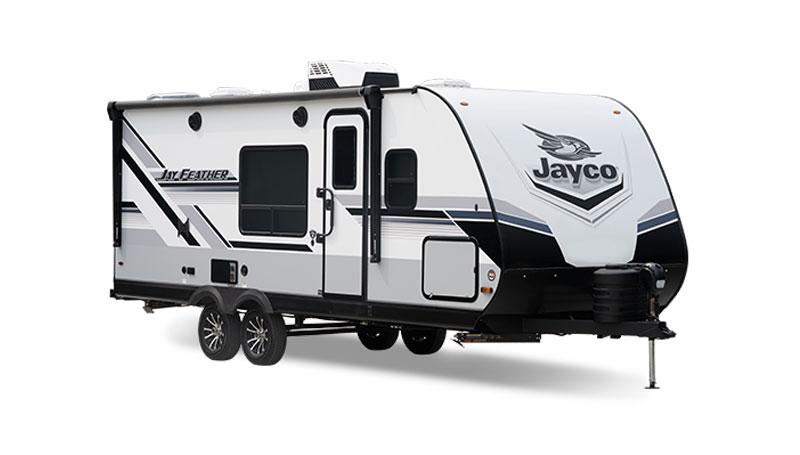
Jayco Jay Feather
Related stories.

A Guide to Cooling and Heating Your RV
Gabe and Rocio share their advice for how to keep control of your RV’s interior climate.

Ready to buy an RV?
So, you’re thinking about buying a new RV? Full-time RVer Renee Tilby shares her tips for feeling prepared and ready to speak with an RV dealer.

The Ultimate RVer Gift Guide
Trying to find the perfect gift for an RVer in your life? Well, we've got you covered. We asked real RVers to share what their favorite gifts are. From garden hoses to corn hole boards to backup cameras, here are some of the best gifts for RV owners.
Find Your Perfect RV
Whether you're new to the world of RVing or you're ready to narrow your search, we're here to help you sort through it all and find the RV that's right for you. Explore RVs based off of your lifestyle and the features important to you.

- Skip to primary navigation
- Skip to main content
- Skip to primary sidebar
- Skip to footer
Journey With Confidence
A Complete RV Winterizing Checklist

Get Your RV Ready for Winter
Many travelers will use their RVs to travel to warmer areas during the winter, while others will prepare them for a few months in storage. If you find yourself in a situation where you need to winterize your RV, you’ve come to the right place! There are many different things you’ll need to do to help your camper endure the colder seasons, so let’s review our RV winterizing checklist.
The Essential RV Winterizing Checklist
Many of these steps will be quick fixes that can be completed within a few minutes or hours. However, make sure you give yourself enough time to properly prepare your RV for the off-season. Skipping or overlooking steps can lead to devastating consequences and long-term damage. Winter can be a difficult time for an RV, especially if it isn’t properly prepared for winter conditions.
1. Drain water supply
The most important step of winterizing an RV is draining the water supply. During the winter, RVs will be subjected to a wide range of temperatures. If they aren’t being regularly heated and used, the stagnant water that’s left behind can freeze and expand, which will lead to burst pipes, flooding, and other types of structural damage.
There are many to-do items on an RV winterizing checklist, but none of them will do you much good if you don’t address the water situation first. Luckily, it doesn’t take too long to empty the water reserves in most RV. You just need to make sure you’re being thorough.
Begin by draining your holding tanks
This includes everything in the freshwater tank, grey water tank, and black water tank. The freshwater tank can simply be emptied, but the other two will need to be flushed and cleaned.
Winter and early spring is a prime time for bacteria, mold, and other nasty things to build up, so give your RV a fresh start for the season. Use the tank flushing system if you have one. If not, you can use a cleaning wand and/or an RV holding tank cleaning product . Take the contaminated water to your nearest dump station so it can be safely processed.
Empty standing water in appliances
Just because your tanks are now empty doesn’t mean that your RV is completely drained. A small amount of water will linger in appliances like sinks, showers, toilets, ice makers, refrigerators, dishwashers, and washing machines.
Go around your RV and turn on all faucets (cold and hot). Flush toilets multiple times until they run dry. Empty out the water supply for your other appliances.
Use an air compressor to dry water lines
Even after everything has been drained there will still be a bit of moisture left in the pipes. This is why it’s a good idea to hook up an air compressor to your RV water lines.
This step isn’t a complete necessity on an RV winterizing checklist, but it never hurts to stay on the safe side when you’re dealing with water. Use 30-50 psi of compressed air to clear out any remaining moisture in your plumbing system. Once that is complete, replace the caps on the holding tanks and water lines.
2. Use RV antifreeze
Next up, you’ll want to apply RV antifreeze to your plumbing system. This will prevent any warping over the winter when the RV is exposed to fluctuating temperatures.
Bypass water heater
The first thing you’ll want to do when adding antifreeze is bypass the water heater. If you don’t do this, the water heater will have to be completely filled with antifreeze before it will spread to the rest of the plumbing. You will end up wasting a ton of antifreeze (and money) if you don’t first bypass this system.
To do this, you’ll need a kit . Turn off the water heater, disconnect the cold and hot lines, and install the bypass kit according to the directions on the product. Reconnect the water lines and open the bypass, and you’re good to go!
Place RV water line in antifreeze container
Now it’s time to fill the RV plumbing system with antifreeze . Disconnect the RV water line (if you haven’t already done so), and place the end in a container of RV antifreeze (this will usually be a pink or green substance). Usually, you will need 2-3 gallons of antifreeze to winterize an RV, but you’ll need up to 10 gallons more if you aren’t able to bypass the water heater first.
Turn on freshwater pump
Activate the freshwater pump and allow antifreeze to travel through the plumbing system. Turn on the faucets throughout your camper until they start to run pink or green with antifreeze. Flush the toilet several times until the same thing happens. Pour 2-3 additional cups of antifreeze into each drain and toilet. Finally, you can turn off the pump and reconnect the RV water line to the freshwater tank.
Drain water heater
After everything on the RV winterizing checklist is done up to this point, you can return to the water heater. Remove the plug and drain its contents. This is usually done last so that nothing goes wrong with the draining and bypass installation.
3. Clean interior
Now that the vehicle is safe from water damage, it’s time to turn your attention to other aspects of winterizing. Clean out the RV and remove any extra cargo. This will help reduce weight and it will help you declutter. Make sure you don’t leave any food or temperature-sensitive items inside.

4. Protect against humidity
Major water damage can be avoided by following the steps above, but humidity can still be a pain in the neck. To prevent mold, mildew, or just unpleasant dampness, there are a few things you can do to reduce humidity levels.
Start off by wiping down and drying potentially moist areas of your RV. This includes the bathroom, kitchen, and windows. Add a few desiccants or drying agents in cupboards, windowsills, or secluded corners. Consider using an RV dehumidifier to help keep moisture out.
5. Remove battery
RV batteries are important pieces of equipment, and they need to be protected during the winter. To prevent any possible temperature damage, remove the battery and store it in a temperature-regulated area as long as the RV is sitting unused.
Basements, garages, closets, and crawlspaces are good options where your battery will be out of sight and out of mind. Wrap it in a few blankets to provide an extra layer of insulation.
6. Cover vents
Next item on the RV winterizing checklist: Protect the vehicle’s exterior! By this point, most of the interior issues have been addressed, so it’s time to turn our attention outward.
Begin by protecting all RV exterior vents. If these are left exposed, they provide entry points for snow, ice, humid air, and even infestations. Mice, bugs, and other pests might see your RV as a great place to spend the winter, so make sure they can’t get in. Place vent covers over every opening, and consider adding a layer of plastic wrapping for extra waterproofing.
7. Leave RV on blocks to distribute weight
RVs are sturdy vehicles, but they are still quite heavy. If the entire weight of the RV sits on the wheels for several months, this can cause structural issues and will shorten the lifespan of the tires. To prevent this, use RV blocks to distribute the weight as long as it is sitting unused.
8. Add RV skirting/covers
Now we’ve reached the final step on our RV winterizing checklist! Time to cover up the RV and let it rest until the next travel season rolls around. Install RV skirting around the base and tires to prevent snow and ice from getting underneath.
Add an RV cover that will provide protection against rain, snow, dirt, and wind. It’s easy to buy or make these protective coverings , and something is always better than nothing.
9. Consider storage options
If all of these steps feel like too much of a hassle, or you live in a particularly cold area, you may want to consider other storage options for the winter. For an extra cost, you can store your RV in a temperature-regulated facility.
You will still have to do some level of preparation, but it won’t be nearly as involved. These storage facilities can be quite expensive, but it may be worth the price to you if you want to let someone else take care of everything.
10. Track your RV maintenance
Make sure you keep track of all your RV maintenance and repairs with an online tool such as RV LIFE Maintenance . Not only can you keep all of your documents in one place, but you’ll also receive timely reminders when maintenance is due to help you avoid costly repairs and potentially serious accidents.
Related articles:
- How To Avoid Winter Camping Problems In Your RV
- Covered RV Storage vs Motorhome Covers: What’s Best?
- Is Your Rig Ready For Cold Winter Storage?
The Savvy Campers
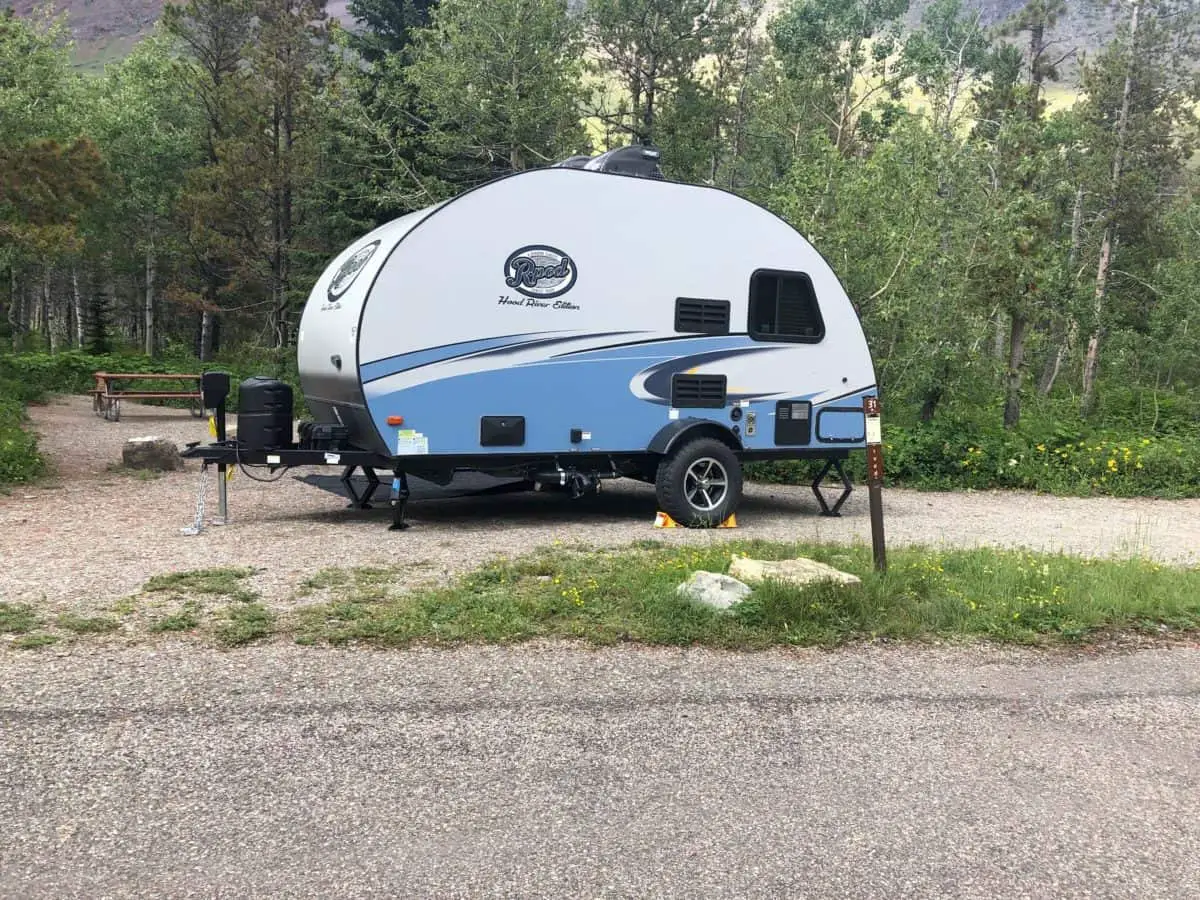
How to Winterize a Travel Trailer: The Complete Guide
If you happen to be the proud owner of an RV, then you must know how important it is to prepare it for winter. Winter can be unforgiving on your RV, especially since they are too large to be stored indoors reasonably.
Before you embark on winterizing your RV, your first order of business should be collecting everything you’ll need for the process. Items needed to winterize a travel trailer will include non-toxic RV antifreeze, a water heater bypass kit, silicone sealant, and other necessary items and tools. Below is a systematic, step by step guide on how to properly winterize your RV in time for the prolonged cold season.
Water System
One of the most important parts to winterizing your RV is making sure the water system does not freeze. The whole point of winterizing your RV’s water system is to ensure that no water residue is left to freeze. The process might be a long and cumbersome one, but it’s a necessary one that shouldn’t be ignored. Once you do it once and learn the tricks for your trailer, you will get the hang of it and next year will go by quickly. Follow the steps below if you’d like to start winterizing your RV’s water system but don’t know how to go about it.
- Remove any inline water filters as well as the bypass before completely draining the fresh water holding tank. Do the same for both the gray and black holding tanks.
- Assuming the hot water is off, drain your tank. If not, wait for the hot water in the water heater to cool off before draining.
- Open all hot and cold faucets before draining them using the water pump. Remember to close them all once all the water has been eradicated.
- Bypass your hot water tank by using the onboard bypass kit. If you do not have one installed, you can find one here. If you do not want to bypass your tank, it will require an additional 6 gallons of nontoxic antifreeze.
- Check to see if you have a water pump winterization kit installed from the factory. If not, you can purchase one here. This kit will pull water from a tube instead of your fresh water tank so you can pump antifreeze in. However, if you haven’t installed it in your RV, you can still achieve the bypass by disconnecting the inlet side of the RV’s water pump.
- Dip one end of the transparent pipe which is from your water pump in a gallon of non-toxic antifreeze.
- Start the pump. Doing so will result in pressure building gradually within the entire system.
- Open the faucet furtherest away from your water pump which will slowly fill the pipes with the non-toxic antifreeze.
- Close the faucet when you see the antifreeze come out. Complete this for both hot and cold water.
- Repeat the same process until all the faucets are filled with the non-toxic antifreeze.
- Do the same with the toilet, shower, as well as the outside shower (If your RV has one).
- Switch the water pump off as soon as the water system is filled with the non-toxic antifreeze.
- Release the pressure from the water system by opening the faucet.
- To winterize the city water system, make sure to complete the step above, if not, you will damage a part.
- Take the small screen off the city water connection, then using a screwdriver (or anything long and pointy), push against the valves until the antifreeze comes out of it. You may need someone to turn the pump on to flow the antifreeze.
- Replace the small screen, and your water system will be winterized.
- If you have a black tank flush, you can use an air compressor with this attachment to blow the water out of the valve.
If you aren’t familiar with the winterizing procedure, then asking your mechanic for help would be the right thing to do. The last thing you want is to mess up your RV’s water system because you skipped on a few essential steps. You can also check the RV’s manufacturers manual for instructions on how to properly winterize your RV’s water system. Once your water system has been properly winterized, it’s time to winter-proof other parts of your RV.
If you get antifreeze in your hot water tank, here is an article detailing what you need to do .
Grey and Black Tank
To winterize your grey and black tank, start by dumping them and make sure they are rinsed out. Pour some antifreeze down each drain to evacuate the water in the P traps making sure some goes down into the grey tank, as well as put a half gallon or so down the toilet and your tanks should be winterized.
Slides, Doors, Windows
Your travel trailer won’t be fully winterized without some additional maintenance. Failure to treat your slides, which include your slide seals, doors and window seals, then they might stay shut completely or leak. Use a good quality conditioner on the seals such as our favorite here to spray and wipe on all of your seals on your RV. You will want to use a lubricant on hinges, and any moving parts such as your awning or slide hardware such as the one we recommend here. Apply some grease on the locks to avoid rust shutting them permanently.
UV light can also discolor your interior so you might want to find something to cover all of your windows.
While lubricating your RV, don’t forget to check the rubber gaskets as well. Make sure they aren’t torn or worn out. In case they are, then it would be in your best interest to replace them before winter because, without suitable rubber gaskets, nothing will prevent running water from entering the RV doors and running the interior.
Clean any debris and grime from the windows so your RV will be clean come spring time. Finally, double check your work to make sure everything is well done. If you’re satisfied with what you’ve done, your next order of business will be winter-proofing the RV roof.
Taking care of the RV roof is an essential process to keeping your RV in top shape, therefore, you should go about it with as much attention. Since the RV roof covers a larger surface area than the roof of an average car, you’ll have to take your time to do a great job. You’ll start by washing the roof with a soft brush to remove any debris and dead leaves that may encourage water damage. Using a hose and some car wash or dish soap will do the trick.
Once the roof is clean and dry, you’ll inspect for any scratches and chipped areas, using a roof sealant to seal them off one by one. Check all of the old sealant on any roof penetrations such as vent fans, solar panels, or air conditioners and reseal if there are any gaps or thoughts of water penetration. If your RV has an EPDM rubber roof, then check out for bumps and other forms of irregularities.
If the damage isn’t too extensive, then you might want to reseal and leave it at that. However, if the damage is extensive, then you might want to replace the entire roof. For resealing your RV’s EPDM rubber roof, you’ll typically use a Dicor sealant. When applying the Dicor, it will self level to create a waterproof seal. Avoid using petroleum-based products to clean your EPDM rubber roof since it can cause irreparable damage.
If you choose to use the EPDM sealant, then you’ll start by mixing it in activator before you start coating. Remember to take your time while applying the coat to avoid missing any damaged spots. If your roof has a slit for example from a branch dragging across it, then you might want to use EternaBond seam tape for all your sealing needs. For safety reasons, always make sure you have the right tools and attire on before embarking on winterizing your RV roof.
To winterize travel trailer tires correctly, you need to condition the tires properly to protect them from damage because of the elements. You’ll start by filling the tires to the recommended air pressure. To prevent the tires from deflating completely, you’ll be required to always check them from time to time and filling them up. Failure to do so will only lead to extensive damage to the tires because of the weight of the RV. It would also be a good idea for you to purchase tire covers to keep off UV rays as well as snow.
The right tire covers will protect your RV tires from the extensive damaging UV rays have been known to cause. Once your tires are covered, look for pieces of treated wood and stick them under the tires between the tires and the ground. This way, your tires will be protected from damage as a result of prolonged contact between the tires and frozen ground. The treated wood should have a much larger surface area than the RV tire for it to rest comfortably on it.
Note that leaving your RV tires hanging on a narrow piece of treated wood might lead to eventual damage. The latter is so because your RV’s heavyweight has to be evenly distributed on the full tires or else the pressure will overwhelm the tires. After you’ve conditioned your RV tires for winter with a good conditioner, move on to the next step.
Stabilizing Jacks
You can’t call your RV a fully winterized camper without paying attention to the stabilizing jacks. You’ll start by doing some preliminary checks to ensure that the RV’s stabilizing jacks are in perfect condition. If not, find what the problem is and fix it. If the stabilizing jacks are broken or extensively damaged, you might want to have them replaced before storing your RV for winter. Use grease or a silicone spray to protect the jacks from water damage. If you live near a saltwater body, then spray the stabilizing jacks with silicone spray at least once a week. Doing so will offer maximum protection from rust, which is more prevalent in areas with a high amount of salt in humidity.
If your winterized travel trailer has a generator, then you’ll have to take care of it as well. You’ll begin by changing the generator oil and adding fuel stabilizer to keep the gas in a good condition. Finally, run the generator long enough until the stabilizer has run its course throughout the entire fuel system. In the spring you may want to change the spark plug and you will be good to go.
The batteries provide you power to all of your vital systems while you are off grid, so you will always want to care for them properly. If you live in a cold climate, remove the batteries from the RV and away from the extreme cold. It would help if you did this because batteries tend to freeze pretty quickly, especially during winter and should, therefore, be stored inside the house. Before storing your RV battery, check your fluid levels and add distilled water if they are low. After that, charge it until it’s full and keep them on a battery maintainer for the duration of the winter.
Store your battery on a block of wood to protect it from direct contact with the cold surface or concrete, which will lead to loss of power. Don’t forget to charge the batteries regularly since doing so is the only way to keep the freezing at bay. Lastly, keep the batteries out of the reach of children for reasons we all know.
If you live in a warm climate, you can take these precautions as well, but you could also leave your travel trailer plugged into shore power to keep them topped off.
Electrical System
If your RV is not going to be in use for the long term, then it’s only logical that you should keep the electrical system completely switched off. Unplug all of the cables from the walls of the RV for safety purposes. This would also be a good idea to do some maintenance which should include the replacement of all faulty electrical equipment and tucking away all the exposed electrical wires. Check your smoke and propane detector batteries to make sure they are working and you are done.
The propane tank facilitates all of your heating needs the RV and should, therefore, be prepared for winter as well. Since you won’t be living in the RV throughout the winter, the propane has to be stored properly to avoid wastage. Start by checking the condition of the propane tank. Look out for any dents, scrapes, weakened valve connections, and rust. Make sure you are replacing any tank with extensive damage. Turn your propane tank off and bring it into the garage.
Cleaning the interior of your winterized camper is just as important as cleaning the exterior. Therefore, taking as much time as you need comes highly recommended. Make sure that all the dust, spills and cobwebs (if any) are swept off from your RV. Remove the curtains wash them. Once they are dry, you can keep them in the house until the next time you’d like to take the RV out for a ride. Make sure the RV windows are wiped clean in the inside just like you did from the outside.
Remove all dry-cell batteries from any devices such as the clock or radio. The kitchen cabinet should also be cleaned and aired out. The latter is very important since not doing so will leave tiny drops of food which are likely to attract rodents or insects, or both. The kitchen sink, the bathroom, the toilet, as well as the bedroom, should be cleaned, dusted, and mopped as well. It always a better idea to get back to a clean RV just in time for spring than having to clean it all over again.
If you have any appliances such as a fridge, microwave, and stove in your RV, make sure you’ve cleaned them thoroughly. Use a prop to hold the doors open. Leaving the doors open will allow for air to circulate freely.
Getting rid of all the food is one significant step of you should never skip whenever you’re winterizing your RV for the incoming cold season. The freezing temperatures can cause some food will either rot or burst, attracting unwanted animals and insects. Some of these food may include water, soda cans, beer cans, soup, honey, and jam. To avoid wastage, you can collect everything and store them in your house instead of discarding them. If a soup can or soda freezes and bursts, trust me, you are in for some cleanup come spring time.
Once the food is out, clean the food cabinets as well as the fridge (as directed above) to finish off any scent that may end up attracting rodents and insects into your RV during winter. Get rid of the trash and clean the dustbin before either returning it into your winterized RV or your house for storage.
You’ll begin by washing your RV’s exterior, removing all the dust, grime, and debris that may have stuck on the chassis. Once the exterior has dried off completely, you’ll start checking for damage on the frame. If you find any patches or cracks on the paint, repair them according to your manufacturer instructions. Once all the cracks on the body have been sealed off, the next step will be waxing. The purpose of waxing is to protect the paint from discoloring or fading that’ll come as a result of regular use or prolonged storage.
The waxing process should be carried out just as you would wax a car. We use this wax as it comes highly recommended for this kind of job. Lastly, avoid waxing the awning cap pieces, the propane covers, the roof, and of course, the battery box as they will take on the white color of the wax and be hard to get off. You can use painters tape to cover any areas you don’t want to mess up.
You’ll start by removing all the beddings from your RV since leaving them in there throughout winter will only make the environment inside your RV stuffy. Once all of the blankets, bed sheets, and pillows have been washed and air out, fold them neatly and stash them in the house. Some people even take their RV mattress and store it inside.
To properly clean your awning, you’ll start by hosing it down. This will get rid of any dust or debris that may have stuck on the canopy by chance. Hosing your awning down is also the most effective way of getting rid of mold formations, especially if you’re in the habit of rolling your awning while wet. After your clean awning has completely dried, you can condition it to make it last longer. Finish things off by applying 303-protectant over the entire surface of your awning.
Moisture Control
Moisture sometimes has more than enough ways to seeping through the RV, especially during winter. Therefore, learning how to keep the moisture from damaging your RV will end up saving you much struggle. First, you’ll be better off finding ways of keeping your RV well ventilated throughout the storage period. That’s the whole idea behind the use of a breathable cover which allows air to circulate freely, whether in and out of your RV.
The ordinary moisture absorbing crystals are quite sufficient when it comes to keeping the humidity levels inside your RV at the bare minimum. If moisture absorbing crystals aren’t appealing to you, feel free to purchase the DampRid Moisture Absorber or even better, if you leave your RV plugged in, an Electric Dehumidifier.
Once your RV has been fully winterized, the final piece of the puzzle will be covering it appropriately. Find a cover large enough to wrap the entire RV; from the roof, the sides to the tires. Find the right cover for your RV, that’s if you haven’t already. The best RV covers might be steeply priced. However, if you were to calculate the damage you’d have to incur repairing your RV if you don’t cover it, then spending that extra money getting the right cover would be the cheaper option.
Winterizing your RV is without a doubt a long and tedious process, but an important one nonetheless. Therefore, always to take your time and try to enjoy it as much as you can. If its too much work for you, then don’t hesitate to call in a professional to help you out.
Be the first to be notified about FREE tips, hints, coupon codes, and email-exclusive information. All for FREE!
Related Posts:

Similar Posts

What is the Best Type of RV Roof on the Market?
One of the things that RV owners are most concerned about is their RV roof. Chances are that you have put a lot of thought into what is the best type of RV roof for you. This is because the roof plays a crucial role in contributing to the longevity, leakproof, and comfort that you…

Are Travel Trailer Warranties Transferable?
Owning a travel trailer is a great addition to any family as it can take you on endless adventures that will help you create plenty of memories. No matter what destination you are heading to next, making sure your rig is covered will help you be confident driving down the road without worrying about high…

When to Winterize a Travel Trailer
If you have ever owned or considered purchasing a travel trailer, you know how costly of an investment it is. Unless you live in a warm climate, you will need to appropriately winterize your travel trailer. If you choose not to winterize your travel trailer, you will likely incur extreme costs in repairs. When do…

Fiberglass vs Aluminum Travel Trailers, What is Better?
There are two main types of siding that you will have to choose from when shopping for a travel trailer, fiberglass or aluminum. Both have benefits and weaknesses, and each make up about half the market of recreational vehicles. What is the difference between Fiberglass and Aluminum sided Travel Trailers, and what is better? In…

Why Does My RV Water Pump Pulsate When Not in Use and How to Fix It?
When it comes to your RV, there are plenty of inconvenient and annoying things that can happen. From flat tires and power surges to not having proper sway control or weight distribution, RVing is a complicated endeavor. However, one of the more troubling and annoying issues is having a water pump that’s pulsating, even when…

How long does it take for RV pipes to freeze?
The problem of frozen pipes is one of the biggest issues with winter camping. The rate at which RV pipes will freeze varies on the temperature and speed of temperature change. How long does it take for RV pipes to freeze? In general, the temperature has to dip below freezing (32 F) for approximately 24…
Join our Newsletter to stay up to date on the latest RV topics and receive our FREE RV Inspection Cheat Sheet Today. Use this tool to inspect new or used campers you are looking at purchasing.
No thanks, I’m not interested!
IMAGES
VIDEO
COMMENTS
RV START-UP CHECKLIST. Inspect and work all interior and exterior latches and locks (lube if necessary). Make sure the batteries are fully charged and installed correctly. Inspect the power cord and carefully clean the contacts if necessary. Plug in the power cord to an appropriate power source. Turn on the interior lights and check outlets for ...
These 2 checklists are based off of a StarCraft AR One Maxx, but they can be modified for whatever version travel trailer you have. These are in PDF format due to the upload limitations on the site. ... _____ 2016 Jayco North Point 377RLBH with Jayco Luxury package, Washer, Dryer and Generator. 2020 Ford F350 King Ranch, 6.7 ...
o Hitch to truck (Follow separate checklist) o Remove and stow chocks and levelers AFTER trailer is hitched to truck. o Check pressure in trailer tires. o Lock trailer and storage compartments. o Walk around trailer twice to insure all items picked up and trailer is locked.
Below is a generic drawing with circuit breaker alignment. Your travel trailer may not be exactly the same as shown depending on model, floor plan, and options. 30-amp main, incoming power to coach. 20-amp circuit to air conditioning 15-amp microwave oven. 4&5 15-amp to general purpose circuits.
Jayco Owners is the #1 community for Jayco Trailer owners. ... 2022 Jayco Eagle Travel Trailers: Most Popular Files: Most Popular Files. IRV Instruction Manual 6500BT: 447: Atwood Water Heater Service Manual: 410: Dexter Complete Service Manual 600-8000 lbs. 364: Coleman (Airxcel) Thermostats: 293:
Our Jayco Swan Camper Trailer Set-Up Checklist. This is our standard set-up procedure for when we're camping on an unpowered site: Insert levelling ramp on low side. Drive onto ramp until level E-W. Apply handbrake and chock wheels. Attach jockey wheel, unhitch, move car. Wind jockey wheel until level N-S. Lower stabiliser legs.
12. Lower Jack back down, and raise leg off ground. 13. Decide how much elevation you will need for front to back leveling. 14. Place appropriate pads/blocks under jack. 15. Unhook safety chains/emergency brake line/power cord to truck. 16. unhook hitch lock lever when pressure is released enough on ball.
2021 Jayco Jay Flight. T z ... Travel Trailer Set Up 60 Fifth Wheel Set Up 60 Bumper Mount Awnings (if so equipped) 61 ... Section 14: Travel/Camping/Storage Checklists Travel Checklist 165 RV Storage 166 Section 15: Additional Information Featured Components Quick Reference Chart 169
I'm assuming they'll walk me through the use of the trailer (hitch/unhitch, stabilizer jacks, A/C, heater, water heater/pump, black, grey, fresh tanks, etc.. I'm anticipating a pickup of our new 154BH this week. Yes, PDI (pre-delivery inspection) should be performed by you at the dealership. A complete walk through and inspection of everything ...
2024 Eagle Travel Trailers. Starting at $59,993. 2024 Eagle HT Fifth Wheels. Starting at $51,006. 2024 Eagle Fifth Wheels. Starting at $72,153. 2024 North Point. Starting at $110,775. 2024 Pinnacle. ... The ever-evolving Jayco lineup is made up of the most popular types of RVs on the road.
It's a massive pain when you're on the road and you realise you've forgotten something essential. We asked some experienced Jayco owners for their RV travel checklists and summarised all into one 'check-all' list. Feel free to comment below your suggestions and we will generate the ultimate list for you to take away!
10. Cleaning and washing the travel trailer. This is an obvious one and you need to do this after every bigger trip. A travel trailer specially on aluminium types can attract a lot of dirt special when you camp near a beach. Fiberglass too need good cleaning and applying wax after cleaning can really put on some shine and protect against weather.
PDI Checklist. Here's the one I used for my travel trailer. It was a combination of a number of them on this and other forums. ... Pre Delivery Inspection.pdf (128.6 KB, 58 views) _____ 2019 Chevy express 2500 Van Coversion. 2017 Jayco 23MRB: 26' total and Glacier Package. 2 Renogy solar panels. Married 49 years. Haley the mutt, 4 years old. ...
The Jayco Family proudly stands behind our craftmanship and materials. Discover why Jayco has the best RV warranty coverage in the industry. ... 2024 Eagle Travel Trailers. Starting at $59,993. 2024 Eagle HT Fifth Wheels. Starting at $51,006. 2024 Eagle Fifth Wheels. ... procedures and a checklist of the maintenance needed to maintain the ...
2024 Eagle Travel Trailers. Starting at $59,993. 2024 Eagle HT Fifth Wheels. Starting at $51,006. 2024 Eagle Fifth Wheels. Starting at $72,153. 2024 North Point. Starting at $110,775. 2024 Pinnacle. Starting at $122,568. ... Calculate their value and see how Jayco measures up. At Jayco, we pack a ton of extra value and standard features into ...
Travel Trailer Self-Inspection Before Buying A Pre-Owned Travel Trailer. It is important to do a thorough inspection of any travel trailer before making a purchase, especially if you are considering a pre-owned model. Bring the Checklist for Buying a Used Travel Trailer, Pencil, Flashlight, Gloves, and Ladder. Dress comfortably.
Step 1: Survey Your Campsite. When you arrive at the campground, start by surveying your campsite before you begin setting up camp. These should be your first steps: Locate the electrical, water, and sewer hookups before you park your RV. This will help you decide exactly where to park based on the length of your water hose, electrical cord ...
Checklist #1: Motorized vs. Towable. To tow or not to tow? That is the question. Our very first checklist was to determine if we wanted a motorized RV (Class A, B and C) or a towable RV (travel trailer, toy hauler and fifth wheel). Here are a few questions to check yourself:
This step isn't a complete necessity on an RV winterizing checklist, but it never hurts to stay on the safe side when you're dealing with water. Use 30-50 psi of compressed air to clear out any remaining moisture in your plumbing system. Once that is complete, replace the caps on the holding tanks and water lines. 2.
Take the small screen off the city water connection, then using a screwdriver (or anything long and pointy), push against the valves until the antifreeze comes out of it. You may need someone to turn the pump on to flow the antifreeze. Replace the small screen, and your water system will be winterized.
2024 Eagle Travel Trailers. Starting at $59,993. 2024 Eagle HT Fifth Wheels. Starting at $51,006. 2024 Eagle Fifth Wheels. ... The ever-evolving Jayco lineup is made up of the most popular types of RVs on the road. ... find helpful resources on the Jayco Journal including this article called The waking your RV from winter hibernation checklist.