
DEV Community
Posted on May 9, 2023
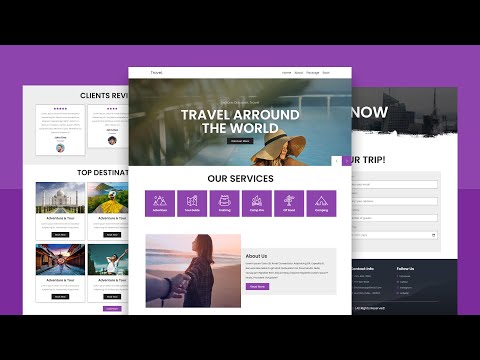
Create A Travel/Tourism Website Using HTML and CSS
Hello, Reader. This post will teach you how to create a Travel Website (Tourism Website) Using HTML and CSS. The webpage I'm going to share with you in this article is about travelling. It's quite simple, and you'll have your own Travel Tourism Website by the end of this article. A travel website is a sort of business that provides customers with travel-related services. When it comes to the future of this industry, there are numerous aspects that will influence how consumers plan their vacations. The rise of mobile usage, greater competition, and a shift in customer expectations are among these factors. The ideal tool for tourists is the travel website creator. People are increasingly using their mobile gadgets when travelling, for example. As a result, businesses should ensure that their websites are mobile-friendly. To enhance their profits, companies employ an easy website builder for small enterprises. They should also be aware that competition among online booking sites is increasing.
I hope now you have a general idea of what the project entails. In our article, we will go over this project step by step.
Step1: Setting Up the Structure (HTML)
Let us begin by establishing a Travel/Tourism project. Create a new index.html file in a new subdirectory to house the website layout. copy and paste the HTML code given below into your html file.
Every website has three sections: the header, the main body, and the footer. In our project, we will use the same procedure; we will build a header section where we will add the heading, and we will add the main content inside the main section.
Header Section of travel website
First, in the header section of our website, we will add a navbar for our travel website using the tag, and inside the nav tag, we will create different navbar links for our website navbar using an unordered list.
Inside our header section, we will add another section called "banner," within which we will add a heading using the tag; a text input box using the form tag; a menu list for selecting the countries from the menu list; an input of type "date" to select the date from the calendar; and a book button using the tag.
Body Section of travel website
In the body section, we will develop three sections: one for services, one for places, and one for about us. In this section, we will introduce several structures. Within our services section, we will use the
Concerning the places portion, we will create the locations in card format. In our places sections, we will first create some div tags, and within those, we will add an image related to the place using the tag, and the text for that place using another div tag. We'll use the span and h2 tags inside that div to add a rating for the place, and the tag to add the subheading of our place items. We'll make 5 more image cards with zoom features like this one.
Now, within our about section, we will use the tag to create another section for about us, and within that, we will use the< img> tag to add a display image about our organisation, and we will use the general html element to give a brief explanation about our website.
Footer Section:
We'll use the footer tag to create a footer section and the
tag. We will generate links for the footer using the unordered list and the tag. We will include a heading for the quick link, as well as additional items and support.
Step2: Styling the Travel Website (CSS)
Let's concentrate on how we can style our website. I'll highlight some key points to remember when styling.
Default Styling:
We will import several new fonts for our travel website via Google's import link using the @import url function. Then, using the universal selection, we'll set the padding, margin, and box size to "border box". We'll style our scrollbar with :webkit-scrollbarselector, setting the scrollbar width to 20px and the border radius to 10px with a yellow background. Navbar Styling:
We will use the class selector (.nav-bar) to set the display to "flex," with the width set to 100% and the height set to 90 px. We will change the background colour to white using the background colour property, and we will style the navbar items using the ul tag selector. Styling Banner:
Using the selector (.banner) and the background-img property, we will add an image to our background. We'll set the width and height to 100% and 100vh, respectively, and use the text-align attribute to centre it. Our form element will also be styled. Styling the Services and Places Section
We will utilise the basic CSS concept; first, we will choose the html element using the class selector, and then we will add a background image and set the width and height of the element using basic CSS styling. Styling footer:
We will add an image background to our footer and the width and height of our footer using the undordered list tag selector. We will add a black background to our text using the background colour property, and the text will be set as white. We will add responsiveness to our trip website using the media query property.
Now we've completed our [travel website] using HTML, CSS . I hope you understood the whole project. Let's take a look at our Live Preview. Now We have Successfully created our Travel website using HTML , CSS. You can use this project directly by copying into your IDE. WE hope you understood the project , If you any doubt feel free to comment!!
If you find out this Blog helpful, then make sure to search code with random on google for Front End Projects with Source codes and make sure to Follow the Code with Random Instagram page.
How to Create a Travel website design?
A Travel Website Is A Sort Of Business That Provides Customers With Travel-Related Services. When It Comes To The Future Of This Industry, There Are Numerous Aspects That Will Influence How Consumers Plan Their Vacations. The Rise Of Mobile Usage, Greater Competition, And A Shift In Customer Expectations Are Among These Factors. The Ideal Tool For Tourists Is The Travel Website Creator.
How to create a travel website using html code?
establishing a travel website project. Create a new index.html file in a new subdirectory to house the website layout. copy and paste the HTML code given below into your html file.
Top comments (0)
Templates let you quickly answer FAQs or store snippets for re-use.
Are you sure you want to hide this comment? It will become hidden in your post, but will still be visible via the comment's permalink .
Hide child comments as well
For further actions, you may consider blocking this person and/or reporting abuse

State Management Types and its Importance in React
cynthia - Apr 11

6 Reasons to Hire a Dedicated WordPress Developer for Your Business Growth
Hire Laravel Developers - Apr 11

Innovations of the Web3 community platform: Sage AI empowers endless creativity for you.
Sage AI - Apr 11

Dairy - Building my own social mídia - The Idea - 1/X
Wederson Cabral Domingues - Apr 11

We're a place where coders share, stay up-to-date and grow their careers.
- Advertise with us
- Explore by categories
- Free Online Developer Tools
- Privacy Policy
- Comment Policy
Top 10: Best Tour (website guide) Javascript and jQuery plugins

Carlos Delgado
- January 02, 2019
See our compilation from 10 of the best Tour Javascript and jQuery plugins to create a web guide for your user

Have you ever visited a website or a web application, where you don't have the most remote idea of how to start to using it because it's your first time there and you just feel like Jhon Travolta?
If you're a web developer, you may want to avoid this experience from your user creating some type of guide video, or a well explained documentation. However, some users won't read the documentation or see a video because there is no time for that, they just want to use your app! For this kind of users (that's the 90% of the people) you can use a dynamic in web tour while they learn to use your app. You can implement this feature by using a Guided Tour plugin in your app.
In this top, we are going to share with you 10 of the best guided tour plugins made in VanillaJS and jQuery.

Anno is a step-by-step guides plugin for powerful web apps. Anno.js is built to be extensible , the source is about 500 lines of literate coffeescript; you can read the annotated source in just a few minutes.
9. jQuery guide

jQuery Guide is a jQuery plugin made to create a "How to use guide" for your web app. It uses jQuery animations to provide a smooth and nice experience for the user while they learn how to use your app.
8. aSimpleTour

aSimpleTour is a jQuery plugin that will help you to make website tours easily.
7. Pageguide

Pageguide is a plugin to create interactive guide for web page elements using jQuery and CSS3. Instead of cluttering your interface with static help message, or explanatory text, add a pageguide and let your users learn about new features and functions. Pageguide comes with an example implementation (the files are in /example) which you can run locally with Grunt.
6. Bootstro.js

Bootstro show your users a guided tour of what is what on a page. Especially, for first-time users. Bootstro requires bootstrap & bootstrap popover , just add the class .bootstro to any element that you'd like to be highlighted, then include bootstro.js & bootstro.css and start using Javascript bootstro.start() .
Any element anywhere on the page can be intro'ed: popovers are automatically scrolled to so they always get focused. This plugins is easily customizable, Bootstro provides various public methods so you can control as you like bootstro.start() , bootstro.next() , bootstro.prev() .
5. Hopscotch

Hopscotch is a framework to make it easy for developers to add product tours to their pages. Hopscotch accepts a tour JSON object as input and provides an API for the developer to control rendering the tour display and managing the tour progress. Hopscotch supports internationalization via i18n object in tour config. The default language is English. If you need a tour in a language other than English, pass in translated text in your tour config. Text used for previous, next, skip, done and close buttons, as well as, tour step numbers can be translated.
A Hopscotch tour consists of a tour id, an array of tour steps defined as JSON objects, and a number of tour-specific options. The tour id is simply a unique identifier string. The simplest tour consists of just an id string and an array of one or more steps. This plugin has been created by the guys at LinkedIn .
4. Enjoyhint

A free web-tool that is created to guide users through a site or app in the simplest way. It gives an excellent way to create interactive tutorials with hints and tips, and embed them into your web apps, thus, enhancing their usability and value/effectiveness. EnjoyHint adds simple hints that prompt users to navigate a website or an app intuitively and easily. It comes along with instant auto-focus highlighting, as the user moves into a new field.
We demonstrated the use of the EnjoyHint web-tool in an issue tracker demo, created with Webix JavaScript UI library. The tool itself is based on Javascript, HTML5 and CSS. The tool works on the client-side and can be used with any server-side platform. The key features of EnjoyHint:
- Fast web-tool setup
- Simple initialization and configuration
- Interactive hints - instant tips that provide a description to the user about the field they are in
- Scenario of coherent actions - allows adding a sequence of hints for all necessary steps
- Auto-focus highlighting - involves automatic focus on the area related to the hint and its instant hightlighting when the hint loads
- Defining shape - defining the shape and margin of the highlighted area
- Timeout settings - allows setting the delay before the moment, when the element is highlighted
- Hint resume that restarts the display of hints from the step where it was stopped
- Auto scrolling to the highlighted element at different animation speed.
- Cross-browser support (Chrome, FireFox, IE10+, Safari)
- Support for Android, iOS and Windows touch sceens (laptops and tablets)
3. Intro.js

Intro.js is a Step-by-step guide and feature introduction plugin for your website. When new users visit your website or product you should demonstrate your product features using a step-by-step guide. Even when you develop and add a new feature to your product, you should be able to represent them to your users using a user-friendly solution. Intro.js is developed to enable web and mobile developers to create a step-by-step introduction easily.
Intro.js has no dependencies, fast and small 10KB JavaScript and 2.5KB CSS, that's all (minified, gzipped), besides it works on Google Chrome, Mozilla Firefox, Opera, Safari and even Internet Explorer.
2. Shepherd

Shepherd is a javascript library for guiding users through your app. It uses Tether, another open source library, to position all of its steps. Tether makes sure your steps never end up off screen or cropped by an overflow. Try resizing your browser to see what we mean.
Shepherd works in IE9+ and all modern browsers.
1. Bootstrap Tour

Bootstrap Tour is a plugin to make an animated, dynamic guided tour through your website using the famous Bootstrap Framework, however, if you don't use Boostrap you can use the standalone version without problem. This plugins is the easiest way to show people how to use your website with Bootstrap Popovers.
Honorable mentions

Driver.js is a light-weight, no-dependency, vanilla JavaScript engine to drive the user's focus across the page. Driver is compatible with all the major browsers and can be used for any of your overlay needs. Feature introductions, focus shifters, call-to-action are just a few examples.
If you know another awesome Tour plugin to show a website to your user or you're developing your own tour plugin, don't be shy and share it with the community in the comment box.
Senior Software Engineer at Software Medico . Interested in programming since he was 14 years old, Carlos is a self-taught programmer and founder and author of most of the articles at Our Code World.
Related Articles

Top 10 : Best autocomplete jQuery and javascript plugins
- July 05, 2016
- 155.4K views

Top 10 : Best notification libraries and plugins for Javascript and jQuery
- February 20, 2016
- 196.3K views

Top 10 : Gallery and photo viewer plugins for javascript and jQuery
- February 21, 2016
- 67.3K views

Top 5 : Best javascript and jQuery tooltip plugins
- March 19, 2016

Top 5: Best javascript video background plugins
- August 10, 2016
- 27.4K views

Top 10: Best slide sidebar menu (drawer) javascript and jQuery plugins
- December 15, 2016
- 152.5K views
Advertising

All Rights Reserved © 2015 - 2024

- Getting started
- API Documentation
- Bug reports
Bootstrap Tour
The easiest way to show people how to use your website. Not using Bootstrap? It works anyway!
Start the demo
The How-to It's simple!
Add the dependencies.
If you are using Bootstrap, include bootstrap-tour.min.css and bootstrap-tour.min.js :
Otherwise, just include bootstrap-tour-standalone.min.css and bootstrap-tour-standalone.min.js :
Setup your tour:
Do you want to do more? Read the full documentation.
The Team It's handmade!
The license it's free.
Code licensed under the MIT license . Documentation licensed under CC BY 3.0 .
Intuitive and customisable tours for user onboarding
TourGuide is a Javascript library written for creating user tours and on-boarding steps for your apps.
TourGuide JS has a range of promise driven methods and callbacks to provide an enjoyable developer experience.
Framework agnostic
Written entirely in vanilla JS with TypeScript and usable in virtually any framework. Choose from CDN or NPM installation.
Typescript support
Type definitions help automatically detect available options in your IDE as well as ensure a type safe package for your projects.
1 Dependency
Tour positioning is supported by Floating-ui. It's required modules are pre-bundled into the TourGuide JS library.
Customizable
Define an array of options to create the perfect onboarding experience for your visitors, you can even use custom HTML in your tour content.
Open source
TourGuide JS is in early stages of development and contribution is welcome. Open license for both commercial and personal use.
CDN installation is available for simpler integration or testing purposes
For projects with build processes, NPM is recommended
Get started
Installation.
Creating a tour only takes a few steps, once initialized you can interact with the TourGuideClient object.
Include in your project
Declare steps (data attribute method)
Initialization
Customization
With a variety of options you can tweak the tour to suit your needs.
Read the documentation to understand how to use events, declare steps and customize the tour behaviours futher.
Advisory boards aren’t only for executives. Join the LogRocket Content Advisory Board today →
- Product Management
- Solve User-Reported Issues
- Find Issues Faster
- Optimize Conversion and Adoption
- Start Monitoring for Free
Complete guide to building product tours on your React apps

Introduction
Ever heard of tours in product UI?

Product tours are self-explaining tips UI for the website user to break down complex UX and make it easily useable.
Product tours play a vital role in B2B product UI. It helps save customer support time related to repeated ‘how-to-use’ questions about the UX.
What problems do product tours solve?
Product tours help with onboarding users to new and complex UX and helps to get users familiar with UI functionalities. They’re also useful for showcasing new updates on product UI, and they can save time for the customer success team.
Slack, Trello, Asana, and Invision are some of the big products that use product tours for different UX needs.
The indirect alternative to product tours including FAQs about product functionalities, product video demos and tours, and on-demand tips UI.
However, video tours or FAQs don’t have the same level of impact as inline product tours.
The majority of users don’t look for tutorials outside the UI.
On the other hand, on-demand tips UI are similar to product tours and can have a similar impact.
In this post, you’ll learn how to build a simple product tour for your React application. Before building, it you’ll first need to learn about existing React libraries.
Existing React libraries for product tours
Even though product tours are used by lot of companies, there aren’t many React-based tour UIs. Some of the libraries are React Tour and React Joyride.

Over 200k developers use LogRocket to create better digital experiences
React Tour library
React Tour has around 1.4k stars on Github and is moderately active.
It has very nice UI if you need a simple product tour without much customization. If this is the case, React Tour UI will be good enough.
You can view the demo for React Tour here .
How it works
With React Tour, you pass the classname selector and content for each step to the component.
It will render the tour UI based on a button click, or after mounting the component. It’s simple for static pages and UI:
However, if you need to customize for a custom behavior, then it won’t work very well. The component is very rigid, and styles aren’t exposed well enough to make it reusable.
One drawback is that if you don’t use styled-components in your project, then you won’t have any luck using the component. There is no other way — the library has a hard dependency for styled components.
Additionally, if a classname selector is not present in the current screen, then React Tour just displays the non-matched content in the center of the screen. There is no way to hide it.
The only way to overwrite such behavior is to trigger the next steps through our own logic, but that defeats the purpose of the component.
It’s almost as complex as writing your own component for product tours.
More great articles from LogRocket:
- Don't miss a moment with The Replay , a curated newsletter from LogRocket
- Learn how LogRocket's Galileo cuts through the noise to proactively resolve issues in your app
- Use React's useEffect to optimize your application's performance
- Switch between multiple versions of Node
- Discover how to use the React children prop with TypeScript
- Explore creating a custom mouse cursor with CSS
- Advisory boards aren’t just for executives. Join LogRocket’s Content Advisory Board. You’ll help inform the type of content we create and get access to exclusive meetups, social accreditation, and swag.
React Tour really shines when you don’t want to customize a lot, and when you want basic tour functionality with beautiful UI and UX.
It also works well for static content or dynamic content where the selector labels always exist on the UI.
React Joyride library
The next famous React product tour library is React Joyride . It has 3k stars on Github and is also actively developed.
The UI isn’t as elegant as React Tours, but the API is less rigid. It allows for some level of customization.
Of course, it has its own limitations.
The docs aren’t good enough if you need custom solution on top of basic React tour functionality. The props API also isn’t very intuitive or simple.
The only difference is that it has solutions for most use cases in product tours. They expose all the events and actions to the end user, so you can capture those actions and do whatever customization you want.
Building a simple product tour in a React app
First, let’s build a simple React tour without any custom functionality.
We’ll use react-dashboard by creative tim as our base application.
This loads the product tour on top of it.
This is what the dashboard UI looks like:

We’ll do a product tour on this UI. You can see the final product tours UI here .
Let’s create the simple product tour component:
Load this tour component anywhere on the page to load the blinking beacon UI. If you click that beacon, it will open the tour. The next button will let you navigate til the end of the tour.
Joyride components take a lot of props. The most important ones are steps props. It accepts an array of objects with target selector elements and content.
Continuous props are used for showing the next button on each step.
You can see the demo for this simple tour component here .
Now let’s add more features and make our product tour more customized. Simple features are:
Skip option on each step
- Change locale text labels
- Hide / show buttons (next, skip, back buttons)
Custom styles like button colors and text alignment
Then we’ll add the custom feature like:
- Auto start the tour
- Start the tour by manual triggers (i.e., through link or button click)
- Hide blinking beacon
- Auto start tour once and only show tour on manual triggers next time
Most of the basic functionalities can be achieved through the props provided by Joyride docs .
Adding showSkipButton to true will do the trick. Skip link will skip the remaining step on the tour.
How to change text labels for buttons and links
Let’s change the last button text as end tour and skip button text to close tour .
How to hide Back, Next and Skip buttons
- For the Skip button, use *showSkipButton* props
- For the Back button, use hideBackButton
- For the Next button, use continuous props
Unlike other props, continuous props work differently. They either show the Next button or show a Close button, depending on the boolean value passed to the props.
You can see how inconsistent the props API naming are. It isn’t very easy to find lot of hidden features unless you read the complete docs for Joyride couple of times 😅
Styles are exposed as an object. So if you pass a style object to the component, the component will merge it with their default styles.
A caveat to this way of styling is that it only supports a handful of the object styles, which are already defined on the component.
It won’t allow you to customize everything on an element level. Also, the classnames used in the rendered elements are not very easy to customize.
However, the library exposes props to use your own elements instead of the default elements.
Some of the components are:
- Beacon component ( beaconComponent prop)
- tooltip component ( tooltipComponent prop)
Controlled product tour
So far, you’ve learned how to use the Joyride library to create a basic product tour and customize it using props.
You’ve also seen some of the limitations to styling the component.
Until now, the tour has been controlled in the library. You just pass the steps and tweak some props.
It’s possible to control the tour and trigger goto a particular step directly through button click, but it requires some coding.
We’ll see how to do it by achieving a few of the features.
The Joyride component exposes some of the actions and events through callback. You need to capture the callback and, based on the function, you can customize your functionality.
It’s simple to make the component controlled by passing a prop stepIndex .
stepIndex is the index number and starts from 0. Once you pass the values, the Next and Back button clicks need to be handled by you.
Let’s get to it. First, we will define the steps:
Here’s the initial state to make the component controlled:
To auto start the tour, you need to pass disableBeacon: true in the first step. This will just disable the beacon. But you need to trigger start by changing the state run: true :
The actions that are important to make the functionality are Close button click, Skip button click, Next, and Back button click.
Let’s implement the reducer function:
Now we’ll listen to the events and dispatch proper state changes to manage the tour:
Here’s a quick overview of how each action, event, and state update works:
If the Close button, Skip button, or End Tour button are clicked, then STOP the tour. Meanwhile, if the Next or Back button are clicked, then check whether the target element is present in the page.
If the target element is present, then go to that step. If it’s not present, find the next step target and iterate.
Joyride expose EVENTS, STATUS, and ACTION labels. You can use those to listen to the callback event without hardcoding it.
Let’s also auto start the tour when the page loads:
You can even trigger the start of tour using button click:
Right now, we have it set up so that the tour will be shown every time you refresh the page.
If you only want to show the tour once and then trigger it only through manual click, you can do so using localStorage .
You can find the working example code here and the demo here .
Steps for building a custom product tour in React
We’ve achieved the product tour using the Joyride library.
But what if we need to create our own?
Let’s walk through building a tour component.
The biggest challenges to building tour components include finding the target element and showing a popover component, as well as ensuring the popover component calculates the available window space and automatically displays by the target element.
It can also be difficult to ensure the tour component is reusable and that styles are easily extended.
To build a custom tour component in React, it’s easiest to isolate the functionality and component UI with these React Hooks:
- useTour – a custom Hook to build your own UI on top of functionality
- Tour – a dumb UI component that consumes useTour to load the tour portal UI
This mock code shows how useTour works:
I hope this article helped you learn the tricks of creating product tour components in your React application. Let me know your experience on tour UX in the comments 🤗
Get set up with LogRocket's modern React error tracking in minutes:
- Visit https://logrocket.com/signup/ to get an app ID
Install LogRocket via npm or script tag. LogRocket.init() must be called client-side, not server-side
Share this:
- Click to share on Twitter (Opens in new window)
- Click to share on Reddit (Opens in new window)
- Click to share on LinkedIn (Opens in new window)
- Click to share on Facebook (Opens in new window)

Stop guessing about your digital experience with LogRocket
Recent posts:.

Building web-based terminal components with Termino.js
Explore Termino.js, an open source library for integrating web-based terminals into applications, in this introduction article.

How to build a custom GPT: Step-by-step tutorial
Let’s see why and how to build custom GPTs — personalized versions of ChatGPT that act as custom chatbots to serve a specific purpose.

Jest adoption guide: Overview, examples, and alternatives
Jest is feature-rich testing framework that comes with several in-built features that make it powerful and easy to use.

Implementing LiveViews in Node.js
Explore LiveViewJS and how to build a full-stack Node.js app with LiveViews that supports real-time interactivity.

Leave a Reply Cancel reply
Designing for Uncertainty
In uncertain times calls for exquisite design
Complete Responsive Travel & Tour Website Design Using HTML – CSS – JavaScript – PHP – MySQL
how to make complete responsive tour and travel website design using html css vanilla javascript php and mysql database from scratch. complete responsive travel agency / travel booking / adventure tour website design both front and backend, html css vanilla javascript php mysql step by step tutorial for beginner.
the main feature of this website are: ✅ responsive header with toggle menu effect using vanilla javascript. ✅ responsive home section with touch slider using swiper.js ✅ responsive about section using flexbox. ✅ responsive reviews section with touch slider using swiper.js ✅ responsive packages section using grid. ✅ responsive booking form section with php and mysql. ✅ responsive footer section using grid.
Buy Me A Coffee : https://www.buymeacoffee.com/mrwebdesigner
* SOURCE CODES *
DOWNLOAD THE SOURCE CODE FROM GOOGLE DRIVE ( INCLUDES IMAGES ): https://drive.google.com/file/d/13XNH7bOxwabYpszLG1mAf7dT75Q1VTpq/view?usp=sharing ( *you are free to use this source code )
*How To Download*
Step 1 :- click the google drive link ☝☝☝ Step 2 :- click on download link in the google drive. Step 3 :- extract the zip file into your desired folder. Step 4 :- open the converted files into your browser. Step 5 :- open your editor and put your unzipped files into it and then edit it as you like.
lightgallery.js official website: https://sachinchoolur.github.io/lightgallery.js/
lightgallery.js cdn links: https://cdnjs.com/libraries/lightgallery-js
font awesome cdn link: https://cdnjs.com/libraries/font-awesome
google fonts: https://fonts.google.com/specimen/Poppins
clip-path generator: https://bennettfeely.com/clippy/
Editor : – visual studio code with Laetus: Dark Vibrant Theme Browser : – google chrome UI Tool : – Figma localhost : xampp Images / Video / SVG : – 01 – https://www.freepik.com/ 02 – https://storyset.com/ 03 – https://undraw.co/ 04 – https://pixabay.com/ 05 – https://unsplash.com/ 06 – https://pixabay.com/ 07 – https://www.flaticon.com/ 08 – https://pngtree.com/ 09 – https://www.pngegg.com/
New To My Channel Subscribe Now And See More Stuff Like This: https://www.youtube.com/c/MrWebDesignerAnas
Timestamp: 0:00 demo 3:45 file structure 5:55 header 17:54 footer 27:48 services 32:56 home 45:11 home about 48:17 home packages 53:41 home offer 56:40 about 1:04:01 reviews 1:11:22 packages 1:19:44 booking 1:27:27 php / mysql 1:39:43 final demo
#TravelWebsite #MultiPages #CompleteWebsite
7 Awesome JavaScript Product Tour Libraries
Top javascript tour libraries that will help you guide users through using your app..
Shanika Wickramasinghe
Bits and Pieces
Tour and guide libraries are there to help you guide your users through using your app. They do so by adding extra information to your UI, by providing tips or text (usually obtained from the server in JSON format), and by adding step-by-step instructions regarding the UI and/or functionalities of your web app. This post will cover my seven personal favorite libraries.
Build a Clear UI (Before Using Guide Libraries)
“A user interface is like a joke. If you have to explain it, it’s not that good”. — Martin Leblanc
As you well know, nothing beats a self-explanatory UI. Instructions of any type should only be used after you’ve done your best in delivering a clear UI and a great UX. One key step in achieving that is building a design system .
Design systems or UI libraries are a way to reuse and standardize UI components (among other things). They’re a great way to maintain consistency in style and function, making your app more predictable and much easier to learn (less variance in UI means fewer things need to be learned).
Design systems are no longer a luxury enjoyed exclusively by large enterprises. Thanks to new cloud solutions like Bit.dev , design systems or UI libraries can grow and expand as you build your app. You can simply push individual UI components from any codebase/repository to a shared component hub where you and your team may discover, test, use and collaborate on them. Bit supports React, React with TS, Angular, VueJS and many others.
Building a UI Component Library for Your Startup
How to build a component library that suits your startup’s needs..
blog.bitsrc.io
1. Intro.js
Intro.js is widely used due to its user-friendly solutions and has 19k GitHub stars. Its most important features are:
- No dependencies: It does not require any other dependencies
- Small and fast: The library’s smaller size makes the guiding process smooth and intuitive. The overall size of JavaScript files is 10KB, and CSS is 2.5KB.
- User-Friendly: Navigation is user-friendly and provides various themes that can be selected as per your preference.
- Browser Compatibility: Works on all major browsers like Google Chrome, Mozilla Firefox, Opera, Safari, and Internet Explorer.
- Documentation: The documentation is excellent with samples and examples of each element to be introduced.
Intro.js is a free and open-source library, however, if you are using the library for your business you can subscribe…
introjs.com
How to Install
To use Intro.js, you need to have npm and Node.js installed. Alternately, you can get Intro.js from:
- Its GitHub repository: use, git clone https://github.com/usablica/intro.js.git
- using bower:
- CDNs ( jsdeliver.com , cdnjs.com )
Once you have installed intro.js, there are three simple steps to add it to your project:
- Add the JS and CSS files (intro.js and introjs.css) into your project. If you require right to left language support, you can also add introjs-rtl.min.css.
- Add the attributes data-intro and data-step to the relevant HTML elements. This will enable intro.js for the particular elements.
- Call the following JavaScript function:
Use the following additional parameter to call Intro.js on a particular element or class.
Here is an example page where the user-friendly Intro.js is seen working.
See the Users
Intro.js is used by many organizations like SAP, Amazon, Nestle, and Kobo.
2. Shepherd
Shepherd has 8.1k GitHub stars , and its website demonstrates how it works. Here are its main features:
- Accessibility: Provides keyboard navigation support, follows a11y compliance, and also uses JavaScript to enable focus trapping inside DOM elements.
- Highly Customizable: Allows changing the look and feel without affecting performance.
- Framework Ready: Readily ingrates into your project’s front-end framework.
- Documentation: Documentation covers installations and customizations including theming, and styling for your projects.
Shepherd - Guide your users through a tour of your app.
Guide your users through a tour of your app..
Guide your users through a tour of your app.shepherdjs.dev
Shepherd is integrated with many major front-end frameworks and provides the following wrapper facilitates out of the box:
- Angular: angular-shepherd is an Angular wrapper, compatible with Angular 8+.
- Ember: ember-shepherd is an ember wrapper, tested with Ember.js >= v3.8, and is compatible with Ember CLI v12.3.
- React: react-shepherd is a React wrapper.
- Vue: vue-shepherd is a Vue wrapper.
You can directly install these wrappers using npm or yarn:
It can also be pulled directly via JsDeliver from the CDN:
Once you have installed Shepherd, you can include the CSS and JS files as follows:
Here is an example of creating a Shepherd tour and adding steps with DOM elements attached to it.
Shephard is used by companies like SimplePlanner and Brokermate to guide their users through the initial steps of their applications.
3. Bootstrap Tour
Twitter Bootstrap provides its own free tour implementation with Bootstrap Tour. It has 4,315 GitHub stars.
Bootstrap popovers are quick and easy to build. This is a jQuery-based plugin for bootstrap and uses the power of DOM and JavaScript configuration to build the tour. It’s as simple as including the JS and CSS files and provides in-depth documentation.
Bootstrap Tour
If you are using bootstrap, include bootstrap-tour.min.css and bootstrap-tour.min.js: otherwise, just include….
bootstraptour.com
You can simply use the CSS and JS files of bootstrap:
Or use standalone CSS or JavaScript files:
You can even pull the JS and CSS files from CDN.
After the initial setup, you can create an instance of the tour and add steps with the element details as follows:
4. Chardin.js
Inspired by Gmail’s new composer tour, Chardin.js is a simple overlay of instructions on existing elements. It uses a JQuery plugin to display instructions. The GitHub page contains the instructions and documentation and has 4.9k GitHub stars.
Chardin.js - Simple and beautiful overlay instructions for your apps.
heelhook.github.io
You can fork the GitHub repo or download the required CSS and JS files chardinjs.css and chardinjs.min.js and add them to the HTML page.
After setting up, you can add instructions to the document. Below is an example of adding an instruction to an image element. The data-intro sets the text to be displayed and data-positions decide the position of the text.
To run Chardin in the sequential mode you need to use different instructions like data-chardin-sequenced=”true”, data-chardin-auto=”true” and data-chardin-delay=”100” to display the instructions with an automatic movement through elements.
Once the elements are ready with the instructions, you can initialize the library through a button click or make it run automatically. The library can also be limited to a particular container.
Chardin.js allows you to refresh the overlay and also provides construction options to specify URL containing text as JSON objects that can be displayed as instructions.
5. PageGuide
PageGuide is a smart guide for interactive, dynamic, and single-page apps based on jQuery and CSS3.
Pageguide by SolarWinds
An interactive guide for web page elements using jquery and css3. view the project on github tracelytics/pageguide….
tracelytics.github.io
You can install PageGuide in any one of the following four ways:
- Download the latest release from GitHub
- Clone the repo: git clone https://github.com/tracelytics/pageguide.git
- Install with Bower
Install using npm
The installation is loaded with examples and can be run using Grunt at http://localhost:3000/example/ .
For the initial setup, add pageguide.js and the CSS file as follows:
Add the following code to your HTML file to initialize PageGuide:
Specify the selector in <ul>, this will be matched by PageGuide to display the text. Below is an example of adding pageguide.js to the bottom of the page.
PageGuide is used to display static messages on the page, resulting in it being less cluttered.
6. Hopscotch
Hopscotch was built by Gordon Koo and Hans van de Bruggen as an open-source tool during LinkedIn’s Incubator program . Its main purpose was to solve problems of usability, intuitiveness, and performance.
With 4.3k GitHub stars, it is only 8kb in its minified and gzipped state. Though it does not require dependencies, it may use jQuery if available on the page. Hopscotch offers:
- Event callbacks: supports callbacks for onStart, onNext, and onClose events.
- Multipage resistance: Uses HTML5 session storage to persist the state of the tour across pages.
- i18n: Supports internationalization.
- Lightweight callouts: Manages callouts with a convenient method to create them.
- Browser compatibility: It is compatible with all browsers.
- Customizable: It allows CSS tweaks, bubble markup, and page interactivity.
LinkedInAttic/hopscotch
This project is no longer used by linkedin and is currently unmaintained. if you would like to maintain this project….
Use Grunt.js to build Hopscotch. This will run the test suite with new artifacts. Then include the two files hopscotch.js and hopscotch.css into the HTML page.
Once the initial setup is complete, you can initialize the tour using JSON.
Hopscotch can be tested using the Jasmine testing framework and allows continuous integration with Travis CI.
7. Tourist.js
Tourist.js is a simple library best suited for a single page application than a multipage website. It can control the interface at each step. Using Tourist, you can create a guide for the steps that require opening a window or menu. A series of steps can be specified with instructions for particular elements.
Despite the absence of a website, the GitHub page with 12k stars consists of extensive documentation.
easelinc/tourist
Tourist.js is a simple library for creating guided tours through your app. it's better suited to complex, single-page….
You can install Tourist.js using the following bower command:
Tourist requires jQuery and Backbone, and has the ability to use Bootstrap 3 popovers (default) or QTip2 tips along with Bootstrap 3 CSS.
The “tourist.js” JavaScript file and an optional CSS file can be used to customize styles.
After the initial setup, you can create the steps and add them to the tour instance as follows:
It also allows you to have your custom implementation for tips using Tourist.tip.
Implementing JavaScript tours and guides is an easy way to introduce users to an application. Most of these tools use CSS and JavaScript files with simple initialization. These tools are used by many top-notch companies. How your tours and guides look, and function will depend on the library you select. The right tour can make your application a lot more intuitive and attractive to users.
How to Easily Share Vue Components Between Applications
Learn how to easily share vue components between different projects, sync changes, and build faster using bit., 10 top javascript libraries and tools for an awesome ui/ux, recommended tools and libraries that will help you build a stunning web app in 2020, 11 chrome apis that will give your web app a native feel, 11 chrome apis that will give your web app a native-like user experience..

Written by Shanika Wickramasinghe
Senior Software Engineer and Freelance Technical Writer. I write about any Computer Science related topic. https://www.linkedin.com/in/shanikawickramasinghe
More from Shanika Wickramasinghe and Bits and Pieces

Top 5 React Table Libraries
Recommended table libraries for react.

Chameera Dulanga
Best-Practices for API Authorization
4 best practices for api authorization.

Ruvani Jayaweera
Implementing the API Gateway Pattern in a Microservices Based Application with Node.js
Build your own api gateway using node.js in under 5 minutes.

Geek Culture
Best React Routing Libraries
As you may know, client-side routing is an essential aspect of building modern web applications, as it allows users to navigate between…, recommended from medium.

Christine Vallaure
UX Collective
Why UI designers should understand Flexbox and CSS Grid
Or bye bye, 12-column grid layout.

Punit Chawla
UX/UI Design Trends Going Into 2024
Every year, we have a line up of new design trends that not only look good, but also stick around and influence other designers to “steal”….
Interesting Design Topics
Stories to Help You Grow as a Designer
Stories to Help You Grow as a Software Developer

Adham Dannaway
16 little UI design rules that make a big impact
A ui design case study to redesign an example user interface using logical rules or guidelines.
Minko Gechev
Angular Blog
Introducing Angular v17
Last month marked the 13th anniversary of angular’s red shield. angularjs was the starting point for a new wave of javascript frameworks….

Ameer Omidvar
Apple’s all new design language
My name is ameer, currently the designer of sigma. i’ve been in love with design since i was a kid. it was just my thing. to make things….

Julien Etienne
Stop Using localStorage
Bid farewell to localstorage embrace indexeddb for speed, type-safe storage, and non-blocking data transactions. #indexeddb #webdev.
Text to speech
Travel and Tourism Website with Python
Table of Contents
Introduction
The travel and tourism industry has been revolutionized by the advent of technology. Gone are the days of tedious planning, as today’s travelers demand convenience and efficiency. In this context, Python-based tourism website projects are reshaping how we think about travel planning.

Why Python for a Travel and Tourism Website?
Python, when coupled with Django, offers a robust foundation for creating a versatile travel and tourism project. Not only does it enable quick development, but its libraries and frameworks also provide a multitude of functionalities to facilitate real-time communication and centralized data handling.
User and Admin Roles
The system is designed with two primary entities: the User and the Admin.
- Admin : After successful login, the admin gains complete control over the system. They can manage flights, hotels, and even view user activity, ensuring optimal operational efficiency.
- User : A user-friendly interface with a built-in chatbot guides users in booking hotels, flights, and travel packages. The system simplifies the process, making it easy even for people who are not tech-savvy.
Features and Advantages
- Interstation Communication : Real-time communication between different segments of the website.
- Centralized Data : All data is stored centrally, ensuring consistency and reliability.
- Time and Cost-Efficiency : The system reduces the time consumed in booking and lowers the cost by eliminating middlemen.
- Computerized Record-Keeping : Digital record-keeping minimizes manual errors and enhances efficiency.
- User-Friendly Chatbot : Provides instant assistance, making the user experience pleasant and efficient.
Building Blocks of the System
Creating such an advanced system requires a comprehensive set of tools and technologies. Django serves as the backbone, while Python’s various libraries offer functionalities like real-time chat, data storage, and more. These are complemented by HTML, CSS, and JavaScript, which take care of the frontend.
Travel and tourism are sectors ripe for disruption through technology. A Python-based website not only meets the demands of modern users but also offers scalable solutions for the future. From reducing costs to enhancing operational efficiency, the advantages are numerous.
Sample Code
Create a new Django project and a new app.
Register the app in ‘ settings.py ‘
Create models
Run the following command to apply these changes to the database:
Create Views
URL Mapping
Make sure to include these in the project’s ‘ urls.py ‘.
HTML Templates
Create HTML templates (‘ home.html ‘, ‘ flights.html ‘, ‘ hotels.html ‘) under a ‘ templates ‘ folder in your ‘ main ‘ app to display the data.
In order to download the PDF, You must follow on Youtube. Once done, Click on Submit
Subscribed? Click on Confirm
Download Travel and Tourism Website with Python PDF
Related articles.

Automated Roti and Puri Maker Press project

The Oil Skimmer RC Boat

Secure Digi Locker Application Project

Software Piracy Protection Project
Leave a reply cancel reply.
Your email address will not be published. Required fields are marked *
Notify me of follow-up comments by email.

Please Enable JavaScript in your Browser to Visit this Site.
Visit360.github.io
Visit360 - virtual tour editor, demonstration.
Click to go to the demonstration
Documentation
Visit360 is a software that aims to create virtual visits of any building using panoramical 360° images. For the demonstration phase, we created a web page that allows you to edit and save the virtual visit of Polytech Grenoble and some other buildings taken as examples. The demonstration is based on a web page using HTML, JavaScript and CSS and most importantly the library Panellum which is a lightweight, free, and open source panorama viewer for the web. It’s built using HTML5, CSS3, JavaScript, and WebGL.
Getting Started
Hosted examples.
To show the usability of Visit360, we chose to create 4 virtual visits of 4 different buildings that we could visit : Polytech Grenoble, Fablab, DOMUS smart apartmenet and La Casemate. These visits can be imported, navigated or modified and the stored in your local storage. You can use those visits to get familiar with the tool VISIT360 and with the navigation between scenes.
The Visit360 web page is accessible via the following link : http://localhost:8000/Visit360.github.io/Visit360/main/EditionMode.html
Edition Mode
You’ll arrive on the Edition Mode of the software. In the right side, you have a list of panoramical images that you can select to add to your visit. Adding a panorama to your visit requires selecting it, then clicking the button Add Panorama , this will open a pop-up where you can type an Id for your scene (a title), then click the button Submit . This will move your scene to the top of the list and turn the red mark to a green one. Hovering an added scene enables you to see the id id that you already set. Also, clicking on a scene that has already been added to your visit enables you to set it as the initial scene of that visit by clicking on the button “Set to Default”.
In the center of the page, you have the panorama that you’re actually editing, you can drag the panorama using your mouse to navigate in it, you can zoom in or out and you can go to the full screen mode. Buttons allowing you to do that are in the top left corner. The title/ID of the current panorama (scene) is in the bottom left corner of the visualization.
In the right side, we have a list of buttons allowing different features in our software :
- To add an information to the current panorama, you have to click on the location where you want to add it in the panorama, then click the button Add Information , this will open a pop-up where you can type your description and submit it to be added. Later you can read that description once you hover the Information Hotspot icon in the panorama.
- Follow the same process to add a Gateway Hotspot . So start by selecting the location in the panorama where you want to add your gateway, then click the button Add Gateway in the left. This will open a pop-up where you have to type the next Scene ID (the ID of a scene that has a green mark in the right side list, to avoid any possible mistake, you’ll be provided a list of available scenes in the visit, where you can choose the scene to associate to that new gateway), you can also type the gateway text which is the text to show when you hover that hotspot. Finally, you click the submit button to add the created gateway. Remember that youcan’t add a scene twice to the visit, and two scenes can’t have the same name, trying these two scenarios will give you a warning pop-up.
- In order to delete a hotspot (Gateway or Information hotspot), firstly, you have to click the button Delete Hotspot , its color will become red which means that you’re ready to delete a hotspot, all you need now it so select the hotspot that you want to delete from the current panorama by clicking on it. This will delete the hotspot and refresh the current panorama.
- The button Export Visit enables you to export your current edited visit in a JSON format, you can find the downloaded visit in the Downloads repository of your local storage. Exporting a visit is exporting its configuration and the mini map associated to it, which means that you export the scenes, their information hotspots, their gateway hotspots and the mini map that you edited in the edition phase.
- The button Import Visit enables importing an existing visit by selecting one of the available visits. There are 4 visits given as examples, that you can navigate and edit.
- The button Clear Visit enables you to delete all the modifications that are made on the current visit. You have to click that button when you want to start a new visit creation. You can switch between Edition Mode, Map Edition Mode and View Mode :
- To go to the view mode from the edition mode, you have to click on the eye button in the top left corner.
- To go to the edition map mode from the edition mode, you can click on the hand button in the top right corner.
Mini Map Edition Mode
Once in the Mini Map Edition Mode, you’ll have the same list of panoramas in the right side just like the Edition mode. In the center of the page, you’ll have a map representing the floor map of Polytech Grenoble. On this map you can add points of interests (red circles) in the positions that you want. Those points can represent the panoramas that you have, that’s why when you add one, you get a form under the map where you can type the id of the scene (panorama) to associate to the lastly added point. To help you avoid mistakes, you’re provided a list of available scenes in your visit to associate them easily to the mini map. The points of interest on your mini map can easily be deleted any time, when you’re in the Mini Map Edition Mode, with a mouse’s right click. When you finish the edition of the mini map, you can go back to the Edition mode by clicking in the pencil top right corner button.
The view mode contains 3 main parts:
Fistly, the visit visualization part, that is in the right, and that allows us to view the whole edited visit by navigating in panoramas, reading information in the hotspots and navigating through the gateway hotspots to other panoramas of the visit.
Secondly, the mini map visualization part, that allows us to navigate between panoramas by clicking on the points of interest that were added in the Mini Map Edition Mode . The green point represents the current panorama (scene), and clicking on one of the circles takes you to the corresponding scene by loading it.
Thirdly, the history part that you can show and hide by clicking the button Show History / Hide History , this history contains clickable paths to the scenes you went throught in your visit when you went to the View Mode . The history is updated whenever you navigate through the panoramas (scenes) using the gateway hotspots or using the point of interest in the mini map, also the history is deletable by clicking on the button Clear History .
To go back to the Edition Mode , you have to click on the pencil top left corner button.
Browser Compatibily
Since Visit360 and Pannellum are built with web standards, they require a modern browser to function. Full support (with appropriate graphics drivers):
- Firefox 23+
- Internet Explorer 11+
The support list is based on feature support. As only recent browsers are tested, there may be regressions in older browsers.
Not officially supported:
Mobile / app frameworks are not officially supported in this version of Visit360. They may work, but they’re not tested and are not the targeted platform.
Visit360 is distributed under the MIT License. Pannellum is distributed under the MIT License.
Petroff, Matthew A. “Pannellum: a lightweight web-based panorama viewer.” Journal of Open Source Software 4, no. 40 (2019): doi:10.21105/joss.01628
CodeWithRandom

Travel/Tourism Website Project Using HTML and CSS Code
- Post author: admin
- Post published: November 18, 2023
- Post category: Project / HTML & CSS / Html & CSS Project / Project Ideas
- Post comments: 0 Comments
Hello Coder, This post will teach you how to create a Travel/Tourism Website Project Using HTML and CSS Code. The webpage I’m going to share with you in this article is about traveling. It’s quite simple, and you’ll have your own Travel Tourism Website by the end of this article.
Table of Contents
Travel/Tourism Website Project Using HTML and CSS
A travel website is a sort of business that provides customers with travel-related services. When it comes to the future of this industry, numerous aspects will influence how consumers plan their vacations. The rise of mobile usage, greater competition, and a shift in customer expectations are among these factors. The ideal tool for tourists is the travel website creator.
HTML, CSS and JavaScript Projects With Source Code
People are increasingly using their mobile gadgets when traveling, for example. As a result, businesses should ensure that their websites are mobile-friendly. To enhance their profits, companies employ an easy website builder for small enterprises. They should also be aware that competition among online booking sites is increasing.
Travel Website in HTML CSS JavaScript
I hope now you have a general idea of what the project entails. In our article, we will go over this project step by step.
Step1: Setting Up the Structure (HTML)
Let us begin by establishing a Travel/Tourism project. Create a new index.html file in a new subdirectory to house the website layout. copy and paste the HTML code given below into your HTML file.
Every website has three sections: the header, the main body, and the footer. In our project, we will use the same procedure; we will build a header section where we will add the heading, and we will add the main content inside the main section.
Create Portfolio Website Using HTML and CSS (Source Code)
Now that we’ve added structure to our webpage, let’s have a look at it.

Step2: Styling the Travel Website (CSS)
Let’s concentrate on how we can style our website. I’ll highlight some key points to remember when styling.
ADVERTISEMENT
Default Styling:
We will import several new fonts for our travel website via Google’s import link using the @import url function. Then, using the universal selection, we’ll set the padding, margin, and box size to “border-box”. We’ll style our scrollbar with :webkit-scrollbarselector, setting the scrollbar width to 20px and the border radius to 10px with a yellow background.
Weather App Using HTML,CSS and JavaScript (Source Code)
Navbar Styling:
We will use the class selector (.nav-bar) to set the display to “flex,” with the width set to 100% and the height set to 90 px. We will change the background colour to white using the background colour property, and we will style the navbar items using the ul tag selector.

This is just scratching the surface of what you can do with CSS, And if you want an in-depth guide on CSS then we have got you covered. We have launched an E-Book for you, In this E-Book you will not only learn CSS but also HTML , Javascript , and Bootstrap as well. But Wait! It doesn’t end here, This E-Book also includes 100+ frontend projects and interview questions as well. You can find out more with this link – Master Frontend Development: Zero to Hero
Styling Banner:
Using the selector (.banner) and the background-image property, we will add an image to our background. We’ll set the width and height to 100% and 100vh, respectively, and use the text-align attribute to centre it. Our form element will also be styled.

Styling the Services and Places Section
We will utilise the basic CSS concept; first, we will choose the html element using the class selector, and then we will add a background image and set the width and height of the element using basic CSS styling.

Styling footer:
We will add an image background to our footer and the width and height of our footer using the undordered list tag selector. We will add a black background to our text using the background colour property, and the text will be set as white. We will add responsiveness to our trip website using the media query property.
Ecommerce Website Using HTML, CSS, & JavaScript (Source Code)

Now we’ve completed our travel website using HTML, CSS . I hope you understood the whole project. Let’s take a look at our Live Preview.
Final Output of Travel/Tourism Website:
Travel/Tourism Projects using HTML and CSS
If you find this Blog helpful, then make sure to search code with random on Google for Front End Projects with Source codes and make sure to Follow the Code with Random Instagram page.
You Might Also Like
Hangman game javascript | simple hangman game html css javascript.
")
26 Awesome CSS 3D Buttons (Example + Code)

Learn How To Style the HR Element with CSS
Leave a reply cancel reply.
Save my name, email, and website in this browser for the next time I comment.
Thanks 🙏 for visiting Codewithrandom! Join telegram (link available -Scroll Up) for source code files , pdf and ANY Promotion queries 👇 [email protected]
- Html Project
- CSS project
- JavaScript Project
Subscribe Now
Don’t miss our future updates! Get Subscribed Today!
Simple Responsive Tourism Website using PHP Free Source Code
Simple Responsive Tourism Website Introduction
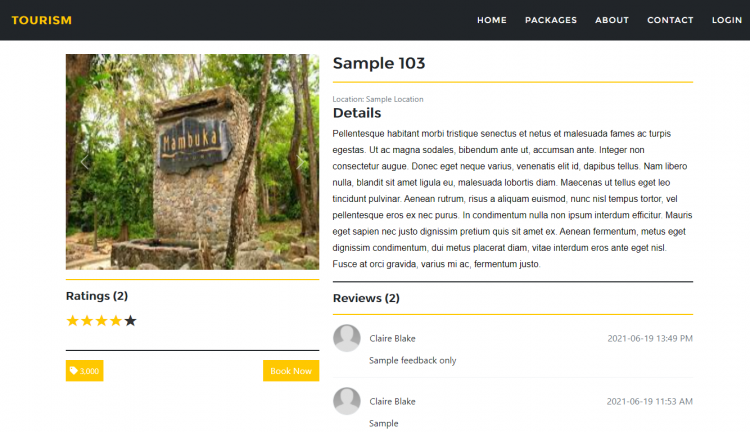
This is a simple PHP project for tourism that has an admin panel for maintaining the website data. This web application website side UI is mobile responsive also. The user/subscriber can send a booking request for the tour and give their feedback (rate/comment/review) of their experience to a specific tour package. This system has some basic features of a travel/tour web application.
About the Project
This Tourism Website Application was developed using PHP, MySQL Database, HTML, CSS, JavaScript , and some libraries/plugins such as Bootstrap . The user can simply create their account on the website by simply registering their website credential in the Login Moda. They can also explore, read details, browse images, and read some reviews in every package. The users can also inquire to the management by submitting their inquiries in the Contact Us Form . The Admin Panel is the side of the website where can management manages the data of the system such as the users' bookings and packages list
Features/Functionalities
- Login and Registration
- Explore Tour Packages
- Browse Tour Package Images
- Read Reviews
- Book Tour Package
- Manage Booking List
- Submit Rate and Review/Feedback
- Manage Packages
- Manage Bookings
- Update Booking Status
- Manage Inquiries
- Manage Feedback
- Manage System Settings
- Manage Account
Images of Some Interfaces

Requirements
- Download and Install any local web server such as XAMPP/WAMP.
- Download the provided source code zip file. ( download button is located below )
Installation/Setup
- Open your XAMPP/WAMP's Control Panel and start the Apache and MySQL .
- Extract the downloaded source code zip file .
- If you are using XAMPP , copy the extracted source code folder and paste it into the XAMPP's "htdocs" directory . And If you are using WAMP , paste it into the "www" directory.
- Browse the PHPMyAdmin in a browser . i.e. http://localhost/phpmyadmin
- Create a new database naming tourism_db .
- Import the provided SQL file. The file is known as tourism_db.sql located inside the database folder.
- Browse the Tourism Management System in a browser . i.e. http://localhost/tourism and http://localhost/tourism/admin for the admin side.
Admin Information
Username: admin Password: admin123
That's it! You can now explore the features and functionalities of this Simple Tourism Website in PHP . I hope this will help you with what you need and you'll find something useful for your future PHP Project. Feel free to download and modify the source code the way you wanted.
Explore more on this website for more Free Source Codes and Tutorials.
Note: Due to the size or complexity of this submission, the author has submitted it as a .zip file to shorten your download time. After downloading it, you will need a program like Winzip to decompress it.
Virus note: All files are scanned once-a-day by SourceCodester.com for viruses, but new viruses come out every day, so no prevention program can catch 100% of them.
FOR YOUR OWN SAFETY, PLEASE:
1. Re-scan downloaded files using your personal virus checker before using it. 2. NEVER, EVER run compiled files (.exe's, .ocx's, .dll's etc.)--only run source code.
- Tourism System
- Tours and Travel System Source Code
- booking system
- simple website
- Mobile Responsive Web App
- Ratings and Reviews
- MySQL Database
problem to run project code
Hi, have you followed the….
Hi, Have you followed the steps provided in the instructions or demo video?
Admin user profile pic is not working
Hello, i tested your project…, not able to run this, hello, do you have same…, an excellent simple tourism…, sad on this file, when i open your project it….
- Add new comment
- 30901 views
Bootstrap Tour Forked Genosite
Quick and easy way to build your product tours with Twitter Bootstrap Popovers.
Note: This library does not depend on the full Bootstrap package. The only dependencies are the tooltip and popover files.
1. Link to the JavaScript dependencies.
2. initialize the tour, 3. add steps.
You can add as many steps as you want, but not too much or your users will fell asleep!
4. Start the tour
Useful methods.
Bootstrap Tour saves the current step in a cookie and will not display the tour again to users who have already completed it.
If, for some reasons, you want to force the tour to be displayed, pass true to the start() method.
Sometimes you want to end the tour prematurely:
Or skip to the next step:
Or go back to the previous step:
Or skip to a specific step:
Or restart the tour after it ended:
Or verify if the tour ended:
Initialization Options
Default options:
This option is used to build the name of the cookie where the tour state is stored. You can initialize several tours with different names in the same page and application.
afterGetState and afterSetState
You may want to do something right after Bootstrap Tour read or write the cookies. Just pass functions to afterGetState or afterSetState .
Your functions can have two parameters:
A simple example if to send a post request to your server each time there is a change:
Function to execute right before each step is shown.
Function to execute right before each step is hidden.
Step Options
Contributing.
Code licensed under the Apache License v2.0 . Documentation licensed under CC BY 3.0 . Well, the same licenses as Bootstrap. We are lazy! ;)

Welcome to the Windows XP Tour!
The tour is available in two formats. Which format do your prefer?
○ Play the animated tour that features text, animation, music, and voice narration.
○ Play the non-animated tour that features text and images only.
Websites for you and your projects.
Hosted directly from your github repository . just edit, push, and your changes are live..

Ready to get started? Build your own site from scratch or generate one for your project.
You get one site per github account and organization, and unlimited project sites. let‘s get started..
- User or organization site
- Project site
Create a repository
Head over to GitHub and create a new public repository named username .github.io, where username is your username (or organization name) on GitHub.
If the first part of the repository doesn’t exactly match your username, it won’t work, so make sure to get it right.
What git client are you using?
- GitHub Desktop
- I don't know
Download GitHub Desktop
GitHub Desktop is a great way to use Git and GitHub on macOS and Windows.

Clone the repository
Go to the folder where you want to store your project, and clone the new repository:
~ $ git clone https://github.com/ username / username .github.io
Click the "Set up in Desktop" button. When the GitHub desktop app opens, save the project.
If the app doesn't open, launch it and clone the repository from the app.
After finishing the installation, head back to GitHub.com and refresh the page. Click the "Set up in Desktop" button. When the GitHub desktop app opens, save the project.
Hello World
Enter the project folder and add an index.html file:
~ $ cd username .github.io
~ $ echo "Hello World" > index.html
Create an index file
Grab your favorite text editor and add an index.html file to your project:
Add, commit, and push your changes:
~ $ git add --all
~ $ git commit -m "Initial commit"
~ $ git push -u origin main
Commit & publish
Enter the repository, commit your changes, and press the publish button.
…and you're done!
Fire up a browser and go to https:// username .github.io .
Use a theme, or start from scratch?
- Choose a theme
- Start from scratch
Repository Settings
Head over to GitHub.com and create a new repository, or go to an existing one. Click on the Settings tab .

Theme chooser
Scroll down to the GitHub Pages section. Press Choose a theme .

Pick a theme
Choose one of the themes from the carousel at the top. When you're done, click Select theme on the right.

Edit content
Use the editor to add content to your site.

Enter a commit comment and click on Commit changes below the editor.

Head over to GitHub.com and create a new repository , or go to an existing one. Click on the Create new file button.

Name the file index.html and type some HTML content into the editor.

Commit the file
Scroll to the bottom of the page, write a commit message, and commit the new file.

Click on the Settings tab and scroll down to the GitHub Pages section. Then select the main branch source and click on the Save button.

Fire up a browser and go to http:// username .github.io/ repository .
Now that you’re up and running, here are a few things you should know.
Blogging with jekyll.
Using Jekyll , you can blog using beautiful Markdown syntax, and without having to deal with any databases. Learn how to set up Jekyll .
Custom URLs
Want to use your own custom domain for a GitHub Pages site? Just create a file named CNAME and include your URL. Read more .
Learn how to create custom 404 pages, use submodules, and learn more about GitHub Pages .
IMAGES
VIDEO
COMMENTS
Add this topic to your repo. To associate your repository with the travel-website topic, visit your repo's landing page and select "manage topics." GitHub is where people build software. More than 100 million people use GitHub to discover, fork, and contribute to over 420 million projects.
Tripify is a Online career maker website. In this projects, user can earn money by guiding tourists in his area. This website has 3 role of user, 1.Admin, 2.Tourist, 3.Tour Guide.Tripify is built in MERN [MongoDB, Express.js, React.js, Node.js] Stake. travel tourism-website toure-guide. Updated on Jan 16.
Image Slider. To create Image Slider, first we will create a img below the content and then above img we will create 6 divs of background black in a grid. Those divs will cover whole image when needed. So basically, we will show those divs and hide them and in between we will change the background image using JS.
Every website has three sections: the header, the main body, and the footer. In our project, we will use the same procedure; we will build a header section where we will add the heading, and we will add the main content inside the main section.
In this top, we are going to share with you 10 of the best guided tour plugins made in VanillaJS and jQuery. 10. Anno. Github. Anno is a step-by-step guides plugin for powerful web apps. Anno.js is built to be extensible, the source is about 500 lines of literate coffeescript; you can read the annotated source in just a few minutes.
Bootstrap Tour is a tool that helps you create interactive and customizable product tours with Bootstrap Popovers. You can use it to guide your users through the features and benefits of your website or application. Learn how to setup your tour, use the API, and customize the options.
Customization. Tailor the tour using a range of options, either set options on initialization or update them on command with the setOptions () method. All options are optional and defaults will be used in place of custom values. Use the TourStep type definition to automatically detect available options in your IDE. Set options on initialization.
To build a custom tour component in React, it's easiest to isolate the functionality and component UI with these React Hooks: useTour - a custom Hook to build your own UI on top of functionality. Tour - a dumb UI component that consumes useTour to load the tour portal UI. This mock code shows how useTour works: /*.
Add this topic to your repo. To associate your repository with the travel-website topic, visit your repo's landing page and select "manage topics." GitHub is where people build software. More than 100 million people use GitHub to discover, fork, and contribute to over 420 million projects.
how to make complete responsive tour and travel website design using html css vanilla javascript php and mysql database from scratch. complete responsive travel agency / travel booking / adventure tour website design both front and backend, html css vanilla javascript php mysql step by step tutorial for beginner. the main feature of this ...
4. Chardin.js. Inspired by Gmail's new composer tour, Chardin.js is a simple overlay of instructions on existing elements. It uses a JQuery plugin to display instructions. The GitHub page contains the instructions and documentation and has 4.9k GitHub stars.
Why Python for a Travel and Tourism Website? Python, when coupled with Django, offers a robust foundation for creating a versatile travel and tourism project. Not only does it enable quick development, but its libraries and frameworks also provide a multitude of functionalities to facilitate real-time communication and centralized data handling.
Visit360 is a software that aims to create virtual visits of any building using panoramical 360° images. For the demonstration phase, we created a web page that allows you to edit and save the virtual visit of Polytech Grenoble and some other buildings taken as examples. The demonstration is based on a web page using HTML, JavaScript and CSS ...
We will add responsiveness to our trip website using the media query property. Ecommerce Website Using HTML, CSS, & JavaScript (Source Code) Now we've completed our travel website using HTML, CSS . I hope you understood the whole project. Let's take a look at our Live Preview. Final Output of Travel/Tourism Website:
Download the provided source code zip file. ( download button is located below) Installation/Setup. Open your XAMPP/WAMP's Control Panel and start the Apache and MySQL. Extract the downloaded source code zip file. If you are using XAMPP, copy the extracted source code folder and paste it into the XAMPP's "htdocs" directory.
Useful Methods. Bootstrap Tour saves the current step in a cookie and will not display the tour again to users who have already completed it. If, for some reasons, you want to force the tour to be displayed, pass true to the start() method. tour.start(true); Sometimes you want to end the tour prematurely: tour.end();
Welcome to the Windows XP Tour! The tour is available in two formats. Which format do your prefer? Play the animated tour that features text, animation, music, and voice narration. Play the non-animated tour that features text and images only.
You get one site per GitHub account and organization, and unlimited project sites. Let's get started. User or organization site; Project site; Create a repository. Head over to GitHub and create a new public repository named username.github.io, where username is your username (or organization name) on GitHub.