Mk4 Golf Multifunction Steering Wheel and Cruise Retrofit


Introduction: Mk4 Golf Multifunction Steering Wheel and Cruise Retrofit

Ever get tired of having to take your hand off the steering wheel, move it slightly towards the centre of the car to operate some radio functions? Ever wanted to have cruise control?
Well thats what I wanted, having had newer Volkswagens with these features, I decided it would be nice to retrofit these items in to my mk4 golf as they were factory options at the time the car was produced. It seems its not something thats well documented and there are just bits on various forums, but not exactly what I am doing here: Cruise control + Multifunction Steering wheel retrofit. It seems there are some forum threads on how to do cruise control, but still not everything is greatly documented. Hopefully this instructable will help quite alot in the process.
One thing I will say about this instructable is that I am working on a particular model of mk4 golf, which while many steps are the same, some will differ. My model of car is a UK 2001 V6 4Motion Golf, its classed as a 'highline' so consequently has some wiring/items already in place. Not 100% sure on if cars of other countries are going to be the same.
A prerequisite of the cruise upgrade is a car thats 'fly-by-wire' as in it has an electronic throttle pedal and throttle body, I think this applies to diesels from about 1998-2005 and petrol cars 2000-2005, I had a year 2000 Bora V5 engine and that was throttle cable, not fly by wire, but thats the change over period depending on engine I think. Once again theres quite a few models out there with various engines:
Petrol/Gasoline
1.4 - economy model, additional wiring required
1.6 - economy model, some engines additional wiring required (apparently some had factory wiring, maybe later models)
2.0 - economy model, additional wiring required (I think)
2.3 V5 20v (10v model is cable throttle)
2.8 V6 24v (12v version will be cable throttle)
To do this install you should be pretty competent with cars, wielding a spanner, screwdriver, meaning you most likely have the tools to do the job, some of the stuff I used was this:
Torx bits/Socket set - all of the dash parts are held in place with Torx Screws.
Various Spanners
Pozidrive/Flathead screwdrivers
Soldering iron+Solder
Electrical tape/Heatshrink (heatshrink preferred)
A Laptop and VCDS + Cable for coding, or a friend/mechanic who can do this - Fairly important as its needed to activate the cruise control
Optional - Tesa Fabric tape for wrapping any of the loom, like the factory did. I guess standard PVC electrical tape will do.
Optional - Plastic pry-bar set for removing interior panels(saves damaging the interior with a screw driver).
I'd suggest this is the sort of job to do over a weekend, although I have been doing it over several weeks as you can take off some panels, trace out locations and get to know what your connectors are ect, then do it over some evenings/weekends, or try hard and do it in a day.
Step 1: Gather Your Components
Depending on the model and engine you are starting with this list will vary slightly, so I'll break it down in to a 'core' and 'additional'
-Multifunction steering wheel (MFSW)
You can source this from a breakers yard, ebay etc, you'll want the wheel and airbag, it can be found on mk4 golf, Bora/Jetta and Passat from 1998 - 2005
-Cruise Control Indicator Stalk
These come in 2 varieties: Cruise only and Cruise for cars with MFSW from the factory. Whats the difference? Well 2 part numbers which translate to a cruise control indicator stalk that has 'on/off' on the face of the stalk and 2 buttons on the end - 8L0 953 513 J and the MFSW stalk that just has on/off slide switch on the face - 8L0 953 513 S . I'm planning to use a standard cruise stalk, but with the steering wheel as the normal stalks are cheaper/more available!
- Wiring looms
Theres technically a couple of looms you'll need for this, if you have a highline vehicle, chances are most of it is already in place, you will just require the stalk wiring and the MFSW wiring. I got my cruise stalk wiring on ebay from China, the MFSW bit, I also got on ebay, but they are all made by a company called Kufatec(based in Germany). The alternative is to strip it out of a donor vehicle.
-Clockspring
Apparently cars with ESP already have the right clockspring, it has additional cables required for the MFSW. I believe normal cars have a 4 pin clockspring, ESP ones have a 5 pin clockspring.
-Control Relay 452/451
Can be found on ebay relatively cheap, if your car is pre 2001 Relay 452, apparently 2002> Relay 451. Seems counter intuitive, but apparently relay 451 is for canbus cars and can be coded with VAGcom to act like relay 452!
Additional (for other/economy models)
You'll need a clutch switch+associated wiring which I am not certain is present on all models, which ideally you can get from a donor vehicle, any vehicle with ESP button(mk4 platform) on the dash should have this even if it doesnt have cruise or MFSW. Trace the wiring, take photos and disconnect as gently as possible. If you can get a donor to strip out will make things much easier :)
Brake Switch is different, its a 4 pin brake switch, 1 circuit is for the lights, the other feeds back to the car for traction control etc, check yours first.
Its advisable to look for a proper cruise control retrofit kit on somewhere like ebay that contains more than just the 5 cable stalk connection wire, there are additional cables that run to the ECU that highline cars already have.
You will definitely need a different one on your car if not equiped with ESP button on the dash already. Apparently the clockspring has a sensor for detecting position in it on ESP cars, so VW decided to make one type.
Step 2: Wiring Looms - a Few Modifications.

One of the first jobs before we start in the car is modifying the wiring looms and understanding where they are going to go. I spent about a day looking through a Bentley Manual and my looms, along with drawing it out so that I could positively understand what I was connecting where.
The Kufatec loom I got from eBay was an 'all white' loom that has its location/colour printed in German on the wire. What makes that akward is it doesnt seem to follow the colours of the VW wiring loom according to the Bentley Manual!
I also had a cruise stalk loom from China, cheap and the colours were about what the manual said, these need to be spliced in to the Kufatec loom. I figured that I can use a standalone cruise stalk and a multifunction wheel side by side, as essentially the control relay and the stalk buttons do the same thing, so why not join them together? (plus it seems easier to get standalone stalks compared to the price of MFSW ones)
I have attached a wiring diagram for the steering wheel and stalk so you can see how it essentially connects to the same locations.I have included a picture thats coloured and the single colour PDF version of the wiring diagram I drew up on CAD as you can zoom in with the PDF to read the small writing, hopefully this will help alot!
This is where you need to break out the soldering iron and heat shrink. I stripped a little section of insulation on the Kufatec loom on each of the 4 'cruise' cables, I then cut the cruise stalk loom connectors off about 2 inches from the end, in case I wanted/needed some of the strange push in connections for something else. Tin your wires, solder them together and then when its cooled down slide some heat shrink over each of the new joints. You could use PVC electrical tape, but I have found over time it just doesnt stay put, especially if the car its warm inside! I then finished off by using some Tesa Cotton Tape to wrap the pair of looms together for a few inches near the connector - factory looking and tidy!
At this stage once you have the looms adapted you can actually start the project as some of it is installed from inside the car and requires nothing major to be taken off (the steering wheel) so you can start installing the MFSW socket/looms to parts under the dash leaving the car drive-able until you are ready for the big bit.
Attachments

Step 3: Removing the Dash Panels (leaving the Car Drive-able)

You can actually remove quite a few panels from the interior and still have a perfectly usable car. Its what I have been doing as the MFSW and cruise are not essential, but getting to work is, combined with the need to work on my van too, means I could just do bits.
I have attached some photos of the panels you need to remove to gain access under the steering wheel area to do some of the wiring. I found this is stuff that wasnt always documented and its also the more frustrating.
You'll need a Torx T20 and T25 to remove the lower dash panels, along with some plastic interior pry bars if you have them to pop some bits of panel off without damaging the interior. I started at the door, prizing off the fuse box cover, then worked round undoing the first batch of screws to remove the 2 outer panels.
The one near the fuse box comes off fairly easy, the one near the centre console is more difficult. Once you are sure all the screws are out, you need to pull the panel towards the drivers seat as its held in place with some annoying clips.
Then there is an inner plastic panel, which I dont quite understand why they have 2 like this, the inner one was just held in place with screws.
You should now have access to the entire area under the steering wheel.
Step 4: Wiring in the MFSW+Cruise Wiring Part 1 - T10 Bulkhead Connector Interior

You've already made the modifications to the loom so now you can start installing it, We'll start by doing the more awkward connector, the T10 bulkhead connector. I found that realistically despite my car being already 'pre-wired' you still need to remove the scuttle panel and access the T10 connector from both inside and outside of the car.
There is a black connector that goes through the bulkhead, I have come to know this as the 'T10' connector, which on highline models is already wired from the the engine bay side to the ECU apparently, meaning some connections just need inserting in the correct locations.
In order to get to the T10 connector inside, you actually need to remove the main relay mounting frame, which is secured in place with an M6 nut each side (a 10mm socket), I found there was one relay module I had to unplug to access one. The other thing you'll need to remove is the side fusebox, which is held in place with 2x Torx T25 screws, in the case of my car someone had managed to screw this right up and it took me over an hour to get them out, looks like the threads need re-tapping!
With the side fuse box unbolted it needs twisting and pulling through the hole in the side panel, this will allow you to then remove the relay frame panel, giving you access to the T10 connector.
You'll then need to go to the next step to unclip the plug from engine side so you can insert the cables inside (its a fiddly job). Once the connector is free, you'll need to put the purple center piece slightly through the connector (it slides sideways) as they will allow you to insert new new cables.
Once you have inserted the required cables in the T10 connector, you can now also plug the 452/1 'relay' holder in to the relay frame. It goes in position 5+6. The frame can now go back in place and you can if you needed just reel up the wires with some tape and put them in under the dash and keep driving the car.
Step 5: Wiring Outside the Car

Although I havent done this step to my car (because its a highline and pre wired) technically, I thought I would give some of it a mention.
On cars that need the additional wiring from the 'T10' connection on the bulk head that takes the wiring from inside to outside the car, you'll need to remove some additional parts to get to the ECU.
As I found even with a highline you still need access to the T10 connector to add 4 wires in from the passenger compartment to the connector.
To achieve access to the T10 connector there are several steps: removing the wiper arms (small puller advised as they are on a tapered splined shaft, although some penetrating oil might be enough) along with the plastic scuttle panel, which apparently you start by taking out the access to the cabin air filter (4 screws) located on the passenger side(I'm presuming VW mirrored this for cars that are different parts of the world, mines on the battery side of the engine bay), however I found the opposite end came out easier first. Be gentle with the scuttle panel, but it lifts kind of upwards to unclip it from the edge of the windscreen.
You'll need to also remove the wiper motor (and unplug it which can be a pain, so nows a good time to also service it by using a little spray grease on the joints) to allow access to the cover that goes through the bulkhead.
Although mine was pretty clean, now is a good time to clear out any debris from this area that can accumulate over time.
I found there was quite alot of information on this thread:
https://forums.seatcupra.net/index.php?threads/leo...
However thats a Seat which has different dash parts, but does have photos of connecting up the scuttle area wiring.
I have included some photos to help show how to getting to this.
Step 6: Wiring in the MFSW+Cruise Wiring (Leaving the Car Drive-able) Part 2 - OBD + Radio Connector

Within The Kufatec loom there is a pair of wires marked as T20/11 and T8/3, now I did note that on the VW wiring diagram, the Kufatech T8/3 is actually marked up as T16/7. This makes much more sense as the OBD socket is 16 pin and if you check the pinout the pin 7 is the 'K-line' which is the diagnostic connection. What I also note is the 'power' ISO connector for the radio, pin 3 is the K-Line diagnostic connection, its an 8 pin connector, so you can see why it was labelled this way. The T20/11 is the Blue/Green/Yellow 3 part connector, which does things like CD changers and phone prep, Pin 11 is the bottom of the green nearest the blue connector (look online for this connector for a pinout). This pair of wires that go to the centre console, which allows the diagnostic system wiring to integrate and the stereo control.
There are also 2 more cables which may/may not be included in your car, depending on year there is also Canbus, which is 2 orange wires that are a twisted pair. My Kufatec loom didnt come with any cables in the 2 positions for Canbus, but did seem to come with 2 push in connectors which I can only presume are for this addition(although I also wonder if they might be designed to replace 2 other items in the system). I bought some wire the right colour and am going to add the cables as my OBD connector also has the orange Canbus cables.
You might not have a factory head unit, but thats ok, theres a little box you can get for most brands of stereo meaning you can control some things on the headunit from the steering wheel as if it was factory! I dont cover that in this instructable, but ebay is full of them, if you can do this, then you can add that piece of cake.
So first up you need to find your sockets, the stereo connection is in the blue/green/yellow coloured factory socket. I have an aftermarket stereo so this was just dangling around in the centre console which I currently have a section removed (another job), the OBD socket is held in place by 3 tabs that just push out the way to allow the socket to slide back in to the centre part of the dash.
If you look at the pictures you can see how its retained and also by pushing on the purple section of the OBD connector, it slides out of the way to reveal the pins, a small screwdriver will allow you to lift the retaining clip and slide the receptacle out the back. Do one at a time and make sure you remember which hole you removed a pin from.
I joined my wires to the cable in the same way as I did the wiring modifications, remove a little PVC sheathing and solder in, heat shrink and you're done.
Reassemble your connectors and place back in to their original locations.
Step 7: Wiring in the MFSW+Cruise Wiring (and Leaving the Car Drive-able) Part 3 - Light Switch Connection

To allow the multifunction steering wheel to illuminate like the rest of the dash, there is also a signal wire for this too.
As all the panels are removed from the dash its fairly easy to access the Light switch connector from the area where the side fuse box is, the connector is just held in place with a piece you press each side, should come out fairly easy.
I found the loom allows the connector to come down and out under the lightswitch (rather than out the side), which will allow you to get to the cabling and connect up to Pin 17. The back of the connector is marked up with numbers so its easy enough to find, use the previous method of removing the pin, stripping and soldering, followed by some heatshrink.
Finally plug it back in.
Step 8: Car Out of Commission in a Big Way - Steering Wheel + Stalk Time.

Lets start with some safety.
Airbags in cars will save your life in an accident, however the nature of how they are triggered means they should be handled with care.
Before you start this step, disconnect your battery(take a photo of your speedo clock before hand if you want to keep track of the mileage on your trip/fuel tank if you need), turn the ignition on and go do something else for an hour(I left my battery disconnected over night).
This should make sure there is no electrical charge anywhere that can accidentally fire the airbag while you're working on the car. Equally the bag should be handled carefully and stored somewhere which if it was to go off wouldnt cause any harm(I put mine in the boot, which would contain anything that happens if it did).
Once everything has been safely disconnected and discharged for an hour at least, its time to remove the steering wheel to begin. The airbag centre piece is held in place with a couple of really heavy duty spring clips. To release them the steering wheel will need to be turned approx 90 degrees from straight to reveal a hole each side of the wheel at the back of the wheel. You'll need something fairly strong and small to go through the hole to pop the clip off of its hook. You then then need to turn the wheel the other way and do the same for the second side. I think in the end I used an appropriate screwdriver, but I have seen people mentioning drill bits and various strong pins.
Once released you can get to the plug to unplug the airbag. Go and put the airbag somewhere safe (often people just put it in the boot of the car so its contained when just doing the stalk upgrade). There should also be a plug for the horn/wiring, disconnect this. Now you need to take the wheel off, make sure you recentre it, a 12mm XZN bit is required to undo the large nut in the centre, give the wheel a tug and off it should come. Try not to undo this against the steering lock, either hold or get someone to hold the wheel, I didnt find it too tight to undo with a ratchet in one hand and wheel in the other. Gently pull the wheel towards you.
You should now be greeted by the clock spring, make sure it stays in position, use a bit of tape to keep it in the right position for reassembly. There are a couple of clips at the top and bottom to gently prize outwards, once released it should unplug and put it to one side.
There are also the shrouds surrounding the steering wheel, held in place by a couple of screws and the normal sort of clip together arrangement these plastic parts seem to have, remove and put to one side.
You should now have access to the car side of clockspring connector, which is where we need to start adding new cables.
Step 9: Wiring in the MFSW+Cruise Wiring Part 4 - Steering Wheel & Final Connections

With the new components we put in place previously, we now need to make some modifications/additional connections to the steering wheel.
Originally the horn in the steering wheel was just switch, now though the relay 451/452 triggers the horn when you press the button. In order for there to be enough connections to the steering wheel, some are changed.
The one for the Horn is now connected to a cable labelled 'interconnect' or 'verbinden' in German. I'm not sure why its not just labelled horn?!
On the clock spring connector of the column side, there will a connector, which I think should standardly be 4 pin for cars without ESP and should be a 5 pin connection for cars with ESP. One location will be unpopulated and another location will require the pin to be removed and replaced with one of the new loom's cables. The Kufatec loom has 3 cables - T5/1 , T5/3 and interconnect. T5/1 and T5/3 will go in to the connector, the cable you remove from the connector needs to be connected to 'interconnect' as on mine it already comes with a crimp connection ready to accept the new wire.
With the wires inserted in to the 5 way connector and the modification made, the clockspring can now be replaced and connected up.
There is one power connection that comes from Fuse 5 of the fuse box on the end of the dash, depending on what kits you're using to do this, its either a case of taking the fuse out and popping the pin out to replace it with another Y type connector (I've seen this on some aftermarket cruise control kits) or you have 2 cables to solder in to the existing piece of wiring. On my Kufatec loom I found a wire just marked as 'fuenf' or Five in German, still doesnt give you much clue! on my cruise loom I had a black cable with a blue stripe, both these wires connect to the back of fuse five, so you can do the previous type solder connections by removing the pin, stripping some PVC and doing some soldering followed by heat shrink. Plug it back in and its done.
This should now leave just 2 final connections under the dash, that need to be connected which both have ring connections, one is marked ground, which handily there is a bolt down ground point right near the brake light switch and the power connector '+30' which is labelled on the bottom of the relay board. Undo the nut and insert the connection, replace the nut and tighten up as it was before.
Step 10: Check Everything.
So now you think you have everything in place, double check all the electrical connections are secure, fuse boxes back in place and that everything you have done seems to be right and secure. At this stage you can leave all the panels off as we need to do some testing.
Reconnect the battery. Do this with the keys in the igniton in the on position and nobody in the drivers seat.
Hopefully the airbag didnt just go off and everything on the dash has just come up zero'd. The horn should work without doing anything, hopefully that didnt set the airbag off either - not that I am paranoid about the airbag going off!
Check all your basic operations like indicators and high beam functions operate and make sure your car seems ok.
In order to do a road test you'll have to refit your wipes/scuttle panel at this stage, so refit all the items bonnet side, but you can leave the panels off inside in case connections need checking.
In theory you can now drive the car again, but obviously nothing will work cruise wise, or radio (although I never checked as I didnt have a stock radio).
Step 11: Coding in Cruise Control
In order to get this to work, you'll need to (or a friend) code in the cruise control option to the system. Most popular software for this is VCDS by Rosstech. I have a genuine cable, not sure if repro cables will work for this.
Having had the battery off its also going to throw a whole load of fault codes up that need resetting.
Start by resetting those before moving on to adding the option of cruise control.
With the laptop plugged in, ignition on, go in to VCDS and follow this sequence:
[Select] - (control modules or something I think was first step)
[01 - Engine]
[Login - 11]
Enter 11463 to activate cruise control
Unfortunately I didnt take any photos, but it is as straight forward as that.
Now also another thing you can do at this stage with the laptop plugged in is to select the module for the steering wheel (in the same way you selected engine). If you go in to 'Measuring blocks' a new screen comes up and when you press the buttons on the steering wheel, it well tell you which one, I did a check on mine and everything works, including the cancel button that doesnt work to actually cancel the cruise in real operation (to be investigated, but I think it may be an additional cable not present in any of my retrofitted looms). I might see if I can get some photos of this as I want to do some more tests.
Step 12: Testing and Finish
With any luck everything has gone ok and you have cruise control and no extra faults come up.
So now you need to go and test it out on the road!
Find somewhere with no traffic and nice long straight roads of 40mph+, turn the stalk switch slider to 'on', which if you have a highline model a green symbol will illuminate on the dash, now by pressing either 'set' on the steering wheel or the button on the end of the stalk (if you used a full cruise stalk like me) should set the current speed, let off the throttle and it should cruise? Not all cars apparently have the cruise light in the speedo, so you have to test this way. Now press the brake slightly, is the car just slowing down like you knocked off the cruise? If yes great. If not there may be a problem, cruise should disable by sliding the stalk switch to off, or a last resort is to turn off the ignition. On some cars you should also be able to use 'cancel' on the steering wheel to do the same, I havent found out why mine doesnt work yet, I'm not sure if a further cable might be required or if it only works on canbus 2002> models with a 451 relay. I'll update this if I find out.
If it seems to work ok, Good Job!
If it doesnt work correctly, the first thing is to plug in VCDS and find out what error code come up, my car had apparently an intermittent brake light switch before I even started so I changed that to avoid any problems.
As an extra, I have since starting the draft for this article also gotten a control box for the radio (I have a kenwood), which is made by a company called Connects2. Its fairly straight forward to fit and I am pleased to say all the buttons work for controlling the stereo (volume/track select). There are currently 2 buttons I dont have use of:
Cancel - I want to check this out, but its not on the cruise stalk either, it may be something for Canbus cars, however checking in VCDS when doing the coding, the software could tell me I was pressing the button, so it is working, just not doing anything.
Theres a button on the back of the steering wheel behind the cruise buttons, I dont know what its for (havent looked it up yet) but I think it might be for answering a telephone. Whatever it is, it doesnt do anything even with my Connects2 adapter box.
Hopefully this instructable made your drive just that bit easier.
Recommendations

Made with AI - Autodesk Design & Make - Student Contest

Making Time Contest

Big and Small Contest


Volkswagen Golf Owners Manual: Operating the cruise control system (CCS)
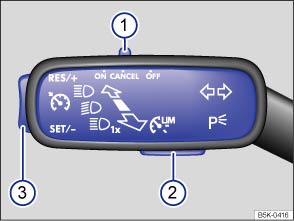
Fig. 161 On the left of the steering column: switch and buttons for operating the CCS
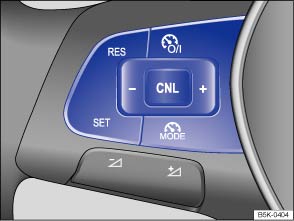
Fig. 162 Left-hand side of the multifunction steering wheel: buttons for operating the CCS

The mph figures given in brackets in the table relate exclusively to instrument clusters with mile readings.
Changing gear in CCS mode
The CCS reduces acceleration as soon as the clutch is depressed, and automatically continues to regulate the speed after a gear change.
Driving downhill with CCS
If the CCS cannot maintain the vehicle speed when driving downhill, brake the vehicle with the foot brake and shift down gear if necessary.
Automatic switch-off
The CCS control will be switched off automatically or switched off temporarily:
- If the system detects a fault that could impair the function of the CCS.
- If the vehicle speed is higher than the stored speed for an extended period with the accelerator pedal depressed.
- If regulation related to the driving dynamics is taking place, e.g. by TCS and ESC.
- If the airbag is triggered.
Display and indicator lamps
Speed limiter, other materials:.
Removing automatic distance control unit from and installing on retaining plate, variant 2 Special tools and workshop equipment required Calliper square -VAS 6335- Removing – Remove adaptive cruise control unit -J428- → Chapter. & ...
Legislative conditions The manufacturer is issued with a general operating permit (GTA in accordance with § 20 StVZO (German road traffic and licensing regulations) and EU operating permit) for the overall vehicle with all parts for specific conversions. Conv ...
Fuse table Fig. 230 In the dash panel: fuse layout First read and observe the introductory information and safety warningsThe table shows the fuse locations for the items of electrical equipment which are most relevant to the customer. The left column contains the location, the other columns contain t ...

- Forum Listing
- Marketplace
- Advanced Search
- Technical Community
- Audio, Electrics and Lighting
Retrofit Cruise Control - A Useful Compatability Guide
- Add to quote
Good post, I'm going to have a go at fitting it to my car within the next month. The only thing that concerns me is accidently moving the ESP slip ring slightly and upsetting the ESP when I connect it all back up
[quote user="Bogwoppit"] Good post, I'm going to have a go at fitting it to my car within the next month. The only thing that concerns me is accidently moving the ESP slip ring slightly and upsetting the ESP when I connect it all back up [/quote]Put some tape over it to hold it still and you should be fine - there's +/- 4 degree tolerance with it as well, so will take a bit of movement. If the worst comes to the worse and it does throw an error, you can always re-calibrate it with vagcom so it learns its new position as straight ahead. To the OP - 2.8 V6 BDE Engine also comes pre-wired if you want to add that to the list. Jon.
- ?
- 106.4K members
Top Contributors this Month
- Technology / Assistance Systems
Adaptive Cruise Control (ACC) with predictive cruise control
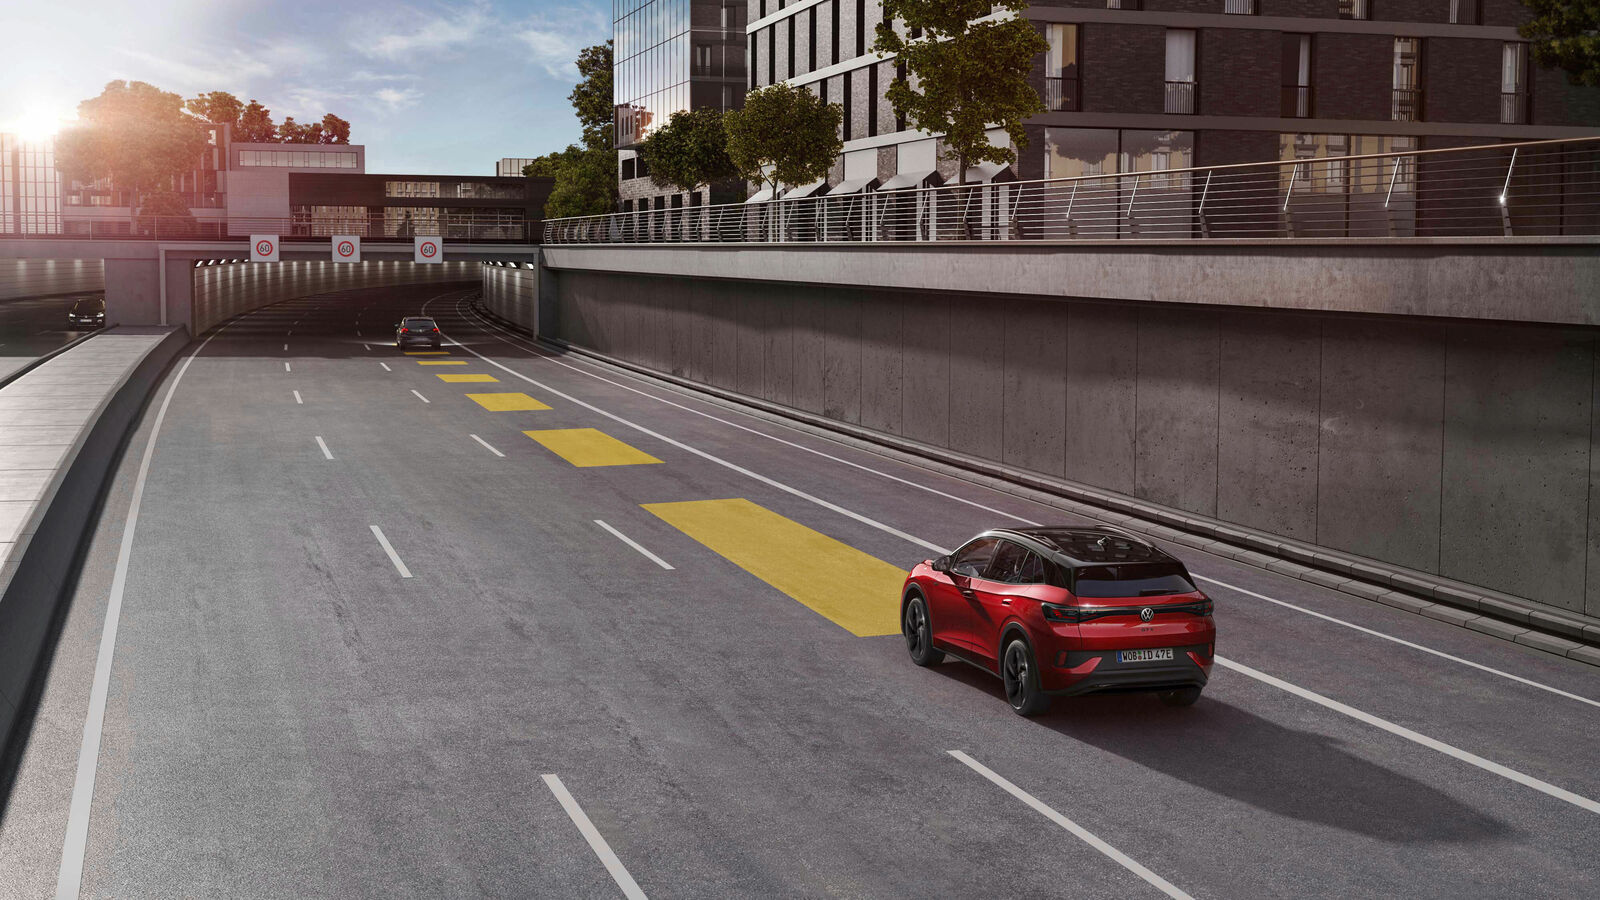
Keeps your distance. And observes speed limits.
Adaptive Cruise Control ACC helps you to maintain a previously set maximum speed and a predefined distance to the vehicle ahead . In conjunction with a navigation system, ACC is enhanced by predictive cruise control and a cornering assist function. ACC can adapt the vehicle speed to the applicable speed restrictions and course of the road (bends, roundabouts, etc.) . In conjunction with the dual clutch gearbox (DSG)*, you can also stay relaxed when driving in traffic jams and stop-and-go traffic . * DSG only in the Touareg
Available in the following models
Polo T-Cross Taigo T-Roc T-Roc Cabriolet Golf Golf Variant Tiguan Tiguan Allspace Passat Variant Arteon Arteon Shooting Brake Touareg*
Adaptive Cruise Control ACC helps you to maintain a previously set maximum speed and a predefined distance to the vehicle ahead . It also features predictive cruise control and cornering assist function. ACC can adapt the vehicle speed to the applicable speed restrictions and course of the road (bends, roundabouts, etc .
ID.3 ID.4 ID.5 ID. Buzz
Press releases
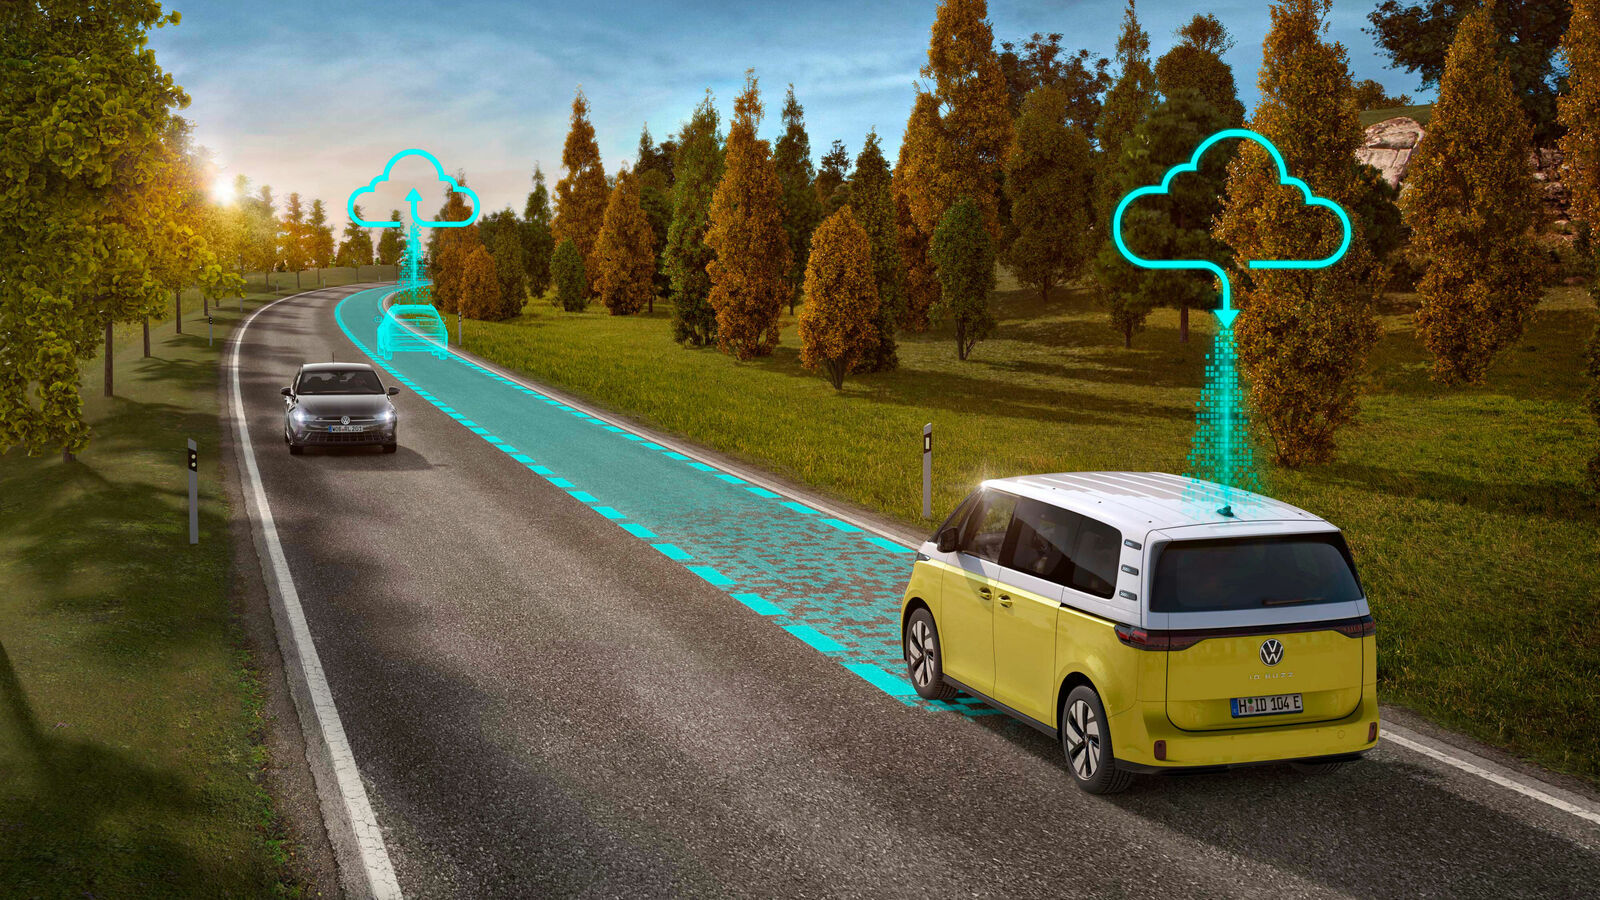
Unique in its class: the new ID. Buzz impresses with innovative driver assistance systems
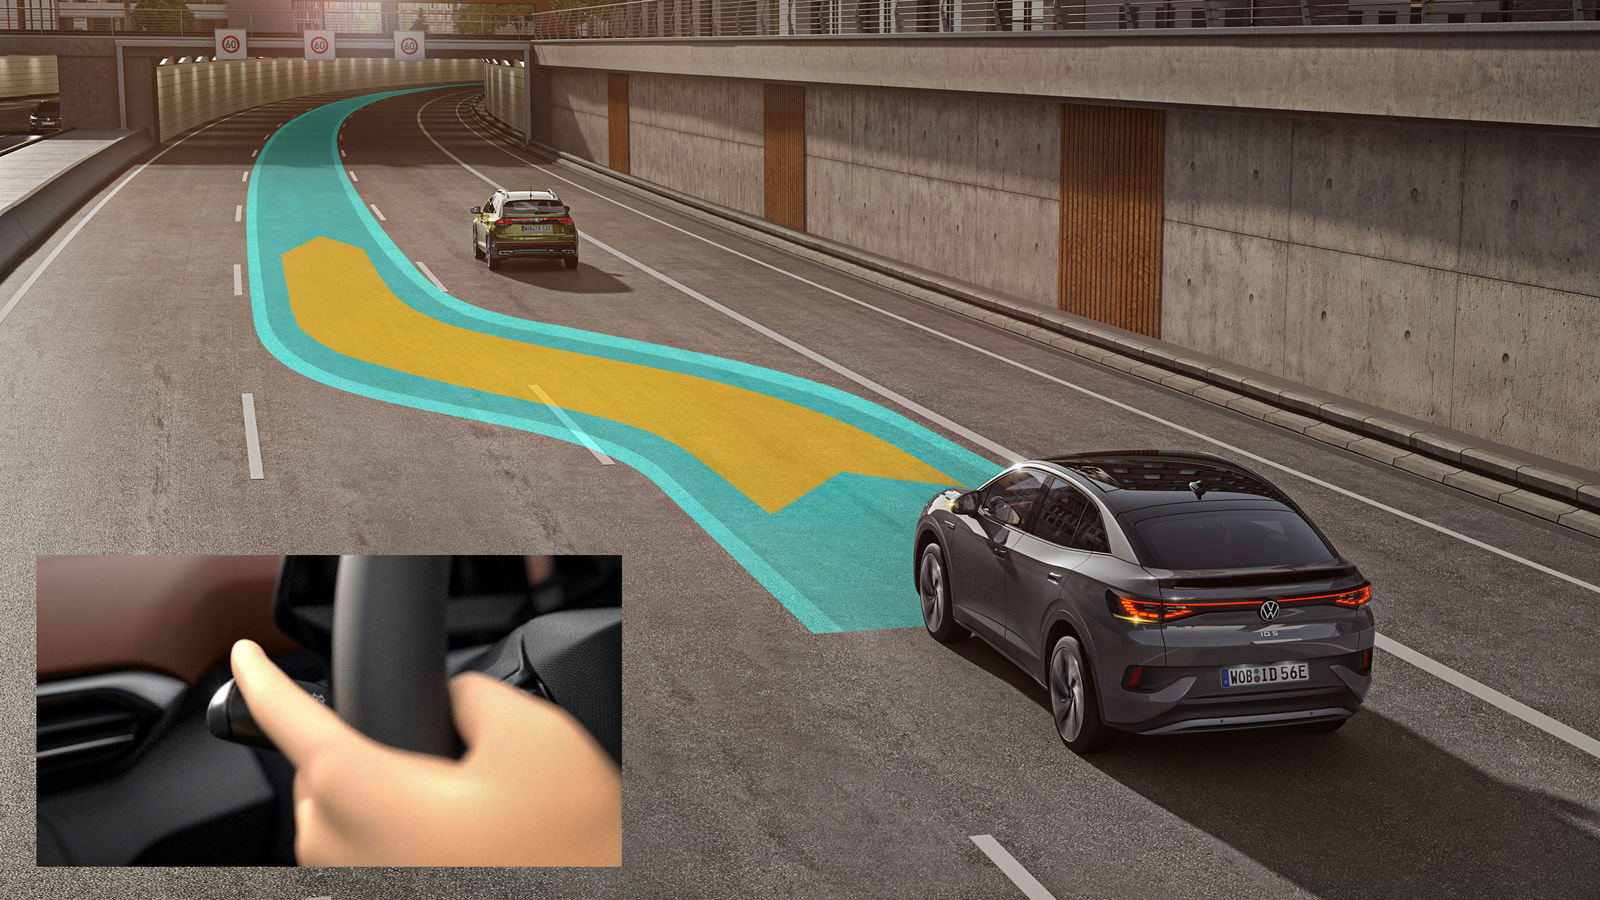
The new ID.5 achieves highest score in the Euro NCAP driver assistance test
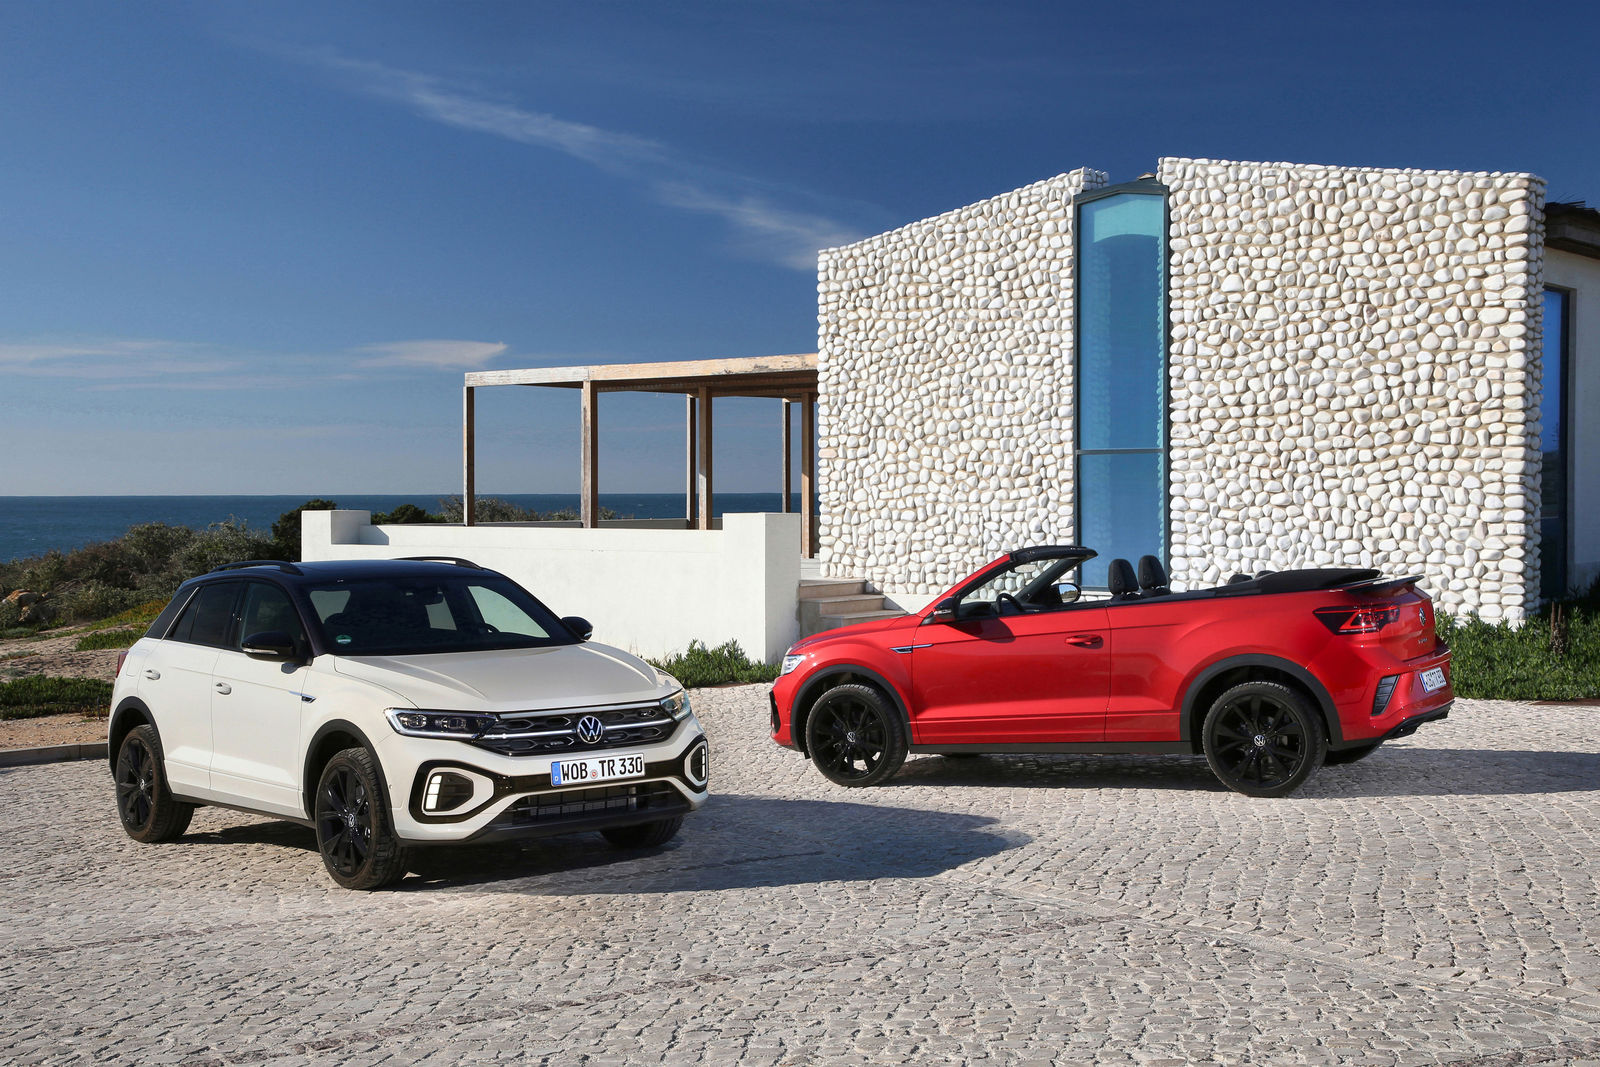
The new “Roc stars” among compact SUVs: T-Roc and T-Roc Cabriolet on sale now
- Basic Infos

Volkswagen ID.4 Pro 4MOTION
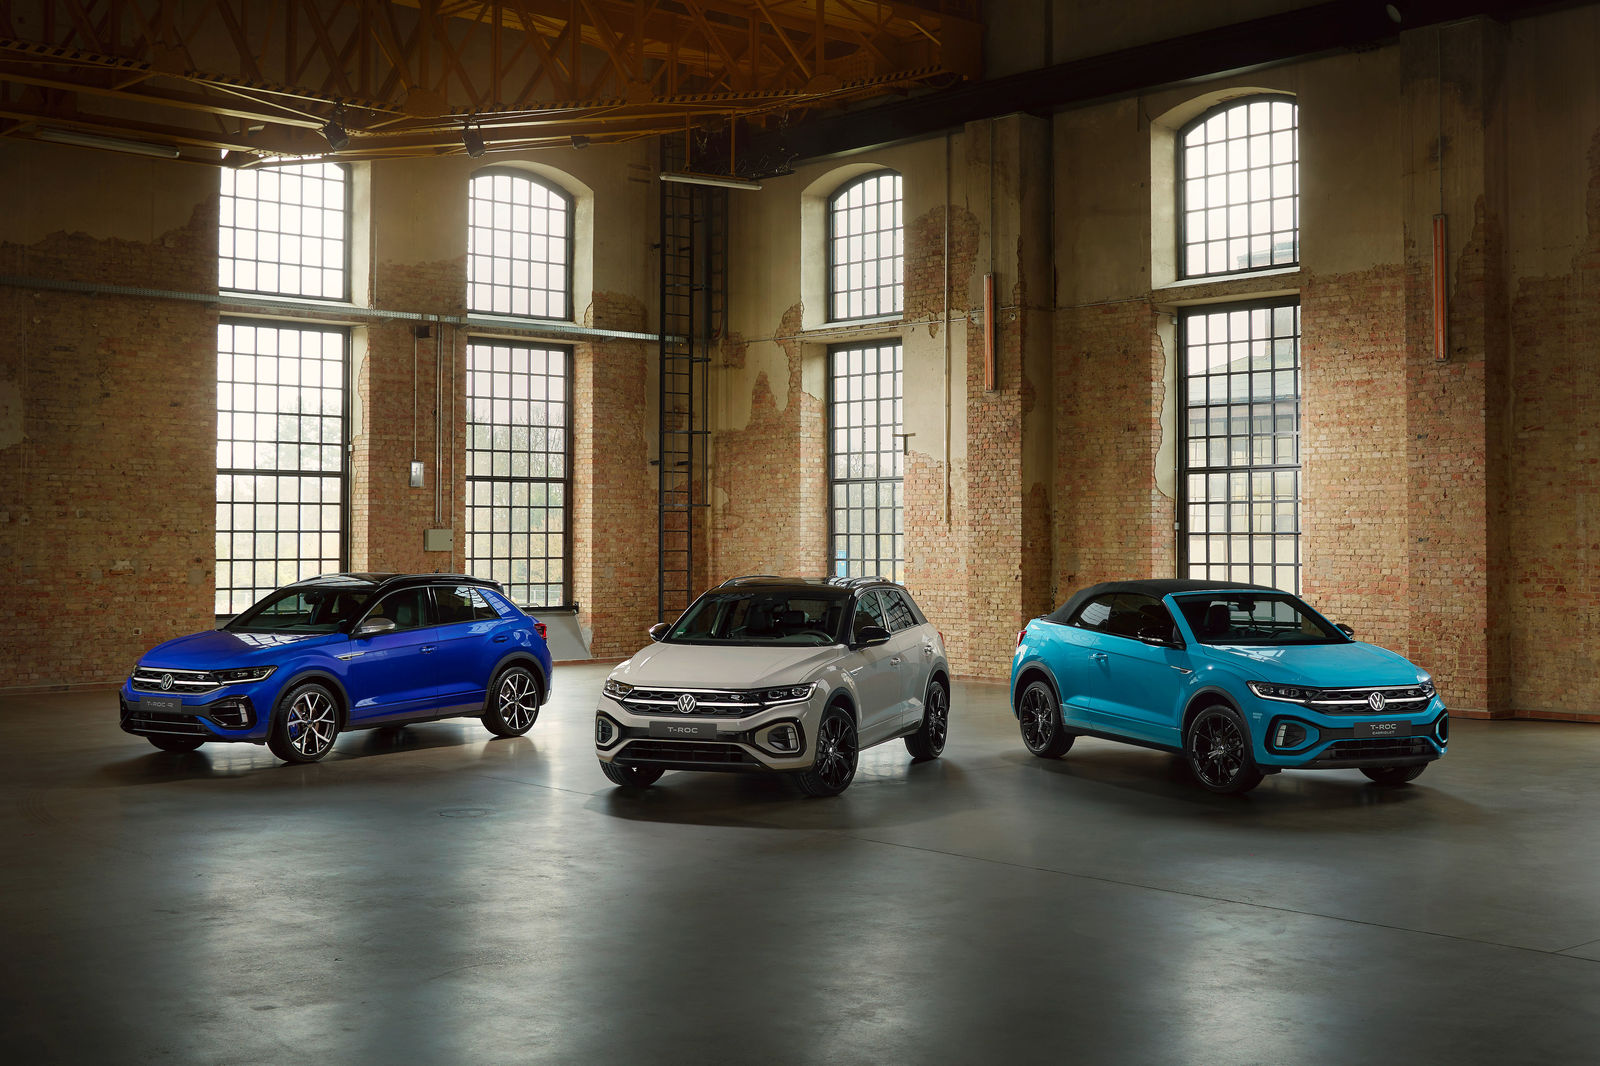
The new T-Roc, the new T-Roc R , the new T-Roc Cabriolet
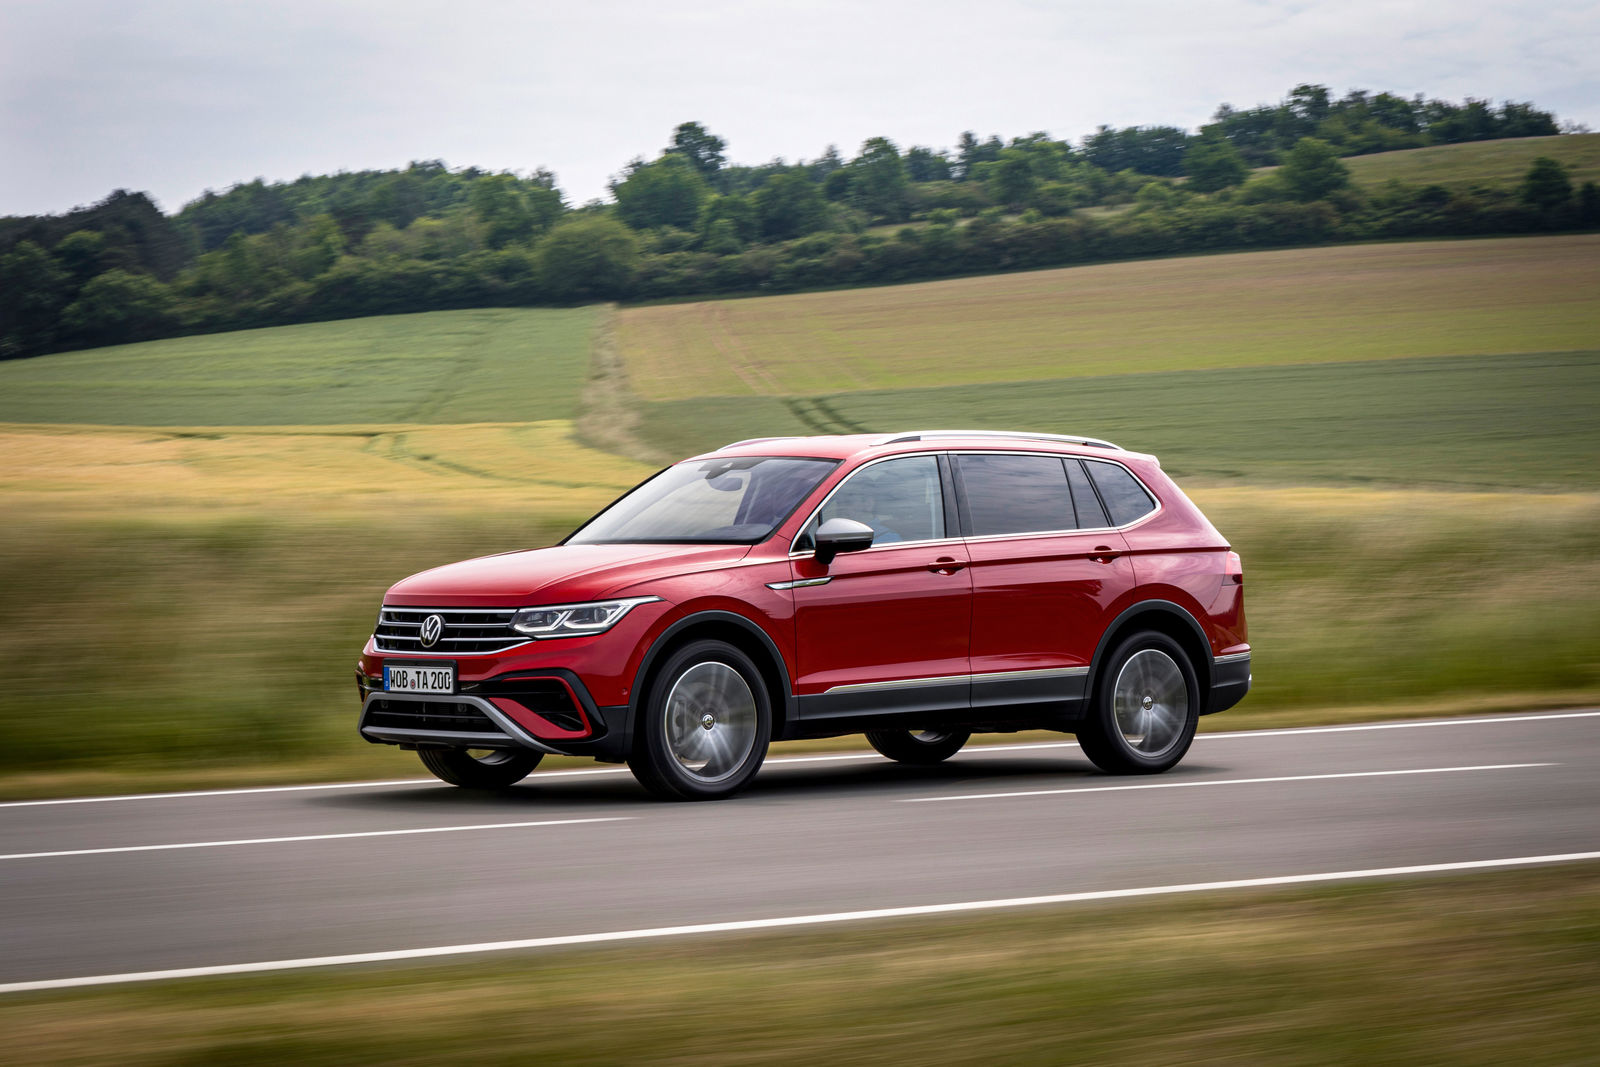
The new Tiguan Allspace - Test drives
- Terms of Service
- Cookie Policy
- Third Party Licence Notes
- Volkswagen AG
- Cookie Settings
- Press Releases
- Media Documents
- Media Contacts
The Volkswagen Newsroom is an open platform and offers comprehensive search options to all users.
If you would like to be kept informed about our press releases you can also subscribe to our media information newsletter.
The specified fuel consumption and emission data are determined in accordance with the measurement procedures prescribed by law. 1 January 2022, the WLTP test cycle completely replaced the NEDC test cycle and therefore no NEDC values are available for new type approved vehicles after that date.
This information does not refer to a single vehicle and is not part of the offer but is only intended for comparison between different types of vehicles. Additional equipment and accessories (additional components, tyre formats, etc.) can alter relevant vehicle parameters such as weight, rolling resistance and aerodynamics, affecting the vehicle's fuel consumption, power consumption, CO 2 emissions and driving performance values in addition to weather and traffic conditions and individual driving behavior.
Due to more realistic testing conditions, fuel consumption and CO 2 emissions measured according to WLTP will in many cases be higher than the values measured according to NEDC. As a result, the taxation of vehicles may change accordingly as of 1 September 2018. For further information on the differences between WLTP and NEDC, please visit www.volkswagen.de/wltp .
Further information on official fuel consumption data and official specific CO 2 emissions for new passenger cars can be found in the "Guide to fuel economy, CO 2 emissions and power consumption for new passenger car models", which is available free of charge from all sales dealerships and from DAT Deutsche Automobil Treuhand GmbH, Hellmuth-Hirth-Str. 1, D-73760 Ostfildern, Germany and at www.dat.de/co2 .
- The company
- Distributors
- Jobs & Career
- Dispatch & Logistics
- Anleitungen
- Cookie-Einstellungen
- Einbauservice
- Händler-Login
- Support / Kontakt
- Zahlungsarten
- Versandkosten
- Widerrufsrecht für Waren
- Show Retrofit solutions for VW Golf 3 / Vento 1H
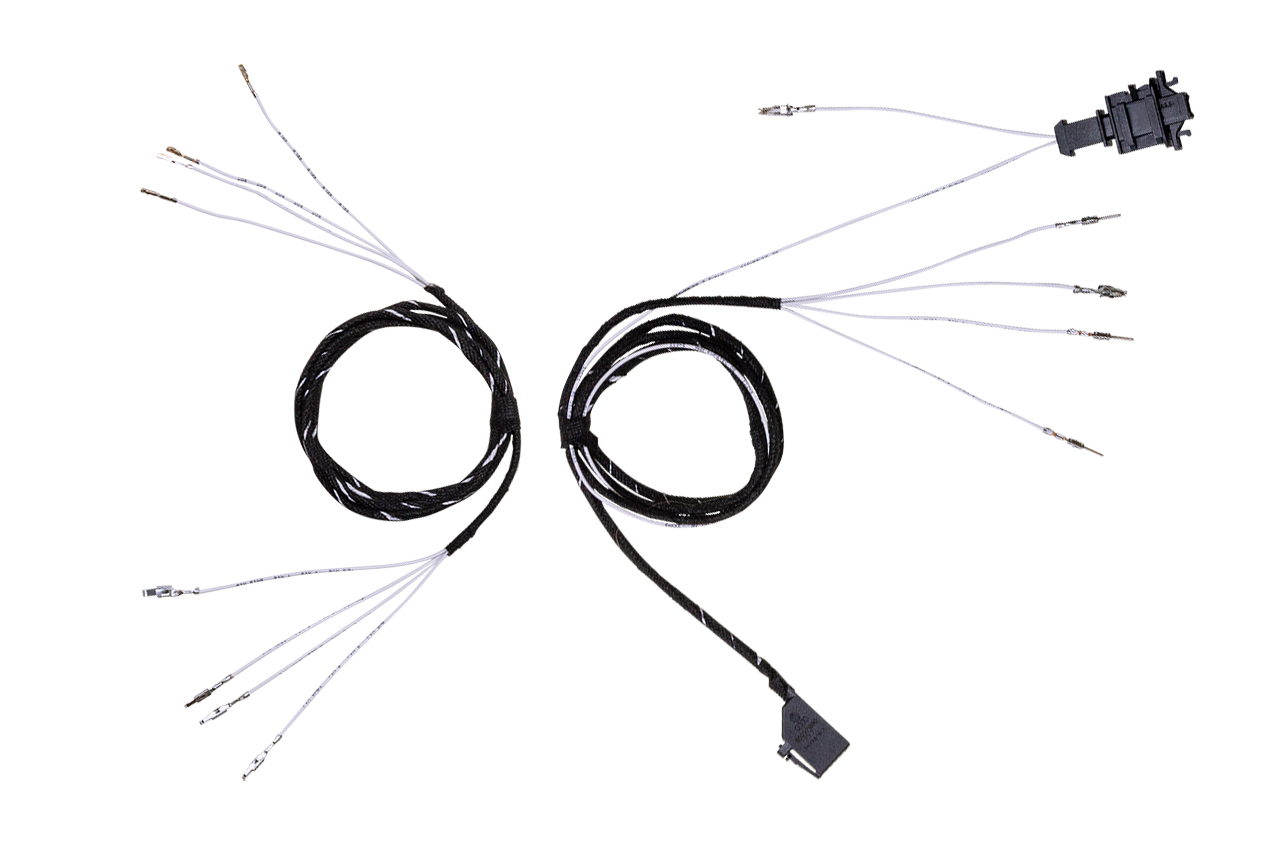
Cruise Control cable set for VW Golf 4 - Gasoline
Prices incl. VAT plus shipping costs
- Description Specific cable set in order to retrofit CCS (cruise control system) in Golf 4 IV for petrol - variantsThis wiring harness pr… More
- Product inquiry
- Installation partner
2 of 2 reviews
5 out of 5 stars
Leave a review!
Share your experiences with other customers.
Reviews can only be submitted while being logged in. Please enter your login details below. New customer?
"perlak" at 25 March 2021 18:53
produit de qualite
produit de qualité et de bonne finition
"autoservicehenrihuisman" at 18 March 2020 21:48
goed product
goed product goede levering

Volkswagen Cars w/ Adaptive Cruise Control (All 11 Models)
Adaptive cruise control has been available mostly in luxury vehicles but is now common in many mainstream cars, including Volkswagens.
The Volkswagen cars, SUVs, and EVs in this post have adaptive cruise control or conventional cruise control system.
Check the corresponding tables to see the relevant model years when the system became available.

Adaptive Cruise Control vs. Cruise Control
The more-basic cruise control in older Volkswagen cars helps the vehicle maintain a steady cruising speed.
Adaptive cruise control (ACC) enhances the conventional cruise control system by adjusting the car’s speed to match the vehicle ahead, slowing or accelerating to the set speed when appropriate.
Newer Volkswagens have the IQ Drive technology that automatically maintains a set distance from the vehicle ahead, with the ability to brake on its own to avoid a potential collision.
Rival mainstream car makers that produce popular models with adaptive cruise control (ACC) include:
- Toyota vehicles with ACC .
- Kia vehicles with ACC .
- Honda vehicles with ACC .
- Hyundai vehicles with ACC .
- Nissan vehicles with ACC .
- Ford vehicles with ACC .
Volkswagen Cars with Adaptive Cruise Control
#1 volkswagen golf.
Although it’s no longer in production after 2021, the Golf hatchback remains a compelling purchase as a used car, with its excellent ride quality and versatile body – even the more-powerful Golf R is a competent daily driver .
All Volkswagen Golf models from 2003 to 2021 had standard cruise control that enabled a steady highway cruising speed.
Only in 2002 when the system first became available was cruise control not available at all trim levels.
#2 Volkswagen Polo
Although the VW Polo isn’t available on American shores, it’s a popular little car sold globally in Europe and many other countries.
Except for the latest generation that debuted in 2022, Volkwagen Polos from 2009 to 2021 had cruise control in the pricier variants, and all pre-2009 models only had the system as an optional add-on.
#3 Volkswagen Beetle
The discontinued Volkswagen Beetle had cruise control as a standard provision from 2012 to 2019.
#4 Volkswagen Jetta
In a class with all-stars like Honda Civic , Toyota Corolla , Hyundai Elantra , and Kia Forte – all with adaptive cruise control – the VW Jetta seems somewhat mediocre.
Still, from 2019 onwards, Volkswagen Jettas have had adaptive cruise control (ACC) in their higher trims and the more-basic cruise control in the lower ones.
Cruise control is standard across all Volkswagen Jettas from 2003 to 2018, with the 2001 and 2002 models only having the system in the more-expensive trims.
#5 Volkswagen Passat
2021 and 2022 Volkswagen Passat sedans have standard adaptive cruise control, while models from 2016 to 2020 only had the system in the higher trims.
Cruise control is standard across all Volkswagen Passat from 2001 to 2015, and older models before that period do not have the cruise management system.
2022 marks this midsize car’s final model year stateside.
#6 Volkswagen Arteon
This 2019 debutant is a unique large hatchback with sleek styling and sporty handling.
All Volkswagen Arteon models have at least the basic cruise control system, with the higher trims carrying the more-sophisticated adaptive cruise control (ACC) before ACC became standard from 2022 onwards.

Volkswagen SUVs with Adaptive Cruise Control
#7 volkswagen taos.
Since its introduction in 2022, the Volkswagen Taos subcompact SUV has had adaptive cruise control in the upper trims and cruise control in the lower ones.
#8 Volkswagen Tiguan
This model stands out among small SUVs with its three rows of seats.
Volkswagen Tiguans from 2018 onwards have had adaptive cruise control or cruise control, depending on the trim level.
All VW Tiguan models from 2009 to 2017 had standard cruise control.
#9 Volkswagen Atlas Cross Sport
This SUV is a two-row version of the VW Atlas.
Since its 2020 debut, the Volkswagen Atlas Cross Sport has had adaptive cruise control in the upper trims and conventional cruise control in the lower ones.
#10 Volkswagen Atlas
This SUV is a three-row midsize, seating up to seven.
Like the two-row variant, the Volkswagen Atlas with an extra row of seats has cruise control in the base trim and the more sophisticated adaptive cruise control in the costlier ones.
Volkswagen Electric Vehicle with Adaptive Cruise Control
#11 volkswagen id.4.
As the German marque’s pioneering electric SUV, Volkswagen ID.4 models have adaptive cruise control with lane centering across all trim levels.
References:
https://www.vw.com/en/models.html
https://www.vw.com/en/iq-drive.html
Checking Cruise Control using Measuring Values
- 1.1 DBW (Drive-by-Wire)
- 1.2 DBC (Drive-By-Cable)
- 2.1 Gasoline Engines
- 2.2 Diesel Engines
- 2.3 Special Notes
Cruise Control Activation
Dbw (drive-by-wire).
The CCS (Cruise Control System) activation in DBW (Drive-by-Wire) throttle systems will vary depending on the Engine Control Module.
1) Control modules using Short Coding often use a Login code and the letter " G " is shown in the component field when activated.
1.8T Gasoline example:
1.9 CR TDI example:
Activating Cruise Control on a new (DBW) ECU using Login
DBW (Drive-by-Wire) Factory fresh ECU's often come with cruise control de-activated.
[Select] [01 - Engine] [Login - 11] or if that function is not available then use [Coding - 11] instead Enter 11463 to activate cruise control [Do It!]
- You may have to cycle the key off and back on before the CCS is activated and the letter "G" is shown in the component field.
- The Throttle Body Alignment (TBA) may need to be completed before CCS operates.
- Adaptive Cruise Control (ACC) uses the letter A instead of G in the component field.
- If the incorrect Cruise Control type is activated it will be necessary to deactivate it using the Login of 16167 followed by a key cycle and enabling the proper type.
2) Control modules using Long Coding are activated in the Coding. Due to different Control Modules Vehicle Equipment, the actual Coding Table is not shown here but will automatically be used by the Long Coding Helper with VCDS.
Activating Cruise Control on a new (DBW) ECU using Long Coding
[Select] [01 - Engine] [Coding - 07] [Long Coding Helper] Check the box for CCS and Exit [Do It!]
- You may have to cycle the key off and back on before the CCS is activated and the new coding takes effect.
- Long Coded modules do Not have the letter G in the component field. If you wanted to see if CCS is enabled, use the Long Coding Helper and see if the box is checked.
DBC (Drive-By-Cable)
The CCS (Cruise Control System) on DBC (Drive By Cable) throttle systems may or may Not be controlled by the Engine Control Module. Refer to the factory repair manual for additional details on these older systems.
Checking Cruise Control using Measuring Blocks
Checking CCS using Measuring Blocks normally involves evaluating binary values of related switches.
Gasoline Engines
Gasoline Engines often use Measuring Block group 066 to display CCS info. Refer to the charts below using line Field 2 and 4 data.
Diesel Engines
Diesel Engines often use Measuring Block group 006 to display CCS info. Refer to the charts below using line Field 2 and 4 data.
Field 2 Data
Field 4 Data
Special Notes
- When additional information is available in VCDS the binary values will appear in a balloon while connected to the vehicle. If there is a discrepancy with the details in the charts above, use the engine specific data in VCDS.
- On some vehicles equipped with an Automatic Transmission it may be necessary to test drive exceeding a speed of 30 km/h (19 mph) before voltage is supplied to the CCS switch.
- Some of the newer Engine Control Modules may use the UDS/ODX/ASAM protocols. Those modules do not support conventional Measuring Block Groups. Advanced Measuring Values will be used instead and you will check the boxes for CCS (or similar) to locate and view the readings.
- See the Cruise Control Retrofitting and Diagnostic Procedures for the specific platform.
- If factory equipped CCS decides to stop working for no apparent reason in a 2011-2012 Jetta or Beetle with a 2.5L Gas engine make sure the letter G isn't missing from the Component field. For some reason we've received numerous reports like that from NAR market (US/Canadian) cars without any damage/repair history that would explain lost CCS. Simply turning it off and back on again via Login with key cycles in between has resolved all issues to date.
Navigation menu
- Diagnostic Procedures
- Common Procedures
- Fault Codes
- Retrofitting
- Immobilizer
- Search forums
- Volkswagen GTI / Golf MK7 General Topics
- GTI & Golf MK7 General Discussions
Aftermarket Cruise Control?
- Thread starter systematic
- Start date Apr 4, 2014
- Apr 4, 2014
Guys, Can I have Cruise control added to my golf bluemotion MK7 (already bought)? I had a VAG VCDS cable and it detected a cruise control system in it. Just wondering if this can be retro fitted? Thanks
Go Kart Champion
Thats that one solved! Good post Rob....
I suspect the add-on would probably have to be coded, but maybe not. I suggest looking at both Carsystems.pl and Kufatec.de - you may get a better price, and Carsystems.pl are good with fitting/installation instructions.
Is it worth buying separately and having it privately fitted to save on cost?
Only if you can fit it yourself. After market companies charge similar money...
See here to give an idea of retro-fit prices - they ain't cheap. I'd explore possibilities further and look to fitting yourself of finding a mate who can.
Ready to race!
They've put the price up a bit to say theres no extra work. i had it put on my mk5 R32 (was current model at the time) and it was £145 at a main dealer. steering wheel off, replace the stalk and code.. job done.
Thats because it was much simpler operation on the Mk.5. The Mk.6 required the entire stalk assembly to be replaced which requires airbag and slip ring removal - not a quick job. Thats progress I guess!
- Apr 8, 2014
Rob, excellent research. What would we do without you? PS did you ever update/finish that table....??
- Apr 28, 2014
DW58 said: Yes you can - in fact an aftermarket Cruise Control "stalk" is available from VW to replace the existing turn indicator lever as follows ... ... AFAIK the Cruise Control is already there, just no controls for it. Click to expand...
Chr15b said: They've put the price up a bit to say theres no extra work. i had it put on my mk5 R32 (was current model at the time) and it was £145 at a main dealer. steering wheel off, replace the stalk and code.. job done. Click to expand...
Drag Race Newbie
- Sep 7, 2015
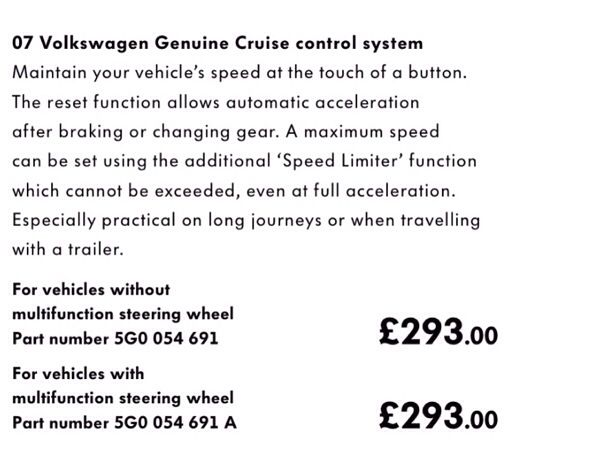
I ordered a Golf MK7 Cruise Control 5G0054691A for my 2015 MK7 Golf R, and this part was the incorrect one. Apparently there are some differences with the button shape compared to the Golf R steering wheel. Does anyone know the correct VW part number for Golf R cruise control?
- Nov 10, 2015
mikef4uk said: Stalk for mk5 was about £55, you also need VagCom to alter the coding, I did my own. Click to expand...
Adaptive Cruise Control 1
Part of the iq.drive safety-enhancing and intelligent technologies.
Adaptive cruise control (ACC) helps drivers maintain a constant speed and distance from the vehicle ahead using sensors to detect other vehicles . The system can reduce speed of the vehicle if there is a slower moving vehicle ahead, bring the vehicle to a standstill, and resume speed regulation as long as the vehicle in front is moving again.
Maintain a safe distance
Assists with unintentional tailgating
Adaptive Cruise Control (ACC) feature allows drivers to maintain a constant speed while also keeping a safe distance from the vehicle ahead using sensors. This helps reduce the stress of constantly adjusting speed and distance, making the driving experience more comfortable.

Safety and confidence on the road
Adaptive responses for responsible driving
With the ability to slow down or bring the vehicle to a standstill in response to slower moving vehicles ahead, drivers can feel confident that they are driving safely and responsibly. This feature also ensures that drivers can easily resume speed regulation once the vehicle in front starts moving again, making the driving experience smoother and more enjoyable.
The ins and outs of adaptive cruise control
How it works
Helps you maintain a preset speed and/or preset distance from the vehicle directly ahead. When dealing with traffic on the highway, it uses sensors to detect vehicles ahead of you, helping adjust your speed, and manages the distance between you and what’s in front of you.
Instructions
- To engage the system, press the ON/OFF button on your steering wheel and then set your speed by accelerating to the desired speed and press the SET button.
- To increase the set speed by the 1 mph, press the + button. If you press and hold the + button, the speed will increase continuously in 5 mph increments.
- To decrease the set speed by the 1 mph, press the - button. If you press and hold the - button, the speed will decrease continuously in 5 mph increments.
- To adjust the following distance from the vehicle in front of you, press the ACC button on your steering wheel. As you press the ACC button, you'll see a change in the number of solid bars in your digital cockpit. The more bars visible, the greater the following distance. You can make the same adjustments using the +/- buttons immediately after pressing the ACC button or in your infotainment screen.
- To cancel, press the brake pedal or quickly press the cruise control button on the steering wheel.
- To resume a previously stored speed, press the RES button on the steering wheel.
- When you accelerate, the ACC function pauses and then resumes as soon as you stop accelerating.
- Note that, in some conditions, select vehicles may come to a complete standstill. For example, if the vehicle ahead of you comes to a stop, your vehicle will also come to a stop. The stop and go feature is included on all model year 2024 vehicles . For previous generation models , see your owner’s manual for vehicle limitations.
Limitations
- You must be driving above a minimum speed to activate the system. For some models the minimum speed is 15 mph; for others, it is 20 mph.
- Only reacts to objects within the sensor’s line of sight; some vehicles such as those depicted below are not detected until they are within the sensor’s line of sight.
- While all MY22 and newer vehicles can detect pedestrians, only some can detect cyclists. See your Owner’s Manual for your vehicle ’s limitations.
- Once activated, system only operates between 0 and 95 mph.
- The following situations can lead to unwanted braking:
- Damage to or misalignment of the sensor or sensor mounting.
- Sensor blockage, which can be caused by ice/snow buildup, dirt, mud or leaves.
- Towing heavy trailers or carrying heavy cargo in the rear of the vehicle , which can elevate the front of the vehicle and change sensor angles.
- Curvature in the road.
- The following situations can disable the system:
- Damage to, misalignment of or blockage of the sensor.
- Towing heavy trailers or carrying heavy cargo in the rear of the vehicle , which can elevate the front of the vehicle and change sensor angles.
Find answers about driver assistance
The VW Help Center
Discover answers to frequently asked questions about driver assistance features and general information about Volkswagen . Explore a wealth of information to better understand our products and services .

Ownership benefits
Shop Models
Build your ID.4
- Search forums
- Golf MK8 - 8th Generation of the Volkswagen Golf
- GolfMK8 General Discussion
Cruise Control
- Thread starter Pinocchio
- Start date Oct 10, 2021
Passed Driver's Ed
- Oct 10, 2021
Had an OTA softwre update last week, now cruise is dangerous to use. Sitting at 70 mph all of a sudden the car would try to drop to 44mph,it's the same at 60 mph it was dropping to 37 mph, then return back to either 60 or 70 mph for the road i was on. This was happening all the time so have switched cruise control off as i can't trust it to keep me at the set speed. Car is a March 2020 life 1.5 150 dsg etsi and have had virtually no problems with it up until now.
Autocross Newbie
Your car is mistaking mph for kph; 70 kph is 43-44 mph and 60 kph is 37 mph. Other forum members have had this issue on this forum and other forums, but I’ve not read of anyone experiencing it for the first time as a result of a recent OTA software update.
SRGTD said: Your car is mistaking mph for kph; 70 kph is 43-44 mph and 60 kph is 37 mph. Other forum members have had this issue on this forum and other forums, but I’ve not read of anyone experiencing it for the first time as a result of a recent OTA software update. Click to expand...
Ready to race!
- Oct 11, 2021
I think you can turn off the predictive part of ACC.
THE 10 CLOSEST Hotels to Statue of Lenin, Elektrostal
Hotels near statue of lenin, property types, distance from, traveler rating, hotel class.
- Best Value Properties ranked using exclusive Tripadvisor data, including traveler ratings, confirmed availability from our partners, prices, booking popularity and location, as well as personal user preferences and recently viewed hotels.
- Traveler Ranked Highest rated hotels on Tripadvisor, based on traveler reviews.
- Distance from Statue of Lenin See properties located closest to the place of interest first with confirmed availability for your dates from our partners.
Investigation Update on the Radiance of the Seas
Cruise Line : Royal Caribbean International
Cruise Ship : Radiance of the Seas
Voyage Dates : April 8–April 22, 2024
Voyage number: 20095
Number of passengers who reported being ill during the voyage out of total number of passengers onboard : 67 of 1,993 (3.36%)
Number of crew who reported being ill during the voyage out of total number of crew onboard : 2 of 924 (0.22%)
Predominant symptom : diarrhea and vomiting
Causative agent : norovirus
Actions : In response to the outbreak, Royal Caribbean Cruises and the crew aboard the ship reported the following actions:
- Collected stool specimens from gastrointestinal illness cases for testing.
- Isolated ill passengers and crew.
- Increased cleaning and disinfection procedures according to the ship’s outbreak prevention and response plan.
VSP conducted an environmental assessment and outbreak investigation to assist the ship in controlling the outbreak.
Note : The gastrointestinal illness cases reported are totals for the entire voyage and do not represent the number of active (symptomatic) gastrointestinal cases at any given port of call or at disembarkation.
Learn how passengers can protect themselves with these tips for healthy cruising .
- Inspection Reports
- About Inspections
- Cruise Ship Outbreak Updates
- About Noroviruses on Cruise Ships
- VSP Operations Manual [PDF – 5 MB]
- VSP Construction Guidelines [PDF – 4 MB]
- Illness Prevention Information
- Publications
Exit Notification / Disclaimer Policy
- The Centers for Disease Control and Prevention (CDC) cannot attest to the accuracy of a non-federal website.
- Linking to a non-federal website does not constitute an endorsement by CDC or any of its employees of the sponsors or the information and products presented on the website.
- You will be subject to the destination website's privacy policy when you follow the link.
- CDC is not responsible for Section 508 compliance (accessibility) on other federal or private website.

Texas Rangers

Atlanta Braves
Rangers hit 3 homers, overcome early deficit to stop braves' 6-game win streak with 6-4 victory.
ATLANTA -- — Andrew Knizner hit a three-run homer, Adolis García added a two-run shot and the Texas Rangers avoided a three-game sweep with a 6-4 victory over the Atlanta Braves on Sunday night.
Evan Carter also went deep as the reigning World Series champions erased an early 3-0 deficit and stopped Atlanta’s six-game winning streak. Michael Lorenzen (2-0) recovered from a rocky start, giving up three runs and three hits with seven strikeouts in six innings.
David Robertson worked 1 2/3 innings in relief and Kirby Yates got four outs for his third save.
“The homer was great to get us ahead, but with that lineup over there it’s all about pitching and executing pitches the rest of the game,” Knizner said. “Lorenzen, Robertson and Yates just did an outstanding job. Those are the guys that held it down for us.”
Marcell Ozuna launched his major league-leading ninth homer for the Braves, a three-run shot off Lorenzen in the first inning.
Atlanta rookie Darius Vines (1-1) allowed four runs and seven hits in five innings while striking out six and walking two. He was optioned to the minors after the game.
Carter’s solo shot in the fourth and Knizner’s drive later in the inning gave Texas a 4-3 lead. García connected off Tyler Matzek in the eighth to make it 6-3.
Helped by García’s error in right field when he dropped a flyball, the Braves got a run back in the bottom half on Austin Riley’s RBI single. Atlanta had two runners on with nobody out, but Robertson struck out Matt Olson and retired Ozuna on a popup. Yates entered and struck out Orlando Arcia to end the inning.
“Robertson, what a job he did with some of the stuff going on out there,” Rangers manager Bruce Bochy said. “He bowed his neck and there were some pretty good hitters he had to go through. ... I can’t say enough about how he kept his poise.”
Carter also had an infield single and made two diving catches in left field.
Knizner, the Rangers’ backup catcher, entered the game 1 for 16 this season but finished with two hits. His three-run homer to right followed singles by Nathaniel Lowe and Josh Smith .
Ozuna homered with two outs in the first. From there, Lorenzen dominated the potent Braves lineup, giving up just one hit over the next five innings as the Rangers rallied.
Atlanta reserve catcher Chadwick Tromp threw out two runners trying to steal.
TRAINER’S ROOM
Braves: Manager Brian Snitker said catcher Sean Murphy has been ramping up his fielding activities but has not been cleared to hit as he recovers from his oblique injury. ... Second baseman Ozzie Albies has been doing light fielding drills while recovering from his broken toe.
Rangers: RHP Dane Dunning (2-1, 3.91 ERA) will face Mariners RHP Logan Gilbert (1-0, 2.33) in the opener of a three-game series at Texas on Tuesday.
Braves: RHP Bryce Elder will be called up from Triple-A Gwinnett to make his first major league start this season Monday night against Marlins LHP Ryan Weathers (2-1, 2.70 ERA) in Atlanta. Elder made 31 starts last year and was 12-4 with a 3.81 ERA. He was selected to the NL All-Star team, but struggled in the second half and got hit hard in his lone playoff appearance against the Phillies.
AP MLB: https://apnews.com/hub/MLB
ATL wins 2-1
Game information.
- Home Plate Umpire - Brock Ballou
- First Base Umpire - Ben May
- Second Base Umpire - Adam Beck
- Third Base Umpire - Dan Iassogna
2024 American League West Standings
2024 national league east standings, francisco lindor's 2-homer day fuels mets win, blue jays place kevin kiermaier on il, call up addison barger, guardians' gavin williams (elbow) shut down after setback.
- Terms of Use
- Privacy Policy
- Your US State Privacy Rights
- Children's Online Privacy Policy
- Interest-Based Ads
- About Nielsen Measurement
- Do Not Sell or Share My Personal Information
- Disney Ad Sales Site
- Work for ESPN
- Corrections
THE 10 BEST Resorts near Museum of Labor Glory, Elektrostal
Resorts near museum of labor glory, property types, distance from, traveller rating, hotel class.
- Best Value Properties ranked using exclusive Tripadvisor data, including traveller ratings, confirmed availability from our partners, prices, booking popularity and location, as well as personal user preferences and recently viewed hotels.
- Traveller Ranked Highest rated hotels on Tripadvisor, based on traveller reviews.
- Distance from Museum of Labor Glory See properties located closest to the place of interest first with confirmed availability for your dates from our partners.
Macalester College Athletics

Match Recap: Women's Tennis | 4/21/2024 10:45:00 PM | Macalester Athletic Staff
Women’s Tennis: Scots Cruise to 7-2 Victory Over Pipers

Thanks for visiting !
The use of software that blocks ads hinders our ability to serve you the content you came here to enjoy.
We ask that you consider turning off your ad blocker so we can deliver you the best experience possible while you are here.
Thank you for your support!

IMAGES
VIDEO
COMMENTS
Installing Cruise Control in VW - Golf MK4, Bora, Jetta, Passat - (Step by Step)In this video, we will show you step by step guide on how to retrofit cruise ...
Welcome to a How To video, I'll be showing you how to fit cruise control in this step by step video on to your Golf mk4, Seat Leon mk1 and Audi A3 8L 1.9 TDI...
Step 1: Gather Your Components. Depending on the model and engine you are starting with this list will vary slightly, so I'll break it down in to a 'core' and 'additional'. Core. -Multifunction steering wheel (MFSW) You can source this from a breakers yard, ebay etc, you'll want the wheel and airbag, it can be found on mk4 golf, Bora/Jetta and ...
Cruise control in the mk4 period was mostly option, I have a 4motion and that didnt have factory cruise.I found with the 'highline' models such as GTi and 4motion its easier to fit Cruise as there is already wiring from the ECU to the bulkhead connector, meaning for the most part its just a new bit of loom the dash side. ... Link: VW Golf 4 TDI ...
Fig. 169 Left-hand side of the multifunction steering wheel: buttons for operating the Adaptive Cruise Control (ACC) . First read and observe the introductory information and safety warnings . When the Adaptive Cruise Control (ACC) is switched on, the green indicator lamp in the instrument cluster lights up, and the speed memory and the status of the Adaptive Cruise Control are shown in the ...
Control is switched off temporarily. The speed is stored in the memory. Resuming CCS control. Press button ③ on the turn signal lever at the area marked , or press the button on the multifunction steering wheel. The stored speed is reactivated and controlled. Increasing the set speed (during CCS control).
Cruise Control is a comfort and convenience feature that customers expect to be standard equipment in the VW e-Golf.-----Connect With Us:https://g...
Cruise Control LEDCurrently, when the Cruise Control ON/OFF Switch on the Indicator stalk is switched ON, there is a green LED indicator in the tachometer wh...
Retrofit Cruise Control - A Useful Compatability Guide. The following is a handy table illustrating which models of MkIV are compatible with the retrofit Cruise Control system and whether those cars are prewired or if they need an additional wiring loom. The Cruise Control kits come with 4 parts: The stalk, the main loom to connect to the ECU ...
Cruise Control Install. MK4 Golf Platform. Including VW Beetle / Bora, Skoda Octavia, Seat Leon / Toledo, Audi A3 & TT . Here follows below, a detailed 'how-to' for the retro-fitting of Cruise Control into the VW Golf Mark 4 (MK IV) TDi. Petrol Engines require the addition of some extra wiring which is missing between the bulkead connection socket and the ECU.
Most ECU's have cruise control de-activated. If this is the case, there will not be a letter "G" in the Component field of VCDS when connected to the Engine, it will show 0000SG. [Select] [01 - Engine] [Login - 11] Enter 11463 to activate cruise control [Do It!] After doing this procedure, Cycle the Ignition & there should be a letter "G" in ...
Models. Adaptive Cruise Control ACC helps you to maintain a previously set maximum speed and a predefined distance to the vehicle ahead 03. It also features predictive cruise control and cornering assist function. ACC can adapt the vehicle speed to the applicable speed restrictions and course of the road (bends, roundabouts, etc 0304.
Product information "Cruise Control cable set for VW Golf 4 - Gasoline". Specific cable set in order to retrofit CCS (cruise control system) in Golf 4 IV for petrol - variants. This wiring harness provides the connection between the pitman arm and the engine control unit. cruise control functions:
Specific cable set in order to retrofit CCS (cruise control system) in Golf 4 IV for petrol - variants; This wiring harness provides the connection between the pitman arm and the engine control unit; cruise control functions: set speed; accelerate; delay; record last speed stored again;
#4 Volkswagen Jetta. In a class with all-stars like Honda Civic, Toyota Corolla, Hyundai Elantra, and Kia Forte - all with adaptive cruise control - the VW Jetta seems somewhat mediocre.. Still, from 2019 onwards, Volkswagen Jettas have had adaptive cruise control (ACC) in their higher trims and the more-basic cruise control in the lower ones.
The CCS (Cruise Control System) activation in DBW (Drive-by-Wire) throttle systems will vary depending on the Engine Control Module. 1) Control modules using Short Coding often use a Login code and the letter " G " is shown in the component field when activated. 1.8T Gasoline example: Part No: 06A 906 032 LP. Component: 1.8L R4/5VT G 0005.
I ordered a Golf MK7 Cruise Control 5G0054691A for my 2015 MK7 Golf R, and this part was the incorrect one. Apparently there are some differences with the button shape compared to the Golf R steering wheel. Does anyone know the correct VW part number for Golf R cruise control? 2006 Tornado Red GTI ...
Adaptive cruise control (ACC) helps drivers maintain a constant speed and distance from the vehicle ahead using sensors to detect other vehicles. . The system can reduce speed of the vehicle if there is a slower moving vehicle ahead, bring the vehicle to a standstill, and resume speed regulation as long as the vehicle in front is moving again.
If the cruise control on your VW Golf is not working after work on the clutch pedal; check the sensor that goes into the front of the clutch assembly. Take t...
Oct 10, 2021. #1. Had an OTA softwre update last week, now cruise is dangerous to use. Sitting at 70 mph all of a sudden the car would try to drop to 44mph,it's the same at 60 mph it was dropping to 37 mph, then return back to either 60 or 70 mph for the road i was on. This was happening all the time so have switched cruise control off as i can ...
Golf. Watch. Fantasy Milwaukee Brewers. 14-7, 10-3 away. 2. Pittsburgh Pirates ... Cruz breaks slump with 3 hits, Jones cruises as Pirates beat Brewers 4-2 to end 6-game skid. 0:33.
Hotels near Statue of Lenin, Elektrostal on Tripadvisor: Find 1,357 traveler reviews, 1,945 candid photos, and prices for 60 hotels near Statue of Lenin in Elektrostal, Russia.
Cruise Line: Royal Caribbean International. Cruise Ship: Radiance of the Seas. Voyage Dates: April 8-April 22, 2024. Voyage number: 20095 Number of passengers who reported being ill during the voyage out of total number of passengers onboard: 65 of 1,993 (3.26%). Number of crew who reported being ill during the voyage out of total number of crew onboard: 2 of 924 (0.22%)
Golf. Watch Fantasy. Texas Rangers. 12-11, 7-6 away. 6 ... overcome early deficit to stop Braves' 6-game win streak with 6-4 victory. ... Jones cruises as Pirates beat Brewers 4-2 to end 6-game skid
Resorts near Museum of Labor Glory, Elektrostal on Tripadvisor: Find 1,358 traveller reviews, 1,945 candid photos, and prices for resorts near Museum of Labor Glory in Elektrostal, Russia.
Roster. Matchup History. ST. PAUL, Minn. - The Macalester College women's tennis team rounded out the weekend hosting Hamline for a MIAC matchup. The Scots took control and won 7-2. Macalester is now 10-5 (5-3 MIAC). The Scots won the all the points in doubles. At No. 1 doubles, seniors Meg Ulrich (Carlisle, PA./Carlisle) and Sydney Ellison ...
In this video i will be teaching you how to use your cruise control system on the MK6 Golf, this method is same for the MK7 Golf.Specs:1.4 Litre TSI (Turbo C...