
- Work With Us
- Customer Experience Training And Workshops
- Customer Experience Coaching And Consulting
- Speaking & Thought Leadership
- Get Started with CX
- Align Organizational Vision & Goals
- Build Customer Journey Maps
- Connect with Customers
- Create a Customer-Centric Culture
- Take Action
- Audio & Podcasts
- Workbooks & Guides
CXI Flight School™ – Learn More Here
CXI Compass™ – Identify your next steps to CX Excellence
Quick Start Guide to Customer Experience Leadership

Learning Center
An introduction to customer journey storyboarding.

More From Our Learning Center
Similar Articles
How to Build a Customer Experience Persona
5 ways to optimize your customer feedback program, 3 commonly neglected micromoments in your customer’s journey.
- Create a Customer-Centric Culturee
Listen to this article
There’s something magical that happens in our brains when we draw. And yet many of us, myself included, don’t see ourselves as talented enough to draw outside of the occasional doodle to see if the pen is working.
Customer experience success relies heavily on understanding our customers. And the low-tech technique of drawing out the experience in a storyboard is often overlooked as a way to understand our customer’s experience.
What is a Customer Journey Storyboard?
Storyboards are simply a collection of still images that represent a sequence of moments in time. They’re often used in film making, advertising, and animation to help visualize what’s needed for each scene in the story, but customer journey storyboards can do the same thing for your customer’s experience. A customer journey storyboard is a sort of visual variation on a customer journey map.
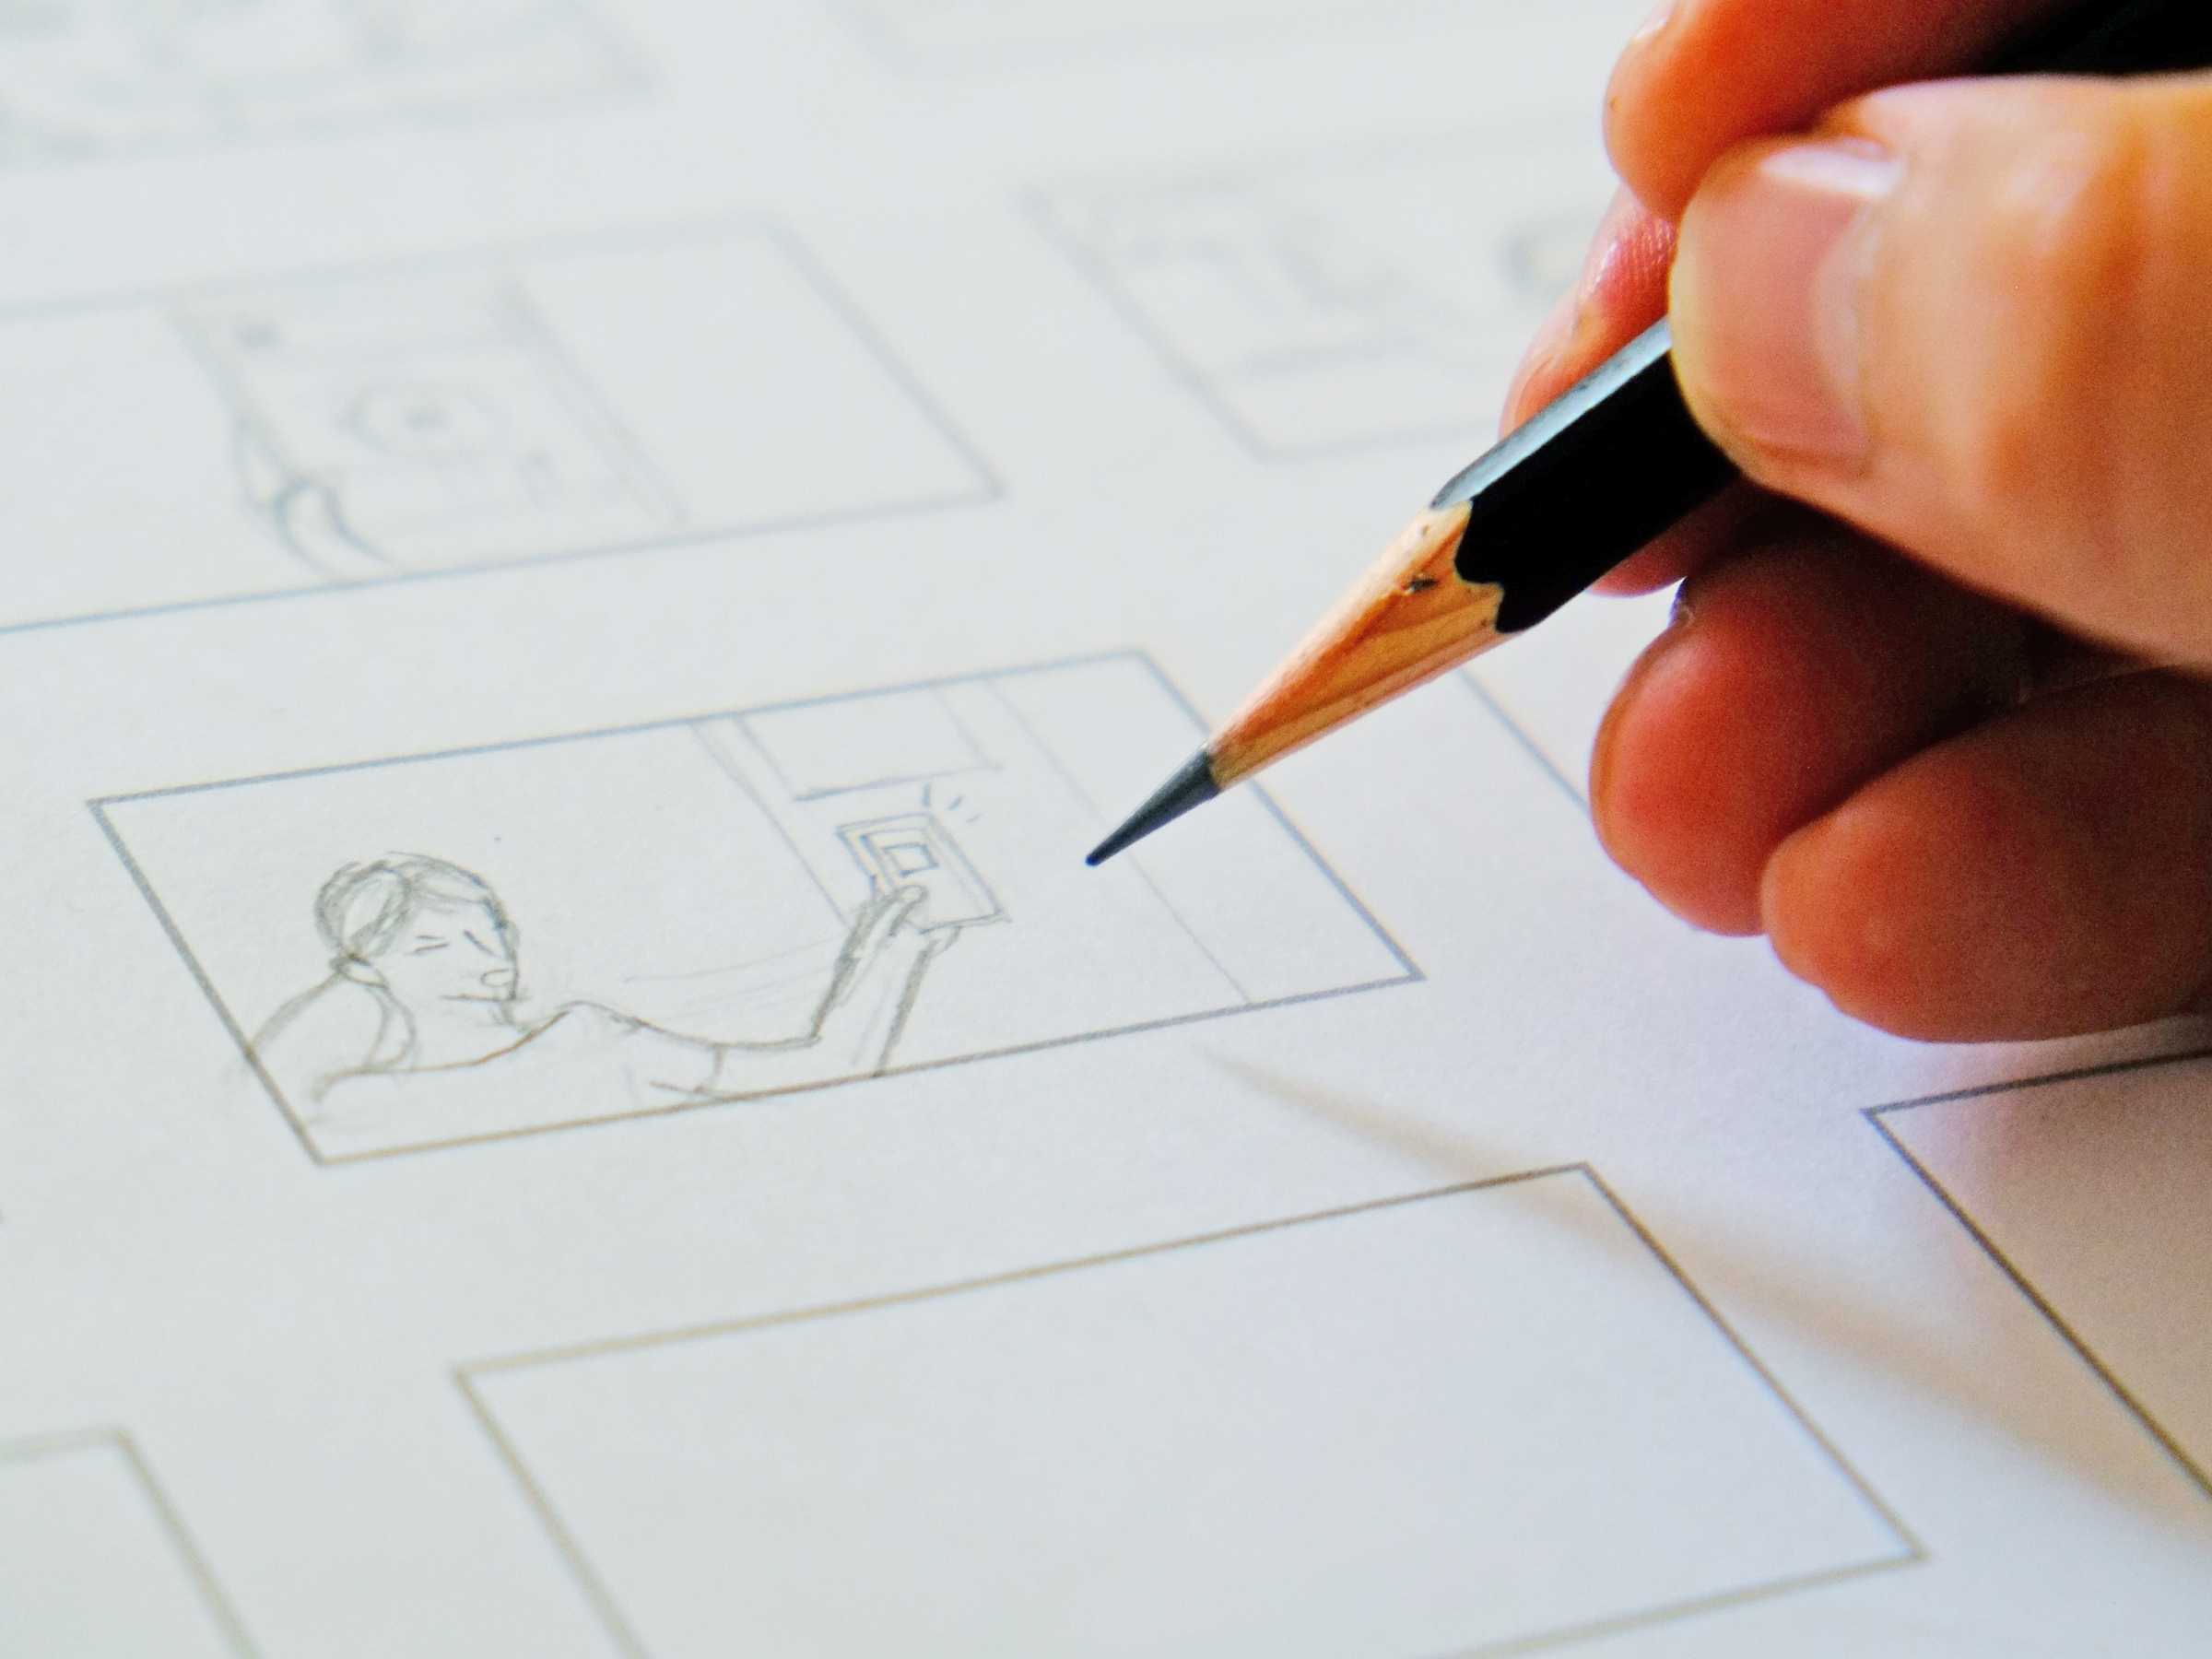
How do you create a customer journey storyboard? It can be as simple as folding a piece of paper to create a grid of squares.
Storyboards can also be created digitally, as some tools even have templates and features to help make this happen. There is a time and place for those more formal storyboards, but I like the process of pen-and-paper storyboarding.
Later this week we’ll be introducing a new customer journey storyboarding template, which you can use digitally (with a tablet and pen), or analog by simply printing it out. To get the template for free as soon as it’s available, as well as many more helpful CX guides, templates, and more, register free for Year of CX here .
Why Is Customer Journey Storyboarding So Effective?
Storyboarding can be highly effective to help with specific parts of the journey that are challenging or just need new thinking. Compared to building a standard customer journey map, the act of drawing out the “scenes” in the journey can tap into new ideas, creative problem-solving, and an awareness of what we know and what we don’t.
I’ve used storyboarding techniques in workshops and consulting because I’ve seen how it leads to new results.
- A cynical construction manager told me afterwards how he realized how many “scenes” he didn’t think about in the customer’s movie until working through a storyboard.
- A fitness executive told me he taped his on the inside of his notebook so he could remember the customer’s story.
- Others simply say “huh, I’ve never thought of it that way before.”
It can seem strange, but the act of drawing – even just stick figures – helps us realize our own misconceptions, improve our memory, and increase our capacity to learn. The National Science Foundation funded a study from 2007 to 2010 involving science students from Harvard, MIT, Duke University and Roxbury Community College, as well as design students. The findings revealed the process of drawing showed student misconceptions better than text. This led to better discussions and instruction to fill in those blanks, which led to better exam results.
Putting down the devices and drawing around the challenge also helps us feel less stress and get into a state of flow. Cortisol, the stress hormone, is shown to go down when people are making art, whether or not they consider themselves an artist, according to a study reported in the Journal of Art Therapy .
This all leads to an openness to new ideas.
And here’s a bonus perk: I’ve found the act of a bunch of leaders drawing together brings a sense of humility that leads to more empathy and understanding, too.
How to Create a Customer Journey Storyboard
Storyboarding is meant to be a quick, organic way to tap into solving a problem, innovating around an idea, or reinforcing ideal scenarios. Don’t get hung up on perfection. The process is the purpose.
1. Know your goal.
What are you using storyboarding to achieve? Keep the story limited to a specific scenario or outcome.
Some goals I’ve seen used in storyboarding:
- Develop better ways to greet customers upon arrival
- Identify opportunities to delight restaurant customers who are picking up orders
- Innovate to a better surgical waiting room experience for caregivers
- Brainstorm ideas to create more meaningful engagement with employees and managers
- Personalize the digital app experience for a bank
Your goal needs to be narrow enough to allow for big thinking. If it’s too complex, it’s easy to get lost in the “what about” and backend processes. This is all about the customer experience and thinking bigger. A narrow goal, ironically, allows you to do that.
2. Get your materials ready.
I like to go somewhere OTHER than my desk when I am focused on storyboards. Reduce your distractions by walking away from your computer, silencing your phone, and writing the goal down somewhere you can see it. (I often use a brightly-colored sticky note on the table.)
If you’re working as a group, even better! Ask everyone to do this at the same time.
While there’s no perfect rule about the number of panels you need in your storyboard, I like to start with 8 panels. This is easy with an 11 x 13 piece of paper:
- Fold the paper in half once length-wise.
- Then fold in half width-wise twice.
- Unfold to reveal eight rectangles.
Use whatever is easy and pleasant for you to work with:
- Like pencil? Go for it.
- Prefer the bold lines of a Sharpie? You do you.
- Want to use a digital device and project it for the whole team to see? Sounds like one productive game of Pictionary to me. Tools like Milanote can help with storyboarding and sharing across teams.
Just choose whatever you like the best.
3. Define the first step of the story.
Whose story are you telling, and where does their story begin?
A single storyboard doesn’t have to be one-size fits all. You can create storyboards for different:
- Customer personas
- Customer journeys or goals
- Points of view
To continue with my earlier example of personalizing a digital app experience, our first step was to decide if the journey was downloading the app or starting from within the app experience. Since our goal was personalizing the experience itself, we decided to start from opening the app. That’s a different story than if we started at deciding to download the app.
Another storyboard could consider that journey, or even compare the customer and employee perspectives of a single journey. There’s no limit on stories and storyboards we can draw, and each can shed light on something new!
Be clear on your start point, point of view, and goal. Then fill in the scenes from one to the other.
4. Set a time limit.
This isn’t exactly a necessity, but it can spur creative thinking. If you’re working with a group, a time limit is really helpful. I’ve watched leaders sit there, staring at the paper, too intimidated to actually draw anything UNTIL they hear the 2-minute warning. Then they churn out some great ideas!
A time limit can help if this is a step outside of your comfort zone. Coming up with a solution in 8 minutes means 1 minute per panel. Give yourself 3 pieces of paper and 30 minutes and you can have three different plans to consider!
5. Get drawing and writing!
Use both images and words to tell the story. Quotes, thought bubbles, and captions can help tell your story.

Don’t worry about the quality of the images. Sketching out stick figures and adding emotional symbols like frowns or hearts still connects with the story and your brain.
Once You Have Your Customer Journey Storyboard, What’s Next?
Storyboards are fun to share. Use them to help others visualize the story. Or share each one with the larger group if this is a group activity.
Capture the ideas, questions, and challenges identified through this exercise. Then use what you’ve learned to prioritize next steps.
Storyboarding doesn’t have to fit into a perfect place in your customer experience framework. It can be used as a way to shake things up as needed, or to plan from the beginning. You can even use this technique to test if the solution that is defined will work for customers. This fits nicely in as part of journey mapping, but it can also stand alone to solve one specific issue.
And it’s fun! It feels good to play a little.
Get creative! Your customers (and your brain!) will reward you.
About Jeannie Walters, CCXP, CSP

Get Jeannie’s insights in your inbox each week by subscribing to The Weekly Win and follow her on LinkedIn , Instagram and YouTube .
Insights in Your Inbox
Subscribe to The Weekly Win and join thousands in our community receiving insider perspective from our Founder and Chief Experience Investigator, Jeannie Walters, CCXP.

- About Experience Investigators
- 312-676-1315
Advisory Services
- Consulting, Coaching & Workshops
- CXI Navigator™
- Our Process
- CXI Compass™
- Work with Us
Thought Leadership
- Keynotes, Webinars, & Other Content Partnerships
- Meet Jeannie Walters
- Thought Leadership Topics
- CXI Flight School™
- Reviews / Why join our community?
- For companies
- Frequently asked questions

UX Storyboards: Ultimate Guide
In user experience design , we use techniques like workshops and interviews to understand users. We turn our research into user stories and process flows. We use personas and wireframes to share our ideas with our teams.
But it’s important to remember the real people we design for. We need to know what happens in their lives. We must see how our product can improve their lives. And that’s where a UX storyboard can help us.
What is a UX Storyboard?
A UX storyboard is a visual tool. It illustrates a user's experience with a product or service. Designers use it to understand and address user needs . It consists of sequences of drawings or images. These sequences show a user's interactions with a product. They also portray the user's emotions and challenges.
The term 'Storyboard' refers to a visual organizer. It shows the development of a sequence, shot by shot. The storyboard includes many panels. Each panel holds illustrations or images. These visuals represent individual shots. Notes accompany each panel. They describe what happens in the scene and the script's dialogue. Walt Disney Studios developed the storyboarding technique in the 1930s. They used it to construct coherent stories. These stories became the animated films many people know and love.
Think of the UX storyboard in the same way. Each panel represents a step in the user's journey. This tool helps designers empathize with users. It also helps you create user-centered designs .
For example, a storyboard for a shopping app might show a user discovering a product. It then shows the user purchasing the product and receiving it. This process may show possible pain points and opportunities for improvement.
Task Analysis , another method, focuses on observing user behavior . Watch Frank Spillers, CEO at Experience Dynamics, discuss this technique in more detail.
- Transcript loading…
Elements of a UX Storyboard

© Interaction Design Foundation, CC BY-SA 4.0
A UX storyboard typically includes three key elements: a specific scenario, visuals and captions.
Scenario : Each storyboard starts with a clear scenario or user story. Outline the persona involved at the top. Include a short, understandable text description of the scenario . This description sets the scene. It makes the storyboard clear to team members or stakeholders . For instance, "Fitness enthusiast John seeks a user-friendly app to track his daily workout routines."
Visuals : Represent each step in the scenario visually, in sequence. The visuals can be sketches, illustrations, or photos. Choose the style based on your storyboard's purpose and audience. These images should include relevant details, like the user's environment, speech bubbles, or sketches of the user interface they interact with.
Captions : Accompany each visual with a caption. These brief descriptions cover the user's actions, environment, emotions and interactions. Keep captions concise since you have the image as the primary element. Limit them to two bullet points maximum.
Together, these elements form a UX storyboard. They serve as a visual tool to communicate the user's journey effectively.
The Role of Storyboards in Product Design
Storyboards greatly help product managers and designers. They are like comic books but intended for different purposes. A UX storyboard shows how users might use a product. It makes it easy to see how people interact with an app or service. This tool also helps to understand users' motivations.
In UX, storyboards map how users will use a product or service. They show each step a user takes. They help predict what might happen. Designers use them like Disney animators did. They help tell the story of the user and the product. This way, designers find problems in the user experience. They can then make it better. Better user experience directly enhances user satisfaction and engagement with a product.
Storyboards also help designers share their ideas. They make it easy to show thoughts in a way that is quick and clear. This helps teams work better together. Storyboards in product design turn ideas into real things. They help make designs that focus on the user. This leads to a better experience for the user.
The Benefits of UX Storyboards
UX storyboards are great for design. They use storytelling to make user experience (UX) design better. Let's look at their main benefits.

1. Clear Communication
Storyboards offer a swift and lucid way to share ideas. They use visuals, which our brains process quicker than text. This quality ensures quick comprehension across teams. It leads to better teamwork, with everyone grasping problems and solutions rapidly.
2. Focus on the User
Storyboards are centered on users. This makes designers think from the user's point of view . Storyboards also make the user's story interesting and easy to relate to. This helps everyone care more about what the user needs.
Good user stories define the user's needs and goals. They ensure the development team builds features that truly benefit the end user.
3. Save Time and Money
Storyboarding helps test ideas quickly. Designers can draw a quick storyboard to see if an idea works. This helps find out early if an idea is good or not. It stops wasting time and money on ideas that don't work.
4. Pictures Speak Louder
Images in a storyboard tell a stronger story than words. They make it easier for people to understand and remember for longer , especially if they are not designers. Storyboards make people feel more connected to the story. They focus on real problems and situations, increasing empathy in the process.
5. Keep Ideas Visible
Storyboards make it easier to remember user stories and problems. They are like a quick picture of what's essential. Putting them up where everyone can see them keeps these ideas in mind.
When to Storyboard in UX Design
Storyboarding in UX design is helpful at many stages. This part explains when to use storyboards best.
1. Fuel the Ideation Process
Storyboards can help designers come up with ideas. They let designers sketch how users might use a feature. This helps understand the user's setting before starting to build. Storyboards for ideation start conversations. They change as more real data comes in.
2. Guide Feature Prioritization and Team Alignment
Storyboards help show how users use apps. This makes it easy to see which features matter most. Teams understand what is important together. For example, a storyboard for a login process can show what works and frustrates users. This helps decide which features to focus on.
3. Integrate into the Design Lifecycle
Storyboards fit into many parts of the UX and product design process . They are good after researching and before solving problems. Storyboards turn research data into a story with pictures. This helps find main themes and user scenarios . It makes it easier to spot the right problems and think of solutions.
Obtaining relevant research insights forms the foundation for informed decision-making. Watch Alan Dix (Author, Professor and Researcher) discuss the difference between two research methods - qualitative and qualitative.
As mentioned above, storyboards show how solutions might work in the ideation stage. Designers can see how well different ideas meet user needs. This is important before starting the design and building stages.
In the design phase, storyboards guide decisions. They keep the focus on what users need. Looking back at storyboards helps stay in line with user needs while designing.
4. Transform Research Insights into Visual Stories
Storyboards can help in explaining the results of research and usability testing . They show how users interact with apps or websites. The use of visuals instead of just text makes summaries more engaging. Storyboards can include what users say and their body language. This helps designers to understand user experiences better.
5. Enhance Journey Maps
Storyboards add detail to journey maps . They show images of users at different stages using a product. Pictures of the user's device, workspace, and group settings help others feel more connected. This gives a clearer view of the user's world and challenges.
Three UX Storyboard Examples
In UX design, storyboards illustrate how users interact with products. They highlight challenges and solutions in a user's journey. Here, we present examples of UX storyboards.
1. User Journey from App Download to Satisfaction

The storyboard captures a user's journey engaging with a food app. It starts with the user seeing a commercial prompting them to download the app.
Feeling hungry, they download the app and place an order. As they wait, the app shows real-time updates. Meanwhile, they drive to the restaurant.
Post-order, the app sends a survey , which the user completes. As a thank you, the app delivers an e-coupon to their inbox. The final frame also shows the user happy with the food through a smile emoji. It indicates a successful and rewarding user experience.
2. Invite a User Made Simple

This storyboard shows a clear path for inviting a new user to a platform. It begins on the landing page. A user taps a share link and the screen slides to the left and shows the invite screen.
The focus here is on ease and clarity. The invite screen includes a field to type in an email address, with no extra animation. It's straightforward—type, invite, done.
When the user adds and saves an email, the storyboard takes them to an updated list. A new user's name fades in to show they've joined. This subtle animation confirms the action without fuss.
Then, the user goes back to the main screen. The storyboard closes the loop and the user returns to the landing page. It's a smooth slide back to the start.
This example shows the power of a clean, simple invitation process. The creator keeps it easy with clear steps and minimal distractions. It shows that a good design helps users confidently complete tasks without confusion.
3. Effortless App Onboarding

The third storyboard illustrates a user's onboarding journey for a mobile app. The first screen welcomes users to the app designed to find free food locally. The storyboard's simplicity ensures the user knows the app's purpose.
Next, the user signs up for an account where they get three options to Sign up - Google, Facebook or with their email. It’s a quick, two-field form—no clutter, no hassle. This simplicity keeps users engaged and not overwhelmed by the process.
Next, the app asks for more personal details. These include the name, address and phone no. This info helps the app include more personalization to the user’s journey.
The storyboard then shows the app in use. The users can see multiple restaurant options available to them. They can quickly find a suitable restaurant and place the order. This quick success shows the app's value right after sign-up. Last, the app completes the process with the ‘Order Placed’ screen. It also shows the exact wait time for the order delivery.
This example shows the effectiveness of a clear, step-by-step onboarding process. The creator made each step purposeful and straightforward. They ensure the user sees immediate value and knows how to deepen their engagement with the app.
Your Step-by-Step Guide to UX Storyboarding
A UX storyboard requires careful planning, the right data, and collaboration to narrate the user's journey visually. In this section, we’ll walk through the fundamental steps in creating a storyboard that brings the user's story to life.

Step 1: Define the Goal
Before you draw the first box of your storyboard, know where you're heading. Ask yourself : What do you want to achieve? Are you mapping out a new feature or exploring a user's journey through your app? Your goal could range from resolving a specific user issue to presenting a new product idea.
Set a specific, actionable goal to guide your storyboard creation. This step ensures your process remains focused and pertinent. Document your goal and communicate it with your team for initial alignment. A precise goal maintains the storyboard’s direction and ensures you take purposeful actions.
Step 2: Collect and Synthesize Data
You have a wealth of sources for data collection , including user research , interviews , usability testing , and site metrics. However, you don't need to use all of them. Select the most relevant sources that will inform your storyboard effectively. Conduct thorough user research , engage in insightful interviews, perform detailed usability tests, and analyze your site metrics to gather robust data.
Once you've collected this data, synthesize it to uncover the core user insights. This synthesis will help you understand user motivations, struggles, and success moments. It tells you what users do and why they do it. You can craft a storyboard that resonates with real user experiences this way.
Performing this step early sets a strong foundation for your storyboard. It ensures that a solid, user-centered ground backs the story you will tell. This makes it a reliable reference throughout the design process.
Step 3: Choose a Fidelity level
Determine the storyboard's fidelity based on its purpose and the intended audience.
Use simple sketches or sticky notes for internal team discussions. This method facilitates brainstorming and allows easy modifications. It supports collaborative creation and the flexibility to adjust sequences.
Create detailed illustrations for client presentations or deliverables using tools like Adobe Illustrator or Sketch. This higher fidelity approach yields a polished and refined visual.
Focus on clarity and effectiveness, not over-finessing visuals. Select the fidelity that best conveys your story and aligns with the storyboard's goals.
Step 4: Create a Persona and Scenario
A persona and scenario ground your storyboard in reality. It ensures the story resonates with actual user experiences .
Personas help you understand and address users' specific behaviors, needs and contexts. Alan discusses how to create effective personas in UX design.
Create a fictional yet realistic persona that represents your target user. Draw from research data to make this persona detailed and authentic. Include behaviors, preferences, and needs. This persona becomes a key figure in your storyboard. It guides the story's direction.
Next, develop a scenario for your persona. This scenario is a specific situation where the persona interacts with your product. Describe the setting – is it at home, in an office, or on the go? What are the other important contexts of use ? Is it a noisy office? Are there distractions at home? Detail the challenges and objectives the persona faces. What are they trying to achieve with your product? What obstacles do they encounter?
This step helps you empathize with users and design solutions that meet their needs. It brings focus to your storyboard.
Step 5: Sketch the Story Steps
Sketch each step of the persona's journey in the scenario.
Start with the initial problem or need for a service.
Show critical actions as they engage with your product.
Include essential moments of interaction, decision-making and the outcome.
Use simple drawings or stick figures for clarity.
Aim to visually represent the user's journey. Make it understandable and sequential. This step turns conceptual ideas into tangible visuals. It lays out the user's path clearly and methodically.
Step 6: Add Annotations
Write short notes under each picture. Explain what's happening and why the user feels a certain way. This makes the storyboard tell a better story. It helps everyone understand not only what the user does, but also how they feel. Keep these notes clear but short. They should give just enough information to get the point across.
Here’s an example of John:
Faces a Problem : John struggles to track his daily fitness routine.
Annotation: John struggles with manual fitness tracking and seeks a better alternative.
Discovers the Product : He finds your fitness tracking app online.
Annotation: Intrigued, John stumbles upon the app while searching for fitness solutions.
Initial Use : John downloads the app and starts to input his fitness data.
Annotation: John easily inputs his data. He expects positive changes.
Engages with Features : He explores features like setting goals and tracking progress.
Annotation: John uses a goal-setting feature. He appreciates its ease and usefulness.
Experiences Benefits : John sees improvements in his routine and feels motivated.
Annotation: John notices a tangible improvement in his fitness routine and overall well-being.
Recommends to Friends : Satisfied, he recommends the app to his friends.
Annotation: Happy with his progress, John shares the app with friends, confident it can help them too.
This storyboard with John shows the steps of the emotional journey and the reasoning behind each action. It provides a deeper understanding of the user experience.
Step 7: Present the Storyboard
Present the storyboard to your team, stakeholders, or clients. Choose a format that suits your audience.
For internal teams, a casual walkthrough might suffice.
For clients or major stakeholders, consider a more formal presentation.
Explain each step with a focus on the user's journey, emotions and the story's flow. Encourage feedback and discussions. This presentation provides an opportunity to align everyone's understanding and gather insights for improvements.
Remember, the storyboard acts as a communication tool. So make sure it conveys the intended message and user experience.
Step 8: Iterate and Refine
After you present the storyboard:
Gather feedback and insights.
Use them to refine your storyboard.
Look for areas that need clarification or improvement.
Adjust the visuals, emotions, or annotations as needed.
This iterative process will help you hone the storyboard into an effective tool. It ensures the final version accurately represents the user experience and meets the project's goals. Refine the storyboard until it resonates with all stakeholders and guides the design process .
Where to Learn More
Read the Forbes article that shares insights on best practices for great UX features on a website . Learn how to visualize your website as a storyboard.
Marli Mesibov takes a real-life example of an app she helped to build in 2017 and explains five steps you can use to help you build a story into your user experience.
Find helpful insights about visual storytelling in Visual storytelling for UI-UX design with examples .
Gestalt Psychology and Web Design: The Ultimate Guide

Get Weekly Design Insights
Topics in this article, what you should read next, 14 ux deliverables: what will i be making as a ux designer.

- 1.2k shares
5 Common Low-Fidelity Prototypes and Their Best Practices

- 1.1k shares
Introduction to the Essential Ideation Techniques which are the Heart of Design Thinking

- 3 years ago
Open Access—Link to us!
We believe in Open Access and the democratization of knowledge . Unfortunately, world-class educational materials such as this page are normally hidden behind paywalls or in expensive textbooks.
If you want this to change , cite this article , link to us, or join us to help us democratize design knowledge !
Privacy Settings
Our digital services use necessary tracking technologies, including third-party cookies, for security, functionality, and to uphold user rights. Optional cookies offer enhanced features, and analytics.
Experience the full potential of our site that remembers your preferences and supports secure sign-in.
Governs the storage of data necessary for maintaining website security, user authentication, and fraud prevention mechanisms.
Enhanced Functionality
Saves your settings and preferences, like your location, for a more personalized experience.
Referral Program
We use cookies to enable our referral program, giving you and your friends discounts.
Error Reporting
We share user ID with Bugsnag and NewRelic to help us track errors and fix issues.
Optimize your experience by allowing us to monitor site usage. You’ll enjoy a smoother, more personalized journey without compromising your privacy.
Analytics Storage
Collects anonymous data on how you navigate and interact, helping us make informed improvements.
Differentiates real visitors from automated bots, ensuring accurate usage data and improving your website experience.
Lets us tailor your digital ads to match your interests, making them more relevant and useful to you.
Advertising Storage
Stores information for better-targeted advertising, enhancing your online ad experience.
Personalization Storage
Permits storing data to personalize content and ads across Google services based on user behavior, enhancing overall user experience.
Advertising Personalization
Allows for content and ad personalization across Google services based on user behavior. This consent enhances user experiences.
Enables personalizing ads based on user data and interactions, allowing for more relevant advertising experiences across Google services.
Receive more relevant advertisements by sharing your interests and behavior with our trusted advertising partners.
Enables better ad targeting and measurement on Meta platforms, making ads you see more relevant.
Allows for improved ad effectiveness and measurement through Meta’s Conversions API, ensuring privacy-compliant data sharing.
LinkedIn Insights
Tracks conversions, retargeting, and web analytics for LinkedIn ad campaigns, enhancing ad relevance and performance.
LinkedIn CAPI
Enhances LinkedIn advertising through server-side event tracking, offering more accurate measurement and personalization.
Google Ads Tag
Tracks ad performance and user engagement, helping deliver ads that are most useful to you.
Share the knowledge!
Share this content on:
or copy link
Cite according to academic standards
Simply copy and paste the text below into your bibliographic reference list, onto your blog, or anywhere else. You can also just hyperlink to this article.
New to UX Design? We’re giving you a free ebook!

Download our free ebook The Basics of User Experience Design to learn about core concepts of UX design.
In 9 chapters, we’ll cover: conducting user interviews, design thinking, interaction design, mobile UX design, usability, UX research, and many more!
New to UX Design? We’re Giving You a Free ebook!
Product Design
Storyboarding in ux: visualizing user journeys.

Vladislav Gavriluk
CEO & Founder at Arounda
Storyboarding UX is a bridge between abstract ideas and engaging user experiences. Today, user engagement is essential for the success of digital products, making the storyboarding approach stand out. It makes abstract concepts concrete and understandable.
This article dwells on Arounda’s experience in UX design and the use of storyboarding in solutions we develop. So, let’s dive into the most critical aspects of the product design storyboard. Read along to find out what storyboarding is, its main elements, how it compares to journey maps, and its significant effect on UX design. We will also provide tips for making effective and engaging storyboards.
Table of Contents
What is a Storyboard, and How is It Used in UX Design?
Components of a Storyboard
Storyboards vs. Journey Maps
The Impact of Storyboarding on UX Design
Creating Effective UX Storyboards: Best Practices
Unlock the Full Potential of Your UX Design with Arounda's Expert Storyboarding
Both storyboards and journey maps are valuable UX design tools. They serve different purposes and offer unique insights, though.
Storyboards: The Narrative Approach
Storyboards are narrative-driven. They tell a story through images or sketches and depict how users interact with a product over time. Here are the main advantages and use cases of storyboards.
Visual Storytelling. Storyboards excel in picturing the emotional journey and context of use.
Team Alignment. Storyboards provide teams with a shared vision of the product's use and impact on users.
Ideal for new product concepts . With storyboards, it’s easier to understand the user's emotional journey.
Useful in presentations to stakeholders. Storyboard UX design conveys a product's potential impact in a relatable, human-centered way.
Journey Maps: The Analytical Tool
Journey maps are analytical tools. They provide a high-level overview of the user's interaction with a product or service. Maps often have the form of a flowchart or diagram.
Comprehensive Overview. Journey maps offer a bird's-eye view of the user's interaction. Maps capture touchpoints, pain points, and moments of delight.
Data Integration. Journey maps incorporate quantitative data and provide a more comprehensive view of the UX.
Use Cases :
Understanding overall user experience. Journey maps streamline identifying and addressing specific pain points in the user experience.
Improving user flows. With journey maps, it’s possible to optimize the existing user flows and improve user satisfaction metrics.
Practical Application
In practice, the choice between a storyboarding UX design and a journey map depends on the project's objectives.
For instance, suppose you design a new app feature. Design storyboard to visualize how users will discover and interact with the feature. This way, you'll capture their initial reactions and emotional journey. In contrast, use a journey map to refine an existing feature and analyze user interactions at each step to identify its potential flaws and improvement areas.
Storyboarding has a transformative effect on UX design. It’s pivotal in shaping user-centric products and services. In particular, storyboards impact several key areas:
Visualizing User Interactions. Storyboarding provides a tangible representation of how users engage with a product by depicting a user's journey. This visualization helps identify the main touchpoints and understand the context of use. It’s crucial for creating intuitive and user-friendly designs.
Predicting Challenges. Through a UI/UX storyboard, designers can foresee potential obstacles and challenges in the user journey. It enables the exploration of different scenarios. Teams can predict problems and devise solutions. This feature is invaluable in creating a seamless user experience. It reduces the likelihood of user frustration and product abandonment.
Enhancing Design Strategy. Teams can align their strategies with the user’s perspective. Thus, they consider the functional aspects along with the emotional and experiential design elements.
To create impactful UX storyboard examples, stick to the following best practices:
Focus on user-centric stories. Begin with a clear understanding of your user personas. Craft stories that reflect their experiences, needs, and challenges. This focus ensures your storyboard resonates with the intended audience and addresses actual user problems.
Simplicity in visual representation. Use sketches and illustrations that are easy to understand. Avoid overcomplicating visuals. Focus on conveying your ideas quickly and clearly. Thus, viewers can grasp the concept without getting lost in details.
Sequential flow and clarity. Arrange the scenes in a logical order that reflects the user's journey. Ensure each frame leads to the next one, maintaining an understandable narrative flow that’s easy to follow.
Incorporate emotions and annotations. Besides actions, include emotional responses and thoughts of the user at various points. Use annotations to provide context, explain actions, and highlight key moments in the journey.
Alignment with Business Goals. While focusing on user experience, ensure the storyboard meets your business objectives. While empathizing with the user, it should also reflect how the product or service covers your goals and requirements.
Storyboarding bridges the gap between abstract ideas and actual user experiences. Designers use it to visualize, empathize, and plan. That's why we at Arounda highly recommend this tool.
Our team crafts detailed, user-focused storyboards and develops impactful solutions . We're experts in turning complex concepts into explicit, engaging visual stories. Every solution should prioritize the understanding of the user’s journey.
Whether you're creating a new product or improving an existing one, our team is ready to bring your ideas to life. Reach out to us to see how our expertise can revolutionize your UX design and take your products to greater heights. Let's work together to create memorable and unique user experiences.
Never miss a post! Share it!

Frequently asked questions
Storyboarding UX design is a visual storytelling tool that illustrates a user's journey with a product or service. It's akin to storyboards in filmmaking but tailored to showcase user interactions and experiences.
Here are the seven core steps in design storyboarding:Define objectives. Clearly outline what you aim to achieve with the storyboard.Research and understand your audience. Gather information about your target users. Dive into their needs, preferences, behaviors, and pain points. Create user personas. Develop user personas based on your research. These are fictional characters representing different target audience segments. Map out the user journey. Outline the steps users take while interacting with your product or service.Sketch the scenes. Each scene in your storyboard should represent a significant moment in the user journey.Add details and annotations. Include elements like user emotions, environmental context, and dialogue.Review and revise. Finally, check the storyboard for clarity, coherence, and alignment with your objectives.
Continue reading
Hungry for more.
Sign up to our newsletter to get weekly updates on the trends, case studies and tools
Got a project in mind? Tell us about it.
Product Design Bundle and save
User Research New
Content Design
UX Design Fundamentals
Software and Coding Fundamentals for UX
- UX training for teams
- Hire our alumni
- Journal of UX Leadership
- Our mission
- Advisory Council
Education for every phase of your UX career
Professional Diploma
Learn the full user experience (UX) process from research to interaction design to prototyping.
Combine the UX Diploma with the UI Certificate to pursue a career as a product designer.
Professional Certificates
Learn how to plan, execute, analyse and communicate user research effectively.
Learn the principles of content design, from mastering tone and style, to writing for interfaces.
Understand the fundamentals of UI elements and design systems, as well as the role of UI in UX.
Short Courses
Gain a solid foundation in the philosophy, principles and methods of user experience design.
Learn the essentials of software development so you can work more effectively with developers.
Give your team the skills, knowledge and mindset to create great digital products
Join our hiring programme and access our list of certified professionals.
Learn about our mission to set the global standard in UX education
Meet our leadership team with UX and education expertise
Members of the council connect us to the wider UX industry
Our team are available to answer any of your questions
Fresh insights from experts, alumni and the wider design community
Read stories from our students who have made successful careers in UX after completing our course
Guide to storyboarding in UX: What are they, what’s their role in UX design, and how do you create one?
Storyboards provide a comic strip-style visualisation of the user’s experience with a product or service, mapping out each step the user takes as they interact with the product.

Free course: Introduction to UX Design
What is UX? Why has it become so important? Could it be a career for you? Learn the answers, and more, with a free 7-lesson video course.

You’ve probably heard of storyboarding in relation to films, animations, and video games. But did you know that they are also an extremely valuable UX design tool?
In UX and product design, storyboards are used to visualise the user’s experience with a product or service. They map out the user’s actions in chronological order, creating a comic strip-style depiction of their journey from A to B within a specific context or scenario.
But why is this useful? What are the benefits of storyboarding for UX, and how can you incorporate storyboards into your own design process?
We cover everything you need to know in this guide. Consider it your ultimate storyboarding handbook, complete with a step-by-step process you can follow to create your own.
Keep reading to learn:
- What are storyboards and how are they used in UX design?
- Where do storyboards fit into the UX and product design process?
What are the benefits of storyboarding in UX design?
What are the key elements of a storyboard, how do you create a storyboard step-by-step guide.
- What are the best storyboarding software and tools?
First, let’s define what storyboarding is and how it relates to UX.
[GET CERTIFIED IN UX]
What is a storyboard and how is it used in UX design?
A storyboard is a sequence of illustrations used to visually depict a story or narrative. It breaks the story down into individual scenes, mapping them out in chronological order so you can see, step by step, how the story unfolds—just like a comic strip.
The storyboarding technique was developed by Walt Disney Studios in the 1930s as a way to construct coherent stories that would later become the animated films we all know and love.
So what do they have to do with UX?
In UX and product design, storyboards are used to visually map out the user’s experience with a product or service. They consider the different steps a user might go through when interacting with the product, predicting likely scenarios and sketching out what happens at each stage.
Just as Disney’s animators used storyboards to carve out a coherent and compelling narrative, UX and product designers use boards to map out the story of the user (the main character in the story) and the product. In doing so, they can identify “plot holes”, i.e. gaps or roadblocks within the user experience, and identify opportunities to write a better story for the user—i.e. to design a better user experience.
Storyboards also serve as a communication tool, helping designers to express and communicate their ideas in a way that’s quick, engaging, and memorable.
Where do storyboards fit into the UX and product design process? When should you create them?
The UX design process begins with user research and defining the problem to be solved. From there, designers focus on ideation, coming up with potential solutions and choosing one to take forward. With a solution in mind, the process moves to designing, prototyping, and validating that solution before it’s developed and launched. After launch, continuous UX testing seeks to improve, update, and add to the existing product in line with the user’s needs.
That’s the UX design process in a nutshell. So where does storyboarding come into play?
It can be useful at various stages of the UX/product design process. You can use them:
- After user research, before defining the problem and ideating solutions . boards are great for organising your research data, pulling out key themes, and turning your findings into a visual story about your users. In what scenarios do they use your existing product or encounter the problem space you’re exploring? What issues do they run into along the way?
- By presenting your research findings as a comic strip-style story, you can (quite literally) paint a picture of the problem space. This makes it easier to communicate and share your research findings, but also to guide you towards defining the right problem and coming up with solutions.
- As part of the ideation process. You’ve done your user research and defined the problem you need to solve. As you come up with different solutions, storyboarding enables you to visualise them in action. If you develop solution X, how will the user interact with it? Does it address the necessary pain-points or generate new issues? How does it compare to solution Y? Mapping out potential solutions helps you to evaluate their validity before moving on to design and development.
- Throughout the design phase to guide product decisions. Just as you might refer back to your user personas to remind you of who you’re designing for and what they need, they can be a useful “north star” throughout the design phase. Creating storyboards, or referring back to existing ones, can help to keep the user’s pain-points at the forefront, enabling you to prioritise their needs and make user-focused design decisions.
Those are some scenarios where storyboards can come in handy. Now let’s dive deeper into the benefits of storyboarding for UX.
[GET CERTIFIED IN CONTENT DESIGN]
Thanks to their visual, concise, and sequential nature, storyboards are an excellent way to leverage the power of storytelling in UX design . Let’s consider the main benefits of storyboarding and why storyboards are such a valuable UX tool.
Storyboards enable you to communicate your ideas quickly and clearly
Our brains are wired to process images much faster than text— 60,000 times faster , in fact. With storyboards, you can present your findings and ideas in a way that’s quick and easy for others to digest. This helps to foster collaboration and dialogue among key stakeholders, to build a shared understanding of the problem space, and to get buy-in for your proposed solutions.
In short: UX storyboards are easy to process and understand, making them a powerful communication tool.
Storyboards centre the user and cultivate empathy
How many times have you heard that empathy is crucial for good UX? The various steps in the UX process—and the fundamental principles of UX —are all geared towards meeting the user’s needs and generally designing an experience that will benefit them. Storyboards are no exception.
Storyboards centre the user by positioning them as the main character. So, as you create your storyboards, you have no choice but to consider the experience from your user’s perspective. That’s user-centric design at its best!
At the same time, storyboards present the user’s experience in a way that’s more engaging and relatable than, say, plain text or simple diagrams. This can help stakeholders who are not involved in the design process—and perhaps not so accustomed to prioritising the user—to empathise with their needs and better understand your ideas and design decisions.
In short: Storyboards put your end user into the role of main character, ensuring a user-first design process and helping to cultivate empathy across the board.
Save time and money
Storyboarding alone is not a sufficient means for validating your ideas, but it can help you to explore their potential before investing in any further design or development. You can take any seedling of an idea and quickly sketch out a storyboard which depicts that idea in action.
In doing so, you may uncover “plot holes” and realise that, actually, this idea isn’t worth pursuing. Or you might find that it appears to work well and is worth exploring further. With storyboarding, you can get a preliminary look at how your ideas might perform in the real world, with real users—allowing you to eliminate unsuitable ideas before you spend any real time or money on them.
In short: Storyboarding can be used to explore early-stage ideas and evaluate their potential, making sure you don’t waste time (or money) focusing on the wrong solution.
So far, we’ve established what a storyboard is, why it’s a useful UX tool, and how you can incorporate it into your design process. For the second half of our guide, let’s get into the practicalities of creating a storyboard.
Before we outline the storyboarding process, it’s helpful to consider all the key elements that make up a storyboard.
The main components are:
- A specific scenario: This is like the title of your story, summing up what the storyboard is about. It also references the persona who will feature in your storyboard. For example: Ellis, a single parent, wants to open a savings account for his/her/their children.
- A main character: Every good story has a protagonist, as does every good storyboard! As specified in your storyboard scenario, the story you’re telling will focus on a specific user persona and their interaction with/experience of the problem space and/or your product. You might provide a brief bullet-point summary of the persona beneath the storyboard scenario. For example: Ellis, 43 years old, single parent to two children aged 5 and 8; works full-time, average income. Relatively tech-savvy but doesn’t have much time; needs a straightforward and manageable saving solution.
- Visuals: Storyboards comprise a series of panels or frames, with each frame depicting a step in the narrative. This narrative is communicated mostly through visuals, so you’ll need to fill each blank frame with sketches or images (e.g. photos or illustrations). The type of visuals will depend on the fidelity of your storyboard and the tools you’re using—are you going for low-fidelity pencil sketches or a high-fidelity digital format?
- Accompanying text: Each frame in your storyboard sequence should be accompanied by some explanatory text which helps to clarify and/or elaborate on what’s being depicted visually. This describes, in brief, what the user is doing, the context in which they’re doing it, and how they’re feeling in the process.
That’s the framework of a UX storyboard. Now: How do you go about creating one? Let’s find out.
We’ve divided the process into seven key steps. Ready? Here’s how to create a storyboard:
- Define the purpose
- Compile any data and artefacts you’ll use to inform
- Gather your tools
- Craft your scenario statement
- Draft your story in writing
- Add visuals and accompanying text
And now in more detail…
1. Define the purpose
Before you get started on your storyboard, it’s important to have a clear goal in mind.
Why are you creating a one? What will it help you to achieve? What stage of the design process is it supporting you with?
Earlier in this guide, we outlined some common scenarios where storyboards can come in handy—for example, to visualise and make sense of your user research data, as part of the ideation process, or as a low-stakes way to evaluate your early-stage ideas.
Having a clearly-defined goal will enable you to determine the scenario and user persona your storyboard will focus on, as well as who should be involved in the storyboarding process.
Are you clear on your goals? Then proceed to step two!
2. Compile useful data and artefacts
How you approach this step will depend on the goal of your storyboard and at what stage of the design process you’re creating it (as covered in step one).
If you’re building a storyboard to visualise user research data, gather that data and, if necessary, condense it into key points. This might be responses from user surveys , transcripts from user interviews , or insights from usability tests.
In the absence of data (for example, if you’re creating storyboards as part of the ideation process), compile any artefacts or documentation that might be useful. For example, if you’ve got a well-defined user persona—or a set of personas, even—you might want those close by while you work on your storyboard.
3. Prepare your tools
Next, have your tools at the ready. The tools you use will depend on whether you’re creating a low-fidelity, hand-drawn storyboard or a higher fidelity digital one.
If you’re going for low-fidelity, you’ll just need pencils and paper. You may also want to download and print a template which you can fill out.
If you’re going down the digital route, you can use a tool like Figma, Canva, or Miro. We outline some of the best software in the penultimate section of this post—check them out once you’re finished with this step-by-step guide.
That’s your essential prep done! Now let’s get underway…
4. Craft your scenario statement
Earlier in this post, we set out the key components of a UX storyboard, the first two being 1) A specific scenario, and 2) A main character.
In this step, you’re going to craft what we’ll call your “scenario statement”—a headline which states what the storyboard is about and who the main character is. Bear in mind that anyone reading this title should be able to deduce what’s going on, even without any prior knowledge or context. So: make it meaningful and relevant.
Beneath the scenario statement, you can flesh out the details of your main character (i.e. your user persona). Limit this to one or two essential bullet points; you don’t need to provide a full persona description, just a few extra details for context.
5. Draft your story in writing
Now you’re going to draft your story in writing. For this step, we recommend using pen and paper.
Write out each step in the story, focusing on the actions the user takes. Each little block of text should represent one step or action; these will soon become the individual frames in your storyboard. And, for each action, note down (or visually depict) the user’s emotions—for example, frustrated, confused, worried, overwhelmed, relieved, excited, and so on.
Here’s how this might play out:
- Roshi receives a mobile notification saying that they’ve reached their overdraft limit [Emotion: worried]
- Roshi navigates to their mobile banking app and clicks “Speak to a customer service advisor” [Emotion: Worried, focused]
- Roshi waits over fifteen minutes to be connected with an advisor [Emotion: Frustrated]

As you draft the narrative, keep in mind that each storyboard should focus on just one sequence or “flow”. If there are multiple stories to be told (i.e. different actions the user could take that would send them down a different pathway), you’ll need to create multiple storyboards.
6. Add visuals and accompanying text
You’ve written out a logical and cohesive narrative; now you’re going to convey that narrative visually.
In each blank frame or panel, sketch out the individual steps in your story (or, if you’re using some other kind of visual representation, insert the relevant media). If you’re sketching by hand, don’t get too hung up on the quality of your drawings—simple stick figures will do just fine!
Underneath each frame, write a brief accompanying text which explains what’s going on: namely, what action the user is taking and how they feel.
Repeat that process for each step in your narrative until you have a fully-fledged storyboard.
7. Present your board
Congratulations! You’ve just created a UX storyboard. Now it’s time to loop back to your original goal and put your storyboard to good use.
Who should see your storyboard? Will you present it to key stakeholders to share, in visual form, your user research findings? Or will you use it to inform and inspire an ideation session with your fellow designers?
Whatever its purpose, we’re sure your UX storyboard will prove extremely valuable. Now, as promised, let’s outline some of the best storyboarding software and tools.
What are the best software and tools?
If you’re creating boards digitally and/or collaboratively with remote or distributed teams, consider using software (or a tool with storyboarding templates and functionality).
Here are some of the best storyboarding tools worth exploring:
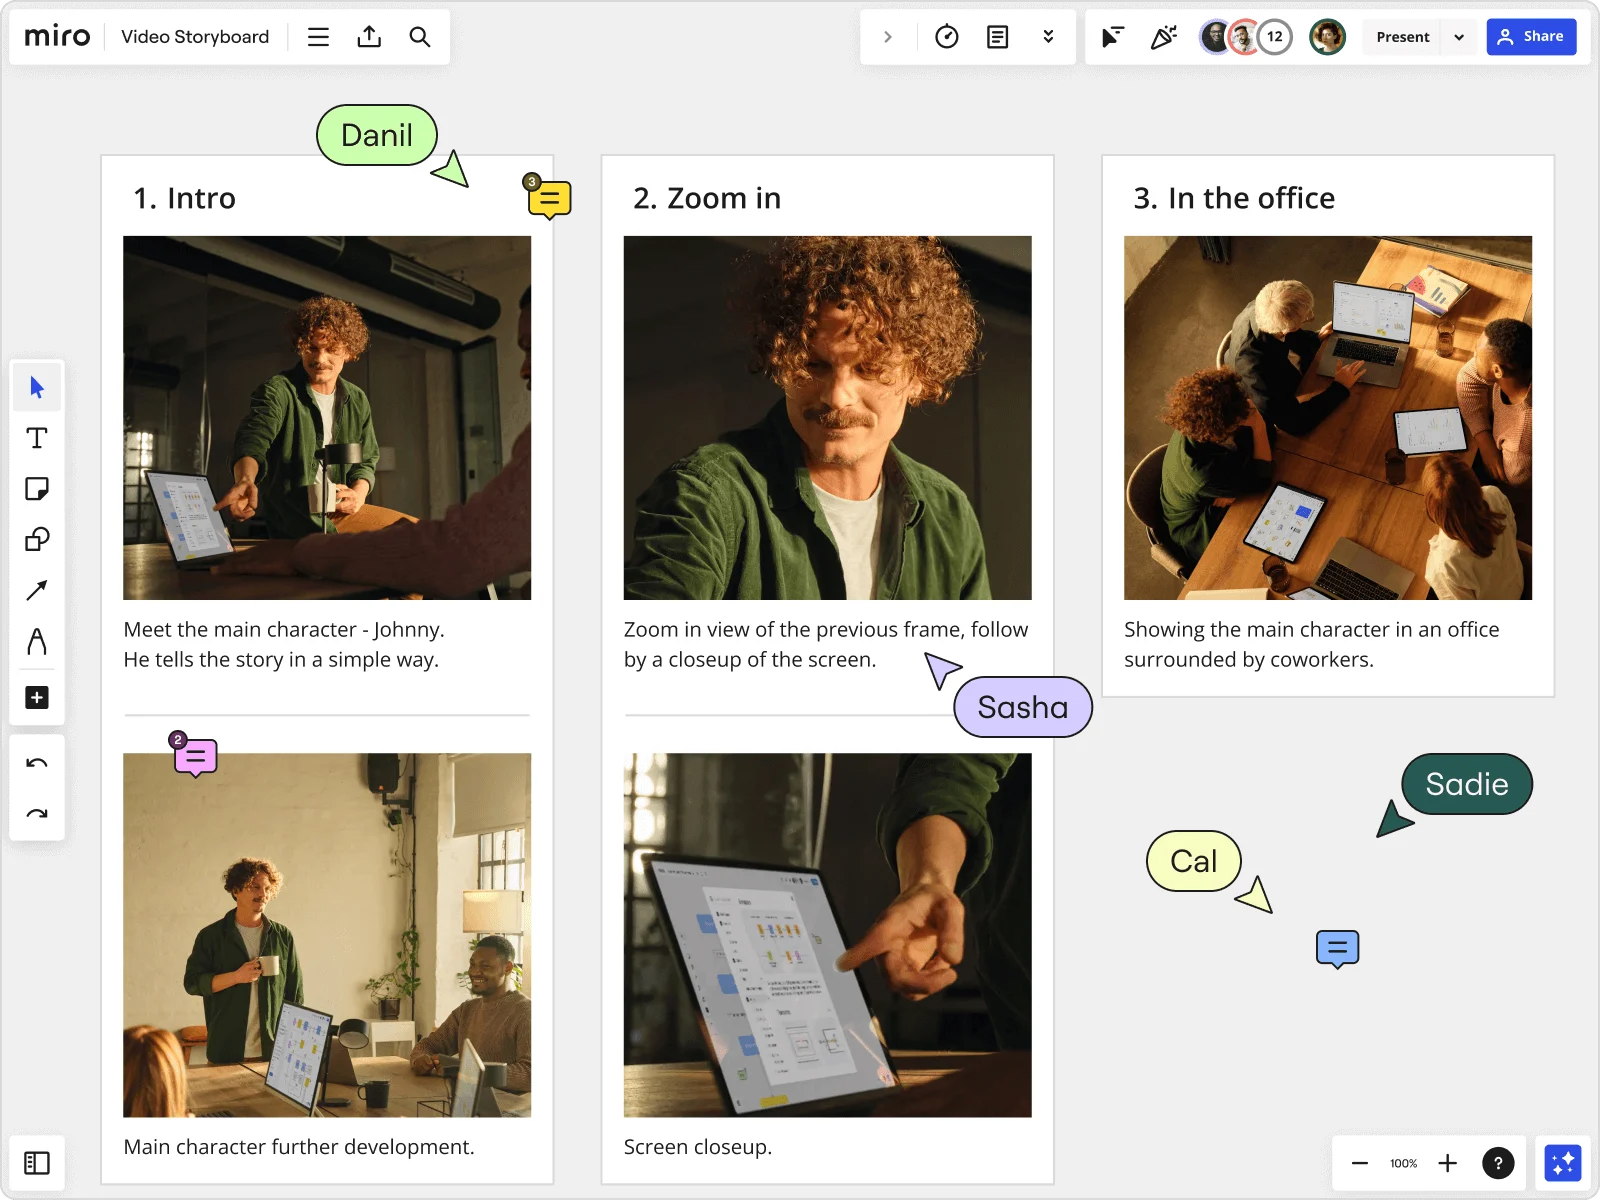
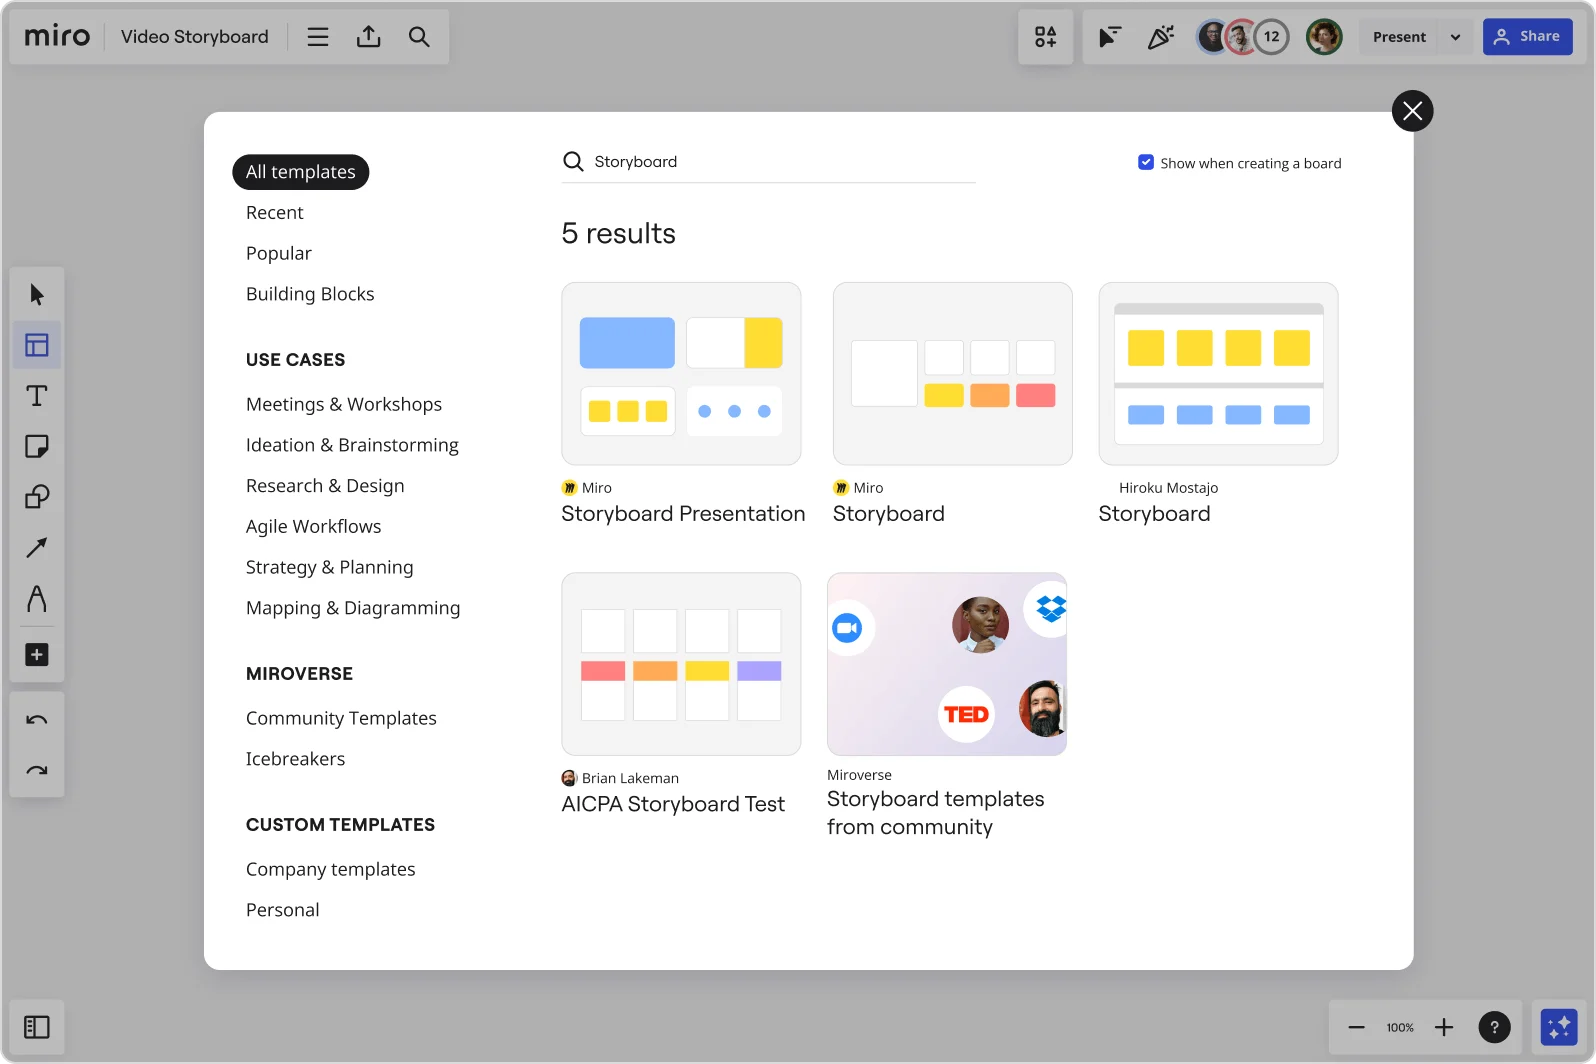
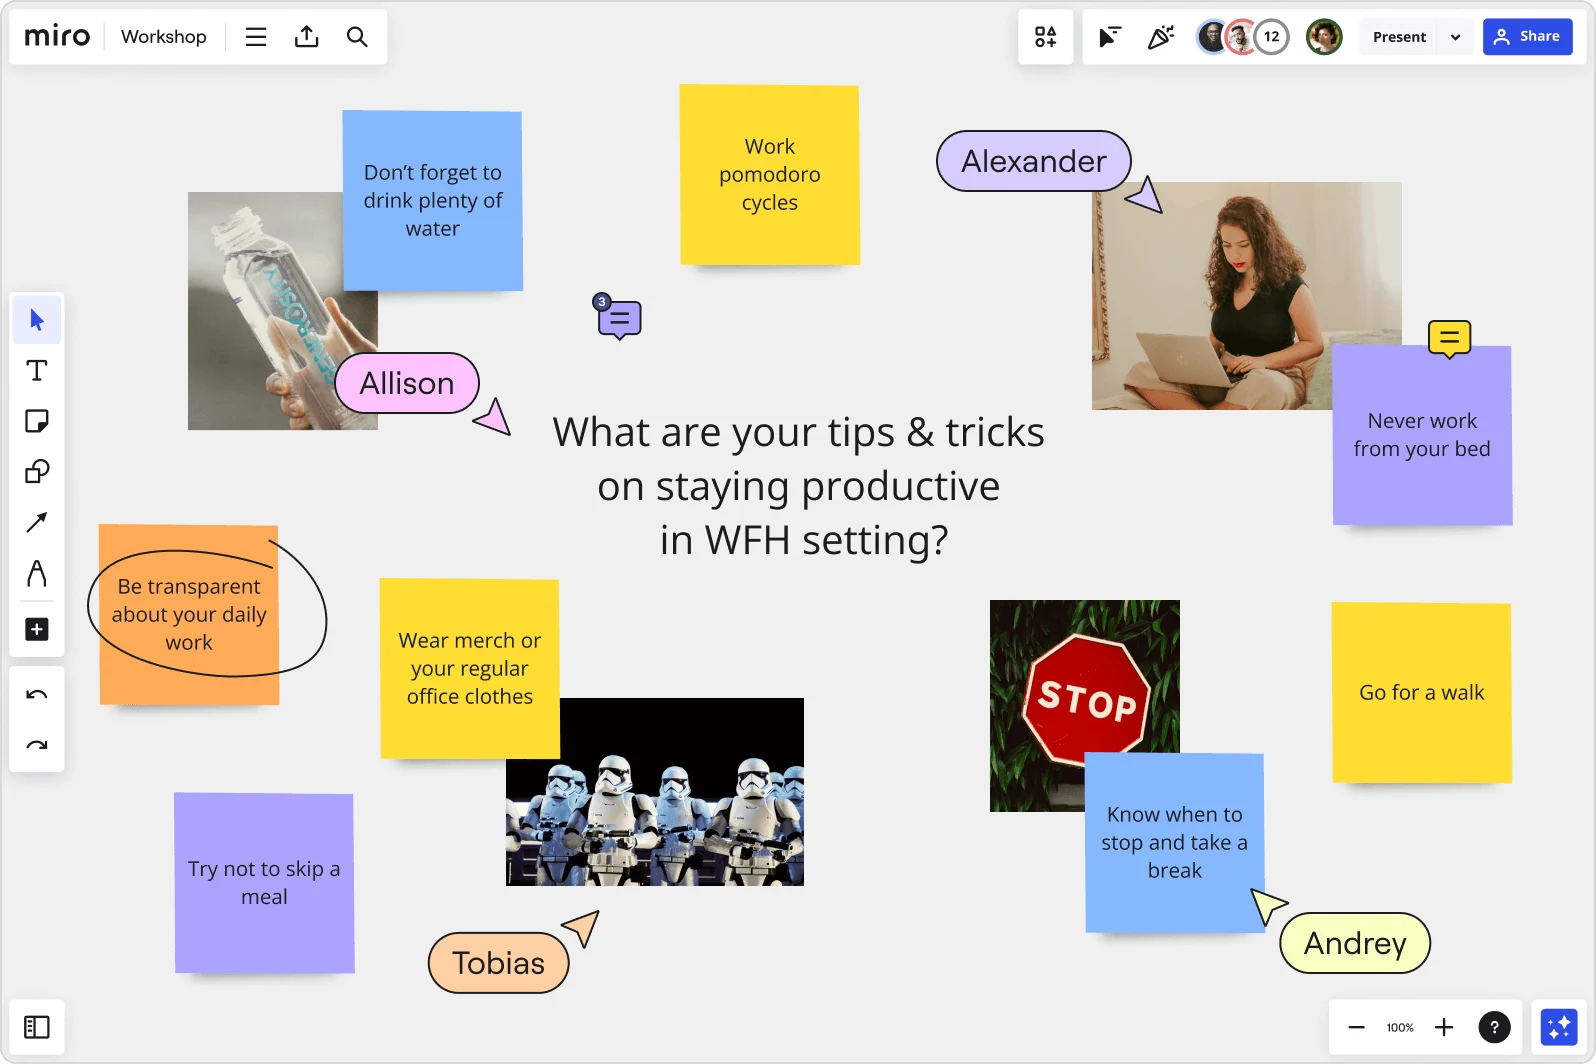
- Miro —a collaborative whiteboard tool, ideal for ideation sessions, workshops, design sprints, user journey mapping and, of course, storyboarding.
- Canva —a drag-and-drop graphic design tool offering a wide range of customisable templates.
- Figma —something of a UX design staple, Figma is a browser-based collaborative design tool which also works well for storyboarding.
- StoryboardThat —not a UX design tool per se, but worth considering if you’re looking for nothing more than a storyboarding program.
- Boords —an all-in-one storyboarding solution, complete with frame-specific commenting for streamlined feedback.
Whew! That was quite a deep dive into storyboards. We hope you enjoyed learning about this valuable UX tool and feel inspired to create your own.
To recap: storyboards provide a comic strip-style visualisation of the user’s experience with a product or service, mapping out each step the user takes as they interact with the product. Each depicts a specific scenario, with a user persona as the main character. The goal is to communicate your findings and ideas in a way that’s visual, memorable, and engaging—and, perhaps most importantly, encourages everybody to walk in the user’s shoes.
Storyboarding is just one of many techniques you can use to optimise your design process and create delightful, user-friendly products. For more tips and insights, learn how to create an effective design handoff for developers here , master the art of creating affinity diagrams with the help of this guide , or check out this post on how to create user journeys .
Subscribe to our newsletter
Get the best UX insights and career advice direct to your inbox each month.
Thanks for subscribing to our newsletter
You'll now get the best career advice, industry insights and UX community content, direct to your inbox every month.
Upcoming courses
Professional diploma in ux design.
Learn the full UX process, from research to design to prototyping.
Professional Certificate in UI Design
Master key concepts and techniques of UI design.
Certificate in Software and Coding Fundamentals for UX
Collaborate effectively with software developers.
Certificate in UX Design Fundamentals
Get a comprehensive introduction to UX design.
Professional Certificate in Content Design
Learn the skills you need to start a career in content design.
Professional Certificate in User Research
Master the research skills that make UX professionals so valuable.
Upcoming course
Build your UX career with a globally-recognised, industry-approved certification. Get the mindset, the skills and the confidence of UX designers.
You may also like

The ultimate guide to usability testing for UX in 2024

A beginner’s guide to typography design

How to conduct a heuristic evaluation in UX design: a step-by-step guide
Build your UX career with a globally recognised, industry-approved qualification. Get the mindset, the confidence and the skills that make UX designers so valuable.
InVisionApp, Inc.
Inside Design
Scrap the user persona. Replace it with the storyboard.
Mark wheeler, • jul 24, 2019.
C ustomer-centric design is key to building great products and services that grow your business offering. As designers, however, you need to get buy-in from the wider organization to turn your ideas into reality.
Easier said than done. How do you effectively share your ideas?
User personas are a great tool for sharing empathy , however, you can all too easily fall into the causation trap, assuming that the behavior of your users is caused by unrelated (but easy to track) attributes. Does the age of your user make them buy your product? If not, why is it listed on the persona? Personas focus on what makes people different, we need to focus on what people have in common. It’s not about nailing down individual customers—it’s about finding what their similarities are. As written in HBR, “We focus on what unites customers. Customers’ differences often prevent you from seeing what’s most important.”
If your tool for transmitting user struggles and goals to your team is ineffective, you are going to make products for a user group that does not exist and growth will stall, putting your design team under increasing pressure. An HBR article on the topic of Jobs to Be Done wrote, “[Many organizations] spend time and money compiling data-rich models that make them masters of description but failures at prediction.”
Different members of your team will be at different lengths away from the end user and therefore have less information to try to create value.
Developers, for example, are not only at a distance from the user they are serving, but they also have very little visibility of the value they create. A tool is needed that allows anyone on the team to look at a user and be inspired by their struggles to help you get the buy in you to need to make your idea a reality.
Something has to be better than user personas
If we are not going to use personas, what other tools can we use?
As humans, we are hardwired to understand and interpret stories. Stories are the way we share empathy in our culture . The great thing about stories is they can capture many different types of situations. Everyone has a story, a set of struggles and anxieties, and we need to capture this information to better serve them.
In this post, we are going to create a storyboard that represents a common story for a subset of users. When I have used storyboards in recent projects they have enabled the design research to be presented in a way that fostered executive-level support much faster than in any other past projects.
We will use design thinking methods to use this storyboard with our multifunctional team to prototype new products and services and create growth through innovation.
As noted in the book Made To Stick , the fewer levels of abstraction used when presenting information, the more memorable the information is. The storyboards you are going to create only have a very simple level of abstraction and will be easily remembered by the team (if you use real images/videos from the user research as companies like Google do, there will be no abstraction at all).
Airbnb has used storyboards to ignite their teams, producing two storyboards, one for the guest and one for the host:
Guest storyboard from Airbnb
Host storyboard from airbnb.
These storyboards are much higher quality than we need (they hired a Pixar artist ) but show what we are going to make.
Planning the storyboard
Design thinking is split into 3 sections:
- 1) User research
- 2) Research interpretation and ideation
- 3) Prototype products/services to provide value
Step 1. Determining Jobs To Be Done
This step in design thinking is about capturing user problems. For our approach we are going to use the Jobs To Be Done method. This requires us to interview users and understand what job they are trying to do, and what obstacles ( anxiety, confusion, pull from previous products ) that stand in the way of a new innovation. This method ( invented by Clayton Christensen ) does not specify what questions to ask, as each product would need a different set of questions. We will create research questions based on the market we are researching.
To try to fully understand the users social, emotional and functional needs , as well as other important contextual information we might need such as who has purchase power etc, we will build up a story for each user we interview.
The user interview
To recap, we are interviewing users to discover their JTBD so we can find areas in which to innovate. We will break down the interview questions to follow the three-act story structure .
Forces acting on new innovations
Act 1. before product use.
In this act, you are going to ask questions that lead up to the purchase/usage of your product. Depending on the product this can be a small or large period. You are looking for the trigger ( inciting incident ) that caused the user to either go in search of your product (if they are an innovator/early adopter ) or the person or advert that caused the user to consider your product ( early/late majority ).
People don’t want to buy a quarter-inch drill. They want a quarter-inch hole! — Theodore Levitt
Questions to ask users in this section include: How long did they consider the purchase? Who did they need to ask before they bought the product? Did they see any marketing material/branding before the purchase?
One of my favorite stories about this stage is described in the 10 Faces of Innovation . When thinking about buying a new TV, one anxiety is whether it will fit. A clever solution was to create a small piece of paper that folded out to the size of the TV. This could be put in magazines to advertise the TV and folded out next to your wall to see if the TV would fit.
Below is an example script for this first step:
What product did you purchase?
Paint for our living room.
Why did you buy this product?
A friend of mine posted some new pictures of their new house and I thought it was about time we had a refresh.
Did your friend post just the one?
No, they posted a bunch of images when they moved in.
How many did you see before you decided you needed a refresh?
About 4 or 5.
What time of year was this?
Around March-April.
So you went straight to the store to buy paint?
I looked online first to get some inspiration for what colors would work for our house.
Was this the same website as the paint manufacturer?
No, they only had images of the paint tins, so it was not much help.
After you decided on color, did you go straight to the store?
Yeah, I took an image with me of the color I wanted and someone in the store mixed paint to match the color for me.
How much did you spend on paint?
Too much! I had no idea how much I needed for the whole room, the paint tins gave you an idea of how many meters they would cover, but I might need to give it two coats. I ended up buying more just in case as I didn’t know if we mixed new paint if it would be the exact color again.
Act 2 . The purchase
The next section of the user journey is at the point of purchase/usage. There is usually anxiety in any purchase decision, and this normally manifests itself as an uncomfortable feeling . People also compare multiple products, but their decision might not be rational , so uncovering this process and surrounding factors is crucial.
Questions such as: Who was involved with the purchase decision? What anxiety/uncertainty did you feel before or just after the purchase? Which competitors did you look at? Are good places to start.
Continuing our example script:
How many tins did you end up buying?
Did you look at other suppliers?
I looked at the generic paint brands but I couldn’t find the color I was looking for.
It must have been more expensive to have it mixed?
Yeah, but the color is going to last a couple of years so there is no point in buying paint because it is cheap. It would annoy me looking at the walls if I knew it was cheap paint.
Why is that?
When my friends come round I will be embarrassed if it looked cheap.
It matters what your friends think?
We all secretly think our houses are better than our friends right?
Did you buy anything else?
Some paint brushes.
Did you take the paint tins home or have them delivered?
They had no delivery option so I had to take them home in the car.
Did they fit in the car?
My partner was with me and helped me carry them to the car.
How heavy was the paint?
Very heavy! I had to stop half way to the car as the thick plastic handles dug a groove into my hands.
Was that the only problem with getting it home?
No, the paint kept moving around in the car, I ended up driving differently to stop it constantly moving around.
How easy was it to paint the room?
A nightmare! We couldn’t open the paint tins, so I got a fork to pry it open and bent the fork! Then I forgot to buy sheets to cover the furniture and had to go back to the store.
It was easy from then on right?
No, the paint had settled and needed stirring. Seen as though I ruined my fork I just used that to stir it.
Act 3 . Life after the purchase (Dénouement)
The final section of the interview centres around if the user adopted the innovation. Not all users who buy your product will continue using it ( churn ) and depending on who you are interviewing (active/inactive user) you will need to cater the questions asked.
Sample questions: Would you buy the product again? Did you continue to use the product? Did you recommend the product to a friend ( NPS )?
How long did it take to paint the room?
A full day to get the first coat on.
Did you need that second coat?
What did you do with the leftover paint?
That is a good question. I couldn’t re-seal the paint tins so I couldn’t store them in case they got knocked over.
What did you do with them?
I had to take them back to the store so they could dispose of the leftover paint.
What did you do with the unopened tins?
I had to keep them, the store wouldn’t take them back as they had been specially mixed. I’ll keep them in case I need a patch-up job.
Would you recommend this store to a friend?
I’m not sure. It was expensive and involved multiple trips.
For each of the acts above, delving deeper with the 5 whys is important, remembering not to rush, as each layer of why reveals important information.
Step 2. Merging stories
This step involves merging stories that share a similar JTBD. As mentioned in the 10 Faces of Innovation , we are going to make a hero character out of the research above so that we can find ways to create value for them.
As it is impossible for the entire team to read every user story, we are going to average the stories we have to create our hero. This averaging needs to be along an axis of JTBD , otherwise, it will create a generic hero that would be impossible to accurately create value for. You need to combine stories that share a Job To Be Done regardless of any other factor or attribute of the user.
In our example above, our hero story looks like this:
- A piece of online content is the trigger for thinking about a refresh
- Inspiration is important and is done on a variety of online sites
- Their friends’ view of the color is just as important as their own
- They buy the paint in-store (not online)
- They have problems getting it home
- They have problems opening and using the paint
- They have problems with the leftover paint
Once this hero story has been created, we will share it amongst the team using a storyboard (see below).
Step 3. Prototyping
The final step is the most well understood. Prototyping and testing products in the field to test value propositions with real users.
The more research you do upfront, the leaner you will be when it comes to the experiments you run. In The Four Steps to the Epiphany Steve Blank kickstarted the lean revolution by removing wasted time by doing more research upfront and therefore limiting the ideation search space.
Looking at our hero story above it is clear that there are pain points in this story that we can design solutions to including:
- Stackable paint tins
- Resealable paint tins
- Comfortable handle tins
For each of these ideas, we need to find a super cheap and fast way to see if they actually create value.
Taking the comfortable handle example we could get an existing tin, remove the hard plastic handles and replace them with cheap comfortable material and put the old and new designs side by side to see which ones the customers prefer.
How to create your storyboard
The storyboard is created from the hero stories generated in step two of the design thinking process.
What fidelity is required?
Storyboards utilize visual storytelling, and their fidelity need only provide enough information for the viewer to empathize with the user (example below).
What layout should I use?
A basic storyboard frame with 8 screens per page is a good place to start.
Sample storyboard
How many screens do i need.
As a rough guide a minimum of 8, as fewer will not give enough detail to the design team, and a maximum of 16 as too many will be hard to take in at once (the Airbnb examples uses 15).
Example storyboard cell
From our example hero story above, the first cell will detail the trigger that started the user on their journey:
Sample cell from storyboard
The level of detail is basic, but the level of symbolism is right . Did you notice the little details? They are on a desktop, they are sat at home, they are alone, it is morning. You picked up all these details instantly without needing to think about it.
The advantage of using the storyboard approach is that it allows all team members to look for ways to innovate. The marketing team, for example, would have a wealth of information about the pre-purchase that would inform their next experiments, and the retention team would have insights into how to bring back churned users. Storyboards could be made for each team detailing the struggles your users face to inspire new products and services.
A benefit of using storyboards is you can use them to look for moments to give the user a great experience.
A wonderful moment in the user journey
In a fashion project I worked on, I spotted a moment in the user story where we could provide a small message whenever the user tried to filter their appearance (body positivity was a company value in a world of over-stylized Instagram images). After we implemented it our users started tweeting pictures of the message immediately, helping grow the business and cementing the brand values in the process.
Feature image found on Airbnb’s Medium .
Want to read more about crafting user journeys?
- 6 tips for remote user testing
- Journey mapping powers better design thinking
- The user experience of blockchain
by Mark Wheeler
For the past decade Mark has been researching the tools and methods to create value and growth in startups and large organisations. The products he has designed have been featured in Wired, Forbes, Mashable, Adobe and the BBC.
Collaborate in real time on a digital whiteboard Try Freehand
Get awesome design content in your inbox each week, give it a try—it only takes a click to unsubscribe., thanks for signing up, you should have a thank you gift in your inbox now-and you’ll hear from us again soon, get started designing better. faster. together. and free forever., give it a try. nothing’s holding you back..
A storyboard creator for any project
Craft a narrative to uncover how customers think and feel with an intuitive storyboard creator. Improve your product or services by visualizing your customer journey and understanding their needs.
Over 60M users love Miro.
Ready-made Storyboard templates
Create a storyboard with any kind of content, including images, videos, logos, icons, and embedded URLs. Speed up the process by using a storyboard template ready to use and make it your own.
One shared space
Miro’s storyboard creator allows you to work in one shared space, where teams capture and organize ideas, gain insights and define customer wants and needs at every stage of their journey.
Limitless board and features
Imagine how your customer will act, think and feel and define the situations and stages of their journey. Sketch scenarios, add images, and paint a picture to visualize your customer experience.
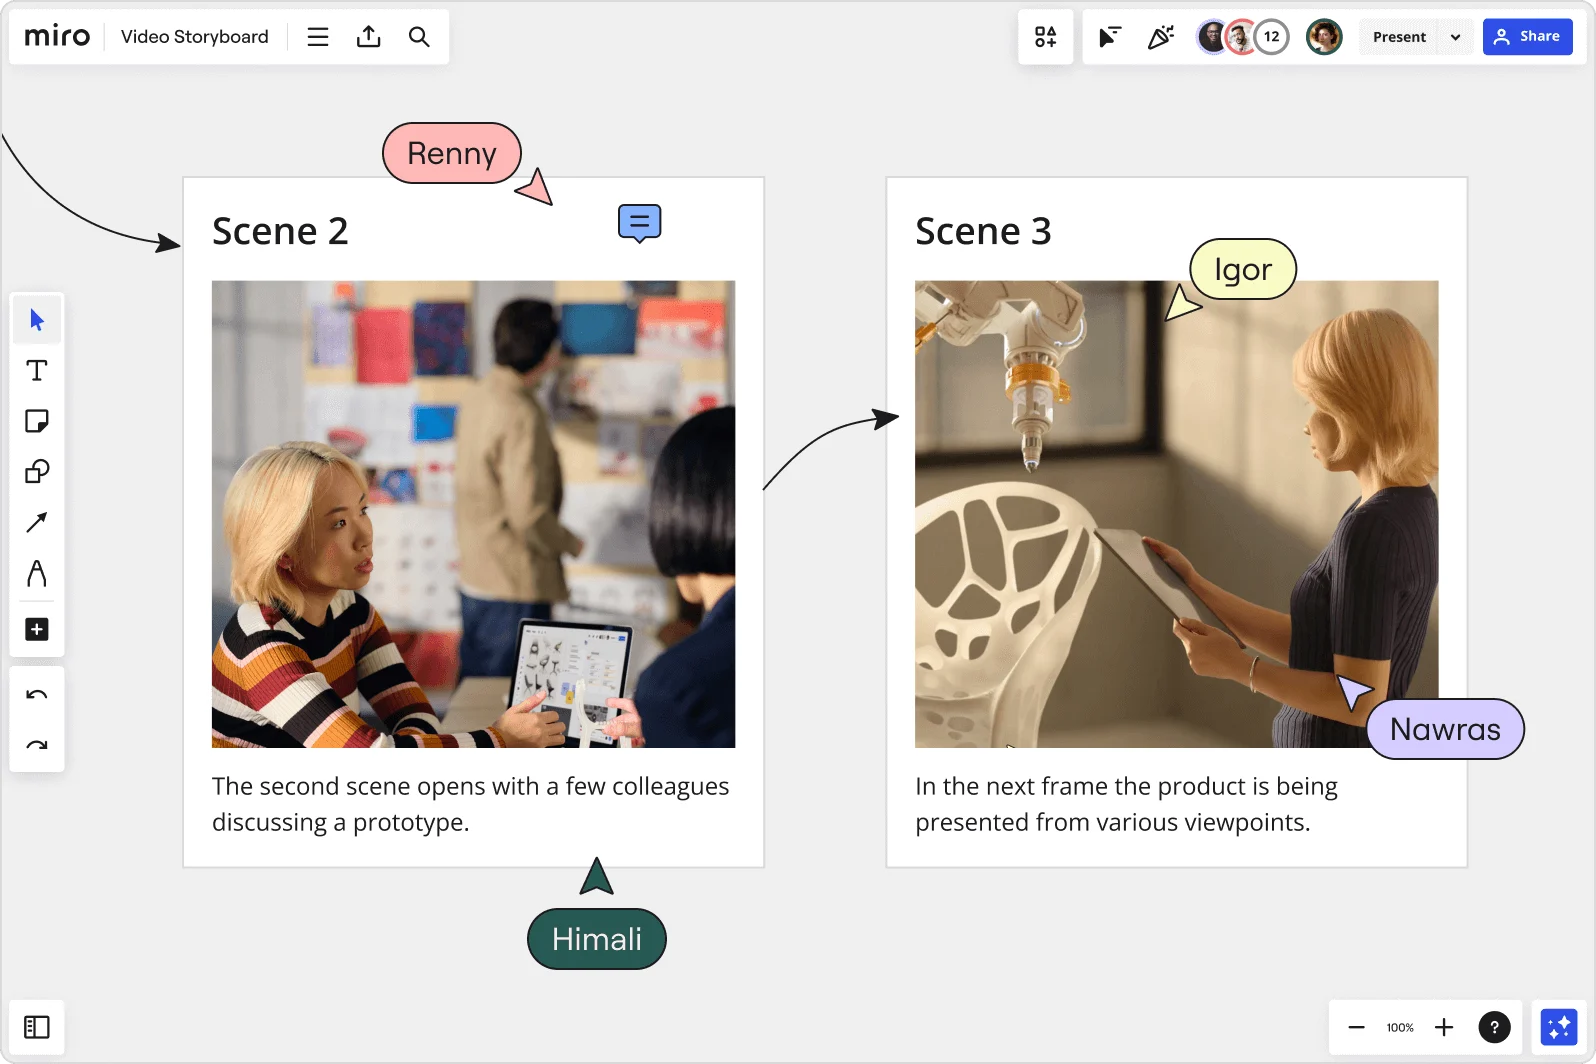
Why Miro is the best storyboard creator
Bring ideas to life.
Ideate, outline, and sketch your customer journey with Miro’s online storyboarding tool. Unleash your ideas on Miro's infinite canvas and co-create new experiences and solutions with your team.
Master storytelling
Use apps like Google Images and Unsplash to create an appealing storyboard, or sketch your customer journey freehand. Miro’s storyboard creator has robust editing features that help you create a storyboard the way you want.
Deep dive into your customer's mind
Validate concepts and assumptions by running user interviews using your storyboard creator and customer journey tools. Ask if the situations you show are familiar, and draw insights by adding notes directly on your board.
Give and receive instant feedback
Get instant feedback from others and see the many possible scenarios. Miro’s storyboard maker allows you to comment, edit and iterate your story with just a few clicks, in real time or async.
Easily share your storyboard by exporting at high fidelity. Download it as an image or PDF and gain visibility no matter what medium you choose.
Go beyond the presentation deck
Be the voice of the customer in the room and ditch uninspired slide decks. Bring the customer experience close to stakeholders, add your storyboard to presentations, and show insights that will resonate across teams.
Storyboard Template
Unlock your customer's journey with the Storyboard Template. Imagine different scenarios and improve your product or service.
Storyboard Presentation Template
Take your audience through a captivating narrative and create a compelling case with the Storyboard Presentation Template.
Customer Journey Map Template
Understand the reasoning behind their choices and design the best product experience and meet your customer's needs.
Buyer Persona Template
Define your ideal customer with the Buyer Persona Template and unlock your product potential by building a service people love.
Infographic Template
Display information visually and create engaging and eye-catching presentations with an Infographic Template.
Create a storyboard collaboratively
Bring strategic, creative, and product teams together to craft your customer journey. Get everyone rowing in the same direction with boards that put projects and context all in one place.
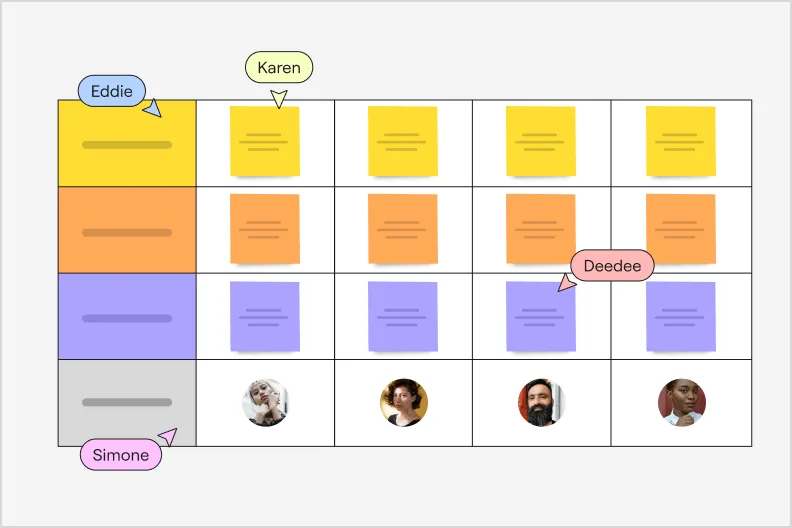
Design Thinking
Generate ideas, uncover insights, and transform the way your team builds products.
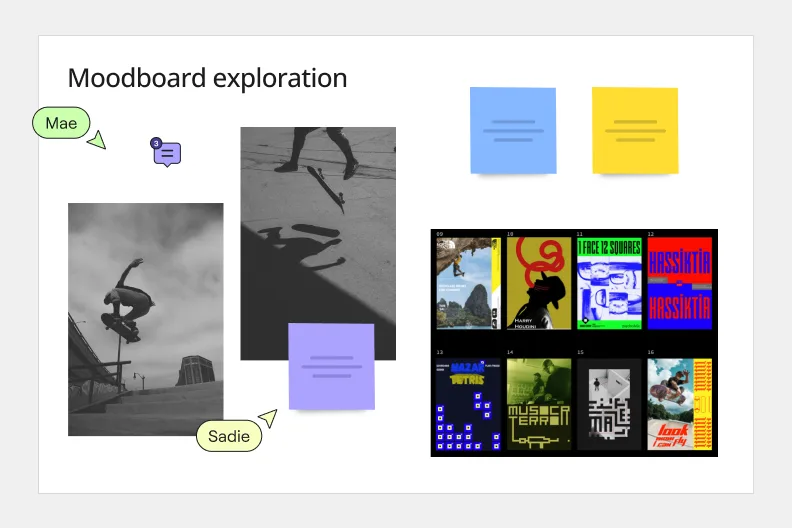
Gather inspiration, collect ideas and start visualizing your project’s look and feel all in one tool.
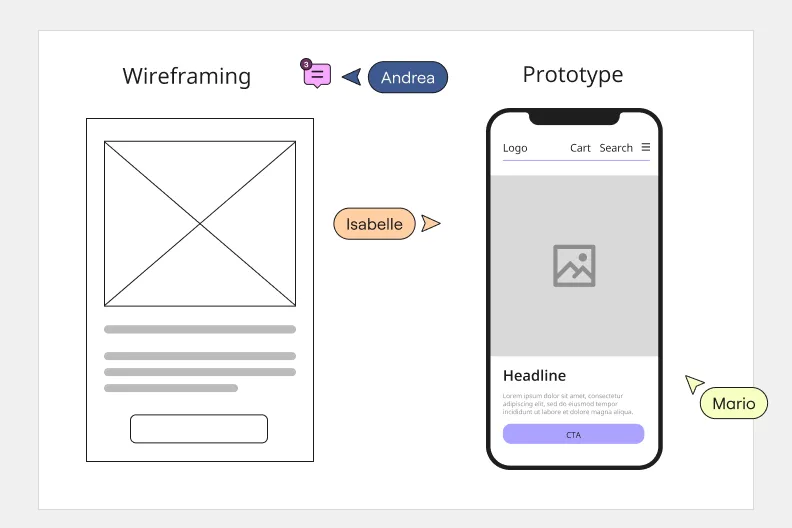
UX Design tool
Create end-to-end design flows, organize insights and collect feedback without constraints.

Brainstorming
Unleash your creative ideas on an infinite canvas and collaborate in real time.
How to create a storyboard with Miro

Select the template
You can create a storyboard from scratch or use our ready-made template.
Define your main actor
Every story has a main actor, and your customer journey is no different. Define who is the persona you want to target and what scenarios they will experience with your service or product.
Start storyboarding
Get creative and build your customer journey. The board is limitless!
Storyboard creator FAQS
How do you storyboard if you can't draw.
There are many ways you can create a storyboard without drawing. With Miro, you don’t need to be a designer or illustrator to storyboard. Our ready-made template allows you to craft a compelling storyboard with images, photos, and any other visual references you see fit by adding them directly to your board from apps such as Google Images and Unsplash.
What program should I use to make a storyboard?
You can use many online storyboarding tools, and Miro’s allows you to collaborate and easily share your storyboard with others. Try for yourself and see if it’s the best solution for you.
Can I share or download my storyboard?
Yes, download your storyboard as an image or PDF file, or simply share your storyboard link with others so they can access your work.
When design meets business – basics of the design thinking process
How to measure the impact of remote workshops
10 Miro templates for powerful presentations
Get on board in seconds
Join thousands of teams using Miro to do their best work yet.
MEET US AT ATLASSIAN TEAM 24
Las Vegas | April 30 - May 2

Agile workflow
10 min read

The User Journey Map Begins With Epic Storytelling

Storytelling is an excellent way to describe anything because stories conjure detailed images. Once you create a visual association, cognitive processes leap into action to make the story in the user journey map a reality that is easy to track.
This is what the customer journey map (CJM) is all about—epic storytelling that involves comprehensive planning to capture the design process and deliver a unique customer experience.
Creating a customer journey map (also called the user journey map) involves planning a project from the user’s point of view and using personas, epics, features, user stories, and tasks. This visualization process also involves several stakeholders as user personas on the road to planning perfection.
By the end of the project, your CJM should help achieve business goals and exceed customer expectations with enough touchpoints along the way to motivate satisfaction. The process is a little like rubbing Aladdin's lamp to manifest your deepest wishes.
What is the user journey map?
In contrast to the flat backlog, the customer journey map makes the vision for your project come alive in real-time. You get to use creative storytelling to generate a magical customer experience through visual representations.
Project team members accomplish this by developing an empathy map to an almost-perfect plan from the customer’s perspective. User journey mapping captures the customer’s emotional state, which helps identify touchpoints and pain points. Teams then use these points to elevate the customer experience.
Unlike rubbing a genie’s lamp for results, you get to use convenient software to develop a service blueprint where design thinking reflects a shared vision between stakeholders.
The starting point is to anticipate customer interactions with the mobile app or other e-commerce project development story. That’s why user research is another vital element in developing the customer journey map template.
This customer journey map template should also draw valuable information from the empathy map and the experience map. An in-depth understanding of the KPIs and metrics that go into storytelling helps direct product usability through appreciating customer interactions with the product.
Customer interactions generate feedback, which leads to understanding customer's needs. Additional touchpoints can then be included or modified to build on the overall project outcomes.
Essentially, you use hierarchical storytelling on a magical customer journey map template to meet real-life expectations that resonate with the customer experience.
The customer journey mapping hierarchy

When beginning the journey to create the ideal customer experience, team members should visualize the project from the user’s current state. Once you capture the essence of the current customer perspective, you can better understand what needs to change and improve.
A simple example may be a travel app that encompasses services such as travel agent services, flight bookings, and accommodation in a geographical area (present state). The client wants to create a future state app which contains tourist activities to augment the customer experience. The basic process will then look like this:
For app customers who want a value-add experience with our travel app which is a helpful resource that provides tips on local tourist activities.
Your user journey map hierarchy involves four building blocks to meet customers’ needs:
- Understanding user personas or buyer personas
- Developing themes and epics to address touchpoints
- Using steps or features to support epics and the narrative flow
- The stories in the customer journey map
1. Understand user personas or buyer personas
The user journey map starts with defining the user personas or buyer personas as vital stakeholders in project development. These customer personas represent the top of the hierarchy, which is the starting point of the customer journey map.
A detailed visual reflection of the user persona is vital to getting your final product right. To deliver this, you need to walk through the story mapping journey from the customer’s perspective. This helps avoid the nasty consequences of inadequate planning that results in sub-optimum deliverables and unhappy teams and customers.
To understand user personas, you need to identify the various potential touchpoints in the journey and customer pain points through use cases and feedback. You’ll need to anticipate as many potential scenarios as possible from the buyer persona’s perspective.
Although the “who,” “what,” and “why” are instrumental in defining the user story, it all begins with visualizing user personas and thinking about customer behaviors, demographics, needs, and goals.
Once you define who your customer personas are, you can follow up with themes and epics to deliver on customer expectations. The epics are the heroes or heroines in this story visualization method.
2. Develop themes and epics to address touchpoints
The customer journey map positions epics at the top of the storyboard because they are vital to creating a great project.
Team leaders must consult with the client and relevant stakeholders to develop an overarching project theme, to translate into epics. Epics flow through this theme from left to right. These epics show large bodies of work broken down into smaller features which can meet continuous delivery value.
Epics are also strategic directives that begin with the current state of an issue and move the situation into a desirable future state. This epic future state is built on tactics, or features and tasks, which team members use to clarify project requirements and move toward that magical future state of project success.
Before team members can move forward, they need to get the epics right. Epics cover three fundamental foundations: user persona, product, and design requirements, which reflect visually on the user journey map.
The epics should meet several foundational requirements:
- Follow through by aligning the overall business goals with detailed buyer personas and demographics
- Broadly outline the user persona’s needs
- Meet specific customer needs by addressing touchpoints and pain points
- Include specific functions, features, and benefits
- Produce a future state ideal project
After designing your heroic epics to cover the project's primary goals, you can start breaking these into steps that integrate with the overall narrative flow of the user story.
3. Use epics for highlighting the narrative flow
Once you clearly define your epics, it’s time to generate narrower steps or features.
As your epics move from left to right, you must define each of the necessary steps to accomplish business goals. This customizable process uses epics to relay the user journey over the project duration to reflect project outcomes.
The customer journey map template also forms the basis of the ideal user story as you transition from epics to features. The features originate from the epics, which is why the epics are the heroes in this story. They “save” customers with excellent planning and deliverables.
At its most basic level, features should include the following elements:
- Deliverables that add value and support epics completion
- Generate business value by considering KPIs, metrics, customer acquisition, and retention
- Demonstrate sufficient definition for team members to follow through on time estimates and complete tasks within one to three sprints
- Team members must be able to test the results of their features
- Establish test criteria for each feature to set acceptable quality standards that meet customer expectations before moving to the next step
In short, the user acceptance criteria (UAC) in the user journey map should include a brief item value description, a feature benefit explanation, and the feature quality completion points that team members must achieve.
Only once you nail these details can you tell the user stories from the customer's perspective. Similarly, only once you complete these three fundamental building blocks in the customer journey map can you focus on user stories and business goals that include customer satisfaction and retention.
4. Begin storytelling through the user journey map
After the third step in the hierarchy of the user journey map, the actual user stories begin. This is the final step in design thinking related to the visualization of epics into manageable stories and tasks.
To state the buyer persona case, team members must understand the “who,” “what,” and “why” of the customer experience. Understanding and defining the customer personas forms the basis of user story creation, enabling delivery of the most acceptable product possible.
Developing the best story relies on creating user stories that highlight the customer experience and use cases that highlight the finer details of system performance.
In the story creation phase, team members assume the customer’s perspective to define requests. Team members can consider exploring social media to understand customer behavior and experiences to use as story inputs. User stories can also include enabler tasks to augment feature completion.
Team members typically write their user stories to complete these in short sprints. Sprint completion involves task completion for release before completing one epic and moving to the next, except where concurrent work is possible.
Ultimately, the user journey map must tell the customer’s story of how their need will be met by creating or modifying a product, process, service, or system feature. New developments must follow through on the formula of “as a…” “I want…” “so that...”
As a new Agile team member , I want to understand my and other team member's roles so that I am clear about my tasks and the responsibilities of other team members.
After generating user stories, team members can break tasks into even smaller parts to facilitate work deliverables and reduce potential churn that negatively impacts customer retention.
As the user journey map progresses, the stories should clearly outline the activities for completion, always linking these back to buyer persona goals. The smaller, granular tasks then relate to user behaviors, and the outcomes link to each step of the process to reinforce what deliverables will meet customer needs within set timeframes.
During the customer journey map, stories can be split further to accomplish greater clarity.
Bottom line: The customer journey map
Through the customer journey mapping process, you should capture the primary epics of the user journey in the story map visualization.
You will need to develop the user story map holistically and interrupt it with additions and subtractions in an iterative fashion. This iterative user story mapping process helps minimize churn as you continue to update your story as you move forward.
Once the project is done, you need to test the product on potential customers, gather customer feedback, and improve the user journey map.
The benefits of carefully planning the customer experience through a visual format are exponential.
Tell your project story with Easy Agile User Story Maps for Jira
The customer journey should highlight the ideal user experience. To do this, the user story map should incorporate the project from user personas to achieve stories with valuable touchpoints as markers along the way.
Once the visual representation is done, it should validate the service blueprint for the customer journey mapping process through the current and future states of the project.
Throughout the project, your team should create a unique user journey that delivers the ultimate customer experience and exceeds customer expectations.
Try Easy Agile TeamRhythm and Personas today to make your customers' stories come alive with magic.

Why User Story Mapping?

Anatomy of an Agile User Story Map

What is User Story Mapping?
Subscribe to our blog.
Keep up with the latest tips and updates.
- Get started Get started for free
Figma design
Design and prototype in one place
Collaborate with a digital whiteboard
Translate designs into code
Get the desktop, mobile, and font installer apps
See the latest features and releases
- Prototyping
- Design systems
- Wireframing
- Online whiteboard
- Team meetings
- Strategic planning
- Brainstorming
- Diagramming
- Product development
- Web development
- Design handoff
- Product managers
Organizations
Config 2024
Register to attend in person or online — June 26–27
Creator fund
Build and sell what you love
User groups
Join a local Friends of Figma group
Learn best practices at virtual events
Customer stories
Read about leading product teams
Stories about bringing new ideas to life
Get started
- Developer docs
- Best practices
- Reports & insights
- Resource library
- Help center
How to create an effective user journey map

No matter what you’re working on, the key to customer satisfaction and business growth is understanding your users. A user journey map helps you uncover pain points, explore the touchpoints from their perspective, and learn how to improve your product.
Imagine you just launched a new ecommerce platform. Shoppers fill their carts with products, but they abandon their carts before checkout. With a user journey map, you can pinpoint where the customer experience is going wrong, and how to enable more successful checkouts.
Read on to find out:
- What is a user journey map, and how it captures user flows and customer touchpoints
- Benefits of user journey mapping to refine UX design and reach business goals
- How to make user journey maps in five steps, using FigJam’s user journey map template
What is a user journey map?
Think about the path a user takes to explore your product or website. How would you design the best way to get there? User journey maps (or user experience maps) help team members and stakeholders align on user needs throughout the design process, starting with user research. As you trace users' steps through your user flows, notice: Where do users get lost, backtrack, or drop off?
User journey maps help you flag pain points and churn, so your team can see where the user experience may be confusing or frustrating for your audience. Then you can use your map to identify key customer touchpoints and find opportunities for optimization.
How to read a user journey map
Most user journey maps are flowcharts or grids showing the user experience from end to end. Consider this real-life journey map example of a freelancing app from Figma's design community. The journey starts with a buyer persona needing freelance services, and a freelancer looking for a gig. Ideally, the journey ends with service delivery and payment—but customer pain points could interrupt the flow.
Start your user journey map with FigJam
5 key user journey map phases.
Take a look at another Figma community user journey template , which uses a simple grid. Columns capture the five key stages of the user journey: awareness, consideration, decision, purchase, and retention (see below). Rows show customer experiences across these stages—their thoughts, feelings, and pain points. These experiences are rated as good, neutral, and bad.
To see how this works, consider a practical example. Suppose a new pet parent wants to learn how to train their puppy and discovers your dog-training app. Here's how you might map out the five key user journey stages:
- Awareness. The user sees a puppy-training video on social media with a link to your product website. They're intrigued—a positive experience.
- Consideration. The user visits your product website to preview your app. If they can't find a video preview easily, this could be a neutral or negative experience.
- Decision. The user clicks on a link to the app store and reads reviews of your app and compares it to others. They might think your app reviews are good, but your price is high—a negative or neutral experience.
- Purchase. The user buys your app and completes the onboarding process. If this process is smooth, it's a positive experience. If not, the customer experience could turn negative at this point.
- Retention. The user receives follow-up emails featuring premium puppy-training services or special offers. Depending on their perception of these emails, the experience can range from good (helpful support) to bad (too much spam).
2 types of user journey maps—and when to use them
User journey maps are helpful across the product design and development process, especially at two crucial moments: during product development and for UX troubleshooting. These scenarios call for different user journey maps: current-state and future-state.
Current-state user journey maps
A current-state user journey map shows existing customer interactions with your product. It gives you a snapshot of what's happening, and pinpoints how to enhance the user experience.
Take the puppy training app, for example. A current-state customer journey map might reveal that users are abandoning their shopping carts before making in-app purchases. Look at it from your customers' point of view: Maybe they aren't convinced their credit cards will be secure or the shipping address workflow takes too long. These pain points show where you might tweak functionality to boost user experience and build customer loyalty.
Future-state user journey maps
A future-state user journey map is like a vision board : it shows the ideal customer journey, supported by exceptional customer experiences. Sketch out your best guesses about user behavior on an ideal journey, then put them to the test with usability testing. Once you've identified your north star, you can explore new product or site features that will optimize user experience.
How to make a user journey map in 5 steps
To start user journey mapping, follow this step-by-step guide.
Step 1: Define user personas and goals.
Gather user research and data like demographics, psychographics, and shopping behavior to create detailed customer personas representing your target audience. In your dog-training app example, one key demographic may be parents. What’s their goal? It isn't necessarily "hire a puppy trainer"—it could be "teach kids how to interact with a puppy."
Step 2: Identify customer touch points.
Locate the points along the user journey where the user encounters or interacts with your product. In the dog training app example, touchpoints might include social media videos, app website, app store category search (e.g., pets), app reviews, app store checkout, in-app onboarding, and app customer support.
Step 3: Visualize journey phases.
Create a visual representation of user journey phases across key touchpoints with user flow diagrams , flowcharts , or storyboards .
Step 4: Capture user actions and responses.
For each journey stage, capture the user story: at this juncture, what are they doing, thinking, and feeling ? This could be simple, such as: "Potential customer feels frustrated when the product image takes too long to load."
Step 5: Validate and iterate.
Finally, show your map to real users. Get honest feedback about what works and what doesn’t with user testing , website metrics , or surveys . To use the dog-training app example, you might ask users: Are they interested in subscribing to premium how-to video content by a professional dog trainer? Apply user feedback to refine your map and ensure it reflects customer needs.
Jumpstart your user journey map with FigJam
Lead your team's user journey mapping effort with FigJam, the online collaborative whiteboard for brainstorming, designing, and idea-sharing. Choose a user journey map template from Figma's design community as your guide. With Figma's drag-and-drop design features, you can quickly produce your own professional, presentation-ready user journey map.
Pro tip: Use a service blueprint template to capture behind-the-scenes processes that support the user journey, bridging the gap between user experience and service delivery.
Ready to improve UX with user journey mapping?
- Nick Babich
- Oct 25, 2017
The Role Of Storyboarding In UX Design
- 11 min read
- UX Design , UX , Illustrations
- Share on Twitter , LinkedIn
About The Author
Nick Babich is a developer, tech enthusiast, and UX lover. He has spent the last 10 years working in the software industry with a specialized focus on … More about Nick ↬
Email Newsletter
Weekly tips on front-end & UX . Trusted by 200,000+ folks.
To come up with a proper design, UX designers use a lot of different research techniques , such as contextual inquires, interviews and workshops. They summarize research findings into user stories and user flows and communicate their thinking and solutions to the teams with artifacts such as personas and wireframes. But somewhere in all of this, there are real people for whom the products are being designed for. In order to create better products, designers must understand what’s going on in the user’s world and understand how their products can make the user’s life better. And that’s where storyboards come in.
In this article, we’ll focus on storyboards as a means to explore solutions to UX issues, as well as to communicate these issues and solutions to others. In case you’ve been looking for a way to go from idea to prototype much faster than you usually do, you can download and test Adobe XD , the all-in-one UX/UI solution for designing websites, mobile apps, and more.
What Is A Storyboard?
A storyboard is a linear sequence of illustrations, arrayed together to visualize a story. As a tool, storyboarding comes from motion picture production. Walt Disney Studios is credited with popularizing storyboards, having used sketches of frames since the 1920s. Storyboards enable Disney animators to create the world of the film before actually building it.
Stories are the most powerful form of delivering information for a number of reasons:
- Visualization A picture is worth a thousand words. Illustrating a concept or idea helps people to understand it more than anything else. An image speaks more powerfully than just words by adding extra layers of meaning.
- Memorability Stories are 22 times more memorable than plain facts.
- Empathy Storyboards help people relate to a story. As human beings, we often empathize with characters who have challenges similar to our own real-life ones. And when designers draw storyboards, they often imbue the characters with emotions.
- Engagement Stories capture attention. People are hardwired to respond to stories: Our sense of curiosity immediately draws us in, and we engage to see what will happen next.
What Is A Storyboard In UX Design?
A storyboard in UX is a tool that visually predicts and explores a user’s experience with a product. It presents a product very much like a movie in terms of how people will use it. It can help UX designers understand the flow of people’s interaction with a product over time, giving the designers a clear sense of what’s really important for users.
Why Does Storytelling Matter In UX?
Stories are an effective and inexpensive way to capture, convey and explore experiences in the design process. In UX design, this technique has the following benefits:
- Design approach is human-centered Storyboards put people at the heart of the design process. They put a human face on analytics data and research findings.
- Forces thinking about user flow Designers are able to walk in the shoes of their users and see the products in a similar light. This helps designers to understand existing scenarios of interaction, as well as to test hypotheses about potential scenarios.
- Prioritizes what’s important Storyboards also reveal what you don’t need to spend money on. Thanks to them, you can cut out a lot of unnecessary work.
- Allows for “pitch and critique” method Storyboarding is a team-based activity, and everyone on a team can contribute to it (not just designers). Similar to the movie industry, each scene should be critiqued by all team members. Approaching UX with storytelling inspires collaboration, which results in a clearer picture of what’s being designed. This can spark new design concepts.
- Simpler iteration Storyboarding relies heavily on an iterative approach. Sketching makes it possible for designers to experiment at little or no cost and to test multiple design concepts at the same time. Designers can be shot down, move on and come up with a new solution relatively quickly. Nobody gets too attached to the ideas generated because the ideas are so quick and rough.
Storyboarding In The UX Design Process
A storyboard is a great instrument for ideation. In UX design, storyboards shape the user journey and the character (persona). They help designers to string together personas, user stories and various research findings to develop requirements for the product. The familiar combination of images and words makes even the most complex ideas clear.
When Is Storyboarding Useful?
Storyboarding is useful for participatory design. Participatory design involves all parties (stakeholders, UI and UX designers, developers, researchers) in the design process, to ensure that the result is as good as possible. With a compelling storyboard that shows how the solution addresses the problem, the product is more likely to be compelling to the target audience.
It can also be helpful during design sprints and hackathons, when the prototype is being built by multiple people in a very short time. Communicating design decisions with a storyboard really comes in handy.
When Is There No Need For A Storyboard?
If everyone involved in creating a product already shares a solid understanding of how the product should be designed and agrees on the direction of the design and development, then there’s no need for a storyboard.
Use Storyboarding To Illustrate Experiences
Before you start creating a storyboard, it’s important to know exactly why you want to do it. If you don’t have a clear goal in mind, you might end up with a few attractive storyboards, but they won’t give you important insights into the user’s experience.
The Primary Purpose Of Storyboards Is Communication
When you search for storyboards online, they always look really nice. You might think that in order to do them properly, you have to be really good at drawing. Good news: You don’t. A great storyboard artist isn’t necessary the next Leonardo da Vinci. Rather, a great storyboard artist is a great communicator.
Thus, it doesn’t matter whether you’re a skilled illustrator. What is far more important is the actual story you want to tell. Clearly conveying information is key. Keep in mind that a designer’s main skill isn’t in Photoshop or Sketch, but rather is the ability to formulate and describe a scenario.
How To Work Out A Story Structure?
Before drawing a single line on a piece of paper or whiteboard, prepare to make your story logical and understandable. By understanding the fundamentals of the story and deconstructing it to its building blocks, you can present the story in a more powerful and convincing way.
Each story should have following elements:
- Character A character is the persona featured in your story. Behavior, expectations, feelings, as well as any decisions your character makes along the journey are very important. Revealing what is going on in the character’s mind is essential to a successful illustration of their experience. Each story should have at least one character.
- Scene This is the environment inhabited by the character (it should have a real-world context that includes a place and people).
- Plot The plot should start with a specific event (a trigger) and conclude with either the benefit of the solution (if you’re proposing one) or the problem that the character is left with (if you’re using the storyboard to highlight a problem the user is facing).
- Narrative The narrative in a storyboard should focus on a goal that the character is trying to achieve. All too often, designers jump right into explaining the details of their design before explaining the backstory. Avoid this. Your story should be structured and should have an obvious beginning, middle and end. Most stories follow a narrative structure that looks a lot like a pyramid — often called a Gustav Freytag pyramid, after the person who identified the structure. Freytag broke down stories into five acts: exposition, rising action, climax, falling action (resolution) and denouement (conclusion).
To make your story powerful, account for these things:
- Clarity The main thing is to make the character, their goal and what happens in their experience as clear as possible. The outcome of the story should be clear for anyone who sees it: If you use a storyboard to communicate an existing problem, end with the full weight of the problem; if you use a storyboard to present a solution that will make the character’s life better, end with the benefits of that solution.
- Authenticity Honor the real experiences of the people for whom you’re designing. If you’re writing a story that isn’t faithful to the product, it won’t bring any value to you and your users. Thus, the more realistic the storyboard is, the better will be the outcome.
- Simplicity Each detail in the story should be relevant to experience. Cut out any unnecessary extras. No matter how good a phrase or picture may be, if it doesn’t add value to the overall message, remove it.
- Emotion Bake emotion into the story. Communicate the emotional state of your character throughout their experience.
Step-By-Step Guide To Creating Your Own Storyboard
With so many things to take into account, creating a storyboard might seem like an impossible task. Don’t worry, the following guide will help you turn out a good one:
- Grab a pen and paper. You don’t have to use special software to leverage storyboards in the design process. Start with a pen or whiteboard marker, and be ready to experiment.
- Start with a plain text and arrows. Break up the story into individual moments, each of which should provide information about the situation, a decision the character makes and the outcome of it, whether a benefit or a problem.
- Bake emotion into the story. Next, convey what the character feels during each step. I add emoticons at each step, to give a feeling for what’s going on in the character’s head. You can draw in each emotional state as a simple expression.
- Translate each step into a frame. Roughly sketch a thumbnail in each frame of the storyboard to tell the story. Emphasize each moment, and think of how your character feels about it. Visuals are a great way to bring a story to life, so use them wherever possible. You can leave a comment on the back of each frame to give more context. You can also show a character’s thinking with thought bubbles.
- Show it to teammates. After you’ve drawn the storyboard, show it to other team members to make sure it’s clear to them.
A Few Notes On Fidelity
High-fidelity storyboards (like the one in the example below) can look gorgeous.
However, in most cases, there’s no need for high-fidelity illustration. The level of fidelity will determine how expensive the storyboard will be to create. As I said before, conveying information is what’s important. A more schematic illustration can do that perfectly, while saving a lot of time.
Real-Life Storyboard In Action
Airbnb is a great example of how storyboarding can help a company understand the customer experience and shape a product strategy. To shape the future of Airbnb, CEO Brian Chesky borrowed a strategy from Disney animators . Airbnb created a list of the emotional moments that comprise an Airbnb stay, and it built the most important of those moments into stories. One of the first insights the team gained from storyboarding is that their service isn’t the website — most of the Airbnb experience happens offline, in and around the homes it lists on the website. This understanding steered Airbnb’s next move: to focus on the mobile app as a medium that links online and offline.
Dieter Rams once said, “You cannot understand good design if you do not understand people; design is made for people.” Storyboarding in UX helps you better understand the people you’re designing for. Every bit you can do to understand the user will be tremendously helpful.
"This article is part of the UX design series sponsored by Adobe. Adobe XD tool is made for a fast and fluid UX design process, as it lets you go from idea to prototype faster. Design, prototype and share — all in one app. You can check out more inspiring projects created with Adobe XD on Behance, and also sign up for the Adobe experience design newsletter to stay updated and informed."
Other Resources
- “ Storyboarding and UX ,” Ben Crothers
- “ The 8 Steps to Creating a Great Storyboard ,” Jake Knapp, Fast Company
- “ Storyboarding in the Software Design Process ,” Ambrose Little, UX Magazine
Further Reading
- Facilitating Inclusive Online Workshops (Part 1)
- Better Context Menus With Safe Triangles
- Make ‘Em Shine: How To Use Illustrations To Elicit Emotions
- How To Create A Flat Vector Illustration In Affinity Designer
Smashing Newsletter
Tips on front-end & UX, delivered weekly in your inbox. Just the things you can actually use.
Front-End & UX Workshops, Online
With practical takeaways, live sessions, video recordings and a friendly Q&A.
TypeScript in 50 Lessons
Everything TypeScript, with code walkthroughs and examples. And other printed books.
Would you like to receive a free callback?
your data are safe and will not be collected or sold for any marketing purposes.
+8 9098 8976 554
Marketing strategy: designing the user’s journey with a storyboard, who is at the center of your business the potential customer, who is at the center of your business you should realize that you are not the center of your business, nor is your idea. you know who should be at the center of your business. the center of your business is your client or end user. how can you build the path your user will follow in order to define your marketing strategy i recommend designing the user’s path with a storyboard., let’s start by defining what we mean by “storyboard” and “user journey”..
The storyboard is an actual graphic representation, like a comic book, of how the customer can reach our product.
The storyboard allows us to understand visually the what, how and when of marketing success.
It allows us to imagine and visualize the user’s experience of interaction with our site.
It allows us to hypothesize about the channels , both online and offline, through which our potential customer comes into contact with the company.
It gives structure to our ideas about the devices and searches our customers will use to reach us .
Each of these contact points will obviously have to be studied and improved.

The user journey gives us – in a detailed and descriptive way – all the steps that a typical user could perform before even knowing that we exist.
This hypothetical path shows us what happens when he discovers us and interacts with our app or with our website.
Then we will continue to broaden our hypothesis, identifying different dynamic scenarios for the user’s journey.
The development of the product should be based on a good understanding of our users. We should look at how they look for products like ours. Here, of course, SEO and a good strategy for positioning content will help.
We should ask ourselves how they will get in contact with our product or service.
What is the “touchpoint?”
We should study the possible offers and interactions with the website, from initial contact through to loading the shopping cart, and finally, if we have done our job correctly, to the purchase that is our ultimate goal.
The Example of Ikea: Augmented Reality
Always remember what we said at the beginning: our points of contact with the user can be anywhere.
They are not only found online.
Let’s consider an example.
Ikea created an augmented reality experience to capture users’ imagination.
Using a tablet or smartphone, users could see if a piece of furniture was suitable for their room.
The IOS app allowed users to read the codes included in the paper catalog and then project the desired item onto their device screen, superimposing it over the live camera view of their room.
Inspirations: Ikea Customer Journey and Augmented Reality

Consider another example of an innovative customer journey.
Google is testing a new mode of integration between research and ecommerce , directly within the search image search results. The user who looks for a photo of a pair of “fringed leather shoes” will also receive a clickable image with the price of an item, allowing them to buy it in just one click. Thus google brings customers from research to buying in record time.
What is a storyboard for?
A storyboard allows us to concretely visualize the path of our user, which is often not linear, and which can vary from user to user, identifying the key points at which it is necessary to capture the user’s intention and push them to interact.
Using the storyboard, we seek to simplify the most complex aspects of our user experience and make the simple steps more compelling and enjoyable for the user.
I once had a customer who had never even tried their website to see what a user would experience.
They knew that their product was good and that the price was competitive.
They were also well positioned in the Google SERP. But they did not sell as much as they would have expected.
When they finally tested the user’s path, they immediately understood the problem. They were not present when the user needed them most.
The user experience was far too complex, which hindered the user rather than helping them find what they needed easily and driving their purchase.
A storyboard allows us to predict and display the user’s path, simplifying all the steps that can be simplified.
First, we devise a mobile experience. After we have refined our mobile navigation, we expand to the desktop. (Many companies still fail to follow this simple best practice).
We emphasize design, colors, call to action and buttons , which can simplify the user journey and make it more enjoyable, and consequently improve conversions.
If you are still not clear about the convenience of designing a user path with a storyboard, let me list some important advantages of this method:
- It is a great way to view your plans and show them clearly to your team.
- It makes the production of your project easier and faster, because “an image says more than a thousand words.”
- It saves time in the long run by keeping all the various steps clear.
- It helps secure a competitive advantage with strategic marketing.
At the same time, the visualization will allow you to better understand the perception and performance of a product, user behavior and the complete picture of an interface built for users and not for the product or service.
Of course, to use this approach, you must include designers and User Experience specialists in your team from the very beginning.
Where do you start to draw the storyboard from? From the script.
The Viral Octopus Loop helps guide us in Point 4: Customer experience.
I have designed a Tool that will help us define our script by stealing the script writing techniques of the cinema and the “scale of awareness” hypothesized by Eugene Schwarz, which I have spoken of previously here .
Click here to see how it looks like.
This tool will help guide you in creating your storyboard to comply with the best practices laid out in Point 4.
In the Storyboard Tool you’ll find:
Describe the potential client and his problem.
Define who the client is, what the problem that afflicts him is, and who he is influenced by. Eg: Bill is a middle-aged man who is beset by efficiency.
The Problem
Describe how his problem affects his life negatively. Define the problem in context. Eg: Bill hates not finding his favorite dish at a restaurant.
The Solution
Show your product as a possible solution. Show how the product solves the problem. Eg: a digital menu that changes according to availability
The First Contact
Describe how the customer finds your product.
The customer comes across your product. How do you know what he wants?
The Product
Describe the client who solves his problem. What does your customer do to use your product and solve his problem?
Please provide an email where we can send your template.
We need a few minutes to illustrate your script.
As soon as you receive it by email, re-read it a million times until you say: Yessss!
Print it and start step 2:
Highlight all the touchpoints and key actions in your story in different colors.
Ex. Bill, desperate about his situation, searches on google for a solution.
He sees a forum that looks like it might be a good place to find answers. He arrives at the forum and posts a question looking for an answer to solve his problem.
A user answers and recommends your product.
There are so many juicy elements to think about!
Draw the Storyboard
During all the courses I teach on this subject, I was asked this question: I suck at drawing, how can I create a storyboard that is understandable? Are there any tools online? The answer is yes.
There are.
The question is do you really need them? I do not draw badly. I draw worse. My incompetence at drawing is, frankly, disgusting. But even I can draw something understandable.
If you’re planning your business, why do care if your strategic drawings are pretty? I found this fantastic video that explains how to solve the problem.
Well, that is more than 1,000 words to think about. That’s enough for this article. We’ll go deeper in the future. Stay tuned!
The Community
- Business Manager
- VO for Agencies
- Self Service Media Buying
- Our Approach
- Premium Services
- Privacy Policy
- Terms of Service
- Be a Gigger
- FAQ Giggers
Select a Language
User Journey | How it improves Agile process
In the dynamic realm of product development, understanding and meeting user needs are fundamental to success. It’s no longer sufficient to merely offer a functional product; the true essence of innovation lies in crafting an experience that resonates with your target audience.
In this fast-paced landscape, the user journey emerges as a pivotal concept, offering a path for developers to empathize with their users and view their creations from a user-centric perspective.
Table of Contents
Understanding User Journey Mapping
Benefits of incorporating user journey, how user journey enhances agile, practical steps to implement user journey in agile, challenges and how to overcome them.
A user journey is a user’s path when interacting with your product or service. It encompasses their entire experience, from the moment they become aware of your offering to the point where they achieve their goals or complete specific tasks using your product. Understanding this journey is akin to stepping into your users’ shoes, allowing you to see your product from their perspective.

In the fast-paced world of product development, understanding your users is paramount. It’s not just about creating a functional product; it’s about crafting an experience that resonates with your target audience. This is where the concept of the user journey comes into play.
At the heart of user journey mapping lies a fundamental principle of customer-centered design. User-centered design is an approach that prioritizes the needs and preferences of users in every phase of product development.
Incorporating user journey mapping into Agile processes offers a multitude of benefits that go beyond the confines of traditional development methodologies.
Enhanced User-Centricity
User journey mapping fosters a deep understanding of your customers’ needs, motivations, and pain points. In the Agile context, this means that every development decision is rooted in user-centricity.

This laser focus on customer needs ensures that the product aligns more closely with user expectations, ultimately leading to higher levels of user satisfaction.
Improved Product Quality
When user journey mapping becomes an integral part of Agile processes, it acts as a quality assurance mechanism. By visualizing the entire user experience, teams can identify potential bottlenecks, usability issues, or areas of friction.
Early detection of these problems allows for swift resolution and refinement before they can affect the end product.
Increased Customer Retention and Loyalty
A delightful user experience isn’t just about attracting new customers; it’s also about retaining and nurturing existing ones. User journey mapping in Agile processes provides a clear roadmap for enhancing the user experience over time.
Satisfied customers are not only less likely to churn but also more likely to become advocates, spreading positive word-of-mouth and contributing to customer growth.
Efficient Resource Allocation
Agile development emphasizes flexibility and adaptability. When user journey mapping is integrated into this framework, it becomes easier to allocate resources efficiently.
This strategic resource allocation leads to a more streamlined development process and optimized use of resources.
Agile Evolution
Agile methodologies thrive on constant evolution and refinement. User journey mapping fits seamlessly into this iterative approach.
This adaptability ensures that the product remains aligned with evolving user needs and preferences.
Integration of User Journey Mapping into Agile Methodologies
User journey mapping can be seamlessly integrated into Agile methodologies such as Scrum and Kanban, enhancing the overall development process. Here’s how:
- Scrum: In Scrum, user journey maps can be used as a valuable tool during sprint planning and backlog refinement. Teams can create and review user journey maps to gain a holistic understanding of user needs and prioritize user stories accordingly. The user journey can also help Scrum teams define the scope of a sprint and set sprint goals, ensuring that each sprint delivers value aligned with the user experience.
- Kanban: Kanban’s visual nature aligns well with user journey mapping. User journey maps can be represented on the Kanban board to provide a clear overview of the entire user experience. As user stories progress through the workflow, teams can visualize how they contribute to the user journey, helping to ensure that work items remain user-centric and that blockers are addressed promptly.
Influence of User Journey on Sprint Planning and Backlog Refinement
- Sprint Planning: User journey maps provide a roadmap for sprint planning. Teams can reference the user journey to select user stories that align with the next steps in the journey. By doing so, sprint planning becomes more focused on delivering value that directly contributes to the overarching user experience.
- Backlog Refinement: During backlog refinement sessions, user journey maps help teams assess the relevance of user stories and features. They can identify gaps in the user journey and address them by adding or refining user stories in the backlog.
Here are six practical steps to help Agile teams implement user journey mapping into their development process effectively:
1. Define Clear Objectives:
Identify Your Goals: Begin by setting clear objectives for integrating user journey mapping into your Agile process. Determine what you want to achieve, whether it’s improving user satisfaction, enhancing product quality, or increasing customer retention.
2. Create User Personas:
Develop User Personas : Before diving into user journey mapping, create well-defined user personas. These personas represent different user types and their specific needs and behaviors. Customer personas will serve as the foundation for your user journey maps.
Manage your user persona with ProductGo – Agile User Story Maps, Roadmaps & Persona for Jira

3. Map Out the User Journey:
Identify User Touchpoints: Outline the key touchpoints where users interact with your product or service. This includes initial awareness, onboarding, core interactions, and any potential exit points.
Document User Steps and Emotions: For each touchpoint, detail the steps users take and the emotions they may experience. Understanding both the practical and emotional aspects of the journey is crucial.
Visualize the Journey: Create a visual representation of the user journey. You can use software tools, whiteboards, or even pen and paper to sketch out the journey. Include user personas, steps, and emotions to make it comprehensive.
4. Integrate User Journey into Agile Practices:
Sprint Planning: During sprint planning, reference the user journey to select user stories that align with the next steps in the journey. Prioritize stories that address critical touchpoints or pain points for your users.
Backlog Refinement: In backlog refinement sessions, assess the relevance of user stories in the context of the user journey. Ensure that stories are aligned with the overarching user experience and identify gaps in the journey.
5. Regular Iteration and Feedback:
Iterate Continuously: User journey mapping is not a one-time activity. It should evolve alongside your product and user needs. Regularly revisit and update the maps to reflect changes in the user experience.
Gather User Feedback: Actively seek user feedback to validate and refine your user journey maps. User testing, surveys, and interviews can provide valuable insights into how well your product aligns with the mapped journeys.
6. Foster Cross-Functional Collaboration:
Collaborate Actively: Involve cross-functional team members, including designers, developers, product owners, and testers, in the user journey mapping process. Different perspectives will lead to a more comprehensive understanding of the user experience.
Promote Communication: Encourage open communication within the team by using the user journey map as a shared reference point. This ensures that everyone is aligned with the user-centric goals of the project.
Time Constraints
Agile projects often operate on tight schedules, leaving limited time for comprehensive user journey mapping.
Solution: Prioritize mapping the most critical user journeys first. Start with key touchpoints and gradually expand as time allows. Consider using lightweight mapping techniques to save time initially.
Keeping Maps Updated
User journeys evolve as products and user needs change, making it challenging to keep maps up to date.

Solution: Schedule regular reviews and updates of user journey maps as part of your Agile process. Use feedback from user testing and customer support to inform updates. Make map maintenance a team responsibility.
Resistance to Change
Team members or stakeholders may resist adopting user journey mapping, seeing it as an additional overhead.
Solution: Educate the team on the benefits of user journey mapping, emphasizing how it enhances user-centricity and aligns with Agile principles. Start with small, low-risk mapping exercises to build buy-in gradually.
Over-Complexity
User journey maps can become overly complex, making it challenging to extract actionable insights.
Solution: Focus on simplicity. Keep maps clear and concise, emphasizing the most critical user interactions. Use visualization techniques that make it easy for team members to understand and engage with the maps. Avoid unnecessary details.
Incorporating user journey mapping into Agile processes isn’t just a best practice; it’s a transformative step towards delivering remarkable user experiences. By embracing the user journey, Agile teams anchor themselves in user-centricity, resulting in higher levels of user satisfaction.
This methodology acts as a quality assurance mechanism, identifying and resolving issues before they tarnish the end product. Furthermore, it paves the way for increased customer retention and loyalty, as satisfied users are not only more likely to stay but also to advocate for your product.
Leave a Reply Cancel reply
Your email address will not be published. Required fields are marked *

What is Epic in Agile?

What is the difference between product backlog and user story?

What Is Agile Project Management And How To Apply This For Your Project?

Improve Project Management with AI

What User Story Mapping Tools Match for Your Project?

Optimizing Project Management with User Story Maps: Harnessing AI’s Power

ProductGo’s New Subscription Plan in 2024

Advanced Project Planning with AI User Story Mapping

Crafting Effective IT Buyer Personas: Essential Steps, Templates, and Expert Insights

Level Up Jira Project Management with Tools
Filter by Keywords
10 Free Storyboard Templates in Word, PDF, & ClickUp
Praburam Srinivasan
Growth Marketing Manager
February 14, 2024
While you can wing it and hope for the best, the most successful video and creative projects are often the result of careful planning. Behind every movie scene or trending TikTok, there’s a pre-production creative that carefully planned the action, dialogue, and visual effects—usually with the help of storyboard templates.
In this guide, we’ll share what makes a great storyboard template and what to look for when considering options. Then, we’ll give you the shortlist of our go-to free storyboard templates to try in 2023. 📽️
What is a Storyboard Template?
1. clickup storyboard template, 2. clickup story outline template, 3. clickup user story mapping template, 4. clickup mood board template, 5. clickup video storyboard template, 6. clickup youtube video production template, 7. microsoft powerpoint animation storyboard template by power production, 8. microsoft word commercial storyboard template by template.net, 9. microsoft word simple storyboard template by sampletemplates, 10. microsoft word storyboard template by getforms, what makes a good storyboard template.
A storyboard template is a graphic organizer that helps you visualize the bigger picture in smaller details, scene by scene. For any storyboarding process—whether you’re flushing our complex ideas or building a video storyboard—it’s a must-have if you want to map out your film or project.
Knowing how to make storyboard panels isn’t complicated, but sometimes you want to shortcut the process and get straight to the details. A blank storyboard template takes care of the structure, so you can focus your attention on the story. 📚
10 Free Professionally Designed Storyboard Templates
The right storyboard template can make it easier to visualize your plans and achieve your goals—whether that’s a desired shot or scene, an improvement to a product or campaign, or simply breaking down your design process. Discover some of our favorite free storyboard templates and find the ideal canvas for your next project.

Let’s kick things off with a modern take on the traditional film storyboard template. This Storyboard Template by ClickUp helps you plan out your short film or motion pictures video shot by shot, so you can see how the action progresses from one moment to the next.
No Adobe Photoshop skills are needed here—just share a drawing or mockup of the scene, then complete the details below to guide your team on exactly what needs to happen. There’s space to add actions, dialogue, interactive media, and audio/FX prompts, and you can even customize the template to add additional boxes if you need to. 🔊
Use this video storyboard template to plan corporate videos, personal projects, social media video campaigns, and more in a visual way.

Not every storyboard needs to be visual. If you love organization and a folder-style view, this Story Outline Template by ClickUp is a great choice. It’s designed with writers and authors in mind, with a structure that helps you craft a compelling story. But this perfect storyboard template can also be used to create a video storyboard as well!
Take advantage of custom statuses and fields to tailor ClickUp’s productivity and organizational features to your novel-writing needs. Quickly see at a glance what the chapter’s location is, which characters are involved, and which part of the plot it refers to.
Understand how your writing progress is going with a color-coded production stage status, and use this to help you decide what to work on next.
Writing a novel takes a huge investment of your time and energy. Using ClickUp as an online storyboard creator is a wonderful way to speed up that process, so you can put more of your energy into coming up with an incredible story.

For most companies, user experience is high on the list of areas to improve. To do this, you first need to map out the user journey and identify all the touchpoints that take place. Without a written or video storyboard template, process mapping can quickly get messy.
With this User Story Mapping Template by ClickUp , it’s easier than ever to visualize your user’s journey. 🛣️
Use whiteboard project management to take the entire customer journey and break it down into smaller parts, with color-coded sections to help you see which steps happen at which stage. Use a digital sticky note (or card) for every touchpoint, and move them around to make sense of your user journey.
You can even convert those cards directly into tasks, giving you an easier way to assign changes and improvements to team members. If your work involves improving the user experience, a concept map can help you not only see what the user’s current path is but also quickly suggest tasks and actions to make it even better.

Before you can plan an incredible campaign video or marketing project, you need to come up with ideas. The Mood Board Template by ClickUp gives you a bright and fresh way to turn those thoughts into a visual style guide.
This storyboard template is perfect to have close by the next time you want to run a promotion or commission a video. It also works as a mood board template as it’s designed to encourage you to think about your visual identity in different ways.
As a brainstorming template , there’s space to cover your UI/UX, icons, illustrations, website examples, typography, and color palette. You can easily swap these themes for others though in just a few clicks. Paste in your images, icons, and colors to create a visual representation of your ideas and inspiration.
Use this mood board template if you’re planning a project or campaign that requires you to get creative or when you’re sharing inspiration or a design brief with a collaborator or designer.
Bonus: Check out 10 Free Mood Board Templates to Organize Your Ideas

Planning a video shoot, edit, and production can get overwhelming. With the Video Production Project Plan Template by ClickUp , you can get organized and stay on top of what’s happening—without wondering whether a task is on time, delayed, or missing entirely.
Build a project plan with different sections for each part of the video production process. Create tasks beneath it, then assign them, add a due date, and assess the impact level and effort level. Add a status flag that reflects where that task is, and get an accurate view of your video production process. ✨
For marketers and creators planning a video project, this template is a must-have. It allows you to see everything at a glance, then click through to the finer details when you need them.

There are lots of steps involved in planning, creating, editing, and publishing an amazing YouTube video. Simplify the process and make sure you don’t forget anything with the help of the YouTube Video Production Template by ClickUp .
Our dedicated task template helps you cover all the bases, so you have the details ready to go when it’s time to hit publish. Add the video’s proposed release date, title, keywords, tags, thumbnail, social media banner, and caption.
You also need a well-written script to plan out your copy and even the camera angles you think you’ll use. Assign the scriptwriter and editor to the task, so it’s clear who’s working on what.
Get a visual reminder of where you are with the production progress bar.
Use this production task template to help you create and publish more optimized YouTube videos. Never worry about using the wrong thumbnail or forgetting your video tags again with the help of ClickUp’s creative project management software .

Often the simplest of templates can help you achieve big things. This Animation Storyboard Template might seem stripped back, but it has everything you need to plan your next animation project successfully. 🚶
Be inspired to fill the white space on this blank storyboard with your creativity. Add a hand-drawn sketch of the scene in the top box, and use the boxes below to share the action, dialogue, and camera movement notes. Finally, there’s space to add the sequencing number below.
This printable storyboard template is ideal if you’re working on your own storyboard for a personal project, your company, or a client. Use it to help you visualize the scenes and share them with your collaborators and stakeholders.

If you’re used to working in Microsoft Word or Apple Pages, this commercial storyboard template is a great option. It allows you to embrace the storyboarding approach, just without some of the extra features you’d gain from using a professional storyboard tool.
There’s space to note your story title and theme, then which part of the story you’re referring to. Map out the scenes with space for a sketch or mockup. Alongside, share a description of the scene and any notes for the production team.
Try this template if you’re looking for a blank canvas that you can use within Microsoft Word or Apple Pages.

Not everyone works best in a visual way, and sometimes a more traditional format can help get stakeholders engaged. Try a more text-based approach to storyboarding with a simple storyboard template.
This Microsoft Word template gives you space to talk about each scene, including the participants, dialogue, and any keynotes. It’s a simple and fuss-free way to describe the sequence of events, and a useful option if you’re tied into using Microsoft software products for your work. 💻
If you’re not a visual planner, you’ll find this approach to storyboarding helpful. You can jot down similar details, but don’t need to provide any imagery to go alongside it.

Sometimes it’s best to keep things plain and simple. Plan out your next movie storyboard or creative project with the help of this storyboard template for Microsoft Word. Hey, even if you’re using stick figures, you’re getting somewhere with the design and word storyboard templates like this.
There’s room on each page for you to outline six scenes, with a big box for a sketch of your proposed moment and another for you to describe the narrative. This template misses some of the technical prompts for audio, FX, and action, but it’s a good place to start.
For video or creative writing projects that are heavy on narrative and visual storytelling, this approach to storyboarding could be a winner. With a big space for narration, there’s room for you to dive into more detail.
Bonus: AI Content Creation Tools !
Professionally designed storyboard templates don’t have to be complicated. In fact, it’s better when they’re simple. A straightforward design or video storyboard gives you more space to be creative and focus on the details.
Your storyboard template is a canvas to work on, so the best ones are minimalist, unfussy, and designed with a specific purpose in mind. When considering which storyboard template to use, think about:
- Storyboarding software: Can you use the storyboard template with a tool you might already use, like ClickUp?
- Ease of use: Is the storyboard template easy to use? Can you make changes easily?
- Your intended purpose: Does the storyboard template match what you want to use it for?
- Collaboration: Is it easy for others to collaborate on the word or video storyboard with you?
- Shareability: Can you easily share your storyboard template with stakeholders?
Your storyboard template needs are likely to be unique, so there’s no perfect template for every creator or collaborator. Use these questions to help guide you find the best storyboard template for your goals .
Visualize Your Work with a Storyboard Template
If you’re working on a creative video or marketing project, storyboard templates are a must-have. It’s almost impossible to plan a successful creative campaign without one—especially if you’re running the whole process from start to finish.
Use our advice and these storyboard templates to help you find the best way to make your creative projects even more successful. Figure out which type of free template you need and how you like to work best.
Whether you’re a visual creator or prefer a more task and folder-based approach, ClickUp has everything you need to plan your projects successfully. From user story maps to video production project plans, you’ll find the templates you need in ClickUp.
If you’re ready to take your production to the next level, sign up for free today , and use our storyboard templates to kickstart your creative process. ✨
Questions? Comments? Visit our Help Center for support.
Receive the latest WriteClick Newsletter updates.
Thanks for subscribing to our blog!
Please enter a valid email
- Free training & 24-hour support
- Serious about security & privacy
- 99.99% uptime the last 12 months
- My Storyboards
Journey Map Infographics: Create Your Own

What is a Journey Map Infographic?
A journey map infographic is a visual representation of a customer's experience as they interact with a company, product, or service. It shows the steps a customer takes, the touchpoints they encounter, and the emotions they feel along the way.
Why are Journey Map Infographics Important?
Journey map infographics are important because they help companies understand their customers' experiences and identify areas for improvement. By mapping out a customer's journey, companies can see where they are succeeding and where they are falling short, and use that information to make strategic decisions that improve the customer experience.
How are Journey Map Infographics Best Used?
Journey map infographics are best used as a tool for identifying and addressing pain points in the customer journey. They can also be used to prioritize initiatives and investments based on their impact on the customer experience. Journey maps can be shared across the organization to foster a customer-centric culture and ensure that everyone is aligned around improving the customer experience.
What is Included in a Journey Map Infographic?
A journey map infographic typically includes the following elements:
3 Tips for Creating Journey Map Infographics
Pick a character.
The first step when creating a journey map infographic is to decide who your user or customer is. Your product likely has multiple types of very different users, each with their own discrete journey map. Choose who this journey map is based on and what problem they're experiencing.
Stay Linear
It's important to keep your journey linear. The user must move from one segment to the next, from experiencing their problem to finding your product, to engagement, and so on. If you lose track of where your users are, you will lose your audience as well. Keep the story clear, simple, and linear.
Note Pain Points
Maybe the most important of creating your journey map infographic is to note potential user pain points. Where might your users run into trouble and abandon your product? The more pain points you can note, the more you can improve your conversion rate. Creating a clear infographic allows all viewers to understand each step in the journey map process and gives each viewer a chance to express where they think user pain points may be apparent.
Frequently Asked Questions About Journey Map Infographics
Can journey map infographics be used for b2b customer journeys.
Yes, journey map infographics can be used for B2B customer journeys as well as B2C. The process of mapping out the customer journey is similar, but the touchpoints and emotions may be different.
How often should journey map infographics be updated?
Journey map infographics should be updated periodically to reflect changes in the customer journey or the company's products and services. Depending on the rate of change in the industry or the company, this may be done annually or more frequently.
How can companies collect the data needed for a journey map infographic?
Companies can collect data for a journey map infographic through customer surveys, interviews, focus groups, or by analyzing customer interactions with the company's website, social media, or other channels.
Can journey map infographics be used for non-customer journeys, such as employee journeys?
Yes, journey map infographics can be used for non-customer journeys, such as employee journeys or user journeys for software or applications. The process of mapping out the journey is similar, but the touchpoints and emotions may be different.

- Thousands of images
- Custom layouts, scenes, characters
- And so much more!!
Create a Storyboard
User Story vs User Journey
What are the main differences between a user story and a user journey.
A user story is a brief, concise description of a task from the perspective of the user.
For example: “As a ‘type of user ‘, I want ‘ some goal’ so that ‘some reason’ .”
A user journey is a described series of steps that show how a typical user would interact with the web app that is being designed.
The main difference between the two, is that a user story is based on a specific user and caters to a particular type of user to answer a specific problem. A user journey can follow a “random user” that may using the tool. This also includes dynamic user journey scenarios.

How can User Story Mapping help integrate both a user story and a user journey?
User Story Mapping has been described as a tool that can be used for many purposes, including product development, feature definition, version improvement, and project management.
In short, you are able to create a map, highlighting the user story, as a persona, whilst building the map for a user journey. Placing cards and tasks and building out the entire epic.
You can get started straight away, and intuitively you’ll be building maps that remove the debate between user story and user journey. Just head over to FeatureMap.co to get started.
Otherwise, read on to get the steps to get started.
We are looking at the steps to create answers that fulfil both requirements for a user story, whilst also catering to the user journey .
Here, we explore how best to utilise the User Story Mapping methodology to help define your path. We also have the added bonus that the first two steps instantly reward in their own right.
The first two steps can be very rewarding. Firstly, planning the map will give you a pathway to the point where you can start writing user stories or journeys.
Secondly, the end result is a visual chart showing the structure of your stories. This will give you the steps you need to take for development.
Here is another way to approach User Story Mapping in three steps.
This is a relatively quick way of getting to a point where you can start development work.

The start of a user story map on FeatureMap
Hosting your Story Mapping Session
Because User Story Mapping can be complex, it is important to have a framework for the session. It is also important to explain what User Story Mapping is and describe the process.
Start with tasks where the team thinks about the product, users, development, and personas.
We start by brainstorming every task that users will want to address when using the product.
Silent Brainstorming.
Task each participant to write down steps in your cards, every step will need to cover from the users first engagement to the conclusion of the users interaction. Encourage the team to think of these as actions not features.
It’s okay for each individual on the team to focus on other user journeys. For example if we take an app, someone may do a customer, and another may write about a copywriter, whilst the developers may think from the perspective of the administrators.
Top Tip: Writing them so they start with a verb is a good technique.
Encourage people to be creative and try to cover tasks and steps wide, but not deep. This part of User Story Mapping is about breadth not depth.
Start posting all cards and tasks in one large map.
That’s fine if you have duplicates. Just group them together, and these should sit beside each other on the line (not above or below).
As you expand and get into the swing of it you can easily drag and drop and delete if needed.
The beauty of using digital software for large collaboration tasks such as this allows you and you and your team to easily edit, expand and develop your map all at the same time.
This first line is the user tasks, and they form the backbone of your story map.

Then we organise these tasks into wider goals, and arrange them in order of completion.
These groups are known as “epics” or “activities”.
As facilitator, you can walk along the line of tasks and ask where the team think the splits are between each group of tasks, and what each group should be called.
For example, if you were building an app for an app to arrange your movies, you might group user tasks into epics like this:
- Browse DVDs in collection – epic
- View flat list of all DVDs – user task
- View DVD cover thumbnails in results – user task
- DVD Spec Call – user task

We can then move into the Prioritisation exercise, further developing the user story map .
This is the stage where you start writing in the details, building up the tasks and redefining tasks.
This may include adding tasks, merging tasks or separating tasks.
It is important to detail the tasks enough to remember in the future. After writing all the tasks, you should have a comprehensive map by this stage. Task your team to go over each line (now defined as Epics/activities) and ensure you have everything charted. This is where the User Story Map will become easier, as you will now have a visual chart of a defined product. Here you can move to the next steps.

Now you are ready to start prioritising the user stories on your map. You can start adapting and moving your tasks to sprints, also known as versions for your product.
You can check out the Movie Buddy Public Board here at FeatureMap.
You could do an entire User Story session with Post-It notes with your in-house team, but better yet digitally, remotely or supporting your in person meeting using FeatureMap.co.
Check out FeatureMap.co and sign up to try for free.
Related Articles:
No related posts.
A Journey by Edith Wharton - Short Story Summary, Analysis, Review
- Podcast Episode
Add a plot in your language
User reviews
- April 1, 2024 (United Kingdom)
- See more company credits at IMDbPro
Technical specs
- Runtime 17 minutes
Related news
Contribute to this page.
- IMDb Answers: Help fill gaps in our data
- Learn more about contributing
More to explore

Recently viewed
Skip navigation
- Log in to UX Certification
World Leaders in Research-Based User Experience
User journeys vs. user flows.

April 16, 2023 2023-04-16
- Email article
- Share on LinkedIn
- Share on Twitter
User journeys and user flows are both UX tools that capture how people accomplish goals with certain products or services. They share some similar traits. Both user journeys and user flows are:
- Used during design ideation or evaluation activities for the purpose of understanding and optimizing experience.
- Structured around a user goal and examined from the perspective of the user or customer (not a company or product).
- Captured and communicated via UX- mapping methods .
Their main distinction, however, is the level of detail and focus for each: User journeys describe a user’s holistic, high-level experience across channels and over time. User flows zoom in to describe a set of specific, discrete interactions that make up a common user pathway through a product.
In This Article:
What is a user journey, what is a user flow, combining user journeys and user flows, comparison: user journeys vs. user flows.
User journey: (Or customer journey) A scenario-based sequence of the steps that a user takes in order to accomplish a high-level goal with a company or product, usually across channels and over time.
The underlying goal of a user journey is high-level. Describing the journey will involve understanding the experience of a user across many points of interaction, because, in a journey, users might use with multiple channels or sources of information.
Consider a new-patient journey as an example. For any person finding and evaluating a new doctor, there will be many touchpoints over a long time (days, weeks, or months): researching information on the practice’s website, calling to schedule an appointment, receiving email communications, visiting the physical office, accessing information in a patient portal, and following up via phone if necessary.

Because of the complexity of the journey, contextualizing these actions with information about users’ emotions and thoughts can be useful for analyzing and optimizing the experience.
Journey maps are a common artifact for visualizing journeys, as they are narrative and descriptive. Effective journey maps don’t just relay the steps taken to achieve a goal; they tell a user-centered story about the process.

The best research methods for journey mapping are usually context methods , such as field studies and diary studies , which uncover longer-term user goals and behaviors in the moment. These methods can be combined with user interviews to uncover first-hand frustrations and needs.
Definition: A user flow is a set of interactions that describe the typical or ideal set of steps needed to accomplish a common task performed with a product.
Compared to a user journey, the underlying goal of a user flow is much more granular, and the focus is narrowed to a specific objective within one product.
Some appropriate goals to capture in user flows might be: purchasing a tennis racket on a sporting goods site, signing up for email updates on a credit-score-monitoring application, or updating a profile picture on a company’s intranet. These goals can be accomplished in the short-term (minutes or hours, at the most), and with a relatively limited set of interactions.
User flows can be represented with artifacts such as low-fidelity wireflows , simple flow charts, or task diagrams. These maps capture key user steps and system responses; they do not contextualize the process with emotions and thoughts like a journey map does.

The best research method for obtaining the data to map user flows is usability testing , which allows us to watch users interacting directly with the product in directed scenarios. As with user journeys, tools that capture analytics (e.g., click heatmaps) are a useful secondary source of insights.
It’s often useful to capture both user journeys and user flows and combine them to understand both macro- and micro-level views of experience. User flows can be thought of as a deep dive into specific areas of the high-level user journey.
For example, let’s go back to the high-level activities that make up the new-patient journey described earlier. Some of those activities entail using digital products (e.g., researching information on the practice website, accessing results in the patient portal). By documenting the associated user flows for these goals, we could further understand the micro-level experience in context of the greater journey.

Unfortunately, most teams do not have systematic processes in place to connect these views, due to gaps in internal team structures, lack of holistic measurement programs, or plain lack of capacity and competency to do the work.
The main differences between user journeys and user flows are captured in the table below:
To determine whether a user journey or a user flow is best for your specific context, consider the following questions:
- Does your user process involve more than one channel or more than one, known product (e.g., your company’s website)? User journeys are best for capturing activities dispersed over multiple channels; user flows are well-suited for interactions within one product.
- Can users generally accomplish the goal in minutes or hours, at the most, or will they need to complete activities over days, weeks, or months? User journeys are better for communicating activities over longer periods of time; user flows are better for relatively short-term goals.
- Will it be critical to understand not only the actions but the emotions and thoughts of users across more complex decision-making? User journeys capture those; user flows are limited to sequences of steps, with no additional information about users’ emotional states.
Related Courses
Journey mapping to understand customer needs.
Learn the process for capturing and communicating UX insights across complex interactions
Customer-Journey Management
Establish and operationalize journey-level experience design work across functional groups for continuous improvement
Omnichannel Journeys and Customer Experience
Create a usable and cohesive cross-channel experience by following guidelines to resolve common user pain points in a multi-channel landscape
Interaction
Related Topics
- Customer Journeys Customer Journeys
Learn More:

UX Roadmaps Common Questions
Sarah Gibbons · 5 min

Discovery Mapping Methods
Maria Rosala · 3 min

UX Roadmaps in 6 Steps
Sarah Gibbons · 6 min
Related Articles:
Understanding User Pathways in Analytics
Page Laubheimer · 7 min
Why Map in Discovery: 3 Mapping Methods
Maria Rosala · 7 min
How Much Time Does It Take to Create a Journey Map?
Kate Kaplan · 5 min
Journey-Mapping Impact: Research Findings
Alita Joyce · 5 min
How Practitioners Create Journey Maps: Typical Uses, Roles, and Methods
Kate Kaplan · 6 min
Cognitive Maps, Mind Maps, and Concept Maps: Definitions
Sarah Gibbons · 7 min
An 82-year-old woman who runs half-marathons shares 3 simple habits that transformed her heart health
- A woman who started running half-marathons in her 70s said the exercise has improved her heart health.
- She walks 8 miles daily, and takes pictures along the way to share with family.
- Her routine, including lifting weights and mobility exercise, is perfect for longevity, science suggests.
Getting older doesn't have to mean slowing down. Just ask Wilma King, who started running half-marathons in her 70s.
King completed her first race in 2014 alongside her daughter Andrea as well as her sister, brother-in-law, and their daughter, all of whom had run the event before.
"It just looked like they were having too much fun and I wanted to join in," she told Business Insider.
Now 82, King said she walks eight miles every morning to keep her heart healthy and to stay mentally sharp .
The walking, along with other habits like keeping in touch with family and working out to keep her joints healthy , has helped keep her energized and alert, though she can't imagine doing anything else.
"I don't have a secret," she said. "This seems normal and natural to me, and I just simply don't think about it."
Experts and research suggest you can improve your health by following her lead, even if you don't put in as many miles.
Walking every morning is part of her daily routine
King said she's always had a fairly active lifestyle and has enjoyed bicycling with her family as soon as her daughter was old enough to be brought along in a carrier seat.
In 2014, however, King was diagnosed with pericarditis (chest pain and irritation of the tissue surrounding the heart), pleurisy, and a valve problem. She was determined to do everything she could to stay healthy and took up a regular walking schedule, starting a little at a time.
"It was an effort basically to get out of the house and then to the corner," she said. "I wanted to get back to the way I had been before because those illnesses took a lot out of me."
King started by just walking down the block and back and gradually went further and further as her stamina increased .
"I don't even know why I started doing eight miles, but that's the routine," she said. "And then from the walking, I started running more."
Now, her main form of exercise is long daily walks, totaling 200 miles a month (although experts say most people can benefit from just an extra 500 to 1000 steps a day , especially at first).
"It's good as far as staying alert and certainly my heart function has improved. And then it's good for my mental health," she said.
Related stories
For her first half-marathon, she used a running plan (she doesn't remember which) to work her way up to longer distances.
She's completed the annual Rock 'n' Roll Washington DC half marathon every year since and has no plans to stop any time soon.
"I'm slower now than I was at one point, but I'm 82, so what can I say?" King said. "I'll do it as long as I can."
King said she suspects the family tradition is also a sneaky way for her daughter to check in on her health over time.
"I think for her it's almost like a cognitive test 'I want to see how mom is moving. I want to see if she's paying attention and things like that.' It's a nice one-on-one, but I think she's watching me to see exactly what I do and how I do it," she said.
And if finishing 12 miles isn't enough of a sign she's aging gracefully, her daughter is " too polite to tell me," King said with a laugh.
Sharing pictures of her walks with friends and family to stay social
King said her morning routine also involves connecting with loved ones as part of her daily stroll — she takes pictures along the route with her phone to pass along as a little check-in.
"I walk for heart health, plus I entertain myself. I have some daily contacts and I send like a 'hello, how are you message' along with the photograph," she said.
There's good science to suggest that King has the right idea since being social can boost both longevity and your motivation to keep exercising .
People in Blue Zones, areas of the world with high concentrations of people who live to 100 , are known for having strong habits of building social connections which is beneficial for both mental and physical health.
Weight lifting and mobility exercises to prevent injury
King doesn't just walk to stay active but does some stretching and mobility exercises like deep knee bends to help protect her joints. Being able to prevent injury by staying mobile is key to longevity , a personal trainer previously told BI.
King also taps into one of the best anti-aging exercises we know of just by working out from home.
"It's not much to talk about. I have some six-pound weights and I lift those up, down, side-to-side and swing them back and forth and all of that. Nothing real special," she said.
Even without any fancy weightlifting techniques, strength training is consistently linked to living a longer, healthier life.
For King, the combination of vibrant social life, long walks, and other workouts is paying off, as she's noticed more serious health declines among peers in her age group who don't have a similar routine.
"I think of myself as one of the lucky ones. So far so good," she said.
- Main content
IMAGES
VIDEO
COMMENTS
A customer journey storyboard is a sort of visual variation on a customer journey map. How do you create a customer journey storyboard? It can be as simple as folding a piece of paper to create a grid of squares. Storyboards can also be created digitally, as some tools even have templates and features to help make this happen. There is a time ...
A UX storyboard is a visual tool. It illustrates a user's experience with a product or service. Designers use it to understand and address user needs. It consists of sequences of drawings or images. These sequences show a user's interactions with a product. They also portray the user's emotions and challenges.
Storyboards provide teams with a shared vision of the product's use and impact on users. Use Cases: Ideal for new product concepts. With storyboards, it's easier to understand the user's emotional journey. Useful in presentations to stakeholders. Storyboard UX design conveys a product's potential impact in a relatable, human-centered way ...
Storyboards are based on a scenario or a user story. The persona or role that corresponds to that scenario is clearly specified at the top of the storyboard. A short text description of the scenario is also included. ... Storyboards are often used to describe a fragment of the user journey (and several of them may be needed to capture the ...
Beneath the scenario statement, you can flesh out the details of your main character (i.e. your user persona). Limit this to one or two essential bullet points; you don't need to provide a full persona description, just a few extra details for context. 5. Draft your story in writing.
Planning the storyboard. Design thinking is split into 3 sections: \. 1) User research. 2) Research interpretation and ideation. 3) Prototype products/services to provide value. Step 1. Determining Jobs To Be Done. This step in design thinking is about capturing user problems.
Visualize what your user is experiencing with our free storyboard creator. Easily create a storyboard online using Miro. ... Use apps like Google Images and Unsplash to create an appealing storyboard, or sketch your customer journey freehand. Miro's storyboard creator has robust editing features that help you create a storyboard the way you want.
The main job of a UX designer is to make products intuitive, functional, and enjoyable to use. By creating a user journey map, you're thinking about a product from a potential customer's point of view. This can help in several ways. User journey maps foster a user-centric mentality. You'll focus on how a user might think and feel while ...
User story mapping vs journey mapping. Journey mapping is a UX tool that helps teams visualize the journey a customer needs to take so they can accomplish a goal. Journey maps focus on the journey for a single persona or customer, based on the persona's specific scenario and expectations. This is useful for aligning the team, getting them ...
Your user journey map hierarchy involves four building blocks to meet customers' needs: Understanding user personas or buyer personas. Developing themes and epics to address touchpoints. Using steps or features to support epics and the narrative flow. The stories in the customer journey map. 1.
Part of product development is understanding your customers. Customer Journey Mapping is the process of looking at the end-to-end series of events that make up the entire story of before your product/service, using your product/service, and after. These maps can become quite long and involve many actors or personas.
Columns capture the five key stages of the user journey: awareness, consideration, decision, purchase, and retention (see below). Rows show customer experiences across these stages—their thoughts, feelings, and pain points. These experiences are rated as good, neutral, and bad. To see how this works, consider a practical example.
A storyboard is a great instrument for ideation. In UX design, storyboards shape the user journey and the character (persona). They help designers to string together personas, user stories and various research findings to develop requirements for the product. The familiar combination of images and words makes even the most complex ideas clear.
Journey Map vs. User Story Map. User stories are used in Agile to plan features or functionalities. Each feature is condensed down to a deliberately brief description from a user's point of view; the description focuses on what the user wants to do, and how that feature will help. The typical format of a user story is a single sentence: "As ...
I recommend designing the user's path with a storyboard. Let's start by defining what we mean by "storyboard" and "user journey". The storyboard is an actual graphic representation, like a comic book, of how the customer can reach our product. The storyboard allows us to understand visually the what, how and when of marketing success.
2 — User stories. A user story is a short statement or abstract that identifies the user and their need/goal. It determines who the user is, what they need and why they need it. There is usually one user story per user persona. As we touched on above, there are often multiple user personas — it's a good thing that user stories are brief!
User journeys evolve as products and user needs change, making it challenging to keep maps up to date. Solution: Schedule regular reviews and updates of user journey maps as part of your Agile process. Use feedback from user testing and customer support to inform updates. Make map maintenance a team responsibility.
The term 'User Story' has a very specific definition. Thanks for the response. I meant to type "Storyboard", not User Story. It sounds like a question of perspective. The storyboard is the content's side, the user story is the visitor's side, and the user journey is the interaction between them. By clicking "Post Your Answer", you agree to ...
A journey map is from the perspective of the person's experience, whereas a story map is from the perspective of the product and what it takes to deliver the user experience. User-story maps help Agile teams define what to build and maintain visibility for how it all fits together. They enable user-centered conversations, collaboration, and ...
For most companies, user experience is high on the list of areas to improve. To do this, you first need to map out the user journey and identify all the touchpoints that take place. Without a written or video storyboard template, process mapping can quickly get messy.
Yes, journey map infographics can be used for non-customer journeys, such as employee journeys or user journeys for software or applications. The process of mapping out the journey is similar, but the touchpoints and emotions may be different. Design your own user journey map with StoryboardThat's free infographic templates.
A user journey is a described series of steps that show how a typical user would interact with the web app that is being designed. The main difference between the two, is that a user story is based on a specific user and caters to a particular type of user to answer a specific problem. A user journey can follow a "random user" that may ...
IMDb is the world's most popular and authoritative source for movie, TV and celebrity content. Find ratings and reviews for the newest movie and TV shows. Get personalized recommendations, and learn where to watch across hundreds of streaming providers.
Effective journey maps don't just relay the steps taken to achieve a goal; they tell a user-centered story about the process. Journey maps capture customer or user journeys by visualizing the actions, thoughts, and feelings users have as they attempt to accomplish a goal over time and across channels.
Apr 6, 2024, 4:25 AM PDT. 82-year-old Wilma King in the Rock 'n' Roll Washington DC Half Marathon with her daughter, Andrea, in March. FinisherPix. A woman who started running half-marathons in ...