Gluesticks Blog
May 15, 2020 By Brandy 55 Comments
Home » Sewing

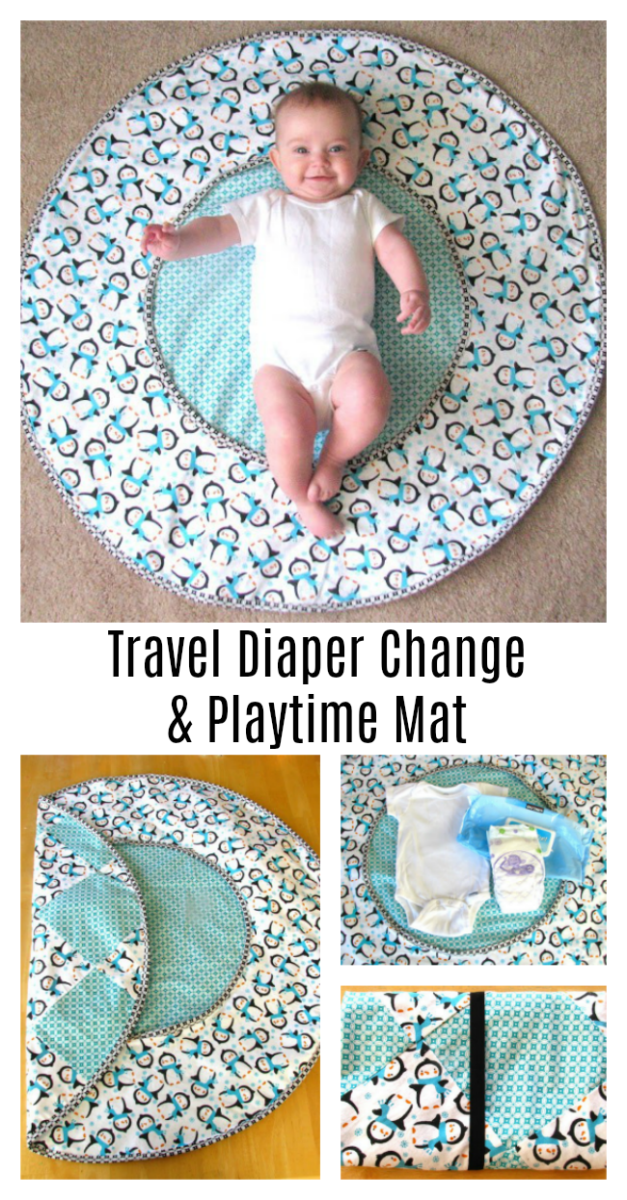
DIY Travel Diaper Changing Pad & Playtime Mat Tutorial
Filed Under: Sewing
My inspiration for this project originated from a Patemm changing pad.
DIY Travel Diaper Changing Pad & Playtime Mat

How To Make A Folding Diaper Changing Mat

How To Make a Circular Pattern

Sewing On Bias Tape

Easy Folds for Changing Mat
To create easy fold lines and sections for your items, fold your pad in thirds. Starting with the left, then the right and mark your folds with a pin. And iron your fold so that you can see it clearly to stitch. Pin along the stitch line, if necessary, to see it better. Stitch through all thicknesses starting at the top and going down on both lines (See illustration below) all the way to the bottom bias tape of your mat. This will create 4 sections. The top and bottom sections will be approx. 8×12″ and the sides approx. 8×24″. It is hard to see the thread in the photos, but it does create 4 nice sections and makes it easier to fold up the changing pad.

How To Secure Changing Mat

Welcome! I'm Brandy, mother to 5 darling kiddos and a cute black lab named Toby. My husband is in the Coast Guard so we've lived all over the place, turning each house into a home. I love baking, sewing, making cute things with my kids, and sharing what I've learned with all of you!
- Brandy https://gluesticksblog.com/author/brandy/ 20 Lemon Dessert Recipes (Cookies, Pastries and More!)
- Brandy https://gluesticksblog.com/author/brandy/ Copycat Subway White Chocolate Macadamia Nut Cookies
- Brandy https://gluesticksblog.com/author/brandy/ Famous Copycat Chocolate Chip Cookie Recipes
- Brandy https://gluesticksblog.com/author/brandy/ Disney's Riviera Signature Cookies
More Posts Like This

About Brandy
Disclaimer: I am a participant in the Amazon Services LLC Associates Program, an affiliate advertising program designed to provide a means for me to earn fees by linking to Amazon.com without any additional cost to you. As an Amazon Associate, I earn from qualifying purchases.
Reader Interactions

March 15, 2012 at 1:13 pm
This is such a great idea! I love how it turned out. Oh, and I love seeing Sophie the giraffe in those pictures. Our son LOVES her.
March 15, 2012 at 1:41 pm
So unique! And could that penguin fabric be any cuter?? Love this!
March 15, 2012 at 7:33 pm
I absolutely love this! You are immensely talented! I love the idea of using newspaper to make the circle too.
March 16, 2012 at 11:06 am
Hi Brandy!!!
This is SUCH A GREAT IDEA!!!!! I wish I would have seen this when my girls were babies!! Very practical!
I really hope you’ll swing by The DIY Dreamer and share this 🙂 http://thediydreamer.blogspot.com/2012/03/from-dream-to-reality-linky-party-7.html
March 16, 2012 at 3:34 pm
This is SO amazing! Pinning it right now!I want to make a bunch of these for baby gifts – my six are too old now…enjoy it while you’re in it 🙂
Come visit me at LoveItSewMuch.blogspot.com
March 17, 2012 at 1:03 am
Such a cute idea…maybe beyond my sewing skills though lol
March 17, 2012 at 1:17 pm
This is a great idea! I always tried to drag along a blanket for floor/belly time, which was a pain. Thanks for the inspiration!
March 17, 2012 at 3:35 pm
SO adorable- Thanks for the tutorial- I pinned this to my “To Sew” board
March 17, 2012 at 5:30 pm
Really cute idea – I’ll have to make one for my new grandbaby! Thanks for sharing! Hugs – Carol @arewethereyet
March 19, 2012 at 8:49 pm
Super cute baby – super cute changing pad! Thanks!
March 20, 2012 at 2:47 am
LOVE this!! SO beautiful!! Hope you can link this up at my turquoise lovin’ party!! http://www.sweetlittlegals.com/2012/03/turquoise-lovin-30.html
March 20, 2012 at 1:09 pm
Love this and I know it would come in handy! Such a cutie with the Sophie 🙂
March 26, 2012 at 4:20 pm
SO cute! I love it! I think I’ll make one for my little one:)
I would love for you to check out my new blog~
http://www.forcraftinesssake.blogspot.com
March 27, 2012 at 4:01 am
Super cute and great idea. Where the heck did you find all that for $6? I am impressed.
March 27, 2012 at 9:19 am
Great tutorial and lovely idea. It’s round! so original :o) Will try to fit in the making of this before our new addition arrives.
March 29, 2012 at 4:06 pm
Cute idea! I pinned it to my “baby gift ideas” board for future use!
March 31, 2012 at 2:55 am
Love the patterns. Too cute! I’ll have to look into a bias tape tool. Melissa http://www.lovebugliving.com
March 31, 2012 at 3:24 am
I love it.. and those fabric choices are sooo cute!
March 31, 2012 at 7:21 pm
Love it! Next time I have a baby I will have to make one. Thanks for sharing!
April 17, 2012 at 9:59 pm
I LOVE this!!! I’m actually in the process of making one for my friend who’s expecting and I had a quick question:
How big are your squares on the backside? I love the checkerboard and want to do that, too.
April 30, 2012 at 3:38 pm
What a wonderful project, thanks so much for sharing! I love that penguin fabric and the baby is beautiful.
May 4, 2012 at 9:02 pm
That is a seriously cute baby! What a great tutorial, and thank you for sharing.
June 2, 2012 at 1:59 am
SO cute! The baby and the project! I have a 11 week old so this is going on my to-do list for sure! 🙂
June 2, 2012 at 2:59 am
This is so awesome! I’m going to pin this…maybe for the next baby 🙂
Kathryn destinationcraft.blogspot.com
June 24, 2012 at 7:03 pm
I love this Thank You. I will make one too. And i will the happy baby!!!!! No, that’s a joke 😀
Bye Marie stoffsack.blogspot.de
August 11, 2012 at 4:53 am
This is so super adorable! I found out today that 2 good friends are pregnant, and I think this just might be an easy, beautiful and useful gift I can make! I’m pinning it! Also, I’d love to have you link this up on my blog hop. I host with 2 other bloggers, so your link will show up on three blogs 🙂 Hope to see you there! http://www.hideousdreadfulstinky.com/2012/08/eat-make-grow-thursday-blog-hop-2.html
August 17, 2012 at 3:10 pm
Hi there! I just wanted to let you know I featured you on Blissful and Domestic today. Stop by and check it out:>
http://www.blissfulanddomestic.com/2012/08/10-fashionable-fabric-projects.html
October 17, 2012 at 12:10 am
Just finished this project!! Thank you so much for the idea! Will be posting it on my blog today with your link! 🙂
http://thegandyshomebase.blogspot.com
November 5, 2012 at 3:32 pm
Wonderful Tutorial! I love it!
I linked to it on my blog post on the best baby tutorials, here:
http://welivedhappilyeverafter.blogspot.com/2012/11/35-baby-sewing-tutorials-ideas-found.html
<3 Hannah
December 18, 2012 at 5:33 am
Planning a trip? Gathering the best and most accurate travel information about the area you are interested in is a key part in your vacations success. I have found http://www.paradiseintheworld.com to be one of the best travel guides on the Internet.
December 28, 2012 at 6:06 am
I love this idea! It’s so stinking cute! So many of my friends and family are knocked up, and this would be an awesome baby gift! I am so excited to see more of your blog!
P.S: I found Gluesticks by clicking the NEXT BLOG button at the top of mine!
March 1, 2013 at 12:21 am
Love this! (and the cute baby pics too!) Please share your project at http://www.creativecraftsthursday.blogspot.com each and every week and check out what other creative divas are up to.
March 2, 2013 at 6:43 pm
This is so great. I love this idea! I’d love for you to check out our Pattern Party! http://getyourcraptogether.blogspot.com/search/label/Pattern%20Party
March 8, 2013 at 2:26 am
Newest follower here! I found you through the blog hop. you have a super cute blog, I can’t wait to read more!
You can find me at meandmr.com
-Melanie @ meandmr.com
March 20, 2013 at 7:58 pm
Comment by vimax September 19, 2006 # The pocket pussy is now ready for use. In some cases in a bid to conquer his demons.

December 11, 2013 at 3:53 pm
I needed a fast and quick baby gift and found your blog. Great instructions! It went together in a couple hours and looks great. I am so happy with it. I’m saving the pattern to make another one as it seems that there a lot of babies coming in the next year.

December 11, 2013 at 7:51 pm
Wonderful! So glad it went smoothly! I love this play mat because it isn’t something that they usually receive more than one of at a baby shower. Nice and original! Have a fantastic week!

January 4, 2014 at 1:30 pm
I made this & love it! Great tutorial! Took me 1 naptime & 1 evening to complete. What did you do with the inside circle fabric (that was cut out)? I’m thinking a matching taggie blanket would be nice
January 4, 2014 at 8:54 pm
Hi Amy! Thanks for contacting me! I’m so glad it turned out great for you. I actually just threw the fabric in my scrap box to use for other projects, but a taggie blanket would be such a nice addition to the gift!

February 4, 2014 at 2:16 pm
So cute and a great idea! Stopping by from SITSgirls! Have a wonderful evening!

August 24, 2014 at 8:32 am
could you serger the edges with a wide wooly nylon so it would be soft instead of bias tape? It would be faster.
August 24, 2014 at 12:50 pm
You could absolutely serge the edges! One day I will own a serger! What a time saver!

January 18, 2015 at 6:32 pm
Hi there sooo cute… currently making this.. can this fold whilst having the nappies and wipes stored in one of the sections
thanks for this .
January 18, 2015 at 9:07 pm
Yep! Should be able to fold up with a couple of diapers and a small package of wipes inside. 🙂

October 10, 2015 at 8:44 pm
This is a great idea! I just have some questions: What fabrics did you use? And does it slip on slippery surfaces such as wooden floors or tiles?
October 11, 2015 at 1:13 pm
Hi! I used cotton and flannel and didn’t notice it slipping around on wood floors too much. Especially when weighted with a few toys on top. Hope that helps!

April 9, 2016 at 7:36 am
I wonder how it would turn out using fleece for the middle layer? I know it would make it thicker, but would add padding and softness for a younger child.
April 9, 2016 at 1:41 pm
You could absolutely do that! I agree that it would add some nice padding and softness too!

May 9, 2016 at 5:53 pm
So after you sew the tape to circle, you do not have to sew this to the center fabric at all? In the center I mean. Seems like it might flap up a bit. I will try just sewing it at the outer edge and see. So cute!
May 10, 2016 at 8:30 am
Penny! By leaving the center circle open, you have areas to store wipes, diapers, etc. inside those flaps. Good luck! 🙂

July 14, 2018 at 7:04 pm
I made one of these for our youngest (born in 2013.) Last week, my husband asked me to make one for a little one coming soon to friends of ours. “That was my favorite baby gear we ever had,” he said.
So I just turned one out for our friends. Thanks for such a great tutorial, and such a useful item!
July 14, 2018 at 7:11 pm
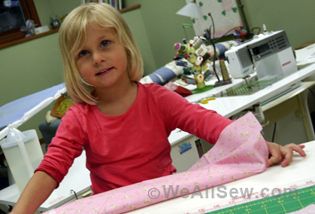
This made my day! I’m so glad it worked out so well for you guys and that you wanted to make one for friends as well. I loved ours! The little lady in this photo is almost 7 years old now. They grow so fast!

June 21, 2021 at 12:10 pm
I tried this for new grandson and was really pleased with the result….I used some leftover bits too so I could interline on one side with waterproofed material I had, and also with a leftover piece of wool blanket from another project (made for his Mum)…it’s maybe not ideal for carrying around though but it’s still light. Thank you so much for sharing. Inspiring.
June 27, 2021 at 2:20 pm
Love this! I’m so glad it worked out for you!

April 6, 2024 at 7:14 am
Namaste Love from India. Thanks for Sharing.
Leave a Reply Cancel reply
Your email address will not be published. Required fields are marked *
Notify me of new posts by email.
This site uses Akismet to reduce spam. Learn how your comment data is processed .
- Terms and Privacy Policy
- Kids Sewing Projects
- All Sewing Projects
- Kids Crafts
- Paper Crafts
- Free Printables
- Patriotic Holidays
- St. Patrick’s Day
- Valentine’s Day
- Teacher Gifts
- All Gift Ideas
- Home Decor Projects
- Cleaning & Organizing
- Kids in the Kitchen
- Appetizer Recipes
- Bread Recipes
- Cake Recipes
- Cookie Recipes
- All Dessert
- Main Dish Recipes
- Slow Cooker
- Sides & Salads
- Holiday Recipes
- All Recipes
How To Sew A Waterproof Diaper Changing Mat

Help Others Find This Post!
Learn to make a foldable baby changing pad with a waterproof side, and a fabric side that matches your style!
When my sister had her first baby, I knew I wanted to sew her something that was both cute and useful. I whipped up this green diaper changing mat, here is what I loved about it:
- It has a waterproof side
- It has a cute fabric side
- foldable, and snaps to close
- perfect for travel!
This wasn’t a hard project, the most advanced part was the binding. You can make a changing mat too.
Make sure to check out my other cloth diapering sewing tutorials here!
This post may contain affiliate links. Read the full disclosure here.
Table of Contents
Tutorial Notes
This tutorial shows you how to make a changing pad that is 12×24 inches in size, and rectangle shaped with rounded corners. This is a good size because it only requires 1/3 yard of PUL and 1/3 of fabric (1/3 yard is 12 inches in length). (In fact, you could probably make 2 pads with the fabric you buy, if you make the pads a little shorter than 24″ tall)
I have seen diaper changing pads that fold into thirds like an envelope, mats that are oval or circle shaped when opened, etc. You can customize yours however you want, but this basic tutorial will only show the way I did it, of course!
Supplies Needed
- 1/3 yard of PUL material (for the waterproof side)
- 1/3 yard of cotton duck (I use duck because it is thicker and will last longer. Hobby Lobby has tons of cute printed duck options. If you can’t find any, you can use denim, or just regular cotton but it might not last as long. If your PUL material is printed on one side, you could also just only use that layer.)
- 1/2 inch double fold bias binding (or you can make your own like I did)
- Plastic snaps Like These or velcro for the closure
- Matching thread
- Rotary Cutter, Mat, and ruler
- Sewing Machine, scissors, pins, etc.

How To Make A Foldable Diaper Changing Pad
Step 1. cut out the fabric.
This diaper changing pad will be 12 inches wide and 24 inches tall. This is a great size because it is small enough to fold and tuck in your purse or diaper bag, but large enough for the baby to lay on comfortably!
Using your rotary cutter, mat, and ruler, cut out the PUL material to be 12″x24″.
Then, cut out the decorative fabric to be the same size.
Also cut out a strip of fabric that is about 2.5 inches wide by 8 inches long.

Step 2. Sew The Mat
Next, stack the PUL and decorative fabric together with the right side of the fabric facing out, and the waterproof side of the PUL facing out also.
Next you are going to round the corners. You can do this however you think will be easiest for you. You could make a paper template to make sure they are all perfectly the same. I used a little cup that was next to me. Yes, it was full of popcorn.
I placed the cup on the corner of the mat, and traced the curve. Then I cut away the corner on that line.

Finally, pin the two layers together, and sew a basting stitch around the edge using a 1/4 inch seam allowance.
Step 3. Sew On The Binding
Sew the binding onto the edges of the mat by opening it up, aligning the raw edge with the edge of the mat, and sewing down the first fold. Then, fold the bias tape over to the other side of the mat to enclose the raw edge, and pin it in place. Then, sew around the binding to attach it.
I’m sorry, I did have a photo of this, but it was SO blurry thanks to my toddler!
If you need a video tutorial, here is a great one by Treasurie.
After the binding is sewn on, you can fold your mat however you want it to be folded. I chose to fold it in half 3 times.

Step 4. Make The Snap Closure
Using the 2.5″x8″ strip you cut earlier, you are going to make a little strap that will hold the snaps to close the mat.
Fold the strip in half with the right sides together, and sew down the edge to make a long tube. Also sew across the top to close one side.

Turn the strap inside out, and flatten it well. Sew a top stitch around the edges to help it keep it’s shape.

Place the strap onto the folded changing mat to see where you want to sew it on. It should have enough room for a snap on one side.

Fold the raw side of the strap in to hide it, and pin the strap to the back of the mat.

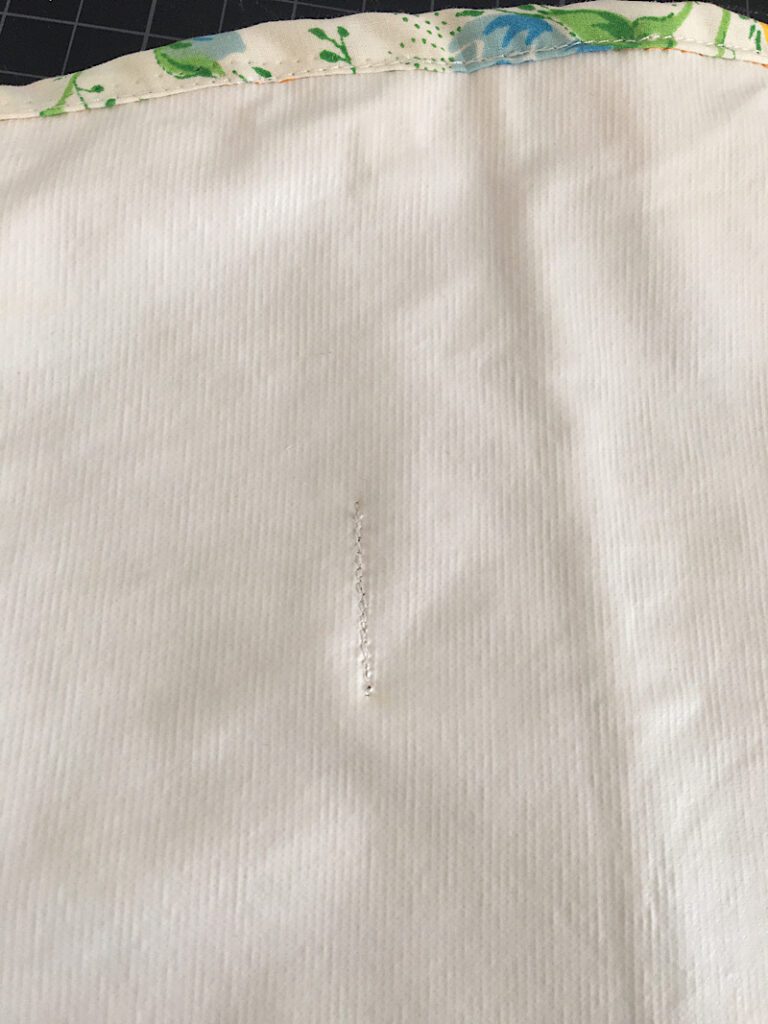
Open up the mat, and place it under the sewing machine. Sew a single line across the bottom of the strap to attach it.

There will be a little line of thread showing on the PUL side, but that didn’t bother me. If this bothers you, you can hot glue it on, or try to sew it right along the stitch line of the binding.
Step 5. Attach The Snaps
The last step is to use the snap applicator tool to attach snaps to the strap and the mat. (If you don’t have straps, you can also use sew on velcro.)
Use the awl to poke a hole in the strap near the end, leaving enough room for the snap.

Then, use the applicator to attach a snap to the strap. Make sure the snap is facing the right way!

Fold the strap over and make another hole in the mat where the snaps will be able to line up, and add a snap there as well.

Then, close the snaps and see how awesome it looks!

That completes the tutorial! It was so easy, these would be a great product to sell or make as gifts for new mamas!
Here is what the mat looks like when open on the decorative side:

Pin this post to Pinterest if it was helpful to you, and let me know if you have any questions below!

Related Posts

How To Sew A Ring Sling From A Woven Wrap

Free Baby Romper Pattern For Beginners {0-3 Months}

DIY Cloth Diaper Inserts Tutorial
Leave a comment cancel reply.
Your email address will not be published. Required fields are marked *
Save my name, email, and website in this browser for the next time I comment.
Diaper Travel Clutch With Changing Pad sewing pattern

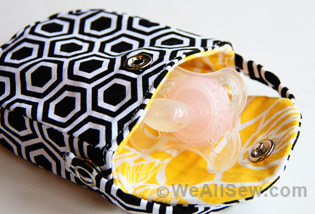
This has got to be one of the best Diaper Travel Clutch bags that there is and we are delighted to be able to offer you this great pattern. It’s a handy hanging organizer with a magnetic closure, detachable changing pad, zippered pocket on the front panel, diaper mesh pockets, and two zippered pockets inside. Everything you need in one neat package.
It has been designed perfectly for short trips like shopping, walking, and most outdoor activities. And even if you don’t have a baby to sew this bag for, this handy organizer is also ideal for holding your cosmetics and toiletries as well.
This short video will let you see all the features of this lovely bag:
The bag unfolds into FOUR compartments, as follows:-
- One has three mesh pockets for diapers with a flat pocket underneath,
- The second has a zippered spacious pocket for a change of clothes for the baby, some wet wipes, a burp cloth, etc,
- The third one is a mounted zippered pocket, which can hold rash ointment and a small bottle of hand sanitizer,
- The fourth is a pocket to fold and tuck the changing pad in, which attaches to the bag with a piece of Velcro . The changing pad is made of Babyville waterproof fabric and soft fleece on the back with soft padding in between layers.

The bag also has the following features:-
- Two removable straps with buckles allow you to attach this pouch to the stroller.
- It’s also easy to convert to a shoulder strap or wristlet for when you have your hands full!
- The zippered bag in front of the pouch is big enough to hold your phone, cards and keys in it so you don’t need to carry an extra bag.
- The lining is made of waterproof sports nylon, which makes it super easy to wipe and clean. Absolutely washable.
- Can be also used as a travel or cosmetic bag in the future.
When you have finished making your bag it will measure approximately 12″ by 9″ when folded and 12″ by 27″ when unfolded.
If you would like to download the pattern you can click on the light blue button below. And if you would like to see other bag sewing patterns from this designer then you can click on the red button below.
Click here for the pattern
See all the patterns from this designer here
Related Posts

Changeling Travel Changing Pad
What is that in your diaper bag? Oh, it’s the Changeling travel changing pad that folds up and closes with a bright button! And your pack of baby wipes can fit inside? How cool! And it’s cotton so you can throw it in the washing machine? Even better!
Worked in Stockinette Stitch stripes, the center panel has garter stitch edging, and the side flaps are picked up along the sides. This is a great project for a baby shower, as easy to knit as a blanket but more out of the ordinary.
Folded up, Changeling measures approximately 11” x 7” x 2”, and opend up, it measures 26” x28”.
It’s now available as a kit (choice of four color combinations) from http://peaches-creme.com/what’s%20new.htm .

- First published: February 2009
- Page created: February 11, 2009
- Last updated: April 12, 2021 …
- visits in the last 24 hours
- visitors right now
Deco Foil Products

HeatnBond Products

Brand Partner Products
Travel diaper changing pad with fusible fleece.

We have a new designer joining our Education Team! We hope you’ll help give a warm welcome to Karen Willard! We think you’re going to love her style and creative projects! Be sure to leave her a comment today for her first project and follow her on Instagram !

Here’s a little more about Karen before you jump into today’s project!
My name is Karen Willard and I reside in Central Virginia. I have an amazing husband and a wild toddler, as well as three adult stepsons. I have been creative for as long as I can remember, but I have always had a passion for business. I have a Bachelor’s Degree in Business Administration and an MBA from Gardner-Webb University. After graduation, I spent a bit of time in the corporate world and also worked as an adjunct professor at a local community college.
Despite all of the time I spent in school, I still explored my creative side heavily, and continue to do so to this very day. I have been sewing for around 23 years and I’m also a fine artist and illustrator and I love working with acrylics, colored pencils, and watercolors. My success as an artist and designer began with my 8-year career as a custom shoe designer, painting shoes for thousands of clients worldwide. For the last 2 years, I have made sewing my main focus. I am now am a full-time seamstress, creating outrageous handbags and accessories for clients worldwide. I love bright colors, interesting textures, and unique shapes. I am thrilled to be part of the Therm O Web Design Team and look forward to creating with you!
Travel Diaper Changing Pad
1 Yard of Main Fabric 1 Yard Lining Fabric 1 package of HeatnBond Iron-On Vinyl 1 package of HeatnBond High Loft Sew-In Fleece OR 1.5 yards of HeatnBond Fusible Fleece 2 Yards of HeatnBond Soft Woven Fusible Interfacing 1 Set of KamSnaps & Snap Setter This can also be closed with hook & loop tape 1 Pilot Frixion Pen (optional) Rotary Cutter Sharp Shears
Seam Allowance throughout the patter is 1/4” and topstitching and basting are done at ⅛”
When I considered what items would be useful and last the entirety of my child’s infancy, no one could have told me that my expensive changing table would be one of the things I used less and less as time passed and as he became more mobile. I often found myself changing him wherever I was in the house, and with 3 floors, running upstairs isn’t always optimal. I’ve drafted a solution to that problem and only wish I had thought of it 2.5 years ago. This changing pad is a perfect gift for parents-to-be and can even be used on the go and is very stroller friendly. The vinyl layer can easily be wiped clean and the pad itself, once complete is hand-wash only.
This pattern is simple and uses only rectangles, so in theory, you can easily alter the length or width to suit your needs.
Changing Pad Pattern Pieces
CHANGING PAD 17” W x 24.5” L
Cut the following:
- 1 Main Fabric
- 1 Backing (or Lining) Fabric
- 2 HeatnBond Soft Woven Fusible Interfacing
- 1 Sew In or Fusible Fleece
- 1 HeatnBond Iron-On Vinyl
SIDE FLAP 1 17”W x 8.5”L
- 1 Main Fabric
- 1 Lining Fabric
- 1 Fusible Fleece
SIDE FLAP 2 10” W x 8.5” L (For this tutorial, I have used 2 of my main fabric for these pieces) Cut the following:
- 1 HeatnBond Fusible Fleece
POCKET FOR SIDE FLAP 1: 17” W x 10” L
- 1 Main or Lining Fabric
- 1 HeatnBond Soft Woven Fusible Interfacing
Start by fusing your woven fusible interfacing to all corresponding pieces. This can be done using your iron, or a heat press.
Next, clip 3/8” around all of your fleece pieces. This helps to reduce the bulk in layers when sewing! Now, center and fuse your fleece to all pieces, and if you used sew-in fleece for your main changing pad piece, pin it at the corners and maybe once each at the ⅓ and ⅔ points of the length.
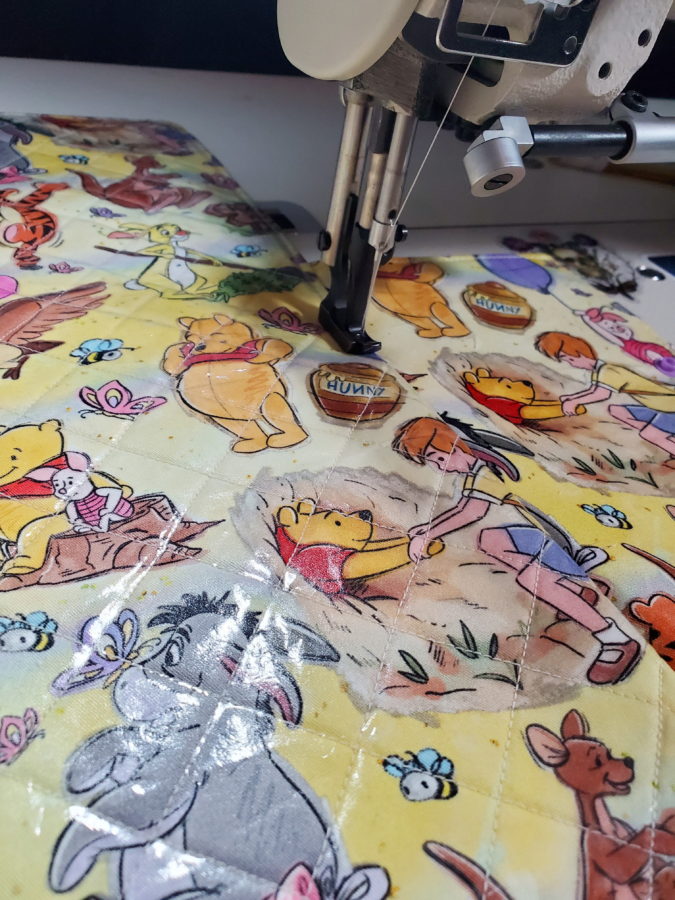
This next step is totally optional, but I like it because it gives a really nice finished look.
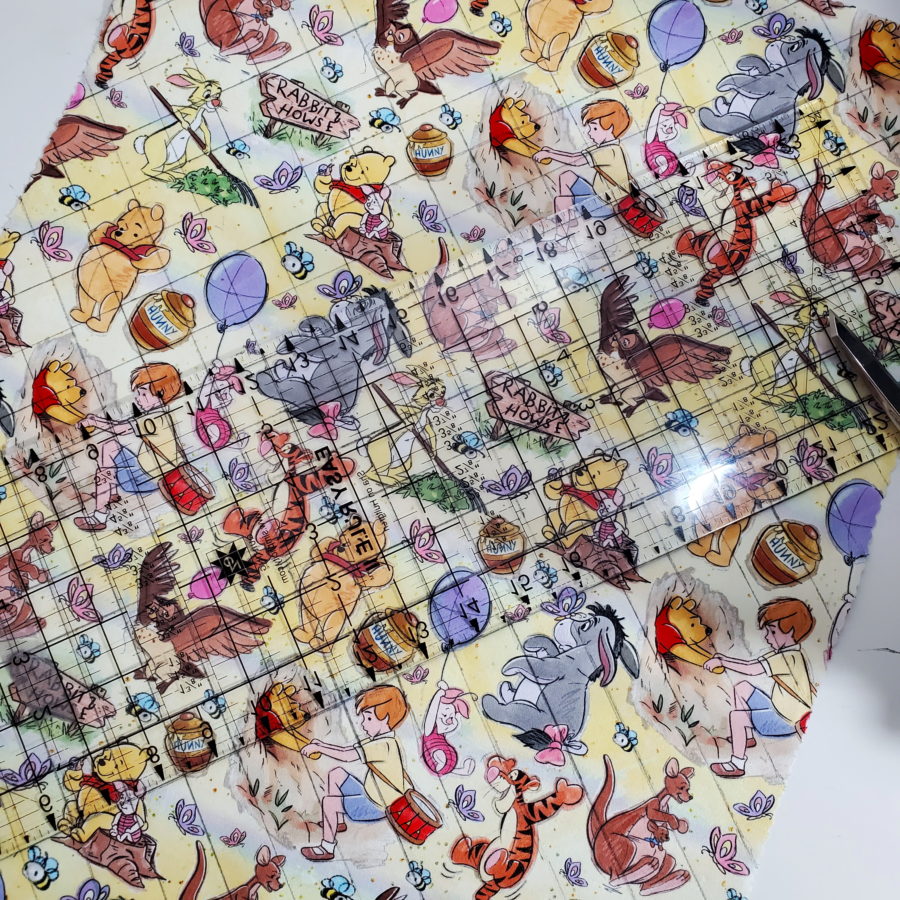
You can do freestyle quilting or a simple diamond pattern. If you are working with a larger scale floral print, you can get really creative and follow the outline of the flowers and leaves. I opted for a diamond pattern. Starting at one of the top corners of the main changing pad piece, take your Friction pen, and start drawing diagonal lines as pictured below. I made my lines an inch apart. Repeat the process from the opposite corner. These lines will disappear when we run a warm iron over the fabric after the quilting process.
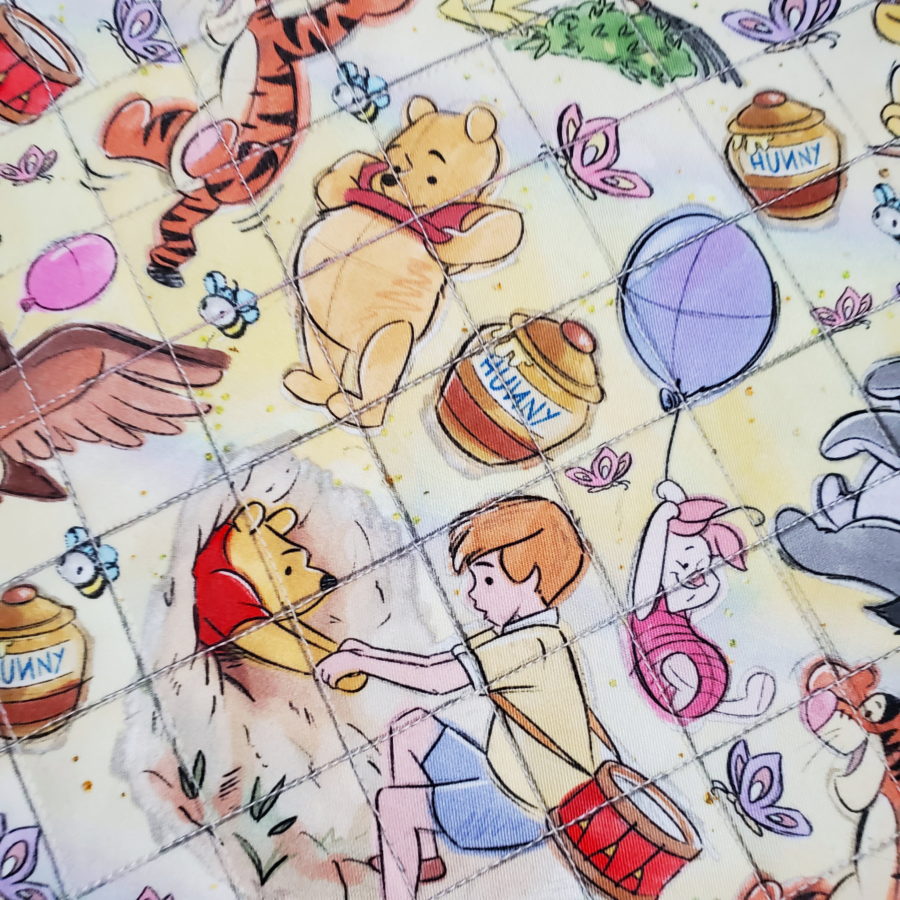
Head on over to your machine and sew along with each one of those lines, being sure to remove your pins as you go.
Press the Iron-On Vinyl
Next, get your iron ready for applying the vinyl. We apply vinyl after quilting to maintain the waterproof layer. Even the tiniest of pinholes can allow moisture in. Run your warm iron over your quilted main piece, removing the marks you previously drew. Next, apply your vinyl to that piece according to the directions on the package. Once you’ve done that, set the piece to the side to allow it to cool.
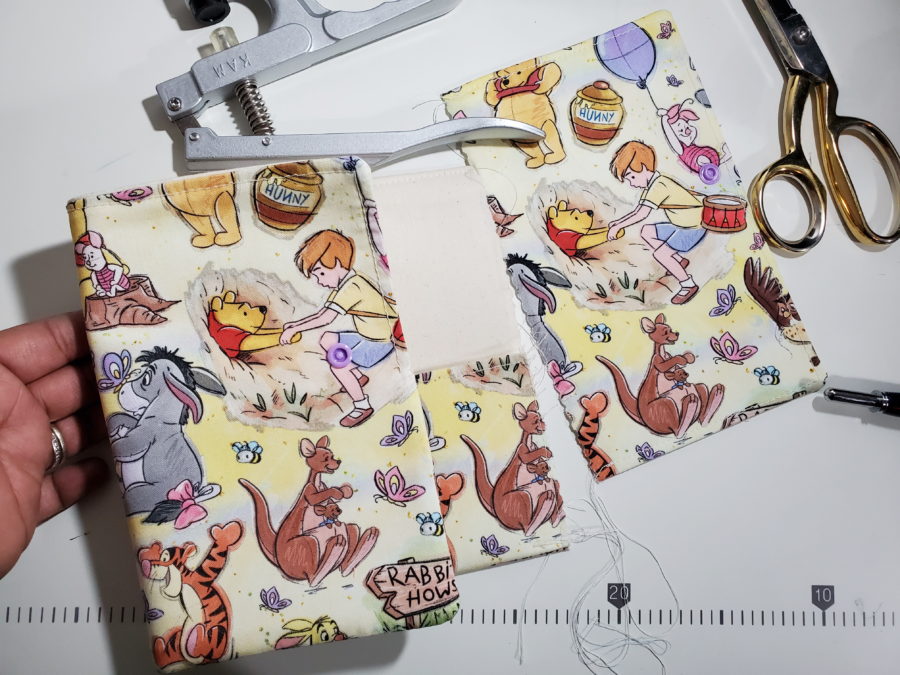
Diaper Pad Side Flap 1
Take your pocket piece for the side flap, and fold it in half so that it measures 17” wide by 5” high. Give it a good press at the crease, and then topstitch at ⅛”.

Pin your pocket piece so side flap 1 and match the bottom and side edges. Baste in place at the three unfinished edges of the pocket.
At this point, I like to divide the pocket in half so there is a spot for a few diapers and a spot for a travel-sized pack of wipes. If you chose to do this, you can simply fold the piece in half to get the center point, and then sew along the crease made on the pocket.
Take your other Pocket flap 1 piece and place it on top of the prepped sideslip piece with the pocket, RST.
Sew along the top, left side, and bottom edges, turn right side out, and press well.
Topstitch around the top and down to the pocket but do not topstitch the pocket. Baste the opening closed.
Measure 5 up from the bottom and 15.5″ to the right of the unfinished edge of this piece and place a mark for your snap. Using an awl, make a hole and apply a female snap to the flap. The smooth button side is what should be facing you when your side flap 1 piece is right-side up. Set aside.
Diaper Pad Side Flap 2
Place your lining piece for this flap on top of the fleece-fused piece, right sides together.
Sew along the top left and right sides. Turn right side out and press well. Measure 5″ up from the bottom and 1.5″ to the left of the unfinished edge of this piece and place a mark for your snap. Using an awl, make a hole and apply a male snap to the flap. The snap connecting side should be what is facing when you look at this piece right side up.
Mark the center points at the bottom of both flaps. Also, find and mark the center point of the main changing pad piece. Match the center points with Side flap 1 on the left, right side down, and side flap 2 on the right, right side down.
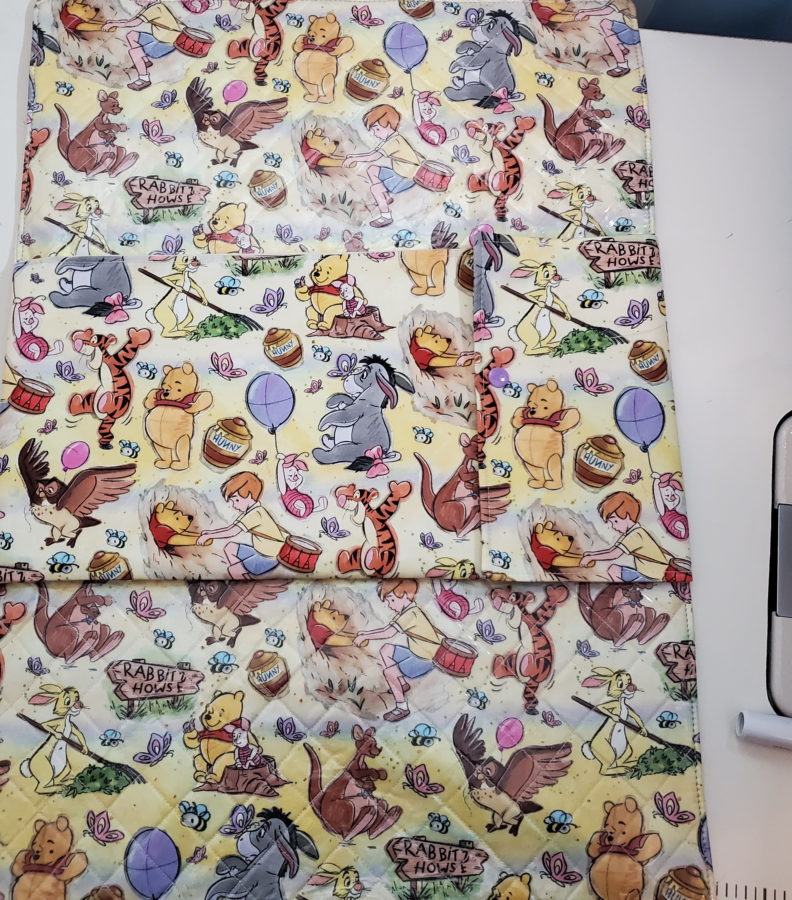
Place your lining or back piece of the main changing pad piece on top wrong side up, and sew around the entire piece leaving an 8” opening at the bottom, or whatever size you are comfortable turning through I use a larger opening to minimize a lot of bunching of the vinyl in the turning process. Once you have turned the piece, smooth it out and if you want, take the protective paper you used previously to attach the vinyl and place it on top of the main piece and give it a quick swipe over the entire changing pad area to smooth out any wrinkles.
Topstitch the Diaper Pad
Topstitch around the entirety of the main changing pad piece closing your turning hole, and moving the flaps as necessary.
Fold the changing pad in thirds, snap closed and you’re done!
1 Comment on Travel Diaper Changing Pad with Fusible Fleece
Lauren Chrisman
Love this!!!
www.thermowebonline.com
- Home Improvement
- Food/Recipe
Sew Baby Changing Pad Travel Diaper Clutch Bag Picture Instructions [Video]
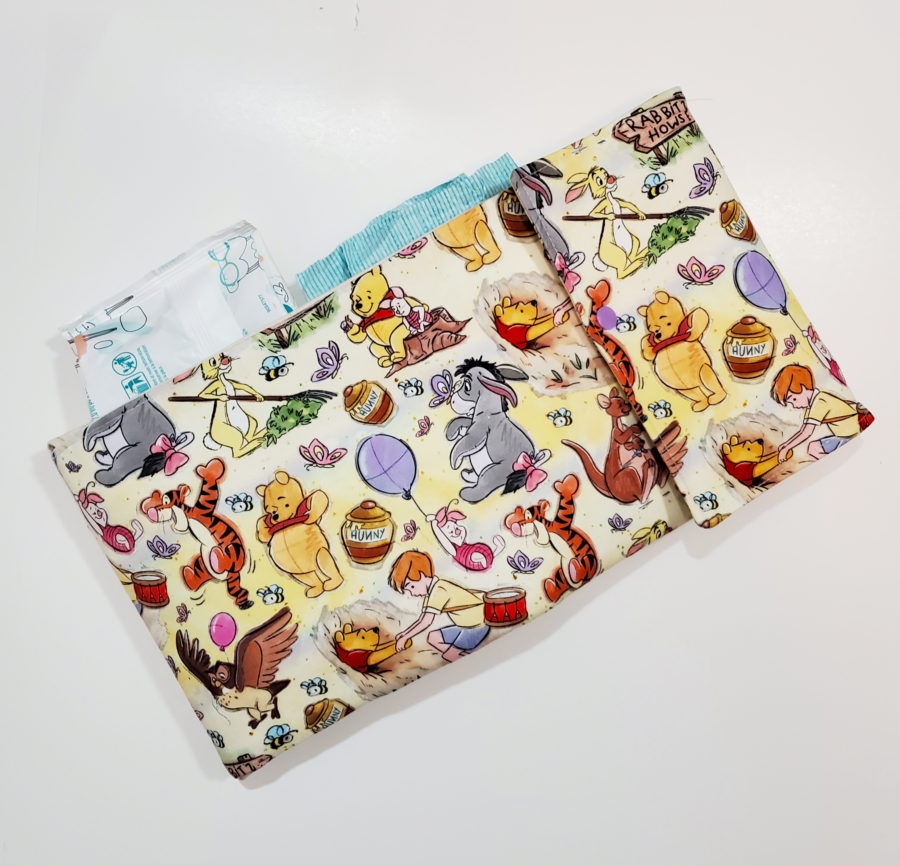
Become a new parent can be exciting, while dealing with tall the baby chores can be super challenging. If you’re tired of digging into your bag high and low to find diapers and wipes in those emergency times, you’ll get happy with the convenience of these All-in-One Changing Mat (or Pad). It can open to serve as a changing pad instantly, holds babies essentials for a quick diaper change when you’re out and about, with two hanging pockets for diapers and wipes. Its elastic closure that can be fastened so you can fold it up into a tidy clutch in no time.
This little handy travel sewing pattern is easy to make for sewers to craft very own for little ones and they are super easy to carry and easy to clean too! It The pocket holds a couple of diapers and a small box of wipes so everything is together so it could be easily carried when you have your hands full, perfect gift to give a new mom and parent-to-be.
Image and Instructions: Made By Marzipan
Video: Made By Marzipan on Youtube
Image and Instructions: Sew 4 Home
Image and Instructions: Glue Sticks Blog
Image and Instructions: Sew Kate Sew
RELATED ARTICLES MORE FROM AUTHOR
Amigurumi easter rooster crochet free patterns, amigurumi star war yoda free crochet patterns, amigurumi monkey softies crochet free patterns, 20 amigurumi angel doll crochet patterns, earbud pouch free crochet patterns, amigurumi lion crochet patterns.
- Terms of Service
- Privacy Policy
- DMCA Disclaimer
30 Crochet Turtle Amigurumi Toy Softies Free Patterns
20 high knee crochet slipper boots patterns to keep your feet....
Baby changing pad: DIY Waterproof quilted diaper changing mat tutorial
By Author Joy Kelley - Under Categories Nursery & Baby , Sewing , Tutorials

Learn how to make a waterproof baby changing mat that you can roll and toss in your diaper bag with this step by step tutorial. Right before baby Peanut was born, I made a few projects with the help of my Mom, it was so much fun to sew with her, especially when we're working on projects for her first grand-baby.

Now I've been using this diaper changing mat for ( 6 months ) 10 months and still LOVE it. It saved us so many times in the car when Conner was little and we had accidents very often.
I actually took the photos for this post when Conner was 6 months old, now he's 10 months, so it's very cute to see how much bigger he looks now.
Back then he was just learning how to crawl, now he's learning how to walk and GOSH! I thought it was trouble back them =]
Now changing his diaper is a lot more challenging because he doesn't stay still and he hates when I lay him down (yup, he hates to go to bed too) so I don't use the mat as often as I used to, because sometimes I change his diaper when he's standing (pretty funny to see!)
But I love how long this mat has lasted with all the use we gave it, definitely keeping it for the second (in a couple more years)

I made this mat so that I could roll it, secure it and store it in my diaper bag, I made this along with a nursing cover and a cover for the car-seat with the same fabric, and my diaper bag is a different pattern but the same brown and turquoise colors, so everything goes well together =]
Below you can see how the cover un-rolls, it's very easy but sometimes I used to trow it on the diaper bag just folding it 2 times whenever I was in a hurry and then roll it and make it pretty while restocking the diaper bag.

So now I'm going to share how I made it so that you can make your own (or send this tutorial to your very skilled friend/Mom/MIL before your baby shower ;) )
- 21″ by 24″ cut of Babyville PUL Fabric (Or any waterproof soft fabric)
- 23″ by 26″ cut of batting (I just cut a piece bigger than both my waterproof fabric and cover fabric, because while quilting, they kind of more a little)
- 23″ by 26″ cut of accent fabric (I used a left over turquoise and brown, from several baby project's fabric I got on sale at Joann)
- A 3″long piece of Velcro
- At least 20″ long of fabric for binding, I used a brown leftover flannel
INSTRUCTIONS
To start you will need to make a “sandwich” with your waterproof fabric, the batting and the cover fabric, just make sure you have them in the order showed below =] After that you need to either straight pins or use safety pins to bast them together so that you can quilt them, I like to secure the edges first and the walk my way to the inside.
After you have them together its time to sew =] I liked the look of the curvy lines, because they allow mistakes and still look cute, if you want to learn how to properly quilt curves you should check my friend Holly's wavy quilt tutorial , it's very simple and easy to follow =]
Once you have the cover quilted is time to bind the edges, for this I am not actually going to post a tutorial because I think Abby from Sew Much I do did a great job explaining exactly what I do to bind blankets and in this case, the changing mat. I used stripes of 5 1/2″ for my binding because I wanted an edge of approx. 2″ wide, but you can make it as wide of thin as you like =]
Now comes the last portion, adding the velcro closure. To do this I first made a double sided piece of (8″x15″ that you will fold in half) 4″ wide by 15″ long, sew leaving one opening to fold inside out, close side and topstitch, finally add the velcro and attach to the cover like the illustration shows. You are all done!
And of course I HAD to add some more pictures of my little model! I can't believe how little he loos in this pictures! You are really going to laugh when you see the next tutorial (carseat cover with front opening) because those pictures are from when he was 3 days old!

More baby projects for you
- Baby hat with teddy bear ears
- DIY Shoes for baby – Tutorials
- Baby bedding tutorials
- Baby changing pad tutorial
- Free banner “Sleeping baby”
- DIY wall name sign
I hope you all have a wonderful day!!
Esther Heavnzbrat
Monday 25th of January 2016
Hi Joy! I have the same PUL set (with the dinosaurs/monster). Since you made the PUL side right side up it is no longer a wipe down fabric right? So you just clean it by machine washing? How has that been working for you? I'm debating between using my cute PUL fabric or laminating (which would make it wipe down and not machine washing).
Saturday 23rd of January 2016
Thanks for sharing this. I made this today but 24x30 - more space. Used the PUL and followed some of their hints - use polyester thread vs cotton and put in hot dryer for 20 minutes after finishing to take care of any holes made in construction. I did not put my strap in center but played with it to see where best for my size - closer to end. From the PUL site either side can be used as right side - but since I'm picky with my binding I put the fabric side as right side so could iron it.
Karen Kelleher
Friday 16th of January 2015
Thursday 11th of September 2014
Does quilting through the PUL make it less waterproof?
Saturday 17th of May 2014
I just made this. I used a plasticized cotton instead of PUL (not available locally) and I made a thicker mat by using two layers of cotton batting plus another layer of synthetic fabric (don't know the name). It's really soft, but more difficult to work with because it's bulky, but considering that this is my first quilting experiment ever, I'm quite pleased with the result. Thank you for the tutorial.
How to Make a Changing Pad and Pocket
This handy little mat will follow you and your tot where the diaper bag cannot or will not go. Unfold it on the floor, a bed, a sofa or a hard public changing table to keep your little one comfortable and everything clean. The wallet snugly stores a couple of diapers and a small box of wipes.

- One 11″ x 23″ rectangle of chenille or other soft fabric for the mat
- One 11″ x 23″ rectangle of quilting-weight fabric for the outside
- One 11″ x 2″ rectangle of thin batting
- One 11″ x 9″ rectangle of quilting-weight fabric for the pocket
- One package of double-fold bias
- One large button
- Marking pen
- One small ponytail elastic
I do not recommend starting this project without a walking foot on hand, such as BERNINA Walking Foot #50 . It will make quick work of stitching all the layers without any shifting.

1. Prepare the Rectangles for Quilting
Layer the three large rectangles exactly on top of each other as follows:
- The chenille rectangle face down on the bottom
- The batting in the middle
- The large quilting-weight fabric rectangle face up on the very top
Place pins all around the perimeter of your fabric sandwich.

2. Quilt the Layers
Using a walking foot, follow the lines of your fabric (if it has any) or draw some with a marking pen to guide you. Quilt up and down with a slightly lengthened stitch (3 mm), rotating the direction in which you feed the fabric into the machine. This minimizes stretching and shifting of the layers. I quilted this wallet every 1-1/2″.

3. Sew around all four sides, staying as close as possible to the edge. Aim for a seam allowance slightly less than 1/4″ from the edge.

4. Round the Corners
Use your marking pen to round the two corners of one end of the wallet. Cut away the corners on the draw lines. Clean up the edges of the four sides of the wallet with a rotary cutter and mat or scissors. Do not cut into the perimeter seam.

5. Sew on the Pocket
Fold and press the small rectangle in half, wrong sides together, to create a 4-1/2″ x 11″ rectangle. Place it on the square end of the wallet mat, against the chenille, matching the raw edges.

Pin in place and sew around the edges leaving the fold open. If you find that the pocket is now a bit larger than the mat, it’s nothing to worry about. Just trim the excess fabric with your rotary cutter or scissors.
6. Attach the Ponytail Elastic
Place the ponytail elastic on the outside of the wallet mat, in the middle of the rounded end. Sew back and forth over the elastic a few times to secure it in place.

7. Bind the Wallet
Bind the edges of the wallet with double-fold bias following the instructions included in the package.

8. Sew on the Button
Place a diaper and some wipes in the pocket, fold the wallet in thirds and mark the placement of the button.
9. Sew on the button and you are ready to go out and play with your tot in tow!

Used Products

What you might also like

DIY Reversible Baby Changing Pad

How to Make a Padded Phone Pouch
How to Make a Pacifier Pocket

How to Make Pocket Hand Warmers

How to Add Pockets to a Skirt

How to Make a Crumb Catcher and Bag

How to Add Pockets to a Dress or Skirt

How to Add a Hemstitched Pocket to a T-Shirt

How to Make a Danish Wreath and Banner

How to Make a Wrap Burp Cloth with Heat Retention Bottle Pocket

How to Make a Spirals and Flowers Pillow

How to Make an Arrows and Hexies Bed Runner

How to Make Football and Heart Eye Spy Bags

How to Make a Haute Top
How to Make a Doll Quilt – with Kari, Kendall, and Anna

How To Sew A Simple Heart-Shaped Treat Pocket

How to Make Cat Wand Toys

How to Make a Pen and Pencil Case from Pieces of Ribbon

Baby Shower Gifts to Sew

How to Make a Chic Wrap
2 comments on “how to make a changing pad and pocket”.
Very useful !
The pattern say 11 x 2 inch piece of batting? Is this correct? I’m thinking it should be 11 x 23? Thanks!
Leave a Reply Cancel reply
You must be logged in to post a comment.

Recent Blog Posts
- Quilt Safari, Part Eleven: Sewing the Diamond Border + Giveaway
- Stitching Success: The Journey to Q Series
- How I Quilt It! with Amanda Murphy, Episode One
- Quilt Safari, Part Ten: Sewing the Quilt Blocks Together
- Easy Hack for Inserting Boning
Subscribe to our newsletter!
- February 2024
- January 2024
- December 2023
Image Unavailable

- To view this video download Flash Player
Moscow State University - Large Gaming Mouse Pad - Tabletop Mat - 23.6"x13.8"(60cmx35cm)

Looking for specific info?
Product information, technical details, additional information, warranty & support, customer reviews.
Customer Reviews, including Product Star Ratings help customers to learn more about the product and decide whether it is the right product for them.
To calculate the overall star rating and percentage breakdown by star, we don’t use a simple average. Instead, our system considers things like how recent a review is and if the reviewer bought the item on Amazon. It also analyzed reviews to verify trustworthiness.
No customer reviews
- Amazon Newsletter
- About Amazon
- Accessibility
- Sustainability
- Press Center
- Investor Relations
- Amazon Devices
- Amazon Science
- Sell on Amazon
- Sell apps on Amazon
- Supply to Amazon
- Protect & Build Your Brand
- Become an Affiliate
- Become a Delivery Driver
- Start a Package Delivery Business
- Advertise Your Products
- Self-Publish with Us
- Become an Amazon Hub Partner
- › See More Ways to Make Money
- Amazon Visa
- Amazon Store Card
- Amazon Secured Card
- Amazon Business Card
- Shop with Points
- Credit Card Marketplace
- Reload Your Balance
- Amazon Currency Converter
- Your Account
- Your Orders
- Shipping Rates & Policies
- Amazon Prime
- Returns & Replacements
- Manage Your Content and Devices
- Recalls and Product Safety Alerts
- Conditions of Use
- Privacy Notice
- Consumer Health Data Privacy Disclosure
- Your Ads Privacy Choices
- Contact us
- Competencies
km travel chesterfield 2024 brochure prices
This is our KM Travel Tour Operators page, we have listed the full address of KM Travel as well as phone numbers and websites. KM Travel is in Chesterfield, KM Travel may offer holiday tours, sightseeing tours, and general city tours in Chesterfield.
If you have used KM Travel before be sure to leave your own comment or rating on the city tour or holiday tour that you went on so other poeple wishing to use this company can read fair and honest reviews before the book there holiday with KM Travel. Please remember that KM Travel may offer much more that just UK holiday tours, UK Coach Tours and city tours so remember to contact the travel agents company using the details below to find out more information.
Latest KM Travel Reviews

- Transportation (Chesterfield)
- KM Travel Chesterfield
Chesterfield, United Kingdom
Related places.
- Get directions
- Photos page
QR code, vCard

Activate map
Business hours
Reviews of km travel chesterfield.
- Things to Do
- Restaurants
- Holiday Rentals
- Travel Stories
- Add a Place
- Travel Forum
- Travellers' Choice
- Help Centre
Lovely holiday - KM British & European Coach Holiday
- Europe
- United Kingdom (UK)
- England
- Yorkshire
- South Yorkshire
- Barnsley
- Barnsley - Things to Do
- KM British & European Coach Holiday
Brilliant holiday to Torquay, tinsel & turkey 20 th November to Belgrave Sands hotel. The hotel was... read more
Thanks to all at KM TRAVEL especially our driver courier Matt who made the trip more enjoyable and... read more
Trains Moscow to Elektrostal: Times, Prices and Tickets
- Train Times
- Seasonality
- Accommodations
Moscow to Elektrostal by train
The journey from Moscow to Elektrostal by train is 32.44 mi and takes 2 hr 7 min. There are 71 connections per day, with the first departure at 12:15 AM and the last at 11:46 PM. It is possible to travel from Moscow to Elektrostal by train for as little as or as much as . The best price for this journey is .
Get from Moscow to Elektrostal with Virail
Virail's search tool will provide you with the options you need when you want to go from Moscow to Elektrostal. All you need to do is enter the dates of your planned journey, and let us take care of everything else. Our engine does the hard work, searching through thousands of routes offered by our trusted travel partners to show you options for traveling by train, bus, plane, or carpool. You can filter the results to suit your needs. There are a number of filtering options, including price, one-way or round trip, departure or arrival time, duration of journey, or number of connections. Soon you'll find the best choice for your journey. When you're ready, Virail will transfer you to the provider's website to complete the booking. No matter where you're going, get there with Virail.
How can I find the cheapest train tickets to get from Moscow to Elektrostal?
Prices will vary when you travel from Moscow to Elektrostal. On average, though, you'll pay about for a train ticket. You can find train tickets for prices as low as , but it may require some flexibility with your travel plans. If you're looking for a low price, you may need to prepare to spend more time in transit. You can also often find cheaper train tickets at particular times of day, or on certain days of the week. Of course, ticket prices often change during the year, too; expect to pay more in peak season. For the lowest prices, it's usually best to make your reservation in advance. Be careful, though, as many providers do not offer refunds or exchanges on their cheapest train tickets. Unfortunately, no price was found for your trip from Moscow to Elektrostal. Selecting a new departure or arrival city, without dramatically changing your itinerary could help you find price results. Prices will vary when you travel from Moscow to Elektrostal. On average, though, you'll pay about for a train ticket. If you're looking for a low price, you may need to prepare to spend more time in transit. You can also often find cheaper train tickets at particular times of day, or on certain days of the week. Of course, ticket prices often change during the year, too; expect to pay more in peak season. For the lowest prices, it's usually best to make your reservation in advance. Be careful, though, as many providers do not offer refunds or exchanges on their cheapest train tickets.
How long does it take to get from Moscow to Elektrostal by train?
The journey between Moscow and Elektrostal by train is approximately 32.44 mi. It will take you more or less 2 hr 7 min to complete this journey. This average figure does not take into account any delays that might arise on your route in exceptional circumstances. If you are planning to make a connection or operating on a tight schedule, give yourself plenty of time. The distance between Moscow and Elektrostal is around 32.44 mi. Depending on the exact route and provider you travel with, your journey time can vary. On average, this journey will take approximately 2 hr 7 min. However, the fastest routes between Moscow and Elektrostal take 1 hr 3 min. If a fast journey is a priority for you when traveling, look out for express services that may get you there faster. Some flexibility may be necessary when booking. Often, these services only leave at particular times of day - or even on certain days of the week. You may also find a faster journey by taking an indirect route and connecting in another station along the way.
How many journeys from Moscow to Elektrostal are there every day?
On average, there are 71 daily departures from Moscow to Elektrostal. However, there may be more or less on different days. Providers' timetables can change on certain days of the week or public holidays, and many also vary at particular times of year. Some providers change their schedules during the summer season, for example. At very busy times, there may be up to departures each day. The providers that travel along this route include , and each operates according to their own specific schedules. As a traveler, you may prefer a direct journey, or you may not mind making changes and connections. If you have heavy suitcases, a direct journey could be best; otherwise, you might be able to save money and enjoy more flexibility by making a change along the way. Every day, there are an average of 18 departures from Moscow which travel directly to Elektrostal. There are 53 journeys with one change or more. Unfortunately, no connection was found for your trip from Moscow to Elektrostal. Selecting a new departure or arrival city, without dramatically changing your itinerary could help you find connections.
Book in advance and save
If you're looking for the best deal for your trip from Moscow to Elektrostal, booking train tickets in advance is a great way to save money, but keep in mind that advance tickets are usually not available until 3 months before your travel date.
Stay flexible with your travel time and explore off-peak journeys
Planning your trips around off-peak travel times not only means that you'll be able to avoid the crowds, but can also end up saving you money. Being flexible with your schedule and considering alternative routes or times will significantly impact the amount of money you spend on getting from Moscow to Elektrostal.
Always check special offers
Checking on the latest deals can help save a lot of money, making it worth taking the time to browse and compare prices. So make sure you get the best deal on your ticket and take advantage of special fares for children, youth and seniors as well as discounts for groups.
Unlock the potential of slower trains or connecting trains
If you're planning a trip with some flexible time, why not opt for the scenic route? Taking slower trains or connecting trains that make more stops may save you money on your ticket – definitely worth considering if it fits in your schedule.
Best time to book cheap train tickets from Moscow to Elektrostal
The cheapest Moscow - Elektrostal train tickets can be found for as low as $35.01 if you’re lucky, or $54.00 on average. The most expensive ticket can cost as much as $77.49.
Find the best day to travel to Elektrostal by train
When travelling to Elektrostal by train, if you want to avoid crowds you can check how frequently our customers are travelling in the next 30-days using the graph below. On average, the peak hours to travel are between 6:30am and 9am in the morning, or between 4pm and 7pm in the evening. Please keep this in mind when travelling to your point of departure as you may need some extra time to arrive, particularly in big cities!
Moscow to Elektrostal CO2 Emissions by Train

Anything we can improve?
Frequently Asked Questions
Go local from moscow, trending routes, weekend getaways from moscow, international routes from moscow and nearby areas, other destinations from moscow, other popular routes.
Na Ulitse Yalagina 13B Apartments

Trending Questions
Property policies, frequently asked questions, how much does it cost to stay at na ulitse yalagina 13b apartments, what are the check-in and check-out times at na ulitse yalagina 13b apartments, does na ulitse yalagina 13b apartments provide airport transfer services, what amenities and services does na ulitse yalagina 13b apartments have, does na ulitse yalagina 13b apartments have a swimming pool, does na ulitse yalagina 13b apartments have fitness amenities, does na ulitse yalagina 13b apartments provide wi-fi, does na ulitse yalagina 13b apartments have non-smoking rooms, does na ulitse yalagina 13b apartments have a restaurant, is parking available at na ulitse yalagina 13b apartments, popular hotels, popular attractions, explore more.
Expedia Rewards is now One Key™
Elektrostal, visit elektrostal, check elektrostal hotel availability, popular places to visit.
- Electrostal History and Art Museum
You can spend time exploring the galleries in Electrostal History and Art Museum in Elektrostal. Take in the museums while you're in the area.
- Cities near Elektrostal

- Places of interest
- Yuri Gagarin Cosmonaut Training Center
- Peter the Great Military Academy
- Central Museum of the Air Forces at Monino
- History of Russian Scarfs and Shawls Museum
- Balashikha Arena
- Balashikha Museum of History and Local Lore
- Bykovo Manor
- Pekhorka Park
- Ramenskii History and Art Museum
- Malenky Puppet Theater
- Drama Theatre BOOM
- Likino Dulevo Museum of Local Lore
- Noginsk Museum and Exhibition Center
- Pavlovsky Posad Museum of Art and History
- Saturn Stadium
- Fairy Tale Children's Model Puppet Theater
- Fifth House Gallery
- Church of Vladimir
- Malakhovka Museum of History and Culture
- Orekhovo Zuevsky City Exhibition Hall
Destinations in May
Destinations in 2024.
Please note prices are based on two persons sharing a twin/double room. Single room supplements may apply, please call check single availability/price.
Comments are closed.
- Destinations
- Hotel Information
- Private hire
- Special offers / Late availability
- Travel Insurance
- Employment Opportunities

NEW CHRISTMAS TOUR 2024 - Bournemouth - Norfolk Royale Hotel - BROCHURE ADDITION . 2024 EUROPEAN HOLIDAYS - Early release - ITALY - Lake Garda / Alassio Click here to download our 2024 Brochure All Our Holidays Include In The Price: Free Door to Door Taxi ( Subject to Area ) ~ Luxury Coach Travel ~ Reserved Coach Seats . Personally Selected ...
www.kmchesterfield.co.uk
KM Travel of Barnsley, South Yorkshire. Request a brochure by: Calling: 01226 245564 email: [email protected] . download: click here to download the 2024 Tour Brochure.
KM Travel is in Chesterfield, KM Travel may offer holiday tours, sightseeing tours, and general city tours in Chesterfield. If you have used KM Travel before be sure to leave your own comment or rating on the city tour or holiday tour that you went on so other poeple wishing to use this company can read fair and honest reviews before the book ...
What people are saying. " HOLIDAY TO BLACKPOOL ". Oct 2023. Thanks to all at KM TRAVEL especially our driver courier Matt who made the trip more enjoyable and a credit to the co... " Lovely place enjoyed it clean need a bit of investment there ". Aug 2022. Stayed at ilfracombe Devon 14 to 20 Aug the coach was lovely our driver Tony was ...
Reviews, contact details and business hours of KM Travel Chesterfield at 27 Stephenson Place, Chesterfield, Derbyshire. Check out nearby places on a map. Write a review. Log in. ... 21:03 Tuesday, 23 April 2024: Business hours. Monday: 9:00 am - 4:30 pm: Tuesday: 9:00 am - 4:30 pm: Wednesday: 9:00 am - 4:30 pm: Thursday: 9:00 am - 4:30 ...
KM Travel of Barnsley, South Yorkshire. Tel: (01226) 245564 [email protected] . Home. Booking Guide Request Brochure Customer Information Contact Us. ... Our 2024 British Coach Holiday Brochure is now available to download and available shortly from our Market Street office in paper form.
5. £339. Nil. Please note prices are based on two persons sharing a twin/double room. Single room supplements may apply, please call check single availability/price. Price Includes: * Luxury Coach Travel * Local Departure Points. * En-suite bedrooms * Excursions. * Half Board Accommodation.
Page List. (Click on the page required to be linked with that page in the brochure) Page 1 - Front cover. Page 2 - Introduction. Page 3 - Contact information. Customer information. Page 4 - How to make a booking. Holiday index January to June. Page 5 - Holiday index June to December.
Our 2024 UK Brochure is OUT NOW! Order yours today. 01246 474747 Opening Times Brochures . Menu (current) Home Holidays Day Trips ... A-Line Travel 15 Soresby Street Chesterfield S40 1JW 01246 474747 [email protected] . A-Line Travel, Company number 13060548
Lovely holiday. Review of KM British & European Coach Holiday. Reviewed 9 December 2023. Just back from a T&T break at Exmouth. The hotel and food were brilliant, and the driver James was the best. However we had a bad start after waiting nearly one and a half hours in cold and rain at Ilkeston for the coach. I know there was traffic problems ...
Geeveetravelchesterfield, Chesterfield. 1,657 likes · 24 talking about this · 29 were here. DOOR TO DOOR COACH HOLIDAYS DAY TRIPS AND PRIVATE HIRE
Thankyou received our brochure in the post , I see you have new for 2024 Kynren weekend , we went last year and its the most amazing show I've seen well worth going recommended to everybody. 22w. Robert Lindley. Can I have a brochure please 9 monsal crescent Barnsley S71 3PY. 15w.
KM Travel of Barnsley, South Yorkshire. Tel: (01226) 245564 [email protected] . Home. Booking Guide Request Brochure Customer Information Contact Us. Skip to content. Request a brochure by: Calling: 01226 245564 . email: [email protected] download: ... Please note prices are based on two persons sharing a twin/double room ...
Central Air Force Museum The Central Air Force Museum, housed at Monino Airfield, 40 km east of Moscow, Russia, is one of the world's largest aviation museums, and the largest for Russian aircraft. 173 aircraft and 127 aircraft engines are on display, and the museum also features collections of weapons, instruments, uniforms (including captured U2 pilot Gary Powers' uniform), other Cold War ...
The journey from Moscow to Elektrostal by train is 32.44 mi and takes 2 hr 7 min. There are 71 connections per day, with the first departure at 12:15 AM and the last at 11:46 PM. It is possible to travel from Moscow to Elektrostal by train for as little as or as much as . The best price for this journey is . Journey Duration.
KM Travel of Barnsley, South Yorkshire. Tel: (01226) 245564 [email protected] . ... we guarantee excellent customer service and affordable prices. ... Winter/Spring 2024. Blackpool 2024 Potters Resorts 2024. Our booking office is located at: 52, ...
2022 Brochure . Page List ... All Our Holidays Include In The Price: Free Door to Door Taxi ( Subject to Area ) ~ Luxury Coach Travel ~ Reserved Coach Seats . Personally Selected Hotels ~ En-suite Bedrooms ~ Free Varied Excursions . Telephone: 01246 -556617 ...
Prices at Na Ulitse Yalagina 13B Apartments are subject to change according to dates, hotel policy, and other factors. To view prices, please search for the dates you wish to stay at the hotel. What are the check-in and check-out times at Na Ulitse Yalagina 13B Apartments? The check-in time is after 14:00 and the check-out time is before 12:00.
Cities near Elektrostal. Places of interest. Pavlovskiy Posad Noginsk. Travel guide resource for your visit to Elektrostal. Discover the best of Elektrostal so you can plan your trip right.
IMAGES
COMMENTS
Press the outside of the mat, the side without the vinyl. Be careful not to touch the vinyl with your iron. Fold in the bottom raw edge a 1/2" and pin. Topstitch with a 1/8" seam, and continue to add a decorative topstitch all the way around your mat. Consider using a contrasting thread for a pop of color.
Sew a Travel Changing Pad. A quick note before we get started! This tutorial serves as a foundation and is easy to customize. Feel free to play and experiment with the size, adding batting, adding a button loop instead of a satchel tie, etc. There are so many ways that you truly make this DIY baby project your own! Materials to Sew a Travel ...
Fold up the left side, then the right. Fold up the bottom until it meets the center and then the top down to the center. Then fold in half one more time. How To Secure Changing Mat. You can add whatever fastener you would like to your changing pad: snaps, Velcro, a button…I just used some black elastic.
Step 3. Sew On The Binding. Sew the binding onto the edges of the mat by opening it up, aligning the raw edge with the edge of the mat, and sewing down the first fold. Then, fold the bias tape over to the other side of the mat to enclose the raw edge, and pin it in place. Then, sew around the binding to attach it.
Learn how to sew a baby changing pad that is wipeable and easy to fold up. Oh! And did I mention that you can add a pocket to your diy changing pad? It is op...
The Travel Diaper Changing Pad Pattern is the perfect gift to give a new mom, especially if she is on the go. This travel sewing pattern for baby is easy to make, easy to carry and easy to clean too! No longer will mom have to search high and low for somewhere to change her little one. Click below link for instruction and tips…. All-in-One ...
The lining is made of waterproof sports nylon, which makes it super easy to wipe and clean. Absolutely washable. Can be also used as a travel or cosmetic bag in the future. When you have finished making your bag it will measure approximately 12″ by 9″ when folded and 12″ by 27″ when unfolded. If you would like to download the pattern ...
Fold strap in half and match long edges. Serge around raw edges of strap. Sew to a corner of the mat, 3″ from the corners edge. Place a snap at the end of the strap. And a corresponding snap at the same spot on the other top corner of the mat, 3″ from the corner. Fold up your mat before placing the snaps to make sure you get the right side ...
Worked in Stockinette Stitch stripes, the center panel has garter stitch edging, and the side flaps are picked up along the sides. This is a great project for a baby shower, as easy to knit as a blanket but more out of the ordinary. Folded up, Changeling measures approximately 11" x 7" x 2", and opend up, it measures 26" x28".
Diaper Pad Side Flap 2. Place your lining piece for this flap on top of the fleece-fused piece, right sides together. Sew along the top left and right sides. Turn right side out and press well. Measure 5″ up from the bottom and 1.5″ to the left of the unfinished edge of this piece and place a mark for your snap.
Check out our travel changing pad pattern selection for the very best in unique or custom, handmade pieces from our changing pads shops. ... By Annie Pattern- Changing Station 2.0- Baby Travel Changing Pad-Diaper Clutch- Sewing Pattern-PBA255-2 (1.4k) $ 9.99. FREE shipping Add to Favorites ...
It can open to serve as a changing pad instantly, holds babies essentials for a quick diaper change when you're out and about, with two hanging pockets for diapers and wipes. Its elastic closure that can be fastened so you can fold it up into a tidy clutch in no time. This little handy travel sewing pattern is easy to make for sewers to craft ...
Now comes the last portion, adding the velcro closure. To do this I first made a double sided piece of (8″x15″ that you will fold in half) 4″ wide by 15″ long, sew leaving one opening to fold inside out, close side and topstitch, finally add the velcro and attach to the cover like the illustration shows. You are all done!
Portable Travel Diaper Changing Pad Mat by Little Koan| Luxury |Waterproof Portable Changing Pad Mat for Babies|Memory Foam Baby Head Pillow (2) $ 25.75 ... Travel Changing Pad Pattern -Baby Quilt Pattern - PDF Pattern - Clutch travel - Changing Mat (580) $ 8.50. Digital Download ...
Cut away the corners on the draw lines. Clean up the edges of the four sides of the wallet with a rotary cutter and mat or scissors. Do not cut into the perimeter seam. 5. Sew on the Pocket. Fold and press the small rectangle in half, wrong sides together, to create a 4-1/2″ x 11″ rectangle.
Altino Portable Diaper Changing Pad for Baby. Keeping your baby's head cushioned is easy with the ½ inch memory foam pillow that is built into the Alatino Portable Changing Pad. The generous size makes this diaper changing pad large enough for use with both newborns and toddlers, all without affecting its portability.
Diaper Pouch. We'll begin with prepping the pocket. Cut out a square 9 1/4″ x 9 1/4″. Fold all 4 edges under twice, 3/8″ per fold. Iron the folds down so they stay in place. For now we'll just finish the top edge of the pocket so stitch along the top of the rectangle 3/16″ in from the edge.
Amazon.com : Moscow State University - Large Gaming Mouse Pad - Tabletop Mat - 23.6"x13.8"(60cmx35cm) : Office Products. Skip to main content.us. Delivering to Lebanon 66952 Update location Office Products. Select the department you ...
The client asks to make the pattern lighter which would allow to use the corporate blue color on the background. This makes the result too light and makes it lose its night-like quality. Instead, using the signature blue to color the outlines and the filled areas. Just in case, creating a design with no illumination that looks better graphically.
Holiday index January to June. Page 5 - Holiday index June to December.... Our 2024 UK Brochure is OUT NOW! Order yours today. 01246 474747 Opening Times Brochures . Menu (current) Home Holidays Day Trips ... A-Line Travel 15 Soresby Street Chesterfield S40 1JW 01246 474747 [email protected]. A-Line Travel, Company number 13060548...
These patterns also reflect CuteGirl's Keltic heritage. And as a last reference to the smithing, I decided to add not a motto or supporters, but a beautifully smithed frame (or console ). How the prompt fits in: When thinking of ornamental knots, the first thing that comes to my mind are the Keltic knots.