16 Tips for Beautiful Travel Portrait Photography
A Post By: Philipp Dukatz

This article was updated in January 2024 with contributions from Philipp Dukatz, Ben McKechnie , Oded Wagenstein , Matt Dutile , Darren Rowse , Kevin Landwer-Johan , Suzi Pratt , and Peter West Carey .
Travel portrait photography might seem difficult – but with the right approach, it’s surprisingly easy.
I’ve taken photos of people while traveling all around the world, and in this article, I explain everything you need to know for stunning travel portraiture, including:
- The best ways to approach locals
- A simple trick to set your subjects at ease
- How to choose the right gear
- How to find the best locations
So if you want to become a travel photography master, then let’s dive right in, starting with my first tip:
- 1. Be ready for beautiful moments

If you’re serious about capturing top-notch travel portraits, then you should be ready to fire the camera shutter at all times .
Travel portraiture is all about shooting the brief moments – the glimpses into a person’s life that aren’t replicable. You’re not doing landscape photography, where you (often) have plenty of time to select a lens, set up your tripod, and choose your settings; instead, you’re doing travel portraits , which require a fast shutter finger and intense mental focus.
That’s why you should constantly scan the environment, looking for potential candid subjects. And even once you’ve found a subject, watch them carefully for a memorable split-second expression.
Also, make sure you take your lens cap off, switch your camera on, adjust your travel settings in advance, and be ready to shoot!

- 2. Get close to your subject
Do you feel your travel portraits look boring? It’s probably because you are too far away .

I know it feels awkward to get close to someone you don’t know, especially in a foreign country. It seems so much easier to shoot from a distance and capture a more environmental travel portrait , or to break out that telephoto lens , zoom in, and click away.
Unfortunately, in my experience, this just won’t work.
If you want to capture crisp, sharp, extraordinary images that tell a story and leave your audience stunned, you must overcome your shyness. A close perspective will add more details to your subject’s face; it will also simplify the composition so that you’re focusing on just one or two elements. And by walking in close, you’ll gain control over key items: the lighting, the background, the composition, and the depth of field . These factors are vital in good portrait photography and are so much easier to adjust when you are close to your subject.
How can you get up close without feeling uncomfortable? That’s what I explain in my next few tips:
- 3. Practice approaching people

It’s the biggest challenge in travel portrait photography: How do you get close to people without bothering them? How do you talk to strangers and ask for permission to take pictures?
My recommendation:
Start by practicing .
Think about what you might say to a person. Write out a script (or three) if you have to. Then practice it in the mirror. Practice smiling, practice gesturing to your camera, and practice saying the script repeatedly until it becomes automatic.
Sure, you might feel a bit silly – but when it comes time to actually approach a person, it’ll be so much easier!
When you’re approaching a person for real, it’s all about your attitude. So make contact, seem upbeat, talk, and – most importantly! – smile.
Bottom line: Don’t be shy, adapt to the local culture, get to know people, make friends, and you will take great pictures.
- 4. Learn the basics of the local language
You may be wondering:
If I don’t know the local language, then how can I approach people and interact successfully?
It’s simple: Just learn a few basic phrases. These won’t take much effort, but they’ll go a long way to helping you approach people. In my experience, these are the six most important phrases you should learn before traveling to a new country:
- Hello, how are you?
- My name is …?
- I am from …?
- What is your name?
Practice the phrases on bus rides, and ask your hotel receptionist, taxi driver, or local friends how to pronounce words. Don’t be afraid to make mistakes!
Then, when you’re out shooting, go up to people with your camera and use the phrases. Once you’ve gotten acquainted, gesture to your camera – and if you get the nod of approval, take their photo!

- 5. Smile a lot!
I said it before, but it’s so important that it deserves its own section:
Whatever you do, when you’re approaching strangers, make sure to smile. A smile can go such a long way . If you are grumpy and angry because you’re not getting the shots you want, it’ll put people off. No one will want to go near you, and people definitely won’t want to get their picture taken by you.
If you do it right, when you come home from a photo walk, you’ll have lots of pictures. And your cheeks should hurt from all the smiling!

- 6. Take your time
Once you’ve made contact with a potential subject, and you’ve established a good vibe, it’s time to take a picture. But don’t rush; that will make your subject uncomfortable, and it won’t make for a good result.
Instead, take advantage of all the “work” you’ve put in and take your time. Be calm, think about the light, think about what you want to emphasize (the eyes, the hands, or the person itself), and think about the background. Take a deep breath and try a couple of shots. Maybe switch angles and test out different compositions.
As you work, your subject will also become more relaxed and get used to the camera. Again, there is no need to rush. In my experience, a slow portrait is nearly always better than a fast one!

- 7. Don’t be afraid to capture candid portraits
When encountering people who are totally engrossed in what they are doing, it’s best not to interrupt them. Instead, remain separate and capture candid or semi-candid photos.
I rarely hide my camera; instead, I prefer to have it out in the open so people can be aware that I’m taking photos. Most folks pay no attention, especially when you’re in a tourist area.
For this next photo, I wanted to capture the young boy advertising goods at the top of his voice. He and the older man (I assume it was his grandfather that he was helping) were aware of my presence and that I was taking photos. I was able to do so without disrupting the action.

- 8. Choose a strong composition
Numerous compositions can work for portraits. The rule of thirds can work incredibly well, but don’t overdo it or all your travel portraits will look the same.
Another approach is to place one of your subject’s eyes directly in the center of the frame; a study proved that portraits composed this way appeal to viewers on a subconscious level. (I promise I’m not making that up!) It’s a trick that can be applied in both portrait and landscape orientation.
A general rule exists in travel portraiture that you shouldn’t place your subject directly in the center of the frame. However, rules are made to be broken sometimes!

- 9. Come down to their eye level
Try not to stand above your subject if they are sitting. It’s intimidating and works against your goal to relax the person. Positive psychological things happen when you get down on someone’s eye level. Take a look at the example below:

The image was not captured in a touristy location in India, so he is the real deal. I sat down on the step to receive a blessing. Accompanied by mystical chanting, I drank some lukewarm tea of unknown provenance, had air blown all over my face, and ash spread across my forehead. We chatted after, and I felt in no rush to suggest a portrait. It was a fascinating experience. What do you think when you look at his facial expression – is the time spent together palpable?
- 10. Always be aware of the lighting
Light will add feeling to your travel portraits when you use it well. Look at the type of lighting in the location where you’re making your portraits. Is it conducive to the style of the portrait you wish to capture? Do you need to come back at another time of the day or night? Will adding some flash improve the shot?
When you’re traveling, you often can’t wait for the right light, so you must make the best use of available light. When the light at the location is not great, you need to get creative and add illumination – either with a flash or a reflector.
For this night portrait of a Samlor rider, I was able to position him to make the most of the light in the street market behind him. I also used my flash to illuminate him and help catch a glimpse of the motorcycle passing behind.

- 11. Don’t be afraid to move
Reality can be quite boring, and while there are plenty of great subjects, not all compositions work – so don’t get stuck capturing the same obvious, conventional shots.
Instead, when you approach a new subject, think about all the different crops and angles you might use. Envision a strong image in your head. Then move to make it happen!
In particular, pay attention to your subject’s position in the scene and how they relate to elements in the foreground and the background. You don’t want trees or signs coming out of your subject’s head, and you don’t want any strong splashes of color that will distract the viewer, either.
Fortunately, just by taking a few steps to the right or left, you can often eliminate distractions and/or include additional beautiful elements.
Don’t be lazy! And don’t just rely on your lens’s zoom capabilities. For the best shots, move those feet!

- 12. Get a 50mm lens
I know, I know: You can take great travel photos with any lens (and any camera, for that matter). However , certain lenses are ideal for certain types of photography, and if you want stunning travel portrait photos, I highly recommend you invest in a 50mm lens.
What makes a 50mm lens so special?
For one, the perspective is very natural and therefore great for portraits. You’ll be able to capture detailed shots without standing too close to your subject, but you’ll also be able to back up for a wider field of view in case you want to take some environmental images.
Plus, a 50mm prime lens will force you to really think about your compositions. You won’t be able to zoom in on your subjects; if you want to get a tight shot, you’ll need to make the deliberate decision to move closer.
Bonus: 50mm lenses are super portable, which means you can carry one all day and you won’t notice the weight.

- 13. Choose the right settings for travel portraits
With my fixed focal lens, I often shoot portraits at f/2.8 or slightly above. If you shoot any wider, the focal plane can be so thin that you risk your subject’s eyes being in focus but having their nose out of focus. For a zoom lens, I recommend selecting your widest aperture but standing further away from your subject. Zooming in on their face will accentuate the shallow depth of field effect that works so well for portraits.

For engaging portraits, the most important element requiring sharp focus is the eyes. I suggest setting your camera to spot focus on the center AF point. Next, aim the center point at one of your subject’s eyes. Use the focus and recompose method – or even better – the back button focus method to lock in on the eyes. This will ensure they’re in sharp focus in the finished photo.
- 14. Start by shooting kids and people in action
If you’re still feeling a bit uncomfortable about approaching people and asking for a shot, then start out easy:
With kids, and with people in action.
You see, kids are so easy to photograph. They usually love getting their picture taken; they’ll pose for long minutes and never get bored! Of course, be mindful of boundaries, and always ask the parents before shooting their child.
As for capturing people in action:
I’m talking about people who are doing something. For instance, you’ll have an easy time photographing a person playing a musical instrument, whereas a person doing nothing will surely notice your approach. Do you see what I mean? People who are busy with tasks won’t care about you taking pictures, so they’re a great beginner’s subject!
Pro tip: Look for traditional workshops or handicraft businesses. They usually make for great travel portrait opportunities!

- 15. Shoot a series with the same subject
When you have someone’s permission and have bonded with them, consider staying with them a while and shooting a series of images. This is what I did when I met a man in the Philippines recently. I directed him gently for a series of shots after telling him how interested people would be to learn about his culture. He was happy to oblige.

- 16. Get out of the touristy areas
Travel portrait photography is about capturing authentic images that really tell the story of a location.
And you won’t find that story in touristy hubs.
You see, tourist attractions are (usually) far from a country’s reality. Sure, take a few images in the tourist traps, but then move farther afield. Note that getting off the beaten track isn’t as difficult as you might think; sometimes it takes just 15 minutes to find yourself in a small, local village.
And as a photographer, that is where you want to be. You’ll meet real people who aren’t out to sell things. You will have more chances to interact, practice your newly acquired language skills, and take more authentic photographs.
Plus, it’ll make for a much better travel experience than the “Lonely Planet path.”

- Travel portrait photography: final words
Capturing great travel portraits takes a little practice.
But it’s worth it.
So don’t be shy; instead, get out that camera, make friends with the locals, and capture some great photos! Take your time, open up, get close, and don’t forget to smile.
Now over to you:
Which of these travel portrait tips do you plan to use on your next trip? Share your thoughts in the comments below!

Table of contents
Travel photography.
- 8 Ideas of What To Do With Your Vacation Photos
- What Skills do You Need to be a Travel Photographer?
- How to Capture the Essence of a Place – Travel Photography Tips
- 7 Tips to Make Travel Photography Interesting Again
- Avoid These 5 Major Mistakes Made By Travel Photographers
- Travel Photography – Do You Ask Permission Before, After Or Not At All?
- Travel Photographers Workflow – At Home and on the Road
- The Photo Critique: Travel Photo Edition
- 6 Reasons Why Your Travel Photos Don’t Look Like the Ones in Magazines
- The Fine Line Between Travel Photography and Having a family Vacation
- 10 Ways to Improve your Vacation Photos
- What is Your Biggest Travel Photography Challenge?
- 7 Travel Photography Hacks to Get You Going Places
- How to Use a Travel Photography Shot List to Come Home with Better Photos
- Why You Need To Be A Guerrilla Travel Photographer – And How To Become One
- How to Get the Most Out of a Travel Photography Location
- Travel Photography, Backpacking and Packing Light
- 6 of the Best Smartphone Apps for Travel and Landscape Photography
- How To Keep Camera Gear Safe While Traveling
- 5 Ways to Find Great Locations for Travel Photography
- 15 Tips for Protecting Your Images While Traveling
- Safety Tips for Travel Photographers (Particularly Women)
- Off Camera Flash for Your Travel Photography
- How to Use Natural Light in Travel Photography
- Photo Composition Tips from Bob Holmes – Composition in Travel Photos
- The Importance of People in your Travel Photos
- Create More Unique Travel Photos by Adding a Model
- 5 Lessons Learned Switching from DSLR to Mirrorless for Travel Photography
- How To Keep Your Batteries Charged While Traveling – Remote Location Edition
- 5 Tips For Travel With Only One Lens
- 5 Lessons Learned While Using a Kit Lens for Travel Photography
- 7 Tips for Using a Tripod in Landscape and Travel Photography
- The Best Fujifilm X-Series Kits for Travel Photography
- The First 10 Things You Need to Buy After Your Camera for Travel Photography
- Tiniest Interchangable Lens Micro Four Thirds Cameras for Travel with Amazing Quality
- The Only Three Lenses You Need for Travel Photography
- Must Have Gear for Travel Photography Newbies
- Why Olympus Mirrorless Cameras are Top Notch for Travel Photography
- The Best Travel Photography Lenses: Our Top 12 Picks
- 5 Camera Bags That Every Travel Photographer Needs At Some Point
- A Travel Tripod that can Also Act as a Light Stand
- The iPad as a Photographer’s Travel Helper [a Review]
- 7 Non-Photography Items Which No Travel Photographer Should Leave Home Without
- 7 Reasons Why a Tripod is a Travel Photographer’s Best Friend
- Travel Photography Equipment – What To Pack?
- How to Plan and Take Killer Sunset Photos on Your Next Vacation
- Tips for Photographing Local Parks
- How to Find the Best Kinds of People to Photograph While Traveling
- 4 Ways To Make Better Street Portraits While Traveling
- How to Photograph People When Traveling
- How To Take More Creative Environmental Travel Portraits
- Photographing Signs – Travel Photography Tip
- Tips for Creating Better Documentary Travel Photos
- 6 Tips for How to be a Culturally Sensitive Travel Photographer
- Travel Photography Subjects: Old People
- How to Put the Fine Art into Travel Photography
- Travel Photography without the Travel – Going Local
- How to Tell Better Visual Stories with Travel Photography
- Create a Theme to Step Up Your Travel Photography
- Travel Photography ~ Think Outside The Postcard When Photographing Famous Landmarks
- Photographing Festivals and Events – Tips for Travel Photographers
- Video: Travel Photography Tips – Shoot with a Purpose
- 7 Reasons Why You Should Art Direct Your Travel Photography
- Buy Less Gear: Travel and Experience More
- Editorial Travel Photography – Telling the Story of a Location
- Travel Photography Subjects: Religion
- Travel Photography Subjects: Views
- Travel Photography Tips – Photographing the Coast
- Taking Photos in Busy Tourist Destinations with no People in the Shot
- How to Backup and Manage Your Photos When Traveling Without a Computer
- Tips for Creating a Killer Vacation Photo Book
- Photo Editing Workflow for Travel Photography
- How to Build a Travel Photography Portfolio
- How to Become a Professional Travel Photographer – Two Paths
- 11 Tips for Shooting Travel Stock Photography to Make Money
- How to Sell a Travel Story to a Magazine and Help Fund Your Travels
- 7 Realities That Hit Once You Become a Professional Travel Photographer
- Is a Career in Travel Photography Right for You?
- Travel Inspiration: Bali
- Canadian Travelogue – Introduction
- Travel Photography Inspiration Project: South Africa
- Travel Photography Inspiration Project: Thailand
- Canadian Travelogue – Newfoundland – Gros Morne National Park
- Travel Photography Inspiration Project: India
- Travel Photography Inspiration Project: Japan
- Travel Photography Inspiration Project: Kenya
- Travel Photography Inspiration Project: Morocco
- Travel Photography Inspiration Project: Vietnam
- An Interview With World Traveler Gary Arndt
- Interview: Oded Wagenstein – Author of Snapn Travel Guide and dPS Writer

Read more from our Tips & Tutorials category

is a German travel blogger and photographer. He recently left his job in advertising and spent a year travelling all across South East Asia. His off the beaten track journey is covered on his widely recognized travel blog escapology.eu . Stop by for adventurous travel reports from 9 countries, travel tips and some amazing photographs. You can also connect with him via Facebook or Google+ .
- Guaranteed for 2 full months
- Pay by PayPal or Credit Card
- Instant Digital Download

- All our best articles for the week
- Fun photographic challenges
- Special offers and discounts
Travel Portrait Photography – Tips For Taking People’s Photos While Traveling

Travel Portrait Photography Tips For Taking People’s Photos While Traveling
Our travel portrait photography guide outlines the best tips and tricks for taking people’s photos while traveling. From tips for nailing your composition, choosing your location, cultural sensitivity, and approaching people to the more technical stuff that will help you improve your portrait photography and take better travel and cultural portraits.
Ask us what we love more, traveling or photography, and we’ll have a hard time giving you an answer. Travel photography combines both of our passions, taking photos and videos and experiencing other cultures . Travel photography includes many aspects and elements of highlighting the local culture, from the architecture and landscape to the customs and food. Though we try to incorporate all of these elements and more while creating our photo essays to convey the story of the place we’re traveling in, our true passion lies in cultural portraits. We love to learn about the local culture mainly by highlighting the human element. We love taking people’s photos while traveling, and in our opinion, it’s the best way to deepen your knowledge about the local culture and truly get to know the place you are traveling in.
So how do you do that? Showcasing the local culture while focusing on the human element? We like to visit local markets and artists. We love strolling around local streets and alleys, trying to capture a fleeting moment or the vignettes of daily life through our lens. We always try to tell a story with our images, and it is something we’ve learned over the years. If you want to improve your travel portraits, if you want to know how to approach people and learn how to tell a story with your lens, this article has all the tips you need and then some. We start by giving some general tips for taking awesome travel portraits and then dig in deeper into the more technical stuff.
This post may contain affiliate links, which means we earn a small commission if you purchase from them (no extra costs to you!). For details check our disclaimer .
Table of Content
Why is travel portrait photography so powerful.
Capturing the essence of a place can come in many forms. You can take pictures of the food, architecture, or landscapes but taking pictures of the people not only helps you showcase the local culture, it also provides endless opportunities for interactions with the local residents and deepens your knowledge about the local culture. No matter if you snap a picture of a local lady in the market or if you take pictures of the local cheesemaker or artisan, you will have an opportunity to make a connection with them. It might be just a smile or a nod of the head; it’s up to you to make it a bit more than that and learn about that person’s life. Ask the lady in the market about the local fruits and vegetables, inquire the cheesemaker about the process of making cheese or how he got into the cheese-making business, ask the artist about the tradition behind his craft. These interactions with local people provide a glance into the local customs and personal lives of the local residents. Besides, as a photographer, you want your pictures to evoke an emotion and tell a story, and in our opinion, travel portraits are the best way to achieve this goal.
Get our FREE Maps-2-Go
Get monthly updatesincluding exclusive access to our google maps which feature all of our favorite attractions in numerous cities all over the world.
I want to subscribe to your NEWSLETTER!
Types of Travel Portraits
Let’s start from the beginning and talk about the different types of travel portraits. Most people think that portrait photography is taking a close-up or medium shot of a person, but that’s not entirely true since there are other kinds of portrait photography.
Classic Portrait
When you take a picture of your subject that fills up the whole frame, that’s a classic portrait. It can be just the face, part of the face, or even the entire body.
Environmental Portrait
The environmental portrait is different from your classic portrait since you’ll fill the frame with your subject and the environment. The environmental portrait is all about showcasing the place of work of your subject, where he lives, his personality, hobbies etc.
Details Portrait
Sometimes you don’t need to capture the face of your subject. Highlighting just a part of the body can tell a story as well. You can focus on a unique outfit, special shoes, hands, and so on.

Challenges of Taking People’s Photos While Traveling
If you are a travel portrait photographer, you have to face many challenges before getting the perfect shot. Most times, you won’t be able to control the light or carry a lot of equipment with you. If it’s a candid shot, you need to be quick about it, and even if it’s not, you can’t keep your subjects from their daily routines for a long time. You’ll need to learn how to approach people if you’d like to take their photo from up close; there will be cultural differences, language barriers, and many more issues you’ll have to deal with. There is also the ethical issue of taking people’s photos without their permission or using your travel portraits across social media.
Travel Portraits – Ethical Issues of People Photography
In recent years more and more voices have started speaking about the ethics of people photography. Should you ask for permission before taking a photo? Should you take pictures of children? Should you post your photos across social media? Should you sell your photos? Some are even claiming that in the era of social media, Westerns seem to treat people in third world countries as if they were animals in a zoo, snapping pictures of the “exotic creature” without permission. There are also questions regarding the photographs’ authenticity and the different approach in people photography. Some photographers would not dream of staging a moment, while others claim it’s the only way to get breathtaking travel portraits of their subject matter.
So what’s the right answer? You’ll have to decide for yourself. We have our own rules of conduct that we try to follow. Regarding permission, if it’s a candid shot, there’s no point in asking for permission because the moment will be lost forever. If our subject is aware of our presence, we’ll ask for consent—either verbally or by gesturing to our camera. If we notice that someone isn’t happy about us snapping a picture of him, we’ll apologize and delete the image. When we do ask for permission, we do it with a smile and accept the fact the photograph is going to be a bit staged, which can even be a good thing at times. In fact, after our encounter with a group of photographers in Myanmar’s Inle Lake, we realized some of the most stunning shots on Instagram must have been staged. Regarding social media and posting photos on our site, we make a point of choosing images that we feel flatter our subject. We’ll never post a picture that showcases someone in a negative light. We love to highlight a place by taking photos of the daily life and local customs and traditions, so for us people photography and travel portraits are a big part of our cultural photo essays.
We encourage you to think about these ethical questions and decide for yourself how to behave but always be respectful, accept “no” as an answer and treat your subjects like you would like to be treated. Think about your intention and only post pictures that you believe flatter your subjects.
Travel Portrait Photography Tips and Tricks - General
Research your destination - history, customs and more.
Before going anywhere, we do our research. We’ll start reading a little bit about the history and culture of the place we plan on visiting. You have to know at least the basics about the local culture in terms of Do’s and Don’ts and make sure to search for these social cues while traveling. If people leave their shoes at the entrance to a temple, follow their lead and if you’re not sure, ask one of the local residents. You should especially be culturally sensitive when taking pictures of children, and if you see a child with his parents, always ask for permission before photographing them.
Regarding locations, research online for the sights you’d like to see, but also, always look beyond the obvious sights and attractions if you’d like to be a bit more original and capture more authentic shots.

Learn a Few Phrases in the Local Language
Learning a few phrases and words in the local language goes a long way. It’s much easier to make someone smile or have a positive attitude when you speak a few words of his language. Moreover, it’s much more respectful when you visit another country, and you make the effort of learning how to say ‘thank you’ ‘you welcome’ and so on in the native language.
In terms of travel portraits, it’s a good idea to learn how to ask ‘what is your name’ ‘May I take a picture’ ‘thank you’ ‘how to say’ and perhaps a few adjectives like ‘beautiful smile’ ‘nice’ etc. People tend to be more open and listen to you or give you the time of day when you make an effort to learn their language. They will gladly help you learn a few more words if you ask them ‘how to say’ and point to an object. It’s also a great way to break the ice and even get a candid moment from a somewhat staged situation.
Search for Things You’d like to Photograph
Besides learning about the local culture and etiquettes, list your interests and favorite places you’d like to visit. We love local markets and art, so we always look for the best markets, and we intentionally search online for local artists we could see or local festivals or events that take place during our visit.
First of all, always have your camera ready. Stumbling upon a magical moment and having your camera in the bag will result in heartbreak (and we’re talking from experience). You always need to be ready to shoot, and that means choosing your camera’s setting and looking around for interesting situations.
Travel Portrait Photography Tip: Most DSLR/Mirrorless cameras have custom buttons. You can choose your custom settings and assign them to these buttons. For example, you can assign the perfect setting for an outdoor photoshoot to one of them, and the second can be used for a low-light setting.
Are You Going for a Staged Photo or a Candid Photo
There’s something magical about a candid travel portrait. You were able to capture a fleeting moment, one perfect shot that no one will be able to reproduce. We love taking candid photos. It’s all about street photography and catching that decisive moment. However, staged shots have their own merits and charm.
What is a staged shot? Many times, once you ask for permission from your subject, it’s going to be a staged shot (including a big cheesy smile). Your subject’s posture and facial expression are going to change, and many times it won’t be as unique or authentic as it was before. Nevertheless, there are ways to make your subjects act or pose more naturally, and we’ll discuss it later.
Now there are those staged shots when you tell your subject how to act, where to look, what to do or even where to stand. It can be awkward at first, but that’s the best way to get a perfect portrait (provided your subject is following along with your guidelines).

Approaching People/Asking Permission
Most times, we ask people for permission before or after we take the picture. Many times, while we’re taking the shot, the person might notice us, and we ask for permission with a gesture. If he seems comfortable with it, we’ll continue shooting; if not, we’ll apologize and delete the images.
There are times when we ask for permission in advance, especially when we get really close to our subject. We smile, point to the camera and to him/her, sometimes we introduce ourselves and try to say a few words and see if it’s ok. Sometimes after a short conversation, people will change their minds and let you take their picture.
It is not easy, and for us, it has always been and still is one of the most challenging aspects of people’s photography, but we’ve learned to overcome our shyness. Even if you’re not sure, there’s no harm in trying, and remember to always be polite and thank them with a smile even if they say no.
Keep Smiling, Show Your Interest and Engage with Your Subjects
No matter what happens, always keep smiling and have a positive attitude. It’s not just about approaching people but also about taking candid photos, talking to people on the street, addressing your waiter, and so on. Not just while traveling, keeping a big smile, having a positive attitude, and showing a genuine interest in the daily lives and local traditions of anyone you meet can open the door to many opportunities. If you’re taking pictures of a local, ask for recommendations for the area. If you’re photographing a local artist, ask about the process, and by doing so, you might learn about another craft you’d like to photograph.
Get close to your subjects! Yes, using a zoom lens might give you beautiful classic portraits with nice bokeh in the background, and it’s definitely less obtrusive, but you’ll get the best travel portraits by getting close to your subjects.
When you take a candid shot of a street or a market scene, it’s always best if you have someone close in the foreground since it adds perspective, depth, and interest to your photo. It also allows you to make a real connection with your subject.
Reciprocation
After you’ve learned how to approach people and engage with them, what about reciprocation? Should you offer to pay them for their portraits? Should you buy something from them? There’s no right answer to these questions, and we judge each situation as it comes.
We don’t encourage paying someone for taking his portrait, especially in third world countries, since many times it creates a habit. People are expecting a payment, they might be rude about it, and in some countries, children are taken out of schools and go “work” in the streets by posing for tourists. If someone asks us for money, we simply smile, shake our heads and go away. A few times in the past, especially in Vietnam , I refused, and then the women called me back to take their portraits after all ; fter taking a few snaps, I bought some items from them.
Nevertheless, there’s an exception to that rule. Many times, especially in third-world countries and especially in pagodas or nunneries, it’s customary to donate a small amount of money for the living expenses of the nuns/monks. Other times, if you’d like to ask someone to pose for you and you are going to give them instructions and spend a while there, you should definitely consider paying him/her.
Other times, in local markets, for example, we usually buy something from the vendor. We’re always happy to have fresh fruit or nuts as a snack. When photographing local artists, we buy an item, and if we spend a long time there but know that the items are too heavy to carry, we do offer a small payment for their time.
When we visit local villages in third-world countries, we try to carry with us some simple toys, crayons, or stickers to give to the local children. Some say it’s a bad habit since they start to expect it (which might be true), but it’s a simple exchange, and it’s nice to see the pure joy of these children who often don’t have access to these kind of items.
No matter what, you should always offer to show your subject the picture you’ve taken. Sometimes they don’t want to see it, but many times they will be grateful for the offer and, if possible, ask to send it to them by email. Some people even carry a polaroid camera and give them the picture on the spot.

Travel Portrait Photography Tips and Tricks - Advanced
Think about the light.
As a photographer, light is your best friend or your worst enemy. The more you learn how to use the light to your advantage, the more you’ll be able to capture breathtaking travel portraits. If you have no clue about how light affects your camera, we suggest either taking the portrait in the shadow or in the light but in most cases, taking a picture when half of the frame is in shadow and half of the frame in the sun will result in a bad travel portrait unless you know what you are doing.
Generally speaking, without getting too technical, the worst time for taking travel portraits is around noon when the sun creates harsh shadows under the nose and eyes. A backlight travel portrait can be quite flattering when you know how to work with the light, and the best light for travel portraits is definitely in the late afternoon and early morning hours.
Over exposure is usually more flattering to your subjects, while underexposure is going to enhance the appearance of wrinkles and signs of time. Analyze the quality of light (is it a harsh or soft light ) and use it to your advantage.
Travel Portrait Photography Tip – Try and plan your daily schedule according to the light. In the morning and late afternoon, you’ll have the best light, so plan for outdoor activities. During the harsh hours of midday, you can visit indoor markets or other indoor venues.
Know Your ISO Limit
ISO can be your best friend when you don’t have enough light, but you need to be familiar with your camera’s ability. Some cameras can handle ISO 8000, while others produce very grainy images in ISO 400. You should always try and be at ISO 100 or 200 but if you don’t have enough light take advantage of the ISO capabilities of your camera.
Travel Portrait Photography Tip – If you don’t have a lot of light, choose a lens with a wide aperture and use it to your advantage. If you have a camera with internal image stabilization, you’ll be able to work with slower shutter speeds under 1/60 (provided your subject stands still), but you can always lean against a wall or something steady which will provide extra stabilization.
Composition
Composition is everything, and after learning how to work with light, you should spend some time learning about the different composition rules. From the rule of thirds to leading lines and the golden ratio, knowing how to compose a portrait will improve your portrait photography skills. Also, think about headroom or breathing/negative space when you compose your travel portraits.
Composition also includes choosing to take a horizontal or vertical picture. Generally speaking, most old-school photographers will probably say that a classic portrait should be vertical, and an environmental portrait should be horizontal, but nowadays, it’s all up to you. Depending on what you would like to express and how you choose to compose the picture, there are no clear rules regarding the horizontal/vertical choice.
Check out this quick overview of Steve McCurry’s , one of the most well-known travel photographers, composition tips!
Travel Portrait Photography Tip – Apply the grid option in your camera (Mirrorless, DSLR or mobile phones). It will help you compose the shot according to the Rule of Thirds.

Break the Rules
Once you know the classic composition rules of photography, it’s time to break them. There are many stunning travel portraits that don’t adhere to any of the traditional composition rules. Think about what you are trying to express and the story you’d like to convey, and compose your frame accordingly. For example, though it’s customary to leave some breathing space in front of your subject in the direction he’s walking to, by placing your subject close to the edge of the frame, without leaving breathing space in front of him, you might express anxiety, stress, the end of a journey etc.
Think about DOF
Depth of Field (DOF) is the distance between the closest and farthest objects in a photo that appear acceptably sharp. In simpler terms, the area in front/behind your subject that remains in focus. A large depth of field means that much more area in your photo will be in focus, while a narrow DOF means that just a small area in your photo will be in focus.
You can control the depth of field mainly with your aperture and the distance of your subject from the camera. Large apertures (smaller f-numbers such as 1.8 or 4) means shallower DOF. Small apertures (such as f 10) mean larger depth of field. Shallower DOF provides some dreamy quality to your travel portrait and it works great with classic portraits when there’s a ‘hero’ in your shot. A larger DOF is great for environmental portraits when you want to showcase the background as well. If there are many people in your photo that stand at various distances from the camera, you have to go for a larger DOF if you want them all to be in focus.
Other than the aperture, other factors such as distance from the camera/background, the focal length of your lens, and the size of your camera’s sensor can affect the DOF. Check out this helpful DOF guide!
Travel Portrait Photography Tip – If you’re using your mobile and you’d like to have a blurry background (shallow DOF) choose the food/live focus option for Samsung or Portrait for iPhone.
Change Your Angles
When you attempt to take a portrait of someone, do you choose to take a picture at eye level, or do you go for a higher/lower angle? Choose your camera angle, depending on what you want to convey
The classic portrait is usually taken at eye level. This way, the subject looks directly into the lens, which enhances the feeling of connection between the subject and the spectator.
However, a lower angle, when the camera is slightly lower than eye level and tilted up, can provide some kind of authority to your subject and contribute to making him the hero of your shot. If you choose a lower angle, do so with caution since it can be unflattering if the camera is too low.
A high angle puts the focus mainly on the face and can help create beautiful light in the eyes of your subject (catch light) since they are looking up towards the light source. It’s also great to show artists with all of their arts and crafts or while working, but you should pay attention to the depth of field and think about what you’d like to be in focus, and choose your aperture accordingly.
Travel Portrait Photography Tip – Always try to take a few pictures at different angles and various compositions. Sometimes a few steps to the right or lowering your angle makes all the difference in the world. In addition, you can play with your angle/composition/DOF to eliminate distracting elements in your shot.

Think About Focus
First of all, you need to learn everything you can about the focus system in your camera. If you don’t nail the focus in your travel portrait, there’s really not much you can do about it; the portrait will be unusable.
Now think about where the focus should be. Most times, It should be on the eyes but sometimes it can be elsewhere, depending on what you’d like to emphasize and your composition. The shallower DOF, the harder it is to nail the focus. So when in doubt, opt for a smaller aperture (larger f no.). With extremely wide aperture numbers like f1.8, it’s much harder to nail the focus.
Travel Portrait Photography Tip – Some cameras have face/eye detection systems, so it’s easier to nail the focus, but with other cameras, your best bet is to work with a single focus point.
Know How to Use Your Manual Focus
When in doubt or when your camera struggles to focus, switch to manual focus. Many cameras let you enlarge the area you’re focusing on, so it’s easier to nail the focus.
Know Your Camera – Custom buttons & Functions
It’s always a good idea to get to know all the functions of your camera. If you’re a beginner, you can use the Auto function. However, most times, you’ll get better results while using one of the semi-automatic (shutter/aperture priority) or manual mode.
Travel Portrait Photography Tip – Other than the shooting modes and ISO capabilities learn about the most important functions of your camera that can help you improve your travel portrait photography. Try to shoot in burst mode, so you don’t miss a moment. Learn about the focus system, light-metering and so on.
Tell a Story & Evoke Emotions
The most mesmerizing portraits tell stories and evoke emotions. Think about your favorite portraits, often times you can see the emotions of the subject, spontaneous laughter, a gesture of heartbreak, an expression of delight or any other kind of emotional spark. Even when you stage someone, you can create candid moments that will highlight the situation and your hero.
Furthermore, try to tell a story with your portrait. You can shoot your hero in his/her environment and include everyday objects/tasks, or you can capture the interactions of several people like a group of children, market vendors, a father and son, and so on.

Look for a Nice Location & Wait for the Shot
That’s one of the most important rules that can genuinely make a difference. The problem is it can take a long time to take the shot. When you see beautiful scenery and the light conditions are great for your travel portrait or street photography, you want to wait for the right moment for someone interesting to pass by.
Travel Portrait Photography Tip – For these kinds of situations, it is always better to shoot in burst mode
Use Colors, Textures, Patterns & Light
Colors add so much life and vitality to an image, so look for these colorful spots/ walls/ objects and incorporate them in your photo. Use patterns and textures to your advantage to add depth and interest to your travel portrait, and always think about the light and backdrop. Ray of lights can add so much drama to a scene. If you’re trying to capture someone who is smoking or a steamy dish, a light source and a dark backdrop will enhance the drama in your shot.
Go Off the Beaten Path
We always try to find off-beaten-path locations. Sure, we want to capture the most famous places in each destination we visit, but for a less touristy experience, we recommend finding these places that not many tourists know about. There’s something much more authentic when you visit a local market than the touristy one and we’ve visited many of those in Sidemen area in Bali. We are always looking for neighborhoods and towns we don’t know much about, and usually, we discover hidden gems like the Istrian peninsula in Croatia. The residents are usually surprised to see tourists there and are much more patient and willing to have their portraits taken.
Look for Inspiration
If you want to be a better photographer, you need to learn from the best and seek inspiration. There are so many great travel and portrait photographers. Look for inspiration on Instagram, Pinterest, Google, or wherever you can find it. Think about which portraits you will remember or which ones evoke emotion and determine how the photographer has achieved it.

Tips for Taking Environmental Portrait While Traveling
Environmental portraits must showcase the surrounding of your subject. We’d often opt for a horizontal shot, but depending on the environment, we might go for a vertical shot. It doesn’t really matter as long as your viewer can recognize the environment and your image tells your subject’s story.
Don’t go for an ultra-wide aperture like 1.8; otherwise, the background is going to be blurry. We usually go for f/5.6-11 depending on the setting and what we’d like to emphasize.
Since you’re photographing a relatively large area, think about the composition. What would you like to include in your frame, how are the light conditions, do you prefer a staged/posy portrait, or do you want to capture your subject in action? After you have your answers, give directions to your subject, ask him to move according to the light conditions, tell him what to do (go about his business or pose for you), and change your angles so you’ll have a variety of shots.
Tips for Taking Classic Portraits
Classic portraits focus on your subject, so you don’t really have to pay much attention to the environment, even though sometimes it can improve your shots. For example, if there’s a beautiful colorful wall, use it as your backdrop, include some leafy greens in your photographs etc.
In the past, many photographers believed classic portraits must be vertical, but nowadays, the rules are more flexible. It really depends on your subject, what you would like to emphasize, and the intended use of your image. We usually take some vertical and some horizontal shots.
Choose your aperture according to your framing and be aware of the depth of field. Always make sure the eyes are in focus, and usually you’d want your subject to be lightened evenly across his body/face unless you work in manual or aperture priority and you know how to expose for the shadows or highlights.
Sometimes people feel awkward while they pose. You can give them something to think about or fuss about to evoke emotion and make the portrait more natural. Ask an artist to hold his tools, ask a child to play with his/her favorite toy.
Tips for Taking Portraits of Details
Details portrait can be powerful, but you have to make sure they can still depict a story, evoke an emotion, or shed light on the culture/person you photograph. You can play around with the depth of field depending on what you’d like to convey. Sometimes you’d like to highlight just one item (choose a wide aperture), or you’d like the majority of things to be in focus (choose a narrow aperture like f8).
If there’s movement in your shot (like the hand of the artist), you need to think about your shutter speed. If you want to freeze the motion, choose a higher shutter speed like 1/250 to be on the safe side (the faster the movement, the higher the shutter speed should be in order to freeze it).
Tips for Taking Candid Portraits
Candid moments are usually best to capture emotions and tell stories simply because once you ask someone to take his picture, his demeanor changes, from the facial expression to the body language. However, don’t be afraid of posing your subject because sometimes it’s the best way to capture great travel portraits. The secret is you need to create these real moments that occur naturally and evoke emotional sparks. Ask your subject about himself until he relaxes a bit, tell a joke to catch his genuine laughter, ask an artist to continue working or ask a vendor to grab some fruits.

Editing Your Travel Portraits
Nowadays, post-processing is a must, especially when shooting RAW. Try to use Photoshop, Lightroom, or any other photo editing up to your advantage. Eliminate distracting colors, enhance the important elements in your image, get rid of noise etc.
Travel Portrait Photography Tip – Shooting RAW will give you more options while you edit your travel portraits. You could salvage some of your under-exposed/over-exposed images. If you have a good camera, you probably have the option to shoot in RAW files. Many mobiles also give you such an option, and so are some photography editing apps like the mobile version of Lightroom (DNG is RAW).
As a travel photographer, you usually don’t carry a lot of equipment with you. Some prefer a zoom lens, while others like to work with prime lenses (with a fixed focal point). Generally speaking, for classic portraits, you’d better use a focal point of 50 mm or above since it’s more flattering to your subject (wider lenses have a distortion effect). However, for environmental portraits, use semi-wide and wide lenses (35mm and below). The wider the lens, it can have a slight distortion, depending on the quality of your lens but you could fix in post-processing.
Most times, you will shoot in natural light, but you can have a foldable reflector with you if you need a boost of light. However, nowadays, especially if you shoot in RAW, you’d be able to open up the shadows in post-processing.
A flash can be an excellent addition to your portrait photography kit if you know how to use it. Bouncing the light from a white wall or using an off-camera flash allows you to adjust the lighting conditions to your liking, but it means carrying more stuff with you.
A Word About Model Releases
Portrait photographers need to be aware of model releases, especially if they plan to sell their travel portraits to stock photography sites or make commercial use of them. In general, if someone is in a public place, technically, you do have a legal right to photograph him, so why do you even need a model release?
The bottom line is that in order to use a travel portrait on your social media/website/private use, you do not need a model release, but you should think about your subject’s privacy and show your respect. If someone clearly doesn’t want his photo taken, don’t use it. As long as you do not portray your subject in a negative light, you should be ok.
When talking about selling photos, you can sell travel portraits to individual people or for editorial use without a signed model release. However, you can not use these photos commercially or sell them to stock photo sites since they require such a release. You can read more about model releases or if you’d like to have an app for model release on your mobile just in case, here are some great choices.
That’s it for our travel portrait photography guide. We hope we’ve given you some useful tips to improve your travel portraits and feel free to ask us anything or add tips of your own in the comments below.
Don't forget to pin our guide for later!

Check out some of our other guides!

Jerusalem in Photos
Check out our Jerusalem photo diary and learn about the best sites for photographers in the holy city!

Food Photography
Check out our ultimate guide to take stunning food photos while traveling, including tips, tricks and examples!

Madrid Neighborhoods
Our Madrid neighborhood guide lists the top things to do in our favorite Madrid neighborhoods!
4 thoughts on “Travel Portrait Photography – Tips For Taking People’s Photos While Traveling”
This is a nice tutorial. I will surely try it later. I think this tutorial will help me a lot. I would like to read more of your article in future. I wish you best of luck for your next article.
Many thanks for your kind words, glad it was helpful!
This is a nice blogwith having good content & best Visuals
Thank you so much for your kind words, we’re glad you like it 🙂
Leave a Comment Cancel Reply
Your email address will not be published. Required fields are marked *
By using this form you agree with the storage and handling of your data by this website. *
This site uses Akismet to reduce spam. Learn how your comment data is processed .
Privacy Overview
- Student Successes
- My Learning
How to Take Travel Photos: A Complete Guide
You can also select your interests for free access to our premium training:
Travel photography is one of the most exciting types of photography you can pursue. Combining two of life’s great pleasures—exploring new lands and taking photographs—is a thrill any photographer would enjoy.
While travel photography is open to anyone with the drive to get up and hit the road, there are a few things you need to learn. That’s why we’ve compiled this in-depth article containing everything you need to know about travel photography. We cover everything from camera settings to the best travel gear, so keep reading to find out more.

What Is Travel Photography
Travel photography is simply taking pictures of different places around the world. But good travel photos are not mere holiday snaps. Travel images should show a location in a new light so they’re interesting even for people who have already been there.
Travel photography involves many different styles and techniques. You can incorporate landscapes and portraits into your travel photography. You can even use more advanced techniques like time-lapse and long exposures.
A travel photographer needs to show more than the obvious. They need to explore each location at a deeper level and look for elements that make that place unique and interesting. It isn’t enough to take pictures of the famous landmarks. A travel photographer needs to look deeper and go beyond.
Far-flung exotic locations often hold the most romance for travelers, but you don’t have to go far to practice travel photography. Venturing to new locations is always exciting, but you can also photograph places you’re familiar with. Using your familiarity to your advantage, you can give viewers a deeper view of these locations.
Anyone can shoot travel photography. The first thing you need is a desire to explore the world, which is something you probably already have. But continue reading for everything else you need to know about travel photography, from techniques to gear.
Mastering Travel Photography
While travel photography is open to anyone with an adventurous spirit, mastering the art does require practice, knowledge, and skill.
Firstly, you need to understand your camera and its settings. You might be tempted to take the easy road and shoot on auto mode. But you’ll get far better results and more interesting and unique images when shooting with semi or fully manual settings.
You should also experiment with composition, and you can try both color and black-and-white photography. These are stylistic choices that’ll give your travel photography a personal touch. You also have to consider specific types of travel photography so you’re ready for anything when you’re on the move.
The following sections covers mastering the art of travel photography. Click the links in the text if you want more information on each topic covered.
Camera Settings
When it comes to camera settings for travel photography, there are a few key things to keep in mind. First, make sure your camera is set to the right aperture and shutter speed for the type of photo you want to take. You’ll also need to adjust your white balance and ISO as you move through different locations.
Always pack extra batteries and memory cards. You don’t want to miss a great shot because your camera died or you ran out of space. To learn more about camera settings for travel photography, check out camera settings for travel photography .

A travel photography shot list helps you plan and capture the best photos on your trip. Research the location thoroughly, including famous sights, experiences, geography, and lighting conditions. Look at existing travel photos for inspiration, but aim to create something unique.
Use a spreadsheet to organize your shots by day and time, considering factors like sunrise, sunset, and harsh midday light. Include a mix of portraits, environmental portraits, cityscapes, daily life moments, religious sites, festivals, food, transportation, landscapes, close-ups, architecture, night scenes, and wildlife.
Remember to be adaptable and respectful of local customs. With careful planning and a detailed shot list, you’ll be well-prepared to capture stunning travel photos that transport viewers to your destination. To learn more about creating a travel photography shot list , check out this in-depth guide.

Composition
Good travel photography composition captures the beauty and essence of a destination. Use the rule of thirds by placing important parts of your photo on the intersecting points of a 3×3 grid. Take advantage of symmetry by centering the axis of symmetry in one direction, like a reflection placed off-center.
Direct attention with leading lines, using elements like paths or fences to guide the viewer’s eye to your subject. Frame spectacular views with windows or arches to provide context. Or you can use bold colors to lead the eyes or balance the composition.
Change your perspective by moving around, kneeling, or shooting from a rooftop. Get close to fill the frame with your subject or step back to include surrounding context. Play with scale by including familiar elements like people to convey the impressive size of large spaces.
To learn more about travel photography composition , check out this in-depth guide.

Black & White
Black and white travel photography can be a powerful way to capture the essence of a place. By removing color, you can focus on the light, shapes, and textures that make a scene unique.
Pay attention to contrast and tone in your black and white photos. Look for strong shadows and highlights that create depth and drama. Texture is also important in black and white photography, so seek out interesting surfaces like rough stone or smooth water.
Most importantly, use black and white photography to connect with your subject and tell a story. Whether it’s a portrait of a local person or a landscape that captures the mood of a place, aim to convey emotion in your images.
By developing your own style and vision, you can create compelling black and white travel photos that stand out. To learn more about black and white travel photography , check out this in-depth guide.

Unique Perspectives
Taking unique photos of famous places can be challenging, but with some creativity and planning, you can capture stunning images. Start by researching the location and scouting out potential spots for your shots. Arrive early to avoid crowds and take advantage of the soft, golden light.
Look for elevated views or unusual angles to create a different perspective. Use composition techniques like the rule of thirds to emphasize the landmark in an interesting way. Including people in your shots can add a sense of atmosphere and tell a story.
Don’t be afraid to experiment with different techniques like light trails or time-lapse photography . If you encounter photography restrictions, think outside the box and find creative solutions. To learn more about capturing unique photos of famous places, check out this in-depth guide.

Documentary Photography
Documentary photography captures real-life events as they happen. It’s a form of visual storytelling that depicts the world around us. Documentary photographers often work on long-term projects to tell new stories through their images.
You don’t need to travel far to find good documentary photography ideas. Look for interesting subjects in your family or community. Focus on the people involved to help viewers connect with the story. You can also tackle big topics by photographing small, local stories related to them.
Visit and scout your locations before the shoot. Get comfortable with the basics of photography, like camera settings and composition. Keep your story personal and critique your work as you go.
If you want to learn more about documentary photography ideas , we have a detailed guide to help you get started.

Train Photography
Train photography offers a diverse range of subjects, from historic steam engines to modern bullet trains. To capture excellent locomotive photos, research train routes and schedules to find the best locations and times. Use natural light to your advantage, with side or backlighting to highlight steam and texture.
Longer focal lengths can compress the scene and show the train in its surroundings. At stations, photograph details like wheels and logos to create atmosphere. Adjust shutter speed for sharp images or creative motion blur, and slightly overexpose for more detail.
Composition is key – avoid modern elements, and try front, side, and overhead angles. Including human elements like drivers and platform staff adds interest.
For more insights on capturing stunning train photography, train photography provides in-depth tips and techniques.

Backing Up Photos
Backing up photos while traveling is important. Using an external hard drive is a great option. They are compact, durable, and have large storage capacities.
Smartphones and tablets can also be used to manage photos on the go. With the right accessories, they can connect to external storage devices. This allows you to backup and edit your photos without a laptop.
For the best results, use multiple backup methods. This could include an external hard drive, USB thumb drive, and cloud storage. By having multiple copies of your photos, you reduce the risk of losing them. If you want to learn more about the way to backup photos , there are many helpful resources available online.

Making Money from Travel Photography
Becoming a travel photographer takes hard work and dedication. You need to learn a wide range of photography skills, from landscapes to portraits. Building a strong portfolio of your best travel images is key to attracting clients.
To get your name out there, create a travel website or blog to showcase your work. You can also sell your images on digital platforms like stock photography websites. Selling physical prints of your photos is another option.
As you travel, look for photography work with local businesses, such as hostels or tourism boards. Capture great travel content and consider offering tours or workshops for extra income.
To learn more about how to become a travel photographer , check out this in-depth guide.
Travel Photography Jobs
Travel photography jobs can be an exciting and rewarding career path for those with a passion for photography and adventure. However, it’s important to understand the challenges that come with the job. You’ll need to have exceptional photography skills, business savvy, and the ability to handle tough physical conditions.
To succeed, you’ll need a strong online presence, including a professional website and active social media accounts. You’ll also need reliable gear that can withstand the demands of travel.
There are many ways to make money as a travel photographer, such as selling prints, licensing stock photos, writing for publications, and teaching. The key is to diversify your income streams and constantly look for new opportunities. With hard work and creativity, a career in travel photography jobs can be both fulfilling and profitable.

Get Paid to Travel
Getting paid to travel and take photos is a dream for many photographers. There are several ways to make this a reality. Selling prints of your travel photos through print-on-demand websites is one option. You can also upload your best images to stock photography agencies and earn passive income from sales.
Entering travel photography competitions is another way to earn money and gain prestige. Winning contests can help you promote your work and attract potential clients.
Building relationships with travel magazine editors can lead to regular paid assignments. Learn what they want and deliver high-quality photos to make their jobs easier. To further your success, get paid to travel and take photos by marketing your photography services to people who have the budget to hire you.

Sell Travel Photos
Selling your travel photos can be a great way to make money with your photography. To get started, make sure you have high-quality images that are well-lit and properly composed. They should also be free of technical errors like chromatic aberration and noise.
There are many ways to sell your travel photos, such as through stock photography agencies, directly to clients, or as prints. Each option has its own requirements and markets, so consider your goals before deciding which path to take.
Actively promoting your work is key to maximizing sales. Use social media, email lists, and other marketing strategies to reach potential buyers. If you’re working with a stock agency, ask them what types of images are in demand so you can plan your shoots accordingly.
Learning how to sell travel photos takes time and effort, but with persistence and a willingness to adapt, you can turn your passion into a profitable venture.

Gear for Travel Photography
When packing for a travel photography trip, it’s important to bring the right gear. A lightweight and compact camera body is essential, along with one or two versatile lenses like a wide-angle and a superzoom.
Don’t forget a sturdy tripod that fits in your luggage for sharp shots in low light. Filters like a circular polarizer and strong neutral density are small but open up creative options when traveling.
Cleaning supplies, extra batteries, memory cards, and rain protection round out the must-haves. With the right travel photography gear , you’ll be ready to capture amazing images anywhere your adventures take you.
Traveling with Camera Gear
Traveling with camera gear can be challenging, but there are ways to make it easier and safer. Use padded cases to protect your equipment from bumps and knocks. A shoulder bag is a good option for keeping your camera close and secure while walking through busy areas.
Always carry your gear in your hand luggage when flying. Most airlines understand the importance of this and are lenient about the weight of your bag. To deter thieves, hide or remove any camera branding using black duct tape.
Insuring your gear is crucial in case of theft or damage. Take down all the serial numbers and make sure your equipment is fully covered. By following these tips for traveling with camera gear , you can have peace of mind and focus on capturing great photos during your travels.

External Hard Drives
An external hard drive is an essential accessory for travel photographers. Memory cards fill up fast when you’re traveling, and you don’t want to carry hundreds of them around with you. It’s best to take an external hard drive to keep all your photo files in one place.
You’ll need something durable yet compact, which is why we recommend the LaCie Rugged Mini for travelers. It’s an easy fit for any travel camera bag. You have storage options up to 5 TB, and it’s the most durable external hard drive on the market.
See more of the best external hard drives in our full article on the subject.

If you buy a product through one of our referral links we will earn a commission (without costing you anything). Prices last updated on .
As an Amazon Associate, I earn from qualifying purchases. Product prices and availability are accurate as of the date/time indicated and are subject to change. Any price and availability information displayed on Amazon at the time of purchase will apply to the purchase of this product.
Cameras for Travel Photography
The Canon EOS RP is a great mirrorless camera for travel photography. It’s lightweight, easy to handle, and has a 26 MP full-frame sensor that captures high-quality images in any situation.
The camera’s autofocus system is fast and accurate, even in low light. It also offers eye-detection AF for portraits. The EOS RP can shoot 4K video and has convenient Wi-Fi and Bluetooth connectivity.
This camera is ideal for most travel photography needs. If you want to learn more about the best travel cameras , check out our detailed guide.
Mirrorless Cameras
The best mirrorless cameras for travel are compact and lightweight, but still capture stunning photos and videos. Our top pick is the Nikon Z50 . It has a compact body that fits easily in any camera bag. The 20.9 MP sensor produces bright, vibrant images with excellent low-light performance.
The Z50 is also great for travel vlogging. It records 4K video at 30 fps and has a flip-down screen for easy self-recording. Built-in Wi-Fi and Bluetooth make it simple to share your adventures with friends and family back home.
If you want to learn more about the best mirrorless cameras for travel , check out our in-depth guide. We cover a range of cameras for every type of traveler, from beginners to professionals.

Compact Cameras
The Sony ZV-1 II is a pocket-sized camera packed with features for modern travelers. It has a high-resolution 20 MP sensor and a versatile 18-50mm zoom lens. The f/1.8-4 aperture provides solid low-light performance.
Vloggers love the ZV-1 II’s 4K video at 30 fps and the special Cinematic Vlog Setting. A built-in mic and wind muffler make capturing audio easy. Real-time AF with face and eye detection keeps subjects sharp.
The Sony ZV-1 II is the ideal compact camera for travel vlogging. It’s a worthwhile investment for creating exciting content abroad. But we have more options in the link above.

Lenses for Travel Photography
The best travel lenses give you a wide focal range in a compact size. Zoom lenses like the Nikon AF-S DX 18-105mm f/3.5-5.6 are very popular. It has vibration reduction to reduce camera shake and improve low-light performance.
Prime lenses are another good option. They are usually smaller and lighter than zooms. The Canon EF-S 24mm f/2.8 STM is a great example. This pancake lens is ultra-compact but still gives you a versatile focal length.
When choosing the best travel lens , think about the size, weight, and focal length. You want a lens that is easy to carry but still gives you plenty of options. The lenses on this list are all fantastic choices for your next adventure.
Canon Lenses
The best Canon lenses for travel photography are lightweight, versatile, and capture stunning images. Our top picks are the Canon RF 50mm f/1.8 STM and Canon EF 50mm f/1.8 STM . These nifty-fifty lenses are compact, affordable, and great in low light.
Other top choices include the Canon RF 24-105mm f/4-7.1 IS STM for its wide zoom range and the Canon RF 16mm f/2.8 STM for landscapes. The Canon EF 24-105mm f/4L IS USM is a popular all-in-one zoom for DSLR users. It has a constant f/4 aperture and weather sealing.
No matter your camera type, there’s a perfect travel lens for you. Look for a lens that’s light, has a useful focal range, and fits your budget. Canon lenses for travel photography help you capture amazing images around the world.

Nikon Lenses
The Nikon Z 50mm f/1.8 S and Nikon AF-S 50mm f/1.8G are the best Nikon lenses for travel photography. The Z 50mm f/1.8 S offers sharp images and a durable build. It’s great for low light with its f/1.8 aperture.
The AF-S 50mm f/1.8G is compact and lightweight. It also performs well in low light. The 50mm focal length is perfect for street scenes and portraits.
Both lenses are very popular with travel photographers. If you want to learn more about Nikon lenses for travel photography , we have a detailed guide that covers the best options for Nikon mirrorless and DSLR cameras.

Sony Lenses
When choosing the best Sony lenses for travel photography, consider weight, versatility, and image quality. Our top pick is the Sony E 18-105mm f/4 G OSS PZ , offering a wide zoom range, constant f/4 aperture, and effective optical stabilization in a compact design.
For APS-C cameras, the Sony E 35mm f/1.8 OSS is a great low-light prime lens. Its wide f/1.8 aperture and built-in stabilization help capture sharp images in dim settings. The Sony FE 50mm f/1.8 is an affordable and versatile prime for full-frame cameras, ideal for portraits and everyday shots.
Other notable lenses include the Sony FE 24-105mm f/4 G OSS for its all-in-one zoom capabilities and the Sigma 18-50mm f/2.8 DC DN | C for its fast aperture and compact size. To learn more about the best Sony lenses for travel photography , check out our in-depth guide.

Travel Tripods
A travel tripod is a must-have for any photographer on the go. The best travel tripods are lightweight, compact, and easy to set up. They also need to be sturdy enough to support your camera gear.
Our top pick is the K&F Concept Lightweight Travel Tripod . It weighs only 2.4 lb but can hold up to 17.6 lb of gear. The aluminum ball head gives you great flexibility for positioning your camera. And the included carry case makes it easy to take with you anywhere.
If you want to learn more about choosing the right travel tripod , check out our detailed guide. It covers everything from key features to look for to our top recommendations in different price ranges.

Travel Camera Backpacks
When choosing a camera backpack for travel, protection and comfort are key. The best bags are well-designed, roomy, and easy to carry.
Our top pick is the Manfrotto PRO Light Multiloader Backpack. It’s sturdy, spacious, and very adaptable. You can use it as a backpack, duffel, or sling. It has access from the front and both sides.
The Wandrd Duo Daypack is another great option. It’s made from quality materials that protect your gear from the weather. It has ample storage and the main zipper allows quick access to your camera.
If you want to learn more about the best camera backpack for travel , check out our detailed reviews. We’ll help you find the perfect bag for your next adventure.

Manfrotto PRO Light Multiloader
The Manfrotto PRO Light Multiloader Camera Backpack is a top choice for photographers. It has a sturdy design and plenty of space for your gear.
The backpack is comfortable to wear, even when fully loaded. You can easily adjust it to fit your body.
This bag is perfect for any photography adventure. It’s a worthwhile investment for serious photographers looking for a reliable way to carry their equipment. To learn more about the manfrotto pro light multiloader, check out the full review .

Think Tank Airport Essentials
The Think Tank Airport Essentials is a camera backpack made for air travel. It has a smart design, useful features, and fits as carry-on luggage.
This backpack offers secure storage with an efficient use of space and a special lock. The lifetime warranty makes it a one-time investment for years of use.
While it lacks some versatility, the Airport Essentials excels at storage capacity, protection, and style. Photographers who want a Think Tank Airport Essentials for their travels will find this bag a great choice.

Weatherproof Backpacks
Protecting your camera gear from the elements is essential. Weatherproof camera bags offer peace of mind when shooting in unpredictable conditions. They feature robust materials and coatings that keep water out, even in sudden downpours.
Our top picks, the Wandrd Prvke , Wandrd Duo , and Lowepro Freeline , have impressive exterior materials that don’t need a separate rain cover. The Prvke’s roll-top design is commonly used in waterproof bags, while the Duo and Freeline include waterproof zippers to secure even the weakest points.
When choosing a weatherproof camera bag , consider not only its water-resistant abilities but also its functionality for your photography style. Look for features like easy access points, ample storage, and comfortable carrying options that suit your needs.

A camera hard case is the best way to protect your photography gear while traveling. The Pelican Air 1525 is our top choice, with its tough exterior and foam-padded interior that keeps your equipment safe and secure. It’s spacious enough for your camera and accessories without being too bulky.
The Vanguard Supreme 46F is another excellent option, especially for adventure travel. It’s waterproof down to 16.5 ft (5 m) and can withstand temperatures as low as -40°C. The customizable Pick ‘n’ Pluck foam interior ensures a snug fit for each item.
For convenience, the Nanuk 935 is hard to beat. Its retractable handle and wheels make transportation a breeze, while the padded dividers keep your gear organized and protected. If you’re looking for a camera hard case that combines durability and ease of use, the Nanuk 935 is a great choice.

Travel Apps
Travel apps can make your photography adventures easier and more enjoyable. Snapseed is a powerful photo editor with a wide range of tools, from basic adjustments to creative effects. It’s free and available on both iOS and Android.
VSCO is another popular editing app that offers a simple, streamlined experience. Its presets are based on real film stocks, giving your photos an authentic vintage look. You can also use sliders to fine-tune the exposure and add fade or grain effects.
When you’re ready to share your travel photos, consider using Spot. This app helps you find picturesque locations and share your own discoveries with other photographers. With detailed maps and tips, it’s a great way to explore new travel photography destinations .
Editing Travel Photos
Editing your travel photos can take them to the next level. There are many techniques you can use to improve your images, from simple adjustments to more advanced processes.
Cropping is a quick way to remove unwanted elements or zoom in on important parts of the photo. Sharpening will make details pop, while noise reduction can clean up high ISO shots. Straightening the horizon line is also important for a polished look.
Other useful techniques include adding a vignette to draw the eye, adjusting saturation and contrast, balancing highlights and shadows, and using digital blending for challenging lighting. For an extra level of refinement, you can even remove unwanted objects.
With practice, you’ll learn which editing steps work best for your travel images. If you’d like to dive deeper into editing travel photos , there are many great resources available.
Location Guides
Whenever you’re heading off somewhere new, it’s always best to do some research before you go. Your preparations will be more thorough and more specialized when you have a better idea of what to expect. That means you can hit the ground running when you arrive, and you’ll get better results.
We have a collection of location guides for some travel photography hot spots. These posts give you a head start when taking pictures in these locations, helping you get unique shots in popular places.
Let’s drop in on a few of the hottest locations in Europe, Asia, and the US.
European Cities
Europe is a photographer’s dream, with its stunning architecture, charming villages, and beautiful countryside. From the centuries-old buildings to the cobblestone streets, there’s no shortage of photo opportunities.
Some of the best European cities for photography include Amalfi, Italy, with its medieval stories and dainty houses; Venice, Italy, known for its canals and seafood; and Dubrovnik, Croatia, a seaside location with picturesque houses and Game of Thrones filming locations.
Other notable cities include Prague, Czech Republic, with its historic buildings and Gothic churches; Oia, Greece, with its stunning white buildings and sunsets; and Amsterdam, Netherlands, full of incredible art and historical monuments.
Whether you’re interested in architecture, landscapes, or street photography, these European cities offer endless inspiration. To learn more about the European cities for photography , check out this in-depth guide.

Paris is a photographer’s dream, offering countless opportunities to capture stunning images. From the iconic Eiffel Tower to the charming streets of Montmartre, there’s no shortage of beautiful subjects to photograph.
One of the best spots for photography in Paris is the Trocadero, which offers a perfect view of the Eiffel Tower. The Champs Elysee and Arc de Triomphe are also must-see locations, with the latter providing a great vantage point for capturing the city’s skyline.
Other notable photo locations include the Louvre, with its striking glass pyramid, and Notre-Dame Cathedral, which offers both interior and exterior photo opportunities. It’s still striking even after the fire damage.
For a taste of modern Paris, head to La Defense, the city’s business district filled with skyscrapers and unique architecture.
To learn more about Paris photography , check out this in-depth guide that covers the best locations, tips, and techniques for capturing the city’s beauty.

London offers plenty of photography opportunities, from cityscapes to street photography and architecture. Some of the best locations include the Palace of Westminster, where you can capture iconic photos from Westminster Bridge or the south bank of the Thames. Tower Bridge is another well-known site, offering great angles for traffic light trails and sunrise photos.
The London Eye is a newer addition to the skyline, perfect for creative shots like zoom bursts or portraits inside the capsules. Don’t miss the photogenic wrought iron roof at Borough Market, or the beautiful exterior of St Paul’s Cathedral.
For stunning views, head to The Shard, the highest skyscraper in the European Union. Buckingham Palace is a must-see, especially during the Changing of the Guard ceremony. If you’re interested in photography in London , these locations are sure to inspire you.

Rome is a photographer’s dream, with stunning architecture, rich history, and vibrant culture around every corner. From the iconic Colosseum to the beautiful Trevi Fountain, there are countless opportunities to capture breathtaking images.
Don’t miss the Vatican Museum, where you can photograph the famous spiral staircase. The Pantheon’s exterior and interior are equally impressive, especially during the blue hour. St. Peter’s Basilica offers great views of the city and a chance to capture the Pope if you’re lucky.
The Tiber River provides picturesque views, particularly from Ponte Sant’Angelo towards St. Peter’s Basilica. Piazza Navona and Piazza del Popolo are perfect for street photography and capturing traditional Roman scenes. To learn more about the best spots for Rome photography , check out this in-depth guide.

Venice is a photographer’s dream, offering endless opportunities to capture its unique beauty. The best time to avoid crowds and oppressive heat is during the low season or early morning. Sunrise at Academia Bridge provides a stunning view of the Grand Canal, while Piazza San Marco is best photographed before tourists arrive.
Don’t miss the iconic gondolas along the waterfront near Piazza San Marco, especially during sunset and blue hour. For a different perspective, head to San Giorgio Maggiore island to photograph the church and Venice’s skyline at golden hour.
Explore the backstreets of San Polo and Dorsoduro districts for charming piazzas, decaying architecture, and canal scenes. Murano and Burano islands offer colorful buildings and glassmaking demonstrations perfect for photography. To learn more about Venice photography , check out this in-depth guide.

Budapest is another fantastic city for photographers, offering endless opportunities to capture stunning images. From the grand architecture of the Hungarian Parliament Building to the thermal baths of Széchenyi, there’s no shortage of photogenic spots in this beautiful city.
One of the best places to start is the Fisherman’s Bastion, a neo-Gothic terrace with breathtaking views of the Danube River and the Pest side of the city. Nearby, you’ll find Matthias Church, a stunning example of Neo-Gothic architecture that’s perfect for capturing intricate details and beautiful stained glass windows.
For panoramic views of the city, head to Gellért Hill, where you can capture the entire skyline from the Citadella fortress. And don’t miss the iconic Chain Bridge, which looks particularly stunning at night when it’s lit up against the dark sky. To learn more about the best spots for Budapest photography , check out this in-depth guide.

Japan is a brilliant destination for a photography trip. From stunning landscapes to interesting architecture and fascinating culture, there’s no shortage of inspiration for your travel photography.
Capture the vibrant cityscape of Minato, one of Tokyo’s special wards. Improve your food photography skills at Japan’s many cafés and restaurants, where every dish looks like a work of art. Take adorable photos of tame deer in Nara Park or sharpen your landscape photography in Hakone, with its hot springs, views of Mount Fuji, and gorgeous lake.
Don’t miss the breathtaking cherry blossoms in Japan’s parks during sakura season, usually from January to April. Visit the magical Blue Pond in Biei, go on an adventure in Kyoto’s Bamboo Grove, or document the commercial side of Japan in Shinjuku. For more inspiration on Japan photography , check out our in-depth guide.

Tokyo is one of the world’s most vibrant locations, offering a diverse range of subjects to capture. From the bustling streets of Shinjuku and Shibuya to the traditional temples of Asakusa, there’s no shortage of incredible hot spots to explore.
For those seeking modern architecture and vibrant city life, the Tokyo Skytree and Roppongi Hills Mori Tower provide stunning views of the skyline. Harajuku, the heart of Tokyo’s youth culture, is perfect for street photography and capturing unique fashion trends.
If you’re interested in learning more about Tokyo photography , there are many resources available to help you plan your trip and find the best spots to shoot. With its mix of old and new, Tokyo is a city that will inspire and challenge you as a photographer.

Etiquette in Japan
When taking photos in Japan, it’s important to be respectful and follow proper etiquette. Always ask for permission before taking someone’s photo, especially if you plan to share it publicly. If you can’t get permission, blur the person’s face to protect their privacy.
Be prepared to show your photos to the police if asked, and avoid using selfie sticks in crowded areas to prevent injuries. In cafés and restaurants, ask the staff for permission before taking photos of your meal.
At night, skip the flash and use a higher ISO and tripod to capture vibrant neon lights. Avoid taking photos in no-photo areas, of children without parental consent, geishas, people on public transport, and those in the middle of prayer. For more tips on photography in Japan , check out this in-depth guide.

Los Angeles
Los Angeles is a street photographer’s paradise. From the colorful Venice Beach boardwalk to the iconic Griffith Observatory, there are endless opportunities to capture the city’s unique character.
The Santa Monica Pier is a must-visit spot, especially in the evening when the lights come on. Echo Park offers stunning views of the skyline, particularly at sunrise or sunset.
Downtown LA is full of hidden gems like the Bradbury Building with its intricate architecture and the bustling Grand Central Market. For a taste of old Hollywood glamour, head to Union Station or the Hollywood Bowl Overlook. Places for street photography in Los Angeles are as diverse as the city itself, so grab your camera and start exploring.

New York City remains one of the most popular locations for photographers, with countless iconic locations to capture. Central Park offers a variety of scenes, from the Bethesda Terrace and Fountain to the Alice in Wonderland statue. The Brooklyn Bridge is another must-see, with its stunning suspension cables and brick towers.
Grand Central Station and the Chelsea Market are great for street photography and architectural details. The Rockefeller Center provides both street-level interest and panoramic views from its observation deck.
Of course, no trip to New York would be complete without photographing the Empire State Building and the Statue of Liberty. For breathtaking cityscapes, head to Brooklyn Bridge Park or find a unique vantage point to capture the Manhattan skyline. Don’t miss the Flatiron Building and the vibrant energy of Times Square.
To learn more about the best spots for New York photography , check out our in-depth guide.

Photography Road Trip
Planning a road trip for photography involves choosing the right vehicle, deciding on accommodation, and mapping out your route. Your vehicle should be safe, comfortable, and suitable for the terrain you’ll encounter. Living out of your vehicle, like an RV or camper van, allows you to stay closer to photo locations and immerse yourself in nature.
When planning your route, prioritize the locations you want to photograph. Research potential spots using apps and websites like Pinterest, 500px, Flickr, and Google’s My Maps. Plot your route, campgrounds, points of interest, and photo locations to make the most of your trip.
Electricity is essential for photographers on the road. Ensure you have reliable power sources, such as a dual battery system, solar panels, or a 12v inverter. Always carry a power bank as a backup. To stay connected, use local sim cards with data or take advantage of Wi-Fi at cafes and fast food outlets.
By planning your shots in advance and considering factors like lighting, crowds, and unique perspectives, you can capture stunning images that tell the story of your road trip photography adventure.

Inspiration from the Best Travel Photographers
Travel photography captures the adventures and locations you visit during your journeys. It involves many genres like landscape, architecture, street, and environmental photography. Travel photographers often tell stories through their images, focusing on special moments and atmospheres.
There are many approaches to travel photography. You can focus on people, take self-portraits, emphasize landscapes, or try aerial photography. Mixing these approaches can result in a unique style and help you gain recognition as a travel photographer.
If you’d like to learn more about travel photographers , we have an article that goes into greater depth on the topic.
Travel Blogs
Travel photography blogs are a great source of inspiration for your next adventure. They feature stunning images from around the world and provide useful tips for capturing your own travel photos.
Some of the best travel photography blogs cover a wide range of topics, from destination guides to photography tutorials. They showcase the work of talented photographers who have explored every corner of the globe.
Whether you’re planning your next trip or simply looking for some armchair travel, these blogs are sure to inspire you. To discover some of the best travel photography blogs to follow in 2024, check out this list of top picks.

- Photography Articles
- Camera Buying Guide
- Lens Buying Guide
- How to Learn Photography
- Time Lapse Photography
- Learn & Explore Photography
- How to Articles
- Holiday Gift Guides
- Photography Blog
- Color Management
- Travel Guides
- Astrophotography
- Free Photography eBooks
- Real Estate Photography
- Bird & Wildlife Photography
- Tip of the Week
- Photography Quotes
- Best Canvas Print Company
- Best Workshops & Tours 2020/2021
- Photography Glossary
- Photography Lighting
- Drone Photography
- Portrait Photography Tips
- Beginner Photography Tips
- Best Large Print Companies
- Gallery Home
- Latest Uploaded
- View by Categories
- Inspirational Photos
- Upload Your Photos
- Photography Forum Home
- Latest Posts
- Search Photography Forum
- General Discussion
- Taking The Photo & Editing
- Photo Galleries & Critiques
- General Manufacturers
- Equipment Research
- Recommended Vendor
- Camera Bags
- Camera Straps
- Maternity Gear
- Community Badges
- Get Metal Prints
- PT Scholarship
- Member Interviews
- 30 Day Creative Eye Challenge
- Bird Photography Mastery Course
- Business Builder Mastery Course
- Landscape Photography Mastery Course
- Travel Photography Mastery Course
- Portrait Photography Mastery Course
Remember me
- Forgot Username?
- Forgot Password?

Beyond the Selfie: Creative Portrait Ideas to Elevate Your Travel Photography

Photo by FilippoBacci via iStock
Everyone loves a good selfie, but let’s be honest…Do you really want your entire travel photo album full of selfies? We didn’t think so. There are so many fun and innovative ways to take portraits while traveling, and in this article, we hope to encourage you to experiment with a few of them next time you’re on vacation!
Below, we’ll explore four creative portrait ideas that will help elevate your travel photography. They include environmental, candid, cultural, and silhouette portraits. Moreover, we’ll recommend our favorite way to showcase your new and improved photos once you have returned home and share our top tips for travel photography.
Whether you are a hobbyist who wants to impress your friends back home, an influencer who wants better pictures for social media, or a professional who wants to capture stunning images for your clients, everyone needs inspiration occasionally. With that in mind, keep reading to discover which types of travel portrait photography inspire you the most!
Check out Chris Hau's video above to learn more about travel photography and how to improve your results.
Table of Contents
Environmental portraits for travel photography, candid portraiture for travel photography, cultural portraits for travel photography, silhouette portraits for travel photography, showcase your travel photography in a photo book.
- Recommended Photography Gea

Photo by recep-bg via iStock
Environmental portraits are photos that utilize your natural surroundings to enhance the quality of the portrait. Iconic landmarks and beautiful natural features make excellent backdrops for portraits. So, next time you travel somewhere with a jaw-dropping landscape, snap a few photos with you and your loved ones in the frame instead of only scenic shots.
Two more advantages of environmental portraits are that they can make landscapes more interesting and are wonderful souvenirs. Shooting a subject in front of a landscape adds depth, context, and a sense of scale to the photo. At the same time, environmental portraits make great prints for hanging, photo albums for coffee tables, and cards for mailing out.

Photo by imgorthand via iStock
Candid portraits are a fabulous way to capture authentic real-life moments when traveling. Staged photos are also great, but our favorite portraits are almost always the spontaneous ones. There’s just something special about seeing true emotion on someone's face that makes us light up when looking back on them later. Candid portraiture is a type of lifestyle photography .
Whether you are shooting candid portraits of people you know or random strangers, one key is to be discreet. When subjects know you are taking photos of them, their behavior changes (consciously or subconsciously). Therefore, one of our top travel photography tips is to use a telephoto lens for candid photography.
Learn More:
- Travel Photography Tips for Beginners: How to Make the Most of Your Photos
- These Photo Gifts are Fantastic Ideas for Year-Round Giving

Photo by hadynyah via iStock
One of the best parts about traveling is immersing yourself in the unique culture of different countries. So, why don’t you try to capture some of that culture on camera next time? Our favorite way to do this is by showcasing local attire, food, and traditions in our travel portraits. We like to shoot both images of ourselves blending in with the culture and some of the locals.
One super important thing to remember when traveling is to always respect the cultural sensitivities and follow the cultural rules of the country you are in. Read up on these topics before you travel so you can be prepared once you are there. Also, asking people for permission before taking their picture is a good idea, especially if it’s an intimate portrait.

Photo by LeoPatrizi via iStock
Last but not least, there are silhouette portraits. They are one of the most creative portrait ideas out there, and when shot correctly, the results are breathtaking. The key to this type of portrait is backlighting, which creates striking silhouettes in contrast to the background.
When shooting silhouette portraits, be aware that the light will constantly change. Due to this, you have to be willing to play around with different angles, poses, and camera settings to achieve the most dynamic results. Additionally, you can adjust your images in post-production to make them look just right.
The most impressive silhouette portraits are those shot with natural light, but you can also use an outdoor photography lighting kit to manipulate light and create silhouettes. For more information on this subject, check out our “ Outdoor Photography Lighting Never Looked So Good ” article.

Now that you have a big collection of gorgeous travel portraits, it’s time to build a photo book ! Photo books are incredible memorabilia that preserve all your most treasured memories in one easy-to-view place.
While many types of photo books exist, softcover photo books pair particularly well with travel photography. That’s because they offer the perfect combination of quality, durability, and affordability. Other popular options include hardcover photo books , layflat photo books , and sewn photo books .
Photo Book Press is a terrific place to customize and order softcover photo books. It’s an easy-to-use online print shop selling high-quality products at competitive prices. In addition to softcover photo books, they also have hardcover photo books , layflat photo books , and sewn photo books . It’s a great selection for finding the perfect book to showcase your trips!
Recommended Photography Gear
Disclaimer: Just so you know, some of the cool stuff we mention comes with affiliate links, meaning we earn a commission if you buy (no extra charge to you!). Plus, we occasionally feature sponsored content, but rest assured, we only shout out products we genuinely stand behind.
- The Art of Lifestyle Photography: Capturing Real Moments in Time
- Simple Outdoor Portrait Photography Tips for Improved Results
Still haven't uncovered all the tools, tips & tricks you need to take the stunning portrait shots you want?
Enroll in our Portrait Photography Mastery Course and join the photographers who have fast tracked their learning by mastering the art of taking awe-worthy portrait shots in just a matter of days.
We Recommend

- Maternity Photography
- Portrait Photography Master Course
Travel Photography Cheat Sheet: Portrait, Landscape, and Night Photography Tips
Photography is something I’ve always loved but, to be honest, I’ve never considered myself much of a photographer until recently. I just never found the time to really sit down and learn. I spent a lot of time just using my DSL-R on auto mode which kind of defeats the purpose. When I did have something I wanted to try, I always ended up doing frantic internet searches for camera settings. Looking for blog posts with photography cheat sheets to tell me what to do for a night shot vs for a self-portrait because, at the time, the terms ISO, f-stop, and shutter speed were all gibberish to me.
Well, thankfully I’ve taken the time to actually learn how to use my camera (though I now shoot on a mirrorless). I’m by no means an expert photographer but I’ve received plenty of compliments on my photography. I’ve come a long way from the girl frantically searching for Wi-Fi so she can try to find what settings to use to best photograph a sunset. However, I know that there are a lot of people out there who still do that.
So, if you are someone who is just learning photography, or someone who hasn’t gotten around to learning yet and is looking for a quick and easy instructions on how to photograph stars or take beautiful travel portraits. Well, this photography cheat sheet is for you. In this post, I’m sharing what I think are helpful camera settings to have on hand as a traveller. Basically, this is the kind of information I always wanted on hand before I actually learned.

Quick Notes to Start
Before I dig in, there are a few quick notes I want to start with. This post is meant for those with manual cameras. If you are using a cell phone camera check out my post on smartphone travel photography.
I also often get questions on what I use for my camera gear. I don’t have a lot and nothing too fancy. I went for a mid-line mirrorless camera (the Nikon Z50) that would be light and easy to travel with but worked with my old DSL-R lenses (I did buy an adaptor). You can find the list of the camera and photography equipment I use here.
The following tips are from my own practicing and playing with my camera as well as advice I’ve taken from some online photography classes.
With that in mind, let’s get started. Here’s my cheat sheet version of camera settings and tips for travel portraits, travel landscapes, and night photography.
Portrait Camera Settings

Portrait style photos were the first thing I focused on learning because, as a solo traveller, I spend a lot of time trying to take photos of myself.
For portrait photos I shoot on aperture priority. This means I customize aperture and my camera determines the shutter speed and the ISO based on what I choose as an f-stop.
Aperture effects two different aspects of the photo: depth of field and exposure.
A low f-stop means the lens is open wide. This allows more light to get in making the photo brighter, and also lessens the depth of field so your subject in the foreground will be clear and in focus while the background is a bit more blurred.
If you have a higher f-stop, the subject and the background will both be sharper and in focus. High f-stops also mean less light being let into the lens though, so your image will be a bit darker.
For both, you’ll have to play a bit with the f-stops to get your desired focus but also decent lighting. Too low an f-stop may make for a really blurry background, but depending on the setting it may be way too bright and wash out your subject. Similarly, too high a f-stop may create an appealing evenness to the entire photo, but could be too dark.
Personally, I love taking photos of myself or people/animals with a lower f-stop because I prefer the contrast of having a sharper subject and softer background (like the photo of my dog, Stella, above). I’m also a big fan of the bokeh effect which is achieved with very low f-stops. However, especially in travel photography, you don’t want always want to lose the background. In this case, you want to make sure you do some photos using a higher f-stop as well.
Landscape Camera Settings

For the longest time I was very much as point-and-shoot landscape photographer. Sure my pictures were nice but I always knew there must be some sort of trick to make them better. So during my 2020 lockdown time I took online photography classes and spent a lot of time watching classes about landscape photography. Here are the main tips I learned.
For landscape photography, it’s best to shoot on aperture priority. Use a higher f-stop though (start at 11 and go up). Two ‘magic’ f-stop numbers according to professional photographers are 16 and 22. You can play with both (and in-between) to see what you like best.
Lighting is key, which we already know. Dawn and dusk are the best times of day to shoot landscapes. To help with your lighting, make sure to adjust your white balance which you can do directly on the camera. The instructor for one of the classes I took suggests keeping your white balance on the cloudy settings for all outdoor landscape photography, even when it’s full sun. This gives your photos a warmer glow which is especially desirable if you are taking photos during the golden hour.

At the end of the day, however, the biggest part of good landscape photography is composition. Have a foreground, middle ground, and background. Remember the rule of thirds, and don’t be afraid to move around and get high or low to take your photos from different angles.
Fun tip: If the sun is in your photo, try a higher f-stop. This will give you a sun flare effect.
Astrophotography Camera Settings

Astrophotography is, as I have recently learned, is a lot of fun but can be pretty finicky. I’ve spent hours down on the dock at my cottage with my camera pointed to the night sky trying to perfect shots of the milky way or the stars twinkling above the trees. Some turn out, but most don’t. Getting the right focus can be pretty tricky and involves a lot of trial and error.
My biggest tips:
-Set your camera and lens both to manual mode
-focus the lens on infinity to start, but then, on the screen on your camera, focus on a bright point (brightest star), then move your lens a bit until the bright point looks as tiny and clear as possible. If it’s a star, you want it to look like a pin prick, not a small bright blob. Once it looks like this, that’s your ‘true infinity’.
-Put your f-stop as low as you can. Mine will drop done to 3.5
-Set your ISO somewhere between 1600-3200 (play around and see what works best)
-Use the 500 rule for shutter speed
The 500 rule says to divide 500 by your lens’ focal length. Supposedly, this is the longest shutter speed you can use before your photos get blurry. My lens was set at 18mm so it should have been 27.8 seconds according to the rule so I use 30 seconds.
I should also note that you absolutely need a tripod for night photography and a remote may come in handy as well so you don’t shake the camera. I don’t have one but my camera has Bluetooth and can connect to my phone so I can shoot from there. I’ve also done it manually by setting a timer so I don’t risk bumping the camera when pressing the shutter button.
Travel Photography Cheat Sheet
Final tips on this travel photography cheat sheet.

One thing that you may have noticed I did not mention is whether I shoot in RAW or JPEG format. Most photographers shoot in RAW. It’s a much bigger image with a lot more detail and information. However, that doesn’t necessarily mean it’s better. It’s only better if you enjoy and are good at post-processing, aka editing your photos.
Personally, I don’t love editing photos. I’m slowly getting better at it but I am by no means an expert. Therefore, I shoot in both RAW and JPEG. A lot of my stuff is JPEG to be honest, but the night photography definitely is better to shoot in RAW.
Hopefully this travel photography cheat sheet comes in handy! The more you practice and play around the more you will learn what style you like and what settings work best for your camera and lens so get photographing!

This will come in handy for my learning still and thank you very much Hannah for your kindness \ cheers have a beautiful day
you are very welcome!
Plz tel me know what is the night photography settings? Shutter Speed, Aperture and ISO settings…
Read the night photography section for how to set up settings based on your camera and lens.
Leave a Comment Cancel Reply
By leaving a comment you agree with the storage and handling of your name and email address by Eat Sleep Breathe Travel. *
Dreaming of Adventure?
Sign up to the Eat Sleep Breathe Travel mail list and stay up to date with all the latest travel tips and stories.
The Complete Guide to Travel Photography
By Megan Spurrell

As travelers, our cameras can feel like a fifth limb—an essential tool with which to move through the world and absorb new experiences. They make it possible to document the people we meet. They provide tangible memories of the remarkable beauty we travel so far to see. Ultimately, they help us communicate what words cannot.
In the digital era, the tie between travel and photography feels more innate than ever. Photography has become more accessible and affordable to dabble in (who even needs a real camera with phones these days? ). On the flip side, it can feel as if documenting and sharing our travel experiences has become half of the seeing itself. In her essay on pushing herself to take a photo-free trip , Allie Jones asks a question we can all relate to: “If you visit a trendy upstate New York museum and don’t take any photos, were you ever really there?”
As the routine of snapping and sharing becomes as habitual as rinse and repeat, others urge us to become more thoughtful with our travel photography. Just because we can photograph and share everything, in a matter of seconds, doesn’t mean we need to. In his feature, Tyler Moss explores the #nogeotag movement , and looks at just how our photo sharing can drastically alter a destination—and decide who gets to experience it. For professional photographers Gray Malin and Alex Strohl , the “how” of nailing their iconic travel photographs has relied more on patience, and analog techniques like driving massive props cross-country, or waiting for the perfect shot in sub-zero temps, than on any new developments.
And, just in case you were starting to let your Instagram feed convince you that you’ve seen it all, we’ve pulled in photo studies from photographers whose work we can’t help but ogle. Jessica Sarkodie shares a refreshing look at the unspoiled beaches of her native Ghana. Cedric Angeles flew to Mongolia for a peek inside the lives of the country’s famous eagle hunters (and yes, there are photos of the eagles in their hunting caps ahead). For Sandy Noto , photographing harvest season in the Dolomites while off-duty yielded gorgeous slices of life.
Of course, if you’re ready to step up your own game, we’ve also got the gear you need—from underwater cameras to camera bags that don’t look like camera bags. And, we’ve rounded up our favorite photographers to follow right now, because as much as we want to cut the social media umbilical cord, there is so much to admire there. You just need to know where to look.
Through the lens
Think before you shoot
Behind the scenes
The gear you need
Everything else you need to know
By signing up you agree to our User Agreement (including the class action waiver and arbitration provisions ), our Privacy Policy & Cookie Statement and to receive marketing and account-related emails from Traveller. You can unsubscribe at any time. This site is protected by reCAPTCHA and the Google Privacy Policy and Terms of Service apply.
Currently Trending:
APS-C vs full-frame – which sensor size is best?
Why are we obsessed by full-frame sensors, alternatives to the fujifilm x100v here are 7 retro styled cameras, amateur photographer of the year 2023 winners announced, nikon z8 wins product of the year at the 2024 ap awards.
Advertisement
When you purchase through links on our site, we may earn an affiliate commission. Here’s how it works
Tips for better travel portraits: travel photography masterclass
Don’t be afraid to reposition your subject to include a more interesting backdrop. Sony A7 III, 24-70mm, 1/100sec at f/5, ISO 2000. Credit: Matt Parry
For travel photographers, the encounters you have with strangers can become some of the most rewarding, both personally and photographically. Through its people, you can witness and experience many facets of a country – from food and drink to how they celebrate, worship, earn a living or pass the time. What soon becomes apparent is that the differences between us aren’t always as extreme as they appear on the surface. Armed with curiosity, you can open up your travel photography to a whole new genre of opportunity.
Unique photography
The internet has made the world a smaller place and we often hear photography being criticised for a perceived lack of creativity. This is perpetuated by the fact that the number of images being shared now are more than ever before. Or it is the ‘Instagram effect’ that leads to a lack of differentiation – the thought being that we are all influenced in some way by the style and location of photos that we see on social media.
Yet with over 7.5 billion people living on this planet, photographing the people you meet is a great way to capture the stories and feelings that are unique to your experiences. While we may see pictures of the same faces or scenarios popping up from time to time – that photogenic Cuban lady with the big cigar, jumping Maasai Warriors or Myanmar monks in smoky rays of light, the most genuine interactions with the people you meet on your travels are unique picture opportunities.

Look beyond the obvious sights and take a walk with your camera. Canon EOS 5D Mark III, 24-105mm, 1/640sec at f/6.3, ISO 100. Credit: Matt Parry
Photographing strangers
Look beyond the obvious sights and attractions on offer and take a walk with your camera. Stop and chat with the people you meet and delve deeper into their culture. Sounds easy, yet one of the greatest challenges when photographing people is overcoming the nerves to ask a stranger if you can take their picture. Whatever your personality type, most people can be apprehensive at the thought of approaching someone specifically for this purpose. Language barriers and fear of rejection can discourage even the most experienced photographers.
Nonetheless, for those who are willing and able to put their nerves to one side will find this a liberating and fun form of photography. It’s amazing how much you can communicate with someone without speaking a word of each other’s language, and finding out more about a person’s life or culture can often be one of the most memorable and authentic experiences of your trip. While these encounters lead to your own personal memories, the pictures can form stories and imagery that many others will find compelling.

There are people shots to be had everywhere but always ask first. Sony A7 III, 24-70mm, 1/60sec at f/2.8, ISO 5000. Credit: Matt Parry
Breaking down barriers
What is the best way to approach ‘people photography’ when travelling? While this will always be dependent on the circumstance there are a few tips to consider. First, don’t be afraid to acknowledge your camera. There is a case to be made for building a connection with someone before you bring out your camera, yet in my experience your camera can help to break down the barriers to communication and give you the confidence to approach and engage with people.
A smile and a simple nod towards your camera is a globally recognised indication that you would like to take a picture, and more often than not people will be happy to pose. Some people will find it curious that you want to take their picture and some may be willing but shy.
Of course, there will be people who are uncomfortable and don’t want their picture taken, so be polite and respect their wishes. Remember, if someone does decline, don’t be offended or embarrassed – it is not the end of the world. And certainly don’t let this stop you from interacting with that person as this can still lead to some wonderful situations, even if you don’t get the shot. Whoever you photograph, offer to show them the picture on your camera’s live view screen and/or email a copy or post a print to them.
Build a rapport with your subject. If you have time, sit or take a walk with them for a while; share a drink or two. Try to find a common interest such as sport, family or the place you are visiting. Ask questions, listen and show an interest in what they are saying. This will make the whole experience more enjoyable and rewarding for you and your subject. Also, that connection will often mean you can spend longer with them.
Don’t forget to show them your personality, too. If you can get your subject to relax, smile and perhaps even laugh then your shots will look much more natural. If language barriers are an issue then a friendly smile and a relaxed and confident demeanour will go a long way.
You will need to manage your subject – to help them relax as well as direct them. Don’t be afraid to reposition your subject if the light is not hitting them as you’d like or the background is too distracting. Or you can reposition yourself. Remember that even subtle movements can make a big difference in the quality of your final shot.
It also pays to keep your subjects in their comfort zone. While you may need to stray out of yours to get the shot, it can often help if you make your subject do something routine or familiar to them, especially if they are uncomfortable or awkward in front of the camera; if not then the resulting shots may look unnatural or forced.

Think about your position; subtle movements can make a big difference. Sony A7 III, 24-70mm, 1/160sec at f/2.8, ISO 160. Credit: Matt Parry
Authenticity
As travel photographers we have a duty to represent the people and cultures we photograph in a faithful and accurate way. While we can always debate the merits and ethics of photography, image manipulation and even the authenticity of some travel experiences, I believe that we should showcase the people we meet honestly and to the best of our ability.
Similarly, we need to be sensitive when doing so. You should be aware of any cultural sensitivities when photographing people, for example around religious ceremonies or sites or when photographing people’s homes or families. It could be as simple as removing your shoes before walking somewhere. This respect and appreciation for the culture, religion and wishes of your subject goes a long way.
Where to go
People photography on your travels shouldn’t be restricted to far-flung, exotic destinations. While the differences of ‘culture shock’ destinations can make particularly interesting images, you should not overlook applying this approach to any trip you take. From fishermen in the Algarve to businessmen in Paris, there are people-photography opportunities everywhere you turn.
Nor should this form of photography be restricted to ‘locals’. Many times, visitors can tell you as much about a destination as the people who live there, and are often just as photogenic as they bring with them their own idiosyncrasies and culture.
Similarly, there are a number of ways you can practise at home to build up your confidence. In fact, if you can ask a stranger for a picture in your own town or city then you will be able to do it anywhere! Perhaps set yourself a challenge to photograph strangers during your lunch break or at the weekend – a stranger per day or even target 10 strangers in an hour. Projects like this really push you out of your comfort zone and can definitely boost your confidence as a photographer.
People photography offers travel photographers a blend of visually different experiences beyond the cities, landscapes or iconic sights that primarily attract visitors to a region. These experiences can be enhanced through engagement and interaction with the people you meet which can lead to interesting, insightful and memorable trips packed full of wonderful photo opportunities.
Matt’s top tips for engaging travel portraits

Credit: Matt Parry
Shoot in bursts
There is nothing more frustrating than discovering your subject blinked in the millisecond the shutter fired. Shooting a continuous burst of 2 to 3 frames will help increase your chances of an eyes-open shot without the subject feeling uncomfortable.

Work the angles
Think about the type of images you want to achieve on location and always take more pictures than you will need. Mix up your focal lengths, angles, composition and camera orientation to give yourself as many options as possible when selecting the best one.

Shapes and shadows
People photography is all about the eyes. While this is a good principle to follow it doesn’t hurt to break the rules every now and then. The shape or silhouette of a person or group can tell a story or intrigue the viewer more than the expression on someone’s face.

Be prepared
It is important for travel photographers to know their kit – the benefits and limitations and to be prepared before approaching a stranger. The moment may be fleeting and so you don’t want them to get impatient waiting while you change lenses or settings.

A local guide can be a tremendous asset if you are short on time. They speak the language, know the destination and often have a great rapport with people. Another option is to reach out to local photographers through social media or sign up with a local photo tour.

Natural light
Lighting and reflectors are the staple kit of most portrait photographers, especially those working in a studio or with models. However, most travel photography relies on natural light, so avoid the middle of the day when the harsh light can cast unflattering shadows on a face.
Paying for pictures
This is one of the age-old conundrums and its prevalence varies from country to country. Some people will request/expect money in return, but you need to decide if that value exchange is one you are comfortable with.
From street performers to people who dress in traditional costumes, these transactions are now an ingrained part of the economy in some parts of the world. Similarly, if the person is selling something, they may expect you to make a small purchase in return. While transactional-based interactions can stifle the natural engagement that makes a portrait special, they can still lead to amazing images for those willing to negotiate a price.
- Eye AF-enabled camera The eyes are the most important feature in a portrait. Technology such as Sony’s superb Eye AF accurately tracks and focuses on an eye, giving you the flexibility to compose the shot exactly as you wish.
- Standard zoom A fast 24-70mm lens will let you work in low light, create beautiful bokeh and separate the subject from the background. The wide end is useful for capturing environmental portraits.
- Camera bag A simple over-the-shoulder bag such as the LowePro Toploader Zoom 50 AW II or a small messenger bag is perfect when exploring, as it’s light and holds your camera, lens and space for spare batteries, memory cards and a lens cloth.
- Camera strap The strap that comes with your camera isn’t always the best for long days spent walking around with your camera. Third-party straps such as the excellent Peak Design Slide Lite offer a comfortable, secure and practical way to keep your camera ready for any shot.
- Notes app Use a notes app on your phone to record information on the people you meet: names, ages, facts about what you are seeing or doing, details of the subject and dates. These will help to create compelling captions when sharing your images.
Matt Parry is a travel photographer, writer and presenter. His images and articles have been published in leading travel and photography publications. He has visited over 55 countries across six continents. See more at www.mattparryphotography.com or @mattparryphotography.

Matt Parry is an award-winning amateur travel photographer. Having visited more than 50 countries across six continents, his passion for photography has evolved from being a way of showcasing his trips to becoming the driving force behind where and why he travels. Matt Parry also has a passion for film photography.

You may also like...

April 12, 2024
Guide to fine art black and white photography
Claire Gillo turns to monochrome, sharing her top tips for creating fabulous black and white fine art photography.
by Claire Gillo

April 9, 2024
Night photography: how to take great photos at night
Do you want to master night photography but don't know where to start? Check out this complete guide on how to photograph at night.
by Isabella Ruffatti

April 2, 2024
45 ways to make money from photography
There are many ways to make money from your photography and in this guide we’ve compiled a mix of ideas that will suit different types of photographers

Looking to improve your photography? Amateur Photographer is the magazine for you, subscribe today and pay just £26 for your first 13 issues!
No thanks, I’m not interested!

Travel Photography: How to Take Pictures of Local People
By: Author Eddie Smith
Posted on Last updated: December 19, 2022
When it comes to travel photography, pictures of distant landscapes can capture people's imagination only for a moment. It's well known that human beings are wired in such a way that observing other humans is what interests us most. And foreign people also raise our natural curiosity.

There is a certain flavor to portrait photos taken in distant countries during travel that other genres of photography do not have. And there also are specific challenges.
There is no all-encompassing solution or single right way to approach people. But some tips can make taking great portraits of locals a more manageable part of your travel photography.
Table of Contents
1. Prepare Your Gear
2. study the culture, 3. find yourself a guide, 4. make it personal…, 5. …or keep your distance, 6. give something in return, 7. don't neglect post-production, travel photography tips.
Let's assume that you have everything arranged. Someone has allowed you to take their picture, feeling comfortable and waiting for you to fire the shutter.
And then, you begin to mess with your camera settings, which can easily ruin the mood and the shot.
The easiest way to avoid such embarrassment is to adjust your camera beforehand.
It is much better to engage someone in a photo session when neither of you has to worry about technicalities.
To take good portrait pictures, you must interact with your subjects. To make this communication smoother, learn more about the culture and etiquette in advance.
Even your outfit should fit local “fashion,” especially in more traditional or conservative countries like Kenya .
You will have a much easier time if you appear to locals as a fellow person of culture. And, wherever you may go, being polite is a must.
Having someone to show you the way around in a foreign land is a good idea and has some benefits for travel photography.
A guide can help you find a way in an unfamiliar place, navigate local culture and show the intricacies of local etiquette – a necessary knowledge if you want to communicate with the local people.
Furthermore, why not take some pictures of the guide(s) themselves?
It's one thing to grab a lens with a great zoom and “snipe” people's portraits from a distance without them knowing.
But you'll have to establish closer contact to achieve something more engaging, even visceral.
Start with small talk and build up from there. You may appear annoying, impolite, or even threatening if you run toward someone and ask them to take some close-ups immediately.
Contrary to previous advice, keeping the world unaware of your presence is also a way to go. Especially in cities, where people come together and their culture is vividly expressed.
This way, you capture the mundaneness of local life and take pictures of people minding nothing but their own business.
This method will also work in rural or natural environments – wherever people go about their lives.
Related: Instagram and Comparison Culture

More often than not, by allowing you to take their pictures, local people are doing you a favor, not the other way around.
Showing some gratitude for this is the right thing to do. Sometimes a friendly smile and handshake are enough.
In other cases, it is better to offer cash or a printed copy of a travel photograph you're taking (carrying a Polaroid camera is helpful in such situations).
Be aware of local culture and etiquette and read the room to know the right thing to do.
Very few photos that look professional have not undergone editing or correction. So if you think your image could look better with post-processing, do it! After all, neither you nor your camera is perfect.
There are plenty of programs that can help enhance your photography. We recommend checking out PhotoDiva – an easy-to-use portrait editor designed for this kind of photo processing.
It allows you to smooth the skin, remove wrinkles and dark circles, apply makeup, and more. This photo editing software includes tools for face sculpting, background removal, and a built-in library of artistic filters.
The possibilities are endless, but remember to keep things natural. It is one thing to add more contrast or color to your shots and another to iron out all the wrinkles on the face of an older adult.
Taking photographs of local people in your travels is a great way to give others a greater insight into a country's people and culture. Plus, getting to know them is its own reward, an enriching experience.
Why not give some of these travel photography suggestions a try the next time you're on a global adventure? You could be pleasantly surprised by the outcomes!
This story is brought to you in partnership with PhotoDiva.
Planning a trip? Go Backpacking recommends:
- G Adventures for small group tours.
- Hostelworld for booking hostels.
14 Travel Photography Tips to Improve Your Instagram: A Beginners Guide
Taking photos while traveling is the perfect way to capture your moments of adventure. However, there’s nothing worse than the disappointment of blurry portraits, lopsided landscapes, or miscaptured images. Avoid these mistakes by following these travel photography tips for beginners! They’re guaranteed to make your photos stand out from the crowd and give your Instagram the wow-factor it deserves.
1. Choose Your Style of Travel Photography
There are many styling in photography; so the best travel photography tip to start with is: What kind of style do you want to create? Are you taking travel couple photos? Portraits? Landscapes?

Deciding on this is especially important if you’re thinking about curating your Instagram feed in certain colors or tones. For example, are you going to go for a Mediterranean feel with lots of ocean blues and bright whites? Or maybe you’re traveling Asia and want to create a tropical green vibe on your feed.
Travel Photography Tip: Create mood boards on Pinterest or save posts on Instagram that really stand out to you. Use these images as inspiration for your own photos, however, don’t copy! Instead, use your inspiration to make totally unique images.

2. Get up early – Best Travel Photography Tip
If you’re visiting a popular place, like the Eiffel Tower in Paris or the Sagrada Familia in Barcelona , get there as early as possible to have the place to yourself. Not only will it get you the best photos, but it’s such a unique experience to enjoy these world-famous places totally alone.
Also read: The best cameras for travel

The night before your sunrise mission, check the sunrise times online and make sure to arrive before that time. The moment the sun starts to rise you’ll only have the best lighting for 1 hour, and you don’t want to waste any of these precious minutes.
Travel Photography Tip: The same goes for the evening time, arrive 1 hour before sunset to capture all the changing colors of the sky. It’s called golden hour for a reason.

3. Dare to stand out
How many people have you seen getting a photo of themselves pushing against the leaning tower of Pisa? When it comes to travel photography it’s easy to fall into the trap of taking the ‘popular shot’. Sure, this will get you pretty pictures but it won’t make you stand out from the crowd.
Instead, look around you for unusual details that other people are missing. Maybe there’s a puddle of water to use as reflection or beautiful light patterns.
See our Instagram for photography inspiration.

4. Outfits!
When photographing yourself or others try to choose clothing that is complimentary to your photo. For example, if you’re shooting in a green rice field, wear a color like yellow that will stand out against the landscape. Matching colors isn’t best in this situation, as you’ll just blur into the background, especially when the person is a small detail in the photo.
Our favorite travel photography tip is to use colors that ‘pop’, like orange, yellow, and white.

5. Change Your Perspective
Changing your perspective not only allows you to get a unique photo but’s also a great way to get around crowds and other distractions. We always use the example of our time in Rome , when we were visiting the colosseum.

Hannah was sat on the wall and there was already a long line of people waiting just below her. When standing at a normal angle, all the people were in the shot. By getting down low, and changing the perspective to look up at Hannah, we eliminated the people in the photo and got the perfect photo of the colosseum.
Find that unique angle and don’t be afraid to get into weird positions and places. You may look a little strange but it’ll be well worth it!
Instagram Travel Photography Tips

6. Tripod for Travel Photography
Whether you’re traveling solo or as a couple, a tripod is an essential photography tool. Asking people to take your photo can be difficult and time-consuming, as you’ll have to position them with the correct camera angle, and take the time to get yourselves into place. By the time you’ve done this, you might have missed the moment completely! For this reason, our travel photography tip is to use a tripod so that you can position the camera or phone as you wish.

Tripods can be heavy but there are lightweight options available, such as the ‘ Manfrotto Befree Advanced Carbon ‘. You can also get the ‘Gorilla Pod’, which is a flexible phone tripod that you can bend around anything, whether it’s poles or trees.
Travel Photography Tip: Pack your tripod in your check-in luggage, as some airlines have strict hand luggage policies because of their size and weight.

7. Timer or Time-Lapse Function
When using a tripod to capture your shot, it’s very useful to set your camera to a time-lapse function or buy yourself a timer. Either use a remote timer, that connects via Bluetooth or through build-in software in your camera (if supported).

Using a timer for your travel photography allows you to have yourself in the shot or to shoot time-lapses easily. Create a movement in your photos by changing your position or the flow of your clothing after each shot.

8. The Rule of Thirds – General Photography Tip
Get the right composition by applying the rule of thirds; this is one of the best travel photography tips. The principle behind the rule of thirds is to break an image down into thirds (both horizontally and vertically) by displaying lines so that you have a 9 grid.
When placing the points of interest in the intersections or along the lines your photo becomes more balanced for your viewer.
Travel Photography Tip: The rule of thirds is important, but make sure to also look for contrasting colors, interesting backgrounds, and symmetry to get outstanding photos.

9. Shoot RAW
When you take a photo, the default filetype is JPEG, which is a compressed photo, meaning it’s losing some of its information and quality. Switch your camera to taking RAW images instead of JPEG. Even most phones support this.

RAW images are unedited and don’t look great at first, however, there is far more information to work with later on in for example Lightroom . As a result, it’s much easier to edit highlights, and white balance, as well as play around with the colors, leaving you with a really powerful photo.
Try: All our Lightroom presets

10. The right Lens
Depending on what you’re shooting that day, you’ll need different lenses. For example, a wide-angle lens of 16-35 mm is best for landscapes, and photos where space is limited. If you’re shooting details and portraits, use the prime lens mentioned above.
For the perfect middle ground use the Sony 24-70mm Vario-Tessar F4. It’s very flexible, as you can do both wide landscape photography and detailed portraits. This saves you from carrying around numerous heavy lenses and cameras.

Want to get a bird’s eye view? Consider adding a drone to your collection to capture unique photos and videos from above. Always check drone regulations before visiting your destination, as some countries prohibit them and will confiscate them on entry.
See what’s in our camera bag

Travel Photography Tip
Try to also shoot in aperture mode, best done with a 50mm or 85mm lens. This adds a blur in the background (bokeh) and brings the subject of your photo into focus. We use the Sony 85mm F1.8 : a prime lens with a wider aperture and fixed focal length. You can’t zoom, but you’ll get the perfect result with portrait photography and low light.
11. Edit in Lightroom
Lightroom is a perfect application to edit your photos and create your own unique styles. Load your RAW images into Lightroom and start experimenting! In doing this, we have created our own presets, which we use ourselves and are also available to purchase. ( See this video on how we use our presets )
Try: Our Lightroom Presets

12. Have Patience in Crowds
If you don’t have the opportunity to catch the sunrise and avoid the crowds, it can be harder to capture your perfect shot. However, with a little patience, it is certainly possible!
When you’re in a busy city, a good travel photography tip would be to position yourself, line up the camera, and get your subject ready (in our case, Hannah). You may be waiting for a while, but there is always a brief moment of peace where you can take the photo. For instance, when the traffic lights have turned red or the crowd of tourists has just moved on to the next statue. In this time, you can normally find a gap of several seconds to shoot the perfect image.

13. Shoot Vertical
Although horizontal might seem like a good idea to capture as much of the landscape as possible, this means you’ll need much more space without people in it. If you have a small window of time, photographing vertical is useful to avoid people and cars, etc. Additionally, it’s worth noting that the largest size photo you can post on Instagram is 4 x 5 ratio which works best with a vertical photo.

14. Use an ND Filter
ND filters stop light from reaching the sensor, making them the perfect camera accessory for bright sunny days. If you’re shooting outside in bright light, such as the midday sun, screw this filter on. It will instantly reduce the amount of light that comes into the lens and bring back the color that otherwise would be washed out. Use a variable ND filter that you can adjust depending on the light situation. We use a Hoya Variable Density Filter .
By purchasing through our links, you support us at no additional cost. Thank you for your support. ♥️
- Find Hotels via Booking.com
- Find a Rental Car via Sunny Cars
- Find Cheap Flights via Skyscanner
- Get a Travel Insurance via Heymondo
- Book Tours & Attractions via Viator
- Book a Bus/Train/Transfer via 12Go
How to Backup Photos while Traveling
Best cameras for travel in 2024 + camera lenses, what’s in our camera bag travel photography gear.
Looking for more travel information? Plan a chat with us for personalised travel advice or get an answer from the Salt in our Hair Travel Community on Facebook.
Love these tips! So useful :)
Your email address will not be published. Required fields are marked *
Notify me when new comments are added.

- 12 Travel Photography Tips from a Professional Travel Photographer
- Career Tips
- By Lisa Michele Burns
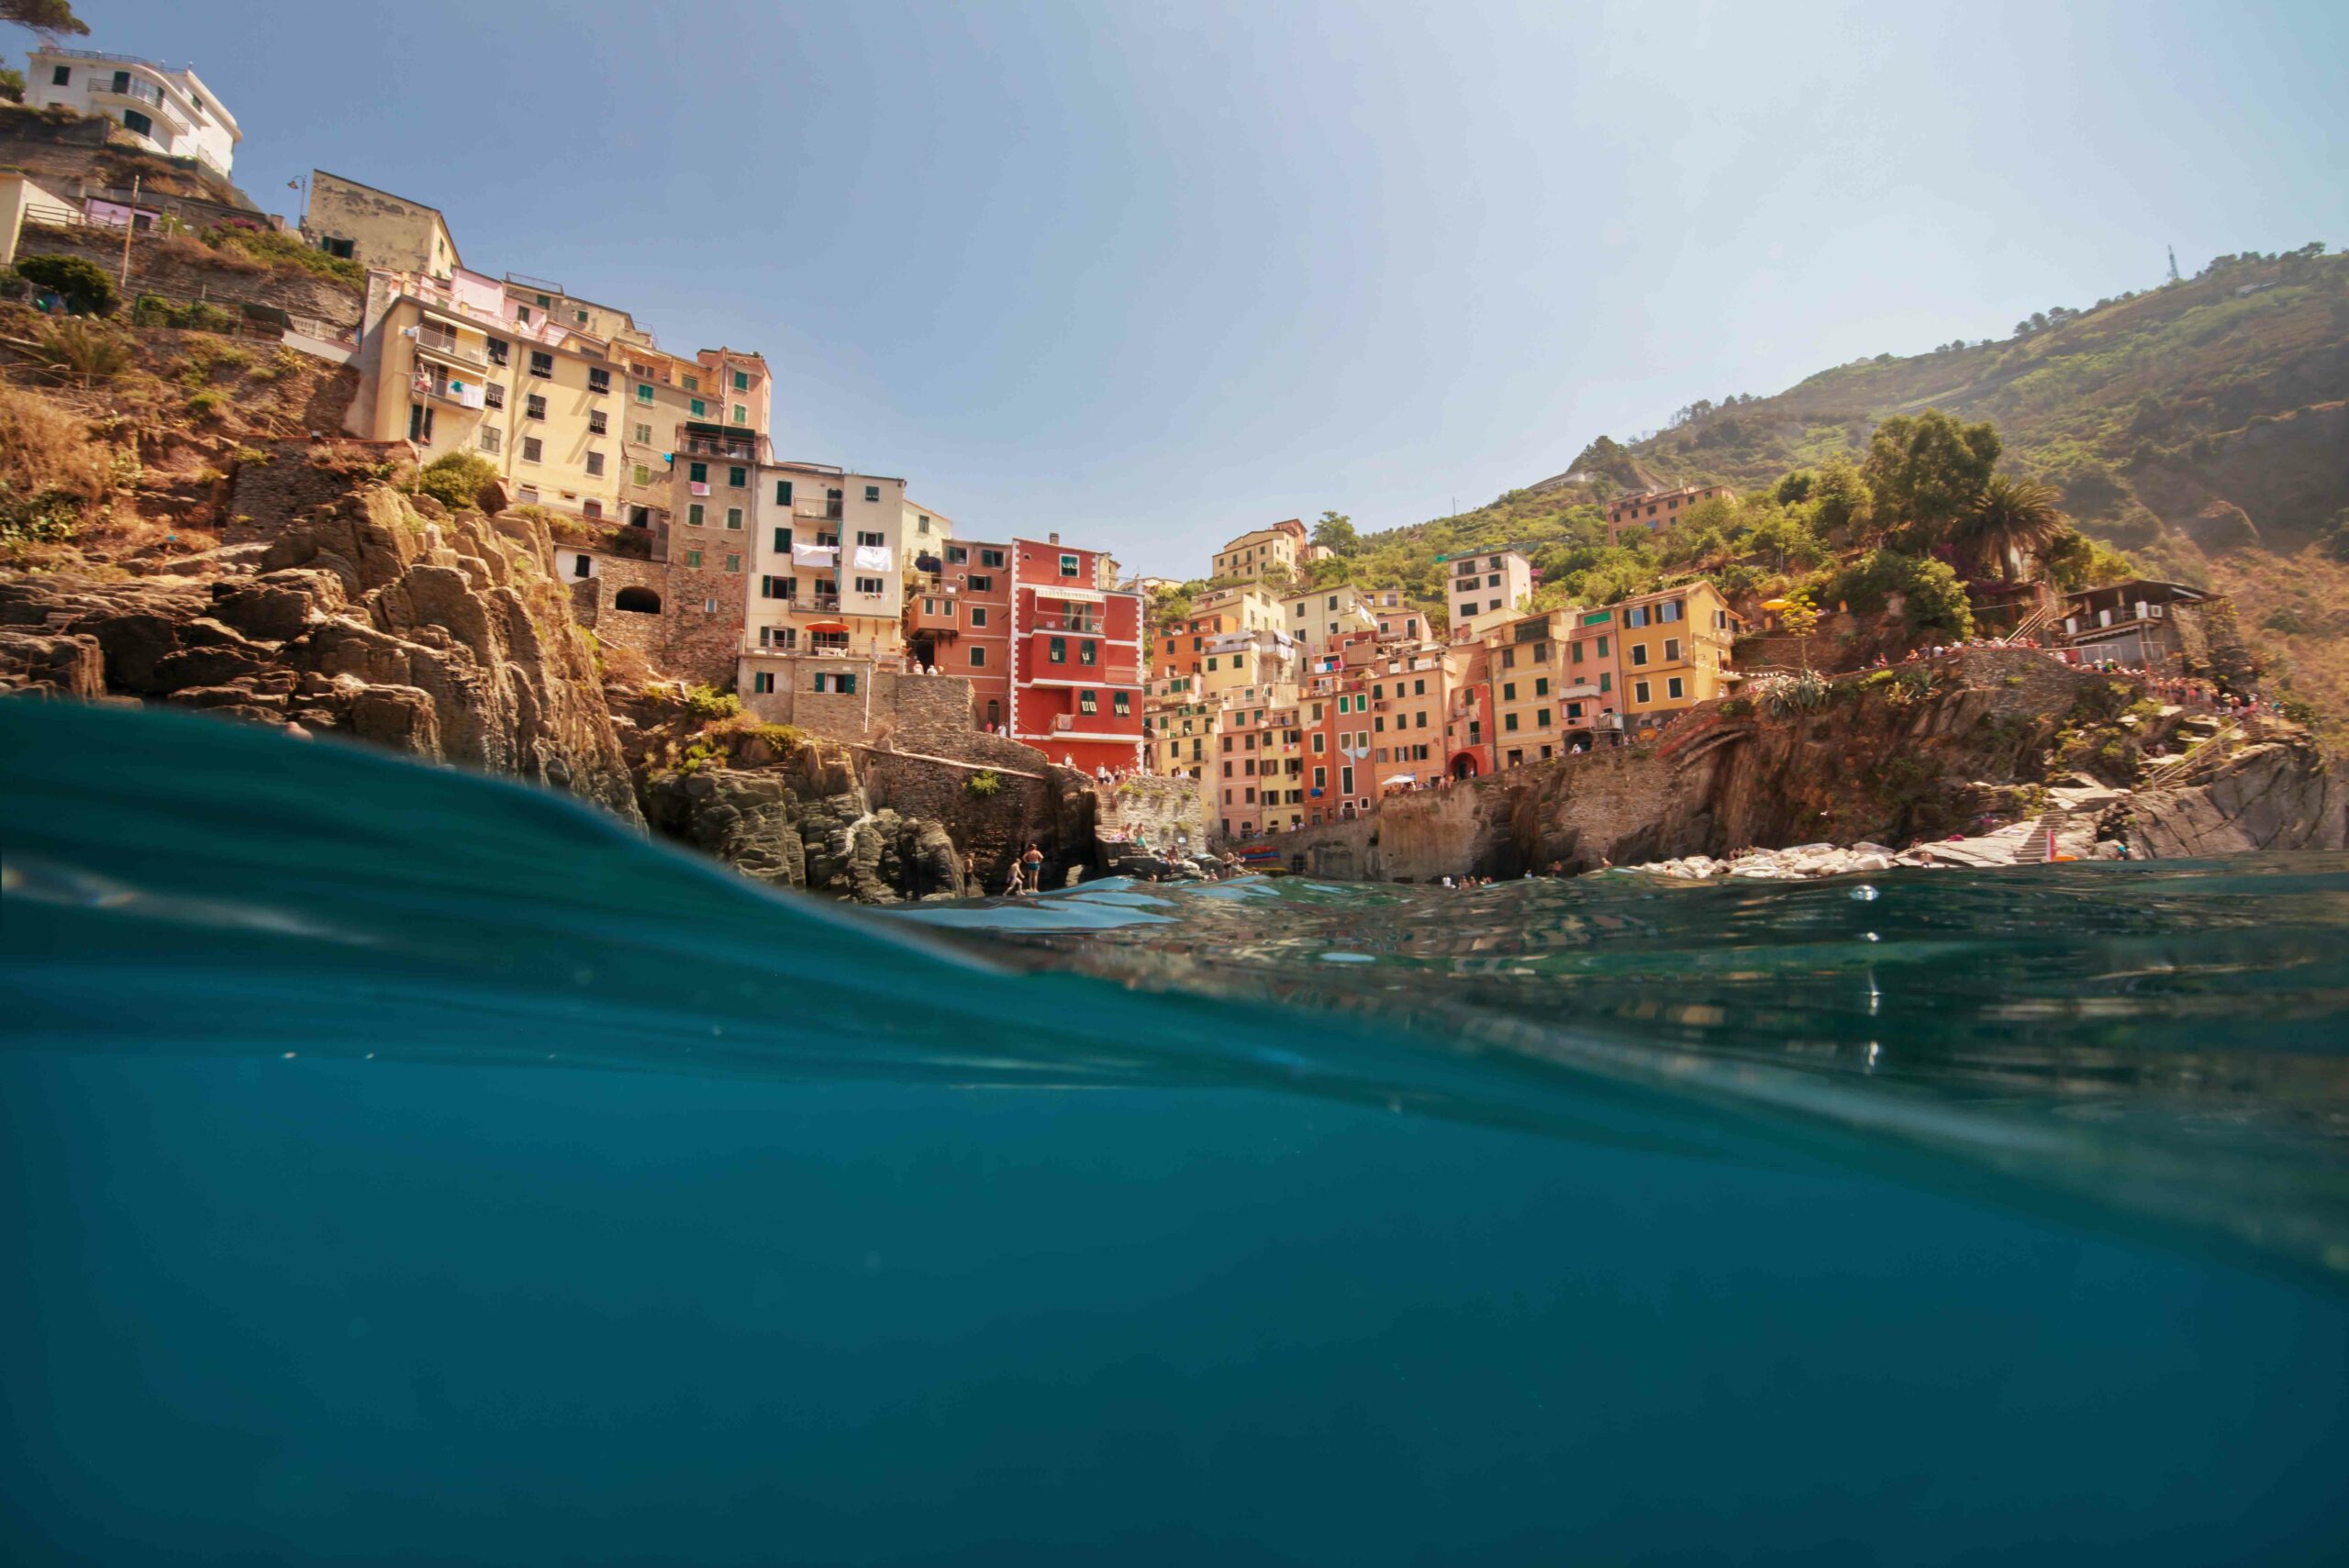
Improve your Travel Photography – Get Creative and Photograph the World
Travel photography offers a creative opportunity to document your adventures and capture the world around you. The places you visit, faces you see and cultures you experience.
As a professional travel photographer, I’ve photographed icebergs in Greenland, elephants in South Africa, remote lodges in Canada, and the temples of Japan. There are so many incredibly photogenic experiences and locations out there just waiting for us to photograph them on our travels.
If you’re looking to work as a travel photographer, building a portfolio is one of the best places to start, and what better way to do that, that on your travels? This guide below shares 12 travel photography tips that will help you capture more creative images on your next trip.
From composition to packing your camera bag, and storytelling to weather forecasting, browse the guide below and let me know in the comments where you’re travelling next!
Travel Photography Tips
1. research and plan logistics.
If you’re serious about taking great photos on your next trip, be sure to research the best places to photograph in the locations you’re visiting. If you’re heading for a major city, you’ll find lots of online guides and resources available that share some photogenic locations and experiences. If you’re seeking adventure and want to photograph landscapes a little more off the beaten path, I’d suggest heading straight for Google Earth or Google Maps first. That way, you can zoom in on the areas you’re going to, browse the maps, look for natural features like lakes, waterfalls, and mountains and start to see how it may be possible to reach them.
By planning to avoid the main viewpoints and popular spots, you’ll end up with more unique images and no doubt, a far more exciting experience!
When planning the logistics, try to research the best times to photograph the location, what the weather conditions will be and how much time it takes to hike/drive/fly to the location.
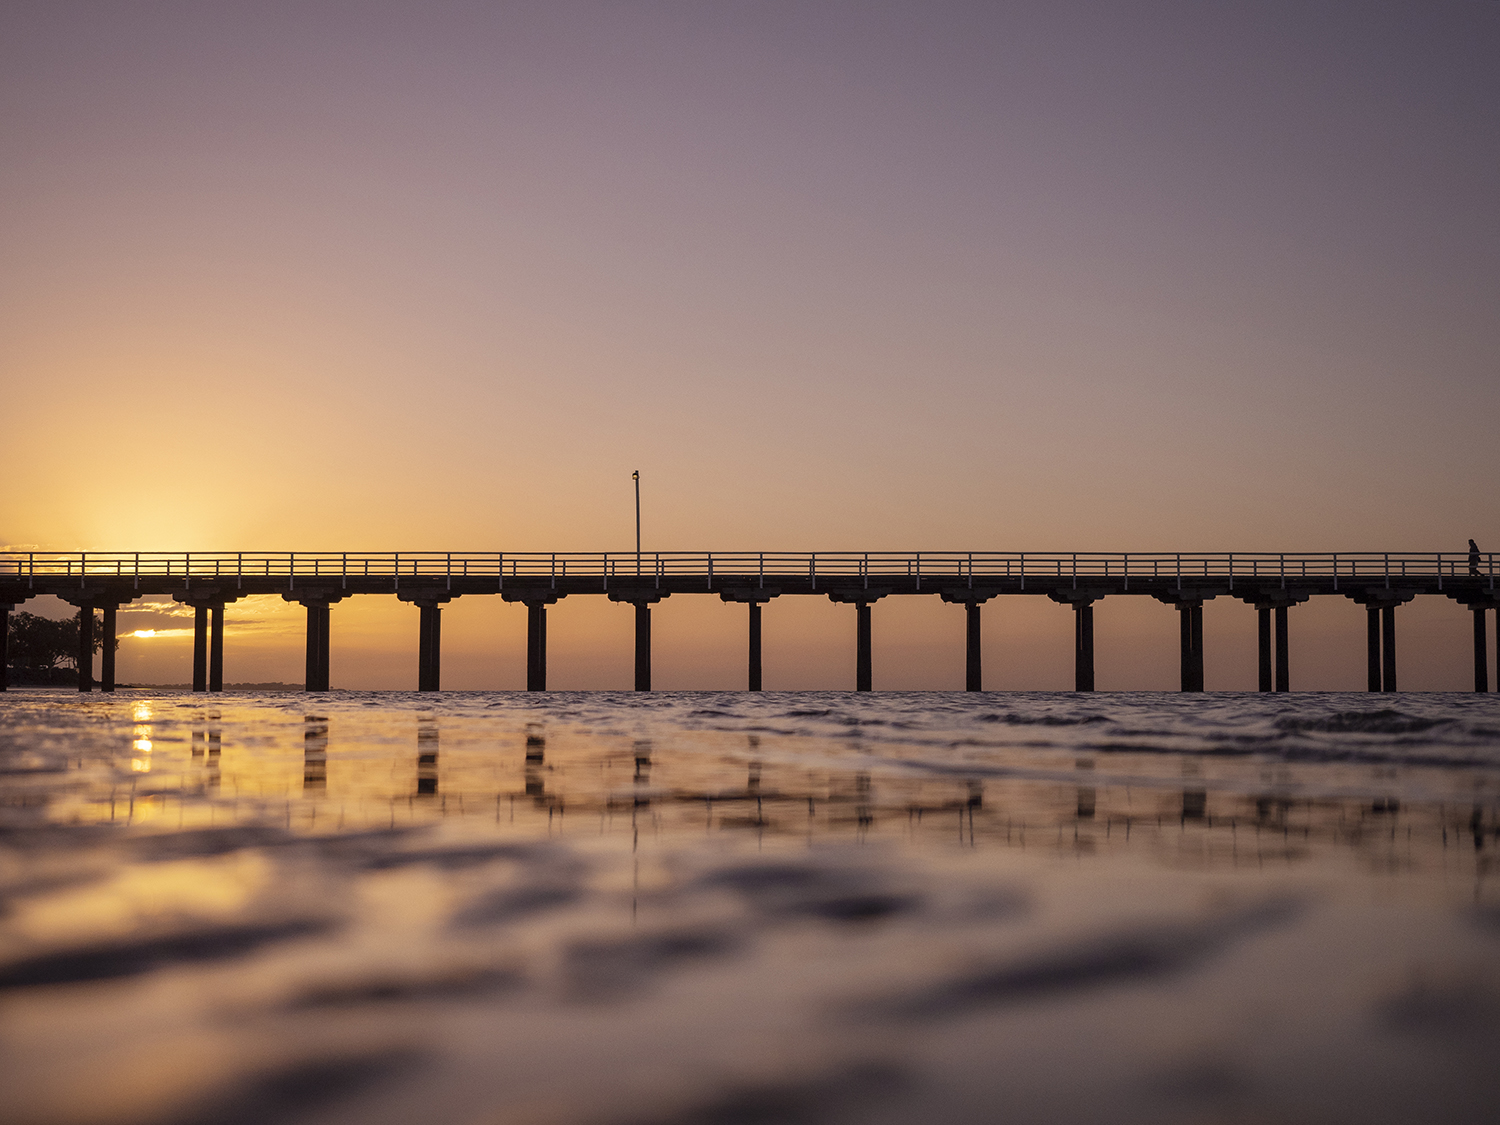
2. Check your camera bag, then recheck it
Being prepared to photograph your travels is an important step in making the journey a little smoother. There’s nothing worse than arriving somewhere, only to find you’re out of batteries, forgot to charge them, or forgot a memory card. This piece of advice comes from experience by the way! When photographing for clients or on assignments , I check my bag a bunch of times before ever leaving the house. When I photograph for fun though, it’s easy to get a little more relaxed and I’ve definitely gone to take a photo, only to find I forgot to put the memory card in my camera…oops!
If you’ll be hiking or spending a great deal of the day outdoors, packing your camera bag nice and light will mean you’ll enjoy the experience more. I travel with my OM SYSTEM cameras (read about my kit here ) which are really lightweight cameras, then opt for only 1-3 lenses based on where I’m going and what I’m aiming to photograph.
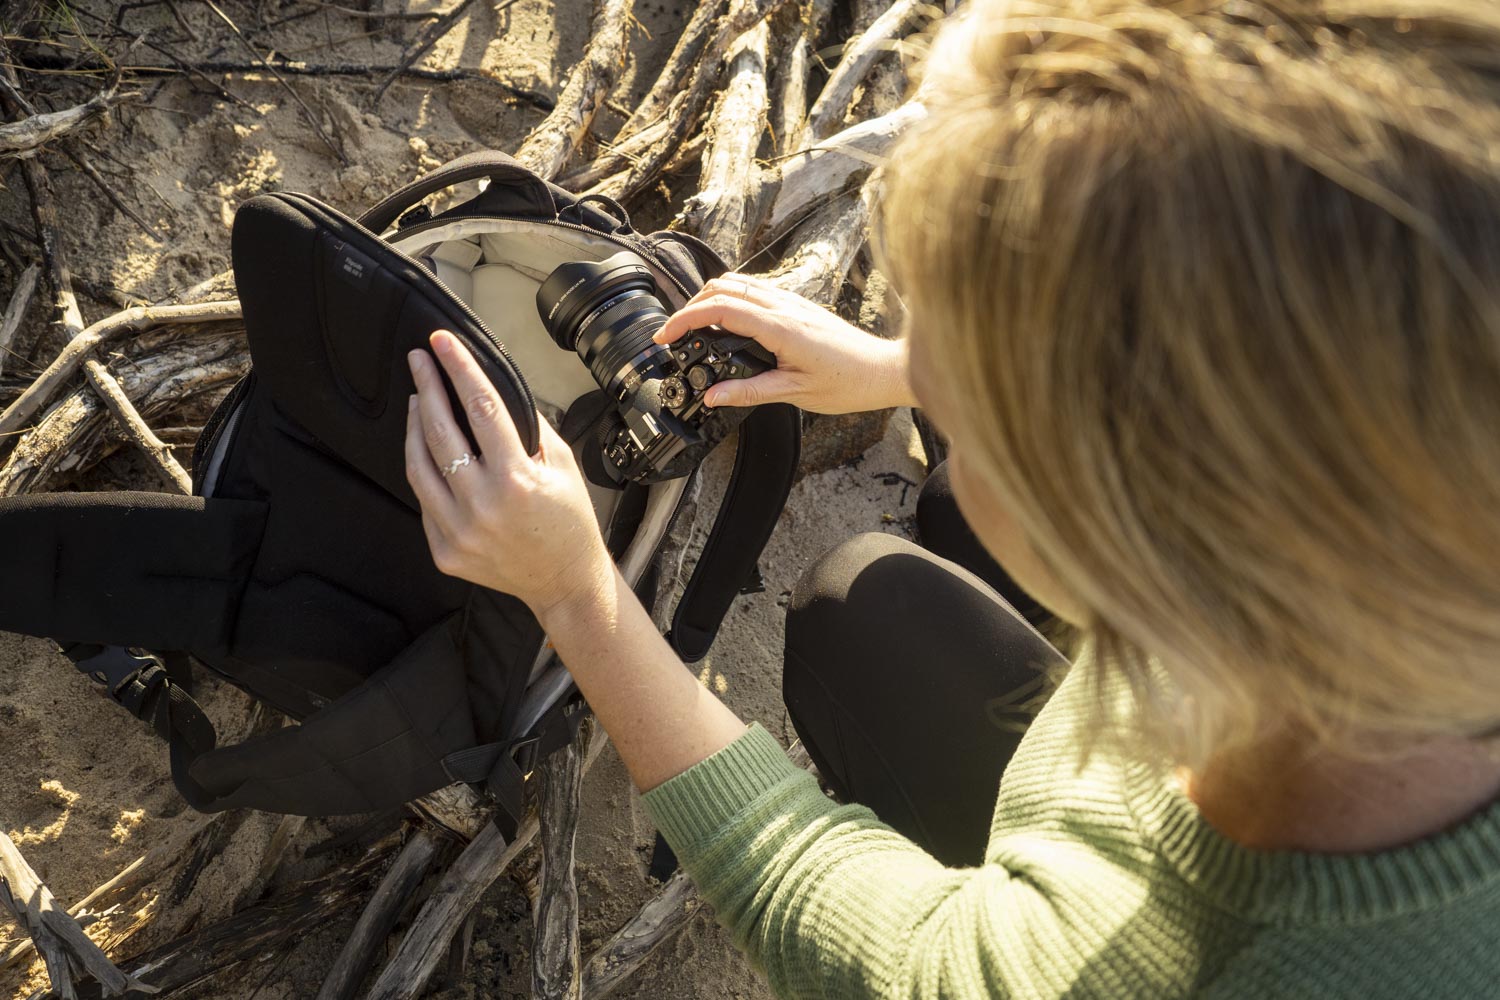
3. Seek out Sunrise and Sunset
Golden hour presents the most beautiful warm light and works wonders for landscape photography. Capturing the glowing sun before it dips below the horizon is one of my favourite things to photograph, and I always make sure I know exactly what time sunset is and arrive nearly an hour before!
Planning your day around where to be and what you’ll photograph during the golden hours of sunrise and sunset, helps you optimize how many locations you can visit and photograph on your travels. When photographing sunrise , aim for somewhere close to your accommodation, then for sunset, you can venture a little further!
Photographing sunrise and the pastel tones of dusk are what I aim for in my own landscape photography as it helps illuminate the scene in a beautiful way, and typically has less crowds or wind.

4. Think Creative + Look for Unique Angles
Once you arrive at a location, don’t just reach for your camera and snap away. Look around, assess the scene and start to get a feel for the stories you can tell with your camera. This way you’ll produce more considered photos, and discover exciting features and subjects to include within the image.
I always like to move around too, not just stand still at a marked viewing platform, but really explore the surrounding area and seek out the potential of unique angles. Don’t forget to bend down, look for ways to incorporate various elements of the scene within the image! It’s amazing how many angles open up once you take a moment to look around and observe the scene and what’s happening within it.
5. Get creative with Composition
This topic is my favourite of all within photography. Within the online courses I teach, composition is something I always enjoy sharing tips about, because it’s so incredible what you can achieve with just a simple adjustment in your creative process.
Composition is essentially, how you compose the elements of a scene, within a single image. So in a landscape photograph, a lake for example, it could be that you’ll be composing the rocks on the shore, the water and distant mountains. How you can approach that creatively, is by getting really low to photograph through the rocks so the water leads viewers towards those mountain peaks. Or you could opt to completely exclude the rocks, instead zooming into the mountains and using any visible greenery nearby to frame their shape.
Composition is where you have the chance to make your photography stand out. If you’re photographing alongside friends or other photographers, you’ll probably all end up creating something entirely different! Look for leading lines, reflections or foreground features. Need to work on your composition skills? Join The 3-Week Composition Reset to refresh your creativity and learn to ‘see’ the world in a new way – find all the details here.
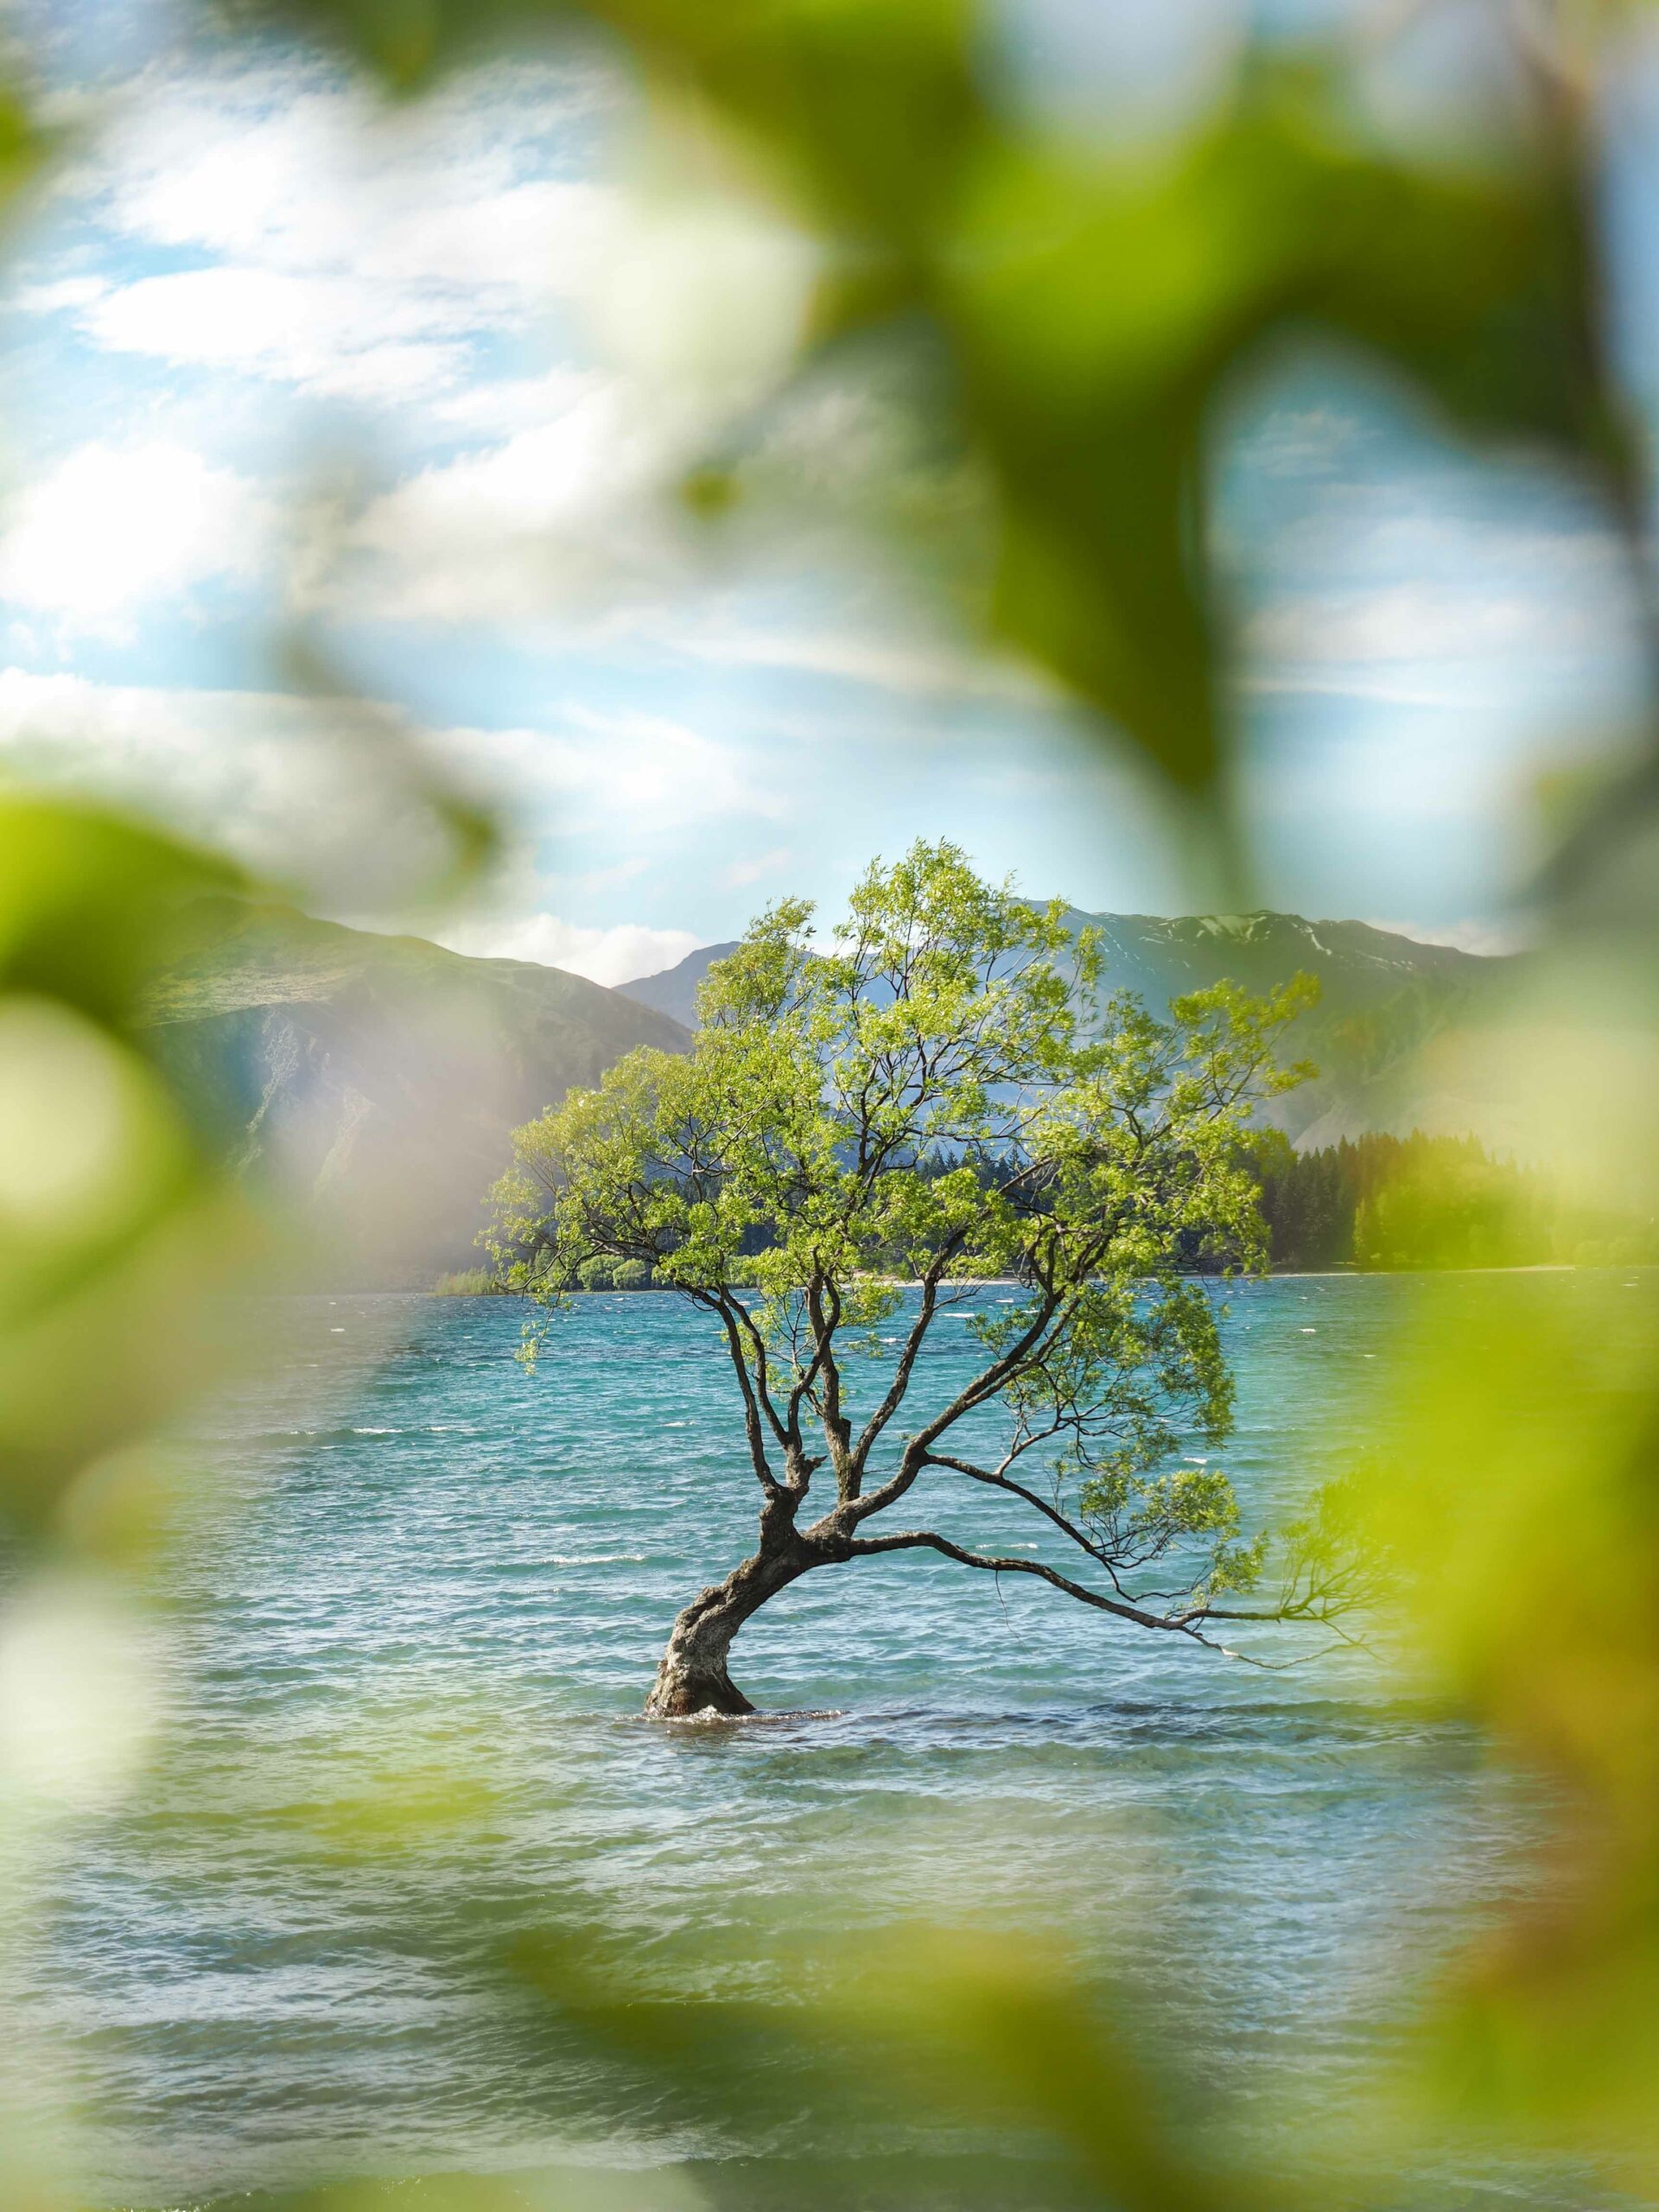
6. Document Cultures
Are you visiting somewhere with cultural experiences or local traditions? If so, research prior to visiting to know what you can and can’t photograph. Being culturally sensitive is very important as a photographer, no photo is worth invading someone’s privacy.
However, if it’s possible to document the experience or destination, try to capture images that highlight the candid moments, finer details and cultural intricacies that solely exist there. Portraits are a wonderful way to showcase people and daily life, always ask before taking someone’s photo though, and I like to try and be as quick as possible, so it doesn’t make them awkward at all – the first smile is usually the most natural!
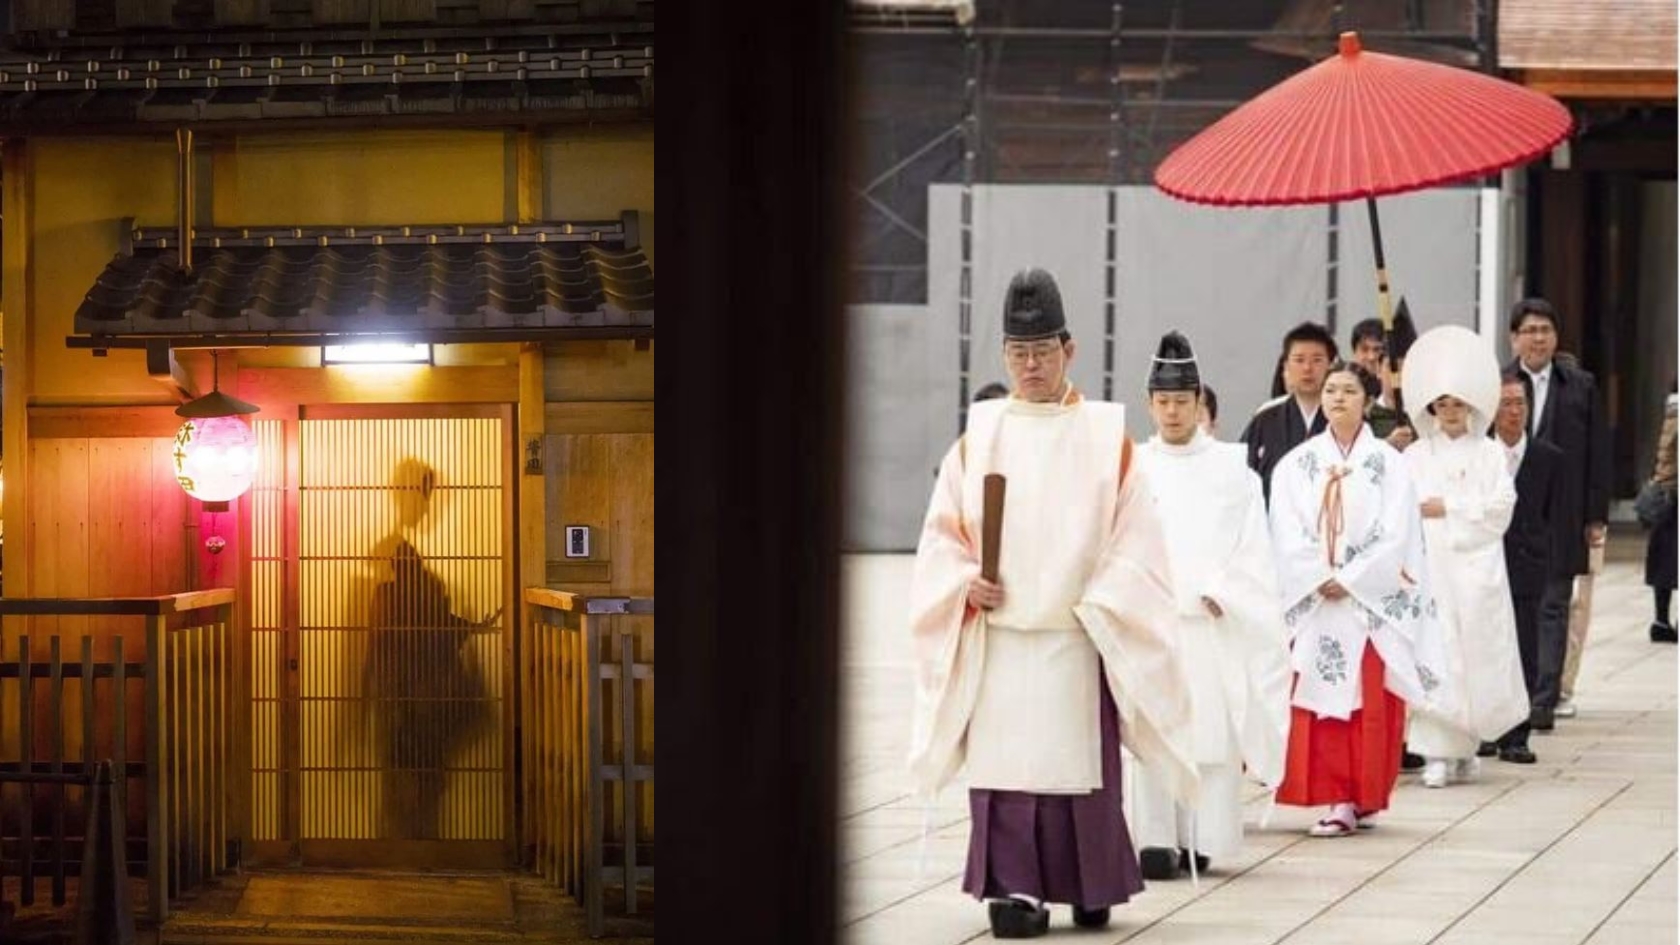
7. Create Travel Photography with Purpose
Similar to composition, noted above, creating with purpose simply means thinking before clicking that shutter button. We’ve all returned home from our travels with thousands of random photos that we’ll never look at again, but what if we stopped to consider what we’re photographing, how, and why?
Creating photographs with purpose will help to produce a collection of travel photographs that connect, showcase where you’ve been, and help to document and tell a story of your adventures.
I love to try and capture a collection of varied images, a mixture of detail shots, landscape images, portraits and patterns when I travel. Actually, I’m exaggerating, I’ve been very obsessed with photographing patterns in nature lately so a big portion of my photos have been patterns in sand, dirt, rocks, water…I should probably get back to some variety haha!
8. Stay Steady
Maintaining stability when photographing is the key to sharp, detailed images. You’ll know when stability was lacking because your images may turn out a little blurry!
You can use a tripod if you know you’ll be photographing in low light or aren’t super steady when holding a camera, however if you’re like me and don’t enjoy carrying a tripod around, there are other ways to keep steady when taking photos.
My camera, the OM SYSTEM OM-1, has in-built stability, meaning that it’ll adjust and keep steady, even if there’s slight movement on my part. Otherwise, if your camera isn’t equipped with in-built stability, you can lean on something solid, like a fence, building or table top when taking a photo.
The ‘Photographer’s Stance’ is a bit of a joke, but take a peek at people when they’re taking a photo…we all stand a little like a tripod, don’t we? This stance can actually help with stability, bracing yourself while taking the photo to stay nice and still and avoid any blur in your images.
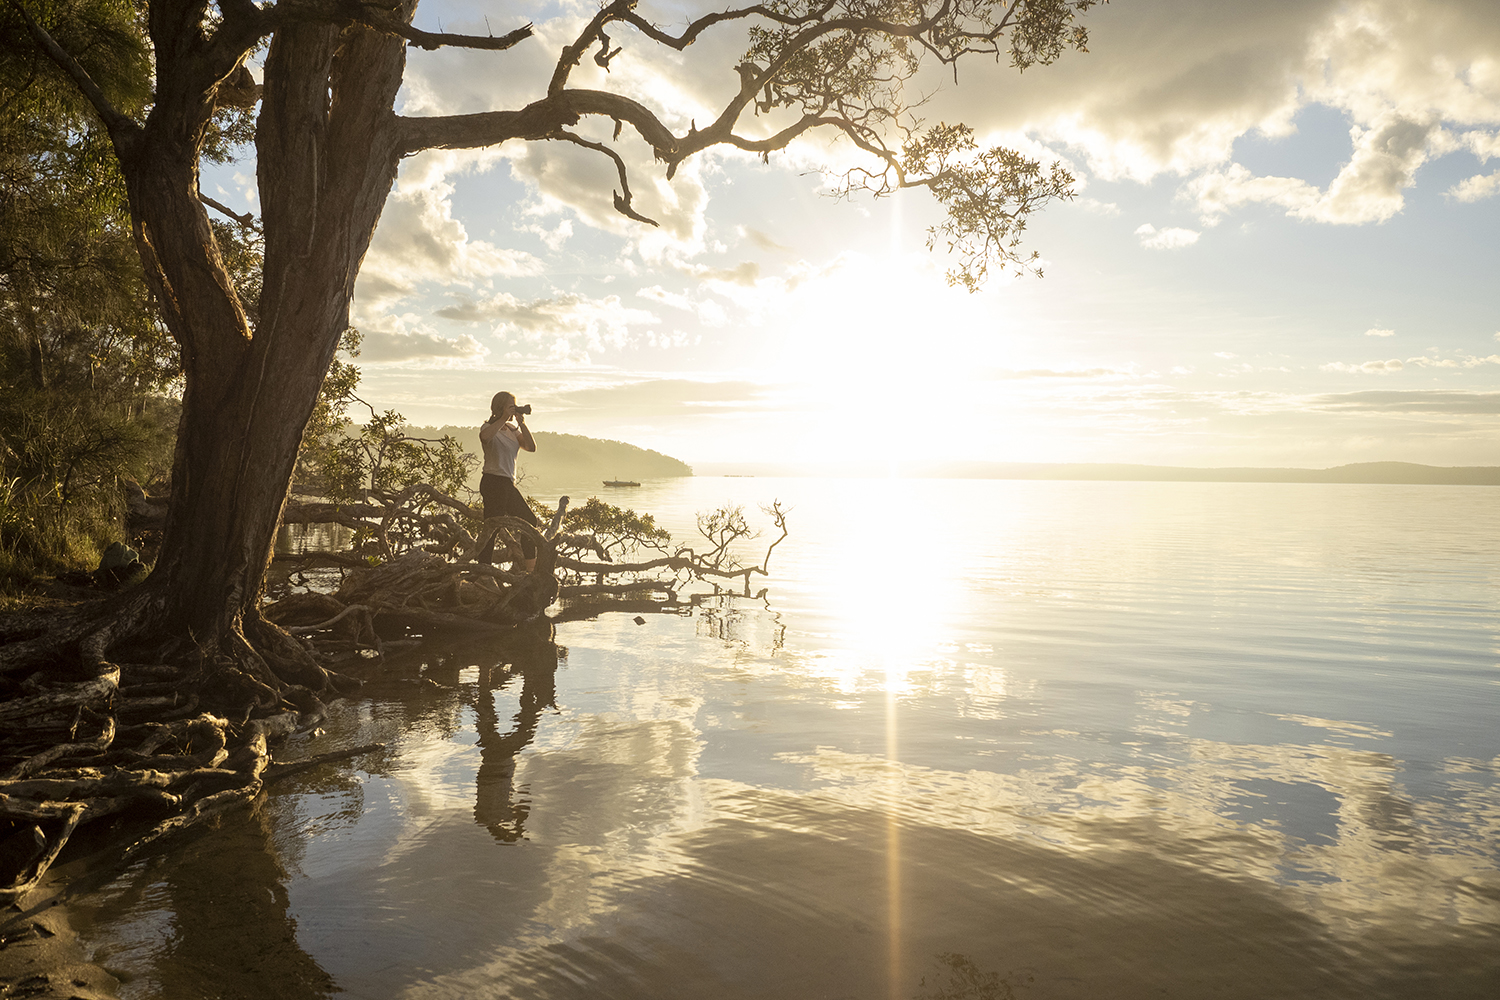
9. Experiment with Shutter Speed
This is something I’ve enjoyed a lot recently, particularly producing travel photos with a more artistic result. Shutter speed is related to the time your shutter is open, exposing available light on to the camera sensor. The longer a shutter is left open, the more light is let in.
A fast shutter results in a quick shot with less light, a slow shutter means your cameras shutter is left open longer, resulting in a long exposure image. You can actually hear the sound your camera makes when taking an image, if it’s a simply click, you’re probably shooting with a fast shutter speed, or on auto. If you hear a click…pause…then another click, it’s probably a longer exposure. Eventually you’ll learn to know exactly how long the shutter speed is and be able to quickly adjust for the result you’re seeking.
Experimenting with shutter speed is a great way to incorporate movement and light into your image. You can read a guide here about ICM Photography, and another guide here that I wrote about using Live ND with the OM SYSTEM.
10. Get comfortable with your camera settings
Travelling is a great opportunity to learn photography and get comfortable with your camera while taking travel photos. We’re usually so much more inspired to use our camera when exploring a new destination, so use this chance to press a few new buttons on your camera or flick over to manual mode and challenge yourself to learn how it works.
Controlling the ISO, shutter speed and exposure can help to produce an image that reflects the scene around you. Learn to work with light and capture it correctly so you’re exposing the highlights and shadows well.
Don’t pressure yourself to jump straight to manual mode, travel photography in particular is usually filled with capturing fast moments, and fiddling with manual mode never works (for me anyway!). I prefer to shoot in aperture priority mode, this enables me to quickly adjust the ISO and exposure, while the shutter speed is then calculated by the camera. Alternatively, if I need to capture an image in a certain way, I’ll then switch to manual and play with the shutter speed.
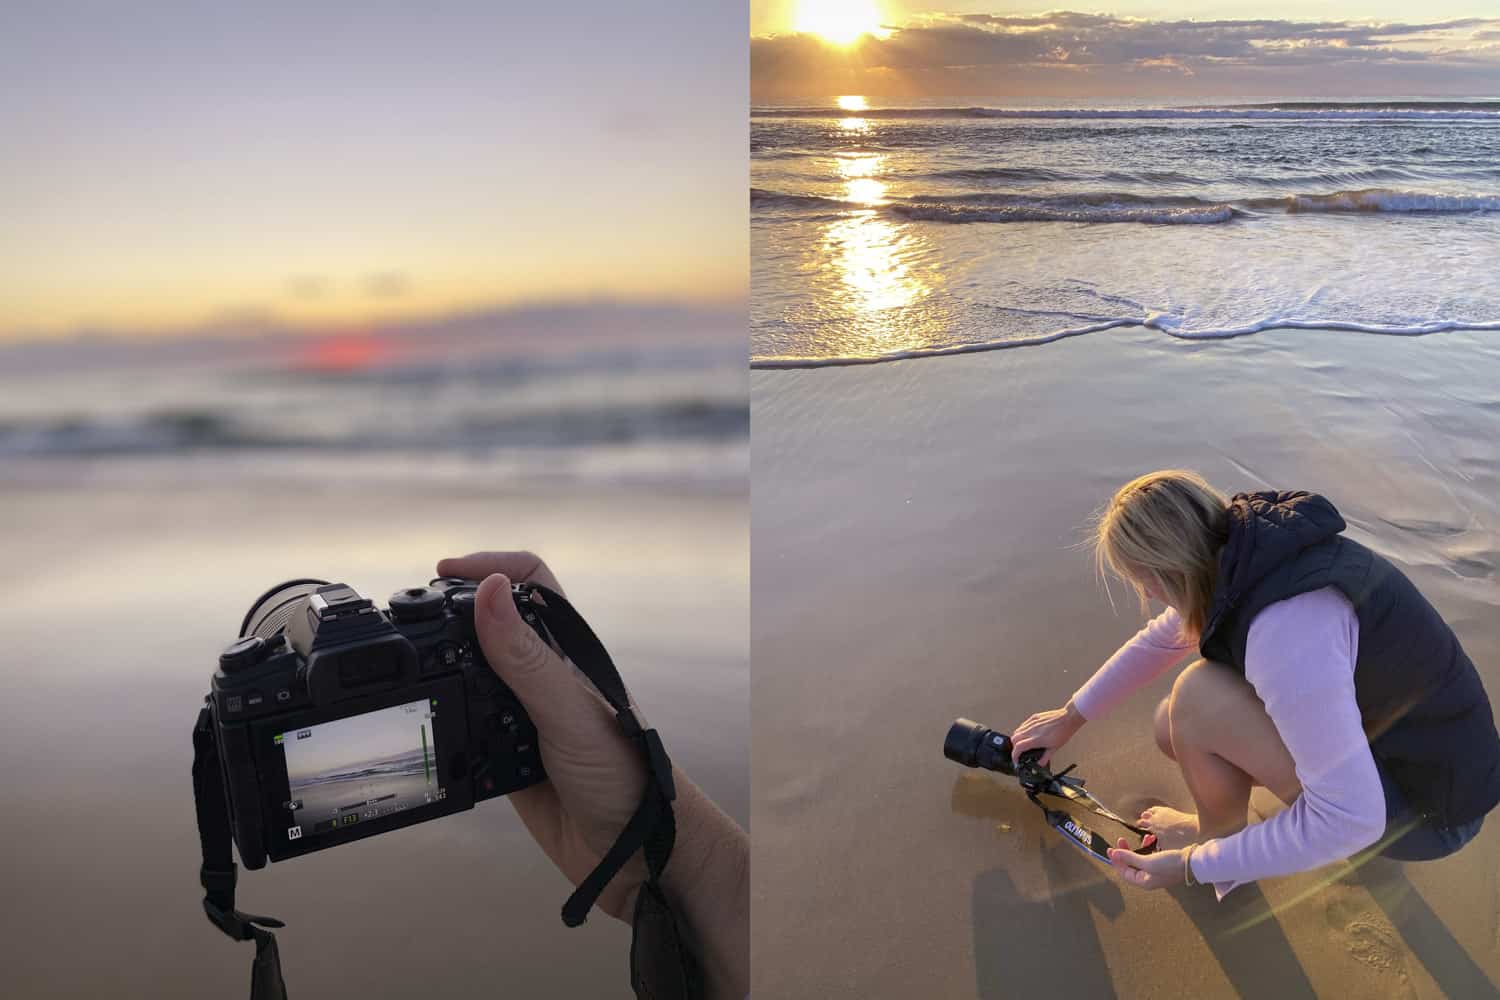
11. Edit and Enhance your Photos
While AI is presenting some interesting editing opportunities in travel photography (hello fake scenes and fantasy dream locations), enhancing your travel photos can form part of the creative process. I love saving my images from a day out, browsing through to pick out the favourites, then editing them that night while travelling.
Editing doesn’t have to make your image wildly different from the original, it can simply enhance the tones, colours and scene a little. Avoid adjusting the saturation too much as this can easily result in your travel photos looking a little too colourful.
When editing, consistency is key. If you’re looking to compile a collection of photographs from one location or destination, aim to keep the editing and tones to a cohesive style. This will also help to identify the work as yours, rather than a random collection of presets and colour combinations.
12. Become a Storyteller
Travel photography gives you the chance to create stories about the places and faces you see on your travels. When you pick up a travel magazine, the images help to tell the story alongside any written articles. They visually share why you should visit, what you can see, or creatively highlight the beautiful features of a scene or subject.
If you’re keen to work as a travel photographer, telling stories with your work will provide opportunities to approach publications and pitch article, or photo feature ideas. Producing a collection of images that connect together to create a visual narrative, will go a long way when sharing your work with editors or tourism professionals.
You can read more about the ‘ Art of Storytelling here ’, or if you’re looking to work professionally as a travel photographer, The Freelance Travel Photographer Course guides you through all the steps required to develop a professional portfolio, network, find work and create longevity with your career in the travel industry. You can start online anytime, with no time pressure as the entire course is designed to be self-paced!

The Benefits of Travel Photography
Travel photography is such a rewarding way to see the world. By taking photos when we travel, we’re staying present, practicing mindfulness and peering deeper into the world around us. With all creative pursuits, practice always helps so I’d encourage you to keep your camera out, and capture as many photos as you can, being considerate of which compositions work best, and creative techniques you can use to enhance the outcome of your travel photos.
Related Travel Photography Articles on The Wandering Lens –
How to Become a Professional Travel Photographer
The Benefits of Working Freelance as a Travel Photographer
Photography Tips Archive – Camera Settings Advice + Creative Techniques
7 Travel Photography Jobs to take you around the World
Want to learn with The Wandering Lens? Explore the self-study courses and discover your potential in travel photography!
Are you craving a creative career, struggle to know where to start as a photographer and need a little guidance.
These creative courses have been written for you and bring together over 17+years of experience and lessons from working in the industry. I want to see others share their talents and get published, sell prints, find clients – to have the confidence to achieve whatever it is you want to within the field of photography.
My three comprehensive photography courses are now available for self-study enrolments and upon signing up, I’ll be in touch with instant access to get you set up and logged into the learning portal! You’ll receive access to every workbook within the course program and can work your way through in whichever order you chose.
Which of the following sounds like you most?
#1 You want to find work as a freelance travel photographer? The Freelance Travel Photographer Course is open for enrolments! Learn more here.
#2 You need a creative boost and want to transform your photography? Start with The 3-Week Composition Reset and work through composition and creative challenges.
#3 You’re keen to start a business selling prints? The Print Store Launch Pad will guide you through the entire process from curation and logistics to marketing + sales.
Take a peek at the course options below, if you’d like to discuss which one will suit you, send me an email via [email protected] and we can chat!

Hello! I’m the founder and photographer behind The Wandering Lens. With 17+yrs experience as a professional travel and landscape photographer, all advice found on this site is from my personal experience on the road. I hope it’s useful for your own travels and would love to hear in the comments about your trips and experiences around the world.
Enjoyed reading? Share the article!
- Leave a comment
Keep Reading...
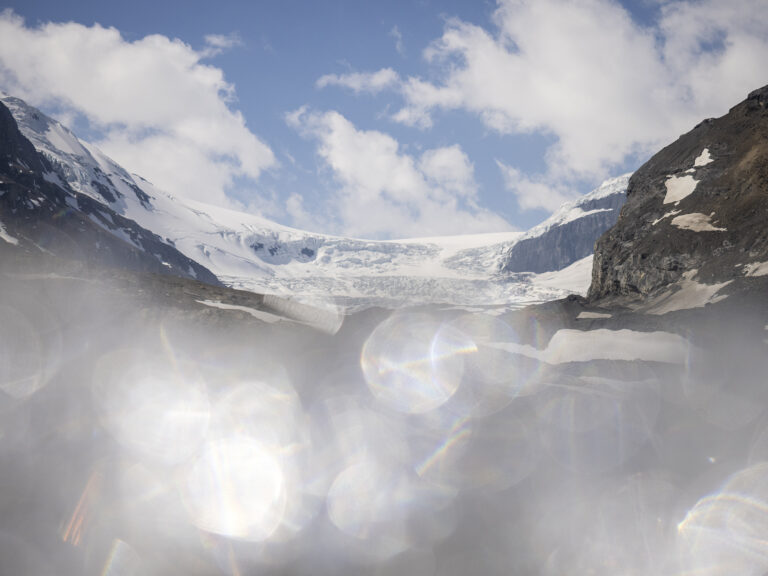
Columbia Icefields – Hiking on the Athabasca Glacier with IceWalks
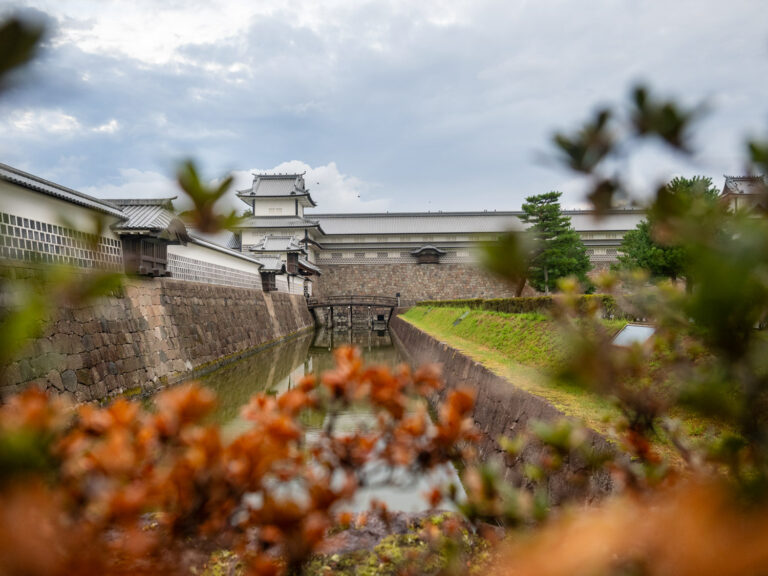
A Photographer’s Guide to Kanazawa, Japan

Mastering Light: A Quick Guide to Golden Hour Photography
Leave a comment cancel comment, looking for something….

Photography
Travel photography tips for near or far.
Get travel photography tips from professional photographers so you can capture new landscapes, cityscapes, and portraits of people you meet on your journeys.
Not sure which apps are best for you?
Take a minute. We'll help you figure it out.
JUMP TO SECTION
Types of travel photography
Top tips for travel photography
Turn travel photography into a career
A 10,000-foot view of travel photography
- Travel photography can be pictures of landscapes, cities, architecture, or people on the street.
- You don’t have to go far to start practicing — photograph interesting places close to where you live.
- To make a career of it, build an online portfolio of your best work.
Types of travel photography.
Travel photography can stretch across genres because you can take any type of photo when you travel. Depending on where you go and what you do, you can touch on everything from astrophotography to wildlife photography . As you travel, consider which aspects of your journey you want to focus on.
Landscape photography.
The world is dotted with picturesque, compelling, and breathtaking sights. When you’re on a walk and you want to capture the feeling of the scenery you find, you can focus on landscape photography. Make sure to do your research before you go, be intentional about the time of day you want to shoot, and be sure to bring gear to protect yourself from the elements.

City photography.
Capture the cityscape . From vast skylines to everyday life on the street, cities present wonderful subjects for experiments with perspective, texture, light, and color. Play with framing and vantage points, from the tops of buildings down to street level and below.
Architecture photography.
With architecture photography , you can explore the universal features and specific quirks of human-made structures wherever you go. Study a still subject like a building or a bridge to highlight the effects of weather or time of day, or to play with different vantage points.

Street photography.
Once you’re on the street, you can focus less on the architecture and more on the people moving through the city. Capturing life on the ground is the goal of street photography — a style of visual storytelling that shows off and communicates the experience of everyday life. It’s vibrant and spontaneous, and you have to work with whatever light is available. Catch people as they move about their day to immerse yourself in the experience of a new city.
Top tips for travel photography.
Finding your way in the world of travel photography doesn’t have to be overwhelming or onerous. Discover how you can get started with these tips.

1. Follow your wanderlust.
No matter where your interest lies, if you travel for the shoot, it counts as travel photography. Like documentary photography , travel photography expresses some truth about the particular scene it captures. “For me, it’s just one way to share my perspective on the world,” says professional travel photographer Tiffany Nguyen. “I travel to different places, see the world through my lens, and tell stories through photography.”
2. Start where you are.
You don’t need to quit your day job and sell all your possessions to make travel photography. “I would just start in your own backyard,” Nguyen says. “I started small, doing short, weekend trips, and then when I got more comfortable traveling and better at photography, I wanted to take it to the next level and do more international locations.” Begin with a list of places nearby that might be interesting to shoot. Find locations you can get to in an afternoon.
3. Research the location.
You can save yourself time and effort, and get better pictures, if you plan ahead. “Having the right inspiration before you get there is really key,” says travel photographer Forrest Smith. “Before I go, I like to build a moodboard to try to find the exact shot that I want.”
Nguyen does a lot of internet research, looking at blogs, Google Earth, and Google images. She scouts Instagram for different angles and perspectives. “I also find that social media is a huge resource, especially using hashtags on Instagram,” she says. “They’re really helpful for finding live conditions at a certain location. For example, if I go to a waterfall, I don’t really want to waste my time trying to get water photos if the waterfall is dry. So I’ll search the hashtag of the waterfall name to get an idea of the water level.”
In addition to weather conditions, your internet research can tell you how popular the location is, how to get there, and what times might be the least crowded. “I’m looking for the length of the hike, the elevation gain, any obstacles or challenges that are going to come my way,” says Nguyen.

4. Bring the right equipment.
Make a checklist so you don’t forget anything as you pack your camera bag. Include things like extra batteries, an extra memory card, a headlamp, emergency snacks, rain gear, protective cover for your photographic equipment, and extra lenses . (If you know you’ll do a lot of walking, make sure you really want that telephoto lens before you bring it.)
“For me it’s important to have compact, lightweight equipment,” says Nguyen, who uses a mirrorless Sony camera. Unlike DSLR cameras , mirrorless cameras have no mirror to reflect the image to the optical viewfinder. “Their bodies and lenses are much smaller than the DSLR cameras, but they’re still super-high quality, super-high resolution,” Nguyen says. She uses several lenses, including a 24–70mm f/2.8 lens and a 16–35mm f/2.8 lens for wide-angle shots. She’ll bring a prime lens (a lens of fixed focal length ) for astrophotography or low-light photography, and a lightweight carbon-fiber tripod. If she’s going to be close to her car, she’ll bring a 70–200mm f/2.8 telephoto lens.
Both Nguyen and Smith will bring drones for aerial shots if they know they’re going somewhere drones are allowed to fly. (Drones are not allowed in US national parks.) The best camera for his work, Smith says, is a Canon 5D Mark IV DSLR. Like Nguyen, he uses a 24–70mm f/2.8 lens. “If I’m going out for the day, I like to have something wide and something more cropped, so I’ll bring my 24mm prime or my 100mm prime,” Smith says. He’ll also bring neutral density filters . “They’re really great to have if you’re photographing water.”

5. Get the timing right.
Part of your research should include finding the best times of day to shoot and factoring in travel time. “I like to take advantage of the light, so I like to shoot at golden hour or sunset,” Nguyen says. “I try to avoid shooting at midday because the harsh lighting doesn’t look good for photos and there are more people out.” If you want to shoot an empty landscape in a typically busy place like a national park, you may want to get to the location before sunrise.
Always be on the lookout for great shots that you haven’t planned. “You have to be in the right place at the right time with the right attitude,” says Smith. “Keep an eye out because there are always stories to be told. Whether you’re in the heart of New York City or the middle of nowhere in Utah, there are always things happening that, if you’re attentive to them, you can use to tell an incredible story.”
Smith recommends keeping a camera with you at all times, even if it’s just a Polaroid or the camera on your smartphone, and using it to develop your creative eye. “Whether you’re at an iconic location or you’re just walking around your neighborhood, look for compositions and good lighting. Those off-the-hip, spur-of-the-moment photographs often tell a more incredible narrative than the super-planned shots do,” he says.
6. Accept uncertainty.
Travel is all about unpredictability. You might stumble upon a once-in-a-lifetime shot, or you might get fogged in and rained on. Try to roll with the punches when you encounter frustrating weather, find a road closed, or miss a train.
It helps to have backup plans and even backup plans for your backup plans. That way, you’re never at a complete loss for what to do if things go wrong. “Be realistic with your expectations and with things that you can’t control; it’s just a lot easier to be flexible and try to find a different plan,” Nguyen says.

7. Focus on telling stories.
Every travel photograph has a story to tell about a time and place. “Being able to bring people along for your journey through your images is the most important part of travel photography for me,” says Smith. “You want to be able to not just show the location but breathe life into it and find those authentic moments.”
Don’t be afraid to tread the beaten path. Even if you travel to places that have been photographed by hundreds or thousands of people, your photos and your stories will be unique. “You can have ten different photographers go to the same location, but you’ll come back with ten completely different images, ten different edits, and ten different stories, because everyone sees the locations differently,” says Nguyen.

8. International travel photography tips.
International travel involves a lot of planning because you want to make the most of your time. But it’s also important to accept that you can’t plan every moment. “Part of the experience that’s so fun and rewarding is how spontaneous it can be,” says Nguyen. “You never know where you’ll run into things you just can’t plan out or predict, so you just have to just go with the flow and work with what you find around you.”
Approach local people and their customs with an open mind and heart, and try to participate in their culture instead of just observing it from outside. “The people make the big difference. They have their own stories to tell, and you can learn a lot from them,” says Nguyen.
Remember to always be respectful. If you want to take a photo of someone, talk to them. Get to know them a bit, and then ask for permission. “A majority of the time, they’re more than happy for you to take their photo and maybe talk, too,” Nguyen says. “People think it’s fun because it’s not something that happens every day.”
Edit, organize, store, and share photos from anywhere.
Adobe Photoshop Lightroom
View product details
9. Family travel photography tips.
You can apply all the tips above to the family photos you take on your travels. Just remember to be patient, do your best to cultivate patience in your family members, and be sure to pack a tripod and remote so you can capture the whole group at once.
If you have specific staged shots in mind, communicate your ideas ahead of time. It might help to share some inspirational photos from Pinterest or Instagram to get buy-in from every member of the family. If you have young children (or teenagers) be prepared to bribe them to cooperate.
Otherwise, focus on taking candid shots of your family members. Like people, candid photography can be unpredictable. You have to read the room, adapt, and give up control, but you might perfectly capture the experience of family travel with a mix of shots that cover everything from excitement to exhaustion, unfettered joy to unequivocal irritation.
10. Practice.
The best way to get better at travel photography is to keep going places and taking photos. “Put in the time and effort, show up and shoot as much as you can,” Nguyen says. Keep building your portfolio, and when you’re ready to look for work in the photography business, be selective about the photos you share. Be sure that you know why you’re including each photo and what skills you want to showcase with it.

11. Make the right moves in post-processing.
With Adobe Photoshop Lightroom photo editing software, you can take your photos from good to great. If a photo just needs a nudge toward the rule of thirds , or your horizon needs leveling, you can easily make those changes in Lightroom. You can also apply presets for fast fixes to urban photos and nature photos or follow step-by-step tutorials to learn how to do everything from image sharpening to removing unwanted objects.
Wherever you go with your camera, remember to embrace the adventure and the uncertainty that goes along with it. Be patient with yourself and your surroundings. With every photo you take, you’re practicing your photography skills and adding to your story.
Turn travel photography into a career.
To turn your passion for travel photos into a career, start by taking a lot of photos and collecting your best work. If you’re committed and willing to think outside the box, you can start your own photography business .
- Pay attention to costs. You may already have camera gear and a computer, but you’ll also have to spend money on photo editing software and travel.
- Create a portfolio. Clients have to see your work before booking, so create a portfolio specific to your audience and your niche.
- Market yourself. One key part of turning your photography into a business is paying attention to marketing and branding . Establish an aesthetic and a point of view, so potential clients can have a sense of what they’re getting when they work with you.
- Think unconventionally. Many tropical paradises are oversaturated with people who want to travel and take photos of picturesque landscapes. A great place to start is by contacting bed and breakfasts, smaller hotels, and other businesses trying to attract visitors. Link them to your portfolio and see if they’re interested in providing lodging or a small per diem to photograph their resort.
- Treat every trip as an opportunity. If you’re interested in travel photography, you've likely already been bitten by the travel bug. Whenever you take a trip, take some time to build your portfolio. Professional photography can be a nomadic lifestyle with inconsistent income, so embrace a mindset of working wherever you are and being open to new opportunities.
Finally, remember that careers are not made overnight, and every small step you take as a travel photographer is moving you closer to the goal of adopting it as your career. Good luck, and happy trails.
Contributors
Tiffany Nguyen , Forrest Smith
Share this article
Do more with Adobe Photoshop Lightroom.
You may also like
Language Navigation
The World's Most Inspiring Travel Portrait Photographers

A portrait can be so much more than a face in a photo – portraits can tell stories, reveal histories, and capture emotions. Travel portrait photography poses the distinct challenge of capturing that depth in an image all while traveling through places where the photographer might not speak the language or be familiar with the customs. Here are the photographers that work through those challenges to show us the common threads in our humanity.
Steve mccurry.
Steve McCurry is most famous for his iconic 1984 National Geographic cover photo, ‘Afghan Girl,’ taken of Sharbat Gula, an Afghan woman living in a refugee camp in Peshawar, Pakistan . The photo has been compared to Leonardo da Vinci’s Mona Lisa in its brilliance and composition. McCurry, who was born and raised in Pennsylvania , has been a photographer for more than 30 years and over this time has made numerous magazine and book covers, over a dozen books, and exhibitions around the world.
Mario Marino
Mario Marino shows a clear emotional connection to the subjects of his many travel portraits. Marino is Austrian -born and currently based in Germany , and he started his taking photographs in 2000. Marino works to depict the life experiences and cultural backgrounds of people by photographing them in their native lands. To find his subjects, Marino simply walks around for eight to ten hours every day he is working, photographing the people he finds along the way.

Catherine Karnow
Catherine Karnow ‘s portraits range from Australian Aborigines to Bombay film stars to victims of Agent Orange in Vietnam. Born and raised in Hong Kong , Karnow is based in San Francisco and has been in the business for more than 25 years after a brief career in filmmaking. Karnow’s work has appeared in National Geographic and other publications, and since 1995, she has taught photography.

Become a Culture Tripper!
Sign up to our newsletter to save up to 500$ on our unique trips..
See privacy policy .
Lisa Kristine
Lisa Kristine is a widely acclaimed humanitarian photographer who has documented indigenous cultures in more than 100 countries. Recently, Kristine has turned her sharp eye toward exposing modern-day slavery, working with the non-governmental organization Free the Slaves. Kristine’s work on slavery has been featured in three films released in 2014, and she has published five books and been the subject of four documentaries on slavery. Based in San Francisco, Kristine inspires change with her photos in a unique way.

Eric Lafforgue
Eric Lafforgue famously photographs areas of the world that are less commonly visited, with populations or regions that are in danger. He has taken astounding portraits in North Korea , Namibia , Kurdistan, and more. Lafforgue started his journey into photography in 2006, and he was quickly published by numerous travel magazines for his work in Africa and Asia. Lafforgue gets to know his subjects, and he has a story about each person he’s photographed.
Réhahn , a photographer born in Normandy, France , and based in Hoi An, central Vietnam, specializes in taking photographs of ethnic cultures in Vietnam, India, and Cuba. In 2014, he published a book called Vietnam, Mosaic of Contrasts , consisting of 150 photographs showing hugely differing aspects of the country. Réhahn collaborates with National Geographic , and he has also been published by the BBC, Condé Nast Traveler , Esquire , Marie-Claire , and more. He also frequently updates on Instagram .

Jimmy Nelson
Jimmy Nelson is best known for his photographs of tribal and indigenous people taken in many countries around the world. Currently, he is completing part two of his series ‘Before They Pass Away,’ which was started in 2010 to document indigenous communities that will stand the test of time for present and future generations. Nelson was born and raised in the UK , and he began his photographic journey after a 1985 trek on foot across the length of Tibet. After traveling for a year, Nelson released his visual diary documenting previously inaccessible areas of Tibet, and he received international acclaim. He has been producing incredible portraits ever since.

Joel Santos
Despite a having studied economics for his bachelor’s and master’s degrees, Joel Santos has spent the last decade focusing on photography. Born in 1978 in Lisbon, Portugal , Santos’ work has graced the cover of more than 30 magazines and plenty of articles. Santos has also written five books, and for three years, he was the editor-in-chief of Portugal’s best-selling photo magazine. Santos’ stunning portraits show a clear mastery of photography. He leads trips and photography workshops in Portugal and around the world.

KEEN TO EXPLORE THE WORLD?
Connect with like-minded people on our premium trips curated by local insiders and with care for the world
Since you are here, we would like to share our vision for the future of travel - and the direction Culture Trip is moving in.
Culture Trip launched in 2011 with a simple yet passionate mission: to inspire people to go beyond their boundaries and experience what makes a place, its people and its culture special and meaningful — and this is still in our DNA today. We are proud that, for more than a decade, millions like you have trusted our award-winning recommendations by people who deeply understand what makes certain places and communities so special.
Increasingly we believe the world needs more meaningful, real-life connections between curious travellers keen to explore the world in a more responsible way. That is why we have intensively curated a collection of premium small-group trips as an invitation to meet and connect with new, like-minded people for once-in-a-lifetime experiences in three categories: Culture Trips, Rail Trips and Private Trips. Our Trips are suitable for both solo travelers, couples and friends who want to explore the world together.
Culture Trips are deeply immersive 5 to 16 days itineraries, that combine authentic local experiences, exciting activities and 4-5* accommodation to look forward to at the end of each day. Our Rail Trips are our most planet-friendly itineraries that invite you to take the scenic route, relax whilst getting under the skin of a destination. Our Private Trips are fully tailored itineraries, curated by our Travel Experts specifically for you, your friends or your family.
We know that many of you worry about the environmental impact of travel and are looking for ways of expanding horizons in ways that do minimal harm - and may even bring benefits. We are committed to go as far as possible in curating our trips with care for the planet. That is why all of our trips are flightless in destination, fully carbon offset - and we have ambitious plans to be net zero in the very near future.

Guides & Tips
Five places that look even more beautiful covered in snow.

The Best Places in Europe to Visit in 2024

The Best Places to Travel in August 2024

The Best Places to Travel in May 2024

Places to Stay
The best private trips to book for your classical studies class.

The Best Private Trips to Book for Your Religious Studies Class

The Best Private Trips to Book With Your Support Group

The Best Rail Trips to Take in Europe

The Best Trips for Sampling Amazing Mediterranean Food

The Best European Trips for Foodies

The Best Private Trips to Book in Europe

The Best Private Trips to Book in Southern Europe
- Post ID: 714108
- Sponsored? No
- View Payload
The leading authority in photography and camera gear.
Become a better photographer.
12.9 Million
Annual Readers
Newsletter Subscribers
Featured Photographers
Photography Guides & Gear Reviews

Travel Photography Tips, Ideas, Examples & Jobs
Have a passion for travel photography but not sure how to take it further? This post covers careers, what gear is best, and tips for improving!
Learn | Photography Guides | By Ashley Darrow
Travel photography is one of the most exciting styles of photography, but it can also be one of the most intimidating to get started with.
I’m at my most inspired as a photographer when I’m on the road.
Even when I’m not headed to an exciting new location, I’ve started to think about all of my photography from the standpoint of travel.
This guide is going to give you everything you need to know to get started with travel photography.
I’ll be covering everything from the basics, to the equipment you need, to 20 travel photography tips that will improve how you approach taking photos.
When you’re ready to hit the road, we’ll start our adventure with some travel photography 101.
Table of Contents
What Is Travel Photography?
Defining travel photography can be a little bit challenging as this is one of the most open and free categories of photography.
In general, travel photography involves documenting people, landscapes, and cultures anywhere in the world.
Your travel photography counts whether you have to hike for thousands of miles or you took a 10-minute bus ride from your home.
Travel photography can be done by career professionals working for major magazines like National Geographic or it can be done as part-time freelance work.
Many travel photographers make their money by taking contract work from tourism departments or brands looking for product photography shot on location.
Travel photographers often find themselves working in challenging conditions. There’s a good chance that you’re going to be snapping pics in low light conditions , rough weather, or even half a world away from the comfort of your own bed.
- Related: 77 useful travel tips for photographers
What Does Travel Photography Include?

Image Credit: Sam Forson
Travel photography incorporates countless different styles.
Travel photographers often take landscape photographs, architectural photographs , as well as street photography. It’s also common to see food photography and documentary work being done by travel photographers.
As a travel photographer, your goal is to capture and express the story of a particular time and place. You’ll be giving people a taste of what’s happening in the moment while you’re in a particular location.
How Much Do Travel Photographers Make?
Travel photography is made up of a wide range of styles, but it’s also made up of a wide range of pay rates.
If you’re lucky enough to land a staff photography job with a major magazine, you could wind up with a six-figure salary. However, freelance travel photographers can make as little as around $18,000 a year.
Beginner travel photographers often make even less than that as they start to piece together their career.
Part of your pay as a travel photographer will come in the form of comped travel expenses. It’s pretty common for travel photographers to take a job with a tourism department that includes free transportation and lodging as part of their payment.
Is travel photography in demand?
Travel photography is in high demand.
How Much Do You REALLY Know About Photography?! 🤔
Test your photography knowledge with this quick quiz!
See how much you really know about photography...

Your answer:
Correct answer:
SHARE YOUR RESULTS
Your Answers
This demand is being driven by tourism departments, brands looking for more engaged lifestyle photography , and the rise of social media making travel photography a viable path for a content creator.
There are more people taking travel photos than ever before which means that you’re also going to have a lot more competition despite there being more job openings.
How Do I Become a Travel Photographer?

Image Credit: Kamaji Ogino
Becoming a travel photographer is pretty similar to how you would start up almost any photography career.
If you’re a total beginner, you want to start by mastering the craft of working behind the camera. This means learning how to stay in control of your exposure, frame captivating shots, and just get comfortable taking pictures wherever you go.
Here’s a basic outline of the steps you’ll take to start your travel photography career.
- Learn your photography basics
- Identify your travel photography niches
- Build your portfolio
- Grow a social media presence
- Begin reaching out to clients
- Publish your photography
- Grow your business by reaching out to bigger clients
- Continue to promote your work
- Have fun traveling!
I should note that plenty of travel photographers also crowdfund parts of their career.
Building a presence on social media sites like YouTube and connecting that to your crowdfunding platform of choice is a great way to bring in some additional money.
What Equipment is Needed for Travel Photography?

Image Credit: Hiren Lad
In all my years of photography, the one thing I’ve learned is that if there’s anything photographers love nearly as much as taking pictures, it’s talking about their gear.
Whether you see this equipment as the tools of your trade or the raw materials of your art, you’re going to need some equipment to get started with travel photography.
I’m going to cover the standard gear that most travel photographers will gravitate towards, but I’ll also be talking about different setups for film photographers and mobile photography.
I’m going to kick things off with the absolute must: a camera.
You’re not going to get very far in your career as a Travel Photographer without a camera. I’m being a little silly here, but it’s not just as simple as picking up any random mirrorless camera for travel blogging .
So, what camera is best for travel photography?
The absolute best cameras for travel photography are going to be, no surprises here, the latest mirrorless releases from the big-name brands like Sony, Camera, and Nikon.
Those cameras are packed full of the latest features and offer some of the best image quality.
You can also get amazing results, and save money, by picking up older cameras. My Sony a7s II is still my main camera body and my Canon 5D Classic, which was released way back in 2005, still takes pictures that get people asking me “How did you do that?”
You don’t need to spend a lot of money on your travel photography camera. A skilled photographer will be able to take amazing pictures using a point and shoot digital camera from the 90s. It’s craft that makes the photographer, not gear.
Travel photography can also be done with your smartphone. There are plenty of professional photographers out there primarily shooting on smartphones.
I also want to highlight film cameras. Film is the historic origin of our art form. Any film camera from a toy lomography camera to a professional large format camera can help us see our travels in a new way.
With all of that said, there are a few important features that you should look for in a travel photography camera.
- Weather sealed designs are much more important when you’re trekking through unknown territory than when you’re at home in the studio
- Your camera should also be ready for the road. Just like your car, you should take your camera in for a tune-up before a long trip
- Double-check for the specs that matter most to you. For me, that’s low-light performance and color science
Your camera is only half the equation which means we need to take a look at the lenses that will be going on this journey with you.
- Related: How to choose a camera and what is the best camera for travel photography?
I bet you’re wondering which lens is best for travel photography? You don’t need to worry, I’ll walk you through my top pics for a travel lens whether you’re shooting on a brand-new Sony mirrorless camera or you plan on taking a Canon 5D Classic on the road.
The first place you need to start is by asking yourself the most essential question in photography: What types of pictures do I plan on taking?
Here’s a quick breakdown of my recommendations for travel photography lenses based on my experience for a variety of photographic styles and budgets.
- Standard Zoom Lens —A standard zoom lens like the classic 24 to 70mm is the go-to travel lens for so many photographers I know. This lens easily handles street photographs, landscapes, and portraits. Pick this to make a flexible one-lens kit
- Wide Angle Zoom Lens —Wide angle zooms are better suited for photographers who know they’ll be shooting landscapes and architecture. If your wide angle zoom goes up to 35mm, then you can even get away with using that as your every-day lens
- Wide to Telephoto —These lenses have focal length ranges like 24 to 105mm. They are usually affordable alternatives to pro-level lenses that can still capture stunning images. You’ll want this lens if your main concerns are budget and stylistic flexibility
- Telephoto Zoom Lenses —These massive lenses typically top out at 200mm or 400mm focal lengths and are ideal for wildlife, bird, and sports photography. Their size, weight, and cost make them less flexible than other options, but these lenses are a must-have for photographers interested in the styles I just mentioned
- Pancakes and Nifty Fifties —Pancakes lenses have such a small profile they double as a body cap while the iconic Nifty Fifty is a budget 50mm with a huge fanbase. These lenses are perfect for photogs who want to stay ultralight or for anyone who wants an emergency backup lens.
- THAT lens —We all have a lens that, despite never getting much use, we just can’t seem to leave at home. Mine is the Helios 44-2. I take that lens on pretty much every trip even if it doesn’t get much use. Allow yourself a little room for that “fun” lens and you might be surprised by how much use it gets over time
I always have at least two lenses on me when I’m traveling—just in case.
I once dropped an expensive prime lens and watched it roll off the edge of a mountain in the desert. Luckily, I had a pancake lens in my bag so the photography trip wasn’t a total loss.
Ever since then, not only do I treat each of my lenses with the utmost care, but I also make sure but I’ve got backup options on hand.
- Related: How to choose a camera lens and best lenses for travel photography .
Travel Photography Bag
Just like with lenses and camera bodies, you have a few options to consider when it comes to picking the right travel bag for your next adventure.
Before I get too far into talking about camera bags, here’s the five things I always consider when I’m packing a bag for my next trip.
- Camera Bag Size —Size is one of the most important things to look at when shopping for a new travel photography bag. You want to find a bag that’s going to comfortably fit all of your equipment without causing too much strain on your back. Sling bags are great for days out in the city with light gear, but you should look for a comfortable backpack if you plan on covering some serious distance with your gear
- Pack Weight —Here’s a quick piece of advice I picked up from hiking. Your maximum pack weight should only ever be 20% of your total body weight. This means that if you weigh 200 lb, the heaviest your camera bag should ever be is 40 lb. The lighter, the better
- Features —There are some features that I consider an absolute must have in any of my travel camera bags including rugged build quality, plenty of padding and protection for my gear, and easy access to at least my main camera body and lens so I can shoot on the fly
- Style —You could buy the most technically perfect travel camera bag, but if you don’t actually like the way it looks you’re never going to take it on a trip. I definitely believe that form should be second to function when it comes to camera bags, but I’d also be lying if I said it wasn’t a huge factor in my camera bag purchasing decisions
- Your Gear —Your gear is actually going to dictate the type of bag that you’ll be looking for. A travel photographer shooting on a Leica Q2 can get away with a much smaller bag than a photographer shooting with a Canon 1DX
I also typically bring a packable backpack with me as part of my kit. This could be a really lightweight sling bag or something like the Lowepro Runabout.
This lets me leave the bulk of my gear at my hotel when I just want to have a quick trip around a new city taking pictures.
- Related: How to choose a camera bag
Tripods for Travel Photography
Tripods are an interesting—and somewhat contested—piece of the travel photography puzzle. I never used to take a tripod with me while traveling and that’s because most of my photography was shot street style which means lightweight and handheld.
However, the more I get into film photography and more interesting exposures, the more I find myself relying on my travel tripod.
My absolute number one pick for an adventure tripod would have to be the Peak Design Travel Tripod . It’s fairly lightweight, intelligently designed, and packs down small enough to fit in most of my bags.
Depending on the type of photography you’re looking to capture, you can also use tripods like a gorilla pod or even just take the tripod you have—even though it might be a little larger and heavier than would be ideal for travel.
This roundup of the 7 best travel tripods is a great place to get started if you’re shopping for something designed for the road.
Do I Need a Tripod for Travel Photography?
I’m going to dig into this mild controversy for just a moment. The question of whether or not you need a travel tripod to begin with is the source of some debate for photographers.
Honestly, the answer is maybe. It really depends on the type of pictures that you’re hoping to capture and your personal style as a photographer.
If you like to run and gun while capturing slices of life on busy city streets, you probably don’t need to bring a tripod with you.
Styles of photography that are highly mobile and rely on fast composition changes typically ditch the added stabilization that a tripod brings because it just slows them down too much.
Tripods might also not work for certain events and organizations. Trying to set up a tripod during a rock concert is a recipe for disaster and some museums won’t even let you bring in a tripod unless you pay their professional photography fees.
Then again, there are a few types of photography that absolutely need a tripod in order to work. Long exposures, shooting in dimly lit situations, and using some telephoto zoom lenses pretty much mandate shooting on a tripod.
The long and short of this is that owning a tripod and learning how to use it will make you a better photographer, but it’s not quite a mandatory piece of your travel photography kit.
The Camera Accessories I Always Forget for Travel Photography!
There are so many small accessories that are vital for digital photography that I find myself constantly forgetting. Far from being little odds and ends, these are essential parts of my kit that I’ve started to just leave in my travel bag so I never have to worry about packing them.
I’m talking about SD cards , microfiber cloths, sensor cleaning kits, and all those other little things that you might not miss until you’re in the field and you’ve got a speck of sand on your sensor ruining your shots.
I’ve started making a checklist that contains all these little items before I pack out. There’s nothing more defeating than being in some beautiful destination and realizing you only have enough space on your memory card for a few dozen more shots.
This is the checklist that I use for your average trip. Feel free to adjust things based on the gear that you use.
- Sensor cleaning swab x 2
- Lens cleaning Spray
- Microfiber cloth
- Spare camera batteries for each camera
- Memory cards—one in each camera, extra in the bag
- External SSD if I’ll need to backup files while traveling
- iPad for editing, emailing, and posting pics on socials
- Camera strap
- Camera body cap and rear lens cap
- Remote shutter release
- Chargers and cables
Lighting for Travel Photography
Lighting is a bit of an interesting topic when it comes to travel photography. We don’t often associate this incredibly mobile genre of photography with the piece of equipment that defines studio work, but there’s some great reasons to take some lights with you on your next trip.
Photographers like Briscoe Park are doing incredible work mixing bold, almost giallo, lighting styles with travel photography. There’s also a wealth of photographers using the dark nights of remote locations as canvases for their light paintings.
I started taking a few small lights with me when I hit the road and it’s definitely pushing my abilities behind the camera.
Lights like the Aputure MC and MC Pro are great for adding lights to portraits, throwing splashes of color into images, or creating other-worldly scenes. The Infinibar or MT Pro, also from Aputure, are solid choices for light painting .
Even something small like the Lume Cube can help gain control over lighting while away from the studio. Just don’t try to haul around your old tungsten lights on your next trip!
Mobile Travel Photography Gear
Before you start thinking travel photography requires a mountain of expensive equipment, you might be reading this article on the only device you need to get started with travel photography.
That’s right, smartphone cameras have come a long way and they are perfectly capable of being your main camera body for traveling adventure photography .
Even though your smartphone is essentially a pocket camera that can surf the internet and make phone calls, you still might want to add some extra gear to make the most out of being a mobile travel photographer.
My biggest recommendation would be to pick up a Moment smartphone case and a few Moment lenses.
These lenses will dramatically change your composition and help make your images look a bit more professional and a bit less like a quick shot on a smartphone.
A lightweight Gorillapod, a photo editing app like Lightroom mobile, and a power bank to keep you charged are a few must-haves.
This might sound a little unconventional, but my smartphone is one of the cameras I use the most. It’s lightweight, can take high quality pictures, and it can be a great budget alternative to expensive cameras because you probably already own one.
I almost never leave the house without throwing one or two Moment lenses in my bag. This is true whether I’m going on a 10-minute walk to the store or I’m about to hop on a 10-hour flight.
Travel Film Photography Gear
Is there any sound more relaxing than the shutter of a film camera when you’re deep in the woods or on top of a mountain ridgeline?
I don’t think so and that’s one of the reasons why I tend to travel with film photography equipment.
Film photography is almost a completely different animal than digital photography. You have to be much more engaged with your subject, composition, and exposure since you only have a few frames before your roll is spent.
Here’s a quick list of the film photography gear that I travel with. Just as a quick note, I’m leaving out things like tripods and camera bags that overlap with digital photography.
- Gallon zip-top bag to store film
- Permanent marker to jot notes on the side of a film canister
- Light meter
- Film (I always try to bring one more roll than I think I’ll need—just in case)
Read our guide to film photography for more tips.
20 Tips to Help You Improve Your Travel Photography
Want to improve your travel photography? I’ve put together 20 travel photography tips to help you up your game the next time you take your camera on vacation.
These tips are going to cover everything from advice for total beginners to some really interesting things that caught me by surprise while I’ve been on tour with my camera.
Tip 1—Get Comfortable With Your Gear Before You Travel

Image Credit: Amar Preciado
This is my number one tip for travel photography because it applies to experienced photographers as well as beginners. Before you head out on your big trip, take some time to get comfortable with your equipment.
This means packing your camera bag just like you’re going to for your travel photography trip and wearing it around your home city or just walking around your neighborhood.
There’s nothing worse than being hundreds, or thousands, of miles from home only to find out that you actually don’t like that brand new camera bag you bought.
Giving all of your gear a comfortable trial run ahead of time ensures that you don’t run into any sudden surprises while you’re traveling.
I’ve started doing this with all of my travel photography gear and it’s hard to express just how much it’s helped me. Most of the time I’m just adjusting my backpack to make sure it’s got a comfortable fit for a long day of hiking, but there have also been times where I realized that piece of my equipment just wasn’t right for me.
This will also help make things easier when you’re out there taking pictures.
It can be a little stressful to try and line up the right composition in a busy downtown neighborhood of a foreign city. Knowing your gear inside and out will give you a huge confidence boost when you need it the most.
Tip 2—Set Your Travel Photography Intentions
This might seem like a silly question to ask, but why do you want to do travel photography?
Setting some intentions and being aware of your goals ahead of time is going to help improve your career as a photographer.
If you need some inspiration for your goals, here’s a few that I’ve used in the past.
- Have at least 5 new pictures that I can turn into prints once I’m home
- Spend two days on location, day one focuses on lifestyle photography while day two is all about landscapes
- Get out of my comfort zone and network with other travel photographers shooting the same location
Remember that goals are a lot like onions. They have layers.
Your ultimate goal might be to become a world famous travel photographer with National Geographic calling you every day, but you’ve got to start somewhere.
Let’s say that your goal is to start getting freelance travel photography contracts with tourism departments. You can start from scratch by pretending that you’re on contract to take photos of a particular location.
This will help you with your future goals as well as allow you to build your portfolio in the now.
Tip 3—Always Bring (Your) Camera

Image Credit: Ketut Subiyanto
Everything starts with the ABCs and for travel photographers this means to Always Bring (your) Camera and always be taking pictures.
You really never know when the right moment is going to strike for your photography. There have been countless moments where I wish I would have had a camera on me to capture a moment that was either beautiful or could have even been historic.
Whether you’re carrying your main camera body, a pocket camera, or even your smartphone, you should always have a camera on you when you’re traveling. Be ready to start snapping pics at a moment’s notice if you spot something that catches your eye.
Worst case scenario, you’ve got another few hundred pictures to sort through when you get home. Best case scenario, you’ve caught the once-in-a-lifetime shot that you might have otherwise missed.
Tip 4—Be Patient with Your Shots
Here’s something that’s happened to me nearly every single time I’ve gone on a travel photography trip.
I’ll be at a historic ruin or in a national park with the perfect shot framed only for there to be dozens of other tourists cluttering up my shot.
When I first started with photography, I didn’t have enough patience just to wait it out. I thought that I would have to spend hours standing at a particular spot waiting for people to disperse.
As it turns out, the longest I’ve really ever had to wait for a shot to clear up has been about a half hour. If you’ve got someone to talk to or a book to read, that’s no time at all.
Don’t pass up on the shots that you want to capture just because there’s something cluttering your frame. Patients will reward photographers every single time.
Pro travel photography tip: Using an ND filter on your camera can let you lower your shutter speed which will cause fast-moving cars and people to “vanish” from your shots!
Tip 5—Learn How to Photograph People
This travel photography tip can be one of the most challenging to incorporate. Getting comfortable cold approaching strangers takes a lot of social energy.
I know extroverted photographers that have a dozen model release forms printed and ready to go in their backpack. They have no problem chatting up strangers, but it took me some time to build up that confidence.
Here’s a quick template that you can use for approaching strangers for portraits.
Be cheerful and open about being a photographer. You can say something like “I’m a photographer taking portraits today in [Location] and I’d love to take your picture.”
If you’re on a freelance contract or working for a client, feel free to name drop them to give yourself some added credibility.
After snapping their pic, I like to give people my business card, email, or Instagram handle so they can contact me later if they’d like a copy of their photo.
If they say no photos, that’s just business.
It also really helps if you can speak just a little bit of the local language. You’ll be shocked how much more accommodating people can be if you can handle a few lines of the local tongue.
Tip 6—Study Local Laws and Customs
Photography laws and customs are different the world over. As a travel photographer, you’re going to need to familiarize yourself with local laws and customs—especially when you’re traveling abroad.
Remember that the letter of the law and the local customs might not necessarily be a one-to-one match.
I’m based in the United States and here it’s perfectly legal to take pictures of strangers as long as you’re in a public location. However, social customs dictate that it’s considered rude to take someone’s picture without asking their permission first.
When in doubt, always default to asking permission first. This means asking someone’s permission before taking their portrait or asking permission before taking pictures at a historic site or museum.
Tip 7—Get in Frame

Image Credit: Dominika Roseclay
This is something I’m still working on becoming more comfortable with.
When I’m in the studio, I’ve got no problem hopping in front of the lens and doing some self-portraiture. However, once I’m out in the field I’m a little bit reluctant to stand in as my own model.
Travel photography is about telling your story. This means that you’re going to need to get in frame for some of your photographs.
Even if it’s just a few shots of you setting up, traveling to your destination, or getting dinner after a long day of shooting, people want to see the photographer behind the camera.
If you’re traveling with other photographers, why not consider making this a game? Challenge each other to see who can take the most interesting photos of your fellow photographers.
You can even take some quick selfies on location to contrast your professional photography. This will make your self-portraiture a little more intimate and warm while your travel photos show off your full talent.
Tip 8—Scout Travel Photography Locations with Your Smartphone
A great way to dramatically improve your travel photography is to scout your locations ahead of time. Before you haul all of your gear on a quest for the perfect photo, go out there with just a day pack and walk around soaking up the scenery.
Location scouting gives you a strong understanding of what speaks to you as a photographer about this location before you even start pressing the shutter button.
I recommend carrying your smartphone or a point-and-shoot camera when you’re out scouting locations.
This lets you take some test shots of a travel location before bringing all your gear out.
Tip 9—How to Always Pack the Right Lenses
I used to be so worried about not bringing the right lenses on a trip, but it’s been years since I’ve felt like I picked the wrong lens for the job.
Part of this is knowing your lenses inside and out. You should learn the basics of your lenses like aperture, how their focal length compresses an image, and which focal lengths are ideal for different styles of photography.
Lenses like the Sony FE 24-70mm f/2.8 make a great choice for travel. The focal length options on that lens easily handle majestic landscape panoramas and street photography portraiture.
I also recommend taking at least two lenses with you for most travel photography trips. I’ll take one primary lens with me that I plan on doing most of my shooting with and a secondary lens for those “just in case” moments.
Tip 10—Staying Safe While Traveling with Camera Gear
Being a tourist always carries some risk when it comes to crime. Being a tourist that happens to be carrying $3,000 in photography equipment carries a little bit more risk.
Here’s a few tips that I stick with when it comes to staying safe while shooting with expensive camera equipment.
If you can, try to do your travel photography with a group. Even if you have one other person traveling with you, that company is usually more than enough to deter most would-be thieves.
This might seem a little obvious, but you always want to keep your gear in sight. Unless I know I’m alone in the wilderness, my camera bag is never further than an arm’s reach away.
I’ve got a tip for you that I don’t see a lot of people talking about when it comes to traveling safely with your camera equipment. I like to stay discreet when I’m traveling with my camera gear.
This means I leave the branded Sony strap at home and opt for a much more neutral Peak Design strap . I also throw a velcro patch over things like the LowePro logo on my backpack that might otherwise announce that there’s some expensive camera equipment in there.
If you stay smart and aware of your surroundings, your odds of having an unfortunate encounter while carrying camera equipment will be greatly reduced.
Tip 11—Shoot Some Short Format Video
We’re all photographers here. This means I can be a little honest with you about shooting short form video.
It might not be your main stay, but social media platforms are putting a lot of emphasis on TikTok style videos. If you can incorporate a little short form videography into your travel photography routine, you’ll have that much better performance online.
There are countless ways that you can build short form video production into your photography routine. You could record a 60 second video demonstrating your setup for the shot or even just an interesting voice over on top of a still image.
Shooting short videos can also be fun. Building this into your photography routine is a great way to improve your skill set while you’re also increasing your social media following.
Tip 12—Find Your Voice by Getting Lost
Some of the best travel photography stories happen because you get lost. Getting turned around is a great way to change your perspective on things and improve you or travel photography.
This is easily one of the most underrated travel photography tips. Best of all, you can do this from the comfort of your hometown.
Try getting lost on purpose by walking through a neighborhood you don’t usually go to or checking out a city that you might have otherwise overlooked.
While all the other travel photographers are gathered at the tourist traps we’ve all seen a thousand times on Instagram, you’ll be exploring something new while catching refreshing pictures of your travels.
Tip 13—How to Fly With Film
If you plan on doing some film photography while you’re traveling, you’re going to need to know how to transport your film while traversing through airports safely.
The x-rays used in airport security scanners can damage undeveloped photographic film. The more x-rays undeveloped film is exposed to, the more haze and distortion starts to pop up on the final image.
Film with an ISO 800 and above can be damaged by any airport X-ray machine. Expired and experimental films can also be damaged by x-ray equipment.
Some airports now use more powerful CT scanners. These are often used for checked baggage, but they can also be used for carry-on as well.
CT scanners put out enough x-ray radiation to damage film of any ISO. You should always bring your film with your carry-on luggage in its own zip-top bag.
When you’re traveling through security at an airport, you can ask the security personnel for a hand examination of your photographic film. In my experience, they almost always say yes no matter how busy the airport is.
However, it is at the discretion of airport security and I have had them turn down a hand examination of my film. One trip through an X-ray scanner won’t damage your film, but multiple trips will.
This is why I recommend buying film on location if possible. You can also have film mailed to your hotel or to a friend’s address who lives near where you’re traveling.
Tip 14—Become a Traveler at Home
Traveling is expensive and it’s not always available for us. However, this doesn’t mean that you have to stop your travel photography plans.
If you’re looking for the true zero-budget way of starting a travel photography career, you have to start in your home city.
While this might not seem exciting at first, keep in mind that the city that you live in is an exotic travel destination for someone else.
Try using all of the travel photography tips and tricks I’ve talked about in this article while taking pictures of your home city. Even if you live in a sleepy little town, there are compelling stories that you can tell by documenting the life and history of the place you live.
Tip 15—How to Find Travel Photography Inspiration
No matter what style of photography you’re in, it’s easy to get stuck in a rut. What should you do if you’re running out of inspiration before your next big travel photography trip?
Here are five quick ways I stay inspired and motivated as a photographer.
- Start following more photographers on social media to see what other people are doing
- Research historic photographers and get inspired by how they were shooting when our medium was still new
- Check out international photographers to see how people are shooting across the world
- Get experimental by looking into the weirder side of photography with things like film soup or databending
- When I’m heading to a new location, I like to look at the history, upcoming events, and what photographers are shooting for that local
Tip 16—Turn Regular Trips into Travel Photography Trips
If you’ve always got your camera with you, and you’re always shooting, every trip you go on is a travel photography trip.
A great way to stay active as a travel photographer who has yet to break into the full-time business is to transform every trip you go on into an opportunity for travel photography.
Whether you’re heading across town for a family dinner or going on a work trip, you’ve got an opportunity to do some trouble photography.
Not everything has to be a grand adventure. You could use that trip across town as an excuse to work on catching shots of yourself in transit, for example.
Tip 17—Becoming a Better Photographer
Every photographer has an area that they can improve on. Whether you’ve always wanted to be one of those photographers who only ever shoots on full manual mode or you’ve been hoping to add sports photography to your travel routine, now’s the time to start working on those skills.
Skills building exercises can be a great activity during your travel photography downtime. You’re not always going to be on the road to an exotic destination and that time in between trips is vital to your success.
Even if you’ve been a professional photographer for decades, there’s still countless things about this art form that you can learn.
Tip 18—Get Your Photos Seen
Now that you’ve got a portfolio of travel photography images, how do you get people to see them?
As with most freelancing gigs, the name of the game is networking. Here’s a few tips for getting your pics in front of more eyes.
- Be more consistent with social media by posting regularly and using hashtags strategically
- Enter into photography competitions
- Ask local shops if you can display your work
- Get your photos published
- Reach out to travel agencies, tourism boards, and parks departments for freelance work or partnerships
- Network with other photographers
As the old saying goes: It’s not what you know, it’s who you know.
Tip 19— Travel Photographer Tips for The Business Side of Things
Making it as a working travel photographer has gotten harder in recent years, but it’s not out of reach. Here’s a few business tips to help you stay on top of your budding photography career.
Always try reaching out to new clients. Keep in mind that bigger clients are harder to land, but there are plenty of smaller travel destinations that are ideal for a beginner photographer.
You should create a budget for your travel photography work. If you’re just starting out, you don’t need a fancy app. A simple spreadsheet is more than enough for you to stay on top of your money.
You can also try becoming a content creator while you’re working on landing clients. Building up a social media following and generating some income through a site like Patreon can help you stay on the road longer.
Tip 20—How to Tell Your Travel Photography Story

Image Credit: Ena Marinkovic
You’ve reached the end of my travel photography tips. The last tip, and the most important one, that I’m going to give you is some advice on how you can tell your story.
Travel photography is all about storytelling. This means documenting your journey, engaging your audience, and finding your voice.
Taking captivating pictures without context isn’t enough. Your travel photography needs to speak to people on a deeper level and communicate something yet untold about the experiences behind your journeys.
It’s going to take time to figure out how you want to represent your adventures. The best thing you can do is get started today.
Even if you’re just taking travel photos a few blocks from your home, you’ll be breaking the ice and taking those important steps in finding your voice as a storyteller.
What is the purpose of travel photography?
The purpose of travel photography is to share your journey with the world. Travel photographers help to tell the story of not only their adventures, but also the people and places they encounter whether they are traveling around the world or within a few miles of where they grew up.
Is travel photography a good career?
Travel photography can be an amazing career that is rewarding and potentially very lucrative. It can be challenging to get started, but there are countless photographers who do travel photography as both their main job as well as a side gig.
What is the single best lens for travel photography?
The single best lens for travel photography is the wide angle to telephoto zoom like the Sony FE 24-105mm f/4 G OSS Lens. This lens allows you to capture everything from sweeping landscape panoramas to sports and wildlife photography .
Is travel photography a job?
Travel photography can absolutely be a job. You can make money as a travel photographer by freelancing for clients, photographing destination weddings , or working as a photojournalist.
Is GoPro good for travel photography?
A GoPro can be great for travel photography especially if you’re interested in capturing video and using stills from that footage for your photography.
Even though a GoPro is a good choice for travel photography, you’re probably going to be better served by a dedicated camera if your main goal is photo rather than video.
Final Words
I hope this guide gives you everything you need to hit the ground running with travel photography. If you’re an experienced travel photographer, I hope you’ve picked up a few new tricks that can help improve your next adventure.
I’ve tried to cover travel photography from nose to tail in this blog, but I’m sure I left a few things out.
I want to hear your travel photography tips, tricks, and experiences in the comments. If you like this article, make sure to check out my other photography blogs .

Check out these 8 essential tools to help you succeed as a professional photographer.
Includes limited-time discounts.
You'll Also Like These:

Ashley is a photographer, writer, and film critic. When Ashley’s not writing essays on photography, cinema, and theory, he’s out taking pictures with retro film cameras.
Keep Sharing more impressive blogs.
Leave a Comment Cancel Reply
👋 WELCOME TO SHOTKIT!

🔥 Popular NOW:

Unlock the EXACT blueprint to capture breathtaking iPhone photos!
Shotkit may earn a commission on affiliate links. Learn more.
55 Instagram Pose Ideas: Use these Travel Photo Poses on your next trip
Love it? Share it!
Travel photo poses are an art form that requires a lot of practice and preparation. Posing for photographs while traveling can be incredibly difficult, especially when you’re trying to capture the perfect vacation moment! Don’t worry, we will share some of the easiest and most creative Instagram pose ideas to help you out.
We have included photos with posing options with and without props, use of hands, movement, and other travel photography tips!
So, let’s get started.
Travel Photo Poses + Instagram Pose Ideas: Perfect for Bloggers & Travel Enthusiasts

Disclosure: This post contains affiliate links. If you click one of them, we may receive a small commission at no extra cost to you.
Use of Props and Travel Photo Poses | Outfits, items & more
Using props regardless of the location is a great way to incorporate wanderlust and life into your photos. These creative poses include using flowers, maps, use of hands (peace sign, clothing, suitcase/luggage), and more.
You can always move away from the camera and just use the movement of clothing and hands to really express yourself and get creative!
1. Twirl your skirt or dress
Adding some movement to your travel photos can help create an interesting and unique image. If you’re wearing a skirt or dress, twirling it around in the air is a fun and creative way to show off your outfit while also capturing beautiful motion shots.
Pose 1: Try standing still and throwing the fabric up toward the sky for a dramatic effect.
Pose 2: Lift the loose fabric gently for a more graceful and romantic look.
2. Cover your face with your camera
Get creative and add easy props to make your travel photos stand out.
Covering your face with an object such as a camera is a super cute pose as it adds a whimsical and ethereal feel to the shot.
Tip : Try holding a leaf or camera up to your face with one hand while gesturing out towards something else with your other hand. This type of pose can add layers to the shot while also highlighting the features of your environment and creating a connection between you and them. It’s a great way to emphasize the relationship between yourself and the world around you in your photos!
3. Read a guidebook
Use a travel guidebook as a lovely prop to add a feeling of instant wanderlust to your photos. You can show your face or cover it with a guidebook, whichever you prefer.

Tip: This is a great way to introduce destinations when you are vacationing as well!
4. Hold a map (or travel brochure)
Another option is to use a travel map (or a brochure) and pretend to be reading it or navigating and planning your next adventure.
You can take a shot by sitting with your head down or looking away.
5. Play with your hair
Playfully interacting with your hair can add a lot of personality and flair to your travel photos. Whether you’re posing solo or with friends, getting creative with the way you style and move your locks can result in some truly stunning images.
Pose 1: Try twirling a few tendrils around your fingers, and gently tucking them behind your ears for a natural, romantic look.
Pose 2: Or just swaying works too!!
Tip : Keep in mind that playing with your hair doesn’t have to involve a lot of styling or time spent in front of the mirror—just a few simple touches can achieve great results. So go ahead and let your hair down, and get creative!
6. Use a hat, or beret (look back and touch your hat)
Using a hat as part of your travel poses can add an extra element of fun and creativity to your photos.
Pose 1: As a pose, you can show your back and hold your hat.
Pose 2: Or touch your hat/ beret and look down.
For a timeless look, try wearing a Trilby hat or fedora with some shades for a classic and chic vibe. You can also mix it up with some more eye-catching options, such as berets, or wide-brimmed straw hats.
Tip : I own hats for every season and berets in various colors! They are not very expensive and you can easily pack them in your carry-on to add a little flair and pop to your photos.
7. Reach for your sunglasses
Pack a pair of sunnies and pose with it. Reaching for your sunglasses is a great pose to add some dynamism and personality to your Instagram photos. This simple yet effective gesture can create an eye-catching silhouette effect, adding depth and movement to your images.
Try to relax and act naturally as you reach for your sunglasses, allowing your body to move with ease and grace.
8. Hold a flower and cover your face or just the eyes
Holding a flower and covering your face or eyes is a great way to capture a playful photo. This pose can bring out the beauty of nature while also adding some fun and mystery to your pictures.
Pose 1: Try holding a wildflower in front of your face, playfully hiding behind it like a mask.
Pose 2: Or try draping the petals over one eye or half of your face to create a dreamy and romantic look (this is perfect for fall photoshoots as well).
Tip : You can use fallen leaves or flowers, or pack a few artificial ones for the purposes of a photo shoot.
9. Throw something in the air
Whether it’s snow, confetti, or leaves, finding interesting objects to throw up in the air can create stunning images with unique textures and colors.
When throwing something into the sky, make sure you find an open space where there is plenty of room to move around without any obstructions. Use the ‘live’ photo options on your iPhone, or the burst mode to capture the right moment.
Experiment with different angles and perspectives to create unexpected and creative looks in your photos.
10. Road trip vibes (car inside or outside)
Road trips are a great way to capture some amazing memories, and there are plenty of unique poses that you can try for your Instagram photos!
Pose 1: One fun idea is to take a photo of yourself from the car side mirrors . This angle works really well when you have interesting scenery or landscape, as it gives an unobstructed view while also adding a sense of movement and adventure.
Pose 2: If you’re feeling daring, try peeking out from the side (or add a victory sign).
Pose 3: Another great pose to try is to stand in front of the car with your friends and pretend that you’re about to drive off on an adventure. This can be especially effective if there are some cool backdrops like mountains or sunsets in the background.
11. Play with an umbrella
Don’t fret when it rains when you are in a new destination. Instead, make use of props like umbrellas or colorful raincoats and strike a pose.
Pose 1: You can cover yourself with an umbrella and pose.
Pose 2: You could even incorporate movement shots by lifting the umbrella over the head – at an angle.
Tip : If you didn’t pack an umbrella and happen to buy it once you arrive at your destination, then you can choose a color to match your outfits or the location.
12. Use a suitcase, backpack and walk away
An ultimate travel prop is a suitcase or backpack that speaks volumes about wanderlust and exploring!
Have your subject (or you) hold a suitcase/bag to create a story of their journey. Use an empty road, or the airport as a backdrop for a unique creation!
Outdoor Travel Photography Poses | Landscapes & Landmarks
When capturing outdoor travel photos in a city or a national park, it is important to find a background that really stands out. A bright and colorful location can bring life to your photos, so look for vibrant wall murals or visually stimulating locations when scouting for a backdrop.
You can always use your lenses and composition skills to frame the subject, add leading lines, depth, etc.
13. Crossing the Street
Walk or cross the street and take an Instagrammable image! This works in both a busy urban area or a tranquil rural setting and is bound to engage those who view your photograph.
Try shooting from a low angle for an added dramatic effect.
Tip: Start early in the morning if you are planning to capture a busy city or landmark to avoid crowds in your shot. Additionally, when traveling solo you will be safe with your belongings and feel confident!
CREATE STELLAR CONTENT WITH THIS
Photoshoot checklist & planner.
Planning a photo shoot can be daunting, but not with our planner!
This planner is designed to help you plan and execute a successful travel photoshoot with ease. It includes a checklist for equipment, packing, location scouting, mood boards, and more – everything you need to know to make your shoot run smoothly.
14. Sit down on a bench
For a more relaxed and candid pose, try sitting down on a bench or chair. This type of photo works well if you’re looking to capture a more casual atmosphere, as it conveys a sense of comfort and ease.
Pose 1: Try sitting down sideways with one leg in front of the other .
Pose 2: Or take a shot from behind without a face . Using props such as a hat, a cup of coffee or a book can also add some character to your photos.
You can also add interest to the shot by incorporating elements around you, like trees, mountains, or buildings in the background.
15. Show your side profile in a cool backdrop
Showcasing your side profile is a great way to capture a striking and dynamic photo.
Try standing in front of a dramatic setting such as an expansive view of the mountain or an urban jungle and show your side profile. You can even bring props with you to add some extra flair to your photo, such as wearing large hats, scarves, etc.
16. Checking your phone (in a busy area)
Sometimes the simplest poses can look really great when done right. If you’re in a busy area, try checking your phone as part of your pose for a more candid and natural look. This type of photo will capture the hustle and bustle of your travels, while still showcasing your personality.
17. Walk away from the camera
If you’re looking for an Instagram pose that will make your followers stop and take notice, try walking away from the camera.
Pose 1 : Take a few steps away from the camera while keeping your gaze fixed on it—this allows you to connect to the audience.

Pose 2: You can also capture some stunning shots of you wandering off into the horizon or woods, conveying a feeling of curiosity and adventure that will certainly make your photos stand out from the rest!
18. Sit and enjoy the lovely view
When visiting a new place, one of the best photo poses you can do is simply sit and enjoy the view.
Find a scenic spot with a beautiful landscape or skyline, then take some time to relax and appreciate your surroundings. This type of pose can be extremely calming and peaceful, so it’s perfect for Instagram posts that evoke a sense of serenity and relaxation.
Tip: You can also bring something with you to further personalize the photo, such as a cup of tea or coffee, a book, or a bouquet of flowers.
19. Stand and enjoy the lovely view
You can also stand and admire the view ahead of you! Position yourself in the centre of the frame and then twist a little – if you are wearing a headgear, hold it gently.
Whether you’re looking out into a beautiful landscape, watching the sunset on the horizon, or just taking in your surroundings, this pose can capture some truly breathtaking photos.
Tip : Try framing yourself against an epic backdrop like a mountain range or vast body of water for maximum impact. You can also experiment with different angles and perspectives, like standing in the middle of a field or on top of a hill for an elevated view.
20. Throw up a peace sign
Sit or stand and use your hands – show off a victory or a peace sign – enjoying that EPIC trip of a lifetime!
21. Take a photo with your phone or camera
Take a photo of you taking photos using a phone or camera with a beautiful backdrop. This doesn’t require you to look at the camera, but shows you in your true traveler element!
22. Put your hand on your hip and pose
Putting your hand on your hip and striking a pose can instantly add some pizzazz to any photo. This timeless classic is an especially great pose for travel photos, as it shows off the scenery while also providing a sense of confidence and empowerment.
With one arm slightly bent at the elbow and your hand resting gracefully on your hip, you’ll look both approachable and stylish in the shot.
23. Pretend to walk (and add movement)
Adding movement to your photos can create an interesting and dynamic effect that is sure to draw the eye of viewers. Pretending to walk is a great way to do this while still keeping the focus on you as the subject.
Take a step forward and gently move back and forward (or swing) to create that movement.
24. Frame yourself with something
Framing yourself with nature or other objects can add an interesting twist to your travel photos. Try using the environment around you, such as roads, trees, rivers, and other landmarks as a way to frame your subject.
You could also get creative with flowers and foliage, positioning them around your body or face for a beautiful and natural look.
For a more abstract approach, try using interesting shapes or textures like windows and doorways as frames. This can add depth to your images and draw attention to the main subject in an unexpected way.
Cute Instagram Poses Indoors | Hotels, Cafes & Stores
Now that we covered all the possible outdoor poses and photoshoot ideas, let’s go over a few options for indoor photography.
28. Sitting on the Stairs
Pose 1: Find a grand staircase (or a plain one), and sit at the edge of the step for an angled look.
Pose 2: Or center yourself on top of them for a more composed shot (take the shot from a low level if you wish to capture gorgeous artwork on the handrails).
Tip: Always sit at an angle rather than looking straight into the camera. Place one foot in front of the other.
29. Enjoy a cuppa
When traveling, taking a photo of yourself seated in a cafe can be a great way to capture the feeling of relaxation and vacation.
You can capture yourself in the moment of sipping your drink while sitting at one of the tables—this can be a great way to tell stories without using words!
30. Hold your drink
Another super easy pose to try at a cafe.
Pose 1: Try sitting outside with your wine, tea, or coffee cup held near your face, allowing for the natural light to enhance your features and make you glow.
Pose 2: Alternatively, you could try turning away from the camera for a more candid and relatable shot.
31. Put one hand/arm up from the balcony
Putting one hand up from a balcony makes for an eye-catching and dramatic photo pose. This simple yet powerful gesture will draw attention to your figure and bring out the beauty of the landscape or the view behind you.

This pose works especially well if you’re in a high-rise building or balcony overlooking an amazing view. If possible, try capturing the sky in your photos for an even more breathtaking look.
Whether it’s a sunny day, twilight hour, or nighttime—this pose will make your Instagram feed truly stand out!
32. Snap a Mirror Selfie
Taking close-up selfies is a great way to express yourself and capture memorable moments while traveling.
Whether it’s a classic selfie with your phone at arm’s length or an intimate portrait with a friend, getting close to the camera will draw attention to your facial expressions and emotions.
I like using pretty mirrors or finding glass that reflects, especially when I am outdoors. This type of pose can be powerful when telling stories or highlighting special memories in your favorite destination, so don’t be afraid to get creative with your angles and lighting.
This is also great for taking outfit photos. With a little experimentation, you can create truly captivating selfies that capture the essence of your travels!
33. Interact with a Prop (hotel room ideas)
Interacting with a prop in your hotel room can be a great way to add some personality and storytelling to your photos. Whether you’re traveling alone or with friends, try incorporating everyday objects like books, magazines, food, or clothing into your shots for an interesting visual effect.
For example, try reading a book while lying in bed for a cozy and relaxed look. Hold a glass, and say cheers!
Or bring breakfast in bed to create a more intimate and intimate feeling.
Tip: And of course, don’t forget to use the items in your wardrobe—a bright and colorful outfit can go a long way towards creating an eye-catching photo!
Read : Hotel photoshoot ideas
34. Admire an artwork or painting (in a museum)
Admiring a piece of artwork or painting can be a great way to capture the beauty and emotion of your trip in a photo.
Pose 1: Whether you’re at an art museum or gallery, simply sit to admire the piece of artwork.
Pose 2: Or standing in front of any large artwork with a contemplative look on your face can make for some stunning photos.
35. Wake me up look (in a hotel)
The ‘wake me up’ look can be a great way to capture the beauty and comfort of your hotel stay in an Instagram photo. Whether you’re in a five-star resort or a simple inn, getting cozy in bed with some pillows and blankets will make for some beautiful shots.
You can also try capturing yourself relaxing on the couch, lounging in an armchair, or taking a seat at the mini bar for some creative and interesting poses.
Tip: For extra detail, try adding elements like eye masks, breakfast trays, room service items, and even your suitcase or passport to add more context to your photos. Not only will this create a sense of luxury and relaxation in your images, but it will also give your followers a glimpse into your travels and hotel experiences.
36. Lean in or Lean out from the balcony
Leaning out from the balcony can be a great way to add some drama and adventure to your Instagram photos. Wear a flowy dress or a skirt and lean forward (or look out) from the balcony.
Budget Travel Tips : Didn’t book a hotel room with a balcony? A rooftop bar or terrace will also work for a similar look. You can also lean against the wall and pose – play with your hair, look out, etc.
In-action & Activities: Posing Ideas for Instagram
You don’t need a Go Pro or any adventure camera for this (bonus if you do, but it’s not a necessity). Now, on to the poses
37. Sit on the floor (swimming pool or poolside)
Adding an extra dose of fun and creativity to your Instagram photos can be as simple as sitting on the floor by a swimming pool. This is a flattering pose as it is perfect for any time of year (plus you can hide your face and tummy).
Try putting one leg on top of the other to create a beautiful shape and symmetry while also adding some dynamic movement to the shot.
38. Throw snow – snow fight (in the winter)
Throwing snow in the air is one of the easy poses in the winter.
Try throwing handfuls of snow up towards the sky for an explosive effect, or running around in circles while letting it fly from your hands for some more whimsical shots.
You can also try having a snow fight with friends! Not only will it be fun, but you can create some great memories while also getting some amazing photos.
Use your hands to make snowballs and aim them at each other while making silly expressions or playfully ducking away from the snow—this will bring an extra layer of fun and energy to the shot.
39. Pottery class
Taking pictures in a pottery class can be an enjoyable and creative way to capture the beauty of your travels.
Pose 1: Whether you’re working on a bowl, plate, or vase, simply holding the clay in your hands while taking pictures can make for some interesting photos.
Pose 2: Or have someone take close-up shots of the clay in your hands as you’re working on it, as this can add an extra element of texture and movement to your photos.

You can also try taking pictures of yourself in the middle of a creative process, such as spinning the wheel or shaping the clay with your hands—this will capture the beauty and energy of creating something with your own two hands.
40. Cooking class
Taking pictures in a cooking class can be a great way to document and showcase your culinary adventures.
Pose 1: Take photos mid-action—like of yourself stirring ingredients, plating up dishes, or cutting vegetables.
Pose 2: You can also experiment with different angles and take a shot once the items are ready.
41. Stop for a pose while biking or cycling
While biking or cycling, get down and stop for a pose – you can look away or smile shyly. My husband took this photo right outside the Basel SBB to share taking off from the station!
You can also try different poses, such as standing side-by-side with your bike, leaning against the handlebars, or just sitting and enjoying the view.
42. On a hike (with related gear)
Hiking is an amazing way to explore nature and capture beautiful photos while doing it.
Pose 1: Wear your hiking clothes and shoes and pretend to walk or climb for a photo.
Pose 2: Try getting creative with your angles when taking pictures – like get your photographer to stand at an elevated level and then take a photo from there — focusing on the views below/around.
43. Look outside and ponder on a cruise
If you are vacationing on a cruise, one of the easy ways to take a vacation shot is to look outside (into the ocean) and then take a shot.
You can also try standing near one of the windows or doors, allowing natural light to illuminate your features and bring out your beauty.
44. Have fun on a Tuk Tuk ride
Climbing aboard a Tuk Tuk is the perfect way to get some fun shots for your Instagram. Have your driver/operator stop at scenic places along the journey and snap away while enjoying some of the most incredible views around you!
Stand on the edge of the Tuk Tuk and peek outside (flowy dresses or skirts are nicer).
45. Look outside from a plane/ car/ train window
Nothing gives a more wanderlust vibe than a mode of transportation – a plane, car, or train window.
If you’re in an airplane, try taking a shot of the window – with the subject peeking out. Or switch an airplane to a train ride with views – it is one of the natural poses to capture when traveling.
Solo Shots (without you/your face)
These travel photography ideas are perfect if you are traveling solo, or do not wish to show your face. Use your hands, phone, purse, or whatever you have with you to show your presence and take a shot!
I use this technique a lot when I am traveling alone, exploring a busy place, or when I am not ready to show my tired face 🙂
46. The Close Up
Close-up shots are a great way to capture the details of your environment or an object. You can also take portrait shots of yourself.
If you do not want yourself in the frame, try taking photos of items that you encounter on your travels like souvenirs, street art, or unique architecture .
47. Smile at the Camera
Look at the camera and smile – simple as that!
Don’t want to smile at the camera – say cheers without showing your face. Raise a glass and take a shot!
49. Use your purse or phone as your signature style in a cafe/destination
Prefer not to show your face? Use your pretty purse or phone as a substitute.
50. Hold an item – same as the destination
Another option is to hold an item such as a coffee mug, magnet, etc. to introduce a destination you are in!
How to Pose for Photos as a Couple or as a Group
51. sit down together (picnic, cafe, etc).
Sit down in a park, and pose together – enjoying the lovely weather or picnic.
52. Cheers, hold drinks together
Hold your drinks, look at the camera and say ‘cheers’!
You can also create this photo without faces and with a group!
Whether a close-up of a couple kissing or capturing a silhouette from a distance with a gorgeous landscape – kissing is simple and makes for amazing couple shots!
54. Look into each other’s eyes
Focus on one subject looking into the eyes of the partner. This is a simple pose and is perfect for engagement photos.
55. Follow me away style
This is one of the popular Instagrammable shots where a girl is leading and the photographer is holding on and following!
Try to re-create this composition in your next location (or use it when you are buying a new house/ housewarming invites, etc)
Fashion Outfit Ideas | Photoshoot Dress Ideas
Finding the perfect outfit for your photoshoot can be a challenge, but don’t worry—there are so many stylish and timeless looks that you can choose from.
- Flowy outfits : Flowy dresses or skirts with movement are great options for creating an effortless and romantic feel. They are also very lightweight and easy to pack.
- Classic white or pastel tones look amazing against a backdrop of nature.
- If the backdrop is busy (like a city/urban landscape), then plain colors without much print work well.
- Red, yellow, and white can be used in most compositions (urban or nature)
- Props : Props are also great for adding another layer to your photoshoot photos. Choose items like hats, scarves, sunglasses, and jewelry that you can play around with. You can also bring along items from home like books or flowers for an added touch of personality.
If I have some room in my luggage, I always add 1-2 shoes for photos, a mini bag, battery-operated lights, fake leaves, etc. You can buy these props/items on Amazon.
CLICK TO SHOP FROM OUR AMAZON PAGE
Travel photography tips.
Whether it’s posing solo or with friends, it’s important to think about your angles, expressions, and body positioning before snapping that Instagram-worthy shot.
Here are some quick tips for travel photography poses that will help you take the perfect vacation photo!
The first tip when taking travel photos is to find a background that really stands out. A bright and colorful location can bring life to your photos, so look for vibrant wall murals or visually stimulating locations when scouting for a backdrop.
If you’re posing with friends on group trips, it’s also important to find a spot with enough room for everyone to stand comfortably.
The next tip is to keep your body language in mind when posing. A confident posture can make all the difference, so think about how you want to be perceived in the photo.
If you’re feeling shy, don’t be afraid to give a subtle smile or side glance.
Looking away from the camera is also a great posing idea.
If you’re feeling more adventurous, try out playful poses such as handstands or jumping into the air with friends!
Finally, don’t be afraid to experiment with angles when taking pictures. You can make use of props like benches and tables to get different perspectives for your shots.
Trying a bird’s-eye view or a low angle can bring out interesting details and shapes in your pictures.
Plus, don’t forget to play around with the lighting—a great way to add drama and depth to your photos is by using natural light from windows and doorways.
We hope you enjoyed this round of poses. If you did, follow us on social media – Instagram here
Read other posts on photography
- Best fall photoshoot outfits
- Best cameras for travel blogging
- Best camera under $300
Pin: Travel Photography Poses for Instagram

Mayuri is the founder & editor of ToSomePlaceNew. An Indian-Canadian globetrotter, she has traveled to over 100 cities and 35+ countries. Mayuri has a graduate degree in History and is an MBA. She loves traveling the world, capturing historical nuances, and discussing that over a cup of coffee with her husband, Salil. She currently resides in Edmonton, Canada, and plots travel plans to Europe, the Americas, and beyond.
Similar Posts

20 Creative and Cute Hotel Photoshoot Ideas
Looking for creative hotel photoshoot ideas? This guide has it all – we have covered hotel rooms, amenities to spaces such as balconies, rooftops and pools for a well-rounded accommodation interior and exterior photography. Salil and I mostly book hotels in a mid-budget range, with occasionally splurging on some stellar properties (like we got engaged…

19 Creative Snow and Winter Photoshoot Ideas
Looking for snow and winter photoshoot ideas? No worries! We got you covered with easy and creative poses and props. Winter is the perfect time of year to take stunning photos that capture the beauty and coziness of the season. From outdoor activities like sledding and ice skating to cozy family portraits in front of…

Best Digital Cameras Under 300 for travel + Photo Tips & Apps
If you love photography, you don’t need an expensive camera to start. Few years ago, both of us were using digital cameras that were priced about less than $300 and learnt basic editing skills to take photos and capture memories from our travels. When you are traveling you need a good digital camera, something that…

24 Cozy Fall Photo Shoot Ideas for the Season
As the leaves begin to change color and the weather starts to cool down, it’s the perfect time to start planning your fall photoshoot. Whether you’re looking to capture the cozy vibes of autumn or add a festive twist with Halloween props, there are endless possibilities when it comes to creative fall photo shoot ideas….

10 Fall Photoshoot Outfit Ideas + Styling Tips
The leaves are falling and the temperatures are dropping, which can only mean one thing: it’s time for a fall photoshoot! If you’re looking for some inspiration for your next photography adventure, check out these cute fall photoshoot outfit ideas. 10 Fall photoshoot outfit ideas: Colors, accessories, clothing, and more Fall is the perfect time…

The Best Cameras for Travel Blogging & Beyond
If you’re a travel blogger, then you know that having a great camera is essential for capturing all of your amazing adventures. But with so many options on the market, it can be tough to know which one is right for you. That’s why we’ve put together this guide to the best cameras for travel…
Leave a Reply Cancel reply
Your email address will not be published. Required fields are marked *
Save my name, email, and website in this browser for the next time I comment.
This site uses Akismet to reduce spam. Learn how your comment data is processed .
- Northern Ireland
- Couchsurfing
- Miscellaneous
- Bucket List
- Who is Penelope?
The Most Beautiful Stations on the Moscow Metro
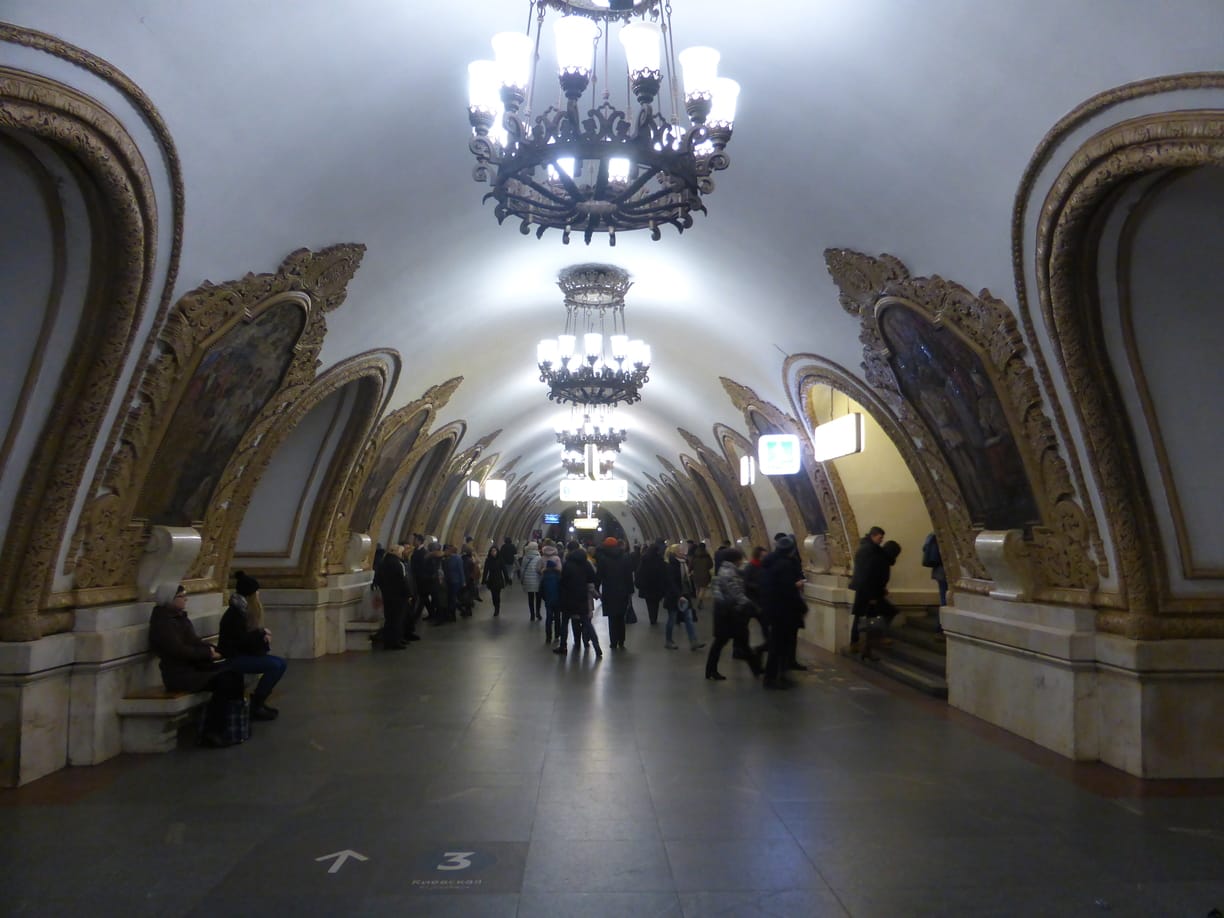
You might have heard that there are some beautiful metro stations in Moscow. Soviet decorations, chandeliers, mosaic painting and statues are common in many of the stations. The good news is that the Moscow Metro does not cost a lot of money and many of the most beautiful stations on the Moscow metro are on the same line, so you can almost get on and off at each station to visit these. Over the New Year holidays, I had a free afternoon and decided to visit some of these stations. Check out what I found below…..
The main stations that you will want to visit are on the Number 5 line, also known as the Circle Line. An advantage of this line is that you can get to it very easily and quickly no matter where you are in Moscow. The announcements on the metro are in Russian as well as English so you don’t need to worry if your Russian language skills are not good.
If, like me, you arrive in Moscow via train from Kyiv , then you will arrive at a metro station which many Muscovites believe to be the most beautiful of them all…..
Kievskaya metro station was opened in 1954 and features white marble walls which curve upwards and have with large mosaics surrounded by a gold trim in a very classical style. The mosaics depict life in Ukraine and was designed by a Ukrainian who wanted to display Ukraine’s influence and contribution to Soviet Russia.

Kievskaya, one of the most beautiful stations on the Moscow metro

Soviet era artwork between the arches

Mosaic with golden trim

People carrying flags is a common theme

Going into battle
Belorusskaya
If you look at a map of the metro , you will want to go in a clockwise direction on the circle line. So you will want to get on the train going in the Barrikadnaya direction and not Park Kultury. Stay on this line until you reach the 2nd station, Belorusskaya. This station was built in 1952 and like Kievskaya also features white marble pylons and a plaster ceiling.
The ceiling features 12 mosaics in an octagonal shape depicting Belarusian life, while the tiling on the floor is said to resemble a Belarusian quilt. One of the passageway exits of the station has a statue called ‘Belarusian Partisans’ of three men wearing long coats, holding guns and carrying a flag.”

Belorusskaya metro platform

Soviet artwork on the roof

The hammer and sickle features prominently in the metro artwork

Three men carrying guns, holding the flag…
Mayakovskaya
To get to the next station, we need to change onto the green line (line 2) and go just one stop to the station of Mayakovskaya. This station has an art deco theme and, for some, resembles an elaborate ballroom. The columns are faced with stainless steel and pink rhodonite while the marble walls and ceiling have 34 mosaics with the theme “24-hour Soviet Sky. Apparently, Stalin resided here during the 2nd World War as the station was used as a command post for Moscow’s anti-aircraft regiment.

Mayakovskaya metro

24-Hour Soviet Sky mosaic

Bomber planes

It looks like planes flying over Red Square

Novoslobodskaya
It’s time to get back on the metro and return to Belorusskaya. At Belorusskaya, change to the circle line again and continue clockwise to the next station, Novoslobodskaya. With its 32 stained glass panels, this station reminds me of a church. The panels were designed by Latvian artists and are surrounded by a brass border.

Novoslobodskaya metro

The platform of Novoslobodskaya metro

Stained glass artwork

The golden trim around artwork is also very common

Prospekt Mira
Back on the metro and again just one stop until our next station, Prospekt Mira. This station was originally called Botanichesky Sad after the nearby Botanical Gardens of the Moscow State University. The pylons are covered in white marble and decorated with floral bas-relief friezes. The ceiling is decorated with casts and several cylindrical chandeliers.

Prospekt Mira metro station

Notice the floral decoration
Komsomolskaya
On the metro once more and once more we are going just one stop to the next station – Komsomolskaya. This station is famous for its its yellow ceiling. The chandeliers in this station are huge. The photos below do not do this station justice. For me, this station resembles a presidential palace. You hace to see it for yourself to truly appreciate it.
Because of it’s location, this is one of the busiest stations in the Moscow metro as it serves three of the main train stations in the city – Leningradsky, Yaroslavsky, and Kazansky so be prepared for a lot of people.

Komsomolskaya metro

The yellow ceiling seems to go on forever

Yellow ceiling and artwork

One of the ceiling mosaics
Elektrozavodskaya
When you are ready to leave Komsomolskaya metro station behind, then get back on the circle line and go one stop to Kurskaya and change to the blue line (line 3) and go to two stops to the Elektrozavodskaya station. This station gets it’s name from a nearby electric light bulb factory and has a somewhat industrial but also futuristic style, with 6 rows of circular lamps (there are 318 lamps in total). I think this is one of the most beautiful stations on the Moscow metro for how unique it is. The station was opened in 1944 after a delay because of the 2nd World War and features 12 marble bas-reliefs of the struggle on the home front during the war.

The Komsomolskaya metro station

The struggles of war at home

Fixing machinery

Hard at work

Making weapons

Building a tank

Even the station sign is elaborate
Ploschad Revolyutsii
Back on the metro line 3 (but in the other direction), getting off at the 3rd stop – Ploschad Revolyutsii (Revolution Square). This is located underneath the square in Moscow of the same name and is a short walk from Red Square in the city centre. It is the perfect place to end a visit around Moscow’s metro. The station features red and yellow marble arches with a total of 76 sculptures in between each arch. The sculptures are supposed to represent the people of the Soviet Union and include soldiers, farmers, industrial workers, children etc… I noticed a lot of people touching the golden chicken in the photo below as well as the show of the woman. I am assuming that this is for good luck.

Industrial worker

Touch the chicken for good luck

Sculpture of the people of the Soviet Union

Woman reading a book – touch the shoe for good luck

In education

Parent and child
These are some of what I think are the most beautiful stations on the Moscow metro. Which ones are your favourite? Would you add any to this list?
You Might Also Like

The Oldest Whiskey Distillery in the World

Kjeragbolten: Scary, Exhausting and Exciting!
Mamayev Kurgan Memorial in Volgograd
19 comments.

Kievskaya definitely caught me off guard. Didn’t know Moscow metro stations were THIS extravagant! Mayakovskaya is gorgeous too with the marble walls and mosaics. I might just need to book a flight over to admire all of these!

Do it! Kievskaya was my first introduction to the Moscow metro as I got an overnight train from Kyiv.

You know, in the States, all we ever hear is bad stuff about Russia. It’s nice to see other (and lovely!) dimensions of such a controversial place.
It’s the same in the UK which is why I prefer going to see somewhere and making up my own mind. It’s all ‘politics and bullshit’ as I say

I went to Moscow about 13years for Christmas and went to train stations, so I can see these amazing mosaics and chandeliers. I agree with you that are beautiful Stations for sure and I could of wandered around for days. I think Kievskaya is definitely my favourite out of them all and I even have some similar pictures as you.
I imagine Moscow would have been a little different 13 years ago but these stations have probably always looked beautiful

Food and Footprints
You chose some great stations for this write up! Beautiful details in these stations and would love to visit them sometime. Particularly like the Komsomolskaya station with that yellow ceiling!
Thank you very much. Komsomolskaya seems to be a lot of peoples favourite stations too

Sumit Surai
Wow! Without the text I would have thought them to be some museum or gallery.
I know exactly what you mean!

Rosie Fluskey
Wow, it is just stunning! How does anyone get to work with so much to look at. I’m surprised at the very bourgeois-looking Komsomolskaya station. I would have thought it was all too Tzarist looking, but then I haven’t been to Russia yet lol. This has just made me want to go more!

Wow, that’s a lot of artwork. I wonder how old some of these pieces are?
Generally most of the stations are from 1940-1960 approximately. The later stations are more functional than style.

My mother-in-law was in Moscow fifty years ago and still raves about the metro stations. So far, I could not imagine much. But now! The pictures are great and I think it’s almost a pity that this splendor is underground. But for every user of the Metro can enjoy a free trip to the world of art. Susanne
True. It is like having a free trip to an art museum/gallery. I hope that you can one day visit Moscow and see for yourself.

Oh wow, I would never have known that these were metro stations. The ceilings remind me of how you need to look up sometimes, even in the commuter rush!
It is true about life in general, we just go from A to B looking directly in front of us instead of around us

Wow, I would have never guessed that these were stations. The decor is so pretty and not one I’m used to seeing at metro stations. Love the ceiling at The Komsomolskaya metro station.
They certainly don’t look like metro stations. The ceiling there is one of my favourites too!
Leave a Reply Cancel Reply
Save my name, email, and website in this browser for the next time I comment.
Notify me via e-mail if anyone answers my comment.

16 Tips for Beautiful Travel Portrait Photography
Mjw photography.
The post 16 Tips for Beautiful Travel Portrait Photography appeared first on Digital Photography School . It was authored by Philipp Dukatz .

This article was updated in January 2024 with contributions from Philipp Dukatz, Ben McKechnie , Oded Wagenstein , Matt Dutile , Darren Rowse , Kevin Landwer-Johan , Suzi Pratt , and Peter West Carey .
Travel portrait photography might seem difficult – but with the right approach, it’s surprisingly easy.
I’ve taken photos of people while traveling all around the world, and in this article, I explain everything you need to know for stunning travel portraiture, including:
- The best ways to approach locals
- A simple trick to set your subjects at ease
- How to choose the right gear
- How to find the best locations
So if you want to become a travel photography master, then let’s dive right in, starting with my first tip:
- 1. Be ready for beautiful moments
If you’re serious about capturing top-notch travel portraits, then you should be ready to fire the camera shutter at all times .
Travel portraiture is all about shooting the brief moments – the glimpses into a person’s life that aren’t replicable. You’re not doing landscape photography, where you (often) have plenty of time to select a lens, set up your tripod, and choose your settings; instead, you’re doing travel portraits , which require a fast shutter finger and intense mental focus.
That’s why you should constantly scan the environment, looking for potential candid subjects. And even once you’ve found a subject, watch them carefully for a memorable split-second expression.
Also, make sure you take your lens cap off, switch your camera on, adjust your travel settings in advance, and be ready to shoot!
- 2. Get close to your subject
Do you feel your travel portraits look boring? It’s probably because you are too far away .
I know it feels awkward to get close to someone you don’t know, especially in a foreign country. It seems so much easier to shoot from a distance and capture a more environmental travel portrait , or to break out that telephoto lens , zoom in, and click away.
Unfortunately, in my experience, this just won’t work.
If you want to capture crisp, sharp, extraordinary images that tell a story and leave your audience stunned, you must overcome your shyness. A close perspective will add more details to your subject’s face; it will also simplify the composition so that you’re focusing on just one or two elements. And by walking in close, you’ll gain control over key items: the lighting, the background, the composition, and the depth of field . These factors are vital in good portrait photography and are so much easier to adjust when you are close to your subject.
How can you get up close without feeling uncomfortable? That’s what I explain in my next few tips:
- 3. Practice approaching people
It’s the biggest challenge in travel portrait photography: How do you get close to people without bothering them? How do you talk to strangers and ask for permission to take pictures?
My recommendation:
Start by practicing .
Think about what you might say to a person. Write out a script (or three) if you have to. Then practice it in the mirror. Practice smiling, practice gesturing to your camera, and practice saying the script repeatedly until it becomes automatic.
Sure, you might feel a bit silly – but when it comes time to actually approach a person, it’ll be so much easier!
When you’re approaching a person for real, it’s all about your attitude. So make contact, seem upbeat, talk, and – most importantly! – smile.
Bottom line: Don’t be shy, adapt to the local culture, get to know people, make friends, and you will take great pictures.
- 4. Learn the basics of the local language
You may be wondering:
If I don’t know the local language, then how can I approach people and interact successfully?
It’s simple: Just learn a few basic phrases. These won’t take much effort, but they’ll go a long way to helping you approach people. In my experience, these are the six most important phrases you should learn before traveling to a new country:
- Hello, how are you?
- My name is …?
- I am from …?
- What is your name?
Practice the phrases on bus rides, and ask your hotel receptionist, taxi driver, or local friends how to pronounce words. Don’t be afraid to make mistakes!
Then, when you’re out shooting, go up to people with your camera and use the phrases. Once you’ve gotten acquainted, gesture to your camera – and if you get the nod of approval, take their photo!
- 5. Smile a lot!
I said it before, but it’s so important that it deserves its own section:
Whatever you do, when you’re approaching strangers, make sure to smile. A smile can go such a long way . If you are grumpy and angry because you’re not getting the shots you want, it’ll put people off. No one will want to go near you, and people definitely won’t want to get their picture taken by you.
If you do it right, when you come home from a photo walk, you’ll have lots of pictures. And your cheeks should hurt from all the smiling!
- 6. Take your time
Once you’ve made contact with a potential subject, and you’ve established a good vibe, it’s time to take a picture. But don’t rush; that will make your subject uncomfortable, and it won’t make for a good result.
Instead, take advantage of all the “work” you’ve put in and take your time. Be calm, think about the light, think about what you want to emphasize (the eyes, the hands, or the person itself), and think about the background. Take a deep breath and try a couple of shots. Maybe switch angles and test out different compositions.
As you work, your subject will also become more relaxed and get used to the camera. Again, there is no need to rush. In my experience, a slow portrait is nearly always better than a fast one!
- 7. Don’t be afraid to capture candid portraits
When encountering people who are totally engrossed in what they are doing, it’s best not to interrupt them. Instead, remain separate and capture candid or semi-candid photos.
I rarely hide my camera; instead, I prefer to have it out in the open so people can be aware that I’m taking photos. Most folks pay no attention, especially when you’re in a tourist area.
For this next photo, I wanted to capture the young boy advertising goods at the top of his voice. He and the older man (I assume it was his grandfather that he was helping) were aware of my presence and that I was taking photos. I was able to do so without disrupting the action.

- 8. Choose a strong composition
Numerous compositions can work for portraits. The rule of thirds can work incredibly well, but don’t overdo it or all your travel portraits will look the same.
Another approach is to place one of your subject’s eyes directly in the center of the frame; a study proved that portraits composed this way appeal to viewers on a subconscious level. (I promise I’m not making that up!) It’s a trick that can be applied in both portrait and landscape orientation.
A general rule exists in travel portraiture that you shouldn’t place your subject directly in the center of the frame. However, rules are made to be broken sometimes!

- 9. Come down to their eye level
Try not to stand above your subject if they are sitting. It’s intimidating and works against your goal to relax the person. Positive psychological things happen when you get down on someone’s eye level. Take a look at the example below:

The image was not captured in a touristy location in India, so he is the real deal. I sat down on the step to receive a blessing. Accompanied by mystical chanting, I drank some lukewarm tea of unknown provenance, had air blown all over my face, and ash spread across my forehead. We chatted after, and I felt in no rush to suggest a portrait. It was a fascinating experience. What do you think when you look at his facial expression – is the time spent together palpable?
- 10. Always be aware of the lighting
Light will add feeling to your travel portraits when you use it well. Look at the type of lighting in the location where you’re making your portraits. Is it conducive to the style of the portrait you wish to capture? Do you need to come back at another time of the day or night? Will adding some flash improve the shot?
When you’re traveling, you often can’t wait for the right light, so you must make the best use of available light. When the light at the location is not great, you need to get creative and add illumination – either with a flash or a reflector.
For this night portrait of a Samlor rider, I was able to position him to make the most of the light in the street market behind him. I also used my flash to illuminate him and help catch a glimpse of the motorcycle passing behind.

- 11. Don’t be afraid to move
Reality can be quite boring, and while there are plenty of great subjects, not all compositions work – so don’t get stuck capturing the same obvious, conventional shots.
Instead, when you approach a new subject, think about all the different crops and angles you might use. Envision a strong image in your head. Then move to make it happen!
In particular, pay attention to your subject’s position in the scene and how they relate to elements in the foreground and the background. You don’t want trees or signs coming out of your subject’s head, and you don’t want any strong splashes of color that will distract the viewer, either.
Fortunately, just by taking a few steps to the right or left, you can often eliminate distractions and/or include additional beautiful elements.
Don’t be lazy! And don’t just rely on your lens’s zoom capabilities. For the best shots, move those feet!
- 12. Get a 50mm lens
I know, I know: You can take great travel photos with any lens (and any camera, for that matter). However , certain lenses are ideal for certain types of photography, and if you want stunning travel portrait photos, I highly recommend you invest in a 50mm lens.
What makes a 50mm lens so special?
For one, the perspective is very natural and therefore great for portraits. You’ll be able to capture detailed shots without standing too close to your subject, but you’ll also be able to back up for a wider field of view in case you want to take some environmental images.
Plus, a 50mm prime lens will force you to really think about your compositions. You won’t be able to zoom in on your subjects; if you want to get a tight shot, you’ll need to make the deliberate decision to move closer.
Bonus: 50mm lenses are super portable, which means you can carry one all day and you won’t notice the weight.
- 13. Choose the right settings for travel portraits
With my fixed focal lens, I often shoot portraits at f/2.8 or slightly above. If you shoot any wider, the focal plane can be so thin that you risk your subject’s eyes being in focus but having their nose out of focus. For a zoom lens, I recommend selecting your widest aperture but standing further away from your subject. Zooming in on their face will accentuate the shallow depth of field effect that works so well for portraits.

For engaging portraits, the most important element requiring sharp focus is the eyes. I suggest setting your camera to spot focus on the center AF point. Next, aim the center point at one of your subject’s eyes. Use the focus and recompose method – or even better – the back button focus method to lock in on the eyes. This will ensure they’re in sharp focus in the finished photo.
- 14. Start by shooting kids and people in action
If you’re still feeling a bit uncomfortable about approaching people and asking for a shot, then start out easy:
With kids, and with people in action.
You see, kids are so easy to photograph. They usually love getting their picture taken; they’ll pose for long minutes and never get bored! Of course, be mindful of boundaries, and always ask the parents before shooting their child.
As for capturing people in action:
I’m talking about people who are doing something. For instance, you’ll have an easy time photographing a person playing a musical instrument, whereas a person doing nothing will surely notice your approach. Do you see what I mean? People who are busy with tasks won’t care about you taking pictures, so they’re a great beginner’s subject!
Pro tip: Look for traditional workshops or handicraft businesses. They usually make for great travel portrait opportunities!
- 15. Shoot a series with the same subject
When you have someone’s permission and have bonded with them, consider staying with them a while and shooting a series of images. This is what I did when I met a man in the Philippines recently. I directed him gently for a series of shots after telling him how interested people would be to learn about his culture. He was happy to oblige.

- 16. Get out of the touristy areas
Travel portrait photography is about capturing authentic images that really tell the story of a location.
And you won’t find that story in touristy hubs.
You see, tourist attractions are (usually) far from a country’s reality. Sure, take a few images in the tourist traps, but then move farther afield. Note that getting off the beaten track isn’t as difficult as you might think; sometimes it takes just 15 minutes to find yourself in a small, local village.
And as a photographer, that is where you want to be. You’ll meet real people who aren’t out to sell things. You will have more chances to interact, practice your newly acquired language skills, and take more authentic photographs.
Plus, it’ll make for a much better travel experience than the “Lonely Planet path.”
- Travel portrait photography: final words
Capturing great travel portraits takes a little practice.
But it’s worth it.
So don’t be shy; instead, get out that camera, make friends with the locals, and capture some great photos! Take your time, open up, get close, and don’t forget to smile.
Now over to you:
Which of these travel portrait tips do you plan to use on your next trip? Share your thoughts in the comments below!
Table of contents
Travel photography.
- 8 Ideas of What To Do With Your Vacation Photos
- What Skills do You Need to be a Travel Photographer?
- How to Capture the Essence of a Place – Travel Photography Tips
- 7 Tips to Make Travel Photography Interesting Again
- Avoid These 5 Major Mistakes Made By Travel Photographers
- Travel Photography – Do You Ask Permission Before, After Or Not At All?
- Travel Photographers Workflow – At Home and on the Road
- The Photo Critique: Travel Photo Edition
- 6 Reasons Why Your Travel Photos Don’t Look Like the Ones in Magazines
- The Fine Line Between Travel Photography and Having a family Vacation
- 10 Ways to Improve your Vacation Photos
- What is Your Biggest Travel Photography Challenge?
- 7 Travel Photography Hacks to Get You Going Places
- How to Use a Travel Photography Shot List to Come Home with Better Photos
- Why You Need To Be A Guerrilla Travel Photographer – And How To Become One
- How to Get the Most Out of a Travel Photography Location
- Travel Photography, Backpacking and Packing Light
- 6 of the Best Smartphone Apps for Travel and Landscape Photography
- How To Keep Camera Gear Safe While Traveling
- 5 Ways to Find Great Locations for Travel Photography
- 15 Tips for Protecting Your Images While Traveling
- Safety Tips for Travel Photographers (Particularly Women)
- Off Camera Flash for Your Travel Photography
- How to Use Natural Light in Travel Photography
- Photo Composition Tips from Bob Holmes – Composition in Travel Photos
- The Importance of People in your Travel Photos
- Create More Unique Travel Photos by Adding a Model
- 5 Lessons Learned Switching from DSLR to Mirrorless for Travel Photography
- How To Keep Your Batteries Charged While Traveling – Remote Location Edition
- 5 Tips For Travel With Only One Lens
- 5 Lessons Learned While Using a Kit Lens for Travel Photography
- 7 Tips for Using a Tripod in Landscape and Travel Photography
- The Best Fujifilm X-Series Kits for Travel Photography
- The First 10 Things You Need to Buy After Your Camera for Travel Photography
- Tiniest Interchangable Lens Micro Four Thirds Cameras for Travel with Amazing Quality
- The Only Three Lenses You Need for Travel Photography
- Must Have Gear for Travel Photography Newbies
- Why Olympus Mirrorless Cameras are Top Notch for Travel Photography
- The Best Travel Photography Lenses: Our Top 12 Picks
- 5 Camera Bags That Every Travel Photographer Needs At Some Point
- A Travel Tripod that can Also Act as a Light Stand
- The iPad as a Photographer’s Travel Helper [a Review]
- 7 Non-Photography Items Which No Travel Photographer Should Leave Home Without
- 7 Reasons Why a Tripod is a Travel Photographer’s Best Friend
- Travel Photography Equipment – What To Pack?
- How to Plan and Take Killer Sunset Photos on Your Next Vacation
- Tips for Photographing Local Parks
- How to Find the Best Kinds of People to Photograph While Traveling
- 4 Ways To Make Better Street Portraits While Traveling
- How to Photograph People When Traveling
- How To Take More Creative Environmental Travel Portraits
- Photographing Signs – Travel Photography Tip
- Tips for Creating Better Documentary Travel Photos
- 6 Tips for How to be a Culturally Sensitive Travel Photographer
- Travel Photography Subjects: Old People
- How to Put the Fine Art into Travel Photography
- Travel Photography without the Travel – Going Local
- How to Tell Better Visual Stories with Travel Photography
- Create a Theme to Step Up Your Travel Photography
- Travel Photography ~ Think Outside The Postcard When Photographing Famous Landmarks
- Photographing Festivals and Events – Tips for Travel Photographers
- Video: Travel Photography Tips – Shoot with a Purpose
- 7 Reasons Why You Should Art Direct Your Travel Photography
- Buy Less Gear: Travel and Experience More
- Editorial Travel Photography – Telling the Story of a Location
- Travel Photography Subjects: Religion
- Travel Photography Subjects: Views
- Travel Photography Tips – Photographing the Coast
- Taking Photos in Busy Tourist Destinations with no People in the Shot
- How to Backup and Manage Your Photos When Traveling Without a Computer
- Tips for Creating a Killer Vacation Photo Book
- Photo Editing Workflow for Travel Photography
- How to Build a Travel Photography Portfolio
- How to Become a Professional Travel Photographer – Two Paths
- 11 Tips for Shooting Travel Stock Photography to Make Money
- How to Sell a Travel Story to a Magazine and Help Fund Your Travels
- 7 Realities That Hit Once You Become a Professional Travel Photographer
- Is a Career in Travel Photography Right for You?
- Travel Inspiration: Bali
- Canadian Travelogue – Introduction
- Travel Photography Inspiration Project: South Africa
- Travel Photography Inspiration Project: Thailand
- Canadian Travelogue – Newfoundland – Gros Morne National Park
- Travel Photography Inspiration Project: India
- Travel Photography Inspiration Project: Japan
- Travel Photography Inspiration Project: Kenya
- Travel Photography Inspiration Project: Morocco
- Travel Photography Inspiration Project: Vietnam
- An Interview With World Traveler Gary Arndt
- Interview: Oded Wagenstein – Author of Snapn Travel Guide and dPS Writer
var dpsTopics = { id: 65365, titles: [{“id”:”be-ready-for-beautiful-moments”,”permalink”:”https://digital-photography-school.com/10-ways-improve-travel-photography-portraits/”,”title”:”1. Be ready for beautiful moments”},{“id”:”get-close-to-your-subject”,”permalink”:”https://digital-photography-school.com/10-ways-improve-travel-photography-portraits/”,”title”:”2. Get close to your subject”},{“id”:”practice-approaching-people”,”permalink”:”https://digital-photography-school.com/10-ways-improve-travel-photography-portraits/”,”title”:”3. Practice approaching people”},{“id”:”learn-the-basics-of-the-local-language”,”permalink”:”https://digital-photography-school.com/10-ways-improve-travel-photography-portraits/”,”title”:”4. Learn the basics of the local language”},{“id”:”smile-a-lot”,”permalink”:”https://digital-photography-school.com/10-ways-improve-travel-photography-portraits/”,”title”:”5. Smile a lot!”},{“id”:”take-your-time”,”permalink”:”https://digital-photography-school.com/10-ways-improve-travel-photography-portraits/”,”title”:”6. Take your time”},{“id”:”dont-be-afraid-to-capture-candid-portraits”,”permalink”:”https://digital-photography-school.com/10-ways-improve-travel-photography-portraits/”,”title”:”7. Don’t be afraid to capture candid portraits”},{“id”:”choose-a-strong-composition”,”permalink”:”https://digital-photography-school.com/10-ways-improve-travel-photography-portraits/”,”title”:”8. Choose a strong composition”},{“id”:”come-down-to-their-eye-level”,”permalink”:”https://digital-photography-school.com/10-ways-improve-travel-photography-portraits/”,”title”:”9. Come down to their eye level”},{“id”:”always-be-aware-of-the-lighting”,”permalink”:”https://digital-photography-school.com/10-ways-improve-travel-photography-portraits/”,”title”:”10. Always be aware of the lighting”},{“id”:”dont-be-afraid-to-move”,”permalink”:”https://digital-photography-school.com/10-ways-improve-travel-photography-portraits/”,”title”:”11. Don’t be afraid to move”},{“id”:”get-a-mm-lens”,”permalink”:”https://digital-photography-school.com/10-ways-improve-travel-photography-portraits/”,”title”:”12. Get a 50mm lens”},{“id”:”choose-the-right-settings-for-travel-portraits”,”permalink”:”https://digital-photography-school.com/10-ways-improve-travel-photography-portraits/”,”title”:”13. Choose the right settings for travel portraits”},{“id”:”start-by-shooting-kids-and-people-in-action”,”permalink”:”https://digital-photography-school.com/10-ways-improve-travel-photography-portraits/”,”title”:”14. Start by shooting kids and people in action”},{“id”:”shoot-a-series-with-the-same-subject”,”permalink”:”https://digital-photography-school.com/10-ways-improve-travel-photography-portraits/”,”title”:”15. Shoot a series with the same subject”},{“id”:”get-out-of-the-touristy-areas”,”permalink”:”https://digital-photography-school.com/10-ways-improve-travel-photography-portraits/”,”title”:”16. Get out of the touristy areas”},{“id”:”travel-portrait-photography-final-words”,”permalink”:”https://digital-photography-school.com/10-ways-improve-travel-photography-portraits/”,”title”:”Travel portrait photography: final words”},{“id”:”be-ready-for-beautiful-moments”,”permalink”:”https://digital-photography-school.com/10-ways-improve-travel-photography-portraits/”,”title”:”1. Be ready for beautiful moments”},{“id”:”get-close-to-your-subject”,”permalink”:”https://digital-photography-school.com/10-ways-improve-travel-photography-portraits/”,”title”:”2. Get close to your subject”},{“id”:”practice-approaching-people”,”permalink”:”https://digital-photography-school.com/10-ways-improve-travel-photography-portraits/”,”title”:”3. Practice approaching people”},{“id”:”learn-the-basics-of-the-local-language”,”permalink”:”https://digital-photography-school.com/10-ways-improve-travel-photography-portraits/”,”title”:”4. Learn the basics of the local language”},{“id”:”smile-a-lot”,”permalink”:”https://digital-photography-school.com/10-ways-improve-travel-photography-portraits/”,”title”:”5. Smile a lot!”},{“id”:”take-your-time”,”permalink”:”https://digital-photography-school.com/10-ways-improve-travel-photography-portraits/”,”title”:”6. Take your time”},{“id”:”dont-be-afraid-to-capture-candid-portraits”,”permalink”:”https://digital-photography-school.com/10-ways-improve-travel-photography-portraits/”,”title”:”7. Don’t be afraid to capture candid portraits”},{“id”:”choose-a-strong-composition”,”permalink”:”https://digital-photography-school.com/10-ways-improve-travel-photography-portraits/”,”title”:”8. Choose a strong composition”},{“id”:”come-down-to-their-eye-level”,”permalink”:”https://digital-photography-school.com/10-ways-improve-travel-photography-portraits/”,”title”:”9. Come down to their eye level”},{“id”:”always-be-aware-of-the-lighting”,”permalink”:”https://digital-photography-school.com/10-ways-improve-travel-photography-portraits/”,”title”:”10. Always be aware of the lighting”},{“id”:”dont-be-afraid-to-move”,”permalink”:”https://digital-photography-school.com/10-ways-improve-travel-photography-portraits/”,”title”:”11. Don’t be afraid to move”},{“id”:”get-a-mm-lens”,”permalink”:”https://digital-photography-school.com/10-ways-improve-travel-photography-portraits/”,”title”:”12. Get a 50mm lens”},{“id”:”choose-the-right-settings-for-travel-portraits”,”permalink”:”https://digital-photography-school.com/10-ways-improve-travel-photography-portraits/”,”title”:”13. Choose the right settings for travel portraits”},{“id”:”start-by-shooting-kids-and-people-in-action”,”permalink”:”https://digital-photography-school.com/10-ways-improve-travel-photography-portraits/”,”title”:”14. Start by shooting kids and people in action”},{“id”:”shoot-a-series-with-the-same-subject”,”permalink”:”https://digital-photography-school.com/10-ways-improve-travel-photography-portraits/”,”title”:”15. Shoot a series with the same subject”},{“id”:”get-out-of-the-touristy-areas”,”permalink”:”https://digital-photography-school.com/10-ways-improve-travel-photography-portraits/”,”title”:”16. Get out of the touristy areas”},{“id”:”travel-portrait-photography-final-words”,”permalink”:”https://digital-photography-school.com/10-ways-improve-travel-photography-portraits/”,”title”:”Travel portrait photography: final words”}] };

Turn Your Curiosity Into Discovery
Latest facts.

Follistatin344 Peptide Considerations

Approach for Using 5 Tips To Help You Write Your Dissertation
40 facts about elektrostal.
Written by Lanette Mayes
Modified & Updated: 02 Mar 2024
Reviewed by Jessica Corbett

Elektrostal is a vibrant city located in the Moscow Oblast region of Russia. With a rich history, stunning architecture, and a thriving community, Elektrostal is a city that has much to offer. Whether you are a history buff, nature enthusiast, or simply curious about different cultures, Elektrostal is sure to captivate you.
This article will provide you with 40 fascinating facts about Elektrostal, giving you a better understanding of why this city is worth exploring. From its origins as an industrial hub to its modern-day charm, we will delve into the various aspects that make Elektrostal a unique and must-visit destination.
So, join us as we uncover the hidden treasures of Elektrostal and discover what makes this city a true gem in the heart of Russia.
Key Takeaways:
- Elektrostal, known as the “Motor City of Russia,” is a vibrant and growing city with a rich industrial history, offering diverse cultural experiences and a strong commitment to environmental sustainability.
- With its convenient location near Moscow, Elektrostal provides a picturesque landscape, vibrant nightlife, and a range of recreational activities, making it an ideal destination for residents and visitors alike.
Known as the “Motor City of Russia.”
Elektrostal, a city located in the Moscow Oblast region of Russia, earned the nickname “Motor City” due to its significant involvement in the automotive industry.
Home to the Elektrostal Metallurgical Plant.
Elektrostal is renowned for its metallurgical plant, which has been producing high-quality steel and alloys since its establishment in 1916.
Boasts a rich industrial heritage.
Elektrostal has a long history of industrial development, contributing to the growth and progress of the region.
Founded in 1916.
The city of Elektrostal was founded in 1916 as a result of the construction of the Elektrostal Metallurgical Plant.
Located approximately 50 kilometers east of Moscow.
Elektrostal is situated in close proximity to the Russian capital, making it easily accessible for both residents and visitors.
Known for its vibrant cultural scene.
Elektrostal is home to several cultural institutions, including museums, theaters, and art galleries that showcase the city’s rich artistic heritage.
A popular destination for nature lovers.
Surrounded by picturesque landscapes and forests, Elektrostal offers ample opportunities for outdoor activities such as hiking, camping, and birdwatching.
Hosts the annual Elektrostal City Day celebrations.
Every year, Elektrostal organizes festive events and activities to celebrate its founding, bringing together residents and visitors in a spirit of unity and joy.
Has a population of approximately 160,000 people.
Elektrostal is home to a diverse and vibrant community of around 160,000 residents, contributing to its dynamic atmosphere.
Boasts excellent education facilities.
The city is known for its well-established educational institutions, providing quality education to students of all ages.
A center for scientific research and innovation.
Elektrostal serves as an important hub for scientific research, particularly in the fields of metallurgy, materials science, and engineering.
Surrounded by picturesque lakes.
The city is blessed with numerous beautiful lakes, offering scenic views and recreational opportunities for locals and visitors alike.
Well-connected transportation system.
Elektrostal benefits from an efficient transportation network, including highways, railways, and public transportation options, ensuring convenient travel within and beyond the city.
Famous for its traditional Russian cuisine.
Food enthusiasts can indulge in authentic Russian dishes at numerous restaurants and cafes scattered throughout Elektrostal.
Home to notable architectural landmarks.
Elektrostal boasts impressive architecture, including the Church of the Transfiguration of the Lord and the Elektrostal Palace of Culture.
Offers a wide range of recreational facilities.
Residents and visitors can enjoy various recreational activities, such as sports complexes, swimming pools, and fitness centers, enhancing the overall quality of life.
Provides a high standard of healthcare.
Elektrostal is equipped with modern medical facilities, ensuring residents have access to quality healthcare services.
Home to the Elektrostal History Museum.
The Elektrostal History Museum showcases the city’s fascinating past through exhibitions and displays.
A hub for sports enthusiasts.
Elektrostal is passionate about sports, with numerous stadiums, arenas, and sports clubs offering opportunities for athletes and spectators.
Celebrates diverse cultural festivals.
Throughout the year, Elektrostal hosts a variety of cultural festivals, celebrating different ethnicities, traditions, and art forms.
Electric power played a significant role in its early development.
Elektrostal owes its name and initial growth to the establishment of electric power stations and the utilization of electricity in the industrial sector.
Boasts a thriving economy.
The city’s strong industrial base, coupled with its strategic location near Moscow, has contributed to Elektrostal’s prosperous economic status.
Houses the Elektrostal Drama Theater.
The Elektrostal Drama Theater is a cultural centerpiece, attracting theater enthusiasts from far and wide.
Popular destination for winter sports.
Elektrostal’s proximity to ski resorts and winter sport facilities makes it a favorite destination for skiing, snowboarding, and other winter activities.
Promotes environmental sustainability.
Elektrostal prioritizes environmental protection and sustainability, implementing initiatives to reduce pollution and preserve natural resources.
Home to renowned educational institutions.
Elektrostal is known for its prestigious schools and universities, offering a wide range of academic programs to students.
Committed to cultural preservation.
The city values its cultural heritage and takes active steps to preserve and promote traditional customs, crafts, and arts.
Hosts an annual International Film Festival.
The Elektrostal International Film Festival attracts filmmakers and cinema enthusiasts from around the world, showcasing a diverse range of films.
Encourages entrepreneurship and innovation.
Elektrostal supports aspiring entrepreneurs and fosters a culture of innovation, providing opportunities for startups and business development.
Offers a range of housing options.
Elektrostal provides diverse housing options, including apartments, houses, and residential complexes, catering to different lifestyles and budgets.
Home to notable sports teams.
Elektrostal is proud of its sports legacy, with several successful sports teams competing at regional and national levels.
Boasts a vibrant nightlife scene.
Residents and visitors can enjoy a lively nightlife in Elektrostal, with numerous bars, clubs, and entertainment venues.
Promotes cultural exchange and international relations.
Elektrostal actively engages in international partnerships, cultural exchanges, and diplomatic collaborations to foster global connections.
Surrounded by beautiful nature reserves.
Nearby nature reserves, such as the Barybino Forest and Luchinskoye Lake, offer opportunities for nature enthusiasts to explore and appreciate the region’s biodiversity.
Commemorates historical events.
The city pays tribute to significant historical events through memorials, monuments, and exhibitions, ensuring the preservation of collective memory.
Promotes sports and youth development.
Elektrostal invests in sports infrastructure and programs to encourage youth participation, health, and physical fitness.
Hosts annual cultural and artistic festivals.
Throughout the year, Elektrostal celebrates its cultural diversity through festivals dedicated to music, dance, art, and theater.
Provides a picturesque landscape for photography enthusiasts.
The city’s scenic beauty, architectural landmarks, and natural surroundings make it a paradise for photographers.
Connects to Moscow via a direct train line.
The convenient train connection between Elektrostal and Moscow makes commuting between the two cities effortless.
A city with a bright future.
Elektrostal continues to grow and develop, aiming to become a model city in terms of infrastructure, sustainability, and quality of life for its residents.
In conclusion, Elektrostal is a fascinating city with a rich history and a vibrant present. From its origins as a center of steel production to its modern-day status as a hub for education and industry, Elektrostal has plenty to offer both residents and visitors. With its beautiful parks, cultural attractions, and proximity to Moscow, there is no shortage of things to see and do in this dynamic city. Whether you’re interested in exploring its historical landmarks, enjoying outdoor activities, or immersing yourself in the local culture, Elektrostal has something for everyone. So, next time you find yourself in the Moscow region, don’t miss the opportunity to discover the hidden gems of Elektrostal.
Q: What is the population of Elektrostal?
A: As of the latest data, the population of Elektrostal is approximately XXXX.
Q: How far is Elektrostal from Moscow?
A: Elektrostal is located approximately XX kilometers away from Moscow.
Q: Are there any famous landmarks in Elektrostal?
A: Yes, Elektrostal is home to several notable landmarks, including XXXX and XXXX.
Q: What industries are prominent in Elektrostal?
A: Elektrostal is known for its steel production industry and is also a center for engineering and manufacturing.
Q: Are there any universities or educational institutions in Elektrostal?
A: Yes, Elektrostal is home to XXXX University and several other educational institutions.
Q: What are some popular outdoor activities in Elektrostal?
A: Elektrostal offers several outdoor activities, such as hiking, cycling, and picnicking in its beautiful parks.
Q: Is Elektrostal well-connected in terms of transportation?
A: Yes, Elektrostal has good transportation links, including trains and buses, making it easily accessible from nearby cities.
Q: Are there any annual events or festivals in Elektrostal?
A: Yes, Elektrostal hosts various events and festivals throughout the year, including XXXX and XXXX.
Was this page helpful?
Our commitment to delivering trustworthy and engaging content is at the heart of what we do. Each fact on our site is contributed by real users like you, bringing a wealth of diverse insights and information. To ensure the highest standards of accuracy and reliability, our dedicated editors meticulously review each submission. This process guarantees that the facts we share are not only fascinating but also credible. Trust in our commitment to quality and authenticity as you explore and learn with us.
Share this Fact:
COMMENTS
For the best shots, move those feet! 12. Get a 50mm lens. I know, I know: You can take great travel photos with any lens (and any camera, for that matter). However, certain lenses are ideal for certain types of photography, and if you want stunning travel portrait photos, I highly recommend you invest in a 50mm lens.
Travel Portrait Photography Tip - If you don't have a lot of light, choose a lens with a wide aperture and use it to your advantage. If you have a camera with internal image stabilization, you'll be able to work with slower shutter speeds under 1/60 (provided your subject stands still), but you can always lean against a wall or something ...
Good travel photography composition captures the beauty and essence of a destination. Use the rule of thirds by placing important parts of your photo on the intersecting points of a 3×3 grid. Take advantage of symmetry by centering the axis of symmetry in one direction, like a reflection placed off-center.
My Top 9 Tips for Amazing Travel Portraits! Here's how you can take less cliché Travel Pics! My Color Grading LUTs and Presets: https://therunngun.com/shop/...
I certainly have, and I'm embarrassed to show those photos to friends and family after my trips. In this article (and of course video above), I'll be giving you my top nine tips to take your ...
Candid Portraiture for Travel Photography. Candid portraits are a fabulous way to capture authentic real-life moments when traveling. Staged photos are also great, but our favorite portraits are almost always the spontaneous ones. There's just something special about seeing true emotion on someone's face that makes us light up when looking ...
Here's my cheat sheet version of camera settings and tips for travel portraits, travel landscapes, and night photography. Portrait Camera Settings Portrait style photos were the first thing I focused on learning because, as a solo traveller, I spend a lot of time trying to take photos of myself.
Jessica Sarkodie shares a refreshing look at the unspoiled beaches of her native Ghana. Cedric Angeles flew to Mongolia for a peek inside the lives of the country's famous eagle hunters (and yes ...
For the most part, you just need to remember: Slow shutter speed = more motion blur. Fast shutter speed = no motion blur. TRAVEL PHOTOGRAPHY TIP |When travelling, use a shutter speed of 1/200+ in standard light conditions for sharp images. UNDERSTANDING APERTURE/DEPTH OF FIELD.
Lighting and reflectors are the staple kit of most portrait photographers, especially those working in a studio or with models. However, most travel photography relies on natural light, so avoid the middle of the day when the harsh light can cast unflattering shadows on a face.
Face paint (photo: Salvatore Gebbia) 6. Give Something in Return. More often than not, by allowing you to take their pictures, local people are doing you a favor, not the other way around. Showing some gratitude for this is the right thing to do. Sometimes a friendly smile and handshake are enough.
Travel photography can lead to unexpected friendships and moments of cultural immersion, you'll find most times it will be portrait photography that creates these opportunities. Photographing portraits of people in various cultural situations is a big part of travel photography.
When placing the points of interest in the intersections or along the lines your photo becomes more balanced for your viewer. Travel Photography Tip: The rule of thirds is important, but make sure to also look for contrasting colors, interesting backgrounds, and symmetry to get outstanding photos. 9. Shoot RAW.
9. Experiment with Shutter Speed. This is something I've enjoyed a lot recently, particularly producing travel photos with a more artistic result. Shutter speed is related to the time your shutter is open, exposing available light on to the camera sensor. The longer a shutter is left open, the more light is let in.
Those off-the-hip, spur-of-the-moment photographs often tell a more incredible narrative than the super-planned shots do," he says. 6. Accept uncertainty. Travel is all about unpredictability. You might stumble upon a once-in-a-lifetime shot, or you might get fogged in and rained on.
A portrait can be so much more than a face in a photo - portraits can tell stories, reveal histories, and capture emotions. Travel portrait photography poses the distinct challenge of capturing that depth in an image all while traveling through places where the photographer might not speak the language or be familiar with the customs.
Travel photography is one of the most exciting styles of photography, but it can also be one of the most intimidating to get started with. ... This lens easily handles street photographs, landscapes, and portraits. Pick this to make a flexible one-lens kit; Wide Angle Zoom Lens—Wide angle zooms are better suited for photographers who know ...
So go ahead and let your hair down, and get creative! 6. Use a hat, or beret (look back and touch your hat) Using a hat as part of your travel poses can add an extra element of fun and creativity to your photos. Pose 1: As a pose, you can show your back and hold your hat. Pose 2: Or touch your hat/ beret and look down.
JetPhotos.com is the biggest database of aviation photographs with over 5 million screened photos online!
bunny_27pvtApril 14, 2024 on : "VACATION #photography #travel #photo #india #nature #love #oneplus #explorepage #portrait #insta #lifestyle #waterpark #wetnjoywater ...
Ploschad Revolyutsii. Back on the metro line 3 (but in the other direction), getting off at the 3rd stop - Ploschad Revolyutsii (Revolution Square). This is located underneath the square in Moscow of the same name and is a short walk from Red Square in the city centre. It is the perfect place to end a visit around Moscow's metro.
This article was updated in January 2024 with contributions from Philipp Dukatz, Ben McKechnie, Oded Wagenstein, Matt Dutile, Darren Rowse, Kevin Landwer-Johan, Suzi Pratt, and Peter West Carey. Travel portrait photography might seem difficult - but with the right approach, it's surprisingly easy.
Along with the journey through the Golden Ring of Russia, every travel guide includes a trip to another interesting ring. The ring of Moscow metro stations. We have collected for you the best metro stations of Moscow. Just look for yourself at what amazing art is presented in underground area.
40 Facts About Elektrostal. Elektrostal is a vibrant city located in the Moscow Oblast region of Russia. With a rich history, stunning architecture, and a thriving community, Elektrostal is a city that has much to offer. Whether you are a history buff, nature enthusiast, or simply curious about different cultures, Elektrostal is sure to ...