- MAGAZINE OFFERS
- BIKE INSURANCE
- Best Products
- Maintenance
- Accessories
- Long-Term Reviews
- BikeRadar Podcast
- First Look Friday
- Bike of the Week
- Tech Features
- Routes and Rides
- Bike Galleries
- BikeRadar Bargains
- Buyer's Guides
- Fitness & Training
- Sizing & Fit
- Mountain Biking UK
- Cycling Plus

The ultimate guide to mountain bike rear suspension systems
Explaining how the most popular designs work, plus their potential advantages or shortcomings
Immediate Media

Mountain bike rear suspension may appear to come in a baffling array of different designs. Each one is claimed to offer superior performance for one reason or another, usually backed by an array of baffling acronyms and marketing spiel. But if you really boil it down, there are essentially just three or four basic layouts, each with their own pros and cons.
- How to get your suspension setup dialled
- 6 top suspension maintenance tips
Suspension nerd Seb Stott talks through the process of fine tuning your suspension for the perfect balance of support and suppleness
Here I’ll go through all the major layouts — and a few variations too — explaining how they work and their potential advantages or shortcomings.
Then I’ll define the major design concepts that are collectively known as suspension kinematics, these include: anti-squat, brake jack, and leverage rate, as well as the important concepts of Instant Centre and Centre of Curvature. I’ll explain what they mean, how they interact and use some real-world examples to shed light on how they affect the way a bike actually rides.
First off, let’s take a look at the four main designs, followed by a few which don’t fit neatly into those categories. The terms used here in bold will be defined and explored in detail later in the article.
Mountain bike suspension designs explained
1 . single pivot.
This is the simplest suspension design. Here the rear axle is connected to the main frame by a swing arm, with no pivots in-between. The axle moves in a constant arc, centred on the pivot point.
In the case of a true single-pivot, the shock is connected directly to the swingarm — a design made famous by Orange Bikes. The simplicity of the design makes for easier maintenance of the pivot bearings.
One possible shortcoming of this design is that it offers little control over the leverage curve . True single pivot bikes are generally pretty linear — the force required to move the rear wheel through its travel does not “ramp up” towards the end (to resist bottom out) as it does with a more progressive design.
2. Linkage-driven single pivot
A linkage-driven single pivot design still uses an uninterrupted swingarm, connecting the rear axle directly to the mainframe. However, it incorporates some form of linkage to drive the shock. This allows the designers to manipulate the leverage curve and so control the frame’s progressivity (how much the suspension firms up towards the end of the stroke).
On a Scott Gambler, or any recent Evil, for example, the linkage is driven from the front of the swingarm.
Kona, Cannondale and Commencal — among others — typically use a visually different design, which sees the shock driven from a pivot (or flex-stay) located above the rear axle.
This looks similar to a four-bar (Horst-link) design, so is sometimes referred to as “faux-bar”; but the rear axle is still connected to the main pivot via a simple swingarm, so this is just another form of linkage-driven single pivot.
3 . Horst-link (four-bar)
Horst-link (aka four-bar) suspension — as used by Specialized , Norco, and newer Transitions (as well as many others) — is marked out by a rear pivot located below the rear axle on the chainstay (rather than the seatstay as with the “faux-bar”).
This means the rear axle is not directly connected to the mainframe, and so moves in a path which is defined by its Instant Centre and Centre of curvature , which may move as the suspension cycles through its travel. Depending on the position of the Instant Centre , the effect of braking forces on the suspension (known as anti-rise ) can be reduced relative to a single pivot design.
As I’ll explain later, this can afford designers more control over the levels of anti-squat throughout the suspension’s travel, as well as reducing the effect of braking forces (known as anti-rise ) on the suspension, with the aim of improving sensitivity.
4 . Twin-link (virtual pivot point)
These use a rigid rear triangle, articulating on a pair of short links which connect it to the mainframe. It actually works in a similar way to a Horst-link design — imagine moving the Horst-link’s chainstay pivot much closer to the mainframe and you have the basis of a twin-link system. The only real difference is the length of the lower link. The Fuji Rakan illustrates this lack of distinction, like a missing link between the two styles.
As with the Horst-link design, here the axle’s direction is tangential to a moving instant-centre , while the related concept of the centre of curvature , or 'virtual pivot point', defines the way in which the axle path curves through its travel.
Some, such as Santa Cruz’s VPP system, use links that counter-rotate (turn in opposite directions), while many others, such as Giant's Maestro system, have links that co-rotate (turn in the same direction).
As we'll see later, the way the centre of curvature migrates as the bike moves through its travel is quite different for each configuration. In fact, twin-link or horst-link bikes with co-rotating links often exhibit anti-squat behavior that's very similar to a single-pivot bike. While counter-rotating links can produce an anti-squat profile which peaks in the middle of the travel, which may be desirable in terms of balancing pedal efficiency against pedal kickback. This distinction between counter-rotating and co-rotating links is more important in terms of suspension kinematics than the arbitrary distinction between Horst-link and twin-link designs.
Example of Pole's moving instant-centre
A few notable exceptions:
5 . trek’s abp system.
This design is essentially a linkage-driven single pivot, except that Trek uses a concentric dropout pivot at the rear axle. This allows them to mount the brake caliper to the seatstay rather than the chainstay.
Because the seatstays rotate less around the disc rotor than the chainstays as the suspension cycles, the effect of braking forces on the suspension (known as anti-rise ) is significantly reduced.
In other words, Trek’s design works like a linkage-driven single pivot in terms of pedalling forces, but like a Horst-link in terms of braking forces. It’s kind of a hybrid.
6 . Yeti’s Switch Infinity
This system uses a lower pivot which slides up and down on a pair of vertical shafts, along with an upper link which rotates clockwise (if viewed from the driveside) as the suspension compresses.
The lower pivot acts like the rear pivot on the lower link of a traditional twin-link design, except that this pivot moves vertically in a straight line rather than a curving arc centred on the forward pivot point.
Imagine you could make the lower link of a traditional twin-link bike infinitely long and horizontal. Then its rear pivot location would move up and down in a straight, vertical line with no curvature to its path at all. This is essentially what Yeti has simulated with its linear sliders (hence the name).
What’s the point of all that? Well, Yeti claims this allows them to get the kinematics to behave how it wants all the way through the travel.
On paper, at least, there’s nothing drastically different about Yeti’s suspension kinematics compared to some regular twin-link designs, although it's managed to weight the anti-squat towards the sag point where it’s needed most, while minimizing pedal-kickback elsewhere in the travel.
I'll explore this trade-off later in the anti-squat and pedal kickback sections. However, it’s not true that the Switch Infinity design has a particularly unusual or rearward axle path , as some media outlets may have claimed.
7 . High-pivot
High pivot bikes typically use a single pivot design, but the pivot point is placed much higher than normal. This would result in unacceptably high levels of pedal-kickback if it wasn’t for the use of an idler pulley, which routes the chain line up past the pivot point.
The advantage of this design is two-fold. First, it provides a rearward axle-path. This in itself can help the rear wheel to deal with square-edge hits and contributes to the overall pedaling efficiency of the bike. Second, because the chain passes right by the pivot point, there is next to no pedal kickback . This further improves suspension sensitivity.
The disadvantages of high pivot designs include increased drivetrain drag and maintenance thanks to the idler pulley, high levels of anti-rise due to the high pivot point, and a rear-centre length which increases as the bike sits into its travel — this can have some odd handling characteristics.
So what do anti-squat, anti-rise and all those other terms mean?
Let’s define some of the technical terms used to describe suspension kinematics.
I’ll look at how they compare between different designs using a few individual bikes as examples.
What is Instant-centre? (IC)
The instant centre (IC) dictates the direction in which the rear axle, wheel and everything attached to it, moves at a given point in the travel. Any such point - including the tyre contact patch or the rear axle - moves in a direction at right angles (tangentially) to the line connecting that point to the IC.
For single-pivot bikes (including linkage-driven varieties), the IC is simply the main pivot point. It doesn’t move; it’s fixed on the mainframe. Therefore, the rear axle is constrained to move at right angles to the main pivot at all times, so it moves in a constant arc centred on the pivot.
In a Horst-link or twin-link design, the instant centre ‘floats’ at the point of intersection of the lines drawn through the pivots of the two links (yellow circles), which are connected to the mainframe as shown by the blue circles in the diagrams below.
The instant centre (blue circle) is located at the intersection of the lines drawn through the pivot points
As you can see, the instant centre moves as the bike cycles through its suspension travel.
This video below shows how the IC migrates as the suspension cycles through its travel. In this case, where the two links both rotate clockwise, the IC moves downwards as the suspension moves through its travel.
Pole's moving instant-centre
The location of the instant centre helps define the levels of anti-squat, pedal-kickback and anti-rise at a given point in the travel.
Because the instant centre moves as the suspension cycles through its travel, Horst-link or twin-link designs can afford their designers greater control over these parameters throughout the travel.
What is Centre of Curvature? (CC)
The centre of curvature is the effective pivot point of a twin-link or horst-link design. Imagine a drawing compass where the rear axle acts as the pencil and the CC is the other end stuck into the paper — it defines the radius of curvature of the axle path.
If you draw a line from the axle to the IC, then move the axle a small amount through the travel, then draw that axle-to-IC line again, the point at which those lines intersect is the CC.
For single-pivot bikes, the CC is at the main pivot point, which is also the IC. For twin-link or horst-link bikes, the IC moves relative to the mainframe. In some cases, the CC moves too. In others it doesn’t.
This Gif shows the position of the CC for a twin-link bike in which the links co-rotate . The CC (yellow circle) doesn't migrate significantly in this design - this is typical of co-rotating links. Notice that at any point in the travel, a straight line drawn from the axle to the IC will pass through the CC. This line is known as the swingarm line. The axle path and anti-squat profile of this bike will resemble a single pivot design with a main pivot located at the point of the CC (see the anti-squat section below).
For bikes with links which counter-rotate (e.g. VPP), the CC moves significantly. This results in varying curvature of the axle path, and anti-squat values which peak somewhere in the middle of the travel range.
At a given point in the travel, the CC always sits at some point along the swingarm line, connecting the rear axle to the IC. Therefore, when calculating anti-squat at a given point in the travel (see below), the IC or the CC can be used interchangeably, as they both agree on the tangential direction of the axle. But to see how the anti-squat changes throughout the travel, the position and movement of the CC is helpful to look at.
What is Pedal bob?
Every time you push down on the pedals, the bike accelerates. This acceleration causes the rider’s weight to shift backwards and compress the rear suspension — just like in an accelerating car.
This happens with every pedal stroke, so the bike oscillates, or bobs, as you pedal. This oscillation is known as pedal-bob and it’s driven by the rhythmic nature of pedalling.
This movement wastes energy; the suspension dampers convert this energy into heat rather than propelling the bike forwards.
As the rider puts weight on the pedals they exert a downwards force on the bottom bracket. This causes the suspension to compress, so the bottom bracket moves downwards as the pedals pass three and nine o’clock, then it rebounds back up as they reach six and 12 o’clock.
So if you moved with the bike and looked at the cranks from the side, the pedals wouldn’t move in a circle, they’d move in an elliptical (oval) path because the bottom bracket moves up and down as the cranks turn.
This means the rider has to push the pedals further per revolution than they would if there was no pedal bob, yet the rear wheel still turns the same amount. This extra distance is proportional to the wasted energy.
What is Anti-squat?
Anti-squat is basically a measure of how much the suspension resists pedal bob. This is a large part of what makes one bike pedal more efficiently than another.
So as the squat force (due to acceleration) acts to compress the rear suspension under power, the anti-squat force acts to counteract this. This force comes from two sources: the driving force from the rear wheel, and the chain-pull force.
The driving force is little discussed but easy enough to understand.
For any bike, think of the effective swingarm as a straight line connecting the rear axle to the instant centre. This is known as the swingarm line. By definition, this line will also pass through the centre of curvature, but for simplicity we’ll just refer to the IC here.
The driving force pushes through the swingarm line. The force is composed of the traction force propelling the bike forwards, plus the compressive force generated by the chain tension. If the instant centre is higher than the rear axle - so the swingarm line is angled upwards - a component of this driving force acts to push the mainframe upwards when pedalling, counteracting its tendency to squat down under acceleration.
The chain-pull force comes from the tension in the chain, which generally also pulls the rear wheel downwards relative to the mainframe, and so acts to hold mainframe up, countering its tendency to squat under pedalling load.
Thinking of it another way, (for most bikes) the cassette moves up and away from the chainring as the suspension compresses, therefore the tension in the chain resists this motion by pulling the swingarm down.
The amount of driving force anti-squat force depends on the angle of the swingarm line, while the amount of chain-pull anti-squat depends on the angle of the chain line relative to the swingarm line. The total amount of anti-squat can be worked out by the intersection of the swingarm line and the upper chain line. (see the diagram below.)
The point where they intersect is the key. A third line can then be drawn from the rear contact patch through this point of intersection. This is known as the anti-squat vector, and its gradient defines the amount of anti-squat.
Comparing this line to the centre of gravity and the front contact patch tells you how the anti-squat force compares to the squat force due to acceleration.
In simplistic terms, 100 percent anti-squat would imply that the squat and anti-squat forces cancel out exactly. In theory, this results in zero pedal bob.
If the anti-squat vector is higher than the centre of gravity when it’s directly above the front contact patch you have more than 100 percent anti-squat. If it’s below the COG when it’s above the front axle you have less than 100 percent anti-squat.
Importantly, the anti-squat percentage is independent of how hard you pedal. If you pedalled twice as hard, you’d accelerate twice as fast, and so the squat force would double. At the same time, the anti-squat force would double as there would be double the tension in the chain. So the anti-squat percentage would remain the same.
So why aren’t all bikes designed to have 100 percent anti-squat? Wouldn’t that mean an end to pedal bob?
Well, as you may have guessed by now, it’s not that simple.
For starters, there is no way to accurately estimate the position of the rider’s centre of gravity (it varies depending on the rider, and he or she moves about when riding). Even if you could estimate the rider’s centre of gravity, the position of the bike’s front centre affects the percentage anti-squat. That changes with the frame size, so you’d need to account for that too. Most bike designers don’t.
For most bikes, the amount of anti-squat also depends on what gear you’re in.
The exception to this is the case of a bike where the CC is exactly in line with the top of the chainring. Otherwise, the choice of rear sprocket will give different amounts of anti-squat, as the intersection of the chain line and the swingarm line will change.
Different chainrings upset things too, with smaller chainrings resulting in higher anti-squat. This is an argument in favour of multiple chainrings, as higher anti-squat is generally beneficial when climbing.
Another complication is that, for most bikes, the levels of anti-squat vary as the bike moves through its travel — sometimes by a lot — so how much dynamic sag you run will affect anti-squat and therefore pedal-efficiency. So changing spring pressures, or riding up different gradients, will result in different anti-squat percentages.
Let’s imagine for a minute that you could design for just one frame size, one gear, one point in the travel, and for a rider whose centre of gravity was fixed. In that case you could design a bike to resist squat exactly, if the power was applied smoothly via a motor. That’s why it is possible (though not necessarily advantageous) to design a motorbike that resists acceleration-induced squat almost entirely.
But mountain bikes are not motorbikes. When pedalling, a rider’s weight moves up and down slightly as their legs turn. This introduces another oscillation-driving force, which causes the bike to bob more than the acceleration force alone, especially when pedalling stood up.
For this reason, many bikes have more than 100 percent anti-squat to help counter the combined squat forces from acceleration and the rider’s weight movement. Because downhill bikes are designed to be pedalled standing up only, they often have anti-squat levels far higher than 100 percent. The Scott Gambler, for instance, has anti-squat values of around 170 percent at sag thanks to a very high instant centre. For reasons we’ll discuss later, other downhill bikes such as Speecialized’s Demo, have anti-squat values far lower than 100%.
In theory, if you could pedal perfectly smoothly without jerking up and down, bikes with more than 100 percent anti-squat would rise upwards, like an inchworm, rather than squat down when pedalling. This has led some suspension analysts to say that 100 percent anti-squat is the Holy Grail for the best possible efficiency.
But the jerky bodyweight movements of the rider mean bikes need a bit more anti-squat to overcome this, and because this force changes depending on the rider’s pedalling style, and isn't necessarily in-phase with the acceleration squat force, there’s no way to say what the best anti-squat value is.
So don’t be fooled by any marketeer claiming their bike has “optimised pedal-efficiency.” It’s much more complicated than that.
What is Pedal kickback?
There can be a downside to high levels of anti-squat.
The chain-pull force relies on the cassette moving away from the chainring as the suspension compresses — this is known as chain growth. Most of the time, the cassette will simply rotate forwards to allow the chain enough slack for the suspension to compress.
However, if the cassette can’t spin forwards because the rear wheel is locked up, or is spinning more slowly than the cassette needs to in a sudden compression, the crank will be forced to rotate backwards. The movement of the crank in the case of a non-rotating cassette is known as pedal kickback. The angle through which the cranks rotate relative to the mainframe as the suspension compresses can be calculated using suspension software, or measured.
For a visual demonstration of pedal kickback watch how the crank moves in this gif.
The more chain-pull anti-squat a bike has, the more pedal kickback it generates. These terms can roughly be thought of as two names for the same thing. So for bikes that don’t use an idler pulley, the amount of pedal kickback is proportional to the anti-squat.
For bikes with high pedal-kickback values, its effect can occasionally become noticeable - especially on rough tracks with lots of sudden impacts or when hitting bumps with the rear wheel locked up. (See my Orange Alpine 6 review )
It’s also noticeable when climbing. As the chain is always under tension when pedalling, the anti-squat by definition resists the suspension’s movement. So bikes with high anti-squat can be harsh and unreactive when pedalling over bumps.
For many riding situations, pedal kickback in itself is not something you’re likely to notice. But the more chain growth/pedal kickback you have, the more the chain, cassette and derailleur cage have to move in order to allow the suspension enough slack chain to react. This can have a detrimental effect on suspension sensitivity, especially when using a clutch mech.
But does this matter? Just ask Aaron Gwin. When he won the 2015 Leogang World Cup without a chain he was heard remarking to his team mate Troy Brosnan: “The suspension works so good with no chain!” While by no means a scientific assessment, this passing comment highlights the effect chain-pull can have on suspension sensitivity. If you want proof, try riding chainless.
So there’s a balance to be struck here; more anti-squat generally means greater pedal-efficiency, but tends to mean worse sensitivity.
This is where Horst-link and twin-link designs have a potential advantage over single-pivot systems.
All such designs feature Instant Centres which migrate as the suspension moves through the travel. Some, particularly those with counter-rotating links, can be designed such that the centre of curvature migrates significantly as well. In that case, the angle of the swingarm line varies with travel in a way which isn’t possible with a single-pivot. This makes it possible to have high levels of anti-squat near the sag point (where it’s needed to resist bob), while having less anti-squat, and therefore less pedal kickback, elsewhere in the travel.
This is by no means true of all multi-link bikes, but those with counter-rotating links (e.g Santa Cruz) as well as some Yeti designs, boast anti-squat values that peak between 20–45 percent travel where it’s needed most — see graph. This bell-shaped anti-squat profile is typical of twin or horst-link designs with counter-rotating links. The result is good pedalling efficiency throughout the pedalling zone, with minimal extra pedal kickback further into the travel.
Also notice the the similarity in anti-squat profile between the single pivot Kona and twin-link Pole. The Pole's anti-squat drops off more quickly due to a more rearwards CC (behind the chainring) and because the CC moves downwards very slightly through the travel.
In cases where the links co-rotate, such as Specialized’s FSR layout, the centre of curvature doesn’t move significantly relative to the mainframe throughout the travel. This means the rear axle moves in an arc with a constant radius about the CC, much like a single-pivot, resulting in similar anti-squat behavior. Namely, the anti-squat usually drops off throughout the stroke. The steeper the anti-squat drops off, the less pedal kickback there will be towards the end of the stroke, but the more the pedaling efficiency will be affected by dynamic sag.
However, the centre of curvature can be designed to sit in a position which would be impractical to place a physical pivot (such as within the radius of the wheel, or in the middle of the front triangle). In this sense, the designers can produce kinematic behavior which would be difficult, in practice, to replicate with a single pivot.
Without redesigning your bike, you can tune the amount of anti-squat it has by swapping chain rings.
Bigger rings will result in reduced anti-squat but less pedal kickback, or vice versa. More simply, riding over rough terrain in the smaller cassette cogs (and bigger chain rings if you have multiple) will result in less pedal kickback. So shift into the harder gears before dropping into a rough descent for maximum sensitivity and minimal feedback.
High-pivot bikes bypass this catch-22. The idler means they exhibit virtually zero upper chain growth or pedal-kickback. Yet, due to the high IC, they still have significant levels of anti-squat thanks to the driving force alone.
What is Anti-rise? (aka brake jack)
Another concept which depends on the instant centre and affects suspension performance is anti-rise — commonly referred to as brake jack. This is basically the effect of the rear brake force on the suspension. It works a bit like anti-squat, but in reverse.
Under braking, the rider’s weight shifts forwards due to deceleration, which causes the rear suspension to rise or extend. However, the force going through the rear brake calliper acts to compress the suspension, pushing the mainframe down. This resists the bike’s natural tendency to want to lift at the rear, so the bike stays more level under braking.
If you compress the rear suspension while the rear wheel stays still, the calliper will move around relative to the disc. If you pull the rear brake when riding forwards, the braking torque from the calliper acts to compress the suspension by an amount proportional to this movement relative to the disc.
Check out how the brake's position moves in relation to the disc rotor in this gif.
High levels of anti-rise are generally thought to make the suspension feel firmer and less reactive over bumps, resulting in a harsh feeling when braking. At the time of writing, the author is not convinced of the significance of this effect.
On the other hand, anti-rise also helps the rear suspension sit deeper into its travel, so it’s debatable whether high anti-rise values result in more or less traction under braking.
Currently, the general consensus in the industry is that anti-rise is bad. As a result, some companies go to great lengths to reduce its effect.
The amount of anti-rise depends on the extent to which the calliper wants to move around the disc, and this depends on the position of the instant centre.
Imagine a line between the rear contact patch and the IC: the shallower the gradient of that line, the lower the amount of anti-rise. This is called the anti-rise vector and can be used to calculate the percentage anti-rise in just the same way as the anti-squat vector in the diagram above.
Here, more than 100 percent anti-rise implies that pulling the rear brake only would cause the rear suspension to compress, while less than 100 percent anti-rise implies it would extend.
Horst-link or twin-link bikes with roughly parallel links (e.g. Specialized’s Demo or Rocky Mountain’s Slayer) have an instant centre that’s very far forward.
Therefore, the anti-rise vector sits at a shallow angle, resulting in low levels of anti-rise. Bikes with instant centres placed high up and rearward (e.g. Scott’s Gambler) have more anti-rise.
Trek’s ABP design sees the brake calliper attached to the seatstay, rather than the chainstay. The seatstay moves on an arc which is defined by a floating instant centre, like a Horst-link, which is further forward of the main pivot, so anti-rise is reduced relative to a chainstay mounted calliper.
Back in the day brake arms were used to similar effect — they reduce anti-rise by limiting the brake’s effect on the suspension.
Just like anti-squat, the amount of anti-rise is a trade-off between preserving the bike’s geometry and preserving the suspension sensitivity. No bike is completely independent of braking forces and it’s debatable whether those braking forces are necessarily a bad thing. So take any marketing claims along these lines with a pinch of salt.
Axle-path explained
The axle path is basically the line the rear axle takes as the suspension moves, measured relative to the mainframe. The direction of the axle path at any point in the travel is at right angles to the swingarm line, which connects the axle to the instant centre, via the centre of curvature.
Therefore, you can think of anti-squat purely in terms of axle path - the more the axle path moves away from the bb, the more anti-squat. This is very much the same as saying that a higher instant centre results in more anti-squat, as described above.
A more rearward axle path may also help a bike to absorb certain bump forces for reasons unrelated to the chain. But for most bikes, the axle path only moves rearwards by a few millimetres at most.
Once again, high pivot bikes are a notable exception. Their axle path moves significantly rearwards throughout the travel.
It makes intuitive sense that a rearward path allows the wheel to move out of the way more easily when faced with large bumps. The force produced by these is rearward as well as upward (the force vector points in the direction at right angles to the point on the wheel where it contacts the bump).
Therefore, it stands to reason that a more rearward axle path will be better able to absorb these large bumps, because the axle moves in a direction that’s better aligned with the bump force.
For an analogy, it’s useful to look at forks with different head angles; the head angle defines the axle-path of the front wheel. Slacker head angles, and therefore forks, tend to absorb kerb-sized bumps more smoothly but are more prone to flex and binding when pushing vertically downwards in the car park or when landing to flat.
The same thing is happening with a high-pivot bike — large bumps push the axle in the direction it wants to go. The flex and binding issue doesn’t apply to the rear suspension as they use a linkage rather than telescoping through bushings.
Think of it another way. A rearwards axle path means the rear wheel travels backwards relative to the mainframe as the suspension compresses. This means the wheel moves more slowly relative to the bump and so moves up and over it more slowly too.
However, there is still some debate about how significant an effect this really is and there’s little evidence to suggest that it helps the bike carry more speed over bumps, as some have claimed.
Having said that, one study demonstrated that a full suspension bike required 30–60 percent less power than a hardtail to ride over simulated rough terrain in a lab.
So, if high-pivot suspension absorbs bumps more effectively, it stands to reason that those bumps will rob the bike of less forward momentum, but this is largely unproven.
Either way, for bikes without an idler pulley, this is all fairly academic. In that case, the potential bump-absorption advantage of a (slightly) more rearward axle path is negated by the increase in chain-growth and anti-rise they produce.
Leverage curves vs. spring curves
Arguably the most important aspect of suspension kinematics in terms of ride feel is the leverage curve — the way the leverage ratio changes through the travel.
The leverage ratio is the ratio between the distance the rear wheel moves vs. the distance the shock moves as the suspension cycles.
The average leverage ratio is therefore the ratio of rear wheel travel to the stroke of the shock. Bikes with higher average leverage ratios (short stroke shocks for the travel) may have an advantage in terms of sensitivity because there’s more leverage to overcome the friction in the shock.
On the other hand, high leverage ratios demand higher spring pressures and higher forces in the damper. There’s also generally less oil inside the damper to deal with heat on long runs. As a result, bikes with lower average leverage ratios (longer stroke shocks for a given travel) tend to be more reliable and more consistent.
The most important aspect of the leverage curve is not the average ratio but how the leverage ratio changes throughout the travel. The higher the ratio, the easier it is to compress the shock, so bikes that start with a high leverage ratio and end with a lower one result in a progressive suspension action.
It’s counter-intuitive, but for a bike to be progressive the leverage graph slopes downwards as you go through the travel.
By comparing the leverage ratio at sag with the leverage ratio at bottom-out, the fame progressivity can be calculated as a percentage. With a coil shock (which has a constant spring rate), the amount of progressivity is defined by the leverage curve alone. With an air shock, the end-stroke progressivity can be fine-tuned (to some extent) with volume spacers.
The overall firmness of the suspension at the wheel is known as the wheel rate. This is a function of the shock’s spring rate and the leverage curve — both of which may vary throughout the travel. A leverage ratio which decreases towards the end of the stroke has a similar effect on the wheel rate as a spring rate that increases towards the end of its stroke. Both result in a progressive suspension action.
A linear leverage ratio with a progressive shock may provide a similar wheel rate (overall progressivity) as a progressive leverage ratio with a linear shock. But these two setups will still offer different characteristics.
For starters, fitting a very progressive air shock (full of volume spacers) to a bike with a linear or regressive leverage curve will result in faster end-stroke rebound due to the high spring force deep in the travel.
A progressive leverage curve also generates more resistance from the damper towards the end of the stroke, so both spring and damping forces are used to resist bottom-out. Whereas, in the case of a linear leverage curve, only the spring force ramps up towards the end of the stroke.
The percentage progressivity doesn’t tell the whole story, what matters most is where in the travel the frame is progressive. In other words, the shape of the leverage curve.
For example, bikes such as the Mondraker Dune and Canyon Sender exhibit what’s known as a “hanging” leverage curve. That means they have a high leverage ratio at the start of the travel to soften the initial stroke and quickly drop to a lower ratio in the middle of the stroke to add support after sag. This is particularly relevant when using an air shock as they tend to be firmer in the beginning stroke and softer in the mid-stroke, relative to a coil.
The opposite case is a kind of humped shape, where the maximum leverage occurs in the middle of the stroke. As you might expect, this results in a firmer beginning stroke and a softer mid-stroke than the “hanging” curve.
Combined with an air shock, this lack of mid-stroke support can result in a wallowing feel in compressions, as well as increased pedal-bob — it’s not just anti-squat which affects pedal-efficiency.
The leverage curve may still be progressive towards the end of the stroke, but this is not where the support is needed with an air shock. Bikes with this shape of leverage curve may work better with a coil spring. Bikes which lack support in the mid-stroke tend to require higher levels of compression damping to resist mid-stroke wallow, but this negatively affects sensitivity throughout the stroke.
This kind of 'humped' leverage curve is the main gripe I had with the 2016 Nukeproof Mega 290 and to a lesser extent the Santa Cruz Hightower . It’s also the main reason why the new Santa Cruz Nomad has been designed with a ‘hanging’ rather than ‘humped’ leverage curve, thanks to the shock being mounted to the lower, rather than upper, link.
How progressive your bike needs to be is entirely personal — it depends on the rider’s strength, terrain and riding style.
Thanks to modern air shocks, progressivity is easily tunable by the end user, but the bike’s leverage curve still plays a huge role in how the bike feels, particularly in the mid-stroke, and that’s something which can’t always be remedied with shock setup.
Whether single-pivot, Horst or twin-link, it’s the details of pivot placement that make all the difference. Bikes with the same basic layout often display very different kinematics and ride feel, therefore it would be ridiculous to say that one design performs better than any other.
Single-pivot suspension offers simple reliability, but provides designers little control over the bike’s kinematics. Adding linkages makes it possible to manipulate the frame’s leverage curve and progressivity, while Horst or twin-link layouts can boost control over the pedalling and braking behaviour too, especially if the links counter-rotate.
But is that an advantage? It depends entirely on what the designers do with that control, because it’s not always for the best.
While the shock setup remains the most important aspect of rear suspension performance, that’s not to say that a good shock tune can make up for a flawed suspension design. Particularly if a frame has excessive chain growth or a leverage rate that’s not supportive enough for the rider’s needs. In that case, the shock setup will be at best a sticking-plaster for poor design.
Having said that, the suspension characteristics that work best for you will depend on how you ride. For example, one criticism levelled at true single pivot bikes is that they are generally pretty linear, but that may suit some riders who prefer a plush feel.
Similarly, those who like to hammer down rough terrain may not like a bike with too much pedal-kickback, while some might like the pedal-efficient and interactive feel that comes with high levels of anti-squat. It’s largely a matter of taste and that probably explains why we still see such a vast array of designs on the market.
The Author would like to thank Alan Muldoon (MBR); Timothy Stevens (Scott); Leo Kokkonen (Pole), and Chris Porter (TBC) for taking the time to discuss the finer points of suspension theory with me - at length and on several occasions. I'm just beginning to get my head around it now.
To find out more about suspension kinematics, check out the links below.
- andrextr You Tube channel
- Vorsprung Suspension
- Linkage Design
- Bikechecker: bike suspension analysis and design software
- Book: Motorcycle Handling and Chassis Design: The Art and Science
- Motorbike Dynamics by Vittore Cossalter
- Motorcycle Handling and Chassis Design: The Art and Science By Tony Foale
Share this article

Contributor

- Terms & Conditions
- Subscribe to our magazines
- Manage preferences
- Mountain Bikes
- Gravel Bikes
- Hybrid Bikes
- Electric Bikes
- Commuter Bikes
- Exercise Bikes
- Women’s Bikes
- Kids’ Bikes
- All Best Bike Brands
- Mountain Bike Brands
- Electric Bike Brands
- Bike Rack Brands
- Brand Review: Rad Power Bikes
- Brand Review: Ride1UP Bikes
Disclaimer: Bikexchange is reader-supported . We may earn an affiliate commission when you buy through the links on our site.
Complete Mountain Bike Suspension Guide: Explaining Basic Concepts and Adjustments

Image source: cannondale.com
Bike suspension is one of the most complicated topics in cycling. It would take a university degree to understand all the details of how suspension works, how the individual components interact, and how each adjustment impacts performance.
This article isn’t going to provide you with the level of detail. However, we will cover the basics of how mountain bike suspension works, the terminology used to describe the systems, the different types of rear suspension platforms, and a quick guide to setting up your fork and rear shock.
So if you know very little about mountain bike suspension but want to understand all the basics, you’re in the right place!
Table of Contents
Overview of mtb suspension and terminology.
- Mountain Bike Forks Explained
- Rear Suspension Explained
Key Mountain Bike Suspension Concepts
- Basic Mountain Bike Suspension Adjustments
Before diving into mountain bike suspension in more detail, it’s helpful to understand how suspension works and go over some important terminology.
How Does Mountain Bike Suspension Work?
Mountain bike suspension uses shocks that allow the wheels to move up and down a predetermined path. This movement absorbs bumps to help keep the tires in contact with the ground for better traction and control and reduces the impact on the rider, increasing comfort.
All MTB suspension has a spring (air or coil) and a damper . The spring provides resistance to the wheel’s movement when it hits an obstacle (compression) and the energy to move back down after compressing (rebound).

Fox Float X Factory air shock (left) and Fox DHX2 Trunnion coil rear shock (right).
The damper is a mechanism in the fork stanchion or shock body that regulates compression and rebound speeds. Modern mountain bike forks and shocks allow you to control each one independently.
Overall, suspension design balances the absorption of impacts, the effect of braking forces, and pedaling efficiency to create a system that best serves a bike’s intended use. This interplay is particularly relevant for full-suspension bikes .
Suspension Terminology
- Bottom-out – Refers to the shock or fork reaching the limit of its travel. A fork should only bottom out occasionally. Regularly bottoming out means it’s set too soft; never bottoming out means it’s too firm.
- Compression damping – Controls the rate of compression when the shock is under load. More damping gives the fork a firmer feel.
- Lockout – This lever significantly reduces compression or stops it completely. Use it to improve pedaling efficiency for climbs or pavement.
- Linear compression rate – Resistance to compression increases at a steady rate throughout the entire travel.
- Progressive compression rate – Resistance to compression increases at a varied rate, with less resistance at the beginning of the stroke and more resistance at the end.
- Preload – Pre-compressing the spring with a ring so that more force is required to begin compressing the suspension, making it stiffer. The equivalent of increasing air pressure in air suspension.
- Rebound damping – This resistance controls how quickly the suspension returns to its original position after compression.
- Sag – The distance the suspension moves into its travel under the rider’s weight while stationary.
Coil vs. Air Springs
Coil spring suspension is the older of the two designs. Steel coils have linear compression rates (see above) and are available with different resistance levels, typically matched to the frame size and the average rider weight in that height range. If your suspension is still too soft or firm after making the appropriate adjustments, you can replace your spring with a softer or firmer one.
An air spring is a pressurized air chamber. By changing the internal pressure using a shock pump, you can change the characteristics of the spring. Air springs have progressive compression rates, are lighter, and are more tunable than coils.
Guide to Mountain Bike Forks
There are two kinds of suspension mountain bikes: hardtails and full-suspension MTBs .
Mountain bike forks are highly variable and adjustable to suit different riding styles and riders. In contrast, hybrid forks offer minimal impact absorption with little-to-no adjustment capability.
Suspension Fork Parts and Terminology
This section will cover the most important fork-specific terminology and the individual components that make up the fork. Forks work in a telescopic motion , wherein the stanchions drop into the lowers when under load.

Image credit: TheProsCloset.com
- Crown – Connects the two stanchions to each other and the steerer tube. Moreover, 200mm-travel forks on some of the best downhill bikes have a dual-crown design to increase stiffness for the extreme demands of this discipline.
- Front travel – Front travel is the distance the wheel moves when the fork reaches full compression. Wheel travel and fork travel are equal.
- Lowers – The outer tubes into which the stanchions slide. The lowers connect to the wheel via the axle.
- Stanchions – These tubes connect to the headset via the steerer and consist of an air chamber or coil spring and damper mechanism.
- Steerer – Connects the fork uppers to the frame’s headset.
Types of Fork Suspension
There are two types of fork currently on the market, the standard double-prong design shown in the diagram above and a single-prong used by Cannondale.
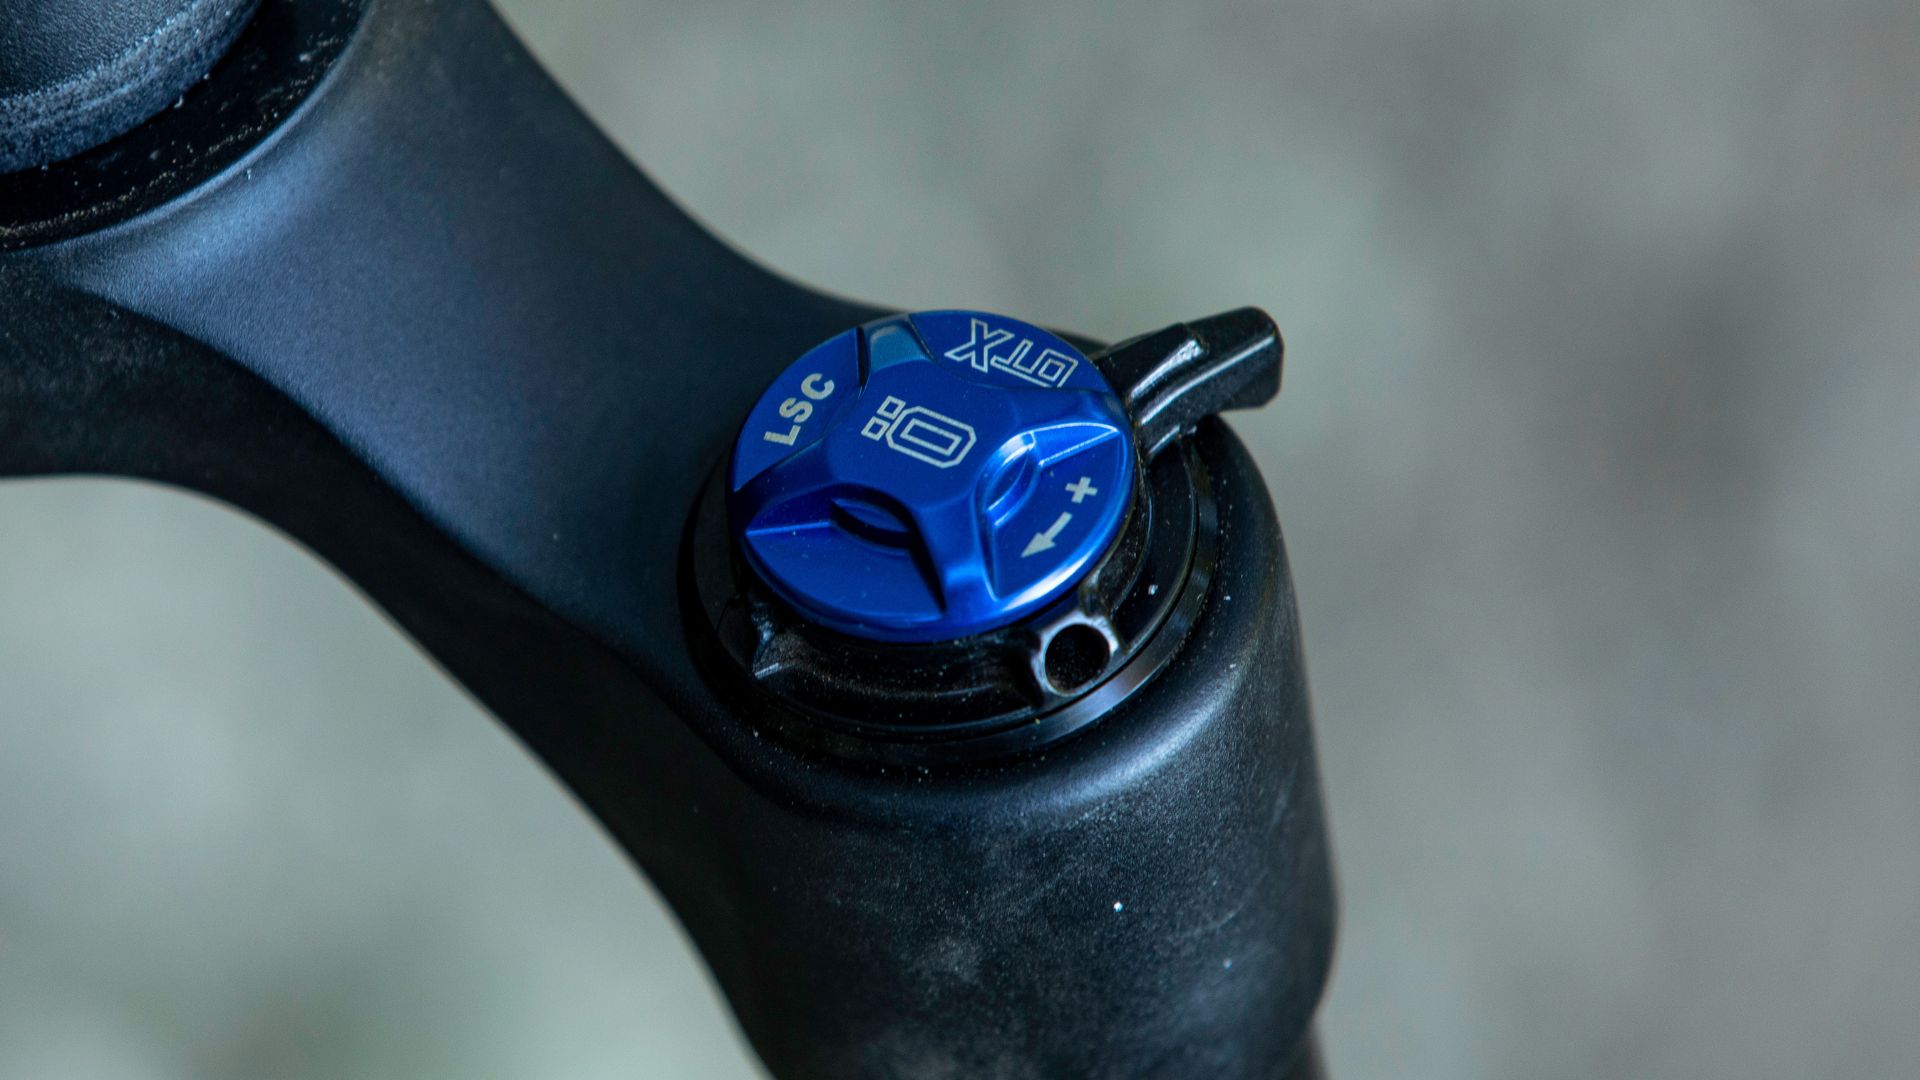
Cannondale’s proprietary ‘Lefty’ fork has a single left-sided stanchion. It provides the same basic functionality as a standard fork but weighs less.

Cannondale Scalpel with a Lefty Ocho fork.
Most MTB forks use air springs, thanks to their lighter weight and tunability. However, cheap beginner mountain bikes and some downhill mountain bikes still use coil springs or offer them as an alternative, like the Santa Cruz Nomad .
Mountain bike forks for adults’ bikes range from 100 to 200mm of travel. Forks with less than 100mm travel are typically only for hybrids or kids’ MTBs.
- Cross-country: 100-120mm
- Trail: 120-150mm
- Enduro: 150-180mm
- Downhill: 180-200mm
The amount of travel required is specific to the trails ridden and the riding style; more isn’t always better. Extra travel means more weight (in a fork of equal quality), lower efficiency, and more sluggish handling.
Another critical measurement in bike suspension fork design is stanchion diameter. When the fork experiences an impact, a small amount of lateral flex occurs in the stanchion; the thicker the stanchions, the less they flex. A fork designed to handle harder and faster hits needs wider, stiffer stanchions to ensure they don’t flex too much and cause damage.
Wider-diameter stanchions flex less , which is better for more extreme riding like the enduro or downhill. However, the trade-off for wider stanchions is extra weight, so weight-conscious disciplines, like XC, use narrow-stanchion forks.
- Cross country and Trail: 30-32mm
- Trail: 32-34mm
- Enduro: 35-38mm
- Downhill: 40mm
Guide to Mountain Bike R ear Suspension
A fork shock moves together with the front wheel because the fork shock directly connects to the front axle. In contrast, the rear shock indirectly links to the rear wheel, requiring one or more pivot points that allow the rear wheel to move along a variable yet predictable path as the shock compresses.
Interestingly, the first rear suspension MTBs actually used forks in the rear dropout, but this was an ineffective design and was quickly discontinued.
This section will mention several important suspension kinematics concepts, which we will explain in more detail in the following section. Now, let’s take a closer look at rear suspension and how it works.
Mountain Bike Shock Anatomy and Measurements
Several different components make up a MTB shock. So you can better understand how rear mountain bike suspension shocks work, we’ve labeled this Fox Float DPX2 air shock. Coil mountain bike shocks are primarily used on heavy-duty downhill mountain bikes as they don’t lose performance from heat buildup like air shocks.

- Eye-to-eye – The total length of the shock, measured as the distance between the two eyelets (mounting points).
- Stroke length – The distance the shock compresses under load.
- Rear travel – The distance the wheel compresses when the shock is fully compressed.
- Leverage ratio – How much the rear wheel compresses in relation to the shock. For example, a 2:1 leverage ratio means the wheel compresses 2mm for every 1mm of shock compression.
- Linkage – The components in the frame’s rear that connect the rear MTB shock to the rear wheel.
- Piggyback reservoir – This keeps the damper reservoir away from the main body to reduce the effect of heat buildup on the damper’s function, increasing performance.
Mountain Bike Rear Suspension Types and How They Work
Rear mountain bike suspension is a much more complex system than front suspension, as they rely on one or more pivots in the frame and linkages to connect the MTB rear shock and the rear wheel. The pivot(s) allows the rear triangle and linkages to articulate and simultaneously compress the rear wheel and rear shock, according to the leverage ratio.
Rear shocks typically sit within the frame’s main triangle, but the position within the main triangle changes in each system. One side of the shock mounts to a point in the main triangle, and the other side mounts to the rear triangle.
In general, rear mountain bike shocks perform the same task as the fork, absorbing impacts to improve comfort and help you maintain control and traction by keeping the rear tire in contact with the ground.
There are four broadly-used rear suspension configurations, each with its own subtle advantages and disadvantages. The average recreational mountain biker won’t notice much difference between rear mountain bike suspension types.
Single Pivot

The Santa Cruz Blur uses a simple single-pivot configuration.
In single-pivot rear suspension, the rear axle pivots in a constant arc around a single unmoving point. A continuous swingarm links the rear axle, the main triangle (on the top tube or downtube), and the shock.
This simple design reduces mechanical complexity and weight and makes the bike easier and cheaper to maintain. In addition, there is no patent on the design, so that any manufacturer can use it.
The downside of the single pivot system is the linear leverage ratio, meaning that the resistance to compression increases at the same rate, and you can’t modify the leverage curve.
Linkage-drive Single Pivot

The Commencal Meta TR uses a single pivot with the four linkages.
The closest design to the single pivot configuration is a linkage-driven version. This system also uses a solid swingarm connecting the main triangle to the rear axle and pivoting around a single point. However, instead of connecting directly, the swingarm uses linkages to connect to the shock.
Various iterations of this design exist, but the general function is the same. A solid swingarm connects the rear axle and a single pivot. This swingarm rotates around this pivot with a fixed instant center throughout the travel.
Using the linkages, engineers can control the leverage ratio curve , so you can have a progressive curve instead of being stuck with a linear one. For example, manufacturers could select a stroke progression that’s softer at the start, providing better small bump sensitivity. Alternatively, a firmer start to the stroke would increase pedaling efficiency.
The downside of this system is extra mechanical complexity, meaning more maintenance and expensive repairs. In addition, the fixed instant center means designers can’t modify anti-squat and anti-rise characteristics independently.
Four-bar (Horst-link)

The Canyon Spectral uses a Horst-link with a pivot on the chainstay at the axle.
Specialized first popularized the four-bar suspension platform, with several brands now using their own variation. The main characteristic of this design is the pivot point on the end of the chainstay just below the rear axle. Instead of connecting to the chainstay, the axle connects to the seat stay.
The rear axle has a modified path that rotates around an instant center that changes position as the MTB rear shock moves through its travel because it’s not directly connected to the main triangle. This design allows engineers to manipulate anti-squat and anti-rise characteristics at different stages of the travel.
In general, manufacturers that use four-bar systems optimize for low anti-rise, so the braking forces have minimal impact on the suspension. Alternatively, you can design Horst-link suspension to have high anti-squat at the beginning of the stroke and less at the end. Higher anti-squat means less pedal bob but more pedal kickback.
In addition to having control of anti-squat and anti-rise , Horst-link suspension gives designers control over the leverage ratio curve. The downside is that these systems typically have lower anti-squat, meaning they’re less efficient.
Twin-link

The Giant Trance X uses their proprietary Maestro twin-link suspension with co-rotating rocker links.
Twin-link systems usually use a fully rigid rear triangle that connects to the main triangle using two rocker links. Instead of being located beside the axle, the chainstay pivot is much closer to the main triangle. In the twin-link design, either the rear swingarm or one of the rocker links will drive the shock.
The twin-link design looks similar to a single pivot but performs similarly to the Horst-link with four pivot points, meaning the instant center can be designed to move throughout the travel. Again, an instant center that moves as the suspension compresses gives engineers control over the handling characteristics at different stages of the travel.
A critical differentiation between twin-link designs is the rotation of the rocker links. Some systems have counter-rotating links, like Santa Cruz’s Virtual Pivot Point (VPP) , while others, like DW-Link and Giant’s Maestro , use links that rotate in the same direction. Each configuration has specific characteristics which impact the system’s performance.
Twin-link suspension is highly tunable , like four-bar suspension, but the curves aren’t as predictable. Finally, a potential benefit is that the anti-squat and anti-rise are more consistent throughout the travel.
Alternative Designs
In addition to the four configurations described above, popular brands have their own proprietary iterations that attempt to improve performance. Let’s take a brief look at two of the most popular.
Firstly, you have Yeti’s Switch Infinity . This design uses a patented translating pivot that switches direction as the bike moves through its travel. This setup theoretically gives Yeti independent control over anti-squat and leverage ratio curves.
High pivot is another unique design that brands like Cannondale (Jekyll), Norco (Shore), and Devinci (Spartan) are using on select models. This distinct system uses an idler pulley to route the chain over the pivot point.
High pivot suspension has a more rearward axle path, improving impact absorption and increasing pedaling efficiency. However, there is more drivetrain drag, extra mechanical complexity and maintenance, and the geometry varies through the travel.
Understanding suspension kinematics concepts will help you understand how the different designs influence handling.
Bike designers must optimize how the system responds to braking forces, absorbs impacts, and influences pedaling efficiency.
Instant Center
The instant center is the point that the rear axle is rotating around at a given instant in the travel. For example, on a single-pivot rear suspension, the instant center is fixed at the pivot point, meaning the rear axle has a constant arc. Alternatively, manufacturers can create an instant center that floats (migrates) throughout the rear shock compression by using a combination of linkages.
To find the instant center at a given point, you draw a line through the pivot points of the top two linkages and another through the bottom and mark the point where the two lines intersect.
As the instant center moves, the anti-squat and anti-rise characteristics change. Designers can manipulate the path of the instant center to get their desired effects on performance at specific points in the travel.
Pedaling Efficiency
Pedaling efficiency refers to the percentage of energy that reaches the rear wheel from each pedal stroke. Generally, the more suspension a bike has, the less efficient it is to pedal. However, there are notable variances between suspension systems. The trade-off of higher efficiency is a less plush ride.
The most advanced suspension designs can maximize pedaling efficiency in the early part of the travel, where it’s most important, and let it digress throughout the travel.
What Is Pedal Bob?
‘Pedal bob’ is an oscillating motion that occurs when you push the pedals. To illustrate, you push the bottom bracket down, and your weight moves back as the bike accelerates, compressing and rebounding one or both shocks.
Unwanted compression and extension lead to wasted energy that the shock absorbs instead of transferring to the rear wheel. As a result, pedal bob is most impactful on climbs where pedaling efficiency is most notable to the rider.
What Is Anti-squat?
Anti-squat refers to how much the system resists the compression that occurs during pedal bob, creating a more efficient pedaling platform. Simply put, it’s how the suspension reacts when you accelerate.
The force that resists squatting (anti-squat) is called the chain-pull force. It comes from the tension in the chain that pulls the swingarm back down when the shock compresses and the rear wheel lifts. Increasing anti-squat reduces the sensitivity of your suspension, making for a harsher ride.
Manufacturers represent anti-squat in percentages. 100% would theoretically mean there is no pedal bob, as the squat and anti-squat forces cancel each other out. Less than 100% would amplify the squat forces, not counteract them, while greater than 100% would extend the suspension, which is actually necessary for some high-travel bikes to offset shifts in rider weight.
Because anti-squat depends on chain tension, the anti-squat percentage is different in each gear on the cassette or if you have multiple chainrings. In addition, factors like the rider’s center of gravity and where the shock is in its travel will contribute to the actual anti-squat in a given moment.
With so many variables to consider, giving a specific formula for the optimal anti-squat characteristics is impossible. It’s down to the manufacturer’s preference. Ideally, you want anti-squat to peak in the early to mid part of the travel and then drop off, which systems like Santa Cruz’s VPP achieve.
What Is Pedal Kickback?
Pedal kickback is the sudden backward movement of your pedals when the suspension compresses . When your mountain bike’s rear shock compresses under the force of an impact, your wheel and the attached cassette lift simultaneously. When the cassette lifts, it tugs on the chain, causing ‘chain growth’ and rotating the chainring backward.
The more anti-squat a bike has, the more pedal kickback it experiences in a proportional relationship. Manufacturers can reduce pedal kickback by using an idler pulley like in the high-pivot system.
You can decrease the anti-squat to minimize pedal kickback and increase the sensitivity of your bike mid-ride by shifting into harder gears (the smaller cogs on the cassette and the larger chainring if you have multiple). This technique is valuable when approaching rock gardens or rough descents.
Absorbing Impacts
Nobody would argue that suspension’s most important function is absorbing impacts. The last thing you want when riding on mountain trails is the energy from landings or big hits to repeatedly transfer from the rear wheel into your body.

One of the main purposes of mountain bike suspension is to absorb impacts and make the ride more stable and comfortable. | Image source: cannondale.com
For this article, we won’t cover the kinematics of impact absorption in detail. However, it’s worth noting that suspension designers try to optimize the wheel path and the wheel rate for the specific bike.
The wheel path is a set path that the axle follows when there is an impact on the rear wheel. The wheel rate correlates to the stiffness of the shock at different points in the travel. Wheel rate can be progressive (soft at the start, firm at the end), linear, or digressive (firm at the start, softer at the end).
Gravity-focused MTB disciplines favor progressive wheel rates to prevent harsh bottom-outs and increase small bump sensitivity.
Braking Efficiency: What Is Anti-rise?
Anti-rise is the effect of braking forces on the suspension or how much the suspension compresses or extends from braking. By manipulating this, manufacturers can create a stable or active response to braking forces.
When you brake, your weight shifts forward, putting more pressure on the front of the bike and less on the rear, making the rear extend. Anti-rise counteracts this extension, so the bike stays level under braking forces.
In theory, high anti-rise makes the suspension feel harsher; therefore, manufacturers try to keep a low anti-rise percentage. 0% anti-rise means the suspension stays active and plush. 100% anti-rise means it doesn’t extend or compress from braking, and the geometry remains the same.
No suspension system can be completely isolated from braking forces, and the right balance of anti-rise to anti-squat and the other suspension kinematics is down to the type of bike.
How to Set up and Adjust Mountain Bike Suspension
Take time to set up your suspension and adjust it regularly to ensure it performs how you need it to, and avoid damaging the components by bottoming out too frequently.
Adjustments
There are several possible adjustments you can make to suspension. Higher-end components have more adjustability and more precise controls.
- Lockout – As mentioned, the lockout closes the damper to eliminate compression. Most bike suspension components, even hybrid forks, have a lockout lever, usually located on the top of the stanchion or on the shock body. However, premium MTBs may have a remote handlebar lever to control lockout. Use this adjustment when you ride on pavement or climb on smooth trails.
- Air pressure – Instead of using a mechanical preload as you would on a coil fork, air suspension forks use a Schrader valve, like those on tires, to adjust the air pressure. These require a specific shock pump, don’t use your tire pump. The fork valve is typically located on top of the stanchion under a cap or at the bottom of the lowers. You can reference your manufacturer’s setup guide to find their pressure estimate based on weight and frame size, but use sag to find the precise measurement.
- Preload – Adjust coil spring preload with the preload knob on top of the stanchion or the collar on the shock body. Increase the preload if your fork feels too soft, and decrease it if it’s too firm. The adjustment range is much lower for coil preload compared to air pressure. Big adjustments will require swapping out the coil.
- Damping – Most modern shocks allow you to tune them with compression and rebound damping. Compression damping also breaks down into high-speed compression and low-speed compression. High-speed compression damping controls how the shock reacts under big hits and landings; low-speed controls how it reacts under slow inputs like shifting weight. Increasing low-compression damping holds the suspension higher up in the travel and reduces pedal bob.
Basic Mountain Bike Suspension Setup
A basic suspension setup can help you get onto the trails quickly after buying a new bike. The following instructions include the most important initial adjustments. However, most shocks and forks offer extra adjustments that can fine-tune your suspension even more.

Compression and rebound suspension adjustment on an air rear shock.
Begin by getting dressed in your typical riding gear and carry your backpack or hydration pack if you usually ride with one. Next, inflate your tires to the correct air pressure , and pack your shock pump (if you have air suspension).
Then, take your bike to an open space where you can ride around slowly without interfering with traffic, such as an empty parking lot. id=sag
Setting Sag
Recommendations for sag depend on the discipline and the manufacturer. You can choose higher or lower settings based on your riding style and preferences. For more conservative riding or inexperienced riders, aim for more sag. Fox recommends the following:
- Rear shocks: 25-33%
- Forks: 15-20%

The o-ring lets you fine-tune the sag setting by allowing you to measure the travel. | Image source: liv-cycling.com
Before beginning, ensure that the lockout setting is off and that your compression adjustments are in the most open position. To set the rear sag, move the thin rubber ring on the shock (O-ring) to the end of the shaft flush with the shock body (if your suspension doesn’t have an O-ring, use a rubber band or a zip tie).
- Sit onto the saddle slowly, and allow your weight to press down with your feet off the ground.
- Dismount and note the position of the ring. On Fox suspension, the shaft has marks to indicate sag. If yours doesn’t have any, you must measure the distance to the ring and calculate it as a percentage of the total travel (usually indicated on the shock or fork). If you have more than your desired sag, say 29% instead of 25%, you need to add air pressure using your pump. If you don’t have enough, bleed some air.
- Unscrew the cap on the air valve and pump or bleed the air. Note the pressure before disconnecting the pump (in case you need to make more adjustments).
- Push down on the saddle to pump the suspension a few times to balance the air pressure inside.
- Measure the sag again by repeating step one and keep repeating the process until you hit your desired sag.
You can set up fork sag using the manufacturer’s air pressure chart or a similar process to the mountain bike rear shock.
- Push the ring on the fork stanchion to the bottom.
- Sit on the bike and start rolling. Then, slowly stand up and assume an attack position without bouncing the fork.
- Allow the fork to settle under your weight.
- Slowly bring your weight back to a seated position and gently stop the bike.
- Repeat the same pumping or bleeding process as required to reach your targetted sag, and note the air pressure.
- Retest the sag and repeat the process if necessary.
Setting Progression
Progression is set based on the force it takes to bottom out the suspension.
- Use the O-rings to measure this by pushing the fork ring to the bottom of the stanchion and the shock ring flush with the shock body.
- While rolling on flat terrain, stand up in an attack position and bounce on the fork as hard as possible without leaving the ground.
- Repeat this single explosive bounce, but focus on the rear shock this time.
- You should use between 80 and 90% of your fork travel and roughly 90% of the shock travel during this test, indicated by the rings.
- If you use more travel than you want to, your suspension is probably too soft. Add a volume spacer or set a lower sag percentage to address this.
- If you don’t use enough travel, you could remove a volume spacer or set a slightly higher sag.
Rebound controls how fast the shock returns after compression—an appropriate rebound setting balances sensitivity and traction. You can use the air pressure of your shock and fork to set the rebound. The manufacturer’s setup instructions should have a guide for selecting the rebound lever position based on shock pressure. Alternatively, follow these steps.
- Start with the rear shock by turning the red rebound adjustment clockwise until it’s fully open.
- Find a sidewalk nearby and ride off at around walking pace while sitting on the saddle, noting how the suspension feels when you drop off.
- You want the suspension to compress, rebound slightly past the sag point, and compress again to reach the sag point.
- Repeat the process to achieve this effect, turning the rebound lever counter-clockwise with one click each time and noting the effect.

Compression (blue), Lockout (black) and Rebound (red) adjustment knobs on a Fox 36 Float Factory Grip 2 fork.
The fork uses a slightly different process (this works for hardtail bikes).
- Open the rebound on the fork fully by turning it fully clockwise.
- Without mounting the bike, push down hard on the handlebars and release suddenly so the fork can bounce up.
- Turn the rebound lever counter-clockwise one click and repeat this process until the wheel starts leaving the ground upon release.
- Then, turn the lever clockwise one more time, so the rebound is set at the fastest speed possible before the tire starts to leave the ground on release.
Double-check Rebound Speed
For full-suspension bikes, you want to ensure both the fork and the shock return at the same speed. If you’re unsure, err on the side of caution and set it so the fork returns slightly faster than the MTB rear shock. If the shock rebounds faster, it will cause a bucking motion.
Best Mountain Bikes You Can Buy
Best Full-Suspension Mountain Bikes Under $3,000
13 Best Hardtail Mountain Bikes We Recommend
Share this on:
About the Author

Jordan Grimes
Leave a reply cancel reply.
Your email address will not be published. Required fields are marked *

How to set up mountain bike suspension: forks and rear shocks
- Benjamin Haworth
- June 27, 2023
Everything you need to know about how to set up your mountain bike suspension, including mountain bike fork, shock and coil shock suspension set up.

Need a bit of help with set up mountain bike suspension fork and shock (if you have one)? Set up is absolutely crucial in order to get maximum comfort and control while riding off-road. Get it wrong and you’ll be fighting a constant battle with your bike and the terrain. Get it right and you will enter a whole new world of control. And while it can seem very complicated, getting the basics right is actually simple. Read on and find out how to dial in your mountain bike suspension.
If you’ve decided you want to upgrade your suspension, check out our guides to the best mountain bike suspension forks and best rear suspension shocks to find our recommended options.
Here’s what we’re covering in this guide:
Jump to: Basic suspension theory – how does MTB suspension work? Jump to: How to set the sag on mountain bike suspension Jump to: How to set rebound damping on a mountain bike Jump to: Rapha UK women’s clothing sale Jump to: How to adjust spring progression in mountain bike suspension Jump to: And finally, look after your suspension!
Basic suspension theory – how does MTB suspension work?
Mountain bike suspension is either via forks which control the movement of the front wheel, or forks and a shock which controls the rear wheel movement. These are essential pneumatic springs (or sometimes, in the case of shocks, actual springs) and it’s how these springs are tweaked to respond to the terrain, rider and environment that affects how well they perform.

With setting up suspension you are essentially setting two things: how hard the spring is and how that spring’s movement is controlled (the damping).
With air sprung suspension (which covers the vast majority of suspension these days), the firmness of the spring is dictated by the air pressure. Air pressure in an air chamber. If you need a harder or softer spring you adjust the pressure in this chamber with a shock pump.
For this guide we’re going to assume that you have air sprung suspension, but if you do have coil sprung suspension this guide is still worth reading as the principles are still relevant.
The spring’s movement – how it compresses and how it re-extends (rebounds) – is controlled by your suspension’s damping.
Damping is essentially fluid passing through a hole or over a series of metal shims (very thin washers). Fluid will move more slowly through a small hole than a larger hole, or over a thicker/stiffer shim than a thinner shim. With a larger hole, fluid will pass through faster. When you’re adjusting your damping, you’re changing the size of hole(s) that the fluid flows through.
How much control and adjustment you have over your suspension’s damping will depend on your fork or rear shock. Some forks and shocks only have rebound damping adjustment. Some forks and shocks have compression damping adjustment as well.
Some higher end forks and shocks have separate damping adjustments for low speed and high speed impacts/forces. We’ll deal with these later on in this guide.
How to set the sag on mountain bike suspension
This is first thing you need to do with your suspension. Thankfully it’s also the easiest thing you’ll need to do. You’ll need a specific shock pump for this.
What is sag? Sag simply refers to the position the bike settles into with a rider on board. It’s your starting point before fettling any other parameters. Begin with the rear suspension, assuming you have it.

While many guides advise you to set your sag in what’s often referred to as the ‘attack’ position, we’d suggest taking a seated approach. Why? It’s a little more repeatable than the standing position, it’s easier to do on your own, as you don’t need a helper to hold the bike, or a wall to lean against, and finally it’s less likely that your suspension will end up too soft when you’re seated and climbing, as that’s the position you use to set-up the bike.
Suspension is designed to work best with between 25-35% sag (AKA a quarter to a third). For example, on a 100mm travel bike you want to aim to have 25mm-33mm of sagged travel when you sit on your bike.
- Start by making sure any lockouts are off and your compression damping dial is open (unscrew counter-clockwise).
2. Drop your saddle and sit on the bike with your back straight, your legs planted on the ground and your arms holding the bars.
3. Bounce on the bike a little and let it settle.
4. Slide the o-ring on the shock up to the seal on the air can.

5. Lift your feet for a second so that your weight is running directly through your straight back to your saddle.
6. Stand up and step off the bike, making sure that you don’t compress the suspension further.

7. Check the distance from the main air seal to the o-ring. If you have a RockShox shock you can read the gradients to work out your sag percentage – aim for 30% to start with. If it’s another brand then measure the distance using a small ruler or tape measure.
8. Find out the shock stroke for your bike and divide by 3.3 to work out 30% sag. If your o-ring has gone beyond this point then you’ll need to add air, if it hasn’t reached it then you’ll need to remove air.

9. When adding or subtracting air remember to compress the suspension with the pump attached to equalise the positive and negative chambers before you recheck the sag. You can do this by putting your stomach on the saddle and pulling up on the swingarm.
10. Don’t check the sag with the pump attached as it will act as an extra air chamber.
11. Make a note of the pressure on your phone when you hit 30% sag so you can always get back to your baseline if you make changes.

12. When it comes to fork sag, we tend to go much more by feel than any specific percentage. Try starting with the recommended pressures printed on the chart on your fork, which will work out around 15-25%.
You want the bike to feel like the front and rear are moving up and down roughly the same amount when you bounce around in the car park.
Once riding, if you find you’re not getting decent amounts of travel used on big hits and landings then feel free to try increasing how much sag you’re running ie. let air of the suspension, try 10psi at a time. You should also dial off a click or two of rebound damping after you’ve let air out.
Many brands now have suspension set-up calculators to help you get started. These can be very useful, but always cross-check with your own sag measurements to see how accurate they are. Most ask you to input your height and weight and will give you a pressure for the shock and sometimes the fork. The more sophisticated calculators will also give you damper settings and volume spacer recommendations.
PRO TIP: Try to use the same pump when making changes to your shock pressure, as the gauge may read differently between pumps.
How to set rebound damping on a mountain bike
DO NOT attempt to set your rebound damping until you have set your sag properly!
If your bike has compression adjustment (blue dials) then unwind them completely (counterclockwise). The most important damping adjustment to get right (it’s also the most common adjustment on all forks and shocks) is rebound damping. This is the speed at which the fork or shock returns after hitting a bump. Most rebound dials are red and you’ll find them on the body of the shock and/or the base of the fork, by the dropout. Start by closing the rebound circuit completely (clockwise), then count the number of clicks to fully open (counterclockwise). That’s your range of adjustment.

The rebound adjuster on this set of forks sits just under the leg
- Set both your fork and your shock in the middle of the range and make a lap of the car park.
2. Bend your knees and elbows and compress the suspension as hard as possible, but as your body extends fully, keep your limbs straight.
3. Watch the fork and the shock – they should return just past the sag point, then settle at sag. If they extend beyond the sag point on the second compression then you need to add a single click of rebound damping. If they return to the sag point without going beyond it, then you need to reduce the rebound damping by one click.

As a general guide, on Fox and Rockshox shocks, the red dial controls rebound, and the blue controls compression rate
4. Repeat the process one click at a time until the rebound takes you just beyond sag then settles back to sag. Make a note of the number of clicks from fully closed on your phone.
5. Now you can play with the damping out on a ride and always be able to return to the baseline.
PRO TIP: You will need to reset the rebound damping if you change the air pressure or progression using volume spacers.
How to set compression damping
Not all suspension forks or rear shocks have adjustable compression damping so this section may not be applicable to you.
If your suspension does have adjustable compression damping, you don’t HAVE to adjust it if you feel it might be a bit beyond you at the moment. that’s fine. Go ride your bike.

The blue dial on the piggyback resevoir control the compression damping
Compression damping affects how your suspension compresses.
Not enough compression damping will result in suspension that bobs around and dives through its travel while pedalling, descending and/or under braking.
Too much compression damping will prevent your suspension from absorbing impacts effectively. You’ll feel it kick back at you, also known as ‘spiking’. If the palms of your hands feel sore at the end of a descent, you may have too much compression damping on your fork.
Compression damping is again, a thing of personal preference. Some riders like an easy-moving supple suspension, other riders prefer super stable suspension that doesn’t move eagerly. Think firmly-sprung rally car versus cushy family estate car.
Generally speaking, a lot of riders don’t have enough compression damping dialled on. Their suspension bobs around and dives excessively.
Preset compression damping modes
A lot of rear shocks (and some forks) have built-in presets for compression damping. Fox forks and shocks, for example, often have a pedal platform mode with more compression damping and an open mode with less.
The pedal platform mode means lots of compression damping, resulting in a firm ride that resists moving under pedalling (bobbing) but doesn’t give up sufficient suspension travel on bumps.
Open mode means minimal compression damping, resulting in a supple, plush ride but one that can be wallowy with excessive bobbing.

This shock is currently set to a ‘Trail’ preset setting
Trail mode is the general all-rounder setting. Firm enough to avoid excess bobbing but still able to absorb decent hits.
RockShox and other companies have similar presets.
Low speed compression
If you have suspension with properly adjustable compression (as opposed to built-in presets) then it’s worth getting to know how it works.
Basically low-speed compression affects how the suspension compresses at low speeds and during low amplitude forces.
Dial in low speed compression until your suspension doesn’t bob about excessively under pedalling. Some bob is fine (often unavoidable really) but it’s nice to get rid of your suspension pogo-ing around robbing you of energy and control.
Don’t worry about losing small bump absorption too much; your tyres are there for soaking up the small stuff.
With low speed compression dialled in suitably you’ll also find that your fork doesn’t dive or sink through its travel during steep descents, especially those where you’re braking significantly.
High speed damping adjustments
Not a lot of suspension forks or rear shocks have adjustable high speed damping (rebound or compression). It’s reserved for high end units intended for knowledgable riders and racers.
Setting high speed damping is something of a dark art. Most riders dial off the high speed compression. They also dial in a few clicks of high speed rebound if they’re riding terrain with lots of jumps and drop-offs.
Read more: How to set up a Cane Creek rear shock
We’re not going to go into adjusting high speed damping in this guide. If you have a shock with high speed damping adjustment, your best bet is to refer to the instruction manual and/or website of the manufacturer.
How to adjust spring progression in mountain bike suspension Believe it or not, on a lot of suspension nowadays you can have it behave in a certain way for the first part of its travel whilst at the same time have it behave in a different way for the latter stage of its travel.
In other words, you can have a supple, linear rate action for the first third (approx) of your suspension’s travel and also have a firmer, ramping up action for the latter third of your suspension travel.
This tweaking of your suspension’s spring rate is done via volume spacers.
Inserting volume spacers into your fork (eg. RockShox’s Bottomless Tokens) or rear shock only affects how your suspension feels for the last part of its travel. How the suspension behaves at the sag point or in the middle part of its travel remains unaffected.
If you’re a lighter rider, or a rider who rides relatively sedately on milder terrain, you’ll be fine with your suspension as it is. You don’t nee volume spacers. Just ride your bike.
If you’re a heavier or more aggressive rider tackling technical terrain at high speeds then you can really benefit from increasing the progressivity of your suspension.
Read more: How to fit Fox Float rear shock volume spacers
With volume spacers installed you can run lower air pressures in your suspension and/or less low speed compression damping and have a supple freely-moving action to the early stages of your suspension’s travel whilst at the same time avoiding a fork that blows/dives through the latter stage of its travel too eagerly.
Don’t forget to burp your suspension!
This isn’t an essential thing but you may wish to do it, just because. What do we mean by “burp”? Basically air can get trapped beneath your fork’s dust wipers. It doesn’t have a huge effect but it can cause them to lose a bit of suppleness.
How to get rid of the trapped air? Get hold of a small zip tie and carefully push it between the fork stanchion and the dust wiper seals. Insert the zip tie only a centimetre or two. You may hear a small hiss of air come out.
If you do, remove zip tie slowly and get back to setting your suspension up as before. If you don’t hear any air hiss out, never mind. There wasn’t any trapped in there. Slowly remove zip tie and carry on with other setup twiddles. If fork feels a bit sticky, it’s probably in need of a quick lube mini-service.
And finally, look after your suspension!
Don’t neglect your suspension . It will degrade depressingly quickly if you do, especially in filthy conditions. This is more true for forks as it is for rear shocks (although you should still keep an eye on your rear shock).
You’ll be surprised how easy and quick it is to perform a basic clear-out and lube-up job on your fork and rear shock.
You probably won’t need any weird specific tools but you will need to get hold of some suspension fluid that is designed for your particular brand of suspension.
Looking to upgrade your suspension? Check out our guide to the best mountain bike forks and best mountain bike rear suspension , which covers both air and coil shock options. Or if it’s time for a full upgrade, our guide to the best mountain bikes has something to suit every riding style and budget.
MTB suspension 101 – everything you need to know about your mountain bike suspension dials
We delve into how all the colorful dials on your fork and shock affect your suspenison

Mountain bike suspension is continually becoming more adjustable, from literally changing how many millimeters of travel a fork has, to how your rear shock will react to bumps of different sizes.
Click into any review of a suspension component and you will hear references to rebound, compression damping, and maybe even spring rate, progressivity, and volume spacers. If you’re just getting into mountain biking, this type of jargon can be intimidating, and so can the different knobs and dials on your suspension. Worse still, a few clicks the wrong way on a fork or shock can make it feel like it’s filled with sand or turn it into a wallowing nightmare.
Depending on your fork or rear shock, it may have some or all of these adjustments — usually, as a rule of thumb the more expensive the suspension, the more knobs and dials it will have to customize the way it feels.
So if you have a new fork or shock and are unsure what the dials do, read on for our jargon buster. As all of these concepts apply to both front and rear suspension, we will use fork and shock interchangeably.
- Best mountain bike forks
- Best rear shocks for mountain bikes
- Best mountain bike wheels
Air vs. Coil and sag
Before we get into the complex stuff we need to do a primer on air springs, coil springs and sag.
For the most part, most mountain bike suspension will be built around either an air spring or a coil spring — there are a few outliers like the linkage forks from now-defunct Trust and a few others. This spring-type will determine your suspension's overall feel at its most basic level, which is called the spring rate.
The spring rate on an air spring will be progressive, meaning that it will become firmer as it’s compressed. On the other hand, a coil spring will have a linear spring rate, meaning the energy needed to compress the spring will be consistent through its travel. Again there are some exceptions to the rule for the latter, as progressive coil springs do exist.
Depending on the terrain and bike you are riding, there are pros and cons to each, and for rear suspension, frame designers can tweak the linkage and swingarm to accentuate specific characteristics.
For each, you will need to adjust the sag, or how much the suspension compresses just from you sitting on the bike. It's as simple for an air spring as adding air pressure until you reach the desired sag. Setting up a coil shock is a bit more complex and involves turning the preload adjuster (essentially a washer and nut that buts up against and compresses the spring) and possibly swapping to a lighter or heavier weight spring.
Getting the sag correct is key because adding or removing air pressure (using a shock pump ) or preload will also have an effect on rebound and compression. The recommended amount of sag varies for manufacturers and forks/bikes but it’s usually in the ballpark of 20 per cent of the fork travel and 30 per cent of rear shock travel.

Without any sort of damping, riding a rock garden or a drop would likely end with you laying on the side of the trail because your suspension bucked you off. Without anything to control how the shock compresses and extends, it would act like a pogo stick — which is less than ideal. In terms of your fork and rear shock, the corresponding dials refer to compression and rebound.
Before we get to the heart of it all, we’ll delve into how they work because both are controlled by the same medium - oil.
Turning the knobs on your fork or shock either opens or restricts oil flow through its compression or rebound circuit. We like to think of them a bit like the two-stage lids on containers of spices that control how much chilli powder ends up in your dinner. On the one end, you have half of the lid with the small holes that only let a few grains of powder fall through at a time. The other half which is open allows the chilli to flow more freely for a bit more spice, and ripping the lid off altogether will enable it to flow unencumbered for a 5-alarm meal.
Your suspension works the same way, but instead of a plastic lid, it controls the flow of oil using small metal shims and ports.
- RockShox forks overview
Compression Damping

Compression refers to how firm the shock is as it moves through the travel. So as you spin the compression knob on the top of your fork, it restricts the flow of oil, with some going as far as being able to ‘lock-out’ and create an almost solid platform. When you open up the compression, it allows the oil to flow freely, and the shock or fork can move uninhibited through its range of travel to absorb bumps.
You would increase the amount of compression damping when you don’t need or want the suspension to move as much; this could be on a smooth or rolling trail, a tarmac liaison, or in the final sprint of an XC race when you don’t want to lose anything to suspension bob.
On the inverse, when you are descending or rolling through technical terrain, you want to ensure your compression is fully open as this will allow the front wheel to move out of the way when it needs to, and maximize traction.

- Marzocchi Bomber Z2 review
Your shock may have a dial that splits compression into high speed and low-speed. This means your fork has more complex oil circuits that allow the fork to adjust and control how it responds to you pressing down on the shock (low-speed compression), and the ground pressing up (high-speed compression).
Examples of low-speed compression would be standing up to pedal, or pumping over rollers; here, your suspension is essentially absorbing your bodyweight. The low-speed compression circuit in your shock is what provides the feeling of support, so it's not wallowing through heaps of travel as you pedal. Adding a few clicks of low-speed compression will offer more of this pedaling support, however, it comes at the cost of small bump sensitivity — of course you don’t ride in a vacuum, and your tire and air pressure/spring weight play a role here, too.

On the other hand, high-speed compression is an abrupt impact, like hitting a rock, root, or successive impact like brake bumps where the shock has to compress quickly. When this happens, the oil flows through the compression circuit with enough force to bypass the low-speed circuit — either via alternative flow paths or a design that physically moves it out of the way. The high-speed circuit also controls the rate of shock compressions; low levels of high-speed compression make it easier to achieve full travel in response to big hits. Adding a few clicks will increase the progressivity and make it more challenging to achieve maximum travel.
Rebound damping

While compression damping refers to how the shock responds as its compresses, rebound refers to the speed at which it extends. Just like compression damping, the rate your suspension bounces back after an impact is governed by oil flow. A few clicks in one direction will force the oil through smaller openings, just like the chilli powder, slowing down its return. Turning the dial in the opposite direction allows the oil to flow more freely, and the spring will return at a higher rate of speed.
Rebound, as with all aspects of suspension, is all about finding a happy middle ground of the shock extending fast enough to maintain ground contact and provide some squish for the next bump, but not so quickly that it bucks you or bounces off subsequent impacts. If your rebound is too slow, it will feel as though you’re getting bogged down in the travel.
For the vast majority of riders, a few clicks either way from the middle will have you laughing.
- Fox and Marzocchi forks overview
Some higher-end forks and shocks will have separate dials for high speed and low-speed rebound — if you only have one rebound dial, it’s doing low-speed rebound. The vast majority of forks and shocks will have the high-speed rebound (HSR) set from the factory and, even if your shock or fork doesn't have an HSR dial, there will be separate high and low-speed rebound oil circuits.
The high-speed rebound has nothing to do with the speed of the impact and only comes into play as you approach full travel. With your shock fully compressed, the spring pressure is higher, which means it wants to rebound faster than it would a half or three-quarters travel. High-speed rebound controls the speed at which the shock returns in this highly compressed and pressurized state, so it extends at a uniform rate as it moves back into the range governed by low-speed rebound.
Because HSR only controls this small portion of the travel, most suspension doesn’t have a dial for it, and if it does, it takes A LOT of fiddling to get it right.
Volume spacers

While this technically isn’t a knob you can spin trailside; volume spacers or tokens are a useful tool that allows you to customize the spring rate of your air suspension. Essentially, a token reduces the volume of air in a shock required to reach a certain pressure. Adding volume spacers will firm up the spring rate making the shock more progressive as it compresses. Removing a volume spacer increases the air volume required to reach a particular pressure, softening the spring rate and reducing the amount of force needed to achieve a bottom out.
If you’re a heavy rider and are constantly bottoming out at the air pressure that provides the correct amount of sag, a volume spacer or two adds the support you need. For a lighter rider that struggles to use all of their suspension, removing a token may help you take advantage of that bottom end of the travel.
- Suspension includes you and the bike
- Best enduro mountain bike

Born and bred in Colorado, and now based in Australia, Colin comes from a ski racing background and started riding as a way to stay fit through the summer months. His father, a former European pro, convinced him to join the Colorado State University collegiate cycling team, and he hasn't stopped since. It's not often he pins on a number nowadays, and you'll likely find him in search of flowy singletrack, gravel roads and hairpin corners. Colin has worked at Bikeradar and is a regular contributor to Australian Mountain Bike and Cyclist magazines.
Rides: BMC Team Machine SLR01, Trek Top Fuel 9, Ibis Ripley
Schwalbe SOS Mini Pump review – small, super portable and rock-solid
Mavic Deemax Enduro SL wheels review – lighter rims and Mavic's latest hub design
Lewis LH4 Brake Set review – an eerily familiar looking brake
Most Popular
Join our Email List
Subscribe to our mailing list.
Oversize Charges
Some of our large and/or heavy items are subject to additional oversize charges that are separate from standard shipping costs. Most Bikes are subject to this fee. Learn More
OPEN: Mon, Sat 10-5; Tues - Fri 10-6; CLOSED: Sun
- Account Account
- Stores Stores
- Subtotal : $ 0.00 Checkout Cart
Availability
- In Stock Now 20
- Medium/Large 43
- Show More Sizes
- Show Fewer Sizes
- $2000 to $3499.99 14
- $3500 to $5999.99 19
- $6000 to $100000 21
- & up 17
- & up 19
- & up 20
Trek Full Suspension Mountain Bikes
- Bicycling Catalog
- Full-Suspension
What is Full Suspension? A full suspension mountain bike has a main frame made up of three parts: the front triangle, rear triangle, and connnecting pivots and linkages. A shock controls the rate of compression and rebound. The front wheel is connected to the front triangle by a suspension fork. Both fork and shock allow the wheels a certain amount of controlled vertical movement that varies depending on the style of bike (Cross Country = 60-120mm; Trail = 120-150mm; Enduro = 150-180mm; Down Hill = 180-200mm). Suspension is designed to give riders more comfort, stability, and control by keeping the wheels on the ground while on rough terrain.
Read Our Trek Full Suspension Mountain Bikes Guide
Who is it for? Full suspension is smooth, comfortable on rough terrain, and stable on descents. This means more control and more confidence. However, these benefits cost more money, add weight, and decrease pedal efficiency. Is a full suspension bike for you? That depends on how much you want to spend and what types of trails you'd like to ride. If you're comfortable investing $2,000 + in a bike and would like to experience the widest range of Utah trails (which tend to be narrow, rocky, and loose), a full suspension is probably a good fit. We recommend visiting your local bike shop to talk with a professional about your cycling goals. It's a good idea to test ride some different models and note what you like or dislike about each. The most popular and versatile full suspension model we sell is the Trek Fuel EX. Swing by and check one out today.
For those looking for the cost-savings or simplicity of a hardtail, please take a look at our selection of Trek Hardtails .

We're Hiring! Learn More and Apply Here.
- Account Account
- Stores Stores
- Subtotal : $ 0.00 Checkout Cart
Buyers' Guide To Full-Suspension Bicycles

- ALL MOUNTAIN
- ACCESSORIES
- ALL (130 Forums)
- WHEELS & TIRES
Trek HiFi Deluxe 29er Full Suspension

- USER REVIEWS
I ride in Norcal so it's not rocky like Colorado, so this bike handles all the terrain here as well. Plenty of travel and clearance (29ers get me places my friends on 26ers can't go) and I like how the bike handles. Cool graphics. Some other posters wrote about the weight, but I find it okay. Climbs well, descends well. I get compliments about the bike often.
I recommend this bike for single track riding. I added SHI XT clips so I ride clipped in, even downhill. The bike will take you down Downieville np.
X country Geometry I've done 2 Ultra endurance races on this bike, The Hampshire 100 X 2. For me, I dont think there is a better set up. I think the FS keeps you alive in 8+ hours of riding climbing. Both shocks lock out ENOUGH on big climbs and soak up the nasty stuff when open. This bike works for me.
I thought the FSA headset was a POS... and replaced it with a Chris King. I have a Chris King BB replacement on order now that they do Press Fit stuff.
If youi want to ride A LONG TIME over some varied terrain....this is great bike.
It seems like a bomb proof frame and fork combination. Great travel when going full squishy. I'm a big fan of 29ers in general, and this one doesn't disappoint. Great climber, solid on the downhills. I paid about $1800 for it as a closeout, i thought that was a pretty good deal.
Like a lot of 29ers, it really has to be ridden hard into corners to get it to go. I feel like it has to be pushed into the tight twists. The parts on this thing are crap. Either go all Shimano or all SRAM. This mix/match is a hodgepodge meant to hit a price point, but the X9 rear derailleur and X7 shifters are truly crap. And the wheels are bombproof, but pay a really expensive weight penalty.
I picked up this bike in May 2012. It has about 700-750 miles on it on really nice single tracks, some doubletracks. I'm absolutely sold on 29". I'm not sure I am sold on "this" 29er. I think the frame handle really well. No complains about the fork. The bars are very wide, but for me I think they're fine. It climbs especially well. Downhills predictably. It does suffer a bit when the trail get tight and twisty. The bike almost needs to be thrown into corners, whereas my older 26" just seems to go where I pointed it. Although it is nice when I pick a crappy line that rather than go around something it just goes over it. Its a real pig. Just plows through damn near anything. Ok, that was the good. The bad...the parts mix/match sucks. Truly is crap. The SRAM X9 Rear Der, X7 shifters, Shimano SLX Front, Shimano Craptacular Crank, and Shimano Cassette do not play well. Yeah I know they are supposed to, but they don't. I've spent many long rides baby-ing this thing into gears, having to pre-pplan my shifts, hope the chain doesn't drop, or under pressure that the thing shifts at all. I don't know if its the combination of cassette, rear derailleur, shifters, or what, but its just to dang finicky and unreliable. So, this winter I'm dumping the drivetrain and just going XT. That should help this bike reach its full potential. Sure, I'm dropping another couple hundred into it, but I got a good deal on it in the first place (that's what I'm telling the wife). The stock tires were ok, but wore out quickly. I do really like the brakes- Avid 5's I think. Way more power than I am used to. A little tough to moderate, but plenty of stopping power. I have the stock wheel on this. They are bombproof. I've had far too many drops that I thought were going to just crush these wheels. I'm no light weight at 230lbs, and these things have taken a beating. They are really heavy though. I don't know exactly how much but I compared them to my riding bud's DT's and I bet I'm every bit of 2-3 lbs heavier without the tires- for wheels, thats a lot, but they do take a beating. Still as true today and when I first rode the bike.
Similar Products Used:
Some random old Frankenbikes. Still fun, but way outdated.
this bike kicks butt. uphill, downhill, XC this is a great all mtn bike. they keep saying its more of a xc-setup but i ride downhill singletrak with babyhead & bigger rocks the whole works and i have yet to have any problems. you can beat this bike up and it just asks for more! components are good. no problems other then minor usage adjustments. its the same frame as the rumblefish thats why they DC'd this line not for any other reason. if you cant find it anywhere just get the RF its all the same.
heavy, but the bike is bullet proof. This bike is not for the little guy. if your 5'10" or taller forget the 26" bike. 29r is for big boys. if your worried bout wt get new rims, and bars thats all.
the 29r is a great bike in general. im totally past 26" bikes! will never go back. Im seeing that newr 29rs ar coming with greatr travel. Not sure thats better but it could be a little more helpful down the steep rough stuff. @ this pt i see no need for it. time will tell. As i said before if your 5'10" or more you have 2 go 29r its the only way 26" is worthless unless your doing tricks. I have to say all bikes are good just depends what your riding style is but if your a big guy 29r is the only way!!!
Suitable for a variety of riding styles and terrain. Stiff, reliable, effective design. Good looking graphics.
Heavy, especially the wheels.
This is a fun, well-designed bike. A little bit of a tank... Trek had to warranty it's predecessors somewhat frequently and I think they cut down on that with this frame by adding material here and there. Also, the frame is shared with the Rumblefish, which probably explains why it has extra travel and a stiff axle attachment in the rear but not the front. I really dig the graphics and colors. The stock wheelset is a bit heavy, and replacing with nice wheels is a really rewarding upgrade.
Fisher Caliber
Well constructed, good spec gear, rides like a dream over bumps
slight squeak from pivot points after about 500km
Have just changed to a 29 and loving it. My riding is mostly cross country with a bit of easy downhill. This bike is so much faster than my stumpy
sworks stumpjumper, mongoose teocali
Rolls over everything and just flies. It's built like a tank. I've had no problems with, well, anything. I've ridden some of the toughest trails in Michigan and this ride handles everything I can, and the trail can, throw at it.
None so far. Okay I won't whimp out here and put nothing. I did up grade the handle bar and tires, but other than that - it's good to go.
Prior to my HiFi, I was one of the middle of pack guys in my group and when I was done I was done. Now I finish top two and am still done but not as much as before. This past year has been a blast on the trails. Even over the technical stuff where before, and yes I'll admit it, I would unclip one side and put a foot down, now I don't even hesitate at the top of the run down through the roots and rocks. The bike is strong and feels 100% solid doing - well - anything. It is on the heavy side but this is not one of those rigid frames. It's made for the abuse that 90% of the trail riders out there dish out.
My last ride was a 26" - I did some rides on a few 29ers prior to purchase but did not ride one full time before buying the HiFi
Strong frame. Good geometry. Decent equipment. Very comfortable. Powder coated frame - not sure why more manufacturers don't do it this way.
The rake on the stock handlebars seems more for a beach-cruiser than a mtb. Overall weight.
The bike is a heavyweight contender for sure. The frame I've got is an XXL and yes was shocked to find out there was a bike co. out there making frames for "normal" sized riders. I'm 6'6" and thought for sure I would have to go custom to get anything close to what I needed. I have to say the bike fits me very well. I moved up to a 29 from my be-loved XL Fisher Sugar 2. I like how the HiFi fits like a glove. The HiFi is a great training bike but because of the overall weight of this behemoth racing it is chore to say the least. It tips the scale at close to 35lbs, now add the 202lbs clyde rider and man that's one deep tread print left behind. I also don't care for the mix-match Shimano system. For the price I thought it would be easy for Trek to make it all SLX or X7. The X9 rear hangs too low. I've already busted the drop-out twice after picking up sticks in the chain. Ouch, that's not fun. If you're picking one up, just go ahead an order a new handle bar. It will save you the trip back after your first ride. Oh, and the Trek tire selection is not the best either, you'll want to upgrade those as well.
Gary Fisher (a true Fisher, pre-Trek days) Sugar 2 baby.
Get the latest mountain bike reviews, news, race results, and much more by signing up for the MTBR Newsletter
Hot Deals See All Hot Deals >>
- CLASSIFIEDS
- TERMS OF USE
- PRIVACY POLICY
- ADVERTISING
VISIT US AT
© Copyright 2024 VerticalScope Inc. All rights reserved.
- FIRST RIDE IMPRESSIONS: CANYON NEURON:ONFLY LIGHTWEIGHT ELECTRIC MOUNTAIN BIKE
VIDEO: ‘OFFSEASON’ PART 2 WITH EMMY LAN IN VANCOUVER ISLAND
- IBIS HD6 LONG-TERM REVIEW—HARD-HITTING ENDURO PERFECTION
- DEVINCI RELEASES ALL-NEW E-TROY LITE LIGHTWEIGHT ELECTRIC MOUNTAIN BIKE
- RAPHA TRAIL GORE-TEX INFINIUM JACKET REVIEW – A HIGH QUALITY RAIN JACKET WITH ONE FLAW
- ELITE WOMEN’S XCC HIGHLIGHTS FROM ARAXÁ, BRAZIL
- ELITE MEN’S XCC WORLD CUP HIGHLIGHTS FROM ARAXÁ, BRAZIL
ELITE WOMEN’S XCO HIGHLIGHTS FROM ARAXÁ, BRAZIL
ELITE MEN’S XCO WORLD CUP HIGHLIGHTS, ARAXÁ, BRAZIL
- WORLD CUP RESULTS AND STANDINGS FROM ARAXÁ, BRAZIL
How To Service Fisher and Trek ABP rear-suspension
Gary Fisher’s Josh Borgmeyer took us through the steps to properly service the all-new Fisher Rumblefish rear suspension. Josh’s tips will also work with the Fisher Superfly 100 , Fisher Roscoe and even Trek bikes using the ABP rear dropout. The shock and hardware might be slightly different, but the process is the same.
How often should you perform this service? That depends on how nasty the conditions are where you ride. In really nasty conditions, once a month is not out of the question, but most riders could probably get away with four times a year.
Before you start, please note that the rear brake and rear derailleur are removed during this service. If you are not familiar with how to adjust either component, do not proceed with this service. Tools Needed -A crescent wrench -Allen wrenches – Loctite 242 -High-quality grease -A torque wrench

Ryan Cleek’s World Champs Photo Gallery
Easton Haven Wheels
HOW TO CHOOSE THE PERFECT MOUNTAIN BIKE SADDLE – THE SCIENCE OF SEAT SELECTION
THE INS AND OUTS OF FRAME PROTECTION – THE BEST WAYS TO KEEP YOUR FRAME LOOKING…
APPETITE FOR INSTRUCTION: HOW TO MAKE EVERY DAY A JOYRIDE
HOW TO SERVICE A PRESS-FIT BOTTOM BRACKET

mountainbikeaction
- Since 1986 - Covering All Aspects of ⛰🚲 #MBAmagazine

We and our {{count}} partners use cookies and other tracking technologies to improve your experience on our website. We may store and/or access information on a device and process personal data, such as your IP address and browsing data, for personalised advertising and content, advertising and content measurement, audience research and services development. Additionally, we may utilize precise geolocation data and identification through device scanning.
Please note that your consent will be valid across all our subdomains. You can change or withdraw your consent at any time by clicking the “Consent Preferences” button at the bottom of your screen. We respect your choices and are committed to providing you with a transparent and secure browsing experience.
Privacy Overview
- Most purposes explained in this notice rely on the storage or accessing of information from your device when you use an app or visit a website. For example, a vendor or publisher might need to store a cookie on your device during your first visit on a website, to be able to recognise your device during your next visits (by accessing this cookie each time).
- A car manufacturer wants to promote its electric vehicles to environmentally conscious users living in the city after office hours. The advertising is presented on a page with related content (such as an article on climate change actions) after 6:30 p.m. to users whose non-precise location suggests that they are in an urban zone.
- A large producer of watercolour paints wants to carry out an online advertising campaign for its latest watercolour range, diversifying its audience to reach as many amateur and professional artists as possible and avoiding showing the ad next to mismatched content (for instance, articles about how to paint your house). The number of times that the ad has been presented to you is detected and limited, to avoid presenting it too often.
- If you read several articles about the best bike accessories to buy, this information could be used to create a profile about your interest in bike accessories. Such a profile may be used or improved later on, on the same or a different website or app to present you with advertising for a particular bike accessory brand. If you also look at a configurator for a vehicle on a luxury car manufacturer website, this information could be combined with your interest in bikes to refine your profile and make an assumption that you are interested in luxury cycling gear.
- An apparel company wishes to promote its new line of high-end baby clothes. It gets in touch with an agency that has a network of clients with high income customers (such as high-end supermarkets) and asks the agency to create profiles of young parents or couples who can be assumed to be wealthy and to have a new child, so that these can later be used to present advertising within partner apps based on those profiles.
- An online retailer wants to advertise a limited sale on running shoes. It wants to target advertising to users who previously looked at running shoes on its mobile app. Tracking technologies might be used to recognise that you have previously used the mobile app to consult running shoes, in order to present you with the corresponding advertisement on the app.
- A profile created for personalised advertising in relation to a person having searched for bike accessories on a website can be used to present the relevant advertisement for bike accessories on a mobile app of another organisation.
- You read several articles on how to build a treehouse on a social media platform. This information might be added to a profile to mark your interest in content related to outdoors as well as do-it-yourself guides (with the objective of allowing the personalisation of content, so that for example you are presented with more blog posts and articles on treehouses and wood cabins in the future).
- You have viewed three videos on space exploration across different TV apps. An unrelated news platform with which you have had no contact builds a profile based on that viewing behaviour, marking space exploration as a topic of possible interest for other videos.
- You read articles on vegetarian food on a social media platform and then use the cooking app of an unrelated company. The profile built about you on the social media platform will be used to present you vegetarian recipes on the welcome screen of the cooking app.
- You have viewed three videos about rowing across different websites. An unrelated video sharing platform will recommend five other videos on rowing that may be of interest to you when you use your TV app, based on a profile built about you when you visited those different websites to watch online videos.
- You have clicked on an advertisement about a “black Friday” discount by an online shop on the website of a publisher and purchased a product. Your click will be linked to this purchase. Your interaction and that of other users will be measured to know how many clicks on the ad led to a purchase.
- You are one of very few to have clicked on an advertisement about an “international appreciation day” discount by an online gift shop within the app of a publisher. The publisher wants to have reports to understand how often a specific ad placement within the app, and notably the “international appreciation day” ad, has been viewed or clicked by you and other users, in order to help the publisher and its partners (such as agencies) optimise ad placements.
- You have read a blog post about hiking on a mobile app of a publisher and followed a link to a recommended and related post. Your interactions will be recorded as showing that the initial hiking post was useful to you and that it was successful in interesting you in the related post. This will be measured to know whether to produce more posts on hiking in the future and where to place them on the home screen of the mobile app.
- You were presented a video on fashion trends, but you and several other users stopped watching after 30 seconds. This information is then used to evaluate the right length of future videos on fashion trends.
- The owner of an online bookstore wants commercial reporting showing the proportion of visitors who consulted and left its site without buying, or consulted and bought the last celebrity autobiography of the month, as well as the average age and the male/female distribution of each category. Data relating to your navigation on its site and to your personal characteristics is then used and combined with other such data to produce these statistics.
- An advertiser wants to better understand the type of audience interacting with its adverts. It calls upon a research institute to compare the characteristics of users who interacted with the ad with typical attributes of users of similar platforms, across different devices. This comparison reveals to the advertiser that its ad audience is mainly accessing the adverts through mobile devices and is likely in the 45-60 age range.
- A technology platform working with a social media provider notices a growth in mobile app users, and sees based on their profiles that many of them are connecting through mobile connections. It uses a new technology to deliver ads that are formatted for mobile devices and that are low-bandwidth, to improve their performance.
- An advertiser is looking for a way to display ads on a new type of consumer device. It collects information regarding the way users interact with this new kind of device to determine whether it can build a new mechanism for displaying advertising on this type of device.
- A travel magazine has published an article on its website about the new online courses proposed by a language school, to improve travelling experiences abroad. The school’s blog posts are inserted directly at the bottom of the page, and selected on the basis of your non-precise location (for instance, blog posts explaining the course curriculum for different languages than the language of the country you are situated in).
- A sports news mobile app has started a new section of articles covering the most recent football games. Each article includes videos hosted by a separate streaming platform showcasing the highlights of each match. If you fast-forward a video, this information may be used to select a shorter video to play next.
- An advertising intermediary delivers ads from various advertisers to its network of partnering websites. It notices a large increase in clicks on ads relating to one advertiser, and uses data regarding the source of the clicks to determine that 80% of the clicks come from bots rather than humans.
- Clicking on a link in an article might normally send you to another page or part of the article. To achieve this, 1°) your browser sends a request to a server linked to the website, 2°) the server answers back (“here is the article you asked for”), using technical information automatically included in the request sent by your device, to properly display the information / images that are part of the article you asked for. Technically, such exchange of information is necessary to deliver the content that appears on your screen.
- Bike Builds
- Cross Country Bikes
- Downhill Bikes
- Enduro Bikes
- Hardtail Bikes
- Trail Bikes
RAPHA TRAIL GORE-TEX INFINIUM JACKET REVIEW – A HIGH QUALITY RAIN JACKET WITH…
MAXXIS DISSECTOR TIRE REVIEW – THE DUST GRIPPER
ROCKSHOX HITS BOULDER CITY–APRIL 14
ENDURA MT500 WATERPROOF JACKET II REVIEW
GATES OFFERS 100,000 EUROS TO FIRST ELITE RIDER TO WIN A DOWNHILL WORLD CUP ON A…
ASK MBA: WHY DO MY BIKE’S DISC BRAKE PADS KEEP RUBBING?
ASK MBA: WHY AM I HAVING TROUBLE ALIGNING SHIMANO MICROSPLINE COGS?
ASK MBA: HOW DO I PICK THE RIGHT LENGTH DROPPER SEATPOST?
ASK MBA: SHOULD I BUY A CARBON OR ALUMINUM FRAME?
ASK MBA: SHOULD YOU REPLACE THE ROTOR ALONG WITH YOUR BRAKE PADS?
ASK MBA: HOW DO I DIAL IN MY FOX 34 FORK?
MATHIEU VAN DER POEL TELLS US ABOUT HIMSELF AND HIS MOUNTAIN BIKE, MBA SEPTEMBER 202O
BIKE CHECK: LARS FORSTER’S THÖMUS LIGHTRIDER WORLDCUP
The Greatest Riders in Mountain Bike History (Updated)
BIKE CHECK: ISABELLA NAUGHTON’S LIV ENDURO RACE MACHINE
- Mountain Bike Action
- Digital Mountain Bike Action
- Back Issues
- NICA Team of the Month
- B’s Buzz
DESTINATION: SPIDER MOUNTAIN TEXAS – COME FOR THE BBQ, STAY FOR THE RIDING!
DESTINATION SLOVENIA – RIDING BENEATH THE EARTH
CANADA’S UNTAMED PARADISE – RIDING IN THE SOUTH CHILCOTIN MOUNTAINS
TEN REASONS TO RIDE SANTA FE NEW MEXICO
PHOTO GALLERY: THE BEST OF SEA OTTER CLASSIC 2024
CAPE EPIC STAGE 4 RESULTS AND FULL STAGE VIDEO
CAPE EPIC STAGE 3 RESULTS AND FULL STAGE VIDEO
DURANGO DERBY ANNOUNCES $10k PRO CASH PURSE
READER SENDS: THIS MONTH’S BEST READER-SUBMITTED PHOTOS
READER SENDS – THIS MONTH’S BEST READER SUBMITTED PHOTOS
READER SENDS – THIS MONTH’S BEST READER SUBMITTED PHOTOS
- Anneke’s Blog
- Down The Trail
Mastering Common Mountain Bike Suspension Troubleshooting and Repairs
- By Daniel Shakibaie
- Bike Suspension , Bikes

Key Takeaways:
- Regular maintenance is key to ensure a well-functioning suspension system
- Common suspension problems include noise, sag issues , and bottoming out
- Troubleshooting techniques include adjusting sag , lubricating and cleaning fork components, and fixing shock leaks
- Proper suspension tuning can improve your bike’s performance and comfort on challenging terrains
Understanding Your Bike Suspension System
What makes up a bike suspension system, suspension settings: sag, rebound, and compression.
- Sag – the amount of suspension travel used when you’re sitting on the bike.
- Rebound – how quickly the suspension extends after compression.
- Compression – how quickly the suspension compresses under load.
Common Bike Suspension Problems
Suspension noise, fork stiction, shock leaking, bottoming out, troubleshooting suspension noise, identifying the source of the noise, fixing the noise, addressing fork stiction issues, performing suspension fork maintenance, performing a fork service, fixing shock leaking problems, suspension shock maintenance, seal replacement, adjusting suspension sag.
- Sag measurement : The first step in adjusting suspension sag is measuring it. To measure sag, stand the bike upright and have someone else hold it steady while you sit on it with your riding gear on.
- Preload adjustment : Once you measure sag, you can adjust preload to achieve the desired sag percentage. Preload adjustment involves compressing the suspension spring to adjust its initial length and stiffness.
- Sag setup: The ideal sag setup varies depending on riding style, terrain, and personal preference. Most riders aim for a sag percentage of 25-30% for the rear suspension and 15-20% for the front suspension.
What are the Essential Maintenance Steps for Full Suspension Mountain Bikes?
Full suspension maintenance and tuning is crucial for ensuring optimal performance and longevity of your mountain bike. First, regularly clean your bike to remove dirt and grime that can cause wear. Check and lubricate the suspension pivots and shock bushings to prevent unnecessary friction. Keep an eye on the suspension sag and adjust it accordingly. Regularly inspect and tighten all the bolts and screws. Lastly, have a professional mechanic perform regular servicing to keep your full suspension mountain bike running smoothly.
Preventing Bottoming Out
Q: how often should i maintain my bike suspension system, q: what tools do i need to troubleshoot and repair my bike suspension, q: how can i identify the source of suspension noise, q: can i fix shock leaking issues myself, q: how can i measure and adjust sag on my suspension, q: how many volume spacers should i use to prevent bottoming out.
About The Author

Daniel Shakibaie
Want To Receive Exclusive Offers, Tips & Freebies?
More To Explore

8 of The Best Cycling Routes in Cotswolds (Unforgettable Rides)
6 best mountain bike brake pads for reliable stopping power.

Uncover the Best Cycling Routes in Jordan for Adventure Seekers

Explore the Best Cycling Routes in Iceland – Adventure Awaits
Subscribe to newsletter.
We hate spam so we pinky promise that we will only send you the good stuff. Sign up to our weekly newsletter to get tips, tricks & freebies😲
Affiliate Disclaimer
Please note that some of the links on ‘Outdoor Lab With J’ are affiliate links. This means we may earn a commission, at no additional cost to you, if you click through and make a purchase.
We only endorse products and services that we have personally used or believe to be valuable to our readers.
Our primary goal is to provide helpful and informative content, and any commissions help us maintain the site and continue to produce quality content. Thank you for your support.
Bikes By Brand
- Priority Bicycle
- Rad Power Bikes
Biking Guides
- Mountain Bike
- Hybrid Bike
Legal & About Us
- Terms & Conditions
- Privacy Policy
- Earning Disclaimer

- Regions
Cycling routes in
Enjoy bike routes through historic cities or unspoiled nature thanks to the bike route planner. Russia, the country of contrasts, extends over two continents and ten time zones. Russia’s most known metropoles, the old city of tsars St. Petersburg and the modern Moscow are impressively beautiful and are equally attractive as the Russian lowlands’ pure nature. The wide landscape gives an idea of Russia’s size and ferocity, endless birch forests, untouched lakes and former villages seem like a trip to the past.
Find cycle routes in Russia:
Flat routes | Hilly routes | Uphill routes | Downhill routes | Quick rides | Long tours | Top rated routes
The Gorki park in Moscow is located on the right hand side of the river Moskva and was opened in 1927. It offers huge green spaces, small lakes with boat rentals and can be easily discovered by bike.
Sochi, sometimes called the “Russian Riviera”, is most known as the 2014 Olympic Winter Games’ host. After an exhausting bike trip through Sochi’s surrounding environment, the city is the ideal place to watch the sun set over the Black Sea and is thus also worth a visit during the summer.
A trip with the trans-siberian railway is always an adventure. No matter which train you take, it is advisable to plan several stops along the route to explore the local area. Attention: It can be very difficult to take your bike with you!
It is really helpful to learn the Cyrillic alphabet. It makes it easier to decipher street signs, maps and timetables.
Take care! There are no long-distance cycle trails in Russia. Cycle fans bike on low-traffic streets and paths through forests or fields.
Russia is a very big country. Distances shouldn’t be underestimated.
Explore other cycle destinations
See where people are biking

Join the fast growing global cycling community
Are you ready for the full cycling experience.
- TOUR HISTORY
Home » TOUR
2019 Tour Dates:
Sun June 9 @ Anaireseis Festival – Athens, Greece
Tues June 11 @ UT Connewitz – Leipzig, Germany
Wed June 12 @ Rockhouse – Salzburg, Austria
Thur June 13 @ A38 – Budapest, Hungary *with Uncle Acid & The Deadbeats
Fri June 14 @ PPC – Graz, Austria
Sat June 15 @ Cronache Marziane Festival – Milano, Italy
Sun June 16 @ Blah Blah – Torino, Italy
Tues June 18 @ Duna Jam – Sardinia, Italy
Wed June 19 @ L’Usine – Geneva, Switzerland *with Monkey3
Fri June 21 @ Hellfest – Clisson, France
Sat June 22 @ Schmittner Open Air – Schmitten, Switzerland
Sun June 23 @ Black Deer Festival – Tunbridge Wells, United Kingdom
Tues June 25 @ De Zwerver – Leffinge, Belgium
Wed June 26 @ Helios 37 – Cologne, Germany
Thur June 27 @ Vera – Groningen, Netherlands
Fri June 28 @ Keller Club – Stuttgart, Germany
Sat June 29 @ Raut Oak Festival – Riegsee, Germany
Sun June 30 @ PMK – Innsbruck, Austria
Mon July 01 @ Arena – Vienna, Austria
Wed July 03 @ Lido – Berlin, Germany
Thurs July 04 @ Schlachthof – Wiesbaden, Germany
Fri July 05 @ Resurrection Festival – Viveiro, Spain
FULL TOUR HISTORY
- Images home
- Editorial home
- Editorial video
- Premium collections
- Entertainment
- Premium images
- AI generated images
- Curated collections
- Animals/Wildlife
- Backgrounds/Textures
- Beauty/Fashion
- Buildings/Landmarks
- Business/Finance
- Celebrities
- Food and Drink
- Healthcare/Medical
- Illustrations/Clip-Art
- Miscellaneous
- Parks/Outdoor
- Signs/Symbols
- Sports/Recreation
- Transportation
- All categories
- Shutterstock Select
- Shutterstock Elements
- Health Care
- Sound effects
PremiumBeat
- PixelSquid 3D objects
- Templates Home
- Instagram all
- Highlight covers
- Facebook all
- Carousel ads
- Cover photos
- Event covers
- Youtube all
- Channel Art
- Etsy big banner
- Etsy mini banner
- Etsy shop icon
- Pinterest all
- Pinterest pins
- Twitter All
- Twitter Banner
- Infographics
- Zoom backgrounds
- Announcements
- Certificates
- Gift Certificates
- Real Estate Flyer
- Travel Brochures
- Anniversary
- Baby Shower
- Mother's Day
- Thanksgiving
- All Invitations
- Party invitations
- Wedding invitations
- Book Covers
- About Creative Flow
- Start a design
AI image generator
- Photo editor
- Background remover
- Collage maker
- Resize image
- Color palettes
Color palette generator
- Image converter
- Creative AI
- Design tips
- Custom plans
- Request quote
- Shutterstock Studios
- Data licensing
You currently have 0 credits
See all plans

Image plans
With access to 400M+ photos, vectors, illustrations, and more. Includes AI generated images!

Video plans
A library of 28 million high quality video clips. Choose between packs and subscription.

Music plans
Download tracks one at a time, or get a subscription with unlimited downloads.
Editorial plans
Instant access to over 50 million images and videos for news, sports, and entertainment.
Includes templates, design tools, AI-powered recommendations, and much more.
Counter Spare Parts royalty-free images
530 counter spare parts stock photos, vectors, and illustrations are available royalty-free for download..

Our company
Press/Media
Investor relations
Shutterstock Blog
Popular searches
Stock Photos and Videos
Stock photos
Stock videos
Stock vectors
Editorial images
Featured photo collections
Sell your content
Affiliate/Reseller
International reseller
Live assignments
Rights and clearance
Website Terms of Use
Terms of Service
Privacy policy
Modern Slavery Statement
Cookie Preferences
Shutterstock.AI
AI style types
Shutterstock mobile app
Android app
© 2003-2024 Shutterstock, Inc.
IMAGES
VIDEO
COMMENTS
Step-by-step instructions. 1. Sag set-up should be performed in full riding gear including shoes, helmet, and pack to ensure accuracy. 2. Set the compression damping to "open" by turning the blue knob on your fork all the way counter-clockwise, and the blue lever on your shock counter-clockwise. 3.
Trek 2021 E-Caliber 29 Swingarm Assemblies. $1,099.99. Compare. Select a color.
Mountain bikes. Full suspension mountain bikes. Full suspension mountain bikes keep you in control and comfortable over rugged terrain. Trek's suspension solutions have been proven and refined over the years. Active Braking Pivot (ABP), Full Floater and Mino Link make Trek full suspension models a class above the competition. 131 Results. Items.
Trek full-suspension mountain bikes include both a front suspension fork and rear shock for ultimate trail capabilities. Extra shock absorption not only makes the ride more comfortable, but also allows riders to have more control over large obstacles. These advantages let mountain bikers carry more speed downhill or through XC race circuits.
The ultimate guide to mountain bike rear suspension systems | BikeRadar.
Suspension set-up is crucial to getting the best performance from your mountain bike. Trek Certified Service shows you how to make sure you're getting the be...
Rear mountain bike suspension is a much more complex system than front suspension, as they rely on one or more pivots in the frame and linkages to connect the MTB rear shock and the rear wheel. The pivot(s) allows the rear triangle and linkages to articulate and simultaneously compress the rear wheel and rear shock, according to the leverage ratio.
The rebound adjuster on this set of forks sits just under the leg. Set both your fork and your shock in the middle of the range and make a lap of the car park. 2. Bend your knees and elbows and compress the suspension as hard as possible, but as your body extends fully, keep your limbs straight. 3.
Best mountain bike forks; Best rear shocks for mountain bikes; Best mountain bike wheels ... most mountain bike suspension will be built around either an air spring or a coil spring — there are a few outliers like the linkage forks from now-defunct Trust and a few others. ... Rides: BMC Team Machine SLR01, Trek Top Fuel 9, Ibis Ripley. More ...
00:00 Intro00:42 Shock Sizing3:05 Upgrade Options6:20 Compatibility11:42 Words of AdviceUpgrading the rear shock on your mountain bikes is one of the best an...
00:00 Intro1:01 Rear shock SAG4:16 Fork SAG6:36 Rear Shock Rebound9:31 Fork Rebound11:47 Rear Shock Compression13:27 Fork Compression14:26 Tips and TricksKno...
Trek Top Fuel 9.7 - 2023. $4,699.99. Top Fuel 9.7 is a quick and nimble full suspension carbon mountain bike that fuses the flat-out speed of a cross country bike with the trail-munching appetite of a trail bike. It lets you fly up climbs, hammer through flat sections, and keep on truckin' on rough descents.
Full-suspension bicycles are some of the most popular mountain bikes available today, and for good reason. The past decade has seen dramatic advances in frame and fork technology, suspension designs and rear shock function, while the overall weight of full-suspension bicycles has actually dropped to rival their hardtail siblings. In fact, the benefits of today's full-suspension rigs are so ...
Manuals & user guides. Product support. Bike basics & safety. Bike sizing & fit guides. Bike registration. Bike archive. Suspension calculator. Apparel sizing & fit guides.
Trek HiFi Deluxe 29er Full Suspension user reviews : 4.6 out of 5 - 8 reviews. Read it's strength, weaknesses, find deals and pricing - mtbr.com ... SRAM X.9 rear derailleur. USER REVIEWS . Showing 1-8 of 8 [Apr 15, 2014] ... Get the latest mountain bike reviews, news, race results, and much more by signing up for the MTBR Newsletter.
Step one: Put the bike into a bike stand (or any device you have to elevate the rear end) and remove the rear wheel. Step two: Remove the large nut on the brake side that holds the ABP sleeve between the chainstay and seat stay. Step three: Pull the sleeve out of the stays.
Key Takeaways: Regular maintenance is key to ensure a well-functioning suspension system. Common suspension problems include noise, sag issues, and bottoming out. Troubleshooting techniques include adjusting sag, lubricating and cleaning fork components, and fixing shock leaks. Proper suspension tuning can improve your bike's performance and ...
Enjoy bike routes through historic cities or unspoiled nature thanks to the bike route planner. Russia, the country of contrasts, extends over two continents and ten time zones. Russia's most known metropoles, the old city of tsars St. Petersburg and the modern Moscow are impressively beautiful and are equally attractive as the Russian lowlands' pure nature. The wide landscape gives an ...
2019 Tour Dates: Sun June 9 @ Anaireseis Festival - Athens, Greece. Tues June 11 @ UT Connewitz - Leipzig, Germany. Wed June 12 @ Rockhouse - Salzburg, Austria. Thur June 13 @ A38 - Budapest, Hungary *with Uncle Acid & The Deadbeats. Fri June 14 @ PPC - Graz, Austria. Sat June 15 @ Cronache Marziane Festival - Milano, Italy.
Klimovsk is a microdistrict of Podolsk in Podolsk Urban Okrug, Moscow Oblast, Russia, located 55 kilometers south of Moscow and 8 kilometers south of Podolsk. Population: 56,186 ; 55,644 ; 56,720 . Photo: Ssr, CC BY-SA 3.0. Ukraine is facing shortages in its brave fight to survive. Please support Ukraine, because Ukraine defends a peaceful ...
Trek 2022 Supercaliber 29 Small Swingarm Assemblies. $1,099.99. Compare. Select a color.
customer and retailer at counter in bicycle store holding pedal. ... vehicle suspension system car spare part isolated on white background, nobody. Line Auto service and car part icons - vector icon set 1. Klimovsk, Moscow region, Russsia - October, 16, 2017: interior of the car components shop in Klimovsk, Russia ...
Central PPK operates a train from Grivno to Ploschad Tryokh Vokzalov every 4 hours. Tickets cost RUB 200 - RUB 230 and the journey takes 1h 12m. Train operators. Central PPK. Other operators. BlaBlaCar. Taxi from Klimovsk to Moscow Novoyasnevskaya.
You're looking at the Australia / English Trek Bicycle website. Don't worry. We've all taken a wrong turn before. View your country/region's Trek Bicycle website here.