
Dodge Journey Dashboard Warning Lights (All Models 2009 to 2020)
Welcome to the ultimate guide to all dashboard symbols, warning lights, errors and faults for the 2000 to 2020 Dodge Journey. This will assist in troubleshooting, diagnosing and solving common automotive problems with this specific car.
Please note: This guide covers every single possible symbol/warning light for ALL model variations for Dodge Journey, including standard, premium and top-of-the-line models, plus variations in body shape. While this guide does cover your specific vehicle , your car may not have all the symbols featured on this list.
Dodge Journey Symbols and Warnings Guide
There are 25+ possible lights that may illuminate for a variety of reasons.
While this guide is helpful, please refer to your owner’s manual after reading through this list.
Dodge Journey Engine Fault

There are hundreds of reasons why the check engine warning fault light comes on, and only your dealer or mechanic is qualified to address this.
Common reasons include a loose fuel cap, excess vibration, a blocked cylinder, a bad fuel mix, excessive heat and half power.
This may also highlight an issue with your transmission.
Dodge Journey Check Engine Oil

This means your engine oil is running low or has been completely drained. Your engine may have an extensive oil leak and a mechanic will be required urgently.
At this stage, it’s not recommended that you drive your vehicle.
Dodge Journey Attention / Warning / Fault Detected

Either of these two lights will illuminate to get your attention to other dashboard warning lights and symbols.
These lights can also mean that the handbrake is engaged.
Dodge Journey Battery

This means your battery has low voltage and may need a replacing.
Should you choose to drive your vehicle with a faulty battery, you risk losing power to your battery at high speeds.
Many mechanics will prefer to visit your home to replace your car’s engine battery, rather than have you drive to them.
Dodge Journey Press Foot Brake

This symbol is your Dodge Journey telling you to press the foot brake.
This is required before starting the engine and moving the vehicle out of Park.
Dodge Journey Handbrake Engaged

Your handbrake is engaged.
This can be disengaged by hand, or your vehicle may have a handbrake that is disengaged with your foot.
Dodge Journey Airbag Fault

This means your driver’s side or passenger side airbag has a fault and may not deploy when required. However, it’s quite common for this light to illuminate due to a faulty sensor, rather than a faulty airbag.
Take your vehicle to your mechanic for inspection as soon as possible.
Dodge Journey High Radiator Coolant Temperature

This symbol represents excessive heat from your engine’s radiator. If ignored, you risk overheating your engine very quickly.
Common reasons are a low coolant level and a leak in the radiator.
Call or visit a mechanic immediately.
Dodge Journey Parking Sensors

This symbol represents the front or rear parking sensors. You will also hear an audible beep as you get closer to a wall, pole, tree or other object when reversing.
Dodge Journey Bulb Not Working

This means one of your driving lights has stopped working and requires either a bulb replacement or fuse replacement.
Dodge Journey Low Beam Lights On

This means your front standard driving lights are on.
These lights are used for 99.9% of driving.
Dodge Journey High Beam Lights On

This means your front high-beam driving lights are on.
These lights are used for 0.01% of driving and typically for country roads late at night. Fines can apply for use of high beams in dense residential areas. Do NOT use high team driving lights within 400 metres (1,000 feet) of an oncoming car.
Dodge Journey Automatic Low Beam Lights On

This means your front automatic standard driving lights are on.
These will illuminate by themselves on dusk, when entering tunnels and in other low light situations.
Dodge Journey Automatic High Beam Lights On

This means your front automatic high-beam driving lights are on.
Please be wary that these lights do not turn themselves on automatically around other cars.
Dodge Journey Automatic Lights Malfunction

Dodge Journey’s come with automatic lights, however, these can malfunction.
This is often an issue with the front low-light sensor. You may continue to drive and simply use your normal on/off headlight function until you visit a mechanic.
Dodge Journey Glow Plug Indicator Symbol

This is the Glow Plug Indicator symbol, which is found only in diesel-powered variants of Dodge Journey. Diesel engines require heat in the cylinders to operate, which is supplied initially by its glow plugs when the engine is freezing cold.
When illuminating green, this is operating perfectly but when yellow, a fault may exist.
Dodge Journey Vehicle Is In Park

This means your vehicle is in Park.
Dodge Journey Hood / Bonnet Is Open

While your front hood/bonnet may appear closed, it may show open on the sensor.
Dodge Journey Front Fog Lights Enabled

This means your Dodge Journey front fog lights are engaged. A similar symbol exists for the rear warning lights.
Note: In some areas, it is illegal to use fog lights when it isn’t foggy. Please check with your local authority.
Dodge Journey ABS System Fault / ABS System Off

Your vehicle’s ABS system has a fault and may not engage under heavy braking.
Please visit a mechanic as soon as possible.
Dodge Journey ECO Mode On

ECO mode in a Dodge Journey is an optimum driving mode.
Your throttle will not respond favorably to performance driving.
Instead, your fuel economy will be at its best, hence the term ‘Eco’.
Dodge Journey Truck / Boot Open

While your rear trunk/boot may appear closed, it may show open on the sensor.
Dodge Journey Front Radar Engaged

This means your front sensor is engaged.
This feature provides autonomous braking and adaptative cruise control.
Dodge Journey Lane Assistant On

This means your lane-keeping assistant is on.
This feature allows your vehicle to remain straight within its lane.
This may only engage above 40km/h or 25mp/h.
Dodge Journey ESP / ESC Engaged

This means your Dodge’s Electronic Stability Programme (or Electronic Stability Control in some countries) has been engaged.
This typically engages on wet, muddy or icy roads.
Dodge Journey Check Brake Fluid

This means your brake fluid has become low and may require topping up.
Dodge Journey Check Brake Pads

This means your brake pads have become low.
This may be difficult to check and may require visiting a mechanic as soon as possible.
Dodge Journey Steering Wheel Locked

This means your steering wheel is locked.
This is an anti-theft symbol that flashes when your vehicle is locked.
Dodge Journey Service Due Soon

This means your vehicle is due for servicing soon.
Your mechanic may have programmed an alert within your car’s computer to illuminate this symbol upon crossing a certain odometer reading.
Dodge Journey Heated Seats

This means your heated seats are on.
The number of vertical lines represents the level of heat.
Dodge Journey Cruise Control Activated

This means your cruise control has been activated and is ready to use.
However, your cruise control will not be on. It’s simply ready to switch on.
Cars often use 2-buttons to avoid accidentally turning on cruise control.
Dodge Journey Check Wheel

This means you have an issue with your wheel.
This isn’t the rubber tire but the wheel itself.
Issues include alignment, steering and balance.
Dodge Journey Heated Windscreen

This means your windscreen is being heated to melt frost or ice.
This may turn itself off automatically.
Dodge Journey Air Suspension Fault

If your Dodge Journey has air suspension, then this symbol represents a fault.
This could be a deflated rear suspension air bag, an air leak or a sensor issue.
Dodge Journey Tire Air Pressure Fault

This means your tire pressure is either too low, or the sensor has faulted.
This requires calling or visiting your dealership as soon as possible.
Dodge Journey Intermediate Windscreen Wipers On

This means your automatic windscreen wipers are on. No action is required.
Ultimately, your car is trying to tell you something. You should consult your owner’s manual and have your car inspected by a qualified mechanic as soon as possible.
Symbols Have Different Colors
Much like traffic lights, the color of your dashboard symbol light is just as important as what it means. The lights can also flash to draw your attention to a more severe and time-sensitive issue.
When a Dodge dashboard warning light is green or blue, they are simply telling you that one of your car’s features is being used, or has been activated. No action is required at this time.
When a light is yellow, your car is trying to tell you that a less common safety feature of the car is being used (such as stability control on wet roads), a mild fault has been detected or a repair may be required. If you’re unsure, you should seek the services of a mechanic or dealership as soon as possible.
Orange or Red
If the dashboard on your Dodge is orange or red, this can be a signal that your vehicle is experiencing a problem that needs urgent attention . You MUST call or visit your dealership or mechanic immediately.
This dashboard symbols guide is for entertainment and informational purposes only, and does not replace seeking professional advice from a certified technician or expert mechanic. Please consult with a certified technician or mechanic if you have specific questions or concerns relating to any of the topics covered herein. Under no circumstances will DashboardWarningsLights.com be liable for any loss or damage caused by your reliance on any content on this website.
Joshua Lee is the writer, editor and owner of DashboardWarningLights. Joshua has a deep obsession with the automotive industry, for both passenger vehicles and trucks. When he isn't writing or driving, he enjoys exploring in the great outdoors!

DASH-LIGHTS.COM
Dashboard Warning Lights Explained

Dodge Journey Dashboard Warning Lights
64 thoughts on “ dodge journey dashboard warning lights ”.
My dash board lights only goes off for like 10minutes and then comes back on permanently after turning off the engine and locking the car doors. this drains my battery
I got a warning light that I can’t find in my manual or on line. It looks like a screw in the side of the vehicle. Can you tell me what it means?
Hello Patricia, Are you sure the car and screw warning light is not a loose gas cap symbol?
I checked these on mine but did not affect car with large screw hovering.
I just got that light today…is it the gas cap
Put antifreeze in the car gauge says the oil temperature is rising the transmission fluid temperature is rising and the coolent temperature is rising and says 5470 engine hours what does this mean
Hi Wanda, How old is the existing antifreeze? If it’s several years old, it may require flushing, else there may be sludge build up resulting in the system getting blocked. Transmission systems can also make use of the car’s cooling system and can overheat if there’s a problem. Also check your char’s water pump. The engine hours is referring to how many hours your engine has been in operation over its lifetime.
Patricia I had the dame this last week and even the mechanic had never seen it I checked the gas cap, took if , screwed it in again, but no change. Had the lugs tightened on wheels though he said they were fine= zi have NO IDEA. It bothers me that it’s not in the manual
2014 Dodge Journey: 3 warning lights came on simultaneously. Oil which is full, tired which are filled to spec. and eve light. What causes this and how do I fix it?
Hi Tom. Rather than ‘eve light, did you mean ABS light? Sounds like sensor issues. I would concentrate on the oil light initially as this is the most serious and have your engine pressure checked. If it’s good, it may be the oil pressure sensor.
My 2009 Dodge Journey’s instrument panel completely lights up when shifting from 1st to 2nd. You can feel a slight jerk and click. Tranny works fine but the dashboard is completely lit up. I already reset the dashboard but it comes on immediately when shifting from 1st to 2nd.
Round red light came on three times went out each time what is this red dot panel with rpm’s
Hi Yolanda. I think it’s the vehicle security warning light. Have you changed or disconnected the battery?
I have a 2009 Journey. Sporadically, the ESC light will come on, and the car starts running very rough….almost to the point of stalling. However, if I keep a steady flow of gas, it doesn’t stall on me. Do you know how the gas and ESC error light would be related causing the car to run so badly? Thank you!
Hi Amy, Part of the ESC (Electronic Stability Control) system is to cut engine power and can also apply braking. This helps with traction (preventing wheel spin), oversteer and understeer. If the system is faulty, it could be engaging when it’s not supposed to and giving you the rough engine and problems accelerating. This could be something as simple as a wheel speed sensor that’s at fault, or the ESC module, steering angle sensor.
On my dashboard. Red light came on.and i can’t find the red light symbol.i have a 2010 dodge journey.i have look up the symbols on my phone and i can’t find that symbol.
Hi Loretta Can you describe the light?
I’m having a similar problem as Amy. Sometimes my ESC light will come on and it says OFF though. Basically ESC OFF it shows the image, but it says OFF. It happened today. I turned on the car and the light came on and I had to get in the interstate and I was going 70+MPH and whenever I would let my foot off the gas and the vehicle would stutter and feel like it wanted to stall. The MPH would begin to drop and I wasn’t able to increase by speed. It would drop to about 60 MPH and then I would be able to increase by speed again..I have a 2011 Journey.
I am having the same problem…did you ever figure out how to fix it??
2018 Dodge Journey check engine light and it woo t switch gears. It will jerk really hard then it won’t switch gears
I have a flashing “Dodge” symbol that flashes then remains on for a short time. The tipm has been replaced. Could it be a reset is needed?
What does red ‘Back’ light mean
what does it mean when the letters PSI come on?
On my 2010 Dodge Journey. The Eps light is staying on
My dodge journey yellow light has just come up. Although today I’ve had new tyres and rims fitted have you any idea as to why if so any help will be appreciated thanks
Hello Kelly, I assume you mean the tyre pressure warning light? The tyre pressure light coming on after having new tyres fitted is usually a sign that a sensor has not been fitted, not been fitted correctly or damaged during the tyre fitting service.
I have a stupid question! Do I turn on the slippery car symbol when I’m driving in the snow?
Hi Janie, No, don’t touch it, it will automatically be on already. If you press the button so that the slippery car symbol illuminates, you’ll be switching the system off. On most cars it’s called electronic stability control (ESC) or something similar. ESC comes on automatically each time you start the car.
If you happen to get stuck in snow and can’t get out, you might need to rock the car backwards and forwards. In this situation, you press the ESC button (slippery car symbol), or the traction control button to deactivate traction control. By leaving traction control on, it’ll stop or reduce wheel slip, but if you’re stuck in snow, you want wheel slip to help free your vehicle. Once you’re free from the snow, press the button again to switch on ESC.
Hello, I have a 2016 journey and I get the ETC and the ESC indicators on. Usually I pull over, turn off the car and wait a few seconds but now it’s happening more often. What is this and how can I fix it?
Hello, my ETC and my ESC have started to come on, more in the past 2 days. What should I do to fix this? I have changed the alternator and the battery and it still keeps coming on
Hello Al, The throttle sensor is quite a common fault with the Dodge Journey. The throttle body might need to be replaced.
My etc light came on and now the car isn’t starting what do i do? its not even turning its my moms car and she’s on vacation
Is the car turning over? Things to check are battery charge and connectors. Throttle body is often an issue, sometimes to do with the sensor.
Hello, I have a 2014 journey and I get the ETC and the ESC indicators on. Usually I pull over, turn off the car and wait a few seconds but now it’s happening more often. What is this and how can I fix it? Now it barely even starts half the time what is wrong?
Hi Angel, It’s usually to do with the throttle body. Usually throttle control sensor or position sensor, sometimes the wiring. An issue with the throttle may disable the ESC, so sorting out the throttle issue is likely to fix the ESC issue.
Battery died.Had it jumped.Cars great never any problem. We under reaio are buttone to push for Air, a C button, from, rear ans slippery traction. We t g we button next to air that has C on it bliks :& I don’t know ow if could be a fuse of something more serious My husband fixed these problems but he passed suddenly 90 days ago Can someone answer my question please. I’m in Florida and you can’t dive In aug8with no circulating air. I’m at [email protected]
I have a 2011 journey with 131791 miles on it for the 1st time since owning it in the little center window it’s showing what gear I’m in p r d but it also has a round clock like light right next to the gear light what does that mean I have had nothing but problem’s with this piece of junk the Camara quit heated seats quit had to replace a heater core had to replace head gaskets battery altanator brakes every 1 1/2 years in front worse car ever owned some how front drive shaft got bent or something so the whole car,s vibration was so bad you could not drive the thing .
Hi Dean, Sounds to me like you need to get rid of ASAP. I’m afraid I’m not too sure. Looked into it and can’t find any info. All I can think is that it’s symbol of a reminder – maintenance / service? Hopefully someone else will know.
Hi, there. When I was driving my 2014 Dodge Journey on hyw feeling the car was shaking, I could see my arms were shaking, about half hour later sign on the middle screen looks like a double lined Red Cross while a Ding sound, and disappear soon. Then I got out the Hyw, the shaking was disappeared on 50km/h. Anyone know what’s the sign for? Just changed my tires at Costco three month ago.
I have a 2014, when I put it in reverse a over look of the vehicle comes up on the dashboard with a SERVICE light under it and a dinging sound comes on. This has been going on for awhile, the rear camera works fine and has not ever been damaged. Any ideas on if this is a normal thing or is it something more?
My 2012 journey has a small red polite and a exclamation icon red in colour be for it what does it mean can’t find a explanation any were it is on the rite round dash gauge thanks
Hello everyone while reversing today for my dodge Journey 2018, I noticed a sign came up on the reverse showing clean what does that mean
Hi Teddy, Could it be to do with the backup camera or ParkSense sensors that need cleaning? The ParkView camera is located on the rear of the vehicle above the rear license plate and the outer surface and the underside of the rear fascia/bumper require cleaning and kept clear of snow, ice, mud, dirt or other obstruction for the ParkSense sensors.
I have a 2015 diligence journey. Every now & then going downhill I get an ! Mark and a P. Both are in red circles. Mai
Hi Mai, I should have your vehicle braking system serviced. Always best to have anything to do with brake issues checked out right away. It is worth checking under the hood at your brake fluid levels, as this level will fall over time as brake pads wear low. Also keep an eye on brake pads, they require replacing after a while.
The ETC Light and the traction light lit up. What does this mean? Is it because my air tire pressure is low?
Hi Betsy, It’s unlikely to be related to tire pressure, but it’s best to keep tire pressures up to the recommended values as stated on the sticker inside the door jamb. This will improve stability and fuel consumption. The Dodge Journey does have issues with the throttle body, often needing replacement. This fault can trigger reduced engine power mode (limp home mode) and often systems such as traction control can be automatically deactivated as a result.
What is the small red P with a ! Red icon be for it mean on my 2012 dodge journey it is in the rite round dash gauge
Hi Doug, I’m not sure either I’m afraid. All I can think of is a problem with Park (P). If it would be parking brake related, it would be contained in a circle and parenthesis.
In 2014 dodge journey..the inside lights flashed on and off for 2 minutes while dash had a dinging sound..stopped for a minutes started again..lasted 15 minutes til I got home.. what’s this mean??
Hi Alicia, Is it a specific timed flashing or more of a sporadic flickering? There are some issues with Dodge Journey’s with flicker interior lights, or lights staying on which is related to bad wiring / short issues. A wire that controls lighting to the trunk is a common culprit.
Hit a large pothole and now the ads light along with other lights come on. Sometimes the lights will come on when turning on the ignition and other times it does not. I was told that this could be a wheel bearing problem or an ABS shortage anyone have any ideas.
Hi Eugene, Yes, as you say, wheel bearing is a possibility. There’s also a wheel speed sensor located at each wheel, these sensors are prone to damage and that could also be the issue. If you’re noticing any noise from the particular wheel that hit the pothole, humming noise, looseness in the steering, vibrations etc, this may also be a symptom of a damaged wheel bearing.
Hi I have a 2014 dodge journey and my engine light came on and hasn’t gone off I had a service last week and nothing was bought to my attention. We had a -1 degree morning and the car was frozen could this have an impact on this light coming on?
Hi Kelly, Yes the colder weather can impact on your car. Usually though, it’s the cold weather, triggering the engine light that’s making an already underlying problem worse, hence the light. There’s no way of knowing why the engine light is on other than having diagnostics. When the engine light comes on, you’ll typically have a fault code generated and stored. A diagnostic OBD II tool is used to scan for the codes and point you to where the fault is. You should be able to find an auto workshop where you’ll receive a free diagnostics check.
I had a Throttle Replacement a month ago, for my 2014 Dodge Journey with 67,000 miles at the Dealership. No w, a red sailboat light with a chime just came on. What could this mean. Please help, thank you!
Hi Dionne, A sailboat light? It’s not the engine coolant light is it? (see above)
Hi My Dodge Journey stx 2012 model 3,6 shows slippery Warning light, ABS, Brake and constantly feels like its going to cut but doesn’t cut at all. What it might be?
Hi Xolani, I should check your brake fluid level. A common cause for the ABS and slip indicator light to come on is a faulty wheel speed sensor. However, as your brake light is illuminated, you should have any fault codes read with a diagnostic scanner right away.
Leave a Reply Cancel reply
Your email address will not be published. Required fields are marked *
Vehicle Manufacturers
- Mercedes-Benz
Vehicle Type
- Commercial Vehicles
Warning Lights
- Dash Warning Lights
- Car Warning Light Colour Meaning
- Privacy Policy
Dodge Journey Dashboard Lights And Meaning
Dodge Journey is a crossover SUV car marketed by FCA’s Dodge Brand (2009) that gives you a potent engine along with Low starting price. Its infotainment system is so trouble-free to operate with more user -friendly technical features.
This car highly appealed to a next-level performance with comfy driving. It comes with an excessive lean body that makes its infrastructure more stylish and upgrades your status.
Such trendy cars are composed with so many warning indications displayed on the car’s dashboard. It highlights the malfunctioning of the system’s components, security issues, and immediate maintenance whenever needed. It is highly suggested not to neglect these lights as it can risk the safety of the driver.
Look below the warning lights that demonstrate the respective meanings of these indications.This Dodge Journey dashboard warning lights guide also let you to go through the actions that should be implement when these warnings flickers. You can also refers the other models of Dodge on our site like Dodge Charger, Dodge Durango, Dodge Challenger and Dodge Ram Truck.

Dodge Journey ABS Warning Light
This dashboard symbol activates to indicate a malfunction in the Anti-lock braking System of your vehicle. In this scenario, you can still use your conventional parking brakes without the assistance of ABS. Later you have to inspect your car at Dodge service centre.
Dodge Journey Air Bag Warning Light
If this dashboard light flickers on your dashboard then it indicates a problem in the airbag system and it could not puff out in a crash or a hit. In this case, get serviced your airbag fault from nearby Dodge service centre.
Dodge Journey Battery Charge Warning Light
This warning light gets turn on when the battery is not adequately charged. If this light stays on for a long time, it indicates some malfunction in the charging system. Go and check your vehicle in the service centre.
Dodge Journey Brake Warning Light
This dashboard light gets active when the parking brake is applied or there is a fault in an anti-lock brake system, may be the brake fluid level is getting low in your vehicle. Suppose this light stays on for a longer time than it indicates that parking brakes are disengaged. So, release the parking brakes as earliest. And if this light is still on then go check your vehicle by Dodge service centre.
Dodge Journey Door Open Warning Light
This light gets activated when the Doors of your Dodge journey remain open and not closed properly.
Dodge Journey Electric Power Steering Fault Warning Light
This dashboard light activates when the electric power steering system is detecting a fault in it. If you continue your drive in this warning light, it can create a risk to your safety.
Dodge Journey Electronic Stability Control Active Warning Light
This dashboard light activates on your Dodge Journey Dashboard to indicates that the stability control system is activated in your car, and it is all set to assist you with the road grip and stability.
Dodge Journey Electronic Stability Control Off Warning Light
This warning symbol illuminates on your Dodge Journey dashboard to indicate that the Electronic stability control system is off in your vehicle. Now it will not assist you in controlling your car.
Dodge Journey Electronic Throttle Control Warning Light
This dashboard light gets activate when it indicates a problem in the electronic throttle control system. In this case, completely stop your vehicle and place it in a PARK position. If this light stays on for a long time, then it may reduce your vehicle performance.
Dodge Journey Engine Check Malfunction Indicator Warning Light
This light displayed on the Dodge Journey dashboard to indicates any malfunction in the engine. This light associates with the Automatic Transmission control system and engine monitoring of your vehicle. In this light, we highly advised you to contact dodge service centre.
Dodge Journey Engine Coolant Temperature Warning Light
This warning light activates to alert the driver that the engine of a vehicle is overheating. If this coolant temperature becomes high, then it indicates the chime sound. In this case, a driver should immediately stop the car and turn off the air-conditioning system. Shift your vehicle into the NEUTRAL transmission and idle the vehicle. Immediately switched OFF your system and called for service and maintenance.
Dodge Journey Engine Oil Pressure Light
If this warning light flickers on your Journey dashboard, then it indicates that your engine\'s oil pressure is getting lower. In this situation, please turn off the ignition and stop your vehicle to check its oil level. If the oil level is average, then you should contact to the Dodge service station as earliest.
Dodge Journey Front Fog Indicator Light
This dashboard light gets turn on when front fog lights are activate in your Dodge Journey.
Dodge Journey High Beam Indicator Light
This dashboard light activates when headlights are activated in your vehicle. In this case, push the malfunction lever forward to turn Off the high beams of your Dodge journey. If high beams are still ON, then pull the lever towards your direction to temporarily activate the high beam.
Dodge Journey Low Fuel Warning Light
This warning light indicates when your fuel level reaches 2.7 L, and It stays on until you add some fuel to your vehicle\'s fuel gauge.
Dodge Journey Low Washer Fluid Warning Light
This warning light gets activated when the washer fluid is getting low in your Dodge Journey.
Dodge Journey Park Headlight On Indicator Light
This warning light gets on when the headlights of your Dodge journey are activated.
Dodge Journey Seat Belt Reminder Warning Light
This dashboard light activates whenever the driver or any passenger\'s seat belt remains unbuckled. If this light remains on for a long time and continues to flash, then you should immediately check the seat belts of all the seats of your car.
Dodge Journey Speed Control Fault Warning Light
This dashboard light indicates when the cruise control system is all set to the desired speed.
Dodge Journey Tire Pressure Monitoring System(TPMS) Warning Light
This light activates along with a pop message on the dashboard that your vehicle\'s tire pressure is getting lower than the recommended values. Check all the tires by Dodge Service Station.
Dodge Journey Transmission Temperature Warning Light
This dodge journey dashboard light gets on to alert that the transmission fluid temperature is getting high. In this case, stop your vehicle and engine. Shift to the NEUTRAL position. When this light gets turned OFF, then you will continue driving.
Dodge Journey Turn Signal Indicator Light
This dashboard light gets turn on to alert the driver that your vehicle is driven more than one mile, or we can say 1.6 km with the turn signal on. This light flashes until the left, or right turn signal is activated.
Dodge Journey Vehicle Security Warning Light
This dashboard light activates on your Dodge Journey instrumental cluster when the vehicle security alarm is ringing, and it flashes slowly when the vehicle is disarmed.
Other Models

Subaru Solterra Tire Pressure

Chevrolet Traverse Dashboard Lights And Meaning

Citroen C3 Owner’s Manual

Audi E-Tron Tire Pressure

BMW M1-135i Dashboard Lights And Meaning

Subaru Ascent Tire Pressure

Chevrolet Suburban Dashboard Lights And Meaning

Hyundai Kona Dashboard Lights And Meaning

BMW iX Dashboard Lights And Meaning

Alfa Romeo Giulia Tire Pressure
© 2023 warningsigns.net

- Dodge Manuals
- journey 2017
- Owner's manual
Dodge journey 2017 Owner's Manual
- User manual (180 pages)
- page of 524 Go / 524
Table of Contents
- Troubleshooting
- Introduction
- Introduction 3
- How to Use this Manual
- Warnings and Cautions
- Vehicle Identification Number
- Vehicle Modifications/Alterations
Things to Know before Starting Your Vehicle
- Keyless Push Button Ignition
- Things to Know before Starting Your Vehicle 7
- Ignition or Accessory on Message
- General Information
- Replacement Key Fobs
- Customer Key Fob Programming
- Vehicle Security Alarm - if Equipped
- Rearming of the System
- To Arm the System
- To Disarm the System
- Security System Manual Override
- Illuminated Entry
- To Unlock the Doors and Liftgate
- To Lock the Doors and Liftgate
- Using the Panic Alarm
- Programming Additional Key Fobs
- Key Fob Battery Replacement
- Remote Starting System - if Equipped
- Remote Start Abort Message
- To Enter Remote Start Mode
- To Exit Remote Start Mode Without Driving the Vehicle
- To Exit Remote Start Mode and Drive the Vehicle
- Remote Start Comfort Systems - if Equipped
- Manual Door Locks
- Power Door Locks
- Child-Protection Door Lock System - Rear Doors
- Power Windows
- Wind Buffeting
- Occupant Restraint Systems Features
- Important Safety Precautions
- Seat Belt Systems
- Supplemental Restraint Systems (SRS)
- Child Restraints
- Transporting Pets
- Engine Break-In Recommendations
- Transporting Passengers
- Exhaust Gas
- Safety Checks You Should Make Inside the Vehicle
- Periodic Safety Checks You Should Make Outside the Vehicle
- Understanding the Features of Your Vehicle
- Inside Day/Night Mirror - if Equipped
- Automatic Dimming Mirror - if Equipped
- Outside Mirrors
- Power Mirrors
- Power Folding Mirrors - if Equipped
- Manual Folding Mirrors - if Equipped
- Heated Mirrors - if Equipped
- Illuminated Vanity Mirrors - if Equipped
- Phone Call Features
- Uconnect Phone Features
- Advanced Phone Connectivity
- Things You Should Know about Your Uconnect Phone
- Things You Should Know about Your Uconnect
- Radio 8.4/8.4 NAV
- Uconnect Voice Commands
- Driver's Power Seat - if Equipped
- Power Lumbar - if Equipped
- Front Heated Seats - if Equipped
- Manual Front Seat Adjustments
- Recliner Adjustment
- Driver's Seat Height Adjustment - if Equipped
- Fold-Flat Front Passenger Seat - if Equipped
- Head Restraints
- Third Row Passenger Seats - Seven Passenger Models
- 60/40 Split Second-Row Passenger Seats
- 50/50 Split Third-Row Passenger Seats with Fold-Flat Feature - Seven Passenger Models
- To Open and Close the Hood
- Headlight Switch
- Automatic Headlights
- Headlights on with Wipers
- Headlight Time Delay
- Daytime Running Lights (DRL)
- Lights-On Reminder
- Fog Lights - if Equipped
- Multifunction Lever
- Turn Signals
- Lane Change Assist
- High/Low Beam Switch
- Flash-To-Pass
- Interior Lights
- Map/Reading Lights
- Intermittent Wiper System
- Windshield Wiper Operation
- Windshield Washers
- Mist Feature
- Heated Steering Wheel - if Equipped
- Tilt/Telescoping Steering Column
- To Activate
- To Set a Desired Speed
- To Deactivate
- To Resume Speed
- To Vary the Speed Setting
- To Accelerate for Passing
- Parksense Sensors
- Parksense Warning Display
- Parksense Display
- Enabling and Disabling Parksense
- Service the Parksense Rear Park Assist System
- Cleaning the Parksense System
- Parksense System Usage Precautions
- Parkview Rear Back up Camera - if Equipped
- Courtesy/Reading Lights
- Sunglasses Storage
- Interior Observation Mirror
- Power Sunroof Switch - if Equipped
- Before You Begin Programming Homelink
- Programming a Rolling Code
- Programming a Non-Rolling Code
- Canadian/Gate Operator Programming
- Using Homelink
- Troubleshooting Tips
- Opening Sunroof - Express
- Opening Sunroof - Manual Mode
- Closing Sunroof - Express
- Closing Sunroof - Manual Mode
- Pinch Protect Feature
- Venting Sunroof - Express
- Sunshade Operation
- Sunroof Maintenance
- Ignition off Operation
- Power Outlets
- Power Inverter Operation
- Glove Compartment
- Floor Console Storage
- Center Console Storage
- Flip 'N Stow Front Passenger Seat Storage - if Equipped
- Second-Row Map Pocket and Grocery Retainers - if Equipped
- In-Floor Storage bin with Removable Liner
- Cargo Management System
- Rear Window Wiper/Washer
- Rear Window Defroster
- Roof Luggage Rack - if Equipped
Understanding Your Instrument Panel
- Instrument Panel Features
- Instrument Cluster
- Red Telltale Indicator Lights
- Yellow Telltale Indicator Lights
- Green Telltale Indicator Lights
- White Telltale Indicator Lights
- Blue Telltale Indicator Lights
- Instrument Cluster Display Location and Controls
- Oil Change Due
- Fuel Economy
- Vehicle Speed
- Tire Pressure
- Vehicle Info (Customer Information Features)
- Turn Menu off
- Battery Saver On/Battery Saver Mode Message - Electrical Load Reduction Actions
- Cybersecurity
- Buttons on the Faceplate
- Buttons on the Touchscreen
- Customer Programmable Features
- Radio 4.3 Settings
- Radio 8.4 Settings
- Getting Started
- Single Video Screen
- Play Video Games
- Listen to an Audio Source on Channel 2 While a Video Is Playing on Channel 1
- Important Notes for Single Video Screen System
- Play a DVD Using the Touchscreen Radio
- VES Remote Control - if Equipped
- Remote Control Storage
- Locking the Remote Control
- Replacing the Remote Control Batteries
- VES Headphones Operation
- Replacing the Headphone Batteries
- Accessibility
- Unwired Stereo Headphone Lifetime Limited
- System Information
- Ipod/Usb/Mp3 Control
- Right-Hand Switch Functions
- Left-Hand Switch Functions for Radio Operation
- Left-Hand Switch Functions for Media (I.e., CD) Operation
- CD/DVD Disc Maintenance
- Regulatory and Safety Information
- Manual Three Zone Climate Controls with
- Touchscreen - if Equipped
- Rear Manual Temperature Control (MTC) - if Equipped
Starting and Operating
- Automatic Transmission
- Keyless Enter-N-Go - Ignition
- Normal Starting
- Extreme Cold Weather (below -22°F or −30°C)
- If Engine Fails to Start
- After Starting
- Engine Block Heater - if Equipped
- Ignition Park Interlock
- Brake/Transmission Shift Interlock System
- Four-Speed or Six-Speed Automatic Transmission
- Gear Ranges
- All Wheel Drive (Awd) - if Equipped
- Acceleration
- Flowing/Rising Water
- Shallow Standing Water
- Power Steering Fluid Check
- Parking Brake
- Brake System
- Electronic Brake Force Distribution (EBD)
- Brake System Warning Light
- Anti-Lock Brake System (ABS)
- Brake Assist System (BAS)
- Hill Start Assist (HSA)
- Traction Control System (TCS)
- Electronic Stability Control (ESC)
- Electronic Roll Mitigation (ERM)
- Trailer Sway Control (TSC)
- Tire Markings
- Tire Identification Number (TIN)
- Tire Terminology and Definitions
- Tire Loading and Tire Pressure
- Tire Inflation Pressures
- Tire Pressures for High Speed Operation
- Radial Ply Tires
- Run Flat Tires - if Equipped
- Spare Tires - if Equipped
- Tire Spinning
- Tread Wear Indicators
- Life of Tire
- Replacement Tires
- Tire Chains (Traction Devices)
- Tire Rotation Recommendations
- Traction Grades
- Temperature Grades
- Premium System
- Reformulated Gasoline
- Gasoline/Oxygenate Blends
- E-85 Usage in Non-Flex Fuel Vehicles
- CNG and LP Fuel System Modifications
- MMT in Gasoline
- Materials Added to Fuel
- Fuel System Cautions
- Carbon Monoxide Warnings
- E-85 General Information
- Ethanol Fuel (E-85)
- Fuel Requirements
- Selection of Engine Oil for Flexible Fuel Vehicles (E-85) and Gasoline Vehicles
- Cruising Range
- Replacement Parts
- Maintenance
- Fuel Filler Cap (Gas Cap)
- Loose Fuel Filler Cap Message
- Vehicle Certification Label
- Gross Vehicle Weight Rating (GVWR)
- Gross Axle Weight Rating (GAWR)
- Overloading
- Common Towing Definitions
- Trailer Hitch Classification
- Trailer and Tongue Weight
- Towing Requirements
- Trailer Towing Weights
- Towing this Vehicle Behind Another Vehicle
Advertisement
Quick Links
- Introduction 5
- Things to Know before Starting Your Vehicle 9
- Understanding the Features of Your Vehicle 89
- Understanding Your Instrument Panel 231
- Starting and Operating 335
- What to Do in Emergencies 417
- Maintaining Your Vehicle 441
- If You Need Consumer Assistance 499
Related Manuals for Dodge journey 2017

Summary of Contents for Dodge journey 2017
- Page 1 Journey 2 0 1 7 O W N E R ’ S M A N U A L...
- Page 2 This manual illustrates and describes the operation of VEHICLES SOLD IN CANADA With respect to any Vehicles Sold in Canada, the name FCA features and equipment that are either standard or op- US LLC shall be deemed to be deleted and the name FCA tional on this vehicle.
Page 3: Introduction 3
Page 5: table of contents, page 6: introduction, page 7: warnings and cautions, page 8: vehicle identification number.
- Page 9 THINGS TO KNOW BEFORE STARTING YOUR VEHICLE CONTENTS A WORD ABOUT YOUR KEYS ....9 ILLUMINATED ENTRY ....15 ▫...
- Page 10 8 THINGS TO KNOW BEFORE STARTING YOUR VEHICLE ▫ To Exit Remote Start Mode And Drive The OCCUPANT RESTRAINT SYSTEMS ...34 Vehicle .......21 ▫...
Page 11: A Word About Your Keys
Page 12: ignition or accessory on message, page 13: general information, page 14: replacement key fobs, page 15: customer key fob programming, page 16: to arm the system, page 17: security system manual override, page 18: remote keyless entry - passive entry, page 19: to lock the doors and liftgate, page 20: key fob battery replacement, page 21: general information, page 22: how to use remote start, page 23: to enter remote start mode, page 24: general information, page 25: power door locks, page 26: child-protection door lock system - rear doors.
- Page 27 THINGS TO KNOW BEFORE STARTING YOUR VEHICLE 25 Child-Protection Door Lock Location Child-Protection Door Lock Function 3. Repeat steps 1 and 2 for the opposite rear door. NOTE: When the Child-Protection Door lock system is engaged, the door can be opened only by using the outside door handle even though the inside door lock is in the unlocked position.
- Page 28 26 THINGS TO KNOW BEFORE STARTING YOUR VEHICLE To Disengage The Child-Protection Door Lock WARNING! System Avoid trapping anyone in a vehicle in a collision. 1. Open the rear door. Remember that the rear doors can only be opened from 2.
Page 29: Keyless Enter-N-Go - Passive Entry (If Equipped)
- Page 30 28 THINGS TO KNOW BEFORE STARTING YOUR VEHICLE To Unlock From The Passenger Side: doors and chirps the horn three times (on the third attempt ALL doors will lock and the Passive Entry key fob can be With a valid Passive Entry key fob within 5 ft (1.5 m) of the locked in the vehicle).
- Page 31 THINGS TO KNOW BEFORE STARTING YOUR VEHICLE 29 To Lock The Vehicle’s Doors: With one of the vehicle’s Passive Entry key fobs within 5 ft (1.5 m) of the driver or passenger front door handle, push the door handle lock button to lock all four doors and liftgate.
Page 32: General Information
- Page 33 THINGS TO KNOW BEFORE STARTING YOUR VEHICLE 31 NOTE: For vehicles equipped with Uconnect, the power To stop the window from going all the way down during window switches will remain active for up to 10 minutes the Auto-Down operation, pull up on the switch briefly. after the ignition is cycled to the OFF position.
- Page 34 32 THINGS TO KNOW BEFORE STARTING YOUR VEHICLE Window Lockout Switch WARNING! The window lockout switch on the driver’s door trim panel There is no anti-pinch protection when the window is allows you to disable the window control on the rear almost closed.
Page 35: Wind Buffeting
Page 36: occupant restraint systems, page 37: seat belt systems.
- Page 38 36 THINGS TO KNOW BEFORE STARTING YOUR VEHICLE Enhanced Seat Belt Use Reminder System (BeltAlert) BeltAlert Warning Sequence Driver And Passenger BeltAlert — If Equipped The BeltAlert warning sequence is activated when the vehicle is moving above a specified vehicle speed range BeltAlert is a feature intended to remind the driver and the driver or outboard front seat passenger is unbuck- and outboard front seat passenger (if equipped with...
- Page 39 THINGS TO KNOW BEFORE STARTING YOUR VEHICLE 37 The outboard front passenger seat BeltAlert is not active and reduce your risk of striking the inside of the vehicle or when the outboard front passenger seat is unoccupied. being thrown out of the vehicle. BeltAlert may be triggered when an animal or other items are placed on the outboard front passenger seat or when WARNING!
- Page 40 38 THINGS TO KNOW BEFORE STARTING YOUR VEHICLE WARNING! (Continued) WARNING! (Continued) • A twisted seat belt may not protect you properly. In driver, should always wear their seat belts whether or not an air bag is also provided at their seating a collision, it could even cut into you.
- Page 41 THINGS TO KNOW BEFORE STARTING YOUR VEHICLE 39 WARNING! (Continued) • A shoulder belt placed behind you will not protect you from injury during a collision. You are more likely to hit your head in a collision if you do not wear your shoulder belt.
- Page 42 40 THINGS TO KNOW BEFORE STARTING YOUR VEHICLE Inserting Latch Plate Into Buckle Positioning The Lap Belt 4. Position the lap belt so that it is snug and lies low across 5. Position the shoulder belt across the shoulder and chest your hips, below your abdomen.
- Page 43 THINGS TO KNOW BEFORE STARTING YOUR VEHICLE 41 Lap/Shoulder Belt Untwisting Procedure Use the following procedure to untwist a twisted lap/ shoulder belt. 1. Position the latch plate as close as possible to the anchor point. 2. At about 6 to 12 in (15 to 30 cm) above the latch plate, grasp and twist the seat belt webbing 180 degrees to create a fold that begins immediately above the latch plate.
- Page 44 42 THINGS TO KNOW BEFORE STARTING YOUR VEHICLE NOTE: The adjustable upper shoulder belt anchorage is Seat Belt Extender equipped with an Easy Up feature. This feature allows the If a seat belt is not long enough to fit properly, even when shoulder belt anchorage to be adjusted in the upward the webbing is fully extended and the adjustable upper position without pushing or squeezing the release button.
- Page 45 THINGS TO KNOW BEFORE STARTING YOUR VEHICLE 43 Seat Belts And Pregnant Women Seat Belt Pretensioner The front seat belt system is equipped with pretensioning devices that are designed to remove slack from the seat belt in the event of a collision. These devices may improve the performance of the seat belt by removing slack from the seat belt early in a collision.
- Page 46 44 THINGS TO KNOW BEFORE STARTING YOUR VEHICLE Switchable Automatic Locking Retractors (ALR) – If If the passenger seating position is equipped with an ALR Equipped and is being used for normal usage, only pull the seat belt webbing out far enough to comfortably wrap around the The seat belts in the passenger seating positions may be occupant’s mid-section so as to not activate the ALR.
- Page 47 THINGS TO KNOW BEFORE STARTING YOUR VEHICLE 45 WARNING! WARNING! • Never place a rear-facing child restraint in front of an • The seat belt assembly must be replaced if the air bag. A deploying passenger front air bag can switchable Automatic Locking Retractor (ALR) fea- cause death or serious injury to a child 12 years or ture or any other seat belt function is not working...
- Page 48 46 THINGS TO KNOW BEFORE STARTING YOUR VEHICLE How The Active Head Restraints (AHR) Work Active Head Restraint (AHR) Components: The Occupant Restraint Controller (ORC) determines whether the severity or type of rear impact will require the Active Head Restraints (AHR) to deploy. If a rear impact requires deployment, both the driver and front passenger seat AHRs will be deployed.
- Page 49 THINGS TO KNOW BEFORE STARTING YOUR VEHICLE 47 Resetting Active Head Restraints (AHR) WARNING! If the Active Head Restraints are triggered during a collision, • All occupants, including the driver, should not oper- the front half of the head restraint will be extended forward ate a vehicle or sit in a vehicle’s eat until the head and separated from the rear half of the head restraint (see restraints are placed in their proper positions in...
Page 50: Supplemental Restraint Systems (Srs)
- Page 51 THINGS TO KNOW BEFORE STARTING YOUR VEHICLE 49 The ORC turns on the Air Bag Warning Light in the NOTE: If the speedometer, tachometer, or any engine instrument panel for approximately four to eight seconds related gauges are not working, the Occupant Restraint for a self-check when the ignition switch is first in the Controller (ORC) may also be disabled.
- Page 52 50 THINGS TO KNOW BEFORE STARTING YOUR VEHICLE WARNING! (Continued) • Never place a rear-facing child restraint in front of an air bag. A deploying passenger front air bag can cause death or serious injury to a child 12 years or younger, including a child in a rear-facing child restraint.
- Page 53 THINGS TO KNOW BEFORE STARTING YOUR VEHICLE 51 This vehicle may be equipped with driver and/or front Front Air Bag Operation passenger seat track position sensors that may adjust the Front Air Bags are designed to provide additional protec- inflation rate of the Advanced Front Air Bags based upon tion by supplementing the seat belts.
- Page 54 52 THINGS TO KNOW BEFORE STARTING YOUR VEHICLE The steering wheel hub trim cover and the upper right side of Supplemental Side Air Bags the instrument panel separate and fold out of the way as the Your vehicle is equipped with two types of side air bags: air bags inflate to their full size.
- Page 55 THINGS TO KNOW BEFORE STARTING YOUR VEHICLE 53 When the SAB deploys, it opens the seam on the outboard side of the seatback’s trim cover. The inflating SAB deploys through the seat seam into the space between the occupant and the door. The SAB moves at a very high speed and with such a high force that it could injure occupants if they are not seated properly, or if items are positioned in the area where the SAB inflates.
- Page 56 54 THINGS TO KNOW BEFORE STARTING YOUR VEHICLE area where the SABICs inflate. Children are at an even Side Air Bags are a supplement to the seat belt restraint greater risk of injury from a deploying air bag. system. Side Air Bags deploy in less time than it takes to blink your eyes.
- Page 57 THINGS TO KNOW BEFORE STARTING YOUR VEHICLE 55 Side Impacts WARNING! In side impacts, the side impact sensors aid the ORC in • Side Air Bags need room to inflate. Do not lean determining the appropriate response to impact events. against the door or window.
- Page 58 56 THINGS TO KNOW BEFORE STARTING YOUR VEHICLE Rollover Events Air Bag System Components • Occupant Restraint Controller (ORC) Side Air Bags are designed to activate in certain rollover events. The ORC determines whether the deployment of • Air Bag Warning Light the Side Air Bags in a particular rollover event is appro- •...
- Page 59 THINGS TO KNOW BEFORE STARTING YOUR VEHICLE 57 If you do have a collision which deploys the air bags, any Do not drive your vehicle after the air bags have deployed. or all of the following may occur: If you are involved in another collision, the air bags will not be in place to protect you.
- Page 60 58 THINGS TO KNOW BEFORE STARTING YOUR VEHICLE Enhanced Accident Response System Maintaining Your Air Bag System In the event of an impact, if the communication network WARNING! remains intact, and the power remains intact, depending on the nature of the event, the ORC will determine whether •...
- Page 61 THINGS TO KNOW BEFORE STARTING YOUR VEHICLE 59 • How fast the vehicle was traveling. WARNING! (Continued) • These data can help provide a better understanding of dealer. Only manufacturer approved seat accessories the circumstances in which crashes and injuries occur. may be used.
Page 62: Child Restraints
- Page 63 THINGS TO KNOW BEFORE STARTING YOUR VEHICLE 61 Summary Of Recommendations For Restraining Children In Vehicles Recommended Type Of Child Re- Child Size, Height, Weight Or Age straint Infants and Toddlers Children who are two years old or Either an Infant Carrier or a Convert- younger and who have not reached ible Child Restraint, facing rearward the height or weight limits of their...
- Page 64 62 THINGS TO KNOW BEFORE STARTING YOUR VEHICLE Infant And Child Restraints WARNING! Safety experts recommend that children ride rear-facing in • Never place a rear-facing child restraint in front of an the vehicle until they are two years old or until they reach air bag.
- Page 65 THINGS TO KNOW BEFORE STARTING YOUR VEHICLE 63 Older Children And Child Restraints WARNING! Children who are two years old or who have outgrown Do not install a rear-facing car seat using a rear support their rear-facing convertible child seat can ride forward- leg in this vehicle.
- Page 66 64 THINGS TO KNOW BEFORE STARTING YOUR VEHICLE Integrated Child Booster Seat — If Equipped WARNING! The Integrated Child Booster Seat is located in each out- • Improper installation can lead to failure of an infant board second-row passenger seat. or child restraint.
- Page 67 THINGS TO KNOW BEFORE STARTING YOUR VEHICLE 65 2. Pull the release loop forward to release the latch and seat cushion. Booster Seat 4. Place the child upright in the seat with their back firmly against the seatback. Release Loop 3.
- Page 68 66 THINGS TO KNOW BEFORE STARTING YOUR VEHICLE 7. Once the seat belt is long enough to fit properly, insert WARNING! the latch plate into the buckle until you hear a “click.” Securely lock the seat cushion into position before using the seat.
- Page 69 THINGS TO KNOW BEFORE STARTING YOUR VEHICLE 67 Children Too Large For Booster Seats If the answer to any of these questions was “no,” then the child still needs to use a booster seat in this vehicle. If the Children who are large enough to wear the shoulder belt child is using the lap/shoulder belt, check seat belt fit comfortably, and whose legs are long enough to bend over periodically and make sure the seat belt buckle is latched.
- Page 70 68 THINGS TO KNOW BEFORE STARTING YOUR VEHICLE Recommendations For Attaching Child Restraints Restraint Type Combined Use Any Attachment Method Shown With An “X” Below Weight of the LATCH – Lower Seat Belt Only LATCH – Lower Seat Belt + Top Child + Child Anchors Only Anchors + Top...
- Page 71 THINGS TO KNOW BEFORE STARTING YOUR VEHICLE 69 Lower Anchors And Tethers For CHildren (LATCH) used with the top tether anchorage to install the child Restraint System restraint. Please see the following table for more information. LATCH Positions For Installing Child Restraints In This Vehicle LATCH Label Your vehicle is equipped with the child restraint anchorage...
- Page 72 70 THINGS TO KNOW BEFORE STARTING YOUR VEHICLE Frequently Asked Questions About Installing Child Restraints With LATCH What is the weight limit (child’s weight + 65 lbs (29.5 kg) Use the LATCH anchorage system until the weight of the child restraint) for using the combined weight of the child and the child LATCH anchorage system to attach the child restraint is 65 lbs (29.5 kg).
- Page 73 THINGS TO KNOW BEFORE STARTING YOUR VEHICLE 71 Frequently Asked Questions About Installing Child Restraints With LATCH Can the head restraints be removed? 5 Passenger Vehicle: All second row head restraints are removable. 7 Passenger Vehicle: All second and third row head restraints are removable.
- Page 74 72 THINGS TO KNOW BEFORE STARTING YOUR VEHICLE Center Seat LATCH This vehicle has 5 lower LATCH anchorages in the rear seat. Anchorages A and B are used for the right outboard position behind the front passenger (1). Anchorages D and E are used for the left outboard position behind the driver (3).
- Page 75 THINGS TO KNOW BEFORE STARTING YOUR VEHICLE 73 2. Left outboard and center seating positions (3 and 2): Install the first child seat in the left outboard seating position using lower anchorages D and E. Install the second child seat using the center anchorages, B and C. Do not use the outer anchorage closest to the opposite door, A.
- Page 76 74 THINGS TO KNOW BEFORE STARTING YOUR VEHICLE 2. Place the child seat between the lower anchorages for WARNING! (Continued) that seating position. For some second row seats, you • If you are installing three child restraints next to each may need to recline the seat and/or raise the head other, you must use the seat belt and the center tether restraint to get a better fit.
- Page 77 THINGS TO KNOW BEFORE STARTING YOUR VEHICLE 75 How To Stow An Unused Switchable-ALR (ALR) WARNING! (Continued) Seat Belt • Child restraint anchorages are designed to withstand When using the LATCH attaching system to install a child only those loads imposed by correctly-fitted child restraint, stow all ALR seat belts that are not being used by restraints.
- Page 78 76 THINGS TO KNOW BEFORE STARTING YOUR VEHICLE The seat belts in the passenger seating positions are Lap/Shoulder Belt Systems For Installing Child equipped with either a Switchable Automatic Locking Restraints In This Vehicle Retractor (ALR) or a cinching latch plate or both. Both types of seat belts are designed to keep the lap portion of the seat belt tight around the child restraint so that it is not necessary to use a locking clip.
- Page 79 THINGS TO KNOW BEFORE STARTING YOUR VEHICLE 77 Frequently Asked Questions About Installing Child Restraints With Seat Belts What is the weight limit (child’s weight + Weight limit of the Always use the tether anchor when using the weight of the child restraint) for using the Child Restraint seat belt to install a forward facing child re- Tether Anchor with the seat belt to attach a...
- Page 80 78 THINGS TO KNOW BEFORE STARTING YOUR VEHICLE 1. Place the child seat in the center of the seating position. 6. Try to pull the webbing out of the retractor. If it is For some second row seats, you may need to recline the locked, you should not be able to pull out any webbing.
- Page 81 THINGS TO KNOW BEFORE STARTING YOUR VEHICLE 79 Installing A Child Restraint With A Cinching Latch 2. Next, pull enough of the seat belt webbing from the Plate (CINCH) — If Equipped: retractor to pass it through the belt path of the child restraint.
- Page 82 80 THINGS TO KNOW BEFORE STARTING YOUR VEHICLE Any seat belt system will loosen with time, so check the WARNING! (Continued) belt occasionally, and pull it tight if necessary. strap of a rear-facing car seat to the tether anchorage If the buckle or the cinching latch plate is too close to the that is approved for that seating position, located belt path opening of the child restraint, you may have behind the top of the vehicle seat.
- Page 83 THINGS TO KNOW BEFORE STARTING YOUR VEHICLE 81 4. Remove slack in the tether strap according to the child restraint manufacturer’s instructions. Seat Track Release Lever 2. Route the tether strap to provide the most direct path for the strap between the anchor and the child seat. If your Rear Seat Tether Strap Mounting vehicle is equipped with adjustable rear head restraints, raise the head restraint, and where possible, route the...
Page 84: Transporting Pets
Page 85: safety tips, page 86: safety checks you should make inside the vehicle.
- Page 87 THINGS TO KNOW BEFORE STARTING YOUR VEHICLE 85 Defroster WARNING! (Continued) Check operation by selecting the defrost mode and place Lightly pull to confirm mat is secured using the the blower control on high speed. You should be able to floor mat fasteners on a regular basis.
Page 88: Periodic Safety Checks You Should Make Outside The Vehicle
- Page 89 UNDERSTANDING THE FEATURES OF YOUR VEHICLE CONTENTS ▫ Advanced Phone Connectivity ... . .109 MIRRORS ......91 ▫...
- Page 90 88 UNDERSTANDING THE FEATURES OF YOUR VEHICLE ▫ Automatic Headlights ....175 SEATS ....... .155 ▫...
- Page 91 UNDERSTANDING THE FEATURES OF YOUR VEHICLE 89 ▫ Mist Feature ......182 ▫ Service The ParkSense Rear Park Assist System. .192 ▫...
- Page 92 90 UNDERSTANDING THE FEATURES OF YOUR VEHICLE ▫ Troubleshooting Tips ....204 STORAGE ......214 ▫...
Page 93: Mirrors
Page 94: outside mirrors, page 95: power mirrors, page 96: manual folding mirrors - if equipped, page 97: heated mirrors - if equipped, page 98: uconnect phone (4.3).
- Page 99 UNDERSTANDING THE FEATURES OF YOUR VEHICLE 97 vehicle and enables you to mute the system’s microphone Uconnect Phone Button for private conversation. The Uconnect Phone Button is used to enter the phone mode and make calls, show recent, WARNING! incoming, outgoing calls, view phonebook etc., When you press the button you will hear Any voice commanded system should be used only in a BEEP.
Page 100: Operation
- Page 101 UNDERSTANDING THE FEATURES OF YOUR VEHICLE 99 The system utilizes continuous dialog; when the system Pair (Link) Uconnect Phone To A Mobile Phone requires more information from the user it will ask a To begin using your Uconnect Phone, you must pair your question to which the user can respond without pushing compatible Bluetooth enabled mobile phone.
- Page 102 100 UNDERSTANDING THE FEATURES OF YOUR VEHICLE select Yes you will go the Paired Phones screen, if you 5. Search for available devices on your Bluetooth enabled select No you will return to the Uconnect Phone main Audio Device. When prompted on the device, select the menu.
- Page 103 UNDERSTANDING THE FEATURES OF YOUR VEHICLE 101 Connecting To A Particular Mobile Phone Or Audio Deleting A Phone Or Audio Device Device 1. Push the SETTINGS button on the faceplate. Uconnect Phone will automatically connect to the highest 2. Press the “Phone/Bluetooth” button on the touchscreen. priority paired phone and/or Audio Device within range.
- Page 104 102 UNDERSTANDING THE FEATURES OF YOUR VEHICLE • Only the phonebook of the currently connected mobile Phonebook Download (Automatic Phonebook Transfer From Mobile Phone) — If Equipped phone is accessible. • This downloaded phonebook cannot be edited or de- If equipped and specifically supported by your phone, Uconnect Phone automatically downloads names (text leted on the Uconnect Phone.
Page 105: Phone Call Features
- Page 106 104 UNDERSTANDING THE FEATURES OF YOUR VEHICLE • Ignore Recent Calls • Hold/unhold You may browse up to 34 of the most recent of each of the following call types: • Mute/unmute • Incoming Calls • Transfer the call to/from the phone •...
- Page 107 UNDERSTANDING THE FEATURES OF YOUR VEHICLE 105 Answer Or Reject An Incoming Call — Call first call, refer to “Toggling Between Calls” in this Currently In Progress section. To combine two calls, refer to “Join Calls” in this section. If a call is currently in progress and you have another incoming call, you will hear the same network tones for Toggling Between Calls call waiting that you normally hear when using your...
Page 108: Uconnect Phone Features
- Page 109 UNDERSTANDING THE FEATURES OF YOUR VEHICLE 107 Roadside Assistance/Towing Assistance You can use your Uconnect Phone to access a voice mail system or an automated service, such as a paging service or If you need roadside/towing assistance: automated customer service line. Some services require •...
- Page 110 108 UNDERSTANDING THE FEATURES OF YOUR VEHICLE NOTE: Voice Response Length • The first number encountered for that contact will be It is possible for you to choose between Brief and Detailed sent. All other numbers entered for that contact will be Voice Response Length.
Page 111: Advanced Phone Connectivity
- Page 112 110 UNDERSTANDING THE FEATURES OF YOUR VEHICLE • Always wait for the beep before speaking. • When navigating through an automated system such as voice mail, or when sending a page, at the end of • Speak normally without pausing, just as you would speaking the digit string, make sure to say “Send.”...
- Page 113 UNDERSTANDING THE FEATURES OF YOUR VEHICLE 111 Far End Audio Performance Bluetooth Communication Link Audio quality is maximized under: Mobile phones have been found to lose connection to the Uconnect Phone. When this happens, the connection can • Low-to-medium blower setting generally be reestablished by switching the phone off/on.
- Page 114 112 UNDERSTANDING THE FEATURES OF YOUR VEHICLE Voice Tree...
Page 115: General Information
- Page 116 114 UNDERSTANDING THE FEATURES OF YOUR VEHICLE • Setting Favorite Contact Phone numbers so they are Uconnect Phone supports the following features: easily accessible on the Main Phone screen. Voice Activated Features: • Viewing and Calling contacts from Recent Call logs. •...
- Page 117 UNDERSTANDING THE FEATURES OF YOUR VEHICLE 115 vehicle and enables you to mute the system’s microphone Uconnect Phone Button for private conversation. The Uconnect Phone button is used to enter the phone mode and make calls, show recent WARNING! incoming and outgoing calls, view phonebook along with other features.
Page 118: Operation
- Page 119 UNDERSTANDING THE FEATURES OF YOUR VEHICLE 117 The system utilizes continuous dialog; when the system Pair (Link) Uconnect Phone To A Mobile Phone requires more information from the user it will ask a To begin using your Uconnect Phone, you must pair your question to which the user can respond without pushing compatible Bluetooth enabled mobile phone.
- Page 120 118 UNDERSTANDING THE FEATURES OF YOUR VEHICLE • Search for available devices on your Bluetooth enabled mobile phone. When prompted on the phone, enter the name and PIN shown on the Uconnect screen. • See step 4 to complete the process. 4.
- Page 121 UNDERSTANDING THE FEATURES OF YOUR VEHICLE 119 5. When the pairing process has successfully completed, You can also use the following VR commands to bring up the system will prompt you to choose whether or not the Paired Phone screen from any screen on the radio: this is your favorite phone.
- Page 122 120 UNDERSTANDING THE FEATURES OF YOUR VEHICLE 7. When the pairing process has successfully completed, 3. Press to select the particular Phone or the particular the system will prompt you to choose whether or not Audio Device. this is your favorite device. Selecting “Yes” will make 4.
- Page 123 UNDERSTANDING THE FEATURES OF YOUR VEHICLE 121 3. Press the settings icon button located to the right of the Phonebook Download (Automatic Phonebook device name for a different Phone or Audio Device than Transfer From Mobile Phone) — If Equipped the currently connected device.
- Page 124 122 UNDERSTANDING THE FEATURES OF YOUR VEHICLE • Only the phonebook of the currently connected mobile phone is accessible. • This downloaded phonebook cannot be edited or de- leted on the Uconnect Phone. These can only be edited on the mobile phone. The changes are transferred and updated to Uconnect Phone on the next phone connec- tion.
- Page 125 UNDERSTANDING THE FEATURES OF YOUR VEHICLE 123 Add From Mobile To Remove A Favorite 1. To remove a Favorite, select phonebook from the Phone main screen. Remove From Favorites 4. The Options pop-up will display, press “Remove from 2. Next select Favorites on the left side of the screen and Favs.”...
Page 126: Phone Call Features
- Page 127 UNDERSTANDING THE FEATURES OF YOUR VEHICLE 125 • Recent Call Log Call Controls • SMS Message Viewer The touchscreen allows you to control the following call features: Dial By Saying A Number • Answer 1. Push the Phone button to begin. •...
- Page 128 126 UNDERSTANDING THE FEATURES OF YOUR VEHICLE • Incoming Calls To send a touch-tone using Voice Recognition (VR), push the Voice Command button on your steering wheel • Outgoing Calls while in a call and say “Send 1234#” or you can say •...
- Page 129 UNDERSTANDING THE FEATURES OF YOUR VEHICLE 127 Answer Or Ignore An Incoming Call — Call Place/Retrieve A Call From Hold Currently In Progress During an active call, press the “Hold” button on the If a call is currently in progress and you have another Phone main screen.
Page 130: Uconnect Phone Features
- Page 131 UNDERSTANDING THE FEATURES OF YOUR VEHICLE 129 Working With Automated Systems WARNING! This method is used in instances where one generally has Your phone must be turned on and connected to the to push numbers on the mobile phone keypad while Uconnect Phone to allow use of this vehicle feature in navigating through an automated telephone system.
- Page 132 130 UNDERSTANDING THE FEATURES OF YOUR VEHICLE You can also send stored mobile phonebook entries as Barge In — Overriding Prompts tones for fast and easy access to voice mail and pager The Voice Command button can be used when you entries.
Page 133: Advanced Phone Connectivity
Page 134: things you should know about your uconnect.
- Page 135 UNDERSTANDING THE FEATURES OF YOUR VEHICLE 133 Far End Audio Performance Your phone must support SMS over Bluetooth to use this feature. If the Uconnect Phone determines your phone is Audio quality is maximized under: not compatible with SMS messaging over Bluetooth the •...
- Page 136 134 UNDERSTANDING THE FEATURES OF YOUR VEHICLE Read Messages: Send Messages Using Buttons On The Touchscreen: If you receive a new text message while your phone is You can send messages using Uconnect Phone. To send a connected to Uconnect Phone, an announcement will be new message: made to notify you that you have a new text message.
- Page 137 UNDERSTANDING THE FEATURES OF YOUR VEHICLE 135 Send Messages Using Voice Commands: 1. Push the Phone button. 2. After the “Listening” prompt and the following beep, say “Send message to John Smith mobile.” 3. After the system prompts you for what message you want to send, say the message you wish to send or say “List.”...
- Page 138 136 UNDERSTANDING THE FEATURES OF YOUR VEHICLE 4. I can’t talk right now. 5. Call me. 6. I’ll call you later. 7. I’m on my way. 8. Thanks. 9. I’ll be late. 10. I will be <number> minutes late. 11. See you in <number> minutes. 12.
- Page 139 UNDERSTANDING THE FEATURES OF YOUR VEHICLE 137 Bluetooth Communication Link Mobile phones have been found to lose connection to the Uconnect Phone. When this happens, the connection can generally be re-established by switching the mobile phone OFF/ON. Your mobile phone is recommended to remain in Bluetooth ON mode.
- Page 140 138 UNDERSTANDING THE FEATURES OF YOUR VEHICLE Voice Tree...
- Page 141 UNDERSTANDING THE FEATURES OF YOUR VEHICLE 139 NOTE: 7. Storing Dial tones in contact names is possible but only the first number encountered in a contact name will be 1. You can replace “John Smith” with any name in your sent.
- Page 142 140 UNDERSTANDING THE FEATURES OF YOUR VEHICLE...
- Page 143 UNDERSTANDING THE FEATURES OF YOUR VEHICLE 141 NOTE: 5. You can replace “248 555 1212” with any phone number supported by your Mobile phone. 1. You can replace “John Smith” with any name in your mobile or favorite phone book. You can also say “Send 6.
- Page 144 142 UNDERSTANDING THE FEATURES OF YOUR VEHICLE NOTE: Available Voice Commands are shown in bold face and underlined in the gray shaded boxes.
Page 145: General Information
- Page 146 144 UNDERSTANDING THE FEATURES OF YOUR VEHICLE If no command is spoken the system will say one of two The system will best recognize your speech if the windows responses: are closed, and the heater/air conditioning fan is set to low. •...
Page 147: Uconnect Voice Commands
- Page 148 146 UNDERSTANDING THE FEATURES OF YOUR VEHICLE Voice Tree...
- Page 149 UNDERSTANDING THE FEATURES OF YOUR VEHICLE 147 NOTE: • You can replace “950 AM” with any other AM or FM frequency, such as “98.7 FM.” • You can replace “80’s on 8” with any other satellite station name received by the radio. •...
- Page 150 148 UNDERSTANDING THE FEATURES OF YOUR VEHICLE...
- Page 151 UNDERSTANDING THE FEATURES OF YOUR VEHICLE 149 NOTE: • You can replace the album, artist, song, genre, playlist, podcast and audio book names with any corresponding names on the current device that is playing. • You can replace “8” with any track on the CD that is currently playing.
- Page 152 150 UNDERSTANDING THE FEATURES OF YOUR VEHICLE...
- Page 153 UNDERSTANDING THE FEATURES OF YOUR VEHICLE 151 NOTE: • You can replace “NFL” with any league shown on the sports league screen. For example you can say “Show MLB headlines” or “Show PGA headlines.” • You can replace “Headlines” with any menu items shown on a league screen.
- Page 154 152 UNDERSTANDING THE FEATURES OF YOUR VEHICLE...
- Page 155 UNDERSTANDING THE FEATURES OF YOUR VEHICLE 153 NOTE: • Only available with Navigation equipped vehicles. • You can replace “Player” with “Radio,” “Navigation,” “Phone,” “Climate,” “More” or “Settings.” • Navigation commands only work if equipped with Navigation. • Available Voice Commands are shown in bold face and shaded grey.
- Page 156 154 UNDERSTANDING THE FEATURES OF YOUR VEHICLE...
Page 157: Understanding The Features Of Your Vehicle
Page 158: driver's power seat - if equipped, page 159: power lumbar - if equipped.
- Page 160 158 UNDERSTANDING THE FEATURES OF YOUR VEHICLE If the HI-level setting is selected, the system will automati- WARNING! cally switch to LO-level after approximately 60 minutes of • Persons who are unable to feel pain to the skin continuous operation. At that time, the display will change from HI to LO, indicating the change.
Page 161: Manual Front Seat Adjustments
Page 162: driver's seat height adjustment - if equipped, page 163: fold-flat front passenger seat - if equipped.
- Page 164 162 UNDERSTANDING THE FEATURES OF YOUR VEHICLE This system is designed to help prevent or reduce the WARNING! extent of injuries to the driver and front passenger in • All occupants, including the driver, should not oper- certain types of rear impacts. Refer to “Occupant Re- straints”...
- Page 165 UNDERSTANDING THE FEATURES OF YOUR VEHICLE 163 For comfort, the Active Head Restraints can be tilted forward and backward. To tilt the head restraint closer to the back of your head, pull forward on the bottom of the head restraint. Push rearward on the bottom of the head restraint to move the head restraint away from your head.
- Page 166 164 UNDERSTANDING THE FEATURES OF YOUR VEHICLE push the adjustment button located on the base of the head WARNING! restraint, and push downward on the head restraint. • All occupants, including the driver, should not oper- ate a vehicle or sit in a vehicle’s seat until the head restraints are placed in their proper positions in order to minimize the risk of neck injury in the event of a collision.
Page 167: Third Row Passenger Seats - Seven Passenger Models
- Page 168 166 UNDERSTANDING THE FEATURES OF YOUR VEHICLE WARNING! • It is extremely dangerous to ride in a cargo area, inside or outside of a vehicle. In a collision, people riding in these areas are more likely to be seriously injured or killed. •...
- Page 169 UNDERSTANDING THE FEATURES OF YOUR VEHICLE 167 4. Gently guide the seatback into the folded position. NOTE: You may experience deformation in the seat cush- ion from the seat belt buckles if the seats are left folded for an extended period of time. This is normal and by simply opening the seats to the open position, over time the seat cushion will return to its normal shape.
- Page 170 168 UNDERSTANDING THE FEATURES OF YOUR VEHICLE Recliner Adjustment WARNING! The recline lever is on the outboard side of the seat. To • Adjusting a seat while the vehicle is moving is recline the seatback, lean back, lift the lever, position the dangerous.
- Page 171 UNDERSTANDING THE FEATURES OF YOUR VEHICLE 169 Stadium Tip ’n Slide (Easy Entry/Exit Seat) — Seven Passenger Models This feature allows passengers to easily enter or exit the third-row passenger seats from either side of the vehicle. To Move The Second-Row Passenger Seat Forward NOTE: Raise the seatback/armrest before moving the seat to allow for full seat travel.
- Page 172 170 UNDERSTANDING THE FEATURES OF YOUR VEHICLE To Unfold And Move The Second-Row Passenger Seat Rearward Move the seatback rearward until it locks in place and then continue sliding the seat rearward on its tracks until it locks in place. Push the seat cushion downward to lock it in place.
Page 173: 50/50 Split Third-Row Passenger Seats With Fold-Flat Feature - Seven Passenger Models
- Page 174 172 UNDERSTANDING THE FEATURES OF YOUR VEHICLE To Unfold The Seatback WARNING! Grasp the assist strap loop on the seatback and pull it • Be certain that the seatback is locked securely into toward you to raise the seatback. Continue to raise the position.
Page 175: To Open And Close The Hood
Page 176: lights, page 177: automatic headlights, page 178: headlight time delay, page 179: fog lights - if equipped, page 180: turn signals, page 181: map/reading lights, page 182: windshield wipers and washers, page 183: windshield wiper operation, page 184: windshield washers, page 185: tilt/telescoping steering column, page 186: speed control - if equipped, page 187: to activate, page 188: to deactivate, page 189: to accelerate for passing, page 190: parksense rear park assist - if equipped, page 191: parksense display.
- Page 192 190 UNDERSTANDING THE FEATURES OF YOUR VEHICLE Slow Tone Fast Tone...
- Page 193 UNDERSTANDING THE FEATURES OF YOUR VEHICLE 191 The vehicle is close to the obstacle when the warning display shows one flashing arc and sounds a continuous tone. The following chart shows the warning alert opera- tion when the system is detecting an obstacle: Continuous Tone WARNING ALERTS Rear Distance...
Page 194: Enabling And Disabling Parksense
Page 195: parksense system usage precautions, page 196: parkview rear back up camera - if equipped.
- Page 197 UNDERSTANDING THE FEATURES OF YOUR VEHICLE 195 receiver. The static grid lines will show separate zones that Different colored zones indicate the distance to the rear of will help indicate the distance to the rear of the vehicle. the vehicle. NOTE: The ParkView Rear Back Up Camera has program- The following table shows the approximate distances for mable modes of operation that may be selected through the...
Page 198: Overhead Console
Page 199: sunglasses storage, page 200: garage door opener - if equipped, page 201: programming a rolling code.
- Page 202 200 UNDERSTANDING THE FEATURES OF YOUR VEHICLE 2. Place the hand-held transmitter 1 to 3 inches (3 to 8 cm) 6. Return to the vehicle and push the programmed away from the HomeLink button you wish to program HomeLink button twice (holding the button for two while keeping the HomeLink indicator light in view.
Page 203: Programming A Non-Rolling Code
Page 204: canadian/gate operator programming, page 205: using homelink, page 206: security, page 207: general information, page 208: opening sunroof - express, page 209: pinch protect feature, page 210: power outlets.
- Page 211 UNDERSTANDING THE FEATURES OF YOUR VEHICLE 209 A third fused 12 Volt power outlet is located on the back of the center console. This power outlet has power available when the ignition is in the LOCK, ON or ACC position. Rear Cargo Area Power Outlet NOTE: To ensure proper operation a MOPAR knob and element must be used.
- Page 212 210 UNDERSTANDING THE FEATURES OF YOUR VEHICLE CAUTION! • Do not exceed the maximum power of 160 Watts (13 Amps) at 12 Volts. If the 160 Watt (13 Amp) power rating is exceeded the fuse protecting the system will need to be replaced. •...
Page 213: Power Inverter - If Equipped
Page 214: power inverter operation, page 215: cupholders, page 216: storage, page 217: floor console storage.
- Page 218 216 UNDERSTANDING THE FEATURES OF YOUR VEHICLE Pull upward on the release handle, located on the front of the lid, to gain access to the storage tray and storage compartment. Center Console Storage Compartment WARNING! Center Console Storage Tray Do not operate this vehicle with a console compartment lid in the open position.
Page 219: Flip 'N Stow Front Passenger Seat Storage - If Equipped
Page 220: second-row map pocket and grocery retainers - if equipped, page 221: cargo area features.
- Page 222 220 UNDERSTANDING THE FEATURES OF YOUR VEHICLE • 50/50 split third-row passenger seats with fold flat feature, which allows for extended cargo space. Refer to “Seats” in “Understanding The Features Of Your Ve- hicle” for further information. • An optional front passenger seat with fold flat feature, which extends cargo space even further.
- Page 223 UNDERSTANDING THE FEATURES OF YOUR VEHICLE 221 • Always place cargo evenly on the cargo floor. Put The cover rolls away neatly inside its housing when not in heavier objects as low and as far forward as possible. use. You can also remove the cover from the vehicle to make more room in the cargo area.
Page 224: Rear Window Features
- Page 225 UNDERSTANDING THE FEATURES OF YOUR VEHICLE 223 Rear Wiper/Washer Rear Wiper/Washer Control Rotate the switch upward to the first detent position If the rear wiper is operating when the ignition is turned to for rear wiper operation. the LOCK position, the wiper will automatically return to the “park”...
Page 226: Rear Window Defroster
Page 227: roof luggage rack - if equipped.
- Page 228 226 UNDERSTANDING THE FEATURES OF YOUR VEHICLE 4. Attempt to move the crossbar to ensure that it is locked CAUTION! in position. • To prevent damage to the roof of your vehicle, DO NOTE: NOT carry any loads on the roof rack without the •...
- Page 229 UNDERSTANDING THE FEATURES OF YOUR VEHICLE 227 CAUTION! (Continued) • Travel at reduced speeds and turn corners carefully when carrying large or heavy loads on the roof rack. Wind forces, due to natural causes or nearby truck traffic, can add sudden upward loads. This is espe- cially true on large flat loads and may result in damage to the cargo or your vehicle.
- Page 231 UNDERSTANDING YOUR INSTRUMENT PANEL CONTENTS ▫ Trip Info ......255 INSTRUMENT PANEL FEATURES ...232 ▫...
- Page 232 230 UNDERSTANDING YOUR INSTRUMENT PANEL ▫ Accessibility ......297 UCONNECT MULTIMEDIA — VIDEO ENTERTAINMENT SYSTEM (VES) — ▫...
- Page 233 UNDERSTANDING YOUR INSTRUMENT PANEL 231 ▫ Automatic Three Zone Temperature Control (ATC) ▫ Rear Automatic Temperature Control (ATC) — If With Touchscreen — If Equipped... .318 Equipped ......325...
Page 234: Instrument Panel Features
Page 235: instrument cluster.
- Page 236 234 UNDERSTANDING YOUR INSTRUMENT PANEL 3. Speedometer WARNING! • Indicates vehicle speed. A hot engine cooling system is dangerous. You or 4. Fuel Gauge others could be badly burned by steam or boiling • The pointer shows the level of fuel in the fuel tank coolant.
Page 237: Warning And Indicator Lights
- Page 238 236 UNDERSTANDING YOUR INSTRUMENT PANEL Air Bag Warning Light Red Telltale What It Means Light Air Bag Warning Light This light will turn on for four to eight seconds as a bulb check when the ignition is placed in the ON/RUN position.
- Page 239 UNDERSTANDING YOUR INSTRUMENT PANEL 237 Brake Warning Light Red Telltale What It Means Light Brake Warning Light This light monitors various brake functions, including brake fluid level and parking brake appli- cation. If the brake light turns on it may indicate that the parking brake is applied, that the brake fluid level is low, or that there is a problem with the anti-lock brake system reservoir.
- Page 240 238 UNDERSTANDING YOUR INSTRUMENT PANEL Operation of the Brake Warning Light can be checked by WARNING! placing the ignition in the ON/RUN position. The light should illuminate for approximately two seconds. The light Driving a vehicle with the red brake light on is should then turn off unless the parking brake is applied or dangerous.
- Page 241 UNDERSTANDING YOUR INSTRUMENT PANEL 239 Engine Temperature Warning Light Red Warning What It Means Light Engine Temperature Warning Light This light warns of an overheated engine condition. As engine coolant temperatures rise and the gauge approaches H, this indicator will illuminate and a single chime will sound after reaching a set threshold.
- Page 242 240 UNDERSTANDING YOUR INSTRUMENT PANEL WARNING! CAUTION! If you continue operating the vehicle when the Trans- Continuous driving with the Transmission Tempera- mission Temperature Warning Light is illuminated you ture Warning Light illuminated will eventually cause could cause the fluid to boil over, come in contact with severe transmission damage or transmission failure.
- Page 243 UNDERSTANDING YOUR INSTRUMENT PANEL 241 Electronic Throttle Control (ETC) Warning Light Red Telltale What It Means Light Electronic Throttle Control (ETC) Warning Light This light informs you of a problem with the Electronic Throttle Control (ETC) system. If a prob- lem is detected while the engine is running, the light will either stay on or flash depending on the nature of the problem.
- Page 244 242 UNDERSTANDING YOUR INSTRUMENT PANEL Door Open Warning Light — If Equipped Red Telltale What It Means Light Door Open Warning Light This indicator will illuminate when a door is ajar/open and not fully closed. NOTE: If the vehicle is moving, there will also be a single chime. Liftgate Open Warning Light —...
Page 245: Yellow Telltale Indicator Lights
- Page 246 244 UNDERSTANDING YOUR INSTRUMENT PANEL CAUTION! Prolonged driving with the Malfunction Indicator Light (MIL) on could cause damage to the vehicle control system. It also could affect fuel economy and driveability. If the MIL is flashing, severe catalytic converter damage and power loss will soon occur. Immediate service is required.
- Page 247 UNDERSTANDING YOUR INSTRUMENT PANEL 245 Yellow Telltale What It Means Light • The ESC system will make buzzing or clicking sounds when it is active. This is normal; the sounds will stop when ESC becomes inactive. • This light will come on when the vehicle is in an ESC event. Electronic Stability Control (ESC) OFF Indicator Light —...
- Page 248 246 UNDERSTANDING YOUR INSTRUMENT PANEL can lead to tire failure. Under-inflation also reduces fuel CAUTION! efficiency and tire tread life, and may affect the vehicle’s handling and stopping ability. Do not continue driving with one or more flat tires as handling may be compromised.
- Page 249 UNDERSTANDING YOUR INSTRUMENT PANEL 247 ensure that the replacement or alternate tires and wheels CAUTION! (Continued) allow the TPMS to continue to function properly. damage may result when using replacement equip- ment that is not of the same size, type, and/or style. CAUTION! Aftermarket wheels can cause sensor damage.
Page 250: Green Telltale Indicator Lights
- Page 251 UNDERSTANDING YOUR INSTRUMENT PANEL 249 Front Fog Indicator Light — If Equipped Green Telltale What It Means Light Front Fog Indicator Light — If Equipped This indicator will illuminate when the front fog lights are on. Turn Signal Indicator Lights Green Telltale What It Means Light...
Page 252: White Telltale Indicator Lights
Page 253: blue telltale indicator lights, page 254: instrument cluster display location and controls, page 255: oil change due, page 256: fuel economy, page 257: vehicle speed, page 258: tire pressure, page 259: messages.
- Page 260 258 UNDERSTANDING YOUR INSTRUMENT PANEL • Installing options like additional lights, upfitter electri- The electrical loads that may be switched off (if equipped), and vehicle functions which can be effected by load cal accessories, audio systems, alarms and similar de- reduction: vices.
Page 261: Cybersecurity
- Page 262 260 UNDERSTANDING YOUR INSTRUMENT PANEL NOTE: WARNING! • FCA or your dealer may contact you directly regarding • It is not possible to know or to predict all of the software updates. possible outcomes if your vehicle’s systems are • To help further improve vehicle security and minimize breached.
Page 263: Uconnect Settings
- Page 264 262 UNDERSTANDING YOUR INSTRUMENT PANEL NOTE: Only one touchscreen area may be selected at a Press the desired setting button on the touchscreen to time. change the setting using the description shown on the following pages for each setting. 1 — Radio 4.3 Buttons On The Faceplate Radio 4.3 Buttons On The Touchscreen Push the SETTINGS button on the faceplate to access the Settings screen, use the “Page Up”/“Page Down”...
- Page 265 UNDERSTANDING YOUR INSTRUMENT PANEL 263 Display After pressing the “Display” button on the touchscreen, the following settings will be available: Setting Name Selectable Options Brightness – NOTE: The “Brightness” setting can also be adjusted by selecting any point on the scale between the “+” and “–” buttons on the touchscreen.
- Page 266 264 UNDERSTANDING YOUR INSTRUMENT PANEL Clock After pressing the “Clock & Date” button on the touch- screen the following settings will be available: Setting Name Selectable Options Set Time and Format 12 hour 24 hour NOTE: Within the “Set Time and Format” setting, press the corresponding arrow buttons on the touchscreen to adjust to the correct time.
- Page 267 UNDERSTANDING YOUR INSTRUMENT PANEL 265 Setting Name Selectable Options Hill Start Assist — If Equipped Lights After pressing the “Lights” button on the touchscreen the following settings will be available: Setting Name Selectable Options Headlight Off Delay — 0 sec 30 sec 60 sec 90 sec...
- Page 268 266 UNDERSTANDING YOUR INSTRUMENT PANEL Setting Name Selectable Options Auto High Beams — If Equipped NOTE: When the “Automatic High Beam Headlamps” is selected, the high beam headlights will activate/deactivate auto- matically under certain conditions. Daytime Running Lights Steering Directed Lights —...
- Page 269 UNDERSTANDING YOUR INSTRUMENT PANEL 267 Setting Name Selectable Options Auto Unlock On Exit NOTE: When the “Auto Unlock On Exit” feature is selected, all doors will unlock when the vehicle is stopped and the trans- mission is in the PARK or NEUTRAL position and the driver’s door is opened. Flash Lights With Lock Sound Horn With Lock Sound Horn With Remote Start...
- Page 270 268 UNDERSTANDING YOUR INSTRUMENT PANEL Auto-On Comfort & Remote Start After pressing the “Auto-On Comfort & Remote Start” button on the touchscreen the following settings will be available: Setting Name Selectable Options Auto-On Heated Seats — Remote Start All Starts If Equipped NOTE: When this feature is selected the driver’s heated seat will automatically turn on when temperatures are below 40°...
- Page 271 UNDERSTANDING YOUR INSTRUMENT PANEL 269 Setting Name Selectable Options Headlight Off Delay 0 sec 30 sec 60 sec 90 sec NOTE: When the “Headlight Off Delay” feature is selected, it allows the adjustment of the amount of time the headlights remain on after the engine is shut off.
- Page 272 270 UNDERSTANDING YOUR INSTRUMENT PANEL Setting Name Selectable Options Compass Calibration NOTE: Press “Compass Calibration” on the touchscreen to enter calibration. To start calibration of the compass, press the “Yes” but- ton on the touchscreen and complete one or more 360-degree turns (in an area free from large metal or metallic objects). A message will appear on the touchscreen when the compass has been successfully calibrated.
- Page 273 UNDERSTANDING YOUR INSTRUMENT PANEL 271 Audio After pressing the “Audio” button on the touchscreen the following settings will be available: Setting Name Adjustable Options Equalizer Bass Treble NOTE: When in this display you may adjust the “Bass”, “Mid” and “Treble” settings. Adjust the settings with the “+” and “–”...
- Page 274 272 UNDERSTANDING YOUR INSTRUMENT PANEL Phone/Bluetooth After pressing the “Phone/Bluetooth” button on the touch- screen the following settings will be available: Setting Name Selectable Options Paired Phones List of Paired Phones NOTE: This feature shows which phones are paired to the Phone/Bluetooth system. For further information, refer to the Uconnect Owner’s Manual Supplement.
Page 275: Customer Programmable Features
- Page 276 274 UNDERSTANDING YOUR INSTRUMENT PANEL Display After pressing the Display button on the touchscreen the following settings will be available: Setting Name Selectable Options Display Mode Manual Auto Display Brightness With Headlights ON NOTE: To make changes to the Display Brightness with Headlights ON setting, the headlights must be on and the interior dimmer switch must not be in the party or parade positions.
- Page 277 UNDERSTANDING YOUR INSTRUMENT PANEL 275 Setting Name Selectable Options Units Metric Voice Response Length Brief Detailed Touchscreen Beep Navigation Turn-By-Turn In Cluster — If Equipped NOTE: When the “Navigation Turn-By-Turn In Cluster” feature is selected, the turn-by-turn directions will appear in the in- strument cluster display as the vehicle approaches a designated turn within a programmed route.
- Page 278 276 UNDERSTANDING YOUR INSTRUMENT PANEL Clock After pressing the Clock button on the touchscreen the following settings will be available. Setting Name Selectable Options Sync Time With GPS — If Equipped Set Time Hours NOTE: This feature will allow you to adjust the hours. The “Sync time with GPS” button on the touchscreen must be un- checked.
- Page 279 UNDERSTANDING YOUR INSTRUMENT PANEL 277 Safety & Driving Assistance After pressing the Safety/Assistance button on the touch- screen the following settings will be available: Setting Name Selectable Options Park Assist — If Equipped Sound Only Sounds and Display NOTE: The Rear Park Assist system will scan for, and the alert the driver of, objects behind the vehicle when the transmis- sion gear selector is in REVERSE and the vehicle speed is less than 11 mph (18 km/h).
- Page 280 278 UNDERSTANDING YOUR INSTRUMENT PANEL Lights After pressing the Lights button on the touchscreen the following settings will be available: Setting Name Selectable Options Headlight Off Delay 0 sec 30 sec 60 sec 90 sec NOTE: When the “Headlight Off Delay” feature is selected, it allows the adjustment of the amount of time the headlights remain on after the engine is shut off.
- Page 281 UNDERSTANDING YOUR INSTRUMENT PANEL 279 Setting Name Selectable Options Auto Dim High Beams— If Equipped NOTE: When the “Auto Dim High Beams” feature is selected, the high beam headlights will activate/deactivate automati- cally under certain conditions. Daytime Running Lights — If Equipped Steering Directed Headlights —...
- Page 282 280 UNDERSTANDING YOUR INSTRUMENT PANEL Doors & Locks After pressing the Doors & Locks button on the touch- screen the following settings will be available: Setting Name Selectable Options Auto Door Locks NOTE: When the “Auto Door Locks” feature is selected, all doors will lock automatically when the vehicle reaches a speed of 12 mph (20 km/h).
- Page 283 UNDERSTANDING YOUR INSTRUMENT PANEL 281 Setting Name Selectable Options 1st Press Of Key Fob Unlocks Driver Door All Doors NOTE: When Driver Door is selected with 1st Press Of Key Fob Unlocks, only the driver’s door will unlock with the first press of the key fob unlock button.
- Page 284 282 UNDERSTANDING YOUR INSTRUMENT PANEL Auto-On Comfort & Remote Start After pressing the Auto-On Comfort & Remote Start button on the touchscreen the following settings will be available: Setting Name Selectable Options Auto-On Driver Heated Remote Start All Starts Seat With Vehicle Start— If Equipped NOTE: When this feature is selected the driver’s heated seat will automatically turn ON when temperatures are below 40°...
- Page 285 UNDERSTANDING YOUR INSTRUMENT PANEL 283 Engine Off Options After pressing the “Engine Off Options” button on the touchscreen the following settings will be available: Setting Name Selectable Options Engine Off Power 0 seconds 45 seconds 5 minutes 10 minutes Delay NOTE: When the “Engine Off Power Delay”...
- Page 286 284 UNDERSTANDING YOUR INSTRUMENT PANEL Compass Settings — If Equipped NOTE: Before compass calibration is performed, the com- pass variance zone should be set for best results. After pressing the “Compass Settings” button on the touchscreen the following settings will be available: Setting Name Selectable Options Compass Vari-...
- Page 287 UNDERSTANDING YOUR INSTRUMENT PANEL 285 Setting Name Selectable Options Perform Com- pass Calibra- tion NOTE: Press “Compass Calibration” on the touchscreen to enter calibration. To start calibration of the compass, press the “On” but- ton on the touchscreen and complete one or more 360-degree turns (in an area free from large metal or metallic objects). A message will appear on the touchscreen when the compass has been successfully calibrated.
- Page 288 286 UNDERSTANDING YOUR INSTRUMENT PANEL Audio After pressing the Audio button on the touchscreen the following settings will be available. Setting Name Adjustable Options Equalizer Bass Treble NOTE: When in this display you may adjust the “Bass”, “Mid” and “Treble” settings. Adjust the settings with the “+” and “–”...
- Page 289 UNDERSTANDING YOUR INSTRUMENT PANEL 287 Phone/Bluetooth After pressing the “Phone/Bluetooth” button on the touch- screen the following settings will be available: Setting Name Selectable Options Paired Devices List of Paired Devices NOTE: This feature shows which devices are paired to the Phone/Bluetooth system. For further information, refer to the Uconnect Owner’s Manual Supplement.
- Page 290 288 UNDERSTANDING YOUR INSTRUMENT PANEL Setting Name Selectable Options Subscription Info Sirius ID NOTE: New vehicle purchasers or lessees will receive a free limited time subscription to SiriusXM Satellite Radio with your radio. Following the expiration of the free services, it will be necessary to access the information on the Subscription Information screen to re-subscribe.
Page 291: Uconnect Multimedia - Video Entertainment System (Ves) - If Equipped
Page 292: single video screen, page 293: listen to an audio source on channel 2 while a video is playing on channel 1, page 294: important notes for single video screen system, page 295: ves remote control - if equipped.
- Page 296 294 UNDERSTANDING YOUR INSTRUMENT PANEL 9. ▪ (Stop) – Stops disc play. 16. BACK – When navigating in menu mode, push to return to the previous screen. When navigating a DVDs 10. PROG Up/Down – When listening to a radio mode, disc menu, the operation depends on the disc’s con- pushing PROG Up selects the next preset and pushing tents.
Page 297: Remote Control Storage
Page 298: ves headphones operation, page 299: controls, page 300: unwired stereo headphone lifetime limited, page 301: system information.
- Page 302 300 UNDERSTANDING YOUR INSTRUMENT PANEL Numeric Keypad Menu 2. When the digit is highlighted, push the remote control’s ENTER button to select the digit. Repeat these steps until all digits are entered. 3. To delete the last digit, navigate to the Del button and push the remote control’s ENTER button.
- Page 303 UNDERSTANDING YOUR INSTRUMENT PANEL 301 Options Menu When watching a video source (DVD Video with the disc in Play mode, Aux Video, etc.), pressing the “Options” button on the touchscreen activates the Options Settings menu. From this menu you can adjust Audio, Subtitles, Angle and Title.
- Page 304 302 UNDERSTANDING YOUR INSTRUMENT PANEL If the screen is closed and there is no audio heard, verify DVD Audio Support that the headphones are turned on (the ON indicator is When a DVD-Audio disc is inserted in the DVD player, the illuminated) and the headphone selector switch is on the DVD-Audio title on the disc is played by default (most desired channel.
- Page 305 UNDERSTANDING YOUR INSTRUMENT PANEL 303 • Open sessions are ignored. Only sessions that are closed Compressed Audio Files (MP3, WMA AND ACC) are playable. The DVD player is capable of playing MP3 (MPEG-1 Audio • For multi-session CDs that contain only multiple CD- Layer 3 with data bitrates from 32 to 320 kbit/s, including Audio sessions, the player will renumber the tracks so variable bit rates), WMA (All Standard 8.x, 9.x Windows...
- Page 306 304 UNDERSTANDING YOUR INSTRUMENT PANEL • Other compression formats such as AAC, MP3 Pro, Ogg Disc Errors Vorbis, and ATRAC3 will not play. The DVD player will If the DVD player is unable to read the disc, a Disc Error automatically skip the file and begin playing the next message is displayed on the Radio display and the disc is available file.
Page 307: Ipod/Usb/Mp3 Control
Page 308: left-hand switch functions for radio operation, page 309: radio operation and mobile devices, page 310: climate controls.
- Page 311 UNDERSTANDING YOUR INSTRUMENT PANEL 309 Buttons On The Touchscreen Buttons on the touchscreen are accessible on the Uconnect system screen. Manual Temperature Controls — Buttons On The Faceplate Radio 4.3 Manual 3 — Zone Temperature Controls — Buttons On The Touchscreen...
- Page 312 310 UNDERSTANDING YOUR INSTRUMENT PANEL 2. A/C Button Press and release to change the current setting, the indica- tor illuminates when A/C is ON. Performing this function again will cause the A/C operation to switch into manual mode and the A/C indicator will turn off. 3.
- Page 313 UNDERSTANDING YOUR INSTRUMENT PANEL 311 5. Rear Defrost Button 6. Rear Climate Button — If Equipped Press and release this button to turn on the rear window Press and release this button to turn on the rear climate defroster and the heated outside mirrors (if equipped). An controls.
- Page 314 312 UNDERSTANDING YOUR INSTRUMENT PANEL 9. SYNC Button On The Touchscreen Use the small blower icon to reduce the blower setting and Press the Sync button on the touchscreen to toggle the Sync the large blower icon to increase the blower setting. Blower feature On/Off.
- Page 315 UNDERSTANDING YOUR INSTRUMENT PANEL 313 NOTE: BI-LEVEL mode is designed under comfort condi- 14. Driver Temperature Control Up Button tions to provide cooler air out of the panel outlets and (Radio 8.4 Only) warmer air from the floor outlets. Provides the driver with independent temperature control. •...
- Page 316 314 UNDERSTANDING YOUR INSTRUMENT PANEL Climate Control Functions MAX A/C A/C (Air Conditioning) MAX A/C sets the control for maximum cooling perfor- mance. The Air Conditioning (A/C) button allows the operator to manually activate or deactivate the air conditioning sys- Press and release to toggle between MAX A/C and the tem.
Page 317: Rear Manual Temperature Control (Mtc) - If Equipped
- Page 318 316 UNDERSTANDING YOUR INSTRUMENT PANEL Controlling The Rear Climate Controls From The Front Uconnect Touchscreen The Three-Zone climate control system allows for adjust- ment of the rear climate controls from the front ATC panel. To change the rear system settings: •...
- Page 319 UNDERSTANDING YOUR INSTRUMENT PANEL 317 CAUTION! Interior air enters the Rear Automatic Temperature Control System through an intake grille, located in the right side trim panel. The rear outlets are located in the right side trim panel. Do not block or place objects directly in front of the inlet grille or heater outlets.
- Page 320 318 UNDERSTANDING YOUR INSTRUMENT PANEL Rear Mode Control Automatic Three Zone Temperature Control (ATC) With Touchscreen — If Equipped Headliner Mode Buttons On The Faceplate Air comes from the outlets in the headliner. Each of these outlets can be individually adjusted to direct Buttons on the faceplate are located on the left and right the flow of air.
- Page 321 UNDERSTANDING YOUR INSTRUMENT PANEL 319 Buttons On The Touchscreen Buttons On The Touchscreen are accessible on the Uconnect system screen. Automatic Temperature Controls — Buttons On The Faceplate Radio 4.3 Automatic 3 — Zone Temperature Controls — Buttons On The Touchscreen...
- Page 322 320 UNDERSTANDING YOUR INSTRUMENT PANEL 2. A/C Button Press and release to change the current setting, the indica- tor illuminates when A/C is ON. Performing this function again will cause the A/C operation to switch into manual mode and the A/C indicator will turn off. 3.
- Page 323 UNDERSTANDING YOUR INSTRUMENT PANEL 321 window defrosting and defogging. Performing this func- 7. Rear Climate Button — If Equipped tion will cause the ATC to switch into manual mode. If the Press and release this button to turn on the rear climate front defrost mode is turned off the climate system will controls.
- Page 324 322 UNDERSTANDING YOUR INSTRUMENT PANEL setting. Changing the passenger temperature setting while 12. Modes in Sync will automatically exit this feature. Sync will also The airflow distribution mode can be adjusted so air comes function with the rear climate controls. Changing the rear from the instrument panel outlets, floor outlets and demist climate control temperature setting will automatically exit outlets.
- Page 325 UNDERSTANDING YOUR INSTRUMENT PANEL 323 • Floor Mode 16. Temperature Control (Radio 4.3) Air comes from the floor outlets. A slight Press the driver or passenger temperature button on the amount of air is directed through the defrost touchscreen to regulate the temperature of the air inside and side window demister outlets.
- Page 326 324 UNDERSTANDING YOUR INSTRUMENT PANEL MAX A/C NOTE: In cold weather, use of Recirculation mode may lead to excessive window fogging. The Recirculation mode MAX A/C sets the control for maximum cooling perfor- is not allowed in Defrost mode to improve window clear- mance.
- Page 327 UNDERSTANDING YOUR INSTRUMENT PANEL 325 NOTE: The operator can also select the direction of the airflow by selecting one of the available mode settings. A/C operation • It is not necessary to move the temperature settings. The and Recirculation control can also be manually selected in system automatically adjusts the temperature, mode, Manual operation.
- Page 328 326 UNDERSTANDING YOUR INSTRUMENT PANEL The rear system temperature control buttons are located in the Uconnect system, located on the instrument panel. Uconnect 4.3 Automatic Rear Climate Buttons On The Touchscreen Uconnect 8.4 Automatic Rear Climate Buttons On The 1 — Blower Up Button 5 —...
- Page 329 UNDERSTANDING YOUR INSTRUMENT PANEL 327 Controlling The Rear Climate Controls From The The rear ATC is located in the headliner, near the center of Front ATC Panel the vehicle. • Press the Rear Temperature Lock button on the Uconnect The Three-Zone ATC system allows for adjustment of the touchscreen.
- Page 330 328 UNDERSTANDING YOUR INSTRUMENT PANEL NOTE: It is not necessary to move the temperature settings high. This allows the rear seat occupants to control the for cold or hot vehicles. The system automatically adjusts volume of air circulated in the rear of the vehicle. the temperature, mode and fan speed to provide comfort as quickly as possible.
- Page 331 UNDERSTANDING YOUR INSTRUMENT PANEL 329 Rear Mode Control Operating Tips Auto Mode NOTE: Refer to the chart at the end of this section for suggested control settings for various weather conditions. • The rear system automatically maintains the correct mode and comfort level desired by the rear seat occu- Summer Operation pants.
- Page 332 330 UNDERSTANDING YOUR INSTRUMENT PANEL Window Fogging Outside Air Intake Interior fogging on the windshield can be quickly removed Make sure the air intake, located directly in front of the by turning the mode selector to Defrost. The Defrost/Floor windshield, is free of obstructions such as leaves. Leaves mode can be used to maintain a clear windshield and collected in the air intake may reduce airflow, and if they provide sufficient heating.
- Page 333 UNDERSTANDING YOUR INSTRUMENT PANEL 331 Manual Control Setting Suggestions For Various Weather Conditions...
- Page 335 STARTING AND OPERATING CONTENTS STARTING PROCEDURES ....337 AUTOSTICK ......348 ▫...
- Page 336 334 STARTING AND OPERATING ▫ Electronic Brake Force Distribution (EBD)..356 ▫ Tire Pressures For High Speed Operation ..377 ▫ Brake System Warning Light ....356 ▫...
- Page 337 STARTING AND OPERATING 335 ▫ Premium System ..... . .390 ▫ Starting ......399 ▫...
- Page 338 336 STARTING AND OPERATING ▫ Trailer Towing Weights (Maximum Trailer Weight ▫ Towing Tips ......412 Ratings) .
Page 339: Starting Procedures
Page 340: keyless enter-n-go - ignition, page 341: extreme cold weather (below -22°f or −30°c), page 342: after starting, page 343: automatic transmission, page 344: ignition park interlock, page 345: gear ranges.
- Page 346 344 STARTING AND OPERATING When exiting the vehicle, always: WARNING! (Continued) • Apply the parking brake. engine is idling normally and your foot is firmly • Shift the transmission into PARK. pressing the brake pedal. • Unintended movement of a vehicle could injure •...
- Page 347 STARTING AND OPERATING 345 REVERSE (R) WARNING! (Continued) This range is for moving the vehicle backward. Shift into the ignition in the ACC or ON/RUN mode. A child REVERSE only after the vehicle has come to a complete could operate power windows, other controls, or stop.
- Page 348 346 STARTING AND OPERATING During cold temperatures, transmission operation may be CAUTION! (Continued) modified depending on engine and transmission tempera- Towing” in “Starting And Operating” and “Towing A ture as well as vehicle speed. This feature improves warm Disabled Vehicle” in “What To Do In Emergencies” for up time of the engine and transmission to achieve maxi- further information.
- Page 349 STARTING AND OPERATING 347 In the event of a momentary problem, the transmission can Overdrive Operation be reset to regain all forward gears by performing the The automatic transmission includes an electronically con- following steps: trolled Overdrive (top gear). The transmission will auto- matically shift into Overdrive if the following conditions 1.
Page 350: Autostick
Page 351: all wheel drive (awd) - if equipped, page 352: driving on slippery surfaces, page 353: driving through water, page 354: power steering, page 355: power steering fluid check.
- Page 356 354 STARTING AND OPERATING When the parking brake is applied with the ignition switch WARNING! ON, the “Brake Warning Light” in the instrument cluster • Never use the PARK position as a substitute for the will illuminate. parking brake. Always apply the parking brake fully NOTE: when parked to guard against vehicle movement and •...
Page 357: Brake System
Page 358: electronic brake control system.
- Page 359 STARTING AND OPERATING 357 You also may experience the following when ABS activates: WARNING! (Continued) • The ABS motor noise (it may continue to run for a short • The ABS cannot prevent the natural laws of physics time after the stop). from acting on the vehicle, nor can it increase brak- •...
Page 360: Brake Assist System (Bas)
- Page 361 STARTING AND OPERATING 359 The following conditions must be met in order for HSA to WARNING! (Continued) activate: active driving involvement. It is always the driver’s • The feature must be enabled. responsibility to be attentive to distance to other ve- •...
- Page 362 360 STARTING AND OPERATING For vehicles not equipped with the instrument cluster WARNING! (Continued) display, perform the following steps: or apply more vehicle brake pressure prior to releas- 1. Center the steering wheel (front wheels pointing ing the brake pedal. straight forward).
Page 363: Traction Control System (Tcs)
- Page 364 362 STARTING AND OPERATING ESC Operating Modes WARNING! (Continued) NOTE: Depending upon model and mode of operation, the turns, driving on very slippery surfaces, or hydro- ESC system may have multiple operating modes. planing. ESC also cannot prevent accidents resulting from loss of vehicle control due to inappropriate ESC On driver input for the conditions.
- Page 365 STARTING AND OPERATING 363 NOTE: ESC Activation/Malfunction Indicator Light and ESC OFF Indicator Light • When in “Partial Off” mode, the TCS functionality of ESC, (except for the limited slip feature described in the TCS section), has been disabled and the “ESC Off The “ESC Activation/Malfunction Indicator Indicator Light”...
Page 366: Electronic Roll Mitigation (Erm)
Page 367: trailer sway control (tsc).
- Page 368 366 STARTING AND OPERATING NOTE: tires is the same as for P-Metric tires except for the letters “LT” that are molded into the sidewall preceding the • P (Passenger) — Metric tire sizing is based on U.S. size designation. Example: LT235/85R16. design standards.
- Page 369 STARTING AND OPERATING 367 EXAMPLE: 65, 85, 80 = Aspect ratio in percent (%) – Ratio of section height to section width of tire, or 10.5 = Section width in inches (in) R = Construction code – R means radial construction, or –...
Page 370: Tire Identification Number (Tin)
Page 371: tire terminology and definitions, page 372: tire loading and tire pressure.
- Page 373 STARTING AND OPERATING 371 Tire And Loading Information Placard WARNING! (Continued) • Improperly inflated tires are dangerous and can cause collisions. Under-inflation increases tire flex- ing and can result in over-heating and tire failure. Over-inflation reduces a tire’s ability to cushion shock.
- Page 374 372 STARTING AND OPERATING Loading Steps For Determining Correct Load Limit— The vehicle maximum load on the tire must not exceed the (1) Locate the statement “The combined weight of load carrying capacity of the tire on your vehicle. You will occupants and cargo should never exceed XXX kg or not exceed the tire’s load carrying capacity if you adhere to XXX lbs.”...
- Page 375 STARTING AND OPERATING 373 Metric Example For Load Limit cargo/luggage, and towing capacities of your vehicle with varying seating configurations and number and For example, if “XXX” amount equals 635 kg, and there size of occupants. This table is for illustration purposes will be five 68 kg passengers in your vehicle, the amount of only and may not be accurate for the seating and load available cargo and luggage load capacity is 295 kg (635-...
- Page 376 374 STARTING AND OPERATING WARNING! Overloading of your tires is dangerous. Overloading can cause tire failure, affect vehicle handling, and increase your stopping distance. Use tires of the rec- ommended load capacity for your vehicle. Never over- load them.
Page 377: Tires - General Information
Page 378: tire inflation pressures, page 379: tire pressures for high speed operation, page 380: tire types, page 381: run flat tires - if equipped.
- Page 382 380 STARTING AND OPERATING Compact Spare Tire — If Equipped WARNING! The compact spare is for temporary emergency use only. Compact and Collapsible spares are for temporary You can identify if your vehicle is equipped with a compact emergency use only. With these spares, do not drive spare by looking at the spare tire description on the Tire more than 50 mph (80 km/h).
- Page 383 STARTING AND OPERATING 381 Do not install a wheel cover or attempt to mount a Limited Use Spare — If Equipped conventional tire on the collapsible spare wheel, since the The limited use spare tire is for temporary emergency use wheel is designed specifically for the collapsible spare tire.
Page 384: Tire Spinning
Page 385: life of tire, page 386: tire chains (traction devices), page 387: tire rotation recommendations, page 388: department of transportation uniform tire quality grades, page 389: traction grades, page 390: tire pressure monitor system (tpms).
- Page 391 STARTING AND OPERATING 389 the tire pressure to rise to approximately 28 psi (193 kPa), CAUTION! (Continued) but the “Tire Pressure Monitoring Telltale Light” will still • After inspecting or adjusting the tire pressure, al- be on. In this situation, the “Tire Pressure Monitoring ways reinstall the valve stem cap.
Page 392: Premium System
- Page 393 STARTING AND OPERATING 391 Tire Pressure Monitoring Low Pressure Warnings recommended cold placard pressure value. Once the sys- tem receives the updated tire pressures, the system will automatically update and the graphic display in the instru- The “Tire Pressure Monitoring Telltale Light” will ment cluster will change color back to the original color, illuminate in the instrument cluster and a chime and the “Tire Pressure Monitoring Telltale Light”...
- Page 394 392 STARTING AND OPERATING • If you install the compact spare tire in place of a road tire If the ignition switch is cycled, this sequence will repeat, providing the system fault still exists. If the system fault no that has a pressure below the low-pressure warning longer exists, the “Tire Pressure Monitoring Telltale Light”...
Page 395: General Information
Page 396: fuel requirements, page 397: gasoline/oxygenate blends, page 398: materials added to fuel, page 399: carbon monoxide warnings, page 400: ethanol fuel (e-85), page 401: starting, page 402: adding fuel, page 403: loose fuel filler cap message, page 404: gross vehicle weight rating (gvwr), page 405: trailer towing.
- Page 406 404 STARTING AND OPERATING Weight-Carrying Hitch WARNING! A weight-carrying hitch supports the trailer tongue weight, It is important that you do not exceed the maximum just as if it were luggage located at a hitch ball or some front or rear GAWR. A dangerous driving condition other connecting point of the vehicle.
Page 407: Trailer Hitch Classification
Page 408: ratings), page 409: trailer and tongue weight, page 410: towing requirements.
- Page 411 STARTING AND OPERATING 409 • Check the trailer tires for proper tire inflation pressures WARNING! (Continued) before trailer usage. • Vehicles with trailers should not be parked on a • Check for signs of tire wear or visible tire damage before grade.
- Page 412 410 STARTING AND OPERATING • Trailer brakes are recommended for trailers over Towing Requirements — Trailer Lights And Wiring 1,000 lbs (453 kg) and required for trailers in excess of (If Equipped) 2,000 lbs (907 kg). Whenever you pull a trailer, regardless of the trailer size, stoplights and turn signals on the trailer are required for WARNING! motoring safety.
- Page 413 STARTING AND OPERATING 411 Four-Pin Connector Seven-Pin Connector 1 — Female Pins 4 — Park 1 — Battery 5 — Ground 2 — Male Pin 5 — Left Stop/Turn 2 — Backup Lamps 6 — Left Stop/Turn 3 — Ground 6 —...
Page 414: Trailer Towing Weights
Page 415: recreational towing (behind motorhome, etc.).
- Page 416 414 STARTING AND OPERATING Recreational Towing CAUTION! (Continued) Front-Wheel Drive (FWD) Models • Towing this vehicle in violation of the above require- ments can cause severe transmission damage. Dam- Recreational towing is allowed ONLY if the front wheels age from improper towing is not covered under the are OFF the ground.
- Page 417 WHAT TO DO IN EMERGENCIES CONTENTS HAZARD WARNING FLASHERS ... .416 JUMP-STARTING ......429 ▫...
Page 418: Hazard Warning Flashers
Page 419: 2.4l engine - if equipped.
- Page 420 418 WHAT TO DO IN EMERGENCIES Inspect the wheel mounting surface prior to mounting the tire and remove any corrosion or loose particles. Torque Patterns After 25 miles (40 km), check the lug nut/bolt torque to be sure that all the lug nuts/bolts are properly seated against Wheel Mounting Surface the wheel.
Page 421: Jacking And Tire Changing
Page 422: preparations for jacking, page 423: spare tire stowage, page 424: jacking instructions.
- Page 425 WHAT TO DO IN EMERGENCIES 423 Jacking Locations Jack Warning Label 1. Remove the spare tire, jack, and jack-handle from stow- age. CAUTION! 2. Loosen, but do not remove, the wheel nuts on the wheel with the flat tire. Turn the wheel nuts counterclockwise Do not attempt to raise the vehicle by jacking on one turn while the wheel is still on the ground.
- Page 426 424 WHAT TO DO IN EMERGENCIES 3. Place the jack in the notches underneath the lift area that is closest to the flat tire. Center the jack saddle between the drain flute formations on the sill flange. Turn the jack screw clockwise to firmly engage the jack saddle with the lift area of the sill flange.
- Page 427 WHAT TO DO IN EMERGENCIES 425 Rear Jacking Location Rear Jack Engaged With Jack Handle 4. Raise the vehicle by turning the jack screw clockwise with the jack handle. Raise the vehicle until the tire just clears the road surface and enough clearance is obtained to install the spare tire.
- Page 428 426 WHAT TO DO IN EMERGENCIES WARNING! Raising the vehicle higher than necessary can make the vehicle less stable. It could slip off the jack and hurt someone near it. Raise the vehicle only enough to remove the tire. 5. Remove the wheel nuts. For vehicles so equipped, remove the wheel cover from the wheel by hand.
Page 429: Road Tire Installation
- Page 430 428 WHAT TO DO IN EMERGENCIES 3. Align the valve notch in the wheel cover with the valve WARNING! stem on the wheel. Install the cover by hand, snapping the cover over the two lug nuts. Do not use a hammer or To avoid the risk of forcing the vehicle off the jack, do excessive force to install the cover.
Page 431: Jump-Starting
Page 432: preparations for jump-start, page 433: jump-starting procedure, page 434: freeing a stuck vehicle.
- Page 435 WHAT TO DO IN EMERGENCIES 433 CAUTION! WARNING! Racing the engine or spinning the wheels may lead to Fast spinning tires can be dangerous. Forces generated transmission overheating and failure. Allow the en- by excessive wheel speeds may cause damage, or even gine to idle with the transmission in NEUTRAL for at failure, of the axle and tires.
Page 436: Gear Selector Override
- Page 437 WHAT TO DO IN EMERGENCIES 435 Towing Condition Wheel OFF The Ground FWD MODELS AWD MODELS Flat Tow NONE IF transmission is oper- NOT ALLOWED able: Wheel Lift Or Dolly Tow Rear NOT ALLOWED • Transmission in NEU- TRAL • 25 mph (40 km/h) max speed •...
Page 438: All-Wheel Drive (Awd) Models
Page 439: enhanced accident response system (ears).
- Page 441 MAINTAINING YOUR VEHICLE CONTENTS ▫ Air Conditioner Maintenance ....450 ENGINE COMPARTMENT — 2.4L ...441 ▫ A/C Air Filter — If Equipped ... . .451 ENGINE COMPARTMENT —...
- Page 442 440 MAINTAINING YOUR VEHICLE ▫ Cleaning The Cupholders ....473 ▫ Front Fog Lamp ..... . .482 ▫...
Page 443: Engine Compartment - 2.4L
Page 444: engine compartment - 3.6l, page 445: onboard diagnostic system - obd ii, page 446: loose fuel filler cap message, page 447: replacement parts, page 448: engine oil.
- Page 449 MAINTAINING YOUR VEHICLE 447 American Petroleum Institute (API) Engine Oil CAUTION! Identification Symbol Do not overfill the engine. Overfilling the engine will cause oil aeration, which can lead to loss of oil pressure This symbol means that the oil has been and an increase in oil temperature.
- Page 450 448 MAINTAINING YOUR VEHICLE The engine oil filler cap also shows the recommended Lubricants which do not have both the engine oil certifi- engine oil viscosity for your engine. For information on the cation mark and the correct SAE viscosity grade number engine oil filler cap location, refer to “Engine Compart- should not be used.
Page 451: Engine Oil Filter
Page 452: air conditioner maintenance, page 453: a/c air filter - if equipped.
- Page 454 452 MAINTAINING YOUR VEHICLE The A/C air filter is located in the fresh air inlet behind the 4. Disengage the two retaining tabs that secure the filter glove compartment. Perform the following steps to replace cover to the HVAC housing and remove the cover. the filter: 1.
Page 455: Body Lubrication
- Page 456 454 MAINTAINING YOUR VEHICLE Rear Wiper Blade Removal/Installation 3. Grab the bottom of the wiper blade and rotate it forward to unsnap the blade pivot pin from the wiper blade holder. 1. Lift the pivot cap on the rear wiper arm upward, this will allow the rear wiper blade to be raised off of the liftgate glass.
Page 457: Adding Washer Fluid
- Page 458 456 MAINTAINING YOUR VEHICLE WARNING! CAUTION! (Continued) • Damage to the catalytic converter can result if your • Exhaust gases can injure or kill. They contain carbon vehicle is not kept in proper operating condition. In monoxide (CO), which is colorless and odorless. the event of engine malfunction, particularly involv- Breathing it can make you unconscious and can ing engine misfire or other apparent loss of perfor-...
Page 459: Cooling System
- Page 460 458 MAINTAINING YOUR VEHICLE Cooling System — Drain, Flush And Refill CAUTION! (Continued) NOTE: Some vehicles require special tools to add coolant Additive Technology (OAT) engine coolant is differ- properly. Failure to fill these systems properly could lead to ent and should not be mixed with Hybrid Organic severe internal engine damage.
- Page 461 MAINTAINING YOUR VEHICLE 459 • Use only high purity water such as distilled or deionized Adding Coolant water when mixing the water/engine coolant (anti- Your vehicle has been built with an improved engine freeze) solution. The use of lower quality water will coolant (OAT coolant conforming to MS.90032) that allows reduce the amount of corrosion protection in the engine extended maintenance intervals.
- Page 462 460 MAINTAINING YOUR VEHICLE Cooling System Pressure Cap Disposal Of Used Engine Coolant The cap must be fully tightened to prevent loss of engine Used ethylene glycol-based engine coolant (antifreeze) is a coolant (antifreeze), and to ensure that engine coolant regulated substance requiring proper disposal.
- Page 463 MAINTAINING YOUR VEHICLE 461 • If frequent engine coolant (antifreeze) additions are coolant freeze point or replacing engine coolant (anti- freeze). Advise your service attendant of this. As long as required, the cooling system should be pressure tested the engine operating temperature is satisfactory, the cool- for leaks.
Page 464: Brake System
Page 465: automatic transmission.
- Page 466 464 MAINTAINING YOUR VEHICLE Special Additives 2. Run the engine at normal idle speed for at least 60 seconds, and leave the engine running for the rest of this The manufacturer strongly recommends against using any procedure. special additives in the transmission. 3.
- Page 467 MAINTAINING YOUR VEHICLE 465 7. Wipe the dipstick clean and reinsert it until seated. correctly established at 80°F (27°C), it should be between Then, remove the dipstick and note the fluid level on the HOT (upper) reference holes when the transmission both sides.
Page 468: Rear Drive Assembly (Rda) - Awd Models Only
Page 469: power transfer unit (ptu) - awd models only.
- Page 470 468 MAINTAINING YOUR VEHICLE Washing Special Care • Wash your vehicle regularly. Always wash your vehicle • If you drive on salted or dusty roads, or if you drive near in the shade using Mopar Car Wash, or a mild car wash the ocean, hose off the undercarriage at least once a soap, and rinse the panels completely with clear water.
- Page 471 MAINTAINING YOUR VEHICLE 469 Wheel And Wheel Trim Care CAUTION! (Continued) All wheels and wheel trim, especially aluminum and covered by the New Vehicle Limited Warranty. Only chrome plated wheels, should be cleaned regularly using car wash soap, Mopar Wheel Cleaner or equivalent is mild (neutral Ph) soap and water to maintain their luster recommended.
- Page 472 470 MAINTAINING YOUR VEHICLE NOTE: If you intend parking or storing your vehicle for an Stain Repel Fabric Cleaning Procedure — If extended period after cleaning the wheels with wheel Equipped cleaner, drive your vehicle for a few minutes before doing Stain Repel seats may be cleaned in the following manner: so.
- Page 473 MAINTAINING YOUR VEHICLE 471 Your leather upholstery can be best preserved by regular CAUTION! (Continued) cleaning with a damp soft cloth. Small particles of dirt can • Damage caused by these type of products may not be act as an abrasive and damage the leather upholstery and covered by your New Vehicle Limited Warranty.
- Page 474 472 MAINTAINING YOUR VEHICLE Glass Surfaces Seat Belt Maintenance All glass surfaces should be cleaned on a regular basis with Do not bleach, dye, or clean the belts with chemical Mopar Glass Cleaner, or any commercial household-type solvents or abrasive cleaners. This will weaken the fabric. glass cleaner.
Page 475: Cleaning The Cupholders
Page 476: interior fuses.
- Page 477 MAINTAINING YOUR VEHICLE 475 Cavity Cartridge Fuse Mini-Fuse Description F117 – 10 Amp Red Heated Mirrors F118 – 10 Amp Red Occupant Restraint Controller F119 – 10 Amp Red Steering Column Control Module F120 – 10 Amp Red All Wheel Drive – If Equipped F121 –...
Page 478: Underhood Fuses (Power Distribution Center)
- Page 479 MAINTAINING YOUR VEHICLE 477 Cavity Cartridge Fuse Mini-Fuse Description F141 40 Amp Green – Anti-Lock Brake System F142 40 Amp Green – Glow Plugs – If Equipped F143 40 Amp Green – Exterior Lights 1 F144 40 Amp Green – Exterior Lights 2 F145 30 Amp Pink...
- Page 480 478 MAINTAINING YOUR VEHICLE Cavity Cartridge Fuse Mini-Fuse Description F162 40 Amp Red/20 – Cabin Heater #1/Vacuum Pump – If Amp Lt. Blue Equipped F163 50 Amp Red – Cabin Heater #2 – If Equipped F164 – 25 Amp Clear Powertrain Auto Shutdown F165 –...
Page 481: Replacement Bulbs
- Page 482 480 MAINTAINING YOUR VEHICLE Bulb Number Front Fog Lamp PSX24W or 2504 Center High Mounted Stop Lamp (CHMSL) LED (Serviced at authorized dealer) License Lamp Exterior Bulbs – Rear (LED Version) Bulb Number Rear Tail/Stop Lamp LED (Serviced at authorized dealer) Rear Tail (Liftgate) Lamp LED (Serviced at authorized dealer) Rear Turn Signal Lamp...
Page 483: Bulb Replacement
Page 484: front fog lamp, page 485: rear turn signal and backup lamp.
- Page 486 484 MAINTAINING YOUR VEHICLE 6. Install the bulb and connector assembly into the tail trim stick and hand pressure together to disengage the lamp housing and rotate the connector ¼ turn clockwise tail lamp housing from the liftgate. to lock it in place. 7.
Page 487: License Plate Lamp
Page 488: fluid capacities, page 489: fluids, lubricants, and genuine parts.
- Page 490 488 MAINTAINING YOUR VEHICLE CAUTION! CAUTION! (Continued) • Do not use water alone or alcohol-based engine • Mixing of engine coolant (antifreeze) other than coolant (antifreeze) products. Do not use additional specified Organic Additive Technology (OAT) en- rust inhibitors or antirust products, as they may not gine coolant (antifreeze), may result in engine dam- be compatible with the radiator engine coolant and age and may decrease corrosion protection.
Page 491: Chassis
- Page 493 MAINTENANCE SCHEDULES CONTENTS ▫ Maintenance Chart ..... .493 MAINTENANCE SCHEDULE ....492...
- Page 494 492 MAINTENANCE SCHEDULES MAINTENANCE SCHEDULE NOTE: Under no circumstances should oil change inter- vals exceed 10,000 miles (16,000 km), twelve months or 350 Your vehicle is equipped with an automatic oil change hours of engine run time, whichever comes first. The 350 indicator system.
- Page 495 MAINTENANCE SCHEDULES 493 Maintenance Chart At Every Oil Change Interval As Indicated By Oil Change Indicator System: Required Maintenance Intervals. • Inspect automatic transmission fluid if equipped Refer to the Maintenance Schedules on the following page with dipstick. for the required maintenance intervals. •...
- Page 496 494 MAINTENANCE SCHEDULES Mileage or time passed (which- ever comes first) Or Years: Or Kilometers: Additional Inspections Inspect the CV joints. Inspect front suspension, tie rod ends, and replace if necessary. Inspect the brake linings, parking brake function. Additional Maintenance Replace engine air filter.
- Page 497 MAINTENANCE SCHEDULES 495 Mileage or time passed (which- ever comes first) Or Years: Or Kilometers: Change the automatic transmis- sion fluid and filter. Change the automatic transmis- sion fluid and filter if using your vehicle for any of the following: police, taxi, fleet, or frequent trailer towing.
- Page 498 496 MAINTENANCE SCHEDULES WARNING! • You can be badly injured working on or around a motor vehicle. Do only service work for which you have the knowledge and the right equipment. If you have any doubt about your ability to perform a service job, take your vehicle to a competent me- chanic.
- Page 499 IF YOU NEED CONSUMER ASSISTANCE CONTENTS ▫ Customer Assistance For The Hearing Or Speech SUGGESTIONS FOR OBTAINING SERVICE FOR YOUR VEHICLE ......498 Impaired (TDD/TTY) .
Page 500: Suggestions For Obtaining Service For Your Vehicle
Page 501: fca us llc customer center, page 502: customer assistance for the hearing or speech impaired (tdd/tty), page 503: warranty information, page 504: in canada.
- Page 505 INDEX...
- Page 506 504 INDEX About Your Brakes ..... .353, 355 Air Conditioning Filter..... . .451 Adding Engine Coolant (Antifreeze) .
- Page 507 INDEX 505 Fluid And Filter Changes ....466 Brake Assist System ......358 Fluid Level Check .
- Page 508 506 INDEX Cargo Compartment ......219 Older Children And Child Restraints ...63 Luggage Carrier .
- Page 509 INDEX 507 Drain, Flush, And Refill ....458 Disposal Inspection ......460 Antifreeze (Engine Coolant) .
- Page 510 508 INDEX Electronic Stability Control (ESC) ....361 Oil Change Interval ..... . .253 Electronic Throttle Control Warning Light .
- Page 511 INDEX 509 Flashers Folding Rear Seat ..... . .165, 171 Hazard Warning ......416 Freeing A Stuck Vehicle .
- Page 512 510 INDEX Gas Cap (Fuel Filler Cap) ....400, 444 On With Wipers ..... .175, 182 Gasoline, Clean Air .
- Page 513 INDEX 511 Instrument Panel Lens Cleaning ....472 Keyless Entry System ......16 Interior Appearance Care .
- Page 514 512 INDEX Cruise ....... .250 Reading .......179 Daytime Running .
- Page 515 INDEX 513 Door ........22 Rearview .......91 Power Door .
- Page 516 514 INDEX Materials Added To ..... . .448 Phone (Uconnect) ......96, 113 Pressure Warning Light .
- Page 517 INDEX 515 Programming Key Fobs (Remote Keyless Entry)..16 Reminder, Lights On ......176 Reminder, Seat Belt .
- Page 518 516 INDEX Rotation, Tires ......385 Inspection ......84 Operating Instructions .
- Page 519 INDEX 517 Service Contract ......500 Steering Service Manuals ......502 Column Controls .
- Page 520 518 INDEX Tire Markings ......365 Tread Wear Indicators .....382 Tires.
- Page 521 INDEX 519 Transmission Call Controls ......103, 125 Automatic ......341, 463 Cancel Command .
- Page 522 520 INDEX Unleaded Gasoline ......394 Water Untwisting Procedure, Seat Belt ....41 Driving Through .
- Page 523 INSTALLATION OF RADIO TRANSMITTING EQUIPMENT Special design considerations are incorporated into this The antenna cable should be as short as practical and vehicle’s electronic system to provide immunity to radio routed away from the vehicle wiring when possible. Use frequency signals. Mobile two-way radios and telephone only fully shielded coaxial cable.
- Page 524 STICK WITH THE SPECIALISTS ® 17JC49-126-AC Third Edition ©2016 FCA US LLC. All Rights Reserved. Dodge is a registered trademark of FCA US LLC. Printed in U.S.A.
Rename the bookmark
Delete bookmark, delete from my manuals, upload manual.
- Fuel Consumption
- Engine Sizes
- Engine Torque
- Engine Power
- Towing Capacity
- Seating Capacity
- Steering Wheel Size
- Dimensions and Weight
- Fuel Tank Sizes
- Trunk Space
- Tire and Rim Sizes
- Bolt Patterns
- Coolers and radiators
- Radiator Fan
- Heat Exchanger
- Intercooler
- Timing Belt
- Sizes of Wiper Blades
- Cabin Filter
- Fuel Filter
- Transmission Fluid
- Antifreeze & Coolant
- Brake Discs
- Brake Drums
- Brake Fluid
- Bulbs For Fog Lights
- Bulbs For Headlights
- Bulbs For Turn Signals
- Bulbs For Licence Plates
- Bulbs For Markers
- Bulbs For Rear Fog Lights
- Bulbs For Backup Lights
- Bulbs For Brake Lights
- Technical Specs
- Car History
- Engine & Fuel
- Coolers and Radiators
Lightning Bolt on Dashboard in Dodge Journey - What’s This?
CarAraC auto mechanics and car experts
Your Dodge Journey has warning lights that illuminate on its dashboard , just like every other modern car. For example; the vehicle security warning, brake warning, airbag warning, battery warning, engine oil pressure warning, etc. Then there's the lightning alert that you may not be familiar with.
Lightning bolt warning lights highlights
- Common reasons: throttle control problems
- How to fix: disconnect the battery for some time, use scanner and get trouble codes
- Possible consequences: you may get stranded
- Priority level: High
- Can you drive? Carefully
- DIY repair: Impossible
- Repair price range: $150-$800

Brief Background to the Dodge Journey
Dodge Journey vehicles are medium-sized crossover SUVs (CUVs) that are issued by the Dodge brand. They were first released in 2009. Then there was a rebadge to the Fiat Freemont in 2011 as a parallel collection. The cars come in right-hand and left-hand drive.
The Dodge Journey comes with warning indicators just like other Dodge models. When these warning lights come up; it could be a system malfunction, security issue, or need for urgent maintenance.
Driver safety shouldn't be taken for granted, especially when a warning light comes on. Taking a related risk could be bad for you and/or the vehicle
What Is the Electronic Throttle Control on a Dodge Journey?
Your Dodge's electronic throttle control features an accelerator pedal module which has a motor, sensors, and a throttle plate. It's a great improvement from the traditional mechanical linkage in old-model cars. Although it isn't immune to mechanical faults.
The ETC measures the pressure drivers apply on the gas/accelerator pedal. The pedal isn't mechanically linked to the engine. A sensor tracks the pedal's position and the data is transmitted to the ETC for engine RPMs (revolutions per minute) to be adjusted.
Gas pedal pressure will determine how much the throttle passage will be opened. There's a flat valve at the opening that's regulated by the pedal's movement. It's called the throttle plate or butterfly valve.
The throttle plate rotates inside the throttle body when you depress the pedal. Then the air will be let into the intake manifold and quickly drawn into it by its vacuum.
1) Sensors in the ETC System
Two sensors that are instrumental to the ETC's operations include the following:
- Mass Airflow (MAF) Sensor
The mass airflow (MAF) sensor calculates the change in airflow. It will then send results to the engine's control unit (ECU) or electronic control module (ECM). This sensor is usually located between the throttle body and the air cleaner.
- Throttle position (TPS) Sensor or Throttle Valve Position Sensor
It's linked to the throttle body and it tracks your Dodge's throttle angle. You can find it on the reverse side of the throttle plate.
Don't get confused about the two sensors mentioned above. The TPS simply informs the ECU/ECM that you've depressed the gas pedal, while the MAF detects the air added. The NAF
2) The Role of the ECU
It's the ECU that controls the balancing of the air-fuel mixture in real-time. It also calculates the best moment to activate the spark plugs to ignite the balanced air-fuel combination.
3) Wide-Open Throttle (WOT)
This is what's referred to as full throttle. It's when the throttle is fully opened on an internal combustion engine or in your car. WOT also means the max-speed state of running an engine or the usual condition of a completely opened butterfly valve or throttle plate.
Your depression of the gas pedal in this situation is referred to as "flooring it". There'll be maximum intake of air because of the lowest resistance to incoming air.
What Does the Electronic Throttle Control Warning Light Mean?
The electronic throttle control warning light on your Dodge Journey could mean that the system has detected a communication problem that has resulted in an ETC error. It's most likely a result of a miscommunication between the ETC and its related sensors.
Dodge Journey vehicles were introduced almost a decade and a half ago, so the dashboard instrument cluster arrangement may vary based on the model year of your car. Still, the lightning symbol is very easy to notice when it illuminates.
Electronic Throttle Control Warning Light Behavior
The electronic throttle control warning light can be a troublesome alert that can come on at any time after the first illumination. And it can go off easily and come on after some days or even weeks. It may stay on for hours in some cases, only to stop when you restart the vehicle.
It will seem like the alert has a mind of its own. Worse still, the symptoms of the fault may not be easy to notice. The car might just be driving just fine regardless of the warning light. There's no need to get confused or nervous.
The ETC light could stay on after the initial indicator check when you first start your car. It could also activate when driving. Even the check engine light (CEL) could activate with it simultaneously.
What To Do Immediately After Noticing the ETC Warning Light
You could continue driving, but it wouldn't be the best move. Just remember to get the car checked at your earliest convenience if you decide to take the RISK.
Drivers could also stop the Dodge instead and park it at a convenient spot or put it in "park". Then proceed to put the engine off and cycle the ignition. The warning light may go off at this point.
Your car should be drivable if the alert doesn't go off. But the vehicle will need to be serviced ASAP. In case of the light flashing, then you should understand that the problem is a severe one that demands more urgency. It won't be advisable to drive the car in such a scenario, but you actually could.
Utilize a diagnostic scan tool to check for vehicle fault codes if you have one. This should be done before any other thing-be it DIY physical checks or hiring a professional technician. It may save you from getting scammed by the dealer or mechanic with a wrong diagnosis and unnecessary repair bills.
Ask the professional or dealer attending to you if they can let you be with them in the vehicle as the diagnoses are taking place. Some repairers offer such a service.
You'll have to take your car to the dealer or auto repair workshop immediately if you don't have a scan tool. Decreased engine power, rough engine noise, or abnormally high idle speed may be experienced if you drive the Dodge while the light is flashing.
Performance issues such as misfiring, stalling, and unstable throttle feedback when the light comes on while driving means you must stop the car. Towing the vehicle to a repairer is recommended at this point if you want to avoid complicating the situation.
Other Symptoms of a Bad ETC
You should look out for the following signs when the ETC alert comes on:
- Idle surges
- Rough idling
- Uninitiated acceleration (car accelerating by itself)
- Reduced fuel mileage (poor fuel economy)
- Engine misfiring
Electronic Throttle Control System Reset Procedure
The problem being indicated by the ETC light might just be the need for a gas pedal reset. The pedal position might not be well lined up or aligned. This will result in a communication error with the sensors that trigger the motor which closes or opens the throttle. Such could be the case in a high-mileage Dodge Journey.
Thankfully, the pedal reset can be done on your own instead of hiring a professional. Follow the steps below carefully to reset the pedal.
- Step 1: Switch on the ignition key without starting the vehicle.
- Step 2: Press the accelerator pedal to the floor and ease it up.
- Step 3: Start the vehicle and depress the pedal again. Observe whether your Dodge will respond or not. Check to see if the ETC light has gone off as well.
- Step 4: Proceed to drive the car around to see if the ETC is working well and if there are no other issues.
- Step 5: Take the car to a repair place if the throttle problem continues and the ETC light is still on.
Most of the warning lights that illuminate on your dashboard can't be taken for granted. And the Dodge Journey electronic throttle control warning light isn't an exception. That's why they're referred to as warnings. Always deal with the lightning symbol alert coming on as soon as possible.
Scanning your Dodge for diagnostic trouble codes (DTCS) will help in eliminating so many possibilities related to the ETC alert. It will save you from diagnostics bills at a repair shop or wasting money on "trial and error". You may only need to do a simple fix such as swapping out the air filter and ETC sensor, or resetting the pedal.
About the authors
The CarAraC research team is composed of seasoned auto mechanics and automotive industry professionals, including individuals with advanced degrees and certifications in their field. Our team members boast prestigious credentials, reflecting their extensive knowledge and skills. These qualifications include: IMI: Institute of the Motor Industry, ASE-Certified Master Automobile Technicians; Coventry University, Graduate of MA in Automotive Journalism; Politecnico di Torino, Italy, MS Automotive Engineering; Ss. Cyril and Methodius University in Skopje, Mechanical University in Skopje; TOC Automotive College; DHA Suffa University, Department of Mechanical Engineering

Add comment
What Does The Malfunction Indicator Light Mean? (MIL)
- Updated: January 7, 2023

As you drive down the road, there are numerous warning lights that could appear on your dash, none of which are good. However, the one that seems to cause the most alarm is the Malfunction Indicator Light (MIL). It’s important that you know what to do when the Malfunction Indicator Light Illuminates, so you can get back on the road with peace of mind.
In this guide, I cover the basics of the Malfunction Indicator Light. I also look at what your next steps should be when it comes on, and discuss some of the possible repair costs involved.
What is the Malfunction Indicator Light (MIL)?
The Malfunction Indicator Light or MIL is the technical name for the Check Engine Light . It’s a warning light that comes on the dashboard to tell you when there’s a system malfunction. It’s the ECU’s way of alerting you to potential trouble.
The light comes on after a series of checks to determine that something is operating outside of its parameters.
Sometimes, the Malfunction Indicator Light comes on because of something trivial, such as a loose gas cap. Other times, it points to something more serious, such as catalytic converter failure. Either way, the only way to decipher the trouble is with an OBDII code scanner .
What to Do When Malfunction Indicator Light (MIL) Illuminates
If the MIL is solid and consistent, you want to look for any signs of trouble. You should also have the diagnostic trouble codes (DTC) checked as soon as possible with an OBDII code scanner. If the Check Engine Light is blinking, pull the car over and don’t drive it until the diagnostics are complete.
1. Solid Light
If the Check Engine Light comes on and stays on, there could be multiple issues. However, the fault could be something obvious, such as leaving the gas cap off when you last filled it up. It’s wise to give your car a quick inspection to see if something noticeable is to blame. If so, you can correct the problem quickly and move on.
However, if you don’t spot an immediate issue, you will need to pay close attention to any other symptoms that are occurring. Do you notice any performance troubles? Are there any unusual smells or sounds? Is the car shaking or vibrating ? All of these answers will help you get to the bottom of what’s happening.
It’s also wise to take note of any other lights that came on at the same time. With some faults, the issue will trigger multiple lights, which could help you narrow down where the problem is coming from. For example, if the Check Engine Light and Oil Pressure Light come on at the same time, you know the car is struggling with oil pressure. Fixing the other light first will help to turn off the Check Engine Light.
You will use this information in conjunction with whatever the DTC scanner reveals. Plug your OBDII code scanner into the port and read the engine codes. If there are too many to read, erase them and take the car for a test drive to reset the most recent. With these codes in hand, you can better determine where the fault lies, so you can fix it.
RELATED: 90 Car Dashboard Symbols, Warning Lights & Indicators – Meanings
2. Flashing Light
You should never treat a flashing Malfunction Indicator Lamp the same way you do when it comes on steadily. The flashing light is trying to get your attention, and you would be wise to listen. For starters, pull the car over in a safe location. You do not want to drive the vehicle with this light flashing, or more damage could occur.
If you have a code scanner, you can read the DTCs and determine the issue. Otherwise, you might need to have the vehicle towed to a repair shop for further help.
READ MORE: Check Engine Light Flashing? (Here’s What to Do)
How to Turn Off the Malfunction Indicator Light (MIL)
The Check Engine Light doesn’t turn itself off until the problem that triggered it is repaired. With some vehicles, the intermittent fault that occurred would have to be resolved for several trips before the light would go off on its own. Otherwise, you can clean the fault codes with your scan tool to reset the light.
READ MORE: Will the Check Engine light Reset Itself? (What if not?)
In older vehicles, you could disconnect the battery to clear out the memory and that would turn off the light. However, the Check Engine Light always comes back on if the problem isn’t repaired. Plus, pulling the battery can also cause some annoyances that aren’t worth dealing with.
Before you clear any codes, consider if that’s the best option. By clearing out older codes, you might lose valuable data that will help you troubleshoot the problem. If you need to monitor conditions for a certain amount of time to troubleshoot, erasing the codes could set you back a little. You might have to wait for new data before you can get the heart of what’s going on. Instead, you want to read through the old codes first and try to decipher what’s happening.
RELATED: How to Reset a Check Engine Light (5 Easy Methods)
The only way to turn off the Malfunction Indicator Light for good is to repair the problem. Once the fix is complete, you can reset the codes and the light shouldn’t come back on. If it does, you have to go back to the drawing board and start diagnostics once again.
Cost to Turn off Malfunction Indicator Lamp (MIL)
The cost to fix the Malfunctioning Indicator Lamp (MIL) depends on two important factors. First, the repair cost directly relates to what needs to be fixed. Secondly, your cost will change dramatically if you don’t have a code scanner and/or you need a professional to repair the problem.
For the sake of this article, let’s assume that you need to have a professional fix the Malfunctioning Indicator Lamp. Here are a few problems you might be dealing with and the approximate repair costs.
- Tighten or replace a loose or broken gas cap: $25-$75
- Replace malfunctioning oxygen sensor: $150-$450
- Replace damaged catalytic convert: $1,500-$3,500
- Replace spark plugs and ignition coils: $250-$450
- Replace ignition coils: $150-$450
- Replace thermostat: $200-$400
- Replace mass airflow sensor: $250-$450
- Replace fuel injector: $300-$750
- Replace evaporative emissions (EVAP) purge control valve : $110-$275
The repair cost also heavily depends upon what type of car you drive. If you are behind the wheel of a common vehicle, such as a Chevy or Dodge, your parts might not be as expensive as the luxury automobile, such as an Audi or Mercedes-Benz. You can also get just about any technician to work on your mainstream vehicles, where it could take a special mechanic to repair your BMW or other foreign import. For this reason, it’s difficult to give an accurate estimate of what the repair might cost.
One way you can save money is to visit a local auto parts store if you don’t have your own code scanner. For free, many of these locations will scan the computer and give you the codes. You will still need to do your own research to figure out what the problem is, but you will save money on diagnostics.
READ MORE: Check Engine Light Is On But No Codes – Causes & What to Do?
Categories: Warning Lights
Related Posts

Latest Posts
- The Best & Worst Years Of Ford Explorer
- Best & Worst Years Of Toyota Corolla
- Best & Worst Years of Toyota RAV4
- When Should Your Child Switch To A Forward-Facing Car Seat?
- The Best & Worst Years Of Toyota Camry
- I Accidentally Put Premium Gas In My Car, What To Do?
- Lights & Lighting Accessories
- Lighting Assemblies & Accessories
- Brake & Tail Light Assemblies, Parts & Accessories
- Tail Light Assemblies
Enjoy fast, free delivery, exclusive deals, and award-winning movies & TV shows with Prime Try Prime and start saving today with fast, free delivery
Amazon Prime includes:
Fast, FREE Delivery is available to Prime members. To join, select "Try Amazon Prime and start saving today with Fast, FREE Delivery" below the Add to Cart button.
- Cardmembers earn 5% Back at Amazon.com with a Prime Credit Card.
- Unlimited Free Two-Day Delivery
- Streaming of thousands of movies and TV shows with limited ads on Prime Video.
- A Kindle book to borrow for free each month - with no due dates
- Listen to over 2 million songs and hundreds of playlists
- Unlimited photo storage with anywhere access
Important: Your credit card will NOT be charged when you start your free trial or if you cancel during the trial period. If you're happy with Amazon Prime, do nothing. At the end of the free trial, your membership will automatically upgrade to a monthly membership.
Return this item for free
Free returns are available for the shipping address you chose. You can return the item for any reason in new and unused condition: no shipping charges
- Go to your orders and start the return
- Select the return method
This item has been tested to certify it can ship safely in its original box or bag to avoid unnecessary packaging. Since 2015, we have reduced the weight of outbound packaging per shipment by 41% on average, that’s over 2 million tons of packaging material.

Image Unavailable

- To view this video download Flash Player
LED Inner Tail Light Lamp Stop Brake Indicator Warning Light For Dodge Journey 2012 2013 2014 2015 2016 2017 2018 with Bulb (Right Passenger Side)
Purchase options and add-ons, about this item.
- 🚗Fit For Dodge Journey 2012 2013 2014 2015 2016 2017 2018
- 🚗Meets or exceeds DOT/SAE standards, with particular consideration for photo metric and safety compliance.Waterproof and shock resistant. no modification necessary, plug and play, install is easy.Meets or exceeds DOT/SAE standards, with particular consideration for photo metric and safety compliance.Waterproof and shock resistant. no modificatio necessary, plug and play, install is easy.
- 🚗Special coating on the lens surface prevents hazing and fading, ensuring proper illumination and operational safety.Rigorous and accelerated cycling tests to ensure product service quality and durability.
- 🚗Package Included: 1 PC Tail Light (Right Passenger Side)
- 📧Each Of Our Products Is Elaborately Designed And Manufactured,We Have A Strict Quality Control System To Ensure A Stable Quality. If you have any questions, please feel free to contact us, we will get back to you within 24 hours.
Buy it with

Similar items that may deliver to you quickly

From the brand

Our was established in 2019, is a professional supplier engaged in the research, development, sale of car accessories.
In recent years, our company has introduced a series of products. The products are designed, manufactured, tested by our R&D team and passed variousCertification.
Whether selecting a current product from our catalog or seeking professional assistance for your application, you can talk to our about your sourcing requirements.

MZORANGE Tail Light Lamp

Product Description
About tail light.

- If you are looking for exquisite and outstanding For Dodge Journey tail light, then this set of excellent For Dodge Journey warning light is your ideal choice.

Detailed introduction
- For Dodge Journey 2009 2010 2011 2012 2013 2014 2015 2016 2017 2018
- Durable ABS plastic body,meets or exceeds DOT/SAE standards.
- Please make sure this item fits for your vehicle before you purchase.
- OMG:4806369AF, 4806368AF
- For easy install
- Light bulb is included

- Before you begin installation, please inspect the tail light of damage. Do not install them if there is any damage.
- Please make sure that the tail light are firmly installed before driving.
Product information
Technical details, additional information, warranty & support, compare with similar items, looking for specific info, customer reviews.
Customer Reviews, including Product Star Ratings help customers to learn more about the product and decide whether it is the right product for them.
To calculate the overall star rating and percentage breakdown by star, we don’t use a simple average. Instead, our system considers things like how recent a review is and if the reviewer bought the item on Amazon. It also analyzed reviews to verify trustworthiness.
Reviews with images

- Sort reviews by Top reviews Most recent Top reviews
Top reviews from the United States
There was a problem filtering reviews right now. please try again later..

Top reviews from other countries
- Amazon Newsletter
- About Amazon
- Accessibility
- Sustainability
- Press Center
- Investor Relations
- Amazon Devices
- Amazon Science
- Start Selling with Amazon
- Sell apps on Amazon
- Supply to Amazon
- Protect & Build Your Brand
- Become an Affiliate
- Become a Delivery Driver
- Start a Package Delivery Business
- Advertise Your Products
- Self-Publish with Us
- Host an Amazon Hub
- › See More Ways to Make Money
- Amazon Visa
- Amazon Store Card
- Amazon Secured Card
- Amazon Business Card
- Shop with Points
- Credit Card Marketplace
- Reload Your Balance
- Amazon Currency Converter
- Your Account
- Your Orders
- Shipping Rates & Policies
- Amazon Prime
- Returns & Replacements
- Manage Your Content and Devices
- Recalls and Product Safety Alerts
- Conditions of Use
- Privacy Notice
- Consumer Health Data Privacy Disclosure
- Your Ads Privacy Choices
Dodge Journey Battery Light: Why It’s On and How to Fix
If your Dodge Journey’s battery light is on, it is trying to warn you that there is an issue with the charging system.
The charging system itself is relatively simple. The battery light comes on because the voltage level at the battery is too low.
Quick Facts

Most battery lights will come on when a vehicle starts if the computer has detected that the voltage is too low to turn the starter at the proper RPM. Your Journey’s battery light can come on at any time while driving if the voltage drops below a certain threshold.
You may have noticed your vehicle struggling to start, and the battery light stays on after the start. That would indicate a bad battery , but it’s still worth your while to test it first.
Dodge Journey Battery Light Causes + Diagnosis

The charging system in vehicles hasn’t changed that much in the last 50 years. Here are the basics of how your Journey’s charging system works:
- A serpentine belt turns the alternator.
- The alternator charges the battery and powers your vehicle.
- The voltage regulator produces a fixed output voltage, which keeps the system from overloading.
- The battery stores voltage for when the starter needs it or a sudden voltage demand increase.
- The battery warning light tells the driver if there is an issue with the charging system.
Directly below are the common causes for the Dodge Journey battery warning light. The potential fixes are presented in a good way to check your vehicle.
1. Check The Serpentine Belt

Before testing your Journey’s battery, examine the basic things. The serpentine belt that turns the alternator is top of the list.
Take a look at the alternator. Is the belt missing? Is it shiny and cracked? If it is missing entirely, don’t drive your Journey for any reason until you replace it. If it’s shiny and cracked, it may not be turning the alternator fast enough to charge the battery, even if it is there.
With the engine running, take a look at the serpentine belt. If it appears wobbly or is making a squeaking sound, replace it.
2. Clean any Battery Post Corrosion

Next, examine the battery posts. If they have a battery acid buildup, you may fix your Journey’s alternator warning light by cleaning them and the battery terminals.
The voltage from the alternator goes to the battery through a wire that connects it to the battery post. If the battery post is corroded, it won’t be able to do its job of sending the voltage to and from the battery efficiently, and your Journey’s battery light will turn on.
It only takes a second to check the battery posts out. A battery post cleaner or wire brush can clean them in no time. Just be careful not to get any of the corrosion in your eye.
Battery post cleaner is available at most parts stores. You can also mix a generous amount of baking soda in water to clean the terminals. Let it sit in the mixture for about 10 minutes.
3. Bad Ground Wire
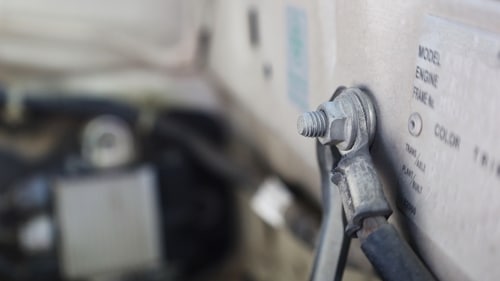
Above, we discussed that a bad ground connection at the battery could cause the lights to flicker and a no-start condition. But, a damaged or loose ground connection can cause the problem anywhere on the cable.
Inspect your Journey’s ground cable for any obvious damage. Then, follow it to its mounting location on the engine block or chassis. Make sure that it is snugged tightly and that there’s no rust underneath it. This is a very common reason why dash lights flicker/no start .
4. Test the Alternator

If you have a multimeter, you can test your Journey’s alternator at home in no time. It’s super easy:
- Set the multimeter to read voltage. Specifically, you’ll need to set it to 20V DC.
- With your Journey turned off, you’ll connect the negative side of the meter to the negative battery post. Touch the positive side of the voltmeter to the positive battery wire. With the engine off, you should get a reading somewhere between 12.0 volts and 12.6 volts.
- Now that you have a baseline, it’s time to turn the engine on. Leave the air conditioner off, as well as the headlights and any other accessories.
- After firing the engine up, you should get over 14.2 volts. If you got 14.2 or more volts, the alternator is charging fine. If it’s still showing in the 12’s, it’s time to replace the alternator. If it’s producing a voltage level in the 13s, go ahead and take it into a parts store and have it tested. It’s probably faulty.
- Assuming that the alternator was producing over 14 volts, go ahead and turn on the headlights, air conditioner, radio, and any other accessory you can think of, and run the same test again. If the voltage dropped back into the 12s, it’s a very strong indication that your Journey’s alternator needs replacing. It’s still worth having it tested, but be prepared to replace it.
An alternator that’s not putting out enough voltage will usually make itself known when the engine is running.
If you see your Journey’s battery light turn on while driving, it’s likely the alternator is no longer providing enough voltage to power the various electrical systems and charge the battery simultaneously.
Can You Drive Your Journey With a Faulty Alternator?
It is not a good idea to drive with a bad alternator. If you must, there are things you can do to prolong how long the vehicle will last before the battery dies:
- Turn off the climate control
- Turn off the radio
- Don’t use the auto-start feature
- No headlights. If you have to drive at night, it’ll drain the battery fast
Basically, anything you can turn off is going to prolong how far your Dodge Journey can go with just the battery. It’ll probably sputter and misfire a bit before the engine gives out entirely.
5. Test the Battery
If the battery light stays on but doesn’t turn back on after running the engine for a few minutes and then starting back up, it’s likely you’ll need to replace your Journey’s battery.
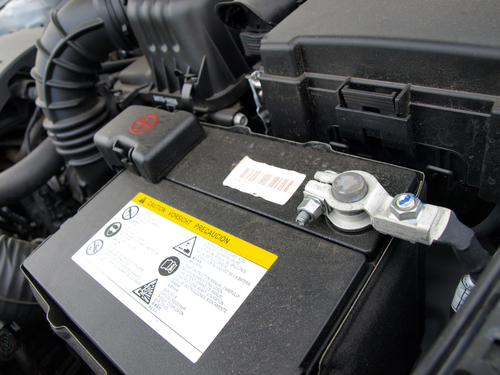
If the battery posts are clean, and you had over 14 volts on your multimeter with the engine idling under full accessory load, but the voltage drops below 12 volts when you shut your Journey off, it’s likely the battery is bad.
You can take it to a parts store and have it tested and replaced free of charge. It’s a great way to get you to buy a battery from them.
Your Journey can run off the alternator just fine once it’s started. This is an important thing to know. A dead battery usually makes itself known when you are trying to start the vehicle.
Resetting the Battery Light
You shouldn’t have to do anything to reset your Journey’s battery light . It should take care of itself as you fix the problem. Sometimes, it’ll stay on if the voltage level was too low when starting the vehicle. In that case, it should turn off on the next start (if the problem was fixed)
Conclusion: Dodge Journey Battery Light
Jumping straight to battery replacement will often fix your Journey’s battery warning light, but taking a look at the charging system first can save you a lot of money.
Your Journey will operate for a short period of time off of the battery alone. But, if the alternator has gone bad, it will eventually leave you stranded.
If your battery light comes on on the road, get somewhere to have it tested as soon as possible. Operate under the assumption that you will be stranded.
- Shopping Cart 0
2017 Dodge Journey Lights

2017 Dodge Journey Automotive Lighting
Featured Products

Light up your drive with CARiD! We carry a comprehensive selection of headlights, tail lights, replacement bulbs, and many other auto lights and components designed especially for your 2017 Dodge Journey. Each and every light is engineered with excellence in mind to allow you to drive safely night and day, in any weather conditions. We strive to make it easy for you to choose the right car light that will meet your rigorous standards of quality, durability, and style. From OE replacement lights for the 2017 Dodge Journey to rugged off-road lights, you'll find everything here!
Popular Automotive Lighting
Popular Products

2017 Dodge Journey Automotive Lighting Reviews
- 2017 Dodge Journey Base
- 2017 Dodge Journey Canada Value Package
- 2017 Dodge Journey Crossroad
- 2017 Dodge Journey GT
- 2017 Dodge Journey SE
- 2017 Dodge Journey SE Plus
- 2017 Dodge Journey SXT
- 2017 Dodge Journey SXT Lujo
- 2017 Dodge Journey Sport

Home » Troubleshooting » Dodge Journey airbag light is on – causes and how to reset
Dodge Journey airbag light is on – causes and how to reset
The airbag warning light turns on in the instrument cluster of Dodge Journey when the on-board diagnostic system detects a problem with the airbag system, which is a crucial safety feature that can save lives in the event of an accident. In this article, we’ll explore some of the reasons why the airbag light may be on in your Journey and discuss some of the steps you can take to reset it.

1. Faulty sensor
One of the most common reasons for the airbag light to turn on in Journey is a faulty sensor. The airbag system relies on a network of sensors to detect a crash and deploy the airbags. If one of these sensors is damaged or malfunctioning, it can cause the airbag light to turn on.

There are several different types of sensors in the airbag system of Journey, including impact sensors, seatbelt sensors, and occupant sensors. Impact sensors are typically located at the front of the vehicle and detect the force of an impact. Seatbelt sensors are located in the seatbelt buckle and detect whether the seatbelt is fastened. Occupant sensors are located in the seats and detect whether there is a person sitting in the seat.
If any of these sensors are damaged or malfunctioning, they may not be able to communicate with the car’s computer, which can cause the airbag light to turn on. A faulty sensor may also cause the airbag system to deploy at the wrong time or not at all, which can be dangerous in the event of an accident.
If you suspect that a faulty sensor is causing the airbag light to turn on, it’s important to have your Journey inspected by a qualified mechanic. The mechanic can use a diagnostic tool to read the vehicle’s computer and identify which sensor is causing the problem. In some cases, the sensor may need to be replaced, while in other cases, it may be a wiring issue or a problem with the computer itself.
Recommended video
2. Loose or corroded connections
Loose or corroded connections in the airbag system can also cause the airbag light to turn on in your Dodge Journey. The airbag system relies on a series of connections and wires to communicate with the on-board computer, and if any of these connections become loose or corroded, it can disrupt the system’s communication and cause the airbag light to turn on.
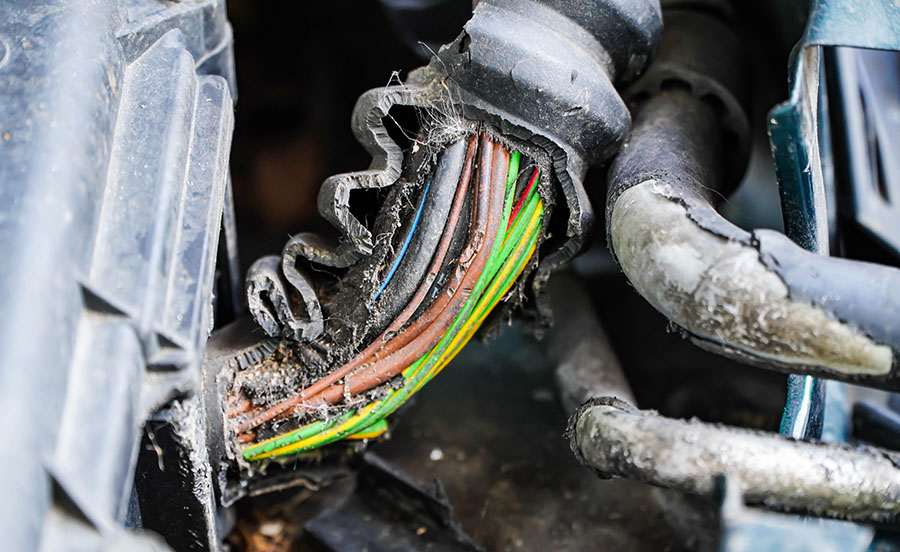
Corrosion can occur due to exposure to moisture, salt, and other environmental factors. Loose connections, on the other hand, can be caused by improper installation, wear and tear, or damage from an accident.
If you suspect that loose or corroded connections are causing the airbag light to turn on, it’s important to have your Journey inspected by a qualified mechanic. The mechanic will inspect the connections and wiring in the airbag system and identify any areas of concern. In some cases, the connections may need to be tightened or replaced, while in other cases, the wiring may need to be repaired or replaced.
It’s important to have any issues with loose or corroded connections in the airbag system addressed promptly. A malfunctioning airbag system can be dangerous in the event of an accident and may not provide the protection you need to stay safe.
3. Faulty clockspring
One of the less common but possible reasons for the airbag light to come on in Journey is a faulty clockspring. The clockspring is a spiral-wound electrical connection located in the steering column that enables the steering wheel to rotate while maintaining an electrical connection for the airbag and the horn with the vehicle’s electrical system.

If the clockspring is damaged or faulty, it can prevent the airbag system from functioning properly, which can cause the airbag light to turn on. A faulty clockspring can also cause the horn or the buttons on the steering wheel to stop working.
There are several reasons why a clockspring may fail, including wear and tear, damage from water or debris, or improper installation during previous repairs. Symptoms of a faulty clockspring may include a malfunctioning horn, problems with the steering wheel controls, or an illuminated airbag warning light.
Replace the clockspring
If you suspect that the clockspring is the cause of the airbag light, it’s important to have it diagnosed and replaced by a qualified mechanic. Replacing the clockspring is a complex process that requires specialized skills and tools. It is recommended to take your Journey to a certified mechanic who can properly diagnose and replace the clockspring, ensuring that your vehicle is safe to drive and all functions are working correctly.
4. Defective airbag control module
Another potential cause for the airbag light to come on in your Journey is a defective airbag control module. The airbag control module is a computer that is responsible for monitoring the airbag system and deploying the airbags in the event of a crash. If the control module is defective, it may not be able to properly communicate with the sensors and other components in the airbag system, which can cause the airbag light to turn on.
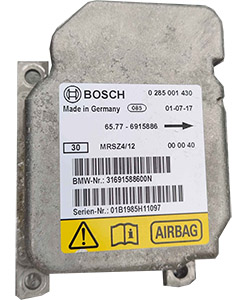
There are several reasons why an airbag control module may fail, including exposure to moisture, electrical issues, and damage from an accident. Symptoms of a defective control module may include an illuminated airbag light, non-functioning airbags, or other electrical issues in the car.
If you suspect that a defective airbag control module is causing the airbag light to turn on, it’s important to have the vehicle inspected by a qualified mechanic. The mechanic can use a diagnostic tool to communicate with the on-board computer and identify any issues with the control module. In some cases, the control module may need to be replaced, while in other cases, it may be a wiring issue or a problem with another component in the airbag system.
5. Bad seat belt pretensioner
A bad seat belt pretensioner can also cause the airbag light to come on. The seat belt pretensioner is a crucial component of the SRS system in your Journey that works in conjunction with the airbags to help protect the occupants of the vehicle in the event of a collision.
The seat belt pretensioner is designed to tighten the seat belt in the event of a collision, keeping the occupants of the vehicle securely in place and reducing the risk of serious injury or death. If the seat belt pretensioner is faulty or not functioning correctly, it can cause the SRS light to turn on, indicating a problem with the SRS system.
There are several reasons why the seat belt pretensioner may not function correctly in your Dodge Journey, such as a wiring issue, a faulty sensor, or damage to the component itself. If the SRS light comes on, it’s important to have the SRS system inspected by a qualified mechanic to identify the underlying cause and address any issues.
6. Recent repairs or modifications
If you’ve recently had work done on your vehicle’s airbag system or made any other modifications, it’s possible that the airbag light was not reset properly.
For example, if the airbag system is improperly reassembled after a repair, or if an incompatible component is installed during a modification, it can cause the airbag system to malfunction and turn on the airbag light. In some cases, simply disconnecting and reconnecting a component during a repair can cause the airbag light to turn on if it’s not done properly.
If you’ve recently had repairs or modifications done to your vehicle’s airbag system and the airbag light has turned on, it’s important to take the car back to the mechanic who performed the work. They should be able to inspect the system and determine what may be causing the issue. In some cases, it may be a simple fix, such as tightening a connection or replacing a faulty component. In other cases, more extensive repairs may be needed.
Use OBD2 scanner for diagnosis and reset
Using an OBD scanner is a quick and easy way to diagnose issues with the airbag system of Dodge Journey. OBD stands for On-Board Diagnostics, and it refers to the computer system in your vehicle that monitors various components and systems, including the airbag system.
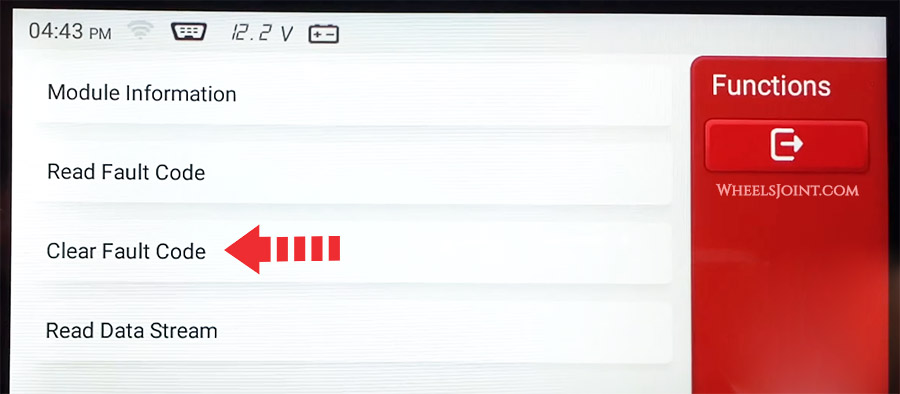
To use an OBD scanner to diagnose issues with the airbag system, you’ll first need to purchase or borrow an OBD scanner that is compatible with your vehicle’s make and model. Once you have the scanner, plug it into the OBD port, which is usually located under the dashboard on the driver’s side.
The OBD scanner will communicate with the car’s computer and retrieve any error codes that are stored in the system. These error codes will indicate what specific issue is causing the airbag light to turn on. For example, if the scanner retrieves an error code related to a faulty sensor, you’ll know that the sensor is the likely cause of the problem.
Once you have the error code, you can look up the specific code online or consult with a qualified mechanic to determine the best course of action. Depending on the issue, you may be able to repair the problem yourself or you may need to take your Journey to a mechanic for repairs.
Using an OBD scanner to diagnose issues with the airbag system can be a quick and easy way to determine the cause of the problem. However, it’s important to remember that an OBD scanner can only retrieve error codes and does not necessarily provide a complete diagnosis. If you’re unsure about the cause of the problem or how to fix it, it’s always best to consult with a qualified mechanic.
Frequently Asked Questions
Will airbag deploy if airbag light is on.
If the SRS (Supplemental Restraint System) light is on, it means that there is an issue with the airbag system and it is not functioning properly. In this case, the airbag system may not deploy in the event of an accident, or in rare cases it may deploy unexpectedly while driving.
Most modern cars have a system in place to prevent the airbags from deploying if the SRS light is on. This is to avoid the possibility of the airbags deploying unexpectedly or not deploying at all in the event of an accident.
Will an airbag light clear itself?
Whether an airbag light clears itself or not depends on the underlying issue that caused the light to turn on in the first place. In some cases, the light may turn off on its own if the issue is minor and temporary. For example, if the airbag system experiences a temporary glitch, such as a loose connection, the light may turn on temporarily and then turn off on its own once the issue is resolved.
However, in most cases, the airbag light will not clear itself and will need to be manually reset using an OBD scanner. This is because the airbag system is designed to be highly sensitive and will not turn off the airbag light until the issue is resolved and the system is functioning properly.
It’s important to note that even if the airbag light turns off on its own, it’s still a good idea to have the airbag system inspected by a qualified mechanic to ensure that everything is functioning properly. This will help to ensure that the airbag system is providing the necessary protection in the event of an accident.
Can the SRS light be reset?
Yes, the SRS (Supplemental Restraint System) light can be reset in your Journey using an OBD (On-Board Diagnostics) scanner. Resetting the SRS light involves accessing the car’s computer system and erasing the trouble codes that caused the light to turn on in the first place.
However, simply resetting the SRS light does not fix the underlying issue that caused the light to turn on. If the SRS light is reset without addressing the underlying issue, the light will likely turn on again in the near future.
Can a blown fuse cause the airbag light to come on?
Yes, a blown fuse can cause the airbag light to come on. The airbag system is connected to a network of fuses, sensors, and wiring that work together to detect any faults in the system. If a fuse related to the airbag system blows, it can cause the system to malfunction, which in turn can trigger the airbag light to come on.
Can you drive your vehicle with airbag light on?
Although, airbag malfunction does not affect the drivability of the vehicle, it is generally not recommended to drive your vehicle with the airbag light. This warning light suggests that one or more airbags may not function correctly in the event of an accident, and as a result, the safety of the occupants in the vehicle could be compromised. Even if there is a chance that all the airbags may still deploy during an accident, it is not worth the risk of ignoring the warning light. The safety of the driver and passengers is essential, and any potential issue with the airbag system should be addressed immediately.
Can a weak battery cause SRS light?
Yes, a weak battery can cause the SRS light to come on. A weak battery can cause several issues in the SRS system, such as voltage drops or fluctuation that can disrupt the proper functioning of the system’s sensors or components. Additionally, if the battery is not providing enough power, it can cause the SRS system’s computer to malfunction, leading to the illumination of the SRS light. If the SRS light comes on, it’s important to have the battery tested and inspected by a qualified mechanic to ensure that it’s functioning properly.

- Peugeot 2008 burning smell causes and how to fix it
- Mitsubishi Raider AC blower motor not working – causes and diagnosis
- Hyundai Bayon makes clicking noise and won’t start – causes and how to fix it
- Genesis GV70 makes clicking noise and won’t start – causes and how to fix it
- Ford Flex clogged catalytic converter symptoms, causes, and diagnosis
- How to remote start Ford Focus
- Is Honda Element key fob waterproof?
- How to operate front and rear wipers on BMW X3
- Nissan Versa Apple CarPlay not working – causes and how to fix it
- Peugeot Rifter auto windows not working, how to reset
- Infiniti QX55 bad spark plugs symptoms, causes, and diagnosis
- Ford Explorer makes sloshing water sound – causes and how to fix it
- Lincoln Continental low AC refrigerant symptoms, how to recharge
- Ford Maverick window bounce back when closing – causes and how to fix it
- Honda Civic slow acceleration causes and how to fix it
- Does the Buick Rainier have Android Auto?
- GMC Envoy makes sloshing water sound – causes and how to fix it
- Is Jaguar E-PACE key fob waterproof?
- Toyota Auris door makes a squeaking noise when opening or closing
- MG MG3 horn not working – causes and how to fix it

What does the check engine light of your Journey mean?
In a few words: It’s a warning light that alerts the driver about any type of engine problems . In some vehicles, the light comes in two colors: yellow to indicate minor problems and red to indicate serious problems.
The check engine light is part of every vehicle that has an electronic engine management system, either an integral one or only for fuel ignition. Its function is to alert the driver about any type of engine problems .
While driving, the computer of your Journey (ECU o PCM) monitors air/fuel supply and exhaust gases in order to verify that the engine is working properly. If any problem is detected, the check engine Light of your dashboard will turn on.
Depending on the type of failure, the light may either blink or remain constantly lit. If the problem is serious, your Journey will be in a “emergency” state that will prevent you from accelerating the engine above certain speed limit, forcing you to drive at low speed in order to avoid further damages.
The check engine light can alert you about some failures but not all of them. It will depend on how complex the electronic control unit of your Journey is.
To properly diagnose the failure of your Journey, it is important to have a suitable scanner that is compatible with the brand and model of your car. The scanner will show the engine fault code that the computer has detected, which is related to a certain problem that is affecting the engine.
The most common check engine light causes of your Journey and how to detect them.
- Ignition cylinder problems: irregular engine running.
- Problem with exhaust gas oxygen sensor (Lambda probe): irregular engine running, there are misfires when accelerating abruptly or driving at low revs. It may be caused by a sensor fault or a failure of the catalytic converter.
- Problems with the engine intake (air or fuel): engine running may be rough or irregular.
- Problems with the electrical system: sometimes it is easy to identify the cause but other times it may take days of testing to find the source of the problem.
- Sensor malfunction: It affects engine running or stops running completely.
- Wiring problems: contact failure, cut wires, short circuits.
Indicator status and severity
The check engine light can behave in different ways. Here we show you the most common light signals so you can know what is happening to your Journey:
- The light turns on when you switch on the ignition key and then it turns off : It’s normal. It’s used to verify that the light itself is working and the bulb is not burned out.
- The light blinks and then it turns off (cyclically) : This indicates that the car had a problem at one point but it is not happening at the moment.
- The light is steady: This indicates that there is a problem but is not so serious as to stop driving your vehicle.
- The light blinks continuously: This indicates that there is a critical problem. Usually, you should stop driving your vehicle.
Keep in mind that if you have a top-quality scanner, you will be able to verify all the car sensors , avoiding blind maintenance which is a pointless waste of money. Another recommendation is to check the owner's manual , if you want to know more about the fault codes that the scanner will detect.
Related guides
Dodge journey problems: the check engine light.
Did you find the website helpful?

- Remember me Not recommended on shared computers
Forgot your password?
- Engine & Transmission
ABS, traction and service AWD light on
By sidney john April 18, 2016 in Engine & Transmission
- Reply to this topic
- Start new topic
Recommended Posts
Sidney john.
Hi everyone.. need help here please..i have a dodge journey 2012 with 71k milleage unfortunately my wheel bearing driver side give up and i change it by myself, after installing the new bearing and have it for drive check suddenly the 3 lights warning went on (ABS, TRACTION CONTROL,SERVICE AWD) i dont know what i did wrong..please anybody has a similar issue like mine that can help me determine the problem..thanks in advance

Link to comment
Share on other sites.

If you did not plug in the sensor properly, the car will have no idea at what rate each wheel is turning. Hence, no AWD, ABS, TC and I'll bet that your Cruise will not work either.
- 2late4u and John/Horace
yes i did, was install properly thats why i can't figure out whats the cause of lights on on my dash
Unplug the sensor, and make sure you did not bend a pin. They are touchy. Then disconnect the negative terminal of your battery for about 30 minutes to reset your system. See what happens.
- 2late4u , sidney john and OhareFred
- 1 year later...

Shawn Patrick Smith
On 4/18/2016 at 12:49 PM, sidney john said: yes i did, was install properly thats why i can't figure out whats the cause of lights on on my dash
I have these lights on my dash. I am not sure whats going on but the car has been running fine since I got the car in 2016 brand new. the light s came on yesterday when I went to go out, thinking it was because of the snow and ice build up in the wheel well I cleared that out and tried shutting down and restarting the car, lights went out. went to go out last night and they came on, so I stopped shut it off and started lights went out then came on after I drove a little bit. went home instead of testing the limits. came out to snow blow the drive way, started car only 2 lights ABS and TC came on. moved the car to the street and light s went out. went to go fill the car up with gas and because the street hasn't been plowed yet, theres still quite a bit of snow on the street so when the traction control kicked in car lost some power and then the 3 lights came on again, awd no abs and when the tc light comes on it loses power unless I turn the TC off and only the front wheels spin. because of the holidays the dealer ship is closed. does anyone know if this would be safe to drive until I get it into service?
I would take a picture of your dash showing the light s so when you take it the dealer you can show them what it is doing

Yes it is safe to drive.
- 2 years later...
Ziyad thaher
I have the same problem. Did you fix it? How?
- 2 months later...
Did anyone fix this for knows how?

John/Horace
Scan for codes to figure out which abs wheel sensor is bad. Then replace sensor and reset with scanner.
- Summer Solstice , 2late4u and jkeaton

What he said ^^^^
On 4/17/2016 at 9:01 PM, sidney john said: Hi everyone.. need help here please..i have a dodge journey 2012 with 71k milleage unfortunately my wheel bearing driver side give up and i change it by myself, after installing the new bearing and have it for drive check suddenly the 3 lights warning went on (ABS, TRACTION CONTROL,SERVICE AWD) i dont know what i did wrong..please anybody has a similar issue like mine that can help me determine the problem..thanks in advance
I know you probably have fixed your problem but this just happened to me for no reason. All systems seemed go so before I connected my OBD reader I tried the trick used for resetting the oil change reminder. Turned the car to run, but do not start it, pressed the accelerator pedal three times holding it down for one second each time. Turned the car off and then restarted it and the trouble codes went away and the cruise control started working. It did not happen again. I am assuming there was something on the sensor and it threw the code when we first started the car. Until reset it stayed on. Once reset it did not return. Just a shot in the dark for you. I got lucky.
Join the conversation
You can post now and register later. If you have an account, sign in now to post with your account. Note: Your post will require moderator approval before it will be visible.

× Pasted as rich text. Paste as plain text instead
Only 75 emoji are allowed.
× Your link has been automatically embedded. Display as a link instead
× Your previous content has been restored. Clear editor
× You cannot paste images directly. Upload or insert images from URL.
- Insert image from URL
- Submit Reply
- Existing user? Sign In
More Forum Apps
- Online Users
- Leaderboard
|| Forum Activity ||
- All Activity
- Create New...

Moscow Sky Lights Up With Strange Glow After Explosion at Electrical Substation: Reports
N ew footage has emerged showing bright flashes lighting up the night sky in southern Moscow during the early morning hours of November 22.
Knewz.com has learned that there was an explosion at an electrical substation on the outskirts of Russia's capital city followed by an alleged power outage in "several" homes.
Video snippets, shared on Russian news channels like ASTRA , captured a series of flashes that caused the sky to change color. Smoke could also be seen rising from a building.
Corroborating the video, several Russian Telegram accounts reported an explosion near the south of Moscow and a subsequent fire at the Lyublino electrical substation, southeast of central Moscow, per Newsweek .
The local authorities from the area have since confirmed that an explosion occurred in the village of Molokovo, but they reassured the public that all vital facilities were operating as normal.
Russian outlet MSK1.ru reported the blaze at the substation and noted “several” power outages.
The town of Lytkarino, located to the southeast of Moscow, was one of the affected areas, as reported by the independent outlet, Meduza .
Additional power failures were reported in the southern Domodedovo section of the city. However, electricity was later restored to these areas.
One local resident speculated that a drone may have been responsible for the explosion, but additional sources are yet to support this theory.
Newsweek reported that messages on the ASTRA Telegram account run by independent Russian journalists showed residents near the substation panicking. One concerned Russian called it a "nightmare."
The incident follows an attack by Russia on a power station in southwestern Ukraine that left 2,000 people without electricity .
Knewz.com reported previously:
“ Russian forces launched a total of 38 Iranian-made Shahed-136/131 drones during the later hours of November 17 and 18.
The Ukrainian Air Force Command reported that 29 of these drones were shot down [...].
One civilian was injured as a result of the attack that targeted energy infrastructure in the southwestern Odesa Oblast.”
The assault came after repeated warnings by Ukraine’s President Volodymyr Zelensky that Russia would try to cripple its power grid as winter approaches.
Ukraine's leader warned that if Russia resorted to attacking its power utilities, it would respond in kind.
Ukraine has conducted numerous long-range aerial drone strikes on Moscow since May 2023.
Most recently on November 20, it was reported that one such incursion was intercepted close to the city, per Kyiv Post .
Moscow’s Mayor Sergei Sobyanin confirmed this and elaborated that the region's air defense systems intercepted the unmanned craft over the city of Elektrostal to the east of Moscow, as well as another over the Bogorodsky district, northeast of central Moscow.
The details of the recently surfaced video footage have yet to be independently verified.

- Share full article
For more audio journalism and storytelling, download New York Times Audio , a new iOS app available for news subscribers.

- April 12, 2024 • 34:23 How One Family Lost $900,000 in a Timeshare Scam
- April 11, 2024 • 28:39 The Staggering Success of Trump’s Trial Delay Tactics
- April 10, 2024 • 22:49 Trump’s Abortion Dilemma
- April 9, 2024 • 30:48 How Tesla Planted the Seeds for Its Own Potential Downfall
- April 8, 2024 • 30:28 The Eclipse Chaser
- April 7, 2024 The Sunday Read: ‘What Deathbed Visions Teach Us About Living’
- April 5, 2024 • 29:11 An Engineering Experiment to Cool the Earth
- April 4, 2024 • 32:37 Israel’s Deadly Airstrike on the World Central Kitchen
- April 3, 2024 • 27:42 The Accidental Tax Cutter in Chief
- April 2, 2024 • 29:32 Kids Are Missing School at an Alarming Rate
- April 1, 2024 • 36:14 Ronna McDaniel, TV News and the Trump Problem
- March 29, 2024 • 48:42 Hamas Took Her, and Still Has Her Husband
How One Family Lost $900,000 in a Timeshare Scam
A mexican drug cartel is targeting seniors and their timeshares..
Hosted by Katrin Bennhold
Produced by Asthaa Chaturvedi and Will Reid
With Clare Toeniskoetter and Lynsea Garrison
Edited by Brendan Klinkenberg and Michael Benoist
Original music by Marion Lozano , Rowan Niemisto , Dan Powell , Pat McCusker and Will Reid
Engineered by Chris Wood
Listen and follow The Daily Apple Podcasts | Spotify | Amazon Music
Warning: this episode contains descriptions of violence.
A massive scam targeting older Americans who own timeshare properties has resulted in hundreds of millions of dollars sent to Mexico.
Maria Abi-Habib, an investigative correspondent for The Times, tells the story of a victim who lost everything, and of the criminal group making the scam calls — Jalisco New Generation, one of Mexico’s most violent cartels.
On today’s episode

Maria Abi-Habib , an investigative correspondent for The New York Times based in Mexico City.

Background reading
How a brutal Mexican drug cartel came to target seniors and their timeshares .
There are a lot of ways to listen to The Daily. Here’s how.
We aim to make transcripts available the next workday after an episode’s publication. You can find them at the top of the page.
The Daily is made by Rachel Quester, Lynsea Garrison, Clare Toeniskoetter, Paige Cowett, Michael Simon Johnson, Brad Fisher, Chris Wood, Jessica Cheung, Stella Tan, Alexandra Leigh Young, Lisa Chow, Eric Krupke, Marc Georges, Luke Vander Ploeg, M.J. Davis Lin, Dan Powell, Sydney Harper, Mike Benoist, Liz O. Baylen, Asthaa Chaturvedi, Rachelle Bonja, Diana Nguyen, Marion Lozano, Corey Schreppel, Rob Szypko, Elisheba Ittoop, Mooj Zadie, Patricia Willens, Rowan Niemisto, Jody Becker, Rikki Novetsky, John Ketchum, Nina Feldman, Will Reid, Carlos Prieto, Ben Calhoun, Susan Lee, Lexie Diao, Mary Wilson, Alex Stern, Dan Farrell, Sophia Lanman, Shannon Lin, Diane Wong, Devon Taylor, Alyssa Moxley, Summer Thomad, Olivia Natt, Daniel Ramirez and Brendan Klinkenberg.
Our theme music is by Jim Brunberg and Ben Landsverk of Wonderly. Special thanks to Sam Dolnick, Paula Szuchman, Lisa Tobin, Larissa Anderson, Julia Simon, Sofia Milan, Mahima Chablani, Elizabeth Davis-Moorer, Jeffrey Miranda, Renan Borelli, Maddy Masiello, Isabella Anderson and Nina Lassam.
Katrin Bennhold is the Berlin bureau chief. A former Nieman fellow at Harvard University, she previously reported from London and Paris, covering a range of topics from the rise of populism to gender. More about Katrin Bennhold
Advertisement
IMAGES
VIDEO
COMMENTS
Dodge Journey High Beam Lights On. This means your front high-beam driving lights are on. These lights are used for 0.01% of driving and typically for country roads late at night. Fines can apply for use of high beams in dense residential areas. Do NOT use high team driving lights within 400 metres (1,000 feet) of an oncoming car.
Name: Dodge Journey airbag warning light. Description: Under normal circumstances, the red airbag warning light illuminates on the dashboard for between 4 to 8 seconds when the ignition is switched to on/tun. This is a bulb check. If the airbag light no longer comes on, the bulb may be faulty and require replacement.
Dodge Journey warning lights & dashboard symbols explained for the years 2008 through to 2020. Find out what the dashboard symbols mean for your make, model and year of car. ... The Dodge Journey is a crossover SUV, and can be seen in left-hand drive countries, and well as right-hand drive countries, as the Fiat Freemont. Manufactured since ...
Dodge Journey Brake Warning Light. This dashboard light gets active when the parking brake is applied or there is a fault in an anti-lock brake system, may be the brake fluid level is getting low in your vehicle. Suppose this light stays on for a longer time than it indicates that parking brakes are disengaged. So, release the parking brakes as ...
vehicle security light will turn on for three seconds for a bulb check. If the light remains on after the bulb check, it indicates that there is a problem with the system. In addition, if the light begins to flash after the bulb check, it indicates that someone tried to use an invalid key fob to start the engine. Either of
View and Download Dodge Journey 2017 owner's manual online. journey 2017 automobile pdf manual download. Sign In Upload. ... Related Manuals for Dodge journey 2017. Automobile Dodge Journey 2017 User Manual (180 pages) ... Page 51 THINGS TO KNOW BEFORE STARTING YOUR VEHICLE 49 The ORC turns on the Air Bag Warning Light in the NOTE: If the ...
Low fuel indicator -- click for more. Low washer fluid indicator -- click for more. Trouble or fault indicators. Electronic throttle control indicator -- click for more. Check engine light -- click for more. Electric power steering fault indicator -- click for more. Loose gas cap indicator -- click for more.
The brake warning light activates when the parking brake is applied or when there's a fault in the anti-lock brake system. It could also indicate a low brake fluid level in your vehicle. If the light stays on for an extended period of time, it means that the parking brakes are disengaged. Release the parking brakes immediately.
1. Fix and Wait. The best way to clear the check engine light is to pull the trouble code, identify and fix the issue and then drive your Journey around until the module that threw the code recognizes that the problem is fixed. Sometimes it can take a few drive cycles for your vehicle's check engine light to shut down.
Very simple steps on how to reset the Service light / Service indicator on a Dodge Journey. Please press the like button if it was helpful! CheersDisclaimer:...
The Dodge Journey comes with warning indicators just like other Dodge models. When these warning lights come up; it could be a system malfunction, security issue, or need for urgent maintenance. Driver safety shouldn't be taken for granted, especially when a warning light comes on. Taking a related risk could be bad for you and/or the vehicle.
It's a warning light that comes on the dashboard to tell you when there's a system malfunction. It's the ECU's way of alerting you to potential trouble. The light comes on after a series of checks to determine that something is operating outside of its parameters. Sometimes, the Malfunction Indicator Light comes on because of something ...
The brake warning light indicates that your Journey has detected that one of its major brake components has failed, typically seen through a pressure loss. You'll feel a loss of pressure that manifests itself in the form of a "mushy" brake pedal (low brake fluid level). If the brake light is only coming on when you push the brakes, that ...
Buy MZORANGE LED Inner Tail Light Lamp Stop Brake Indicator Warning Light For Dodge Journey 2012 2013 2014 2015 2016 2017 2018 with Bulb (Right Passenger Side): Tail ...
Touch the positive side of the voltmeter to the positive battery wire. With the engine off, you should get a reading somewhere between 12.0 volts and 12.6 volts. Now that you have a baseline, it's time to turn the engine on. Leave the air conditioner off, as well as the headlights and any other accessories.
Light up your drive with CARiD! We carry a comprehensive selection of headlights, tail lights, replacement bulbs, and many other auto lights and components designed especially for your 2017 Dodge Journey. Each and every light is engineered with excellence in mind to allow you to drive safely night and day, in any weather conditions.
The airbag light can come on for a variety of reasons, ranging from simple to more complex issues. Some of the most common reasons for the airbag light illuminating in Dodge Journey include a faulty sensor, loose or corroded connections, faulty clockspring, and defective airbag control module. 1. Faulty sensor.
The check engine light is part of every vehicle that has an electronic engine management system, either an integral one or only for fuel ignition. Its function is to alert the driver about any type of engine problems. While driving, the computer of your Journey (ECU o PCM) monitors air/fuel supply and exhaust gases in order to verify that the ...
Great Lakes. Journey's Year:2014. Posted April 18, 2016. Unplug the sensor, and make sure you did not bend a pin. They are touchy. Then disconnect the negative terminal of your battery for about 30 minutes to reset your system. See what happens. 2late4u, OhareFred and sidney john. 3.
Residents of a Moscow region town impacted by power outages have taken to the streets, demanding that local authorities restore heat to their homes as subzero temperatures grip the region, Russian ...
On Wednesday at around 5 p.m. local time, the lights suddenly went out in several areas of Omsk, including in both central regions of the city, and in rural areas, local media reported.
Russian authorities have also been forced to compensate passengers of a train that ran from Samara to St. Petersburg (a 20-hour journey) without heating during -30 C (-22 F) temperatures.
New footage has emerged showing bright flashes lighting up the night sky in southern Moscow during the early morning hours of November 22. Knewz.com has learned that there was an explosion at an ...
The Daily is made by Rachel Quester, Lynsea Garrison, Clare Toeniskoetter, Paige Cowett, Michael Simon Johnson, Brad Fisher, Chris Wood, Jessica Cheung, Stella Tan ...