- Winnebago Manuals
- Voyage 2005
- User manual

Winnebago Voyage 2005 User Manual
- page of 128 Go / 128
Table of Contents
- Troubleshooting
- About this Manual
- Owner Infocase
- Before Driving
- Options and Equipment
- Front Axle Tire Alignment
- Reporting Safety Defects
- Service and Assistance
- Vehicle Certification Label
- Carbon Monoxide Warning
- Formaldehyde Information
- Carbon Monoxide Alarm
- Emergency Exits
- Swing-Out Side Escape Window
- Using Slider Windows as Emergency Exits
- Smoke Alarm
- Fire Extinguisher
- Child Restraints
- Loading the Vehicle
- Roof Loading
- Mountain Driving
- Storage Compartment Doors
- Humidity and Condensation
- Preparing Vehicle for Storage
- Effects of Prolonged Occupancy
- Removal from Storage
- Jump Starting
- Recovery Towing
- Emergency Road Service
- Engine Overheat
- Hazard Warning Flasher
- Headlight Beam Change and Turn Signals
- Instrument Panel Gauges and Controls
- Multi-Function Signal Lever
- Windshield Wipers and Wiper Delay
- Comfort Controls
- Cruise Control
- Battery Boost Switch
- Rearview Monitor System
- Cb Radio Wiring
- Operating Instructions
- Operating Tips
- Operating Oven Control
- Shut down Instructions
- Systems Monitor Panel
- Battery Charge Meter
- Gas/Electric Water Heater
- Water Heater By-Pass Valve
- Ducted Roof Air Conditioning System
- How Lp Gas Works
- Lp Gas Supply
- Lp Tank System
- Lp Gas Alarm
- Safe Use of the Lp Gas System
- Selecting Lp Fuel Types
- Air in the Lp Gas Tank
- Refilling Lp Tank
- Travel with Lp Gas
- Volt Ac System
- Electrical Cautions
- Connecting the Power Cord
- Power Converter System
- Energy Management System
- Volt House Circuit Breakers
- Charging Section
- Ground Fault Circuit Interrupter
- Volt Receptacles
- Thermal Overload Protector
- Auxiliary 110-Volt Generator
- Operation Warnings and Cautions
- Generator Hourmeter
- Volt Chassis Circuit Breakers
- Volt DC System
- DC-Ac Electrical Voltage Inverter
- House Batteries
- Electric Entrance Step
- Solar Charger Panel
- Fresh Water System
- External Water Supply
- Water Purifier (Filter) System
- Exterior Shower
- Dumping Holding Tanks
- Utility Light
- Water Drain Valves
- Winterizing Procedure
- Winterization Valve
- Washer/Dryer Winterizing
- Radio Power Switch
- Video Selector System
- Tv Antenna Signal Amplifier
- Antenna Check Light
- Exterior Entertainment Center
- Hoop Chair Base
- Swivel Lounge Chair
- Dinette Chairs
- Dinette/Bed Conversion
- Sleeping Facilities
- Checking Hydraulic Oil Level
- Exterior Finish
- Headlights and Exterior Lights
- Care of Stripes and Decals
- Waxing and Polishing
- Carpet Care & Cleaning
- Upholstery, Carpeting and Draperies
- Spots and Stains
- Vinyl Fabrics
- Care of Ceiling Fabric
- Draperies, Curtains and Bedspreads
- General Stains
- Water Stains
- Vinyl Wallboard
- Range and Refrigerator
- Doors and Windows
- Coach Maintenance Chart
- Chassis Service & Maintenance
- Engine Cooling System
- Engine Cover
- Towing Guidelines
- Car or Trailer Towing
- Trailer Wiring Connector
Advertisement
Quick Links
Related manuals for winnebago voyage 2005.

Summary of Contents for Winnebago Voyage 2005
- Page 1 MOTOR HOME SERIAL NUMBER VEHICLE CHASSIS IDENTIFICATION NO. (VIN) DATE OF DELIVERY TO FIRST RETAIL PURCHASER VEHICLE MILEAGE AT TIME OF DELIVERY SELLING DEALER NAME AND ADDRESS EMERGENCY INFORMATION YOUR WINNEBAGO INDUSTRIES DEALER Name ____________________________________________________________________________ Address __________________________________________________________________________ _________________________________________________________________________________ Contact Person _____________________________________________________________________ Phone ____________________________________________________________________________...
- Page 3 Winnebago Industries, Inc. of Forest City, Iowa warrants each new WINNEBAGO INDUSTRIES’ RESPONSIBILITY Winnebago Industries motor home to the owner for use in the U.S.A. Any part of the vehicle subject to warranty which is found to be and Canada as follows: defective in material or workmanship, will be repaired or replaced at Winnebago Industries’...
- Page 4 CHANGES IN DESIGN Winnebago Industries, Inc. reserves the right to make changes in design and changes or improvements upon its products without imposing any obligation upon itself to install the same upon its products theretofore manufactured.
- Page 5 TABLE OF CONTENTS Section One ....................Specifications Section Two ..................... Introduction Section Three.............. Getting to Know Your Motor Home Section Four ..................Roadside Emergency Section Five......................Dash/Auto Section Six................... Appliances & Equipment Section Seven ................Heating & Air Conditioning Section Eight ....................LP Gas System Section Nine .....................
- Page 7 SECTION 1 SPECIFICATIONS TANK CAPACITIES Chassis Fuel Tank - All Models..............75 gal. LP Gas Tank Model 31W ................18 gal.* (23 gal. w.c.) Models 33V, 35A, 35D, 36M & 38J ........23 gal.* (28 gal. w.c.) Fresh Water Tank Model 31W ......................76 gal. Model 33V &...
- Page 8 BODY & CHASSIS SPECIFICATIONS F31W F33V F35A F35D F36M F38J Length (Bumper to Bumper) 31’ 5.6” 33’ 6” 35’ 9.1” 35’ 5.6” 36’ 4.7” 38’ 8.4” Interior Width 96.5” 96.5” 96.5” 96.5” 96.5” 96.5” Exterior Width 8’ 5.5” 8’ 5.5” 8’...
Page 9: About This Manual
Page 10: options and equipment, page 11: reporting safety defects, page 12: vehicle certification label, page 13: formaldehyde information, page 14: carbon monoxide alarm, page 15: using slider windows as emergency exits.
- Page 16 The key number for your coach is registered in our factory database, so if you ever lose your keys, any Winnebago Industries dealership can easily order a new key for you. They are also equipped with special master keys and can un- lock your coach for you if needed.
Page 17: Seat Belts
Page 18: child restraints, page 19: loading the vehicle.
- Page 20 SECTION 3 GETTING TO KNOW YOUR MOTOR HOME tank, and a partial tank of fresh water - but empty holding tanks. Finding a Scale: In urban areas, the most common places to find a public access scale are commercial truck stops. In rural areas, most grain storage elevators have scales available.
Page 21: Roof Loading
Page 22: mountain driving, page 23: preparing vehicle for storage, page 24: removal from storage, page 25: recovery towing, page 26: engine overheat, page 27: instrument panel gauges and controls, page 28: cruise control, page 29: battery boost switch, page 30: cb radio wiring.
- Page 31 SECTION 5 DASH / AUTO Leveling System Control Panel COACH LEVELING SYSTEM - 31’ thru 36’ Models The hydraulic leveling system is designed to diminish problems in selecting a parking site, making “set up” easier and faster for you. See the Leveling System Operator Manual in your Owner InfoCase for complete operating in- structions.
- Page 32 SECTION 5 DASH / AUTO NOTE: When parking at an uneven site, always park the front of the motor home to the WARNING downhill side. This allows you to level by raising the front end rather than the rear. Since only the rear wheels are locked Keep all people clear of the coach while in PARK, raising either one or while the leveling system is operat-...
- Page 33 SECTION 5 DASH / AUTO WARNING • Do not use the coach leveling sys- tem as a lift for changing tires or working under the vehicle. • Never check for hydraulic fluid leaks using your hands and/or any other body part. The leaking fluid is under pressure and is capable of cutting and penetrating your skin, resulting in severe injury.
- Page 35 SECTION 6 APPLIANCES & EQUIPMENT NOTE: Some items described in this section may be optional and, therefore, may not be in your vehicle. The appliances installed in your motor home are manufactured by reputable RV appliance makers and have been tested by independent lab- oratories to meet all applicable standards and codes set for RV appliances.
Page 36: Operating Instructions
Page 37: operating tips, page 38: ice maker.
- Page 39 SECTION 6 APPLIANCES & EQUIPMENT Winterizing the Ice Maker When winterizing, make sure the water line REFRIGERATOR SERVICE is completely drained by following this proce- ACCESS COMPARTMENT dure. (Exterior) 1. Drain coach water lines. See Sect. 10. The exterior refrigerator service compartment 2.
Page 40: Range And Oven
Page 41: operating oven control, page 42: systems monitor panel, page 43: battery charge meter, page 44: gas/electric water heater.
- Page 45 SECTION 6 APPLIANCES & EQUIPMENT Gas Safety Information To Turn Water Heater Off 1. Turn switch on monitor panel to Off posi- A. This appliance does not have a pilot light. It tion. is equipped with an ignition device that auto- 2.
Page 46: Water Heater By-Pass Valve
- Page 47 SECTION 6 APPLIANCES & EQUIPMENT The motor aid also increases the capacity of excessive force on the knob to open or lock into the engine cooling system, allowing the engine to closed position. This could cause permanent run cooler under many conditions. damage to the crank mechanism.
- Page 48 SECTION 6 APPLIANCES & EQUIPMENT Vertical Window Catches 6-14...
- Page 49 SECTION 7 HEATING & AIR CONDITIONING LP GAS FURNACE To Start Up: ELECTRONIC THERMOSTAT 1. Open the LP gas tank valve by turning fully (Central Heat/Air Conditioning counterclockwise System) 2. Move THERMOSTAT switch from Off to The thermostat controls heating, front air con- Heat and press the Temp Selector button ditioning, cooling fan and optional heat pump (Up/Down arrows) until the desired tempera-...
- Page 50 SECTION 7 HEATING & AIR CONDITIONING ting. The display will show current room Digital Thermostat Display temperature. The digital display normally shows current room temperature, with the word “ROOM” in small letters at the left side of the display. When HEAT PUMP - Optional you press the temperature selector button up or down, the display will show the word “SET”...
Page 51: Ducted Roof Air Conditioning System
Page 53: lp gas supply, page 54: lp gas alarm, page 55: safe use of the lp gas system, page 56: refilling lp tank, page 57: travel with lp gas.
- Page 58 SECTION 8 LP GAS SYSTEM In very cold weather when a large volume of gas is being used for heating, it is possible to ex- perience a loss of gas pressure. At first, this prob- lem may appear to be caused by a regulator freeze-up, but is actually caused by failure of the liquid gas to vaporize as fast as it is needed.
Page 59: Electrical Cautions
Page 60: connecting the power cord, page 61: energy management system, page 62: volt house circuit breakers, page 63: ground fault circuit interrupter, page 64: auxiliary 110-volt generator, page 65: operation warnings and cautions, page 66: volt dc system, page 67: house batteries.
- Page 68 SECTION 9 ELECTRICAL SYSTEMS 2. Check the battery and recharge as necessary NOTE: Make sure vent caps are on securely to prevent baking soda solution from enter- at least once a month during long storage ing the battery and contaminating the periods.
Page 69: Solar Charger Panel
- Page 70 SECTION 9 ELECTRICAL SYSTEMS WARNING Do not use step unless it is fully extended. Do Not Stand on step when vehicles ignition switch is turned to either the “On” or “Start” position. The step will automatically retract, which may cause personal injury. Always Step Switch remember to retract the step before Automatic Mode (Operates with Door)
Page 71: Fresh Water System
- Page 72 SECTION 10 PLUMBING SYSTEMS • Remove the bowl and pull the strainer screen out of the bowl to tap out any particles and rinse clean. • Insert the strainer screen back into the bowl, then screw the bowl back onto the filter assembly.
Page 73: External Water Supply
Page 74: water purifier (filter) system, page 75: exterior shower.
- Page 76 SECTION 10 PLUMBING SYSTEMS 1. Clean the toilet bowl with a mild bathroom cleaner. Do not allow cleaners to set in the bowl for long periods of time to avoid dam- TOILET aging the seals. Do not use caustic or abra- The toilet in your motor home is very similar sive cleaners because it may damage the to the household type, except that it is designed to...
Page 77: Dumping Holding Tanks
Page 78: water drain valves, page 79: winterizing procedure.
- Page 80 (A “blow-out” plug can • Install a new water filter cartridge. be purchased at any Winnebago or Itasca • If your coach is equipped with the refrig- dealer. P/N 701705-01-000.) erator ice maker option, the ice maker water lines must also be drained.
Page 81: Winterization Valve
Page 82: washer/dryer winterizing, page 83: radio power switch, page 84: video selector system, page 85: tv antenna, page 86: tv antenna signal amplifier.
- Page 87 Hookup jacks are (In Water Center or Shoreline Compartment) located in the left or right front overhead com- partment, depending on model. See your autho- rized Winnebago Industries dealer for proper installation and sealing of roof mounted compo- nents. 11-5...
Page 88: Exterior Entertainment Center
Page 89: swivel lounge chair, page 90: sleeping facilities.
- Page 91 SECTION 12 FURNITURE & SOFTGOODS 4. Arrange dinette cushions to cover bed area. Bed to Dinette: 1. Replace the table onto the wall support and lower the table leg. 2. Make sure that the table leg is secured into the floor support bracket and the leg brace is locked.
- Page 92 SECTION 12 FURNITURE & SOFTGOODS CAUTION Do not recline the lounge completely flat unless the footrest section is extended. To Recline: Press the switch on the front of the armrest. Press ‘down’ to recline; ‘up’ to return upright. The gap between the footrest and seat pro- vides ample room to enter and exit the lounge.
Page 93: Day/Nighter Pleated Blinds
- Page 95 SECTION 13 SLIDEOUT ROOM ELECTRIC SLIDEOUT ROOM through the buckle to provide sufficient slack. EXTENSION - 31’ to 36’ Models • Unhook the strap end from the brackets on the floor and wall edge. Store strap in loca- CAUTION tion of your choice. (Under the couch is one choice.) Release slideout room travel strap before attempting to extend slideout...
- Page 96 SECTION 13 SLIDEOUT ROOM Before Retracting the Slideout Room: 1. Be sure the coach is level and the Parking WARNING Brake is set. 2. Check the outside of the coach to make sure Keep all persons clear of the slideout there are no people, pets or obstructions near room and moving parts while extend- the slideout room.
Page 97: Troubleshooting
- Page 98 SECTION 13 SLIDEOUT ROOM In the event of a total system failure where multaneously will greatly speed up the process. Manual Mode cannot be used, two crank handles At no point in the cranking process should you let may be used to retract or extend the room. one side get more than 2 inches (50 mm) ahead of the other.
- Page 99 SECTION 13 SLIDEOUT ROOM coach to the nearest authorized service center for ERROR CODES inspection. Stall on Front Actua- (Indicates obstruc- Error Codes - tor only tion at front of room or jam) The DigiSync slideout system is equipped with onboard diagnostics capabilities. In the Short Detect on Rear (Rear motor is faulty event of a system failure the green LED on the...
- Page 100 SECTION 13 SLIDEOUT ROOM • Clean the floors inside before retracting the • Pull a short length of the excess strap back room to avoid vinyl flooring scratches or car- through the buckle to provide sufficient pet pile snags. slack. •...
- Page 101 SECTION 13 SLIDEOUT ROOM WARNING Keep all persons clear of the slideout room and moving parts while extend- ing or retracting. Do not occupy the slideout room while it is being extended or retracted. To Extend SlideOut Rooms: Rear Slideout Switch (on wall in rear of couch - varies by model) CAUTION Before Retracting Slideout Room...
- Page 102 SECTION 13 SLIDEOUT ROOM • If the batteries and fuses are okay, there may To Retract Slideout Room: be a failure in the hydraulic system or electri- cal system. CAUTION Step 1 - Relieve Hydraulic Line Pressure Although there is an awning over the •...
- Page 103 SECTION 13 SLIDEOUT ROOM Use provided 1/4” nut driver to turn nut counterclockwise 4 turns only. • Remove the locking pin from the crank-in bolt shafts as shown before trying to turn the bolts. Slideout Room Solenoid Valve • Do not open any of the four large T-handled valves on the opposite end of the pump.
- Page 104 Press the Retract If an apparent cause is not found, call the switch for 15 to 20 seconds before at- number on your Winnebago Industries Premium tempting to extend the room. Then run Roadside Assistance card. They will dispatch a...
Page 105: Checking Hydraulic Oil Level
Page 107: exterior finish, page 108: care of stripes and decals, page 109: spots and stains, page 110: general stains, page 111: water stains, page 112: vinyl wallboard, page 113: doors and windows, page 114: coach maintenance chart.
- Page 115 SECTION 14 CARE & MAINTENANCE Coach Maintenance Chart These recommendations apply for normal recreational use. Heavy duty or full-time use may require more fre- quent maintenance intervals. Always use specified sections or manufacturer’s guide for further information and instructions. LP System (See Section 8) Have LP system checked for leaks.
- Page 116 SECTION 14 CARE & MAINTENANCE Coach Maintenance Chart These recommendations apply for normal recreational use. Heavy duty or full-time use may require more fre- quent maintenance intervals. Always use specified sections or manufacturer’s guide for further information and instructions. Sealants (See Section 14) Inspect (see Sect 14 for proper inspection technique).
Page 119: Chassis Service & Maintenance
- Page 120 SECTION 15 CHASSIS The coolant system MUST be refilled or have fully loaded the motor home according to topped up with the same type of coolant your personal needs. Thereafter, the alignment as equipped to maintain the special long- should be periodically inspected to help prevent life properties.
- Page 121 SECTION 15 CHASSIS the lights to flicker on and off. Headlight wiring should be checked immediately anytime this con- Coach dition is apparent. Refer to your chassis operating Fuse Panel guide for further information. Lift front of Instrument AUTOMOTIVE 12-VOLT FUSES AND CIRCUIT BREAKERS The automotive fuses and breaker are conve- niently located on a panel beneath the hinged in-...
Page 122: Towing Guidelines
Page 123: trailer wiring connector.
- Page 124 SECTION 15 CHASSIS TM = Tail lights GD = Ground LT = Left turn RT = Right turn S = Brake lights A = Backup lights *NOTE: On Ford chassis, these turn signal con- nection also include a brake light func- tion.
Page 125: Table Of Contents
- Page 126 INDEX Ground Fault Circuit Interrupter ....9- 5 Quartz Wall Clock ........12- 5 Hazard Warning Flasher ....... 5- 1 Radio Power Switch ........11- 1 Headlight Beam Change and Turn Signals .. 5- 1 Radio, In Dash ..........11- 1 Headlights and Exterior Lights ....
- Page 127 INDEX Tool & Ladder Storage ......... 3- 9 Towing Guidelines........15- 3 Trailer Wiring Connector ......15- 5 Travel with LP Gas ........8- 5 TV Antenna Signal Amplifier ....11- 4 TV Antenna..........11- 3 Underbody ..........14- 1 Upholstery...........
Rename the bookmark
Delete bookmark, delete from my manuals, upload manual.

¿Qué filtros hay en un Voyage y cuándo reemplazarlos?
En pocas palabras: Los filtros de tu Voyage tienen por objetivo retener las impurezas del sistema que protegen. Casi todos funcionan de la misma manera: el fluido pasa a través de una o varias láminas de papel poroso en las que quedan retenidas las impurezas.
⚠️ El problema principal de los filtros: A medida que pasa el tiempo se acumulan partículas que lo van saturando dejando pasar cada vez menos cantidad de fluido (combustible, aire o aceite). Cuando sucede esto, decimos que el filtro se "tapa" .
¿Cada cuánto deben cambiarse los filtros en un Voyage?
- Filtro de aire : Usualmente debe reemplazarse cada 10.000. Función: se encarga de purificar el aire que entra a los cilindros. Retiene cualquier impureza que pueda tener el aire ambiente, como polvo, arena, restos vegetales, bichos, etc. Es de vital importancia para el cuidado de las superficies internas de los cilindros y aros de pistón, disminuyendo su desgaste. Se encuentra dentro del compartimento del motor, dentro de una caja plástica negra (caja filtrera).
- Filtro de combustible : Los filtros de gasolina conviene reemplazarlos cada 15.000km o 1 año . Los filtros Diesel suelen durar más tiempo, te recomendamos cambiarlo a los 50.000km . Función: retiene todas las impurezas que pueda contener el combustible proveniente del depósito. Evita que se ensucien los inyectores y demás elementos del sistema de alimentación . En los motores Diesel también retiene el agua que pueda traer el combustible.Este filtro suele ubicarse muy cerca del tanque de combustible en los vehículos a gasolina y se accede a él desde abajo del mismo. Por otro lado, en los automóviles Diesel este filtro se ubica dentro del compartimiento del motor.
- Filtro de aceite de motor : Usualmente debe reemplazarse cada 5.000 - 10.000 Km (con cada cambio de aceite). Función: una de las funciones del aceite es limpiar el motor evitando que la suciedad se pegue a las superficies metálicas. Esas suciedades que transporta el aceite quedan retenidas en el filtro para evitar que circulen por todo el motor. También retiene partículas metálicas producto del desgaste del motor. Es de vital importancia para mantener al mínimo el desgaste de todas las piezas internas del motor. Se ubica adosado al bloque de cilindros ( monoblock ), al frente o a un lado del motor.
- Filtro de aceite de transmisión : Reemplázalo o al menos límpialo con cada cambio de aceite de transmisión. En automóviles automáticos, cada 40.000km y en manuales cada 80.000km. Función: Los encontramos más comúnmente en las transmisiones automáticas, retienen las impurezas generadas en ellas evitando el desgaste y manteniendo el correcto funcionamiento de la transmisión. Se ubica dentro de la caja de transmisión.
- Filtro de habitáculo o de polen : Usualmente debe reemplazarse cada 10.000 - 30.000 km dependiendo lo sucio que esté . Función: retiene las impurezas que trae el aire que entra al habitáculo por medio del climatizador. Retiene partículas de polvo, polen, bichos y restos vegetales. Es el menos importante para el funcionamiento del vehículo pero contribuye al confort de los pasajeros. Se ubica dentro del conducto de ventilación, del lado del acompañante.
⚠️ Importante : algunos tiempos de recambio varían mucho dependiendo de cuánta suciedad deban soportar los filtros. Por ejemplo, en ambientes polvorientos, los filtros de aire y de habitáculo habrá que cambiarlos con mucha mayor frecuencia que si conducimos en ciudad. Lo mismo pasa con los filtros de combustible: si el combustible que usamos es de dudosa calidad lo mejor será reemplazar el filtro más seguido.
Los tiempos de recambio indicados son valores estándar, lo mejor siempre será respetar lo indicado en el manual de usuario del Voyage.
Recuerda que si bien algunos filtros serán más importantes que otros para el buen funcionamiento del automóvil, todos deben ser revisados de forma periódica por ti o por un especialista.
Artículos relacionados
Problemas con filtros de recambio en volkswagen voyage.
¿Encontraste lo que buscabas?

Solo en Refacciones Autos y Camionetas

- Supermercado
- Mercado Play Gratis
- Búsquedas relacionadas
- dakota 2001
- hyundai 2004
- hyundai 2007
- pacifica 2007
- filtro de gasolina
- camioneta voyager 2000
- aceite para motor a gasolina
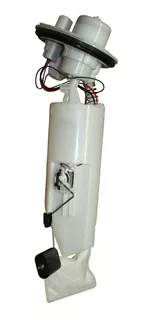
Bomba Gasolina Chrysler Voyager 6cil 3.3 2004 2005 2006 2007
por CARDIC AUTOMOTRIZ
Envío gratis
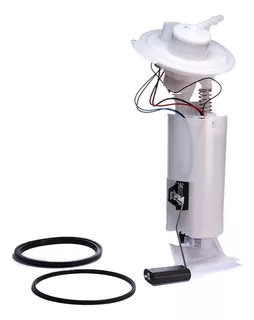
Bomba Gasolina Chrysler Voyager 6cil 3.3 2005 No Flex-fuel
por TANAK autopartes
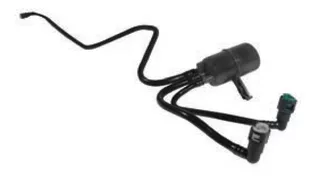
Filtro De Gasolina Voyager 2001-2002-2003-2004-2005 3.3 Opt
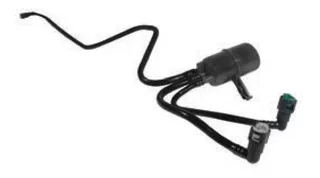
Filtro De Gasolina Voyager 2001-2002-2003-2004-2005 2.4 Opt

Filtro Gasolina Voyager 3.3 2004 2005 2006 2007 Plástico
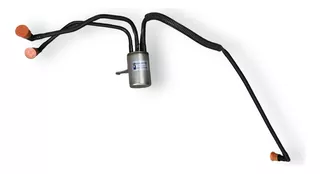

Filtro Gasolina Voyager 2001 2002 2003 2004 2005 2006 3.3l
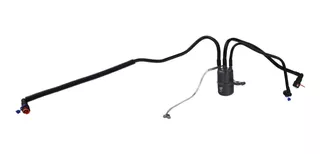
Filtro Gasolina Interfil Voyager 3.3 2004 2005 2006 2007
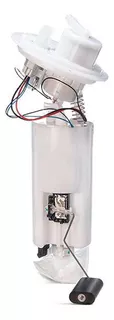
Bomba Gasolina Town Country Voyager Caravan 2004 2005 2007
por Anautomy
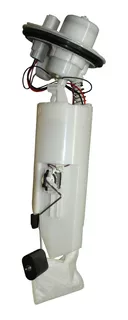
Bomba Gasolina Para Voyager 6cil 3.3 2004 2005 2006 2007
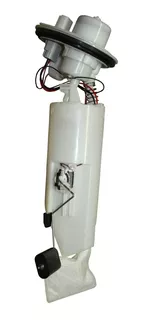
Bomba Gasolina Voyaguer 3.3 2001 2002 2003 2004 2005 2006
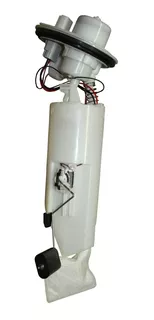
Bomba Gasolina Para Chrysler Voyager 3.3 2005 No Flex-fuel
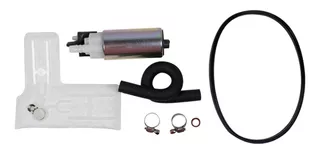
Rep Bomba Gasolina Chrysler Voyager 2005 - 2007 3.3l Gmb
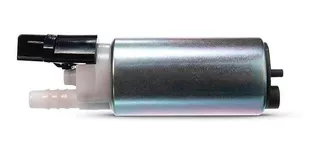
Repuesto Bomba Gasolina Para Chrysler Voyager 6cil 3.3 2005
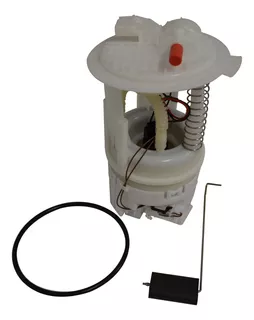
Bomba Gasolina Chrysler Voyager 2005 - 2007 3.3l Gmb
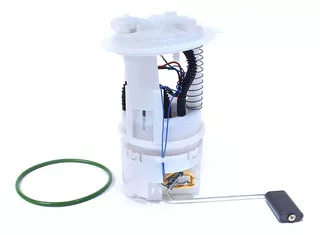
Bomba Gasolina Para Chrysler Voyager 6cil 3.3 2005 2006 2007
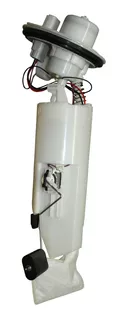
Bomba Gasolina Repuesto Chrysler Voyager 6cil 3.3l 2005-2007

Bomba Gasolina Para Chrysler Voyager 6cil 3.3 2004 2005
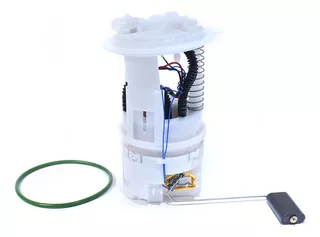
Bomba Gasolina Chrysler Voyager 6 Cil 3.8 L 2005-2007
por Masrefacciones
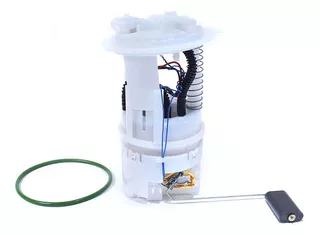
Repuesto Bomba Gasolina Chrysler Voyager 6cil 3.3 2005
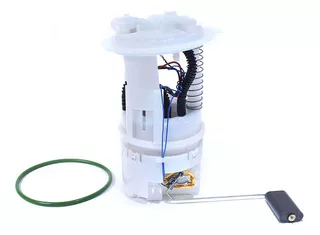
Bomba Gasolina Para Chrysler Voyager 6cil 3.3 2005

Bomba Gasolina Chrysler Voyager 6cil 3.3 2005
Bomba Gasolina Para Chrysler Voyager 3.3 2004 2005 2006 2007
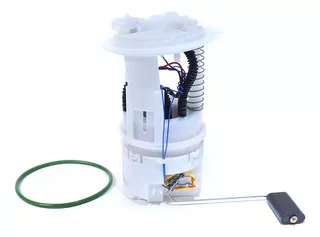
Bomba Gasolina Chrysler Voyager 6 Cil 3.3 L 2005-2007

Bomba Gasolina Voyager 3.3 Caravan 3.3 2005 2006 2007

Bomba De Gasolina Voyager 2005-2006-2007 V6 3.3 Kem
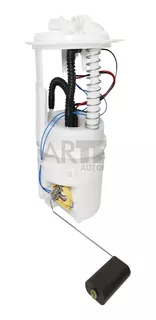
Bomba De Gasolina Voyager 2005-2006-2007 V6 3.3 Ck
El envío gratis está sujeto al peso, precio y la distancia del envío.
Más información
- Mercado Libre
- Investor relations
- Sustentabilidad
Otros sitios
- Mercado Pago
- Mercado Shops
- Mercado Ads
- Resolución de problemas
- Centro de seguridad
2005 GMC Envoy - Engine Oil Filter
- K&N Engineering Performance Gold
- K&N Engineering Pro-Series NASCAR
- MicroGard Select
- Mobil 1 Filters
- Royal Purple
- aFe POWER Pro GUARD D2
Height (in)
- 3-5/16 Inch
- 4-1/16 Inch
- 4-3/16 Inch
- 4-7/16 Inch
Filter Media
- High Flow Premium
Outside Diameter (in)
- 2-15/16 Inch
Related Categories
- Breather Element/Filter
- Cabin Air Filter
- Crankcase Breather Hose
- Drip & Drain Pans
- Engine Additive
- Engine Oil Drain Plug
- Engine Oil Leak Repair
- Fuel Filter/Water Separator
- Hand Cleaners
- Latex Gloves
- Motor Oil - Heavy Duty Diesel
- Motor Oil - High Mileage
- Motor Oil - Motorcycle
- Motor Oil - Racing
- Motor Oil - Vehicle Specific
- Nitrile Gloves
- Oil Absorbent
- Oil Filter Wrench
- Shop Towels
- Smoke Treatment
MicroGard Oil Filter
Wix oil filter, wix xp oil filter, mobil 1 oil filter, k&n engineering performance gold oil filter, acdelco duraguard oil filter, royal purple oil filter, k&n engineering pro-series nascar oil filter, acdelco oil filter, routine maintenance: motor oil and oil filter changes.
A car's oil filter helps trap and remove contaminants in the motor oil before it is circulated throughout your engine to keep your engine clean and running its best. Your oil filter is a routine maintenance part, and should be replaced during every oil change to ensure appropriate motor oil performance. You may perform oil changes and replace your oil filter more often if your engine is experiencing performance issues or if you notice a high volume of contaminants in the oil. A clogged or extremely dirty car oil filter can cause sudden changes in oil consumption, or it can limit oil flow throughout the ending and you may hear metallic sounds coming from the engine compartment. A bad oil filter can create noticeable issues with your vehicle's performance, and the oil should likely be changed and the oil filter replaced if you notice these signs. If you believe you need to replace your oil filter , or if it's time for your regular oil change , check out O'Reilly Auto Parts for the oil, oil filter, and other maintenance supplies you need for your vehicle. You can also learn how to change your oil and oil filter and much more in our informative How-To Hub .

- Oil Filters
- Air Filters
- Sponsorship

Superior Quality Motorcycle Filters
Hiflofiltro — the world’s first TÜV approved oil filter. Engineered to extreme quality standards, Hiflofiltro is the complete range of oil and air filters for motorcycles, scooters, ATVs, and watercraft, providing the ultimate level of protection for your engine.

Hiflofiltro 2018 Catalogue
Now Available

Hiflofiltro Rider Support
Apply for support now!
- Identify the right filters for your motorcycle, scooter, or ATV using our online catalogue
- Find out why Hiflofiltro is the world's number one brand of aftermarket filter

Catalogue Updated
- RC Racing Oil Filters •
- Race Ready Dual-Foam Air Filters •

COMMENTS
Como cambiar el Filtro del Habitáculo de tu chrysler voyager o tambien en dodge caravan.En nuestro caso se trata de una Chrysler 4ªgen
procedimiento rÁpido para el reemplazo del filtro de combustible chrysler
Envíos Gratis en el día Compre Filtro Aire Voyager 2005 en cuotas sin interés! Conozca nuestras increíbles ofertas y promociones en millones de productos. ... Filtro de Aire. Filtro aire voyager 2005. 147 resultados. Saltar a resultados. Filtros. te ahorra envíos Con tu carrito de compras. Envío gratis. Categorías. Filtros (94) Motor (27 ...
En éste vídeo os mostramos cómo cambiar el filtro de aire de una Chrysler Voyager motor 2.5 CRD.
SELECCIONA TIENDA. Ver Precio. Notas: Technical assistance by phone: 800-999-1742. Ubicación:: Air Filter. Equipa tus autos, camionetas y todoterrenos con 2005 Chrysler Voyager Filtro de Aire de AutoZone. ¡Consigue lo que buscas hoy mismo! Tenemos los mejores productos al mejor precio.
Page 103 SECTION 13 SLIDEOUT ROOM Use provided 1/4" nut driver to turn nut counterclockwise 4 turns only. • Remove the locking pin from the crank-in bolt shafts as shown before trying to turn the bolts. Slideout Room Solenoid Valve • Do not open any of the four large T-handled valves on the opposite end of the pump.
Filtro de habitáculo o de polen: Usualmente debe reemplazarse cada 10.000 - 30.000 km dependiendo lo sucio que esté. Función: retiene las impurezas que trae el aire que entra al habitáculo por medio del climatizador. Retiene partículas de polvo, polen, bichos y restos vegetales. Es el menos importante para el funcionamiento del vehículo ...
Get the best deals on Oil Filters for 2005 Chrysler Voyager when you shop the largest online selection at eBay.com. Free shipping on many items | Browse your favorite brands | affordable prices.
Filtro De Aceite Chrysler Grand Voyager Base; Se 2000 3.3l. El envío gratis está sujeto al peso, precio y la distancia del envío. Envíos Gratis en el día Compre Filtro De Aceite Voyager 2005 en cuotas sin interés! Conozca nuestras increíbles ofertas y promociones en millones de productos.
Como cambiar, reemplazar o sustituir el filtro de habitáculo también conocido como filtro anti polen, filtro de cabina o filtro del aire acondicionado en un ...
Filtro Combustible Chrysler Grand Voyager 3.3 L V6 2001 2005. El envío gratis está sujeto al peso, precio y la distancia del envío. Envíos Gratis en el día Compre Filtro Gasolina Voyager 2005 en cuotas sin interés! Conozca nuestras increíbles ofertas y promociones en millones de productos.
RvTrader.com always has the largest selection of New Or Used RVs for sale anywhere. (1) WINNEBAGO 33V. (1) WINNEBAGO 38J. close. California (1) New York (1) Browse Winnebago VOYAGE RVs for sale on RvTrader.com. View our entire inventory of New Or Used Winnebago RVs. RvTrader.com always has the largest selection of New Or Used RVs for sale anywhere.
Get the best deals on Transmission Filters for 2005 Chrysler Voyager when you shop the largest online selection at eBay.com. Free shipping on many items | Browse your favorite brands | affordable prices.
2005 GMC Envoy. 2005 GMC Envoy - Air Filter Search Results. Filter By Brands ACDelco K&N Engineering MicroGard MicroGard Select Spectre Performance hpR WIX aFe POWER Magnum FLOW Style Cylinder Panel ...
RV reviewed 2005 Winnebago Voyage 38J. 5.0. This is a beautiful rig, spacious and well planned out. Drive bed and tows like a dream with great visibility. It has all the bells and whistles, easy to set up and break down. You'll never miss being in a brick and mortar home!...
️ ️ ️LEIAM A DESCRIÇÃO!!!! ⬅️⬅️⬅️add NO FACEBOOK: http://www.facebook.com/dcvvideosINSTAGRAM: dcvvideosSAIBA COMO ATIVAR AS NOTIFICAÇÕES DE ...
2005 GMC Envoy. 2005 GMC Envoy - Engine Oil Filter Search Results. Filter By Brands ACDelco K&N Engineering Performance Gold K&N Engineering Pro-Series NASCAR MicroGard MicroGard Select Mobil 1 Filters Royal Purple WIX ...
SE INSCREVA! Não esqueça de deixar Like!!!Link Canal https://goo.gl/2ksAz5JCAR Mecânica De AutosFACEBOOK: https://www.facebook.com/Mecanica.Jca...e-mail: Jca...
Superior Quality Motorcycle Filters. Hiflofiltro — the world's first TÜV approved oil filter. Engineered to extreme quality standards, Hiflofiltro is the complete range of oil and air filters for motorcycles, scooters, ATVs, and watercraft, providing the ultimate level of protection for your engine.
Como trocar Filtro do ar do Motor VW Gol, Fox , Voyage, Saveiro e Similares.Tutorial de com trocar o filtro de ar do motor do carro de maneira facil e rapida...
olá amigos mais um vídeo sobre filtro de combustível do Voyage g5 veja onde fica o filtro e como eu fiz troca do meu filtro para garantir o bom funcionamento...
Vídeo mostrando passo a passo a troca do filtro de cabine e higienização do ar condicionado do Volkswagen Polo, Gol (g5 em diante), Saveiro, Voyage, Fox e Sp...